

Transforming a patchy, weed-filled front yard into a lush, vibrant green lawn is an achievable dream. With these simplified lawn care steps, you can revive your outdoor space and boost your home’s curb appeal in a year or even less. Say goodbye to sparse patches and stubborn weeds, and hello to the verdant lawn you’ve always envisioned.

While some transformations happen swiftly, the journey to a perfect lawn often feels like a slow, meticulous process – much like watching grass grow, quite literally! After several years of battling frustration with our front lawn’s appearance, we’ve finally cultivated the plush, emerald green grass that was once just a dream. We’re excited to share the detailed steps we took to revive our lawn, offering practical guidance for anyone whose own front yard is yearning for a significant curb appeal upgrade.
The visual impact of a healthy lawn is undeniable. The contrast between what it once was and its current state is truly remarkable. Prepare to see the incredible difference!

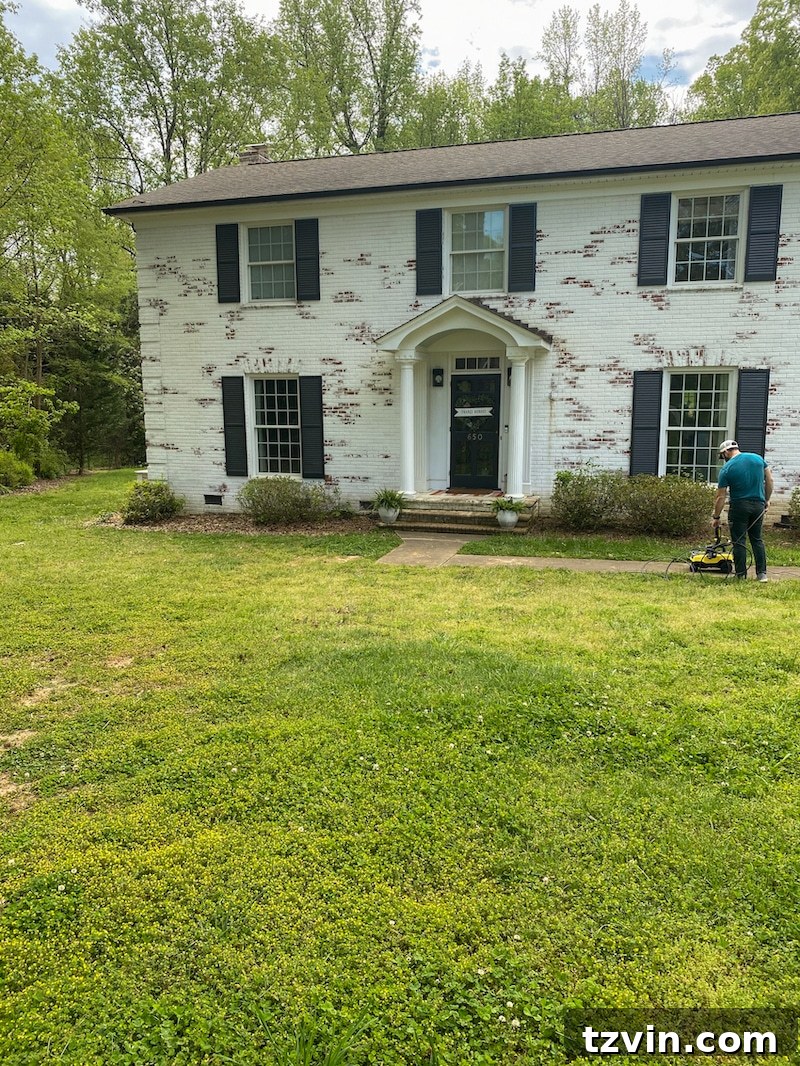
The Journey of Our Front Yard: Before and After Transformation
We use the terms “before” and “after” with a touch of humor because, let’s be honest, is a house ever truly “finished”? However, the progress we’ve achieved with our front flower beds and, most notably, our lawn, is absolutely massive. It’s a transformation that has redefined our home’s exterior.
Our front yard endured several years of significant stress and neglect. It bore the brunt of foundation repairs, heavy equipment traffic during our extensive backyard makeover, and a period of sheer oversight as our focus shifted to numerous interior projects. These challenges left our once-promising lawn in a state of disarray, characterized by a pervasive mess of weeds and an abundance of unsightly patchy areas. The result was far from the inviting landscape we desired, making a lawn revival project a top priority.

Simplified Steps to Achieve Unbeatable Curb Appeal and a Healthy Lawn
For context, our home is situated in the piedmont region of South Carolina, which falls within planting zone 8a. Our soil primarily consists of clay, and our existing grass type is tall fescue. Understanding these local conditions was crucial in tailoring our lawn care approach.
Embarking on a lawn renovation can seem daunting, but by breaking it down into manageable steps, the process becomes much more approachable. Here is a concise overview of the key actions we implemented to dramatically enhance our front yard’s curb appeal and bring our lawn back to life:
- **Define Your Landscape:** We began by adding elegant stone edging to create distinct boundaries for our DIY front flower beds, giving the garden a clean, organized look.
- **Restore Your Home’s Facade:** Next, we focused on the house itself, ensuring a pristine appearance by having our limewashed brick cleaned and sealed, protecting it for years to come.
- **Understand Your Soil:** A critical first step for any healthy lawn, we performed a comprehensive soil test to understand its composition and nutrient needs.
- **Tailor Your Care Routine:** Based on our soil test results and the type of grass we have, we developed a customized lawn care routine designed for optimal growth.
- **Combat Weeds and Improve Soil Structure:** In the fall, we applied a targeted weed killer and then thoroughly aerated the lawn, preparing it for new growth.
- **Boost Growth with Overseeding and Fertilizing:** We strategically overseeded and applied fertilizer during both the fall and spring, providing a continuous supply of nutrients and increasing grass density.
- **Establish a New Watering Routine:** A specific watering schedule was implemented for the newly planted grass seed to encourage robust germination and establishment.
- **Maintain and Prevent:** Once established, we transitioned to a consistent lawn maintenance watering schedule and adopted a practice of mowing high, which helps shade out new weeds and promotes stronger grass.
While these lawn care steps may sound straightforward, each involved careful execution and patience. However, this simplified version outlines the core actions that led to our success. We’ll delve into more intricate details below, guiding you through each stage of our lawn makeover process.

Balancing DIY and Professional Help: What We Hired Out and What We Did Ourselves
Achieving a stunning lawn and refreshed home exterior involved a strategic blend of do-it-yourself projects and professional assistance. Tasks such as adding the stone edging for our flower beds, the initial planting, and periodic aerating, overseeding, and fertilizing were all hands-on DIY endeavors that we tackled ourselves. These tasks allowed us to save costs and inject personal effort into our home improvement.
However, we’ve recently found immense value in delegating certain aspects of our lawn care. Our 19-year-old neighbor, Tanner, who is a true grass enthusiast and owner of his own company, Palmetto Lawn Services, has become an invaluable asset. His expertise has been instrumental in bringing our lawn back to life this year, handling the more intensive and consistent work with a professional touch.
For specific projects requiring specialized skills and safety considerations, professional help was non-negotiable. DeHaan Painting, for instance, expertly managed the intricate process of cleaning and sealing our limewashed brick. The thought of Robert and I navigating two-story ladders for this delicate job was, for us, a definite pass for safety reasons and the desire for a flawless finish.
Last fall, we also made a crucial investment in repairing our existing irrigation system. Getting our sprinklers fully operational again made a world of difference, ensuring consistent and adequate watering for our grass, which is vital for its health and growth. The combination of these DIY efforts, professional services, and functional irrigation has collectively made a profound impact on our home’s overall curb appeal, transforming it into a welcoming and beautiful space. Now, let’s dive into the more detailed lawn makeover process, starting with the essential research phase.

Step 1: The Foundation of a Healthy Lawn – How to Test Your Soil
Before you even think about buying grass seed or fertilizer, understanding your soil is the absolute first and most critical step. You can easily acquire a DIY soil test kit online here or from your local home and garden store. This simple test provides a wealth of information, offering a complete pH analysis and crucial recommendations for the specific nutrients your lawn needs. It’s the roadmap that will guide all your subsequent lawn care decisions, ensuring you apply precisely what your soil requires, rather than guessing.
A soil test helps identify imbalances, such as whether your soil is too acidic or alkaline, and reveals any deficiencies in essential nutrients like nitrogen, phosphorus, and potassium. Armed with this data, you can choose the correct amendments and fertilizers, creating an optimal growing environment for your grass.
Selecting the Right Grass Type for Your Climate and Conditions
Once you understand your soil, the next step is to ensure you have the appropriate grass type for your specific climate and yard conditions. If you’re struggling to identify the existing grass in your lawn, or if you plan to start fresh with new seeding, resources are available to help. This comprehensive guide will assist you in choosing the ideal grass seed for your region.
When making your selection, carefully consider the unique aspects of your planting zone and local climate. Factors such as the average temperature, rainfall, and humidity levels throughout the year play a significant role. Equally important is assessing the amount of sunlight or shade your front yard receives. Some grass types thrive in full sun, while others are better suited for shaded areas. For our lawn, we opted for Pennington Smart Seed Southern Sun and Shade Grass Seed and Fertilizer Mix, specifically formulated to perform well in varying light conditions typical of our Southern climate.
Step 2: Effective Weed Control – When and How to Kill Weeds
Tackling weeds is a non-negotiable step in achieving a pristine lawn. The optimal seasons for applying weed killer are typically spring or fall, when weeds are actively growing but not yet stressed by extreme heat or cold. Prior to application, we made sure to lightly water the grass. This dampness is crucial, as it helps activate the weed killer more effectively within the soil, significantly improving results, especially in conditions with high humidity.
It’s important to note a few key considerations for successful weed killer application: **do not water your lawn immediately AFTER applying weed killer**. The product needs time to absorb and act on the weeds. Also, carefully check the weather forecast. Rain shortly after application can wash away the product, rendering your hard work ineffective and wasting valuable time and resources.
For the safety of your family and pets, ensure that children and animals are kept off the treated lawn for at least 24 hours after application, or as specified by the product instructions. Allow the weed killer sufficient time to work its magic, typically a period of at least 30 days, and up to 4 months, before you proceed with planting new grass seed. This waiting period ensures that the weed killer has dissipated and won’t inhibit the growth of your new grass.
In our case, we applied weed killer in September, which provided ample time for it to act. By October, our lawn was perfectly prepared and ready for the next phase: grass seeding. Remember that the recommended weeding and seeding time frame can vary significantly based on your local climate and specific grass type, so always consult local guidelines or product instructions for the best results in your area.

Step 3: Revitalizing the Soil – Aerating, Overseeding, and Fertilizing for a Thicker Lawn
After the weed killer had completed its job, our lawn initially looked even worse than before – quite literally “dead as a doornail.” This can be disheartening, but it’s a crucial part of the process. Remember, a lawn often looks worse before it begins to look significantly better. This stage is a testament to the powerful transformation that’s about to unfold.
Before aerating, it’s highly beneficial to water your grass. Damp soil allows the aerator to penetrate more easily, creating deeper and more effective holes. You can typically rent an aerator for a day from your local hardware store or equipment rental center. We utilized Sunbelt Rentals for this purpose. A clever tip to save costs and share resources is to split the rental fee with neighbors. By coordinating, you can collectively tackle multiple lawns in a single day, making the process more efficient and economical for everyone.
Aerating is a vital practice for lawn health. Grass thrives when water, air, and essential nutrients can freely penetrate and flow through the soil. Compacted soil, often caused by foot traffic, heavy equipment, or even rainfall, can stifle root growth and nutrient uptake. Aeration alleviates this compaction, creating small channels that allow these vital elements to reach deeper into the root zone, significantly improving overall root health and promoting robust growth. Depending on your lawn’s specific needs, you might also consider dethatching. Here is a helpful guide to show you how to dethatch or aerate your lawn.
Once your soil is prepared, you’ll need to determine the right amount of grass seed and fertilizer. To avoid over- or under-purchasing, use a reliable tool like this grass seed calculator. Simply input the dimensions of your yard, and it will help you calculate precisely how many bags of grass seed and fertilizer you’ll need for effective coverage, ensuring you have enough to achieve a dense, healthy lawn.
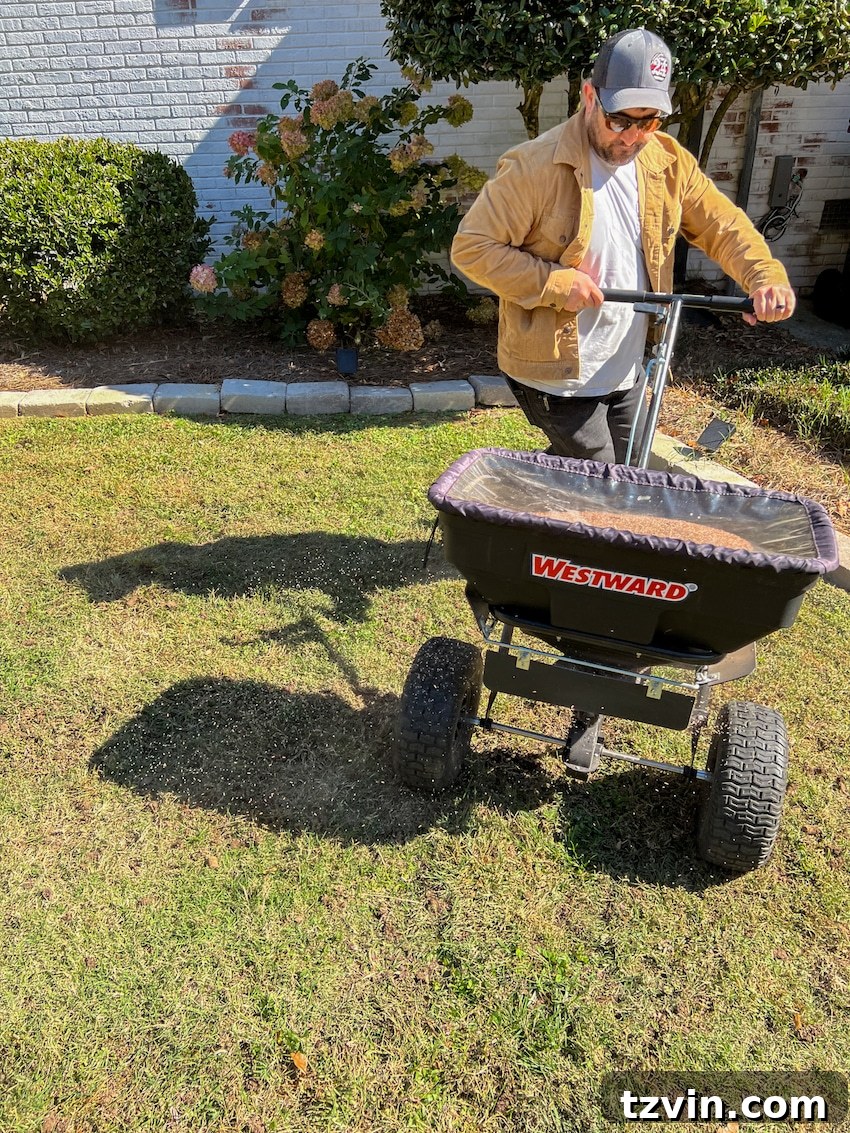
Expert Tips for Successful Grass Seed Application
Applying grass seed correctly is vital for germination and establishment. Follow these tips to maximize your chances of a lush, even lawn:
- **Mow Your Lawn Short:** Begin by mowing your existing lawn to a very short height, ideally an inch or less. This allows the new seed to make direct contact with the soil, which is essential for germination and root development, without being shaded out by existing blades.
- **Clear Debris:** Thoroughly rake and remove any debris such as fallen leaves, small twigs, and grass clippings. This creates a clean seedbed, preventing physical barriers that could hinder seed-to-soil contact and reducing competition for resources.
- **Evenly Spread Seed and Fertilizer:** Utilize a fertilizer spreader to ensure an even distribution of both grass seed and granular fertilizer. Walk in consistent, overlapping rows across your entire lawn. This method prevents patchy growth and ensures that every area receives an adequate amount of seed and nutrients.
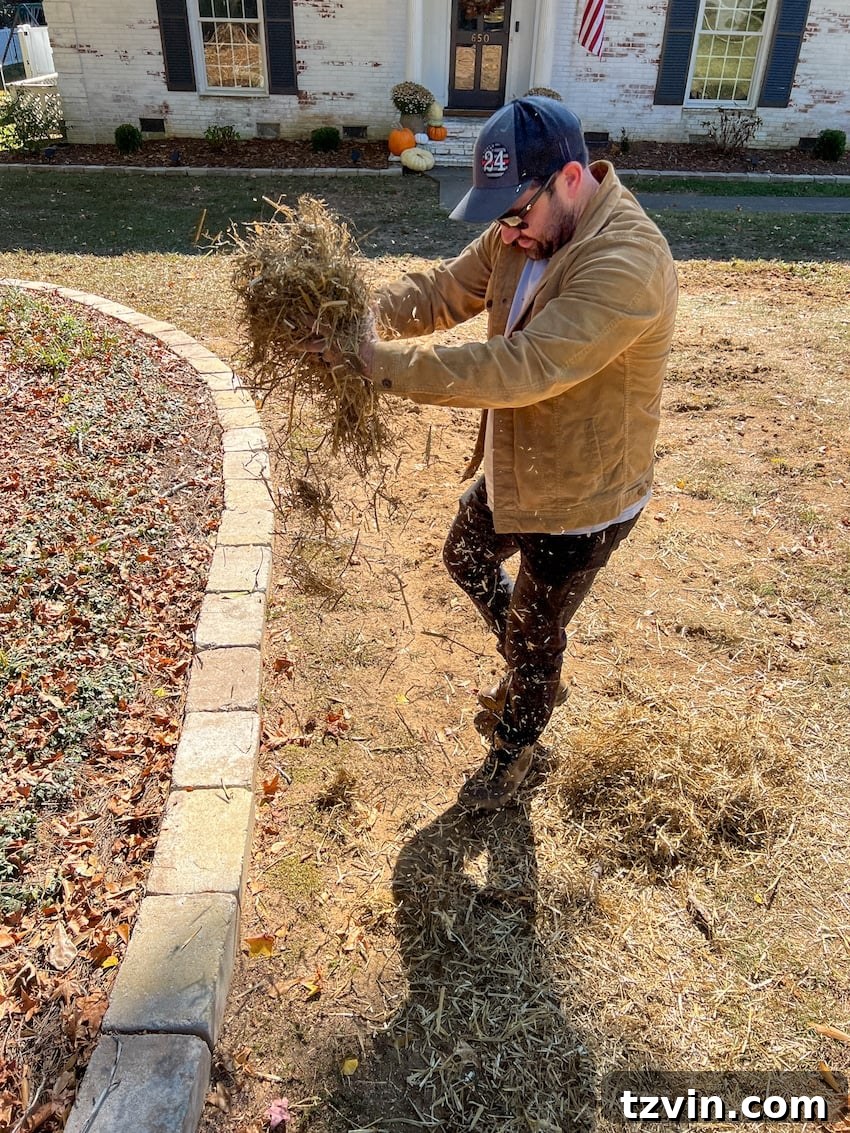
- **Protect New Seed with Hay:** After spreading, lightly scatter a thin layer of hay over the newly seeded areas, especially in bare spots. This protective covering helps retain moisture, shields the seeds from birds and wind, and moderates soil temperature. Ensure you can still see a little bit of soil through the hay, as too much hay can impede new grass seed growth.
Step 4: The Art of Hydration – Crafting the Perfect Watering Schedule
Watering is paramount to the success of your new lawn, but it’s not a one-size-fits-all approach. Your specific climate, soil type, and the amount of shade in your yard will ultimately dictate how often and how long you should water your new grass. Therefore, consider these guidelines as a flexible starting point, rather than strict, unyielding rules. Observing your lawn’s response and adjusting accordingly is key.
Watering Schedule for New Grass Seed
When you have newly sown grass seed, the goal is to keep the top inch of soil consistently moist, but not waterlogged. A good initial approach is to plan on watering your lawn 2-3 times per day, for approximately 10 minutes each session. If you are manually moving a sprinkler or watering by hand with a hose, strive to distribute the water as evenly as possible across the entire seeded area. Frequent, light watering helps prevent the tiny seeds from drying out and allows them to absorb enough moisture for germination.
Watering During the Germination Stage
Once you observe your new grass seeds beginning to germinate and sprout, it’s time to adjust your watering schedule. Transition to watering for a longer period, but only once per day. This encourages the young roots to grow deeper into the soil in search of water, rather than remaining shallow. As the new grass continues to grow and mature, gradually transition to an even deeper, less frequent watering regimen: a long soak of about 40 minutes on alternate days. This strengthens the root system, making the grass more resilient.
Ongoing Lawn Maintenance Watering
Once your grass is fully grown and established, you can further reduce your watering frequency to 2-3 days per week. The key here is to water deeply and infrequently. This encourages the roots to penetrate further into the soil, making the lawn more drought-resistant and less susceptible to common diseases. Always water in the early morning to minimize evaporation and allow the grass blades to dry before nightfall, which helps prevent fungal issues.
This shot of our front yard (directly below) perfectly illustrates what our lawn looked like in Spring 2023 – a clear representation of its previous patchy and weed-covered state.

Just one year later, the transformation is nothing short of dramatic. The difference is astounding, and we can’t help but admire those perfectly mowed lines! This incredible progress showcases the power of consistent, targeted lawn care.

While our lawn still has a little way to go, with a few stubborn patches that we’ll continue to refine, we are truly amazed by the overall difference. What was once a source of frustration is now a source of immense pride.
Last summer, the idea of walking barefoot through our grass was unimaginable due to painful stickers and an abundance of thorny weeds. Today, it’s an entirely different experience—it feels like stepping onto a plush, green carpet. The transformation isn’t just aesthetic; it’s about reclaiming our outdoor space for enjoyment and family time.
Our children now absolutely love running around and lying in the grass, which is, honestly, the most rewarding part of this entire project, regardless of how perfectly manicured the lawn looks. Playing barefoot in my parents’ lush green yard is one of my most cherished childhood memories. Being able to create that same joy and freedom for our girls now is truly a gift we had unknowingly taken for granted before this revival. It’s more than just a lawn; it’s a canvas for creating beautiful family memories.

In just a few short weeks, we have an exciting new project planned that promises to boost our home’s curb appeal factor even further! If you’ve been following our journey on Instagram Stories lately, you might already have a hint about what’s coming. Stay tuned for more updates!
If you’re interested in exploring other projects we’ve undertaken to improve our home’s exterior and overall curb appeal, you can find some of our favorite transformations and helpful guides below. Each project is designed to enhance your home’s beauty and functionality, offering inspiration and practical advice.
- DIY Front Flower Bed Makeover: Creating Inviting Garden Spaces
- 6 Small Front Porch Ideas on a Budget to Add Instant Curb Appeal
- 40 Best Faux Outdoor Plants for Planters on a Porch: Low Maintenance Beauty
- Stencil Painted Porch Floor Makeover: A Creative Exterior Upgrade
- Limewashed Brick Exterior Makeover Reveal: A Fresh New Look
- How to Clean and Maintain Limewashed Brick: Preserving Your Home’s Finish