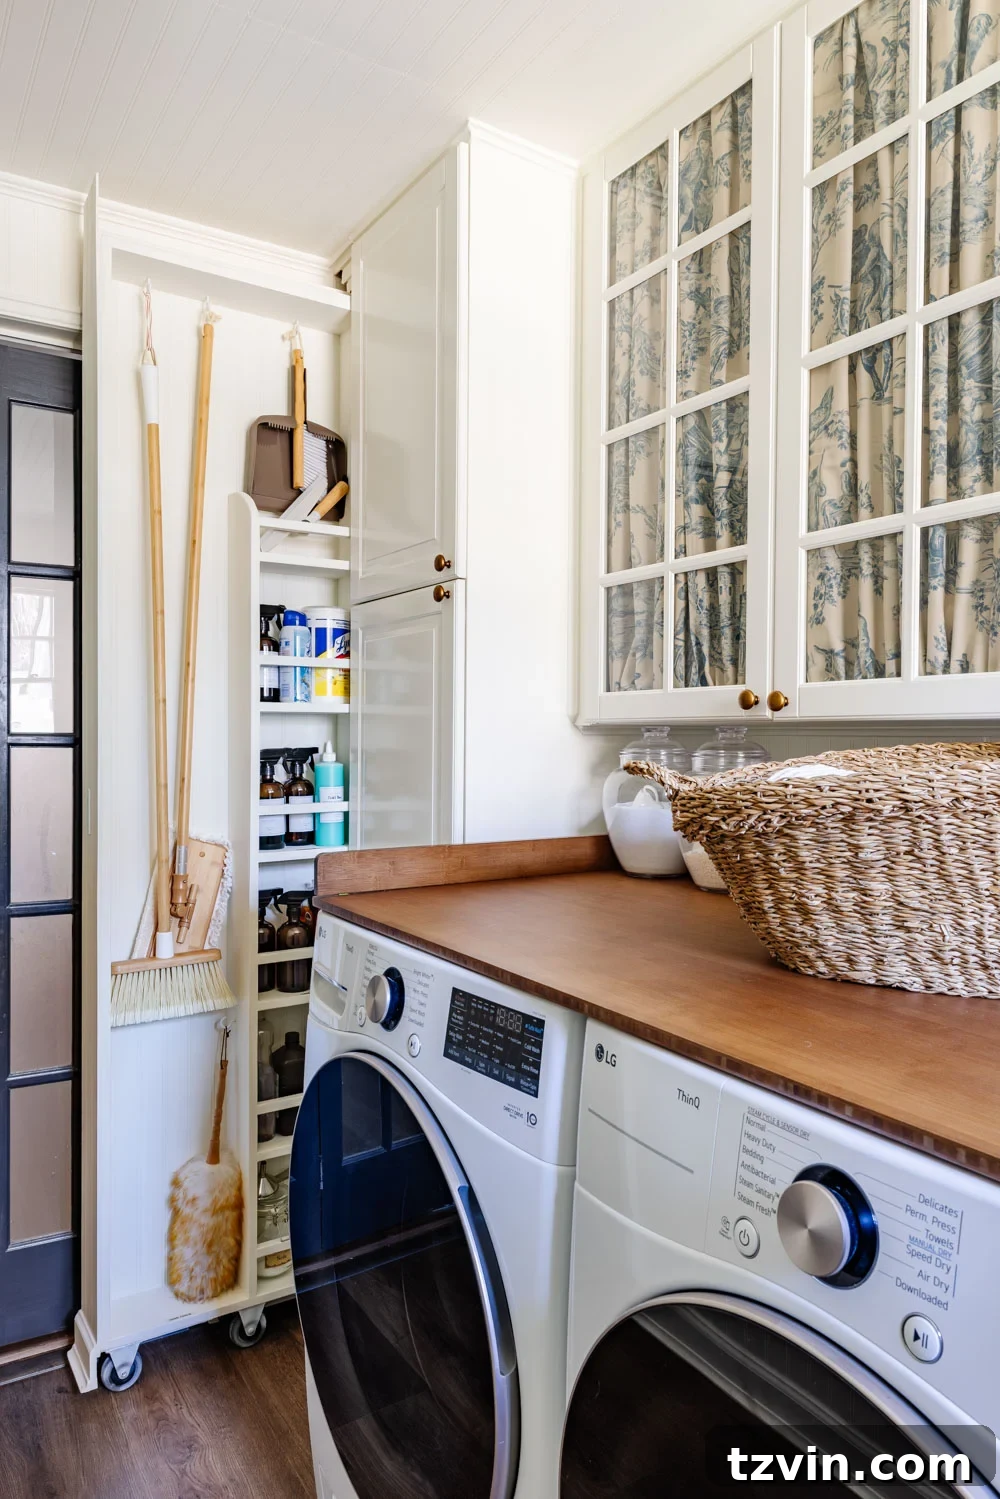
Unlock Hidden Storage: A DIY Guide to Building a Sliding Broom Closet
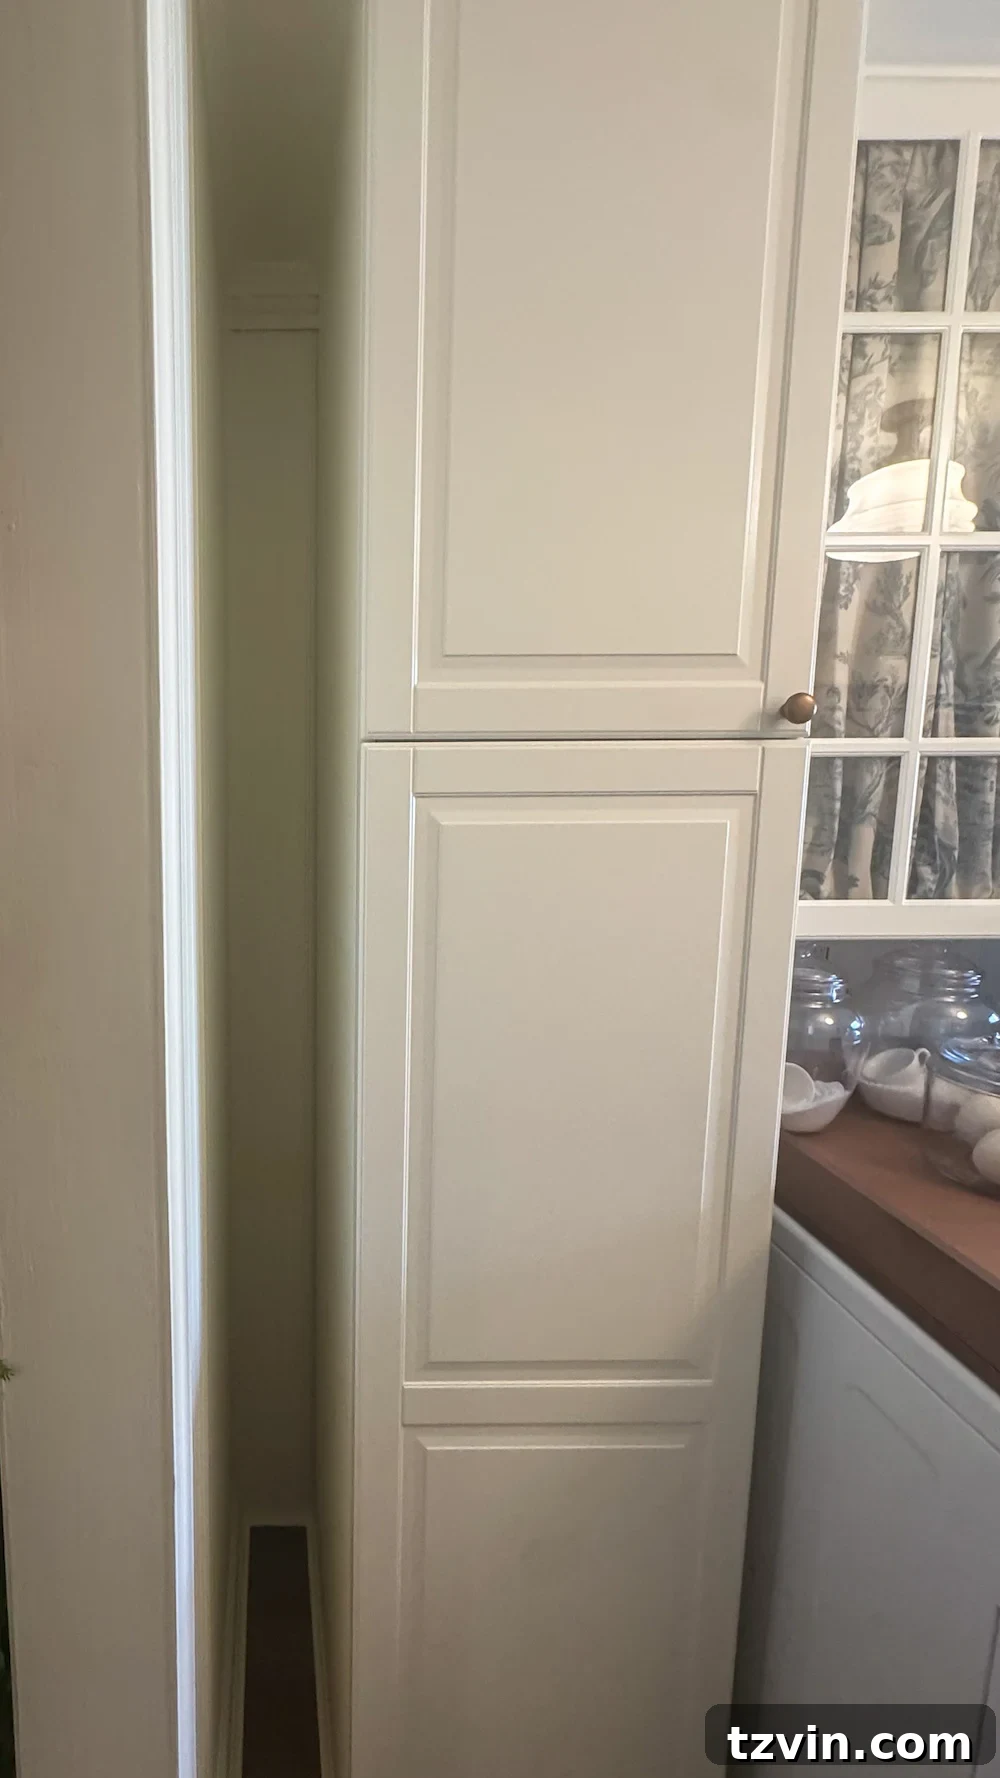
Do you dream of a clutter-free laundry room where every inch is maximized? What if I told you there’s a sneaky way to add valuable storage space, even in the narrowest of rooms? Our laundry room is a high-traffic area, but also very compact, making smart storage solutions essential. That’s why I was thrilled to discover a tiny 6-inch gap between our cabinet and the wall – a space ripe with potential.
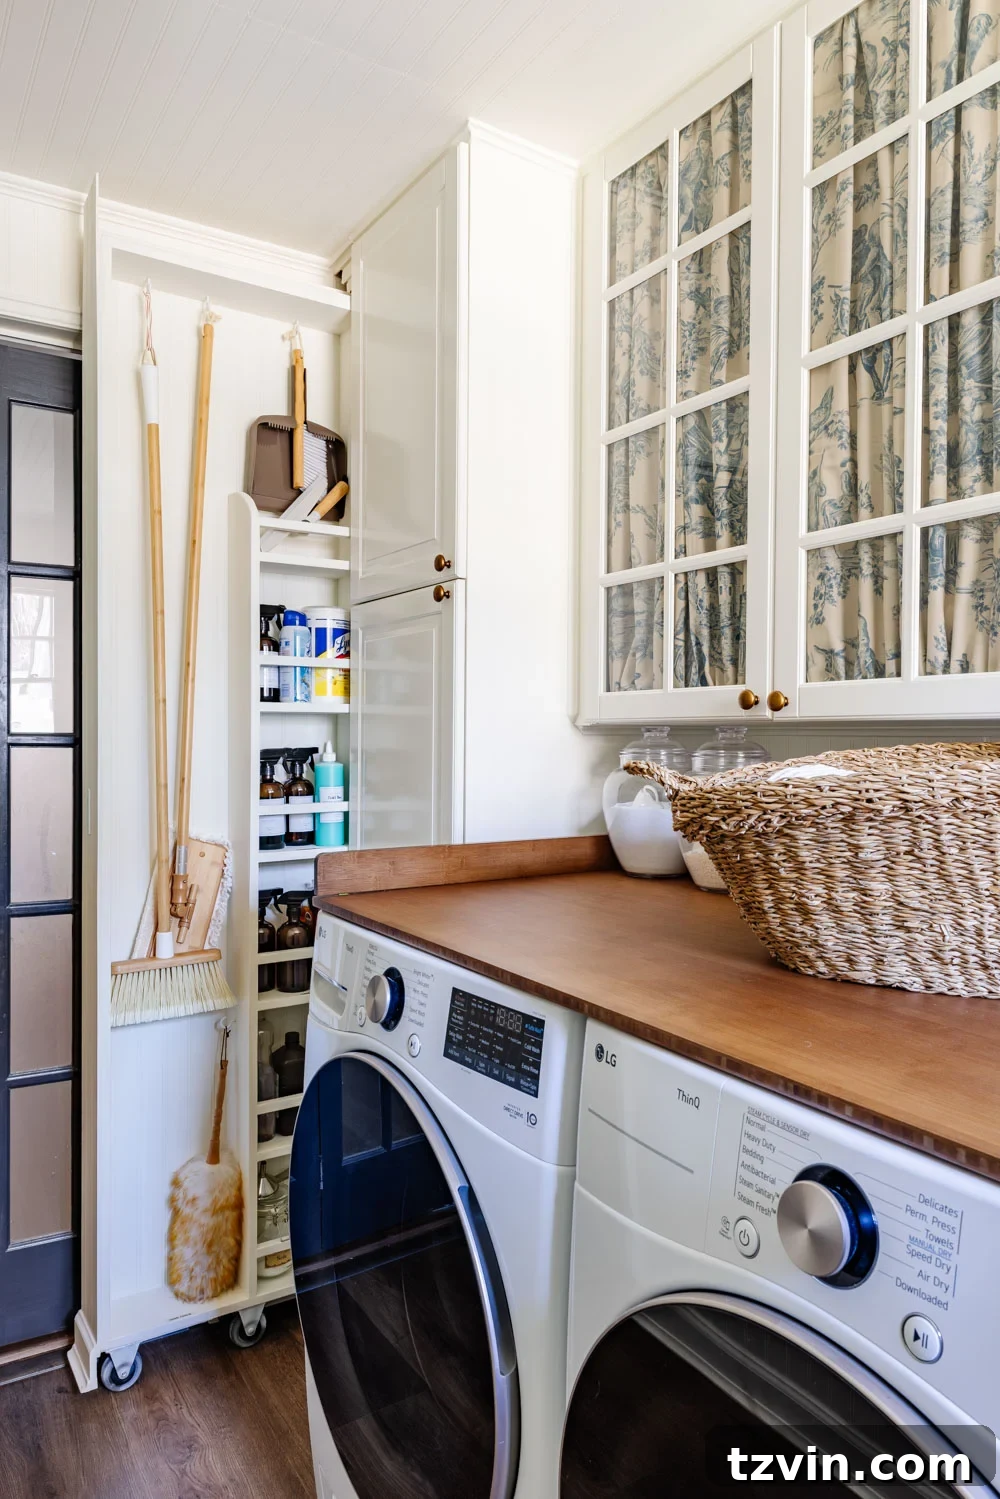
This unassuming sliver of space has transformed into one of my favorite functional features: a hidden sliding broom cupboard. It’s there when we need it, and completely disappears when we don’t, contributing to a tidy and organized laundry area.
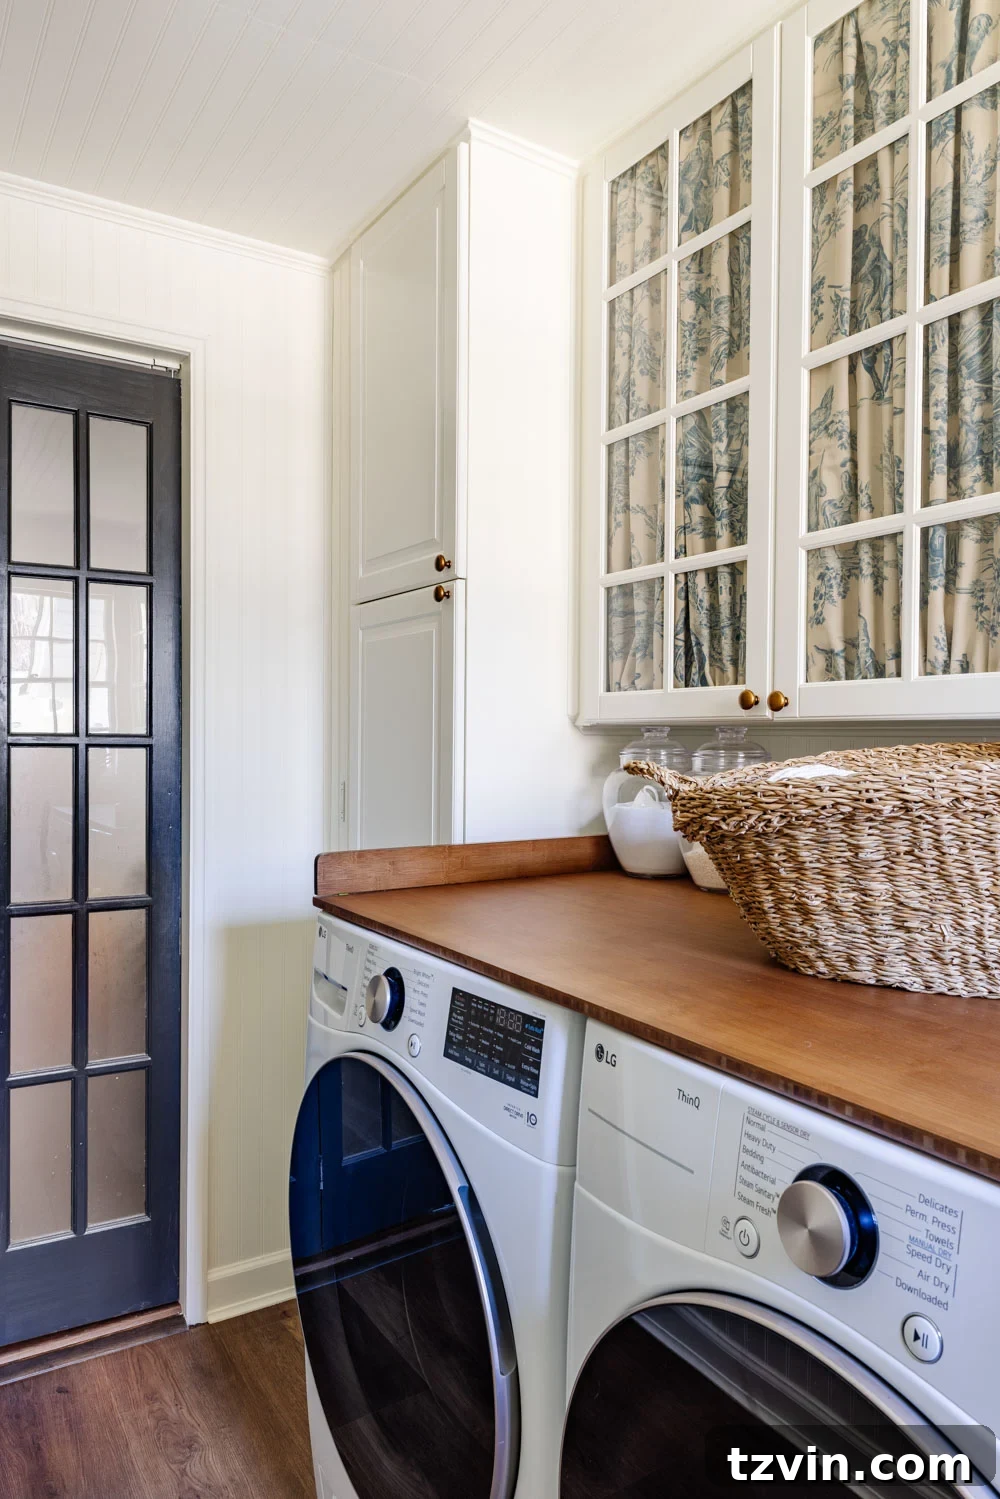
At first glance, it simply looks like part of the wall. There’s no obvious handle, no tell-tale door – just clean lines and matching beadboard that seamlessly blends into the existing decor. But when you pull it out, it reveals a neat and organized storage space for our broom, mop, and other cleaning supplies, all without taking up precious floor space. This clever design helps maintain a spacious and functional laundry room.
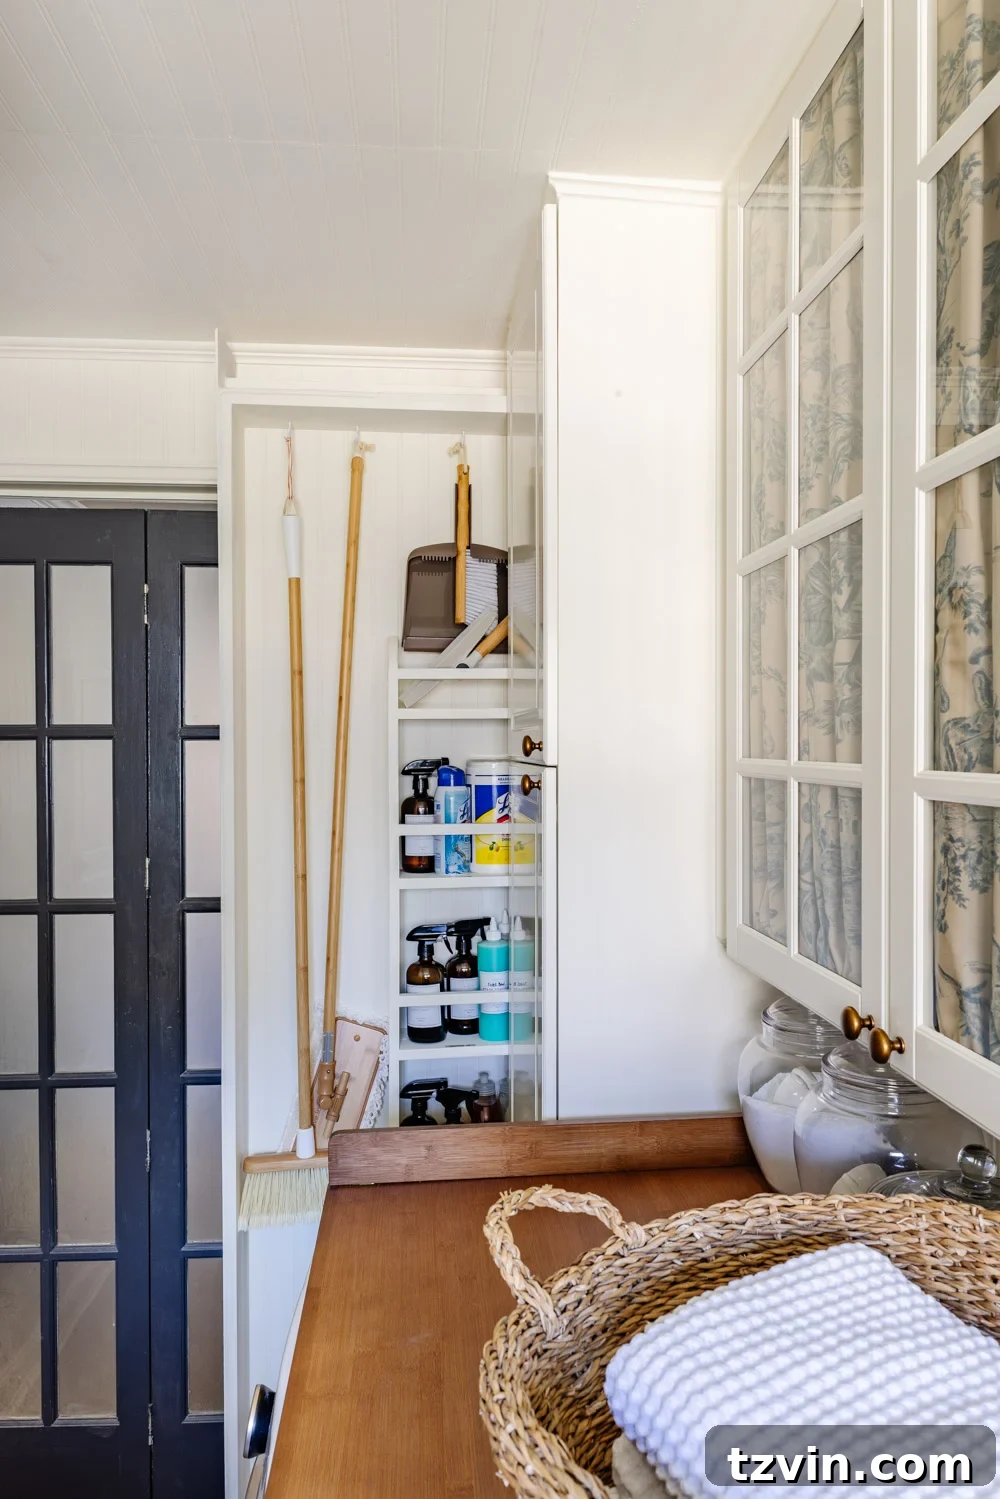
While we took inspiration from the building plans from Renovate108.com (they offer a fantastic tutorial), we had to adapt the design to fit our specific needs. Our laundry room cabinets were already installed, which meant we needed to get creative with our approach. In this guide, I’ll walk you through the step-by-step process of how we adapted their design and built our own custom broom cabinet, perfectly tailored to our laundry room dimensions.
Why Choose a Hidden Broom Cupboard for Your Laundry Room?
Before we dive into the “how,” let’s discuss the compelling reasons to consider a hidden broom cupboard. It’s more than just a storage solution; it’s a game-changer for laundry room organization and aesthetics.
- Eliminate Leaning Brooms: Say goodbye to brooms precariously leaning in corners. A hidden cupboard provides a dedicated, upright storage space, preventing them from falling and creating clutter.
- Reclaim Valuable Space: Forget bulky utility closets that eat up precious square footage. A hidden broom cupboard utilizes otherwise wasted space, freeing up your laundry room for other essential tasks.
- Conceal Clutter: Keep messy cleaning tools out of sight but easily accessible. This creates a more visually appealing and organized laundry room environment.
- Achieve a Custom Look: Even though it’s a DIY project, a hidden broom cupboard adds a touch of custom design to your laundry room, making it feel more intentional and well-planned. It blends seamlessly with your existing cabinetry and wall decor.
This project is an example of how smart storage solutions can transform a room, making it feel more thoughtfully designed and functional. It’s a practical yet stylish addition that enhances the overall ambiance of your laundry room.
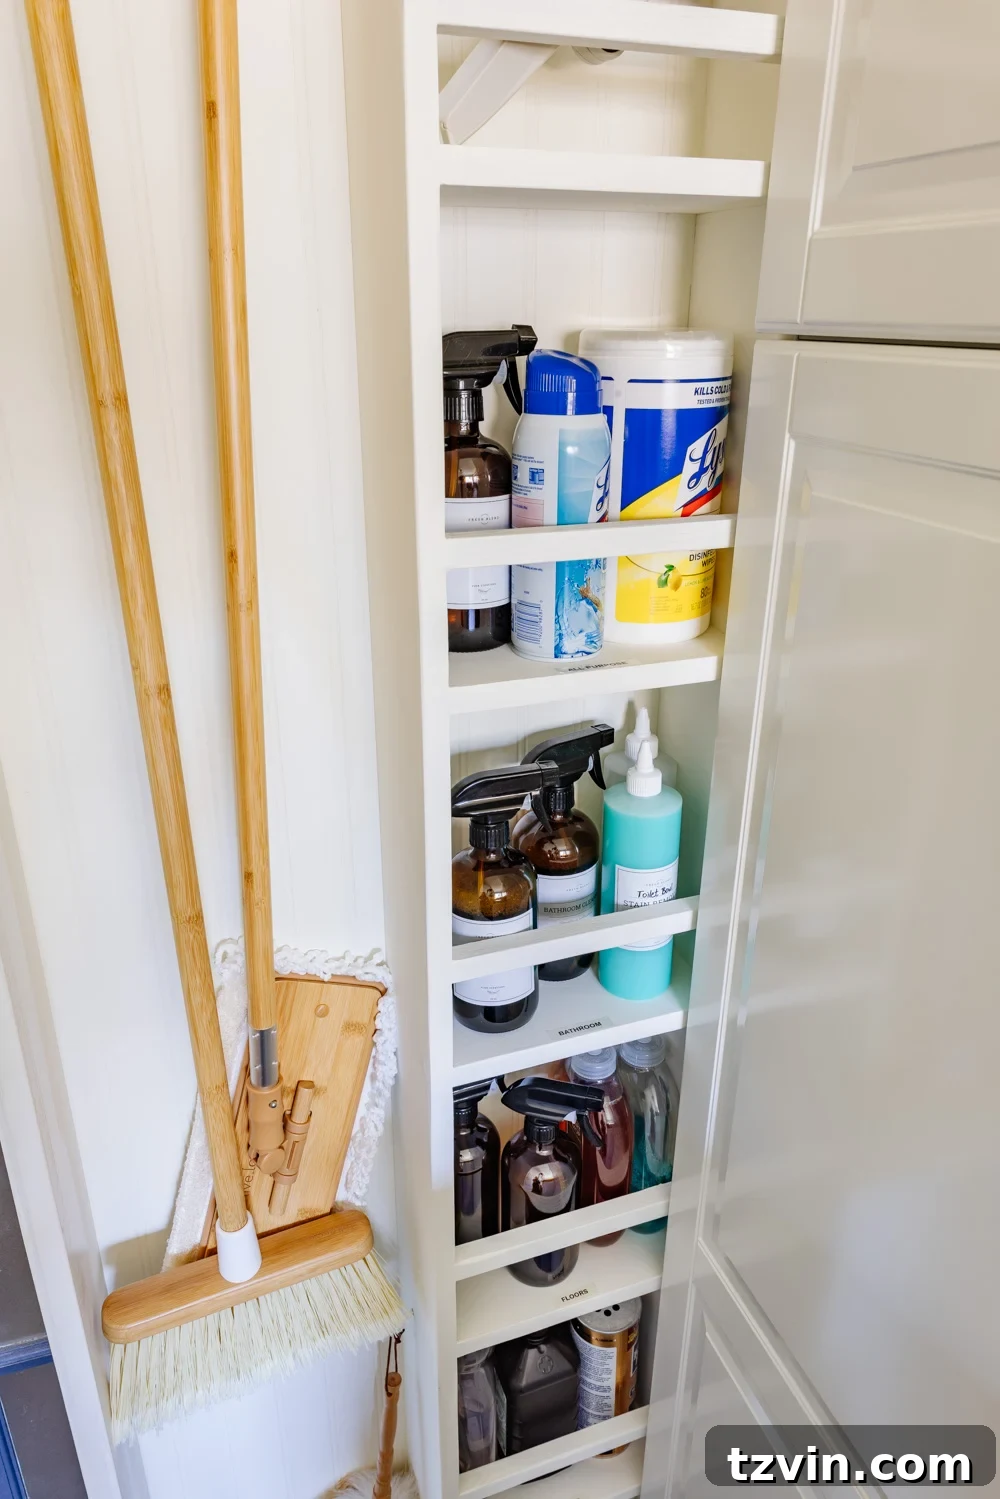
Custom Adjustments: Adapting the Original Broom Closet Plans
The original Renovate108 plans utilize a wall-mounted track system. However, this wasn’t a viable option for us since our laundry room cabinets were already securely in place. To overcome this challenge, we made several key modifications to ensure the hidden broom cupboard would work seamlessly in our existing space. Here are the custom adjustments we implemented:
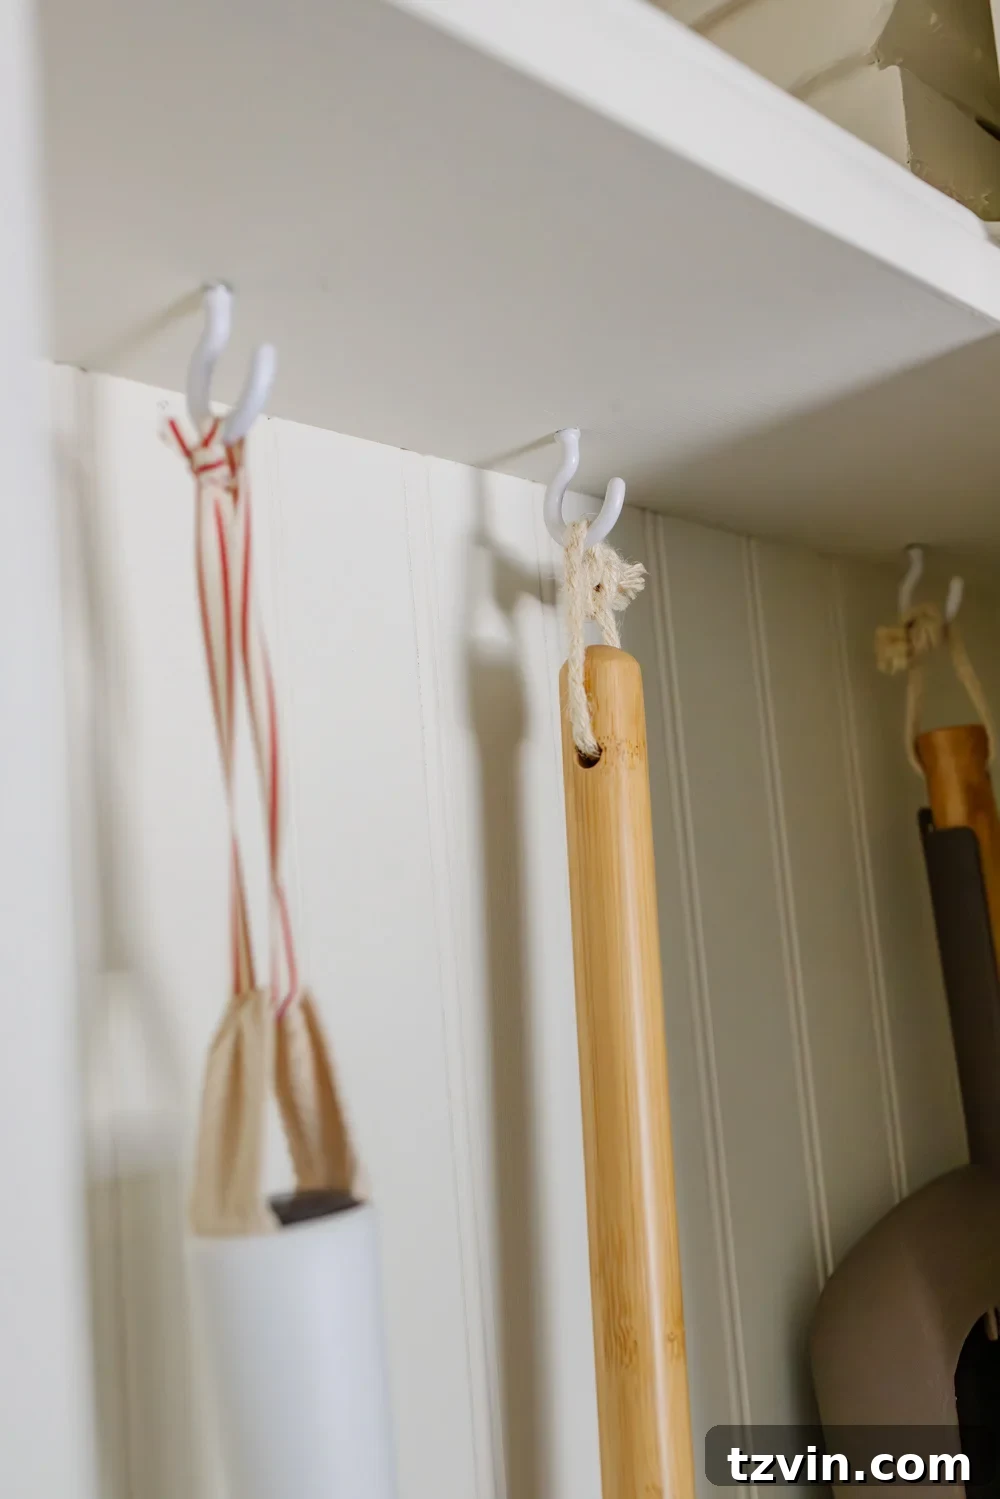
- Ceiling-Mounted Pull-Out Track: Instead of a wall-mounted system, we built a custom ceiling-mounted pull-out track within the 6-inch gap. We used scrap wood from an old pallet, proving that you don’t always need expensive materials for a successful DIY project.
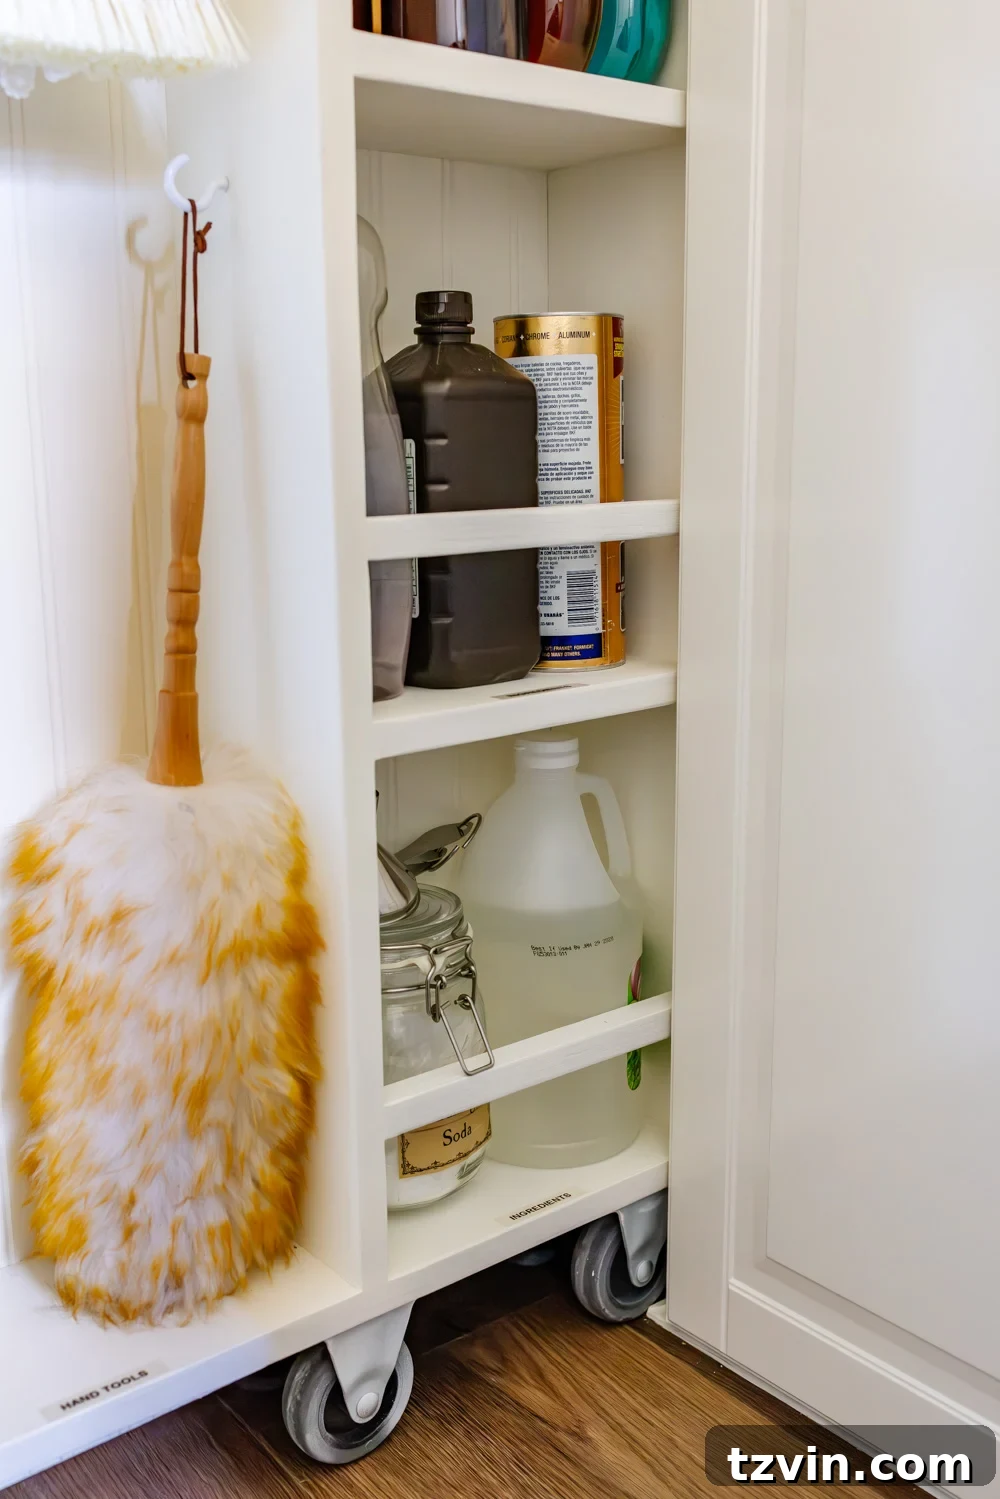
- Casters for Smooth Rolling: We mounted the cupboard frame on casters, allowing it to roll smoothly in and out of its hidden space. This ensures easy access to cleaning supplies without any strain or difficulty.
- Beadboard Integration: To seamlessly integrate the broom cupboard with the existing wall, we added beadboard to the front. This helps it visually disappear, blending perfectly with the surrounding decor.
- Concealing the Casters: To complete the seamless look, we hid the caster wheels with baseboard trim. This ensures that the cupboard appears flush with the wall, enhancing the built-in aesthetic.
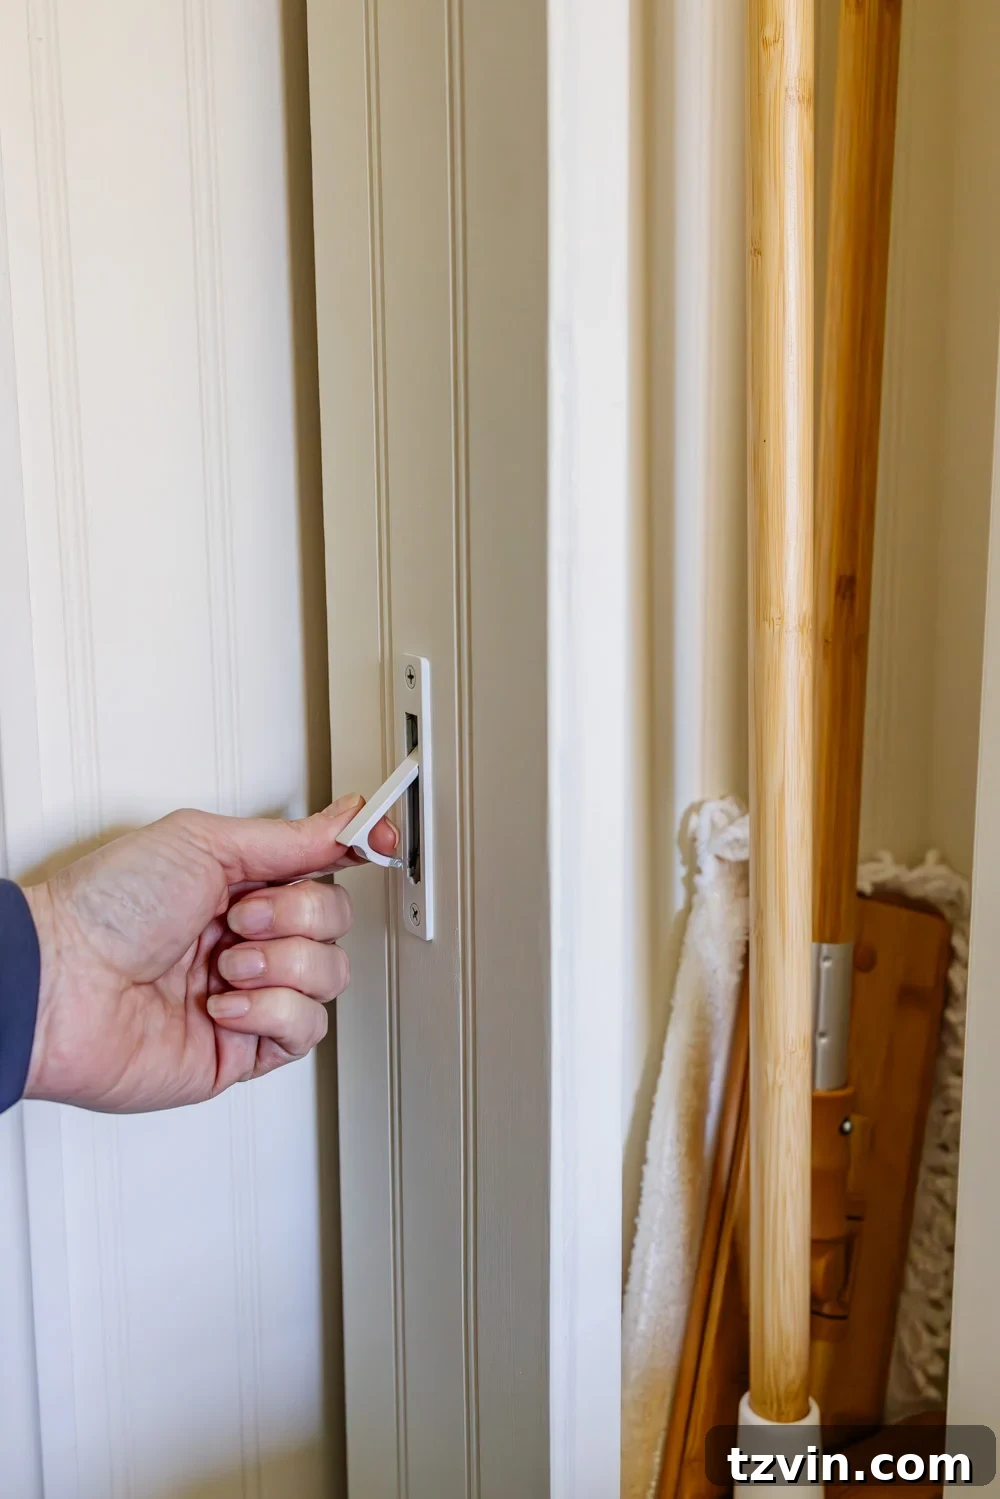
- Invisible Handle Solution: We opted for a pocket door pull instead of a traditional knob or handle. This keeps the cupboard nearly invisible when closed, maintaining a clean and uncluttered look.
These modifications allowed us to create a hidden broom cupboard that feels seamless and intentional, as if it were always meant to be part of the laundry room design. It’s a testament to the power of customization in DIY projects.
Step-by-Step Guide: Building Your Own Hidden Broom Cabinet
Ready to build your own space-saving, hidden broom cabinet? Follow these detailed steps to create a custom storage solution tailored to your laundry room.
Step 1: Precise Measurements – The Key to Success
Accuracy is paramount in this project, especially since the broom cupboard is designed to fit within a tight gap. Take your time and measure carefully.
- Gap Width: Measure the exact width of the gap between the cabinet and the wall. This measurement is crucial for determining the overall width of the cupboard frame.
- Available Depth: Determine the maximum depth you can utilize without obstructing the cabinet doors. This will dictate the depth of the cupboard.
- Ceiling Height: Measure the ceiling height to ensure you have enough vertical space to accommodate tall cleaning tools like brooms and mops.
Remember the mantra: measure twice, cut once! This project allows for minimal error.
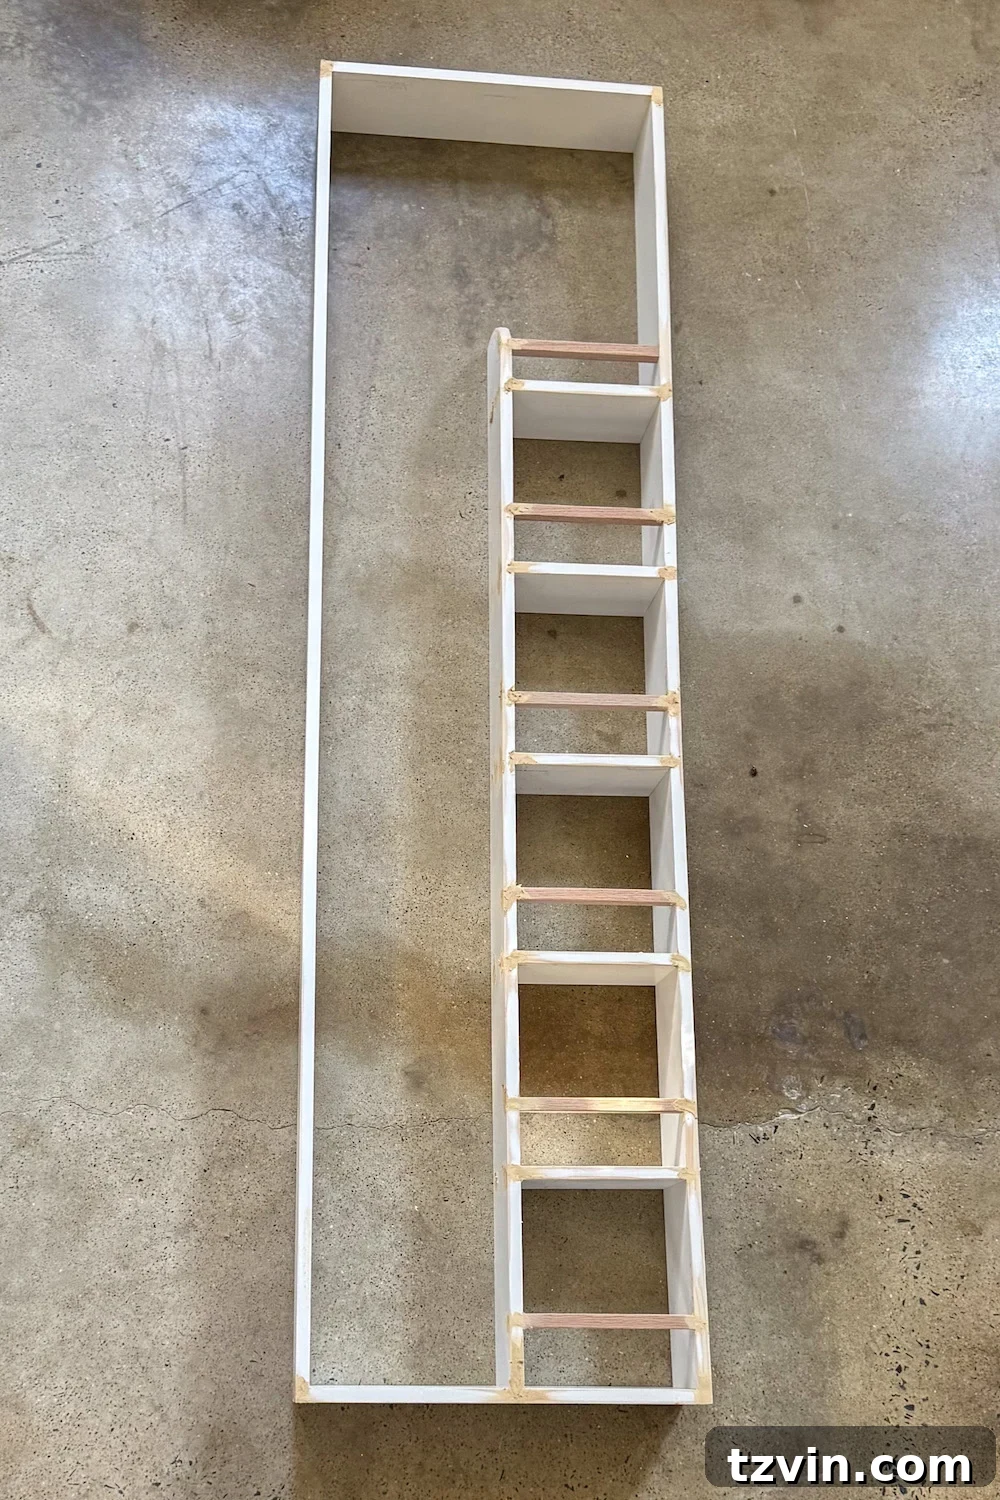
Step 2: Constructing the Broom Cupboard Frame
Using the Renovate108 plans as a foundation, adapt the dimensions to match your measurements. Build a tall, narrow cabinet frame that fits perfectly into your designated space. This involves:
- Sturdy Rectangular Frame: Construct a solid rectangular frame that will form the main structure of the cupboard.
- Horizontal Supports: Add horizontal supports to the frame for increased stability and to prevent warping.
- Open Interior Design: Ensure the interior is spacious enough to hold your broom, mop, duster, and other cleaning supplies comfortably.
At this stage, it might look like a simple box, but don’t worry – the magic happens in the following steps.
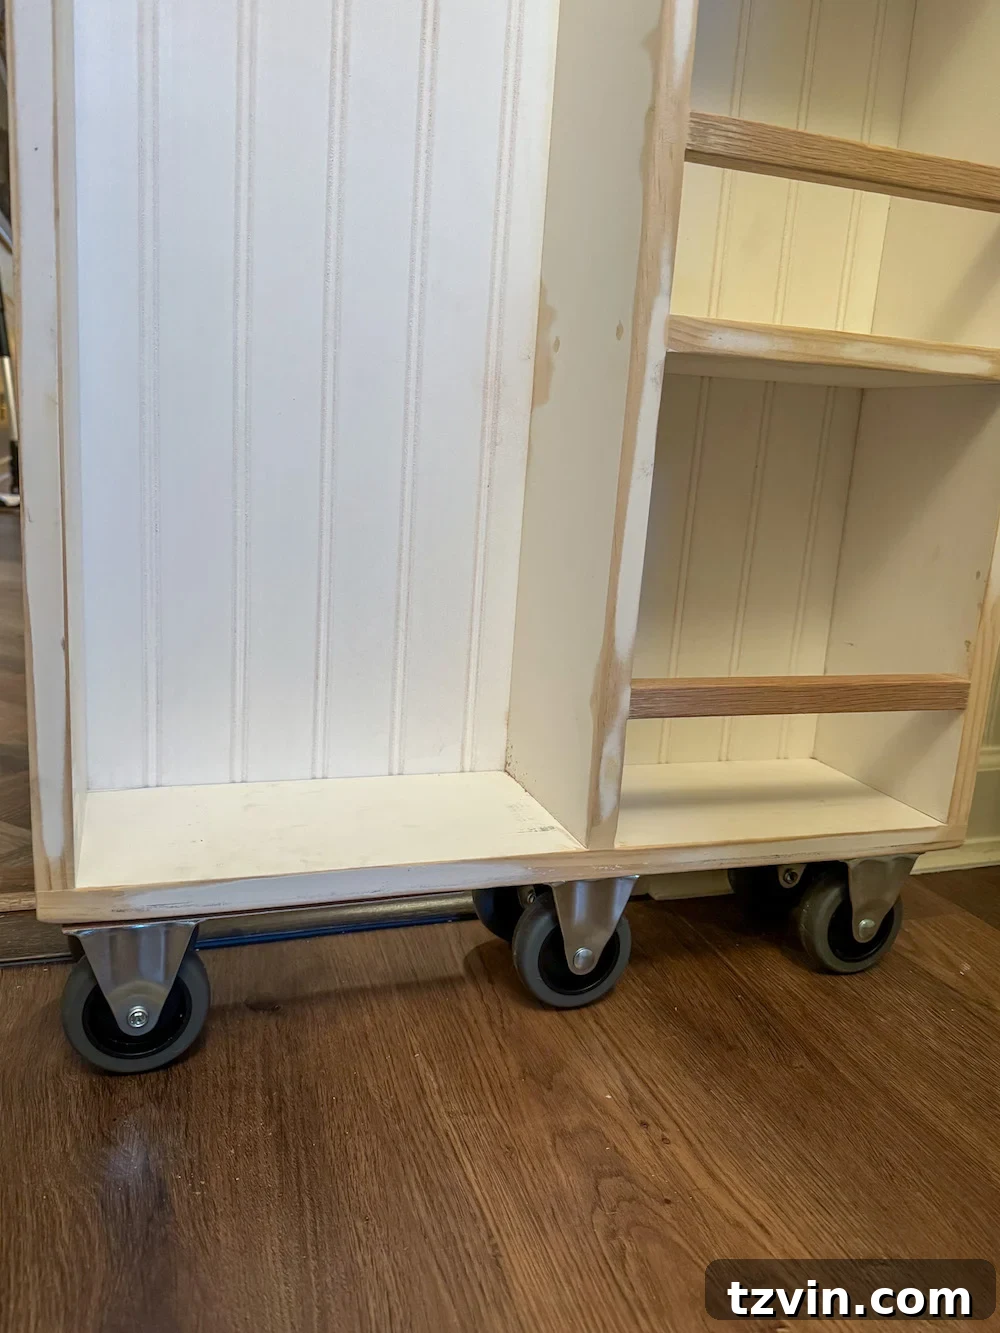
Step 3: Enabling Smooth Sliding with Casters
Since we opted out of the wall-mounted track, we relied on casters to provide smooth and effortless sliding. Securely attach durable casters to the bottom of the frame. This simple addition makes a world of difference.
The cupboard should glide in and out with minimal effort, even when fully loaded with cleaning supplies. Choose casters that are appropriate for your floor type.
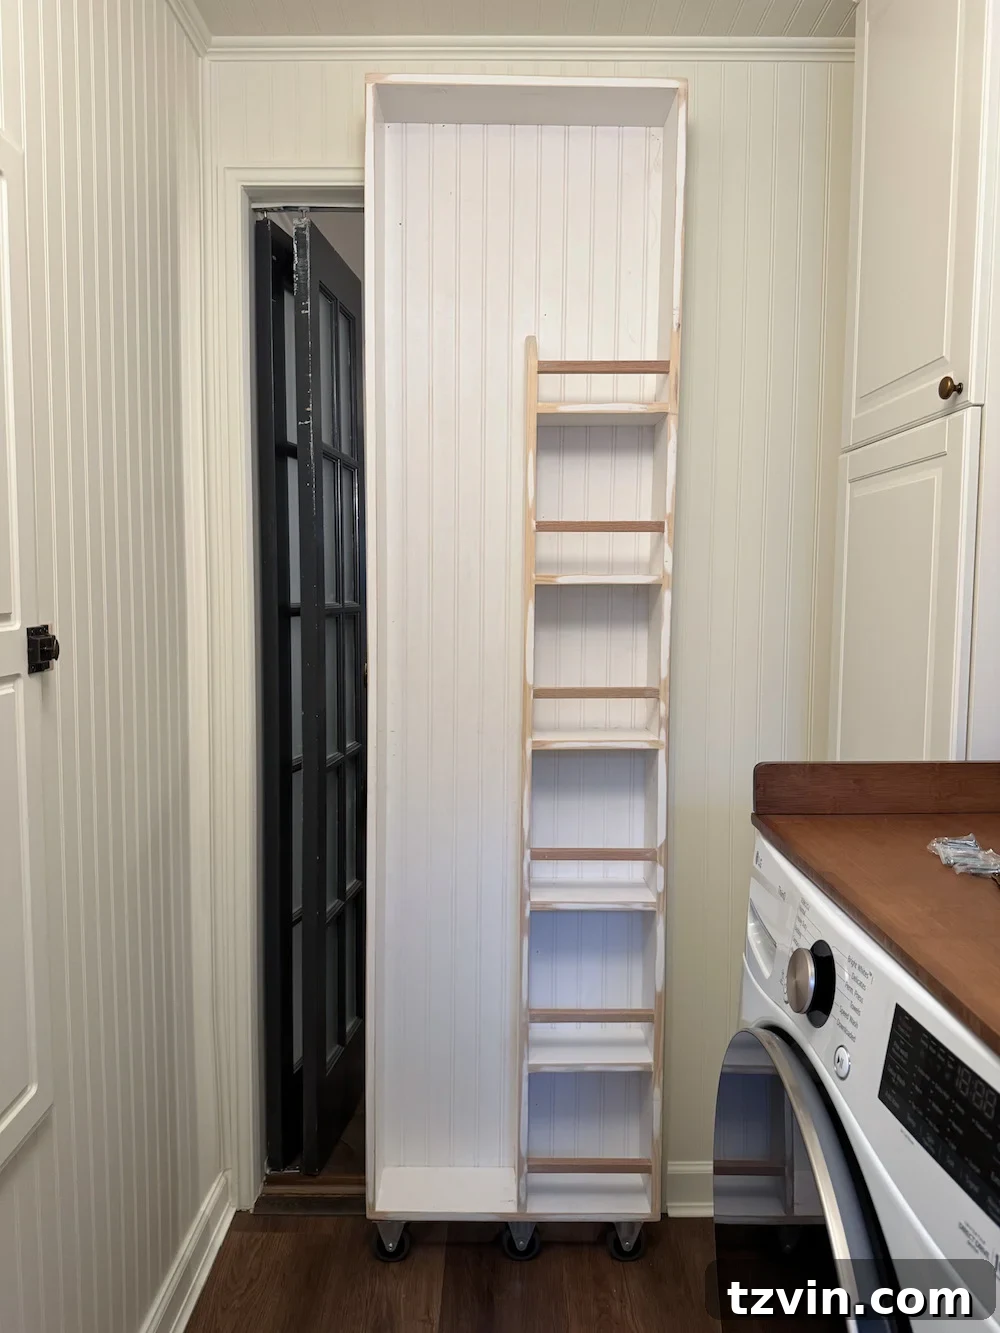
Step 4: Crafting a Custom Ceiling Track
To prevent the broom cupboard from tipping or wobbling during use, a ceiling-mounted guide track is essential. We created a simple track installed within the 6-inch gap.
This track acts as a guide, keeping the cupboard moving straight as it slides in and out. Though hidden from view, it plays a crucial role in ensuring stability and smooth operation.
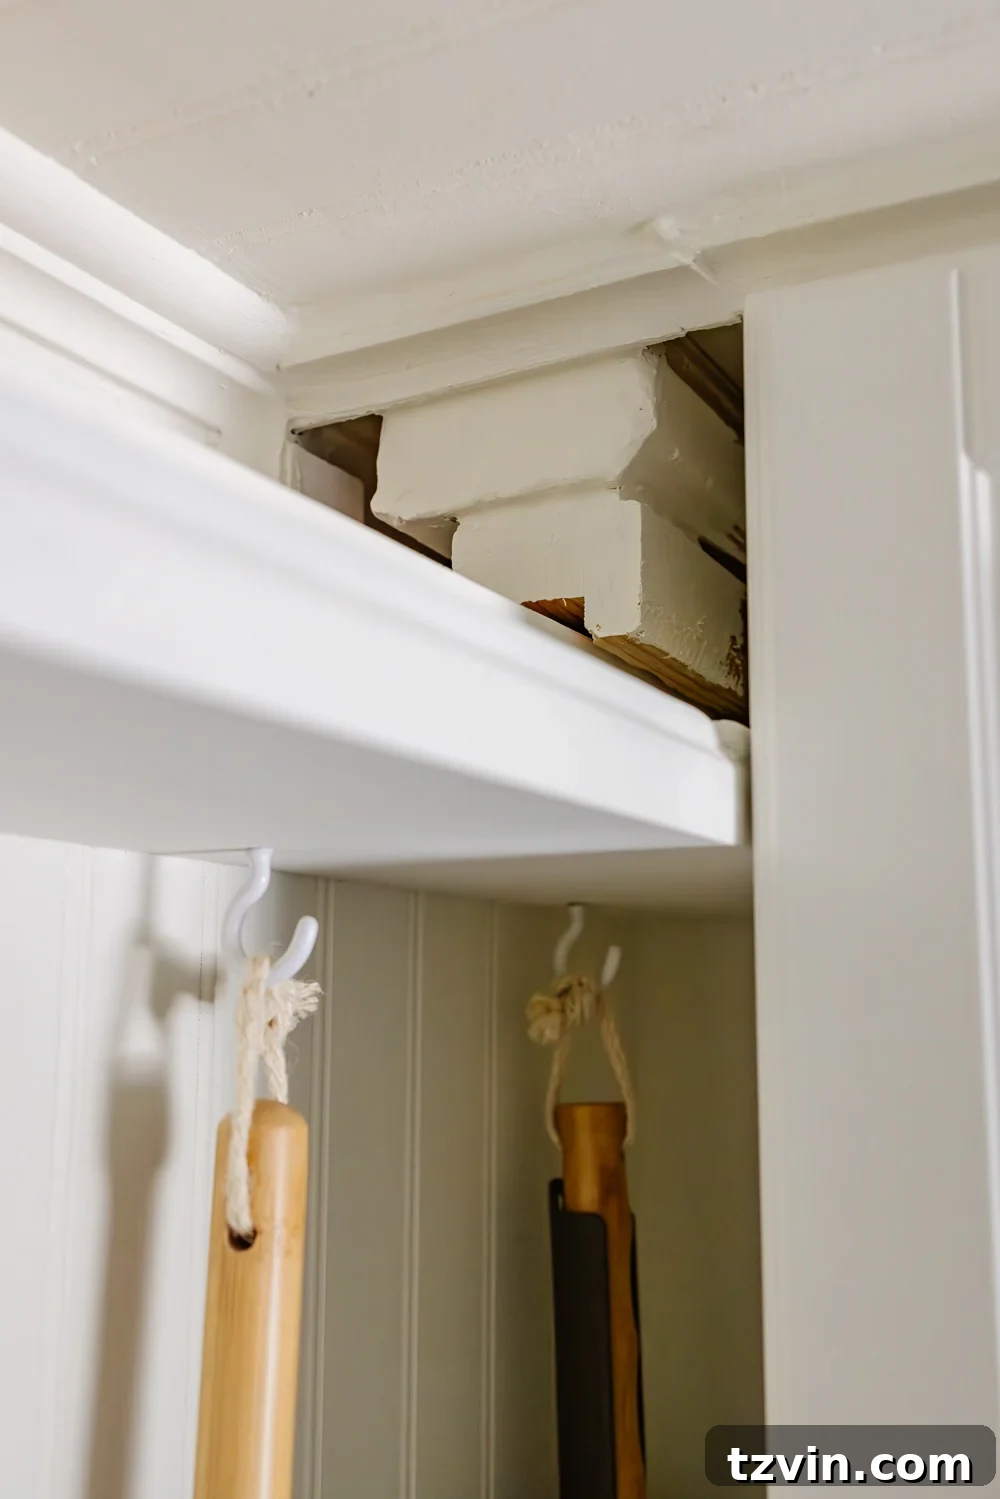
Step 5: Transforming the Look with Beadboard
This is where the transformation truly begins. Applying beadboard to the front of the broom cupboard allows it to visually blend in with the surrounding walls.
Once painted, the beadboard will resemble wall paneling rather than a cabinet door, creating the illusion of a seamless, hidden storage space. This step is essential if you want a truly concealed broom cupboard.
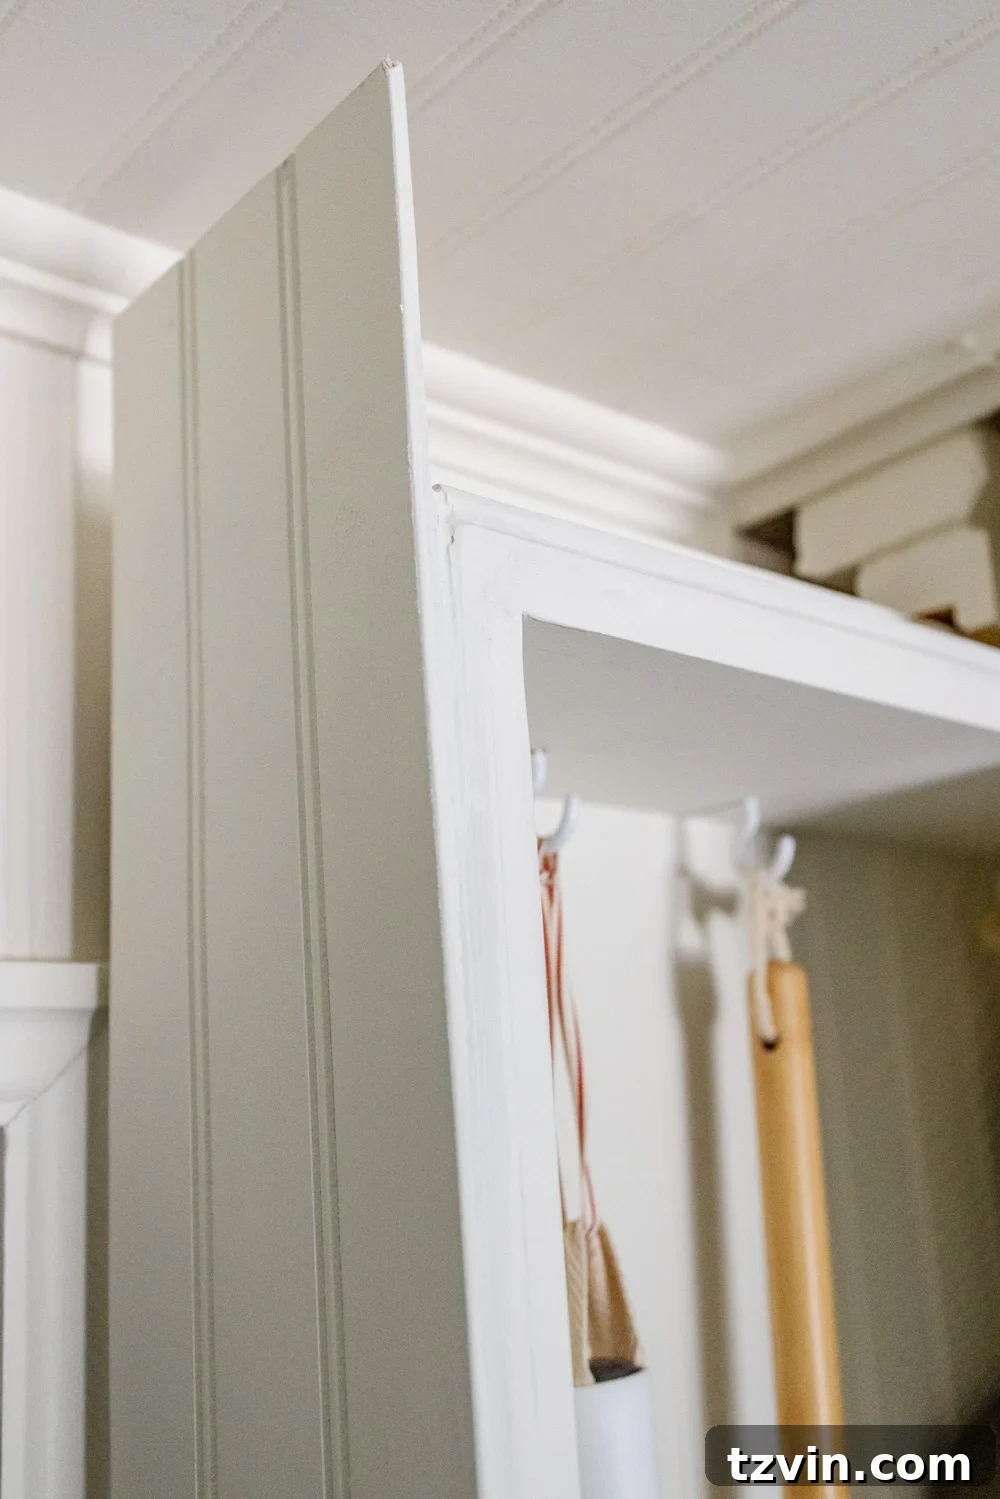
Step 6: Concealing the Casters with Baseboard
To achieve a finished and polished look, attach a piece of baseboard trim to the front of the cupboard, along the bottom.
- Complete Concealment: The baseboard effectively hides the caster wheels from view.
- Seamless Integration: The trim should align with the existing baseboard on the wall for a cohesive design.
- Built-in Illusion: This small detail contributes to the overall impression that the cabinet is built into the wall.
This seemingly minor detail makes a significant visual impact, elevating the overall design of the hidden broom cupboard.
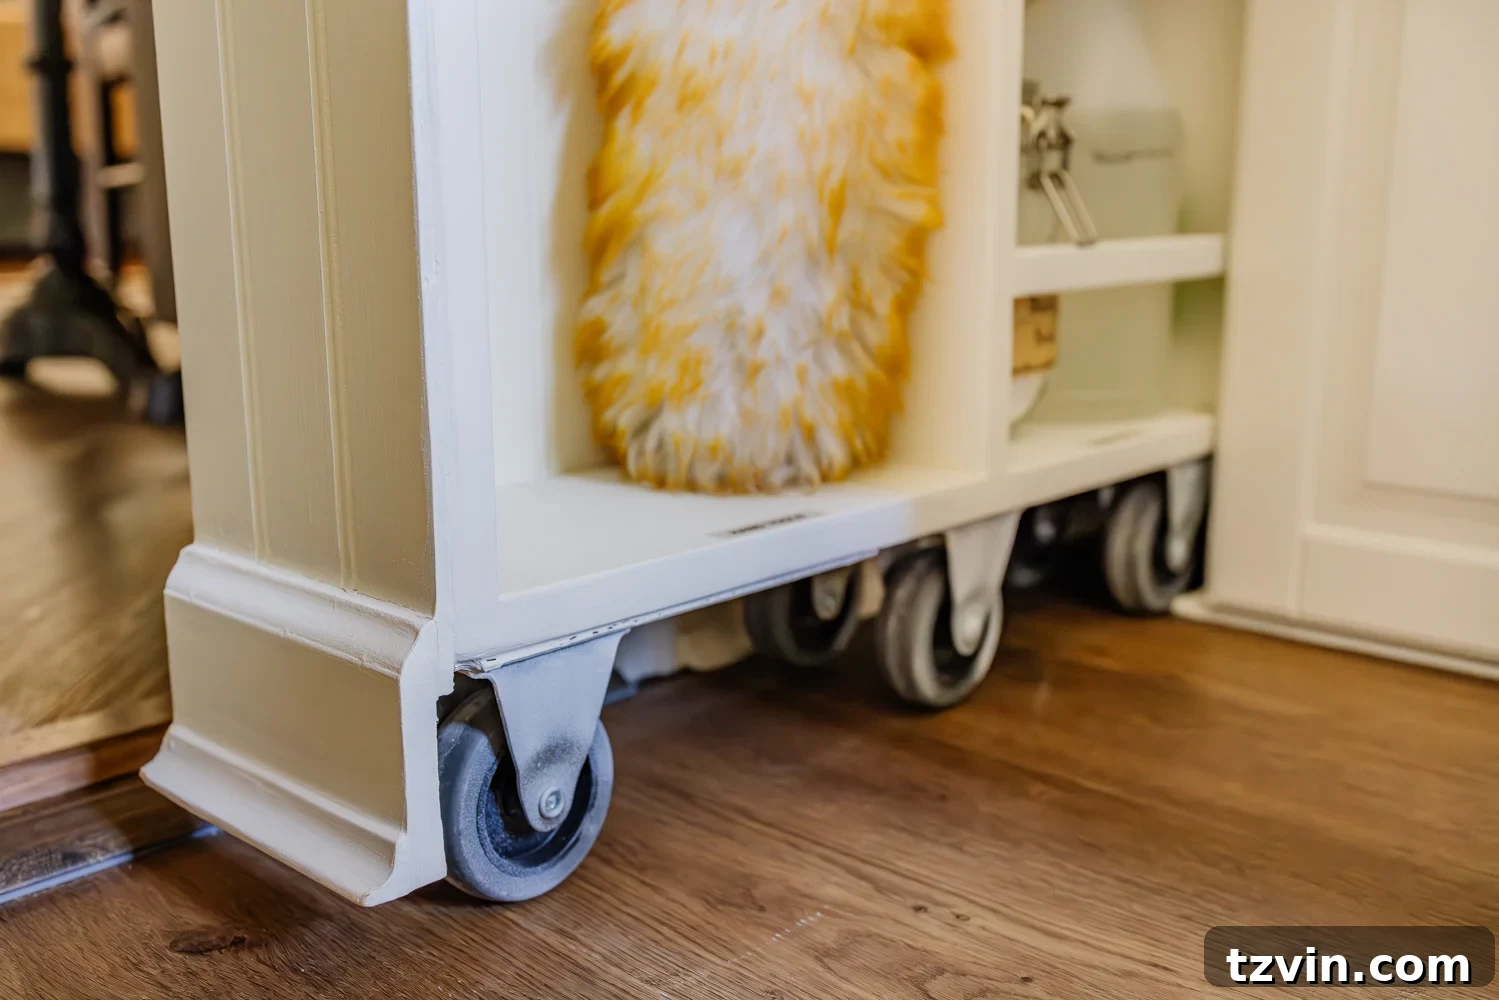
Step 7: Choosing an Invisible Handle: The Pocket Door Pull
Instead of a traditional cabinet knob that would detract from the hidden aesthetic, we opted for a flush pocket door pull. This allows the broom cabinet to remain nearly invisible when closed.
The pocket door pull is easy to grip when needed but disappears into the design when not in use. It’s a subtle yet impactful detail that enhances the overall functionality and aesthetics of the project.
The Reveal: A Hidden Broom Cupboard That Transforms Your Laundry Room
Once painted and slid into place, the broom cupboard seamlessly blends into the laundry room wall. Unless you know it’s there, you’d likely walk right past it. It’s a testament to the power of strategic design and attention to detail.
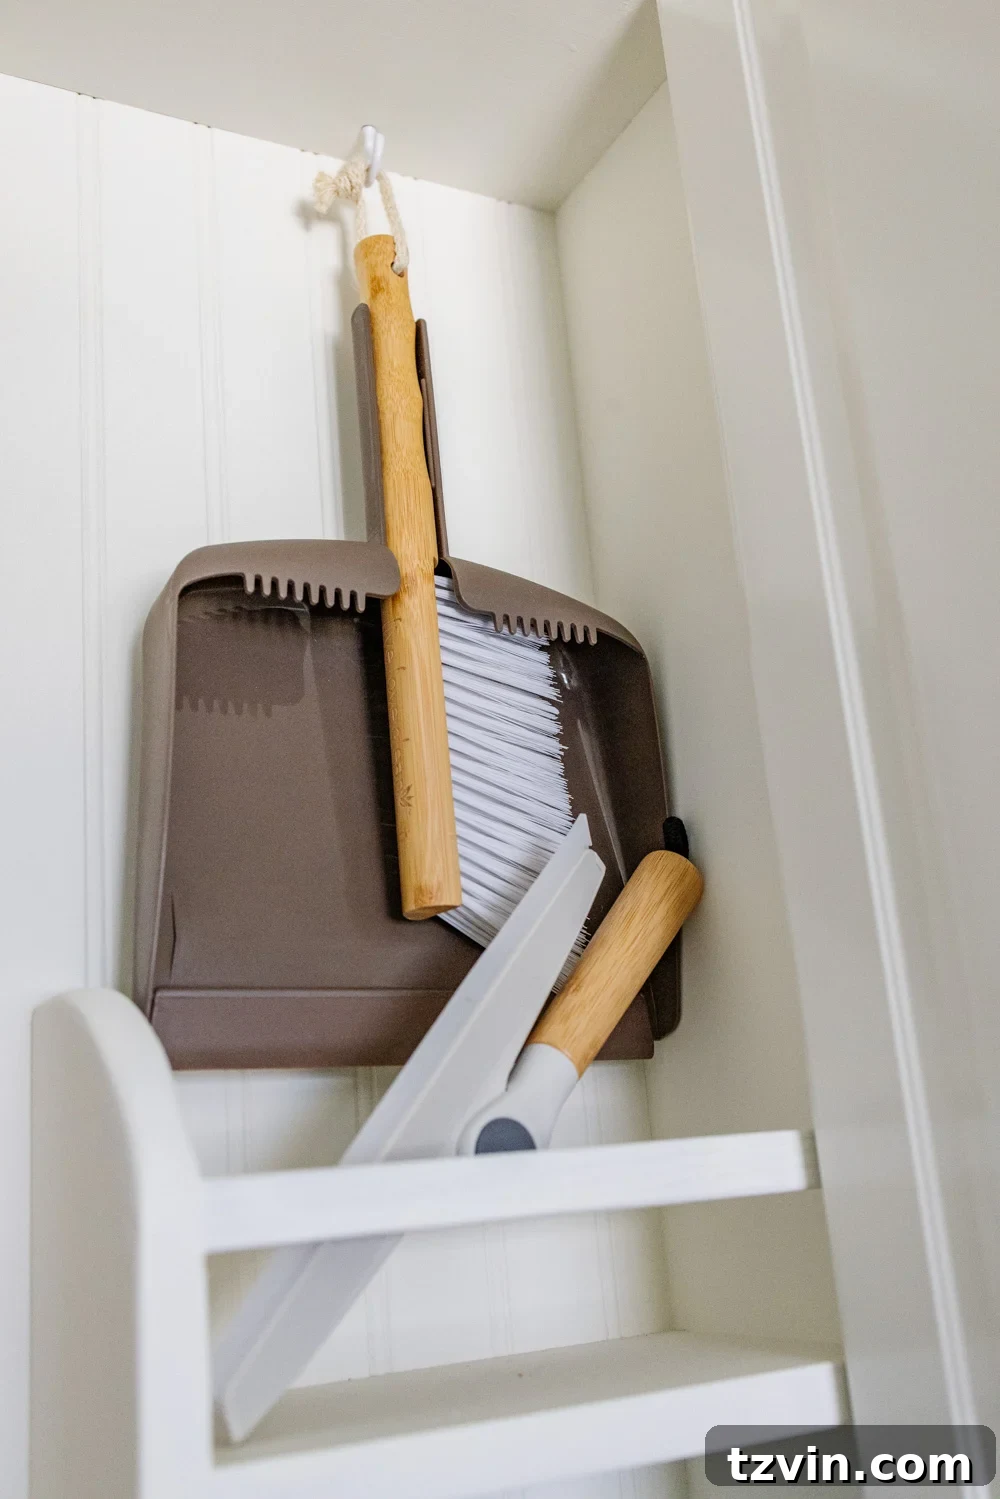
- Upright Broom Storage: Your brooms are now neatly stored upright, preventing clutter and potential hazards.
- Designated Storage Space: Every cleaning supply now has a designated place, contributing to a more organized and efficient laundry room.
- Enhanced Aesthetics: The room feels cleaner, more intentional, and more visually appealing.
This is one of those projects that quietly improves everyday life, making tasks easier and more enjoyable. And those are always the most rewarding.
This hidden broom cabinet proves that even the smallest spaces can be optimized with a little creativity and ingenuity. I’m now inspired to tackle other organization projects in my laundry room, ensuring that every household item has its designated place.
If you’re faced with an awkward gap, an unused sliver of wall, or a perpetual broom-in-the-corner dilemma, this DIY solution might be the answer you’ve been searching for. It’s a fantastic way to maximize storage without sacrificing valuable space.
There’s a unique satisfaction that comes from storage that hides in plain sight, contributing to a more organized and aesthetically pleasing home.
More Home Organizing Ideas to Inspire You
Looking for more inspiration to declutter and organize your home? Here are a few more ideas to get you started:
- DIY Ikea Closet Hack Using Billy Bookcases
- Bathroom Linen Closet Organization Ideas That Totally Work
- Aesthetically Pleasing Ideas to Hide Ugly Household Items