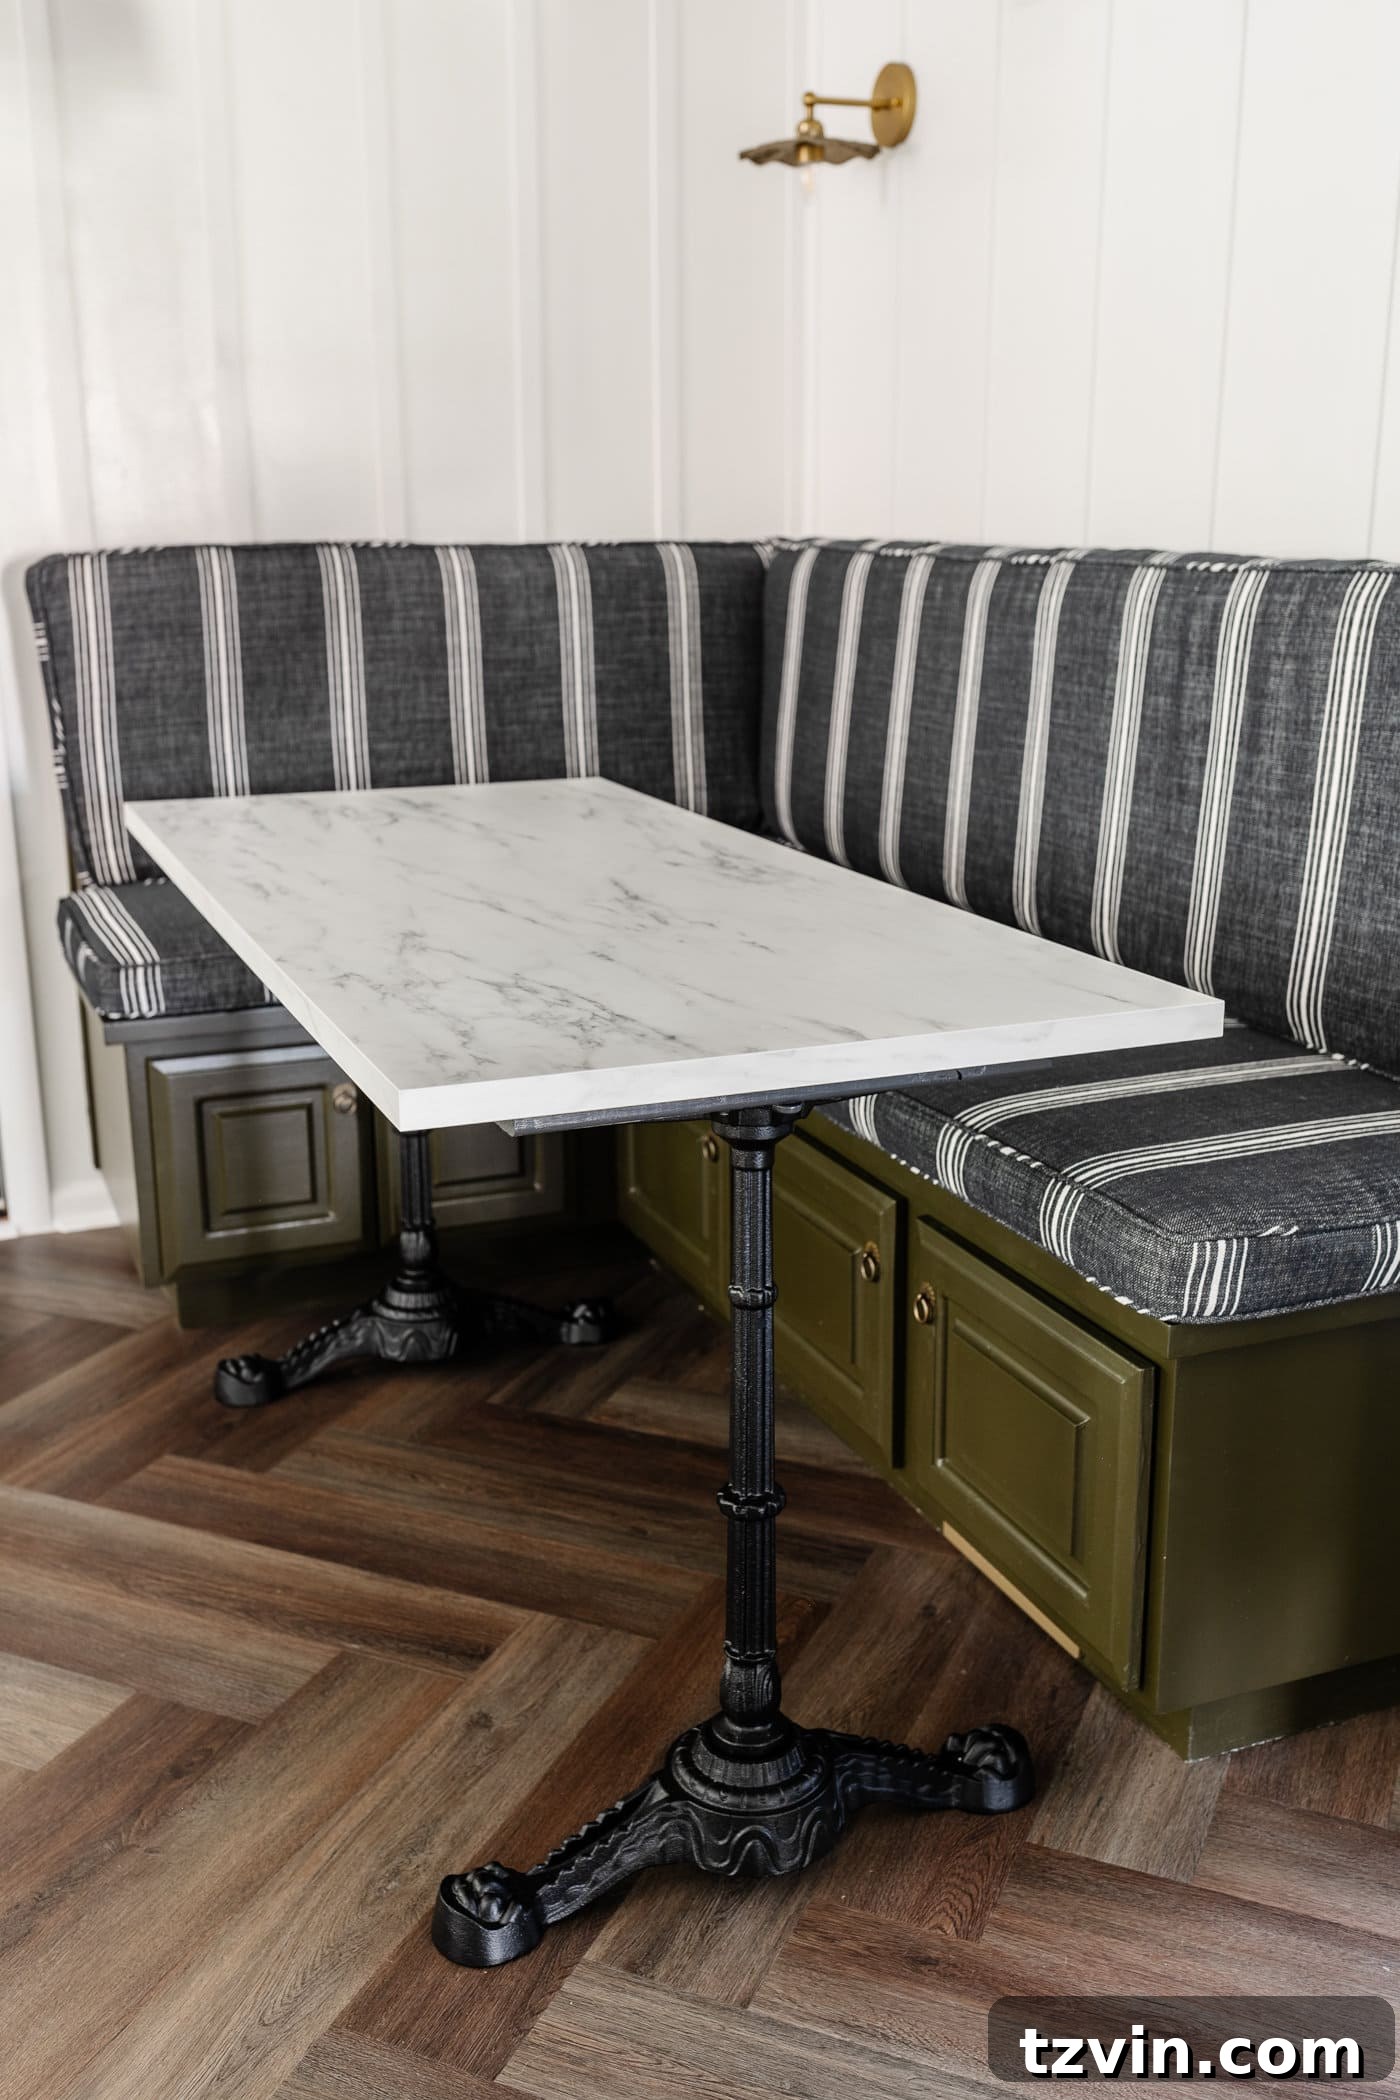
Transform Your Dining Space: Crafting a Parisian-Inspired Faux Marble Dining Table in Under an Hour Using a Kitchen Countertop
Embark on a truly remarkable DIY journey with a project so swift, it might just set a new personal record! We are absolutely thrilled to unveil this stunning Parisian-style faux marble dining table, a creation that came to life in less than an hour. If you’ve ever dreamt of adding a touch of classic French elegance to your home without the exorbitant cost or lengthy renovation, this tutorial is your ultimate guide.
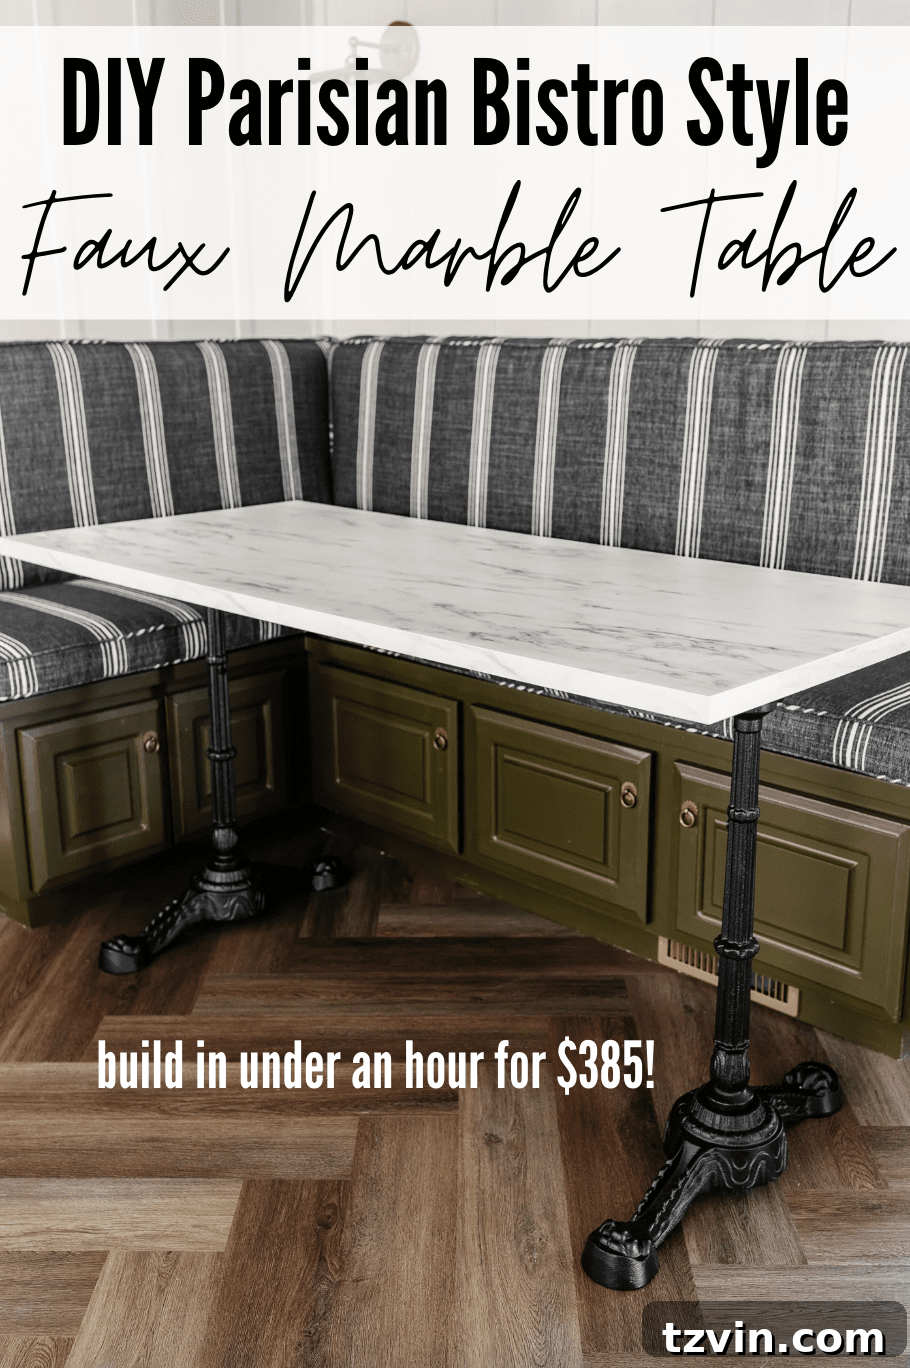
Unlock Savings and Style: The Genius of a DIY Faux Marble Table
Our recent breakfast nook transformation presented a series of design hurdles that ultimately inspired this ingenious project. As we meticulously chipped away at the breakfast nook makeover, we encountered three significant challenges that are likely familiar to many homeowners:
- **The Need for a Pedestal Design:** A traditional four-legged table would hinder movement and visual flow, especially when paired with our new banquette seating. A pedestal style was essential for maximum comfort and an open aesthetic.
- **The Quest for Specific Dimensions:** Our breakfast nook boasts a unique, long and narrow layout. Finding a pre-made dining table with the precise dimensions to perfectly fit this space proved to be an impossible task. Standard sizes simply wouldn’t do.
- **Budgetary Constraints on Customization:** The idea of ordering a custom-sized table, while appealing, quickly revealed a daunting price tag. Custom furniture can easily run into several thousand dollars, a sum we were unwilling to allocate for this particular project.
During our search, we stumbled upon highly similar options like this elegant Art Deco bistro table and this luxurious marble bistro table, both priced well over $2,000 to $3,000! This stark reality reinforced our commitment to finding a more affordable and adaptable solution.
By choosing to craft this DIY faux marble table yourself, especially if you find yourself in a similar predicament, you gain numerous advantages:
- **Perfect Customization:** Achieve the exact length and width required to create the ideal dining surface for your unique small spaces or challenging layouts. No more compromising on dimensions!
- **Beginner-Friendly Project:** This project demands minimal power tools and very basic DIY skills. It’s an accessible endeavor for nearly anyone looking to enhance their home decor.
- **Incredible Value:** Build a stunning, high-end looking table in less than an hour for an astonishingly low cost, typically under $400. This represents massive savings compared to retail or custom alternatives.
- **Durable and Low-Maintenance:** The tabletop, crafted from a laminate faux marble material, offers superior stain resistance compared to real marble. This makes it an incredibly practical and perfect choice for busy families with children, or even for adults prone to the occasional spill – a common occurrence in any lively dining area. Enjoy the aesthetic appeal of marble without the upkeep worries.
Step-by-Step Guide: Crafting Your Own Faux Marble DIY Dining Table
Creating this elegant faux marble dining table is a straightforward process that yields impressive results. Gather your materials and follow these simple steps to bring a touch of Parisian chic into your home.
Before You Begin: Planning and Preparation
The success of any DIY project hinges on good planning. First, meticulously measure your designated dining area. Consider not just the length and width, but also the desired height of your table, especially if you’re pairing it with specific chairs or banquette seating. This will inform your countertop cut and whether you’ll need to incorporate height-adding boards. Visualizing the final placement of your pedestal legs is also crucial for stability and aesthetics.
Essential Tools for Your DIY Marble Table
While this project minimizes the need for extensive power tools, having the right equipment will ensure clean cuts and a professional finish:
- **Circular Saw with a Fine Finish Blade:** This is paramount for achieving a clean, chip-free cut on laminate. A fine finish saw blade is specifically designed for delicate materials. If you have access, a table saw can also provide excellent results.
- Drill with Drill Bits: Necessary for attaching the legs and any optional height-adding boards securely.
- Saw Horses: Provides a stable and elevated surface for safe and accurate cutting of the countertop.
- Straight Edge Guide or Framing Square: Absolutely essential for guiding your saw and ensuring perfectly straight cuts.
Gathering Your Supplies
The beauty of this project lies in its simplicity and the readily available materials:
- **Faux Marble Laminate Countertop:** The star of the show! We successfully used this countertop from IKEA. However, if IKEA isn’t convenient, a stock faux marble countertop or this alternative countertop from other home improvement stores will work equally well. Ensure you select a pattern you love.
- Cast Iron Pedestal Legs: These legs are key to achieving the elegant Parisian bistro look. Their ornate design instantly elevates the table’s aesthetic. For a different application, these bar height cast iron legs are available if you plan to create a bar-style table.
- **Tape Measure:** For precise measurements, naturally.
- **Pencil:** For marking your cuts.
- **Masking Tape / Painter’s Tape:** A crucial, yet often overlooked, item for preventing chipping.
- Utility Knife:** With a sharp, fresh blade, for trimming the edge strip.
- Contact Cement:** For securely attaching the laminate edge strip.
- 1 – 2x6x8 Board (optional): Depending on the desired height of your finished table. You might need one or two, depending on the length of your table.
- 1 5/8″ #8 Wood Screws: For robust assembly.
- **Black Paint (optional):** If you are adding height with 2×6 boards, black paint will help them blend seamlessly with the cast iron legs. We used Romabio satin Italian mineral paint in our color Celtic Stone, which offers a beautiful, subtle sheen.
The Transformation Steps: From Countertop to Chic Dining Table
Follow these detailed steps to construct your elegant faux marble dining table. Precision and patience will ensure a beautiful result.
Step 1 – Measure and Mark Your Countertop
Begin by accurately determining the ideal length for your new dining table to perfectly complement your specific space. Carefully use your tape measure and a pencil to mark this desired length directly onto the countertop. Double-check your measurements to ensure accuracy before proceeding.
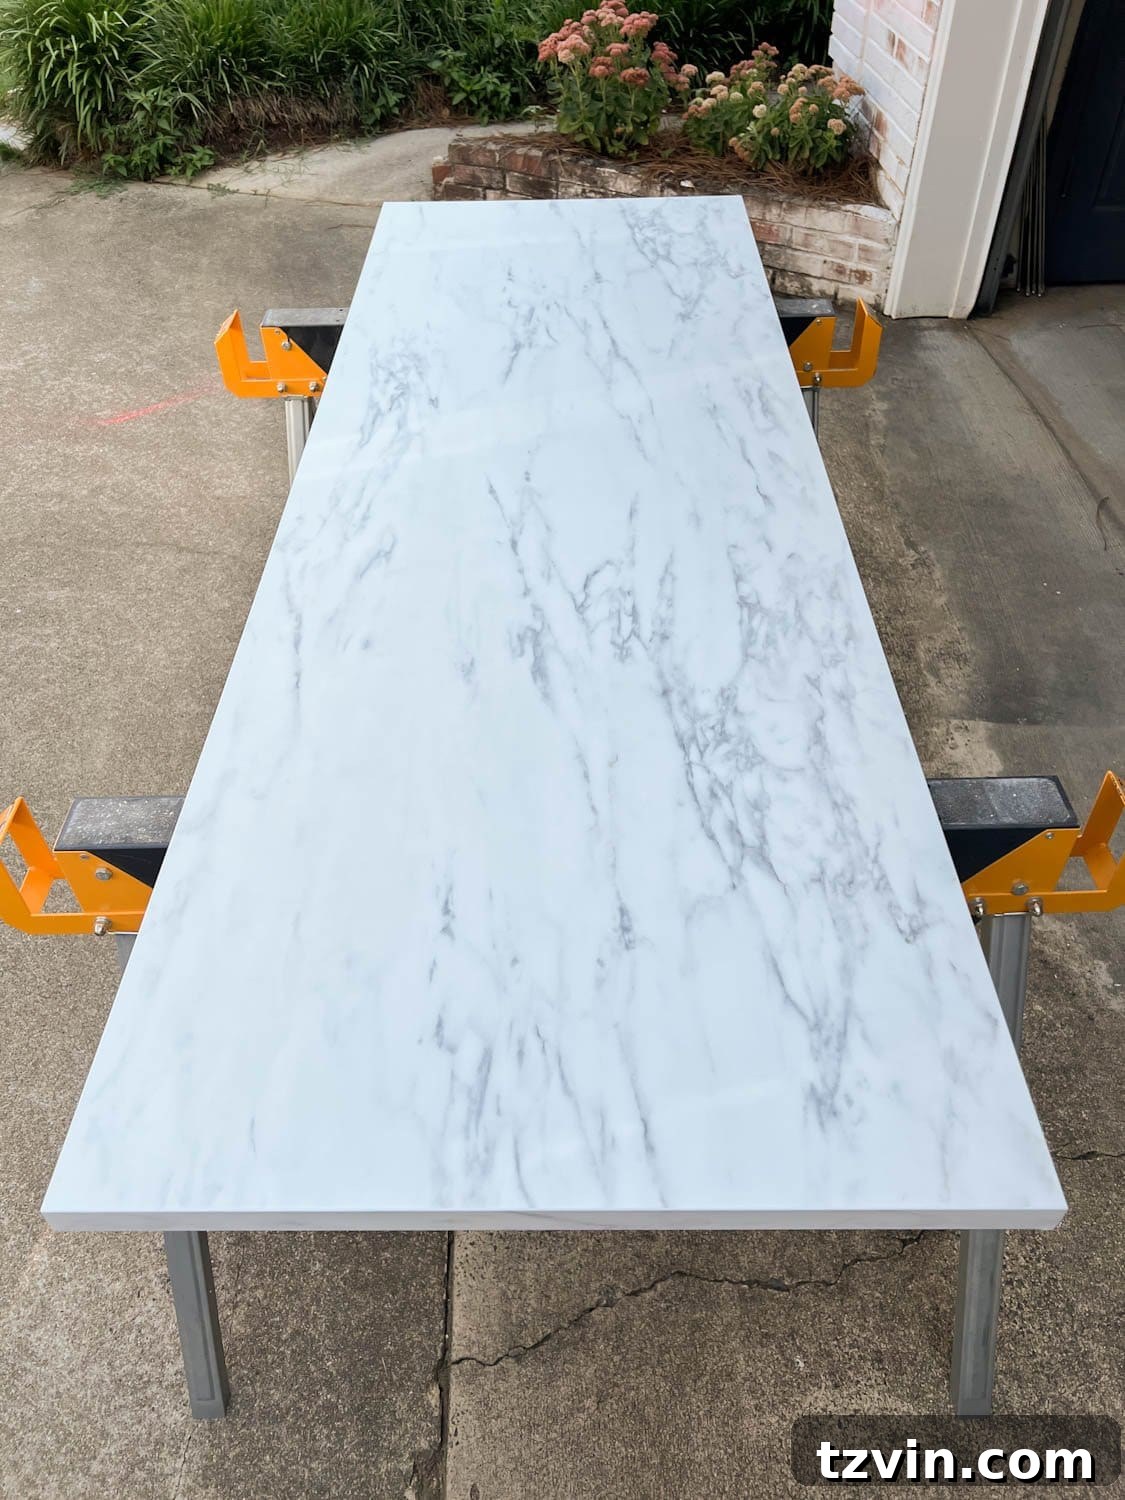
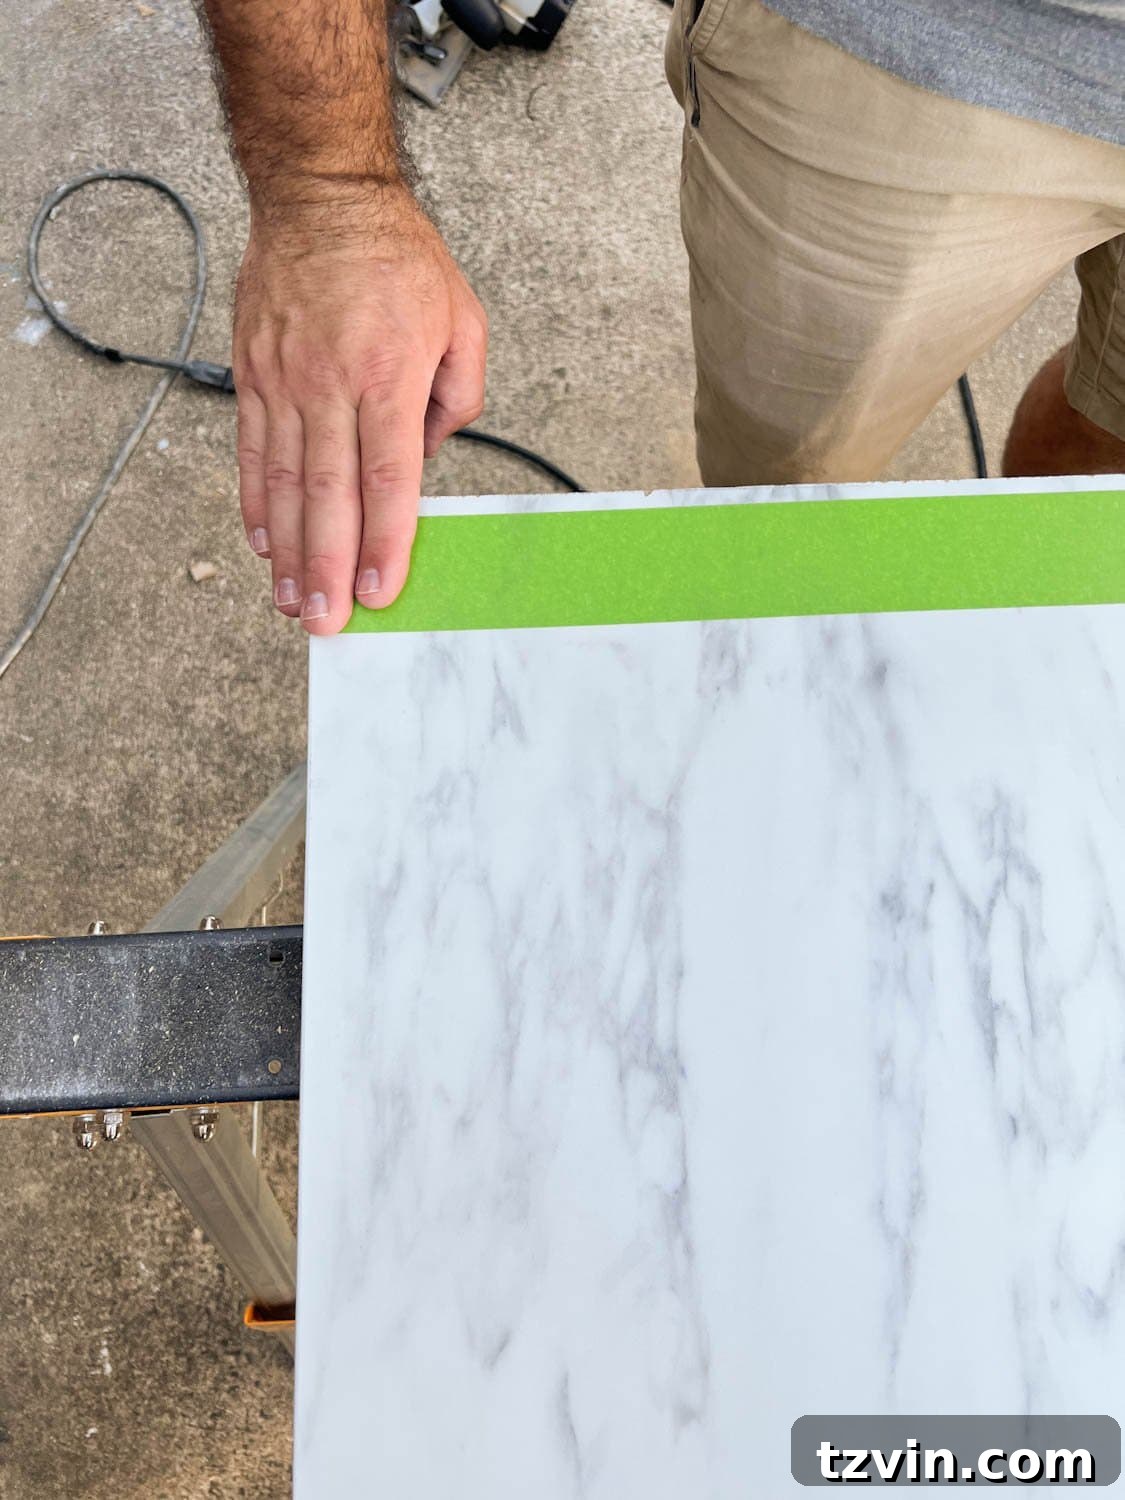
Step 2 – Apply Masking Tape for a Clean Cut
This is a critical step for working with laminate. Firmly apply a strip of masking tape or painter’s tape along the entire length of your marked cutting line. The tape acts as a sacrificial barrier, significantly reducing the likelihood of chipping the laminate surface as the saw blade passes through, ensuring a much smoother and cleaner finished edge.
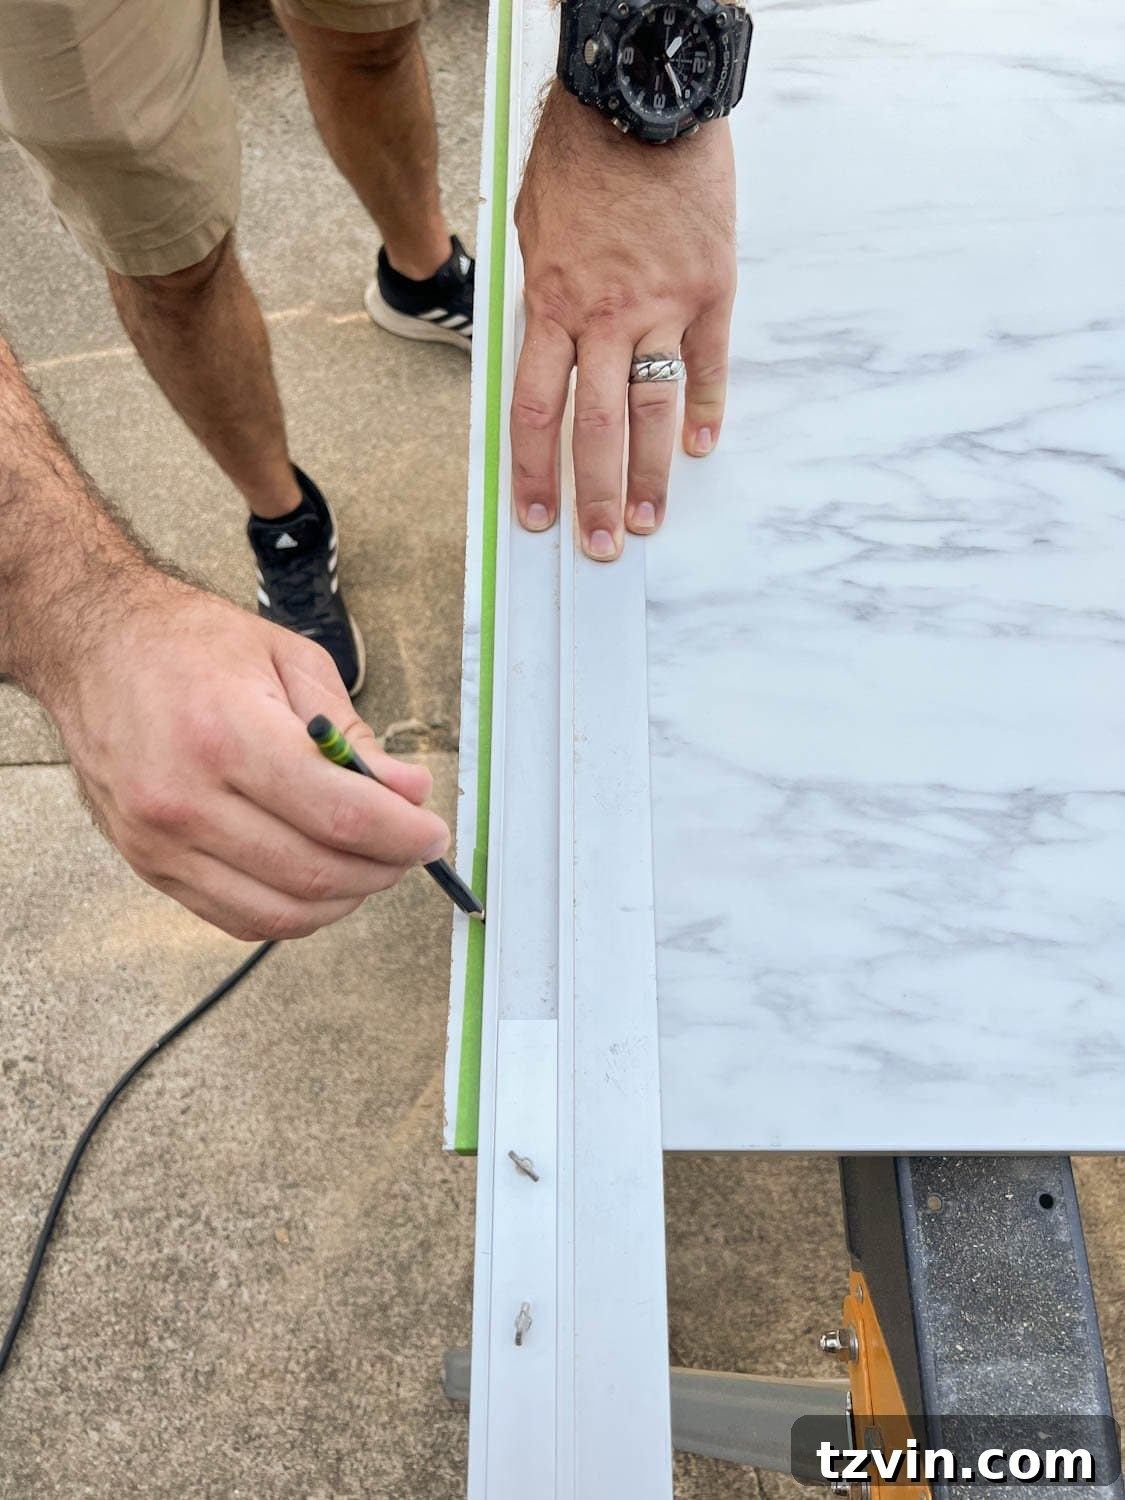
Step 3 – Re-mark Your Cutting Line on the Tape
Once the tape is securely in place, use your pencil and tape measure again to re-mark your precise cutting line directly onto the masking tape. Utilize a straight edge, such as a framing square or a dedicated straight-edge guide, to ensure this line is perfectly straight. This will serve as your direct guide for the saw.
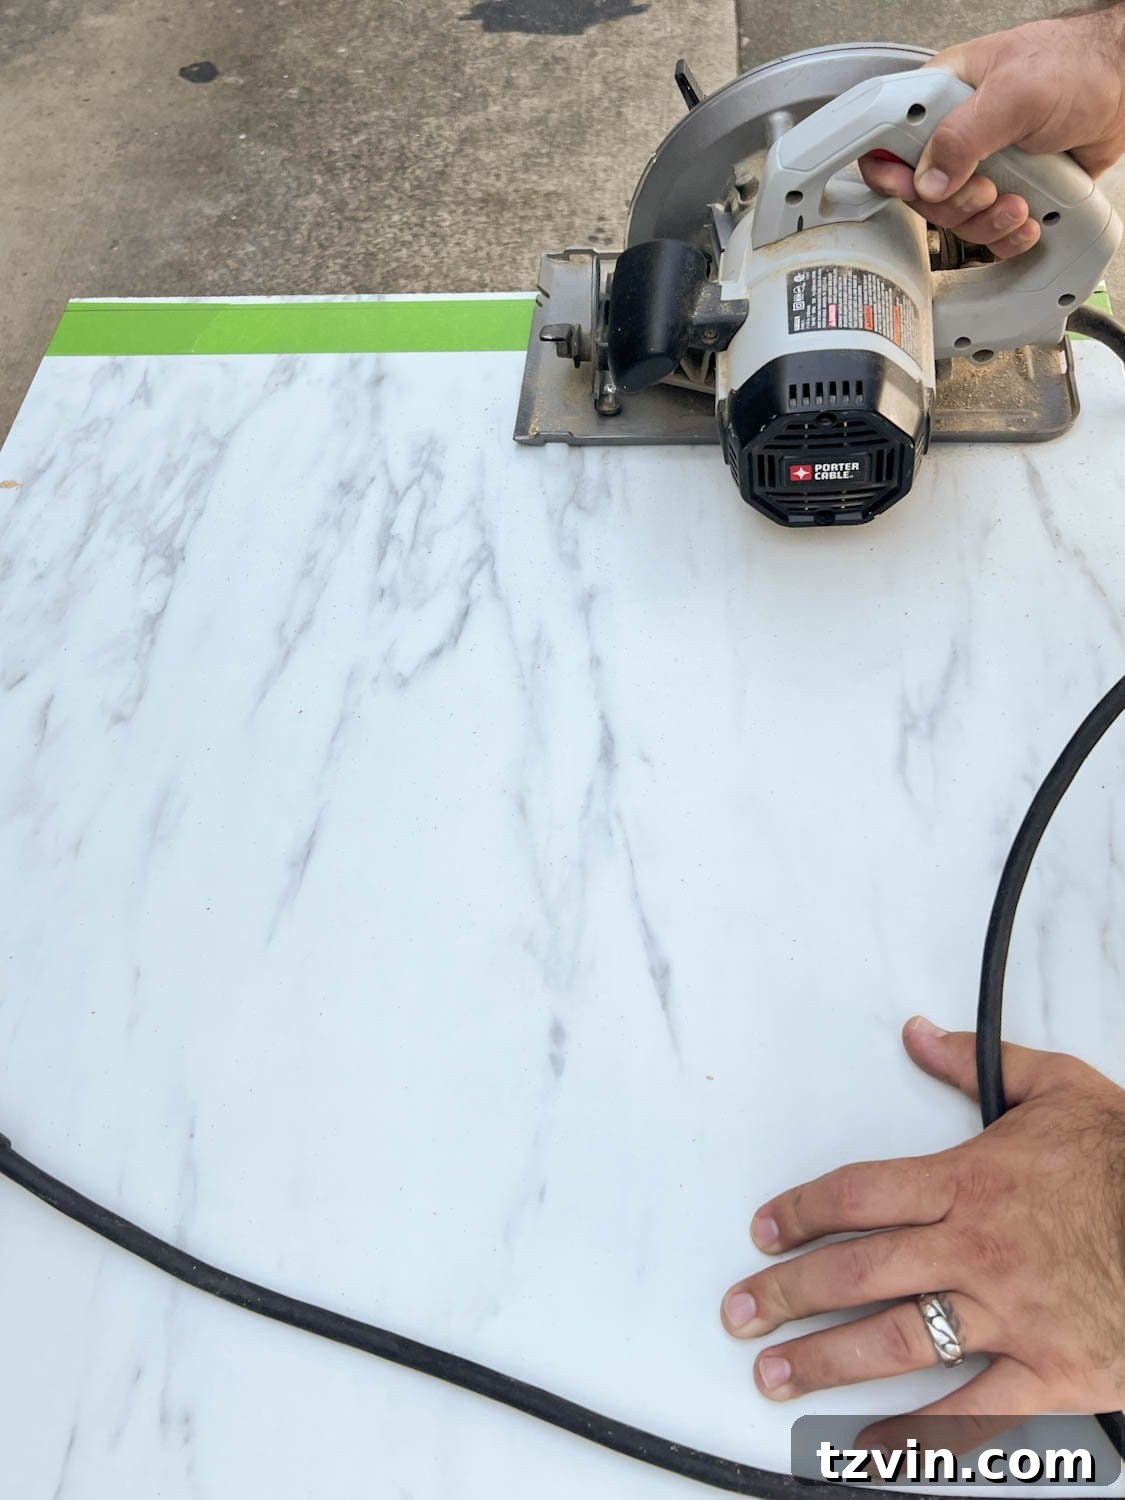
Step 4 – Execute the Countertop Cut
With your countertop securely positioned on saw horses, carefully guide your circular saw along the pencil marking on the masking tape. Ensure you use a fine-finish blade for the cleanest possible cut. Move slowly and steadily, allowing the saw to do the work, to achieve a perfectly straight edge without splintering.
Step 5 – (Optional) Prepare 2×6 Boards for Added Height
If your dining chairs or banquette seating are taller than standard, you might need to elevate your table. This step is optional but highly recommended for ergonomic comfort. In our case, our banquette sits higher than typical chairs, necessitating this modification. Determine the precise spacing required for your pedestal legs underneath the countertop. Then, cut your 2x6x8 board (or boards) to create an “I” shape frame that will support the tabletop and provide the desired elevation. This frame will be narrower than the countertop, allowing the cast iron legs to be securely mounted to the wood.
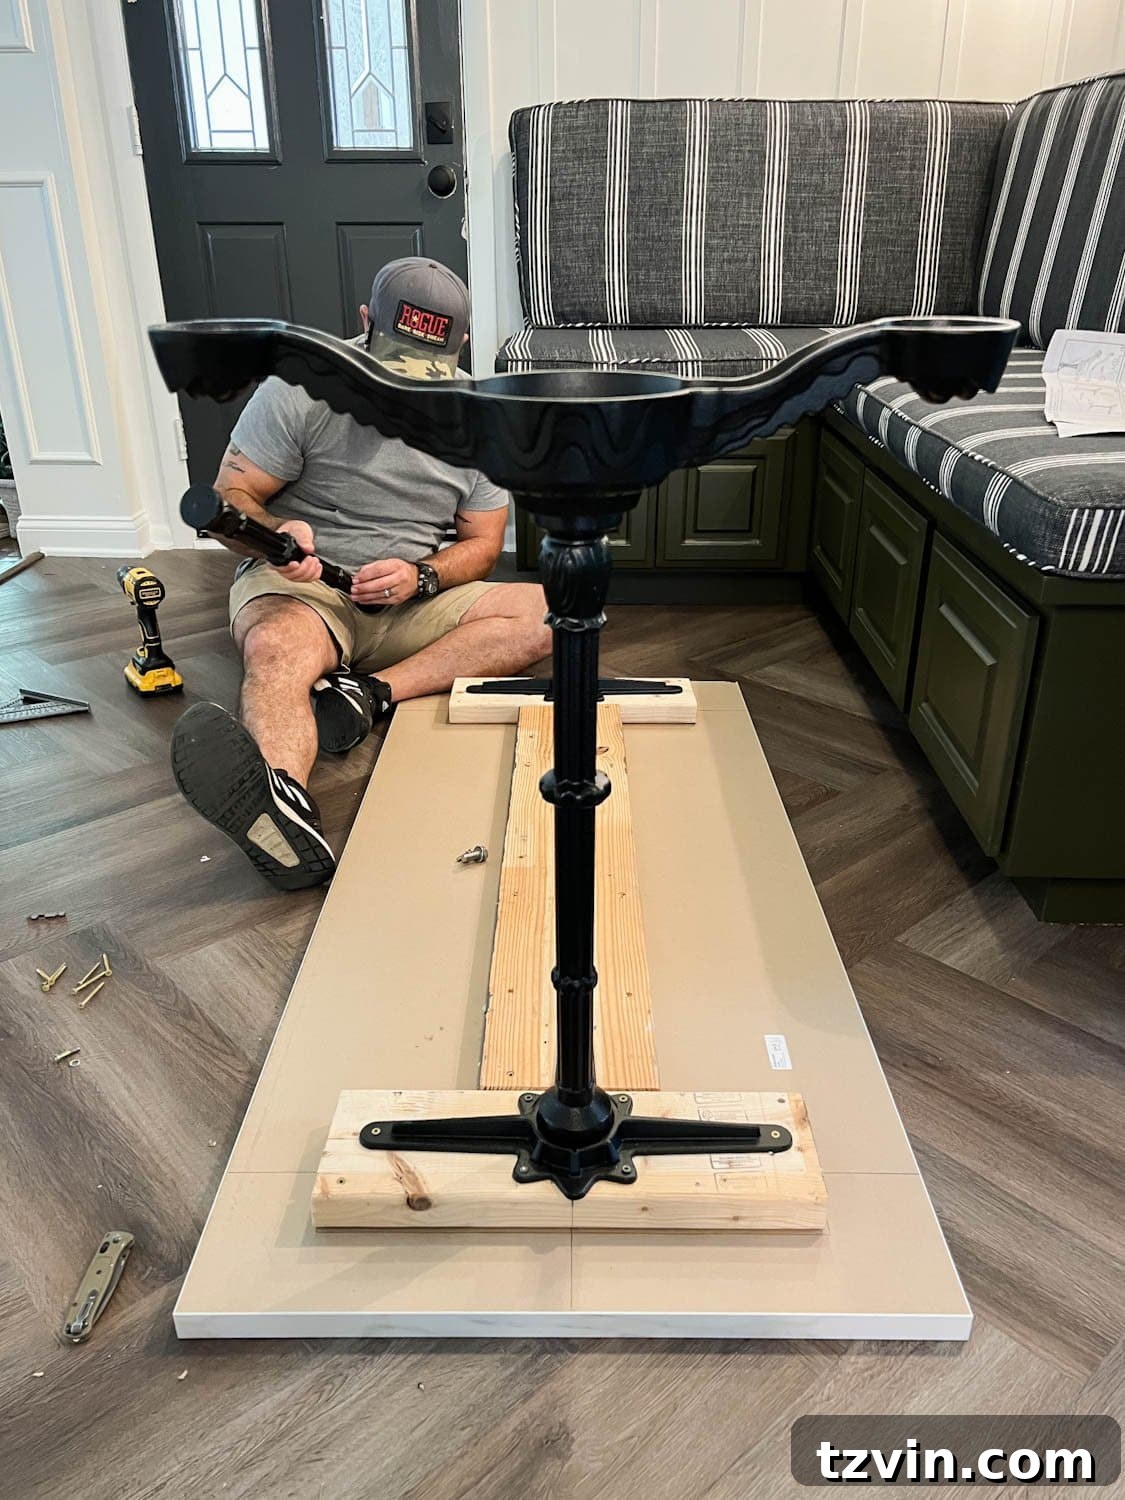
Step 6 – Secure the 2×6 Boards to the Countertop
If you’re using them, carefully position the cut 2×6 boards on the underside of your faux marble countertop, aligning them to create a sturdy foundation for the pedestal legs. Use your wood screws and drill to firmly attach these boards to the countertop. Ensure the screws are long enough to provide a secure hold without penetrating through the top surface.
Step 7 – Assemble and Attach the Pedestal Legs
Follow the manufacturer’s instructions to assemble your cast iron pedestal table legs. Once assembled, position them securely onto the 2×6 boards (or directly to the underside of the countertop if you skipped the height-adding step). Use the provided hardware or appropriate wood screws to attach the legs firmly, ensuring maximum stability for your new dining table. Distribute the weight evenly for optimal balance.
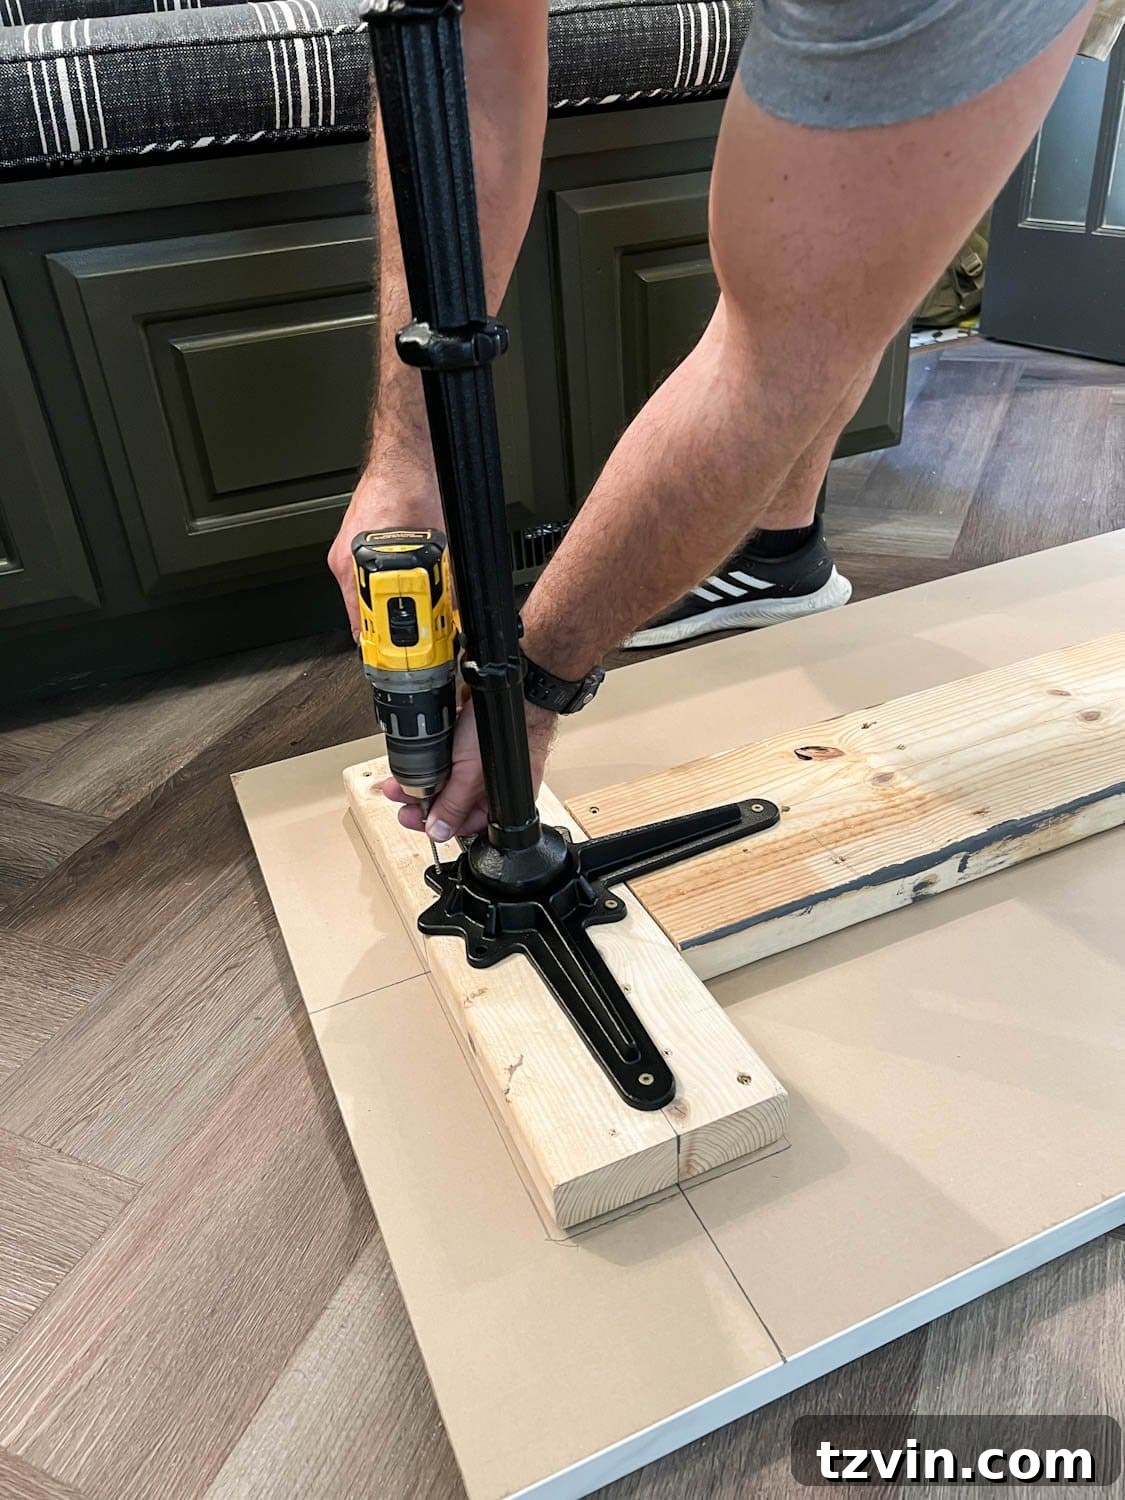
Step 8 – Paint the Edges of the 2×6 Boards (if applicable)
To create a seamless and professional appearance, paint any visible edges of the 2×6 boards with black paint. This simple step helps them blend beautifully with the dark cast iron table legs, making them virtually disappear and enhancing the overall sophisticated aesthetic of your table.
Step 9 – Apply the Laminate Edge Strip for a Finished Look
The raw edge of the countertop where it was cut in Step 4 needs to be finished. Apply contact cement evenly to both the raw countertop edge and the corresponding laminate strip. Allow the contact cement to become tacky according to the product instructions, then carefully align and press the laminate strip firmly onto the countertop edge. Once the contact cement has completely dried and cured, use a sharp utility knife with a fresh blade to meticulously trim any excess laminate strip, leaving a clean, factory-like finish. This step is crucial for both aesthetics and durability.
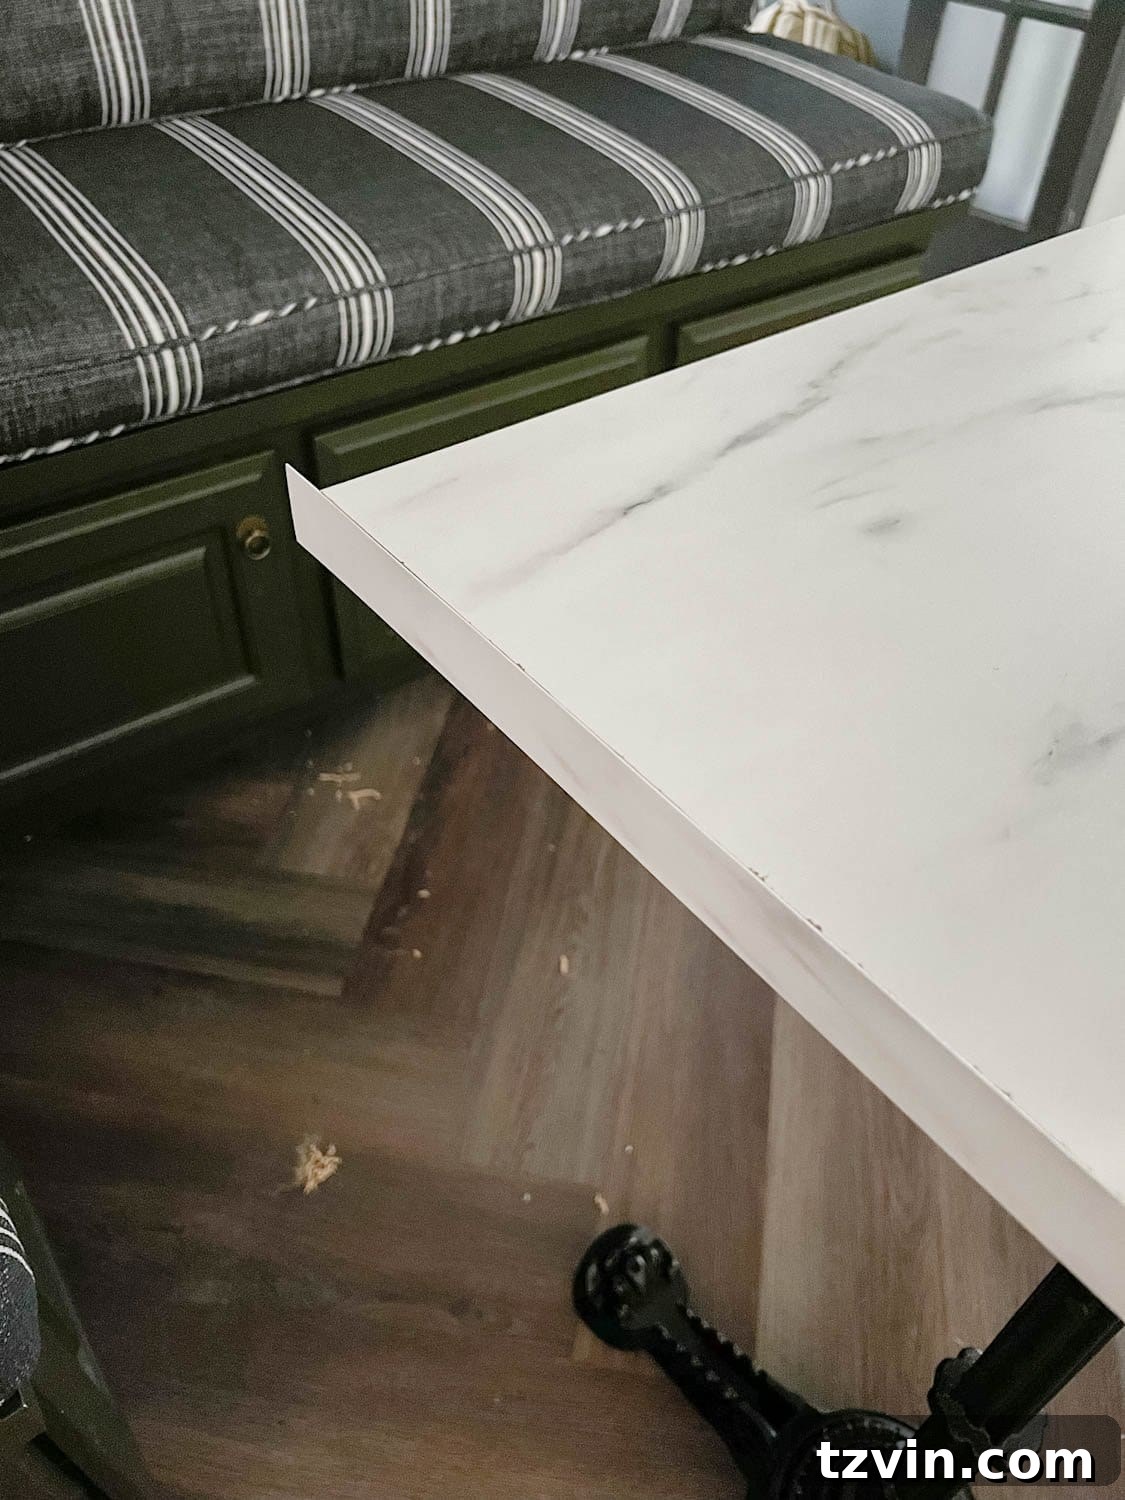
Behold Your Finished Parisian-Style Faux Marble Dining Table!
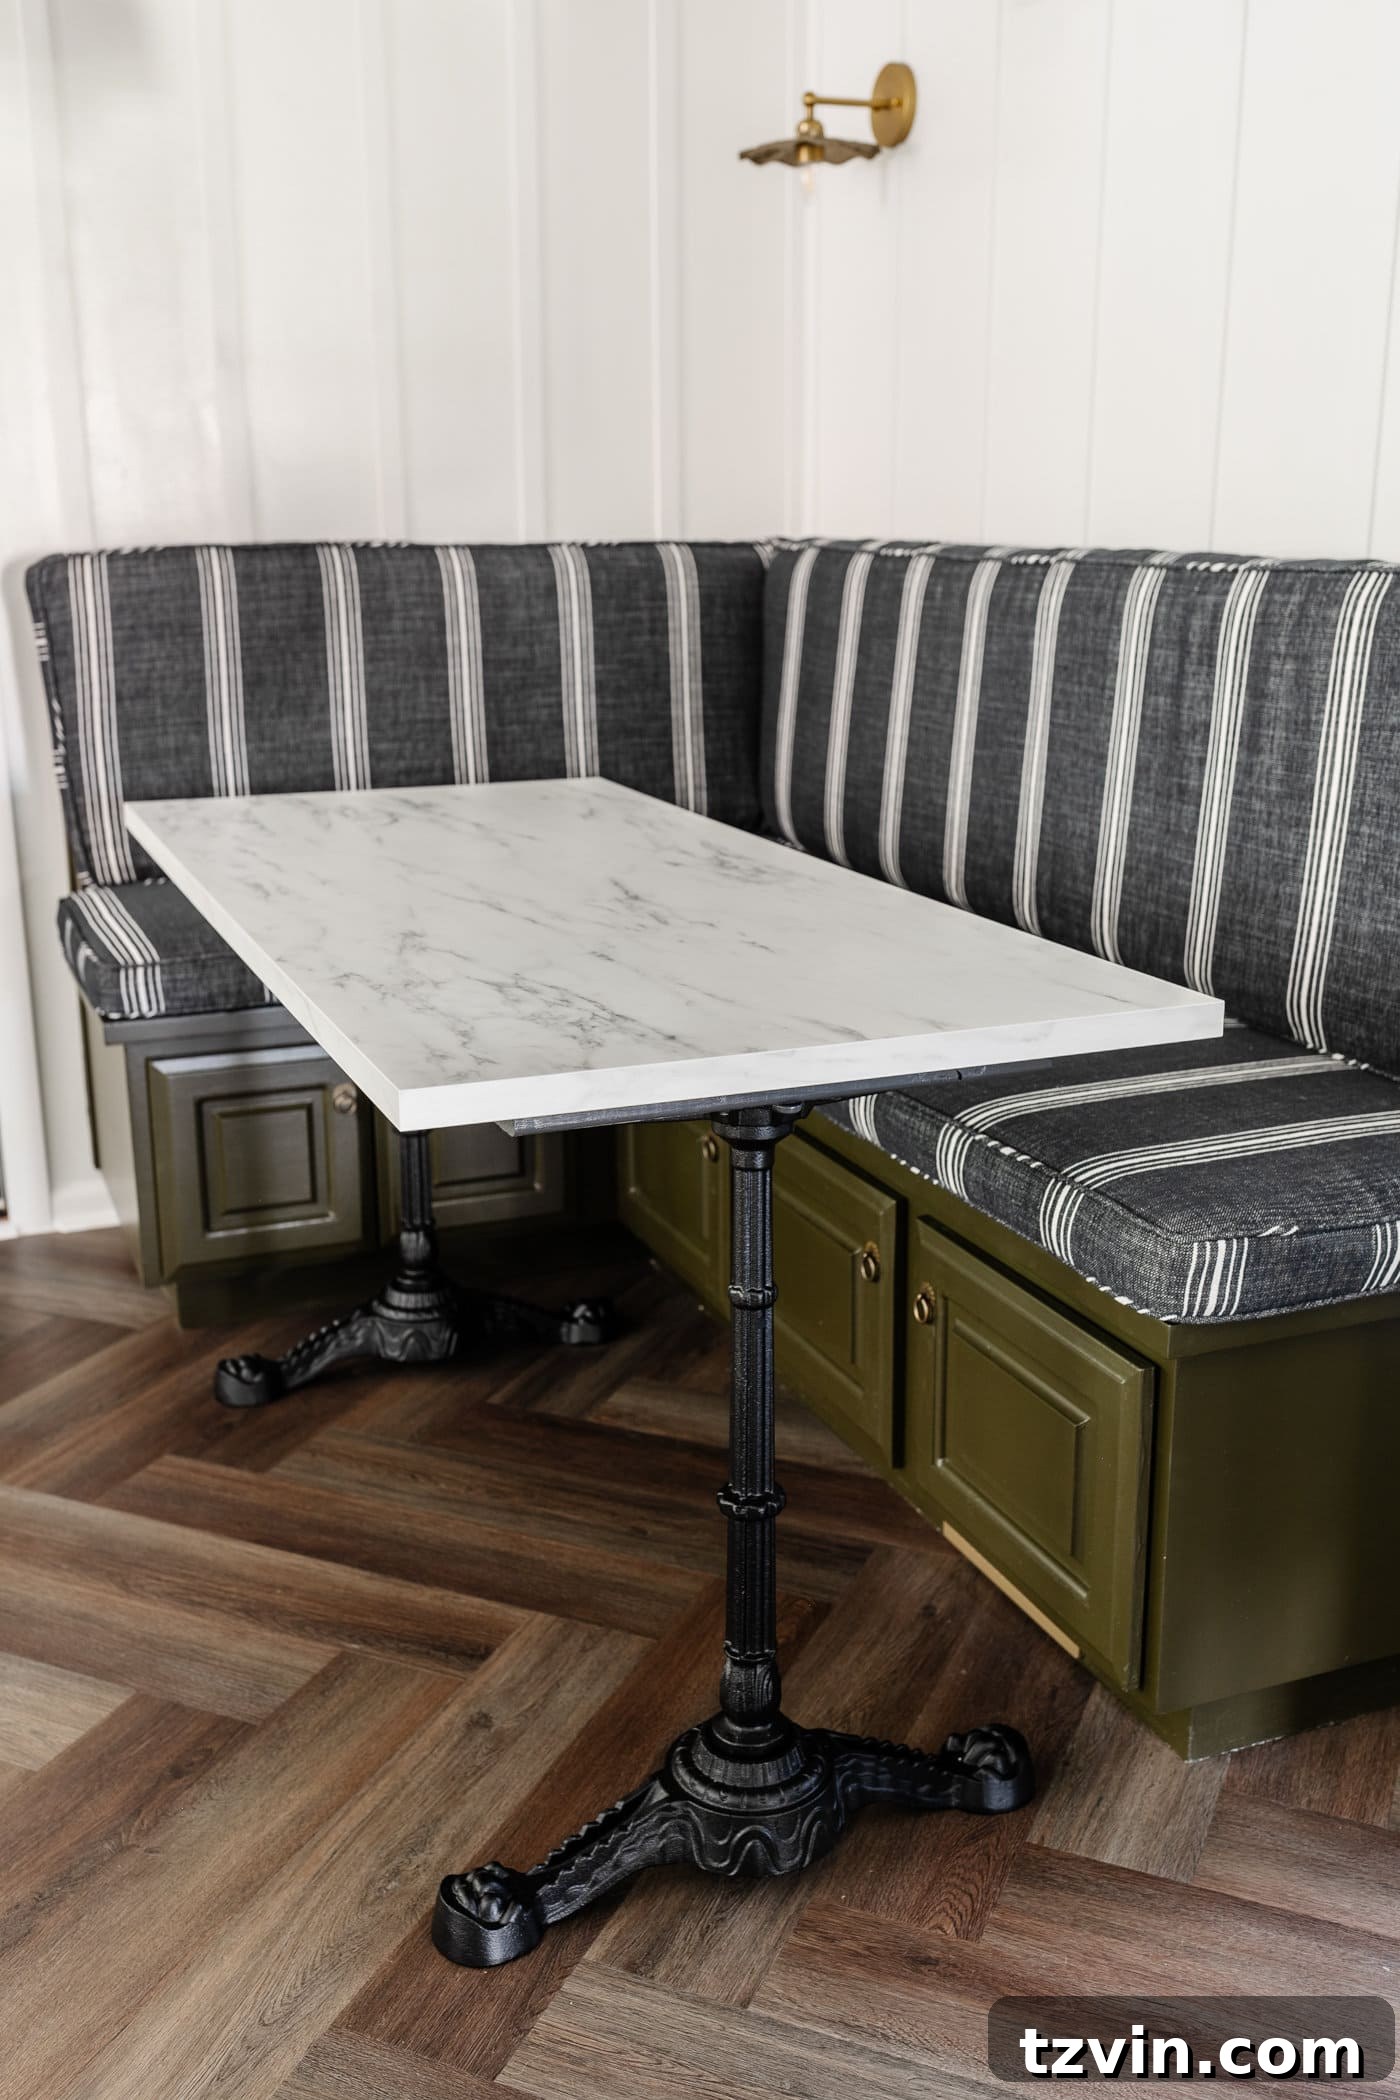
And just like that, you’ve done it! Isn’t the result simply adorable and incredibly chic? This table truly embodies the charm and elegance you’d expect to find in a quaint French bistro, complete with those exquisitely ornate cast iron table legs and the luxurious marble-effect top. It’s a testament to how quickly and easily you can achieve high-end style on a DIY budget, costing well under $400 for a piece that looks like it could have come with a multi-thousand-dollar price tag.
The transformation doesn’t stop with the table. We’re equally delighted with the reupholstered banquette cushions that came with our lucky Facebook Marketplace find. They are now fully finished, adding another layer of comfort and style to the space. Everything is coming together even more beautifully than we initially envisioned, creating a truly cohesive and inviting breakfast nook.
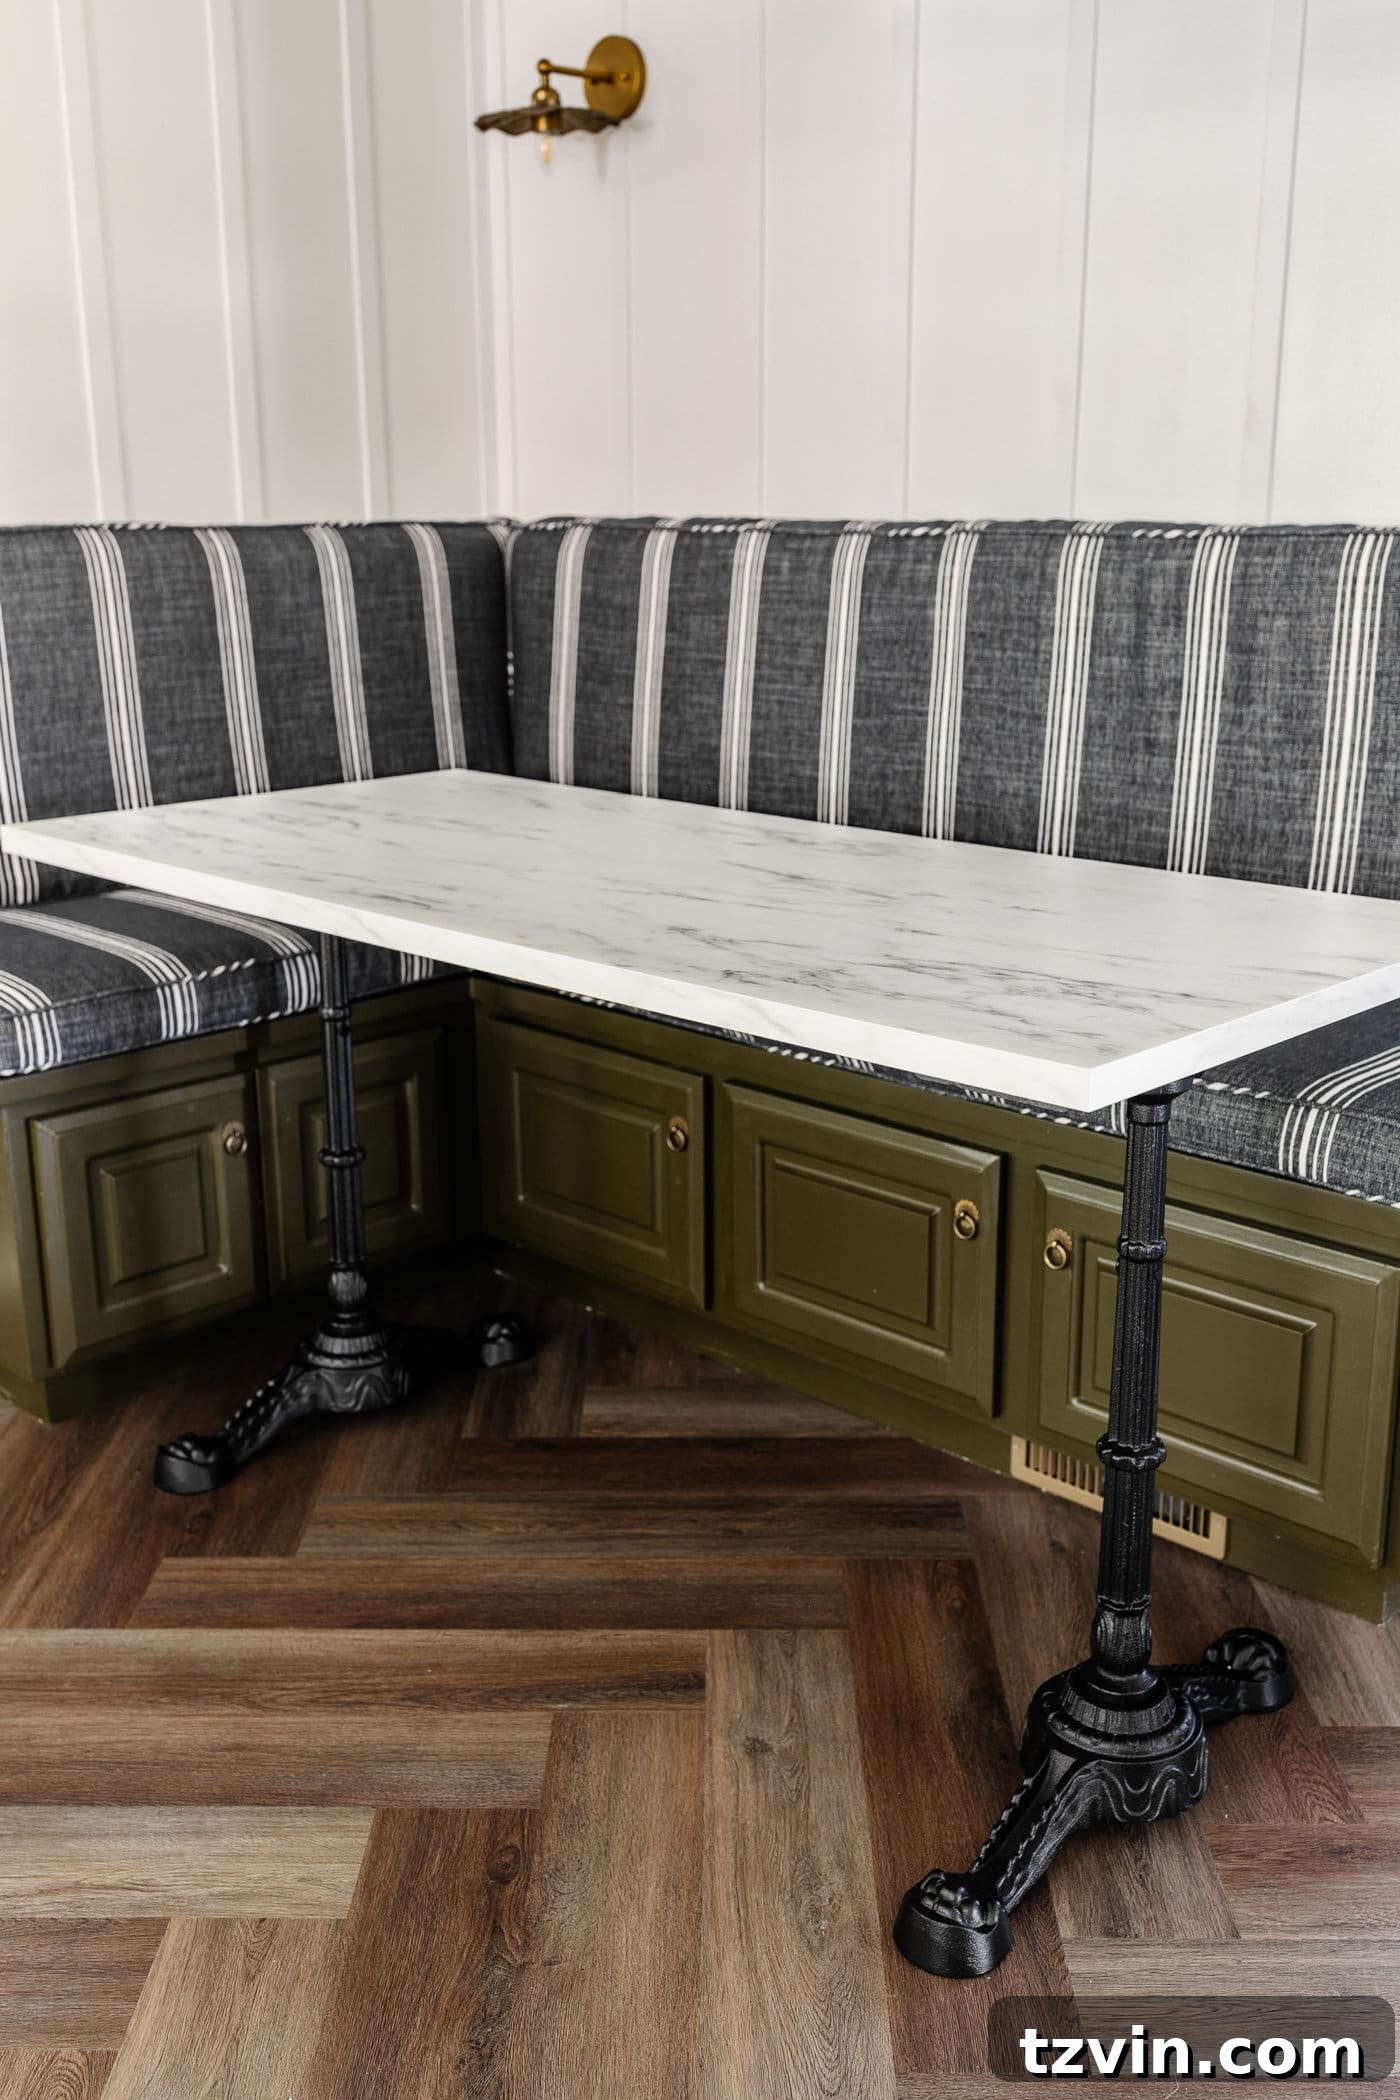
While the major elements are in place, we still have a few finishing touches ahead. There are some minor touch-ups to complete, dining chairs to finalize, and the exciting task of adding art and styling elements to personalize the space further. With every new detail, the herringbone LVP floors seem to gain even more character and warmth as we approach the finish line of this extensive makeover.
The carefully selected fixtures – including the stunning chandelier, charming vintage-style sconces, and the meticulously crafted batten wall detail – collectively contribute the perfect amount of old-world charm and sophistication to the room. We also recently repainted the doors, opting for the rich and inviting color Celtic Stone from the exclusive Bless’er House paint color line from Romabio, tying all the elements together beautifully.
Explore More Breakfast Nook Transformations and Resources
If you’re inspired by our breakfast nook journey and want to dive deeper into the specific elements of this makeover, explore these valuable resources and tutorials:
- How to Install a Herringbone LVP Floating Floor Over Tile: Achieve stunning, durable flooring with this comprehensive guide.
- Corner Banquette Makeover + How to Redirect Air Vents Under Cabinets: Learn how to build and integrate custom banquette seating, even around challenging architectural features.
- Gorgeous Banquette Bench Seating for All Budgets: Discover various options for creating comfortable and stylish banquette seating, no matter your budget.
- Inexpensive DIY Batten Wall Using Lattice Strips: Add architectural interest and charm to your walls with this budget-friendly batten wall tutorial.
- The Best Vintage Wall Sconces for All Budgets in Every Room: Find the perfect lighting to complement your vintage-inspired decor.
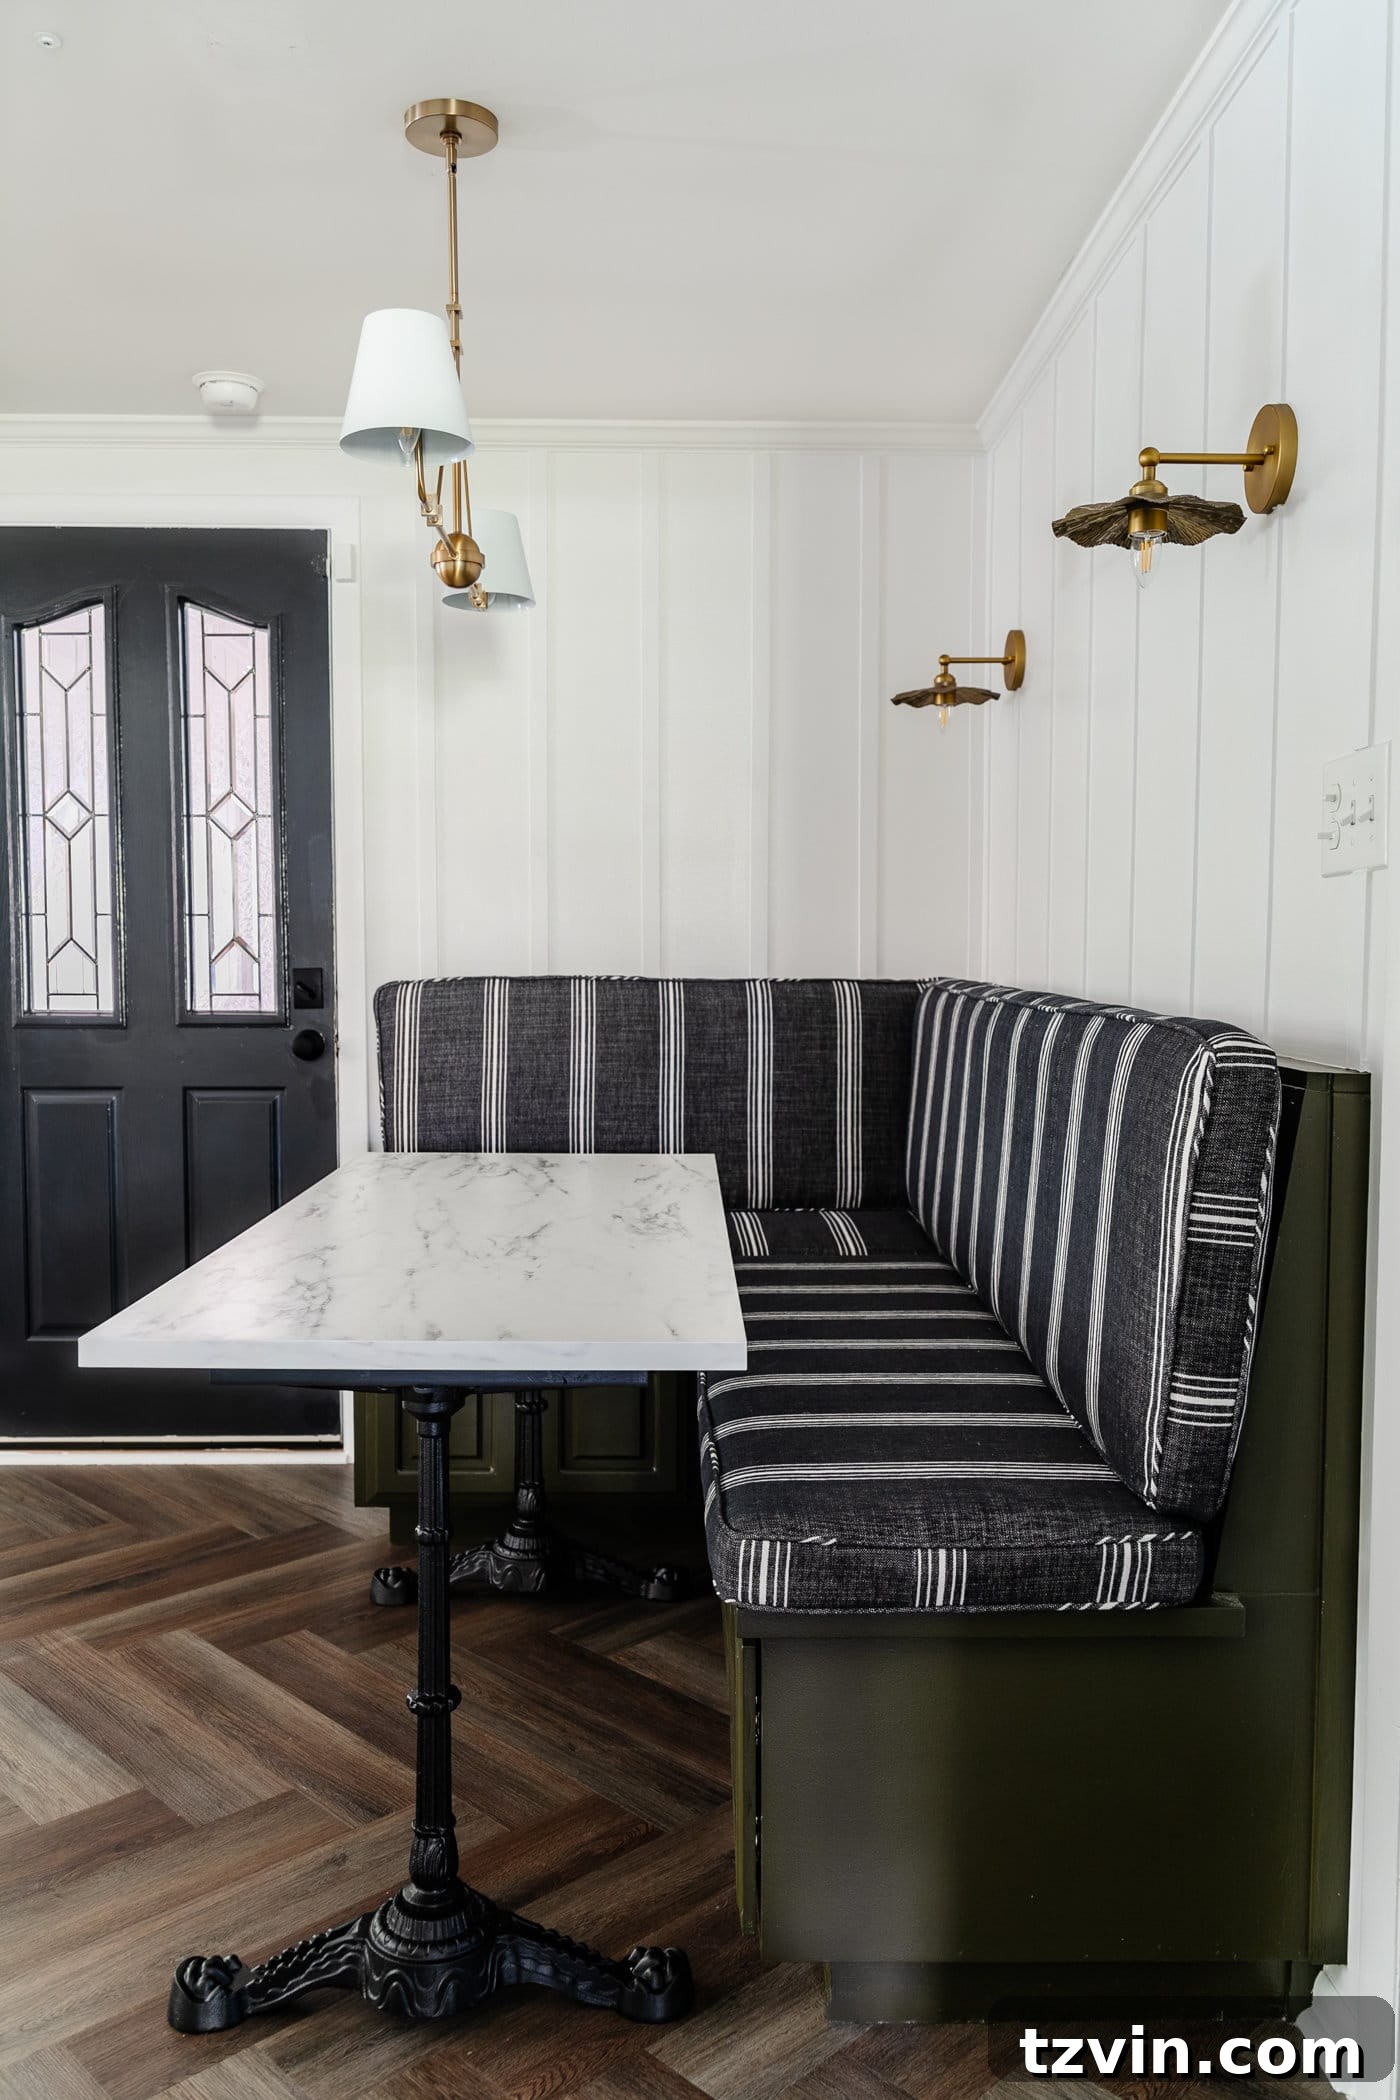
It’s truly gratifying to see how perfectly this DIY faux marble table integrates into the breakfast nook, almost as if it was destined for this space from the very beginning. What are your thoughts? Do you find it as charming as we do? And does its faux marble finish convincingly mimic the beauty of authentic vintage marble? We believe the combination of simplicity, elegance, and practicality makes it a winning project.
If you currently feel this room leans towards a cooler, more sterile aesthetic, rest assured that warm, inviting, and cozy vibes are just around the corner as we add the final layers of styling and decor. Stay tuned for the complete reveal!
More French-Inspired Decor Ideas to Elevate Your Home
If you’re captivated by the allure of French design and seeking more ways to infuse your home with its timeless elegance, explore these additional resources for inspiration and DIY projects:
- Antique Painting Mural Wallpaper in the Dining Room: Transform a room with a dramatic and historically inspired wall treatment.
- En Suite Modern Vintage Bathroom Remodel Tour: Discover how to blend contemporary functionality with classic vintage style.
- Scenic Wall Mural Wallpaper: Add depth and artistic flair with a captivating scenic mural.
- Antique Gold Mirrors for All Budgets: Find the perfect gilded mirror to add opulence and reflect light beautifully.
- The Best Trick for Painting French Doors: Master the technique for flawlessly painting these elegant doors.
- DIY Picture Frame Molding: Create architectural interest and a sophisticated backdrop with this classic trim work.
- Favorite Marble Coffee Tables: Explore various marble coffee table styles, from DIY scores to new acquisitions.
- How to Clean Wood Furniture to Make It Look New: Learn essential tips for restoring and maintaining the beauty of your wooden pieces.