
Transform Your Space: A Complete DIY Guide to a Stunning Limewash Brick Fireplace Makeover
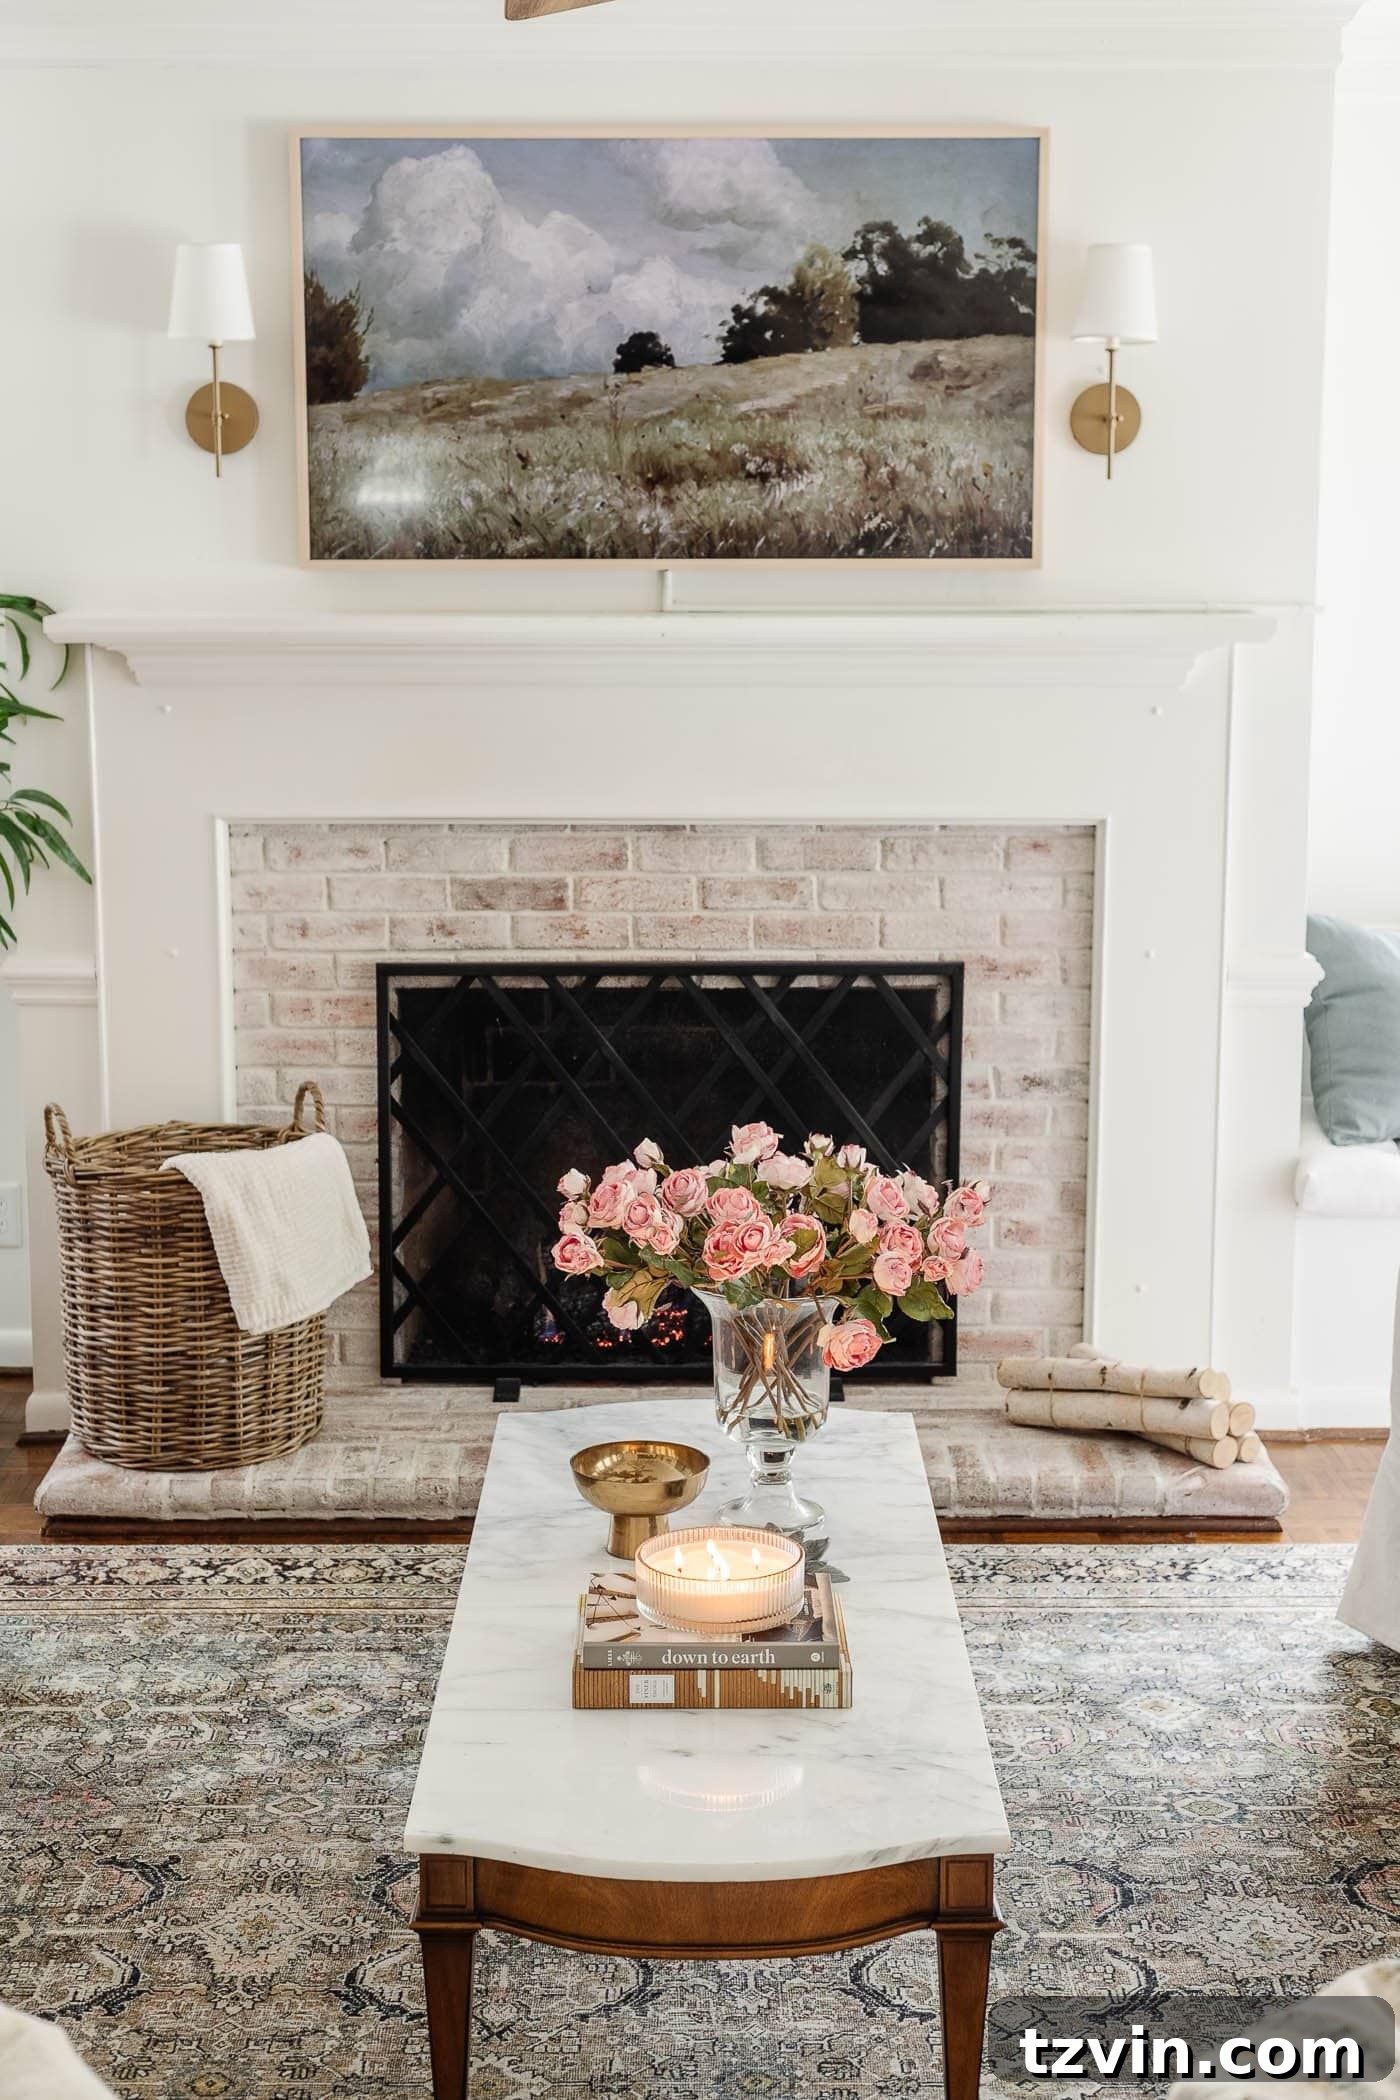
Every homeowner knows that one feature that just doesn’t quite fit – for us, it was a tired, orange brick fireplace. It dominated our living room, feeling dated and a little out of place with our evolving decor style. For years, I wrestled with the idea of a significant change, battling my initial fears of tackling such a prominent focal point. But, as often happens with the right inspiration, I finally worked up the nerve. The decision was made: the dirty orange brick fireplace had to go, not physically, but visually, to make way for a brighter, more serene aesthetic.
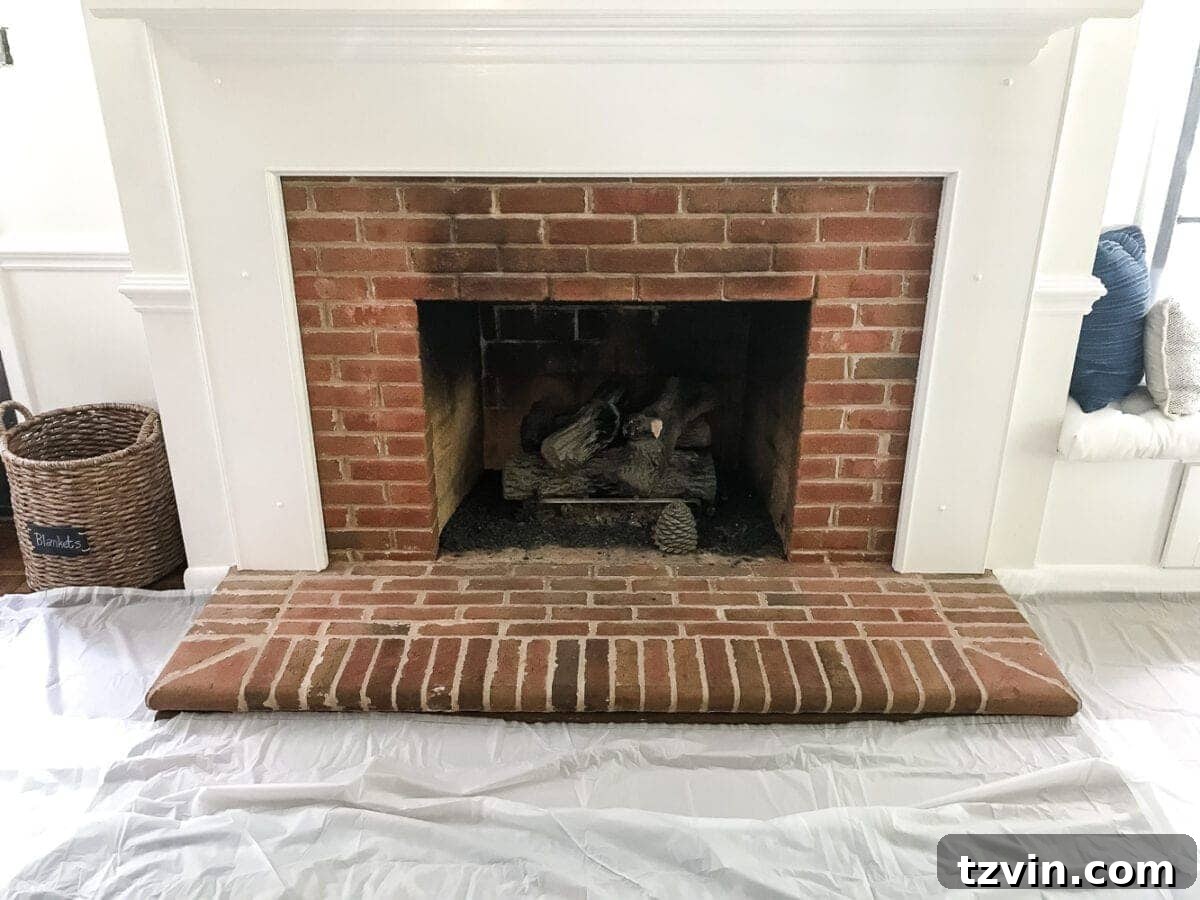
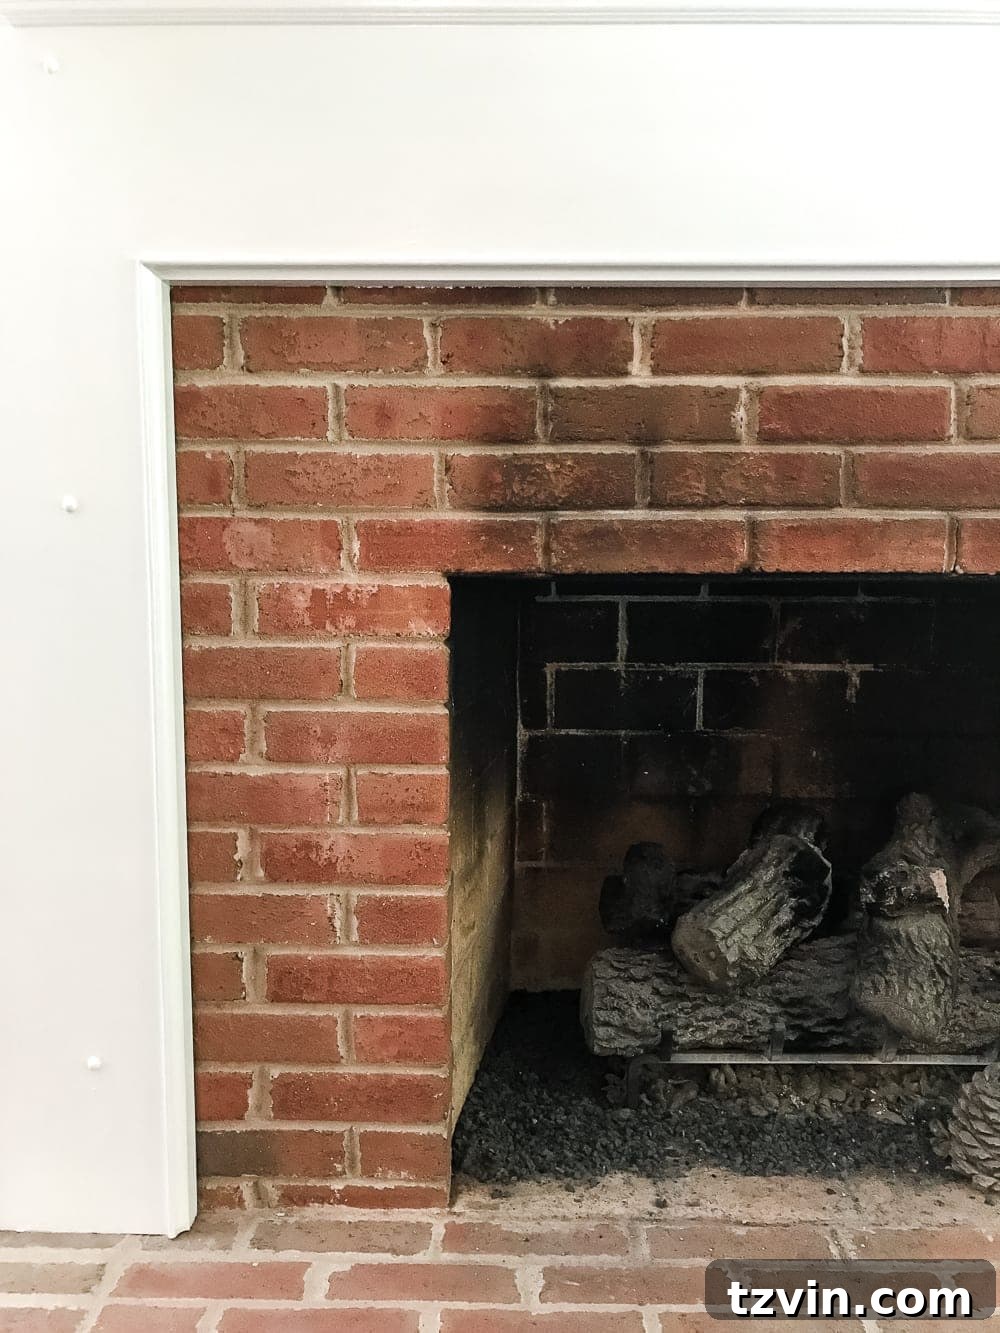
Before embarking on the full transformation, there was a period of contemplation. The existing brick, with its tell-tale soot marks, presented a challenge. I genuinely tried to embrace its rustic charm, convincing myself that its original character added warmth to the room. But deep down, I knew it wasn’t the look I truly desired. This common dilemma – wanting to refresh a space without completely demolishing its history – often leads homeowners down the path of specialized brick finishes. My goal was to lighten and update, while still preserving some of the beautiful, inherent texture of the brick.
How to Limewash a Brick Fireplace: A Step-by-Step DIY Guide
The journey to a beautifully limewashed fireplace begins with thorough preparation. Many assume a fresh coat of paint or finish can cover all imperfections, but the secret to a lasting and stunning result lies in a clean slate. This is especially true for fireplaces, which often accumulate soot, dust, and grime over years of use.
Essential Brick Cleaning with Vinegar
My initial good intentions involved a deep clean, hoping that simply scrubbing away the dirt would reveal a brick I could love. While it didn’t completely change my mind about the aesthetic, it was an absolutely crucial first step for any subsequent finish. Neglecting to clean your brick properly can lead to poor adhesion of your limewash and an uneven, patchy finish. Fortunately, a powerful and eco-friendly cleaning solution is likely already in your pantry.
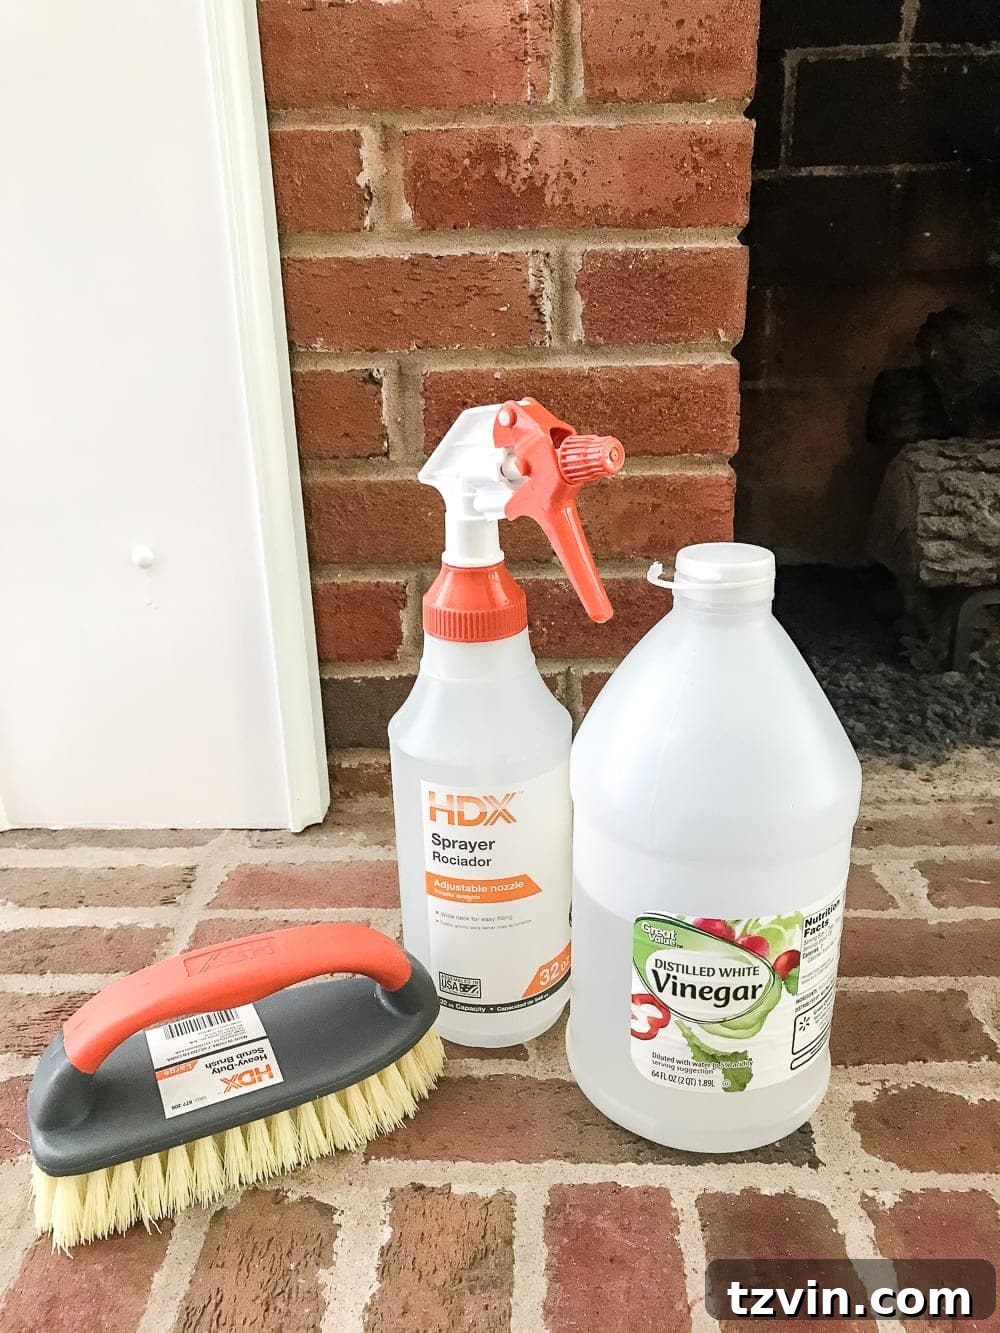
To get your brick fireplace squeaky clean, you’ll need just a few simple items: a sturdy spray bottle, white vinegar, a heavy-duty scrub brush (preferably one with stiff bristles designed for masonry), and a generous amount of elbow grease. The process is straightforward: mix equal parts white vinegar and water in your spray bottle. Liberally saturate the dirty, sooty brick surface with this solution. Allow it to sit for a few minutes to penetrate the grime, then get to scrubbing! Work in small sections, applying firm pressure with your scrub brush. You’ll be amazed at how much dirt and soot lift away, revealing a cleaner brick underneath.
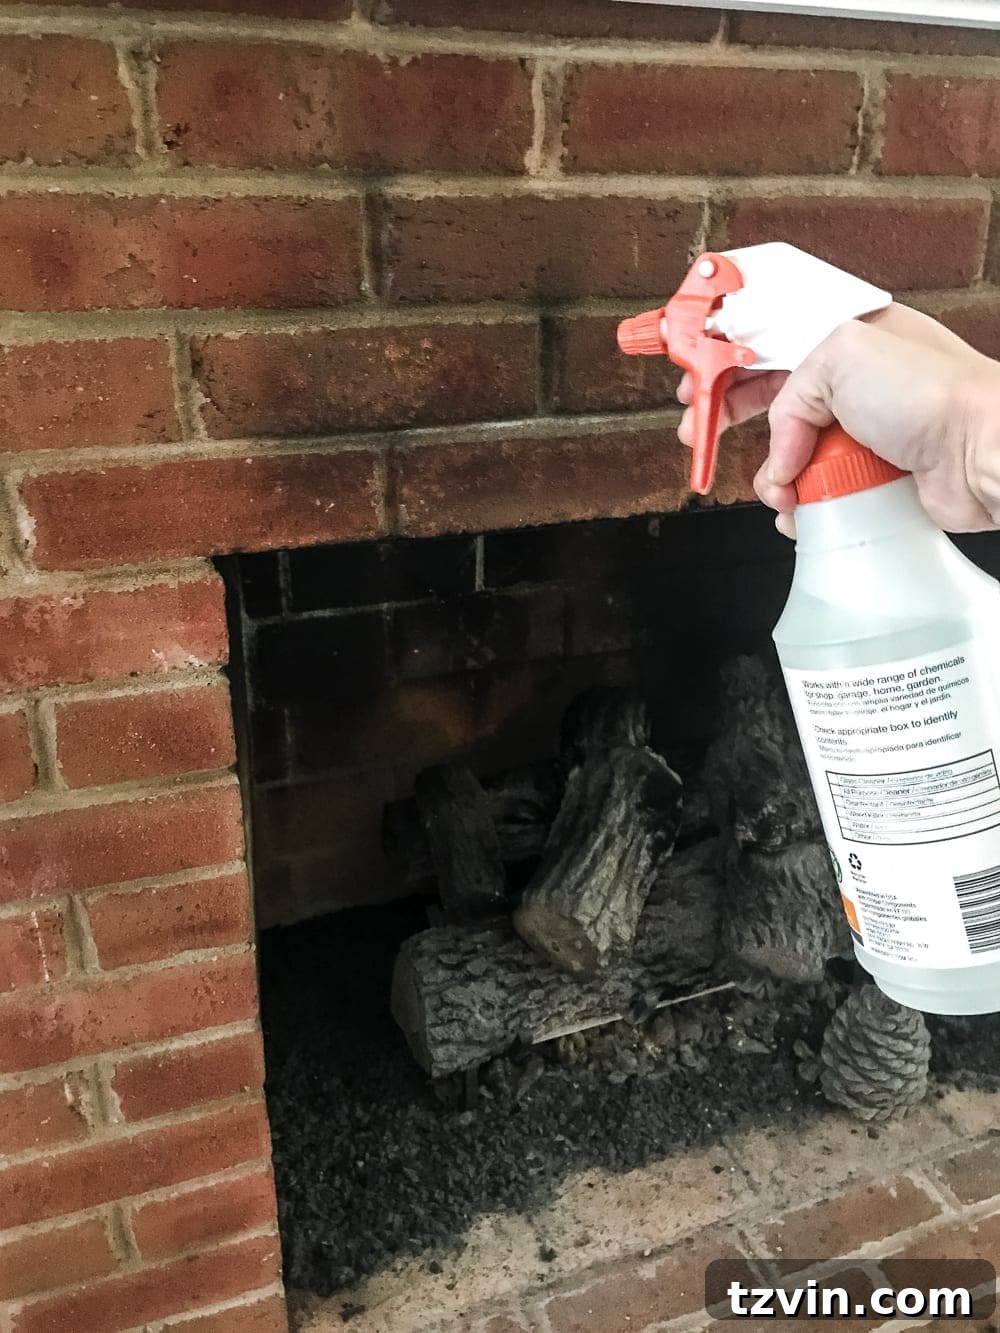
Even after a thorough cleaning, my brick still wasn’t quite what I envisioned. It was cleaner, yes, but the underlying color and aesthetic weren’t matching the brighter, airier feel I craved for our living space. This led me to explore popular brick finishing techniques that had filled my Pinterest boards for years: German Smear, Limewash, and Whitewash. I knew I wanted a project that was achievable for a DIY enthusiast like myself, offered a beautiful, lasting finish, and still allowed the character of the brick to subtly shine through.
Choosing Your Finish: German Smear vs. Limewash vs. Whitewash
When it comes to transforming the look of brick, several popular techniques offer distinct aesthetics. Understanding the differences between German Smear, Limewash, and Whitewash is crucial for choosing the right finish for your fireplace or any brick surface.
German Smear: This technique involves applying wet mortar (similar to what holds bricks together) directly onto the brick surface. It’s known for creating a heavily textured, old-world, and very rustic look, often seen in European architecture. The application is typically thick, allowing for significant coverage and creating a rugged, distressed appearance as excess mortar is wiped away. German Smear dramatically changes the surface texture and can be quite laborious, requiring a specific touch to achieve an authentic antique feel. While stunning, it can be more challenging for a DIY beginner due to the material and application style.
Limewash: Limewash is an ancient, breathable finish made from slaked lime and water. Unlike paint, it doesn’t form a film on the surface; instead, it calcifies onto the brick, creating a soft, opaque, and naturally matte finish that ages beautifully. Limewash is prized for its ability to create a soft, chalky, and weathered aesthetic while allowing the natural texture and slight variations of the brick to remain visible beneath a translucent veil. It’s also permeable, allowing brick to breathe, which is beneficial for the longevity of the masonry. The beauty of limewash lies in its natural, irregular appearance, which can be distressed in sections to reveal more of the underlying brick, offering a timeless, elegant, and organic feel. It’s often chosen for a subtly aged, European-inspired look that softens harsh brick tones.
Whitewash: This technique typically involves diluting white latex or acrylic paint with water and applying it over brick. The goal is to create a translucent layer that mutes the natural color of the brick while still allowing some of its original character to show through. Whitewash can provide a clean, bright look, but because it’s paint-based, it can sometimes create a more uniform, less natural appearance compared to limewash. A common concern with whitewash on older, red bricks is the potential for the underlying red tones to bleed through or mix with the white, resulting in an undesirable pinkish hue. It also tends to obscure more of the brick’s natural texture than limewash.
Considering these options, German Smear felt a bit too involved and permanent for my first major brick project. Whitewashing, while simpler, carried the risk of an unwanted pink tint and might have completely masked the brick’s texture, which I still wanted a hint of. The goal was to brighten, not erase. Limewash emerged as the perfect middle ground: it promised that desirable soft, weathered look while preserving the brick’s character and offering a forgiving application process that could be distressed to personal preference. It was the ideal choice for achieving a beautifully updated fireplace without losing its authentic charm. If you’re up for the German smear challenge, there are many excellent DIY tutorials available, but for me, limewash was the clear winner.
DIY Limewash Fireplace Tutorial: Step-by-Step for a Perfect Finish
Ready to transform your own fireplace? This detailed guide will walk you through every step of achieving a stunning limewash finish that breathes new life into your brickwork.
Essential Supplies for Your Limewash Project
- Romabio Classico Limewash in Avorio White: This high-quality limewash is specifically designed for masonry and offers excellent coverage and a beautiful, authentic finish.
- 2 Spray Bottles: One for your vinegar cleaning solution, and another filled with plain water, essential for dampening the brick during application and distressing.
- White Vinegar: Your natural, effective cleaner for preparing the brick surface.
- Heavy-Duty Scrub Brush: Necessary for deep cleaning the brick and removing stubborn soot and grime.
- Mixing Bucket: To safely and easily mix your limewash solution.
- Power Drill with Paddle Drill Bit (or Stir Stick): For thoroughly mixing the limewash to the correct consistency. A stir stick works, but a drill bit is much faster and more efficient.
- Masonry Brush: A specialized brush with stiff bristles designed for applying limewash to textured surfaces like brick.
- Plenty of Clean Cotton Rags: Crucial for blotting, rubbing, and distressing the limewash to achieve your desired look.
- Frog Tape (or Painter’s Tape): For protecting surrounding areas like your mantel and flooring.
- Plastic Drop Cloth: To protect your floors and furniture from spills and splatters.
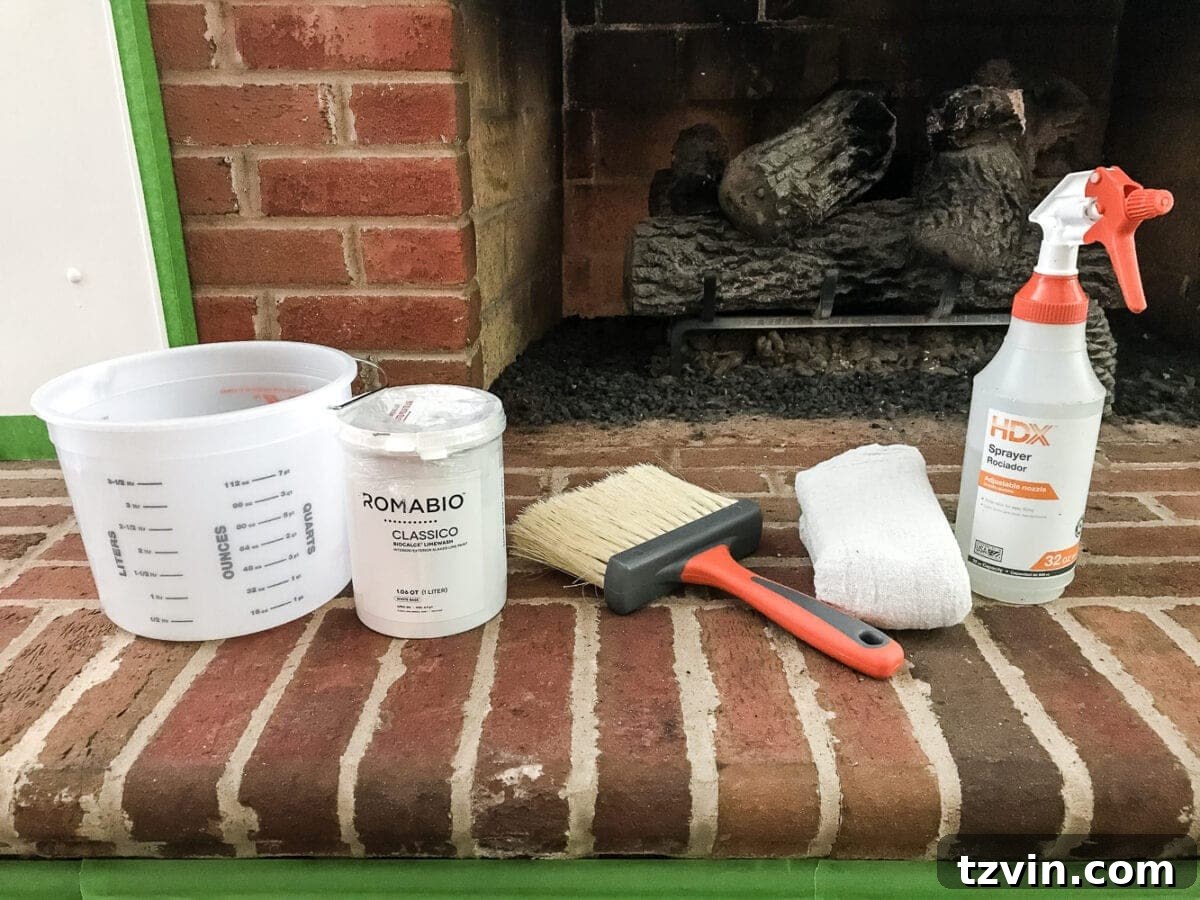
Step 1: Mixing Your Limewash to Perfection
I discovered Romabio limewash at Home Depot, and it quickly became my product of choice after seeing their online galleries of stunning transformations and helpful video tutorials. It’s important to note that this isn’t a sponsored endorsement; I genuinely had an excellent experience with the product. When you open the Romabio container, you’ll find the limewash in a thick, putty-like consistency. This concentrated form requires proper dilution before application.
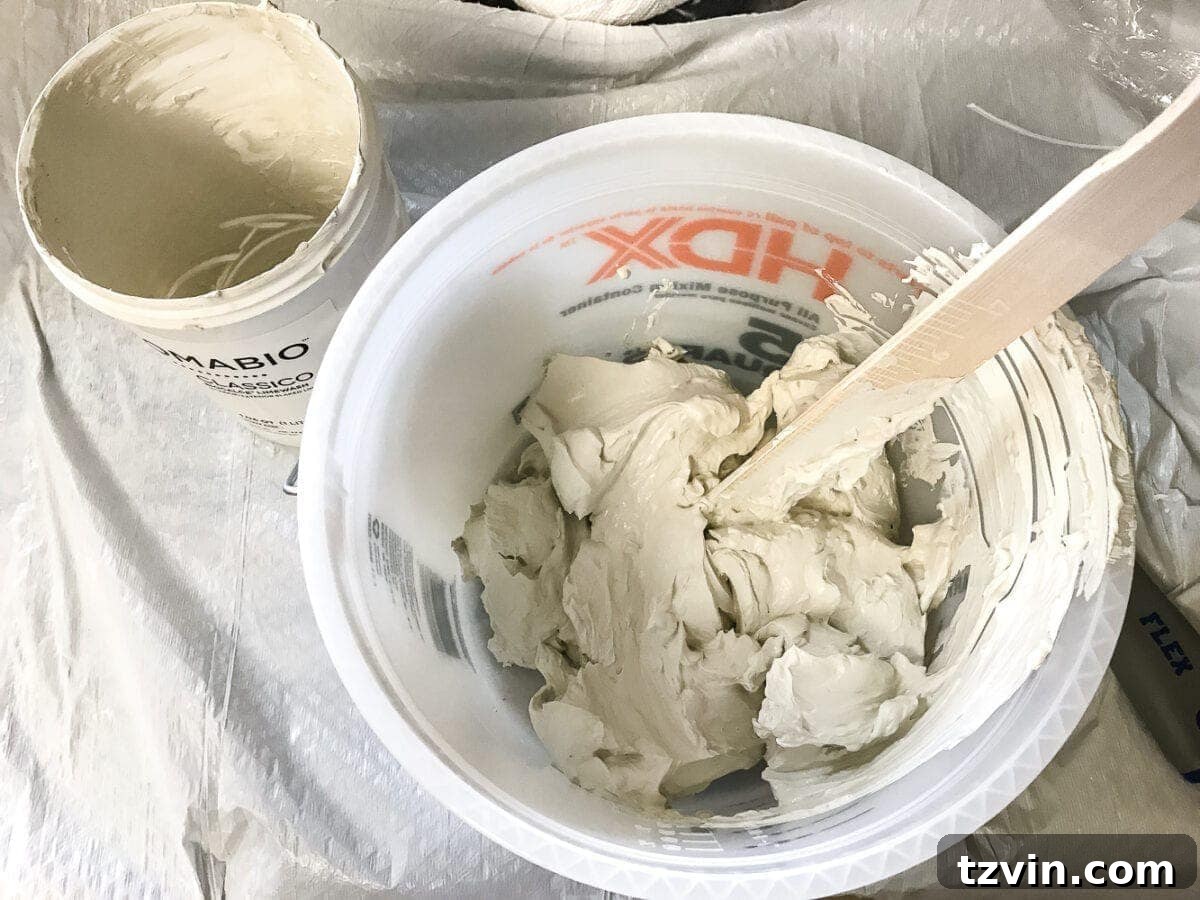
Pour the entire liter (or desired amount) into your mixing bucket. Following the instructions on the Romabio container, add an equal part of water to the limewash. This 1:1 ratio is crucial for achieving the correct consistency and optimal coverage. If you have a paddle drill bit, attach it to your power drill and mix thoroughly until the limewash is smooth and completely incorporated. If not, a sturdy paint stir stick will work, but be prepared for a more strenuous and longer mixing session to ensure there are no lumps or uneven areas.
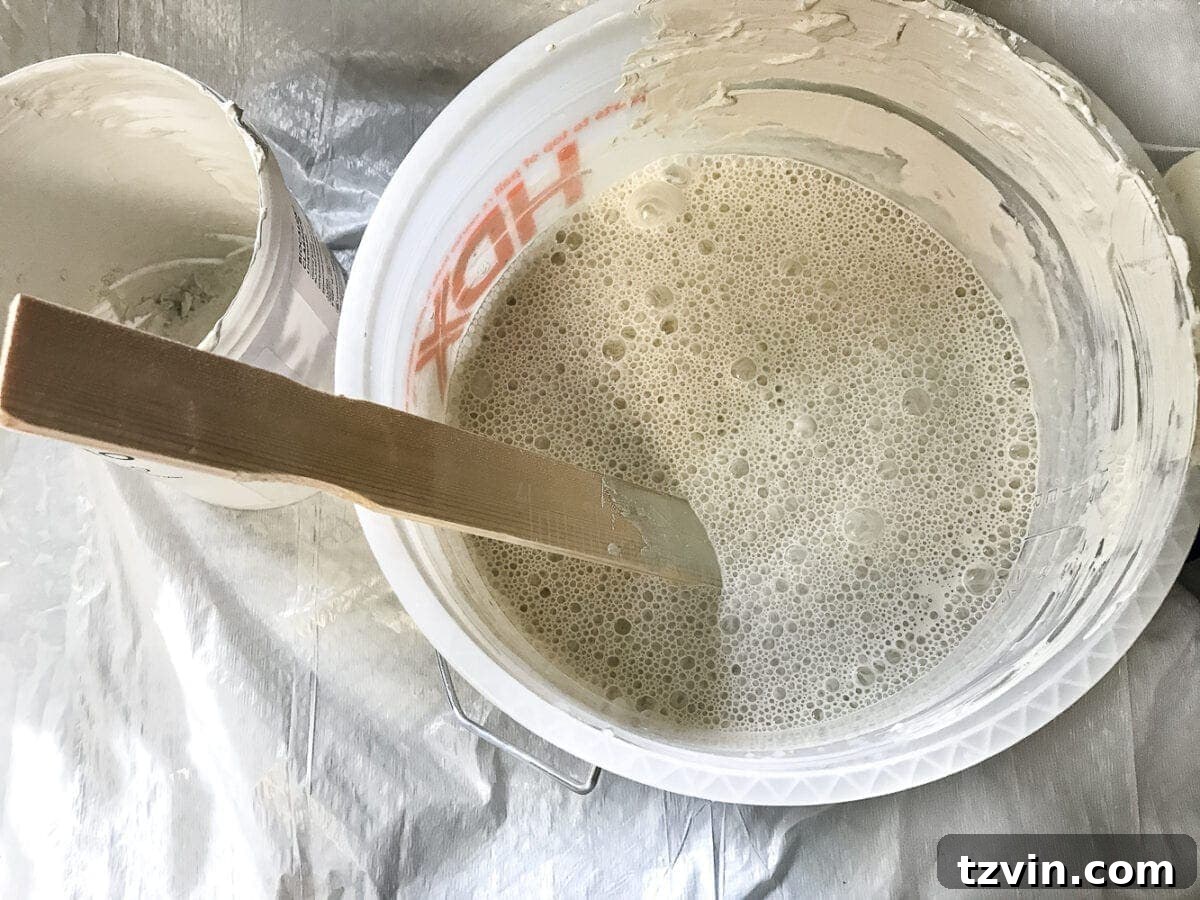
Step 2: Protecting Your Surroundings – Tape and Drop Cloths
Before you begin applying any limewash, it’s essential to protect the areas around your fireplace. Use painter’s tape, such as Frog Tape, to meticulously tape off the edges of your fireplace mantel surround, the hearth, and any adjacent flooring. Lay down plastic drop cloths over your hardwood floors or carpets to catch any drips or splatters. This preventative step will save you significant cleanup time later. Remember, starting with thoroughly cleaned brick (as detailed in the cleaning section above) is non-negotiable for proper limewash adhesion, so ensure your surface is spotless and dry before proceeding.
Step 3: Dampening the Brick – A Crucial Pre-Application Step
Once your surroundings are protected and your limewash is mixed, the next vital step is to dampen the brick. Using a spray bottle filled with plain water, lightly mist all the brick surfaces you intend to limewash. The goal is to make the brick damp, but not dripping wet. This step is critical because limewash is designed to be absorbed into the porous surface of the brick. A damp surface ensures that the limewash is absorbed evenly, preventing it from drying too quickly and allowing for better workability and a more consistent finish. Continue to lightly mist sections as you work to keep the brick uniformly damp.
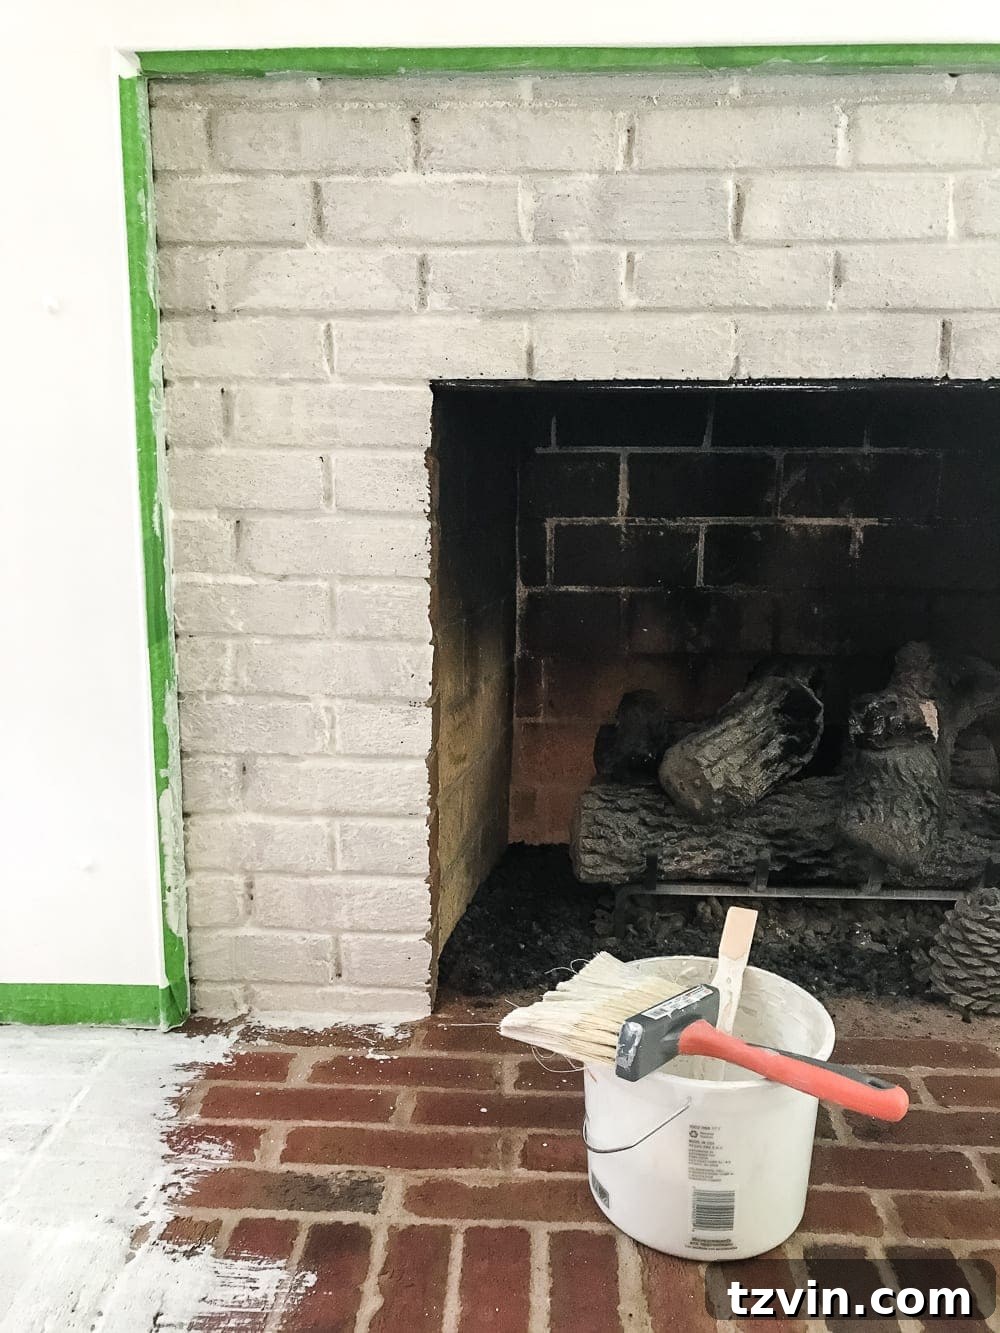
Step 4: Applying the Limewash Paint
With your brick prepped and dampened, it’s time for the fun part: applying the limewash! Dip your masonry brush into the mixed limewash solution, ensuring it’s loaded but not dripping excessively. Begin brushing the limewash liberally over the brick surface, working in sections. Apply with firm, even strokes, ensuring the limewash gets into the mortar joints and covers the face of each brick. As you work, if you notice the brick drying out, give it another light mist with your water-filled spray bottle to maintain dampness – this aids in the limewash’s absorption and allows for a more forgiving application. Once the entire surface is covered, step back and admire the initial transformation. The limewash will look quite opaque at this stage, but don’t worry, the distressing process will reveal the beautiful weathered effect. Allow the limewash to sit for approximately 30 minutes, or until it’s mostly dry to the touch, before moving on to the next step. This allows it to set just enough before you begin removing it.
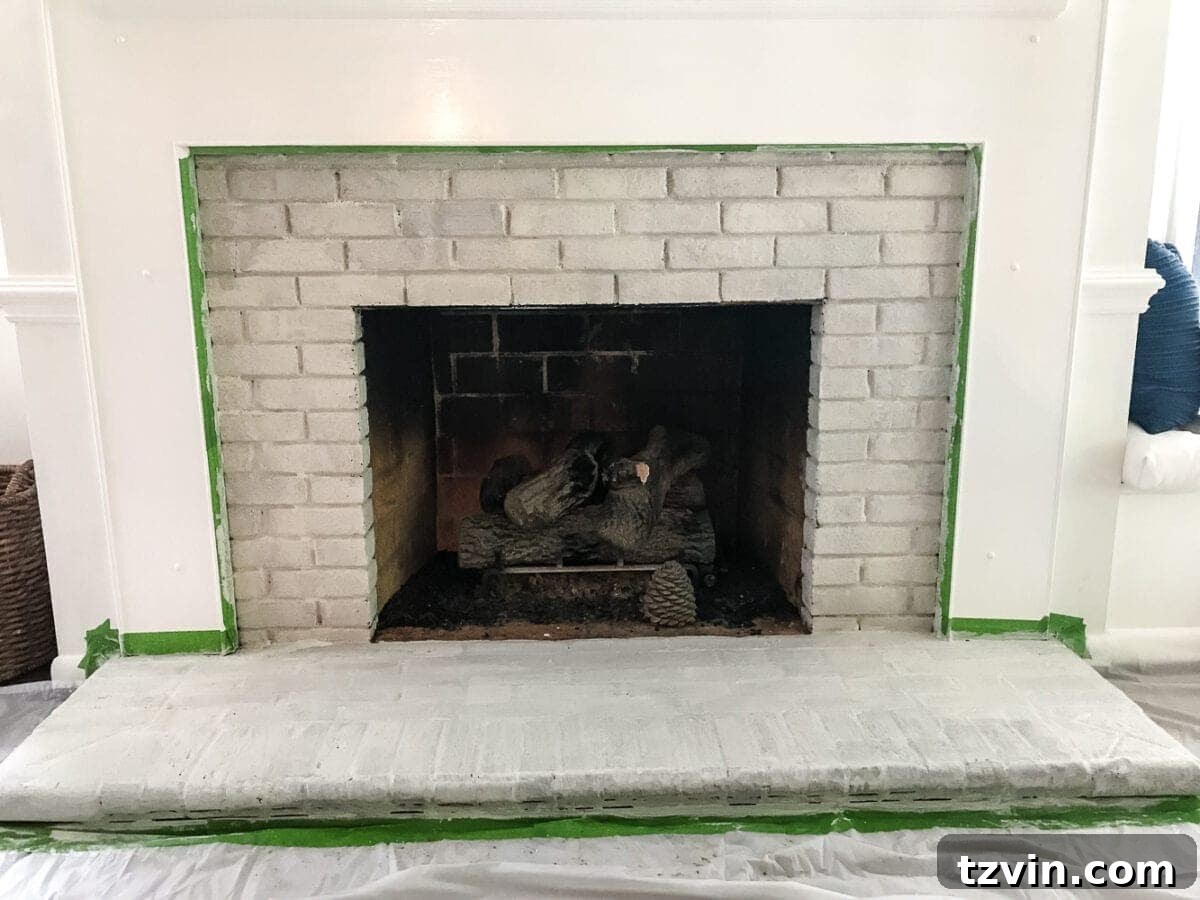
Step 5: The Art of Distressing – Achieving Your Perfect Weathered Look
This is where the magic truly happens, allowing you to customize the weathered, authentic look of your limewashed fireplace. Using your spray bottle filled with plain water, work on one brick at a time. Give a brick one or two light spritzes of water. Immediately, use a clean cotton rag to blot and rub the dampened area, removing as much of the limewash as you desire. The amount you remove will dictate how much of the original brick color and texture shows through. For a more subtle effect, gently blot; for more exposed brick, rub more firmly. There’s no single right way to do this; it’s an artistic process of working until you achieve the depth and character you envision. This helpful video beautifully illustrates the entire distressing process, giving you a visual guide.
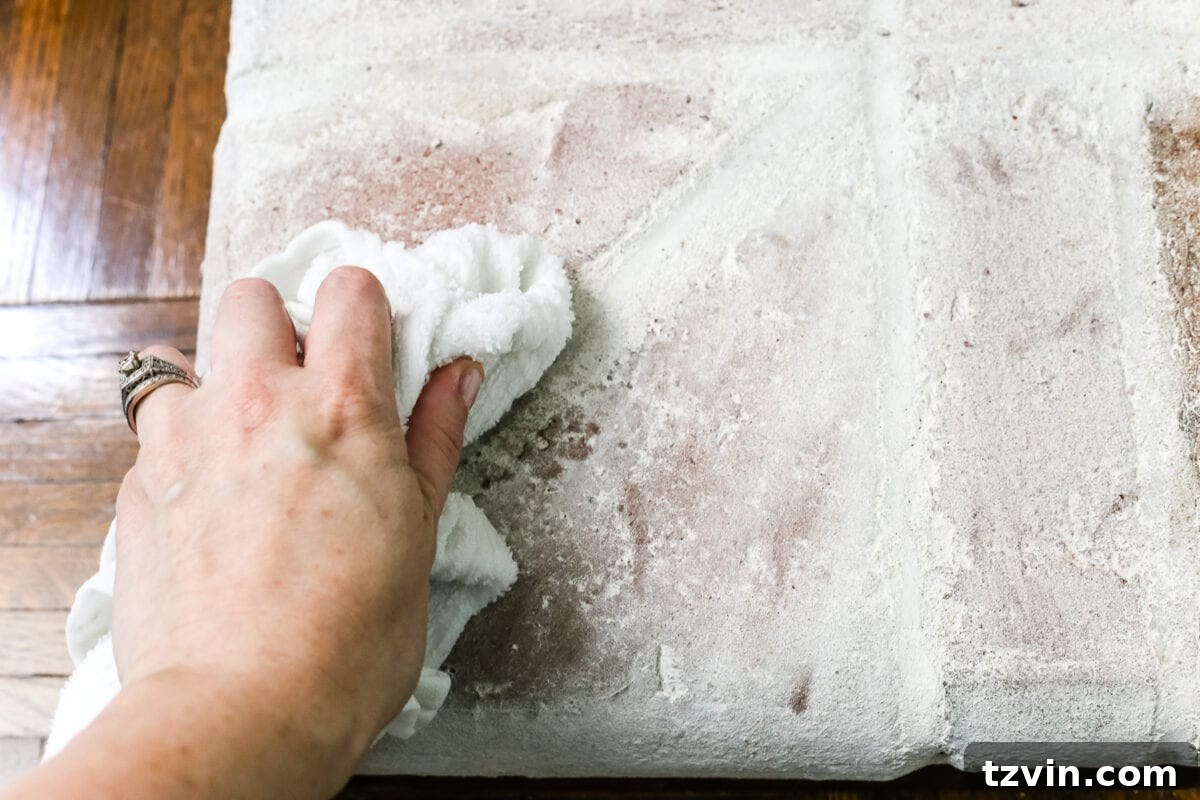
The distressing phase is a patient process of spraying, blotting, and rubbing, moving from brick to brick. It’s less about strict science and more about continuous artistic adjustment until the overall appearance matches your vision for a beautifully aged and brightened fireplace. The beauty of limewash is its forgiving nature – you have control over the final distressed effect, making each project uniquely yours.
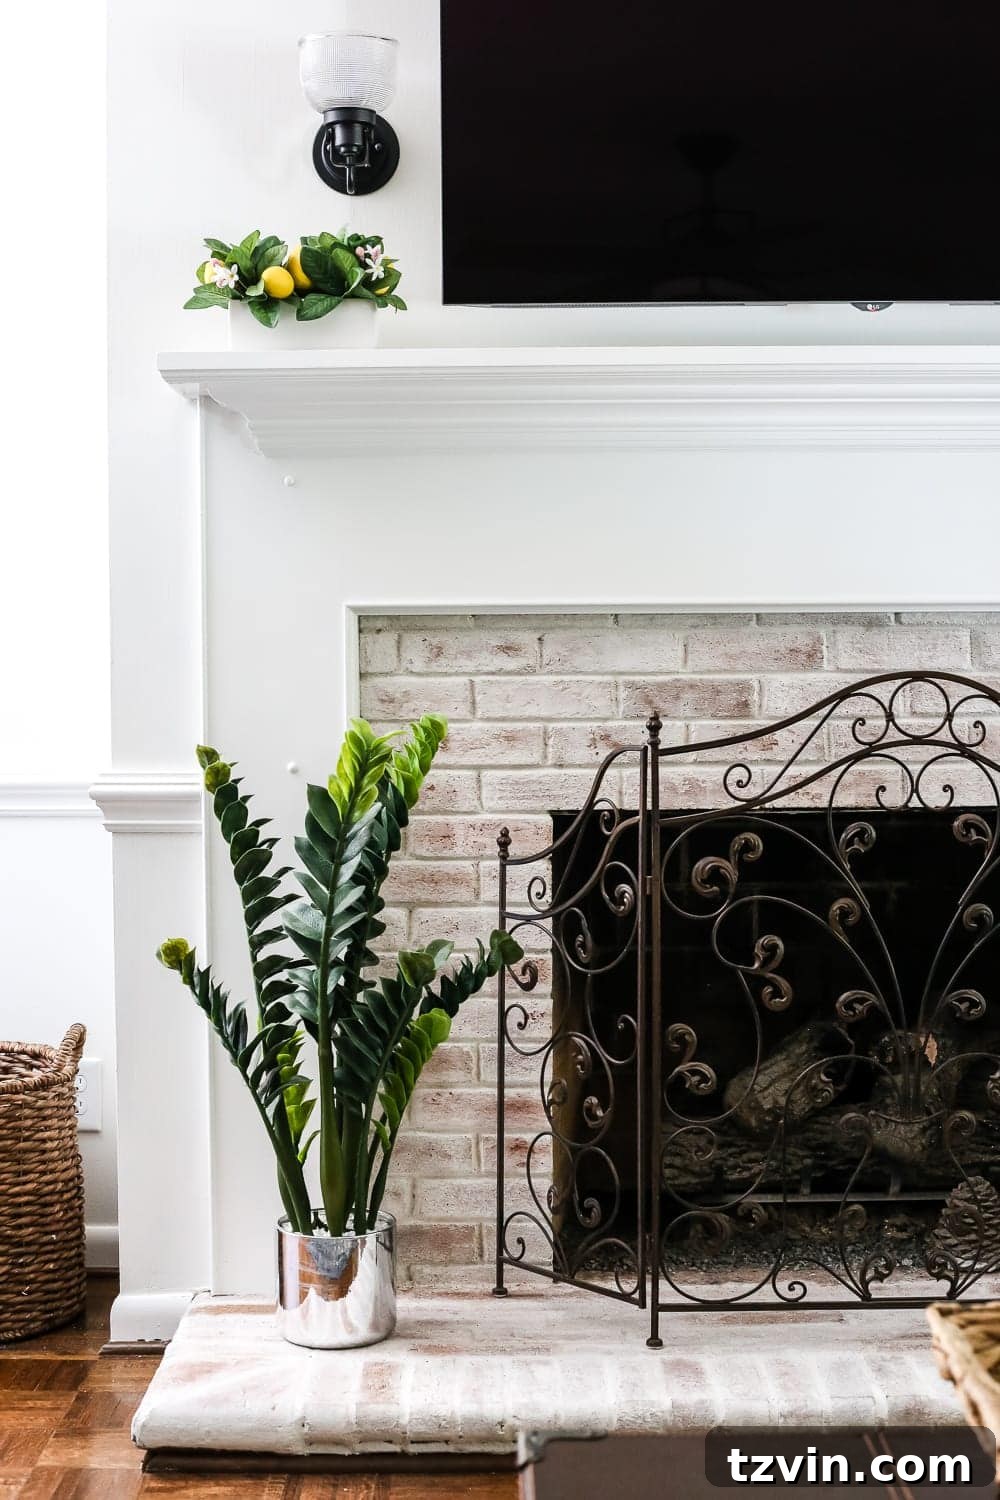
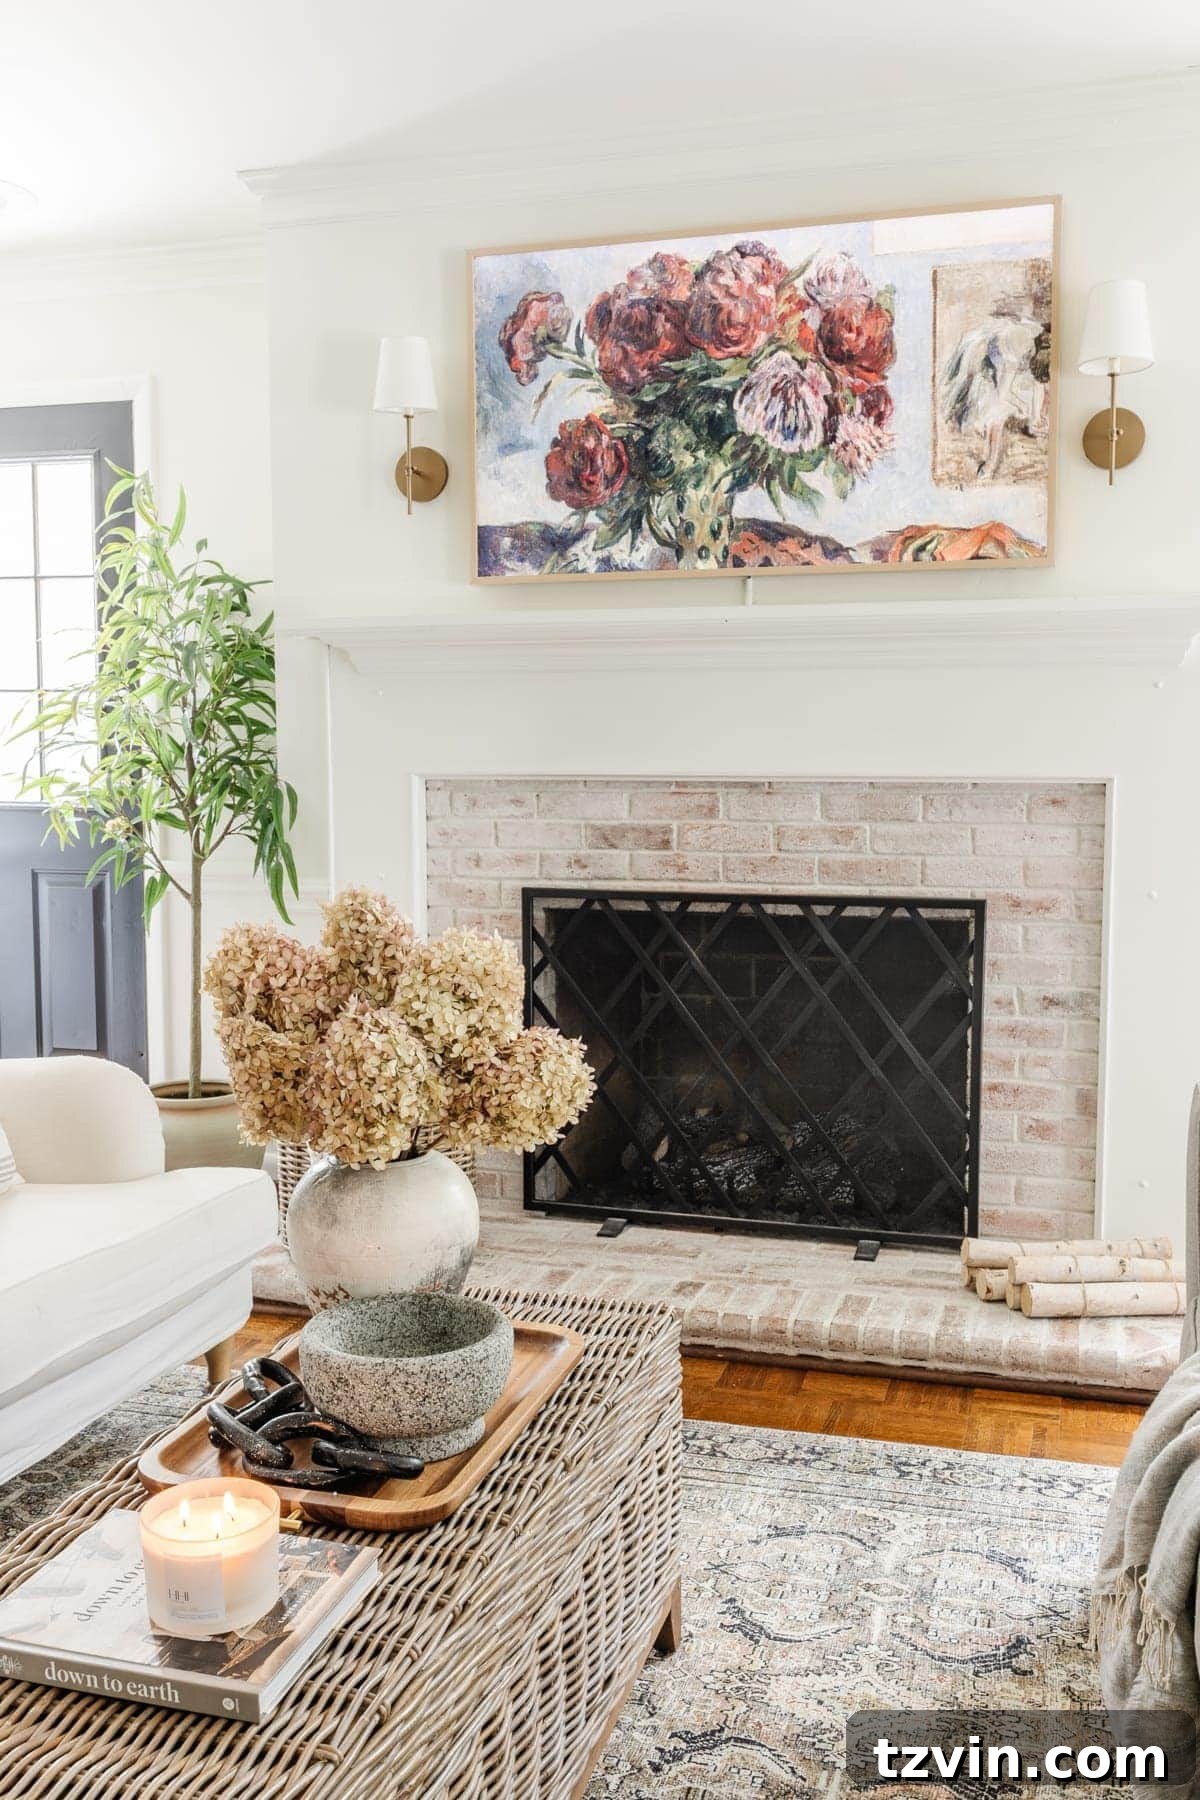
And just like that, with careful application and artful distressing, you achieve a gorgeous, limewashed brick fireplace! While I considered other approaches, such as only brushing the limewash on the mortar or just a few selected bricks, I’m genuinely thrilled with the full coverage and distressed look I achieved. The transformative power of limewash is undeniable, completely revitalizing the entire feel of the room.
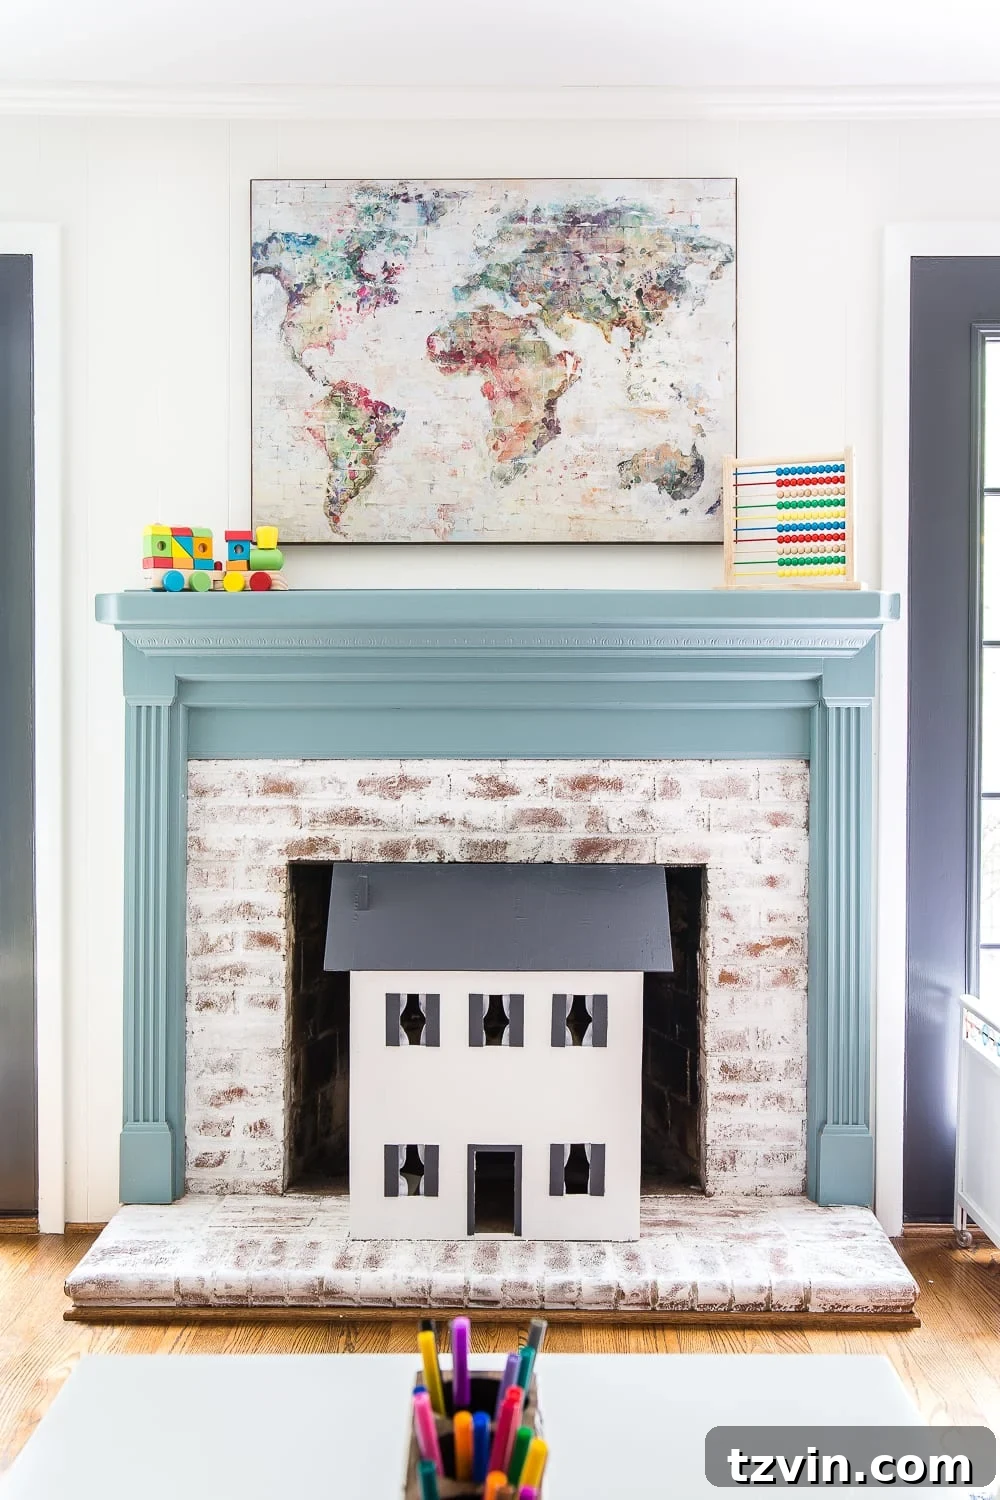
UPDATE: An Alternative Distressing Method for a Unique Look
After the success with our main living room fireplace, I had the opportunity to tackle our playroom fireplace. For this project, I experimented with a slightly different distressing technique. Instead of the spray-and-rub method, I applied the limewash in an intentionally uneven pattern, dabbing it onto the bricks with a paintbrush. This created an organic, naturally distressed look without needing to spray water and remove the limewash with a rag. This method resulted in a more subtly varied finish, allowing even more of the underlying brick texture to peek through. I found this approach incredibly satisfying and, in some ways, even preferred the final outcome for its effortlessly aged appearance!
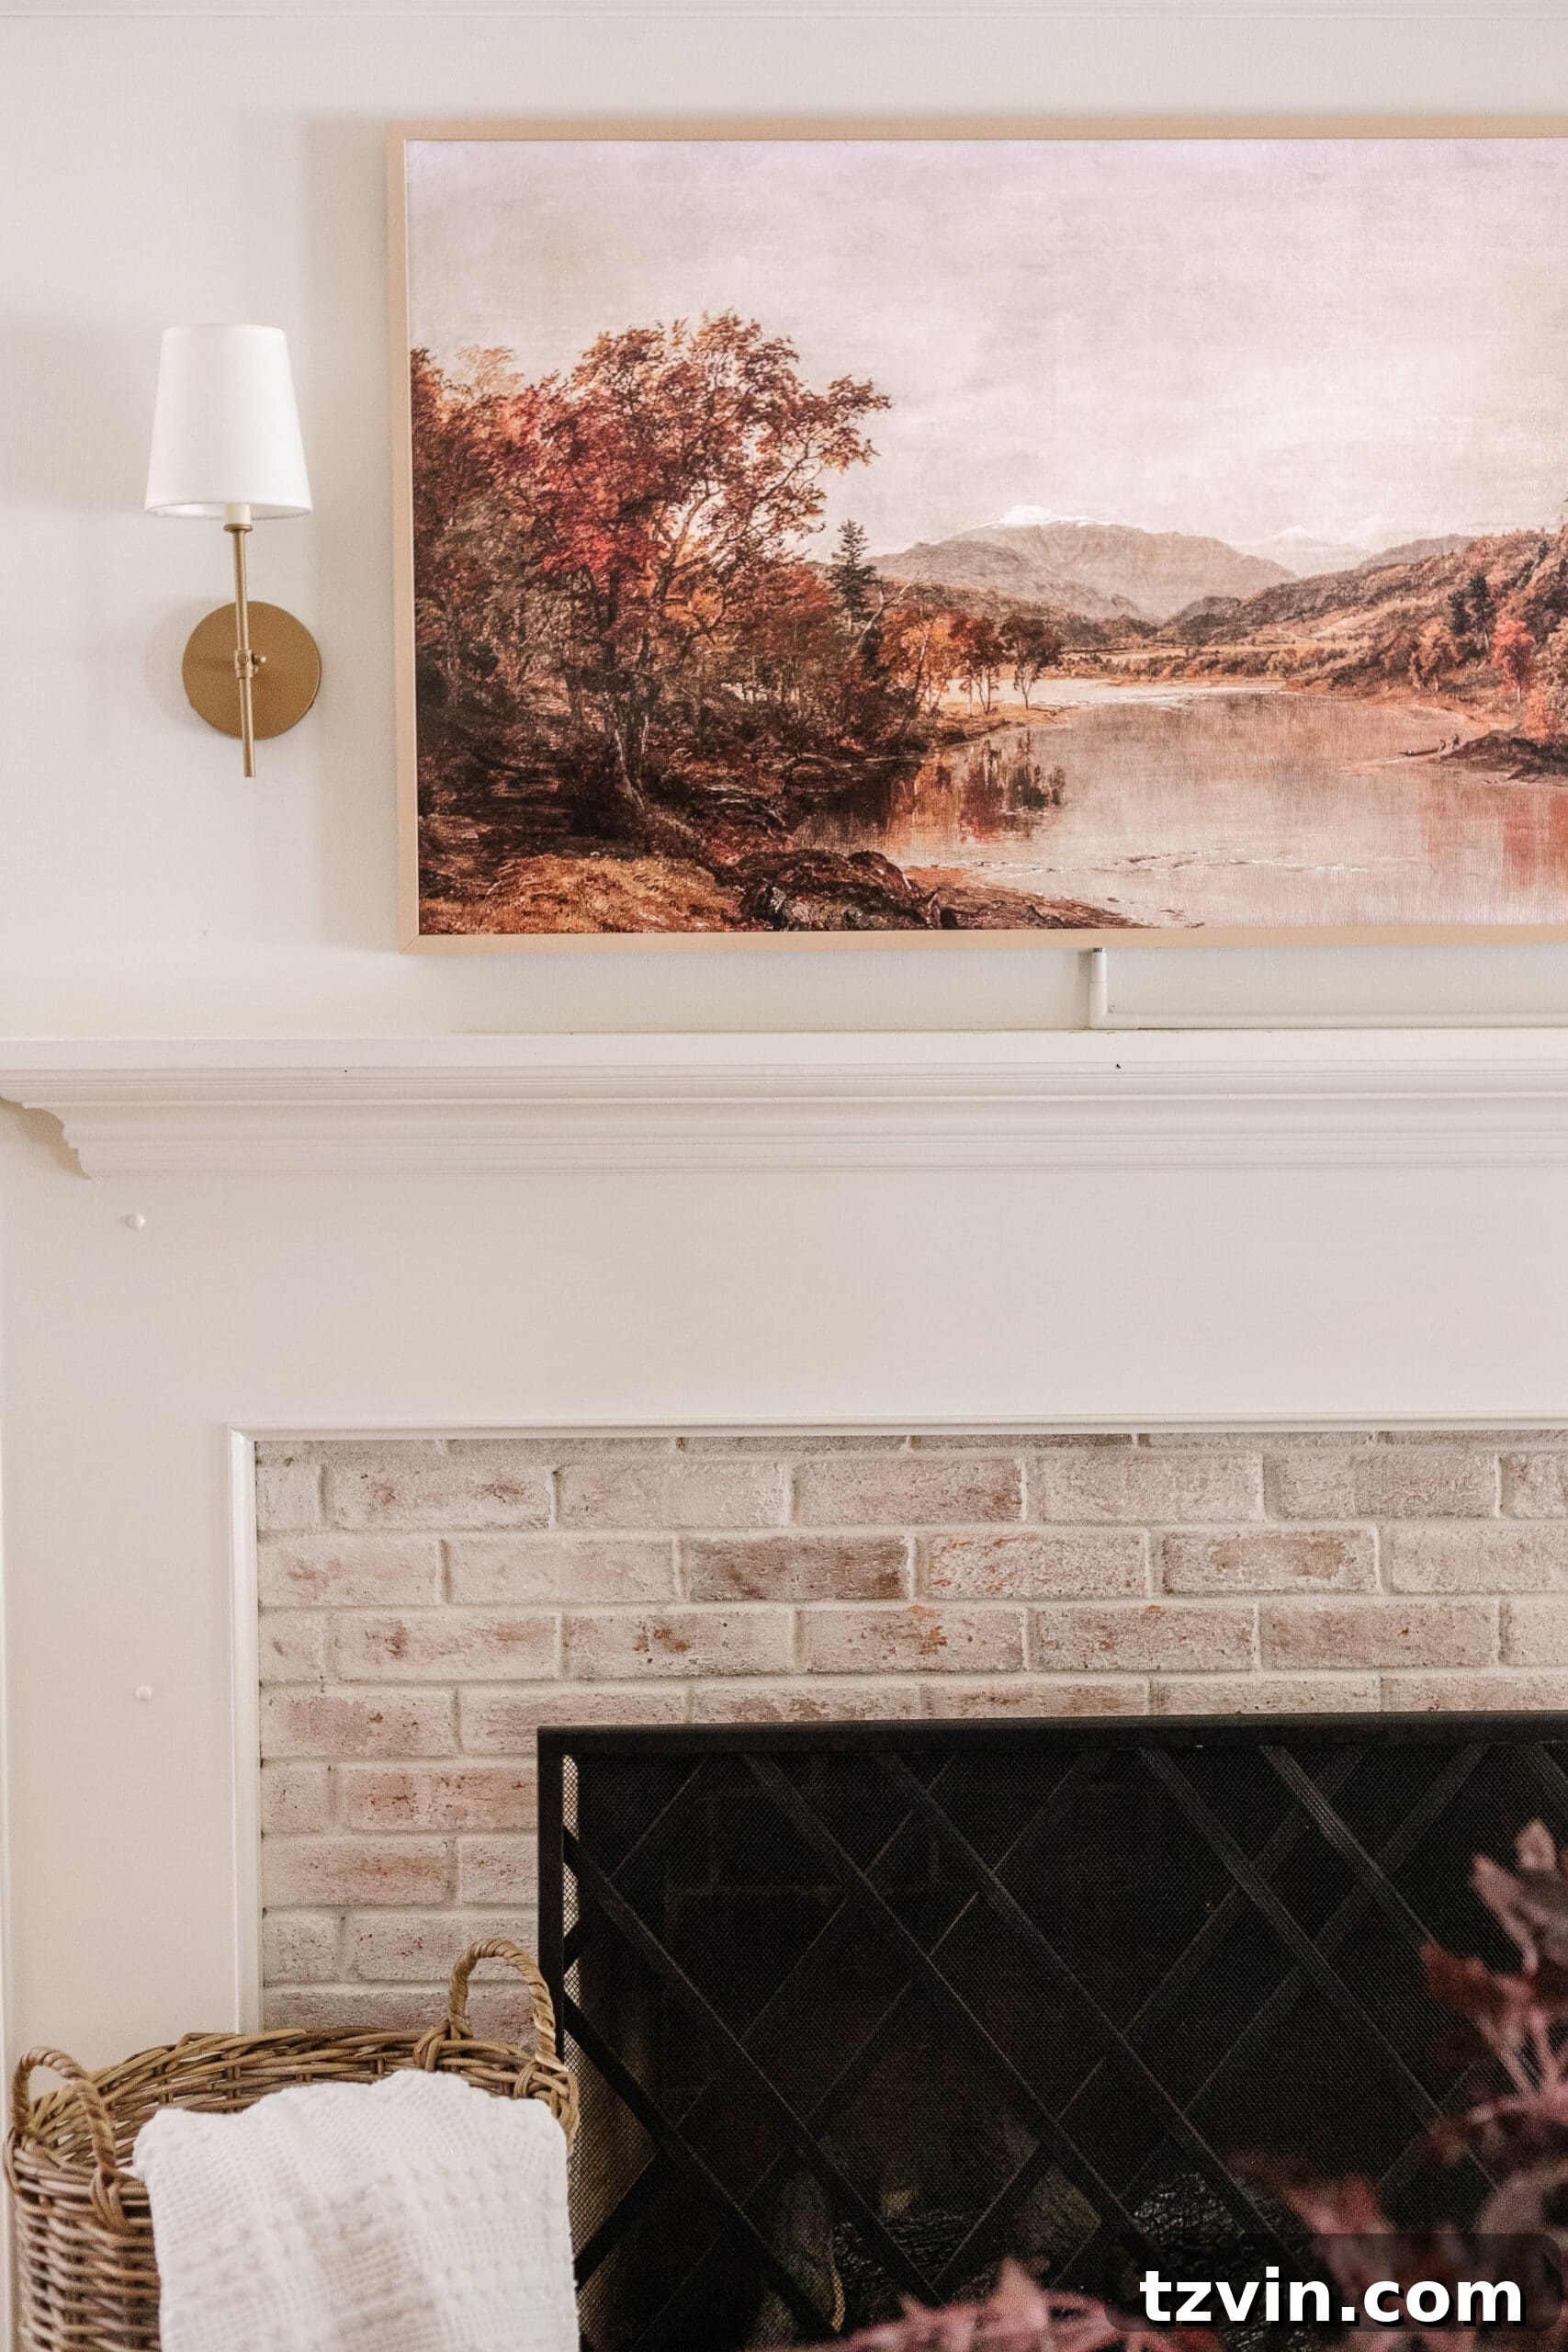
The transformation took a little getting used to, much like adjusting to a dramatically new haircut. However, the brightened, weathered look of the limewashed brick has utterly revitalized our living room. It now feels cohesive, fresh, and truly embodies the aesthetic we’ve been striving for. The fireplace, once a source of visual discord, has become a cherished focal point that perfectly complements our home’s style.
Beyond the Fireplace: Complementary DIY Living Room Ideas
Over the years, our living room has undergone a series of thoughtful updates, each contributing to its complete transformation. A new fireplace finish often inspires other changes, creating a harmonious and inviting space. Here are some of our favorite DIY projects and decor ideas that have helped shape our living room:
- Best Rated Fandeliers: How to Integrate Style and Function – Discover how a modern fandelier can enhance both the aesthetics and comfort of your living space.
- DIY Window Seat from a Kitchen Cabinet: Creative Storage Solutions – Learn how to repurpose existing elements to create charming and practical additions to your room.
- Coffee Table Decor Essentials: Styling for Function and Beauty – Master the art of arranging your coffee table to be both inviting and stylish.
- How to Style End Tables: Practical Tips for a Polished Look – Maximize the impact of smaller surfaces with thoughtful styling.
- Audubon Bird Art Gallery Wall & Free Printable Set: Adding Character with Art – Create a captivating gallery wall that adds personality and visual interest.
- How to Clean a Fabric Couch: Maintaining Your Furniture’s Freshness – Essential tips for keeping your living room furniture looking its best.

Curated Living Room Decor Sources & Honest Reviews
Investing in key pieces for your living room is a significant decision. Over the years, we’ve made several important purchases that have greatly influenced the comfort and style of our space. To help you with your own decision-making process, we’ve shared our candid reviews, including both the pros and cons, of these items. Our aim is to provide unbiased insights so you can choose with confidence:
- Pottery Barn Sofa Review: What You Should Know Before Buying – An in-depth look at comfort, durability, and style.
- Our Brutally Honest Review of the Samsung Frame TV: Art Meets Technology – Is this popular smart TV worth the investment for its unique aesthetic?
- Our Brutally Honest Review of the Pottery Barn Tyler Recliner: Comfort and Style Combined – Evaluating a classic piece for its everyday use and design appeal.

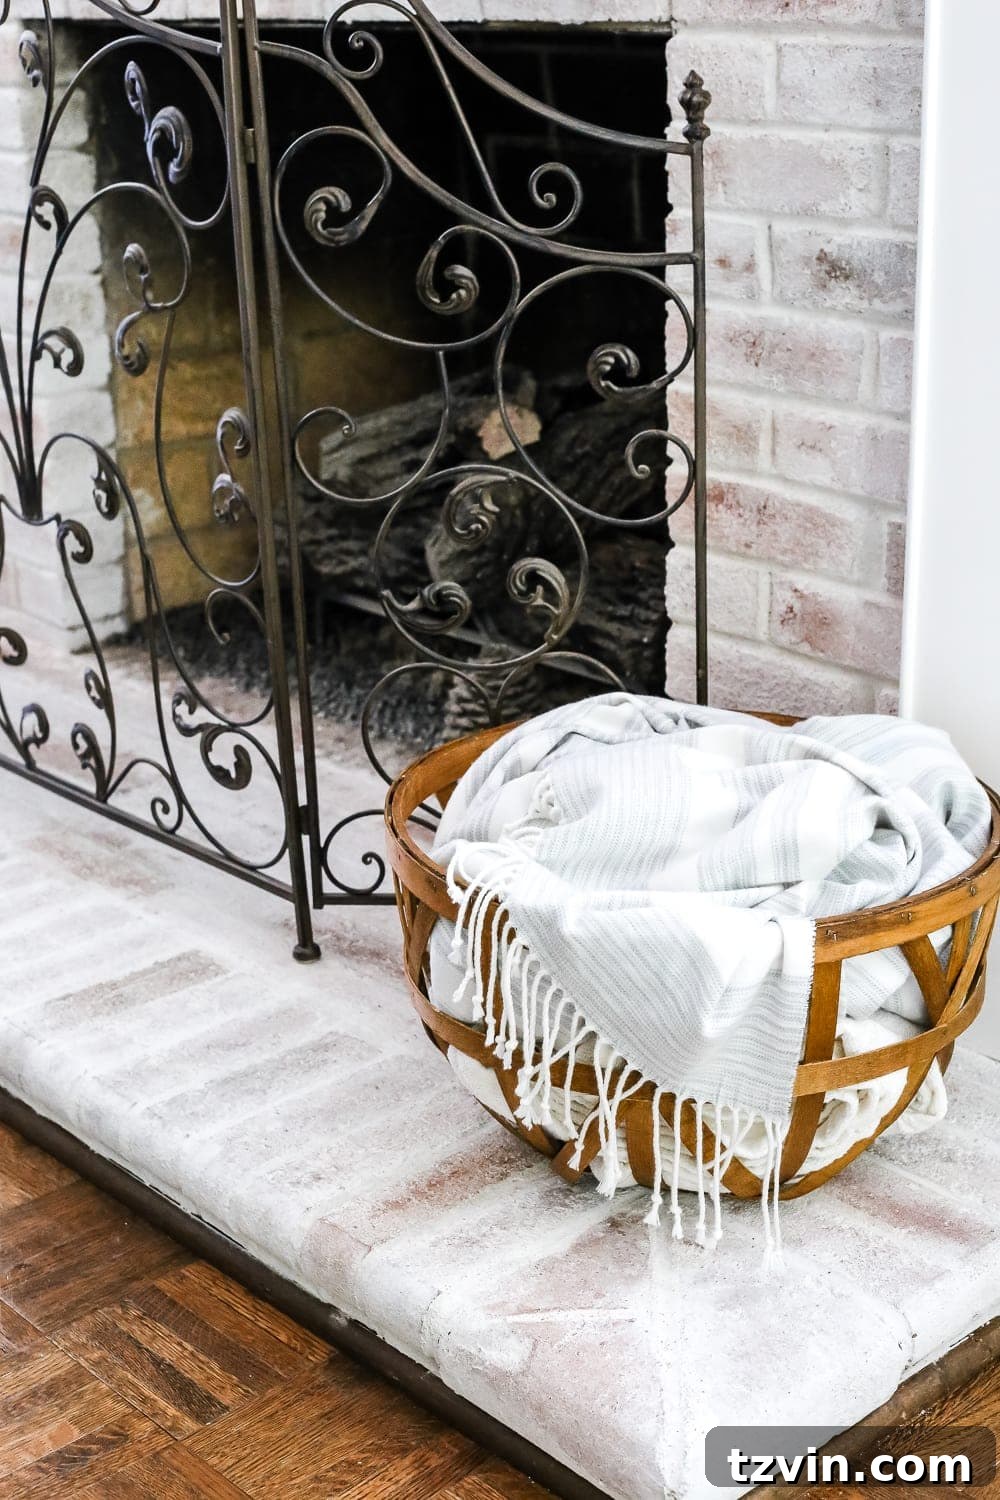

For those curious about the specific elements that complete our living room’s look, here’s a detailed list of sources:
- Wall Color: Benjamin Moore Swiss Coffee in eggshell finish
- Trim Color: Benjamin Moore Simply White in semigloss finish
- Door/Window Color: Benjamin Moore Wrought Iron in semigloss finish
- Sofas: Our comfortable and stylish seating choices that anchor the room.
- Recliners: The perfect blend of relaxation and aesthetic appeal.
- Coffee Table: A focal point combining elegance and practicality.
- Frame TV: Seamlessly blending technology with art.
- Fandelier: A modern solution offering both light and airflow.
- Curtains: Adding softness, privacy, and insulation to our windows.
- Curtain Rod: The essential hardware that supports our window treatments.
- Floor Lamp: Providing ambient lighting and a touch of style.
- Fireplace Screen: A decorative and functional element for safety and beauty.
- Plaid Blanket: A cozy accent for comfort and texture.
- Sconces: Wall-mounted lighting that adds character and task illumination.
- Table Lamp: For additional lighting and a warm glow.
The transformation is truly remarkable – comparing the before and after reveals a dramatic change that has completely refreshed our home. It’s incredible to see how much a single DIY project can influence an entire space.
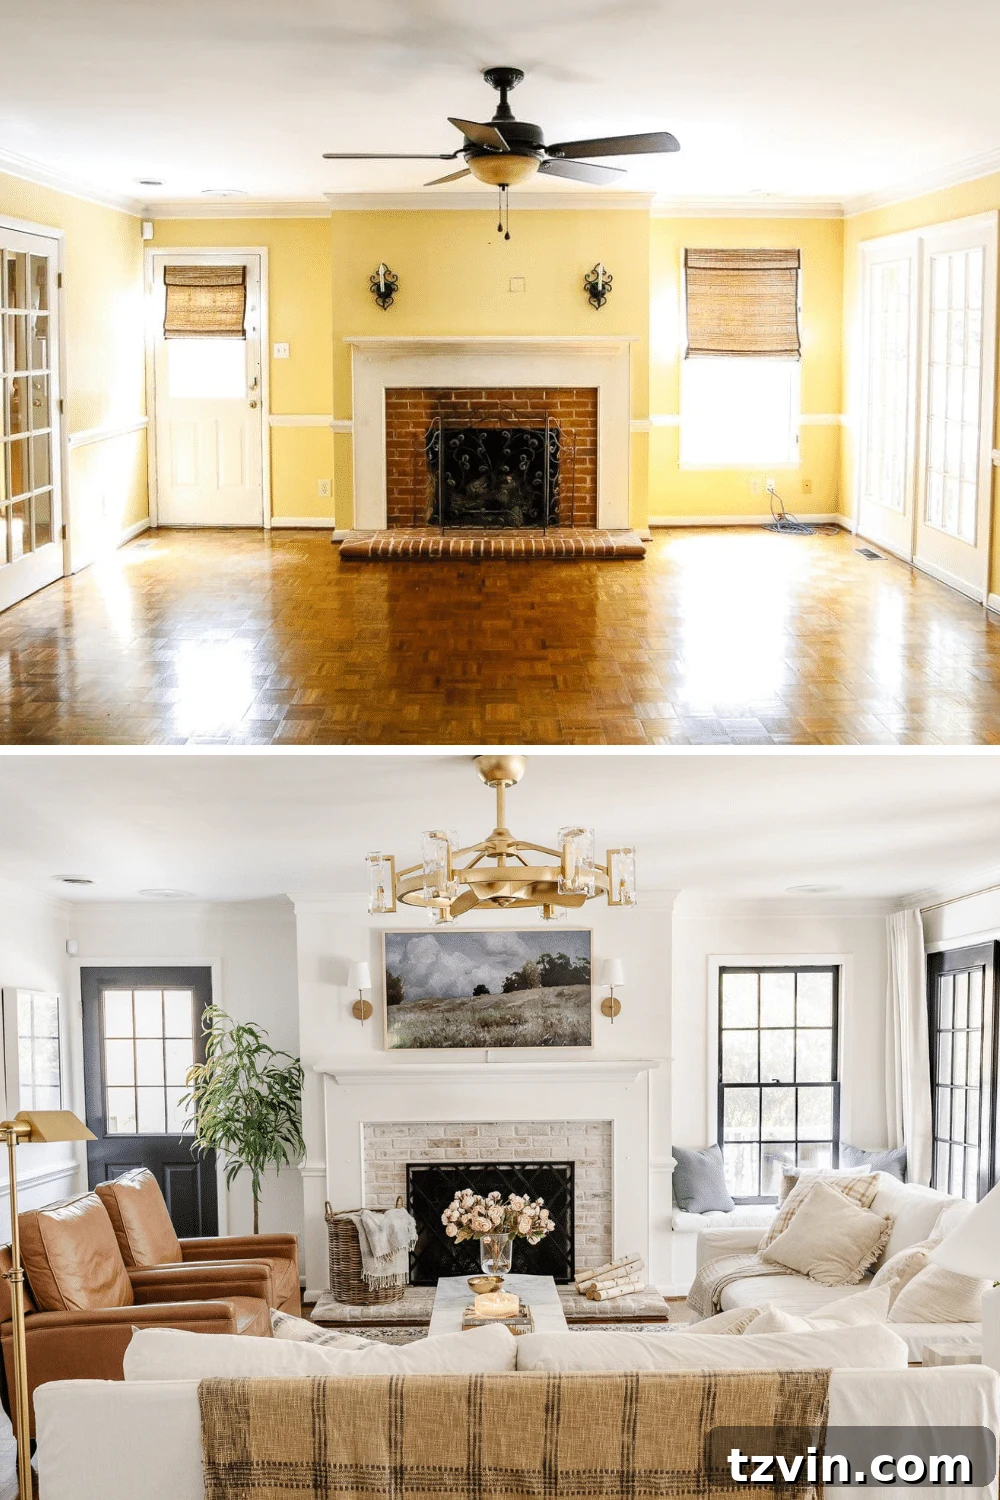
Now, we pose the question to you: are you “Team Orange Brick,” embracing the natural, rustic look? Or are you firmly on “Team Limewash Fireplace,” favoring a brightened, weathered aesthetic? Perhaps you find yourself somewhere in the “Whitewash” or “German Smear” camp? It’s fascinating to realize just how many strong opinions there are when it comes to brick finishes, each offering a unique way to personalize your home.
Deep Dive into Limewash: Further Resources and Advice
For those eager to explore more about limewash and its applications, we’ve gathered additional resources to guide you through various projects and answer common questions:
- Limewashed Brick Exterior Before and After: Extending the Beauty Outdoors – See how limewash can transform the exterior of a home, offering incredible curb appeal.
- FAQs About Our Limewashed Brick: Your Questions Answered – Get detailed answers to frequently asked questions about limewash durability, maintenance, and application.
- How to Clean and Maintain Limewashed Brick: Preserving Your Finish – Essential tips for keeping your limewashed surfaces looking fresh and beautiful for years to come.