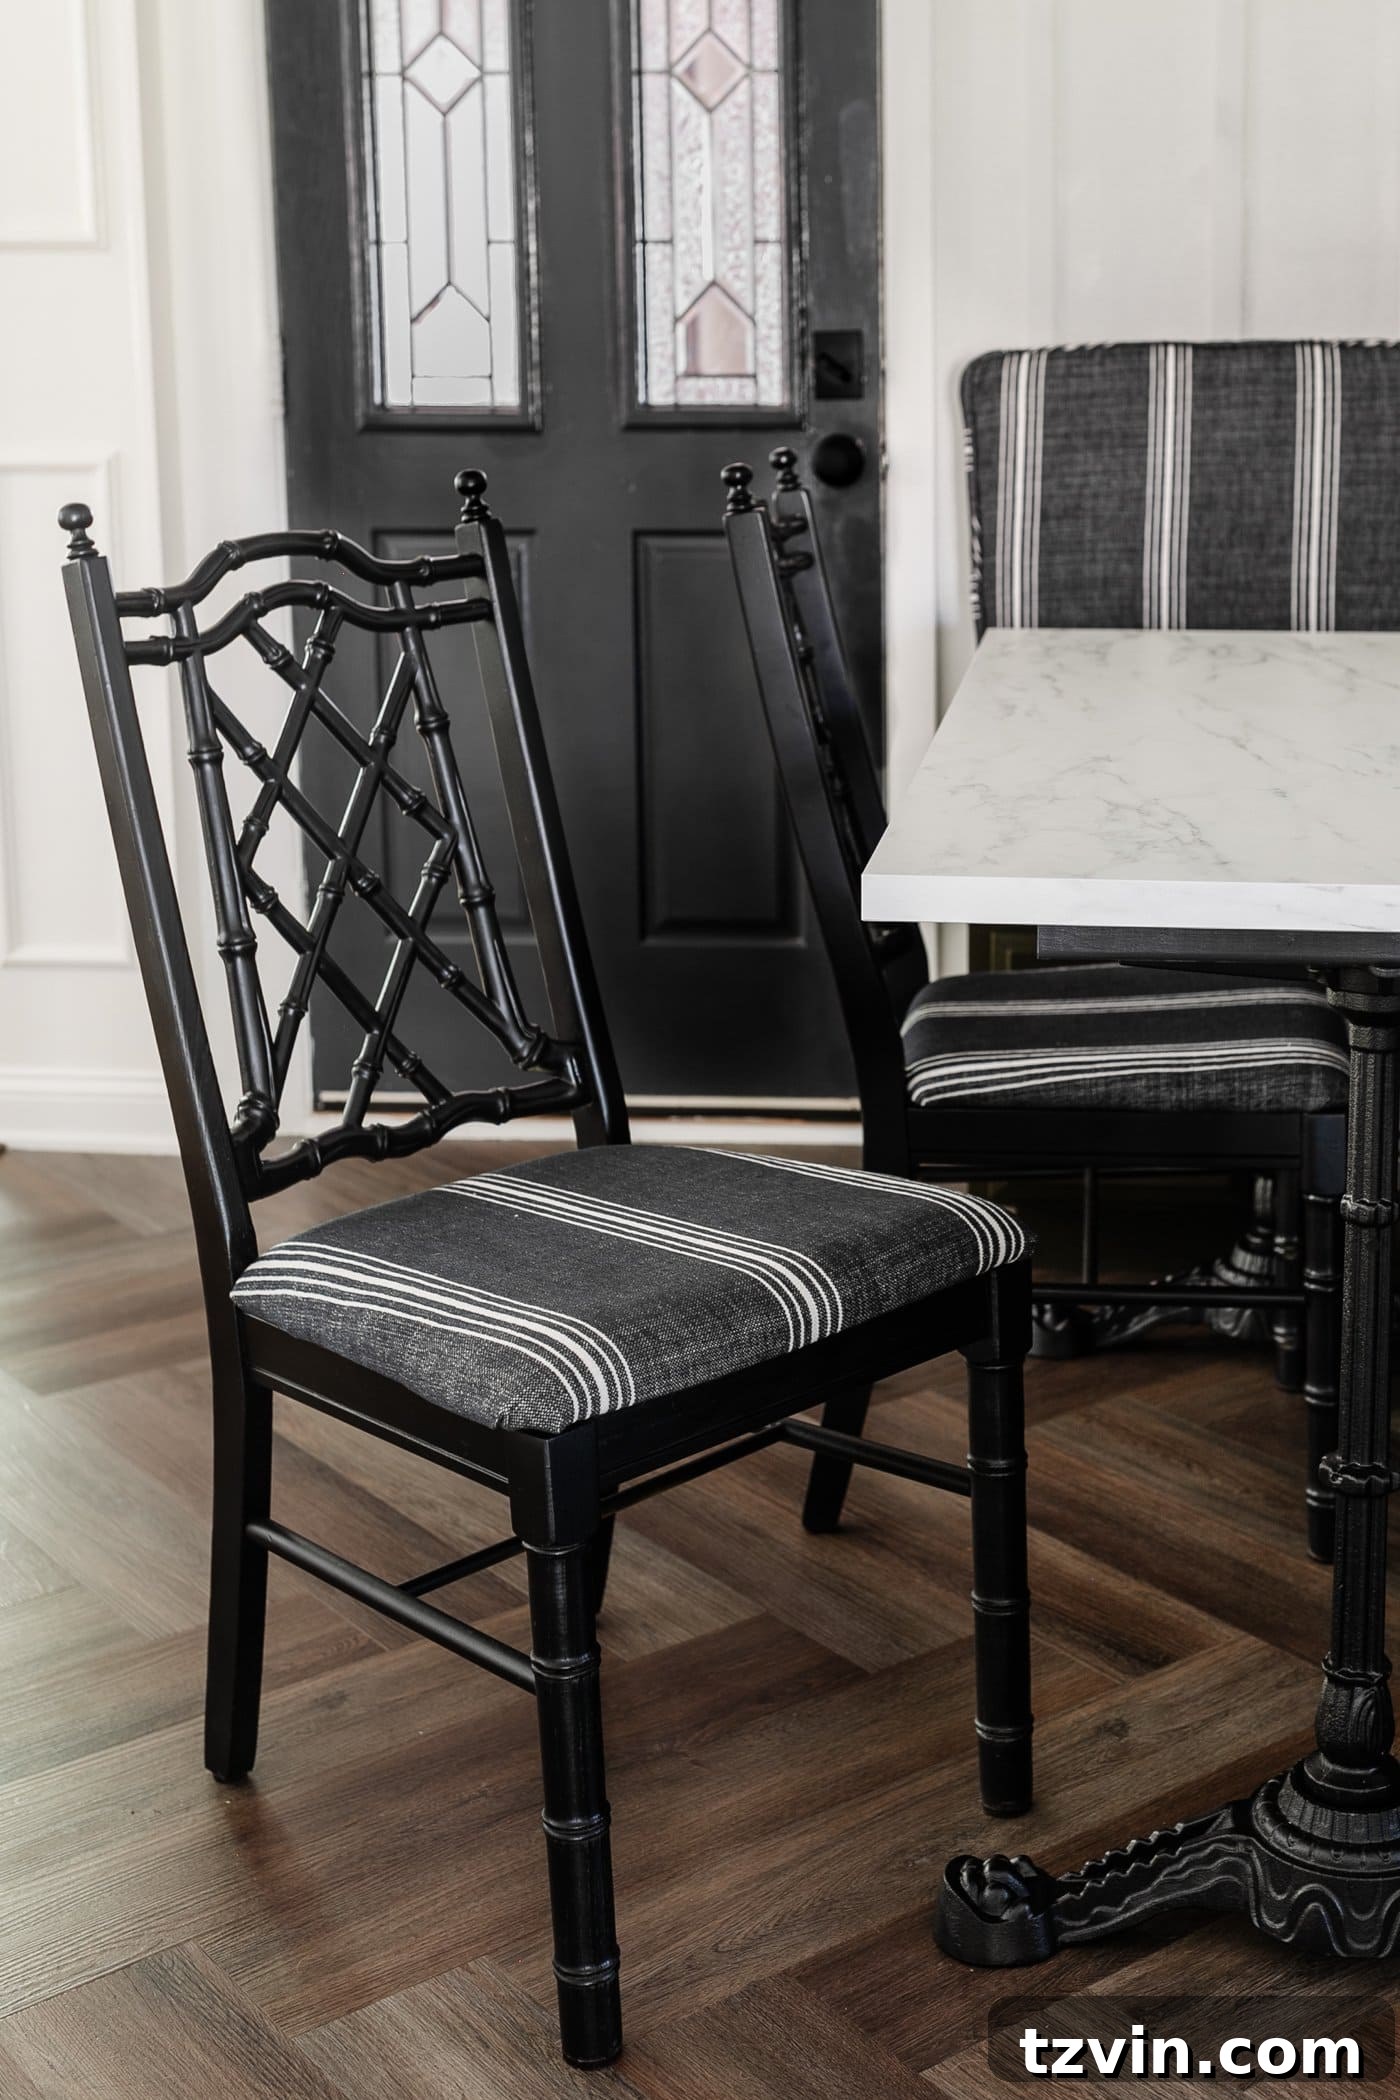
Transform your dining space with this comprehensive, step-by-step tutorial on how to reupholster dining chair seats. Discover how to refresh classic secondhand faux bamboo chairs and achieve a high-end look without the designer price tag.
While sewing might not be everyone’s forte (I certainly have my struggles with a needle and thread!), there are certain upholstery-adjacent projects that are surprisingly accessible to DIY enthusiasts. Reupholstering dining chair seats is one such endeavor that I genuinely believe anyone can master. It’s a fantastic way to breathe new life into old furniture, customize your living space, and save a significant amount of money compared to buying new chairs or hiring a professional.
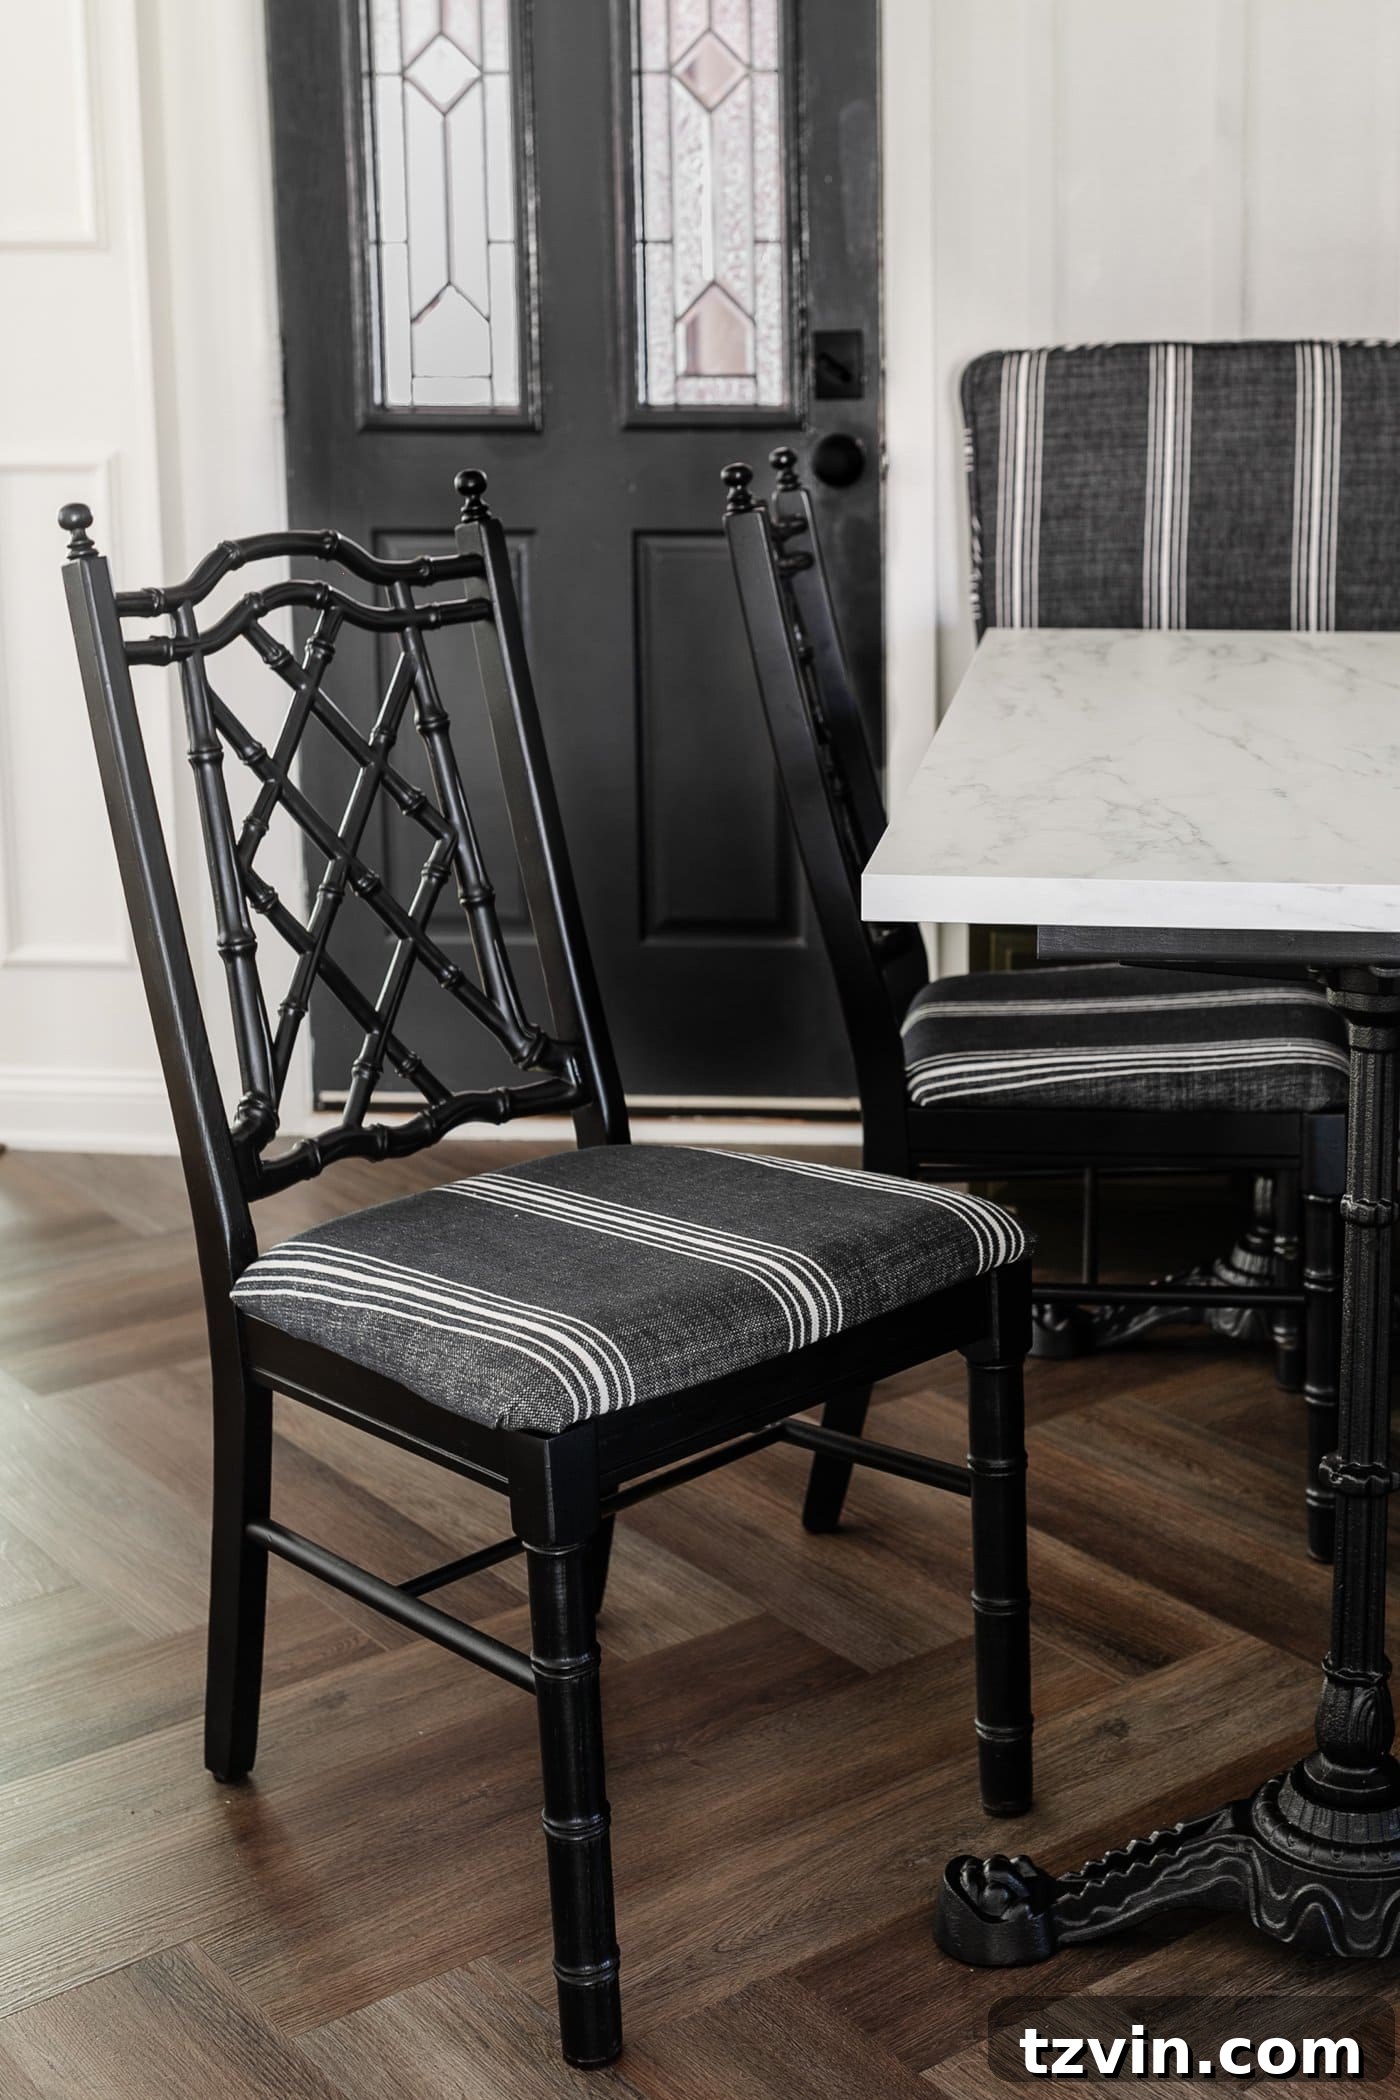
If you’re comfortable with a staple gun and a can of spray paint, you’re well on your way to a successful dining chair makeover. These classic faux bamboo chairs, often found at incredible prices, are especially forgiving and easy to transform, making them an ideal starting point for your DIY upholstery journey. Their simple design allows for straightforward seat removal and reattachment, simplifying the entire process.
I recently discovered a set of these charming faux bamboo chairs on Facebook Marketplace. Priced at just $50 per chair, they were incredibly sturdy, offering a solid foundation for renovation. While their original color and seat upholstery were certainly showing their age and in desperate need of an update, their robust construction made them a diamond in the rough. These kinds of finds are exactly what makes furniture flipping so rewarding!
Essential Reading: How to Find the Best Deals on Facebook Marketplace
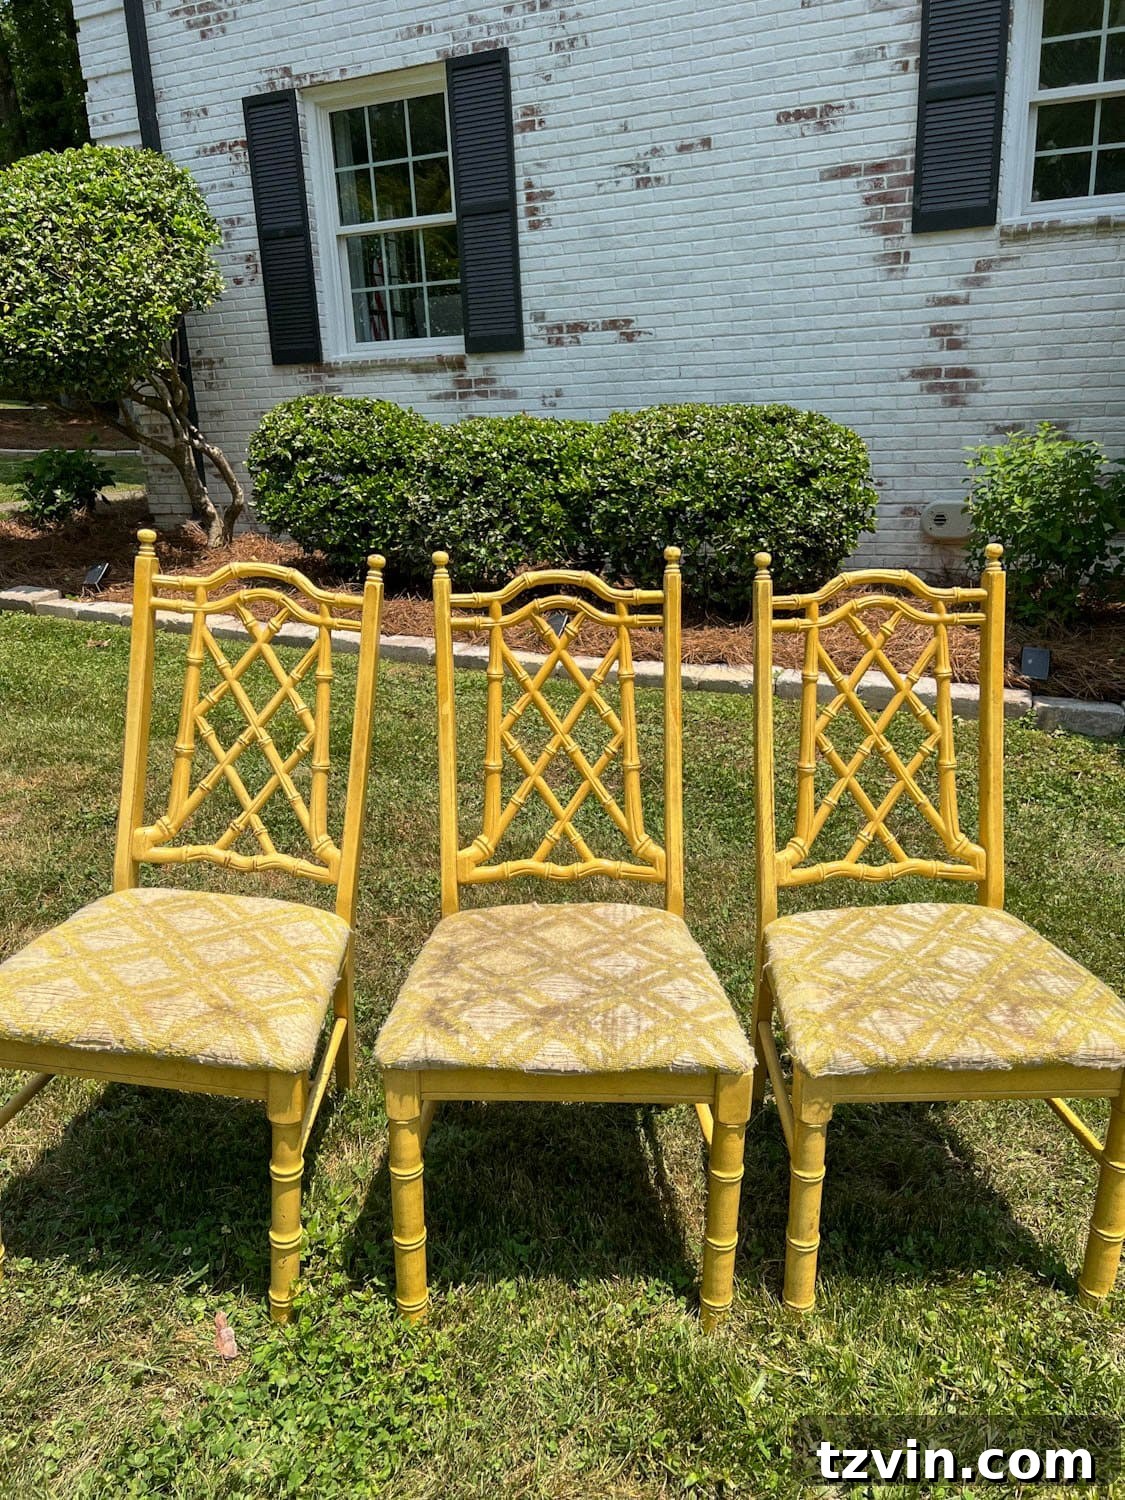
Beyond their initial flaws, these bamboo chairs proved to be the perfect stylistic complement for our breakfast nook makeover. Their classic lines and potential for a vibrant refresh were precisely what the space needed. A little vision and elbow grease were all it took to turn these neglected pieces into stylish, functional additions that perfectly fit our home’s aesthetic.
How to Reupholster Dining Chair Seats: A Beginner-Friendly Guide
Ready to give your dining chairs a stunning new look? This comprehensive guide will walk you through every step of the process, from gathering your materials to reattaching your beautifully updated seats. With a focus on clarity and simplicity, you’ll be amazed at how easily you can achieve professional-looking results.
Supplies You’ll Need for Your Chair Reupholstery Project
Before you begin, gather all your materials. Having everything on hand will make the process smooth and efficient. Choose high-quality tools and fabrics to ensure a durable and attractive finish for your newly upholstered dining chair seats.
- Screwdriver or Power Drill: Essential for quickly and easily removing and reattaching the chair seats. A drill can save considerable time, especially if you have multiple chairs.
- Staple Gun: The star of this project! An electric or pneumatic staple gun will make the job much easier and faster than a manual one, ensuring strong, consistent stapling.
- Upholstery Fabric: The visual heart of your chair makeover. I chose a stain-resistant, high-performance Crypton fabric, found at a fantastic discount. Consider durability, pattern, and cleanability, especially for dining chairs that see frequent use. Always measure your seats and add a generous allowance for wrapping.
- Fabric Scissors: Sharp, comfortable scissors are crucial for precise, clean cuts of your upholstery fabric, preventing fraying and ensuring a neat finish.
- Spray Primer (Optional, if painting chair frame): A critical step if you plan to change the chair frame color. Primer provides excellent adhesion for your paint and helps create a uniform surface, leading to a more durable and professional finish.
- Spray Paint (Optional, if painting chair frame): Choose a high-quality spray paint in your desired color and finish. I often recommend a satin sheen for dining chairs due to its elegant look and ease of cleaning.
Steps for Reupholstering Dining Room Chairs
Important Note: This guide specifically focuses on reupholstering dining chair seats by applying new fabric over existing foam and batting that are still in good condition. If your chair seats require complete foam replacement, batting, or the removal of old, damaged upholstery, you’ll need a more extensive approach. For those more involved projects, please refer to this detailed tutorial that covers comprehensive seat restoration.
Step 1 – Safely Remove the Seat from the Chair Frame
The first step in your dining chair makeover is to carefully detach the seat from its frame. Turn the chair upside down to expose the screws securing the seat. Using either a screwdriver or a power drill, loosen and remove all screws. Make sure to keep these screws in a safe place, as you will need them to reattach the seat later. Inspect the existing seat foam and batting. If it has any unpleasant odors, significant rips, or noticeable lumps, consider removing the old fabric and foam with a staple remover and replacing them for optimal comfort and aesthetics.
Step 2 – Precisely Cut Your Upholstery Fabric
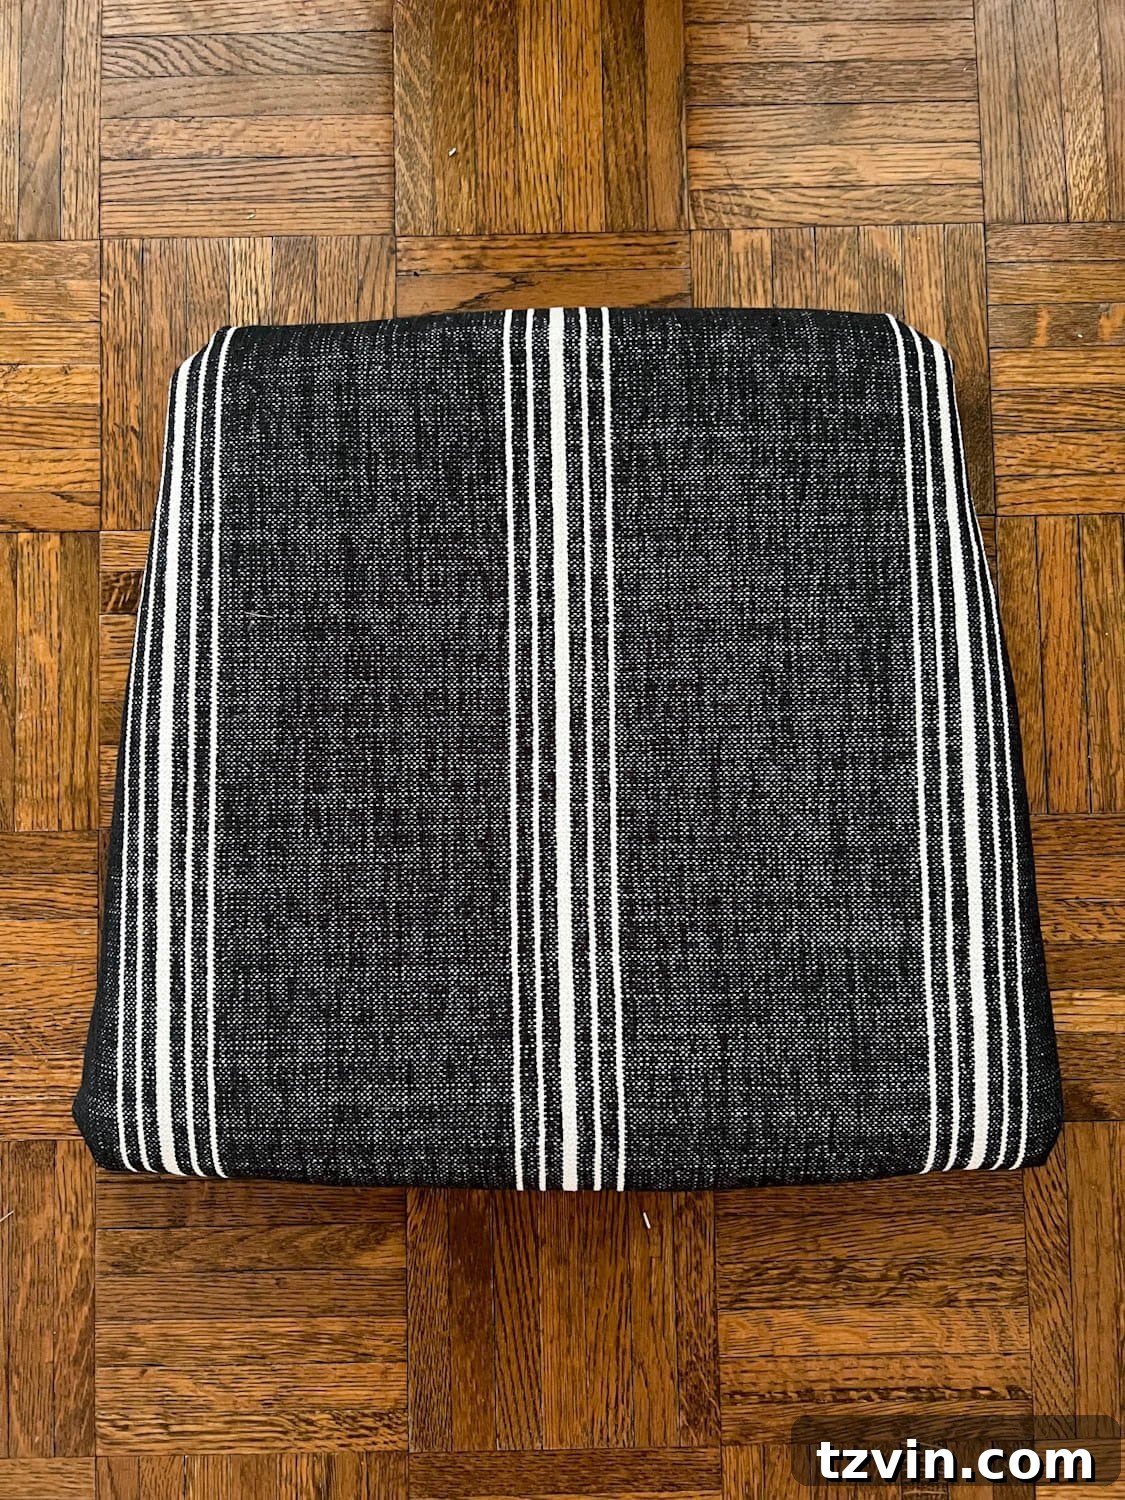
Lay your chosen upholstery fabric face down on a clean, flat surface. Carefully place the removed chair seat centered on top of the fabric, ensuring any patterns are correctly aligned. For fabrics with stripes, like the one I used, it’s crucial to ensure the stripes run symmetrically down the center of the seat for a polished, professional appearance. Using your fabric scissors, cut around the perimeter of the chair seat, leaving a generous margin of 3-4 inches of excess fabric. The exact amount of excess will depend on the thickness of your seat cushion. It is always better to have too much fabric than not enough, so cut generously to allow for adjustments and a firm grip during stapling.
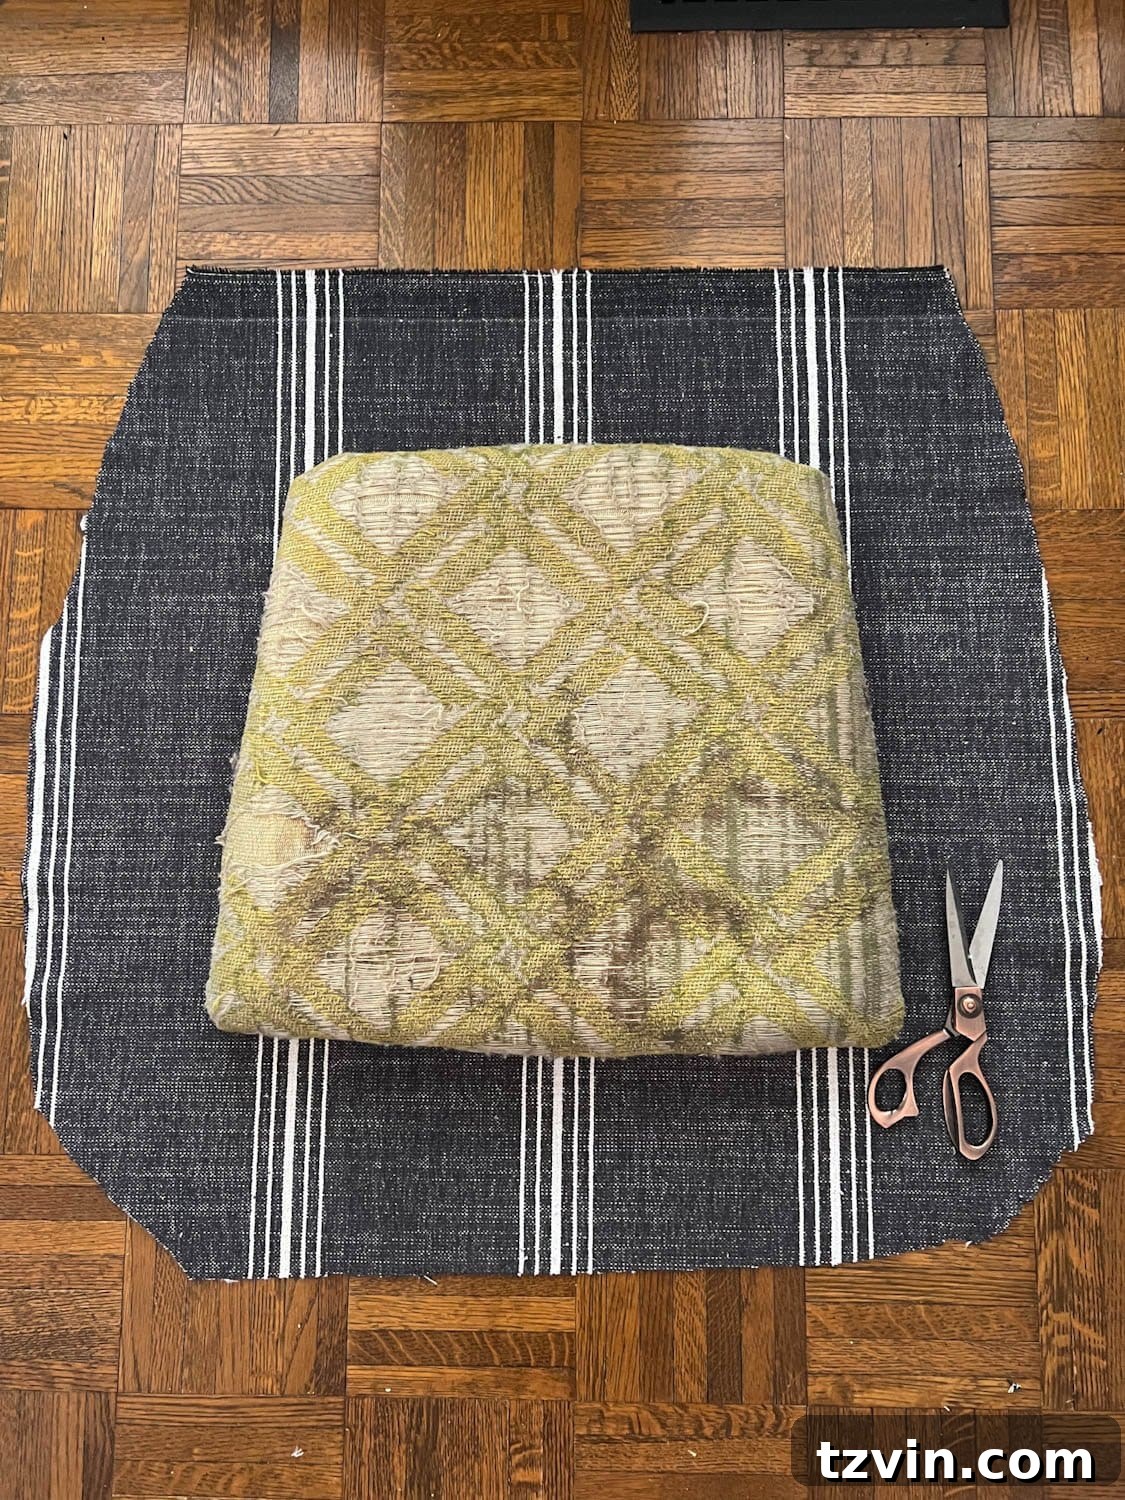
Step 3 – Secure the Front and Back Edges of the Seat with Staples
Now, let’s start the stapling process. Imagine you are wrapping a gift, focusing on smooth, even tension. Place the chair seat on the cut fabric, top-side-down. Select one side of the fabric, ideally a longer side, and pull it firmly up and over the edge of the seat, along the underside. Begin stapling it into place, making sure the fabric remains perfectly smooth on the top surface of the seat, avoiding any wrinkles, puckering, or sagging. Once the first side is securely stapled, move to the directly opposite side. Gently pull the fabric taut – just enough tension to eliminate slack without distorting the pattern or creating bulges – and staple it down. This ensures even tension across the seat.
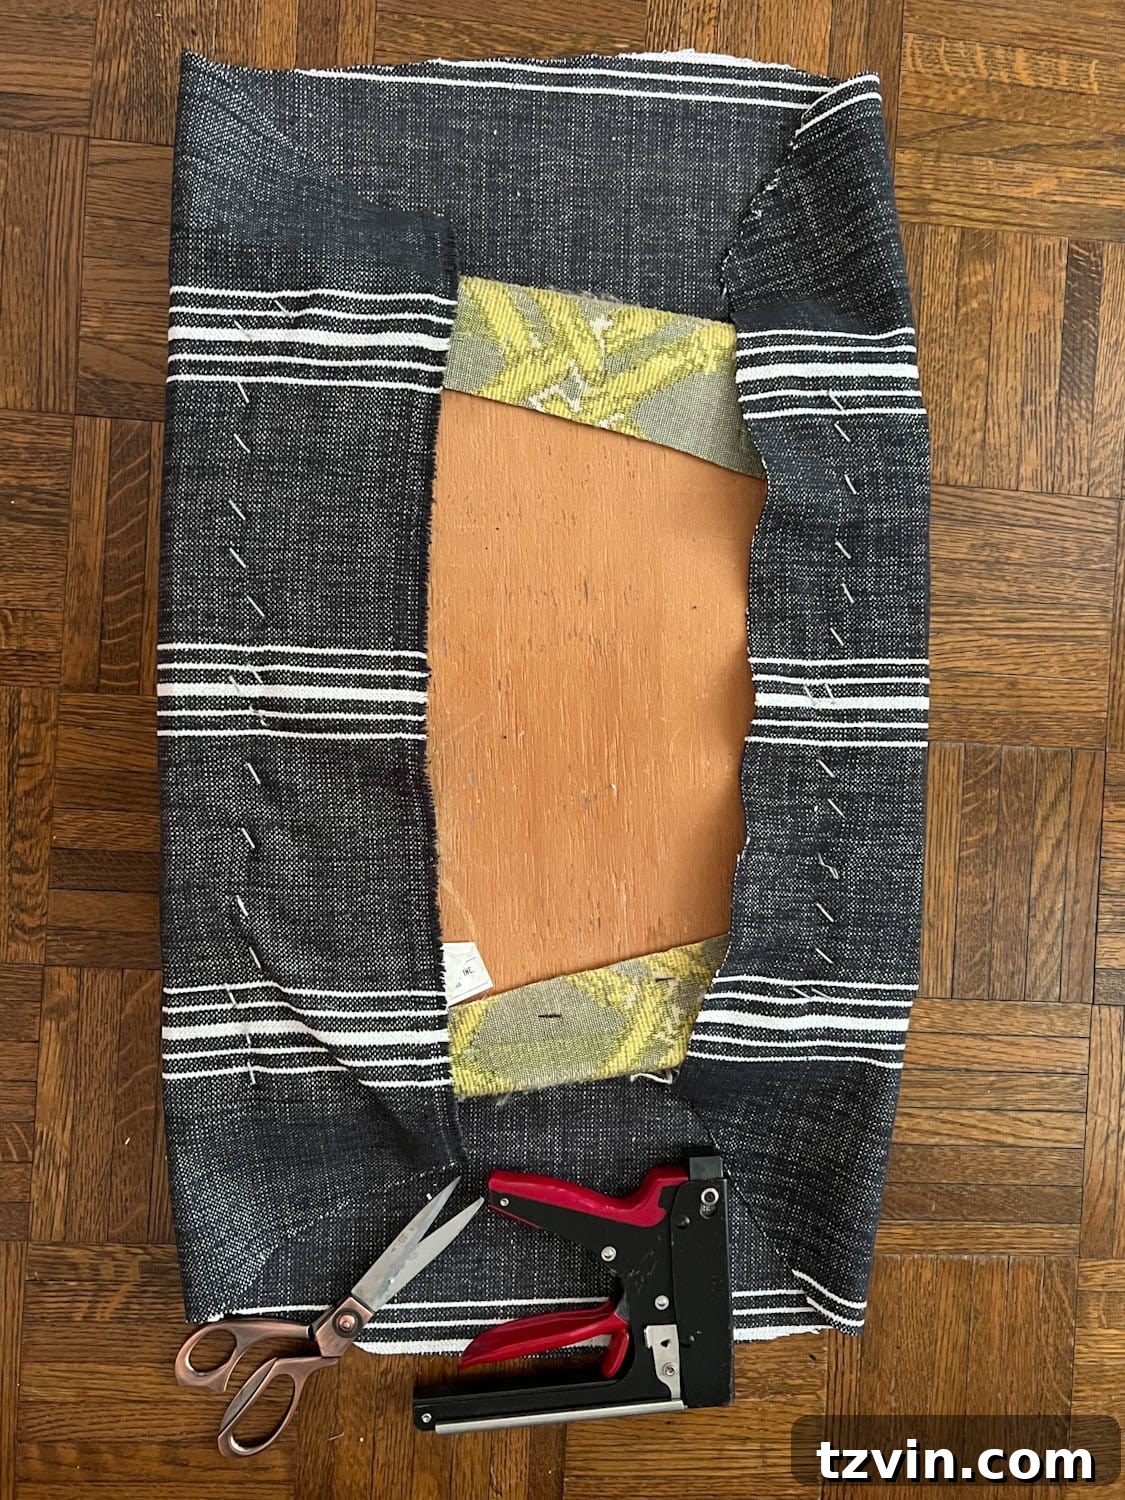
Step 4 – Meticulously Staple the Corners and Remaining Sides
Next, it’s time to tackle the corners for a crisp, tailored look. Turn the seat cushion so you can work on the unstapled sides. At each corner, carefully pull and fold the excess fabric into a neat triangular shape, much like you would fold the corners of a bedsheet or a present. Pull the fabric slightly taut to ensure there are no loose areas on the top surface, then staple it securely in place. After both corners on this side are stapled, pull any remaining excess fabric along the straight edge and staple it, ensuring the fabric is smooth and free from puckering. The goal here is a clean, tight finish that looks professionally done.
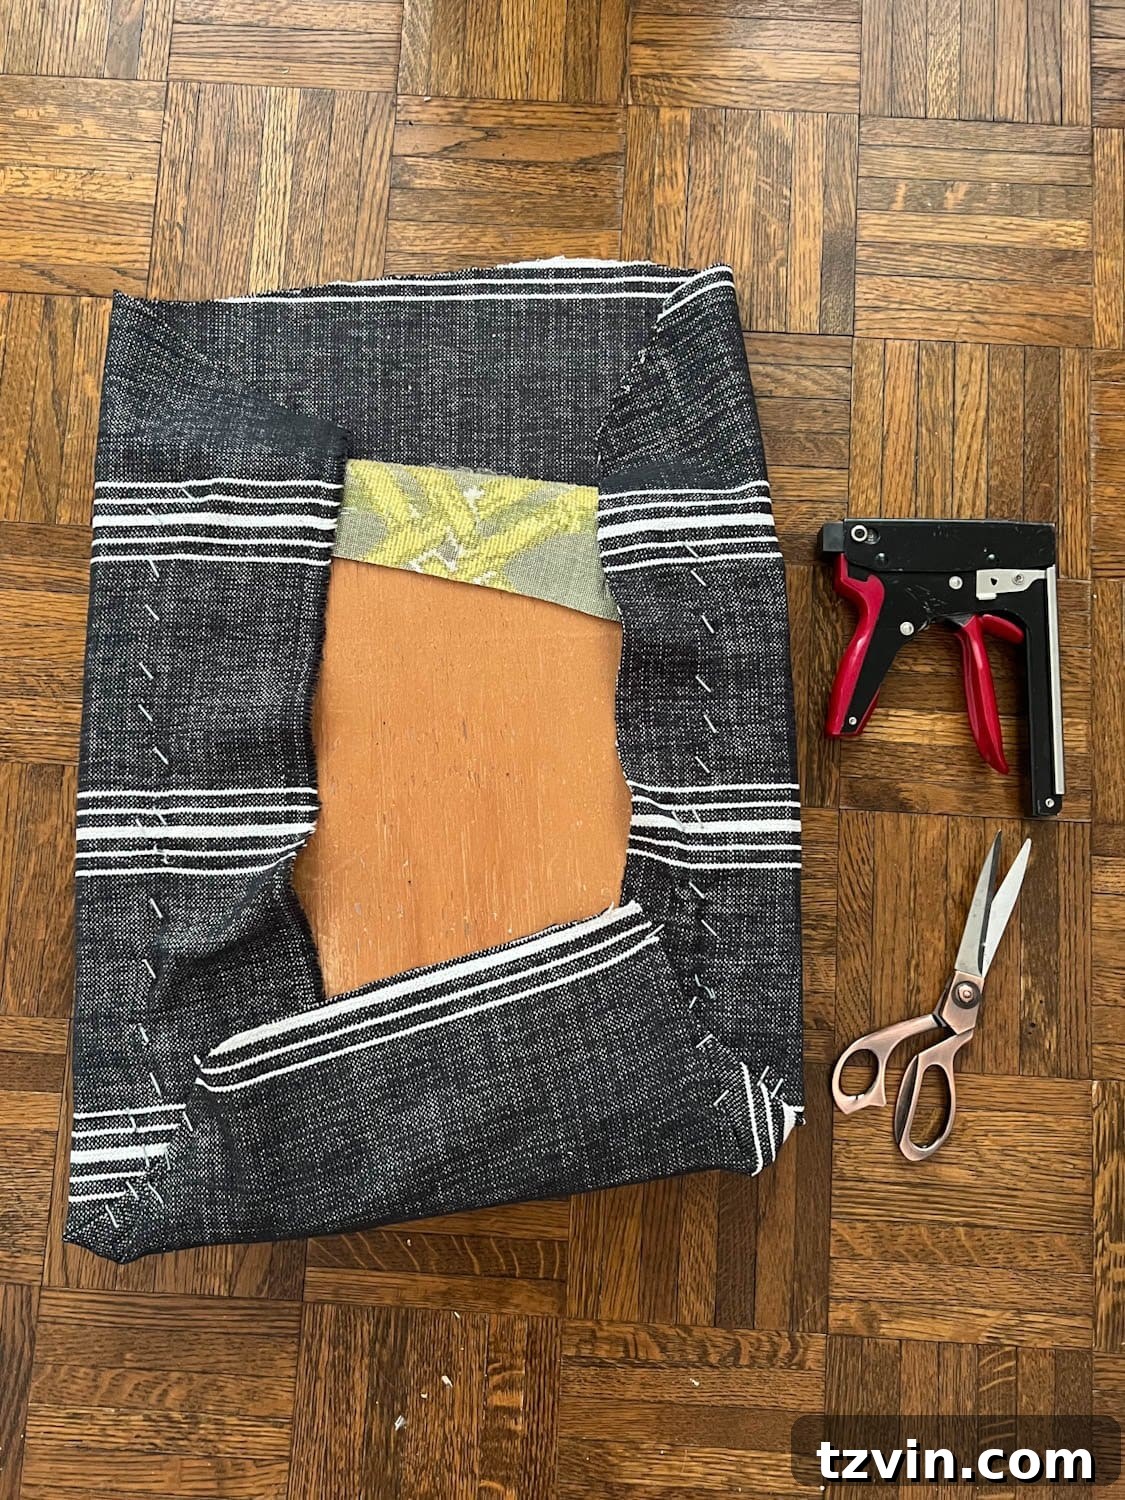
Step 5 – Repeat Stapling for the Final Edge
Continue the process from Step 4 on the fourth and final edge of the dining chair seat. Pay close attention to the corners, folding the fabric neatly and pulling it taut before stapling. Work your way across the straight edge, adding staples every few inches to ensure consistent tension and a smooth, unwrinkled finish. The underside doesn’t need to be perfectly pristine, but ensuring the fabric is well-secured and neatly trimmed will contribute to the longevity and overall appearance of your newly upholstered seat.
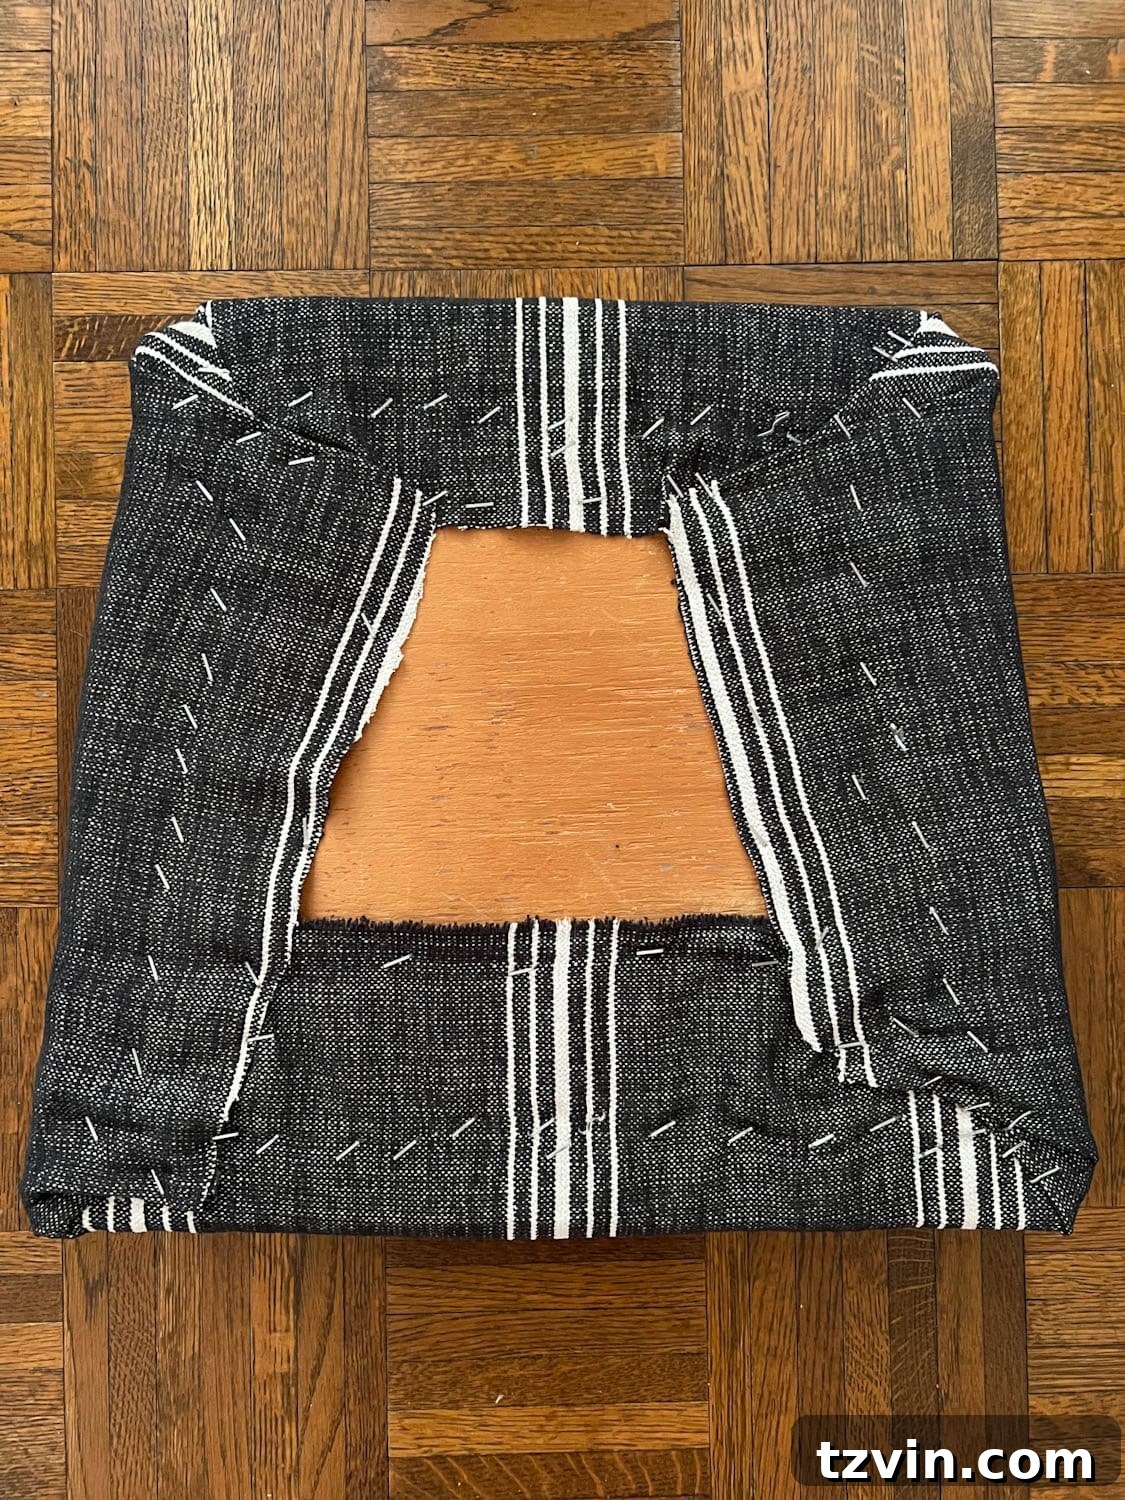
Step 6 – Trim Any Excess Fabric for a Clean Finish
Once all sides and corners are securely stapled, inspect the underside of your chair seat. You’ll likely have some excess fabric hanging down. With your fabric scissors, carefully trim any substantial overhang. Alternatively, you can fold and staple any remaining loose fabric neatly against the seat bottom to prevent it from snagging or becoming visible once the seat is reattached. A tidy underside not only looks better but also ensures the fabric doesn’t interfere with the chair frame or future cleaning.
Step 7 – Prime the Chair Frame (Optional, but Highly Recommended)
If your dining chair makeover includes changing the color of the chair frame, priming is a crucial step that should not be skipped. Dining chairs endure significant wear and tear from daily use, food spills, and frequent handling. Applying a good spray primer beforehand ensures maximum adhesion for your paint, preventing chips and scratches and providing a long-lasting, durable finish. While many spray paints claim to be “paint and primer in one,” for high-traffic furniture like dining chairs, a dedicated primer coat always yields superior results. If you’re painting a dark color, opt for a gray primer instead of white; it will help reduce the number of paint coats needed for full, even coverage.
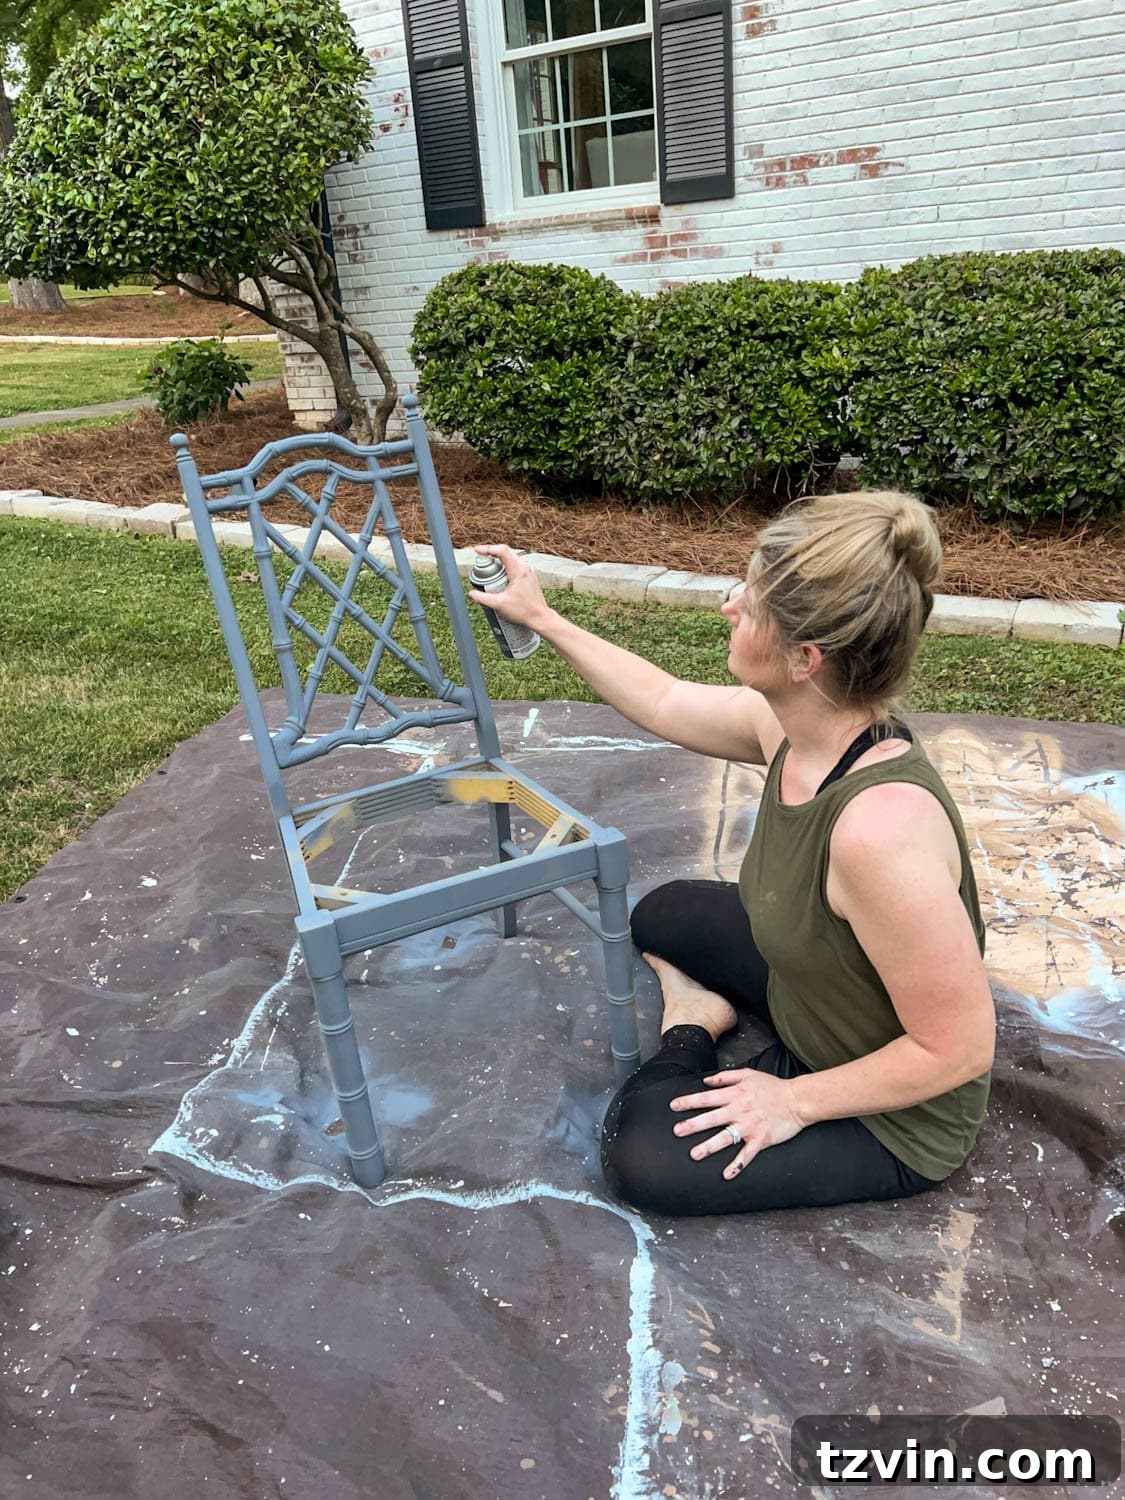
Step 8 – Paint the Chair Frame (Optional)
Once your primer is completely dry, it’s time to apply the paint. For dining chairs with intricate details or many spindles, spray paint is often a more efficient and effective choice than brushing. It provides a smoother, more even finish and significantly speeds up the painting process. Apply 2-3 thin, even coats of your chosen spray paint. Use a steady, sweeping motion, maintaining an appropriate distance from the chair to prevent drips and ensure uniform coverage. Allow each coat to dry according to the manufacturer’s instructions before applying the next. This patience will be rewarded with a flawless, professional-looking finish that will stand the test of time.
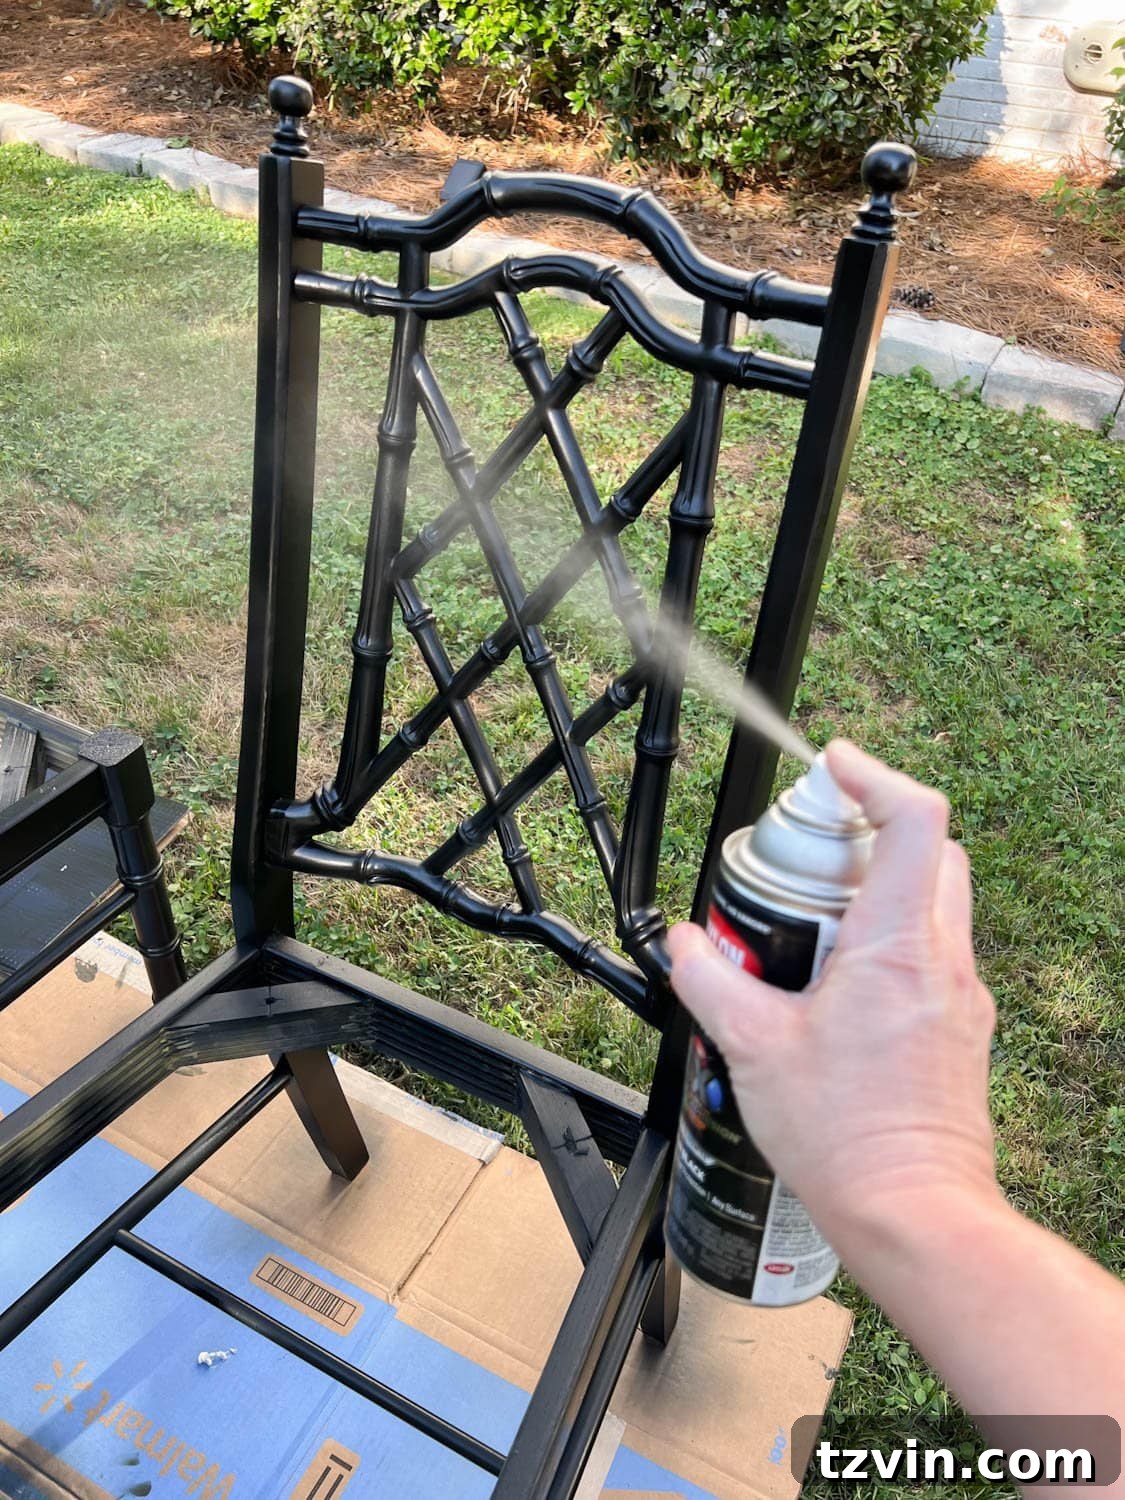
Step 9 – Reattach the Newly Upholstered Seat
With both your chair frame (if painted) and your upholstered seat ready, it’s time for the final assembly. Carefully align the newly covered seat cushion with the screw holes on the chair frame. Using your drill or screwdriver, reattach the seat with the original screws. Ensure all screws are tightened securely, but avoid overtightening, which could damage the wood. Once all screws are in place, your transformed dining chair is ready to be admired and enjoyed!
Behold the Finished Bamboo Chairs: A Stunning Transformation
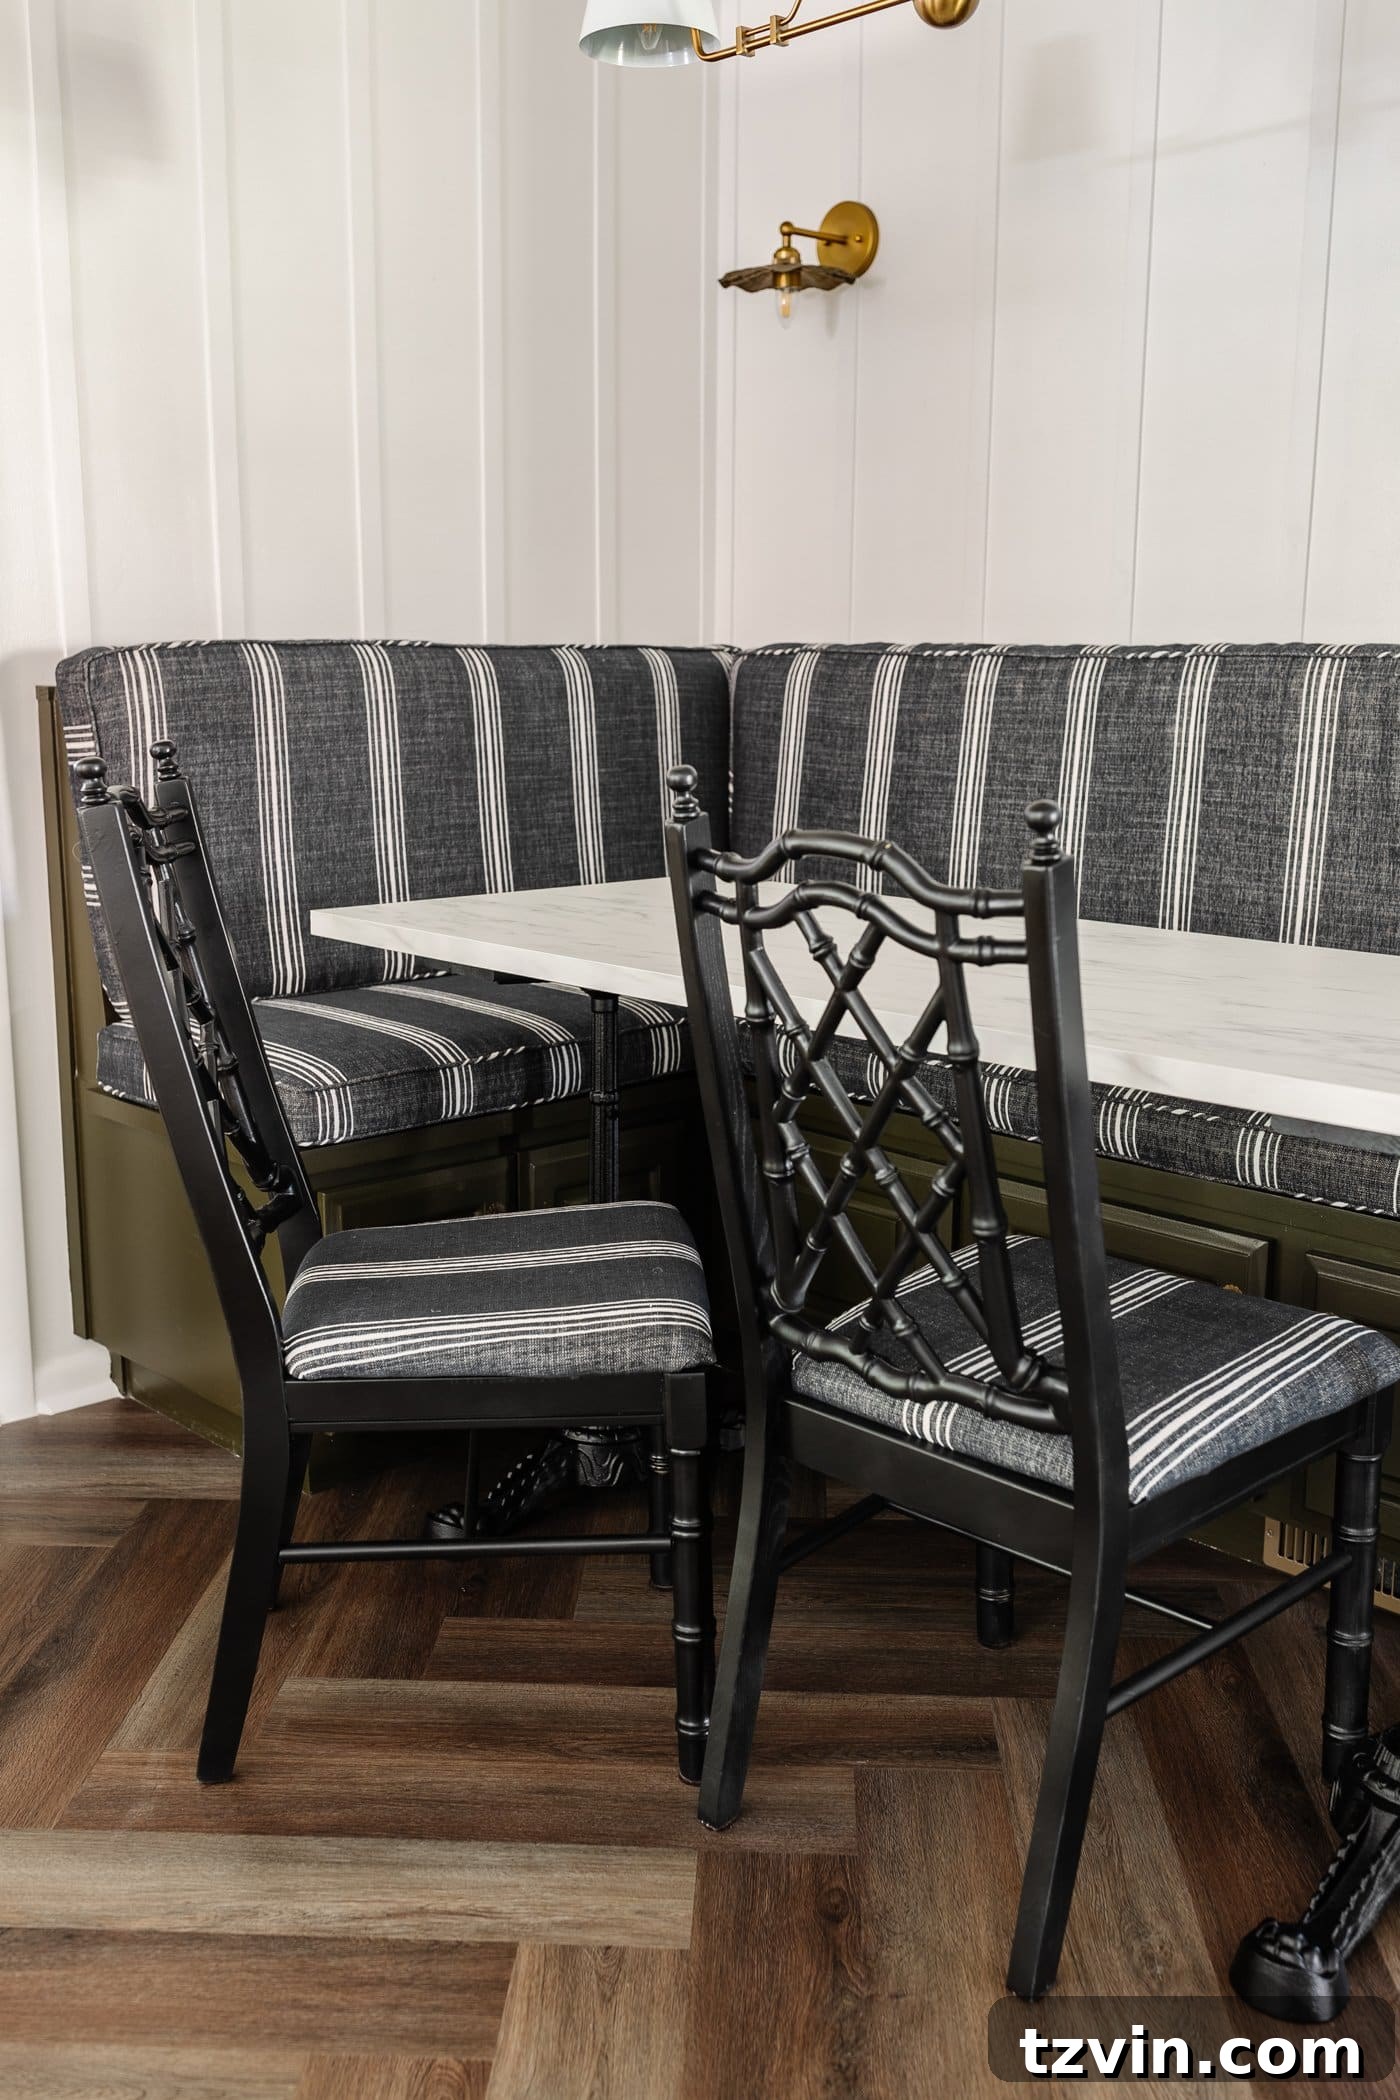
It’s truly incredible to see the dramatic before-and-after! These are indeed the very same bamboo dining chairs I found neglected on Facebook Marketplace. Their subtle nod to the classic Chippendale bamboo style makes them a timeless addition to any space. The total investment for this entire project—including the chairs themselves, the high-performance fabric, and the spray paint—came to an astonishingly low $60 per chair. This is a testament to the power of DIY and savvy shopping!
The effort I put into centering those stripes on the reupholstered chair seats was absolutely worth it; it’s these small details that elevate a DIY project to a custom, designer-quality finish. Now, these chairs don’t just look great; they perfectly complement our banquette bench, creating a cohesive and inviting breakfast nook. And thanks to the stain-resistant Crypton fabric, I no longer have to worry about inevitable spills from the kids, making them both stylish and incredibly practical.
Discover Your Favorite Chippendale Bamboo Chairs for Every Budget
Chinoiserie Chippendale style bamboo dining chairs are renowned for their versatility, effortlessly blending traditional charm with a variety of modern decorating styles. They offer a sophisticated touch that can anchor a dining room or bring elegance to a breakfast nook. If you’re not lucky enough to stumble upon a Facebook Marketplace gem like I did, don’t despair! I’ve curated a selection of my favorite bamboo-style chairs to suit every budget.
While authentic designer bamboo chairs can indeed come with a hefty price tag, there are plenty of less expensive alternatives available that perfectly capture that coveted high-end look without breaking the bank. Whether you’re seeking a specific finish, a different back design, or a set to match your existing decor, exploring these options will help you achieve the chic aesthetic you desire.

Explore and shop for your perfect bamboo chairs by clicking any image in the gallery below.
More Dining Nook Projects to Inspire You
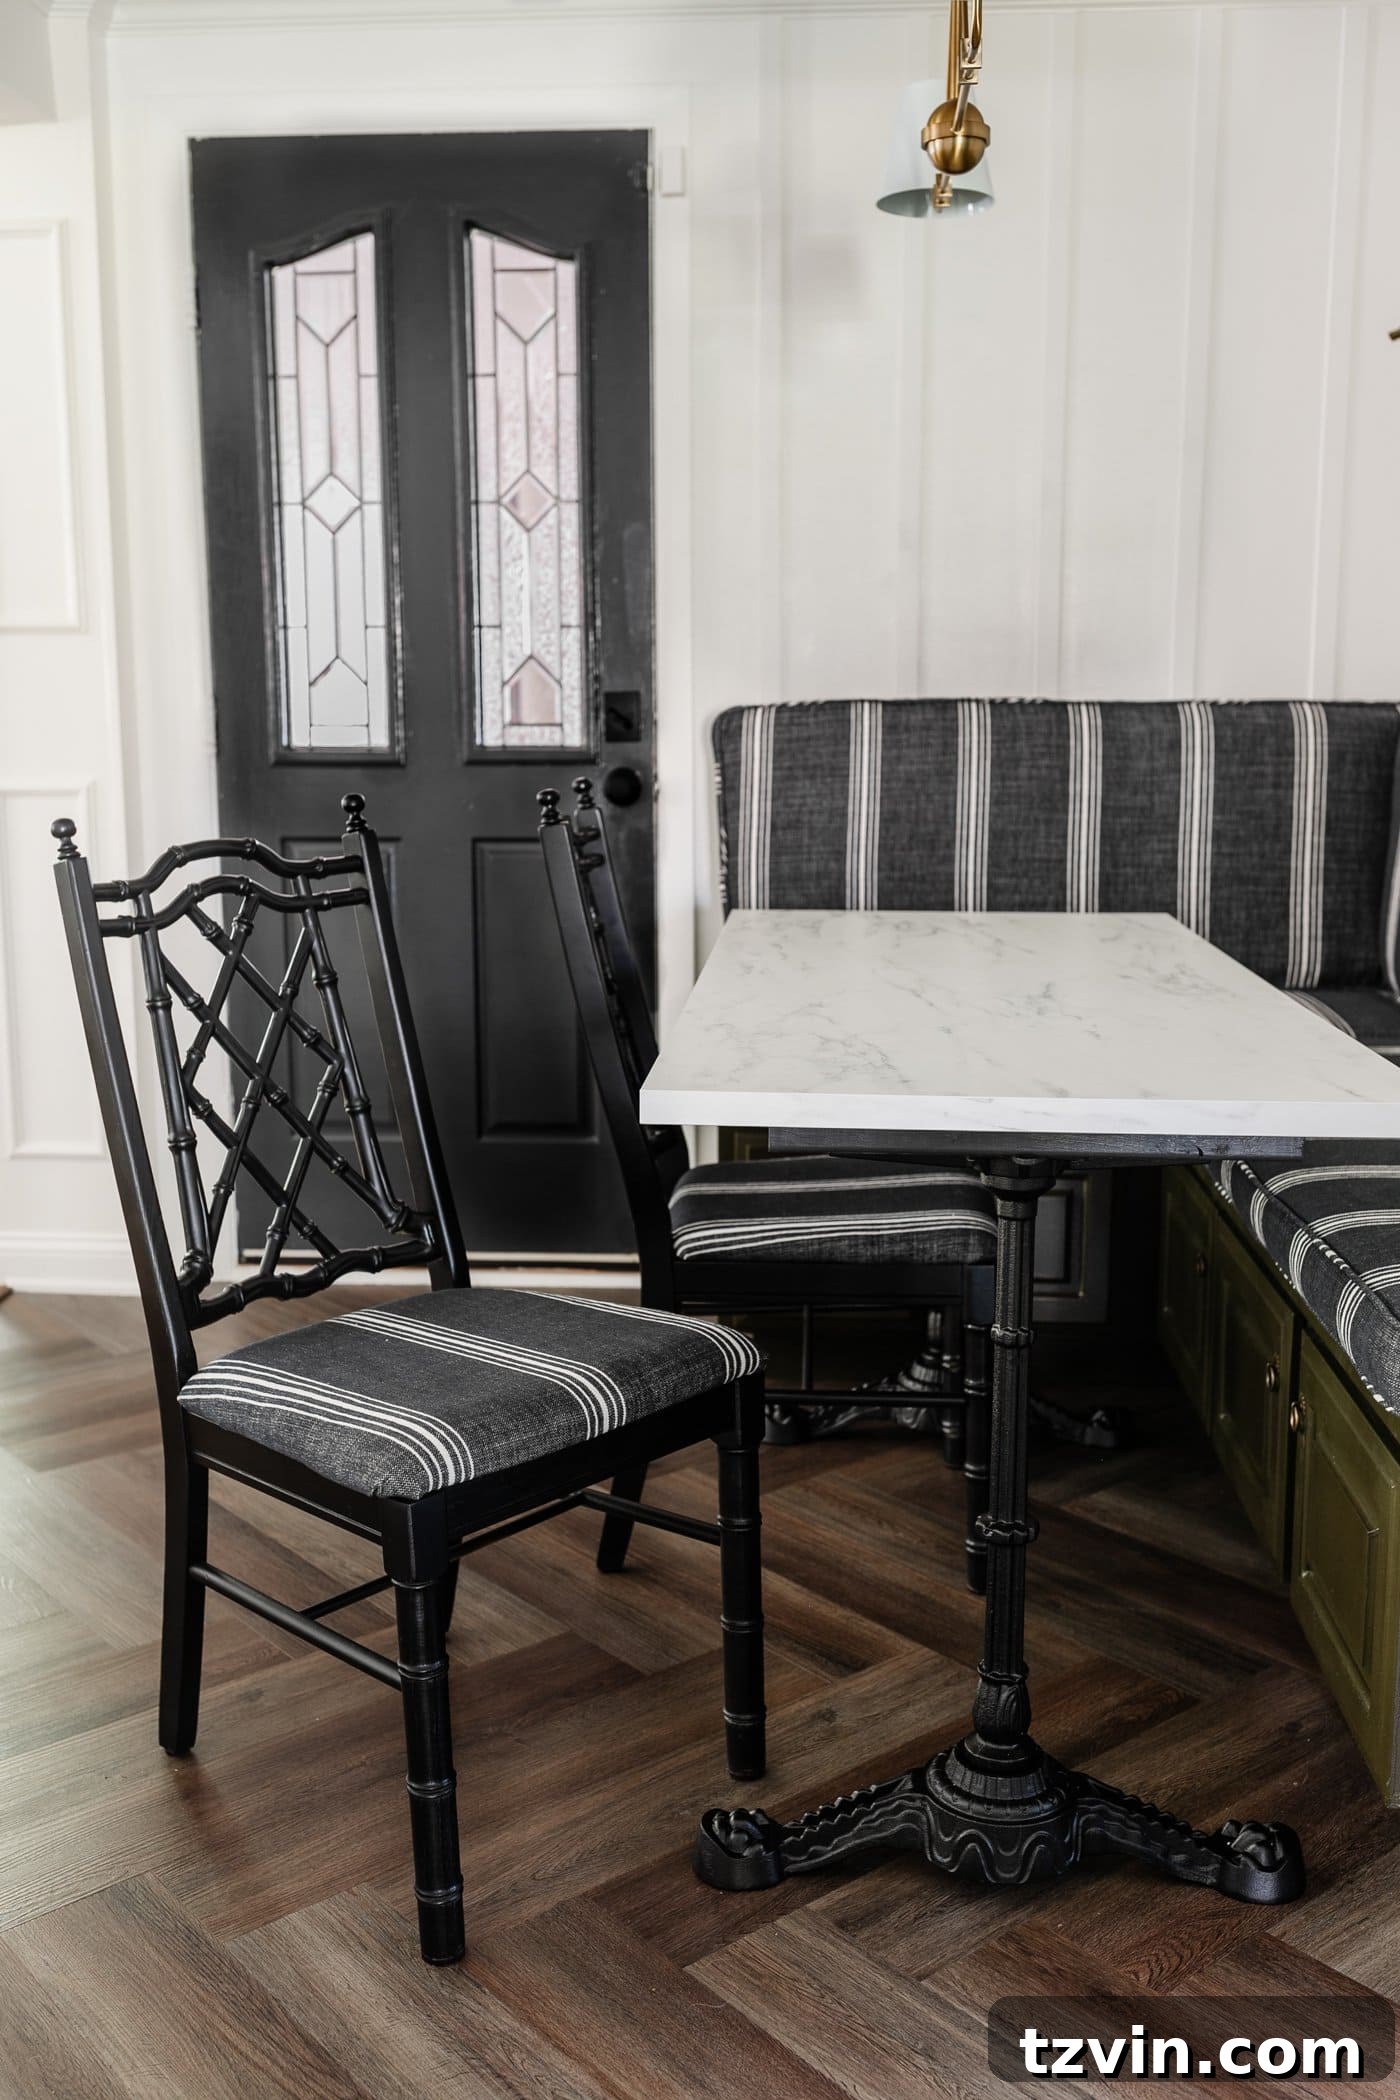
Our dining nook transformation is almost complete! We’re just adding a few final touches, including a beautiful piece of art that I’m eager to hang, and then this space will be truly finished. This reupholstering project was a significant step in achieving the cohesive and inviting look we envisioned. It’s amazing how much impact a few DIY projects can have on a room’s overall feel and functionality.
Here’s a look at some of the other transformative projects we’ve undertaken in this space:
- How to Install a Herringbone LVP Floating Floor Over Tile: Learn how we updated our flooring with a durable and stylish option.
- Corner Banquette Makeover + How to Redirect Air Vents Under Cabinets: Discover how we built custom seating and optimized our space.
- Inexpensive DIY Batten Wall Using Lattice Strips: A budget-friendly way to add architectural interest and character to your walls.
- DIY Faux Marble Dining Table in Under an Hour: See how we created a high-end look for our dining surface with minimal time and cost.
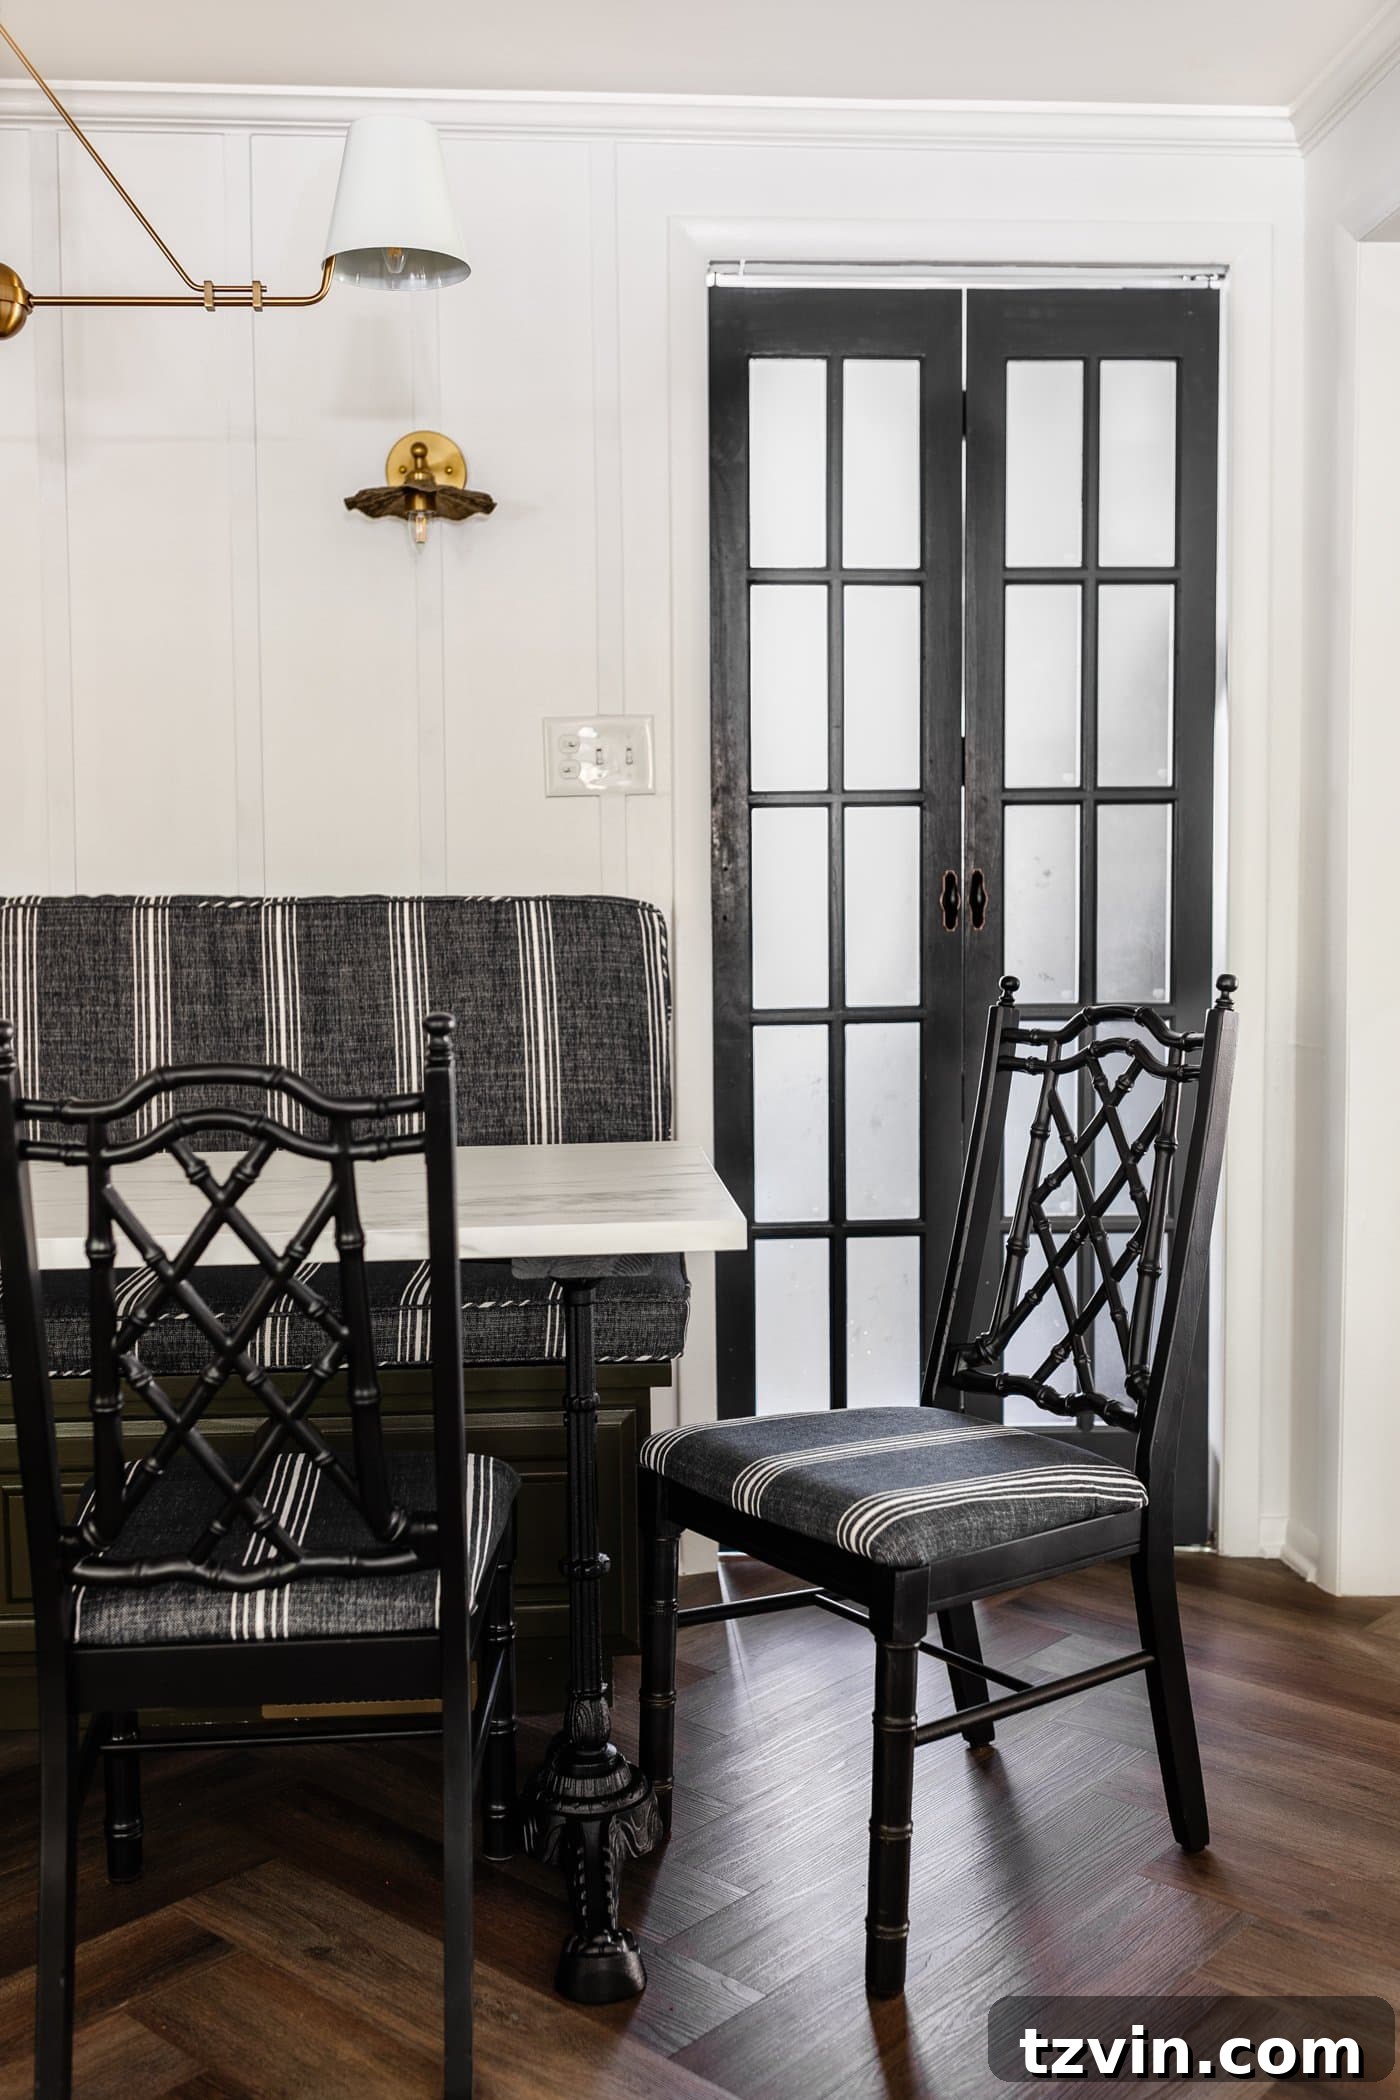
I genuinely cannot believe the significant savings we’ve achieved in remodeling this space. By strategically shopping on Facebook Marketplace for quality pieces and investing a bit of our own time and effort, we’ve managed to create a room that truly reflects our personal style without the prohibitive cost of new furniture or professional services. It just goes to show that with paint, new upholstery, a healthy dose of patience, and some muscle, you can achieve truly amazing transformations in your home.
The full breakfast nook reveal is just around the corner, so stay tuned for the final look!
Expand Your Skills with More Furniture Flip Tips and Ideas
Inspired by this dining chair makeover? There’s a whole world of furniture flipping waiting for you to explore. Dive into these additional resources to further hone your DIY skills and discover new ways to transform everyday pieces into extraordinary statements:
- Beginner’s Guide to Painting Furniture: Master the fundamentals of furniture painting for flawless results.
- How to Clean Wood Furniture to Make It Look New: Learn essential cleaning techniques to revitalize tired wooden pieces.
- Faux Marble Top Coffee Table: Create an elegant, high-end look on a budget.
- Footed Grasscloth Buffet Makeover: Add texture and sophistication to a basic buffet.
- The Trick to Paint Laminate IKEA Furniture: Unlock the secret to painting notoriously tricky laminate surfaces.
- How to Turn a Console Table Into a Bathroom Vanity: A creative and functional upcycling project for your bathroom.