
Unveiling the Best Rub n Buff Metallic Colors: Your Ultimate Guide to Gold, Silver, and Copper Finishes for Craft Projects
In the vast world of crafting and DIY, certain supplies stand out as absolute game-changers. For many, Rub n Buff is one such treasure, often ranked alongside essentials like the hot glue gun for its transformative power. It’s not just a product; it’s a metallic marvel that breathes new life into ordinary objects, bestowing upon them a convincing, lustrous finish that mimics real gold, silver, or copper with unparalleled authenticity.
Having countless projects under my belt where Rub n Buff has played a pivotal role, I often find myself pondering which specific shade will deliver the perfect metallic touch. This ongoing quest for the ideal hue, particularly for an upcoming bathroom renovation that required a precise match for new hardware, inspired a comprehensive color experiment. Much like my previous ranking of gold spray paints, this detailed comparison aims to demystify the Rub n Buff palette, offering clarity and guidance for your future creative endeavors.
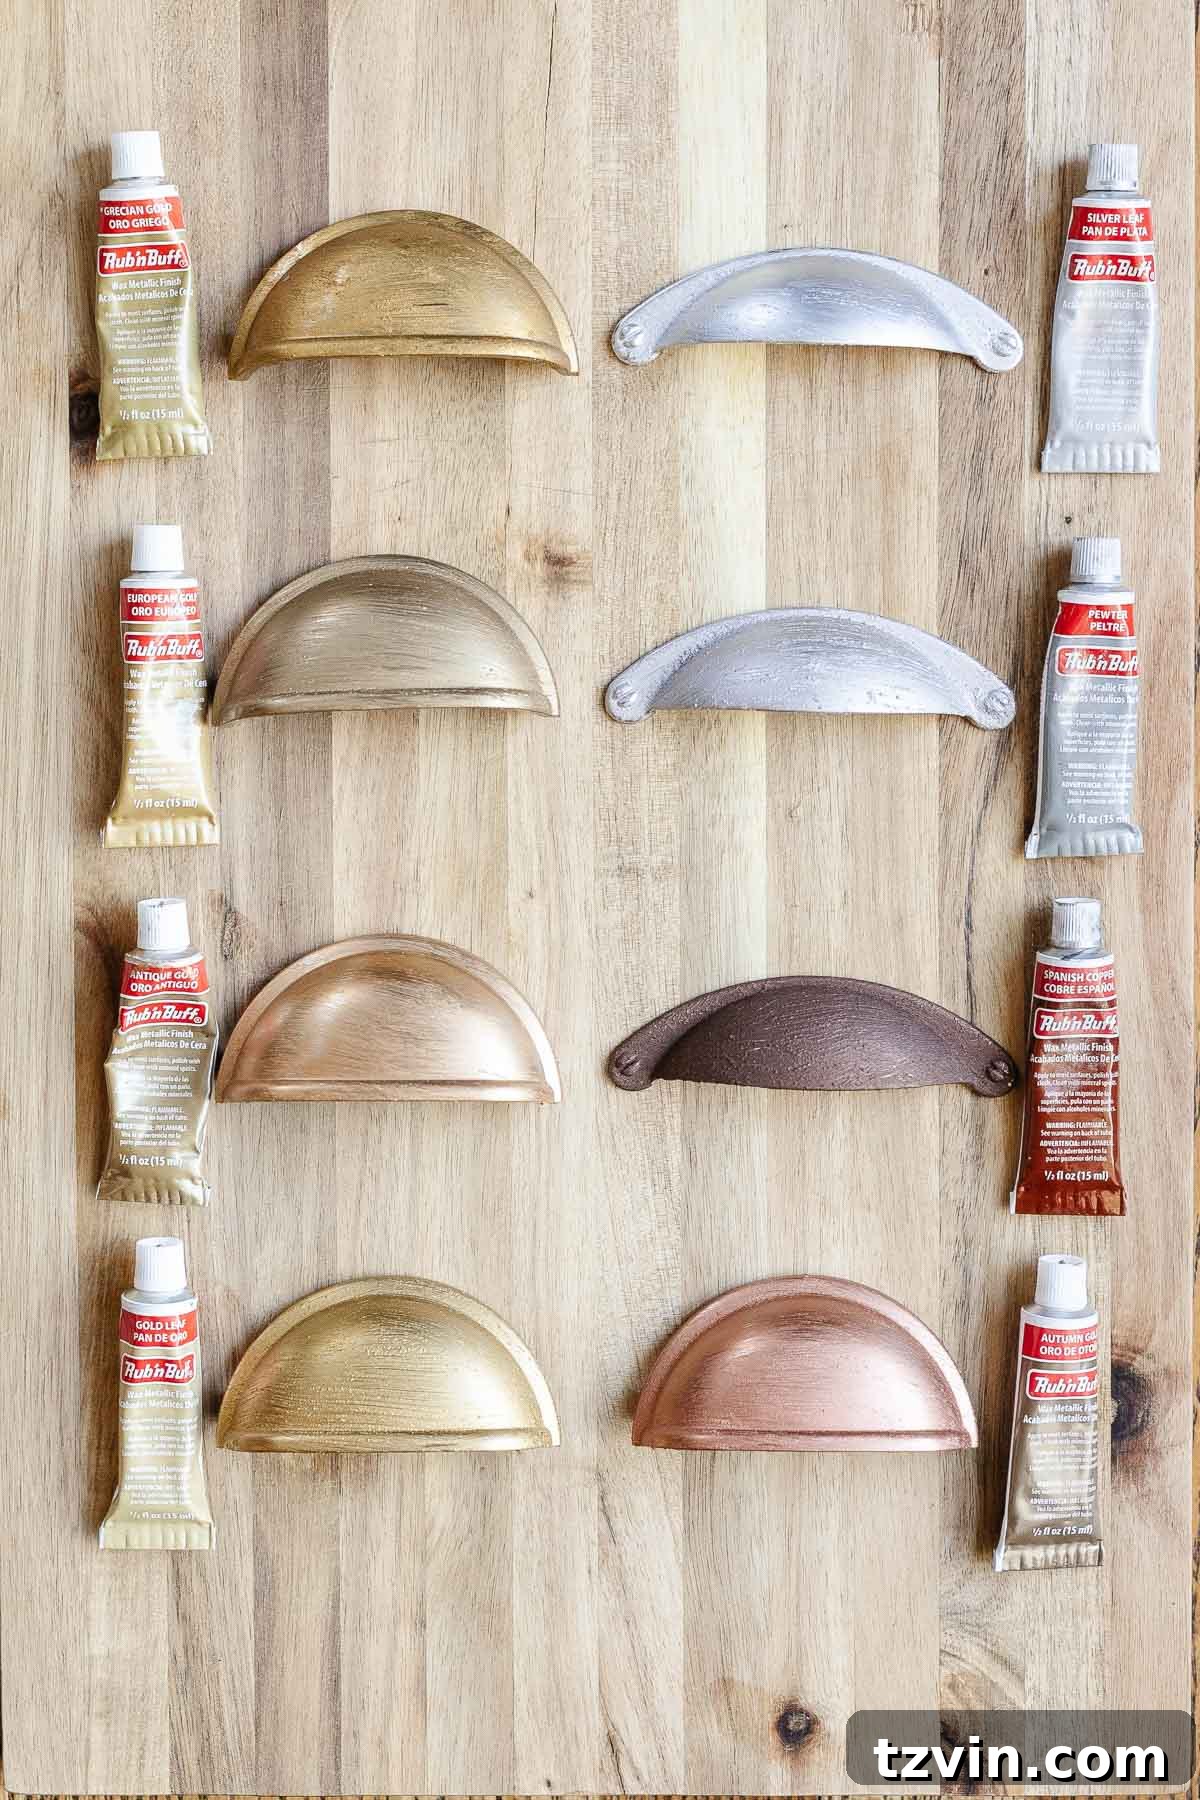
Whether you’re looking to achieve an antique patina, a modern shimmer, or a vibrant metallic pop, understanding the nuances of each Rub n Buff color is key. This guide will delve deep into the application techniques, offer practical tips, and, most importantly, provide a side-by-side comparison of the most popular gold, silver, and copper shades to help you select the perfect finish every time.
Related: The Best Gold Spray Paints: Ranked
What Exactly is Rub n Buff?
Often mistaken for a paint, Rub n Buff is a unique blend that stands in a league of its own. It’s a rich concoction of carnauba waxes, finely milled metallic powders, and concentrated pigments. This distinctive composition is what allows it to impart a truly authentic metallic luster, far surpassing the often flat or artificial appearance of conventional metallic paints. Its magic lies in its ability to be literally rubbed onto a hard surface, allowing the user to control the depth and shine, and then buffed to a brilliant sheen.
Unlike liquid paints that coat a surface, Rub n Buff embeds its metallic particles into the surface, creating a dimensional finish that catches the light beautifully. This isn’t just about changing a color; it’s about transforming the very essence of an object, giving it the genuine look and feel of solid metal.
Endless Possibilities: What to Use Rub n Buff On
The versatility of Rub n Buff is truly astounding. From subtle enhancements to complete transformations, it can be applied to a myriad of household items and craft projects. Its ability to adhere to various materials like metal, wood, plastic, ceramic, and glass makes it an indispensable tool for DIY enthusiasts. I’ve personally used it to elevate countless pieces, giving them a high-end, custom look without the hefty price tag.
Here are just a few examples of items that can be beautifully revitalized with Rub n Buff:
- Light Fixtures: Transform an ordinary fixture into a focal point, giving it the appearance of an expensive designer piece. See this light fixture makeover for inspiration.
- Furniture Hardware: Upgrade drawer pulls, cabinet handles, and hinges to match new decor or restore their original glory.
- Door Hinges and Knobs: Refresh tired door hardware, creating a cohesive look throughout your home.
- Lamps: Give old lamp bases a luxurious update, whether they are ceramic, metal, or even plastic.
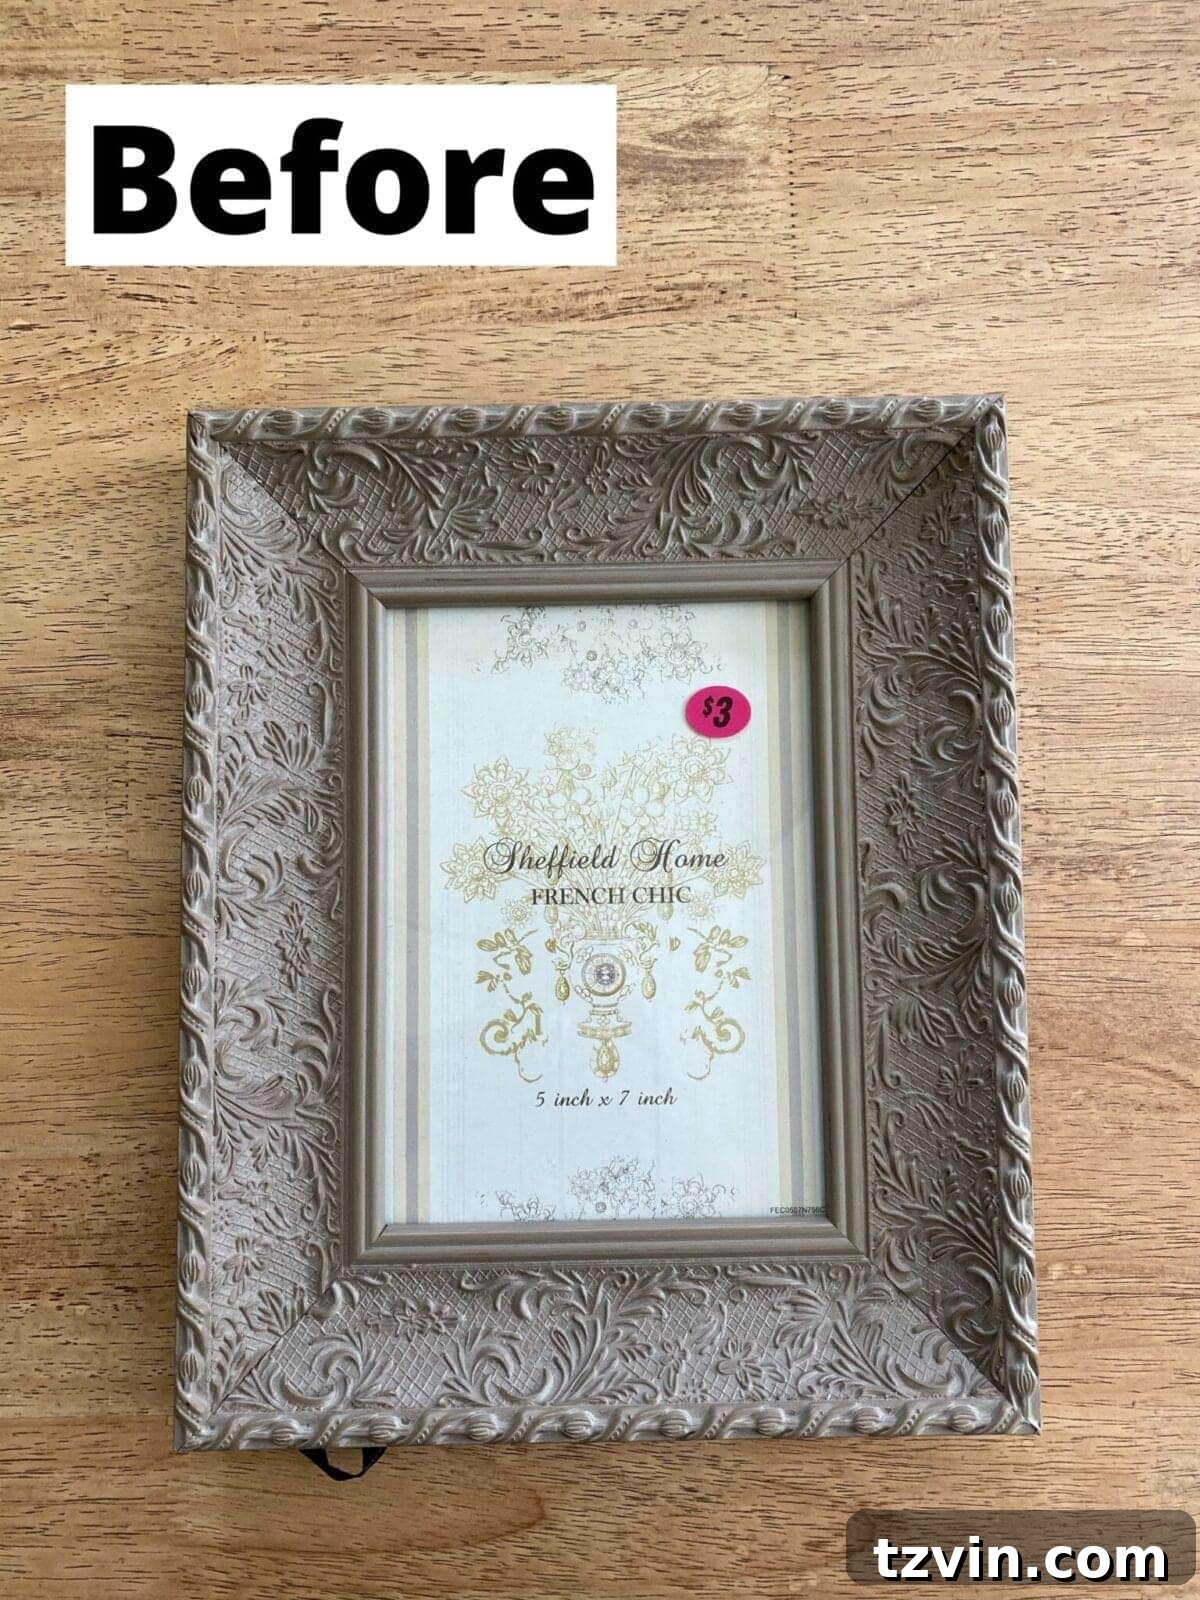
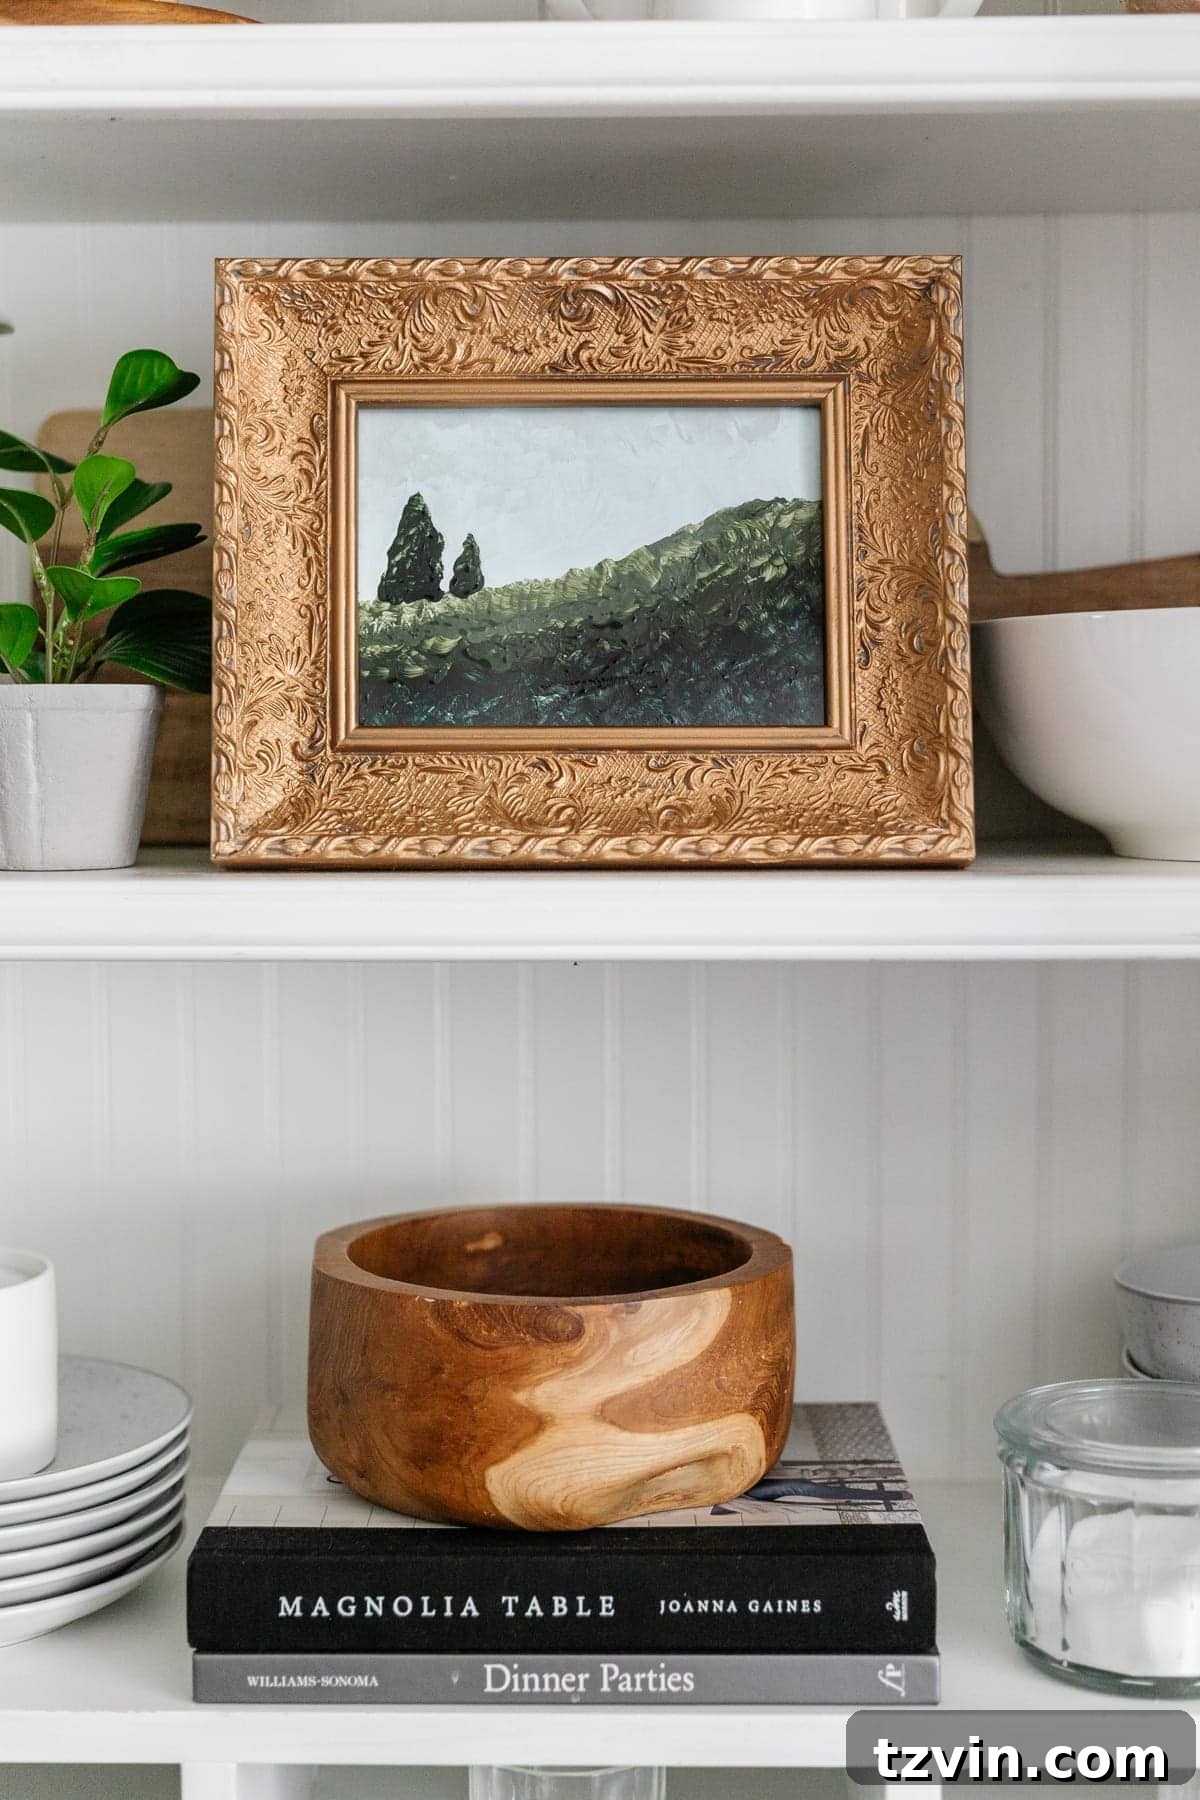
- Picture Frames and Mirror Frames: Add a touch of elegance or create an aged, antique effect. Check out this frame project.
- Planter Pots: Turn simple terracotta or ceramic pots into decorative accents with metallic rims or full-body finishes.
- Christmas Ornaments: Personalize holiday decorations with a custom metallic sheen.
- Exposed Screws: A quick dab can make unsightly screws blend in or even become decorative elements.
- Jewelry and Accessories: Repair tarnished costume jewelry or create unique pieces.
- Small Decorative Objects: Vases, figurines, and other trinkets can be transformed from drab to fab.
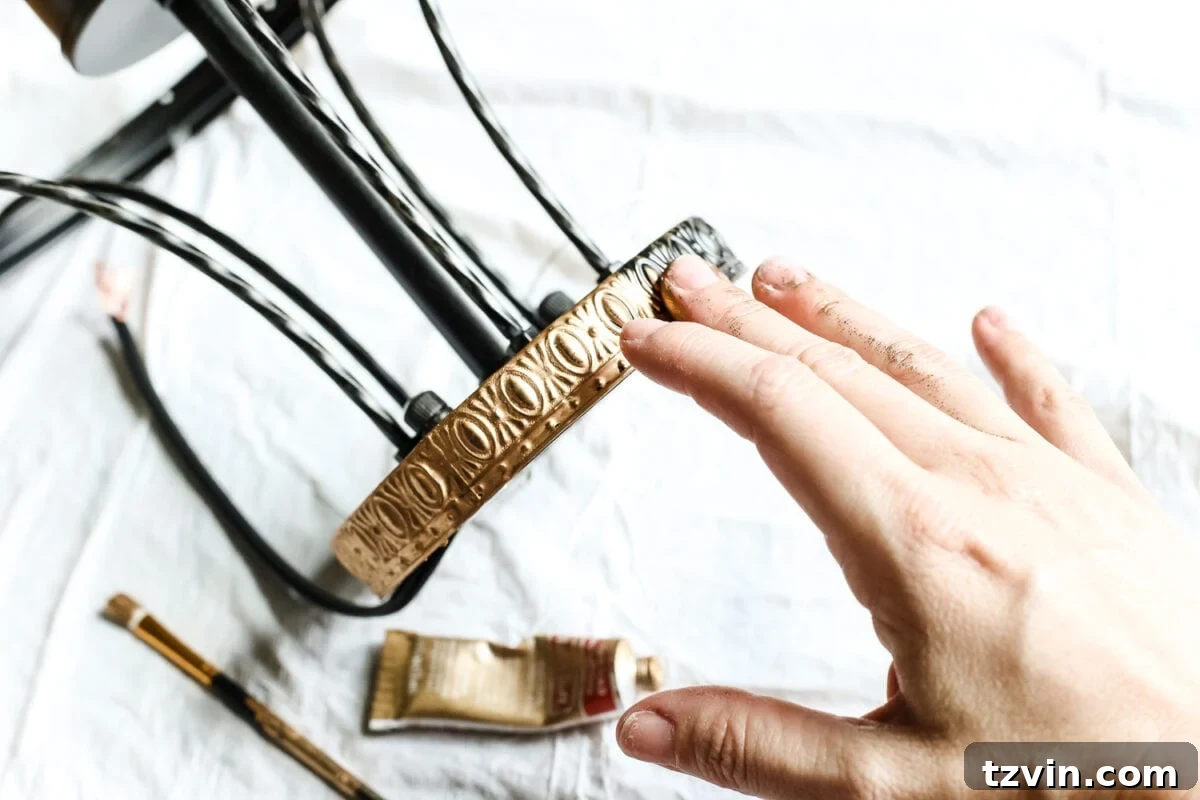
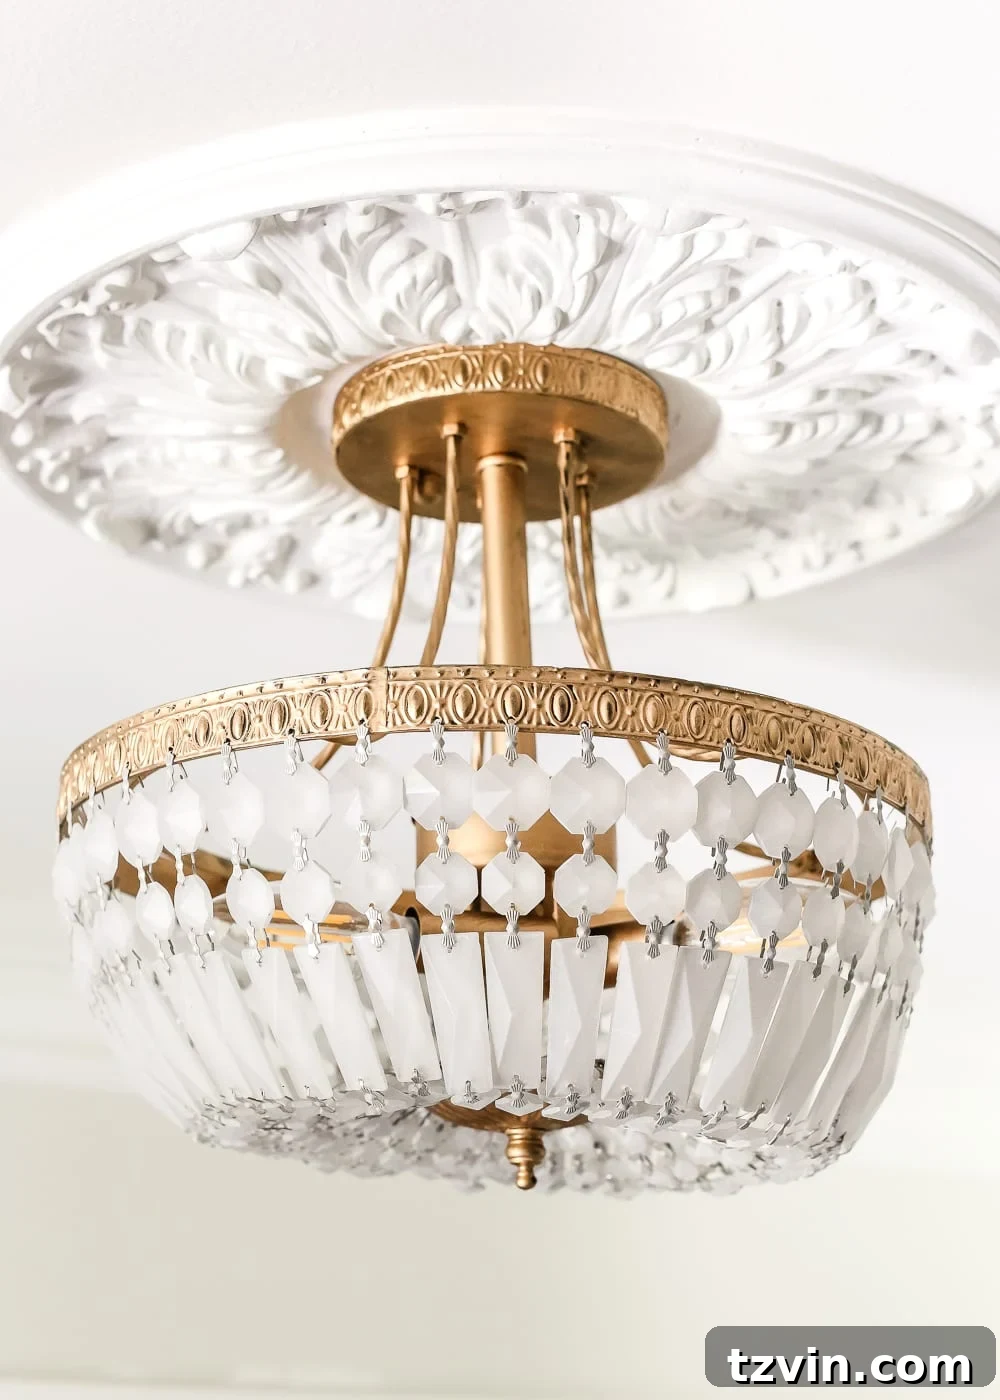
The charm of Rub n Buff lies in its ability to simulate the richness of solid metal, turning humble items into sophisticated pieces. For instance, I used Rub n Buff to make a budget-friendly light fixture emulate a more expensive design often found in high-end stores like Pottery Barn. The transformation was dramatic and truly showcases the product’s potential.
Related: Antique Gold Frosted Crystal Light Fixture Makeover
Mastering the Application: How to Use Rub n Buff Like a Pro
Achieving that coveted professional-looking metallic finish with Rub n Buff is surprisingly simple, but a few key steps make all the difference. While it doesn’t strictly require a primer, proper surface preparation is crucial for optimal adhesion and a flawless result. Think of it as laying the groundwork for brilliance.
Surface Preparation: The Secret Sauce
For the best possible adhesion and an even finish, especially on very smooth or glossy surfaces, a light sanding is highly recommended. Use a fine-grit sandpaper (around 220-grit) to gently scuff the surface. This creates microscopic imperfections that give the wax something to “grip” onto. After sanding, thoroughly clean the object to remove any dust, grime, or oils. A clean, dry surface ensures the Rub n Buff adheres beautifully and buffs to a brilliant shine. Skipping this step, as I once did in my testing, can lead to a textured, dull, and less durable finish. Trust me, sanding is truly the “secret sauce” for success.
Application Technique: Less is More
A little Rub n Buff goes an incredibly long way. Begin by squeezing a pea-sized amount onto a soft cloth, a cotton swab, or even your finger (I always wear latex gloves for this). Then, gently rub the wax onto the surface of your item. The goal is to apply a thin, even layer. You’ll notice the metallic luster immediately start to form.
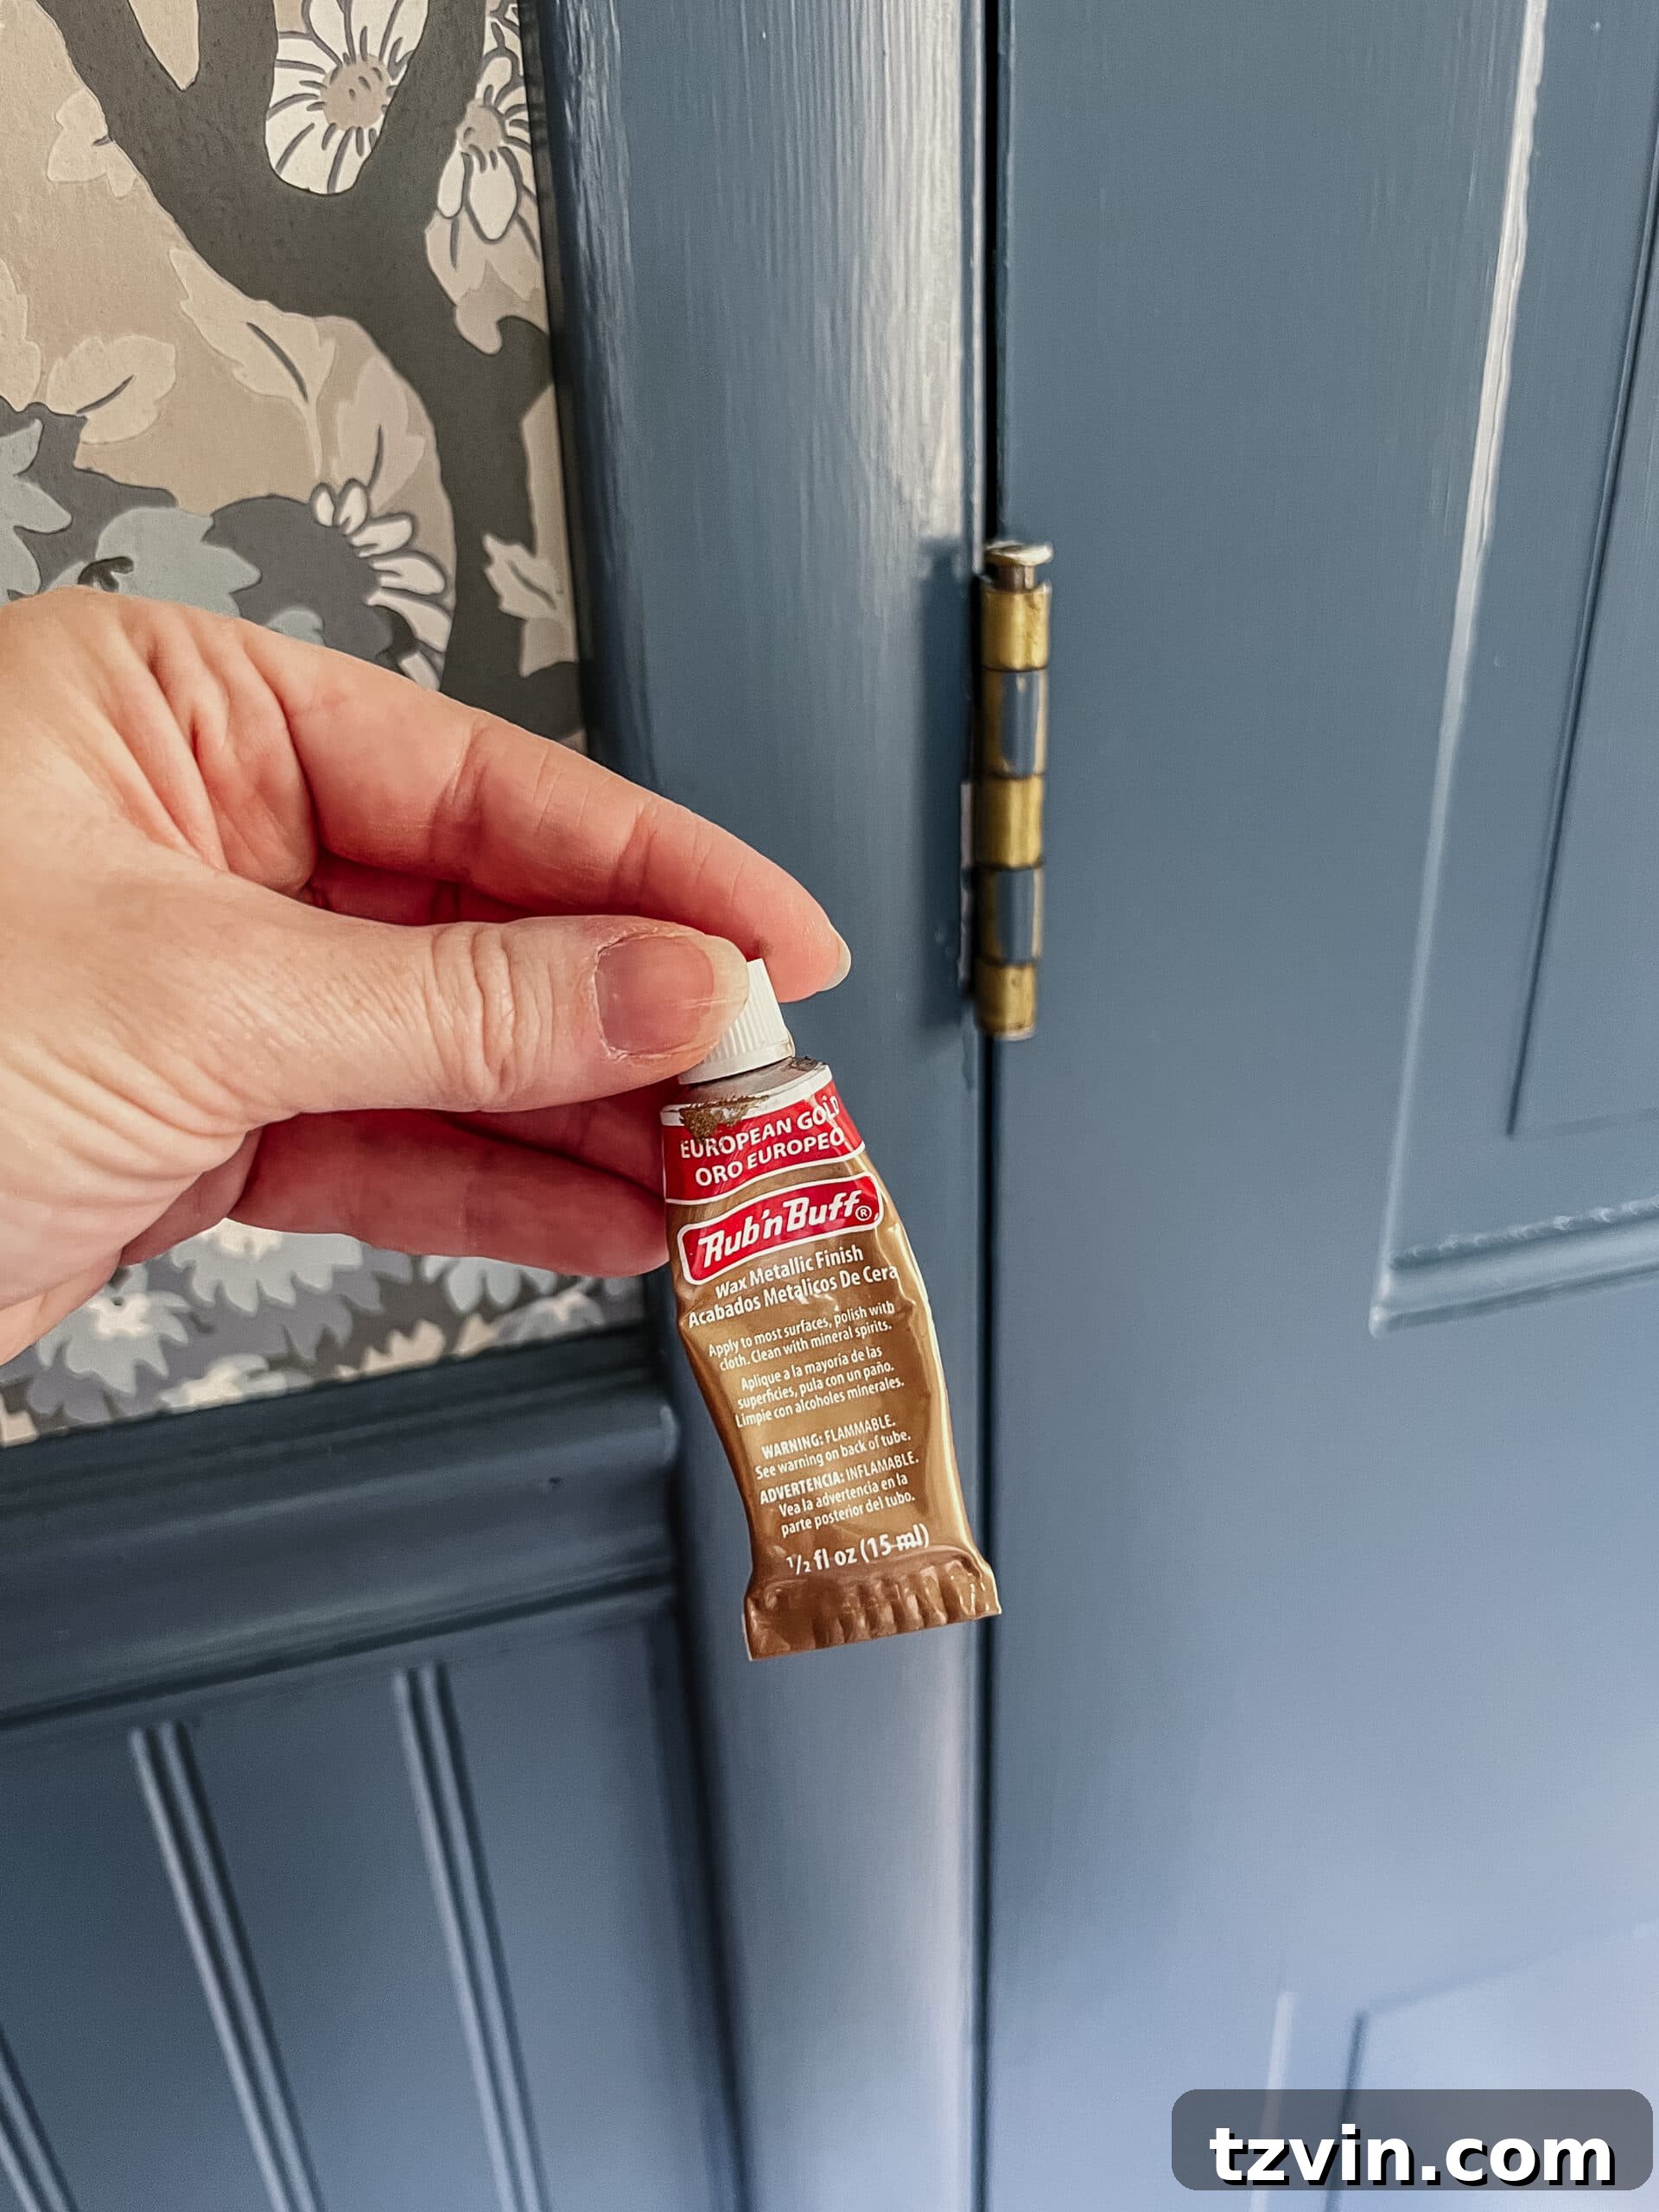
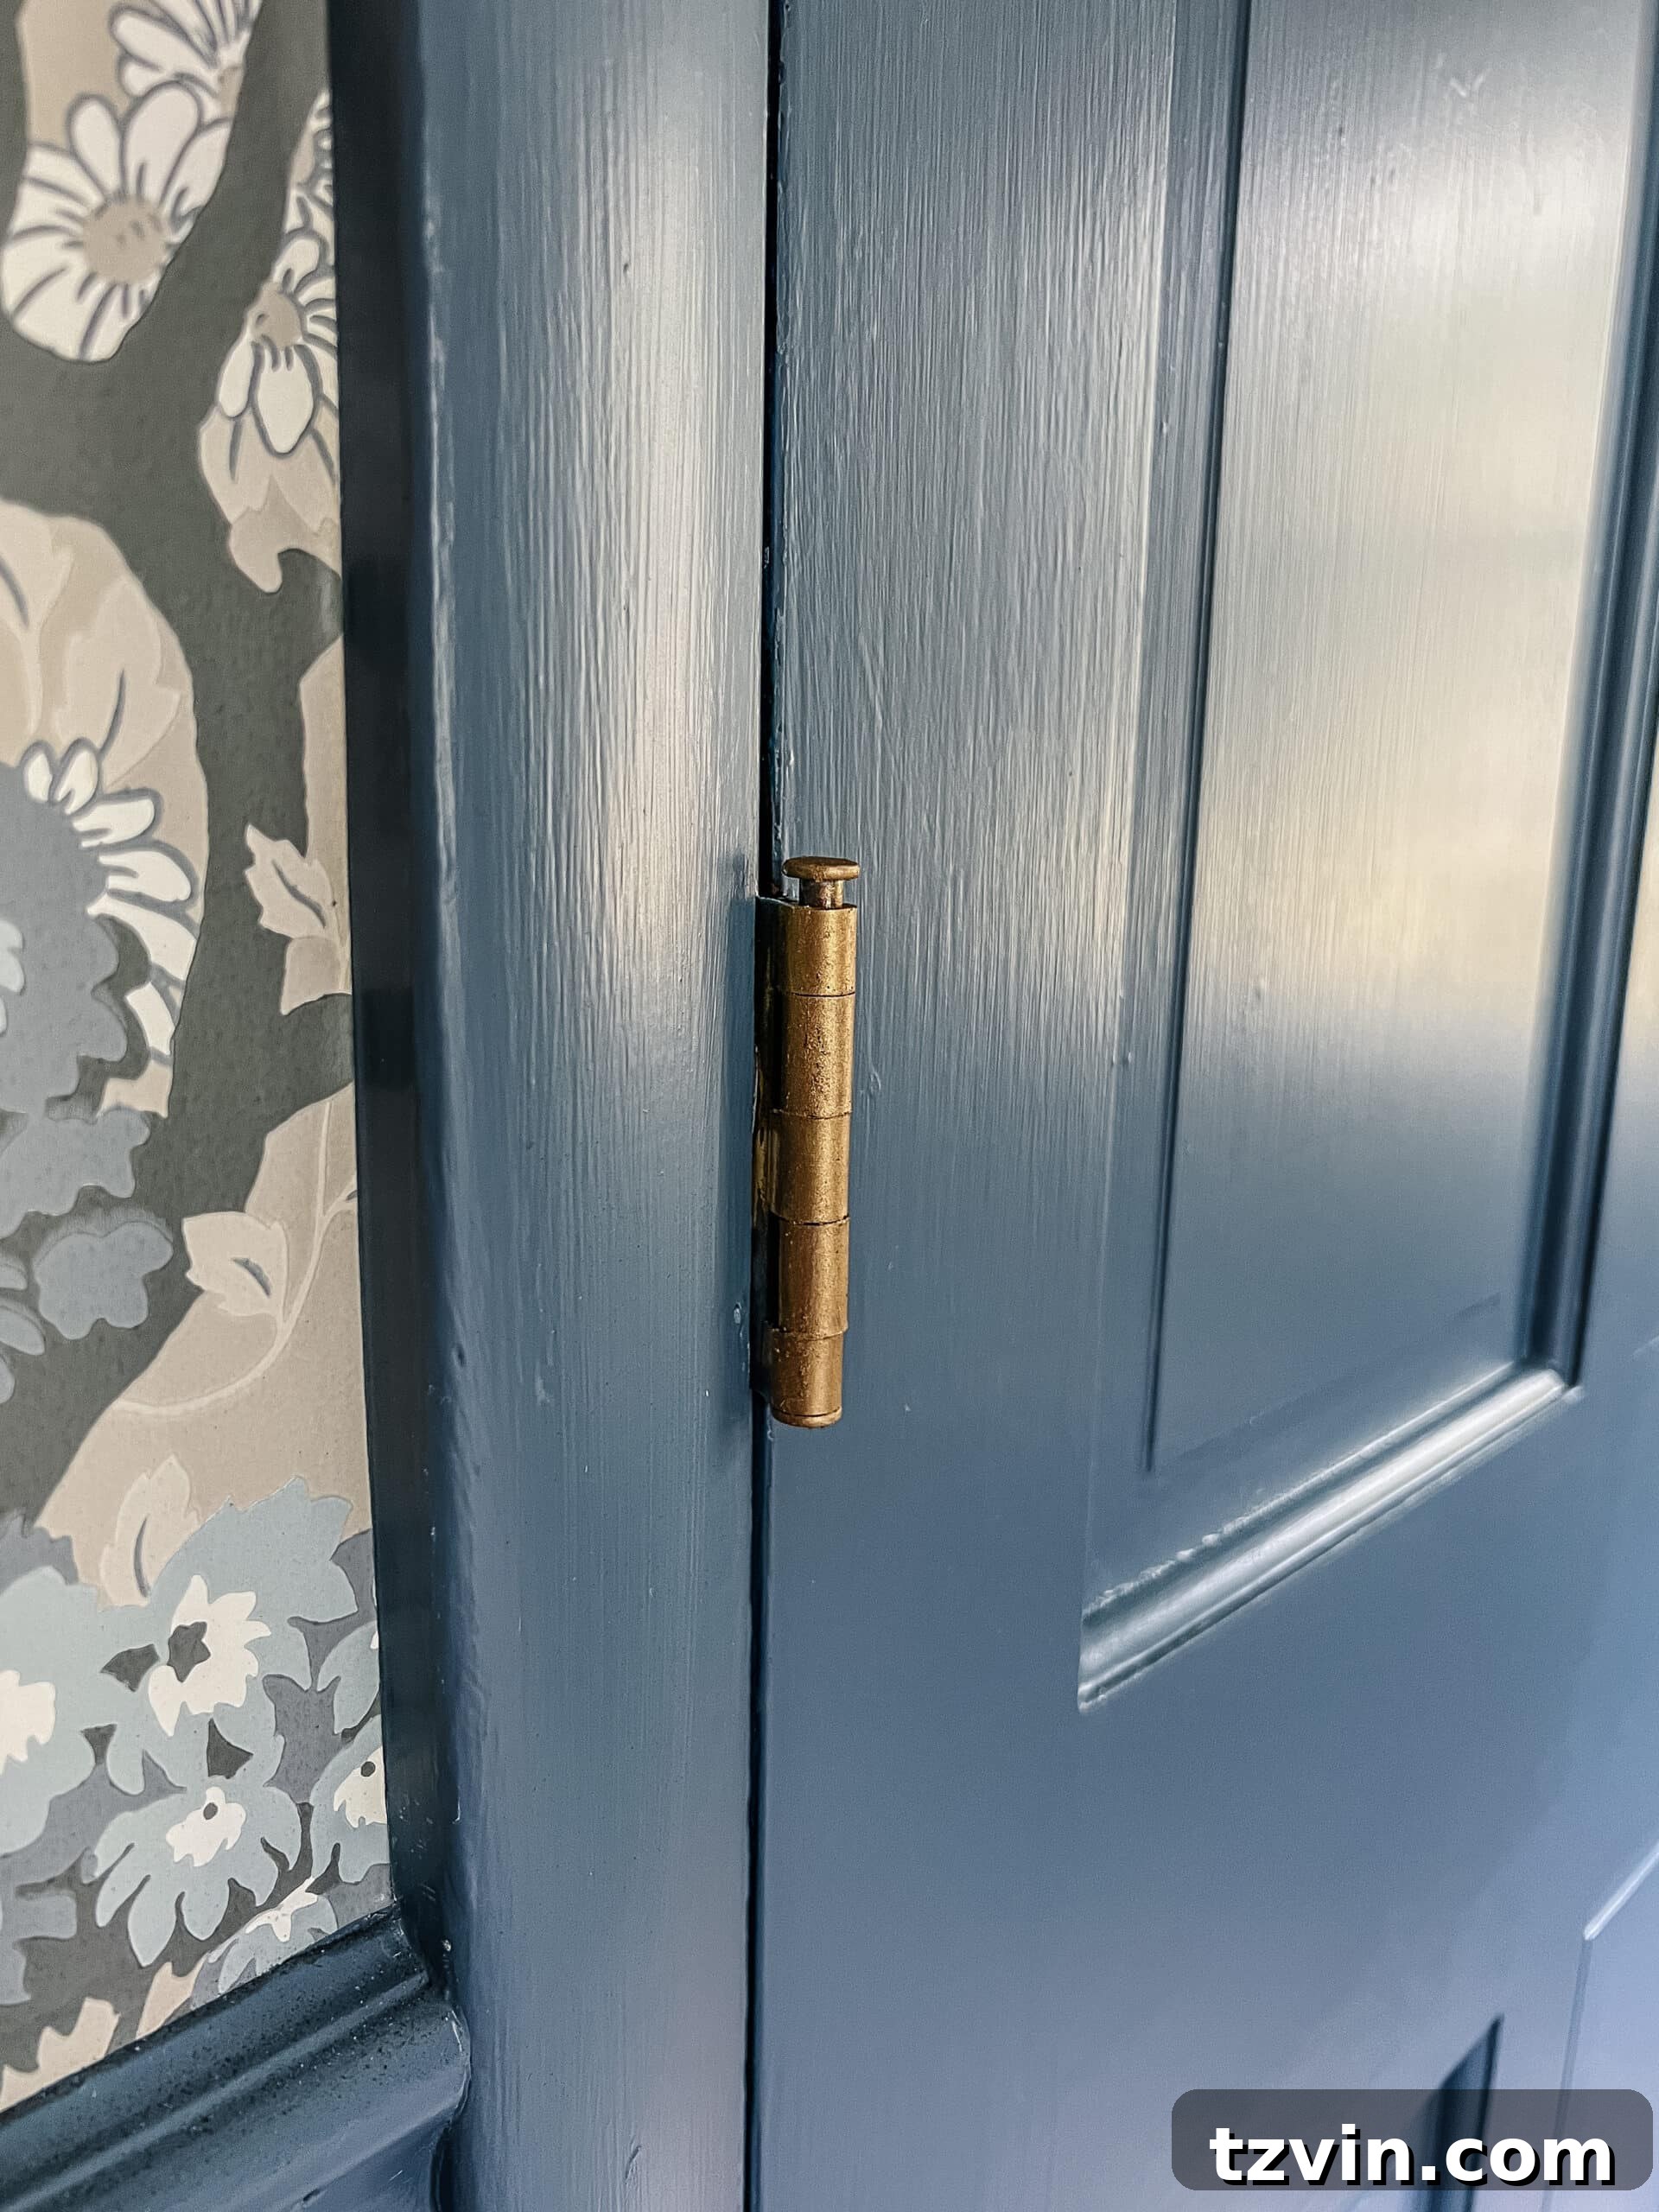
For highly detailed pieces or intricate carvings, a small, stiff-bristled paint brush can be an excellent tool for application. This allows you to get into every crevice and ensure complete coverage without overloading the surface. For example, I used a small brush to expertly apply Rub n Buff European Gold to old door hinges, showcasing how precision can transform even the most utilitarian hardware.
Tutorial: DIY Door Update to Change Hinge Colors Quickly
The Buffing Process: Unveiling the Luster
After applying the wax, allow it to dry for approximately 30 seconds. This brief waiting period is crucial for the waxes to set slightly. Once partially dry, take a clean, soft cloth (microfiber works wonderfully) and gently buff the surface. This buffing action is what brings out the incredible shine and luster, making the metallic finish truly come alive. Continue buffing until you achieve your desired level of sheen. If the finish isn’t as shiny as you’d like, you can apply another thin layer and buff again.
Remember, patience and a light touch are your best friends when working with Rub n Buff. The results are always worth the minimal effort.
My Comprehensive Rub n Buff Color Test: A Real-World Experiment
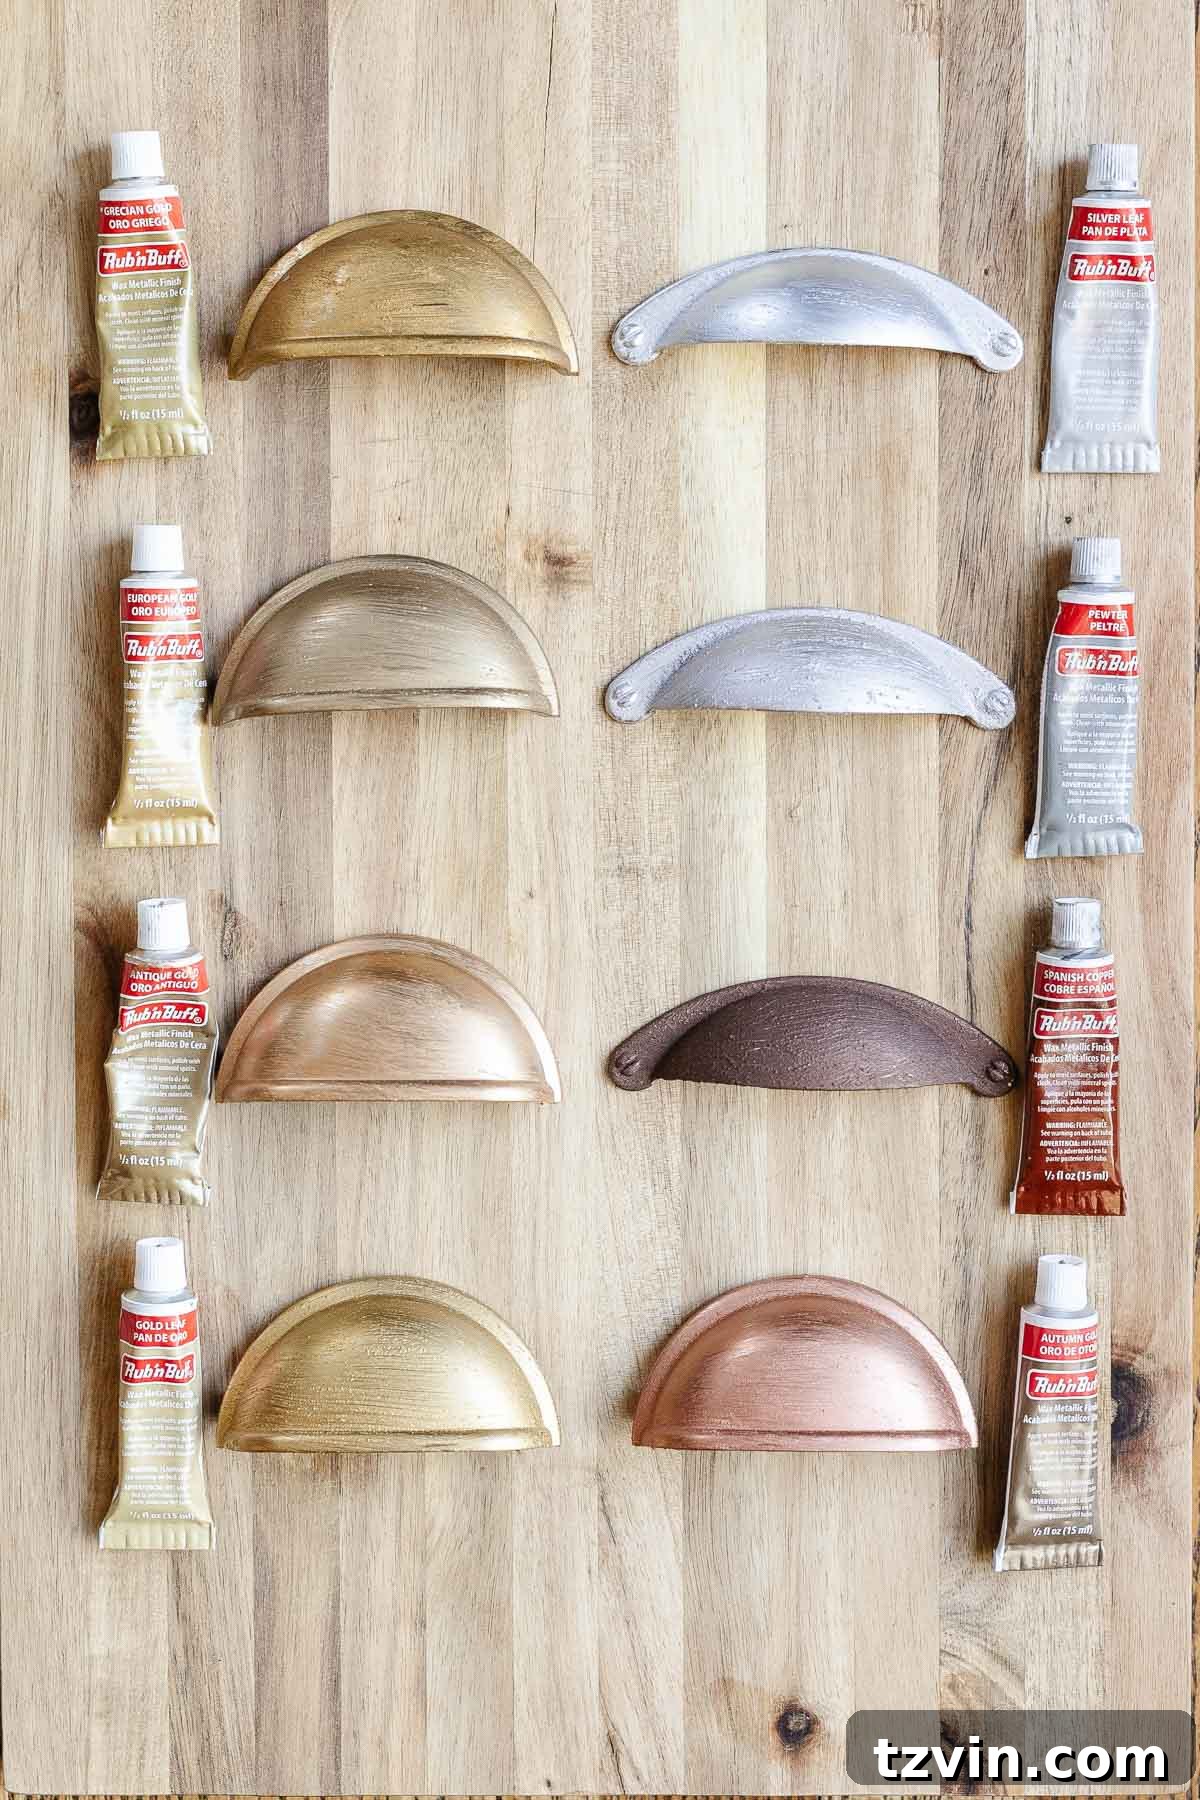
To provide you with the most accurate and helpful insights, I embarked on a detailed testing process for various Rub n Buff colors. My primary goal was to see how each shade truly appeared on a surface, providing a tangible reference for future projects. While I generally advocate for proper surface preparation, during this particular test, I made the rookie mistake of not sanding first. This oversight, unfortunately, made the buffing step considerably more challenging and resulted in a somewhat chunky, terribly textured, and dull finish on the test pieces themselves. It was a valuable reminder that even experienced crafters can overlook critical steps!
Despite this application mishap, the core objective of the experiment was still achieved: I was able to clearly observe and compare the true colors. This visual reference is invaluable for matching existing metals, planning new decor, or simply choosing the perfect metallic accent. This experiment provided me with a personal color chart that I’ll refer back to repeatedly, and I hope it serves the same purpose for you.
Related: Best Places to Find Furniture and Kitchen Cabinet Hardware
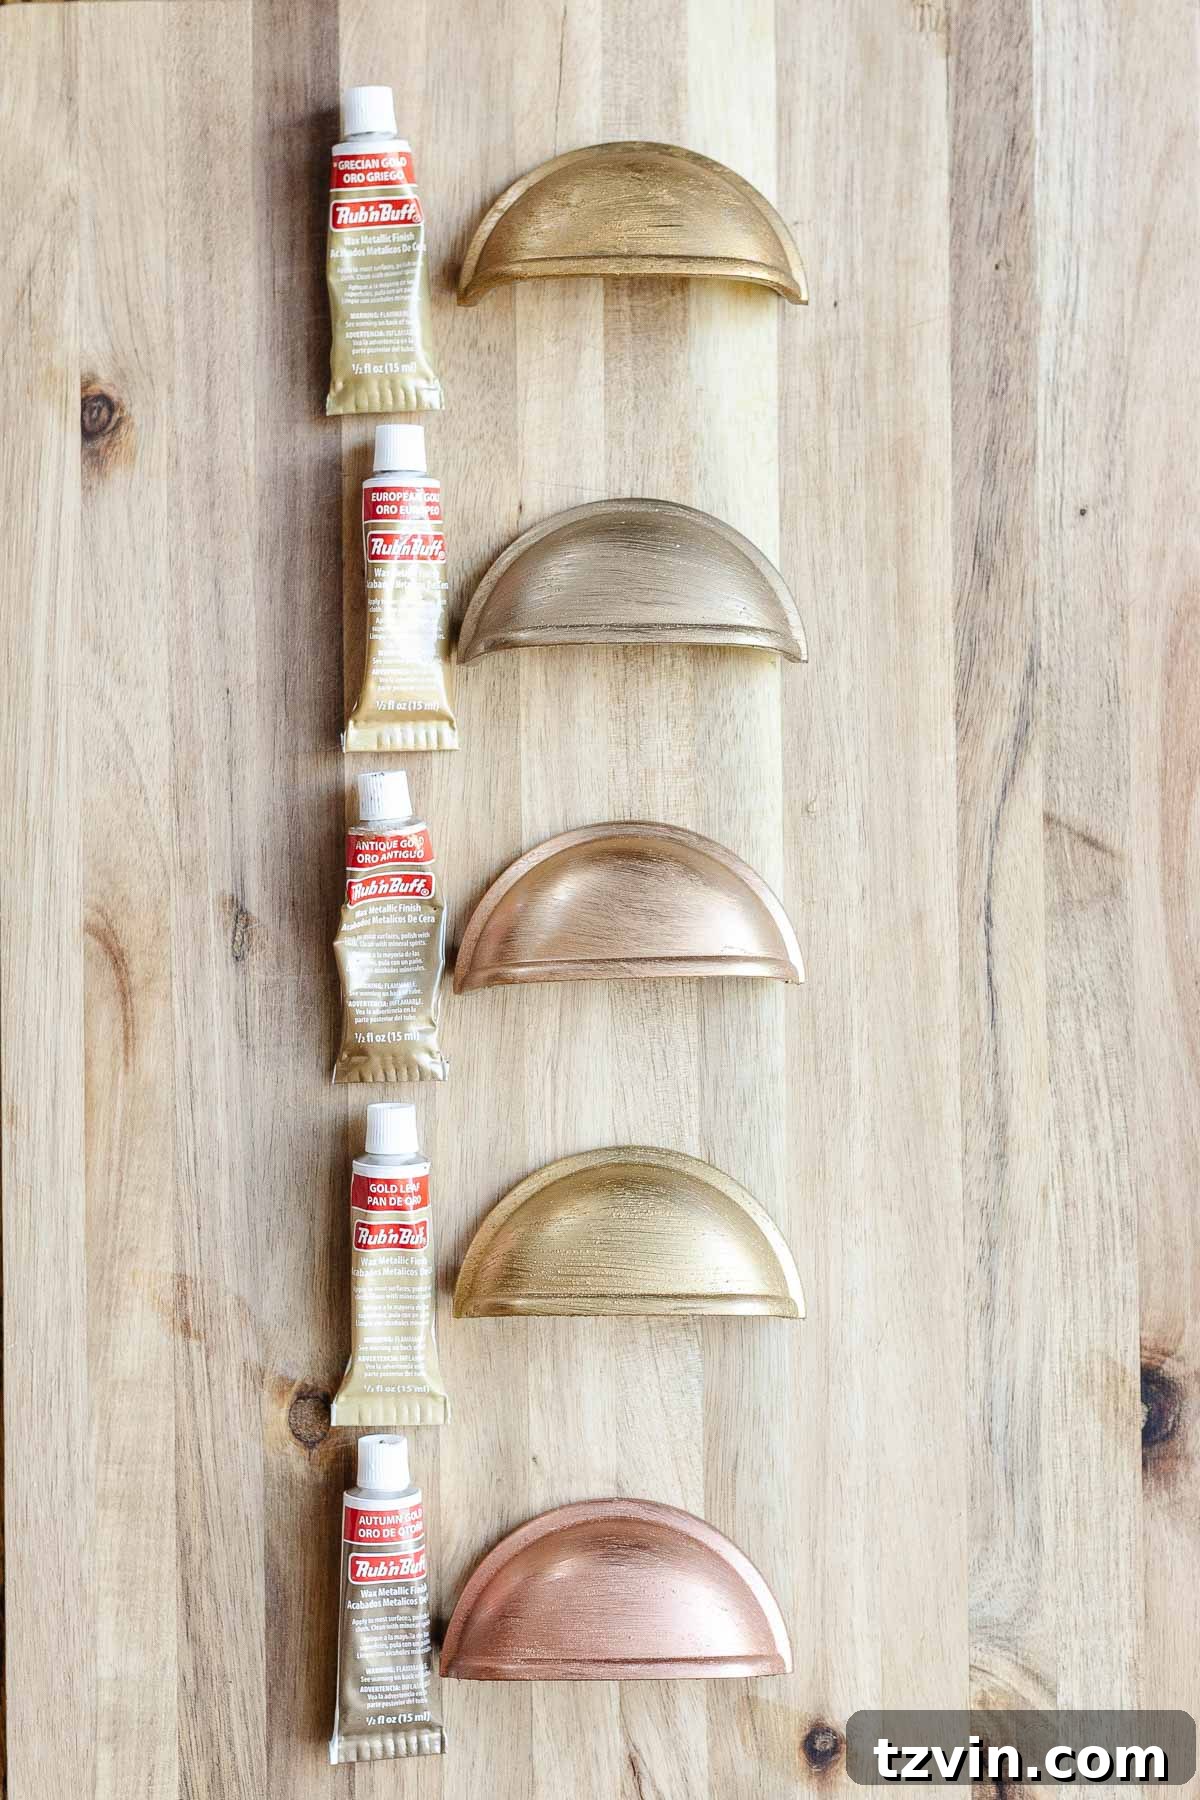
Rub n Buff Gold Colors: A Deep Dive into Hues and Tones
The gold family of Rub n Buff offers a magnificent spectrum, from bright and brassy to deep and antique. Each shade possesses a unique character that can dramatically alter the feel of your project. Here’s a detailed breakdown of the gold options:
- Grecian Gold – This particular gold leans heavily towards a rich bronze, offering a noticeably warmer tone than Gold Leaf. It’s the ideal choice if you’re aiming for an elegantly aged gold look without any hints of copper. Grecian Gold brings a sense of ancient luxury and depth, perfect for vintage pieces, classic decor, or accents that demand a sophisticated, time-worn appeal.
- European Gold – Representing the cooler end of the Rub n Buff gold spectrum, European Gold is characterized by its lower saturation and delicate champagne hue. It’s an understated, elegant gold, providing a subtle shimmer rather than a bold metallic statement. Choose European Gold when you desire a sophisticated, slightly tinted gold that complements modern, minimalist, or French country aesthetics without overpowering other elements.
- Antique Gold – This classic gold shade presents a subtle, almost imperceptible pinkish or copper undertone, making it incredibly versatile. It strikes a beautiful balance between warmth and traditional gold, delivering an authentic aged appearance. Antique Gold is a fantastic all-rounder for furniture hardware, ornate frames, or any project where a timeless, slightly softened gold finish is desired.
- Gold Leaf – For those seeking a vibrant, unmistakably yellow gold, Gold Leaf is your go-to. It closely resembles bright, polished brass or the gleam of brand-new yellow gold jewelry. This shade is perfect for projects that require a bold, eye-catching metallic statement, such as contemporary decor, glamorous accents, or when you want to replicate a freshly gilded look.
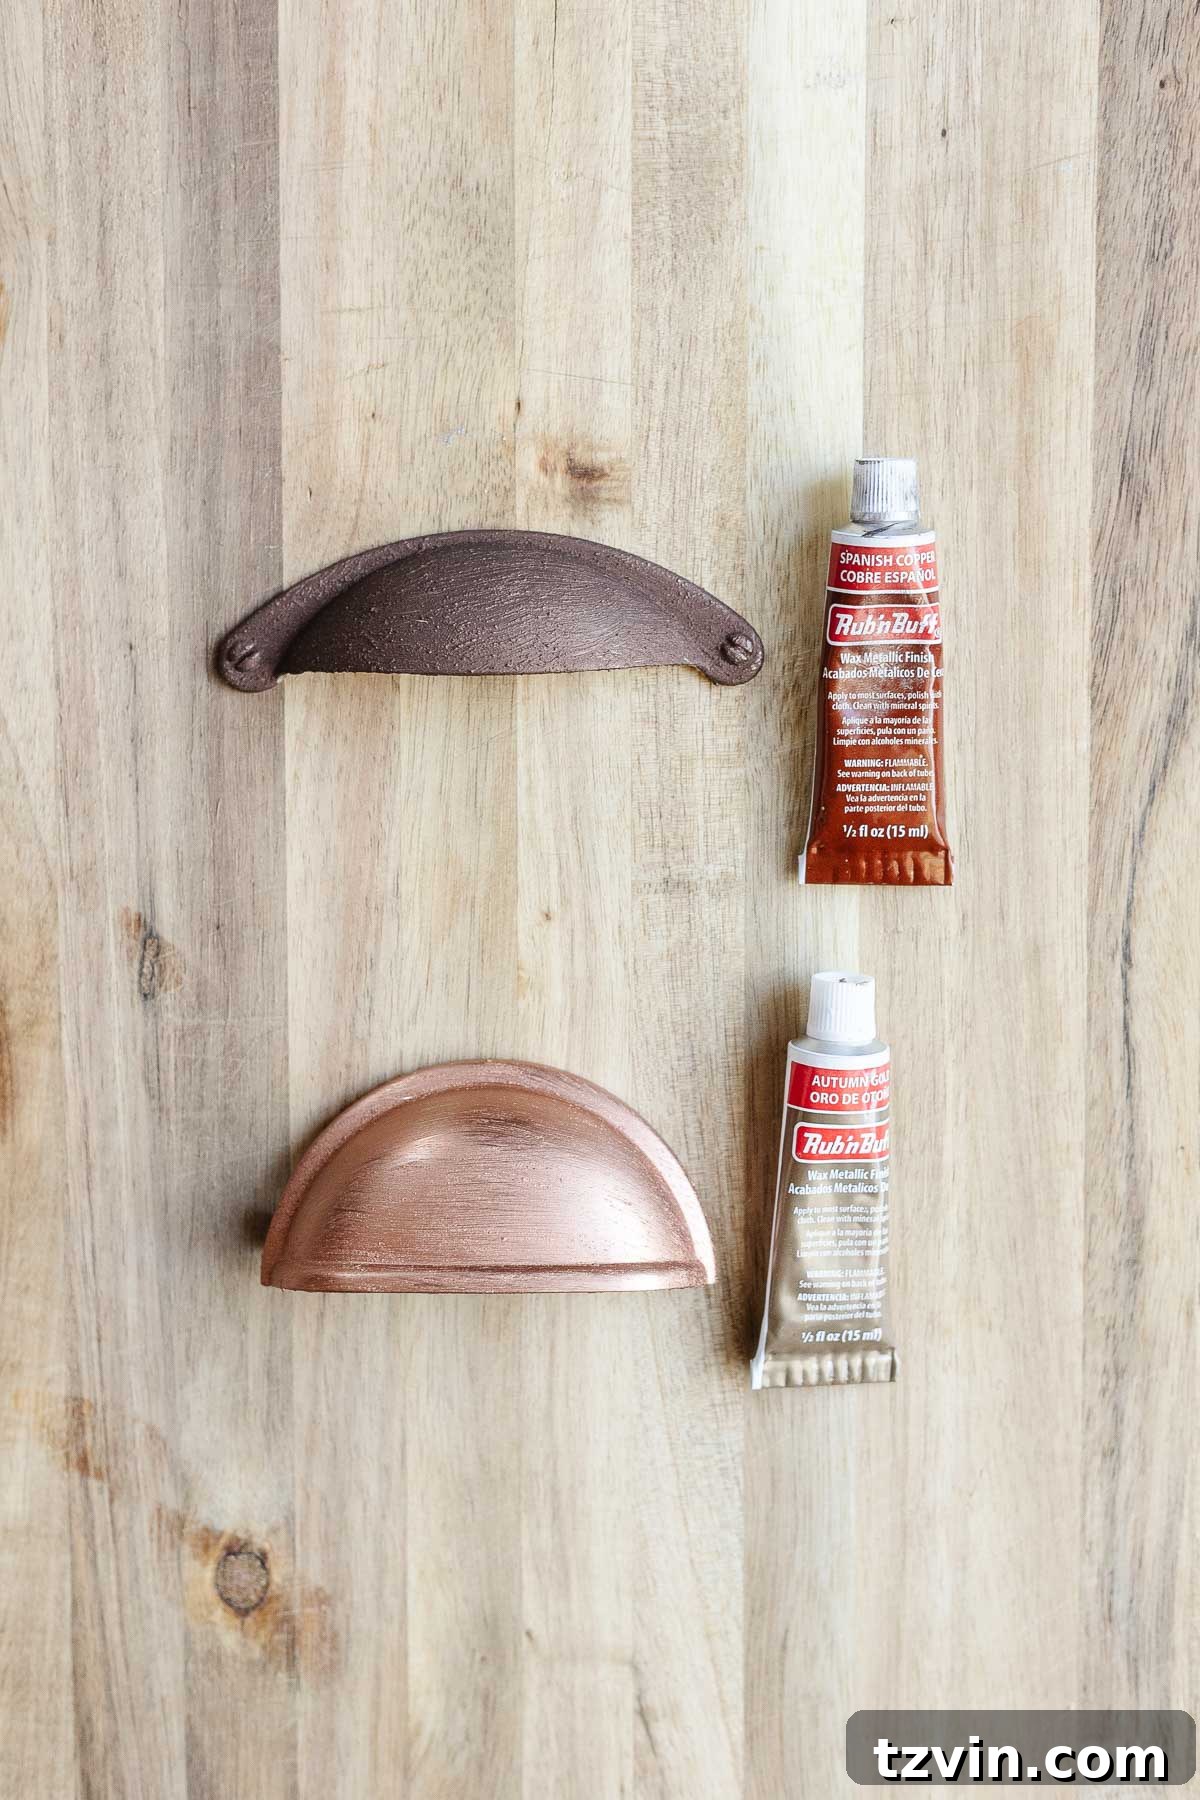
- Autumn Gold – Despite its name placing it in the “gold family,” Autumn Gold is unmistakably a bright, vivid copper. Its strong red undertone gives it the distinct look of a new, unpatinaed copper coin. If your project truly calls for a brilliant, fresh copper finish rather than a gold, Autumn Gold is the perfect, fiery choice. It evokes warmth and richness, ideal for autumnal decor, rustic accents, or any design where a bold copper is key.
Deciding Between European Gold and Antique Gold
Among the exquisite gold offerings, Rub n Buff Antique Gold and European Gold often emerge as top contenders, each with its distinct appeal. My personal preference often sways towards these two for their versatility and nuanced beauty.
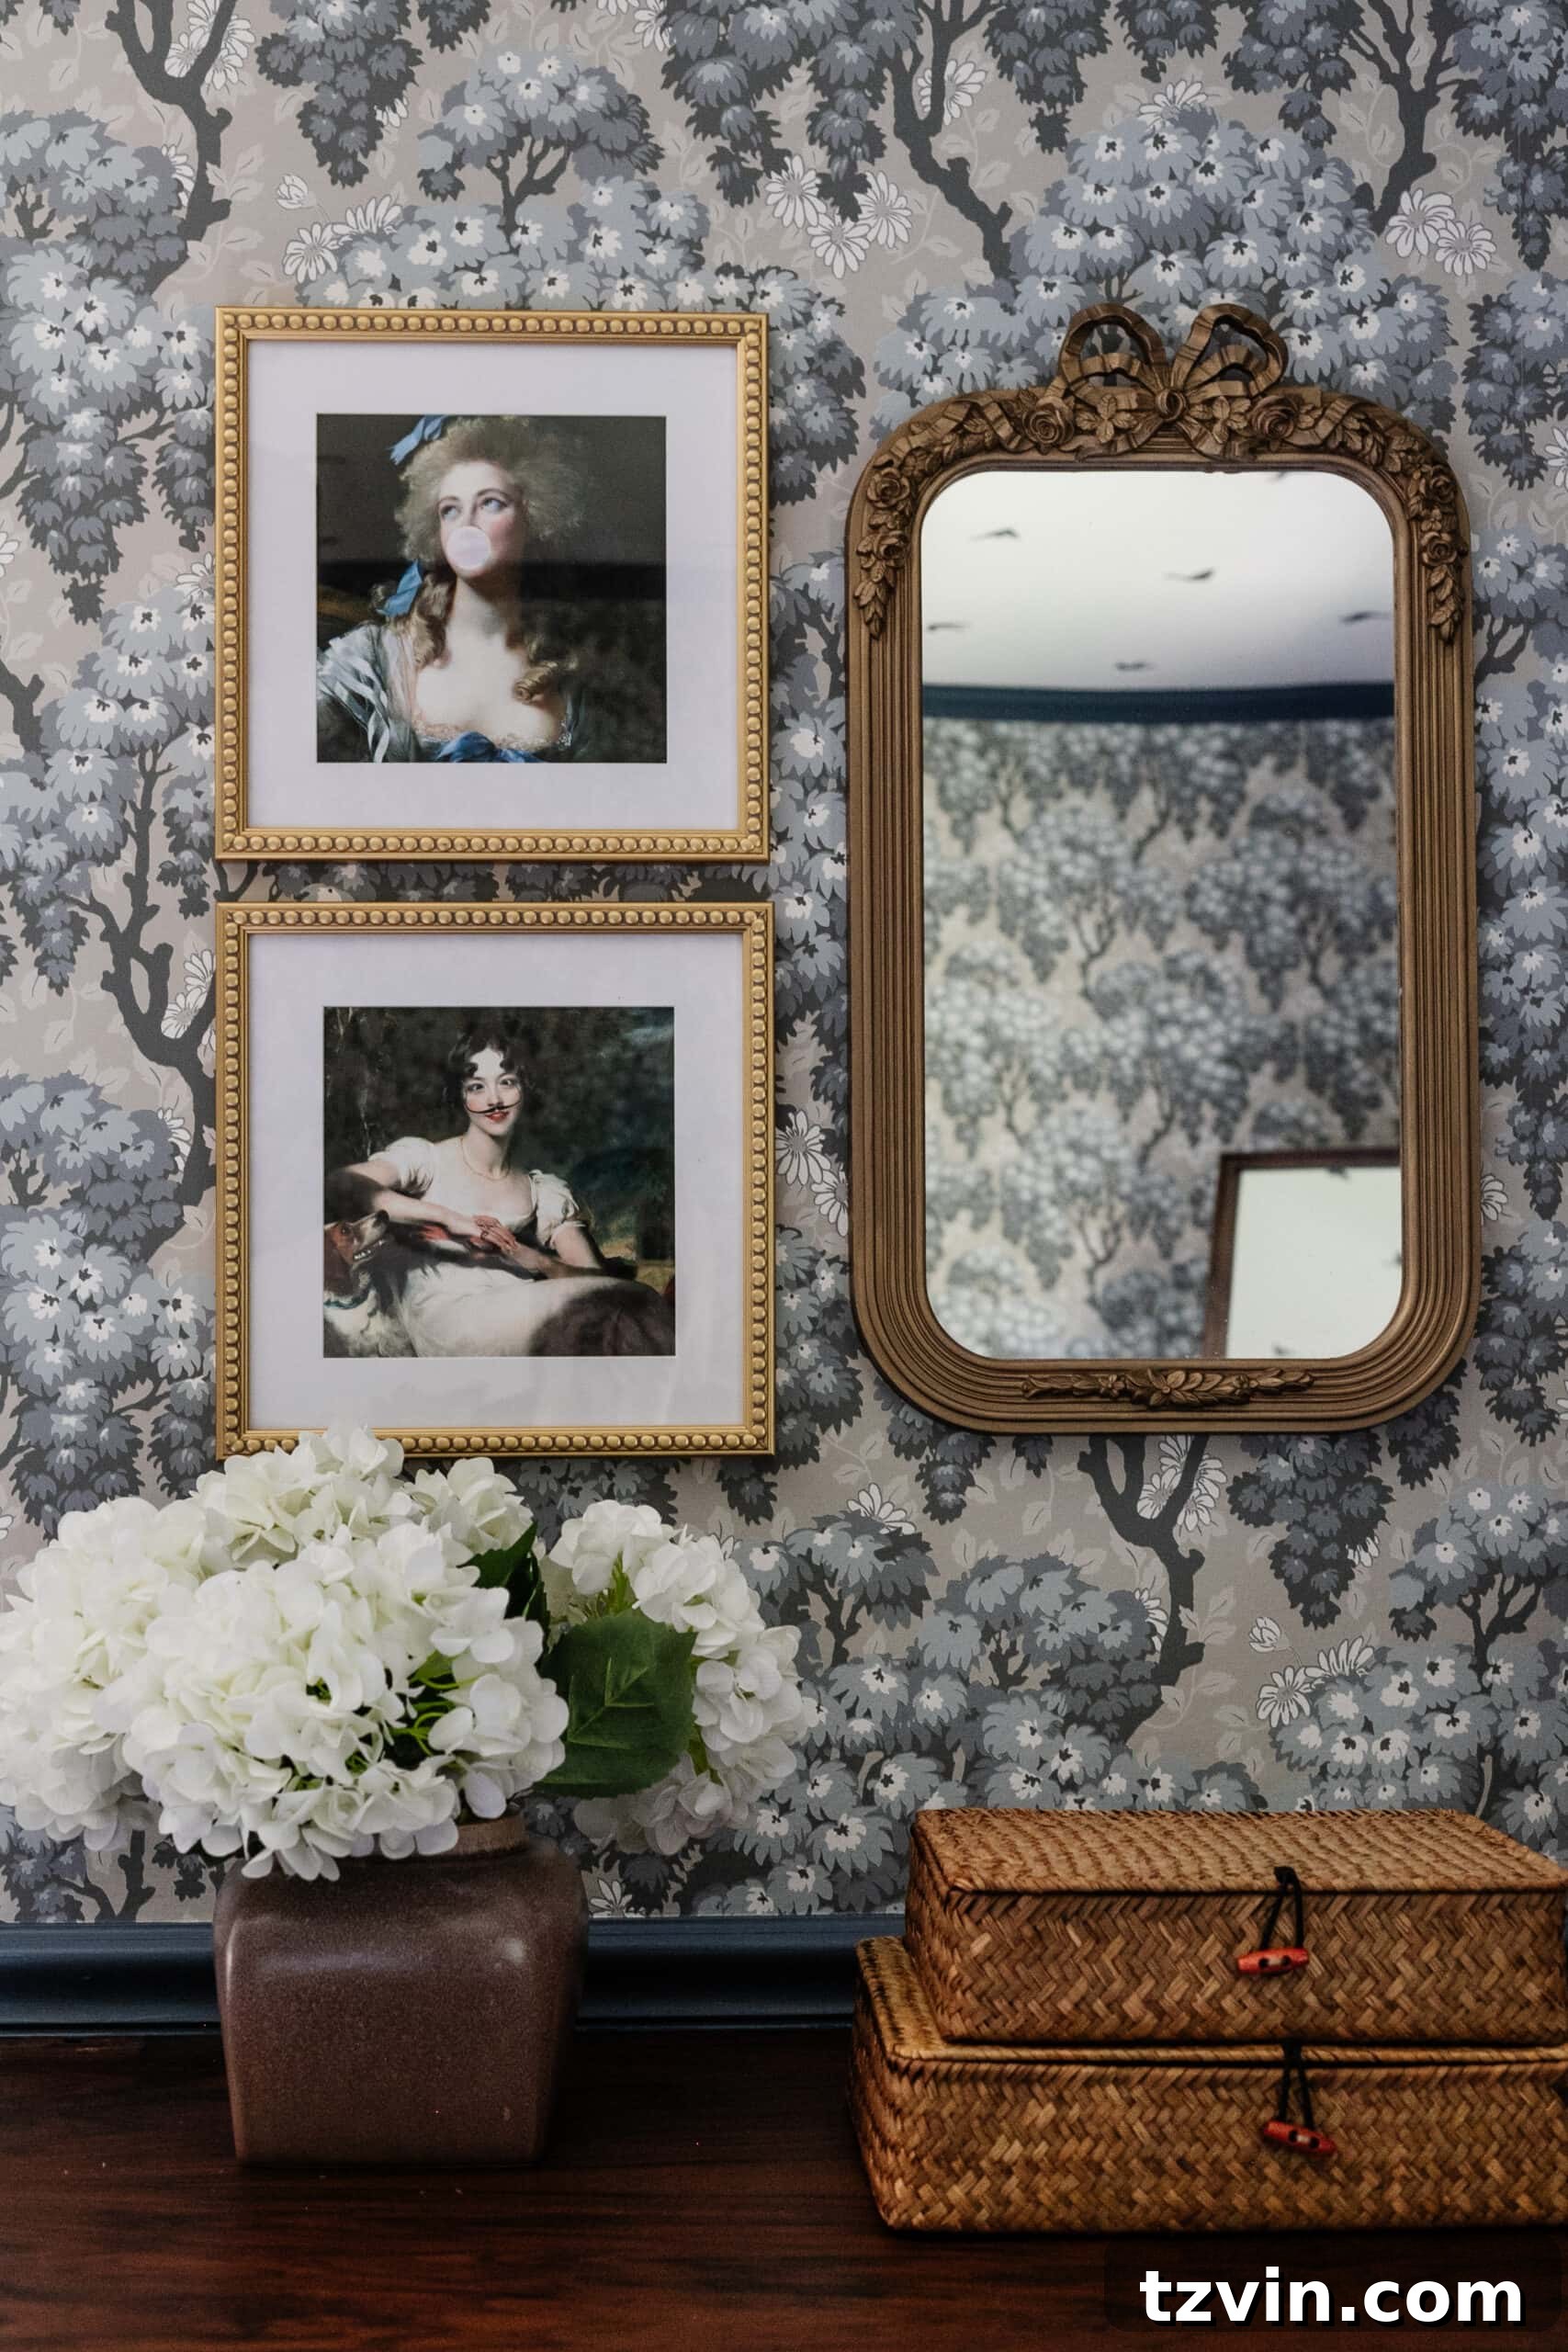
European Gold is a masterpiece of understated elegance. As seen on the mirror below, it offers a less saturated, cooler-toned metallic finish. Its subtle champagne quality makes it perfect for projects where you want a refined gold that isn’t overtly yellow or brassy. It’s ideal for creating a sophisticated, slightly aged look that doesn’t scream “gold” but rather whispers it with delicate charm.
Related: DIY Aged Gold Antique Mirror Makeover
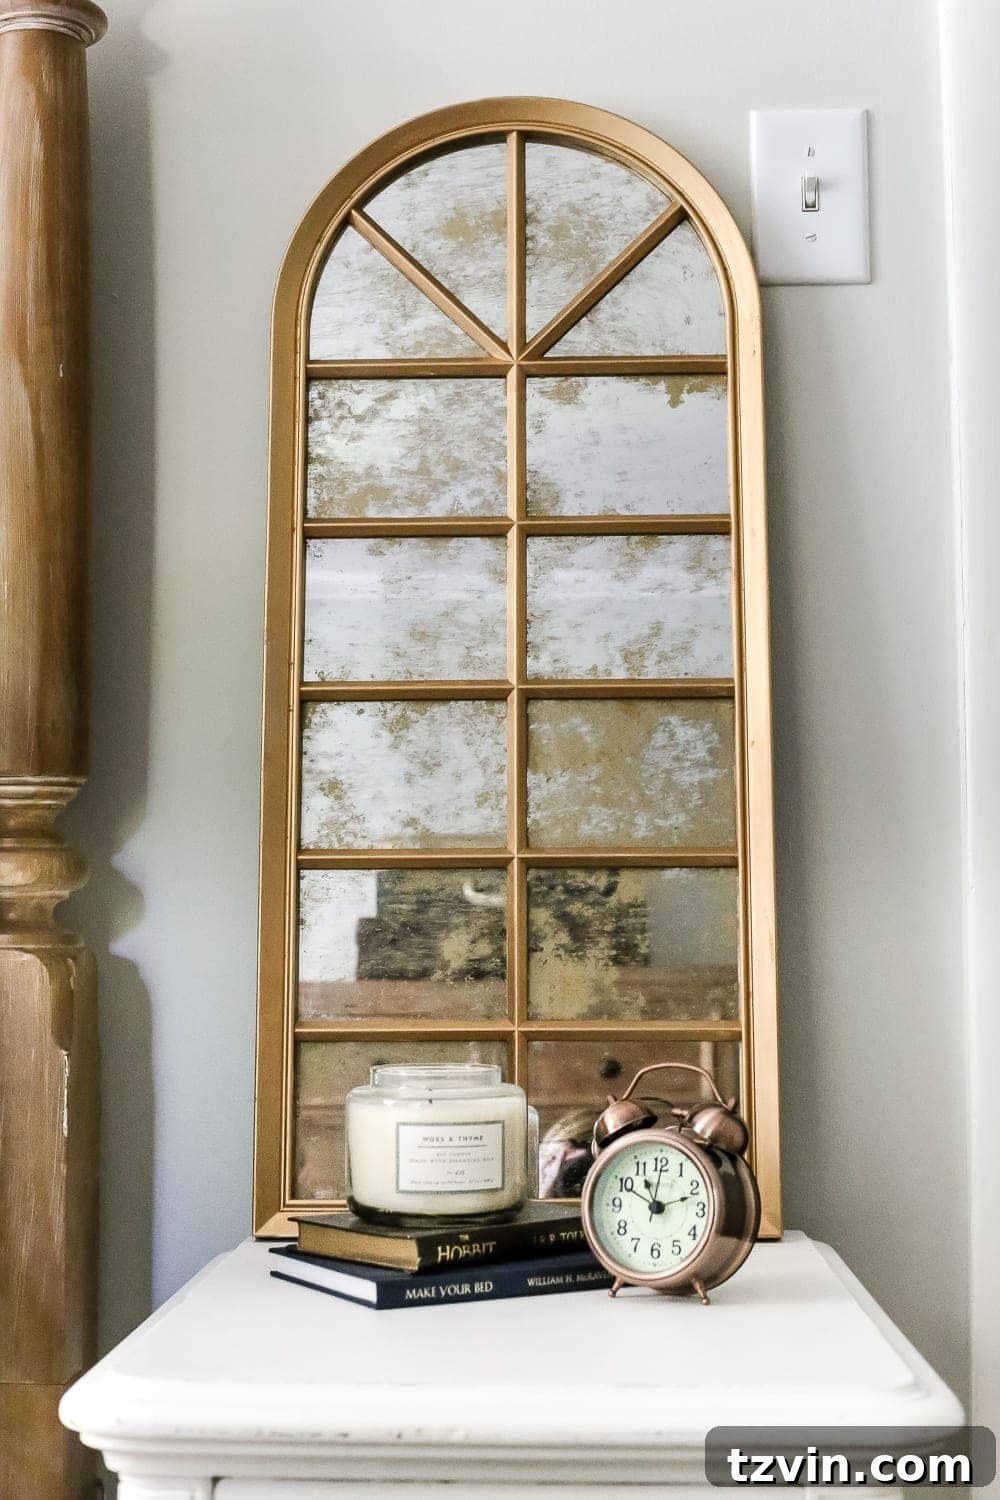
Conversely, Antique Gold provides a more traditional, warmer glow. The mirror pictured below showcases its brighter, more yellow character compared to European Gold. It carries a timeless appeal, offering an authentic antique gold finish that is vibrant yet still possesses a lovely, subtle depth. If you’re aiming for a classic, rich gold that feels historical and substantial, Antique Gold is an excellent choice.
The choice between these two beautiful golds ultimately depends on the specific aesthetic you’re trying to achieve—a soft, muted elegance with European Gold, or a classic, richer warmth with Antique Gold.
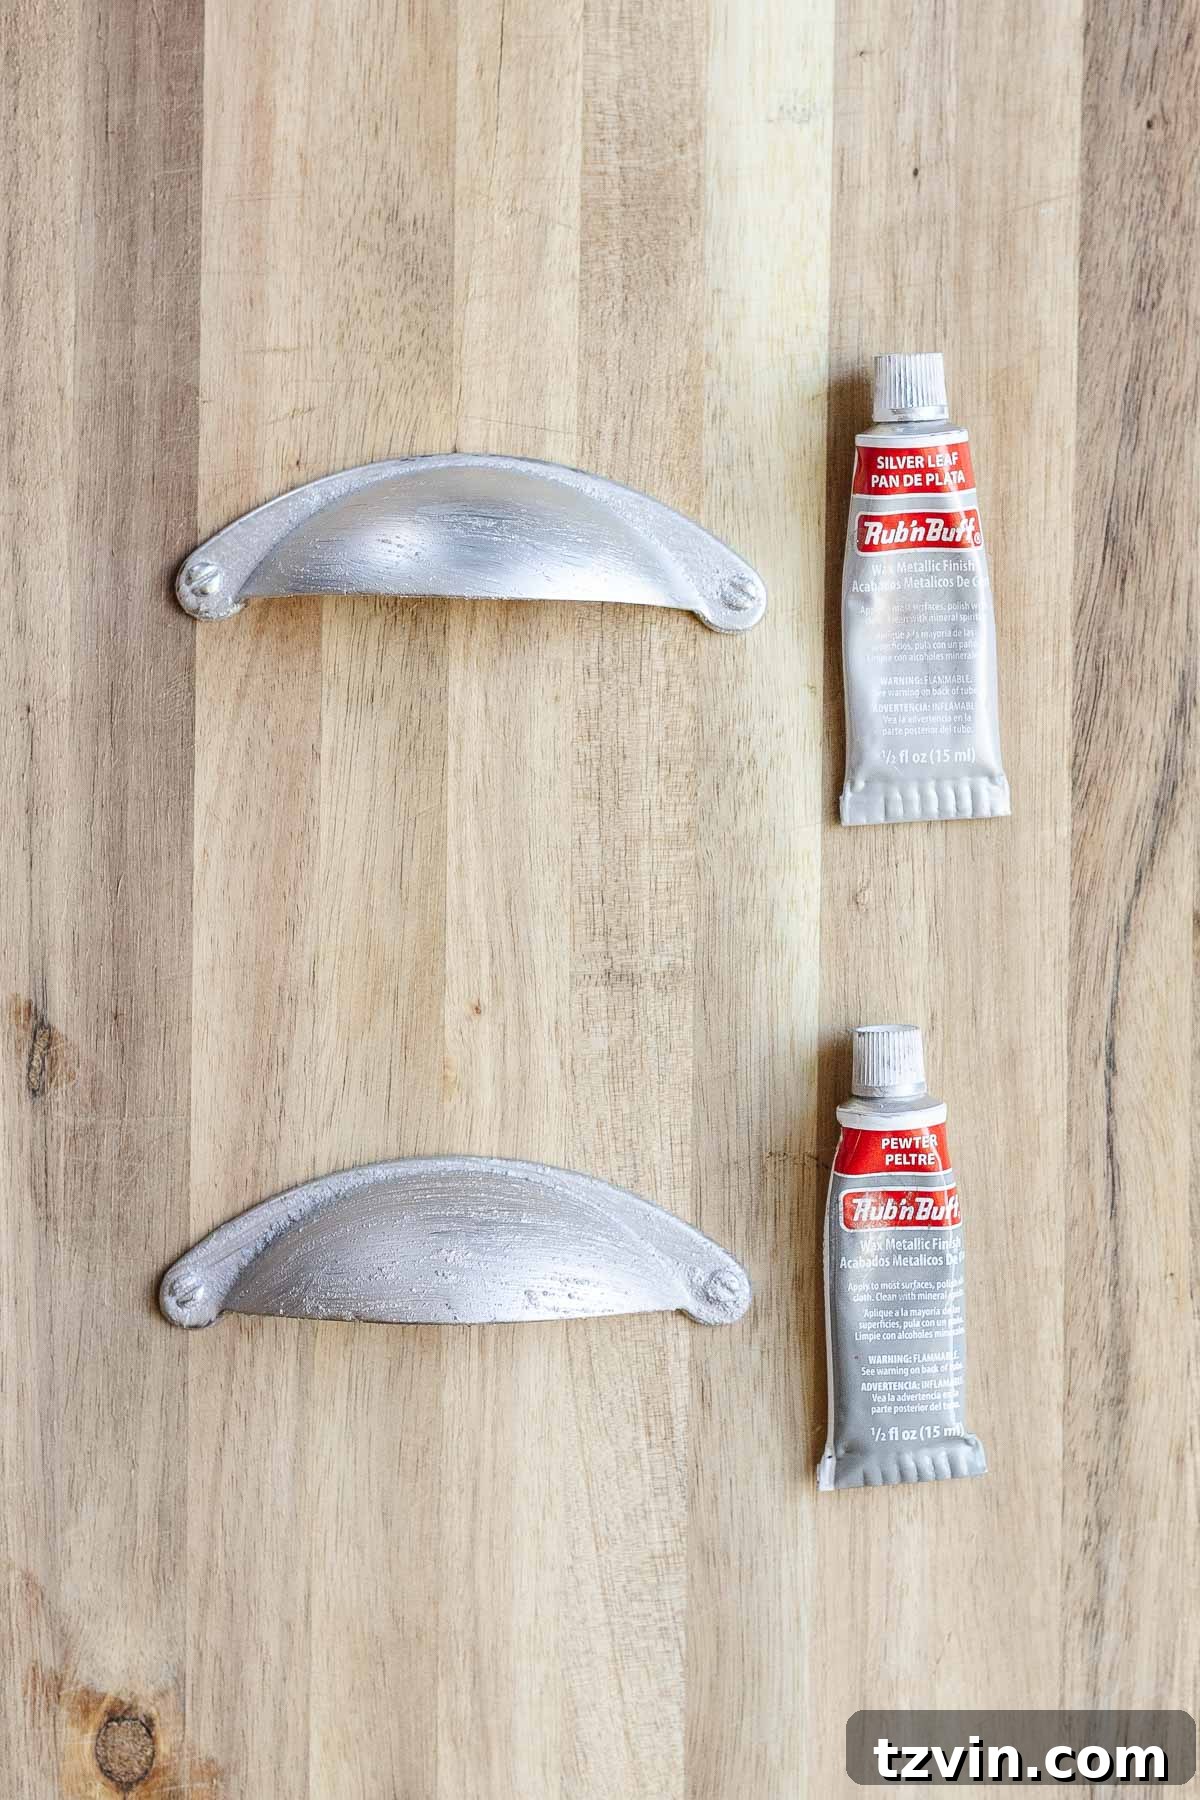
Rub n Buff Silver Colors: Polished vs. Patinaed
While the gold collection boasts a broader range of hues, Rub n Buff’s silver options are equally impressive in their ability to deliver distinct metallic finishes. The two silver shades available are both exquisite and serve different design needs beautifully:
- Silver Leaf – This is the quintessential bright silver. Imagine the pristine, highly reflective surface of a brand-new, freshly minted dime. Silver Leaf delivers a crisp, brilliant sheen that evokes modernity and a polished, contemporary aesthetic. It’s perfect for projects that demand a clean, bright, and impactful silver finish, such as sleek hardware, modern art accents, or any item where a vibrant metallic gleam is desired.
- Pewter – In stark contrast to Silver Leaf, Pewter offers a more subdued, aged silver color. It has a slightly grayer undertone and a noticeably less intense luster, creating a sophisticated, time-worn appearance. For projects aiming for an antique, vintage, or industrial look, Pewter is the superior choice. It provides depth and character, giving objects a storied feel rather than a stark, new shine. I definitely prefer Pewter for crafting surfaces that exude historical charm and understated elegance over the brighter Silver Leaf shade.
Choosing between Silver Leaf and Pewter depends entirely on the era and style you wish to evoke. Silver Leaf offers a contemporary sparkle, while Pewter brings forth a rich, aged patina.
Rub n Buff Copper Colors: New vs. Oxidized
Copper is a metal celebrated for its warm, inviting tones, and Rub n Buff offers options that capture both its freshly polished brilliance and its deep, aged patina. In my color comparison, I included Autumn Gold in the copper test because, despite its “gold” designation, its strong reddish hue positions it firmly within the copper aesthetic.
- Spanish Copper – This shade is a rich, deep copper that verges on bronze, often resembling the color of natural rust or heavily oxidized copper. Spanish Copper embodies an aged patina look, offering an earthy, rustic appeal. It’s the perfect choice when you want to achieve a vintage, industrial, or Southwestern-inspired aesthetic, giving objects a sense of history and weathered elegance.
- Autumn Gold – As previously noted, Autumn Gold functions as a vibrant, new copper shade. It lacks any signs of aging, instead radiating the bright, fiery glow of freshly cleaned copper. If your project calls for a bold, lustrous copper that pops with vivid color, Autumn Gold is the ideal candidate. It’s perfect for contemporary accents, fall-themed crafts, or anything that benefits from the eye-catching sheen of brand-new copper.
The distinction between Spanish Copper and Autumn Gold lies in their representation of age and vibrancy. Spanish Copper offers a mature, rustic charm, while Autumn Gold delivers a lively, unblemished copper sparkle. Your choice will depend on whether you seek the character of aged metal or the brilliance of a newly polished surface.
Sitting at my office desk, meticulously applying and comparing Rub n Buff colors, was an unexpected but incredibly insightful experiment. This detailed comparison has proven invaluable for my own future projects, providing a definitive reference for choosing the perfect metallic finish. I sincerely hope this guide serves you just as well in your creative endeavors.
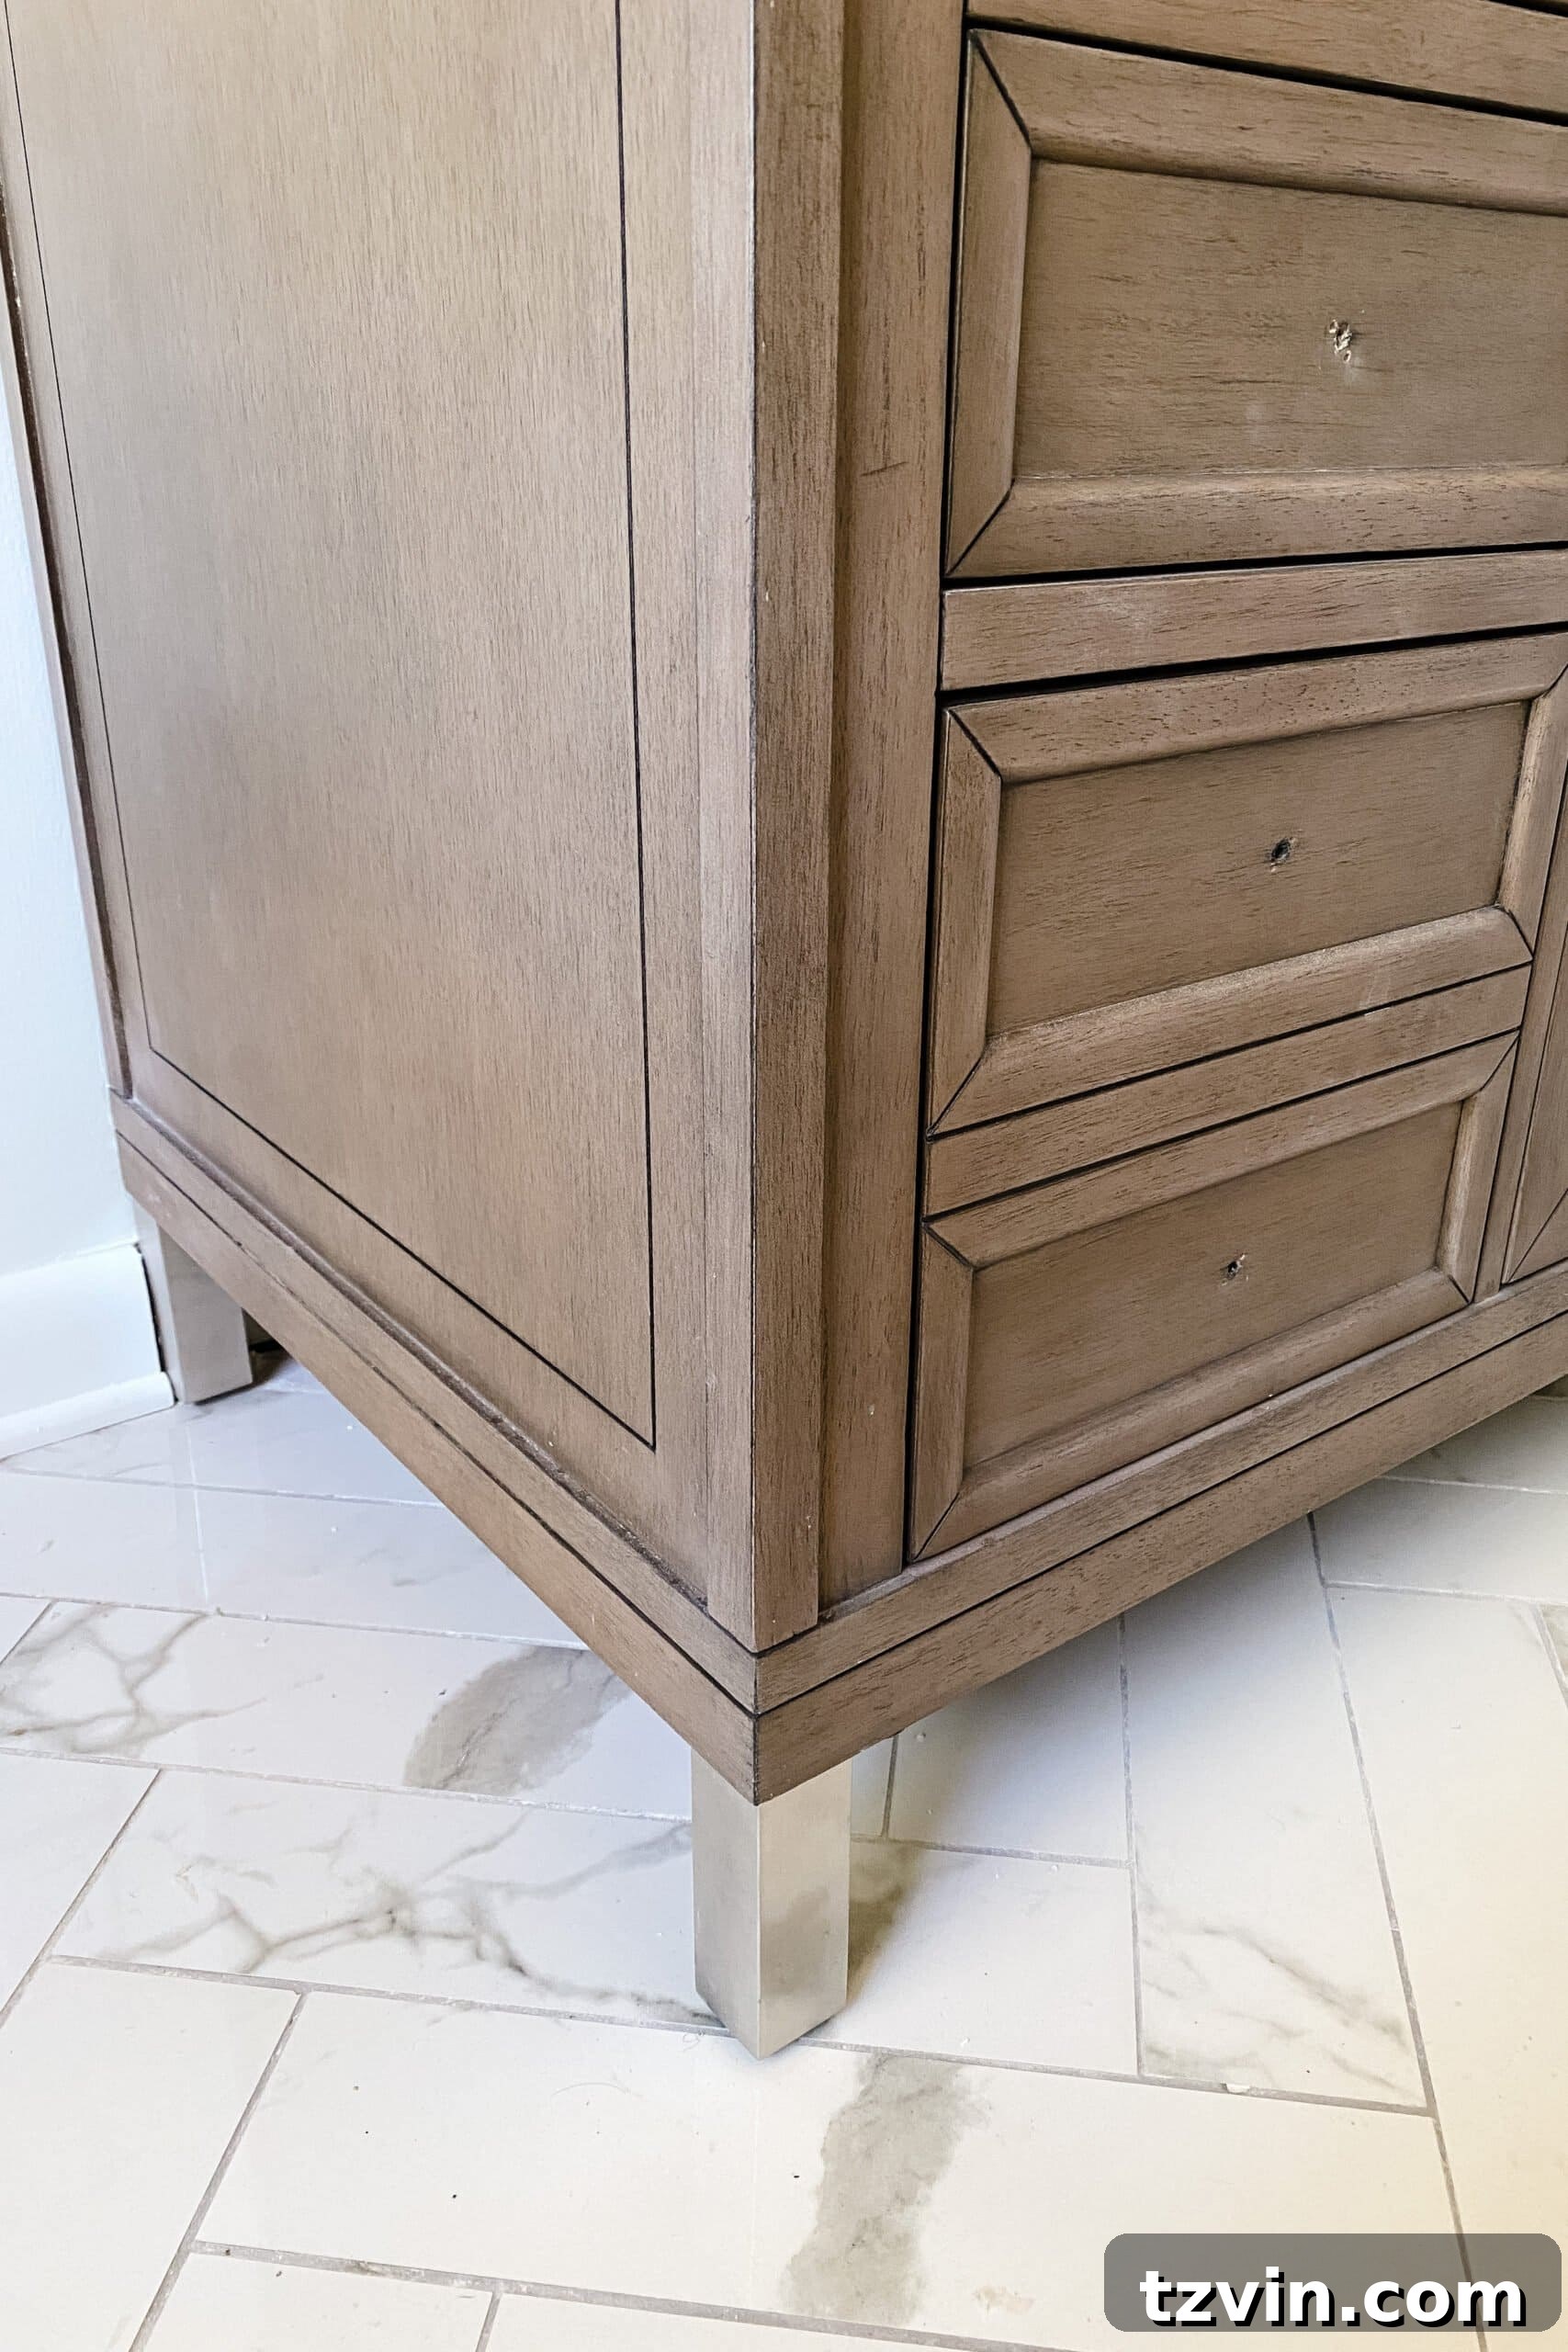
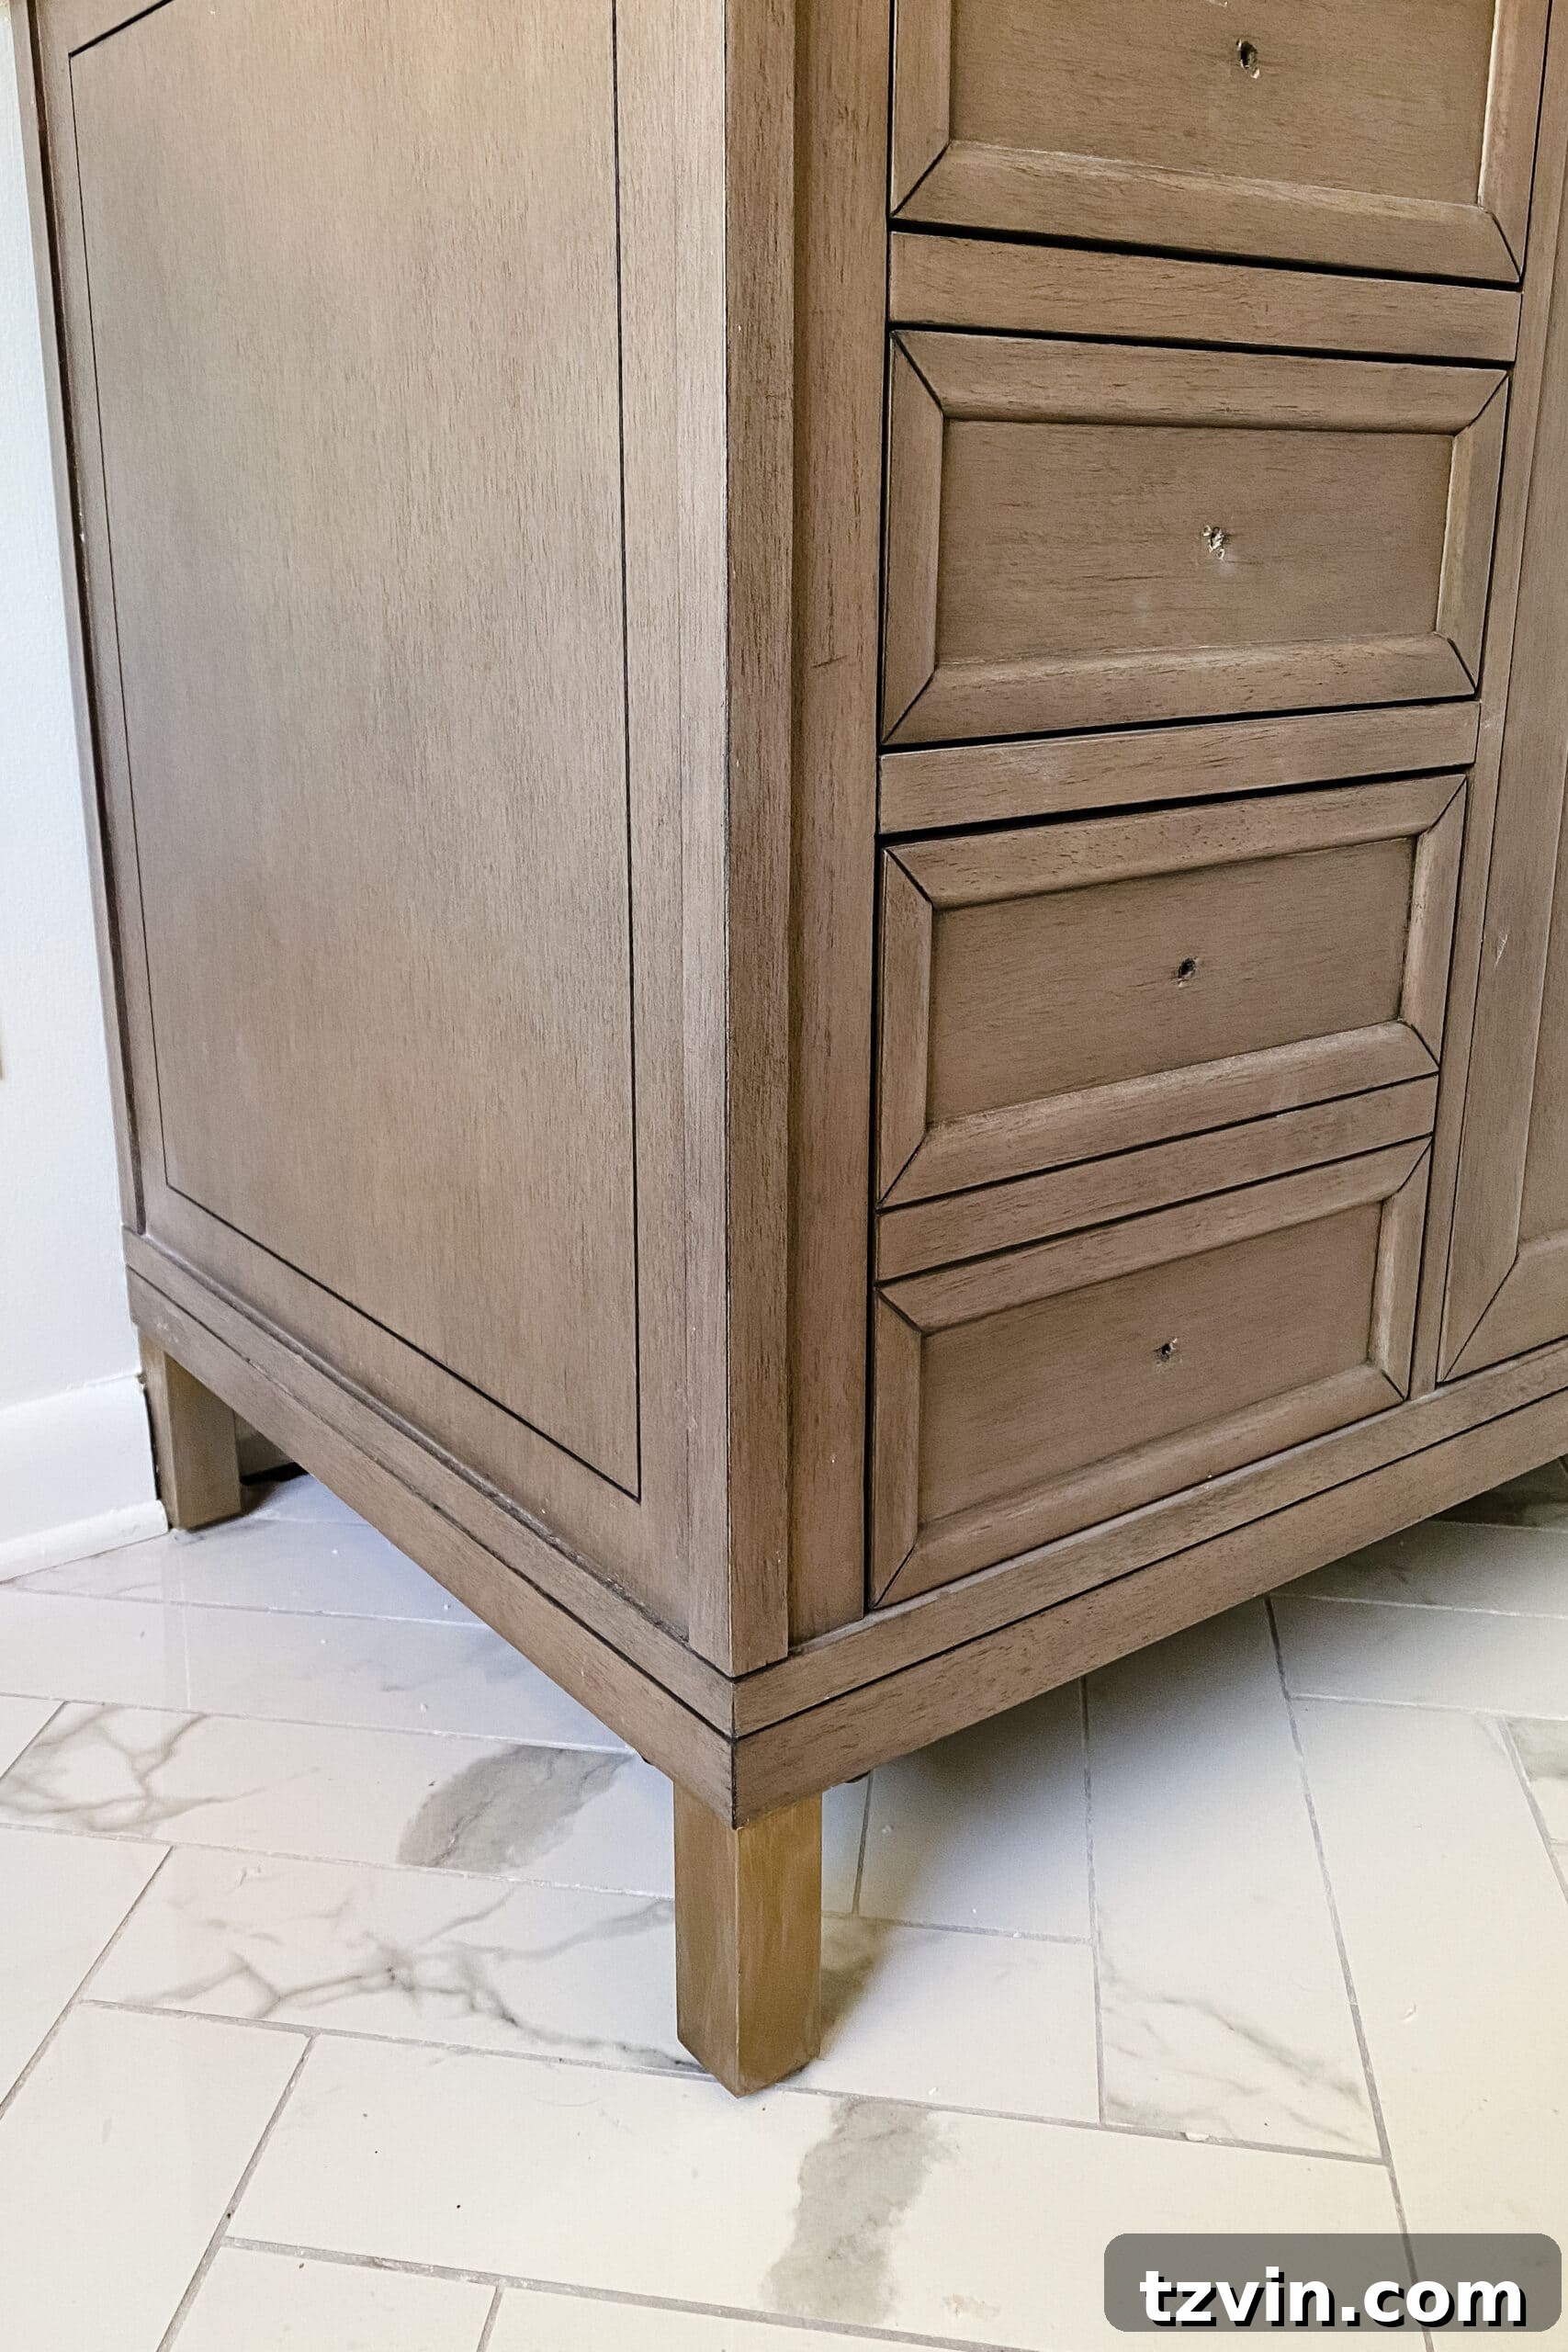
Now, with “European Gold” confidently chosen as the winner for color-matching the faucets in our bathroom, I’m ready to apply it to our bathroom vanity and a few exposed shelving screws. This step brings us one exciting stride closer to completing our bathroom renovation!
Do you have any other “holy grail” craft supplies that you swear by? Or perhaps more color experiment requests you’d love to see? I’m always eager to test them all and share the results!
Frequently Asked Questions About Rub n Buff
Rub n Buff is primarily used to create a realistic metallic finish on various surfaces like metal, wood, plastic, ceramic, and glass. Unlike traditional metallic paints, its unique wax-based formula allows it to add dimension and a convincing sheen that closely mimics real gold, silver, or copper. It is extensively utilized in home decor for transforming decorative hardware, picture frames, light fixtures, furniture accents, and countless craft projects.
Rub n Buff is known for its impressive durability and longevity, especially when applied correctly to well-prepared surfaces. However, it is not entirely permanent, particularly on items that experience frequent handling or friction, such as door knobs or drawer pulls. Over extended periods of constant touch, the metallic finish can gradually wear off. For highly-touched items, consider a thin protective top coat (though many users find it unnecessary for most applications) or be prepared for occasional reapplication to maintain its pristine look.
For the absolute best adhesion and the smoothest, most professional finish, sanding is highly recommended, especially on slick or glossy surfaces. A light scuffing with fine-grit sandpaper (around 220-grit) helps the wax “grip” the surface more effectively. This is particularly important for items that will be handled often, like cabinet knobs, where maximum durability is desired. For decorative items that are rarely touched, such as light fixtures or picture frames, sanding still facilitates an easier and more even application, but a primer is generally not required for Rub n Buff itself.
Rub n Buff dries remarkably quickly. You can typically buff the applied wax to a sheen within 30 seconds to a minute after application. While the surface will be dry to the touch very fast, it’s best to allow the finish to cure for at least 24 hours before heavy handling or placing it in an area where it might be easily scratched. Full curing can take up to a few days, after which the finish achieves its maximum hardness and durability.
More Paint Color Resources
- The Best Gold Spray Paints – Ranked
- The Most Recommended Blue Grey Paint Colors
- 9 Designer-Approved Off White Color Paints to Try
- The Most Recommended Navy Blue Paint
- The Most Recommended Blush Pink Paint
The Best Gold Spray Paints – Ranked
12 Best Sage Green Paint Colors for a Relaxing Room
How to Choose Paint Colors for Your Home Interior Like a Pro