This post is sponsored by ProCore Floors.
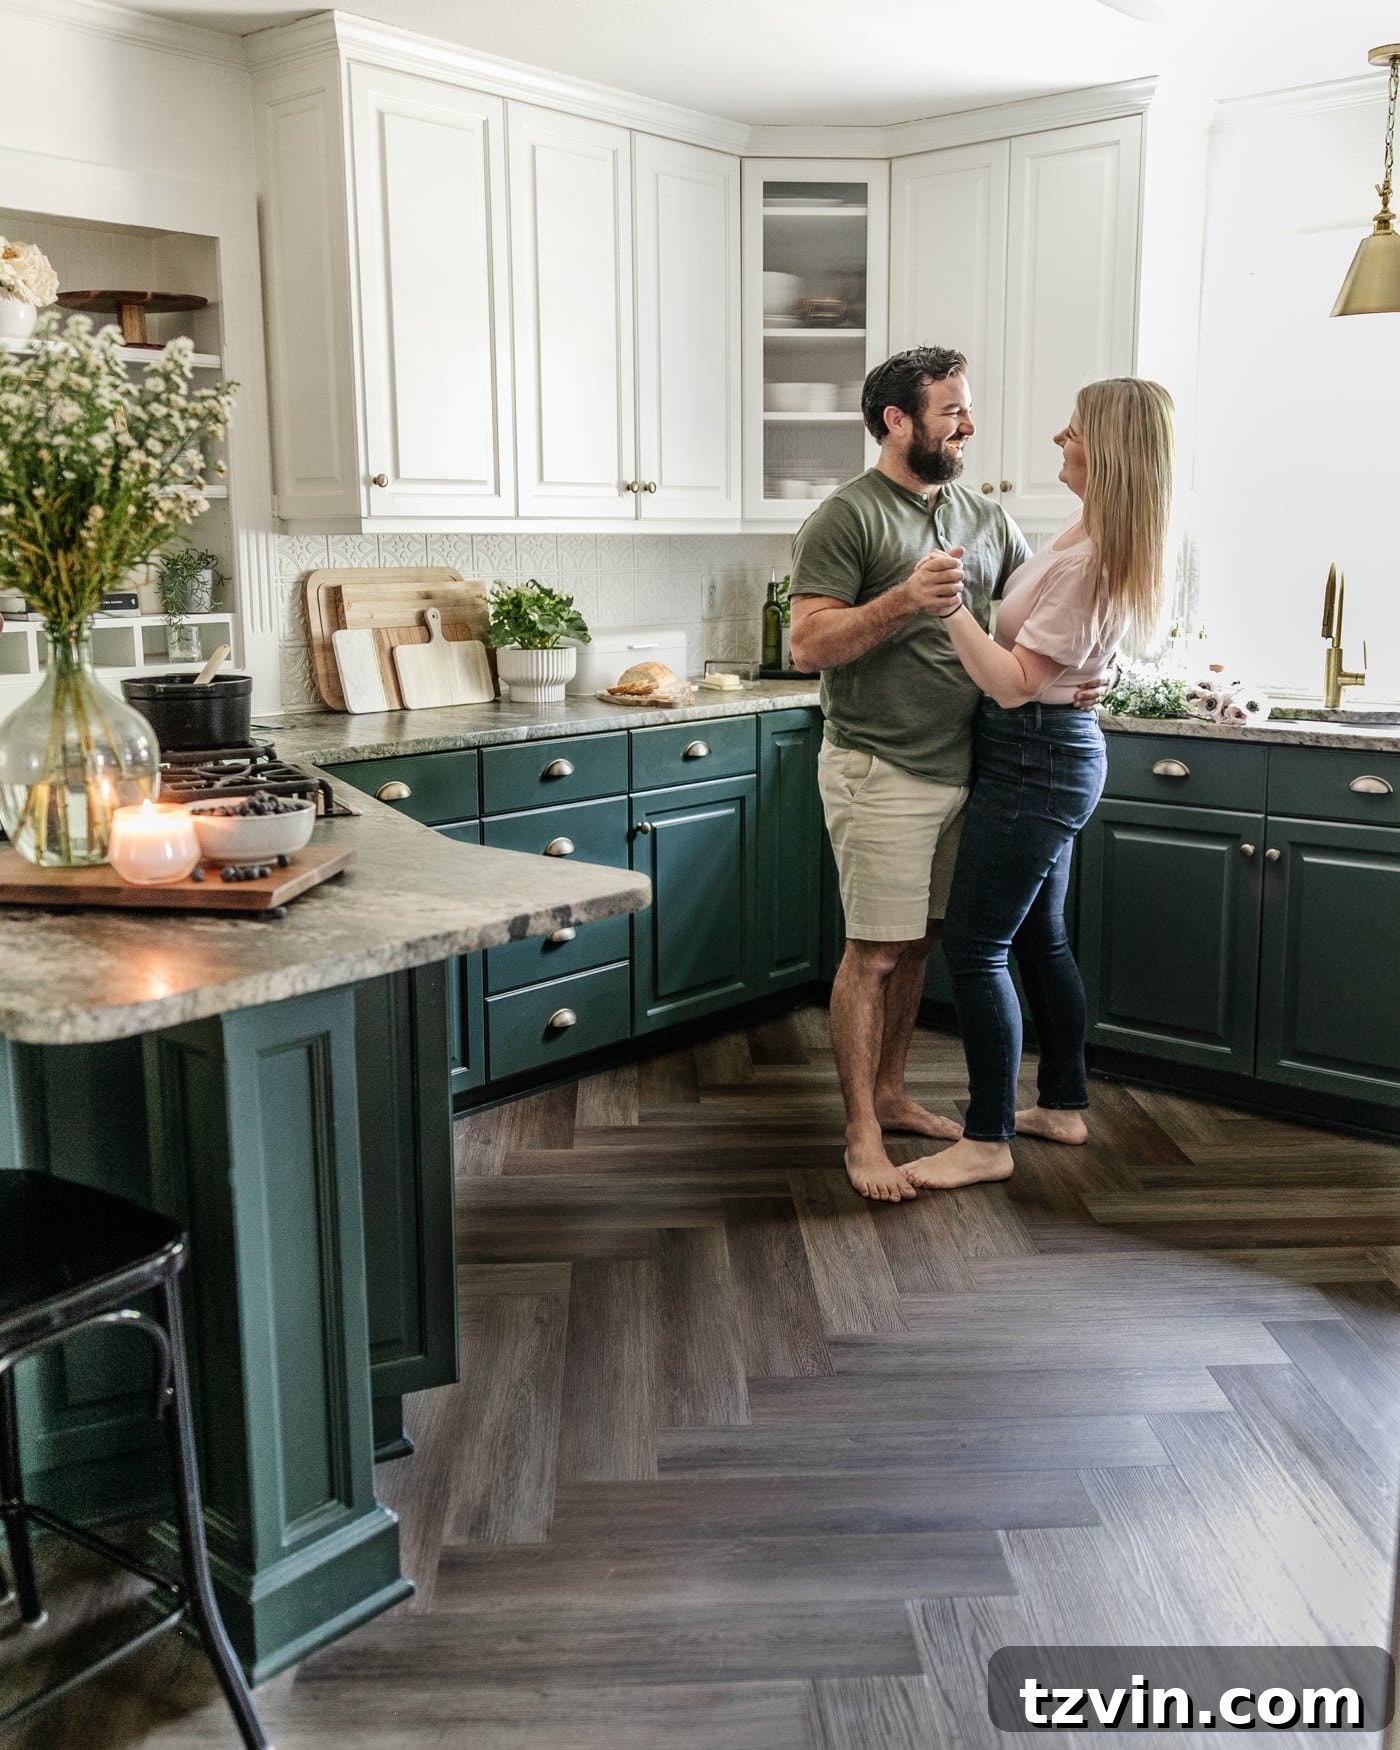
Witness a stunning corner breakfast nook and kitchen transformation, meticulously refreshed with budget-friendly herringbone Luxury Vinyl Plank (LVP) flooring. Discover how these strategic updates completely reimagined the heart of our home without extensive demolition.
Today feels like a grand reveal, and I couldn’t be more excited to share the before and after of our corner breakfast nook and kitchen! What began as a vision for a budget-conscious, no-demo makeover has truly surpassed all expectations. The difference is absolutely incredible, proving that thoughtful design choices can yield monumental results.
This comprehensive refresh involved numerous DIY projects and detailed decisions across two interconnected spaces. For those eager to delve into the specifics, a full budget breakdown and project timeline will be shared in a forthcoming blog post, covering every exciting detail of this journey.
Breakfast Nook Design & Budget Insights
Kitchen Refresh: Sources & Cost Analysis
Our transformation journey was a blend of smart sourcing, creative problem-solving, and a lot of paint. We scoured Facebook Marketplace for unique finds, drew inspiration from various breakfast nook ideas, and embraced innovative, non-demolition strategies to maximize our existing layout. The most impactful change, however, undoubtedly came from the stunning herringbone luxury vinyl plank floors from ProCore Floors, readily available at Lowe’s.
Now that the project is complete, I often find myself wondering why we didn’t upgrade these floors sooner! The deep, rich wood tones of the Brookewood collection provide a beautiful foundation for both rooms, creating a sophisticated contrast that visually expands our home. For those seeking a more contemporary and airy aesthetic, the lighter Ashewood color from ProCore Floors would also be an excellent choice.
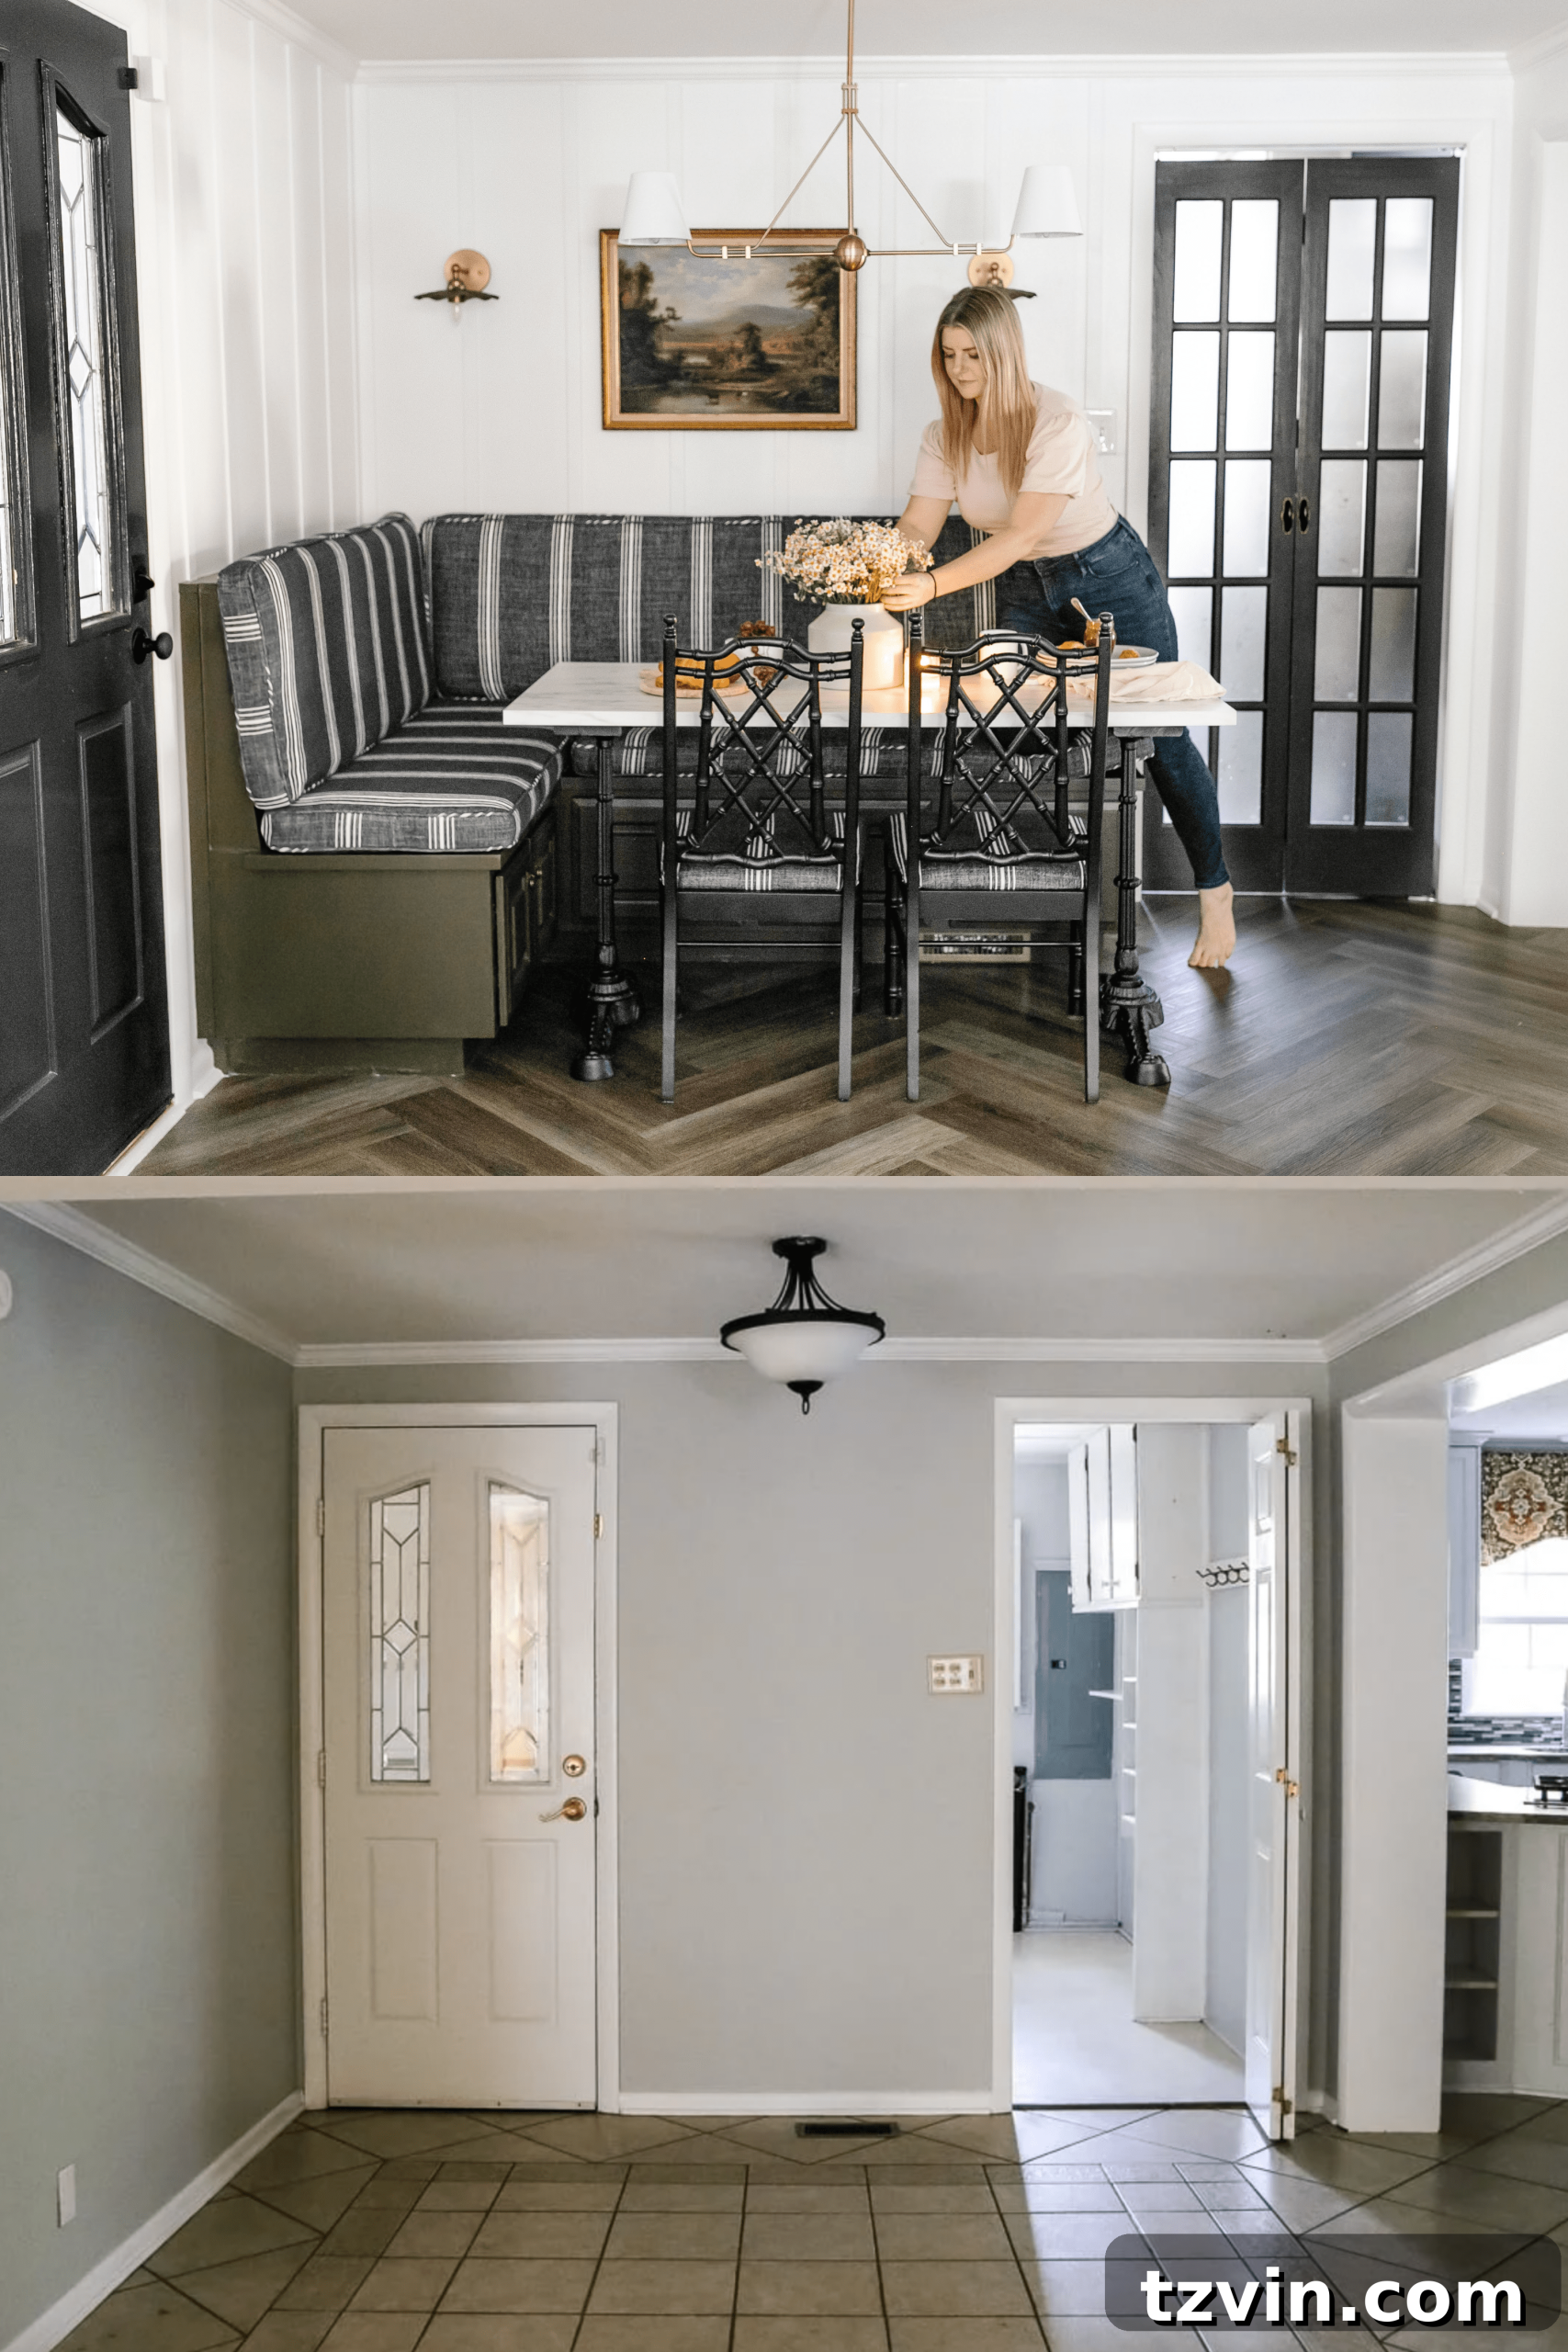
Corner Breakfast Nook: A Dramatic Before & After
For five years, our breakfast nook remained a persistent design challenge. Its compact size and awkward traffic flow seemed impossible to optimize, despite countless mental redecorating attempts. The breakthrough came one day when Robert simply suggested, “What if we moved a door?” That single idea ignited a cascade of solutions, finally transforming this tricky corner into a functional and inviting space.
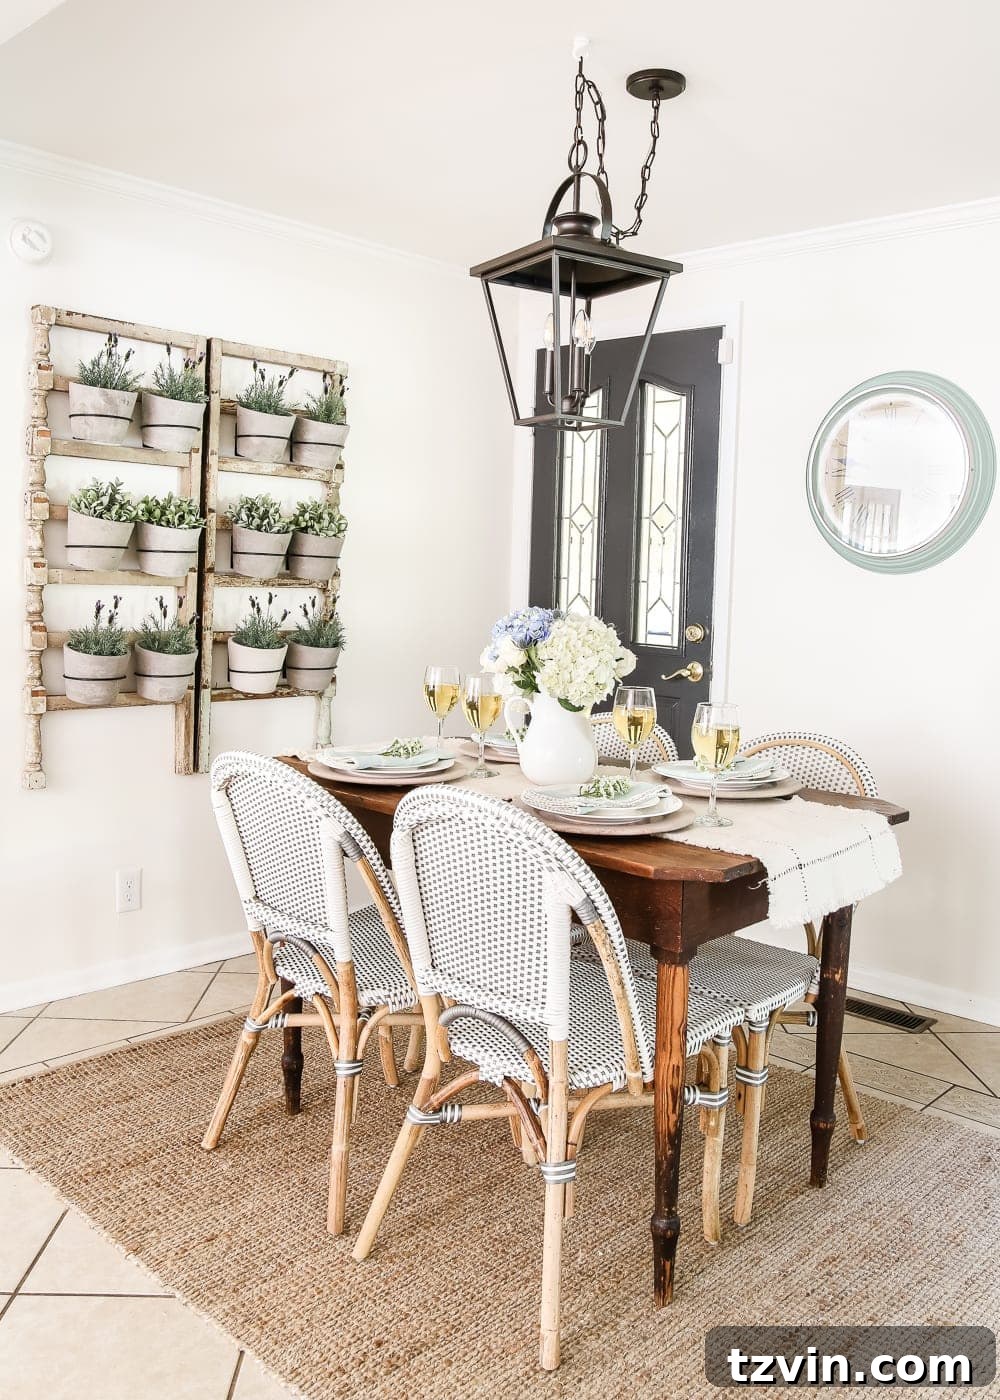
The Strategic Choice: Luxury Vinyl Plank Flooring for Our Breakfast Nook and Kitchen
Our long-term renovation plans always included a complete kitchen gut, which would eventually address the old, slippery tile floors connecting to the breakfast nook. These tiles had caused several slips over the years, particularly after tracking water in from our backyard pool. Replacing them was a priority, but the prospect of expensive, messy, and skilled demolition kept it on the back burner.
Our discovery of ProCore Floors’ herringbone luxury vinyl planks as a “floating floor” solution changed everything. This innovative product allowed us to install new flooring directly over the existing tile, bypassing the need for demolition entirely! This not only saved us significant time and money but also perfectly aligned with our desire for a DIY-friendly project. The immense durability and ease of installation were key selling points, addressing many of our flooring concerns.
Tutorial: For a step-by-step guide, learn how to install a herringbone LVP vinyl floor over tile here.
The ability to float these planks directly over our old tile was a game-changer. It addressed our flooring issues head-on, offering a DIY-friendly installation process and unparalleled durability that truly sold us. Knowing we could achieve a high-end look without the complexities of traditional flooring removal made the decision effortless. This option was a perfect blend of practicality and aesthetic appeal for our busy family home.
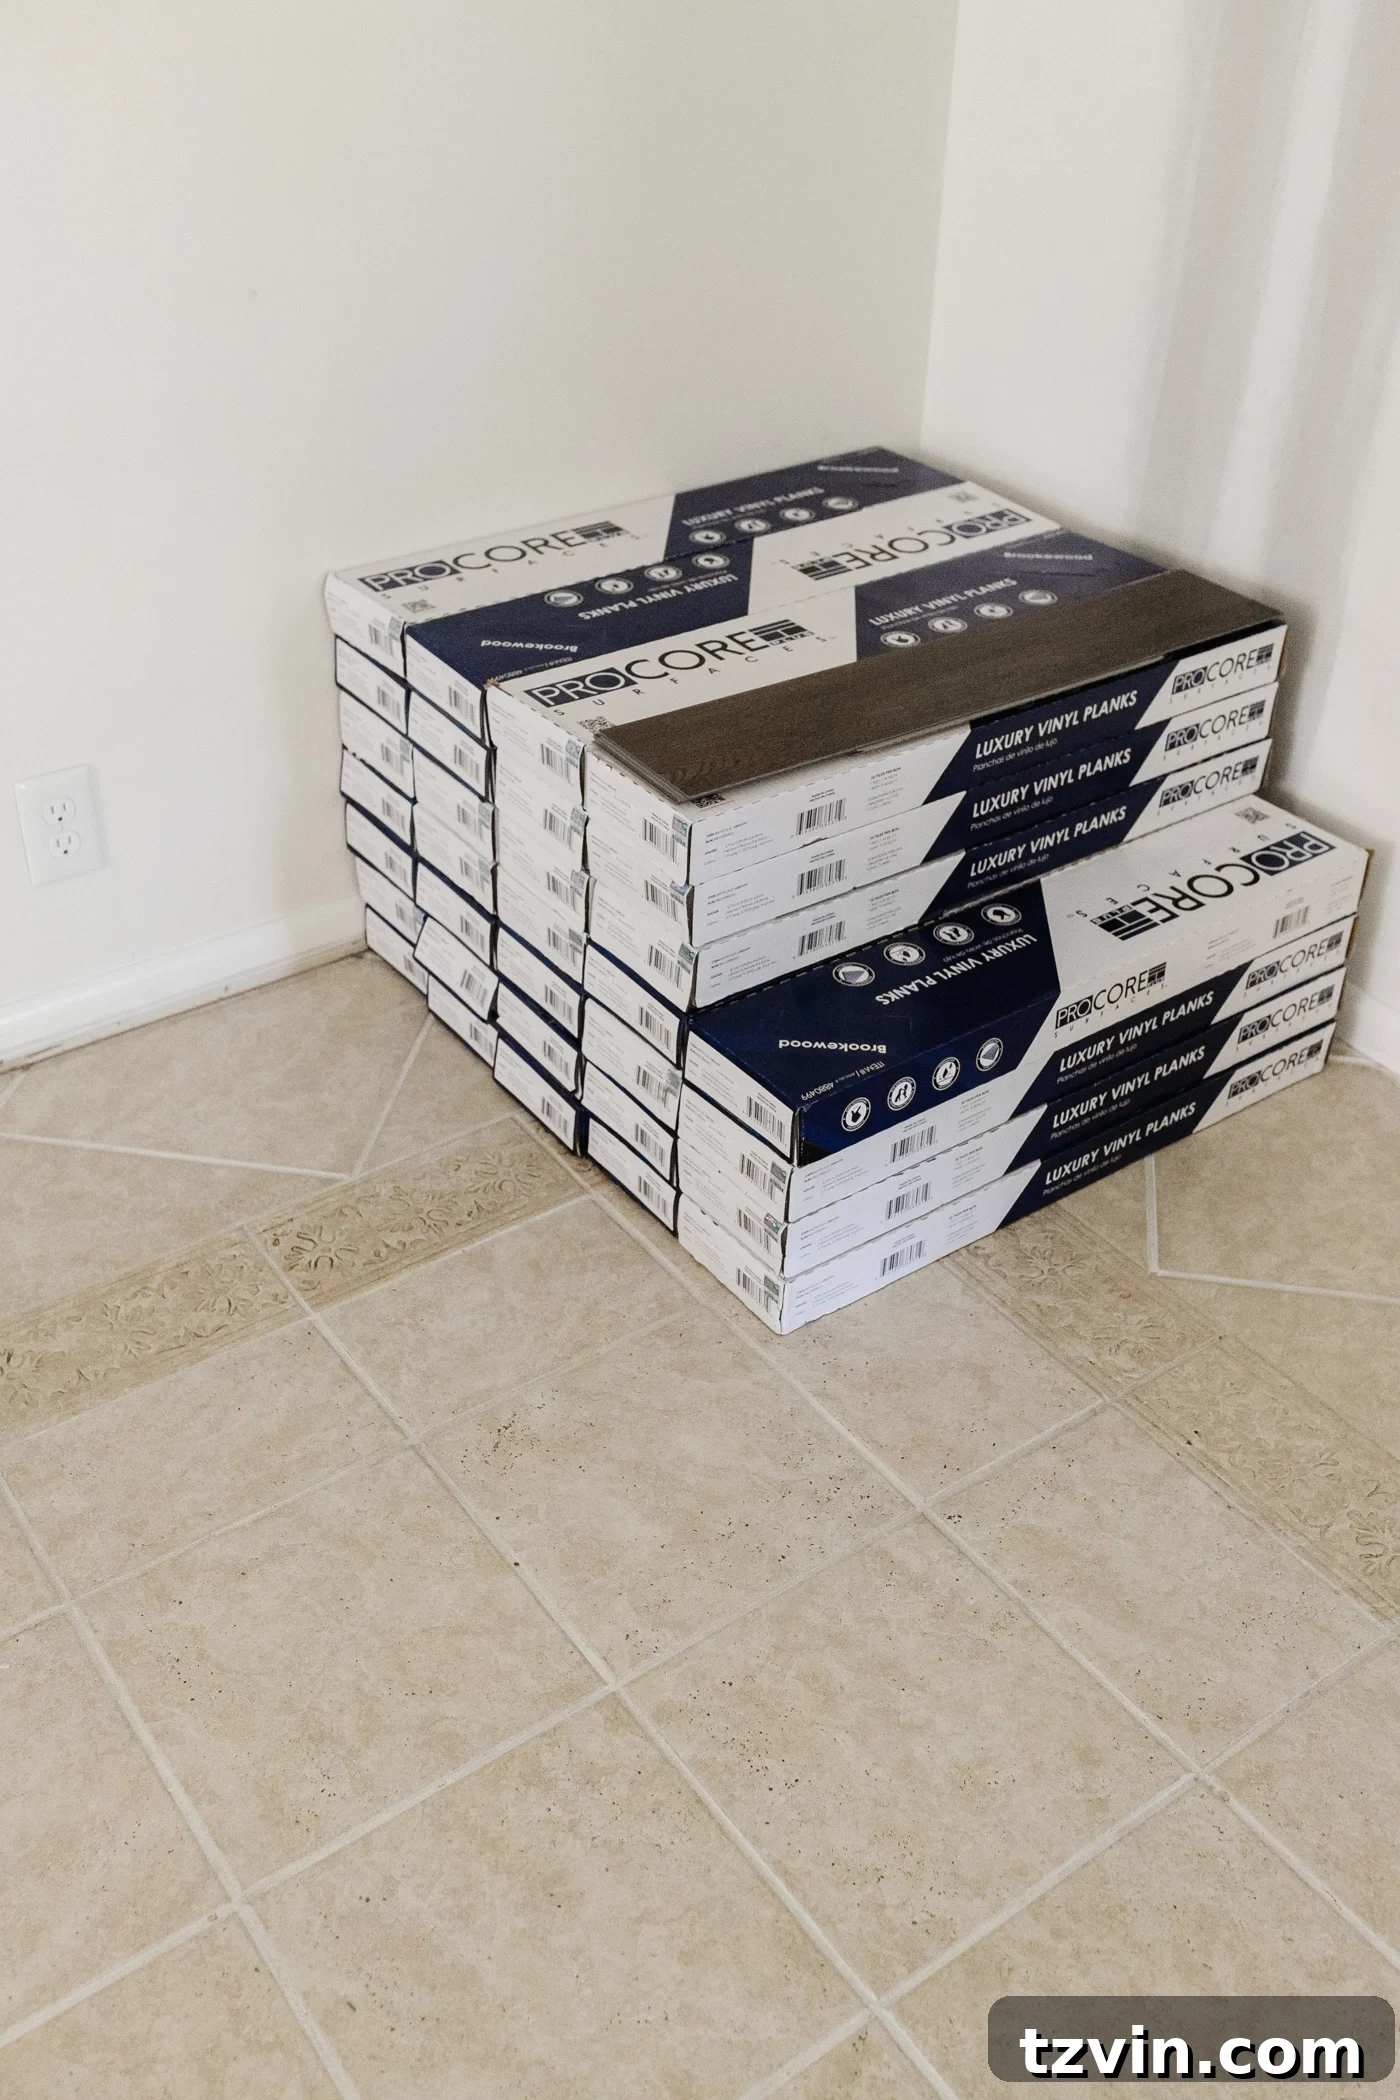
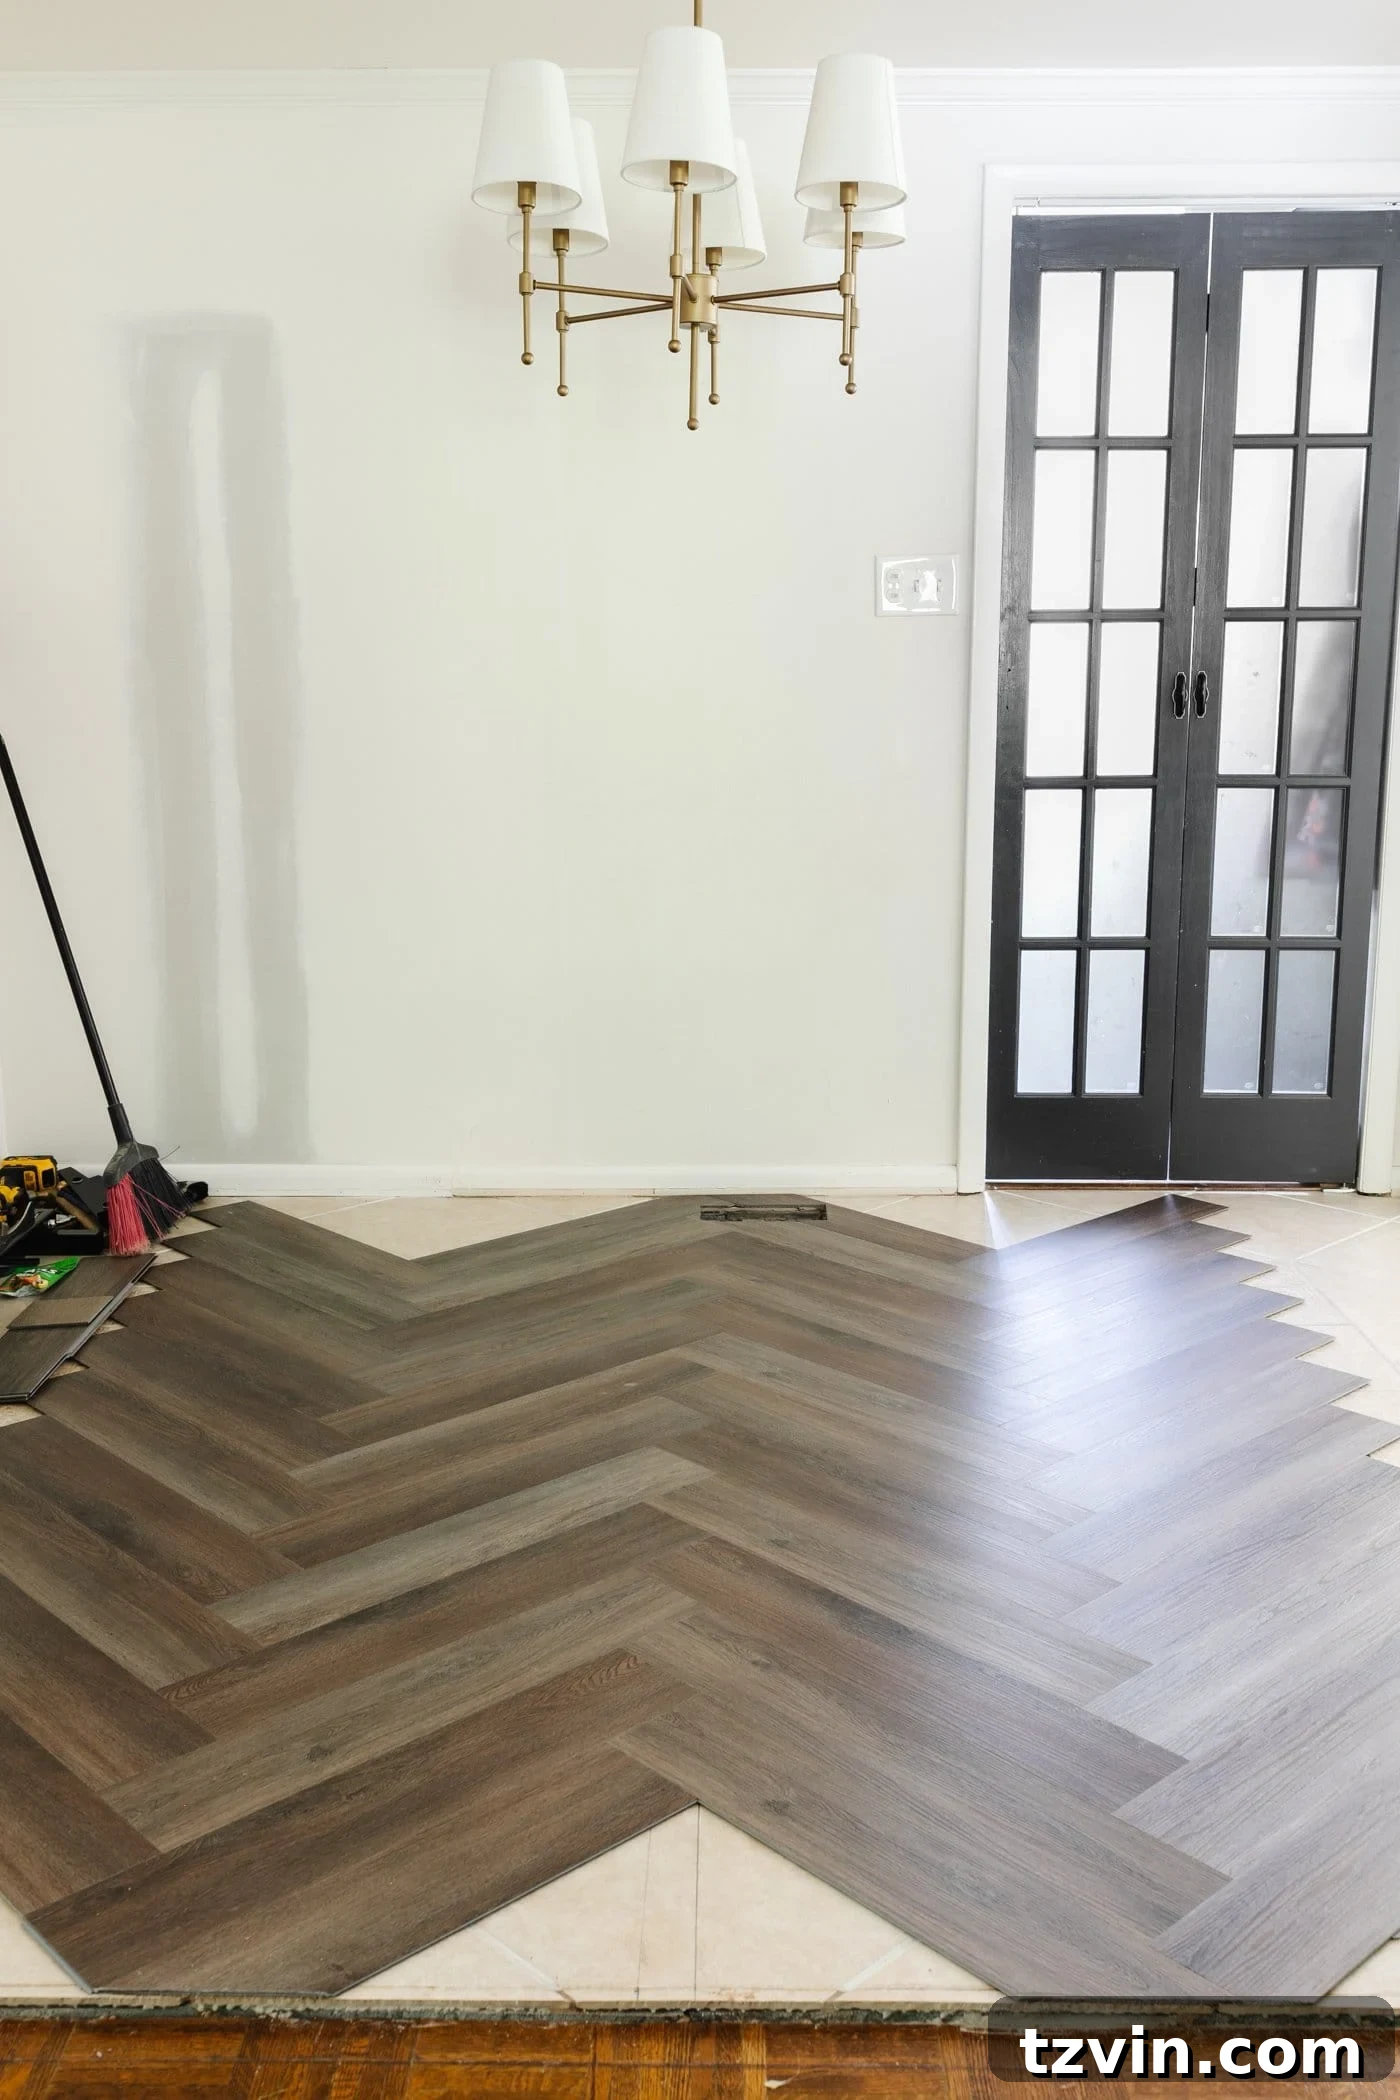
Key Benefits of LVP Flooring:
- Waterproof: Ideal for kitchens and areas prone to spills, protecting against moisture damage.
- Stain Resistant: Effortlessly repels common household stains, maintaining its pristine appearance.
- Scratch Resistant: Built to withstand daily wear and tear from pets, kids, and heavy foot traffic.
- Highly Durable: Engineered for longevity, ensuring your floors look great for years to come.
- Low Maintenance: Simple to clean and care for, requiring minimal effort to keep it looking new.
- Improved Sound Absorption: Contributes to a quieter home environment compared to many other flooring types.
- Kid and Pet Friendly: Specially designed to endure the challenges of an active family, including high-traffic areas.
- DIY-Friendly Installation: Significantly easier to install than traditional tile or hardwood, making it a popular choice for homeowners.
We had previously installed a different pattern of ProCore Floor’s Meadow Oak luxury vinyl planks in our neighbors’ rec room makeover. Their impressive performance and the straightforward installation process gave us immense confidence in choosing ProCore Floors for our own home.
Optimal Scenarios for Installing Floating Vinyl Flooring Over Tile
While installing a luxury vinyl plank floating floor offers incredible advantages, it’s essential to understand that it may not be the optimal solution for every renovation. Ideally, removing old flooring before installing new is often recommended. However, for many homeowners, a complete tear-out isn’t feasible due to budget limitations, time constraints, or the sheer inconvenience of disrupting daily life. In such cases, a floating LVP floor presents a fantastic, cost-effective, and rapid solution to transform an outdated or unsightly space.
Consider LVP Flooring in These Situations:
- When you are seeking a flooring option that allows for self-installation, saving on labor costs.
- When removing your existing flooring poses significant budgetary challenges or compromises the liveability of your home during renovation.
- When you desire the timeless beauty of hardwood floors but require superior durability and moisture resistance.
- When you need a resilient and low-maintenance flooring solution for a busy household.
- When budget is a key factor, as ProCore LVP flooring offers excellent value, starting at an accessible price point of $1.19 per square foot.
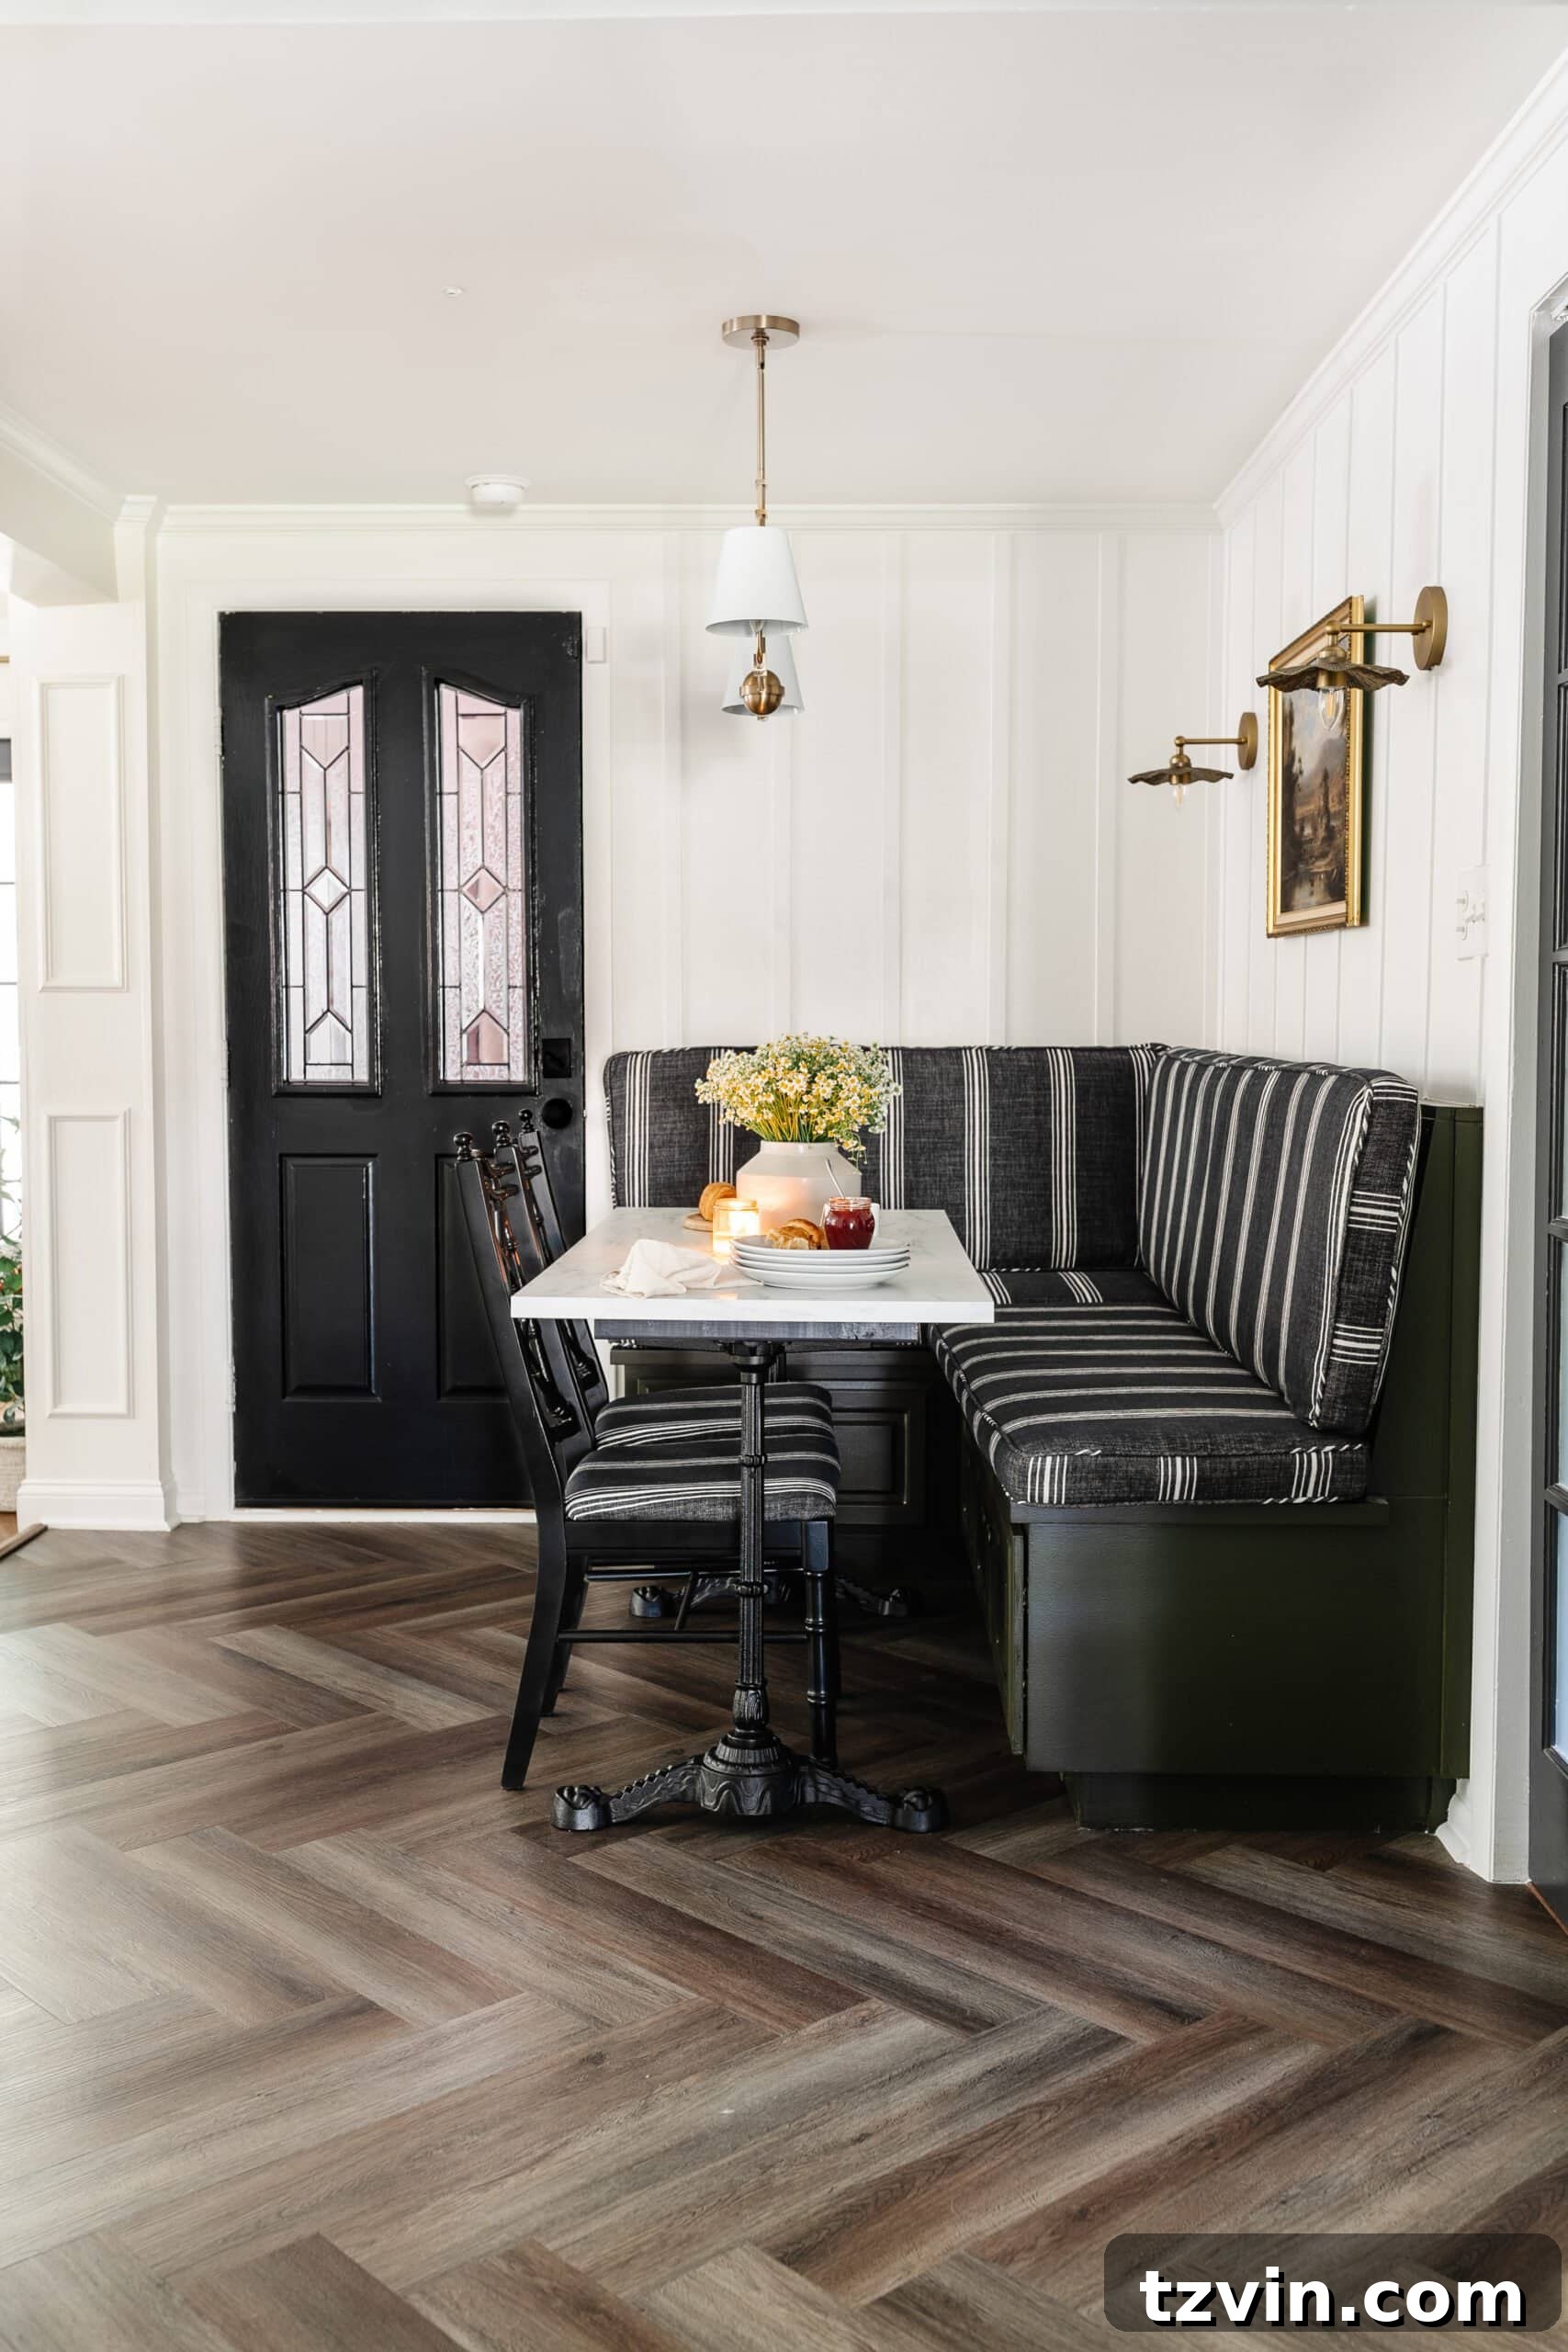
It’s been about a month since we completed the installation of these herringbone LVP floors, and our satisfaction couldn’t be higher. Their ease of cleaning and beautiful aesthetic have truly elevated our space. Moreover, we’ve found them significantly less slippery than our old tile, providing much-needed peace of mind, especially when water inevitably finds its way to the floor.
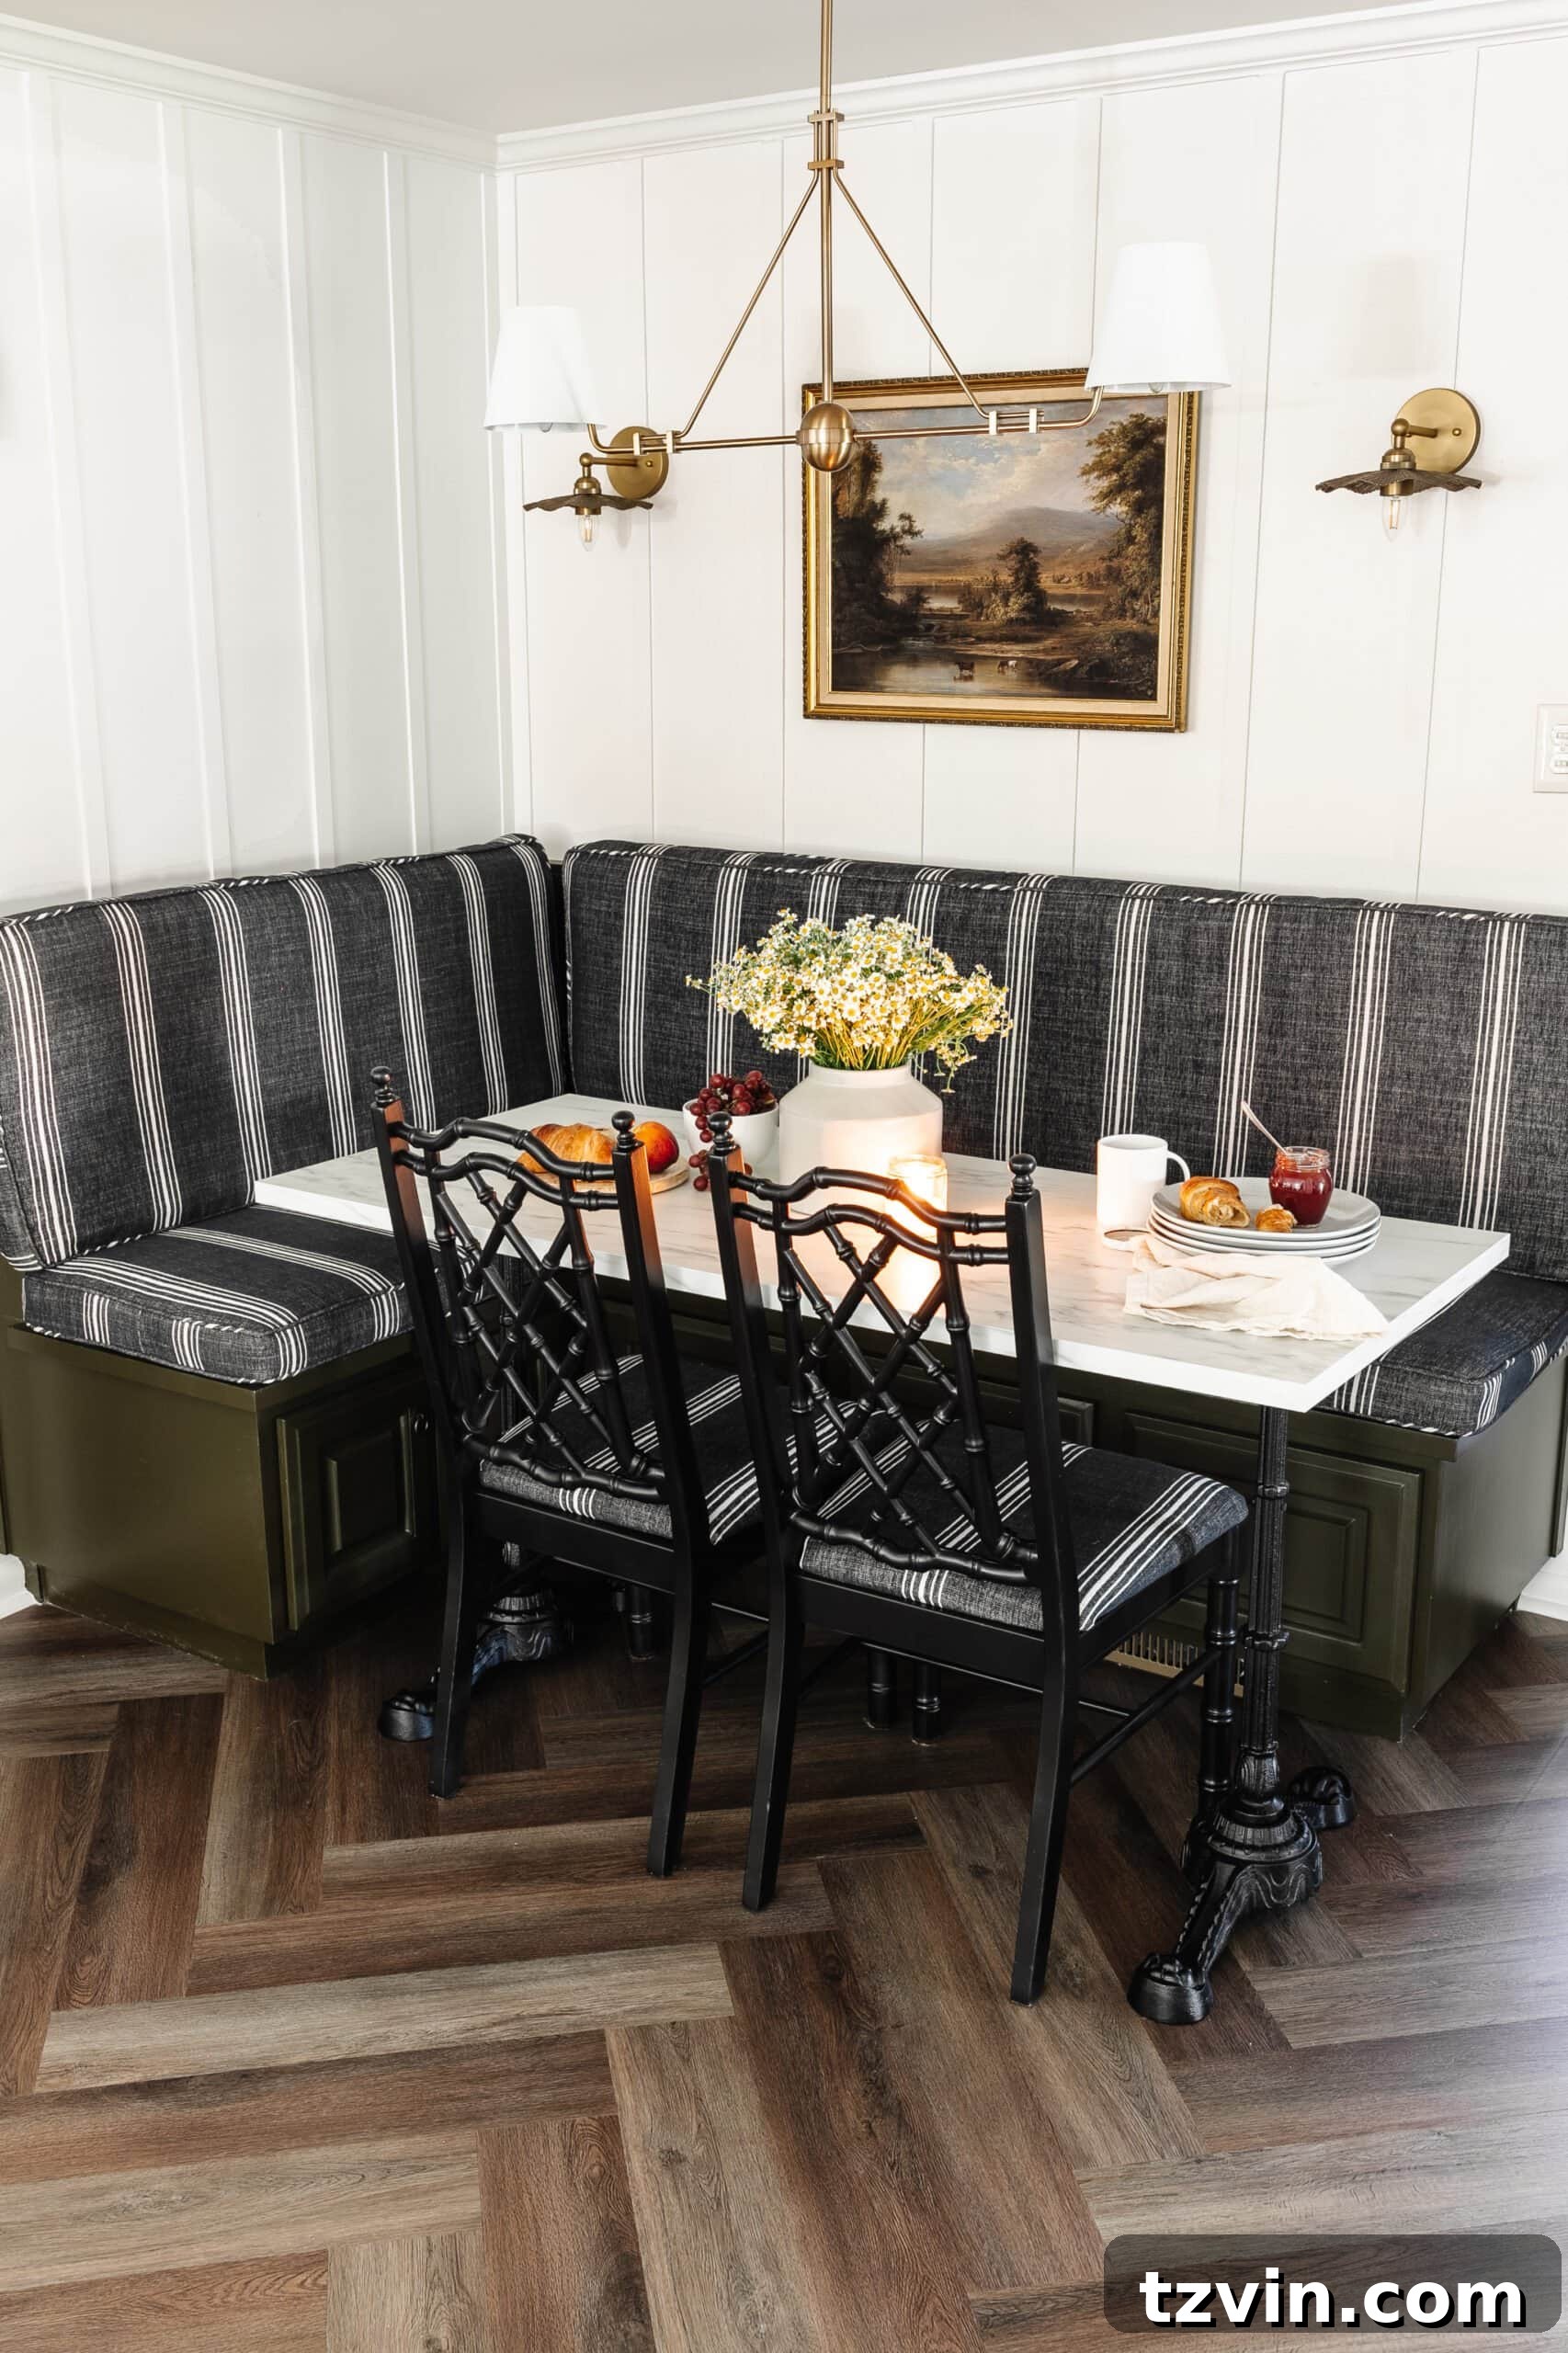
Crafting the Cozy Corner Banquette
Tutorial: Explore our guide on Corner Banquette Makeover and How to Redirect Air Vents Under Cabinets
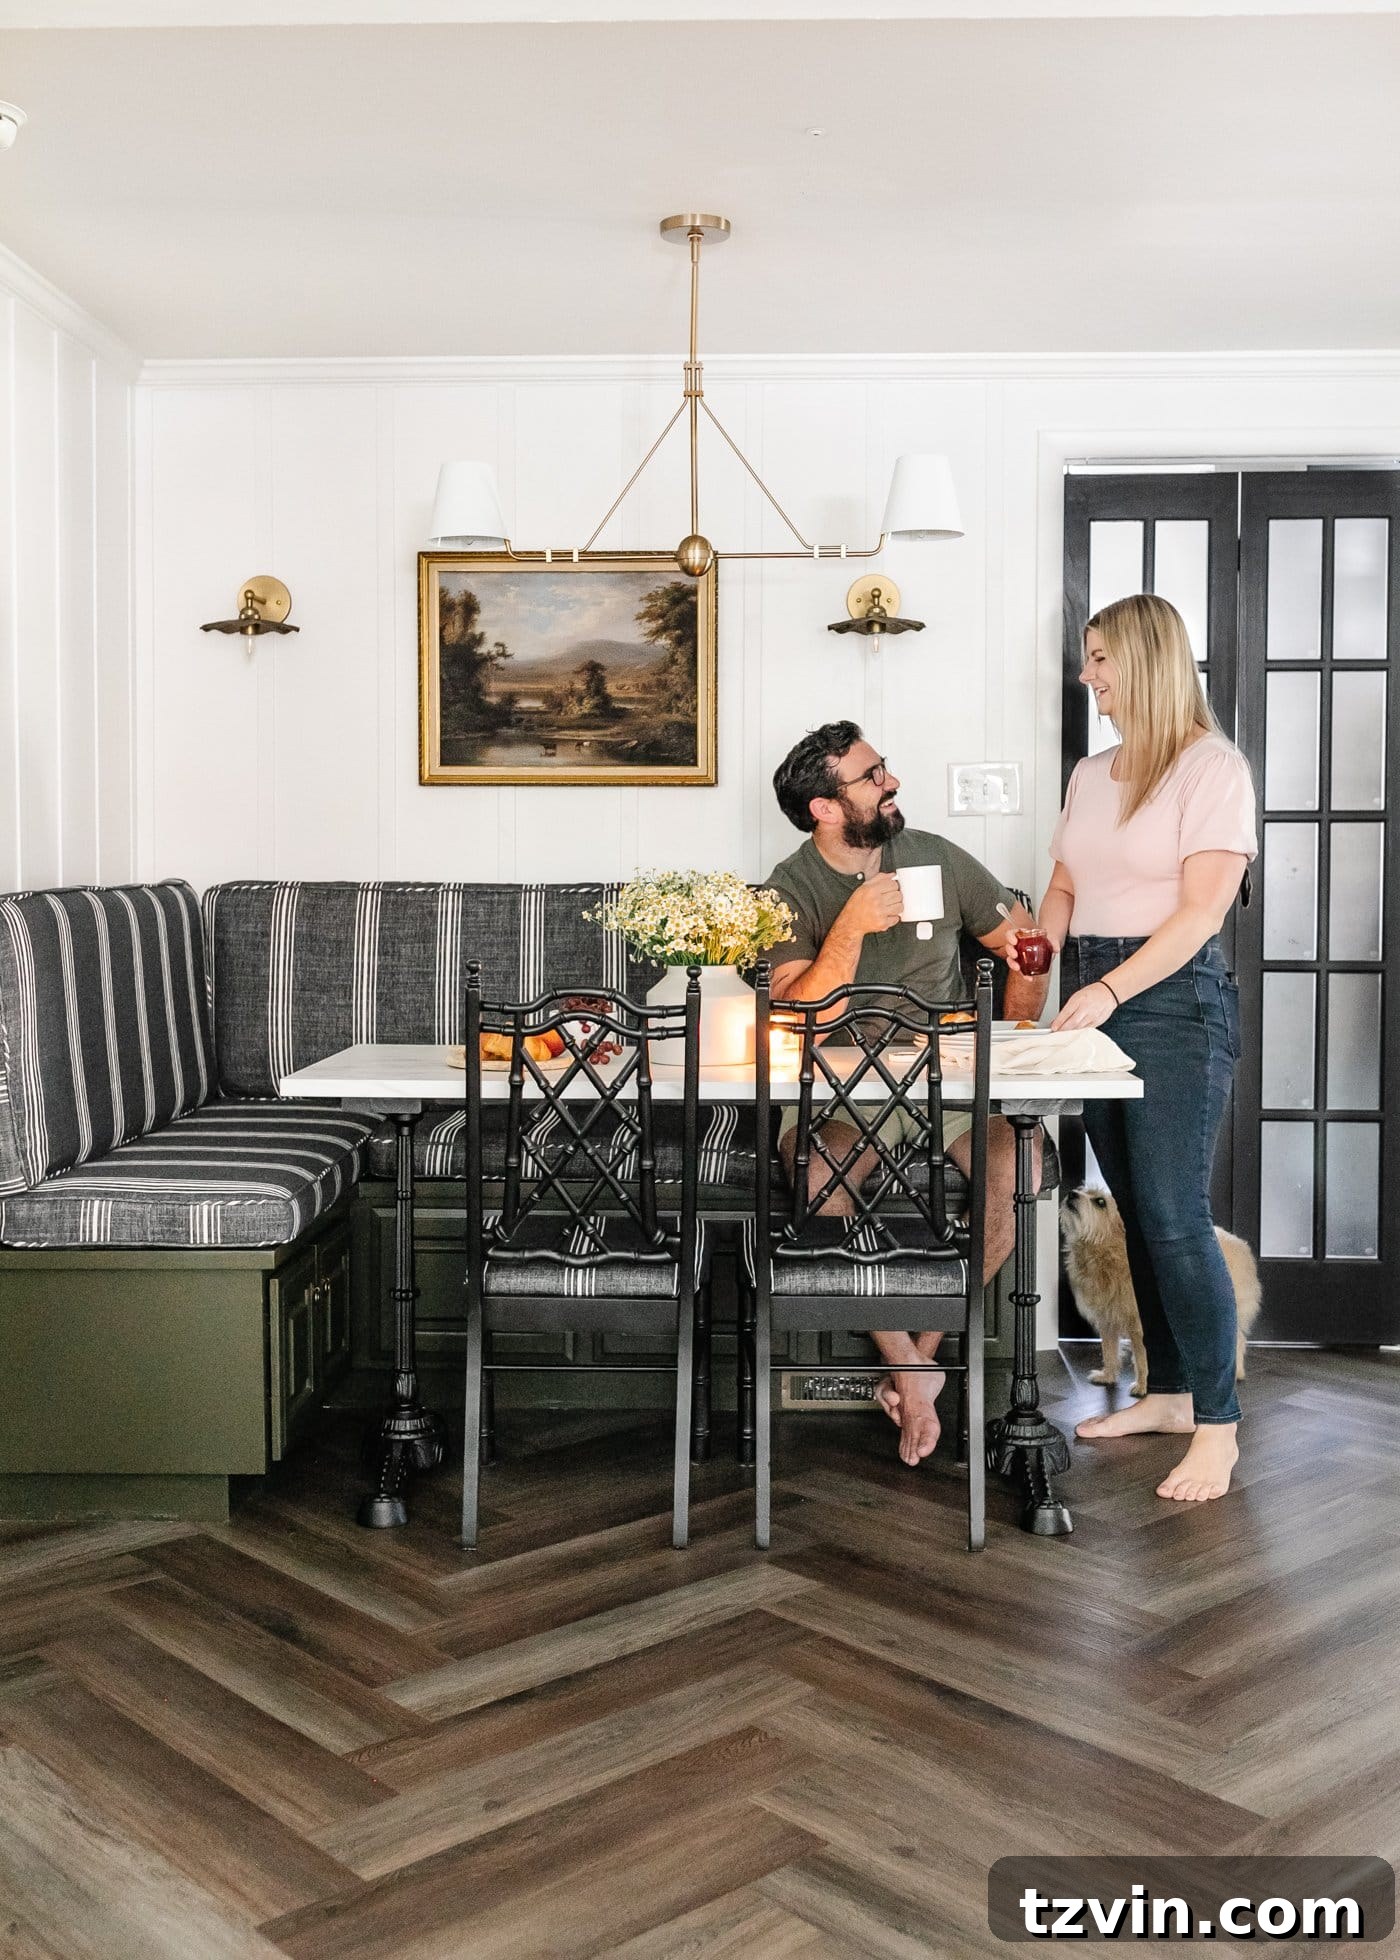
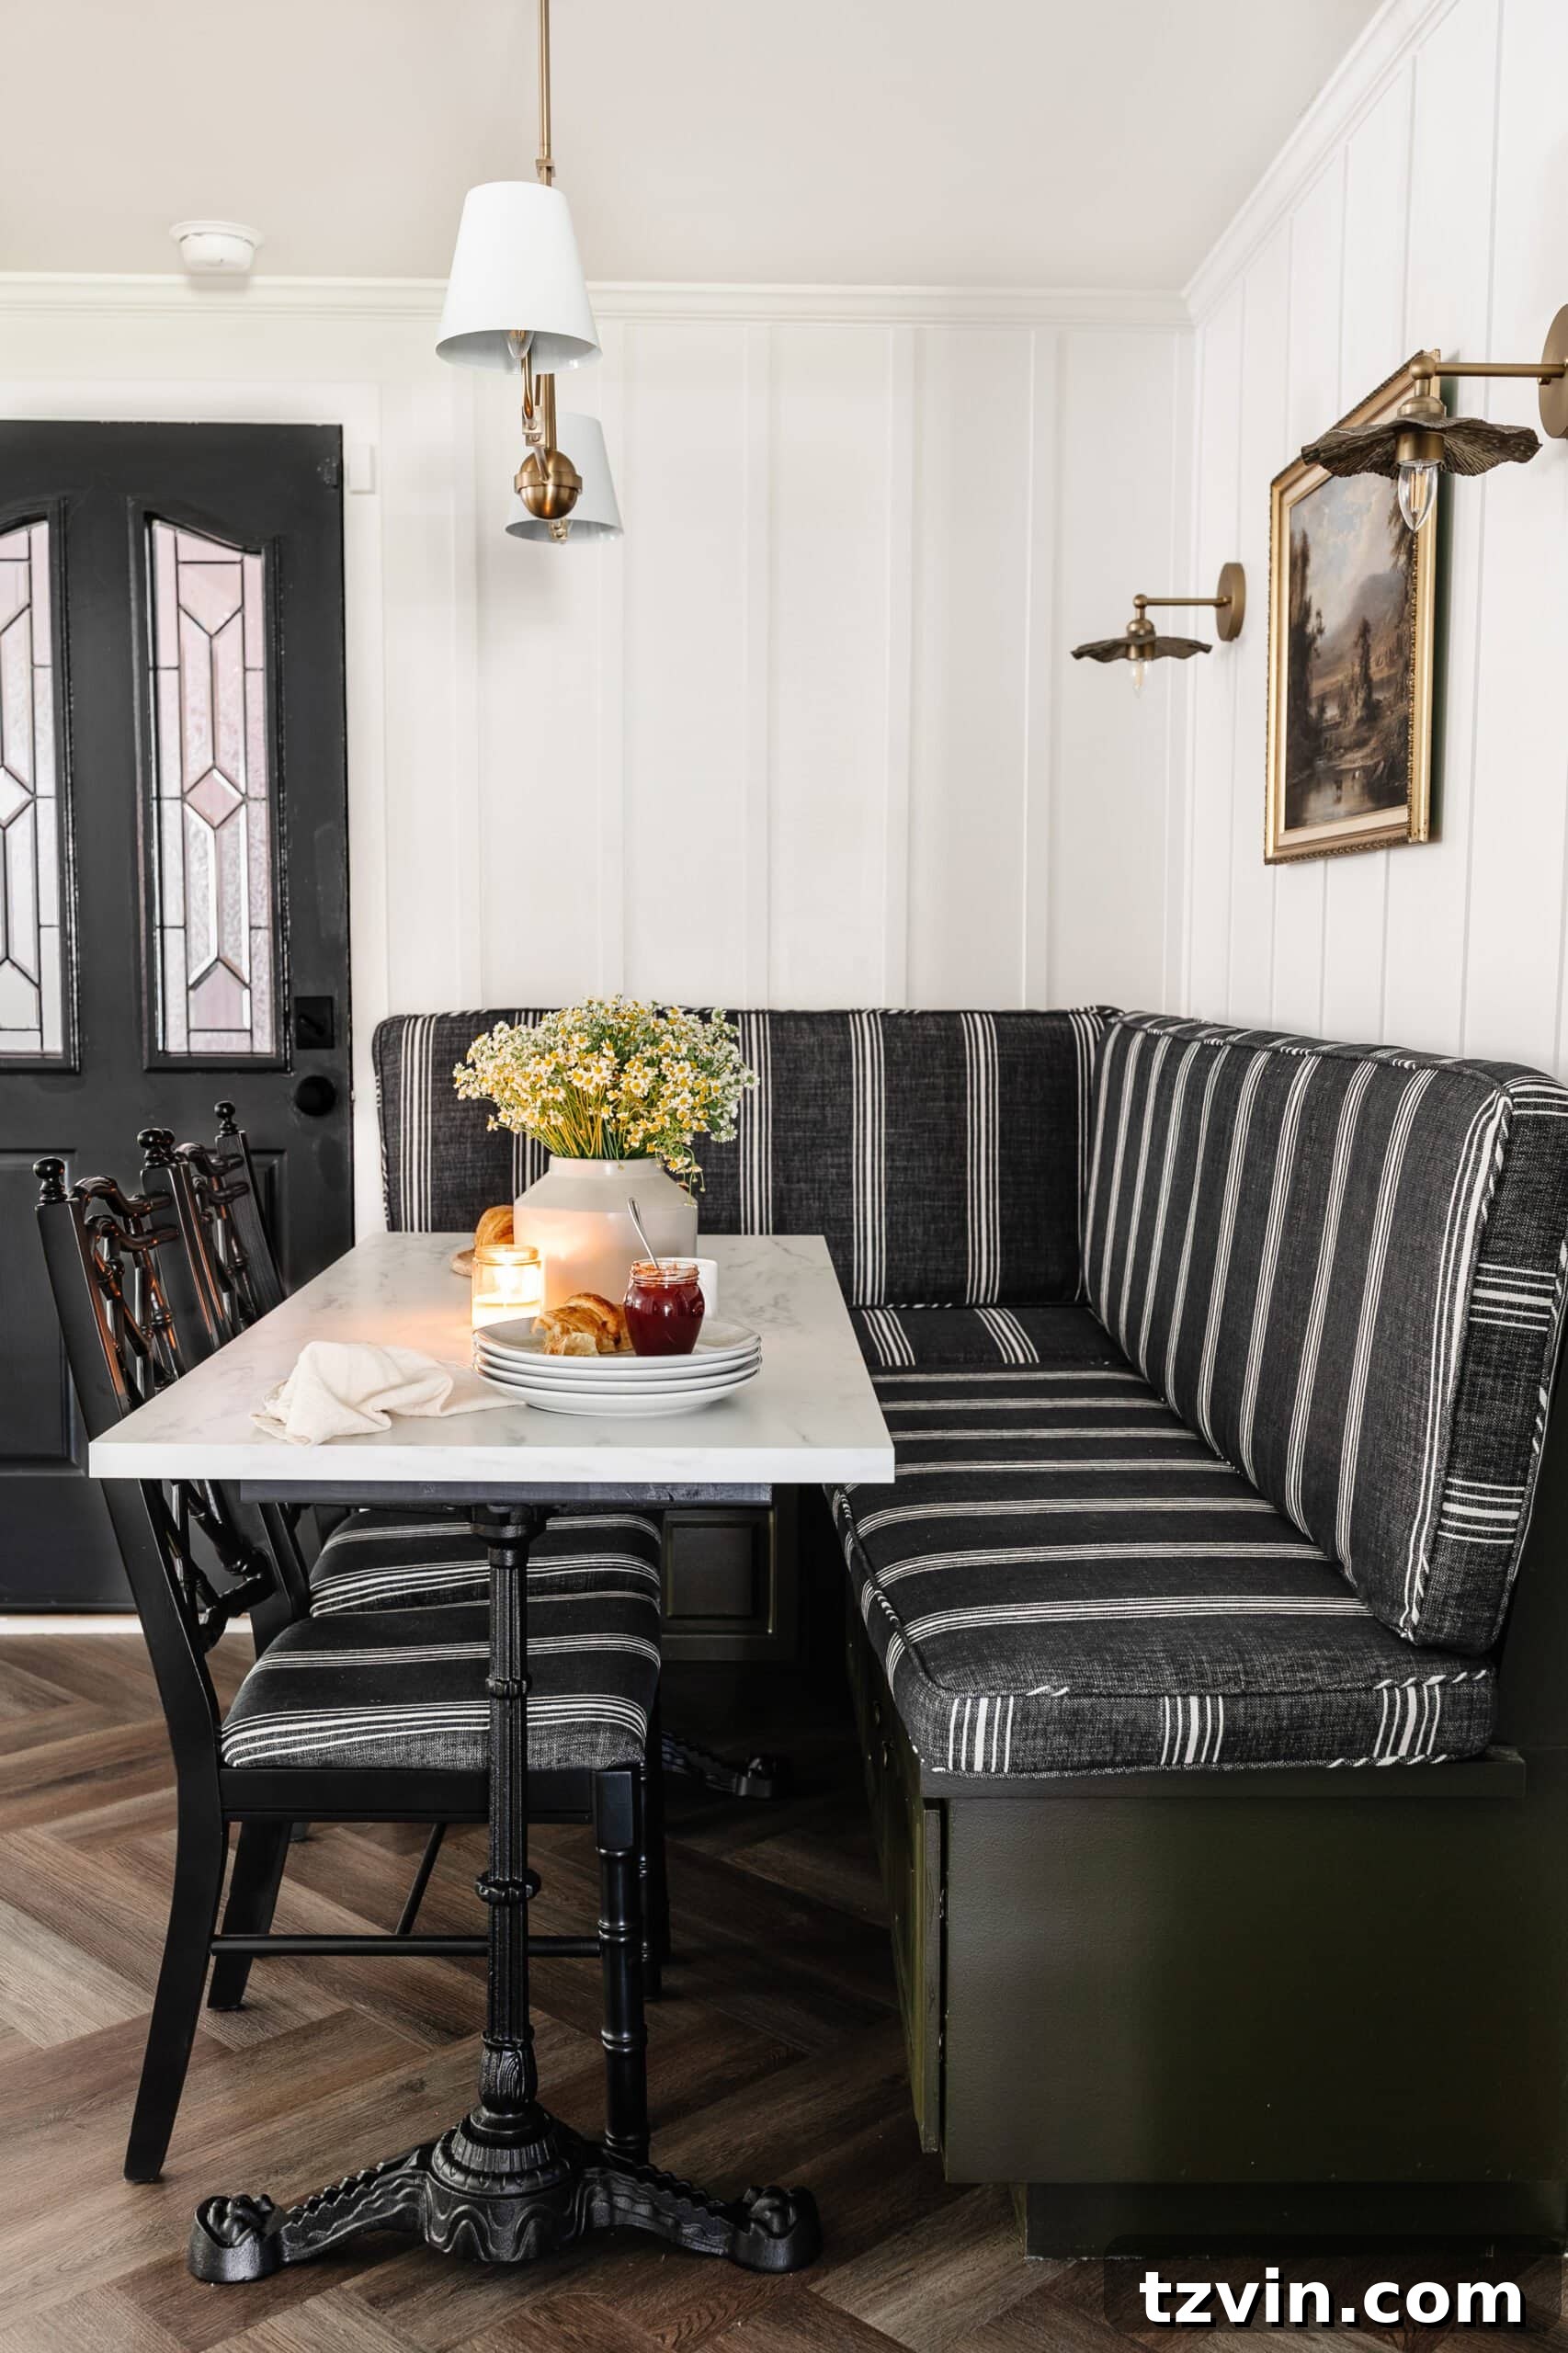
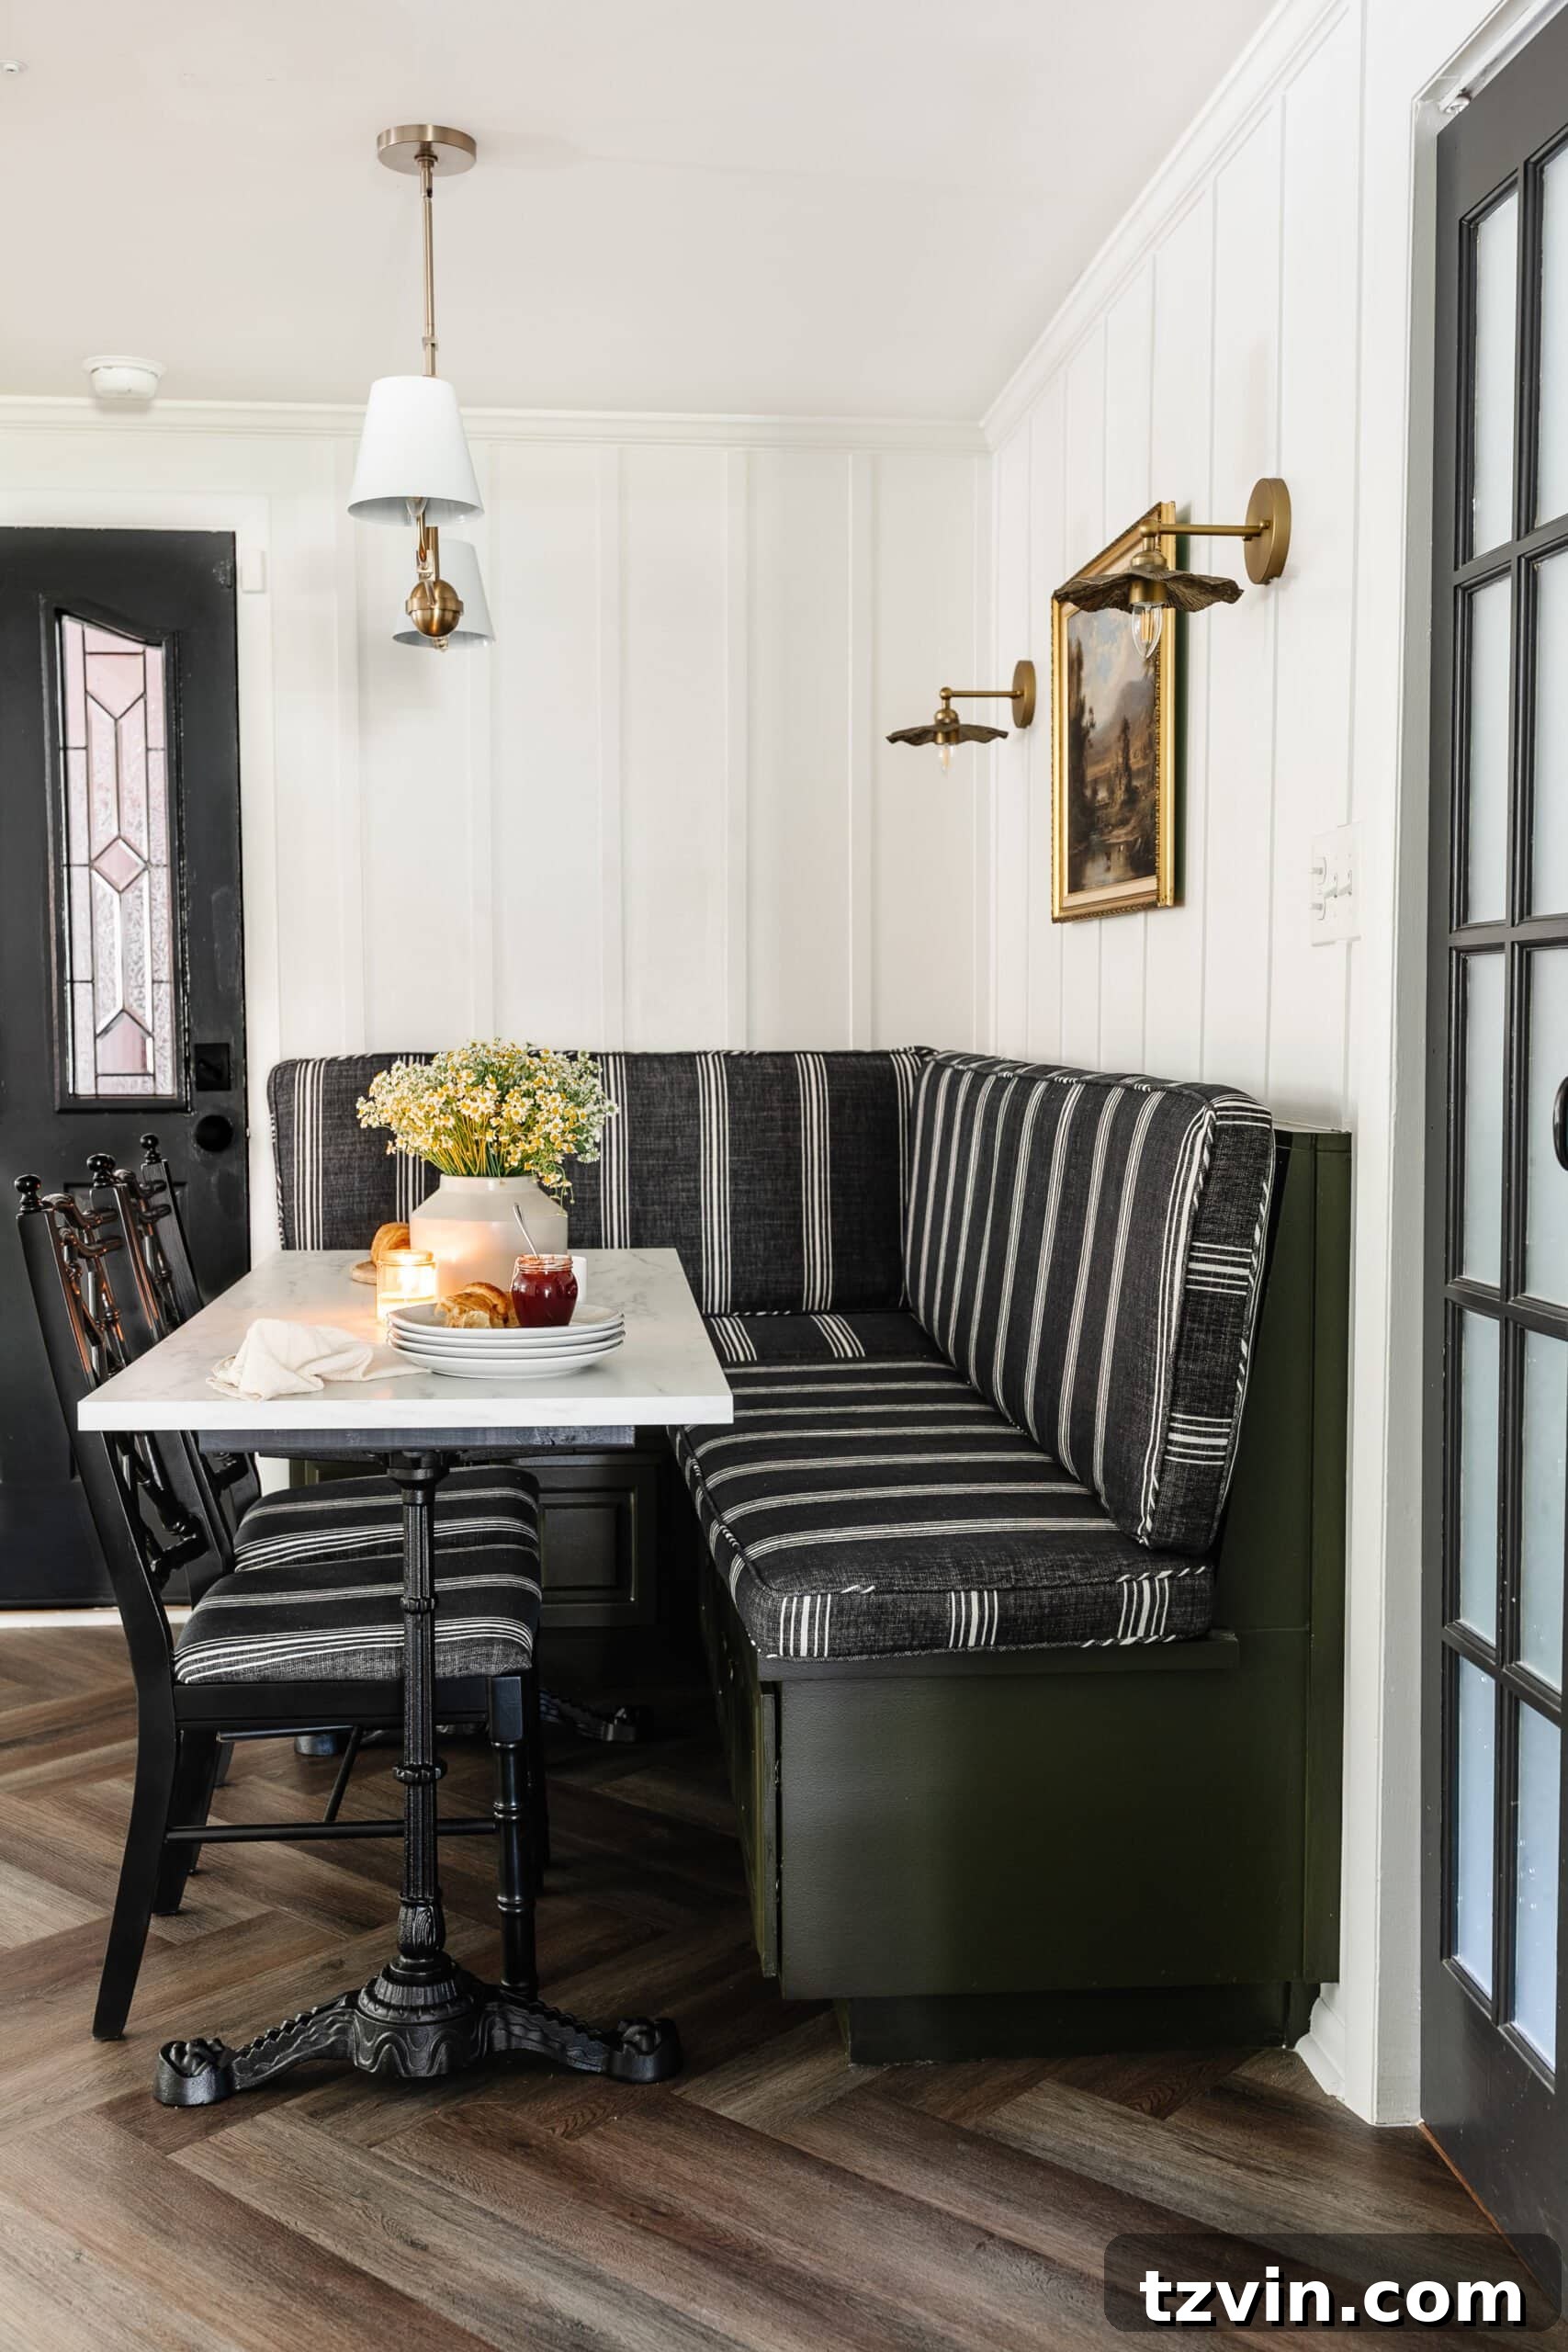
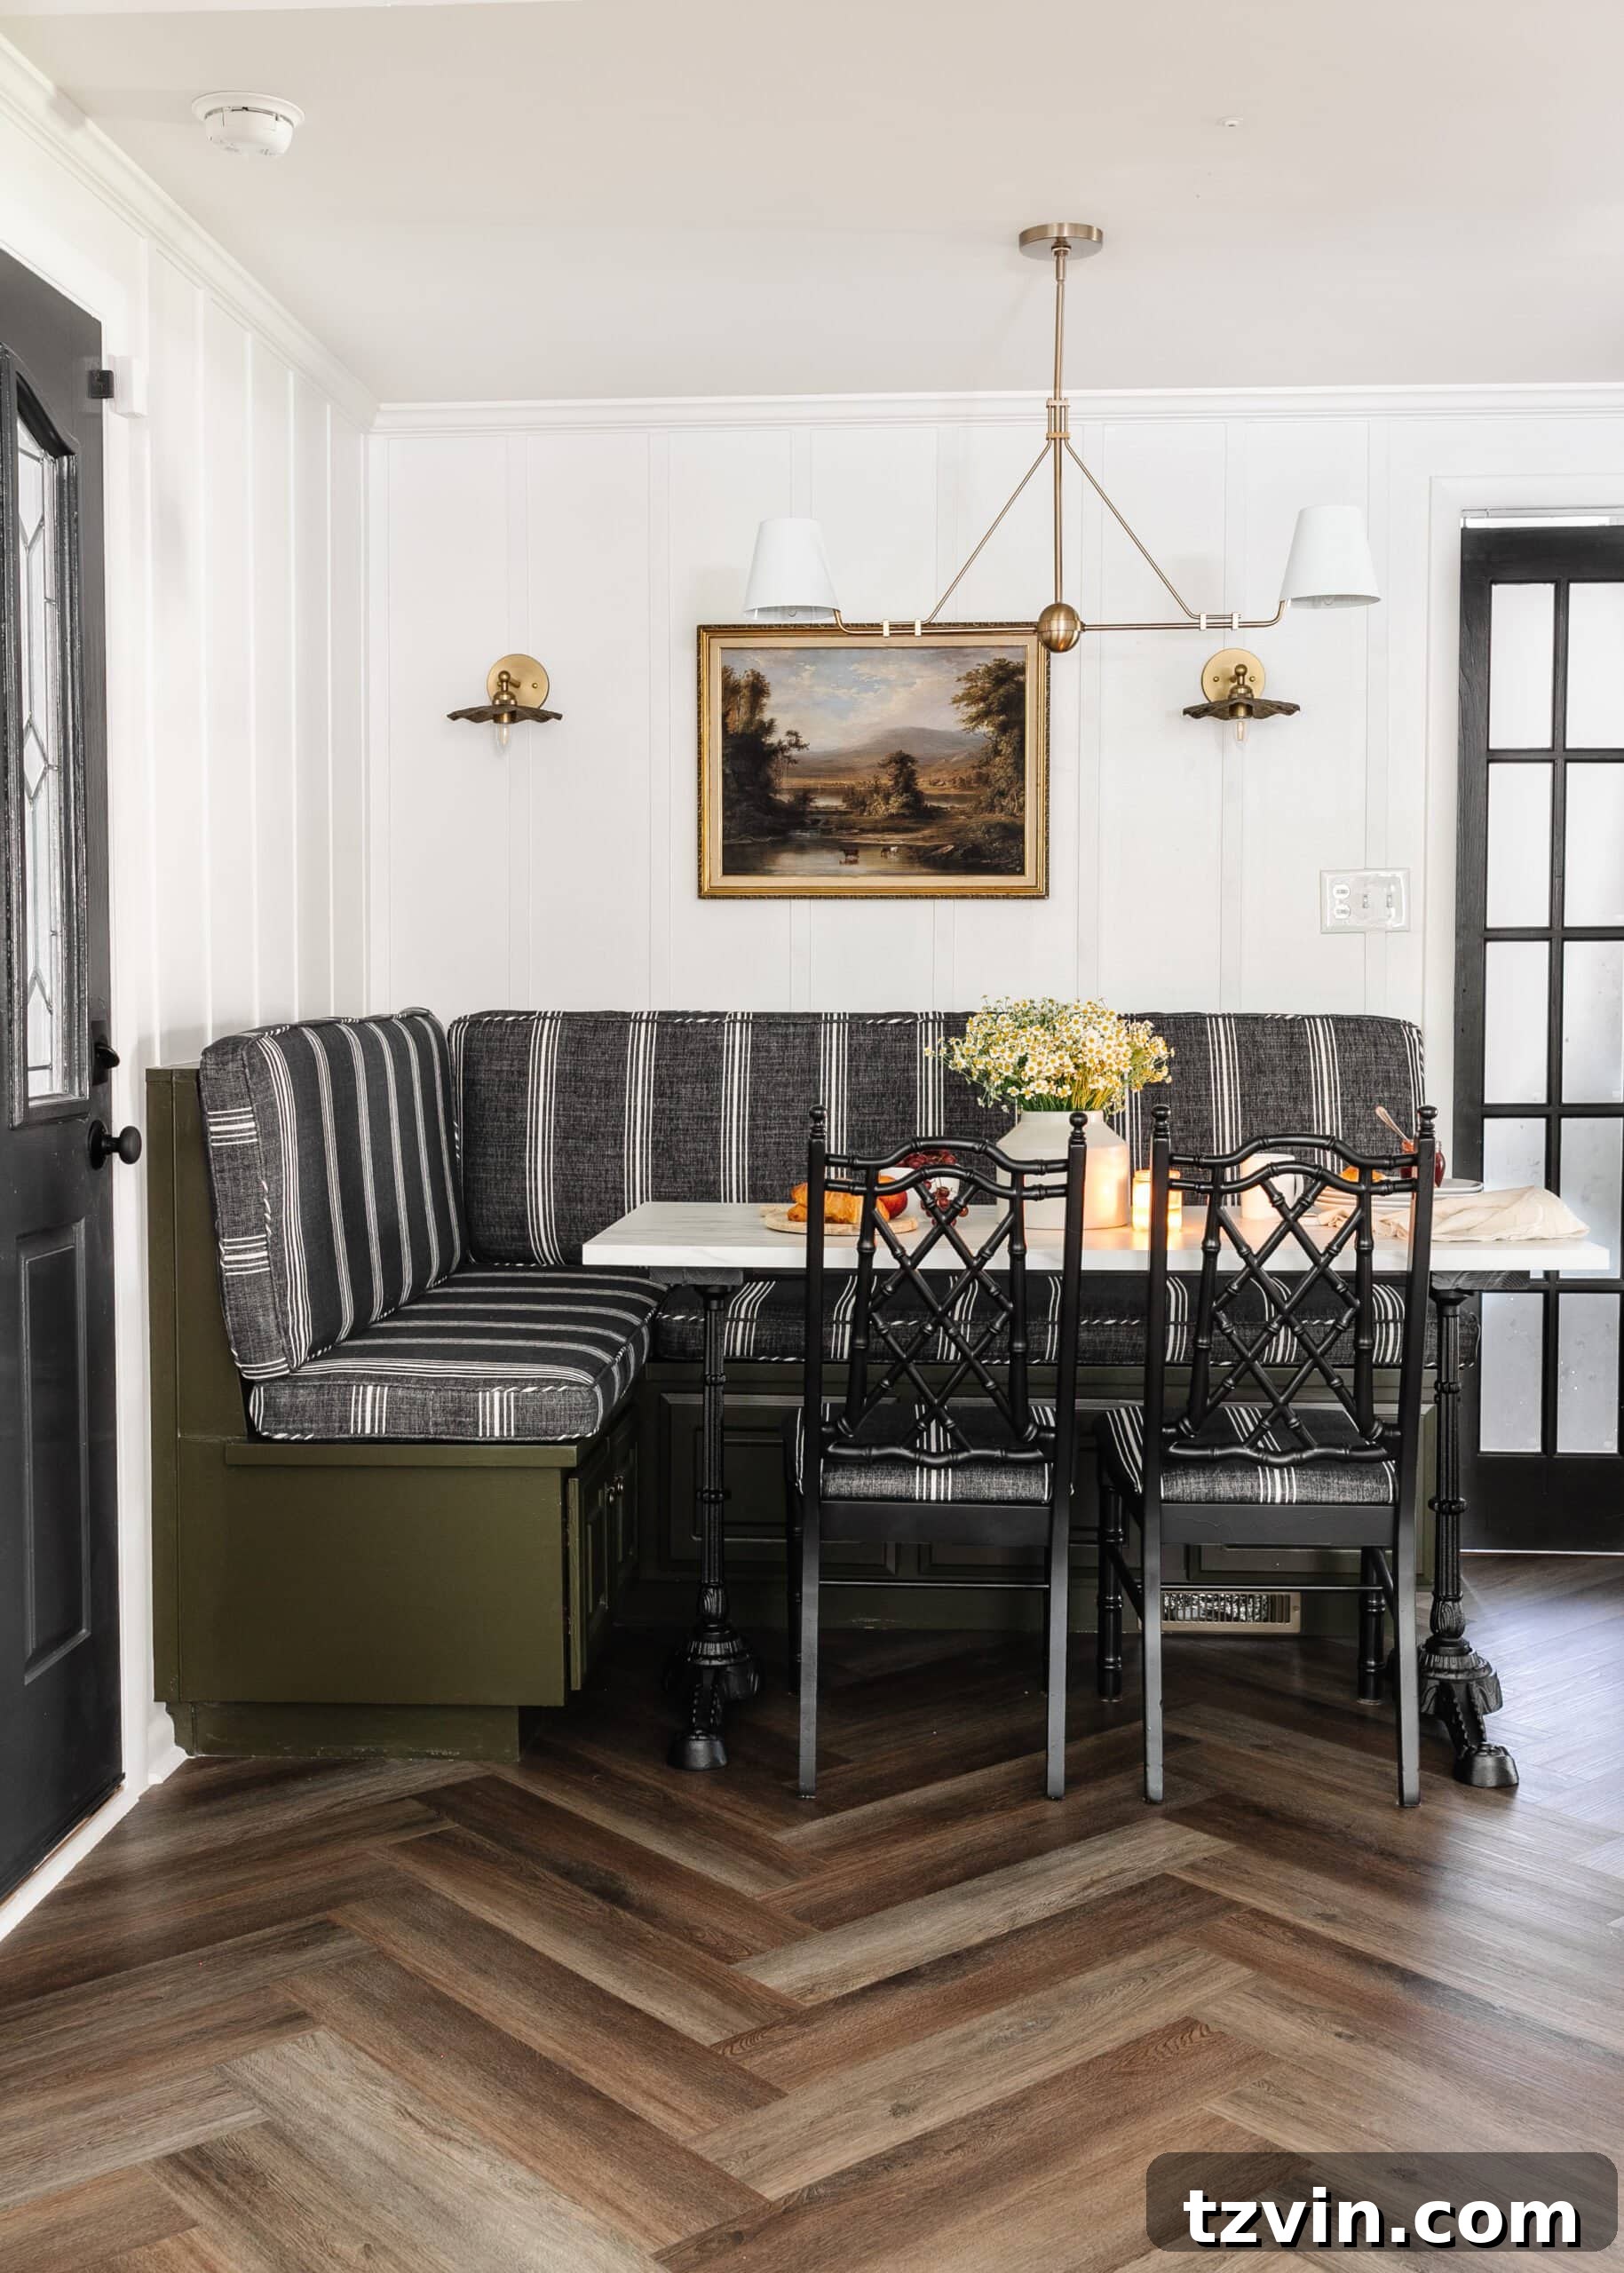
For the remainder of the corner breakfast nook, our biggest win was undoubtedly this secondhand banquette bench, a true score from Facebook Marketplace! Its dimensions were so perfect for our dining nook that it looks custom-built. I utilized my trusted laminate furniture painting method to give it a fresh look. The custom cushions that came with the bench were then professionally reupholstered with stain-resistant fabric by a local shop, ensuring both beauty and practicality for years to come.
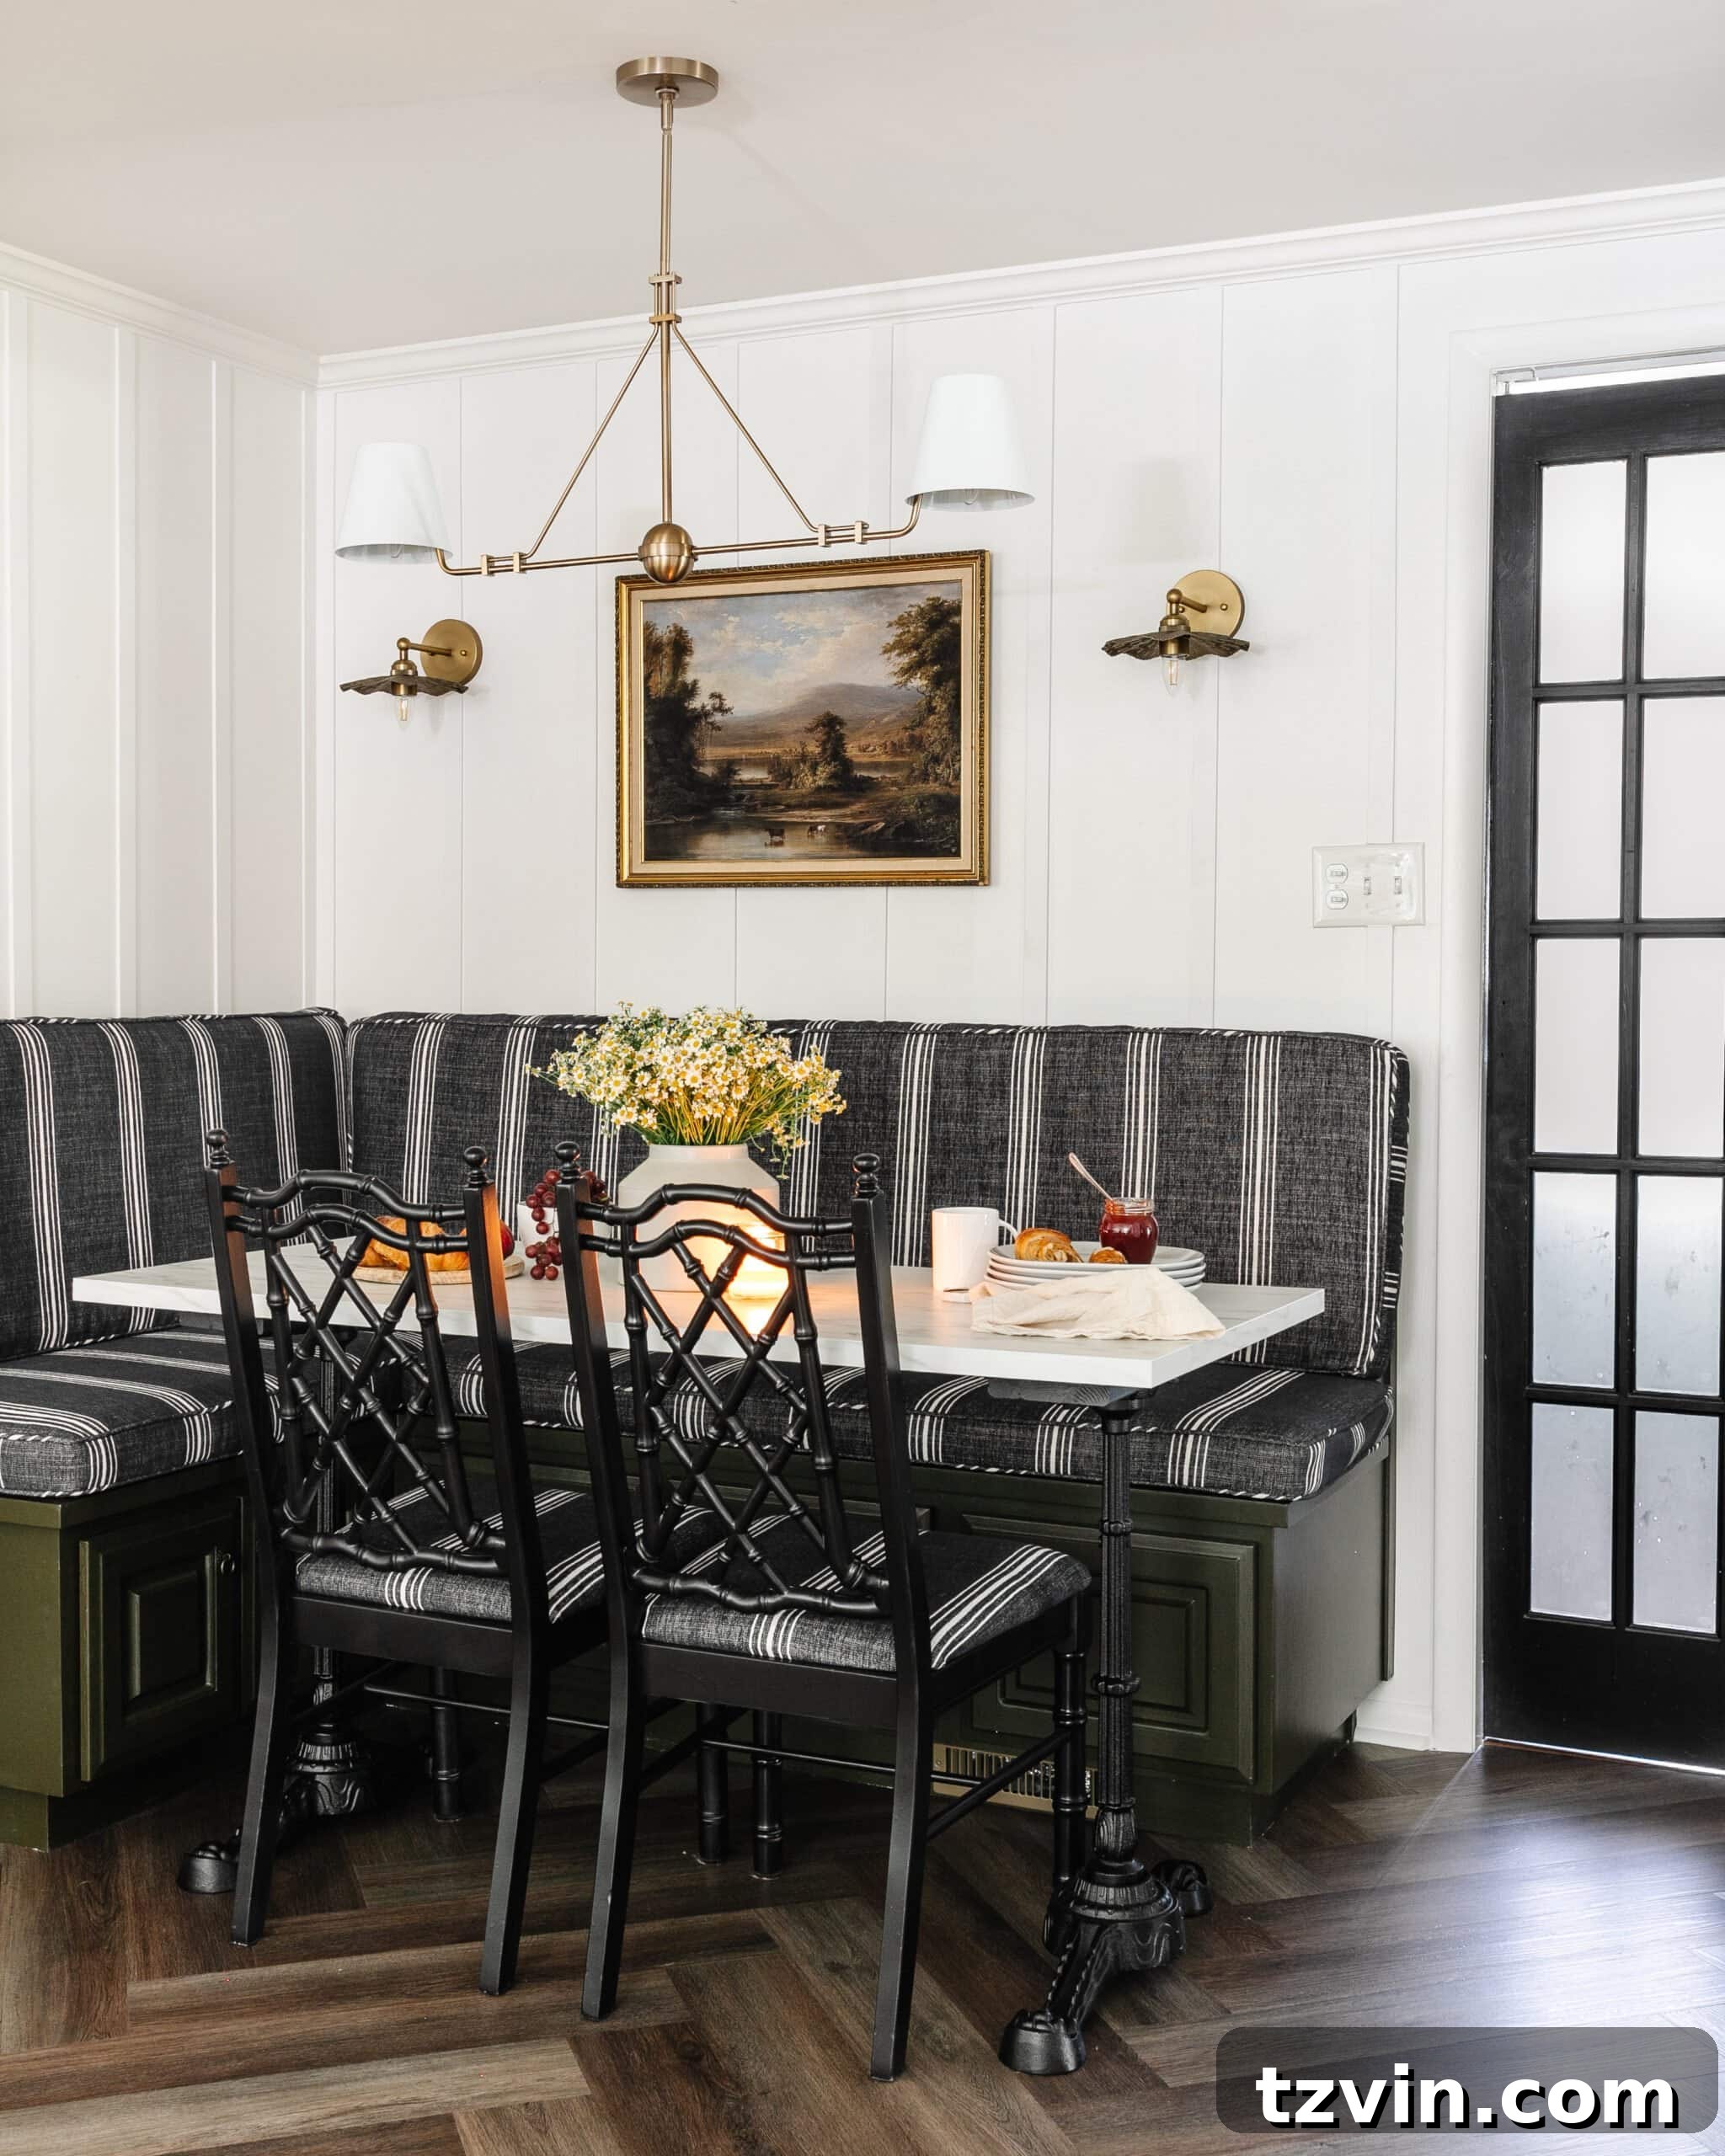
DIY Faux Marble Bistro Table: Elegance on a Budget
Tutorial: Discover How to Make a Faux Marble Dining Table in under an hour!
Finding a table with the precise long and narrow dimensions required for this space, coupled with pedestal legs to accommodate banquette seating, proved impossible. Our solution was to build one ourselves! We combined sturdy cast iron table legs with a faux marble laminate countertop, resulting in an elegant and functional piece that was surprisingly easy and inexpensive to create. Plus, the faux marble offers peace of mind; I don’t have to fret about stains, especially with my children’s enthusiastic dining habits!
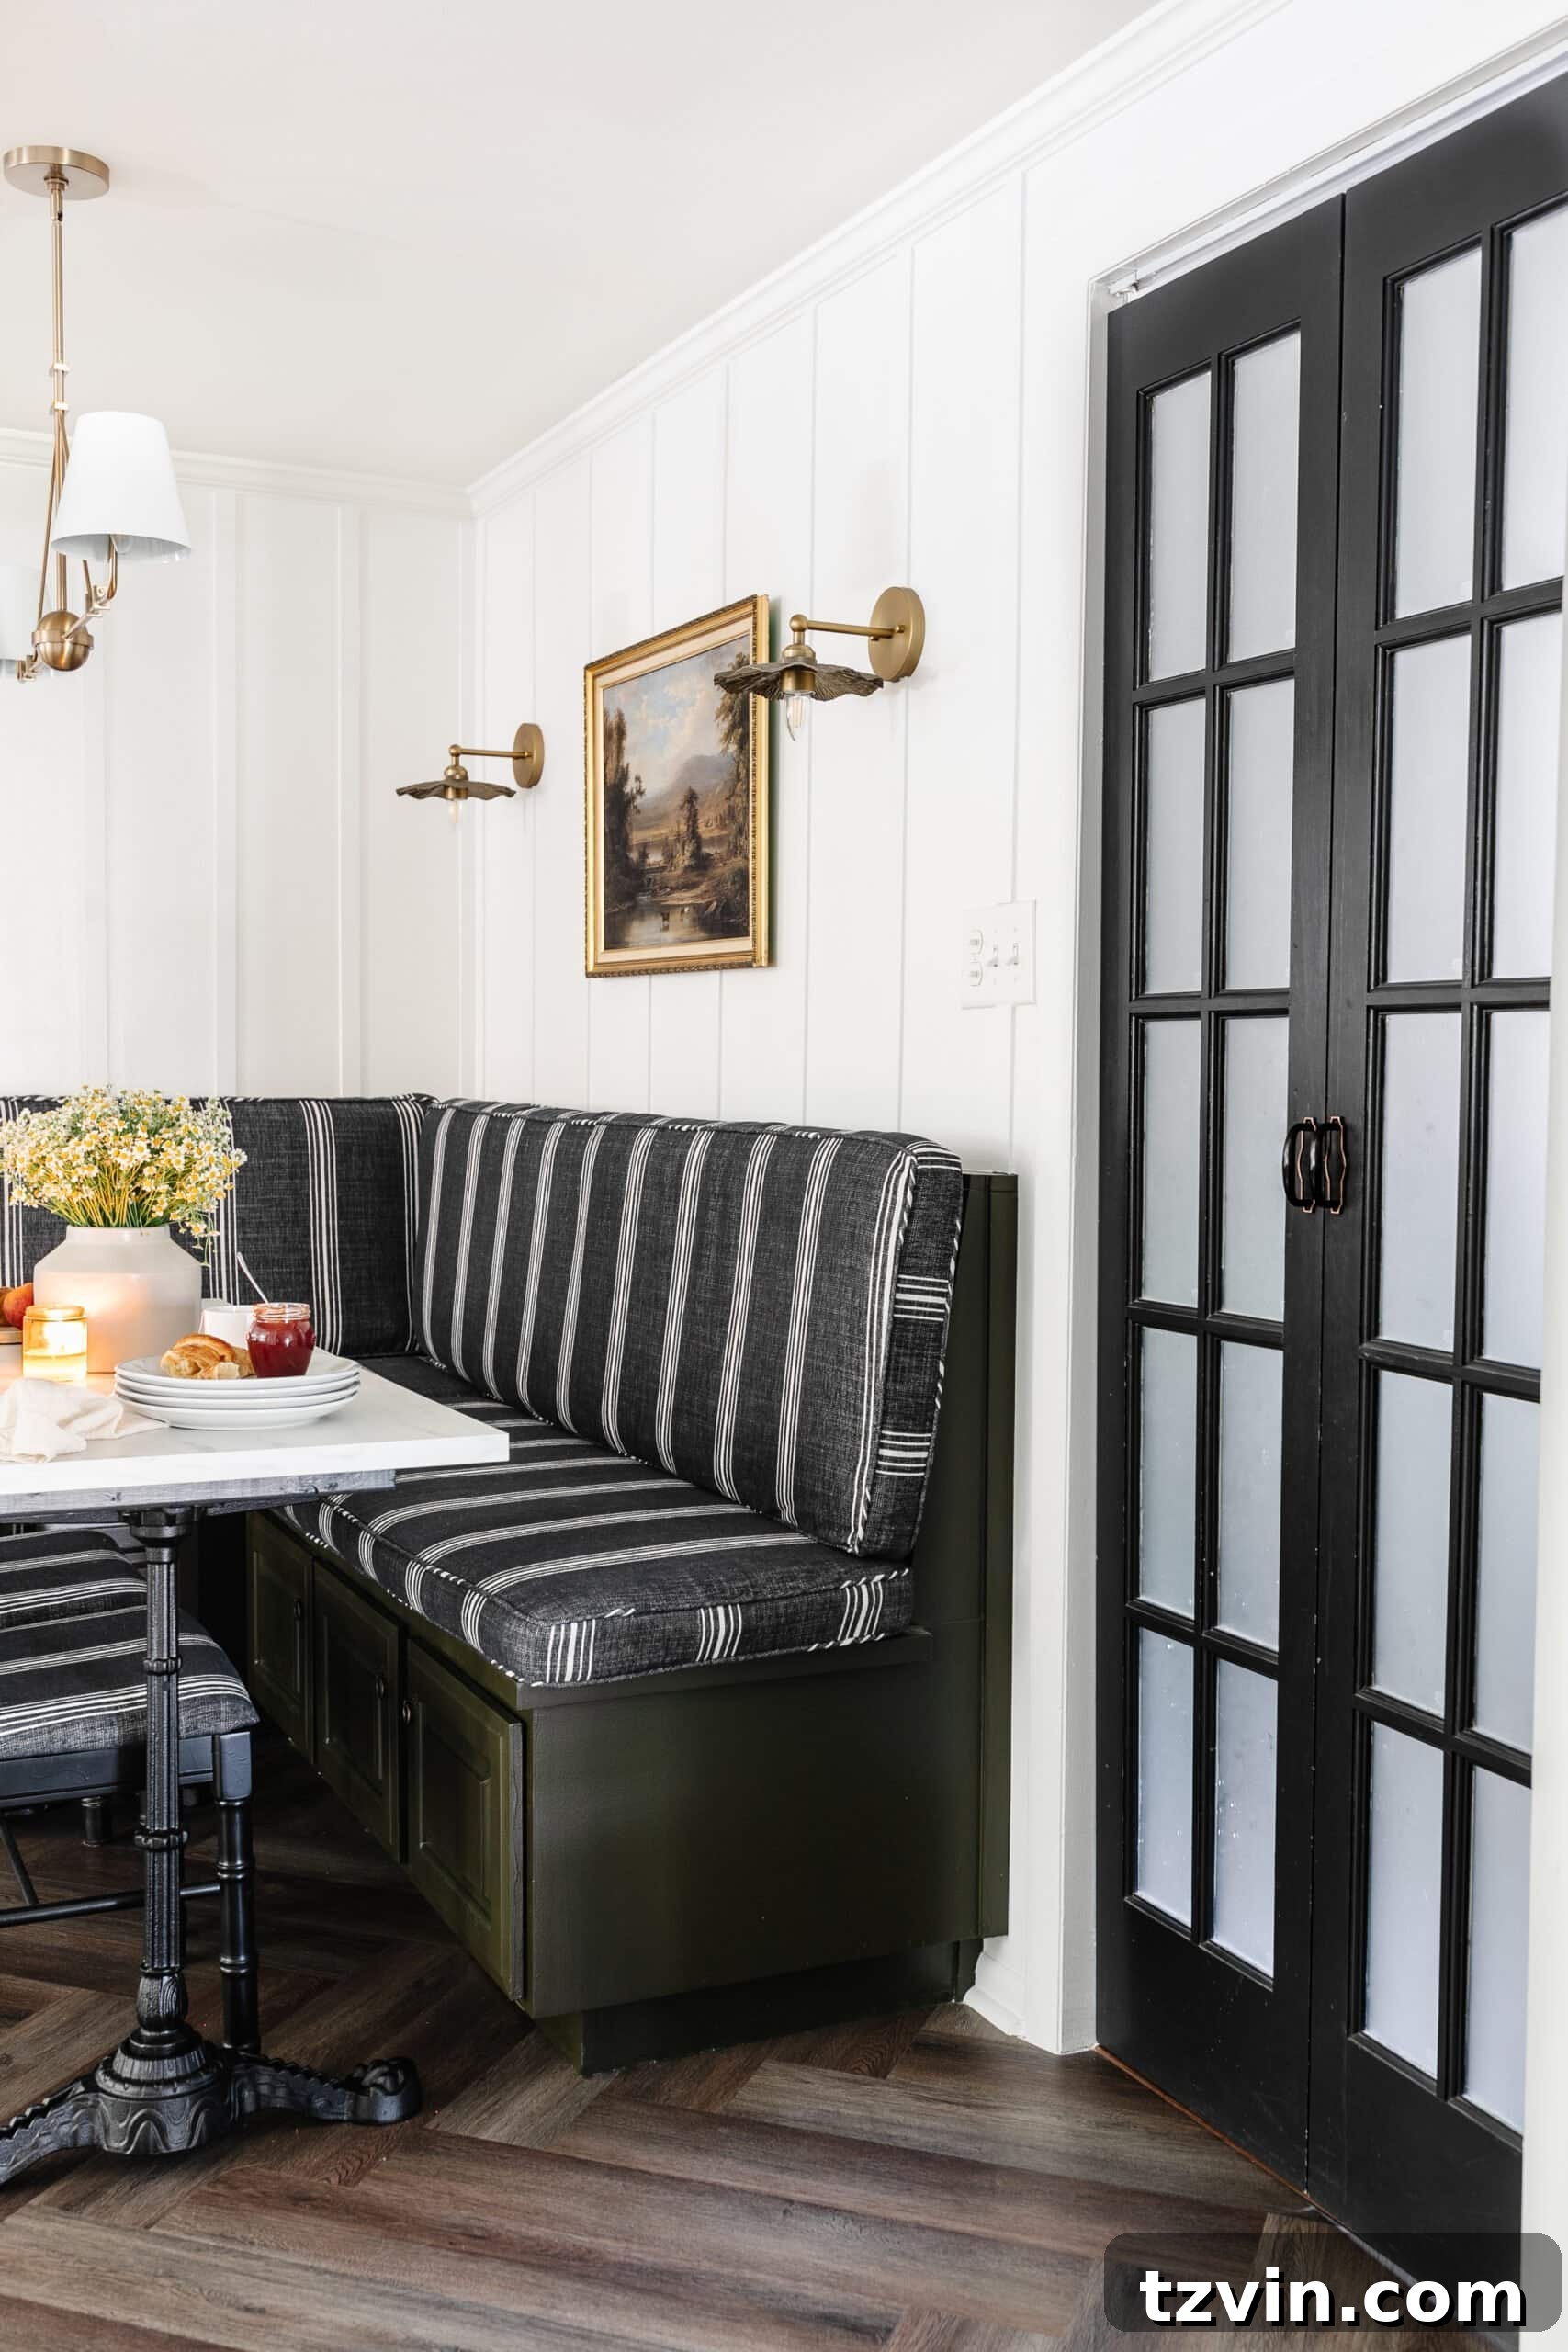
Upgrading with Bifold French Doors
Tutorial: Learn How to Turn Bifold Doors Into Double French Doors
While our dream kitchen renovation might one day include space-saving pocket doors, for now, these bifold French doors serve beautifully. We’ve utilized this transformation technique in several areas of our home, and it consistently elevates the look of plain bifold doors to something more traditional and refined. The frosted glass panes are particularly advantageous here, allowing natural light from our adjoining laundry room to subtly brighten this otherwise windowless space.
Revamping Dining Chairs
Tutorial: Follow our guide on How to Reupholster Dining Chairs to give them a fresh look.
To complement the banquette, we needed additional dining chairs for the opposite side of the table. I was thrilled to find these bamboo-style chairs at an incredible price on Facebook Marketplace. With just a single day of work, we transformed them: spray-painting the frames black and reupholstering the seat cushions with the same stain-resistant fabric used on the banquette. Even for someone like me who can’t sew, stapling fabric to chair cushions is an incredibly simple and rewarding DIY project!
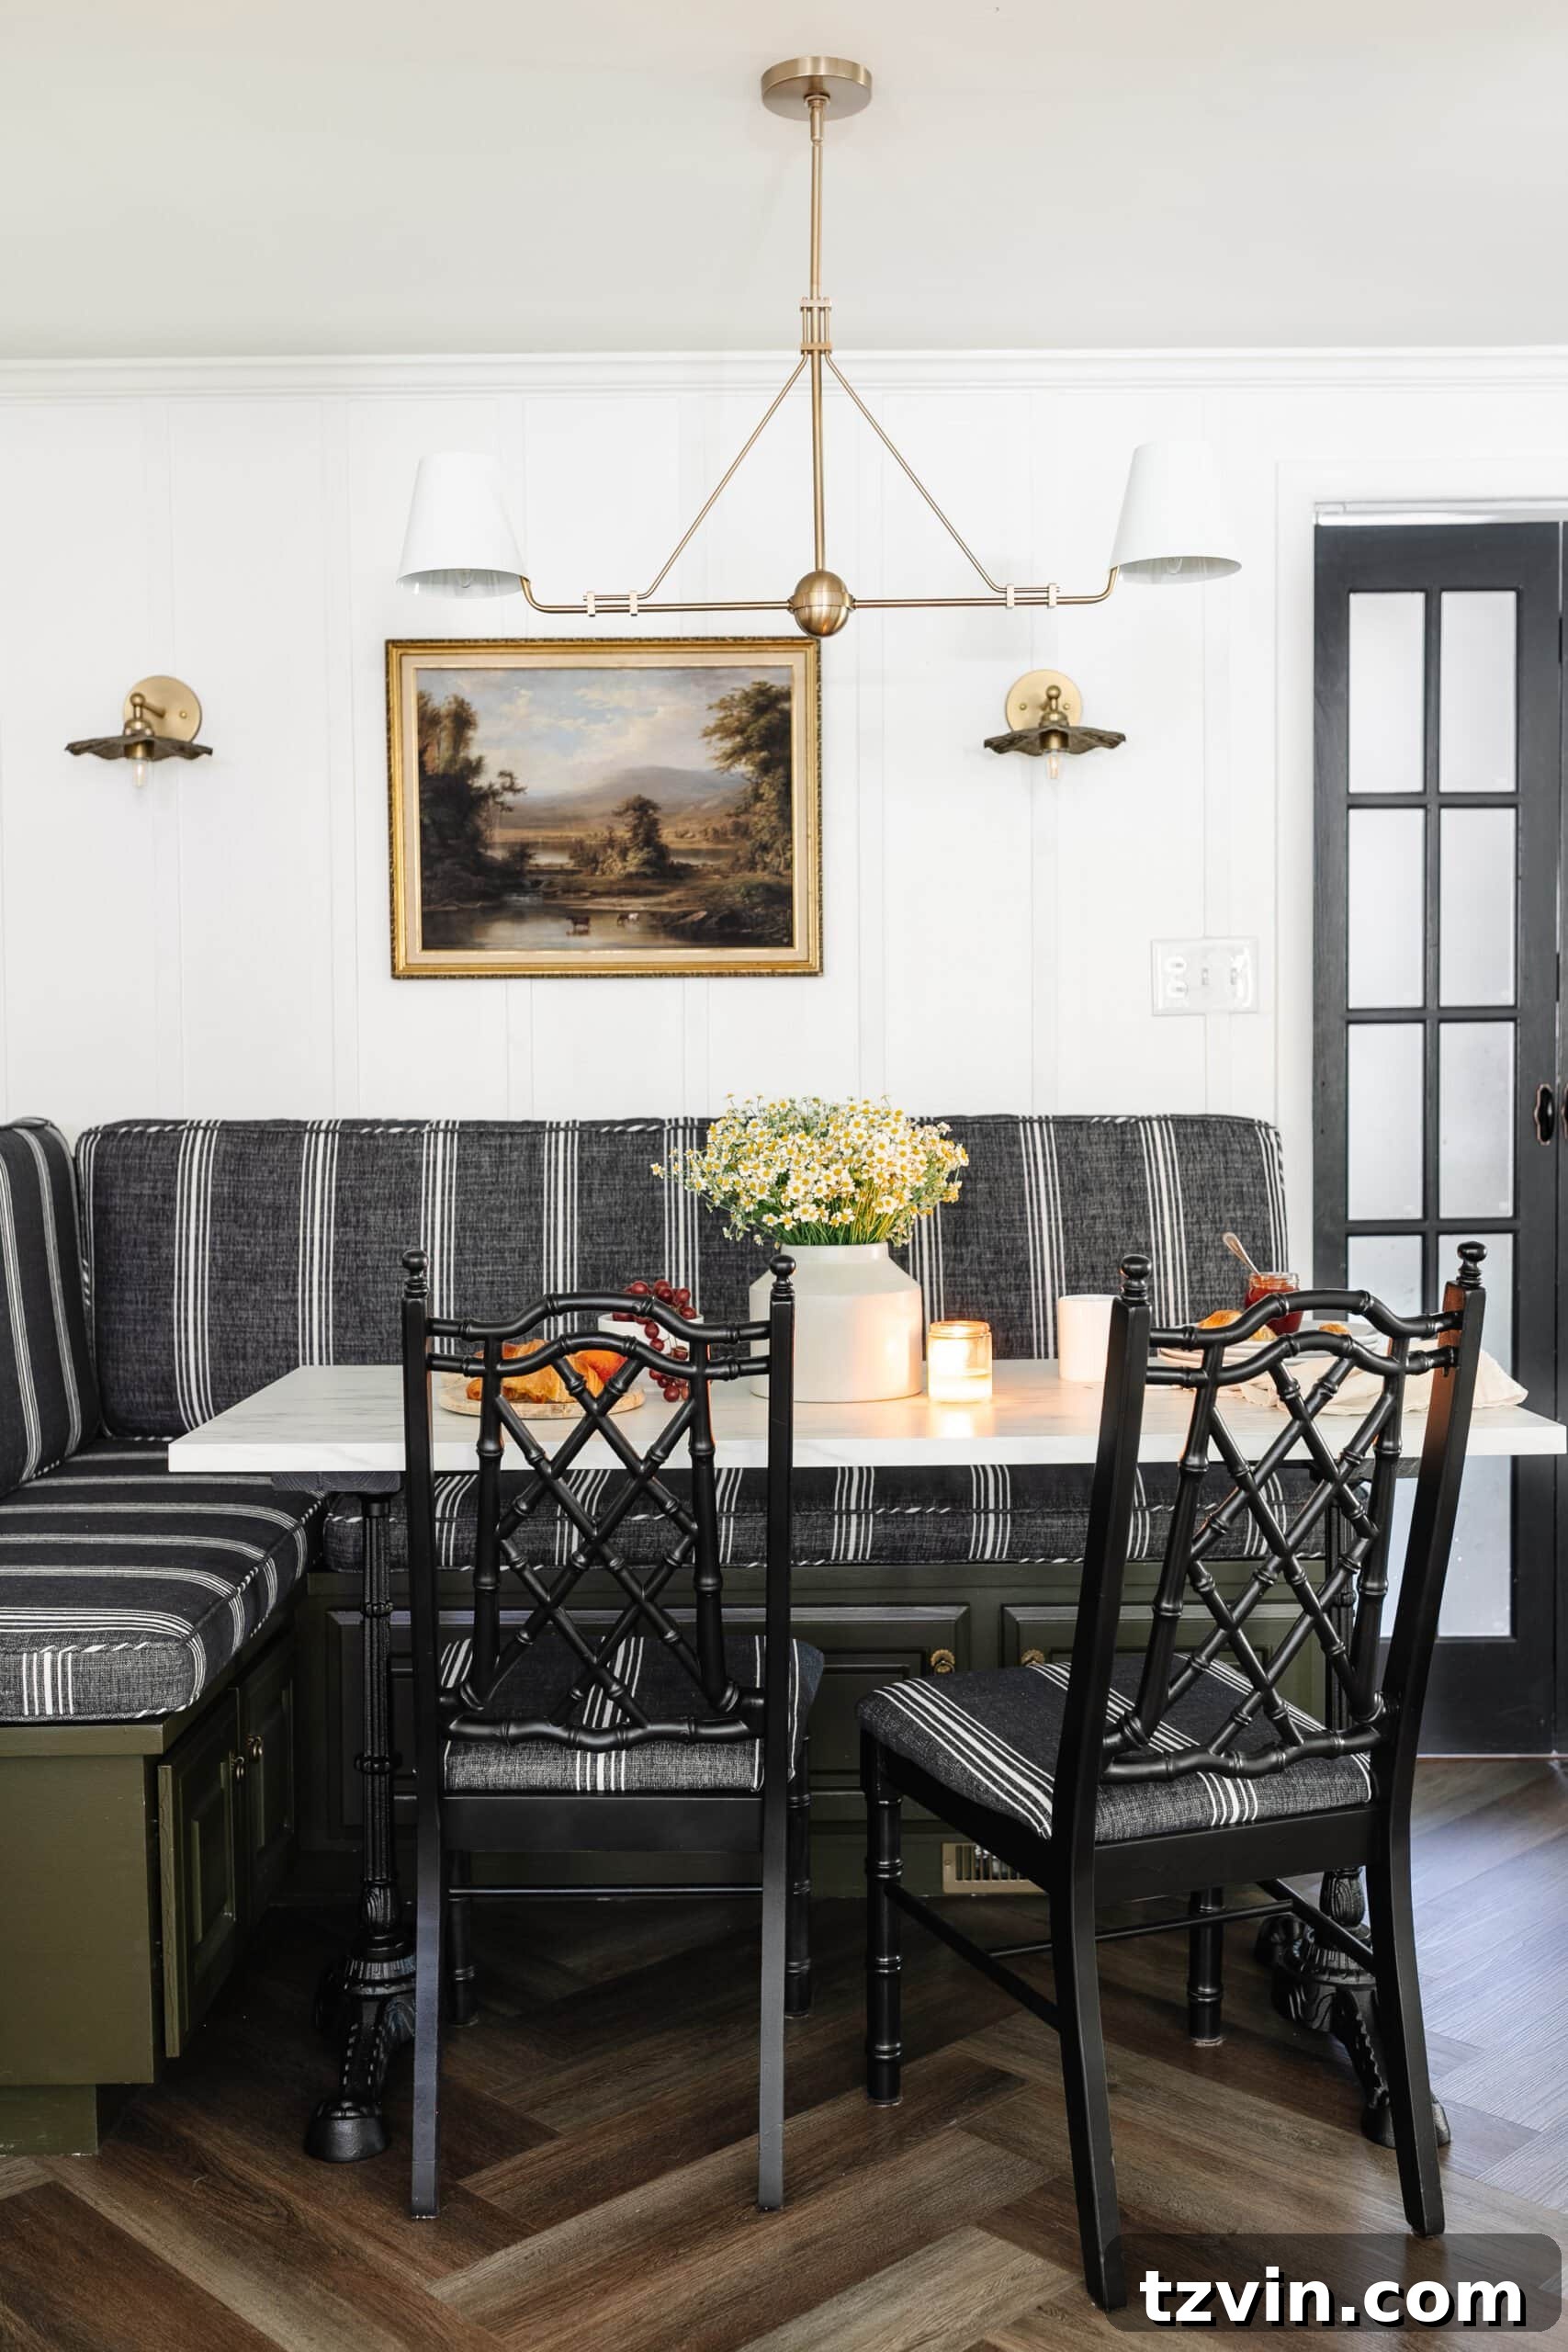
Adding Character with Antique Art
Tutorial: Uncover The Secret to Finding Free Printable Wall Art Online in public domain archives.
Printable: Download our Free Oil Painting Kitchen Art Prints for an instant upgrade.
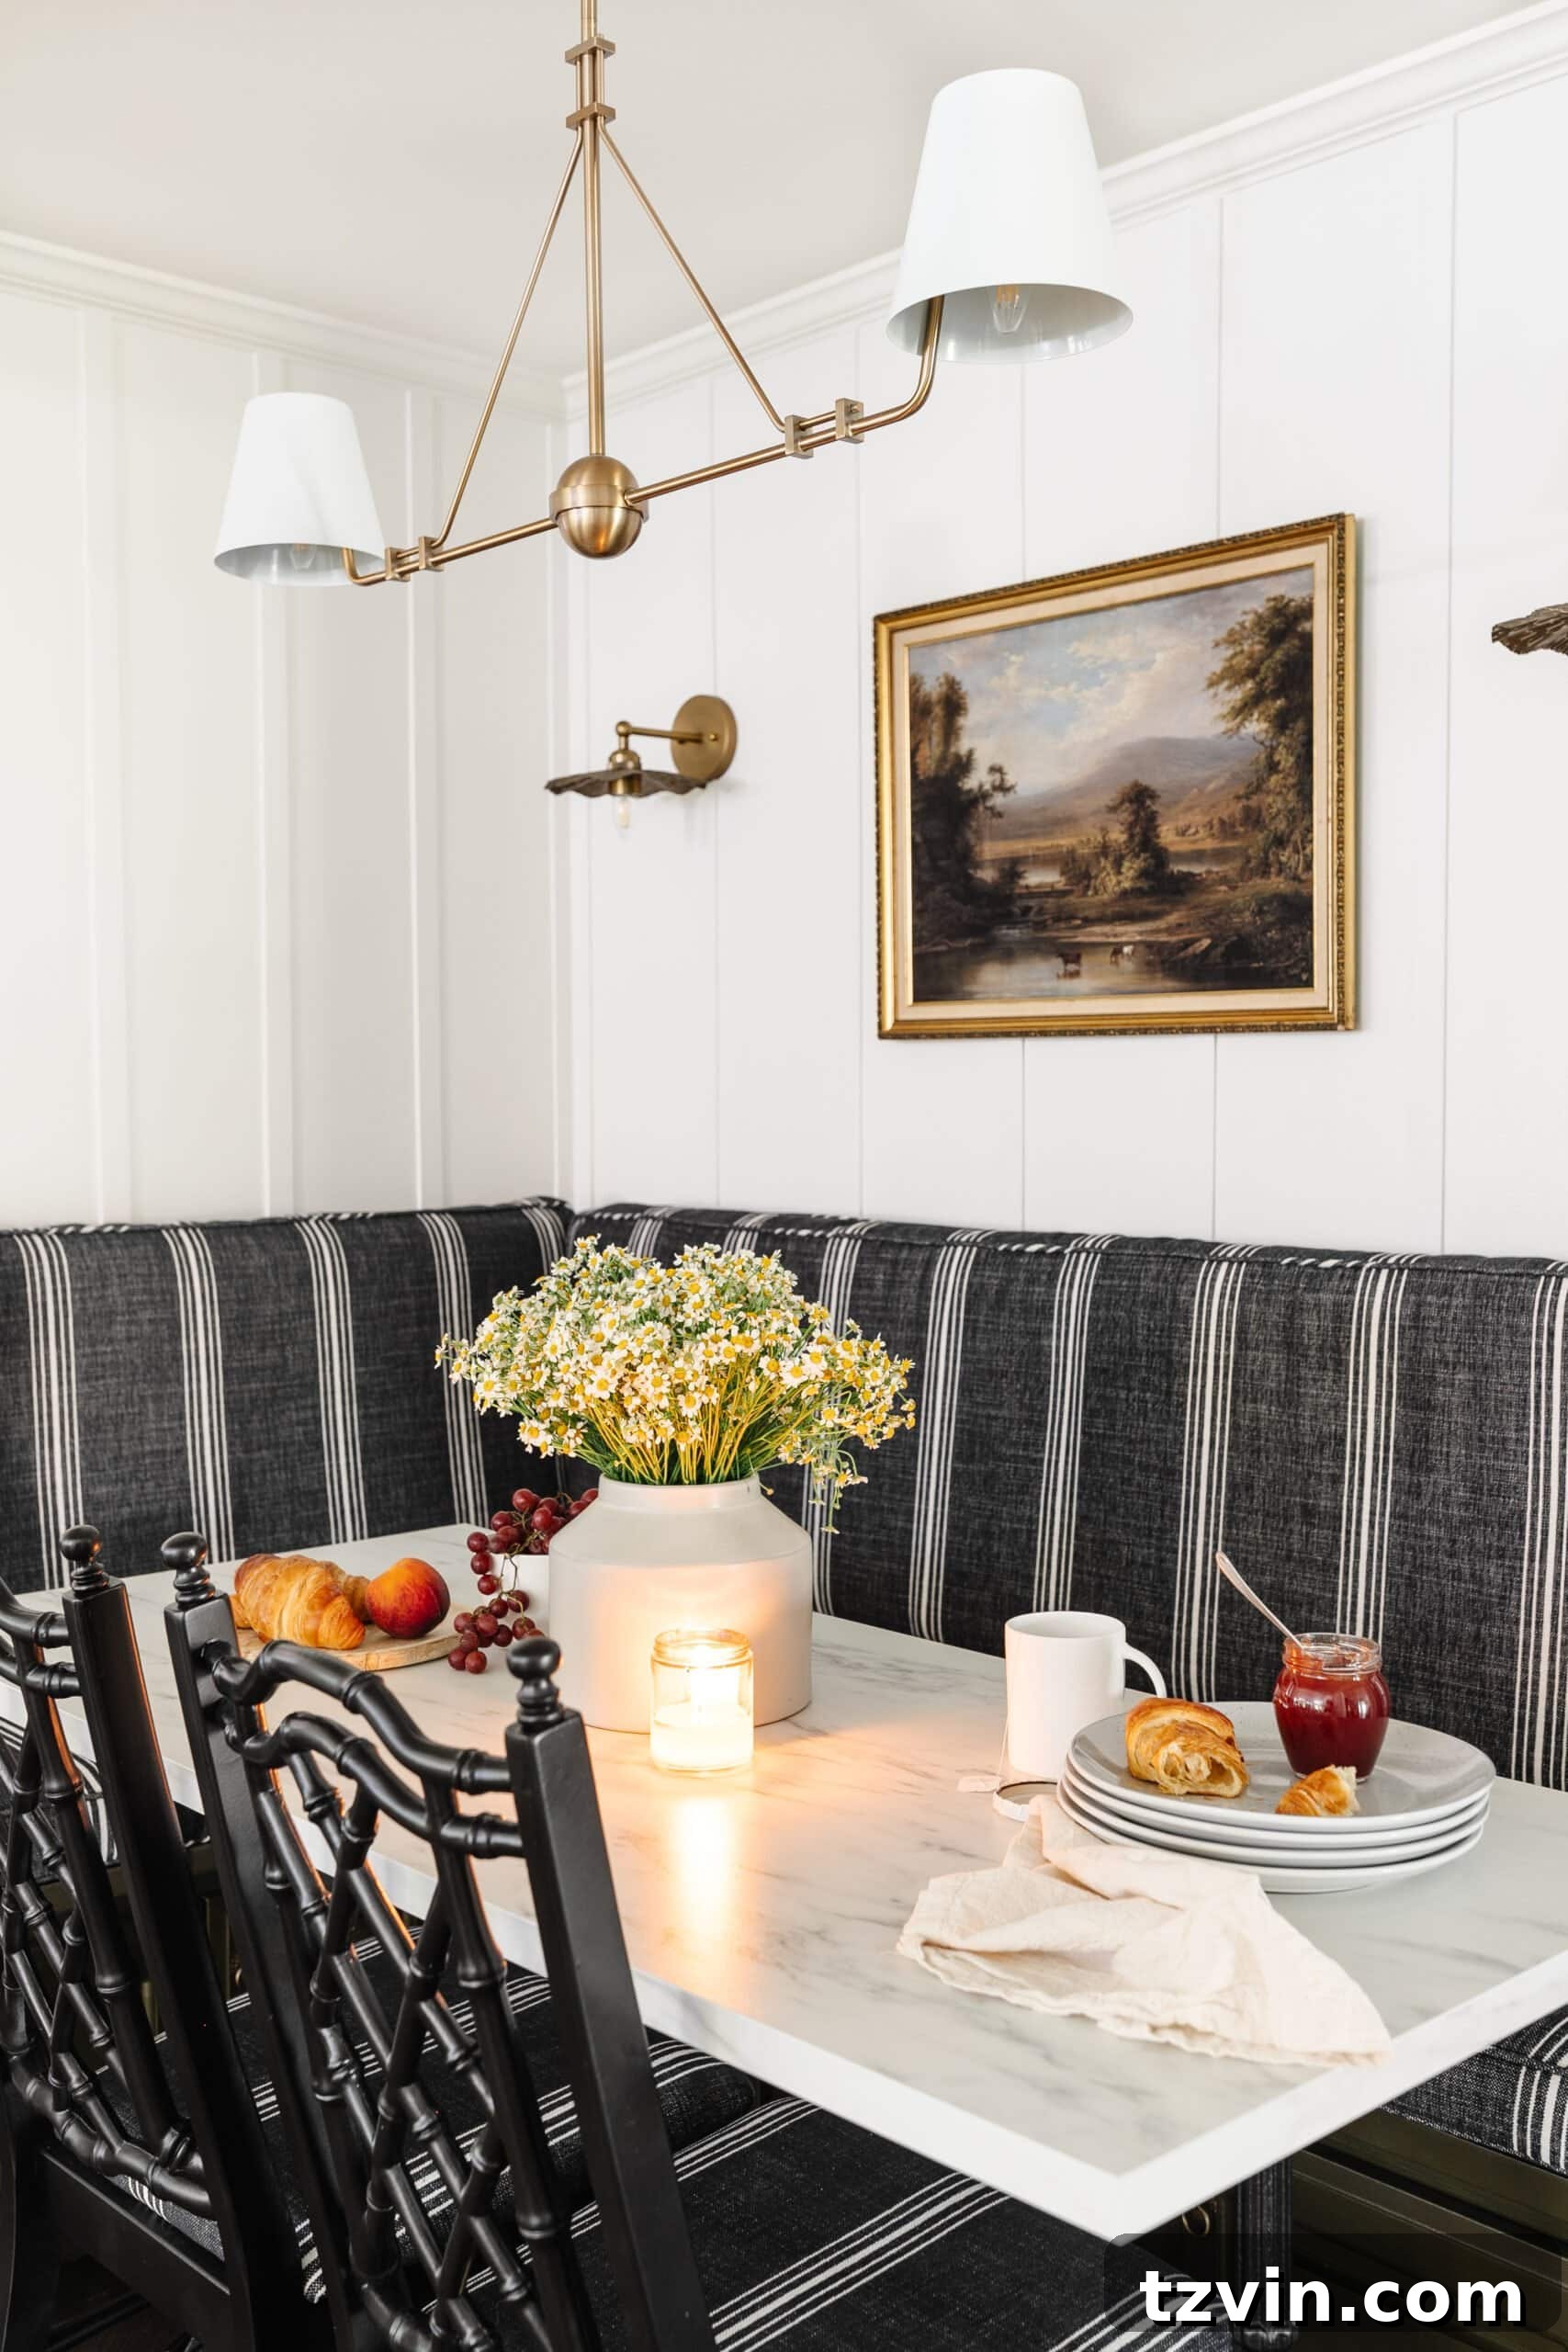
I have a passion for discovering exquisite antique art within public domain archives. This particular oil painting image was perfectly suited for our breakfast nook. After printing it, I simply placed it into a thrifted picture frame, creating a sophisticated and budget-friendly piece that adds timeless charm to the space.
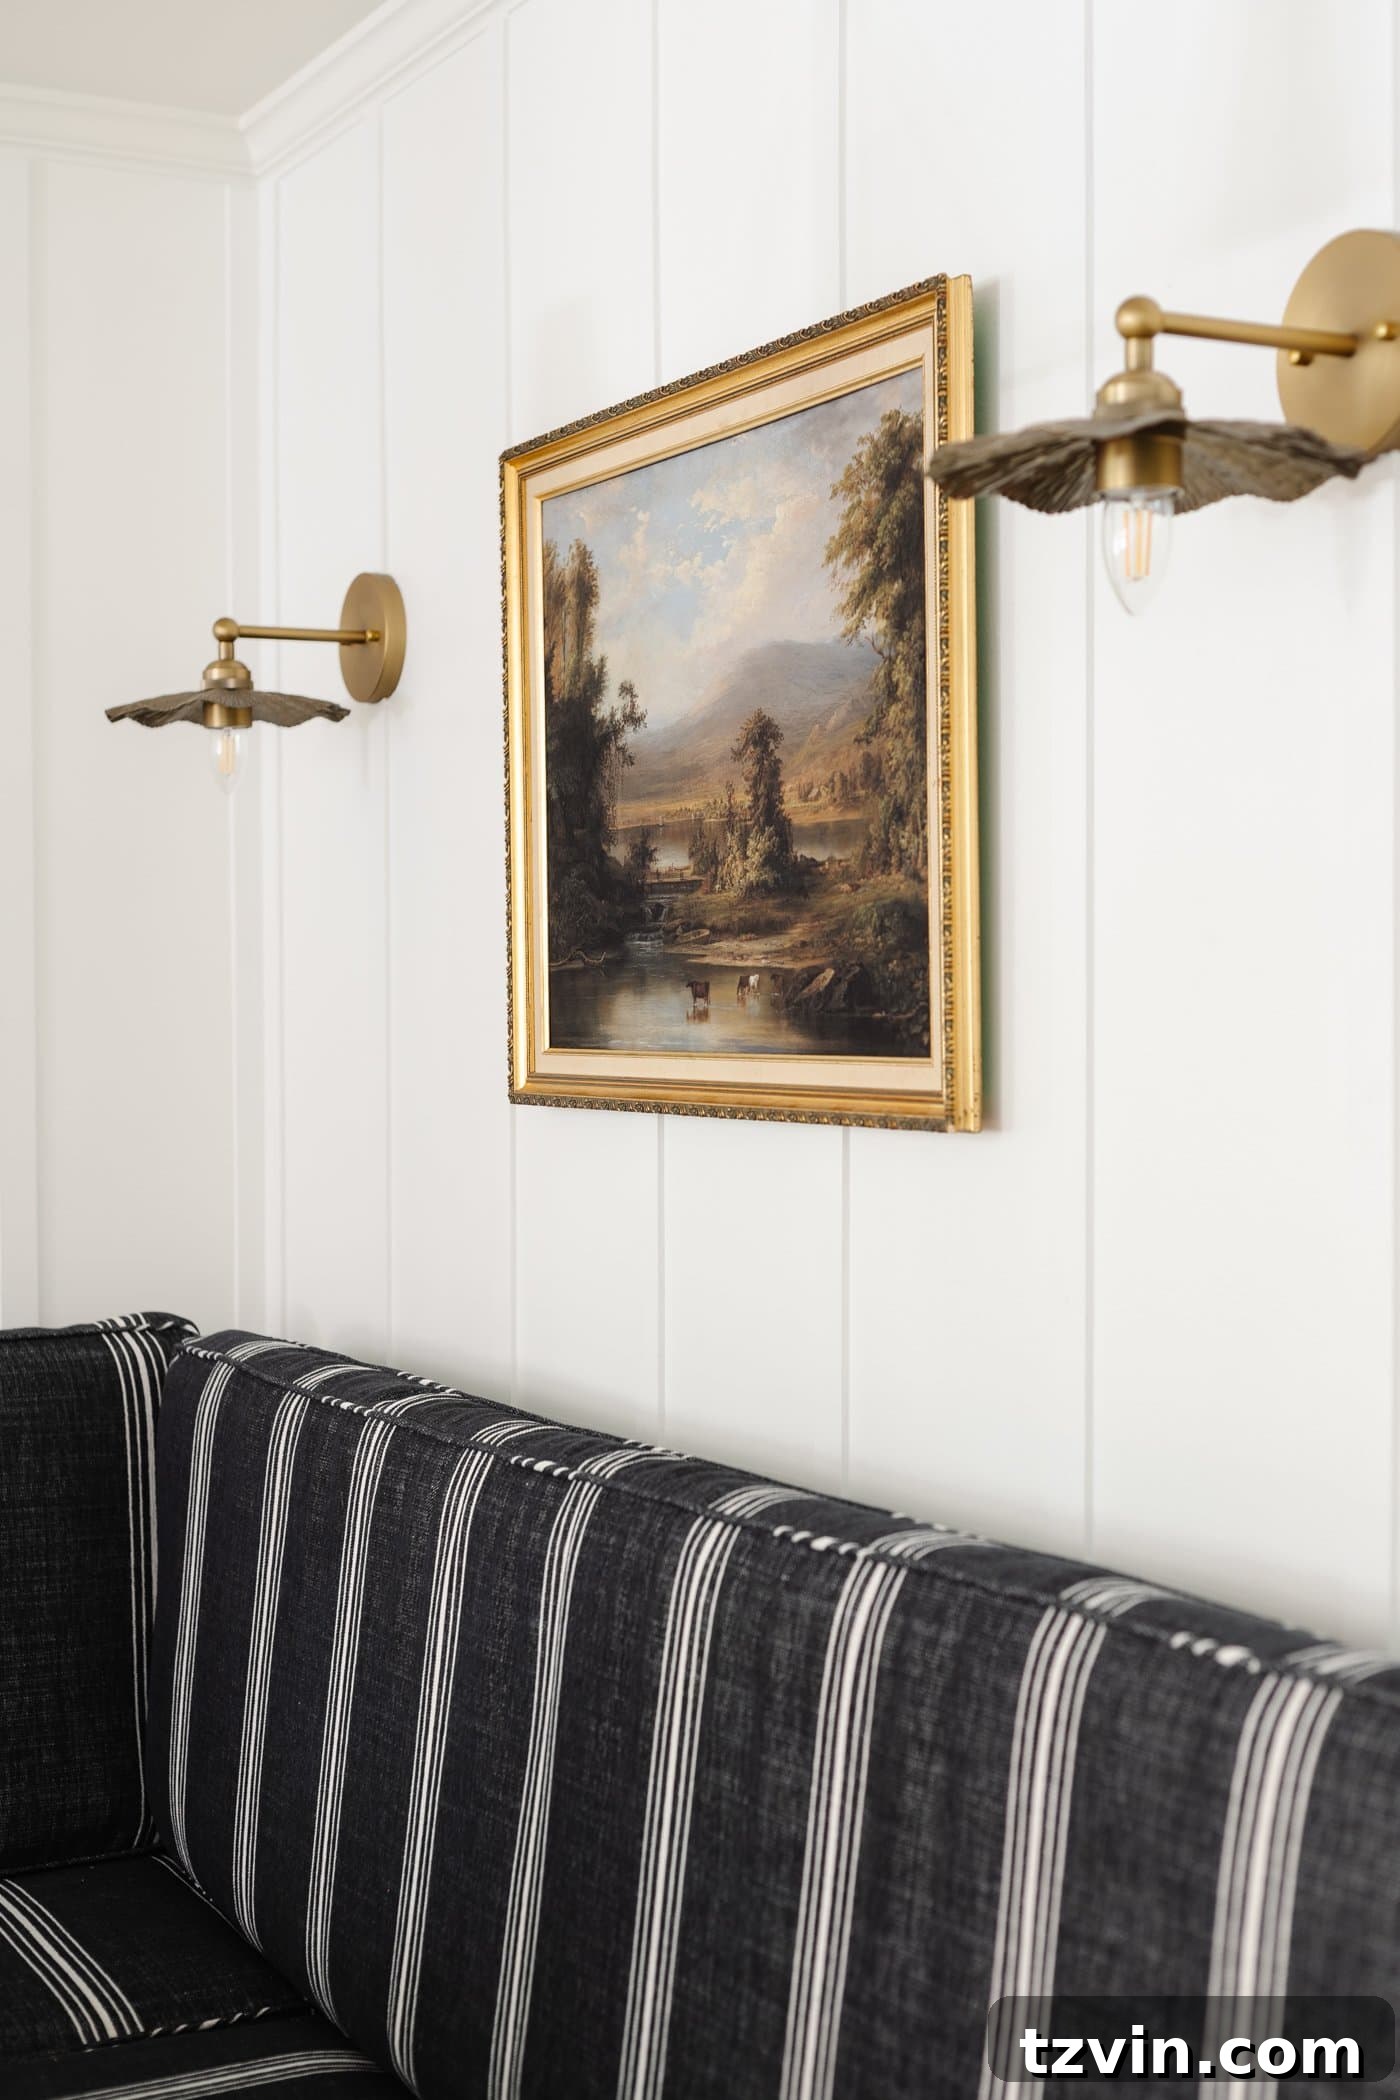
Creating Dimension with a Batten Wall
Tutorial: Master the Inexpensive DIY Batten Wall Using Lattice Strips for a charming upgrade.
We successfully installed a beautiful board and batten wall for an incredibly modest sum of just $80, utilizing simple lattice strips. This project was surprisingly quick and easy, making it an ideal carpentry undertaking for beginners. The subtle yet effective molding adds just the right amount of dimension and character, infusing our corner breakfast nook with an extra dose of vintage charm and architectural interest.
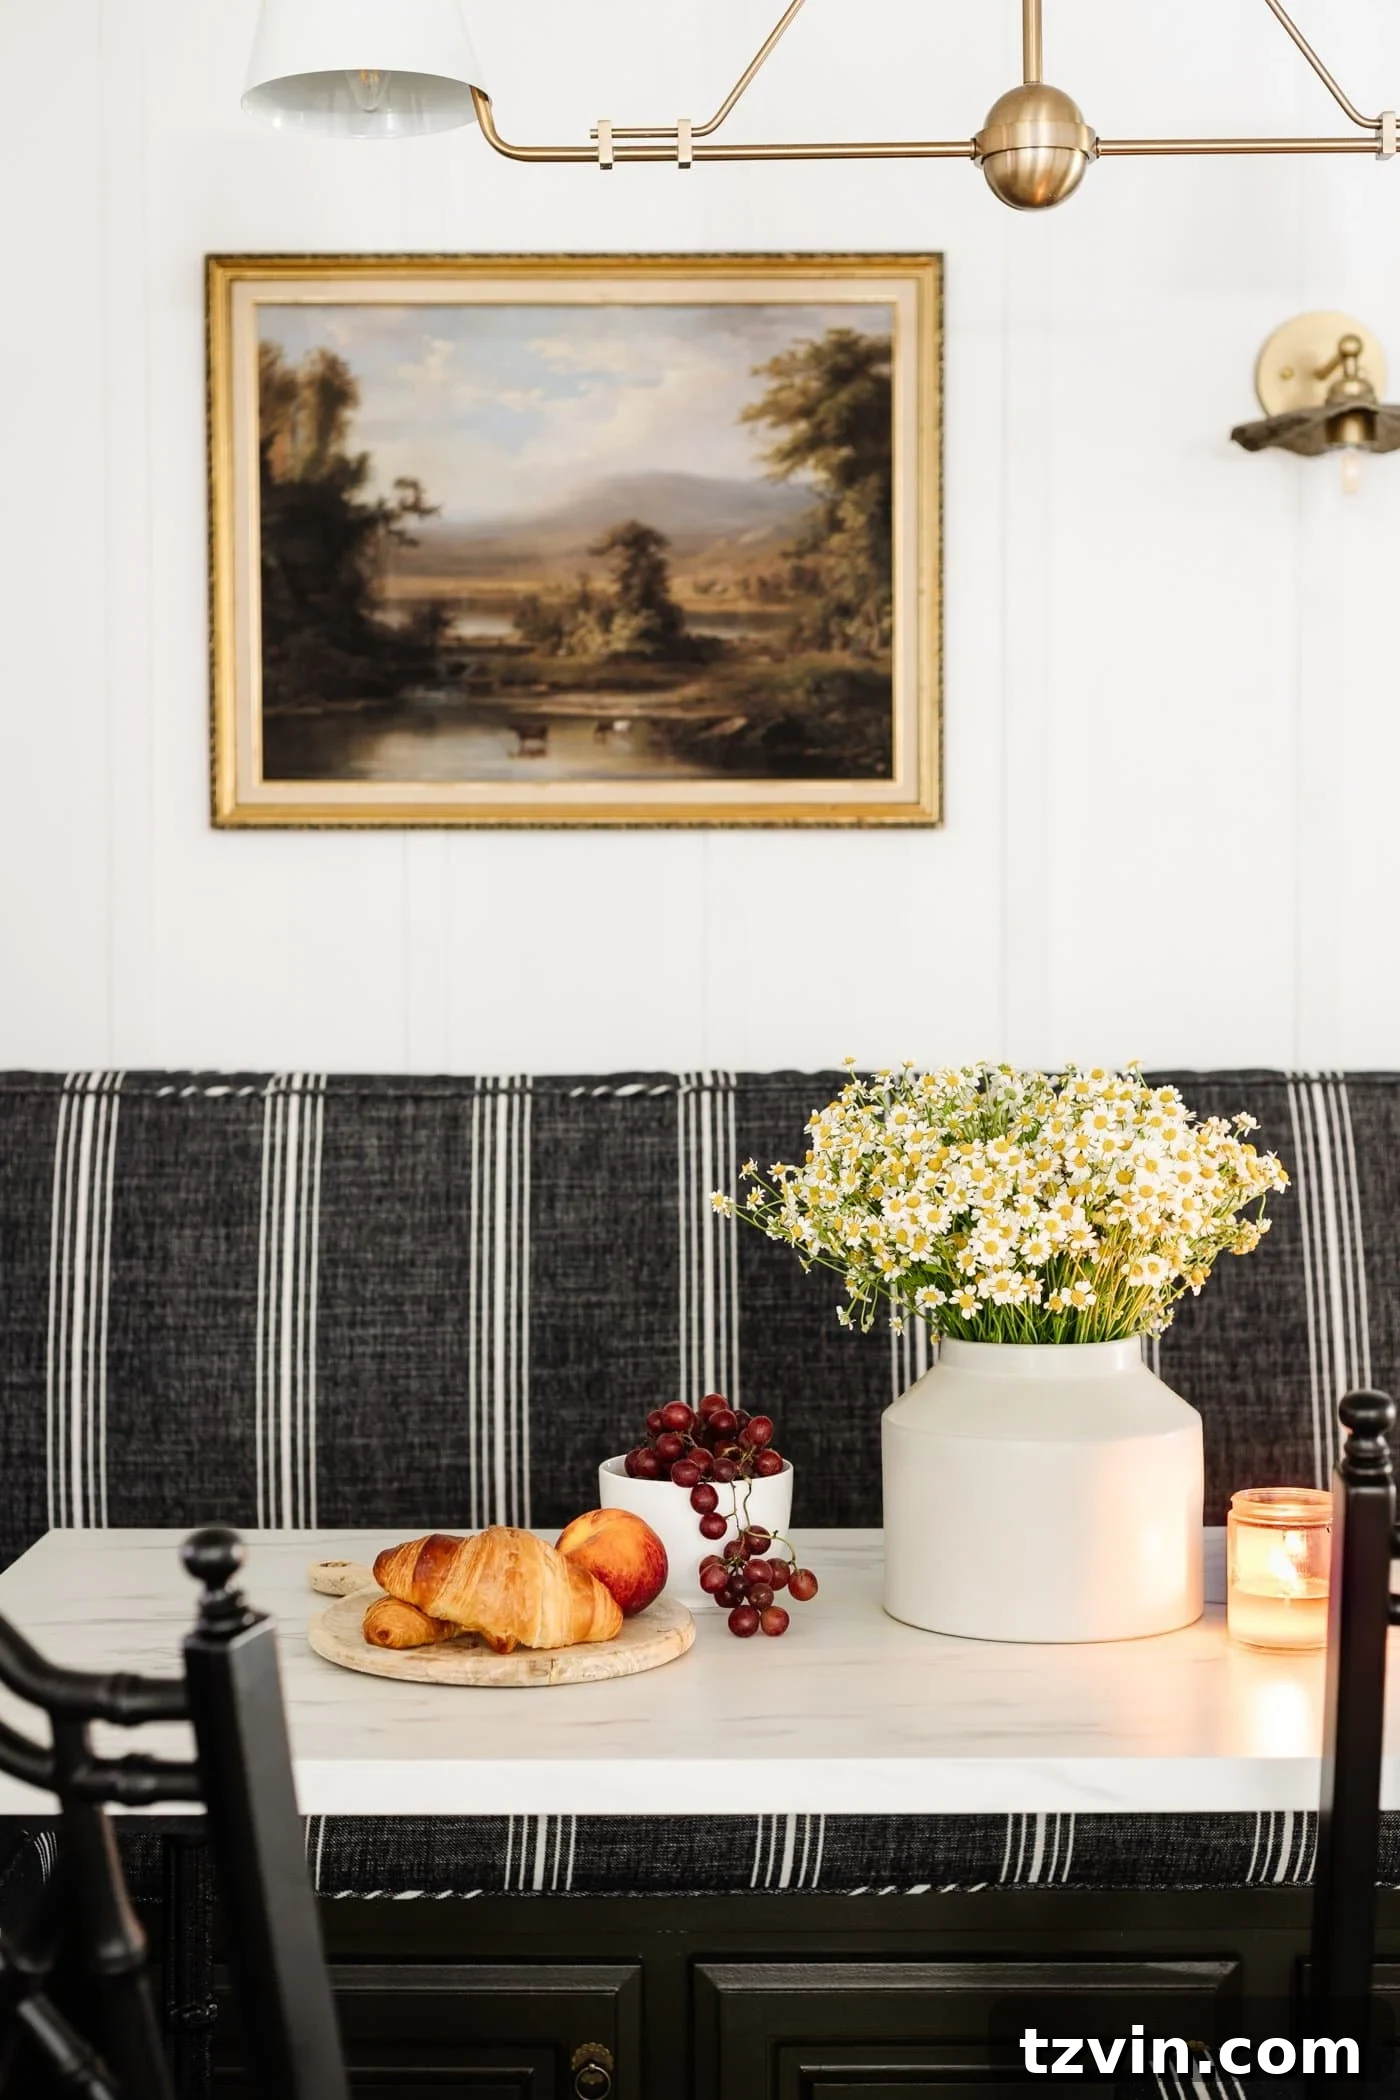
Illuminating the Space with Thoughtful Lighting
Aside from a few decorative accents, the lighting fixtures are almost the only elements we didn’t craft or construct ourselves in this breakfast nook. The linear chandelier we selected was perfectly slender, fitting elegantly above our narrow dining table. Additionally, these carefully chosen vintage-style sconces provided essential ambient light, brightening this cozy, windowless corner and enhancing its inviting atmosphere.
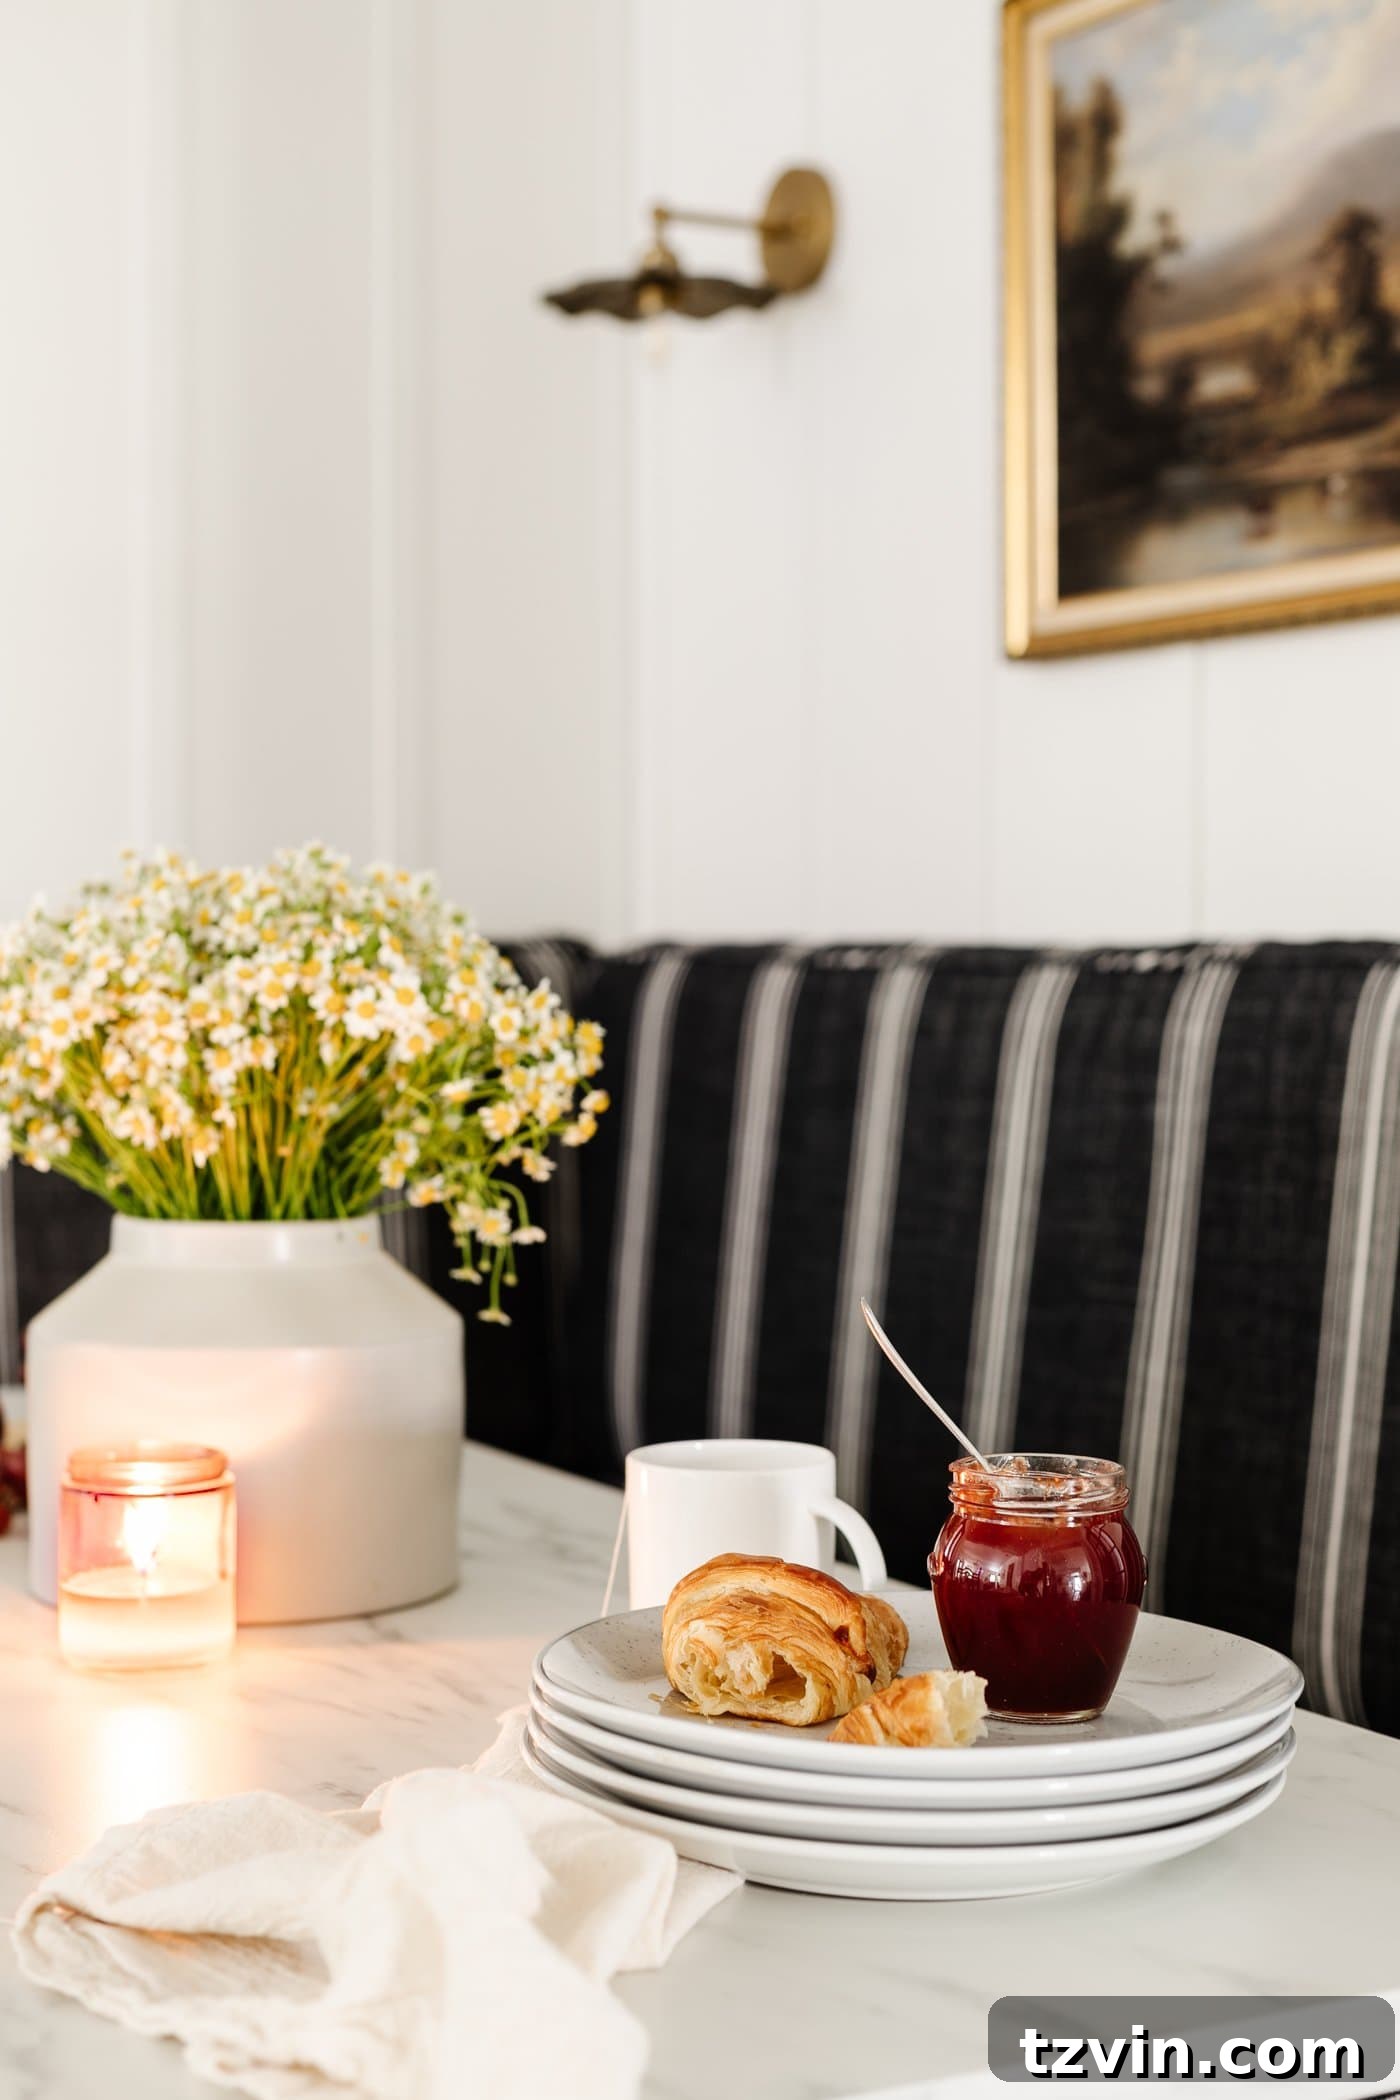
I will soon share a separate post detailing all sources, paint colors, and a comprehensive budget breakdown, as there’s simply too much information to include in a single article. The transformation of this small corner breakfast nook has exceeded our expectations; it now feels incredibly cozy and inviting. We can comfortably seat many more guests around this table, and the previously awkward traffic flow finally makes perfect sense. The herringbone LVP floors lend a classic and quaint charm, a warmth that our old tile floor could never achieve. This wood-look LVP truly ties the entire space together beautifully.
Kitchen Refresh: From Drab to Fab
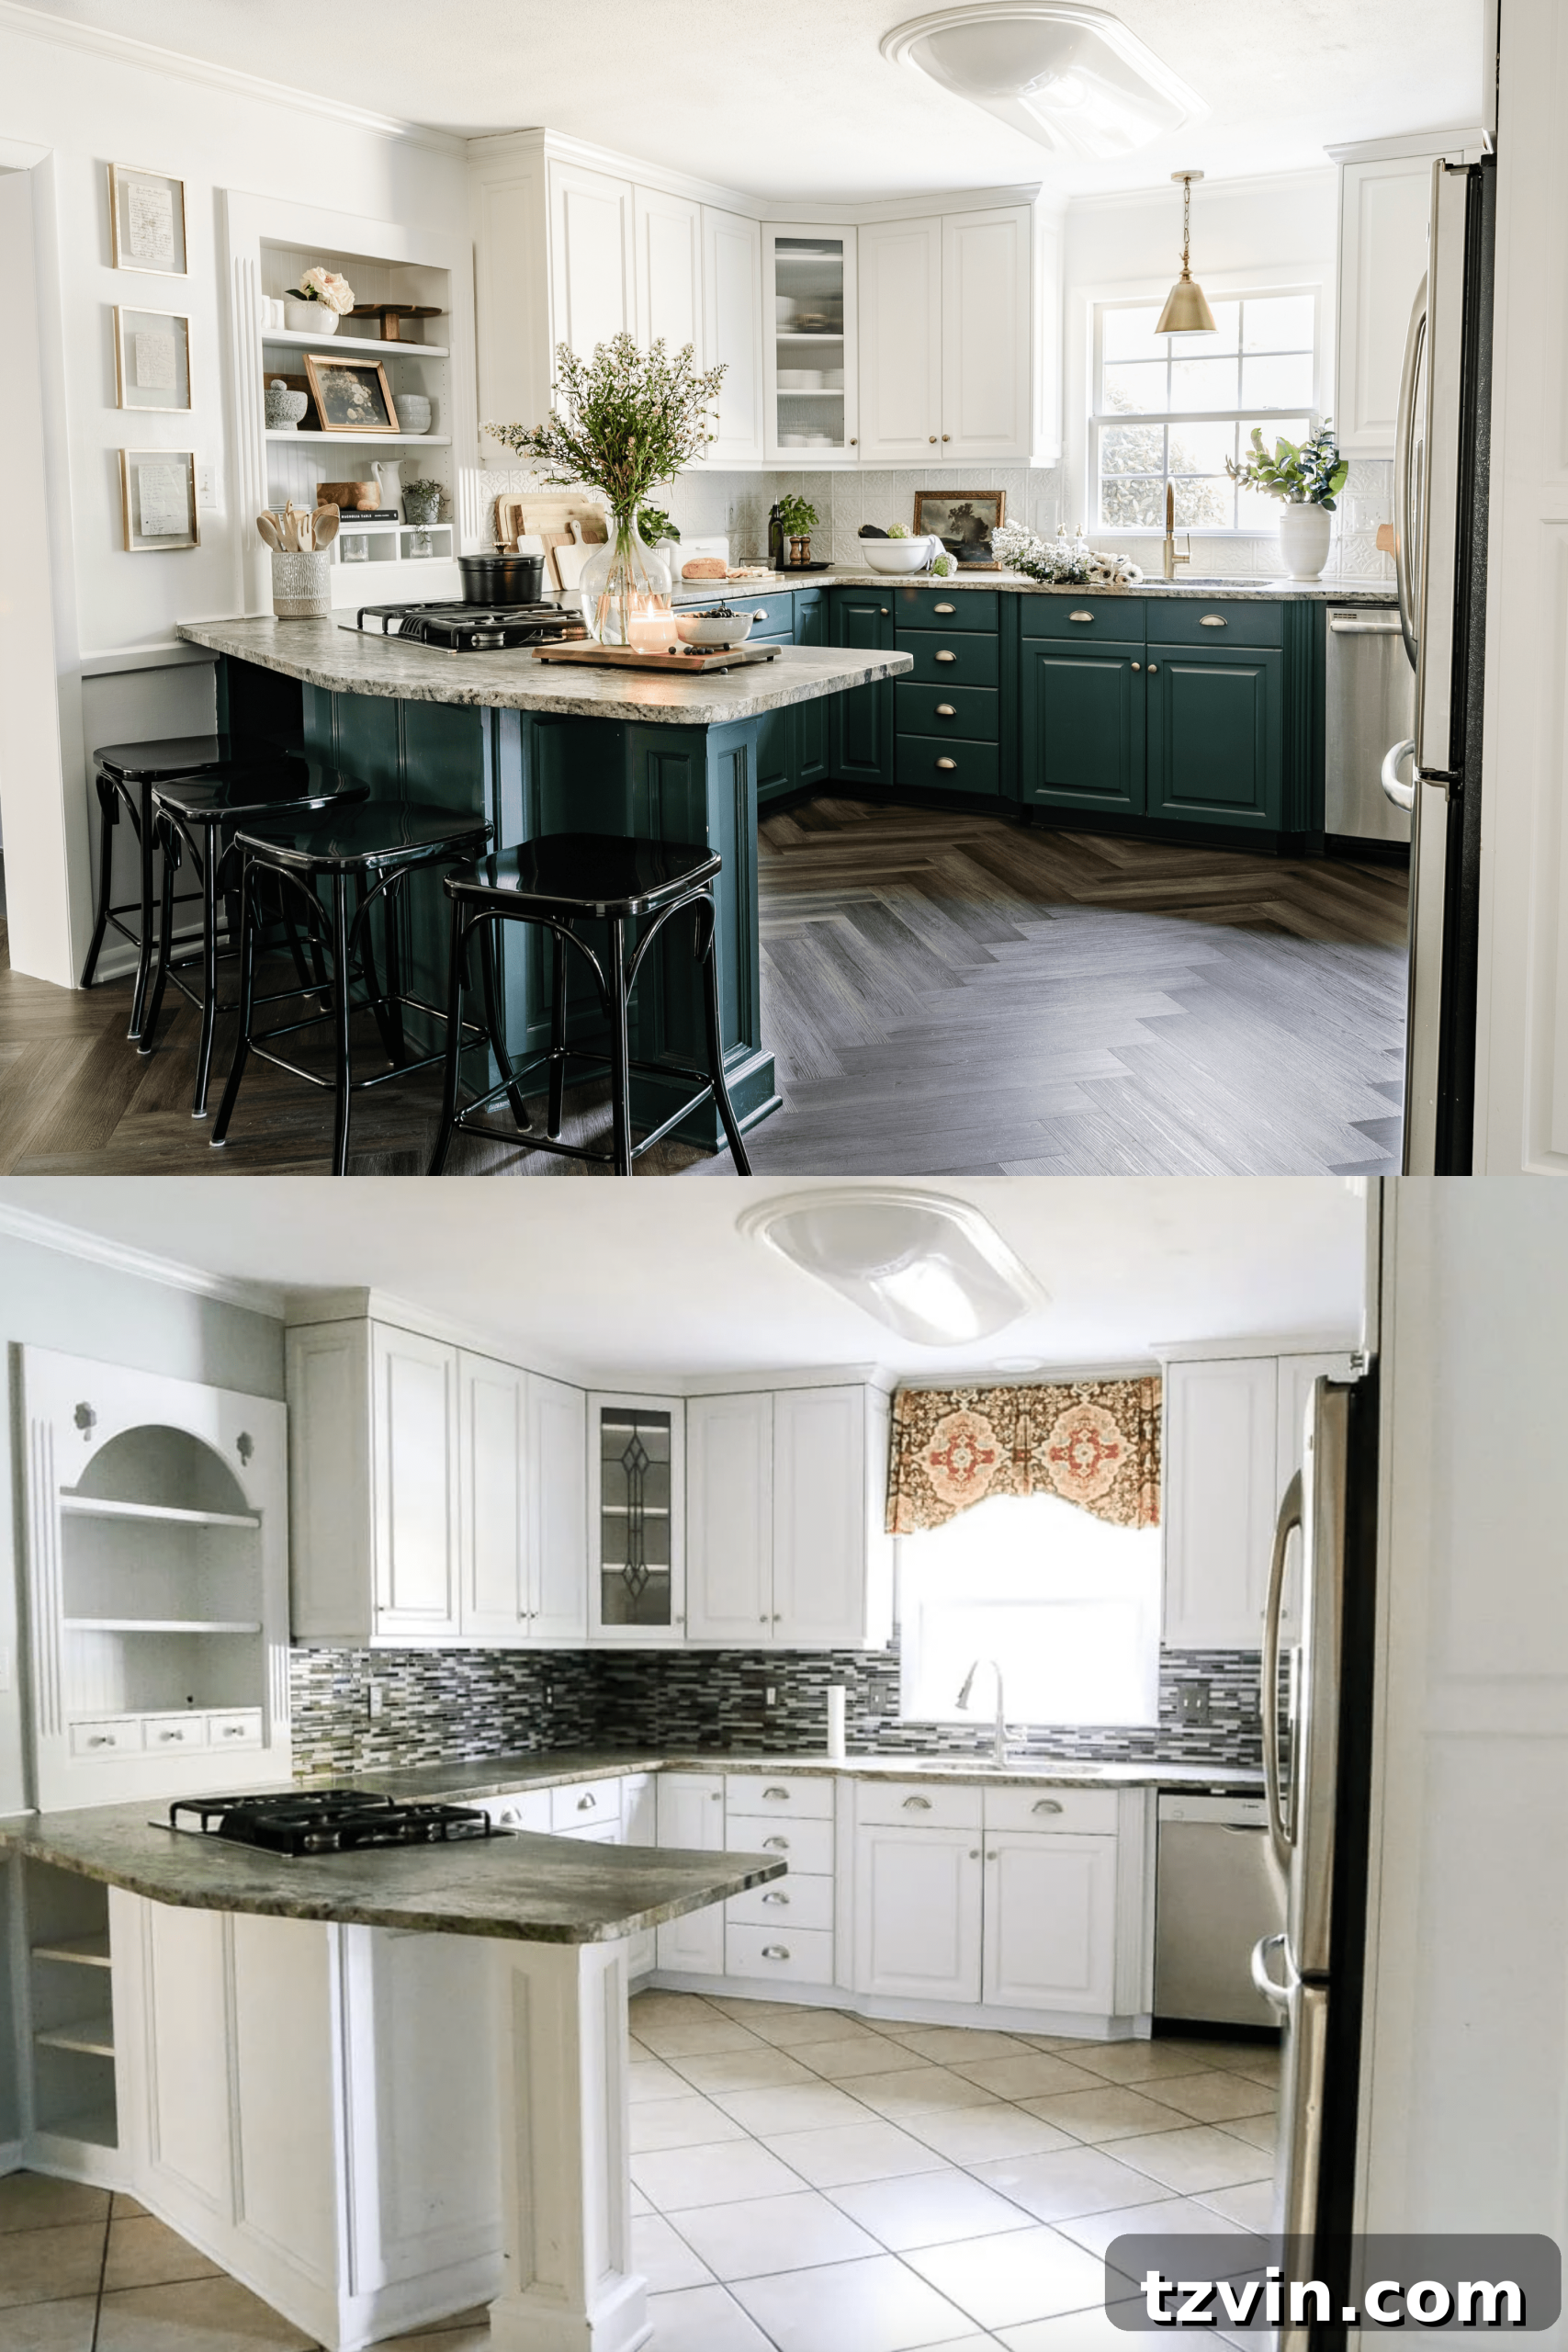
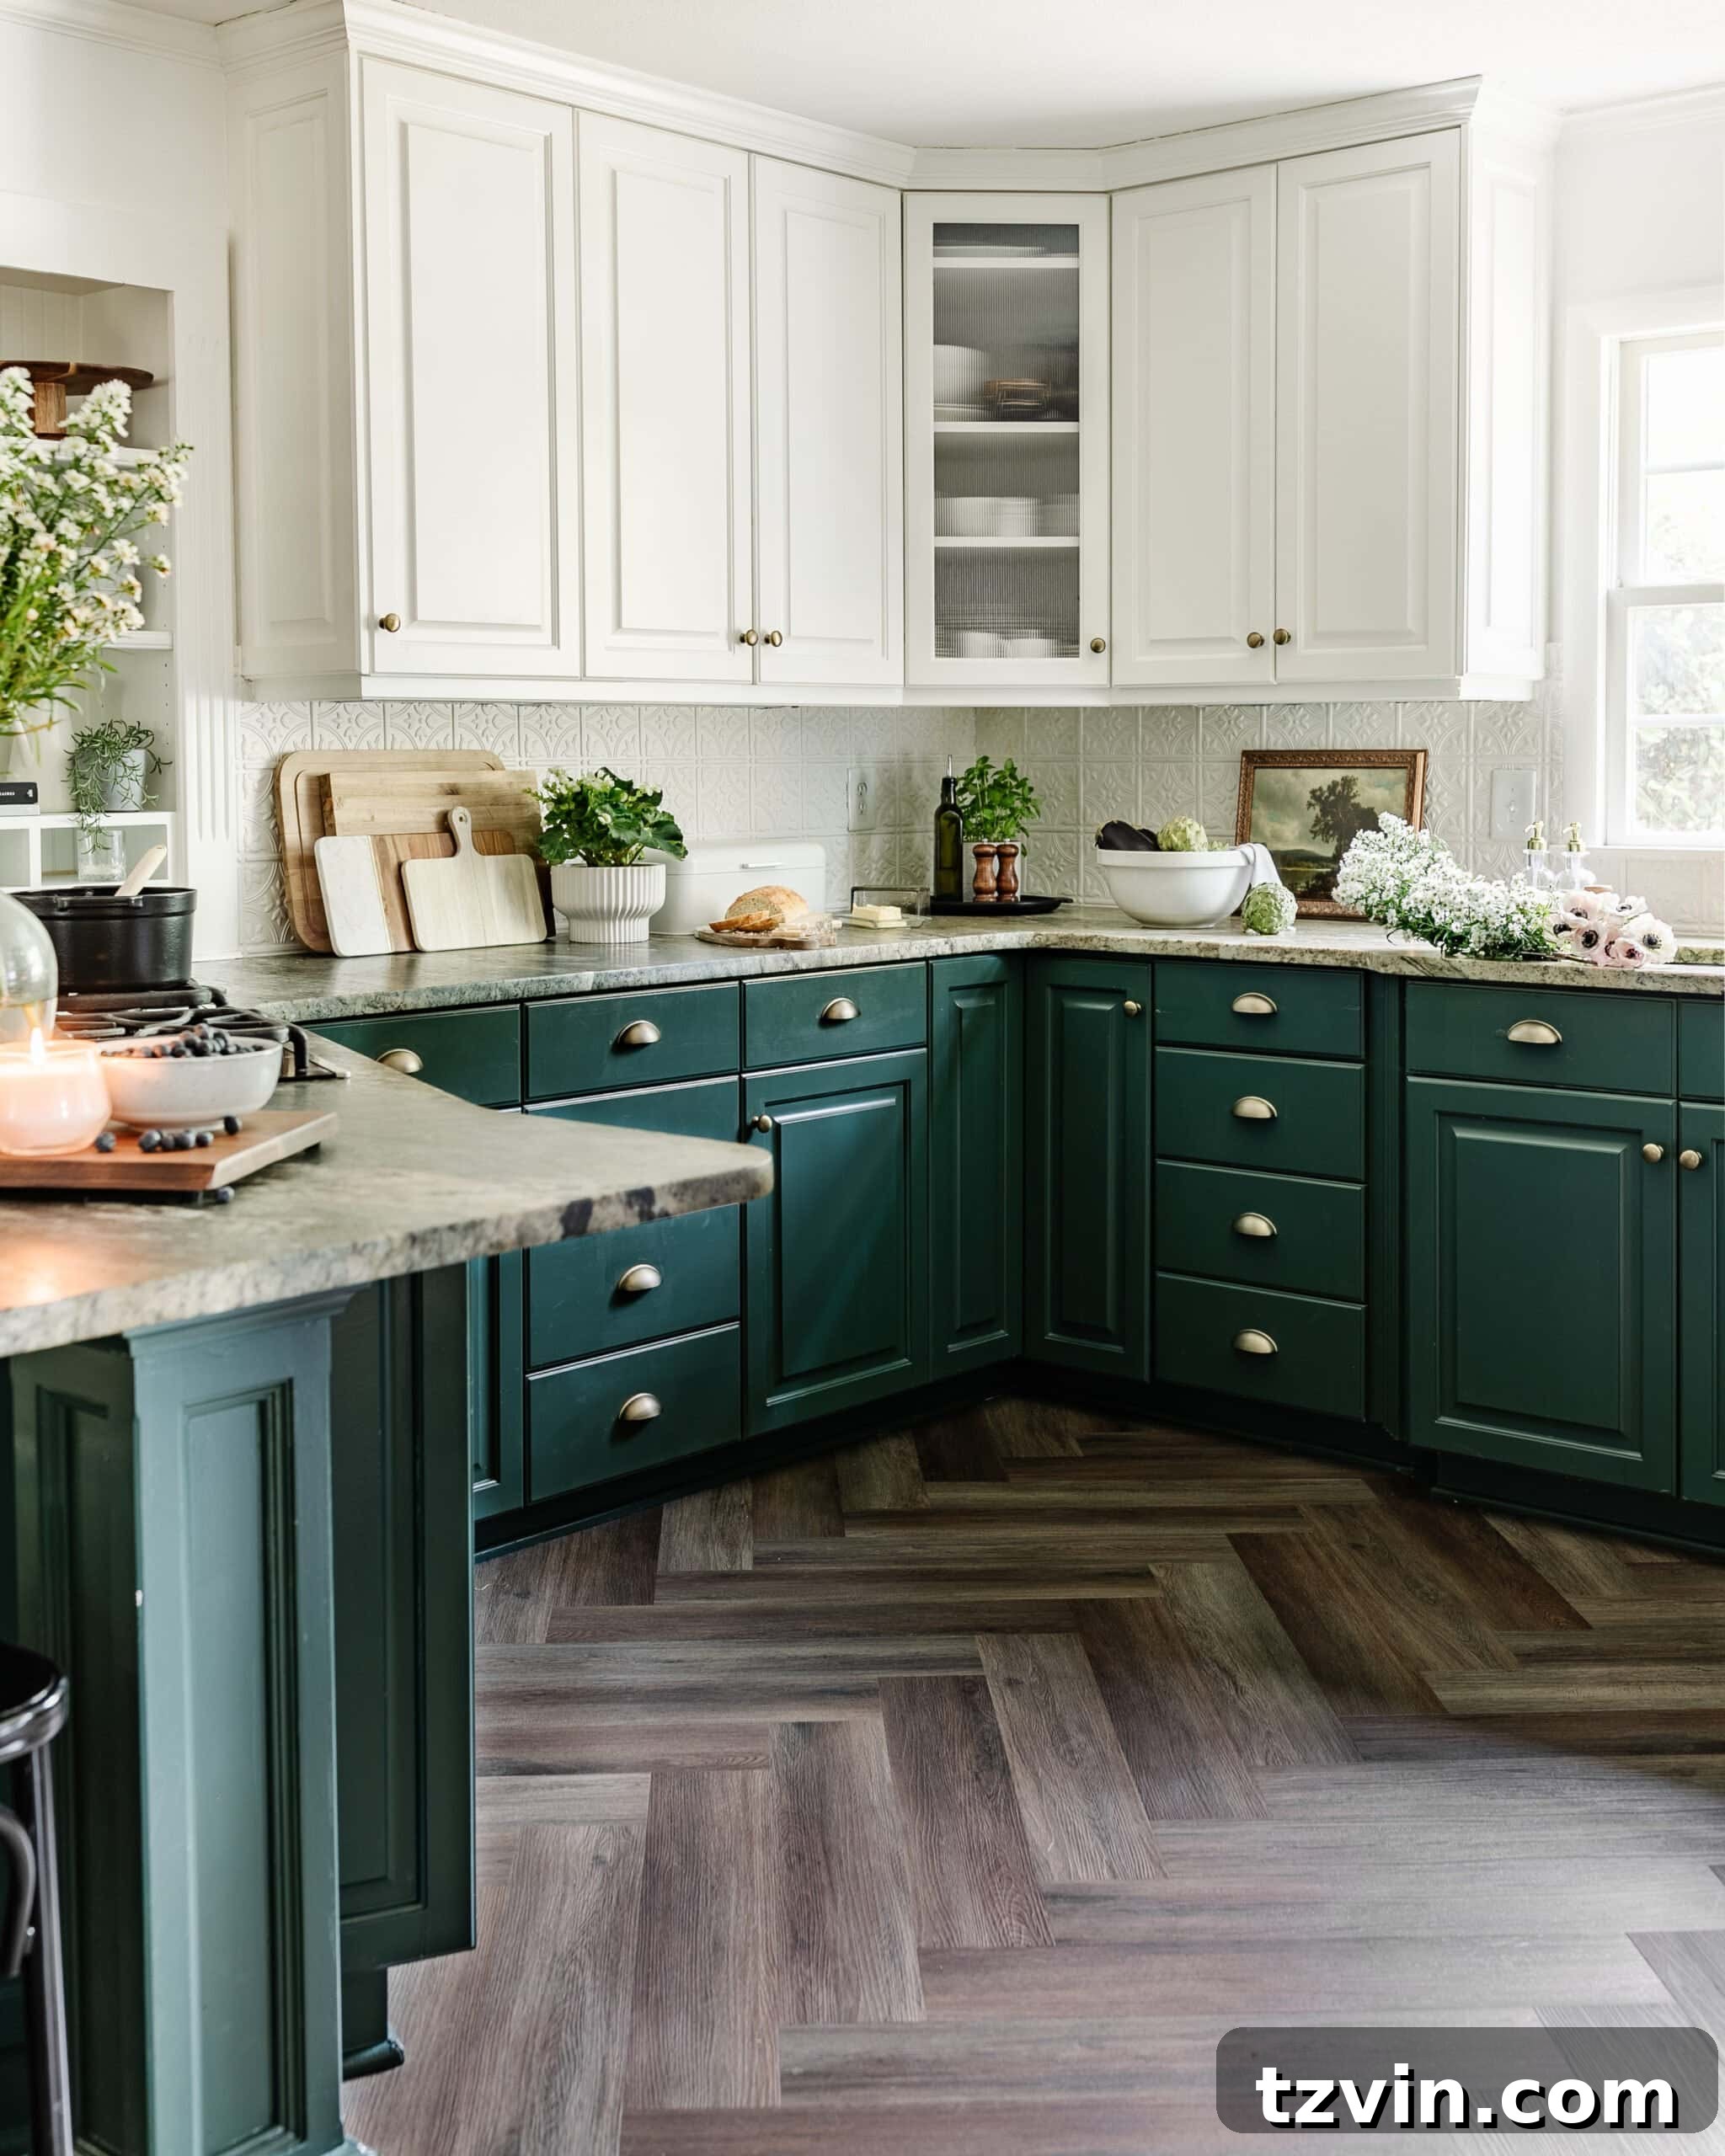
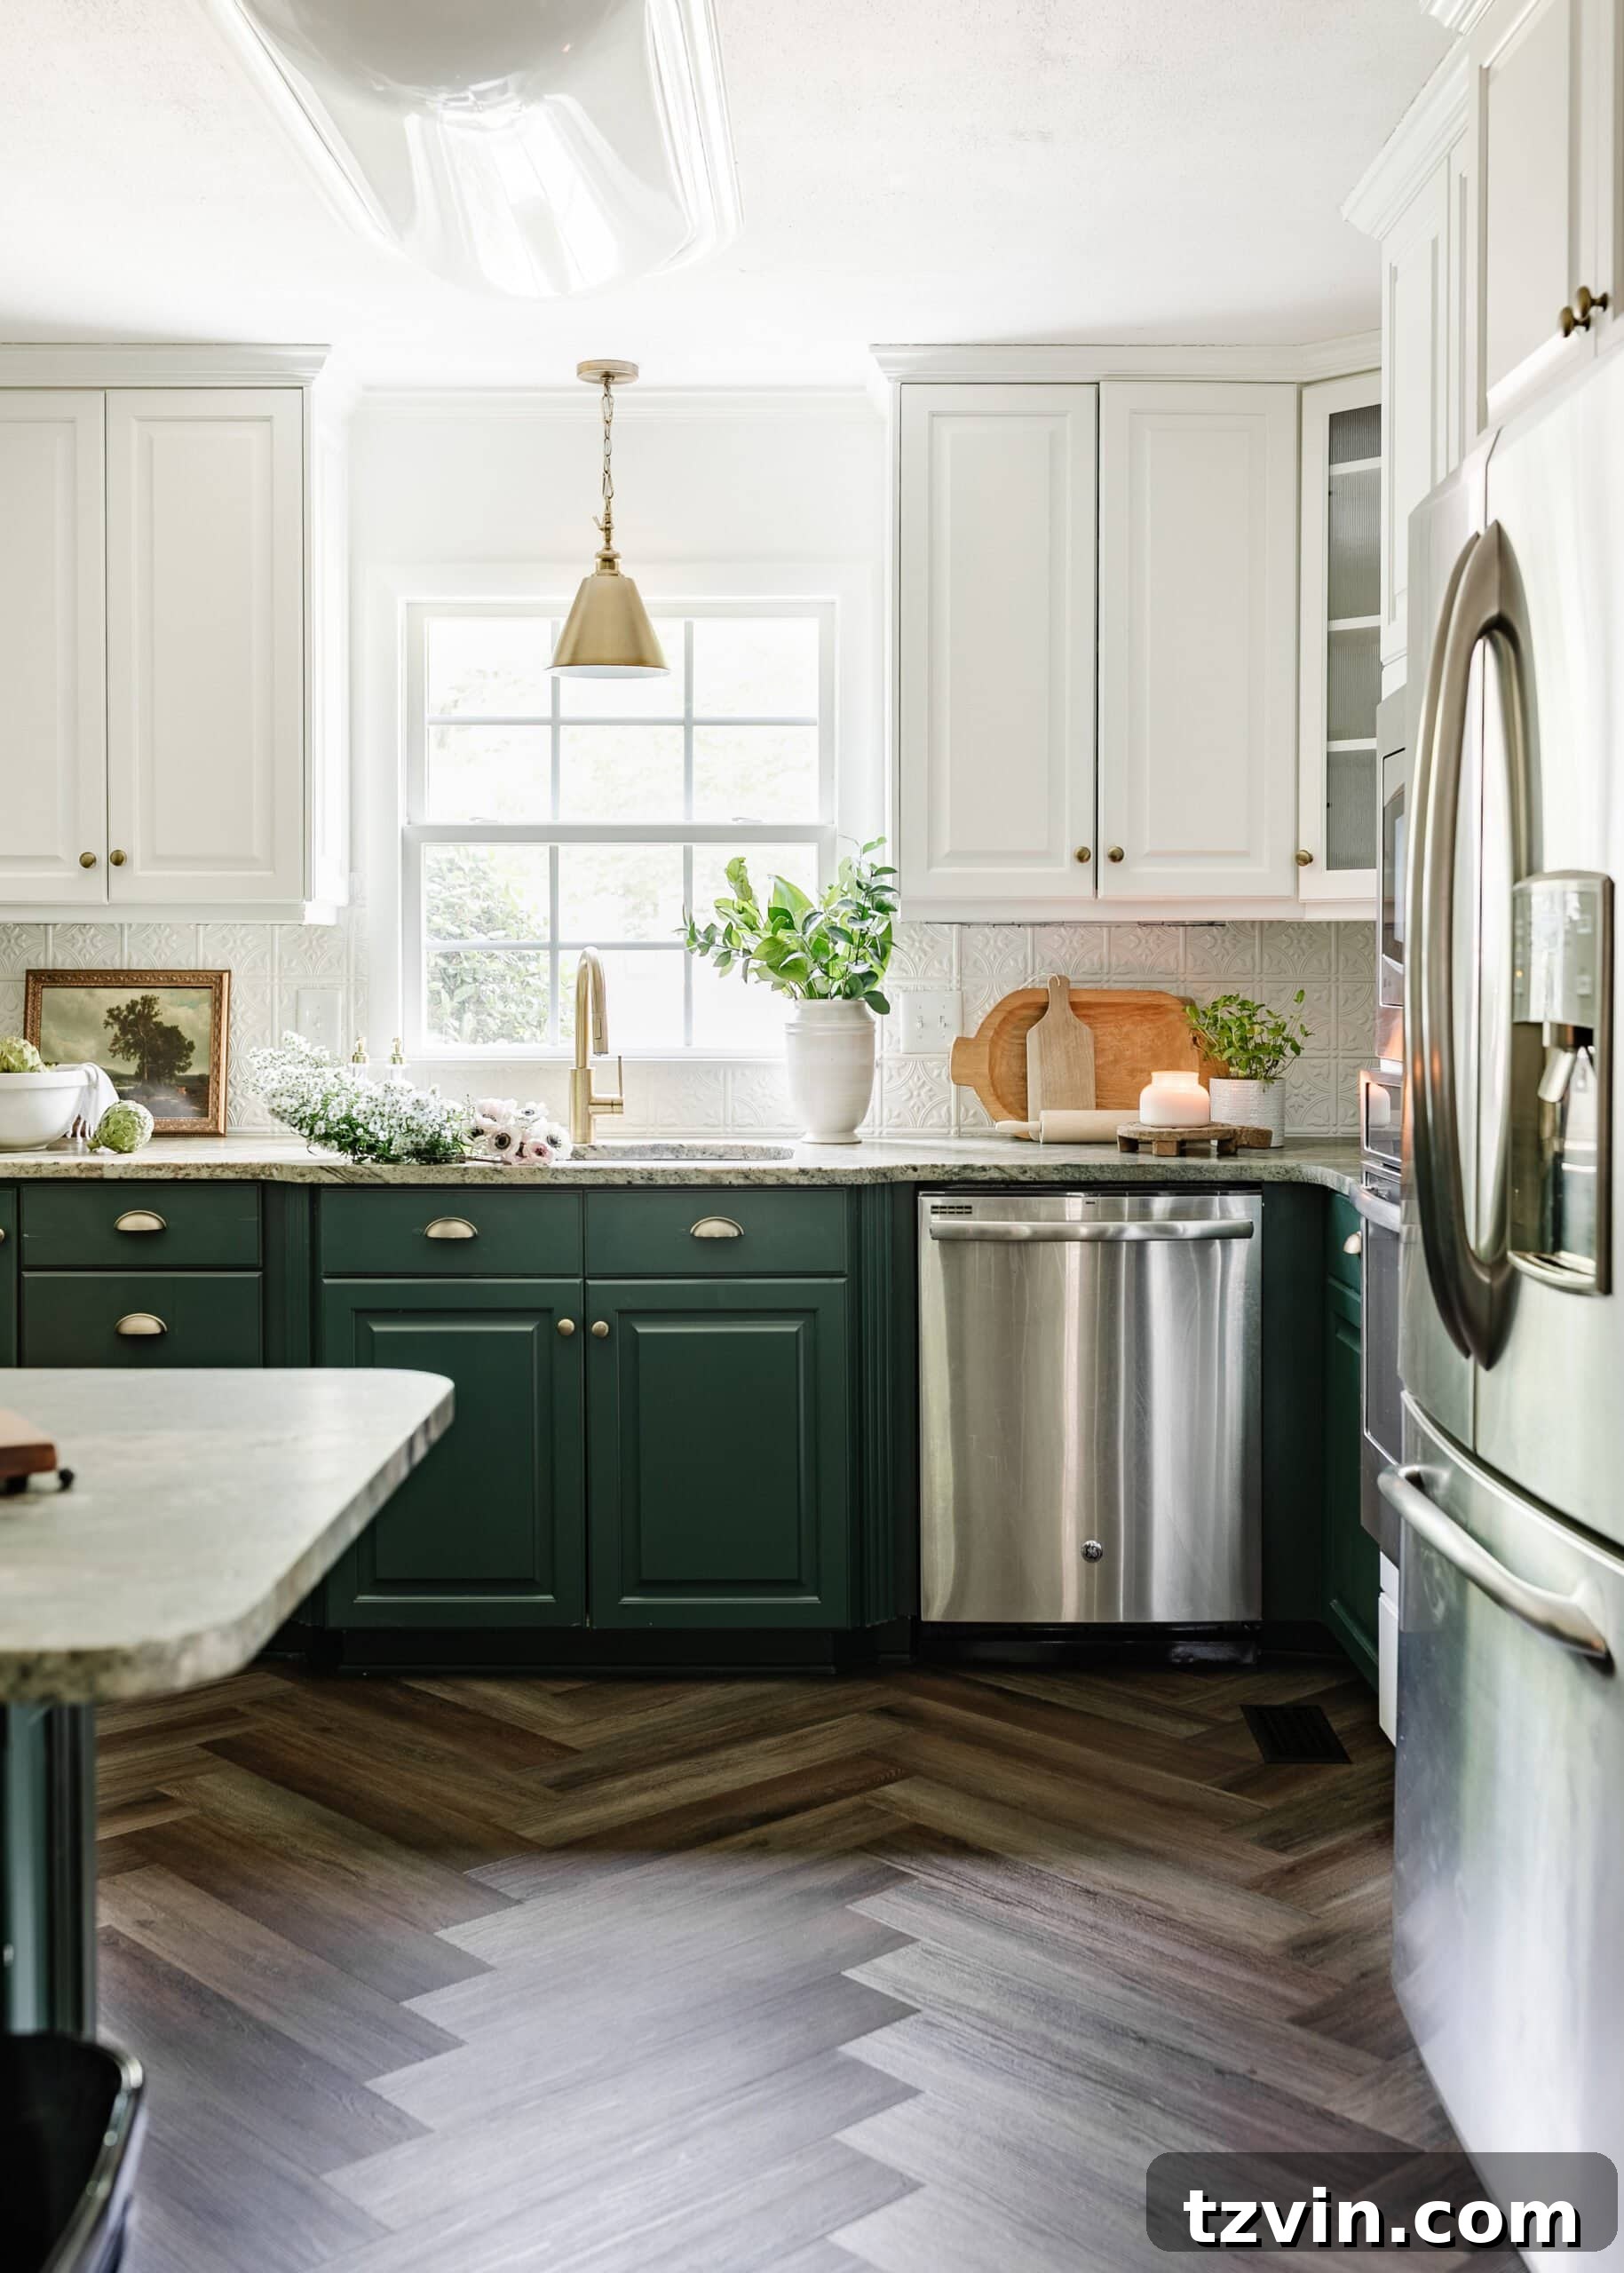
Transitioning from the corner breakfast nook into the kitchen, the impact of these cosmetic changes is truly astounding. It’s hard to believe the massive difference a few strategic updates have made. I’m particularly enamored with the herringbone flooring pattern, which brilliantly offsets the kitchen’s original layout.
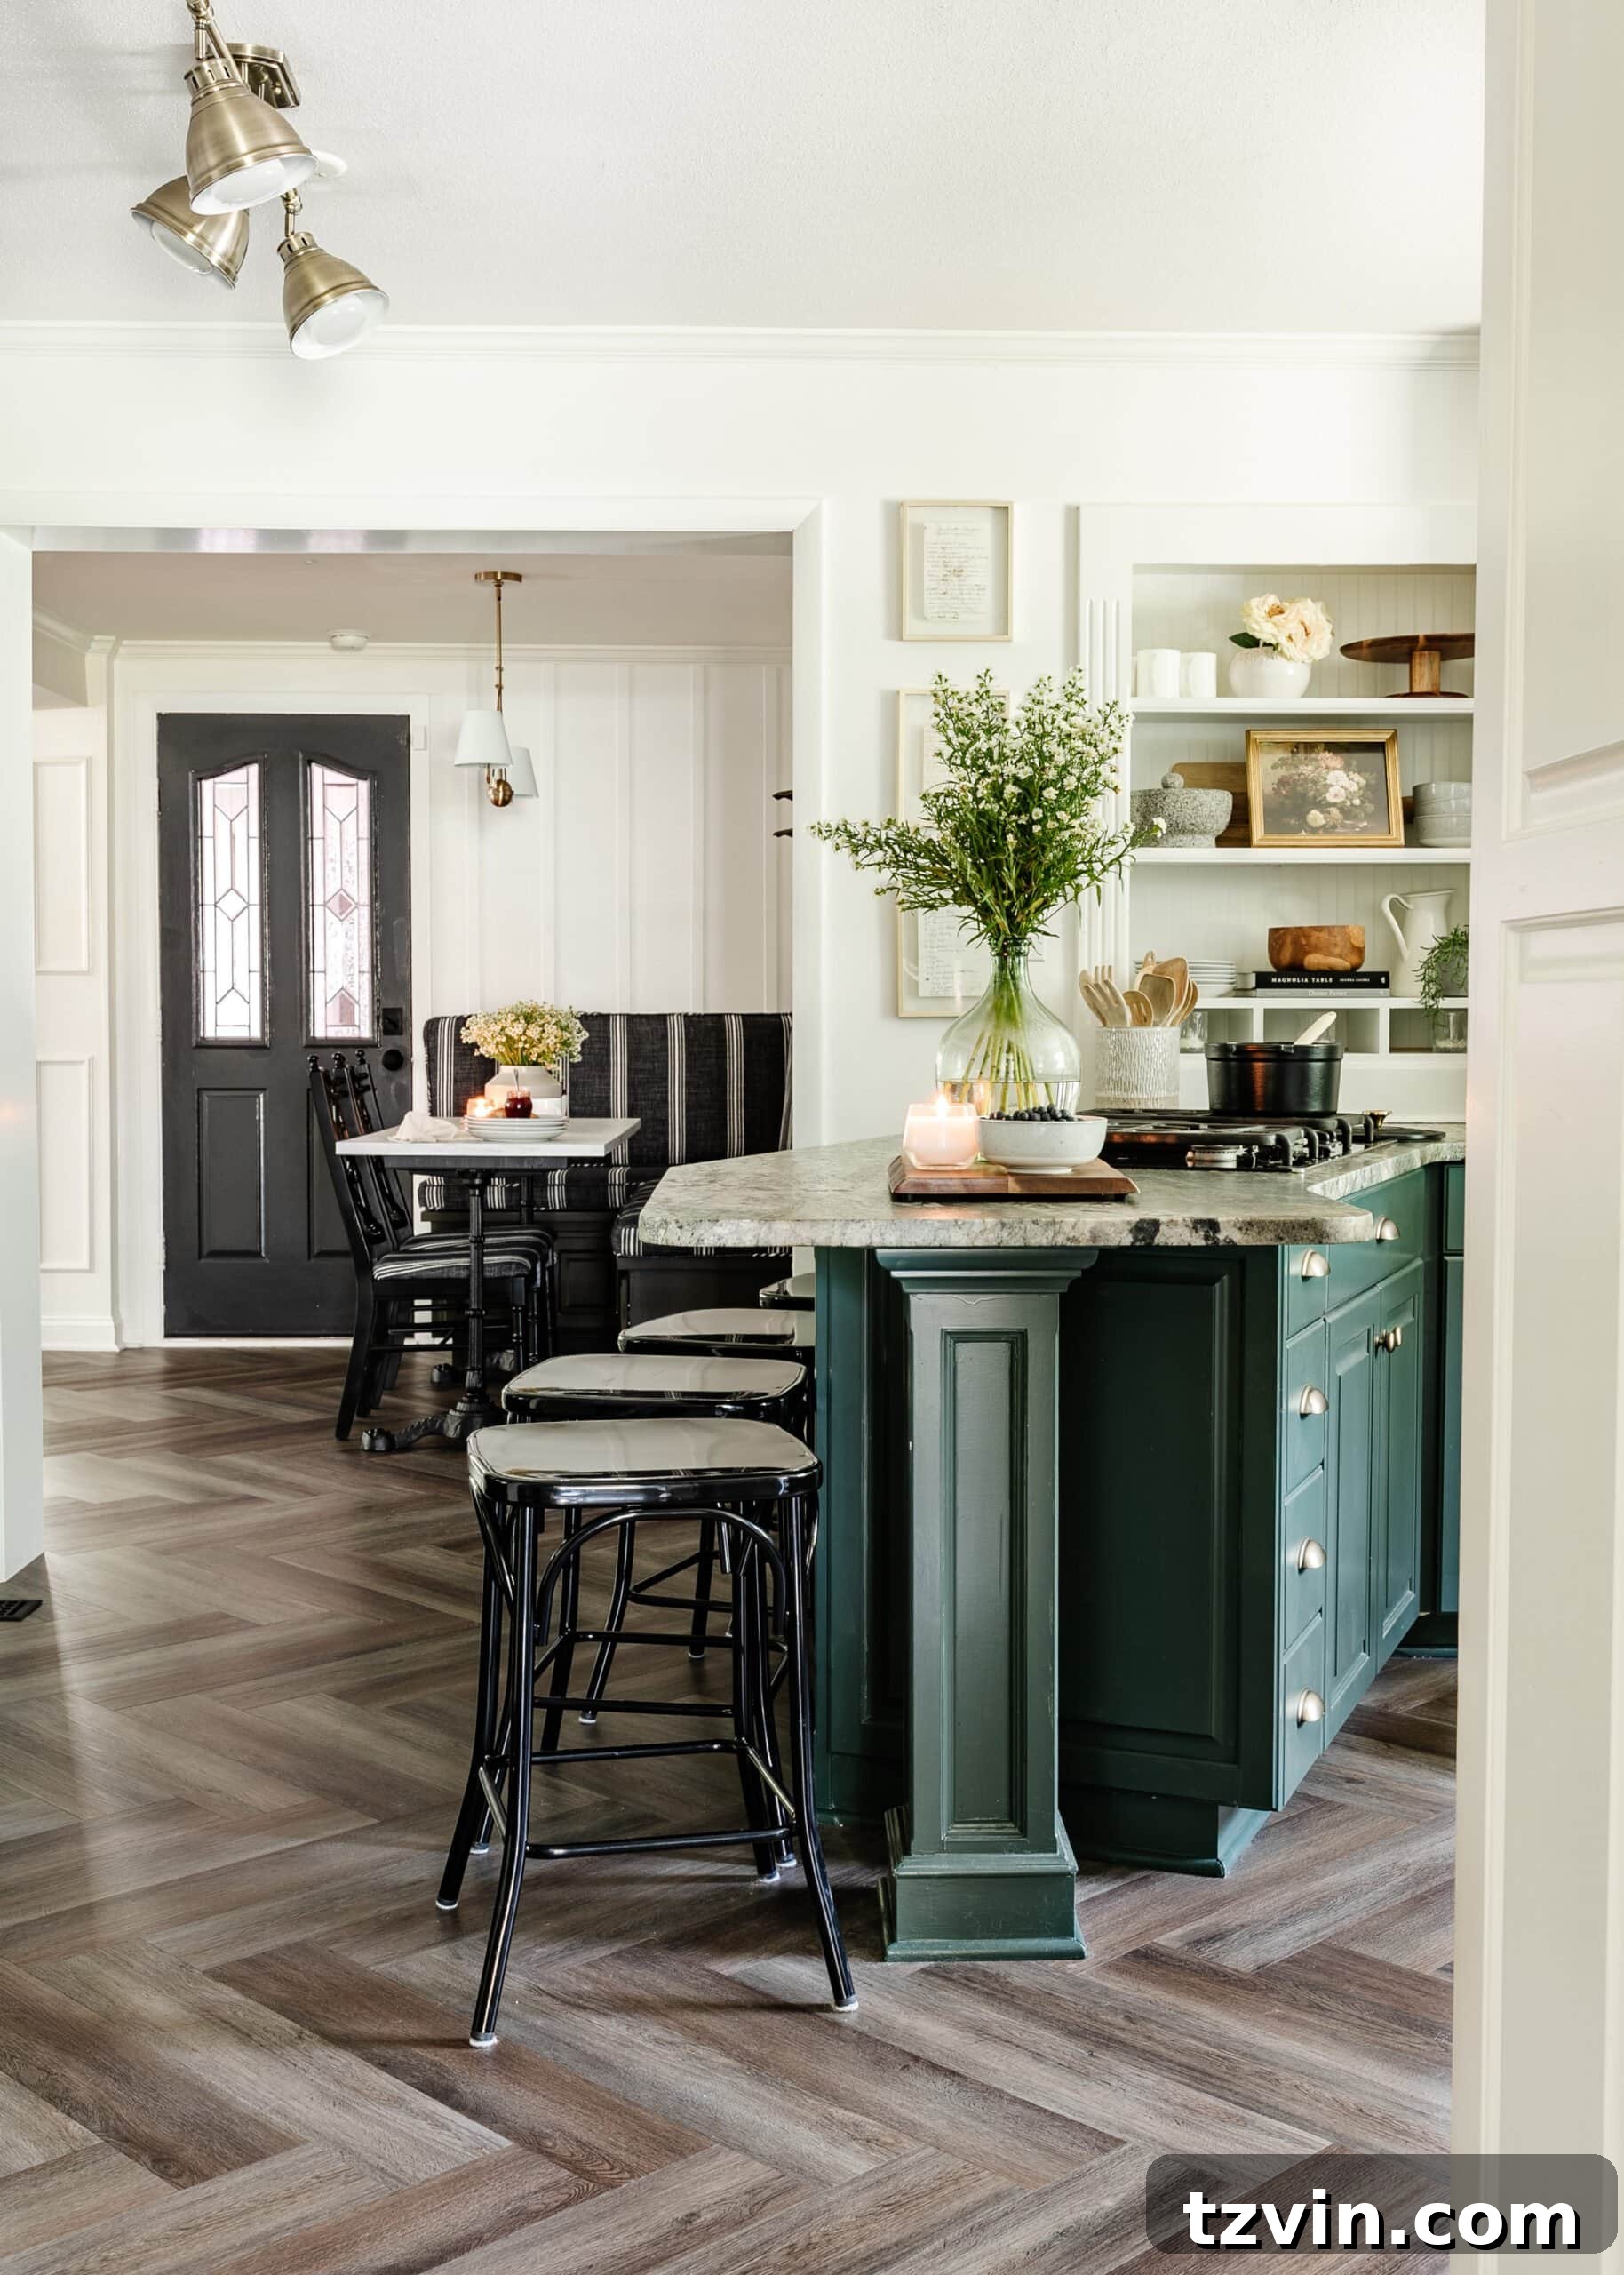
The kitchen’s original design, with the stovetop awkwardly placed in the peninsula, was never my favorite. We often dealt with cooking grease splattering onto guests sitting at the bar stools, a constant traffic jam between the fridge and the peninsula, and a perplexing amount of wasted open space in the middle. However, the introduction of this striking herringbone pattern transformed that central open area from a design flaw into a compelling visual feature. It has undeniably shifted my perspective on the kitchen’s overall aesthetic.
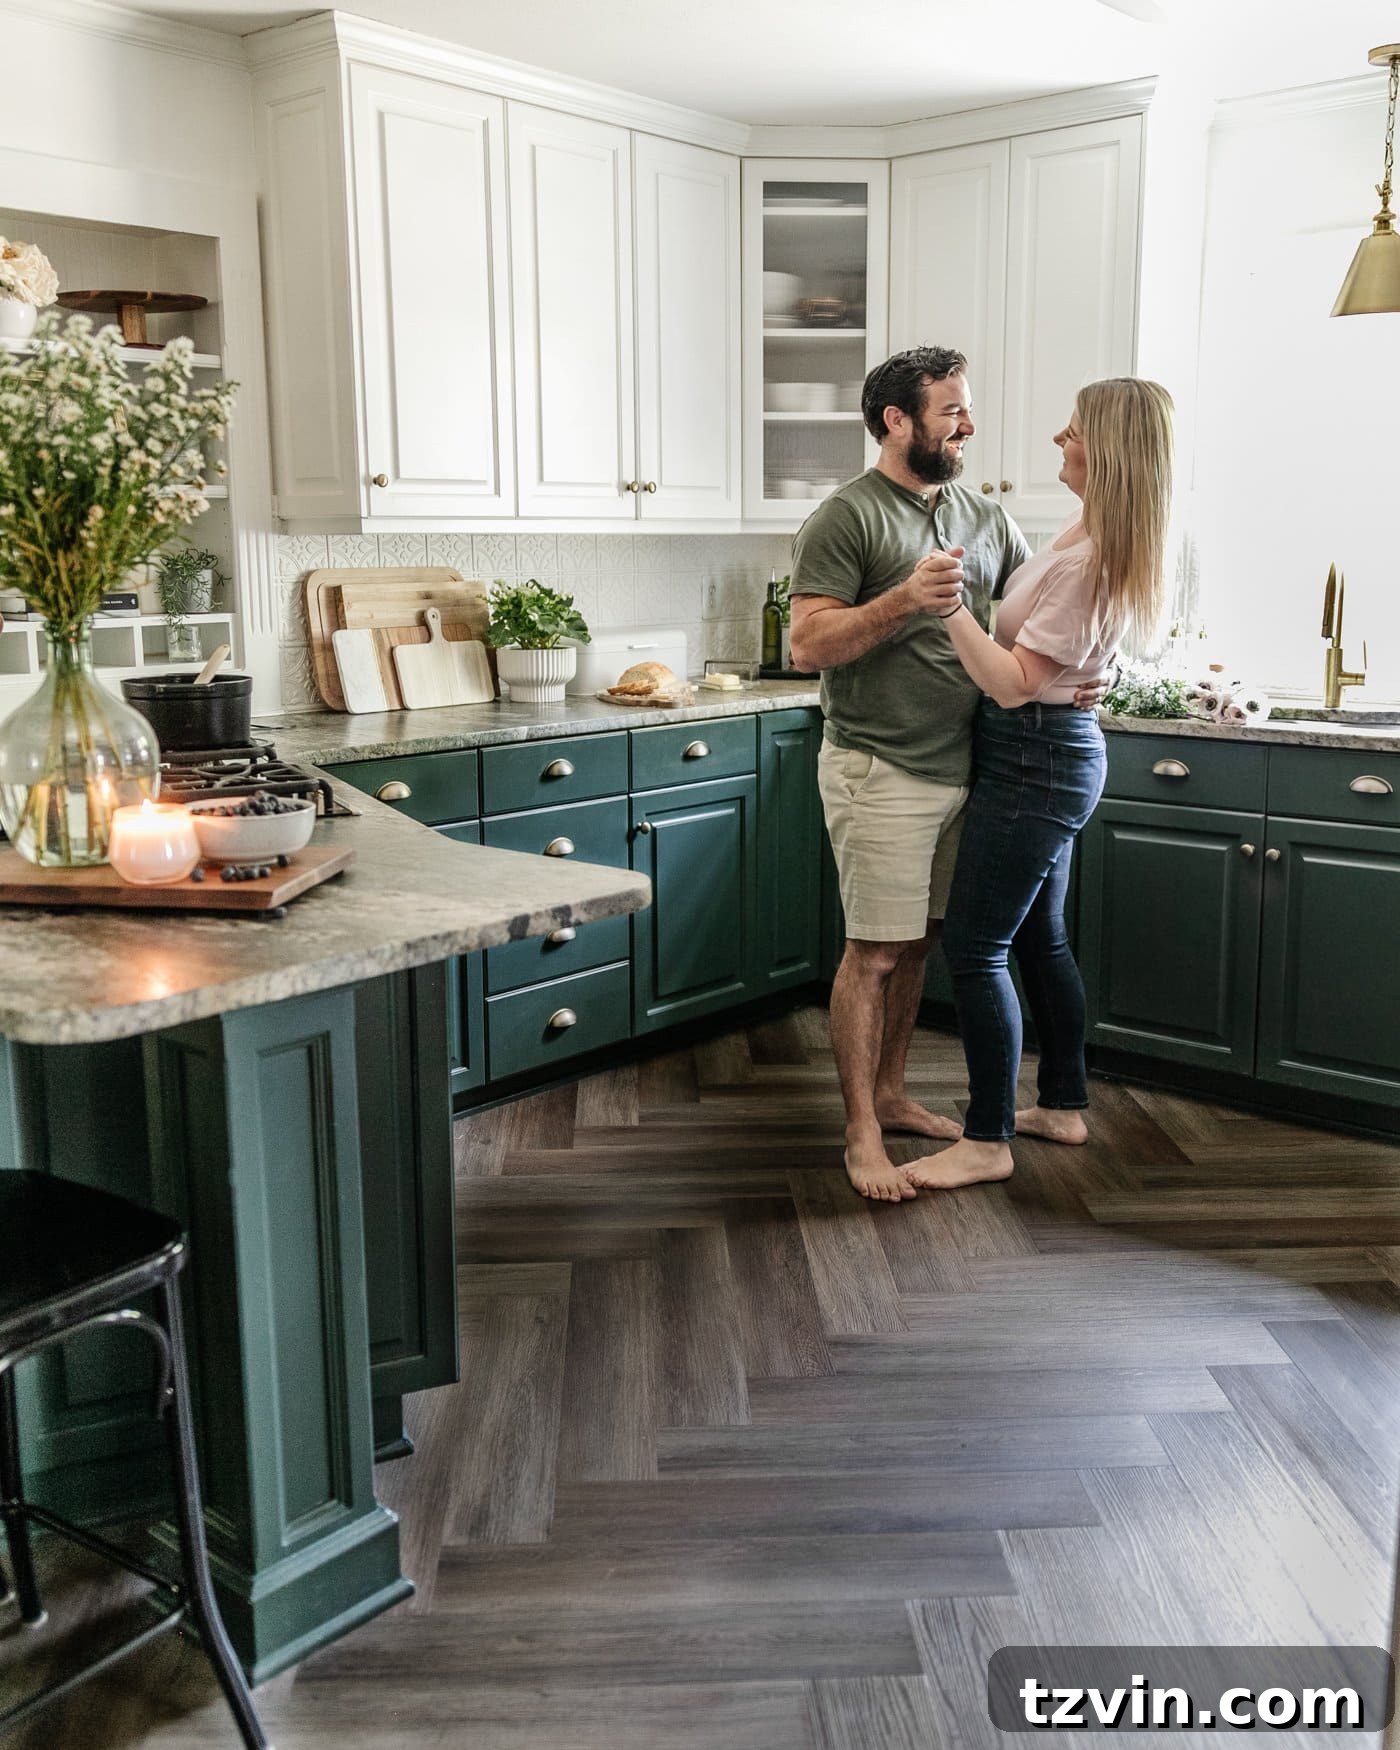
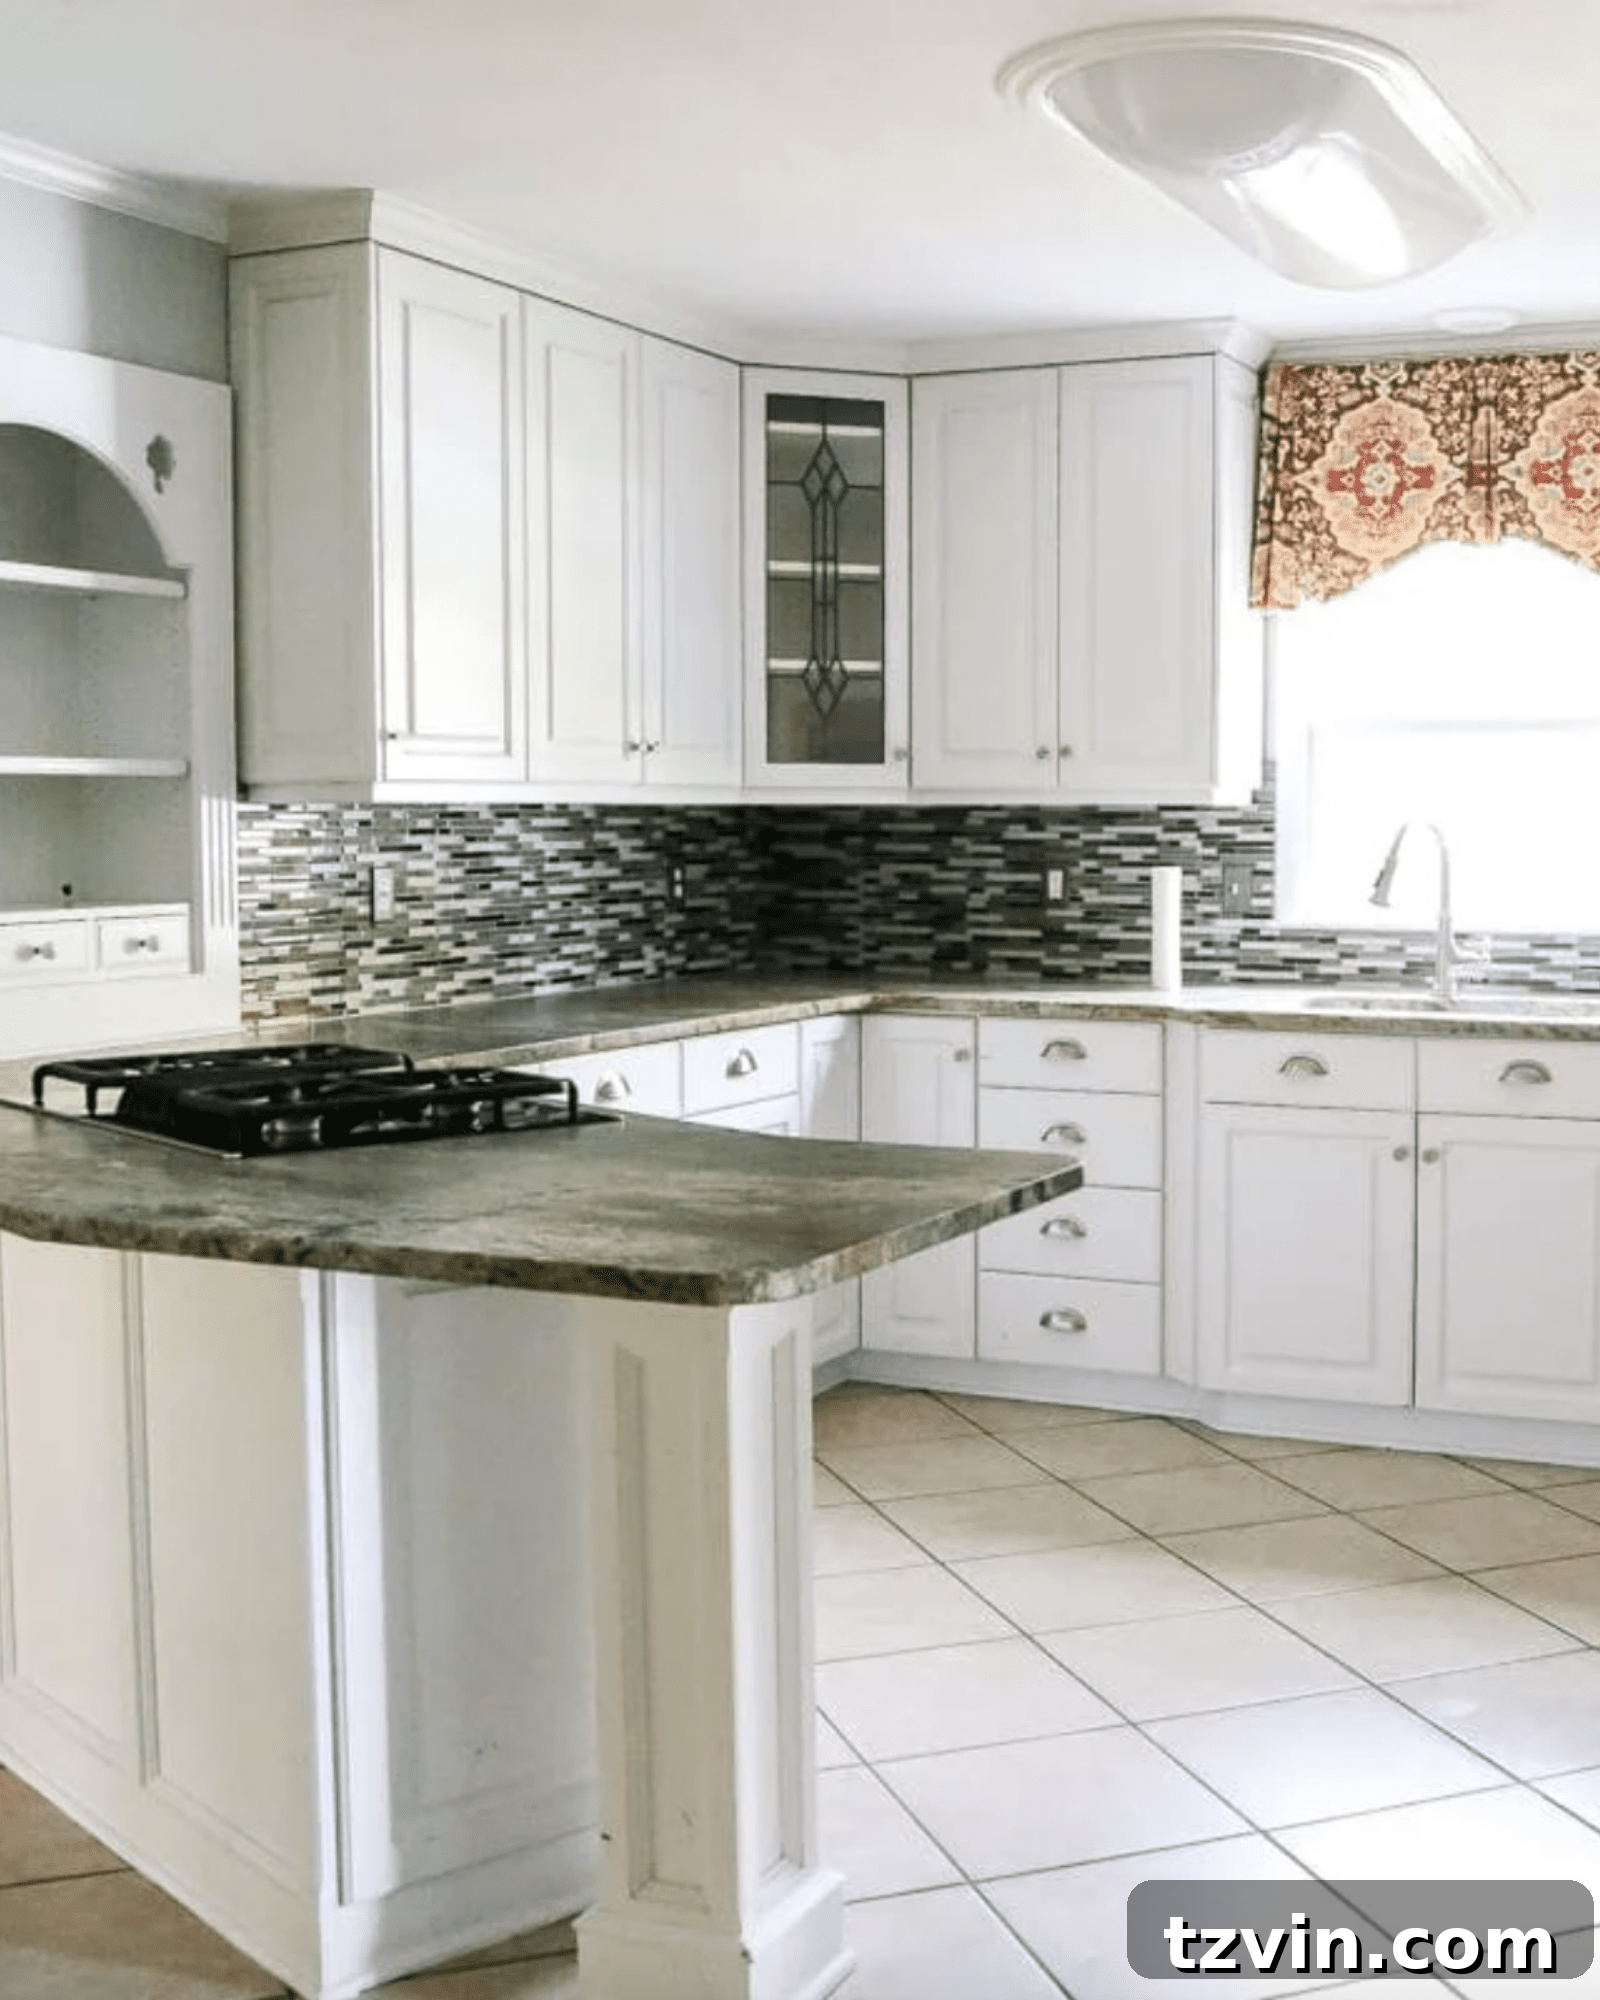
Over the years, we’ve implemented numerous small changes to achieve this kitchen facelift, all without any major demolition. These incremental updates have collectively steered our kitchen toward a charming cottagecore style, carefully balancing aesthetic appeal with the practical needs of storage and modern convenience. It’s a testament to how thoughtful, cosmetic changes can profoundly impact a space.
Transformed with Painted Kitchen Cabinets
Source: Discover Green Kitchen Cabinet Inspiration to transform your space.
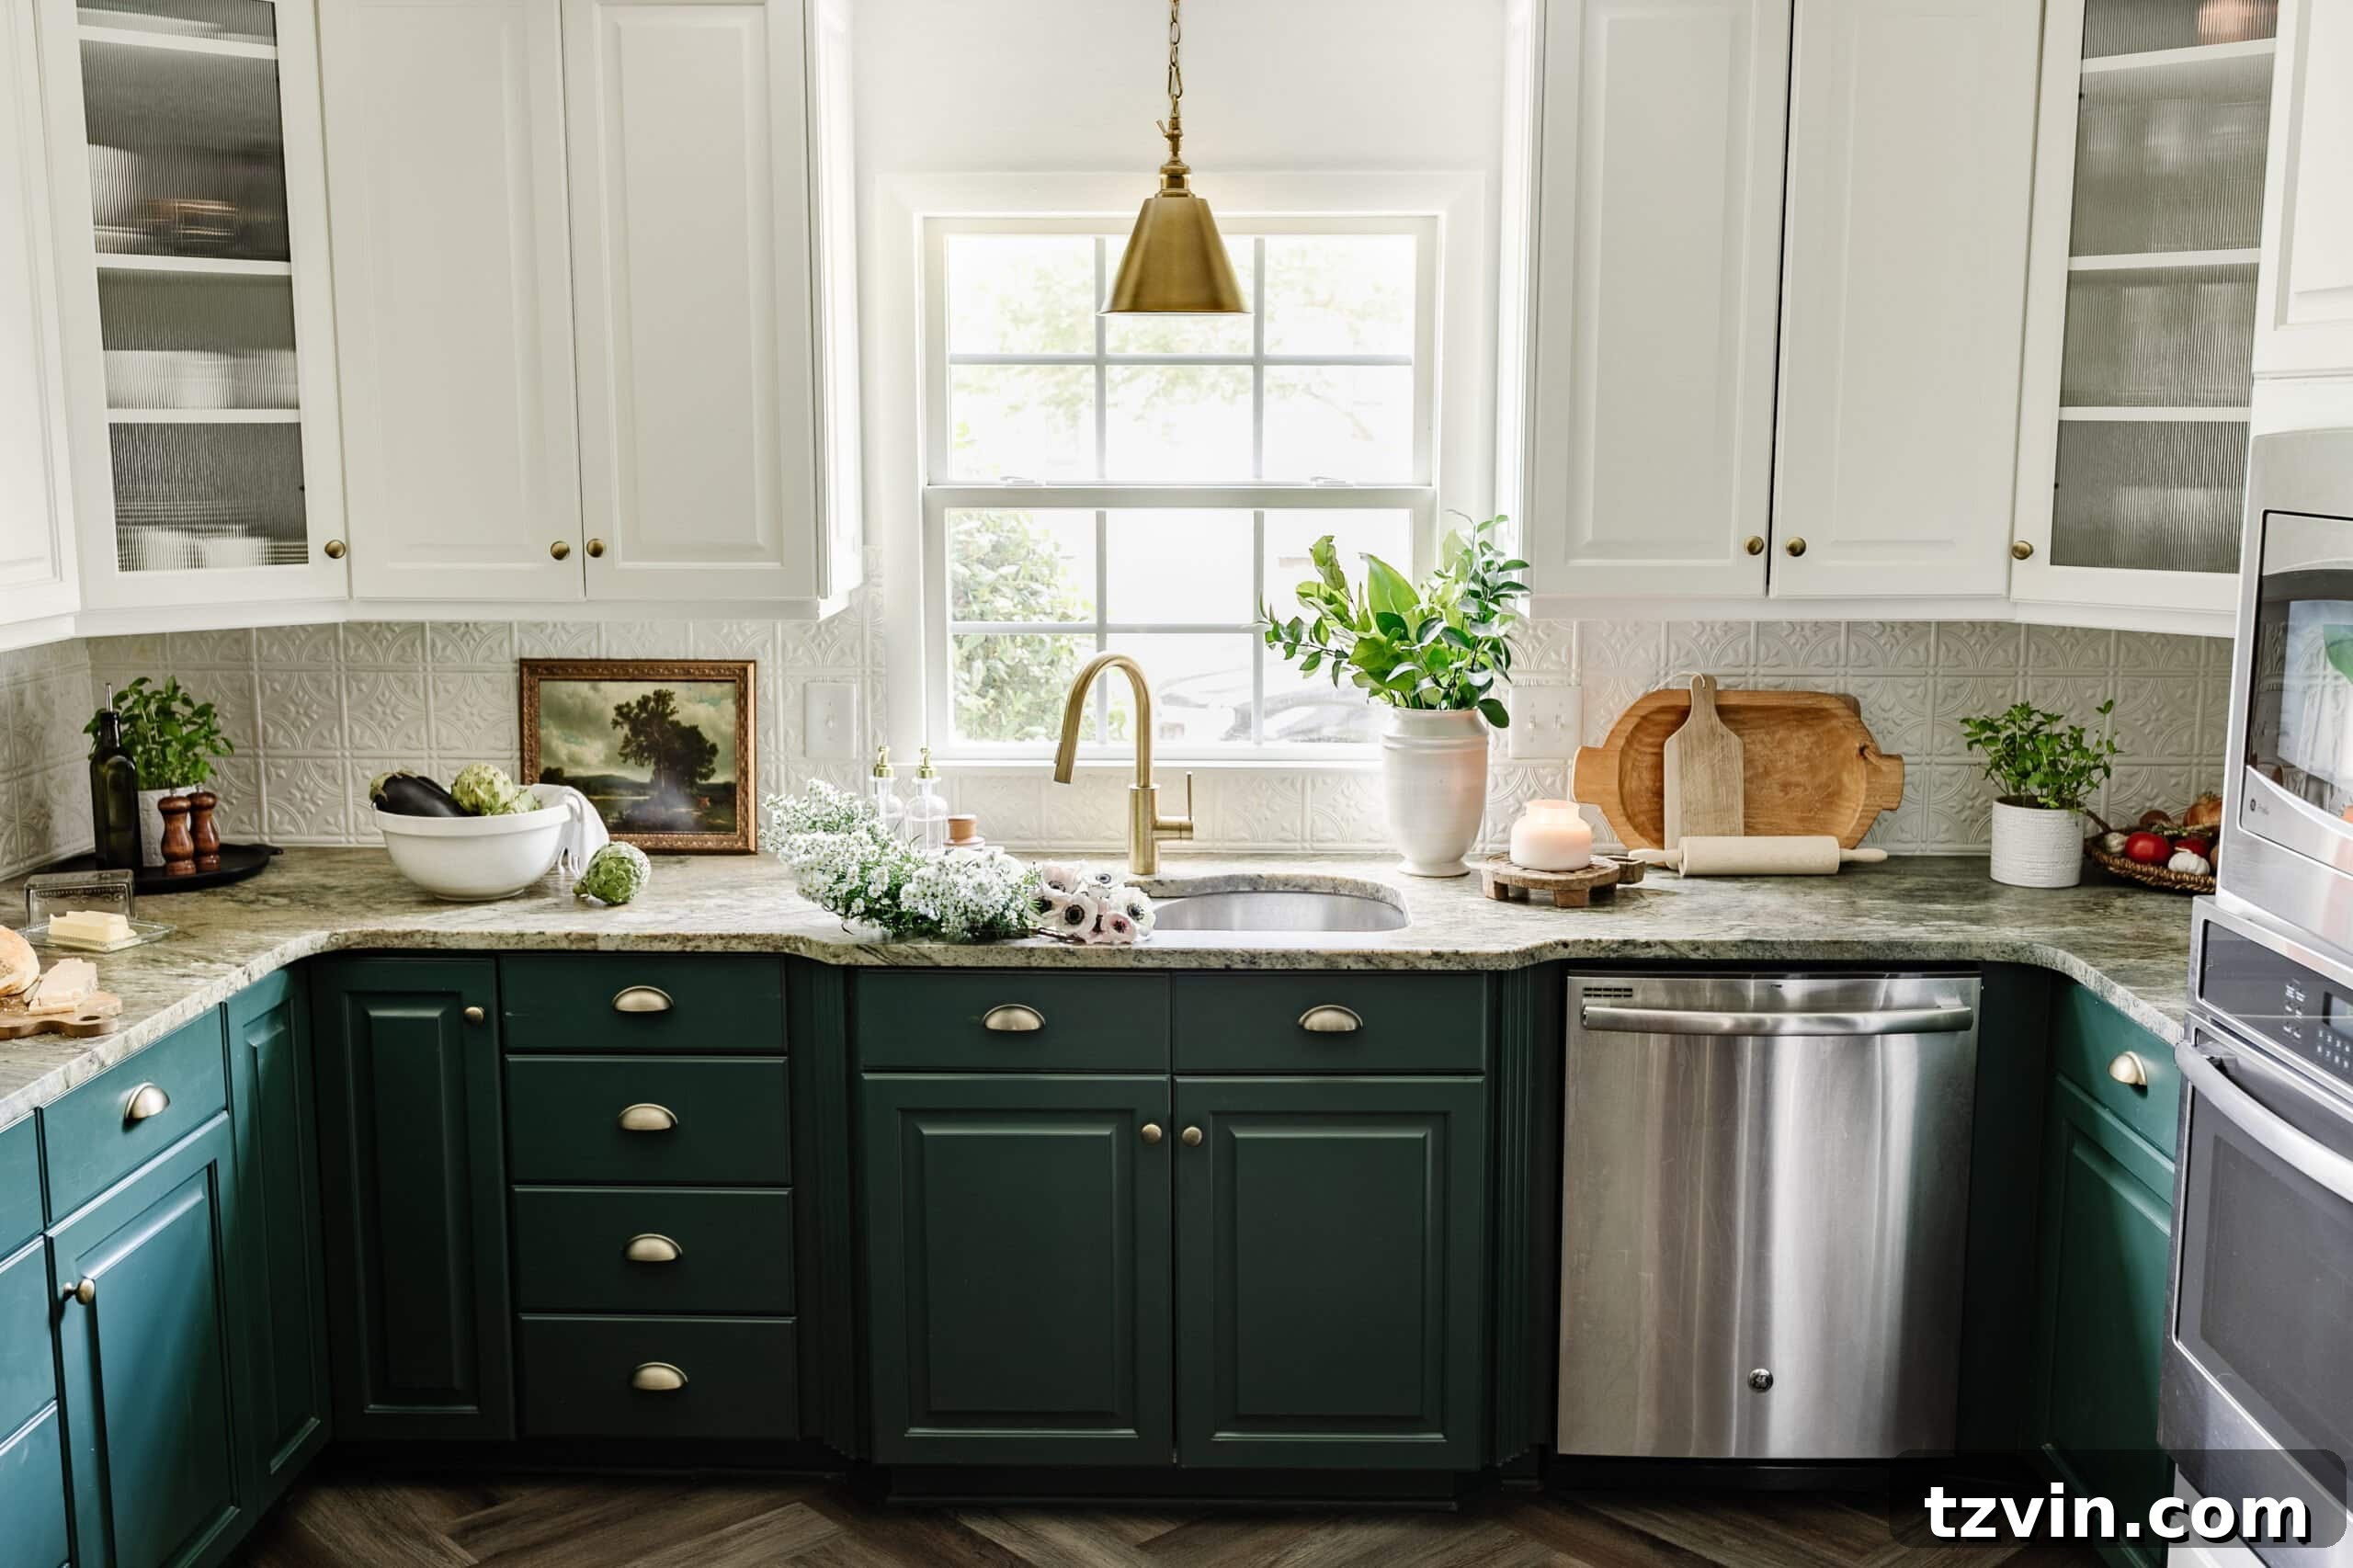
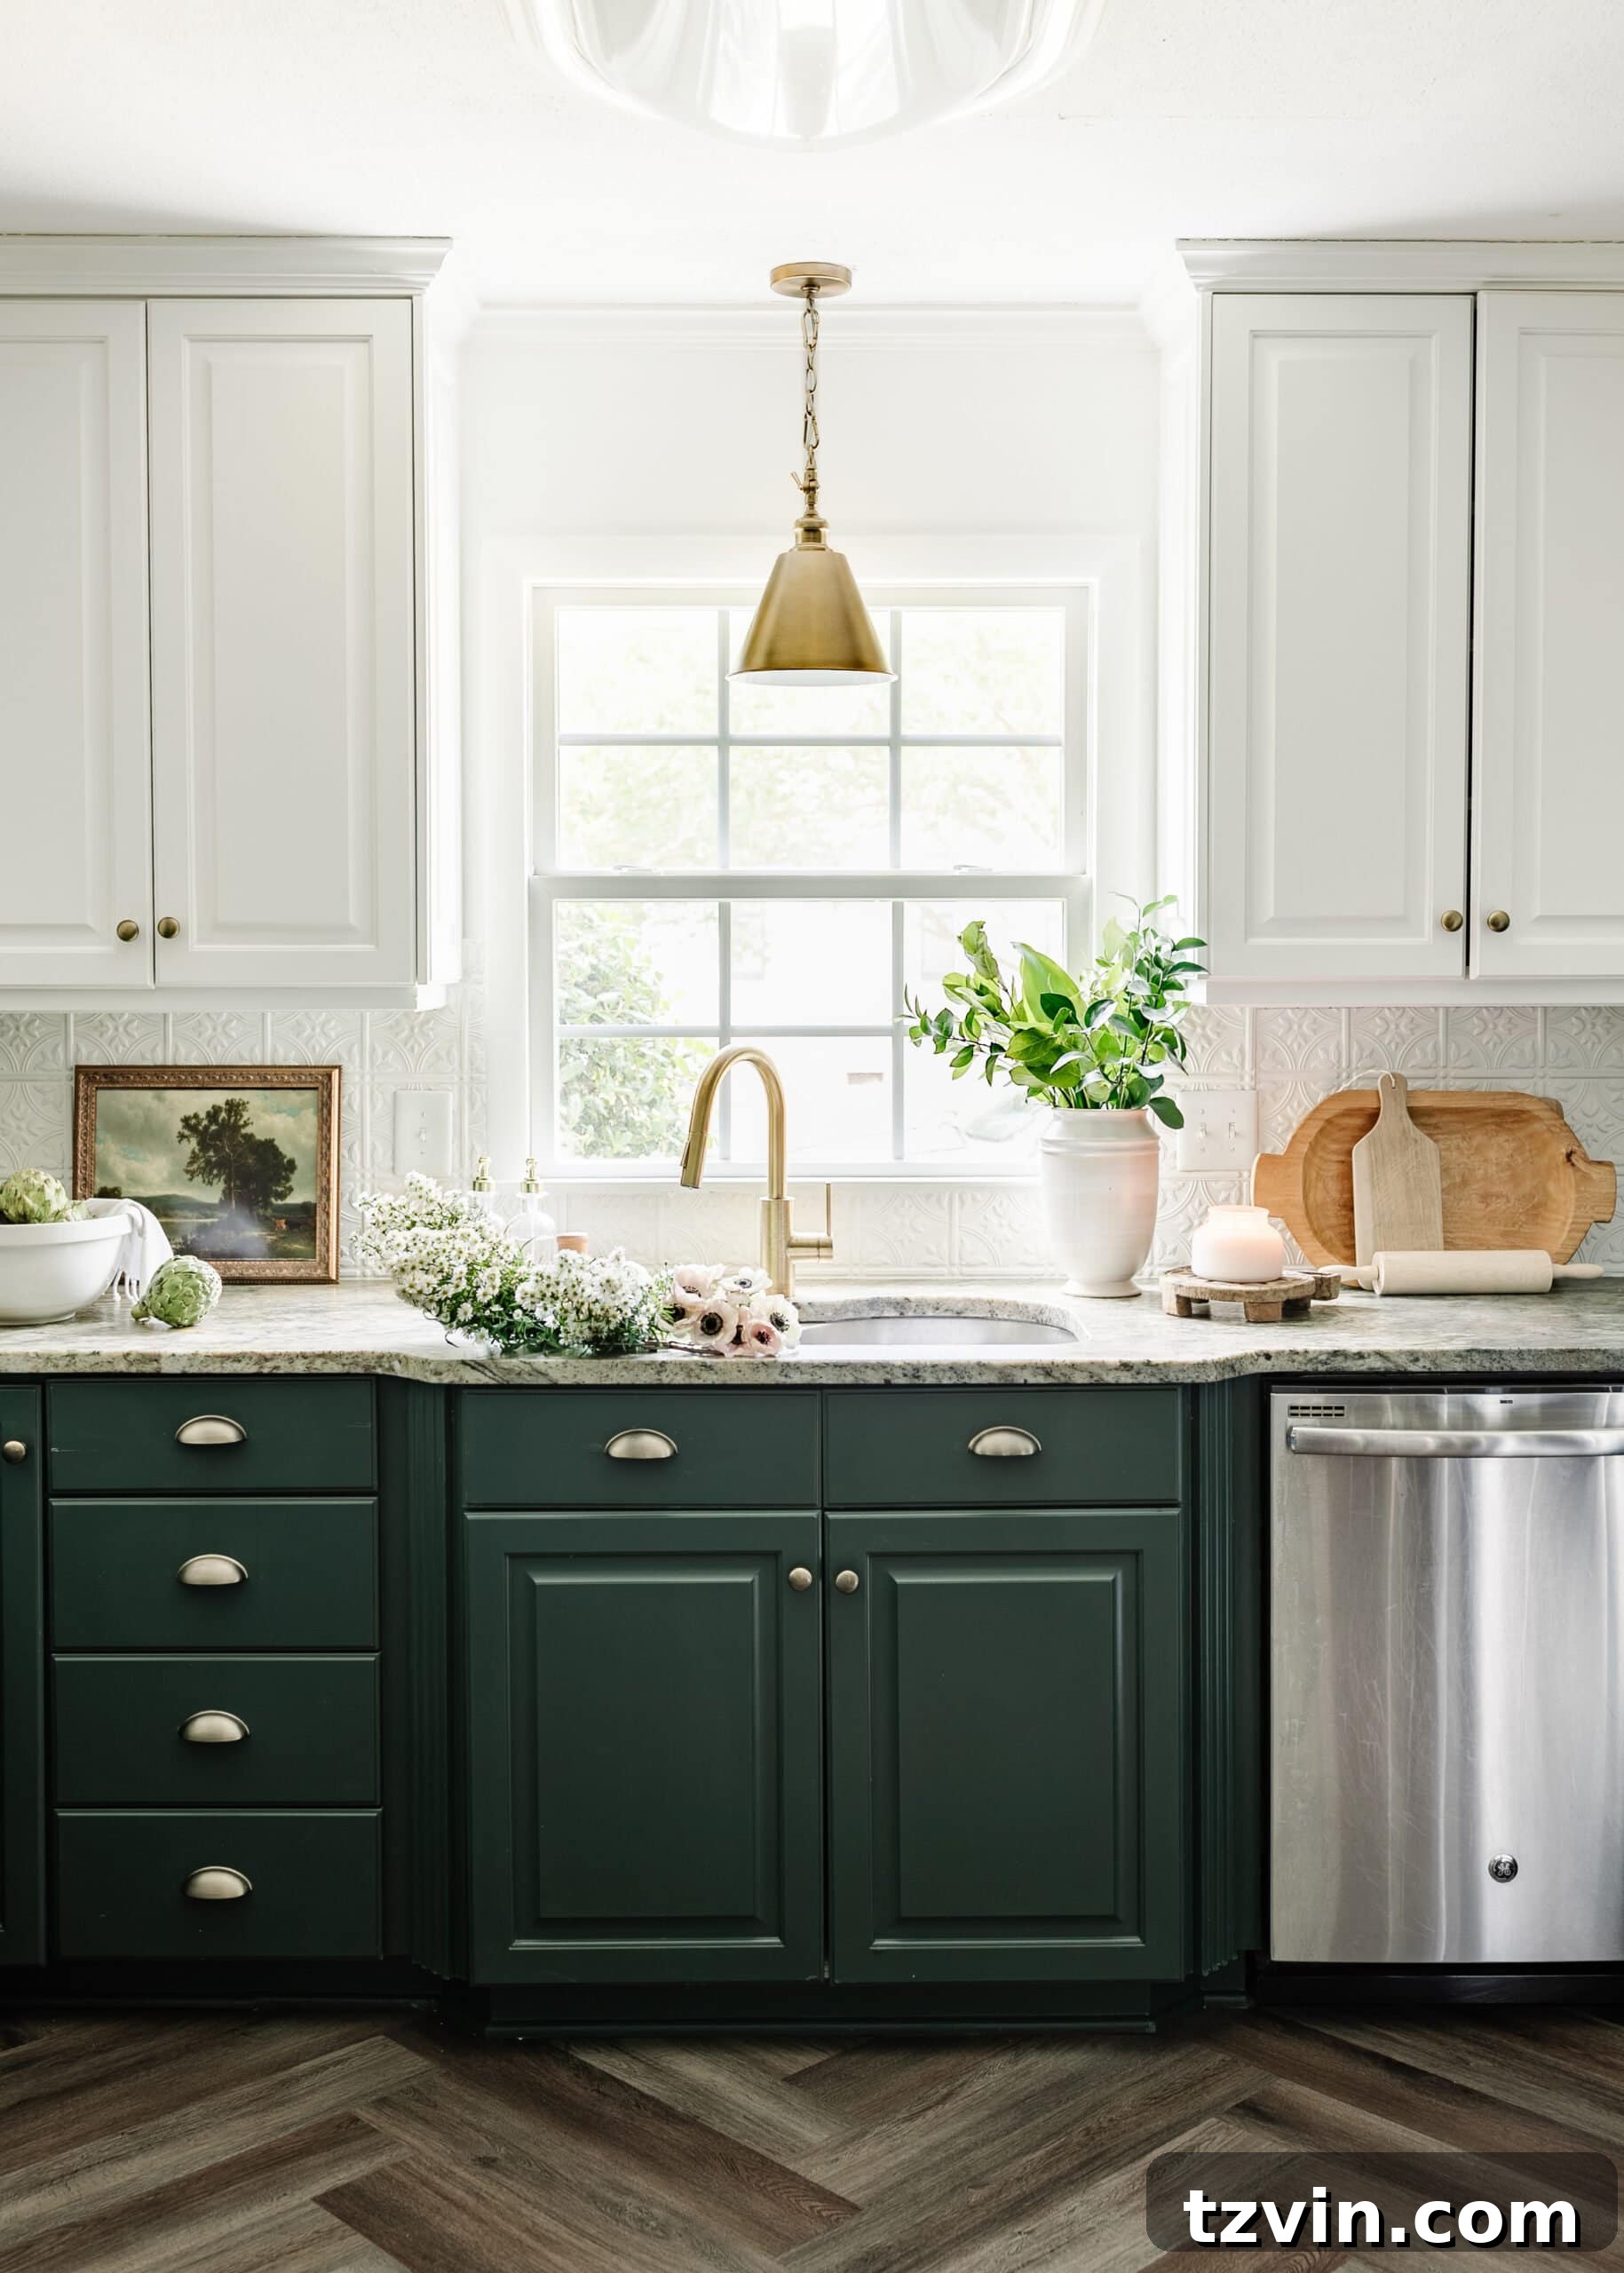
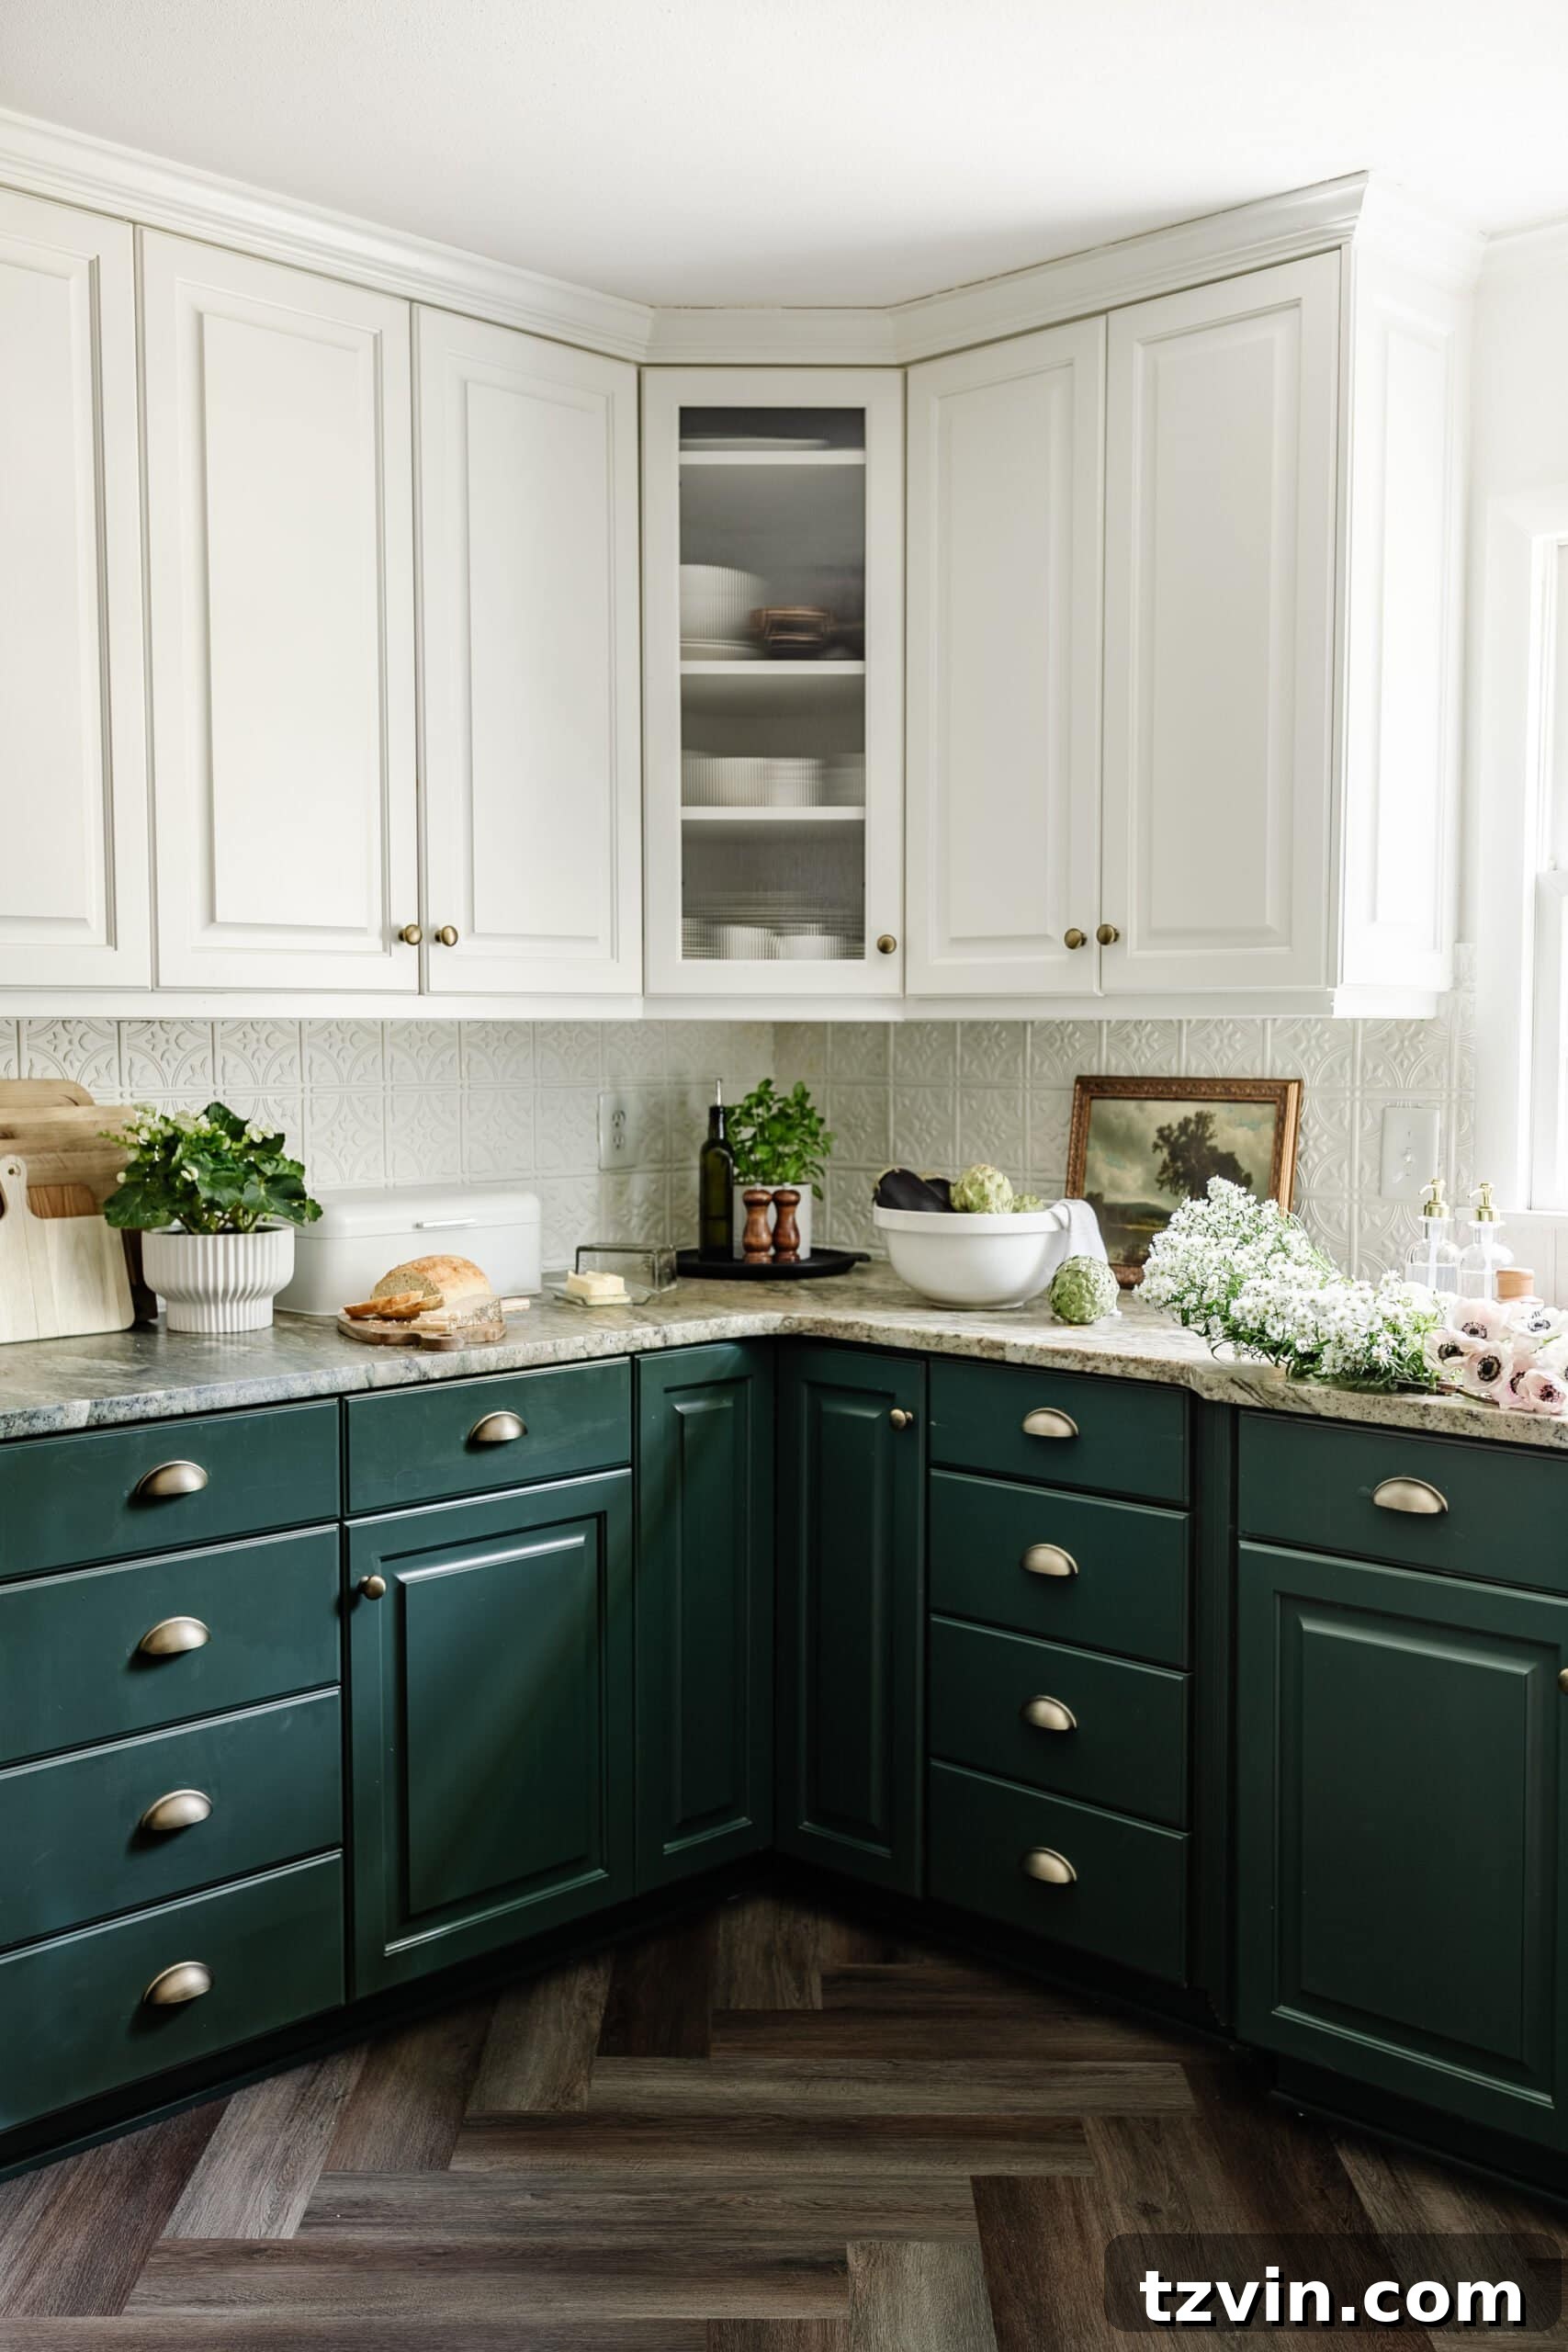
I undertook the task of painting these kitchen cabinets four years ago in July, at seven months pregnant with Regan. I absolutely do not recommend painting while heavily pregnant! The back spasms and risk of heat stroke were certainly not ideal. However, the end result is something I still deeply adore today. I chose deep green for the lower cabinets to harmonize with the existing, subtly green-toned leathered granite countertops that were present when we moved in. This color choice has proven timeless, as I wouldn’t change a thing about the palette even now.
DIY Pressed “Tin” Kitchen Backsplash: A Lasting Solution
Tutorial: Create your own DIY Pressed Tin Kitchen Backsplash for a charming, no-demo update.
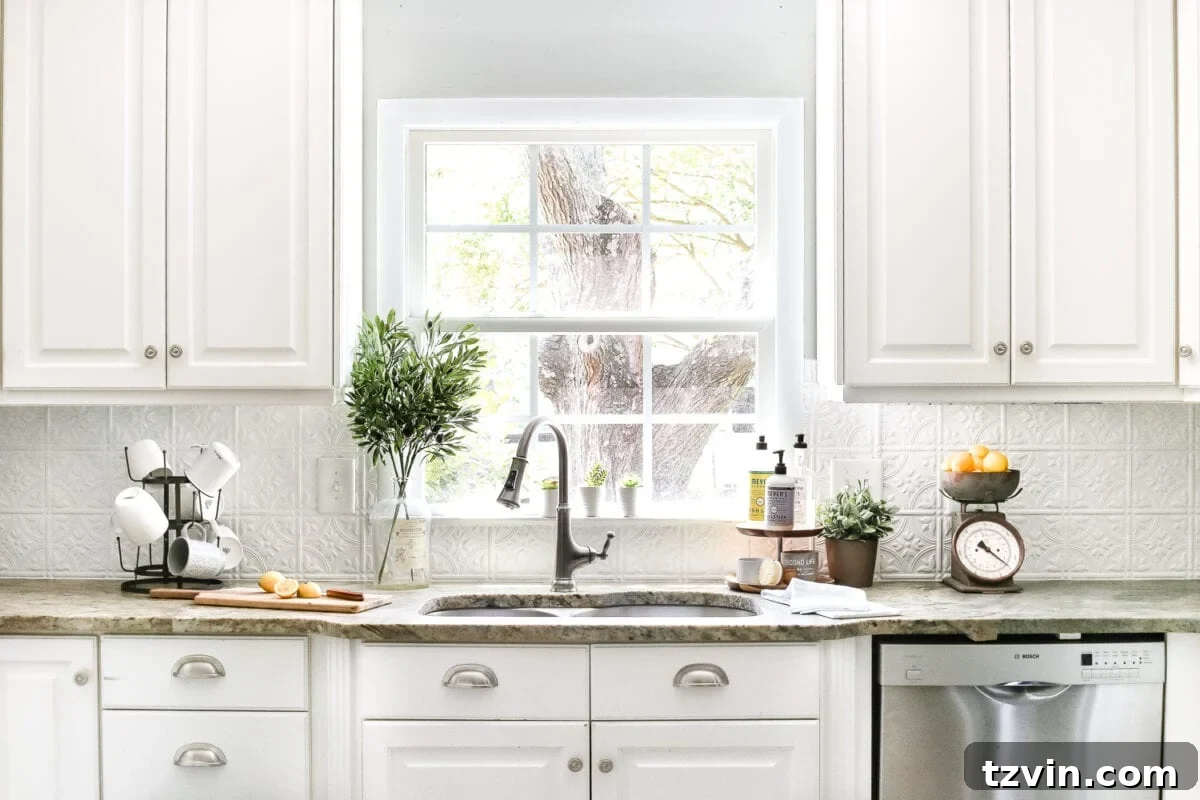
Shortly after moving in, we installed PVC pressed tin-style paneling directly over the existing tile backsplash as a quick, no-demo cover-up. Five years later, it still looks absolutely perfect! This project stands out as one of the cheapest and fastest home improvements we’ve ever tackled. Its clean and simple design has brought a less busy, more organized feel to the kitchen, a stark contrast to its previous cluttered appearance. Our style has certainly evolved over the years, but our desire for a vintage and cozy kitchen has remained constant, and this backsplash continues to serve that aesthetic beautifully.
New Lighting for Enhanced Ambiance
While a gigantic fluorescent flush mount light fixture still awaits its eventual removal in this kitchen (a task I’m not looking forward to), the brass mini pendant light we installed over the kitchen sink is an absolute delight. Its quaint design adds a touch of charm and much-needed focused illumination to this key area.
Upgrading the Faucet
When our old nickel faucet broke, it presented the perfect opportunity to upgrade to the brushed brass faucet we’d always wanted. We chose this modern pull-down faucet for its sleek, streamlined appearance, which perfectly complements the refreshed aesthetic of our kitchen.
The Impact of New Hardware
Though a small detail, swapping out the brushed nickel cabinet hardware for these aged brass knobs and cup pulls instantly transformed the kitchen. This single change infused the space with an immediate sense of warmth and a beautifully time-worn character, elevating its overall appeal.
Elegant Reeded Glass Cabinet Fronts
Tutorial: Explore Window Film Ideas to Create Decorative Glass Around Your Home for Less and achieve a designer look on a budget.
One feature I initially loved in this kitchen was the leaded glass in the corner cabinets. However, tragedy struck last year when one pane broke. We decided to pivot to a slightly more modern yet still vintage-inspired aesthetic by replacing it with reeded glass. This choice offers a fresh take while maintaining the classic charm we adore.
Revitalized Kitchen Shelves
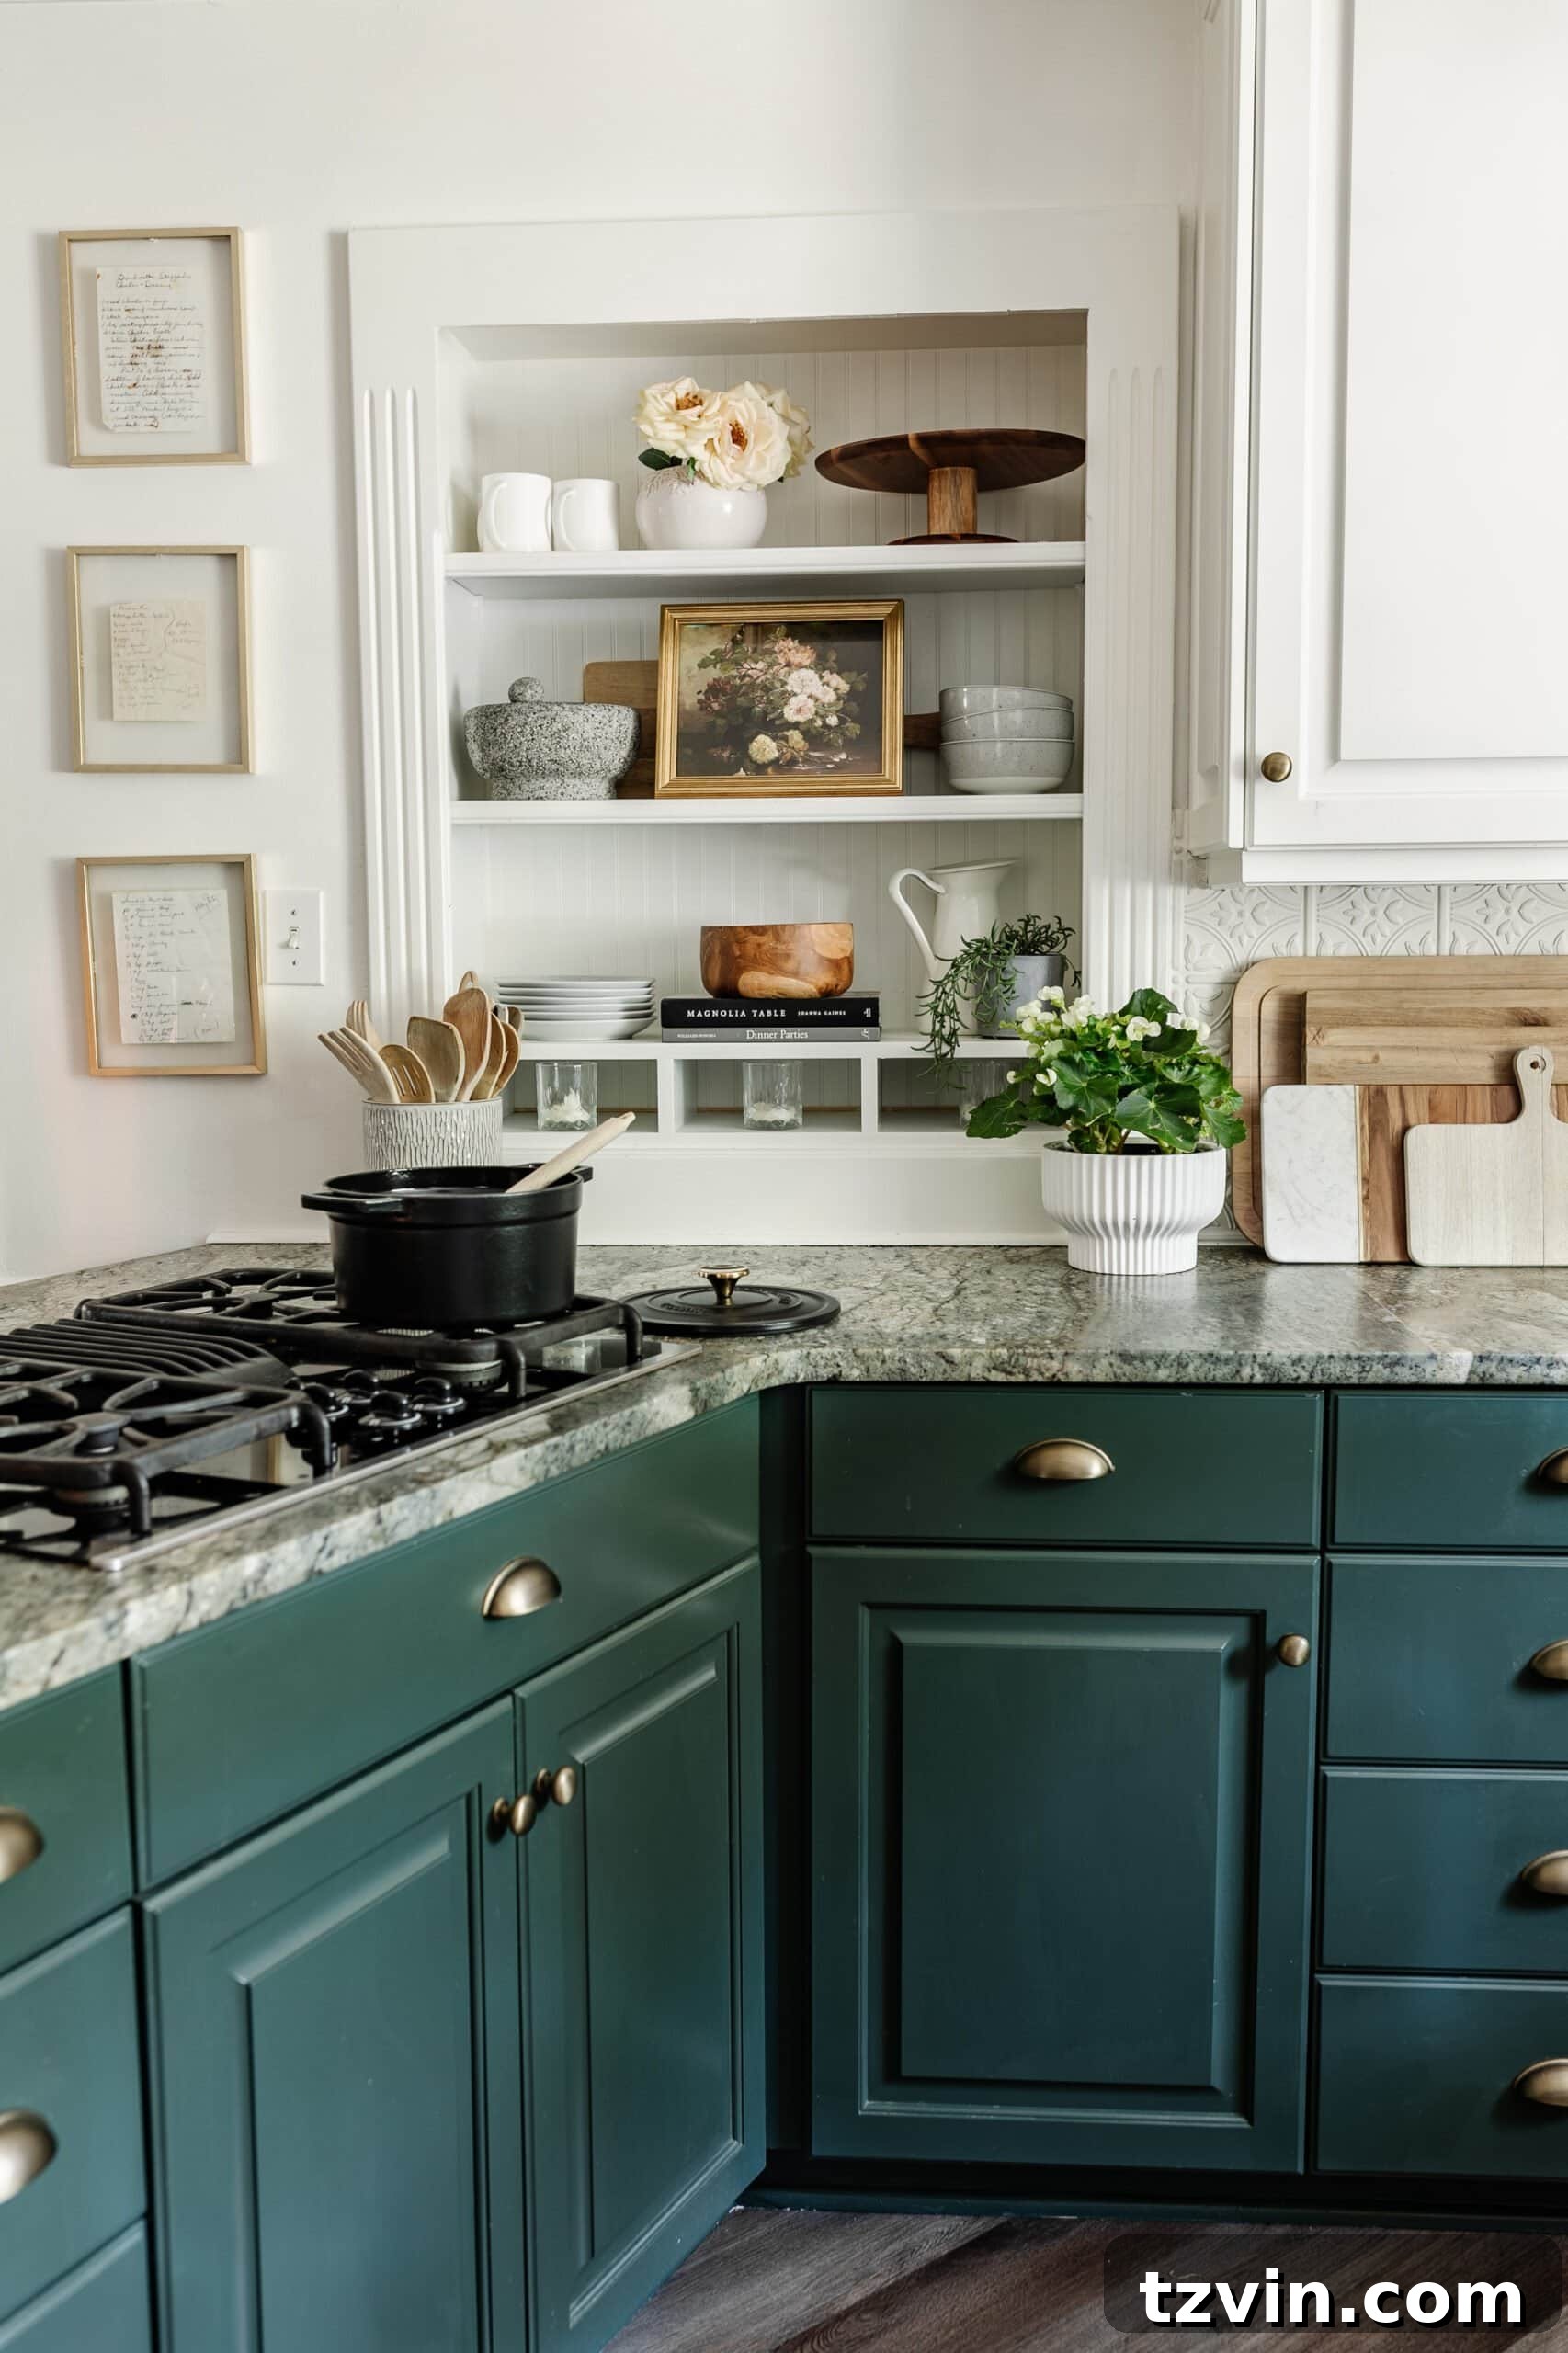
If you examine the “before” image of this kitchen closely, you’ll spot an arched shamrock detail on one of the shelves—a feature we were eager to remove. Robert deftly took a jigsaw to it, and now, you’d never know it was there. We later discovered this shelf cleverly conceals an old doorway that once led into our laundry room, which used to be a porch. We have grand plans for this area during a future, comprehensive kitchen remodel, but that’s a story for another time. Old houses certainly have their charming quirks!
DIY Pantry Cabinets: A Functional and Stylish Addition
Tutorial: Build your own DIY Pantry Cabinets for essential kitchen storage.
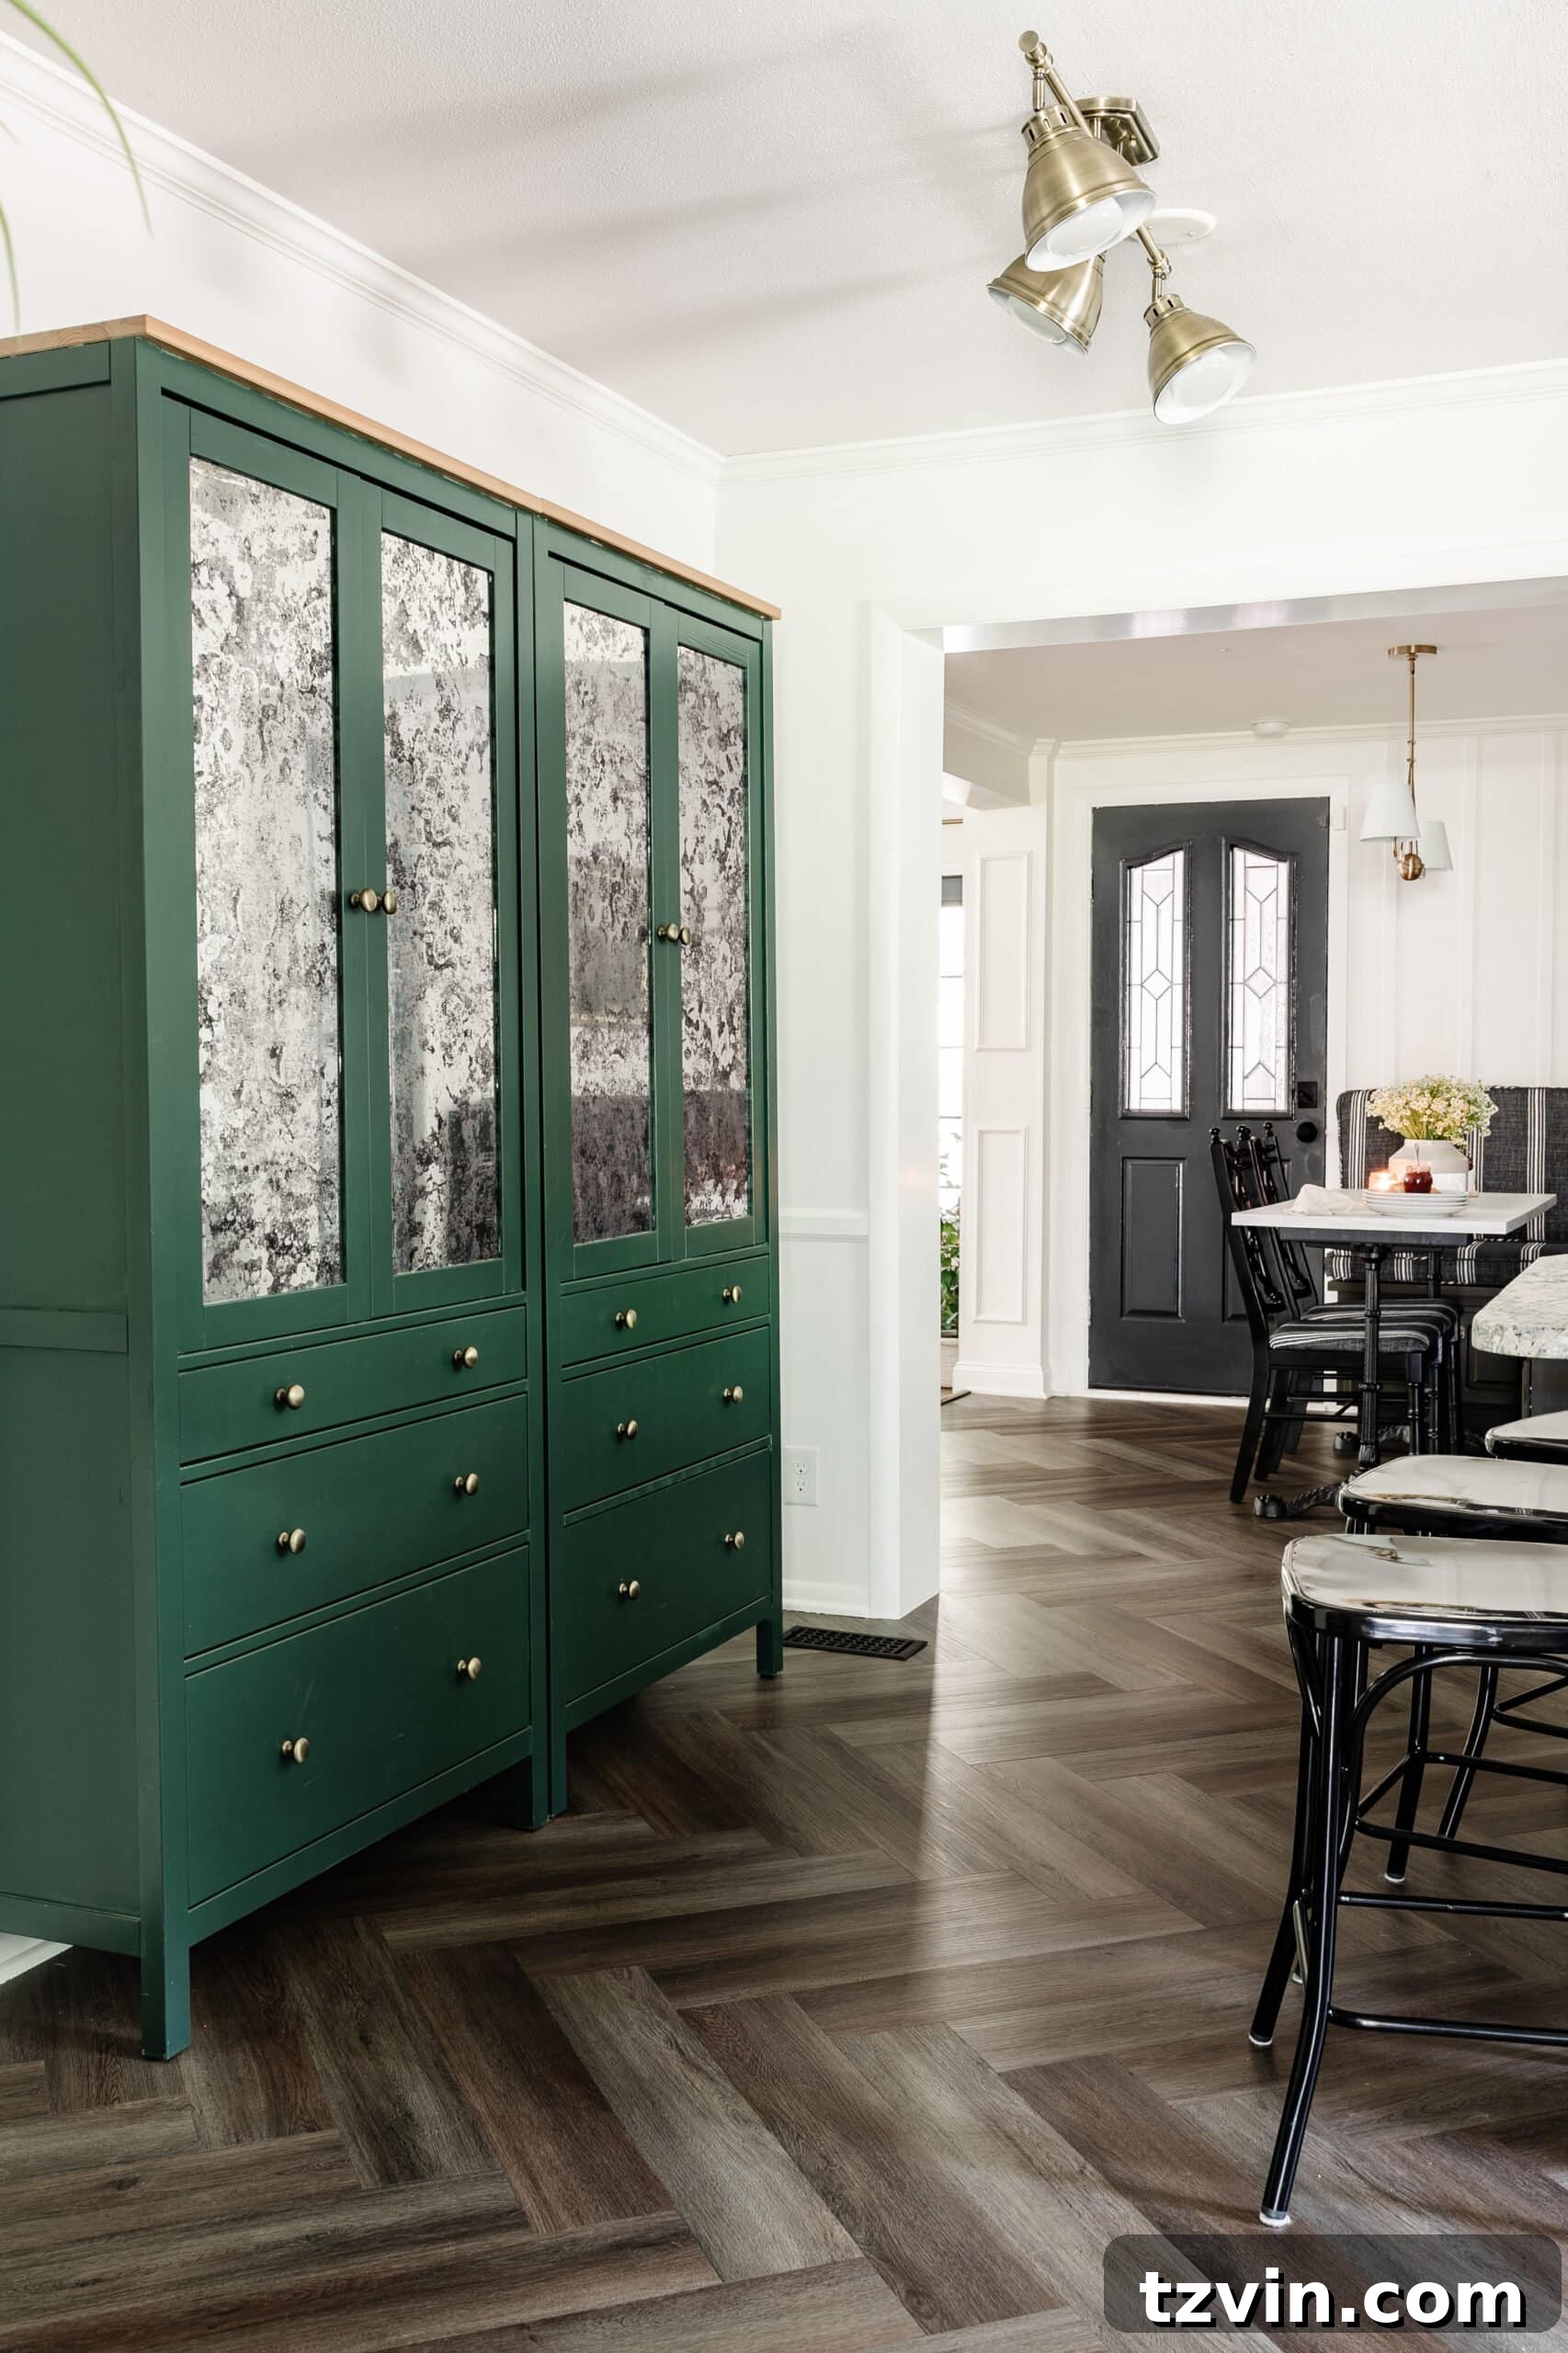
This expansive blank wall represented significant wasted space in our home, which lacked a dedicated pantry. Our solution was to add these standalone cabinets, which I painted and enhanced with antique mirror window film. This clever addition conceals food storage behind the glass while also brilliantly bouncing light from the opposite window above our kitchen sink. The result is a windowless side of the kitchen that now feels significantly larger and brighter, transforming a neglected area into a highly functional and aesthetically pleasing pantry.
Overall, we are incredibly content with this kitchen, despite our long-term aspirations for a full remodel to address some larger, more complex structural issues. That ambitious project is still years away, as we plan for an addition that will repurpose space from our garage and reconfigure our laundry room. However, this gradual kitchen facelift, meticulously chipped away at over the years, has allowed us to genuinely love and live in this space, working creatively with what we have. It consistently reinforces my belief that investing effort into creating a peaceful and rejuvenating home environment is always worthwhile. It’s perfectly fine if the process takes time, if a $100,000 remodel is out of reach, and if mistakes happen along the way. After all, home wasn’t built in a day. Through the journey of transforming these rooms, these spaces have, in turn, transformed us.
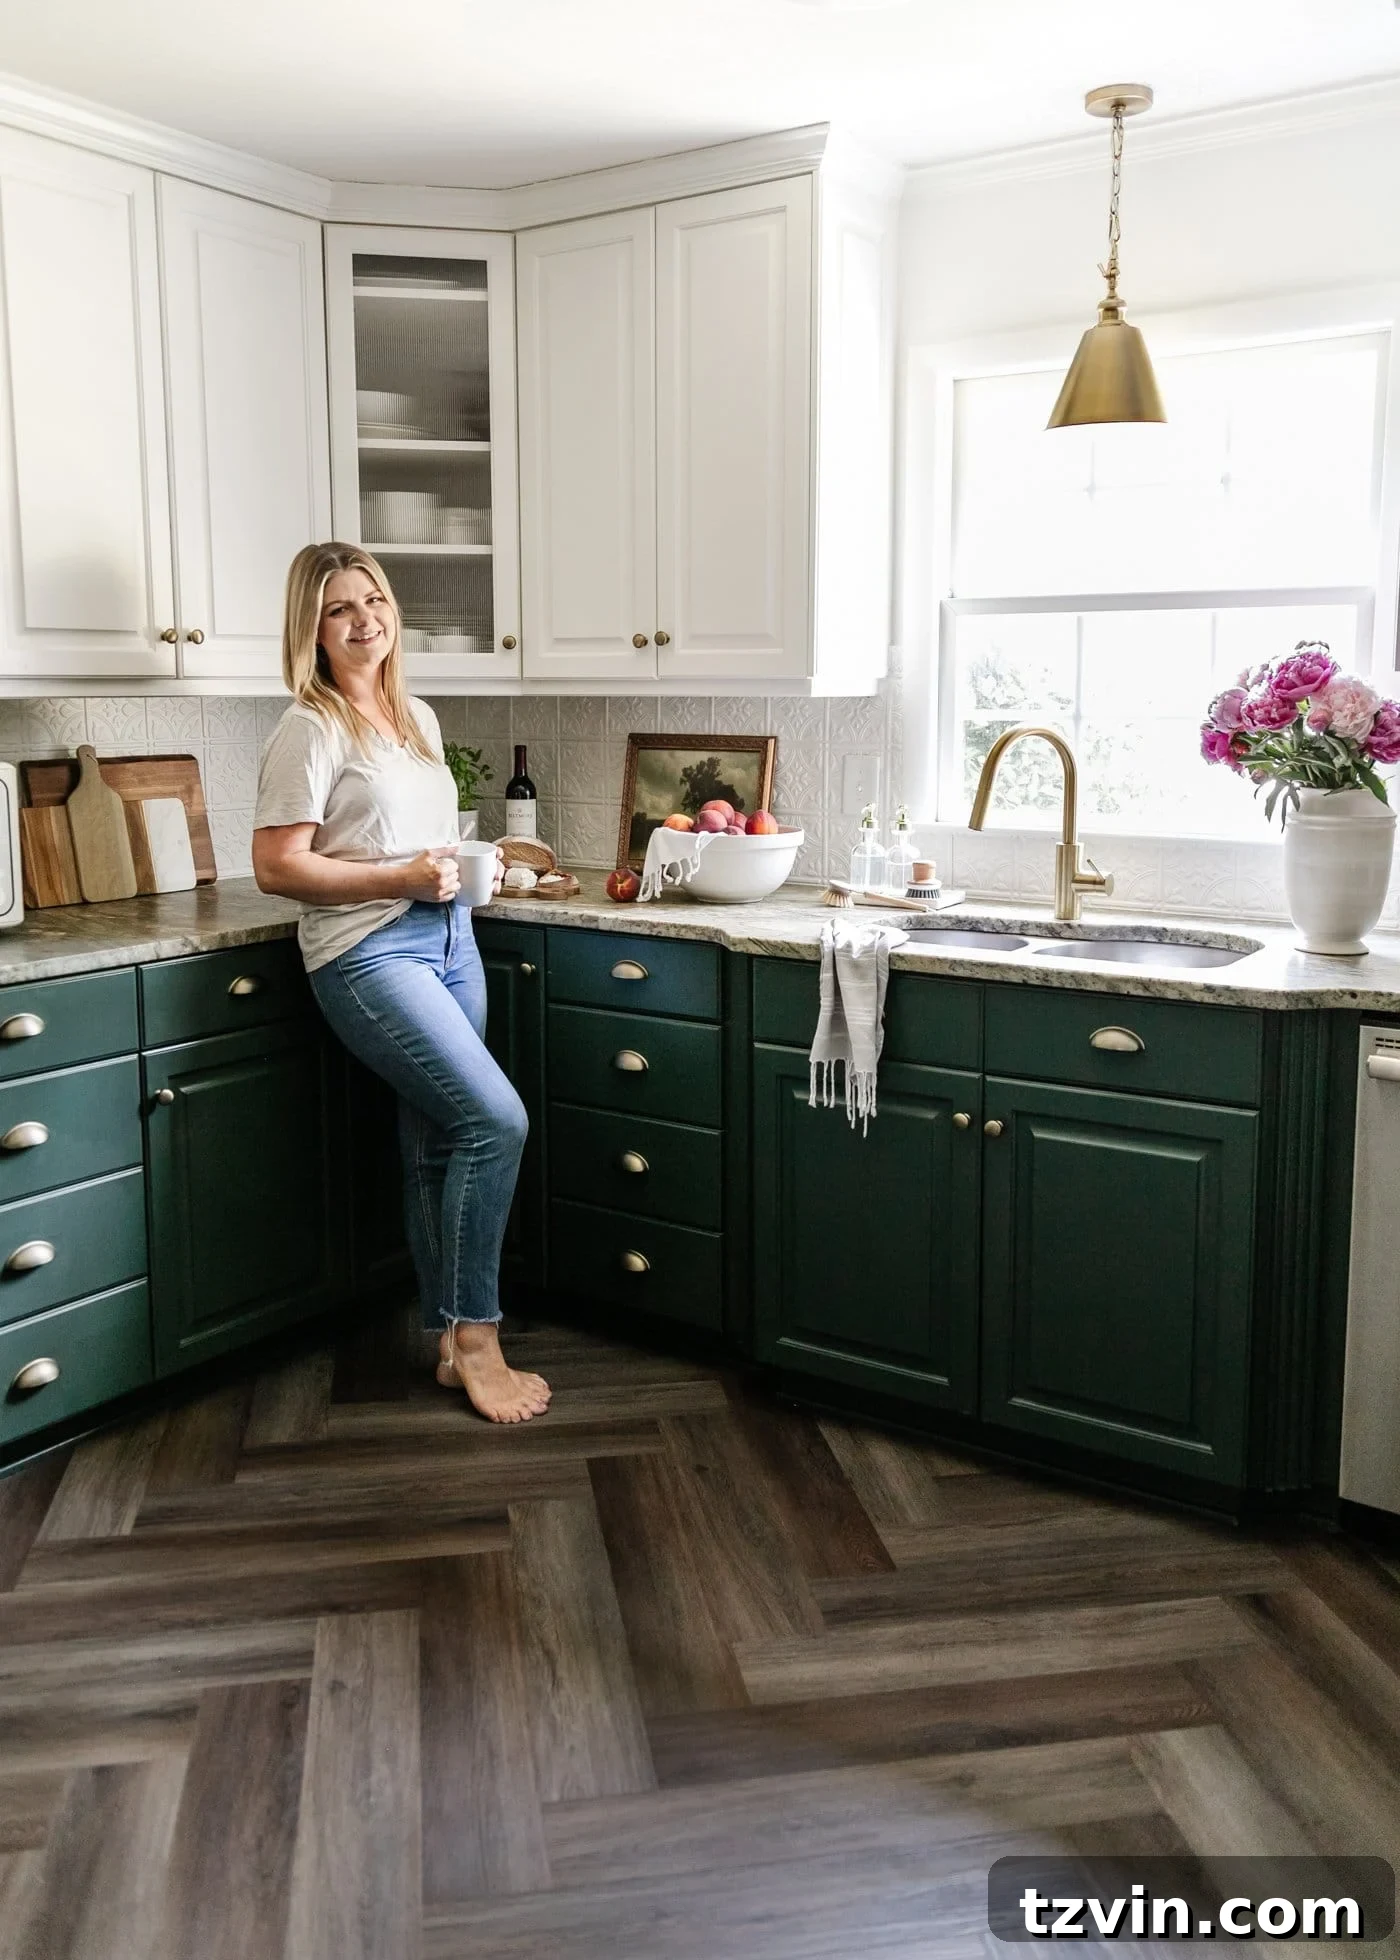
Aesthetically, I am utterly delighted with the current look, and these herringbone LVP floors were precisely the missing piece this space needed all along. Should we decide to keep this kitchen as it is for decades to come, I have full confidence that these durable floors will withstand the test of time and all the challenges a busy family can throw at them.
The Completed Breakfast Nook and Kitchen Facelift
Sources: Explore the Decor and Budget Breakdown in the Breakfast Nook for detailed insights.
Sources: Find all the Decor and Budget Breakdown in the Kitchen for your renovation inspiration.
And there it is! We are absolutely enamored with our refreshed kitchen and breakfast nook, spaces where our family spends so much quality time. This transformation has been a five-year journey in the making, but with the installation of the ProCore Floors LVP flooring, it finally feels truly “done.” The new floors were the pivotal element that tied everything together and gave us the final push needed to complete our vision.
Looking back, I wouldn’t change a single moment of the trial and error, or the immense sweat equity we poured into this breakfast nook and kitchen. This slow, deliberate journey, primarily accomplished with our own two hands, has created an even happier and more personal space for us. I often glance around, a sense of disbelief and pride washing over me, thinking, “We did this! WE did this!” That profound feeling of accomplishment, of having poured our hearts into creating our ideal home, is a reward in itself.
Inspiring Kitchen Ideas and Resources
Have you embarked on any kitchen projects in your own home that you absolutely adore? We’d love to see them! I invite you to share your kitchen transformations and ideas in the Bless’er House Decorating Ideas Facebook Share Group. It’s a fantastic community where you can gather inspiration, ask questions, and celebrate your own home improvement successes.
- DIY Whitewashed Faux Brick Backsplash
- How to Paint Kitchen Cabinets Like a Pro
- How to Install a Herringbone LVP Floating Floor Over Tile
- The Best Boob Light Replacement Fixtures for All Budgets
- The Good, Bad and Ugly of Concrete Countertops
- Simplified Decorating: How to Decorate Kitchen Countertops