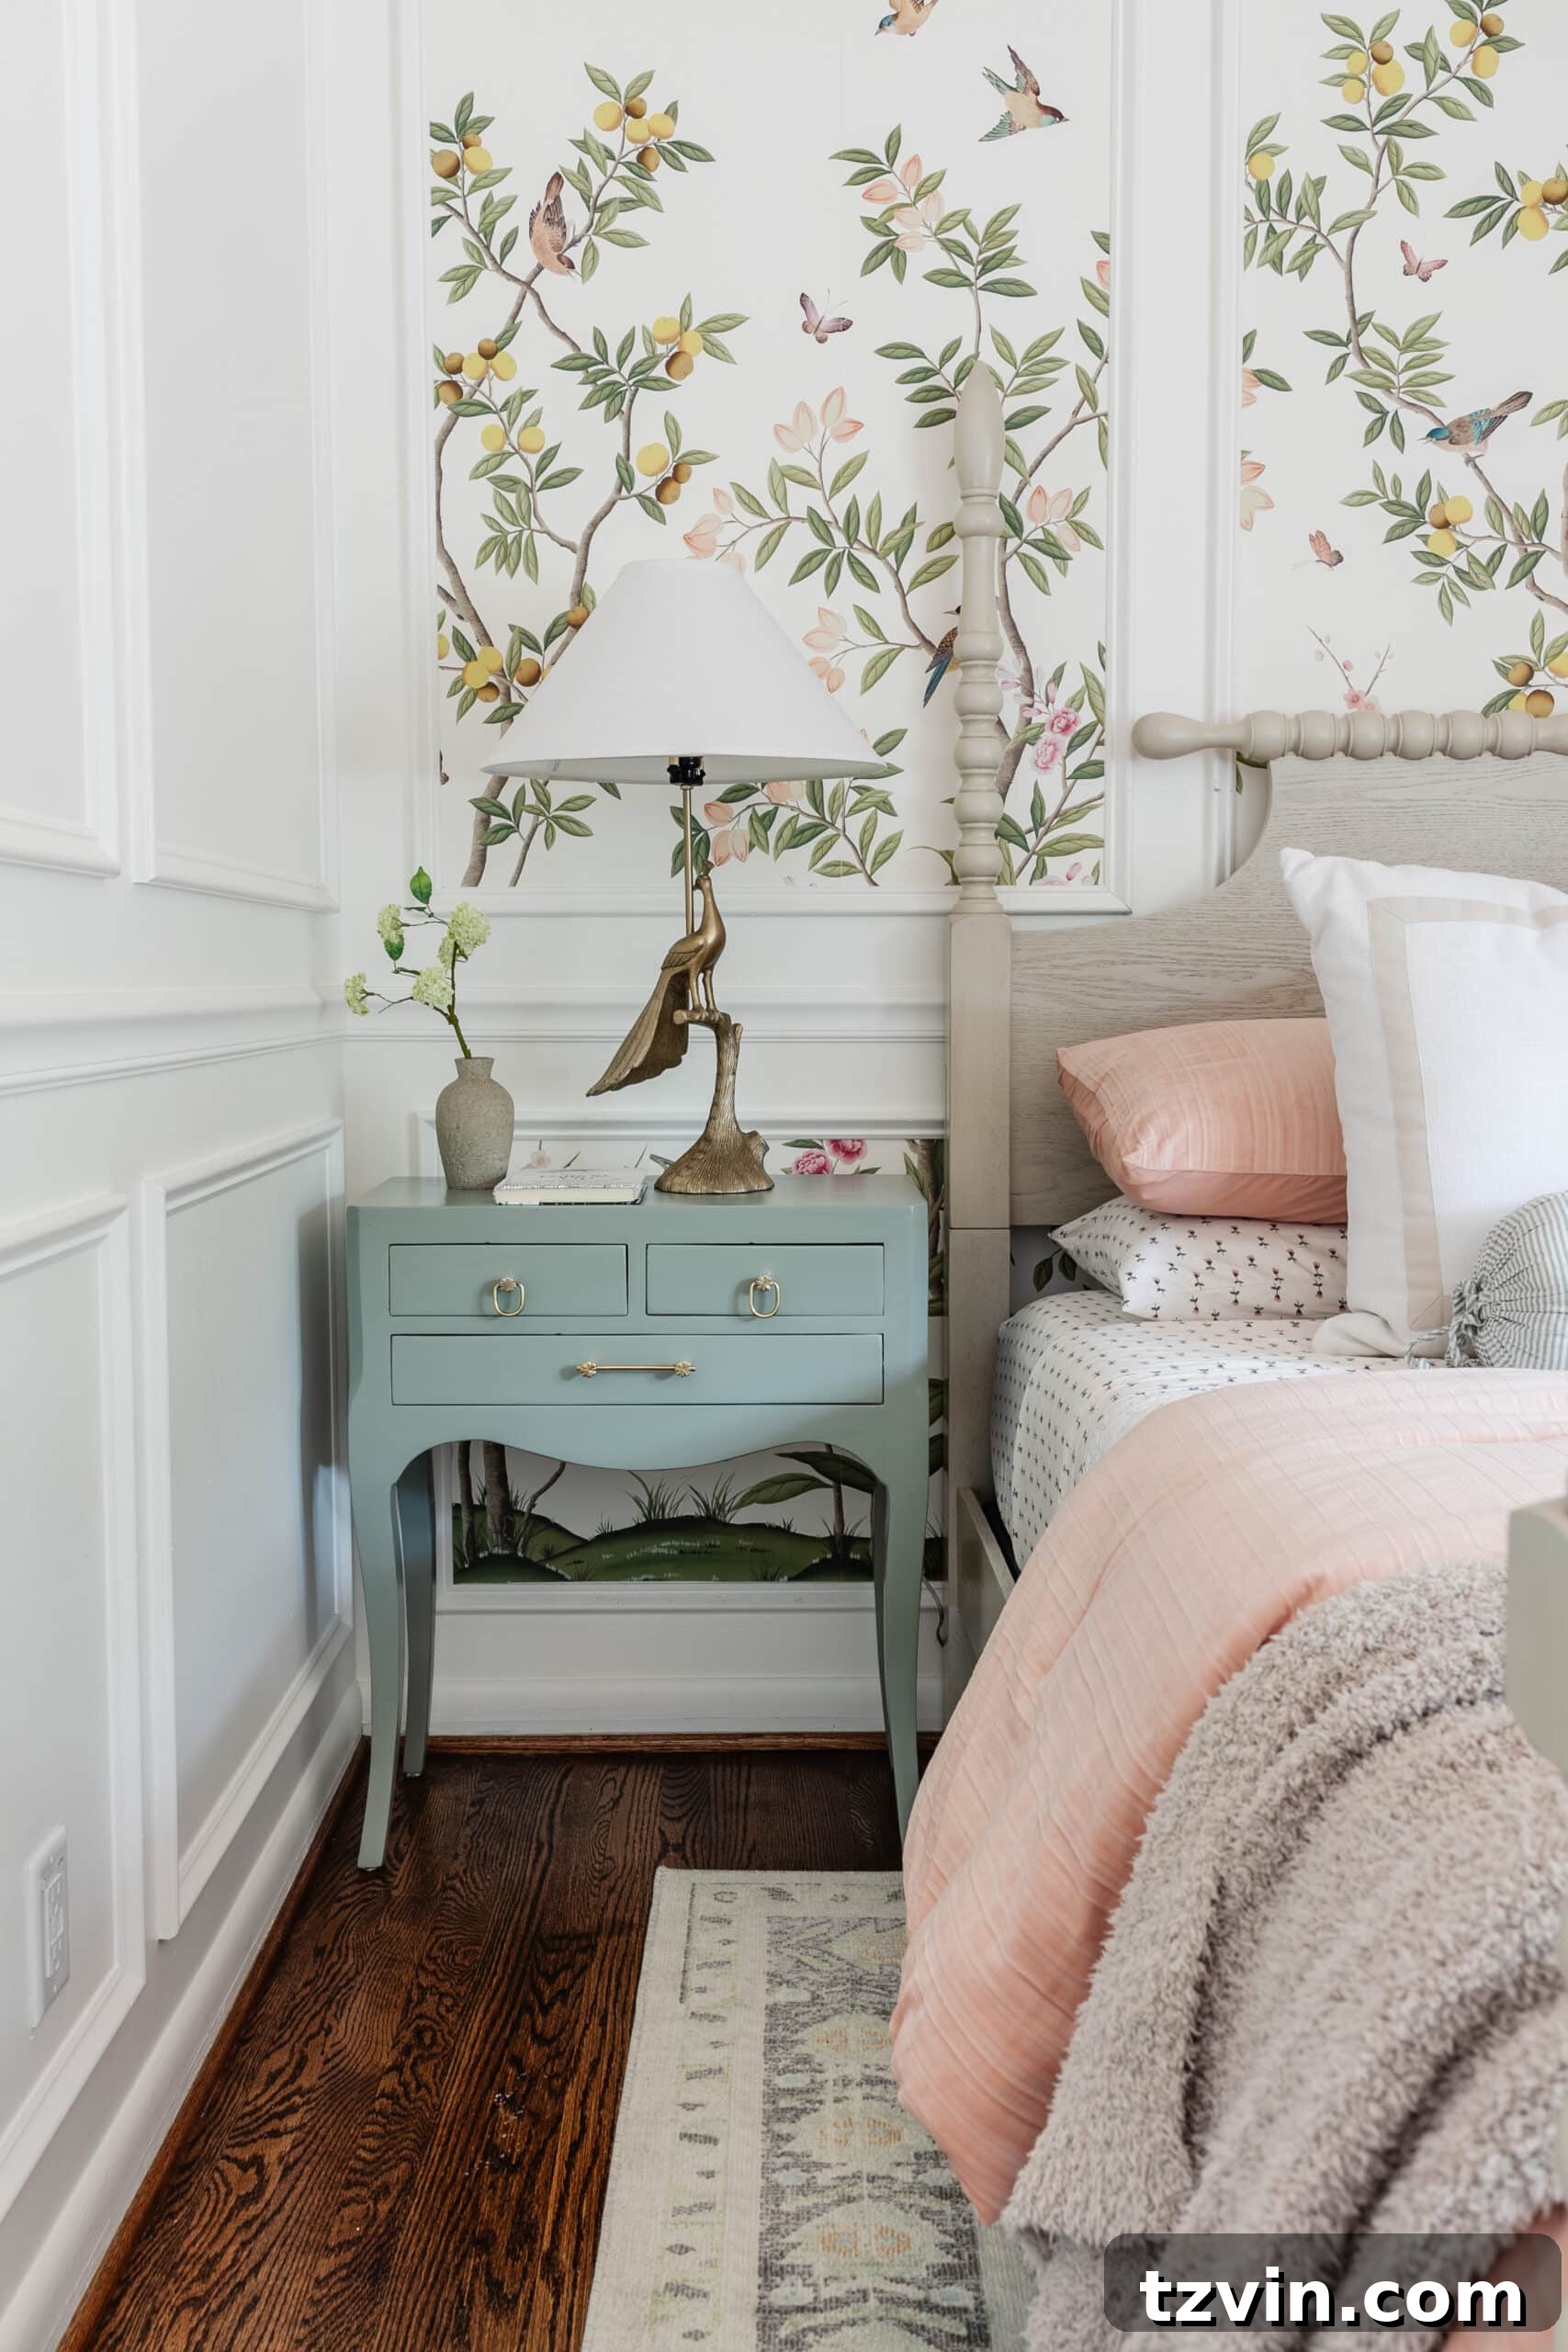
Embarking on a room transformation often leads to delightful detours and unexpected creative quests. Such was the case with Regan’s charming cottagecore room, where the search for the perfect bedside tables initiated a remarkable DIY journey. This project culminated in a truly rewarding outcome, breathing new life into forgotten furniture with a fresh coat of paint and a bit of elbow grease – a common theme in successful home makeovers.
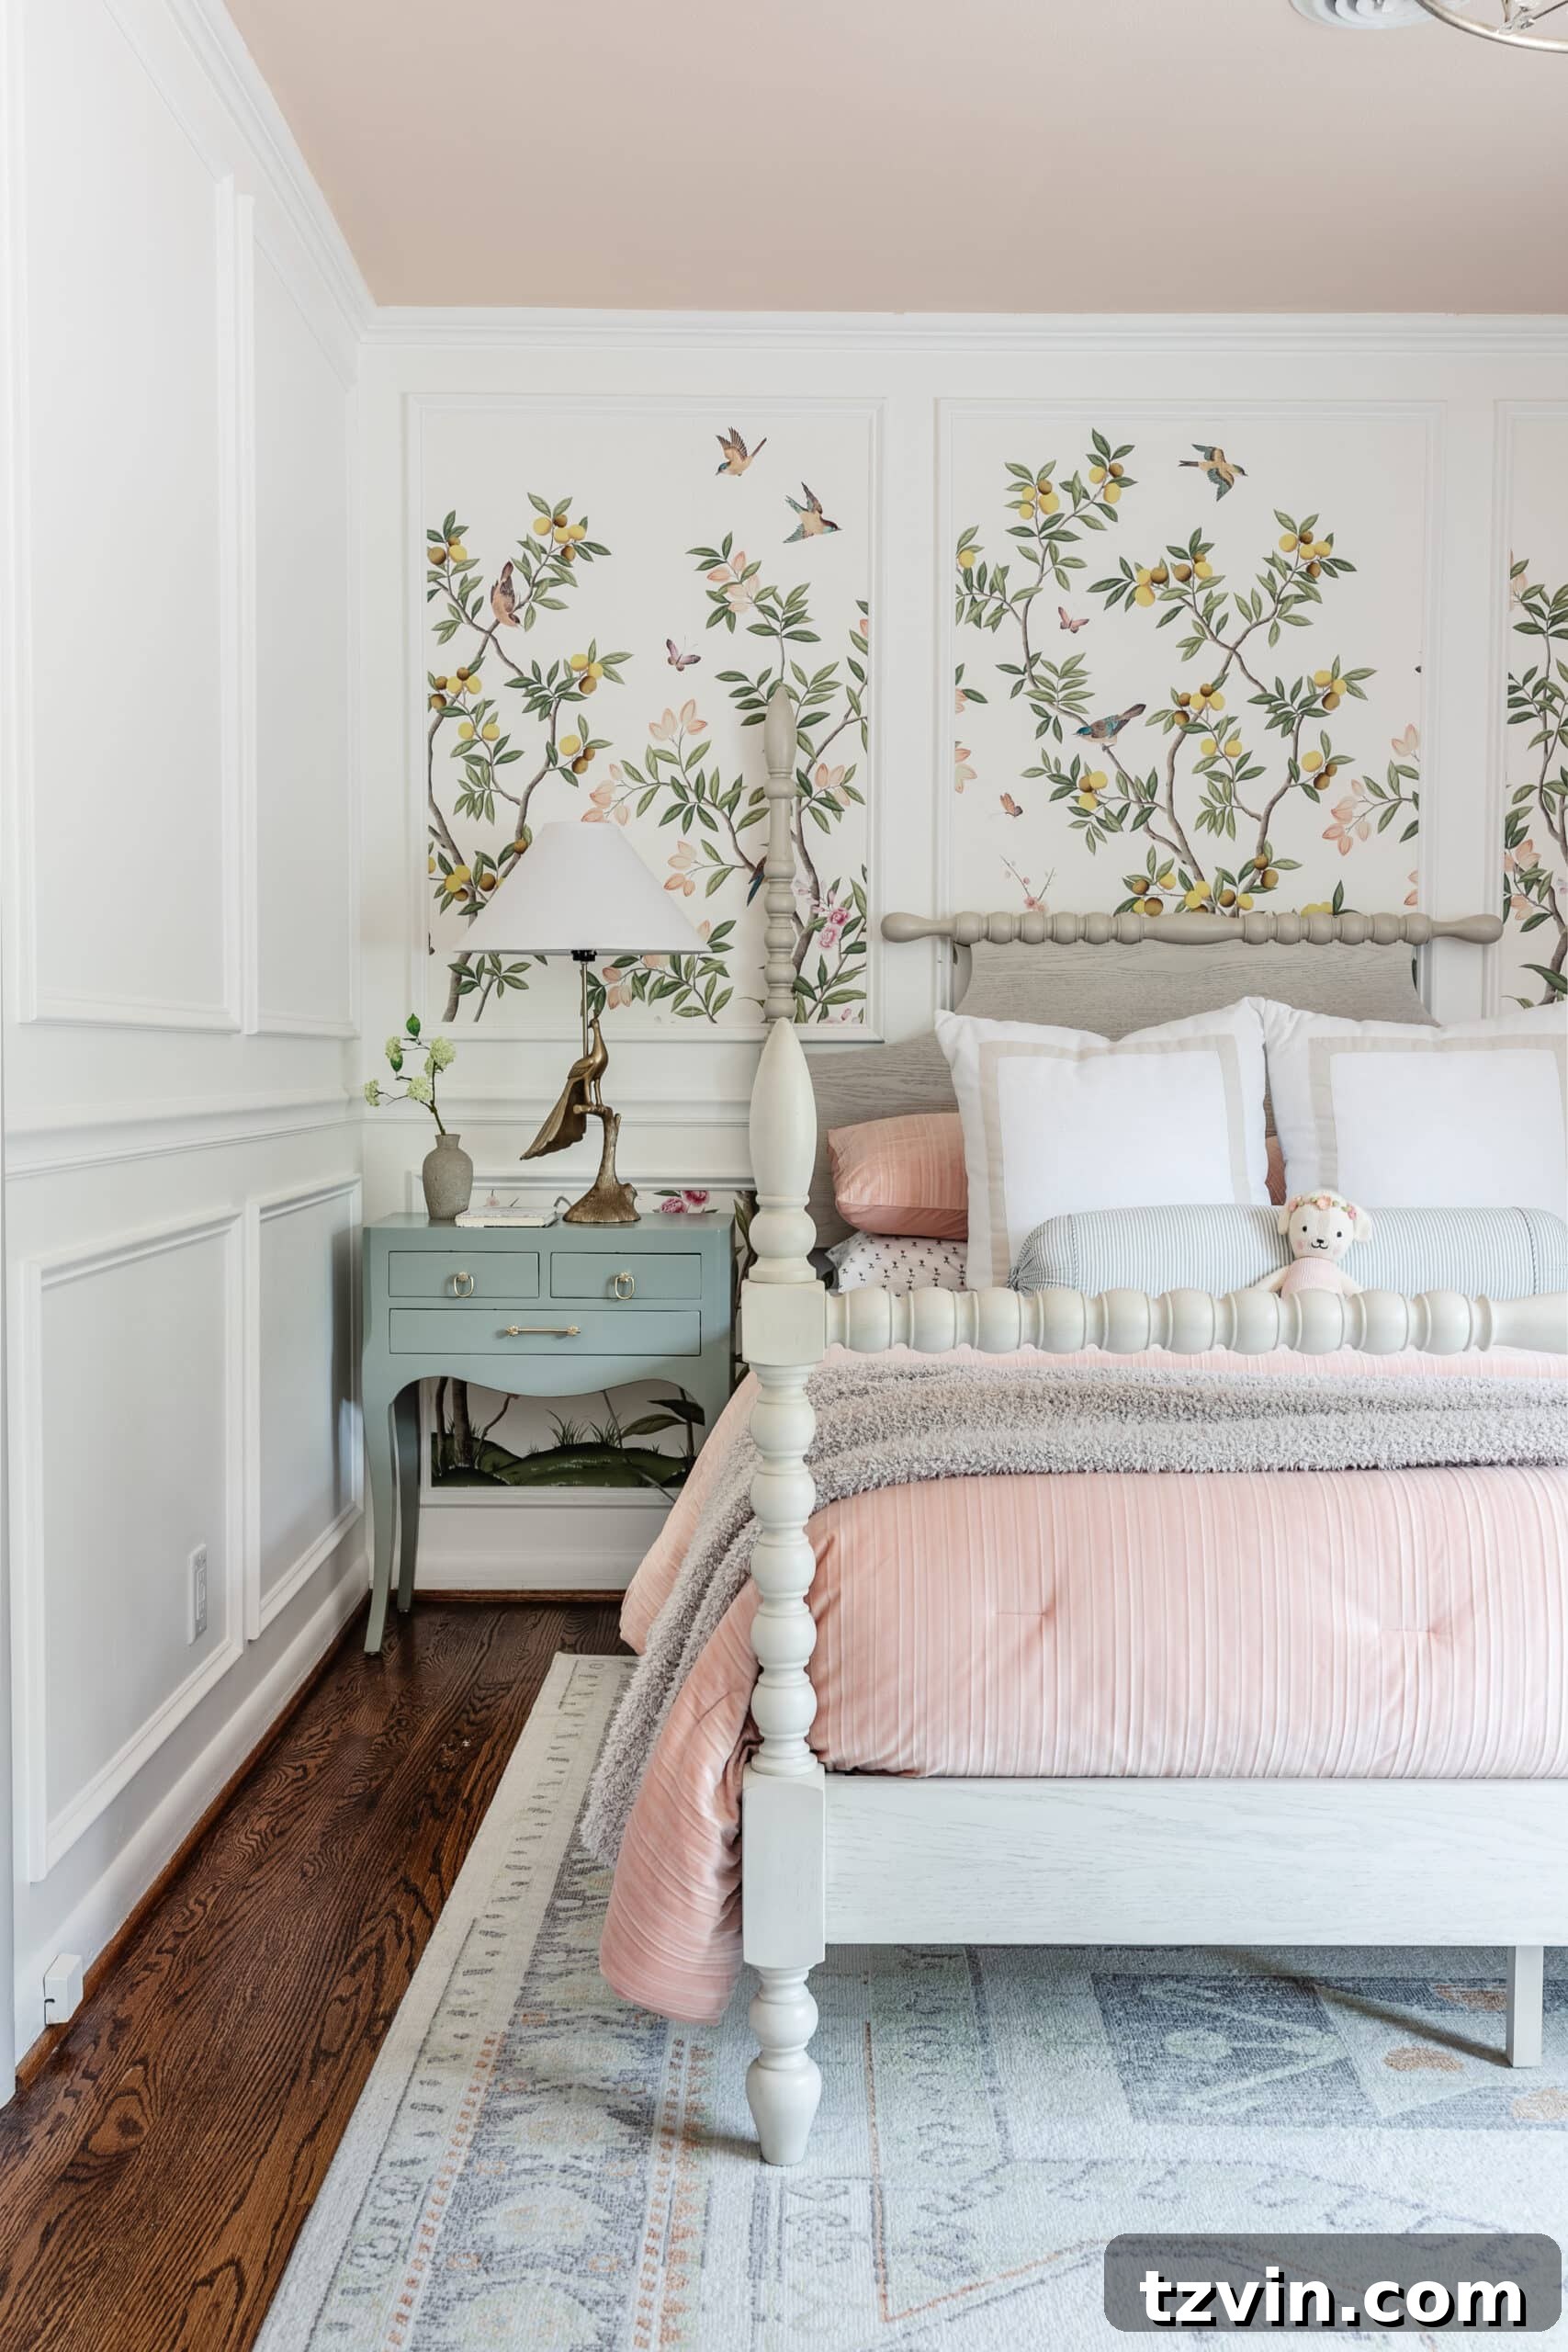
The effort was undeniably worth it, as these once-distressed pieces were reborn as exquisite, minty green gloss-painted nightstands. Their smooth, reflective finish now adds a touch of sophisticated charm, perfectly complementing the whimsical and serene atmosphere of a little girl’s bedroom. This transformation proves that with vision and the right techniques, even the most tired furniture can become a cherished statement piece.
Finding the ideal candidates for this project began, as it often does for savvy DIYers, with a diligent search on Facebook Marketplace. I was fortunate to discover these solid wood nightstands, each boasting sturdy dovetailed drawers, for an excellent price of $100. These are precisely the hallmarks I seek when sourcing secondhand furniture: quality construction that promises longevity and a robust foundation for a makeover.
My vision for these tables was a sleek, high-gloss finish—a look I’ve admired in the recent resurgence of shiny furniture and cabinets, particularly within the elegant grandmillennial style. This aesthetic provides a wonderful contrast to their original state: a heavily distressed, crackled farmhouse-painted layer that spoke of a bygone decorating era.
Related: Unlock Your Inner Treasure Hunter: How to Find the Best Furniture Deals on Facebook Marketplace
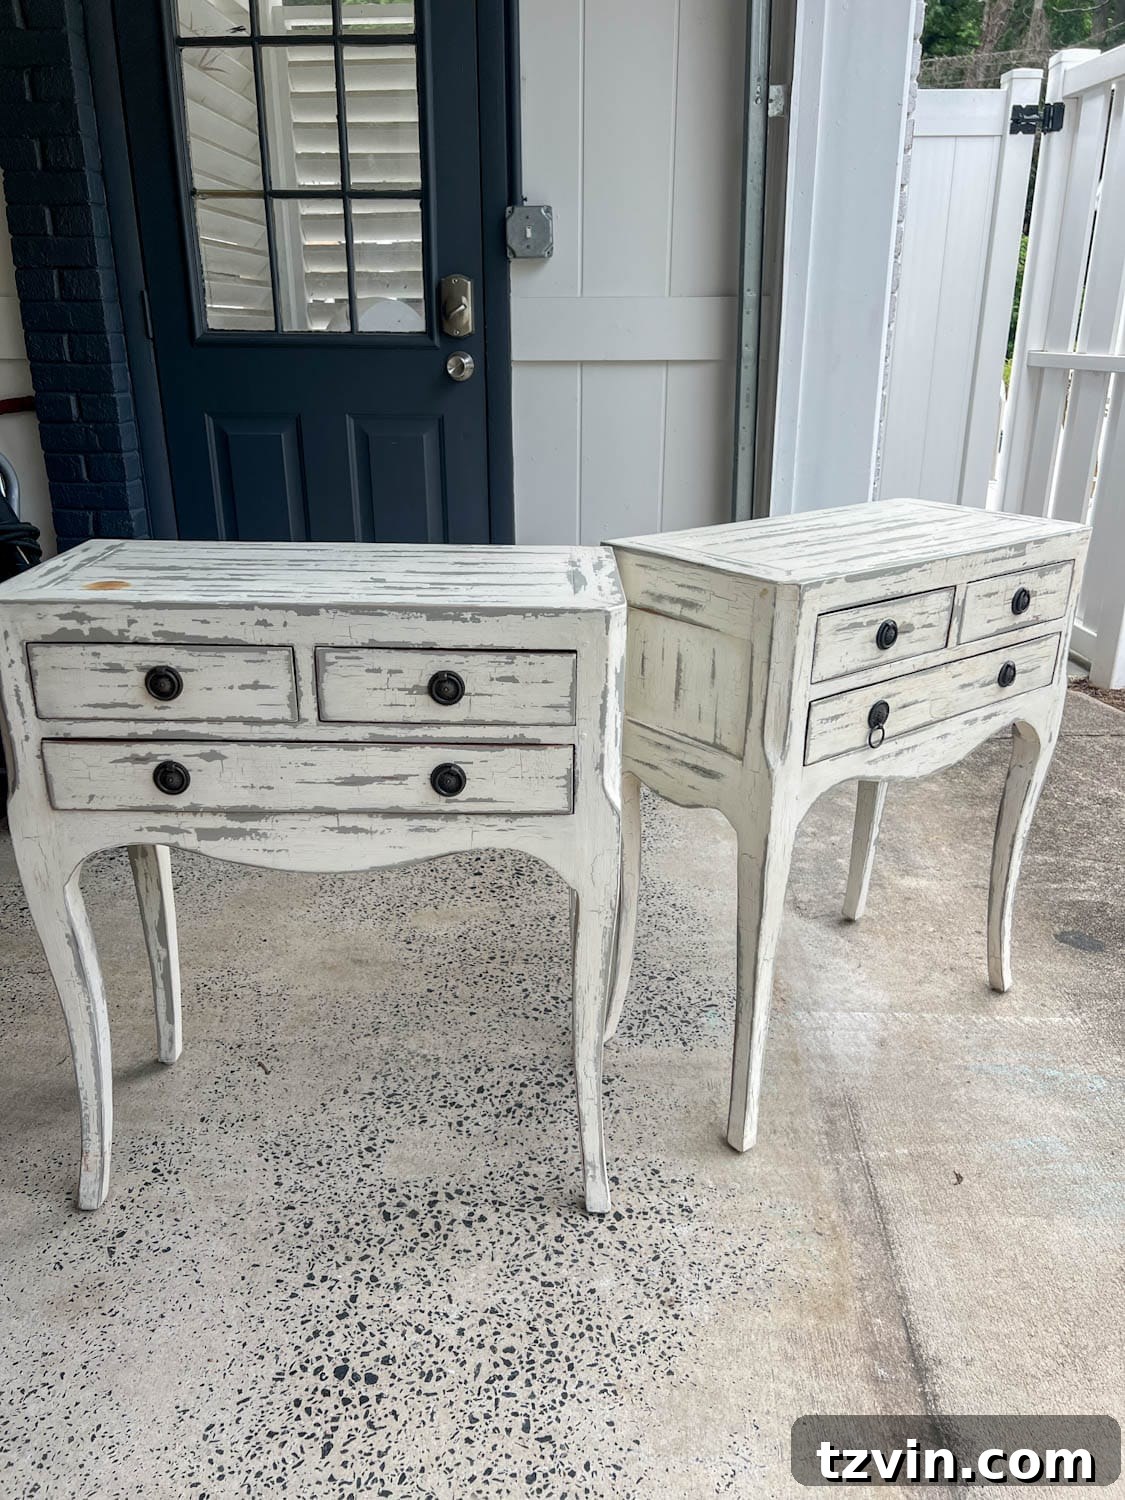
It’s fascinating how home decorating styles evolve and personal preferences shift over time. Just nine years ago, when this blog was in its infancy, I would have wholeheartedly embraced that super distressed, rustic aesthetic. And let me be clear: there’s absolutely nothing wrong with farmhouse style. It holds a beautiful charm, and if it resonates with your personal taste and home, you should absolutely embrace it. However, for my traditional colonial house today, a different style felt more appropriate.
Therefore, the challenge was to transform these nightstands from their rough, crackled past into the smooth, high-sheen pieces that would perfectly fit Regan’s refreshed room. This ambitious goal required meticulous preparation to achieve that coveted glossy finish. If you’re looking to give your own distressed furniture a polished, modern update, the following steps will guide you through the process, ensuring a durable and stunning result that mimics professional quality.
How to Create an Impeccably Smooth Surface for High-Gloss Furniture Paint
Achieving a mirror-like, high-gloss finish on furniture is all about preparation. Any imperfections on the surface will be magnified by the reflective sheen, so a truly smooth base is non-negotiable. This section details the essential supplies and meticulous steps required to transform even the most rugged piece into a sleek, sophisticated canvas ready for a brilliant gloss coat.
Essential Supplies for Your Gloss Furniture Makeover
Gathering the right tools and materials before you begin will ensure a seamless and efficient transformation. Quality supplies are key to achieving a professional-looking, durable gloss finish.
- Orbital Sander: Indispensable for quickly and evenly removing old paint and smoothing the wood surface.
- Sanding Pads in Multiple Grits: You’ll need a progression of coarse, medium, and fine grits to effectively strip and refine the surface.
- Extra Fine Sandpaper (600-800 grit): Crucial for the final smoothing stages and between primer/paint coats to eliminate minor imperfections.
- Wood Filler: Essential for patching old hardware holes, dents, or other surface damage for a truly seamless look.
- INSL-X STIX Waterborne Bonding Primer: A high-quality bonding primer is vital for superior adhesion, especially on tricky surfaces or raw wood, ensuring your gloss paint lasts.
- Round Furniture Paint Brush: Designed to hold more paint and distribute it smoothly, minimizing brushstrokes for a professional finish.
- High-Quality Gloss Enamel Paint: I personally recommend Sherwin Williams Emerald Urethane Trim Enamel in Gloss. For Regan’s room, the sophisticated shade of Evergreen Fog was chosen.
- Decorative Hardware of Your Choice: The final touch to elevate your piece. For inspiration, explore my favorite sources for stylish knobs and pulls.
- Slow Cooker with Water: This clever trick helps warm your paint for a smoother application (can be found affordably at thrift stores).
- Extension Cord: For convenient placement of your slow cooker and orbital sander.
Step 1 – Aggressive Stripping: Sand with Coarse Grit
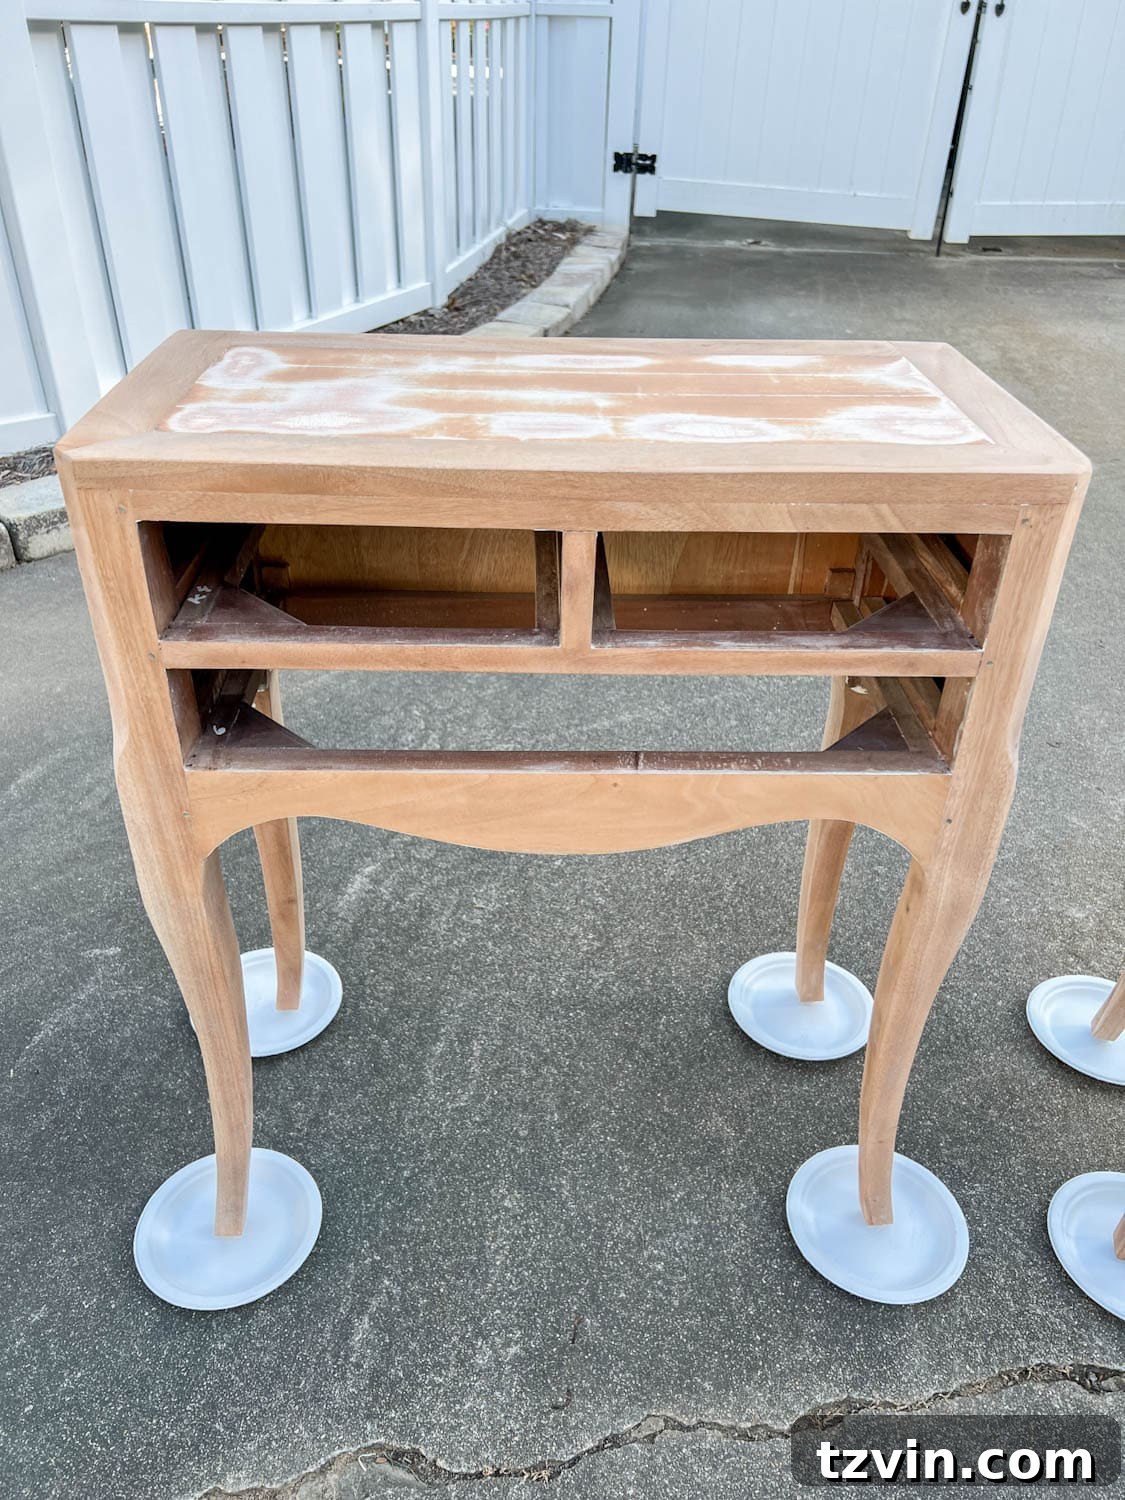
The journey to a flawless gloss finish begins with thoroughly preparing the surface. If your furniture piece, like my nightstands, features a heavily distressed or textured finish, you’ll need to start with a coarse-grit sanding pad on your orbital sander. This initial aggressive sanding stage is crucial for smoothing out any rough areas, removing existing paint layers, and creating an even foundation.
Unlike painting over lightly painted furniture, where a quick scuff sand might suffice, achieving a true high-gloss effect on a distressed surface leaves no room for shortcuts. Gloss paint, by its very nature, is highly reflective and will mercilessly highlight every single flaw, bump, or imperfection. Therefore, dedicating ample time to this step to achieve the smoothest possible surface is paramount. While a furniture stripper could also be used, I often find it to be a more time-consuming and significantly messier process, making the orbital sander my preferred tool for efficiency and control.
This is also the ideal time to address any old hardware holes or significant dents. Apply wood filler generously to these areas, ensuring it’s slightly proud of the surface. This allows for proper sanding in subsequent steps, creating a perfectly smooth and seamless base for drilling new hardware holes later if you plan to change the placement.
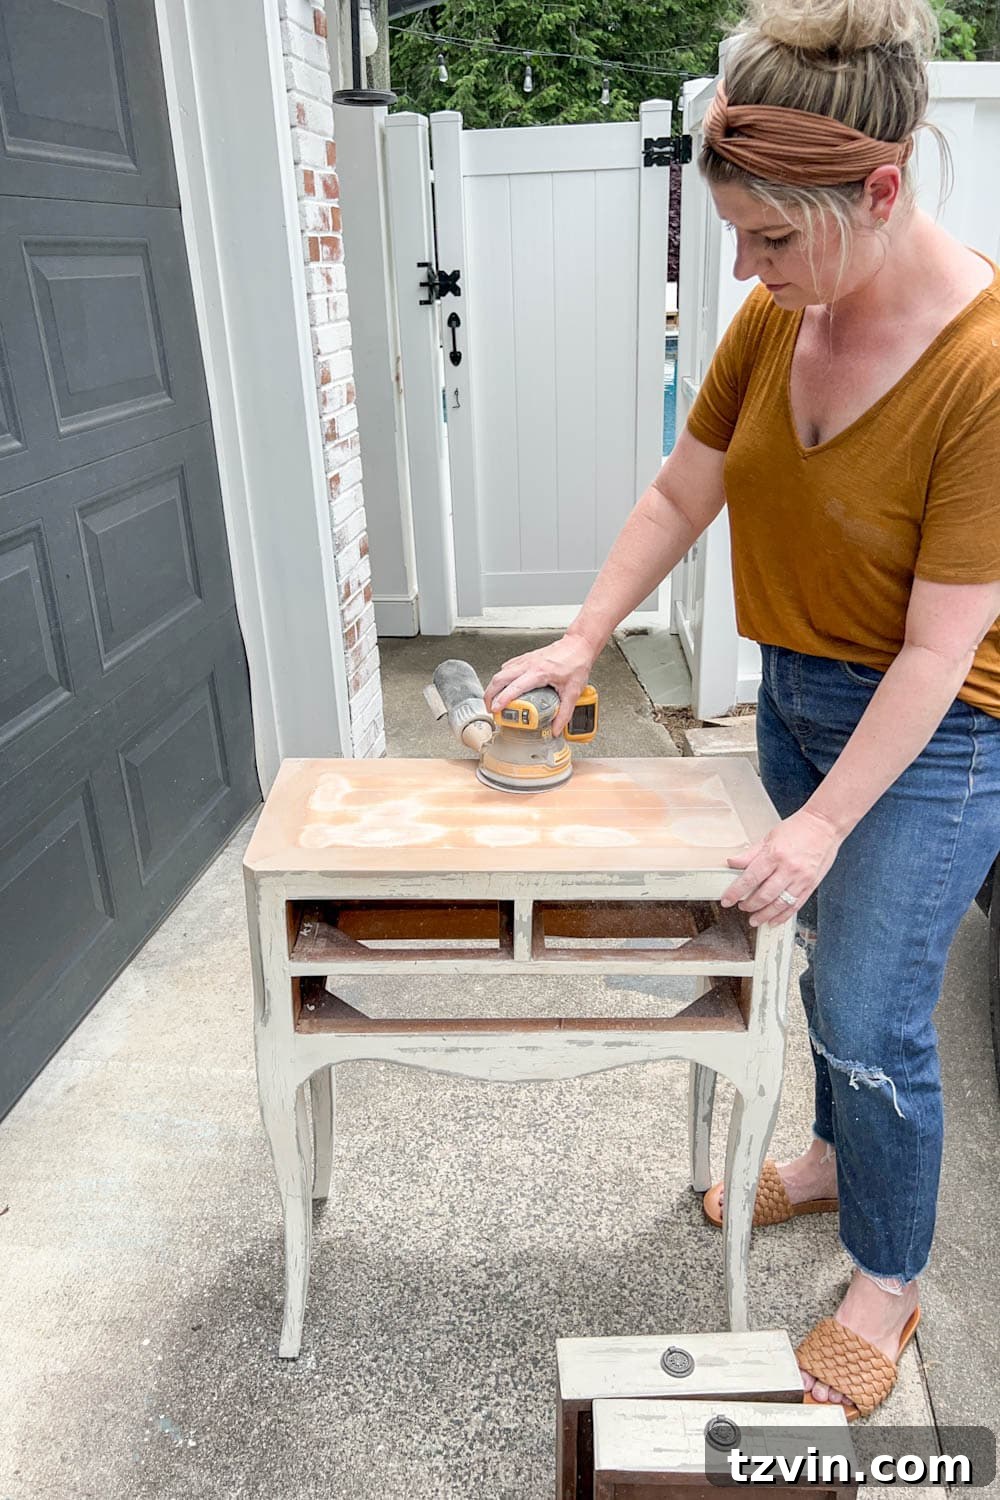
Step 2 – Refinement: Sand with Medium and Fine Grits for a Blank Canvas
Once the initial layers of old paint and texture have been effectively removed with the coarse grit, it’s time to refine the wood surface. This step involves a progressive approach to sanding, gradually smoothing the wood to an incredibly fine texture, which is crucial for a high-gloss finish. The goal is to eliminate all sanding marks from the previous coarser grit and achieve a perfectly uniform, “blank canvas.”
First, switch to a medium-grit sanding pad on your orbital sander. Work over the entire surface, ensuring you cover every area. This medium grit will effectively remove the deeper scratches left by the coarse sandpaper and further level the surface. Pay attention to edges and any areas where wood filler was applied, ensuring they are perfectly flush with the surrounding wood.
Next, for the ultimate smoothness, switch to a fine-grit sanding pad. Repeat the sanding process, meticulously working across the entire piece. This final pass with fine grit will leave the wood incredibly smooth to the touch, ready for priming. Remember, the smoother your surface is at this stage, the less work the primer and paint will have to do in concealing imperfections, resulting in a truly professional, glass-like finish.
Step 3 – Foundation for Flawless Finish: Apply a High-Quality Bonding Primer
After all that meticulous sanding, the next critical step is applying a high-quality bonding primer. This stage is absolutely essential, especially when working with raw wood or refinishing a piece that will endure heavy use, such as a nightstand. A good primer serves several vital functions that contribute to the overall success and longevity of your gloss paint finish.
Firstly, primer creates a uniform surface for your paint, ensuring consistent color and sheen. Raw wood can be porous and absorb paint unevenly, leading to a blotchy finish. Primer seals the wood, preventing this issue. Secondly, and most importantly for a durable gloss finish, a bonding primer provides superior adhesion. It acts as a powerful adhesive layer, allowing the topcoat to grip the surface firmly, significantly reducing the risk of chipping, scuffing, or scratching over time.
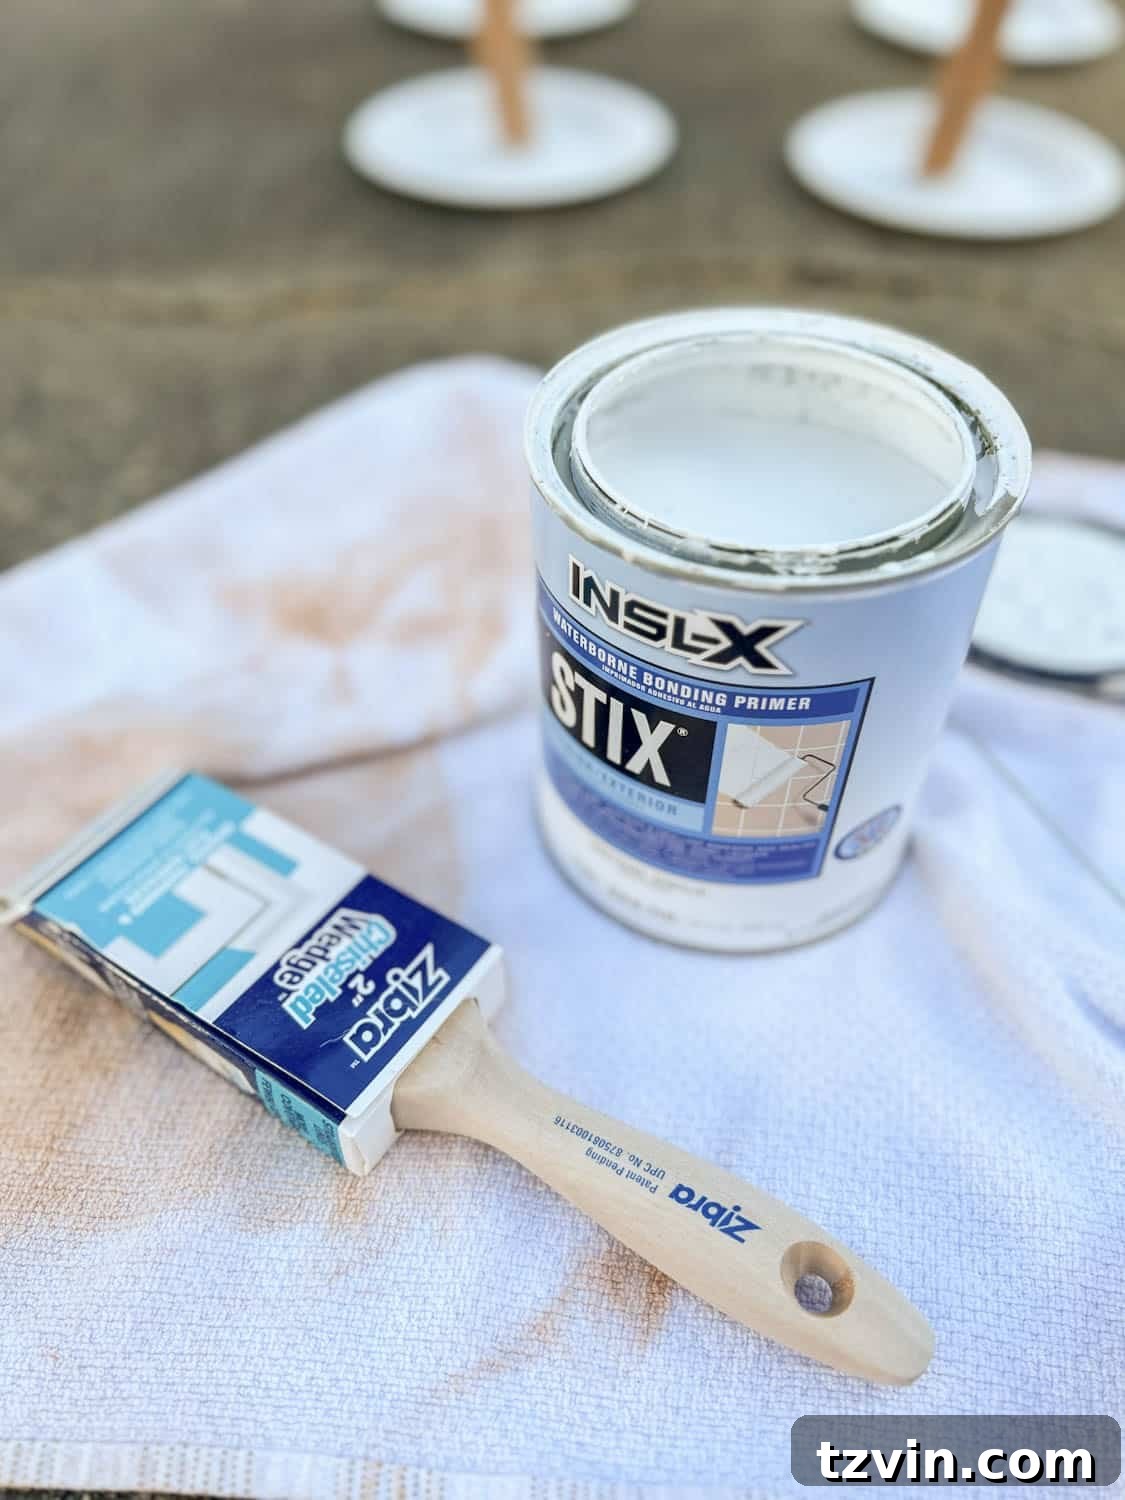
I highly recommend using INSL-X STIX Waterborne Bonding Primer. This particular primer is renowned for its excellent bonding capabilities, even on challenging surfaces. Just one evenly applied coat is usually sufficient to achieve a robust, ready-to-paint base. Allow the primer to dry completely according to the manufacturer’s instructions before moving on to the next step.
Step 4 – Perfecting the Base: Lightly Sand the Primer
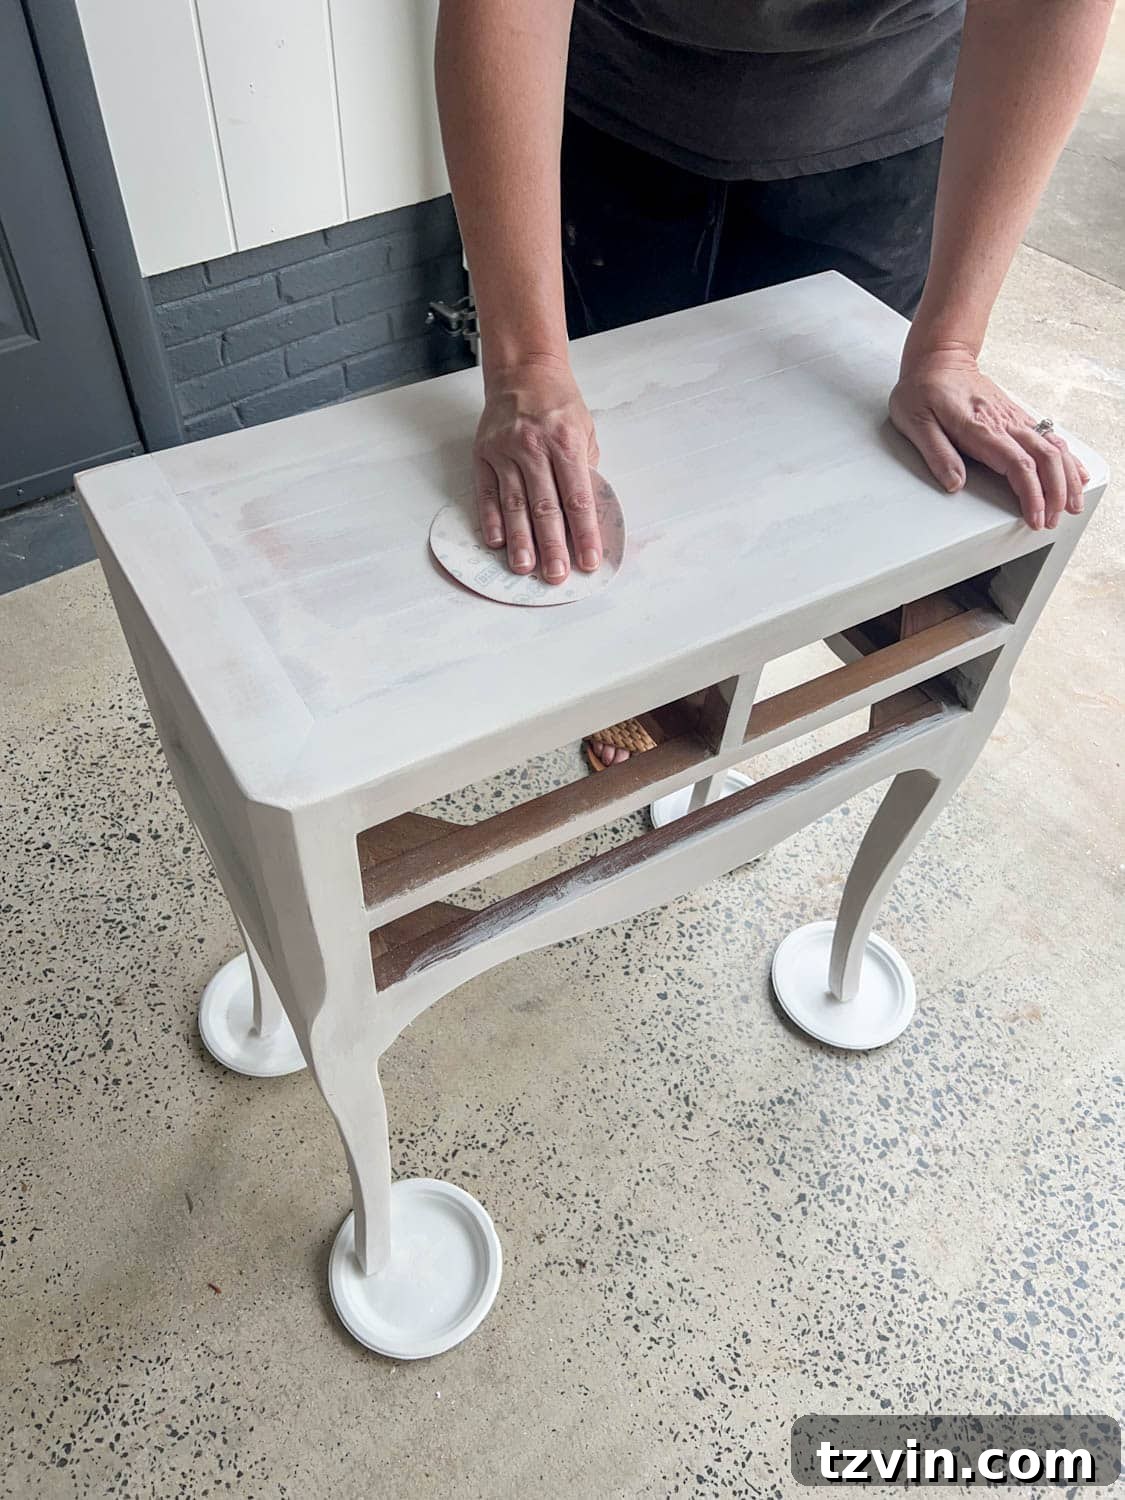
Yes, more sanding! It might seem counterintuitive to sand a freshly primed surface, but this step is absolutely crucial for achieving that ultra-smooth, professional-grade gloss finish. Once your primer coat is completely dry, grab a piece of ultra-fine grit sandpaper (around 600-800 grit) and lightly hand-sand the entire primed surface.
The purpose of this light sanding is two-fold. Firstly, it helps to eliminate any minor drips, brushstroke marks, or subtle imperfections that may have appeared during the primer application. Even the best primers can leave slight textures. Secondly, it creates a very fine “tooth” on the primed surface, which provides an even better grip for the subsequent coats of gloss paint. This ensures maximum adhesion and a truly seamless final appearance.
Work gently and evenly, using minimal pressure. You’re not trying to remove the primer, but rather to smooth it out. After sanding, wipe the surface thoroughly with a tack cloth or a damp, lint-free cloth to remove all dust, leaving a pristine base ready for painting.
Step 5 – The Secret to a Smooth Finish: Warm Your Gloss Paint
This is where we introduce a game-changing technique, one I learned from the incredible The Southern Gail on Instagram (her high-gloss mudroom cabinets are truly inspirational!). The secret to achieving an incredibly smooth, virtually brushstroke-free finish with gloss paint lies in its temperature.
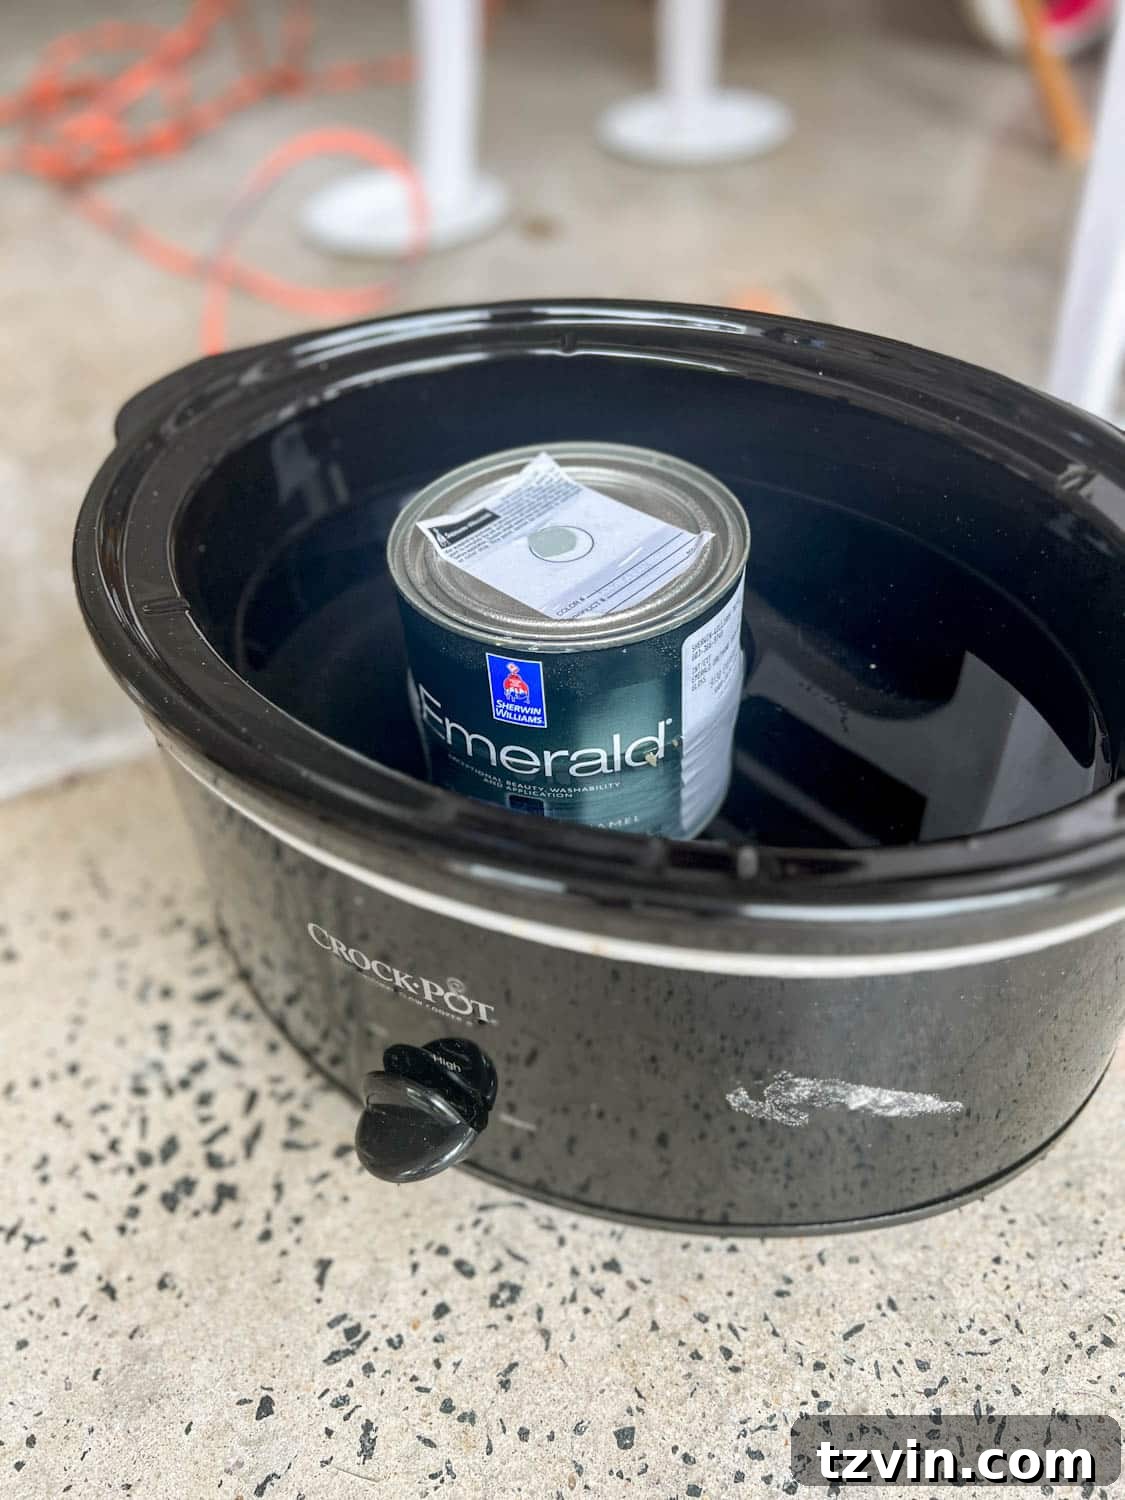
Before you begin painting, place your can of gloss paint (with the lid securely on!) into a slow cooker filled with warm water. Set the slow cooker to a low setting and allow the paint to gently heat up. The science behind this trick is simple: when paint is warm, its viscosity decreases, making it thinner and more fluid. This allows it to flow more smoothly from the brush, reducing drag and minimizing the appearance of brushstrokes. It also self-levels more effectively, giving you that coveted glass-like finish.
While some might opt for a paint sprayer to achieve a smooth finish, I personally find the extensive prep work (taping, masking, setting up ventilation) and the meticulous cleanup involved with a sprayer to be quite cumbersome. Warming the paint offers an excellent brush-on alternative that delivers professional-level results without the added hassle of sprayer maintenance.
Just look at that incredible smooth paint texture. The warmth truly makes a difference in achieving a flawless, even application.
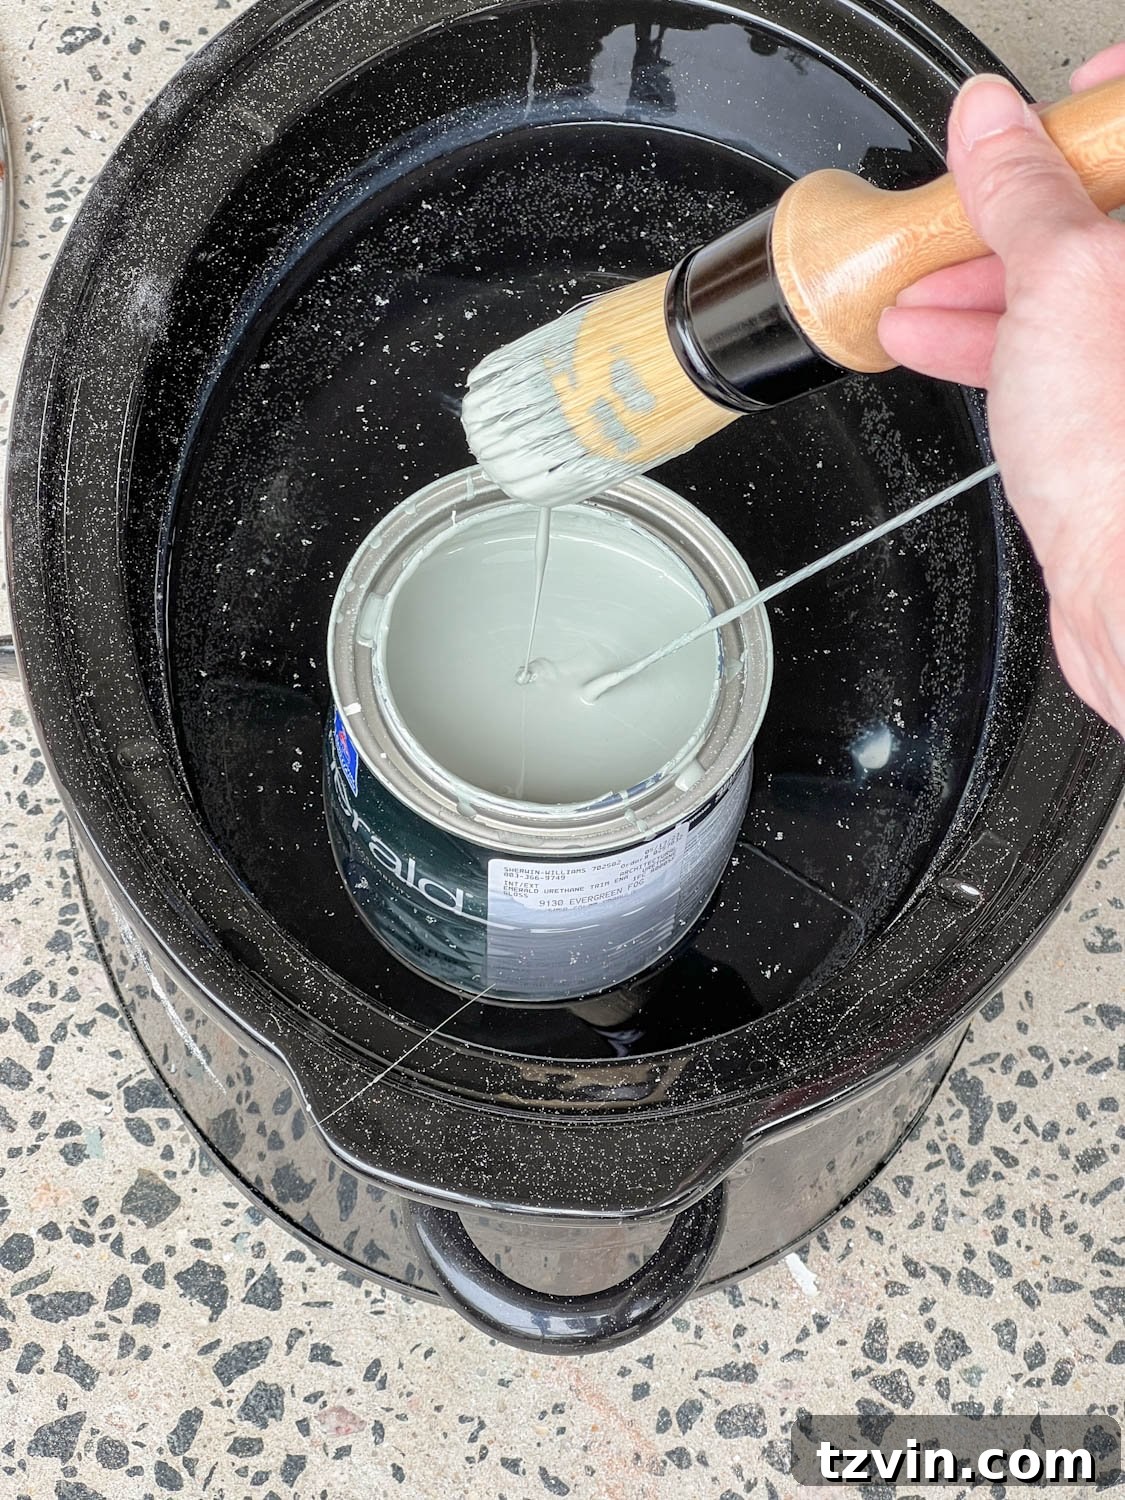
Step 6 – Application Mastery: Use a Round Brush for a Flawless Finish
With your gloss paint perfectly warmed, the next key element for a professional, brushstroke-minimized finish is your choice of applicator. For furniture painting, especially when aiming for high-gloss perfection, a round paintbrush is superior to traditional flat or angled brushes. Its unique shape allows it to hold significantly more paint, ensuring a longer, more consistent stroke without needing to reload frequently. This reduces the chances of creating “hard lines” or uneven texture in your paint finish that are common with brushes that hold less paint.
Because you’re working with warm paint, which is designed to flow smoothly, you’ll want to apply it quickly and evenly. Aim for a coat that is not too thick, which can lead to drips, nor too thin, which might require excessive re-brushing. The key is to apply enough paint to cover the surface well in one or two passes. Resist the temptation to overbrush or rework areas that have already been painted. This is particularly important with high-quality waterborne alkyd paints, such as Sherwin Williams Emerald Urethane Enamel or Benjamin Moore Advance. These modern formulas are specifically engineered with self-leveling properties, meaning that as the water-based paint dries, minor brush marks will naturally smooth out and disappear, leaving a remarkably flat and even surface.
Focus on maintaining a wet edge, working in sections if necessary, and allowing the paint to do its self-leveling magic. You’ll be amazed at the smooth result!
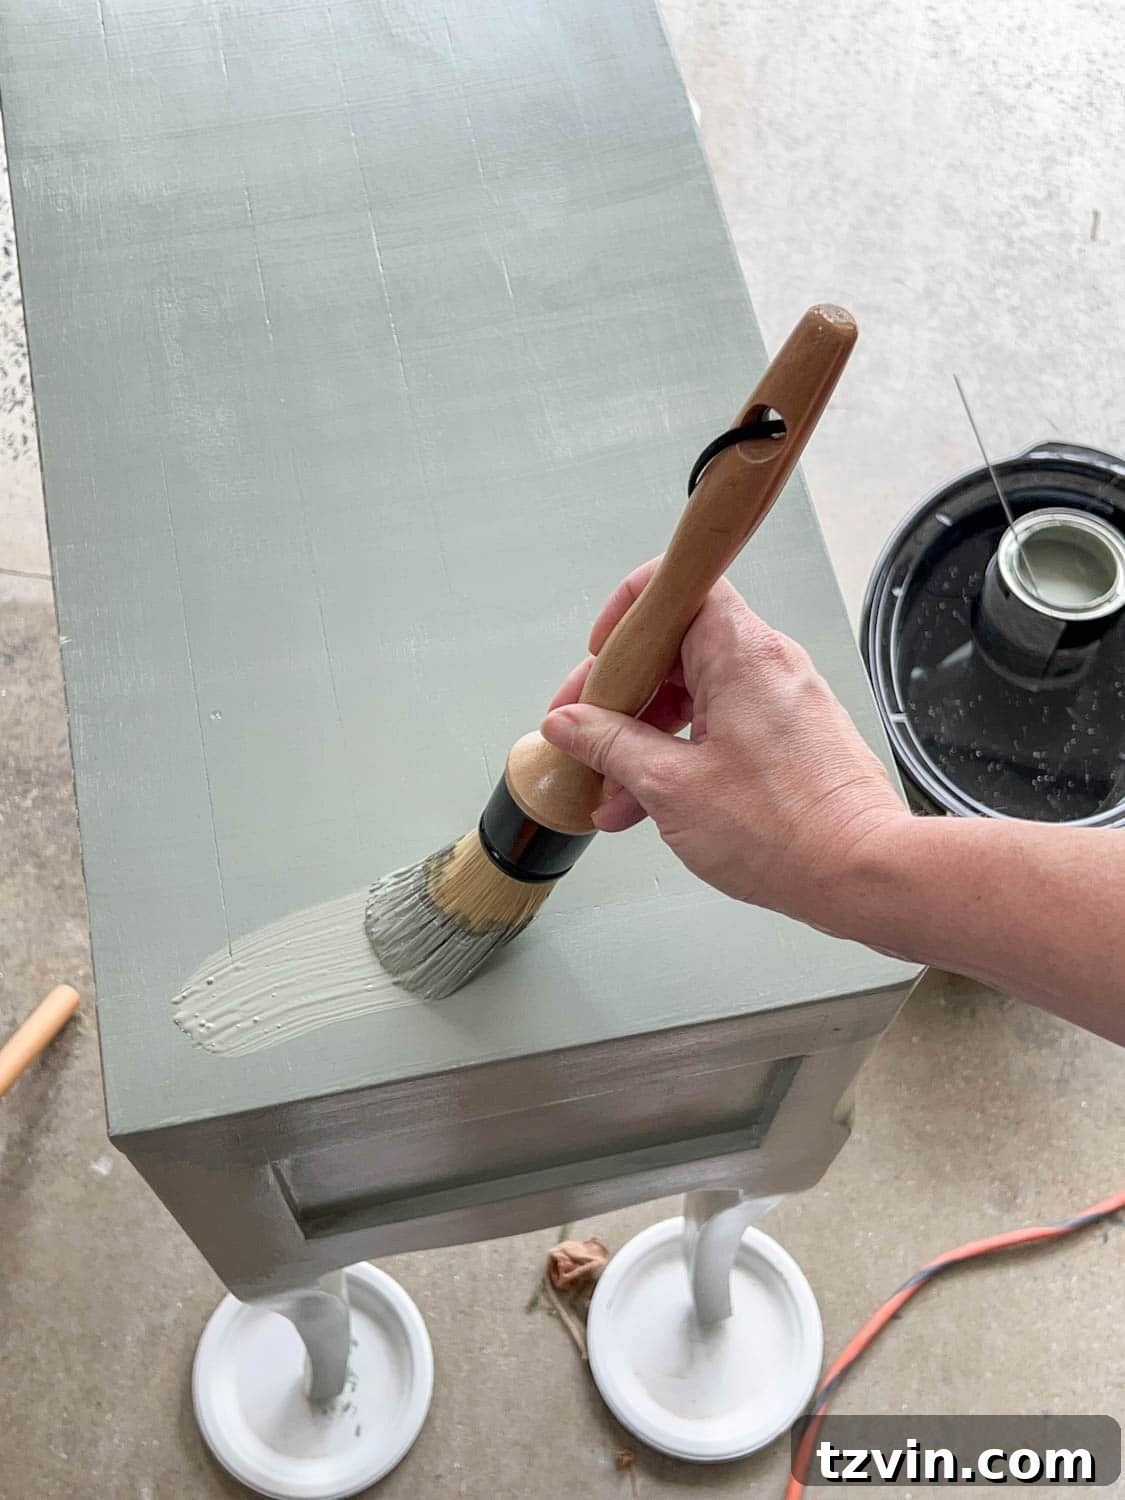
Step 7 – Inter-Coat Smoothing: Sand Between Paint Coats
Are you tired of sanding yet? Don’t be! This penultimate sanding step is incredibly important for achieving the highest possible quality in your gloss finish. Once the first coat of paint has completely dried, it’s time to perform one final, very light scuff sand. This time, you’ll again use ultra-fine grit sandpaper – something around 600 to 800 grit – and gently go over the entire painted surface.
The purpose here is to meticulously eliminate any tiny dust nibs, minute imperfections, or subtle textures that might have settled on the first layer of paint. Even in the cleanest environments, small particles can adhere to wet paint. This fine sanding provides a perfectly smooth base for your final coat, ensuring that the second layer of gloss paint adheres flawlessly and looks absolutely pristine. It also helps to “key” the surface, allowing the subsequent coat to bond even better.
After this light sanding, once again, wipe down the entire piece with a tack cloth or a slightly damp, lint-free cloth to remove all sanding dust. This meticulous cleaning is crucial to prevent any dust from getting trapped in your final coat of paint, preserving the mirror-like smoothness you’re aiming for.
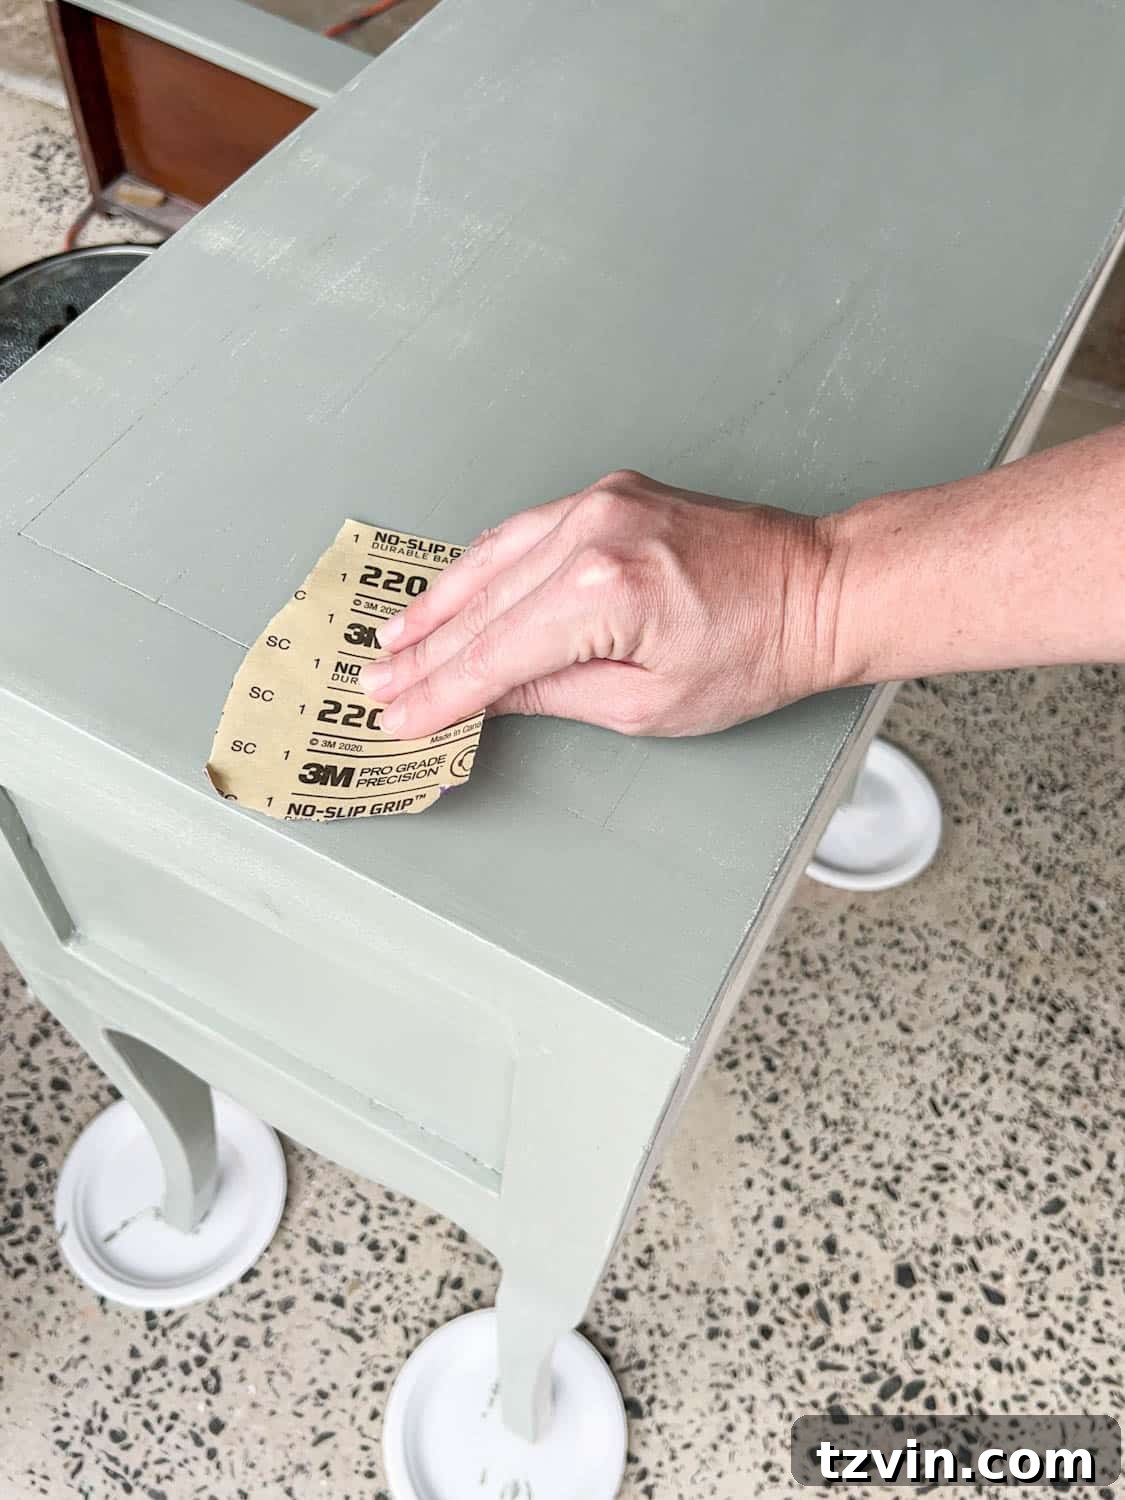
Step 8 – The Grand Reveal: Finish with a Smooth Second Coat
You’re almost there! It’s time for the final act in your furniture transformation. With your surface meticulously prepped and the first coat perfectly smoothed, brush on one last, glorious coat of warm gloss paint. Just as before, aim for even, swift strokes with your round brush, allowing the warm paint and its self-leveling properties to work their magic. Watch as the rich color deepens and the reflective sheen truly comes to life.
Once this second coat has fully cured – which might take a few days for gloss paint to reach its full hardness – step back and admire your handiwork. The painstaking preparation, the strategic warming of the paint, and the careful application will all pay off in a beautifully smooth, luminous finish. Whether you’ve updated bedside tables, a dresser, or any other piece of furniture, the transformation will be striking.
And, of course, no furniture makeover is complete without the perfect finishing touches. Don’t forget to add some dazzling new hardware! Elegant knobs or pulls can dramatically elevate the entire look, acting as the jewelry for your newly revamped piece. They provide a final flourish that perfectly complements the sophisticated gloss finish. Reinstalling new hardware is often the most satisfying part, marking the official completion of your stunning DIY project!
Related: Discover the Best Places to Buy Furniture Hardware and Kitchen Cabinet Pulls for Your Next Project
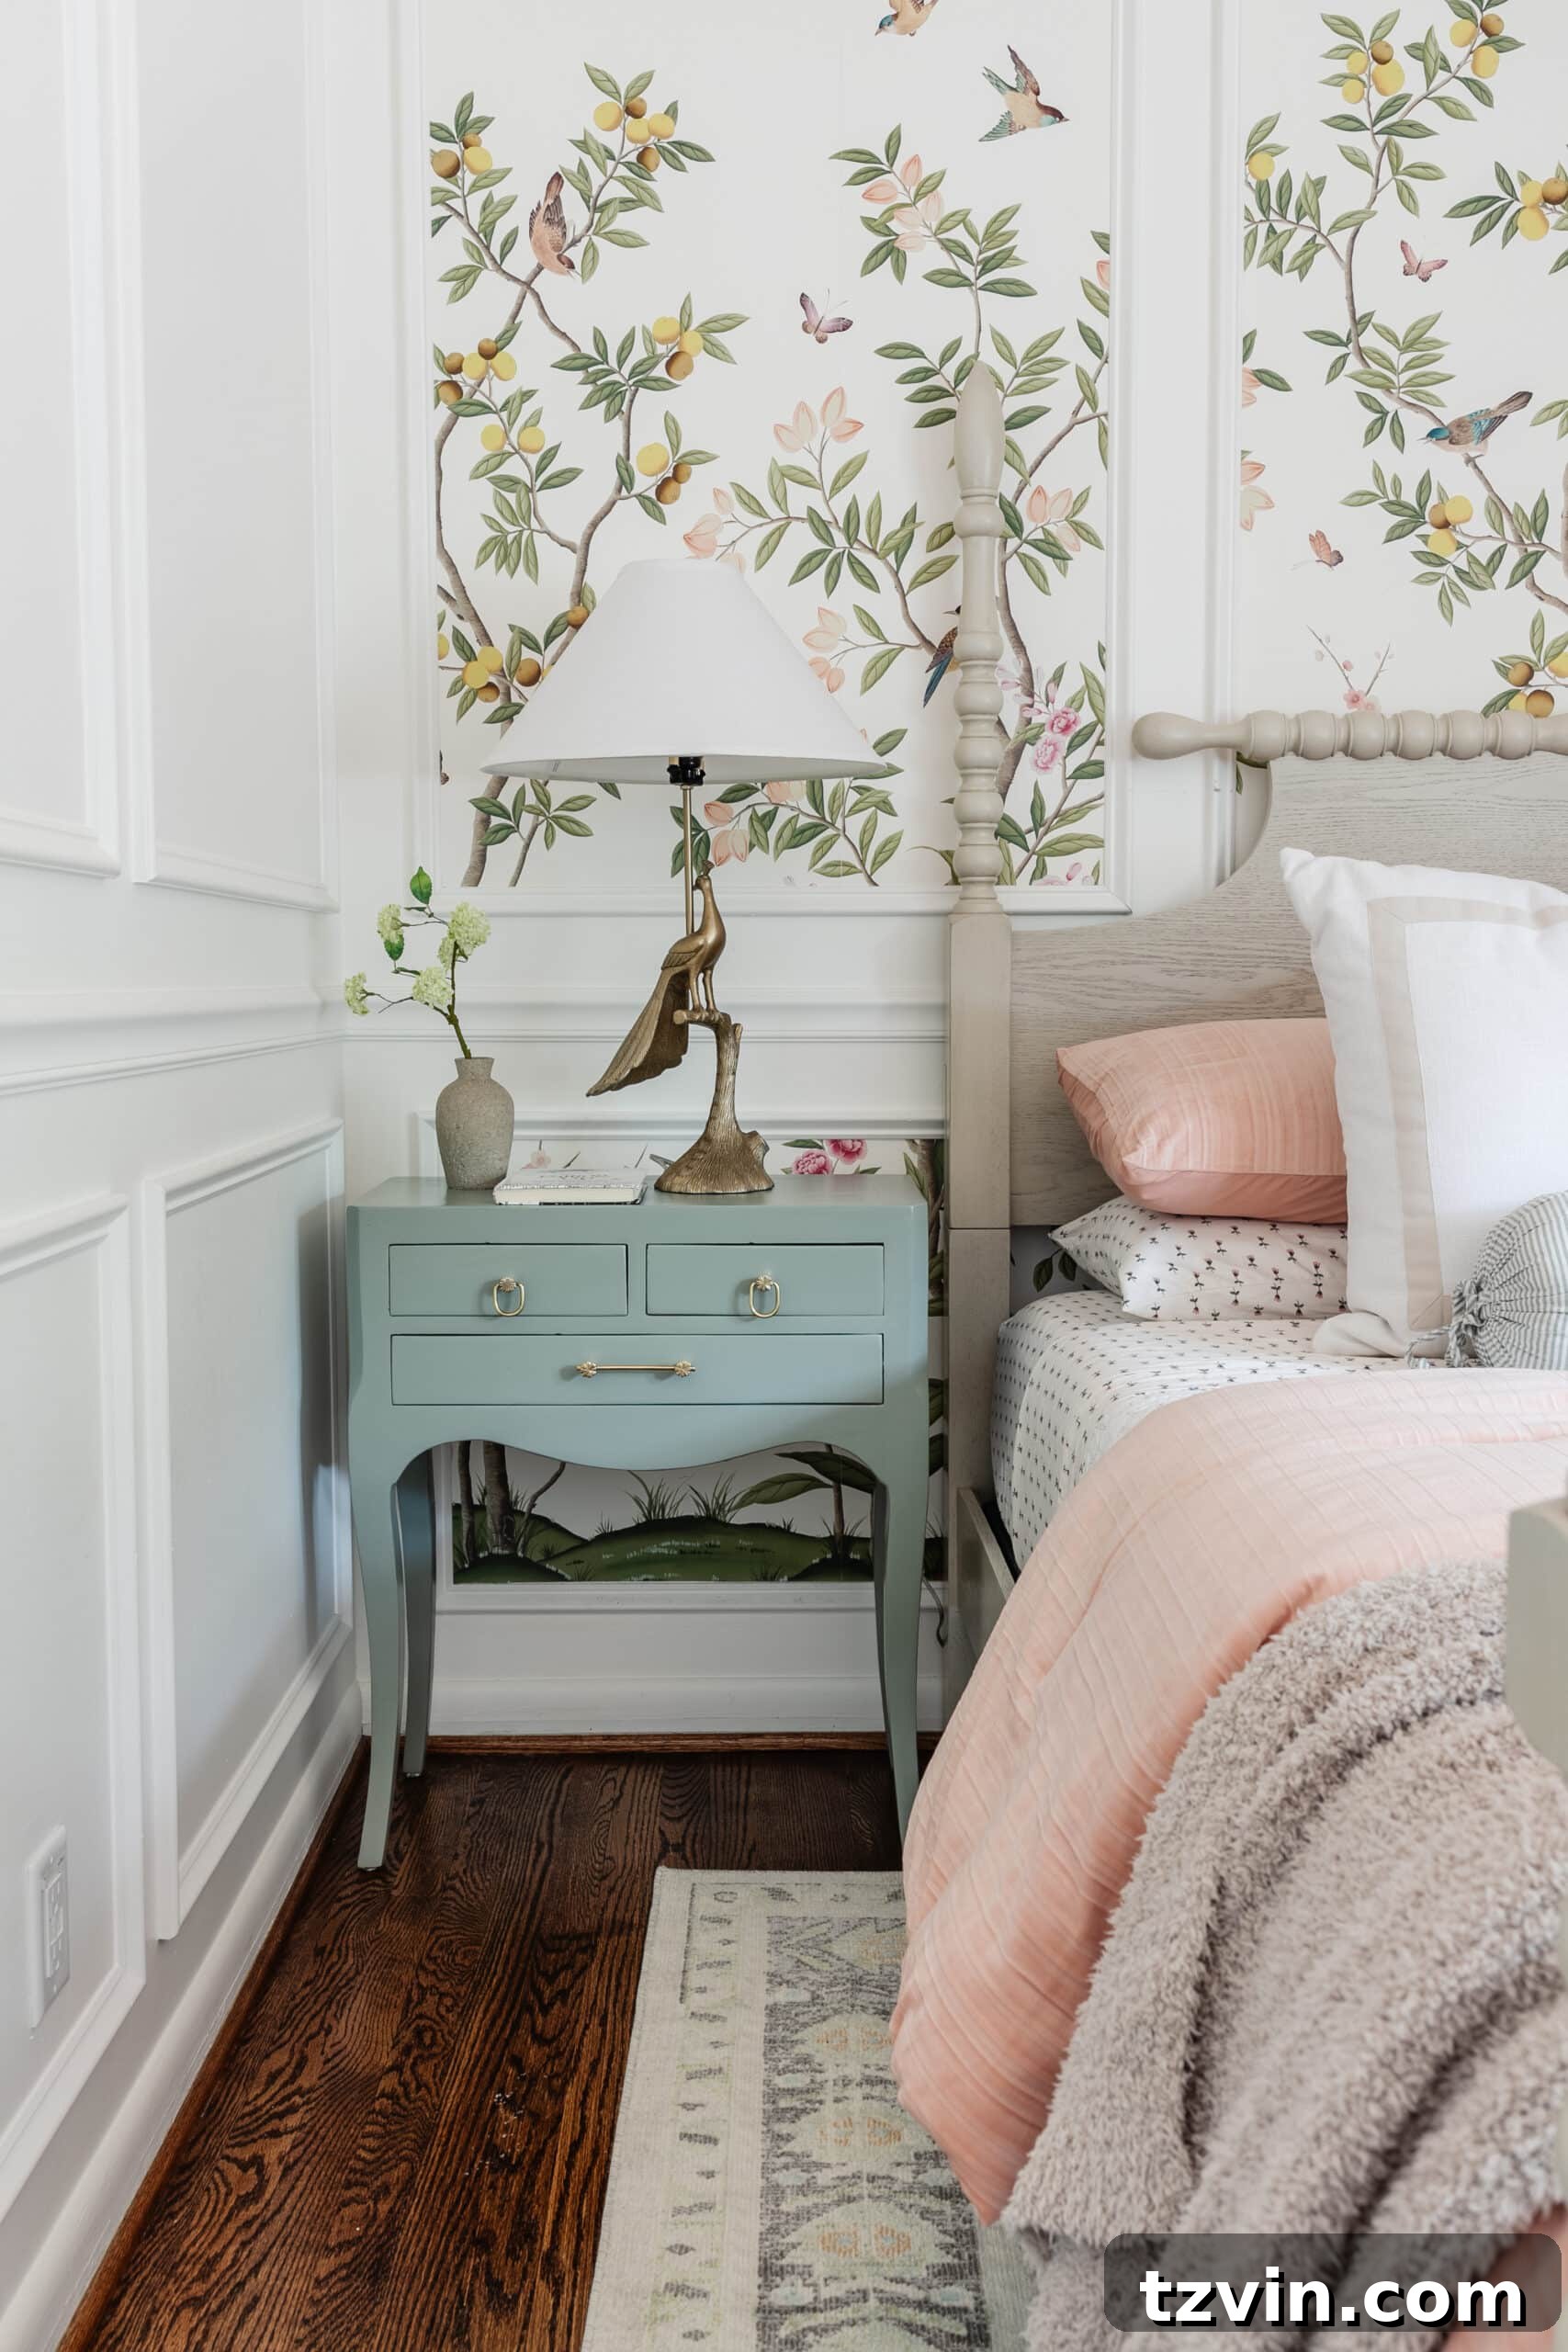
The Stunning Transformation: Finished Gloss Painted Nightstands
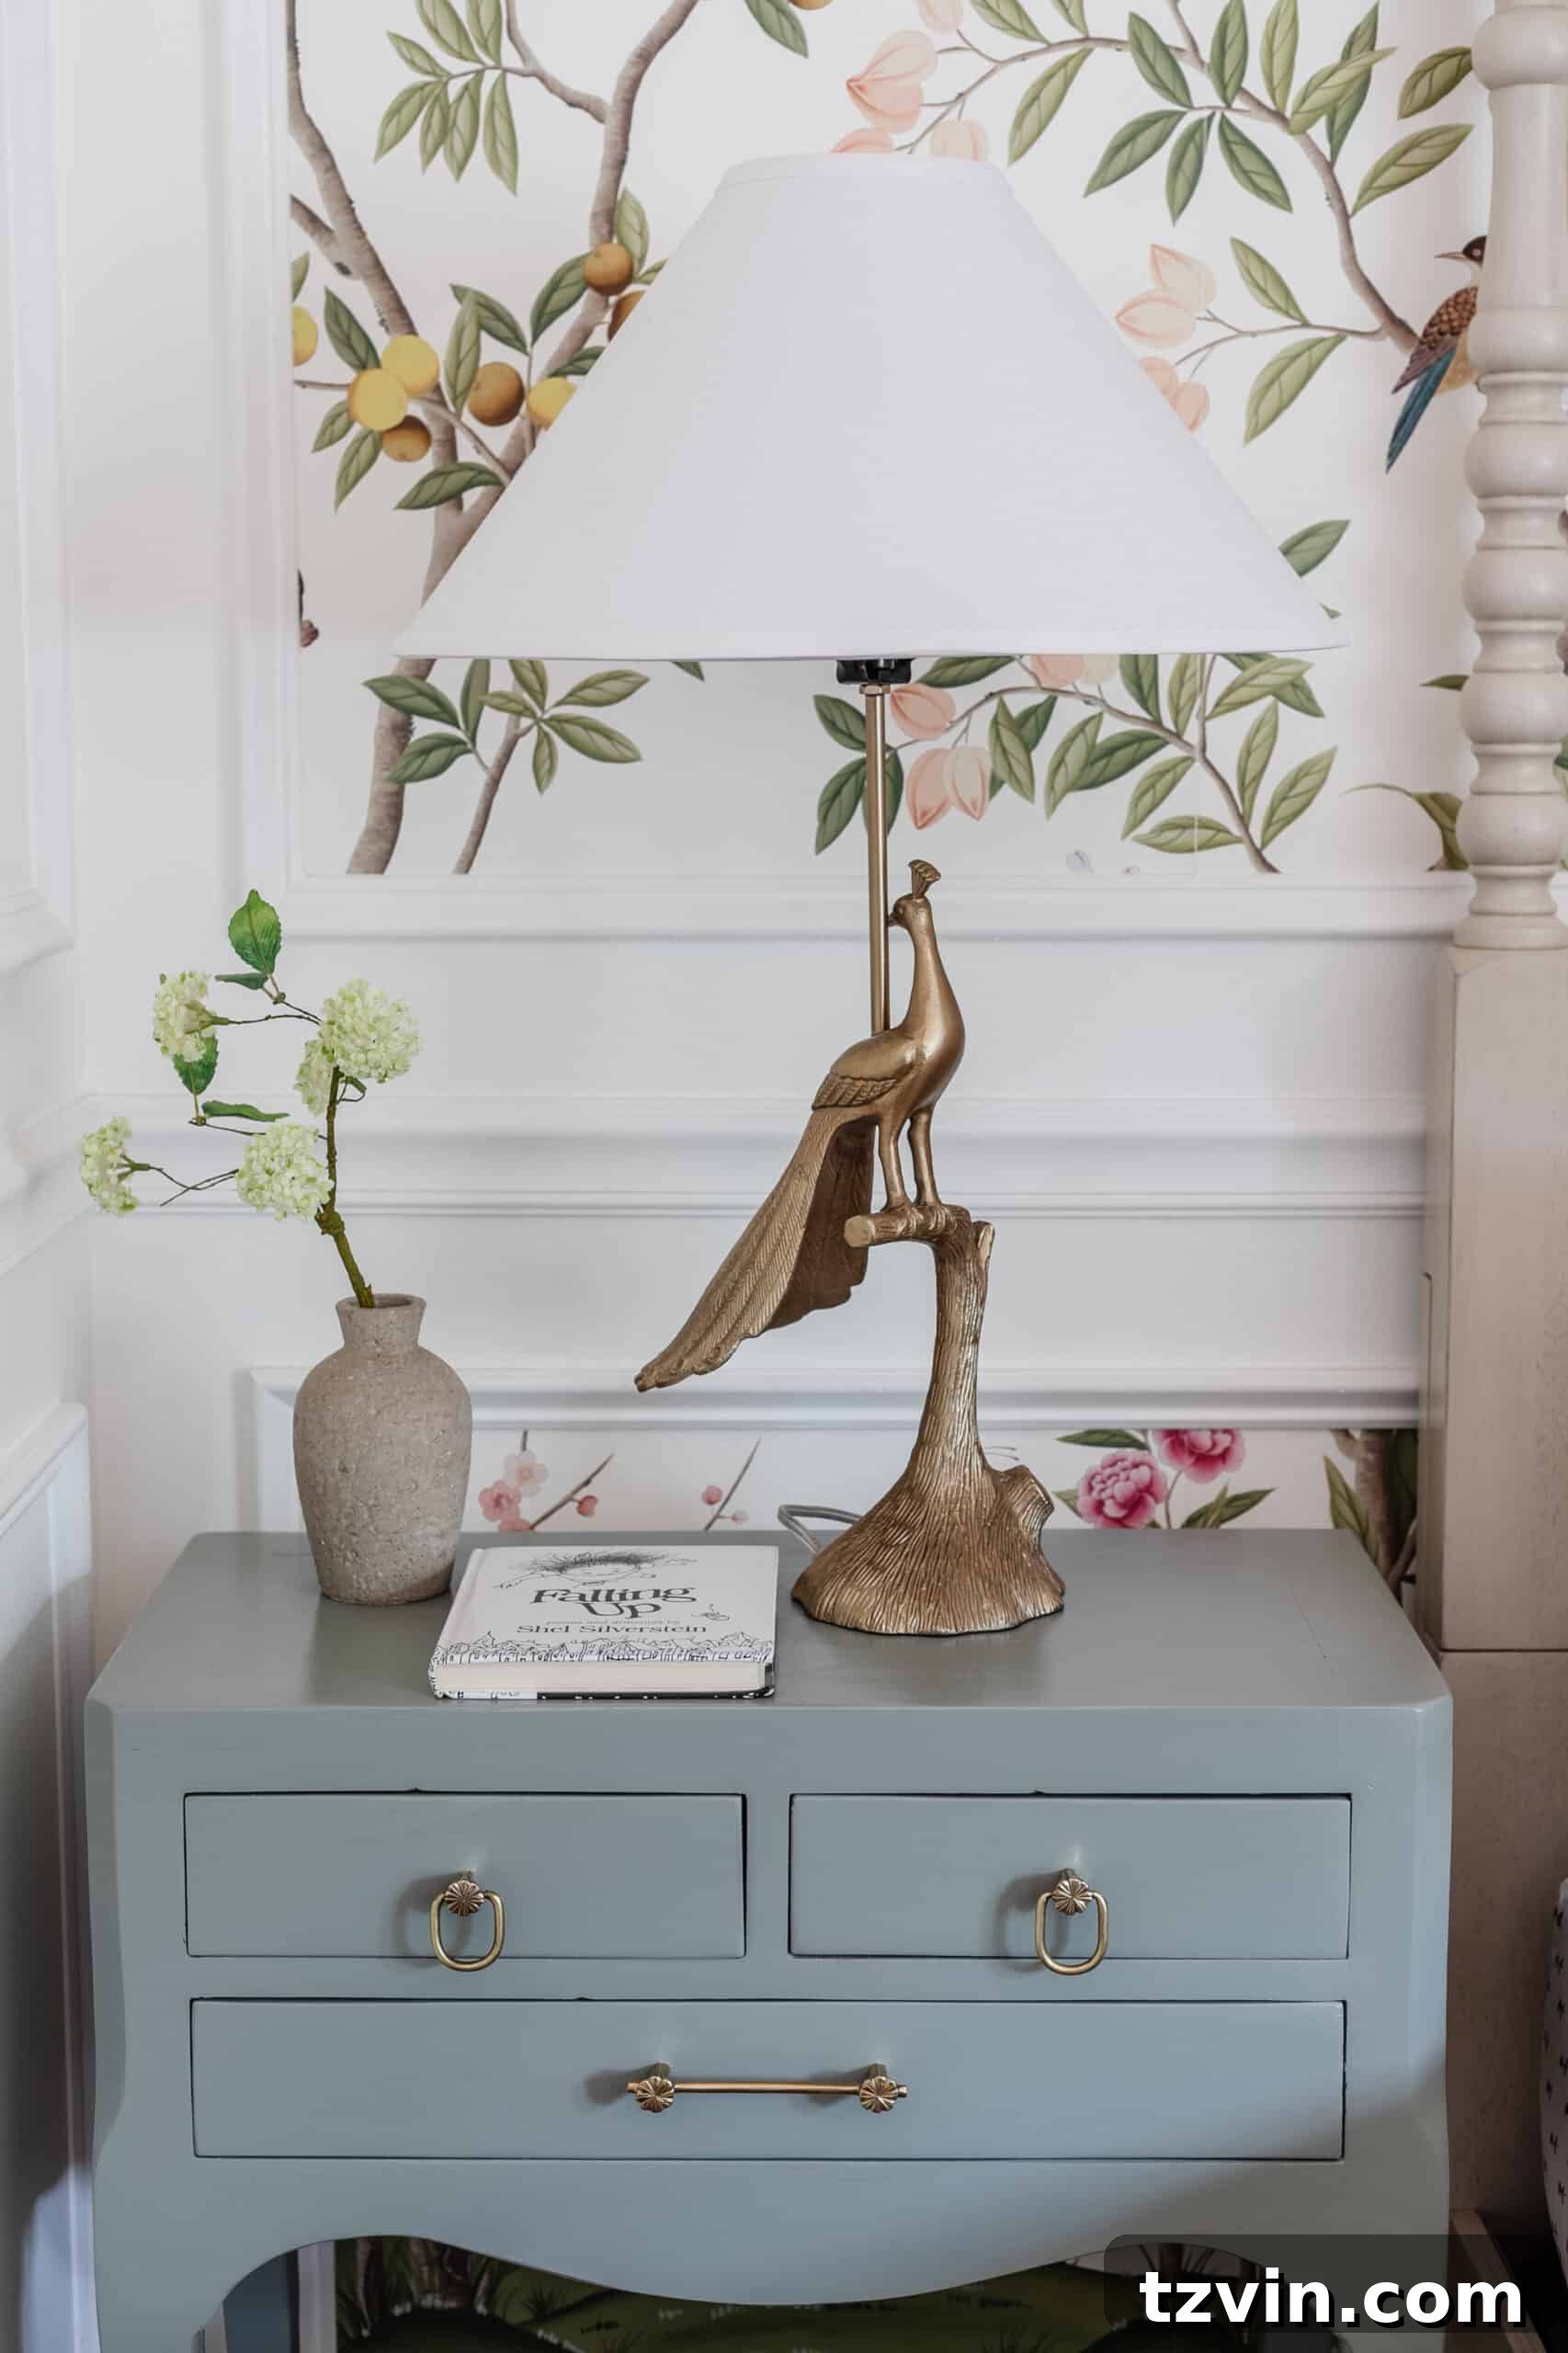
Ta-da! Behold the remarkable transformation! You would truly never guess that these stunning pieces were once heavily distressed, farmhouse-style nightstands found secondhand. The unsightly crackled finish is gone, replaced by an incredibly smooth, glossy surface that exudes modern elegance. While my camera struggles to fully capture the beautiful depth and reflective quality of this finish, in person, it’s nothing short of breathtaking.
What’s particularly interesting is the paint color choice: Sherwin Williams Evergreen Fog. We previously used this same versatile shade in a modern boho cottage bedroom last year, where it presented as a distinctly soft green. Yet, on these nightstands, under different lighting conditions and with the high-gloss sheen, it takes on a slightly different, more muted yet vibrant character. I absolutely adore its adaptability and the serene ambiance it brings to Regan’s room.
The rich, glossy mint green now perfectly complements the bedroom’s existing decor, tying together the various elements into a cohesive and charming space. This project stands as a testament to the power of paint and careful preparation in revitalizing furniture, proving that even a color you’ve used before can offer a fresh perspective with a new finish.
Related: Find Your Perfect Shade: 12 Best Sage Green Paint Colors for a Relaxing Room
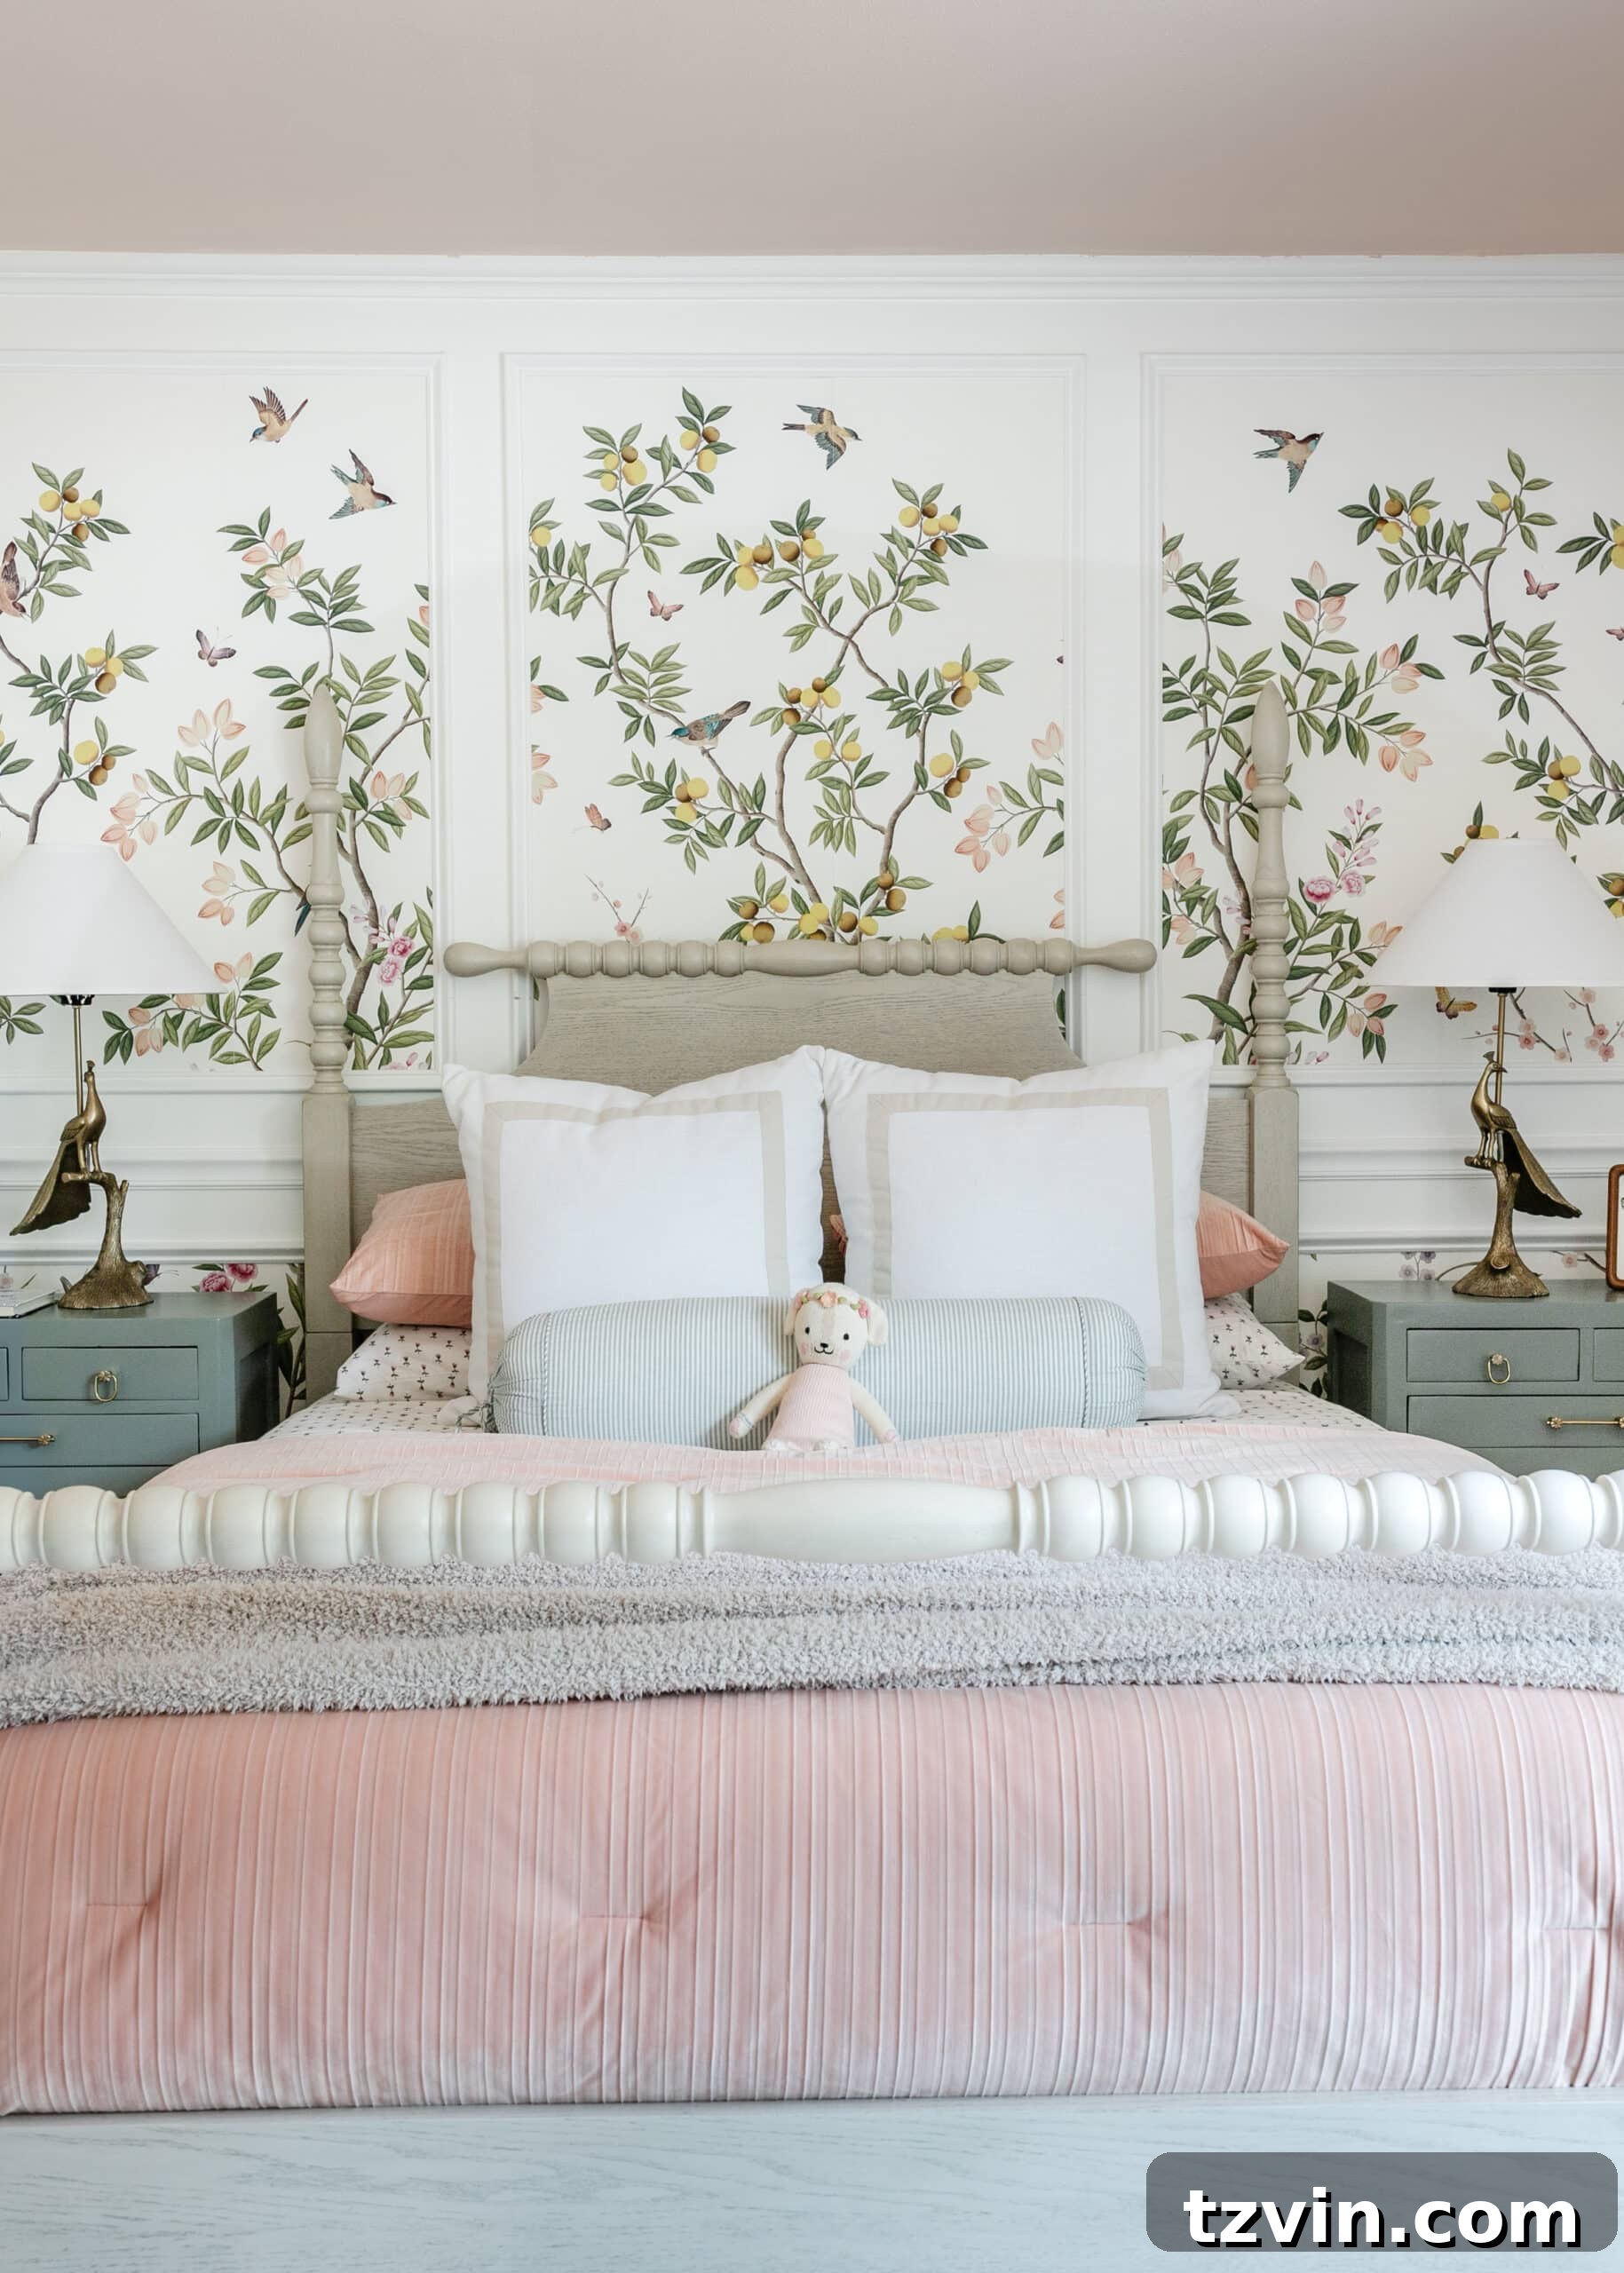
Bedroom Sources: Curated Picks for Regan’s Cottagecore Room
For those inspired by the charming details of Regan’s room, here’s a comprehensive list of all the carefully selected items that contribute to its enchanting cottagecore aesthetic. Each piece was chosen to create a harmonious and inviting space.
- Ceiling Color: Romabio Barefoot Dance – a soft, airy shade that brightens the room.
- Wall Color: Magnolia Home True White – a crisp, clean backdrop for the delicate wallpaper.
- Poster Bed: A classic and elegant focal point that adds a touch of traditional charm.
- Chinoiserie Wallpaper: A beautiful, intricate pattern that brings sophistication and whimsy to the walls.
- Blush Comforter Set: Adds a soft pop of color and comfort to the bedding.
- Tulip Print Sheet Set: A delightful floral pattern that enhances the cottagecore feel.
- Stitched Cream Quilt: Provides an extra layer of texture and warmth with a handmade look.
- Bolster Pillow: A stylish accent pillow for added comfort and visual interest.
- Euro Pillows: Large, decorative pillows that enhance the luxurious feel of the bed.
- Peacock Lamps: Whimsical and elegant bedside lighting that perfectly complements the room’s theme.
- Bud Vase: A delicate touch for fresh flowers, adding natural beauty to the nightstands.
- Area Rug: Defines the space and adds softness underfoot, completing the cozy ambiance.
Related: Inspiring Ideas: 18 Favorite Modern Vintage Beds for a Low Budget
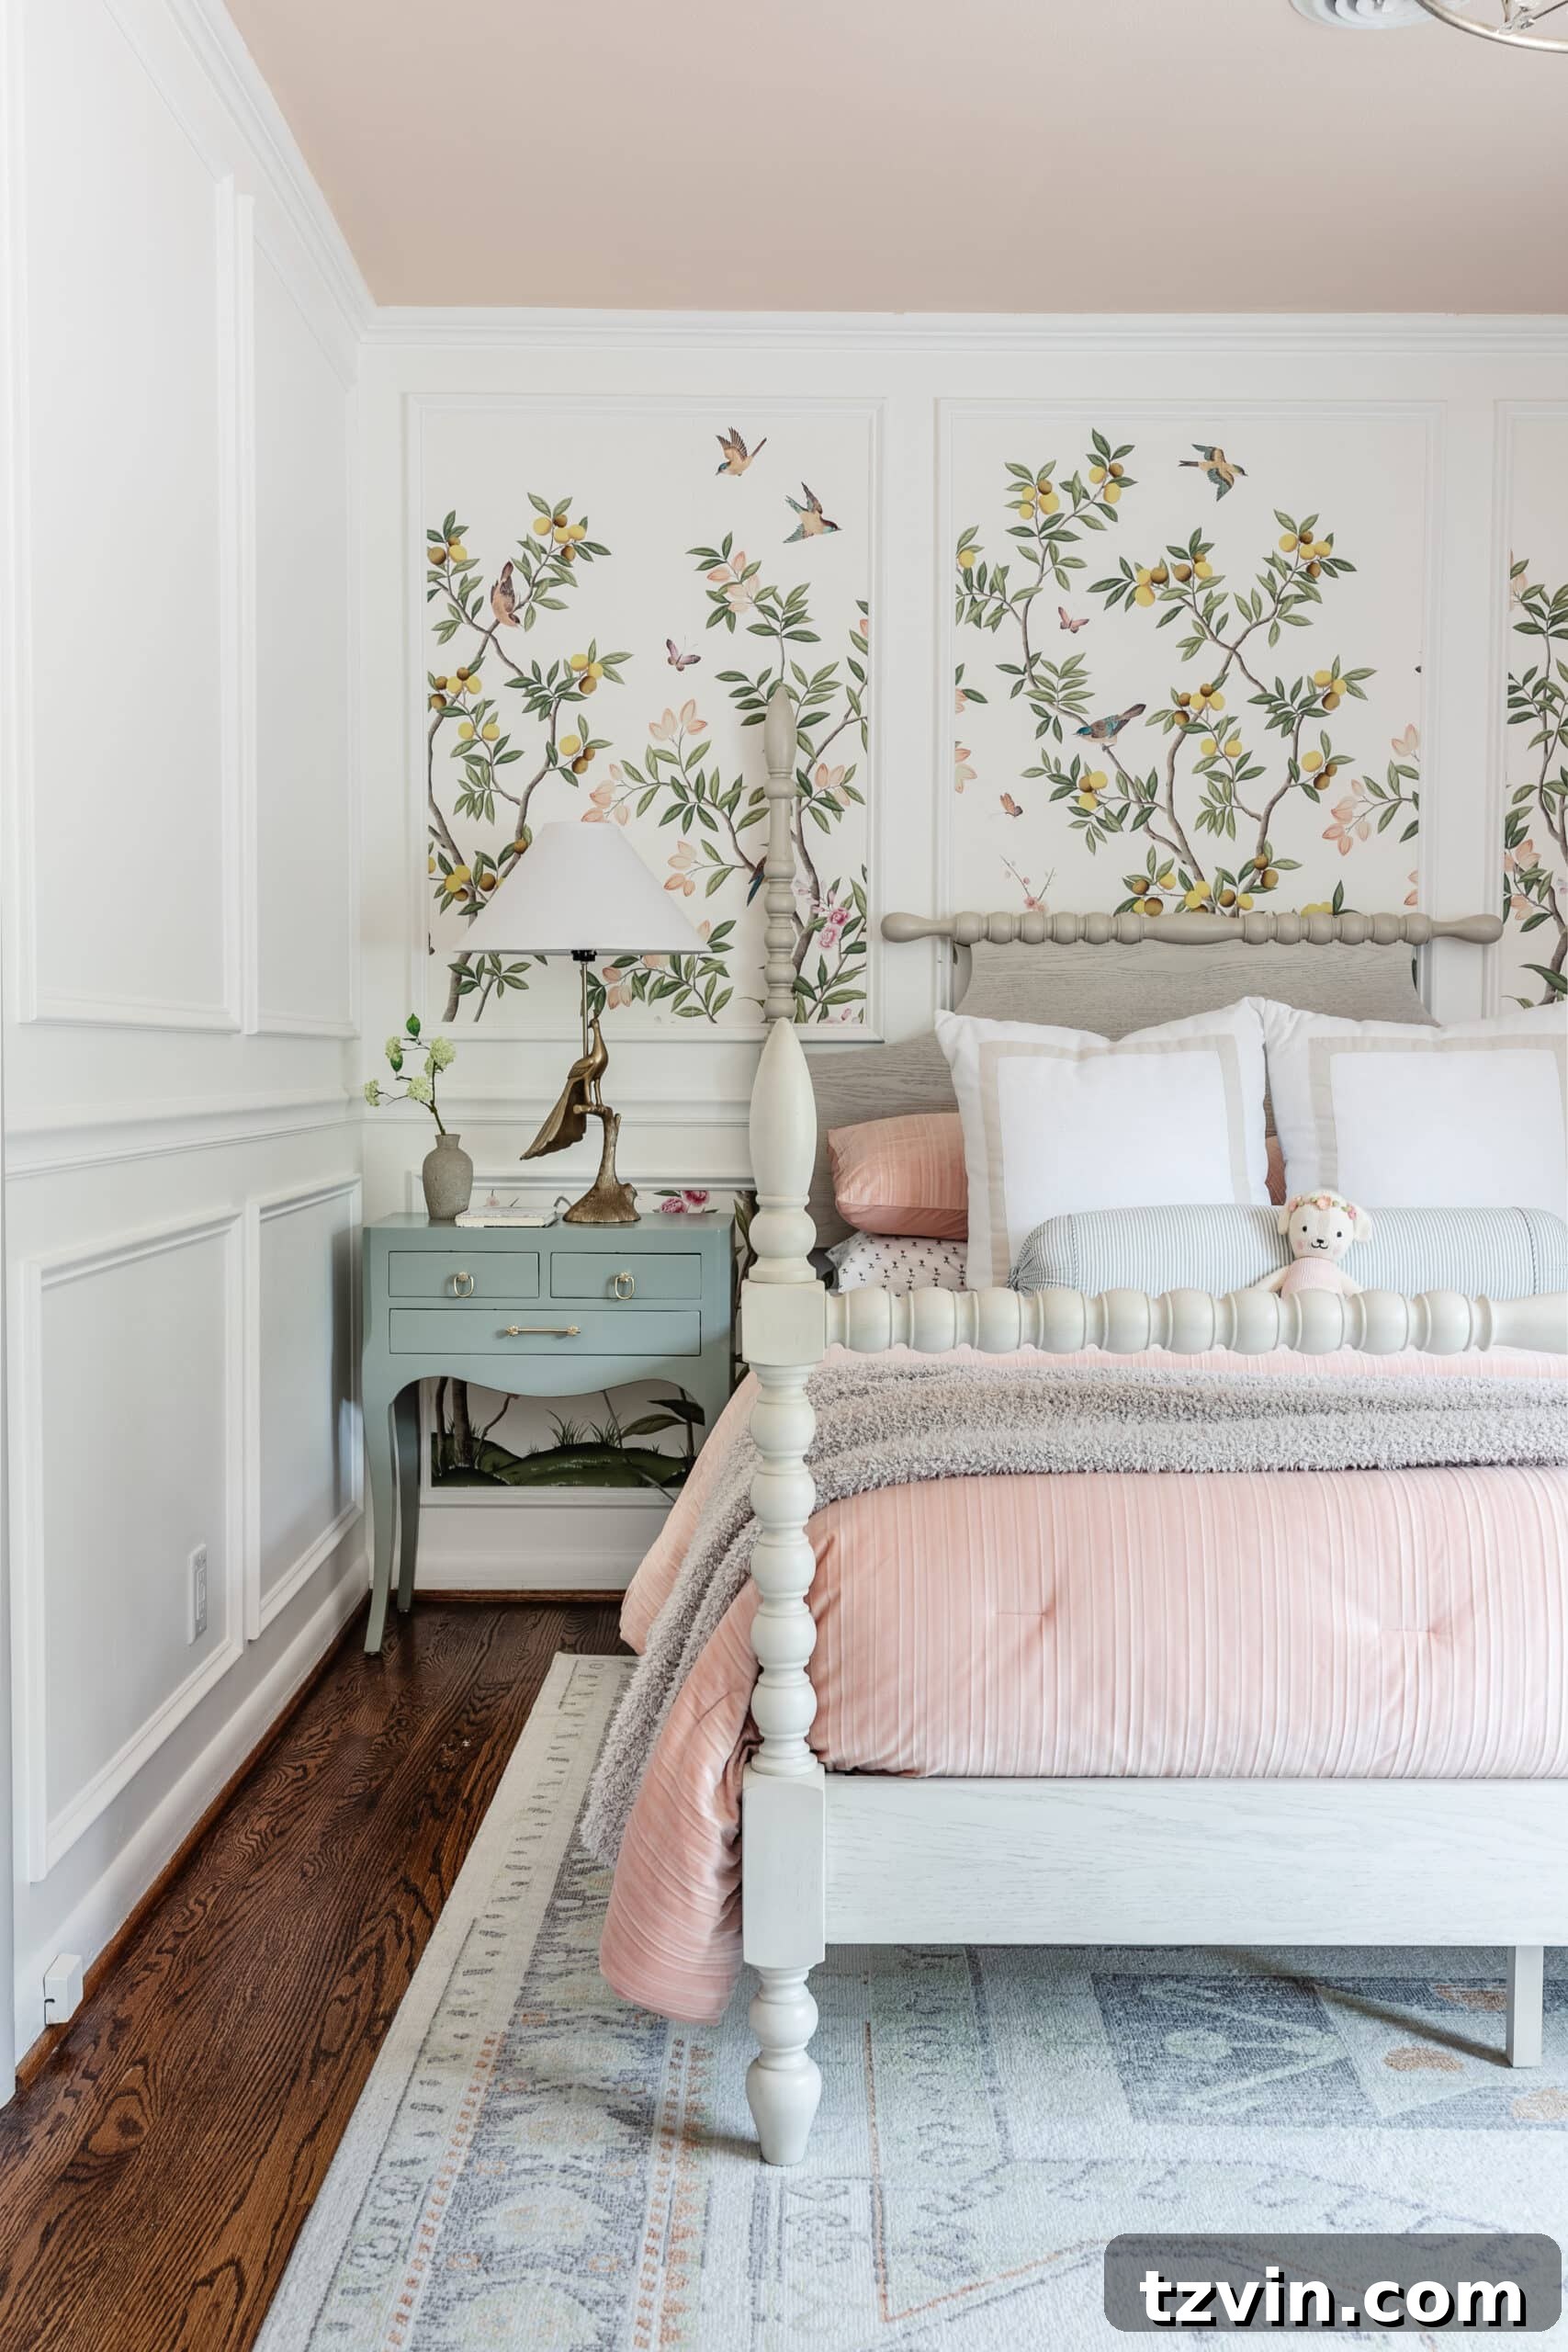
I am absolutely smitten with this adorable bedroom! The entire makeover, from the delicate wallpaper to the carefully chosen bedding, has created a truly magical space. The moment Robert and I finished hauling these newly transformed nightstands into place and positioned her enchanting peacock lamps, Regan, with wide-eyed wonder, asked, “Can I put my Barbies in the drawers?”
And just like that, these meticulously refinished nightstands became Barbie’s newest luxurious hangout spot. I wasn’t even the slightest bit surprised; after all, a beautiful room should inspire imagination and play. This charming detail truly sealed the success of the project, reminding me that the best makeovers not only elevate a space aesthetically but also enhance its functionality and joy for its inhabitants.
More Inspiring Furniture Makeover Ideas
If you’ve enjoyed this transformation and are looking for more ways to update your home on a budget, explore these additional furniture makeover projects:
- Desk Chair and Painted Vanity Makeover: Learn how to revitalize wood furniture without stripping, perfect for a fresh study or vanity area.
- How to Add Reeding to Furniture | Shoe Storage Bench Makeover: Discover a stylish way to add texture and architectural interest to plain furniture pieces.
- How to Reupholster Dining Chair Seats + Faux Bamboo Chair Makeover: Give your dining chairs a custom look with new upholstery and a chic faux bamboo paint finish.
- The Trick to Paint Laminate IKEA Furniture: Unlock the secrets to successfully painting notoriously difficult laminate surfaces for a durable and beautiful finish.