
Crafting Your Own Oversized Vintage Irish Map: A DIY Guide to Personalized Heritage Decor
Every home tells a story, and ours is undoubtedly enriched by a touch of Irish charm. My husband, whom I lovingly refer to as my very own Leprechaun, embodies the spirit of Ireland with his spontaneous jigs, delightful Irish accent impersonations, and an enduring pride in his roots. While he insists he’s not short – merely the same height as me, a fact he often points out with a twinkle in his eye – his vibrant connection to his heritage has undeniably shaped our life together.
From the moment I first met his family five years ago, their deep affection for their Irish heritage was palpable. It’s a connection I’ve come to adore. In every aspect of Irish culture, faith and family hold paramount importance, and there’s a belief that a dash of Irish spirit can brighten any day. It transcends mere ancestry; it’s a profound way of life, a mindset that celebrates resilience, community, and joy. This vibrant cultural backdrop sparked an idea: how could we bring a piece of this beautiful heritage into our American home in a truly personal way?
While we cherish our American identity, weaving in elements of Irish heritage seemed like the perfect way to infuse our living space with warmth and personal history. The idea of creating an oversized vintage map of old Ireland immediately captivated me. It felt like a truly unique and meaningful piece of personalized wall decor, a celebration of family ties and a conversation starter all in one.
You might be thinking, “An oversized map? That sounds complicated, especially if it involves computers!” And yes, it does involve a few digital tricks. But before you run for the hills, let me assure you: even if you’re not a Photoshop wizard, or like me, consider yourself a bit technologically challenged, this project is absolutely achievable. This guide will break down every step, making it easy for anyone to create stunning, large-scale map art that rivals high-end store versions at a fraction of the cost. The satisfaction of crafting such a significant piece of DIY home decor with your own hands is truly immense.
Essential Materials for Your Vintage Map Project:
Gathering your supplies is the first step towards bringing your vintage Irish map to life. Most of these items are readily available at craft stores or hardware shops:
- 1 piece of plywood: This will serve as the sturdy base for your map. The size will depend on your desired final map dimensions, so plan ahead.
- Wood stain (e.g., Rustoleum Weathered Gray): To give your plywood base an authentic, aged look that complements the vintage map aesthetic.
- Brown craft paint (optional): For dry-brushing the edges, adding depth and a framed effect.
- Several sheets of parchment paper: Or other thin paper suitable for printing large images in sections. Regular printer paper works, but parchment can add a subtle aged texture if desired.
- A computer and laser printer: Essential for printing your digital map sections. A laser printer is often preferred for sharp, non-smudging prints.
- Mod Podge: This all-in-one glue, sealer, and finish is perfect for adhering your map to the wood and providing a protective coat. Choose a matte finish for a truly vintage feel.
- Sponge brush and/or small paint brush: For applying the Mod Podge evenly and smoothly.
- Scissors: For precise trimming of your printed map sections.
- A pen or pencil: For marking placement on your plywood.
Step-by-Step Guide to Creating Your DIY Oversized Map:
1. Finding and Capturing Your Zoomable Vintage Map
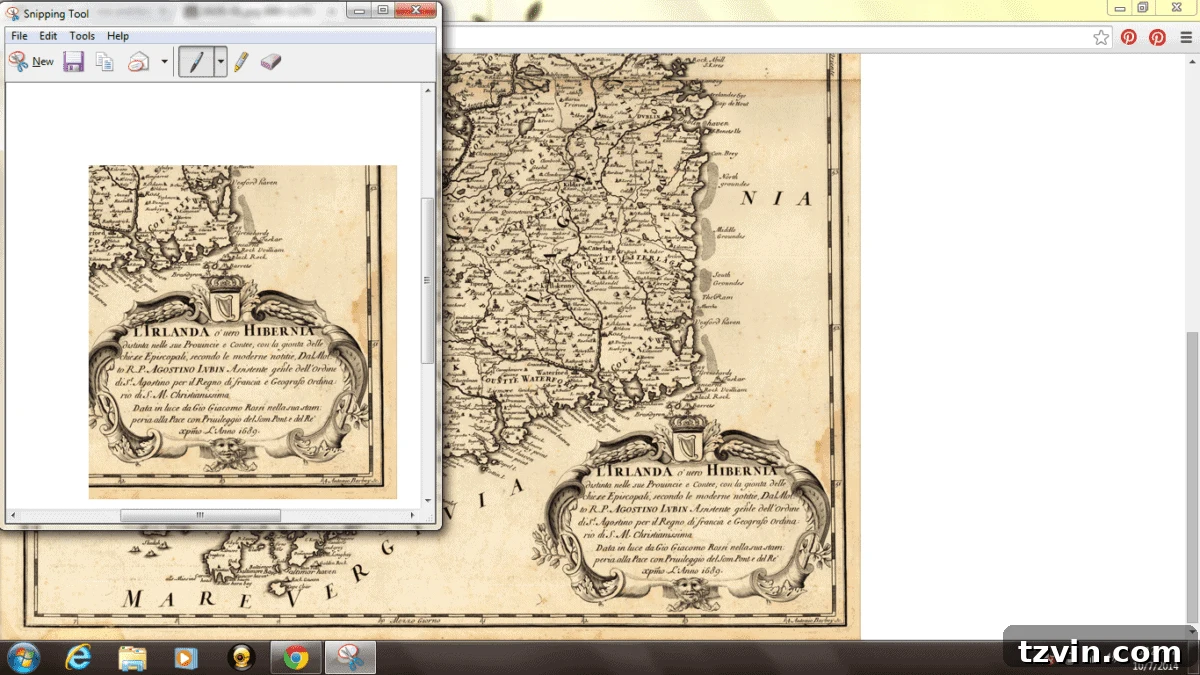
The journey begins with finding the perfect map. When searching online for a vintage map of Ireland, look for high-resolution, zoomable images. The more you can zoom in, the more detail you’ll capture in your snapshots, resulting in a clearer final product. Excellent resources include the Library of Congress and Map History, which offer vast collections of historical maps. Always be mindful of copyright restrictions; ensure the map you choose is in the public domain or available for personal use.
Once you’ve found your ideal map, zoom in to your desired level of detail. The key here is to capture snapshots of small, overlapping sections of the map. For PC users, the Snipping Tool (found in your Start Menu) is perfect for this. Mac users can use Shift + Command + 4. Capture each section as a separate image file, ensuring that each snapshot is roughly the same size and includes enough overlap with adjacent sections to make reassembly easier. Think of it like taking multiple photos to create a panorama; precision now saves headaches later. Save these individual map pieces in a clearly organized folder on your computer.
2. Assembling Your High-Resolution Map in an Online Editor
Now for the clever part that elevates your DIY oversized map from grainy to gorgeous! Even without expensive software like Photoshop, free online photo editors are incredibly powerful. I recommend PicMonkey.com, but other platforms like Canva or Pixlr can also work. The goal is to piece your snapshots back together into one seamless, high-resolution image.
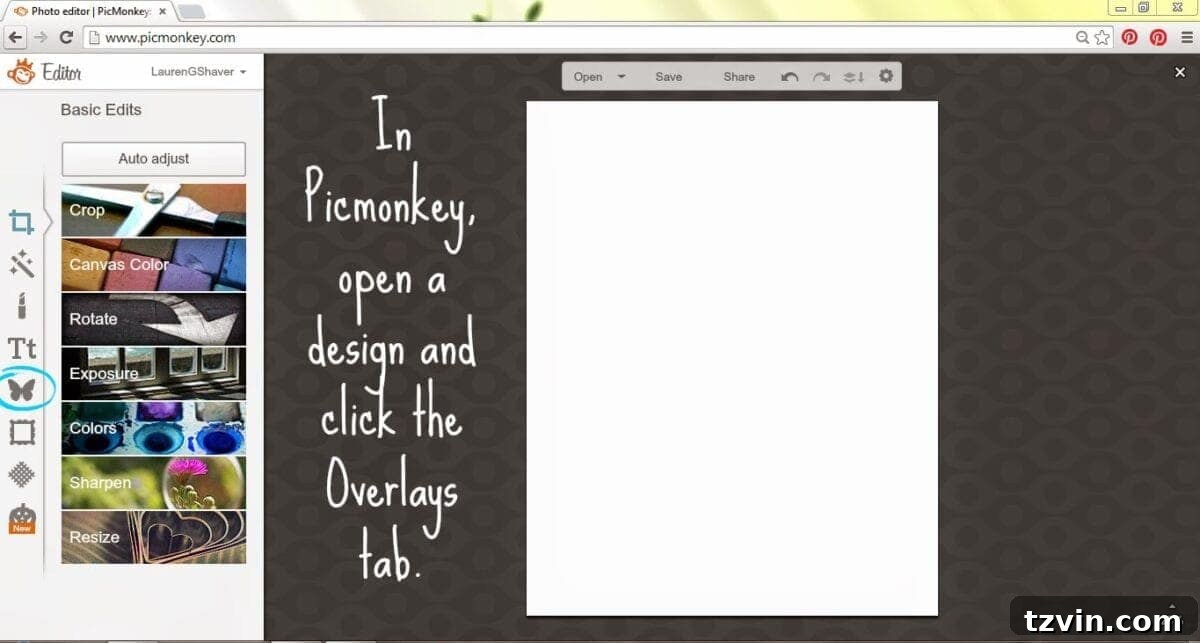
Navigate to PicMonkey, hover over “Design,” and select your desired canvas size. An 8×10 inch canvas is a good starting point as it offers ample space for assembly. Once your blank canvas is open, locate the “Overlays” tab (often represented by a butterfly icon) in the left toolbar. Click “Your Own” to upload the map snapshots you saved earlier.
You might wonder why we’re taking snapshots only to reassemble them. The magic lies in resolution. If you were to simply save a single large image of the map directly from a website, it would likely be of low resolution, resulting in a pixelated, blurry print when enlarged. By breaking it into smaller pieces and reassembling them on a high-resolution canvas in an editor like PicMonkey, you’re effectively creating a much sharper, crisper image that can be blown up to impressive sizes without losing clarity. It’s a fantastic digital trick for DIY enthusiasts!
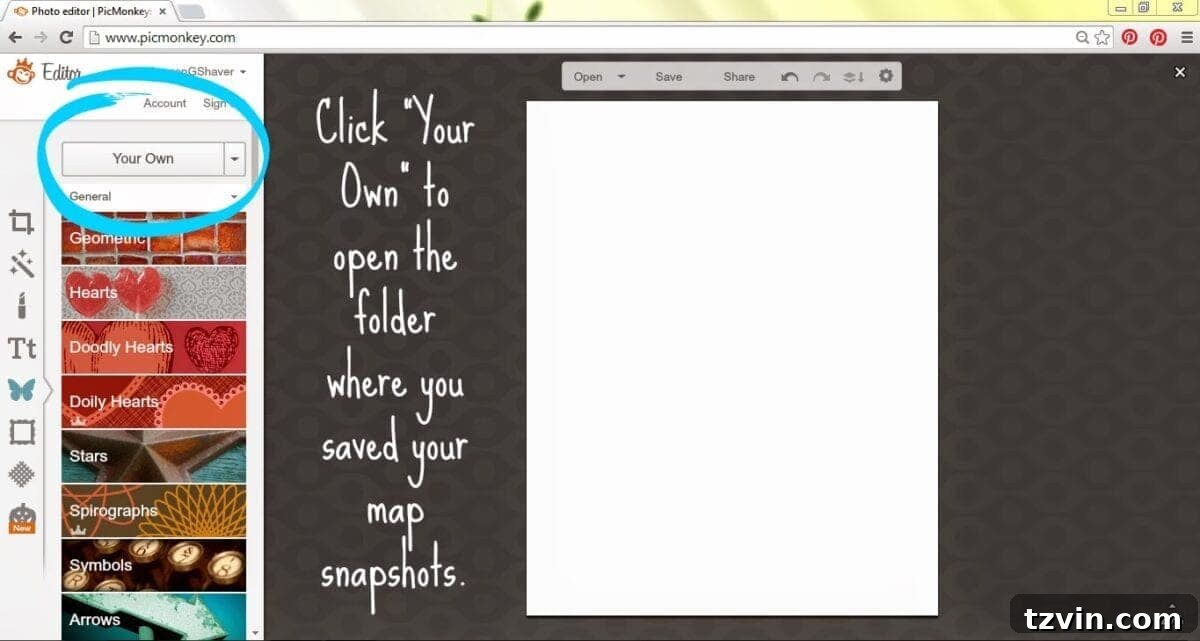
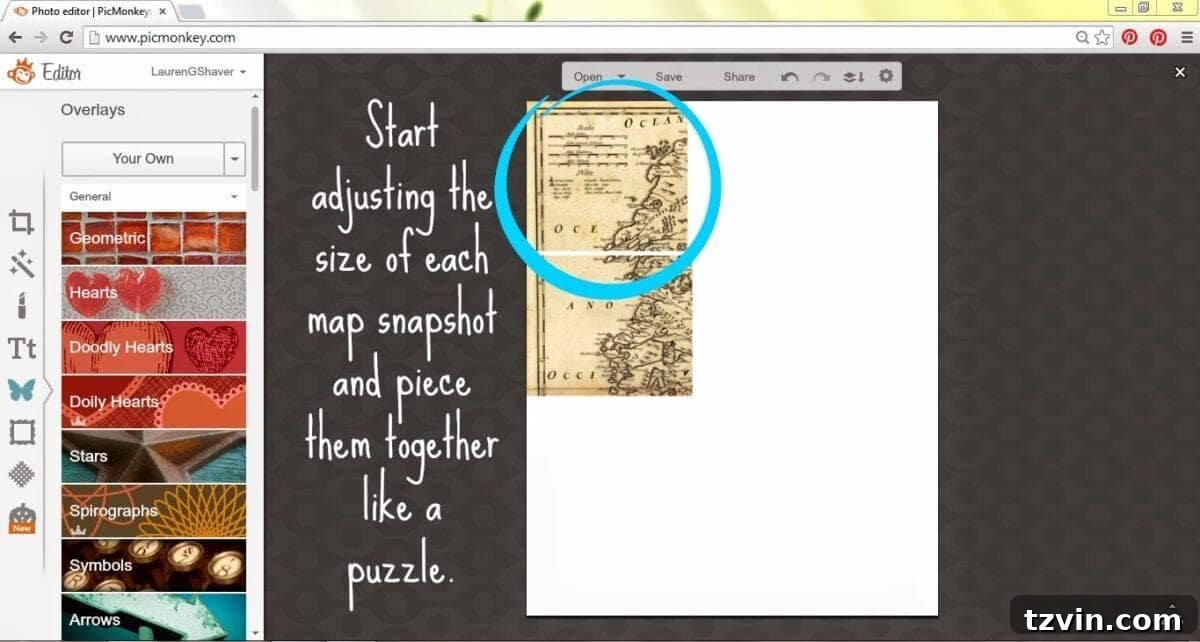
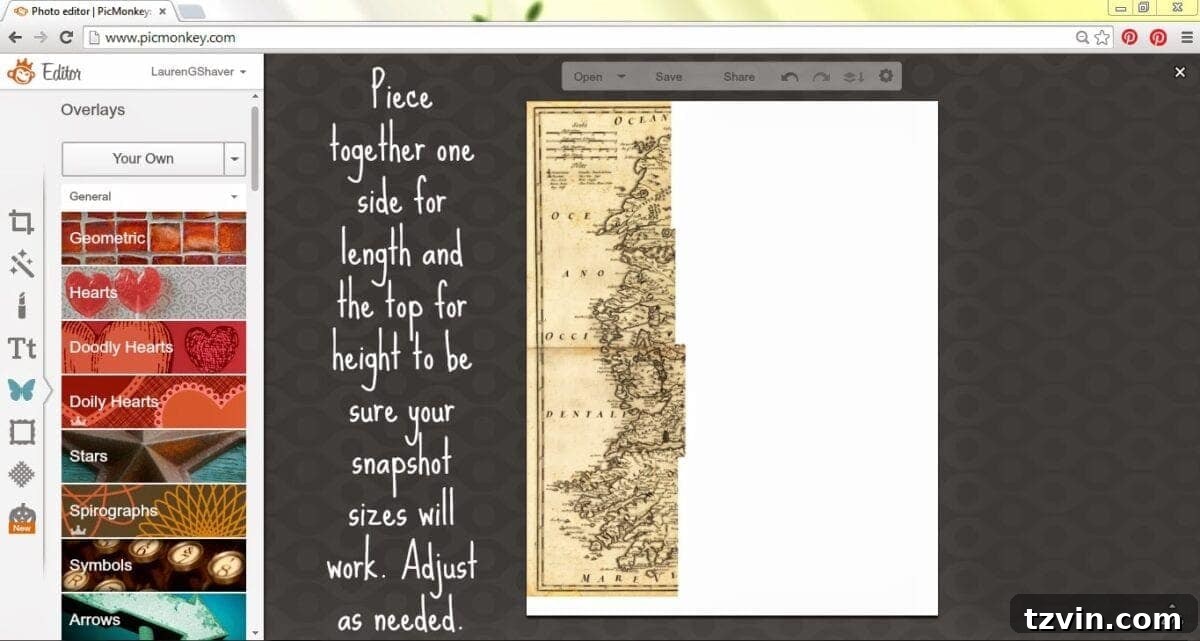
Begin uploading your snapshots one by one as overlays. Carefully drag, resize, and position each piece, treating it like a puzzle. Use the overlapping areas to guide your alignment, striving for a seamless match between sections. Work methodically across the canvas, ensuring all parts of your map are present and correctly aligned. It’s often helpful to start with one corner and work your way across and down. I found it beneficial to align one side and the top first to establish the overall length and width within the canvas.
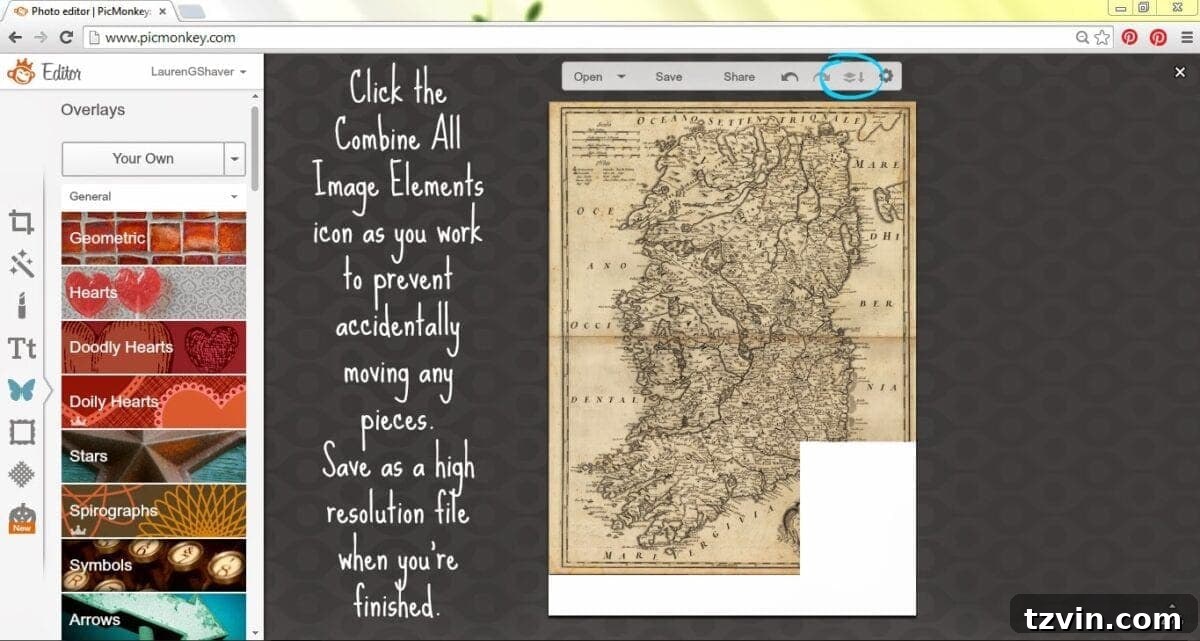
Once you’re satisfied with the placement of a significant portion of your map, or once you’ve adjusted for overall length and width, use the “Combine All Image Elements” feature (or similar, depending on your editor). This action merges all your individual overlays into a single layer, preventing accidental shifts as you add more pieces or make final adjustments. Finally, save your completed map in the highest possible resolution and quality format. PicMonkey offers a “Sean” option, which is their highest resolution. Pay attention to the file size; if it exceeds 1 MB, you may need to subtly reduce its dimensions to bring it just under that limit, as some online printing tools have file size constraints. My final file was around 995 KB.
3. Printing Your Oversized Map with BlockPosters.com
This step is where the magic of creating an oversized print at home truly comes alive without needing a professional print shop. BlockPosters.com is an incredible, free online tool that allows you to upload any image and then generates a printable PDF by dissecting your image into multiple, letter-sized (or A4) pages. It’s truly a DIY enthusiast’s best friend for large-scale projects.
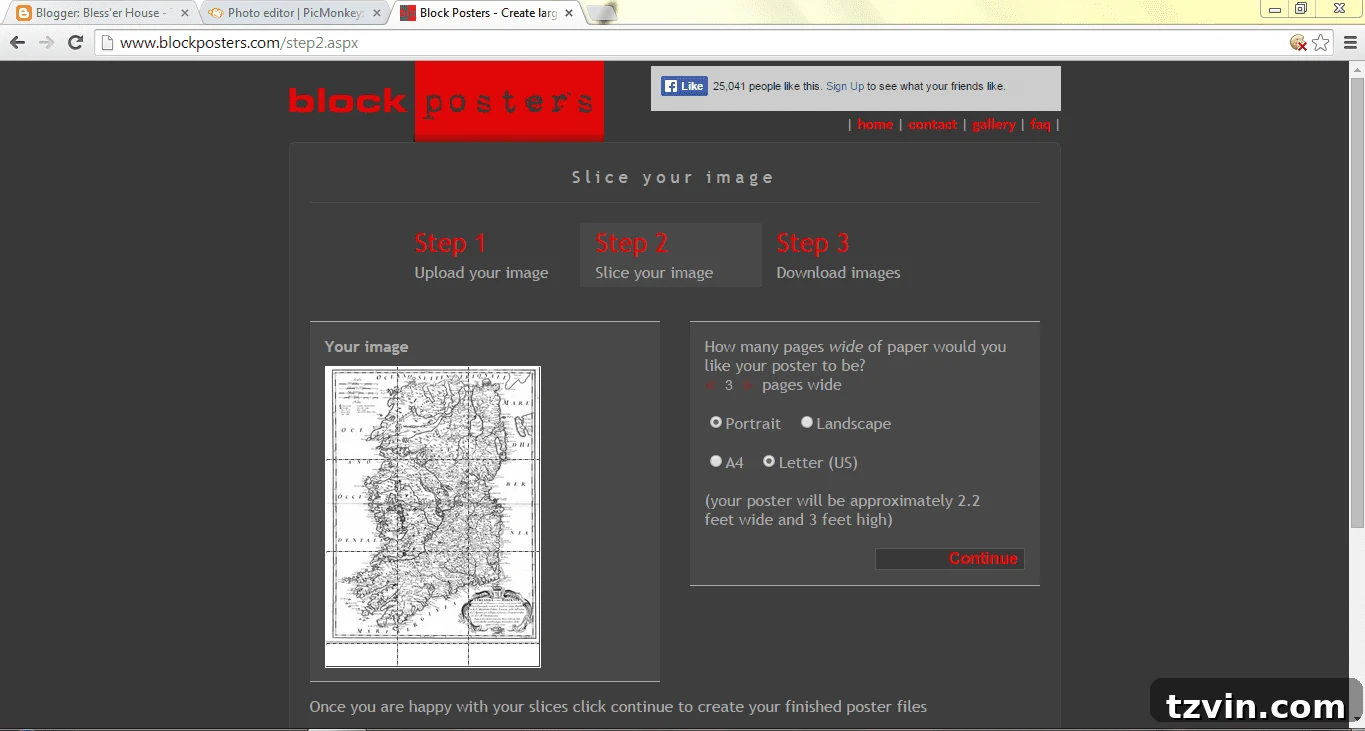
Visit BlockPosters.com and upload your high-resolution, combined map image (remembering the 1MB file size guideline if applicable). The website will then guide you through sizing options. This is a critical point: you’ll need to decide your desired final map dimensions. For example, I wanted my map to be approximately 24 inches wide and 36 inches tall. BlockPosters allows you to specify the number of standard paper pages wide your poster should be. I selected “portrait orientation” and “3 letter sized pages wide,” which translated perfectly to my target dimensions.
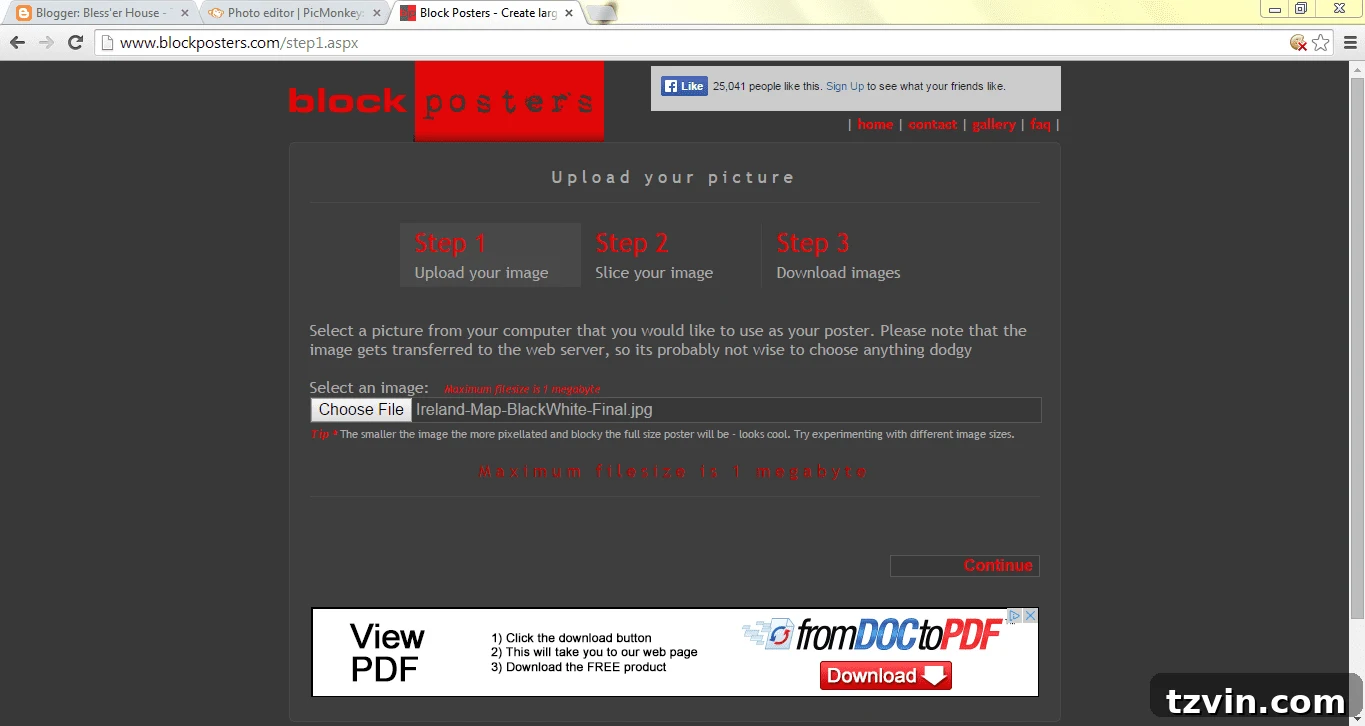
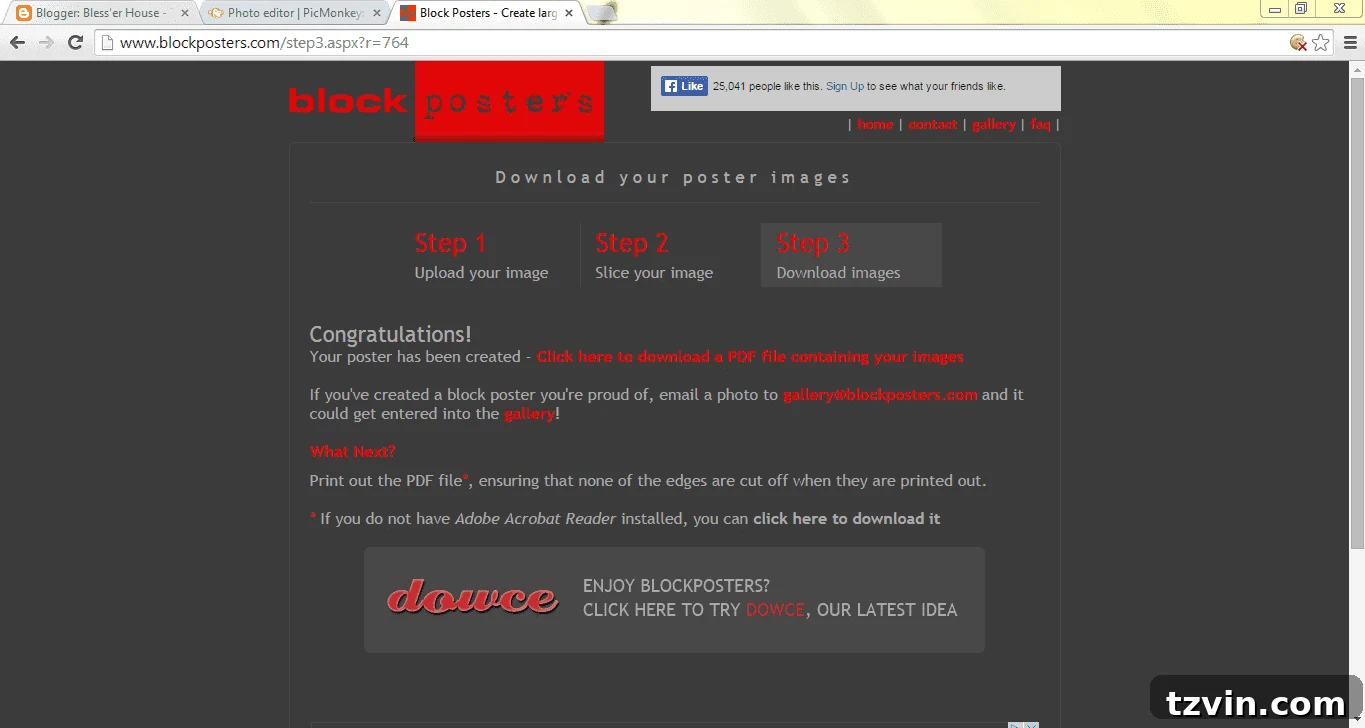
Once you’ve configured your poster size and selected your paper type (e.g., Letter or A4), download the generated PDF. This PDF will contain all the individual pages you need to print. Load your printer with parchment paper (or your chosen paper type) and print all the pages. It’s often a good idea to do a test print on draft mode or cheap paper first, especially if you’re unsure about the final size or alignment. This ensures everything looks right before using your specialized paper.
4. Preparing Your Plywood Base and Assembling the Map
With your map printed, it’s time to prepare the canvas. First, lay out all your printed map pages to double-check the overall size and ensure no pieces are missing or misprinted. My incredibly helpful husband, Robert, carefully cut a piece of plywood that was slightly larger than the final map dimensions. This excess wood will create a rustic, integrated frame around your vintage map, adding to its charm. If you’re cutting the plywood yourself, remember to wear safety glasses and use appropriate tools for a clean cut.
Next, I stained the plywood using Rustoleum Weathered Gray. This specific stain imparts a beautiful, aged patina that instantly makes the wood look like a time-worn backdrop for your vintage map. Apply the stain evenly, following the grain of the wood, and allow it to dry completely – usually about an hour. Once dry, I took a small brush and some leftover dark brown craft paint to dry-brush the edges of the plywood. This subtle technique adds a fantastic sense of depth and further enhances the aged, framed look, making the map appear as if it’s been cherished for generations.
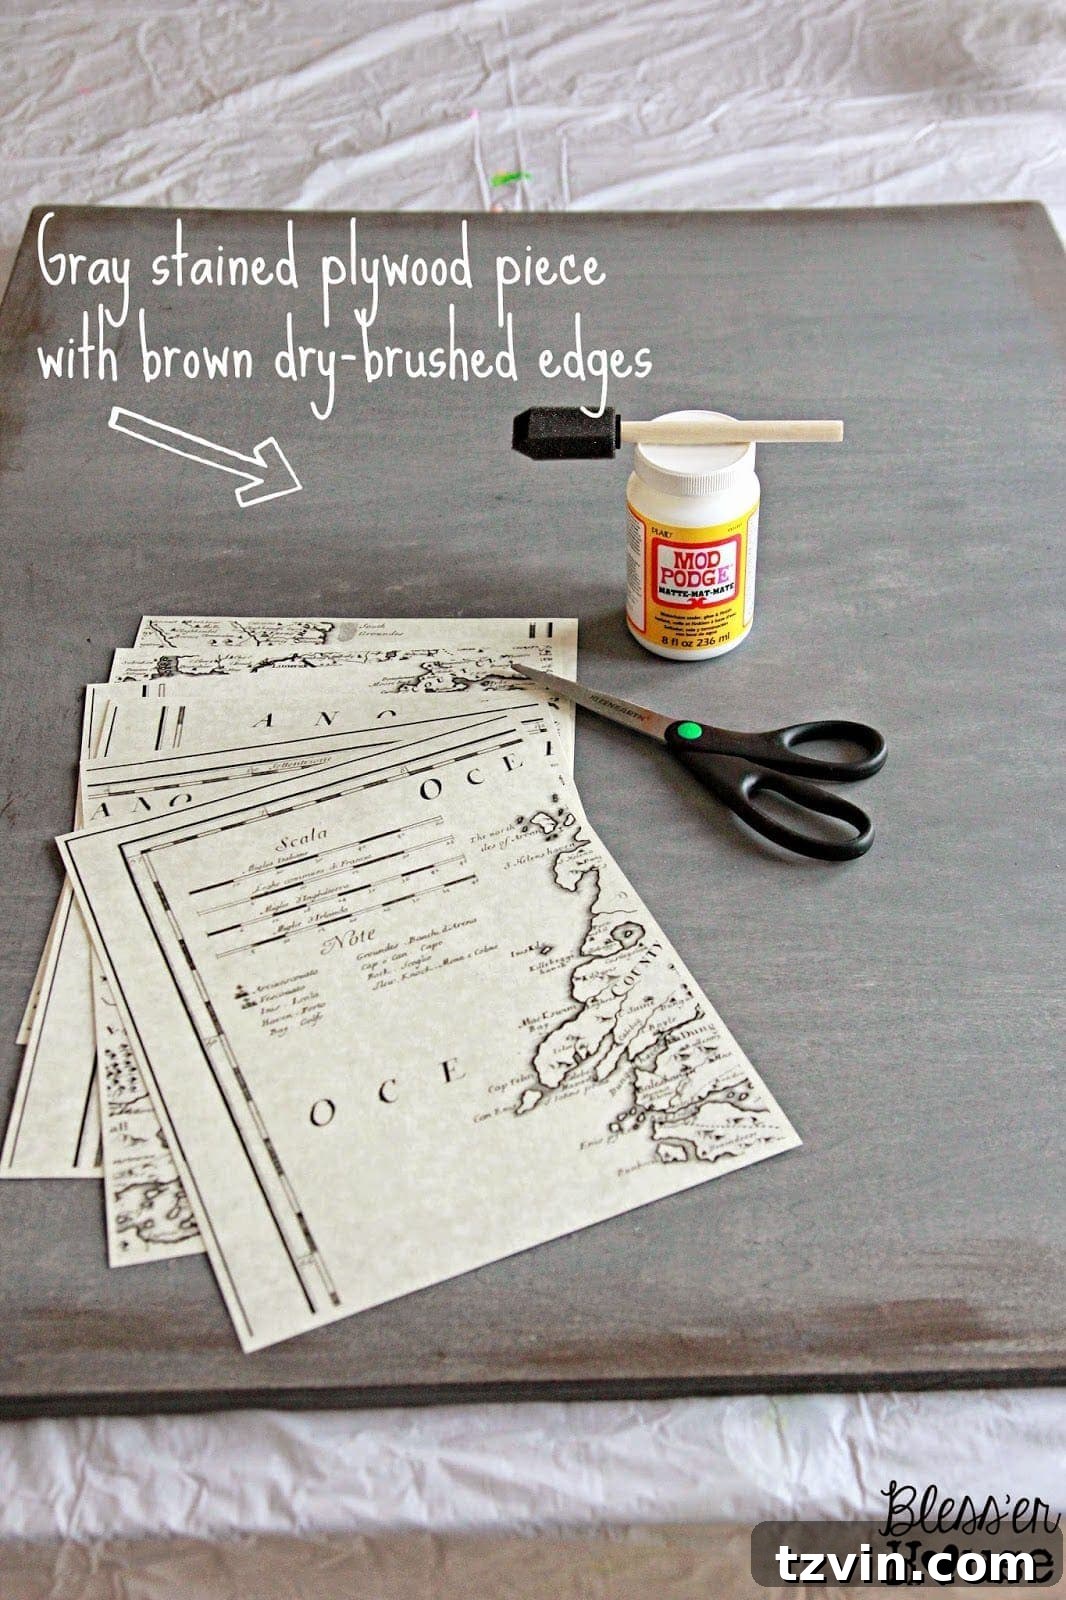
Before gluing, dry-fit your entire printed map onto the stained plywood. This crucial step allows you to adjust the overall placement and determine how much of the stained “frame” you want showing around the edges. I realized I needed to pull my map pieces down by about an inch for optimal centering. Once you’re happy with the general layout, carefully cut off any overlapping margins from your printed pages. This ensures a clean, seamless appearance when the pages are adhered side-by-side.
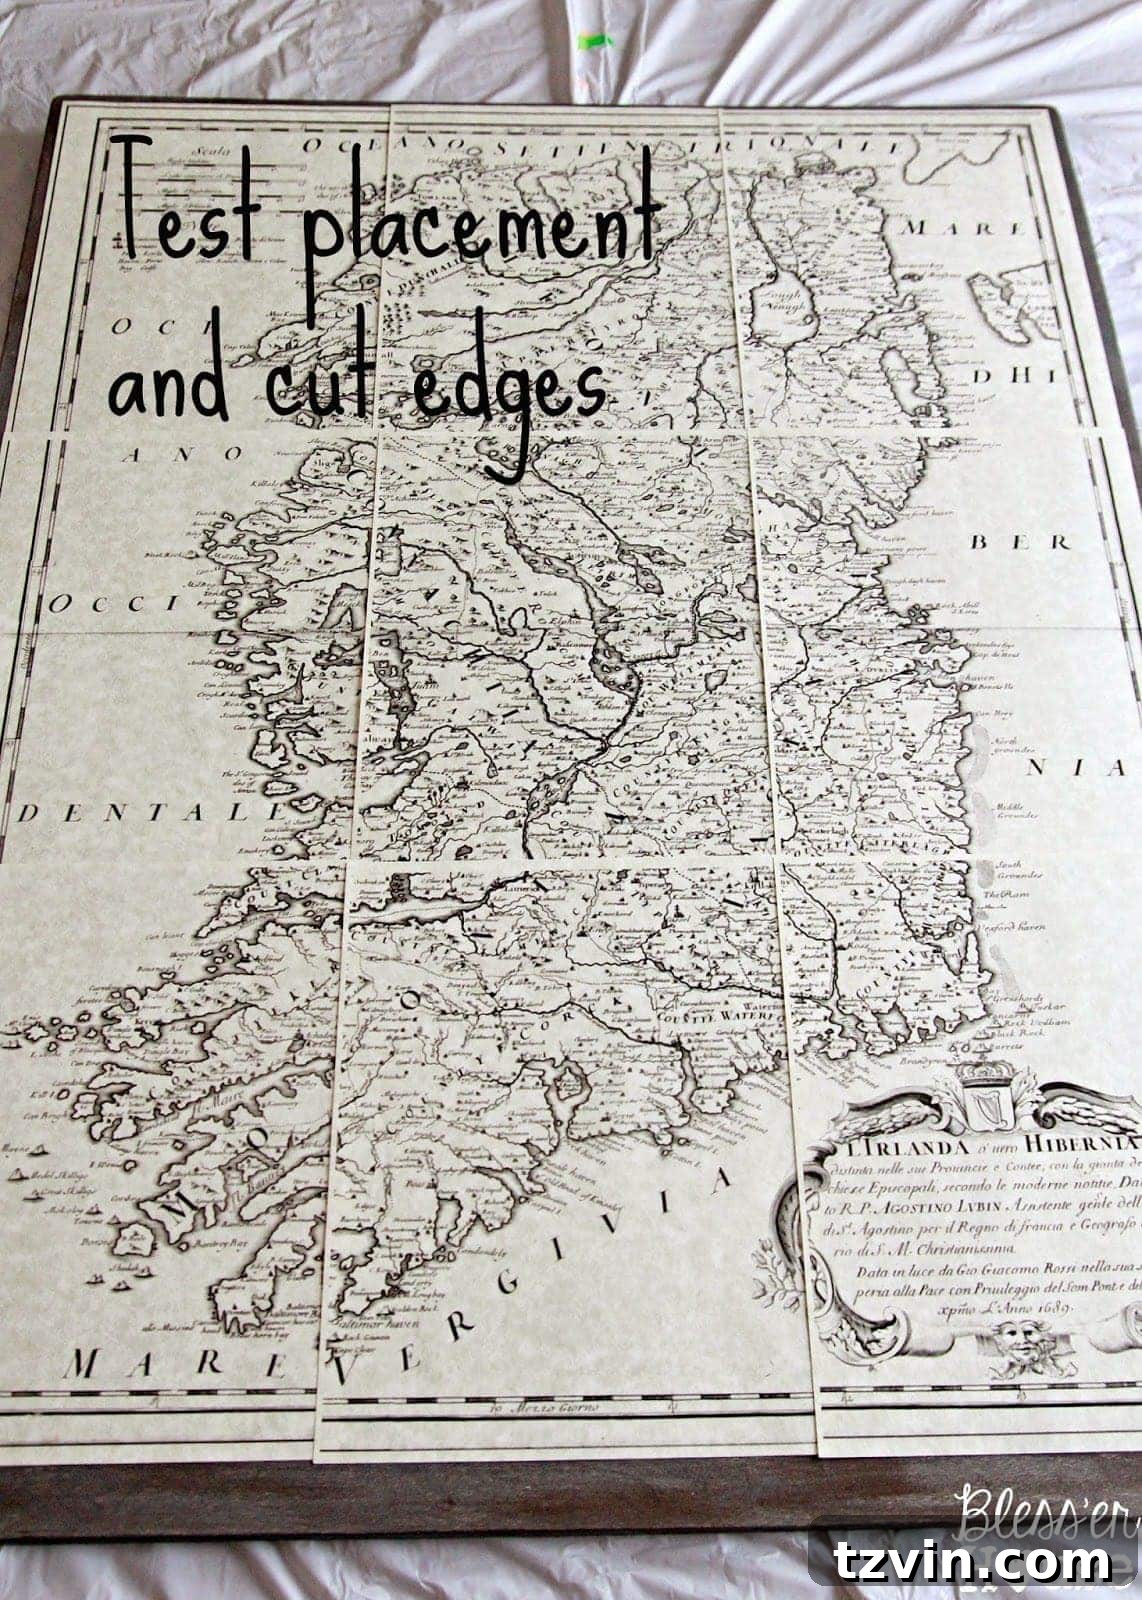
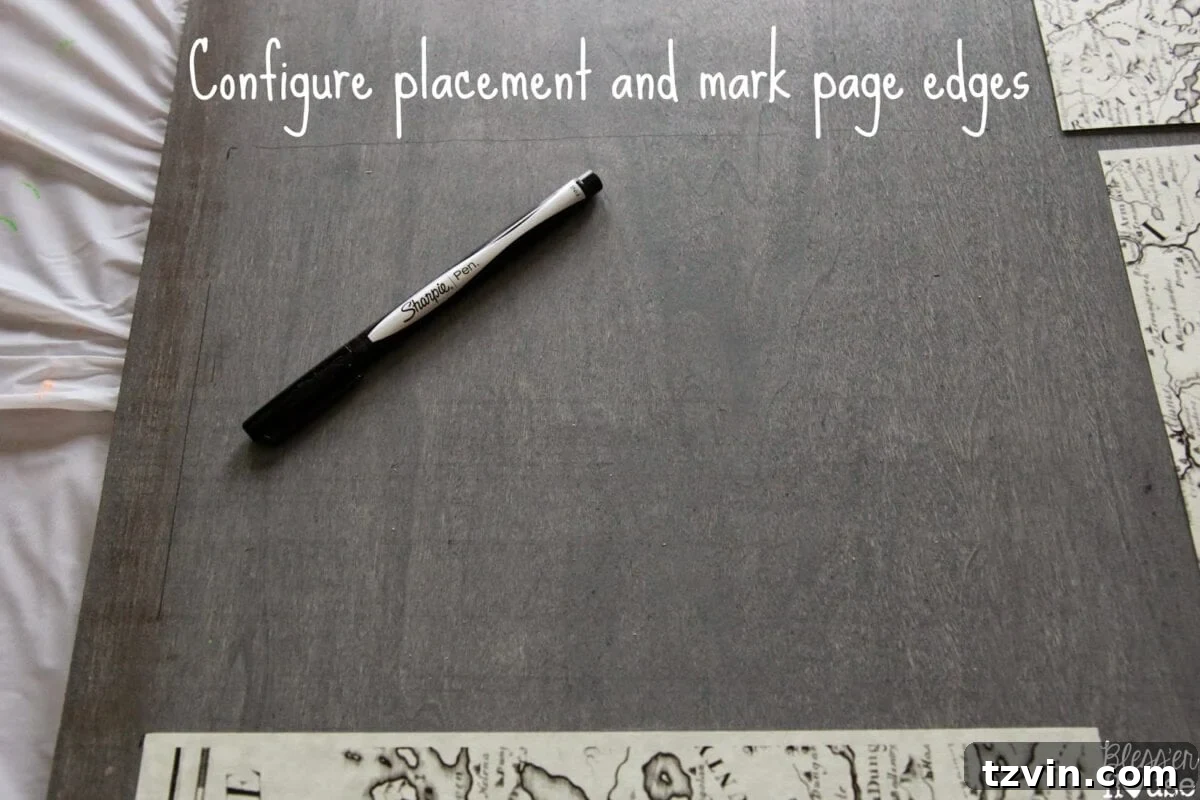
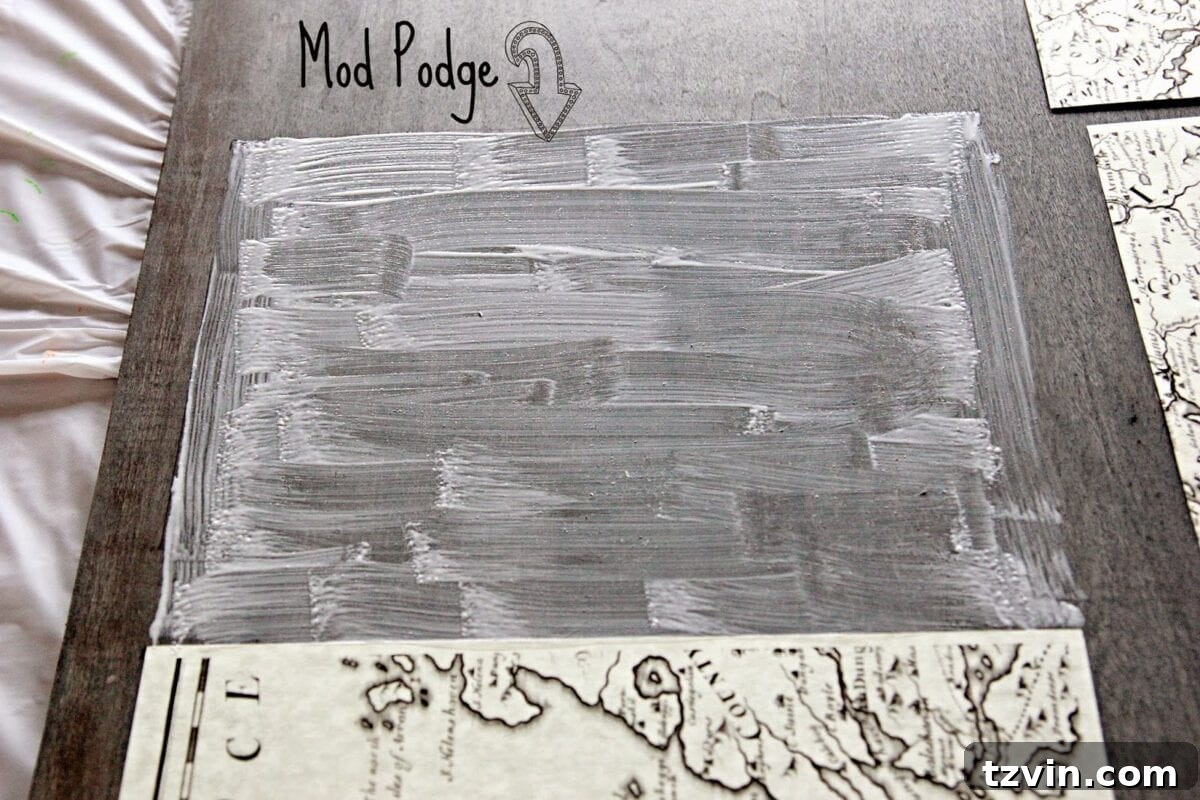
Working one page at a time, mark the exact placement of each section on the plywood using a pencil. This guide will be invaluable for accurate positioning. Apply a generous, even layer of Mod Podge to the marked area on the plywood using a sponge brush. Then, carefully position your map page over the Mod Podge, using your pencil markings as a guide. Smooth out any air bubbles or wrinkles immediately by gently rubbing with your fingers or using an old credit card as a squeegee. Work from the center outwards to push out excess Mod Podge and air. Repeat this “mark, paste, place, smooth” method for all remaining map pages, ensuring each piece aligns perfectly with its neighbors.
Once all the pages are adhered, allow the Mod Podge to dry completely. This might take several hours, or even overnight. For an extra layer of protection and a consistent finish, you can apply a thin top coat of Mod Podge over the entire surface of the map. This seals the paper and provides a durable, matte finish that protects against moisture and wear, further enhancing its vintage appeal.
The Grand Reveal: A Personalized Statement Piece
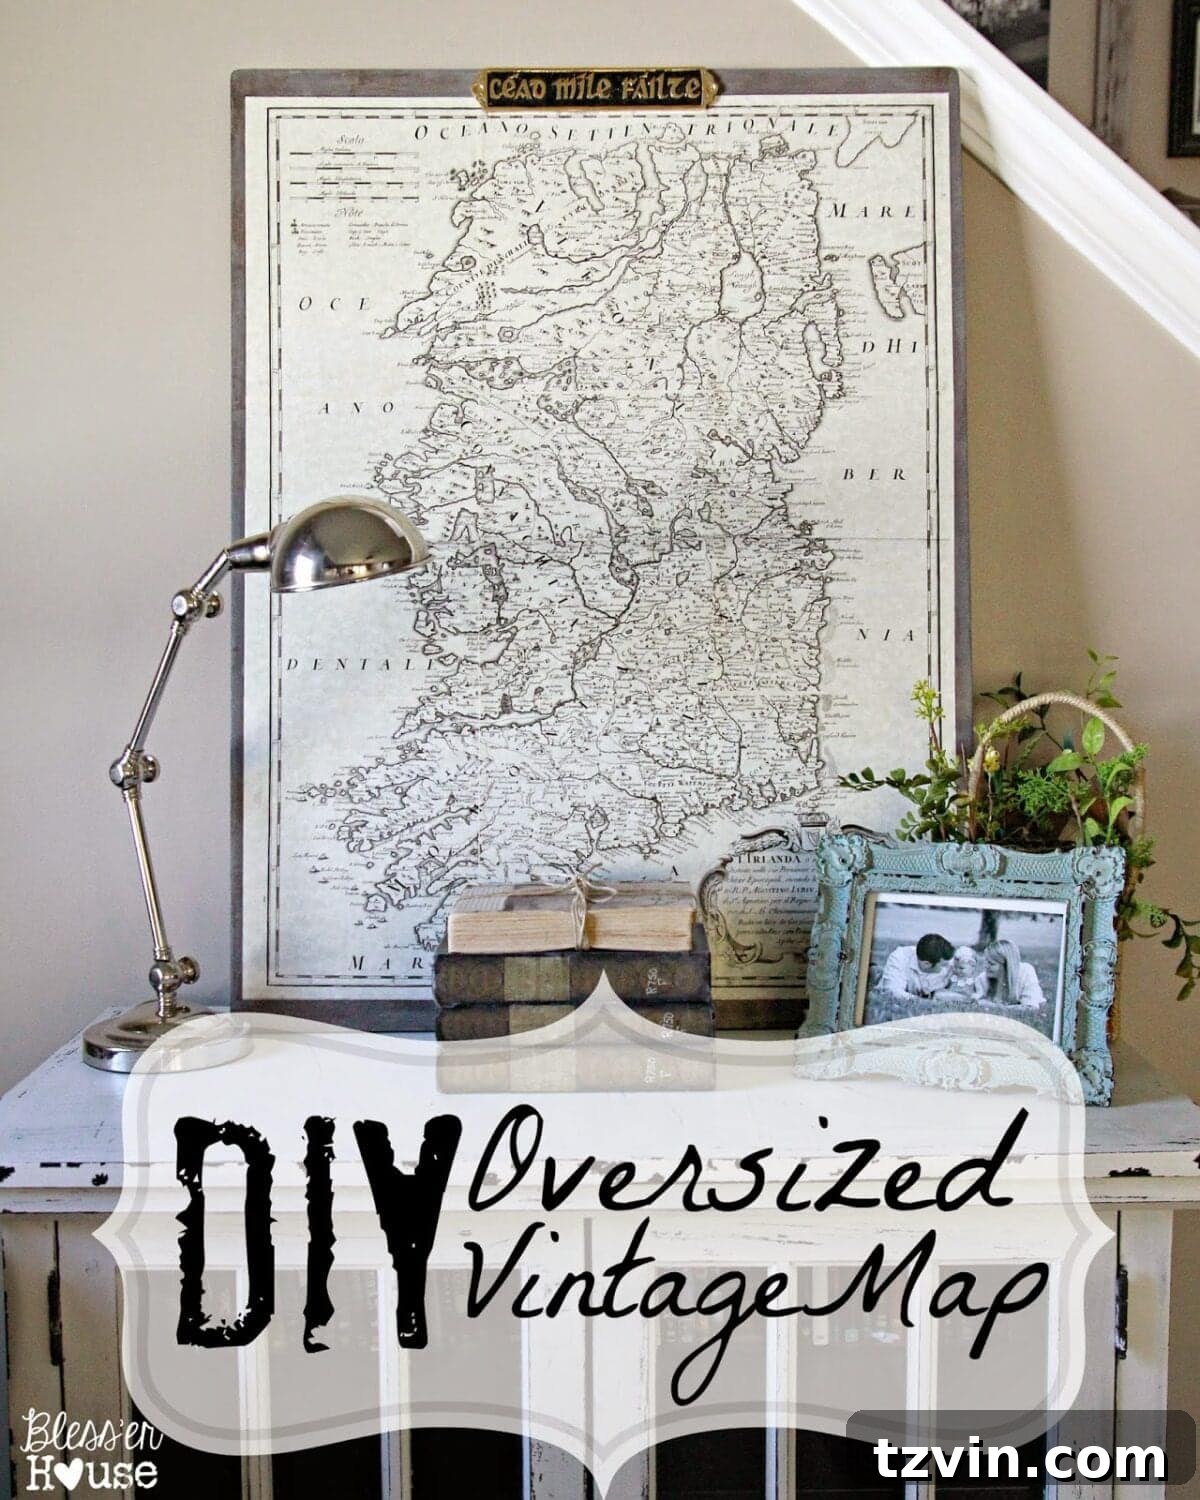
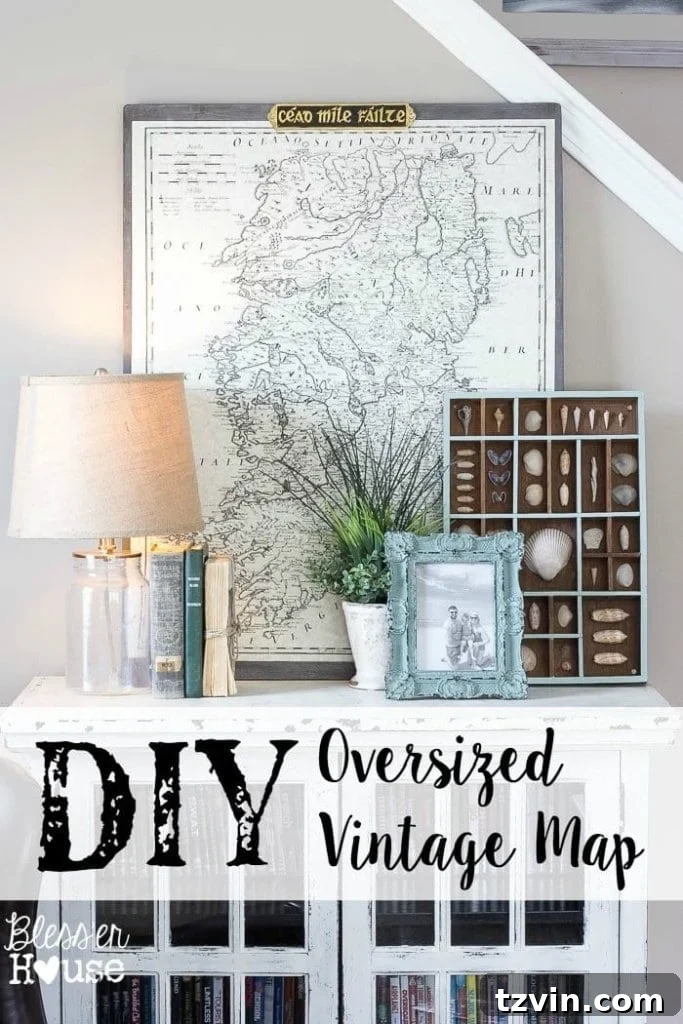
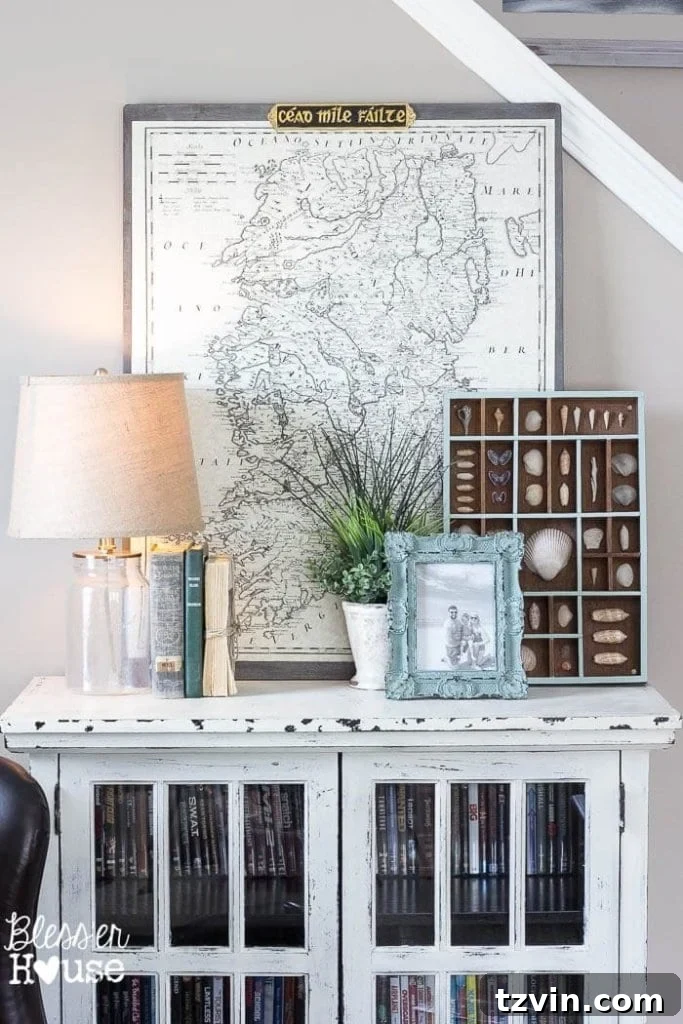
And voilà! Your very own oversized vintage Irish map is complete. Up close, you might notice a few faint lines where the pages meet, but from a normal viewing distance, they are barely discernible. The slight imperfections only add to its authentic, antique charm. This DIY project is not only incredibly rewarding but also a remarkable budget-friendly alternative to high-end options. Store-bought oversized maps, particularly those from places like Restoration Hardware, can easily cost upwards of $1,000 – and even then, finding a specific Irish map might not be an option!
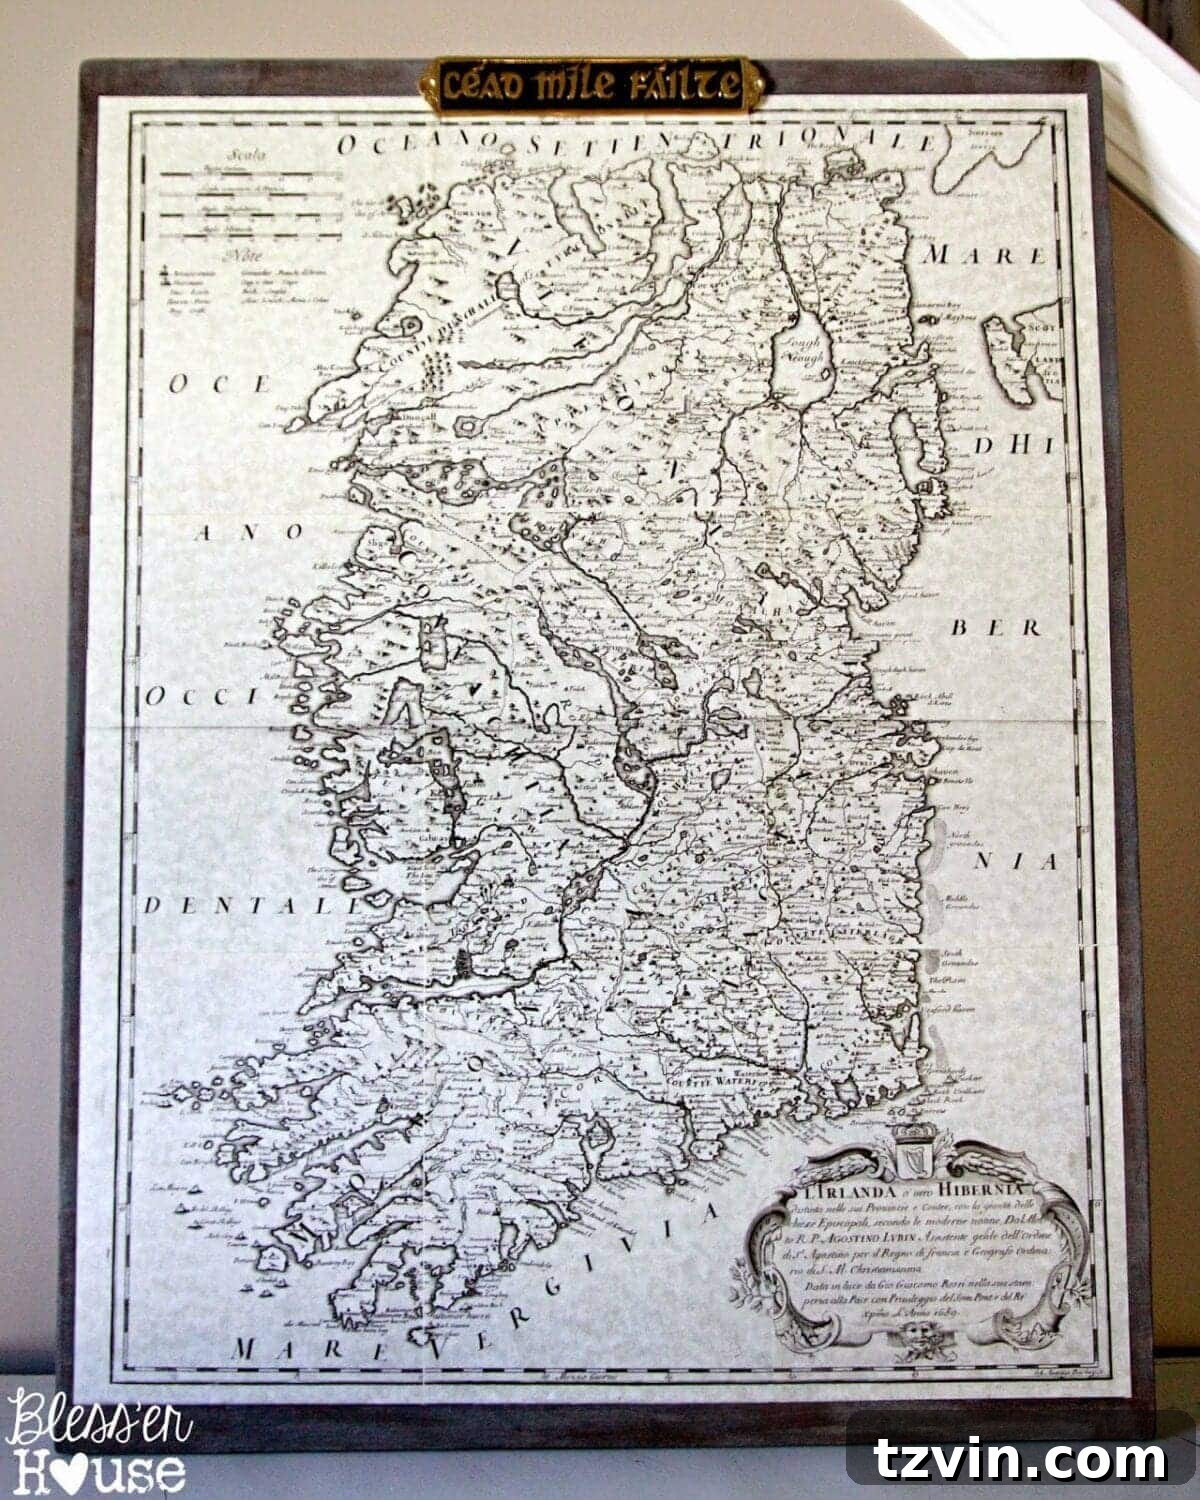
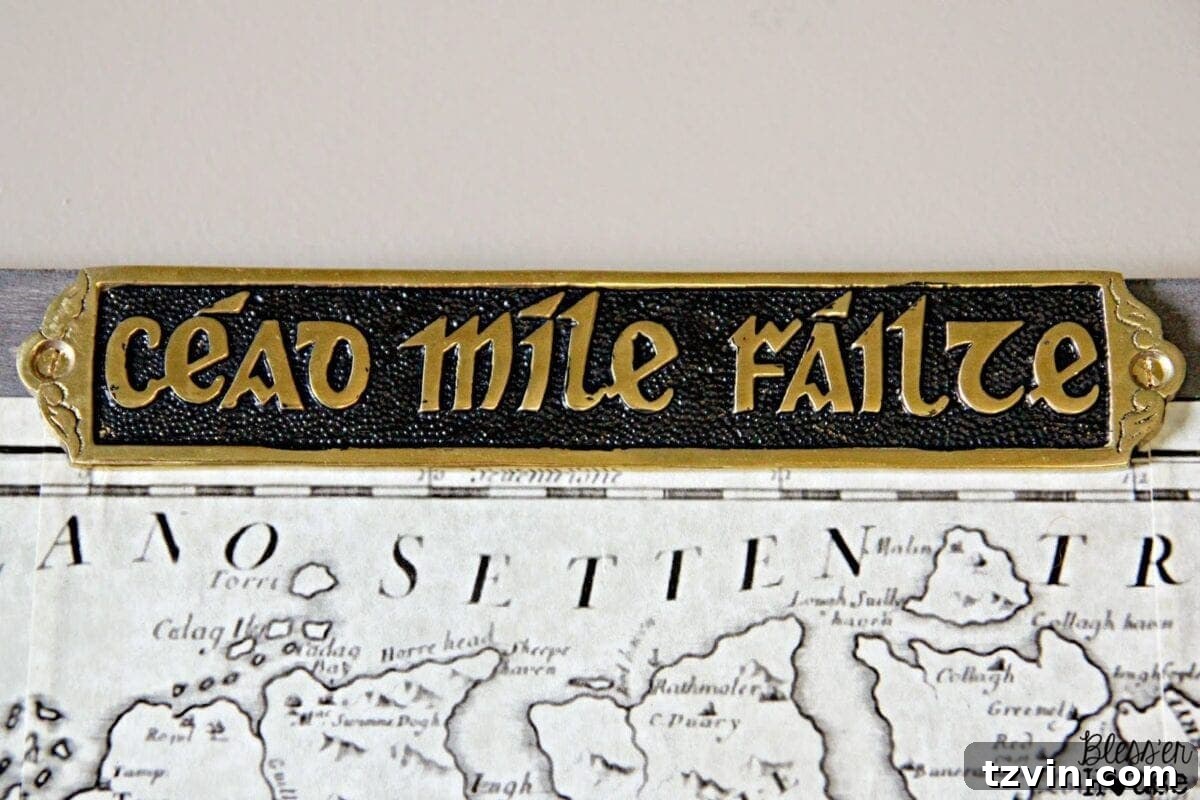
To add an extra layer of personal touch, Robert had a brilliant idea. My in-laws recently returned from Ireland with a beautiful Gaelic plate, translating to “Céad Míle Fáilte” – “A Thousand Welcomes.” We decided to screw this plate into the top of the map, instantly transforming it from a decorative piece into a heartfelt greeting, a warm invitation, and a deep nod to our family’s heritage. It’s truly the perfect finishing touch, marrying form and sentiment.
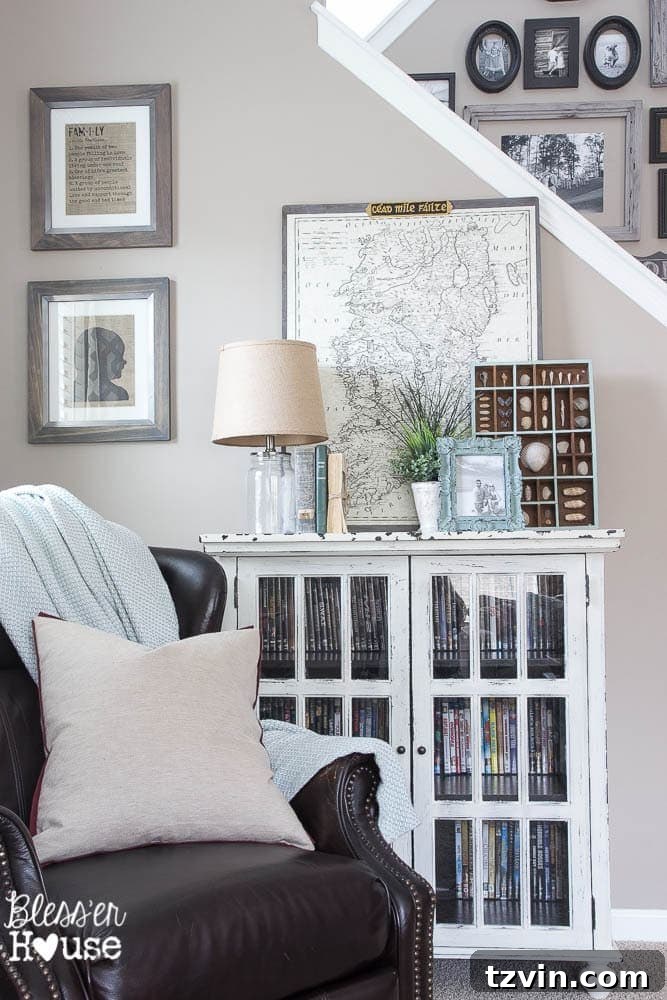
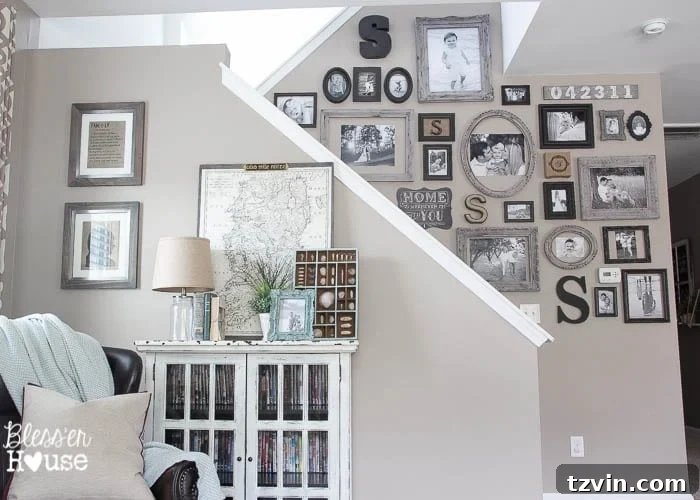
This magnificent piece now graces the lower wall of our stairway, transforming what was once a rather bare space into a captivating focal point. It’s more than just a map; it’s a visual narrative of our family’s story, a tribute to Irish heritage, and a testament to the power of personalized home decor. When I unveiled the finished map to Robert, his reaction was exactly what I’d hoped for: a joyous, spontaneous Irish jig. And I couldn’t help but dance along with him, filled with pride and happiness for this unique creation.
This project has inspired me to think about future ways to infuse our home with other aspects of our family history. Perhaps my Swedish heritage will be the next adventure in personalized DIY decor. For now, however, our stairway proudly showcases a piece of Ireland, welcoming everyone with a thousand blessings.
So, even though it feels a bit unusual to say this during the week of Halloween: may your homes be filled with peace, love, and shamrocks, my friends! And remember, a bit of creativity and a lot of heart can transform any space into a reflection of your unique story. Happy crafting!
And lots of Irish blessings,
Follow me on
Or find me on