
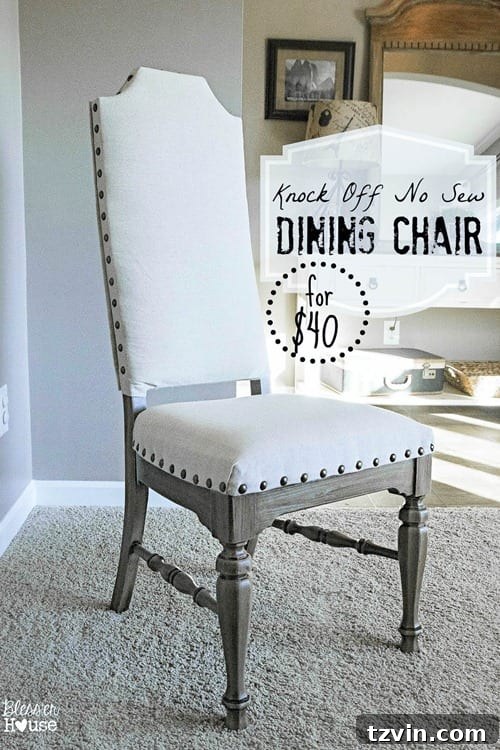
Transform Your Dining Space: Create Pottery Barn and Restoration Hardware Knock-Off No-Sew Dining Chairs from 1970s Castoffs
Every DIY enthusiast knows the thrill and the struggle of a challenging project. There are those ambitious undertakings that push your skills to the limit, making you question your sanity, only to emerge with an “after” that makes every moment of effort worthwhile. This, my friends, is one of those projects. If there was ever a moment to do cartwheels across my front lawn, celebrating a makeover triumph, this is it!
It’s a common tale in the DIY world: you spot a fixer-upper, your imagination runs wild with stunning possibilities, then you hit an inevitable snag. Dreams often exceed current abilities, leading to abandoned projects gathering dust in the garage. (Please tell me I’m not alone in having a “when-I-get-the-nerve” pile!). But for once, my DIY aspirations finally aligned with my execution, and the result is truly spectacular. I won’t make you scroll to the end; here’s a sneak peek at the gorgeous transformation:
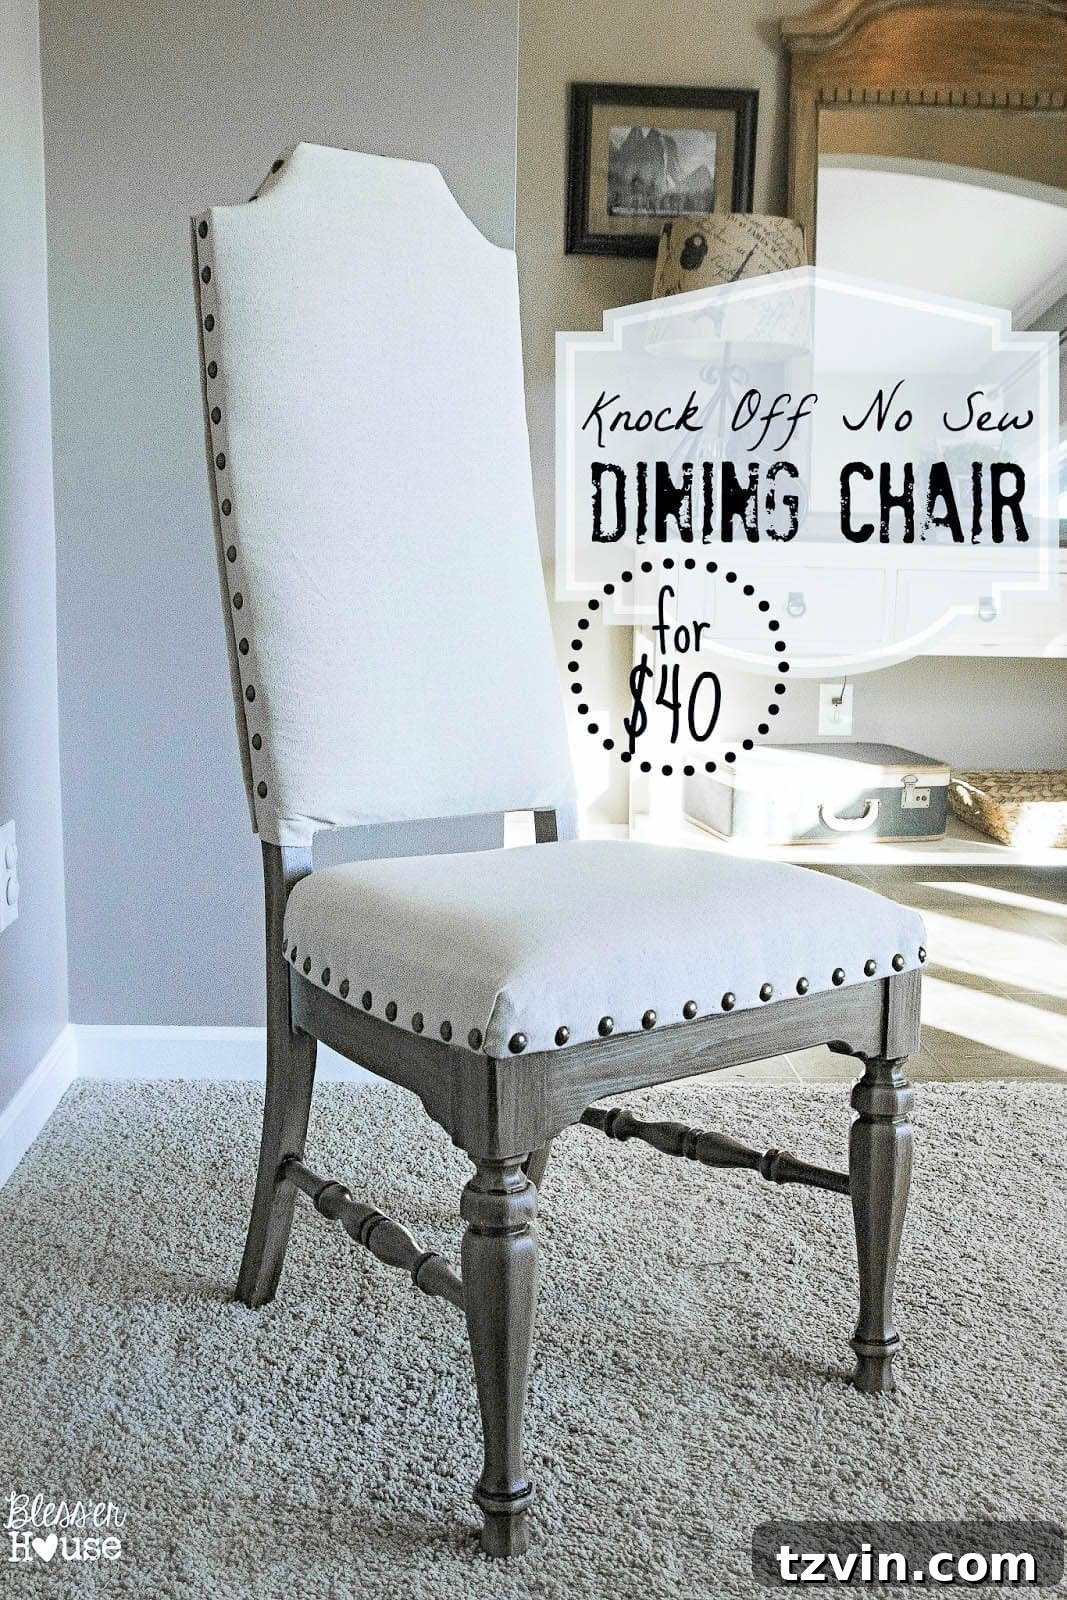
The Journey Begins: From Unloved Relics to High-End Appeal
To truly appreciate this metamorphosis, you need to see where it all began. This is how these chairs looked before my upholstery-inexperienced self dared to lay hands on them:
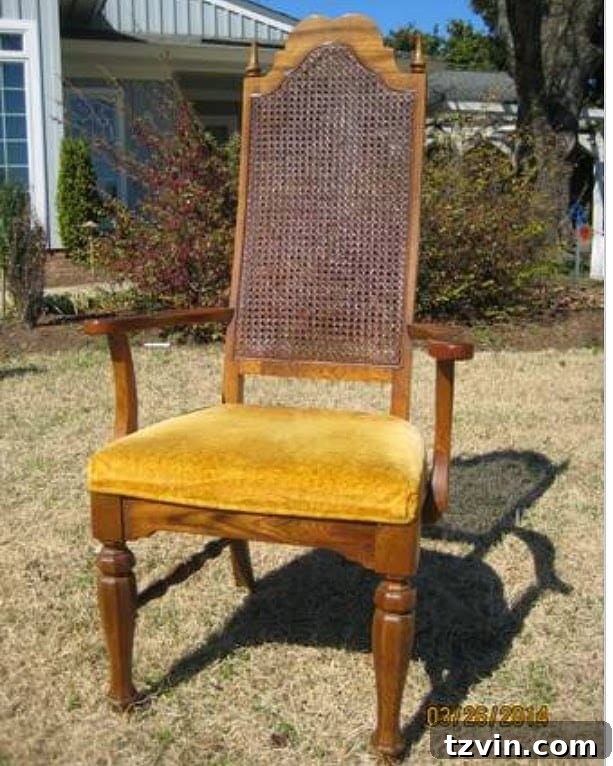
Ah, Harvest Gold – a blast from the past indeed! These chairs were undeniably dated, remnants of a bygone era, but beneath their vintage facade, I saw potential.
Inspiration Strikes: Achieving Designer Style on a Budget
When envisioning our still-bare dining room, certain criteria for dining chairs kept surfacing: a light linen or canvas upholstery, distinctive nailhead trim, and elegant, weathered oak legs. High-end retailers like Restoration Hardware, Pottery Barn, and Ballard Designs consistently offer pieces that embody this aesthetic. Their collections are truly inspirational, but their price tags are often prohibitive for many households. Let me show you what I mean:
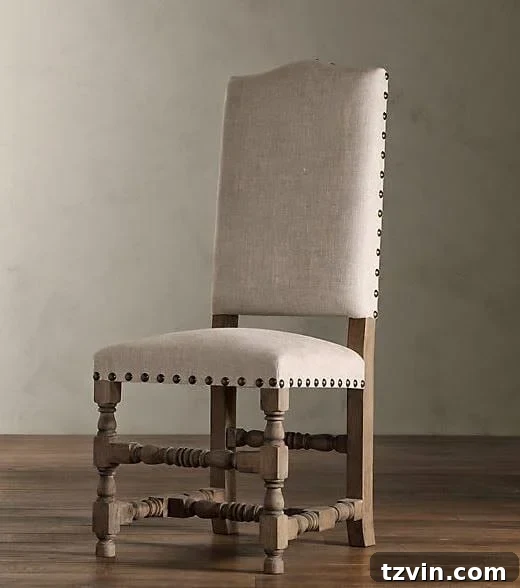
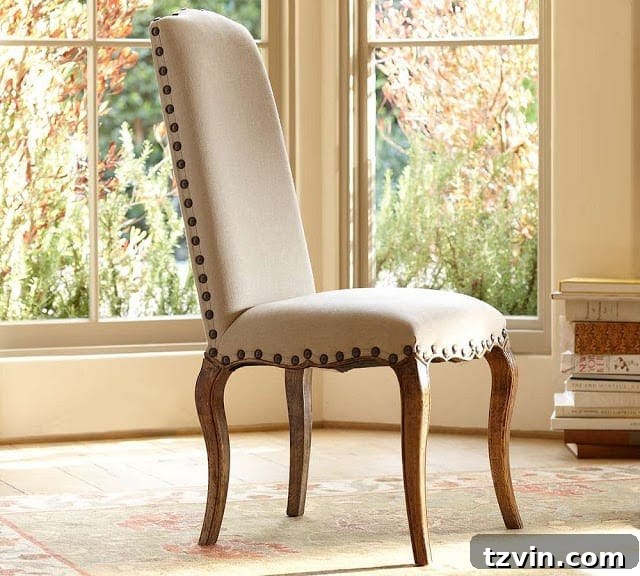

While these chairs are undoubtedly beautiful, shelling out upwards of $2400 for a set of six was simply not feasible for our one-income household. My quest for affordable elegance led me to Craigslist, where I stumbled upon these gems for just $20 each. Though they sat in my garage for months, enduring multiple failed attempts and design revisions, their inherent quality called to me. Despite looking nothing like my sophisticated inspirations, they possessed one crucial element: “good bones.” I simply couldn’t pass them up.
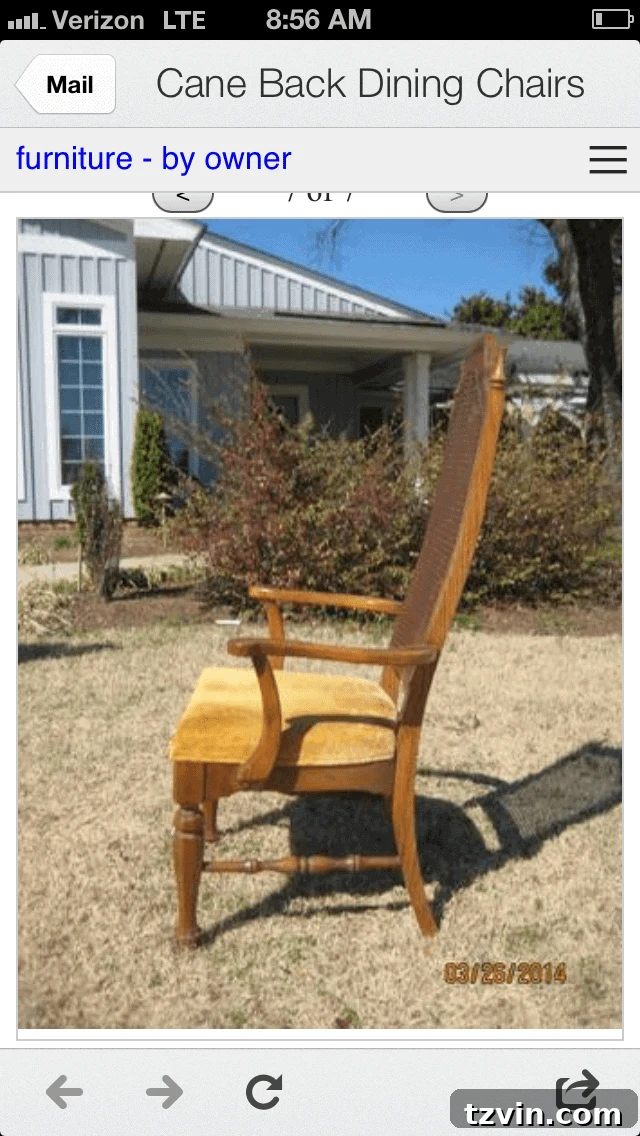
My amazing dad, with over 30 years of experience in the furniture business, graciously joined me on the trek to pick them up. His professional eye confirmed their potential: not only were they well-constructed, but they were also made by American Drew, a company renowned for quality and durability. This assurance was a huge bonus!
Essential Supplies for Your High-End Chair Makeover
Achieving this sophisticated look doesn’t require an extensive list of expensive tools. Many of these items are common in a well-stocked DIY workshop, making this a budget-friendly project. (Affiliate links are provided below for your convenience.)
- Jigsaw: Indispensable for clean, precise cuts, even for DIY beginners.
- Pneumatic Staple Gun: Essential for securely attaching fabric, making upholstery work much faster and more professional.
- Mouse Sander: Perfect for smoothing edges and preparing surfaces for paint and stain.
- Electric Drill: Necessary for pre-drilling holes, especially for hard wood, to prevent splitting.
- Kilz Primer: Crucial for providing a uniform base, blocking old colors, and ensuring paint adhesion.
- Valspar Paint in Montpelier Ashlar Gray (flat): Our chosen color for a modern, neutral foundation.
- Minwax Stain in Dark Walnut: Used to create the aged, weathered wood effect over the gray paint.
- Several rags: For wiping away excess stain and general cleanup.
- 1 1/2″ paint brush (My favorite is this one.): For applying primer and paint evenly.
- Sponge paint brush: Ideal for applying stain smoothly.
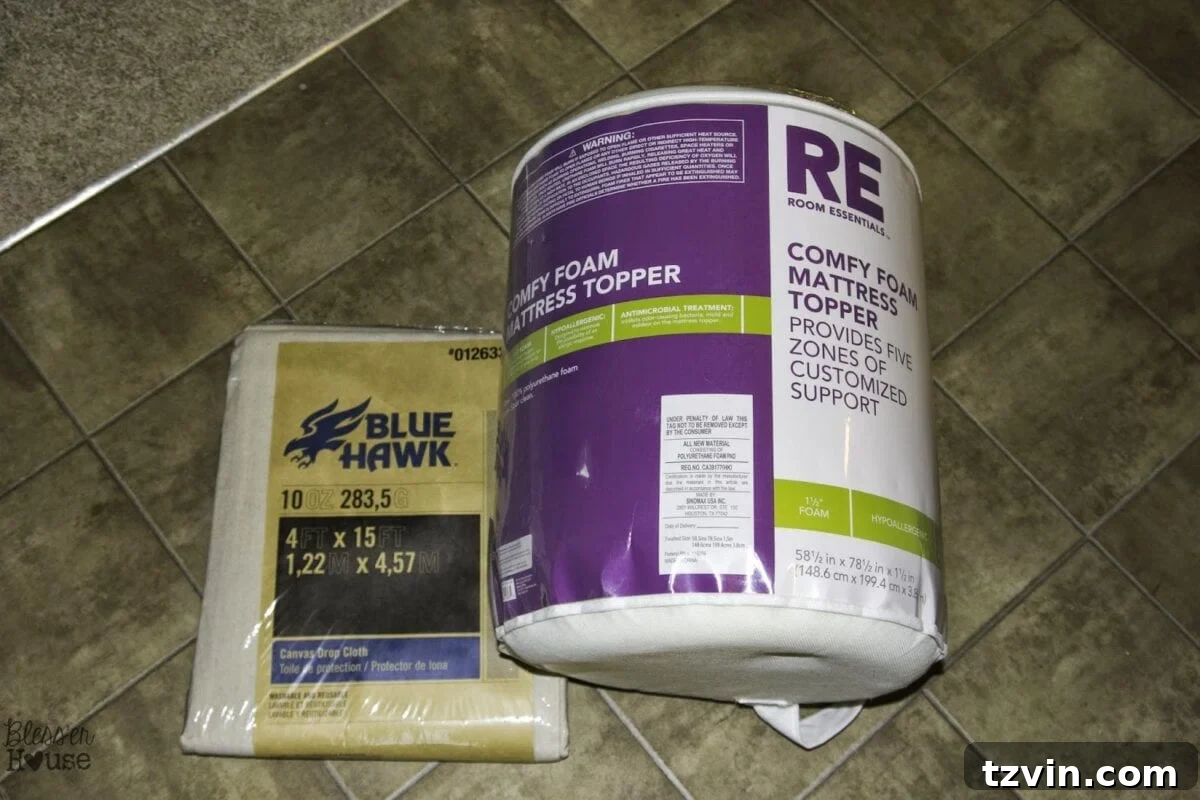
- Mattress Egg Crate Foam: A clever, budget-friendly substitute for expensive upholstery batting, providing excellent cushioning.
- Blue Hawk Canvas Drop Cloth: Our durable and cost-effective fabric choice for upholstery, mimicking high-end linen.
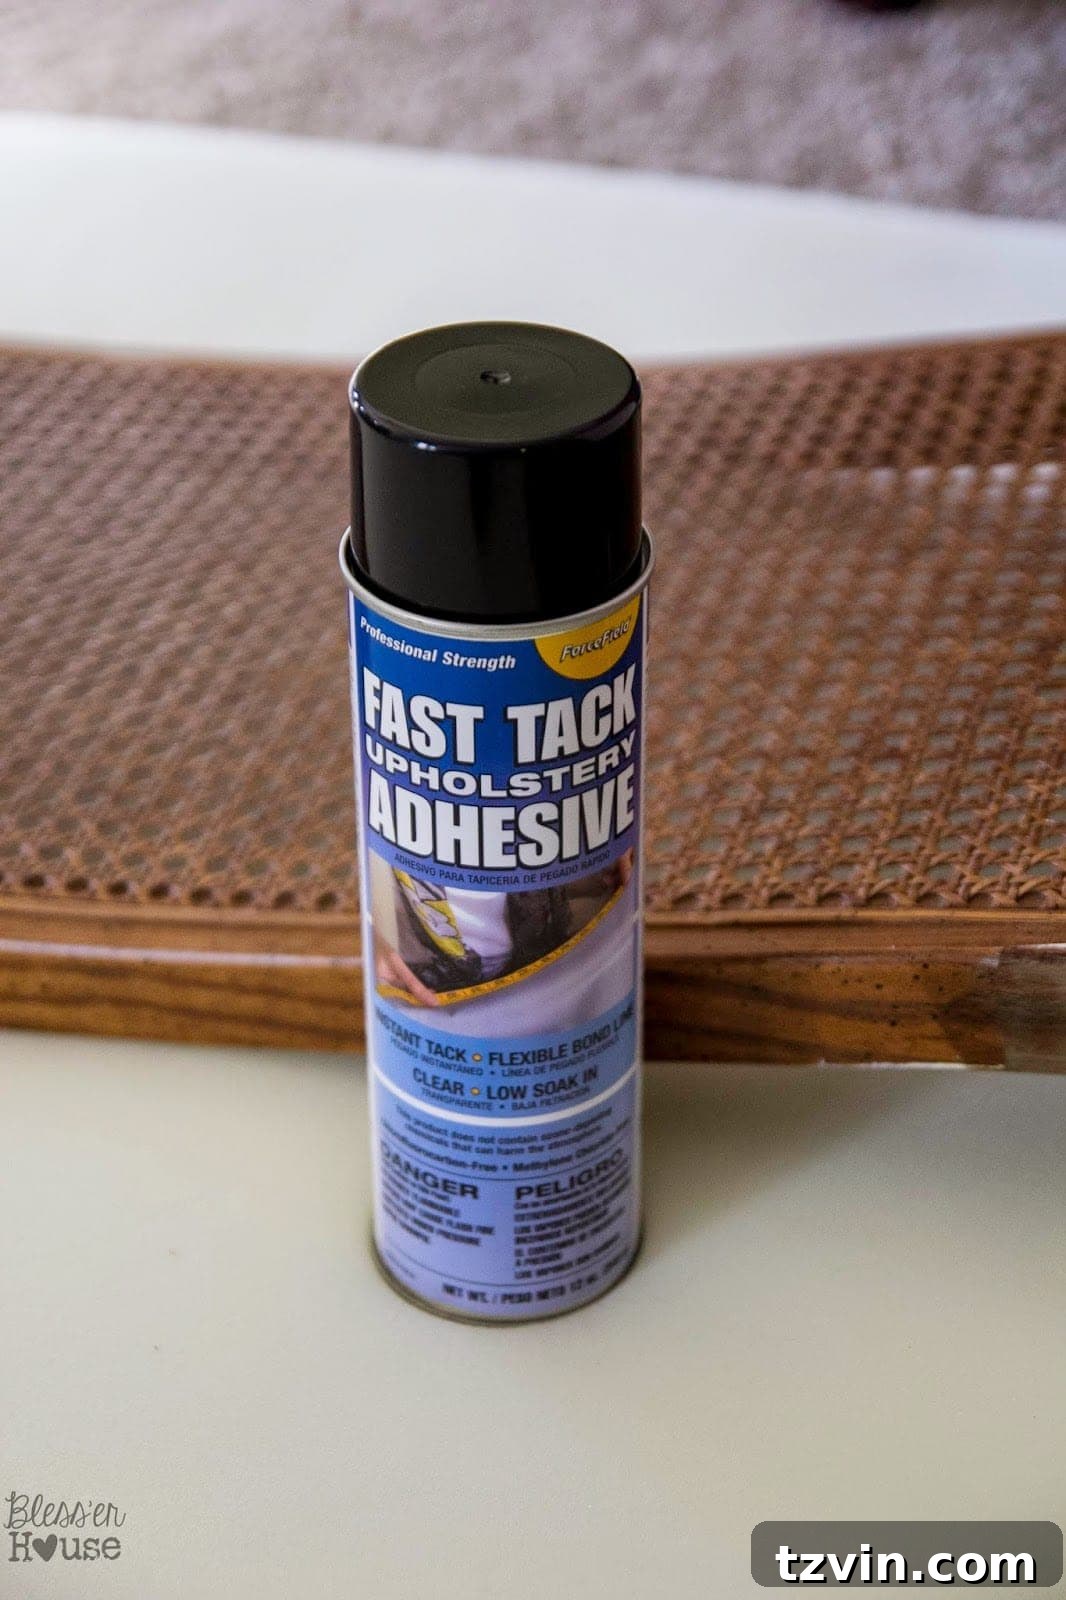
- Spray Upholstery Adhesive: To secure foam batting to the chairback before fabric application.
- Fabric scissors: For clean, precise cuts of the canvas drop cloth.
- Staples: For use with the pneumatic staple gun.
- Sharpie marker: For tracing and marking.
- Medium sized cardboard box from Lowe’s: Used to create templates for the chairback.
- Hot glue gun and glue sticks: For quick adhesion, especially for the back panel.
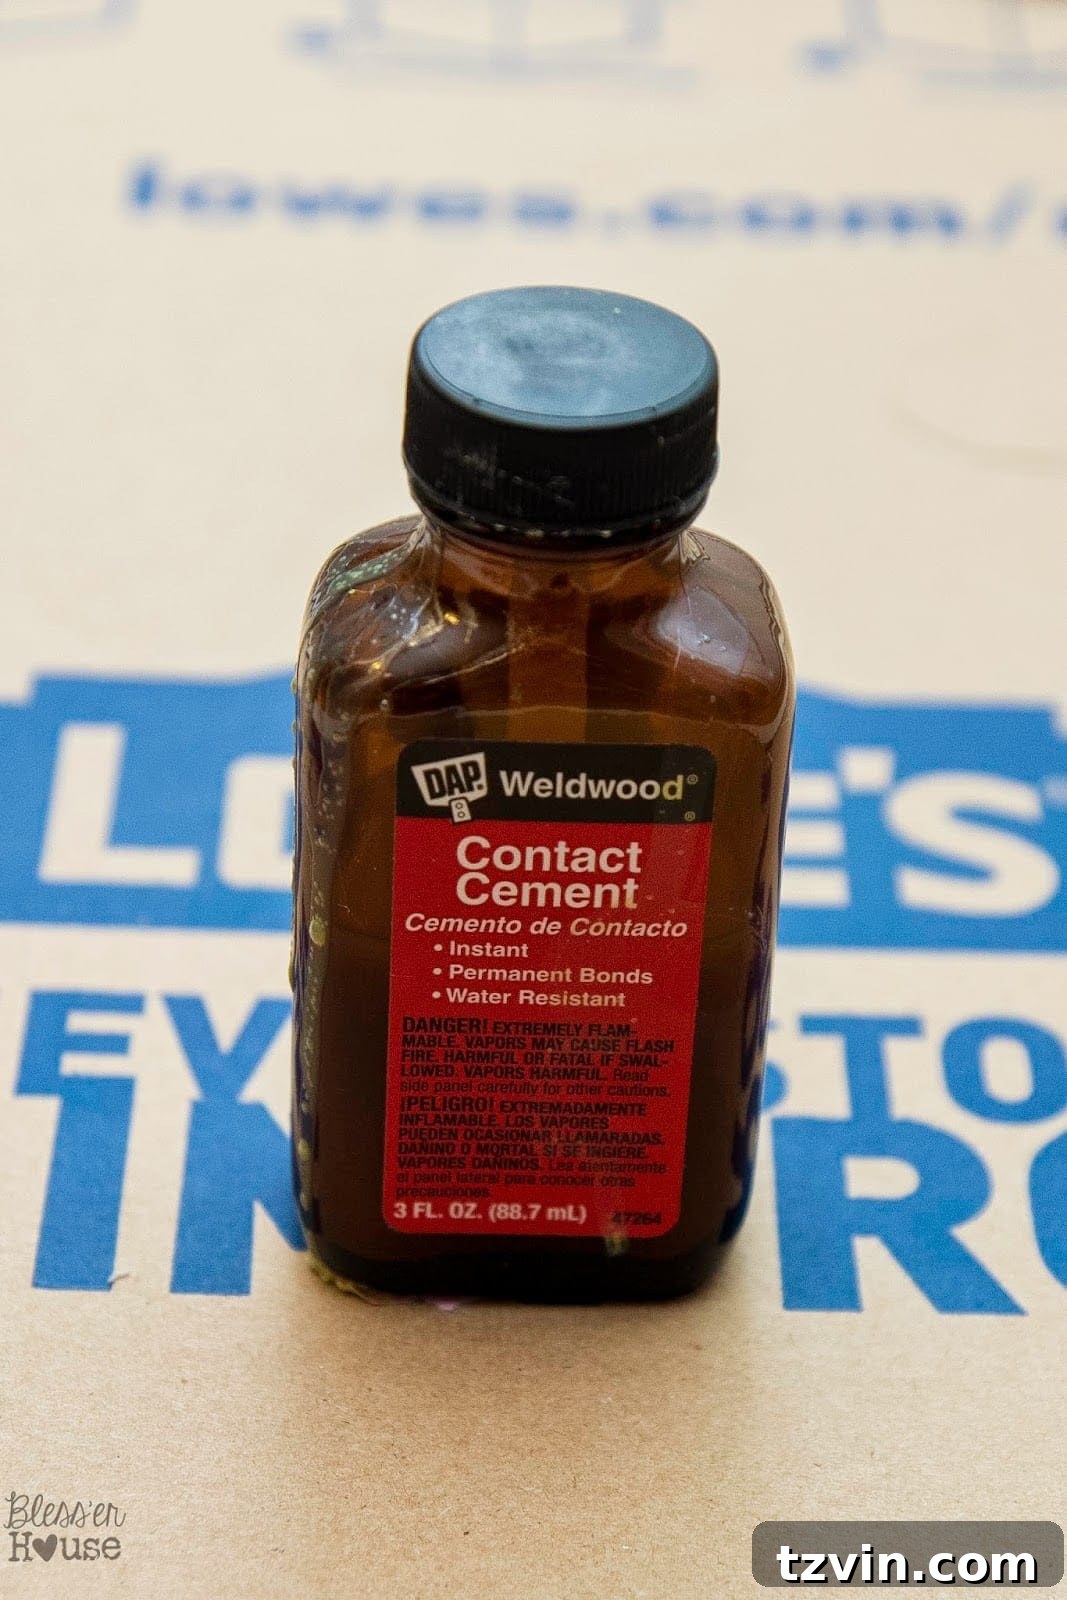
- DAP Contact Cement: Provides a strong, permanent bond for the back panel.
- Dritz Home 5/8 inch Nailheads in Antique Gold: The crucial detail for that high-end Restoration Hardware look (approximately 4 packs per chair).
- Tape measure: For accurate measurements.
- Pencil: For marking.
I was fortunate to have many of these supplies already on hand and could borrow the pneumatic staple gun. This significantly reduced my out-of-pocket expenses. In the end, I only purchased the nailheads, drop cloth, spray adhesive, cardboard, and egg crate foam.
My final cost: an astounding $40 per chair! (This includes the initial Craigslist purchase price.) Even if you had to buy all the supplies new, this project would still represent an incredible bargain. My entire set of six chairs combined cost significantly less than just one chair from Pottery Barn or Restoration Hardware.
Step-by-Step Transformation: From Drab to Fab
1. Preparing the Chair: Cutting and Sanding for a Modern Silhouette
The original chairs featured ornate finials and curves, which would have made upholstering the entire back incredibly complex for a no-sew project. To simplify the process and achieve a cleaner, more modern silhouette, my husband Robert and I decided to remove the finials and straighten the top edges.
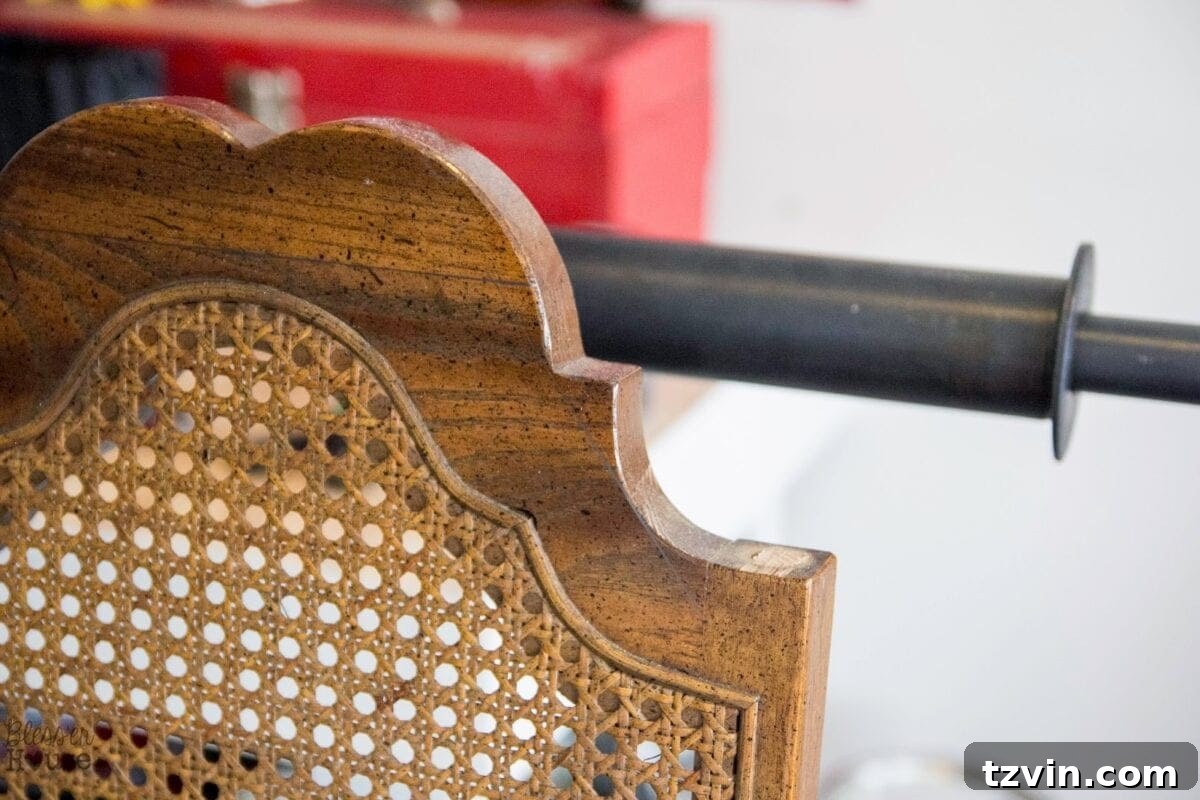
With a few valuable pointers from my woodworking-master father-in-law, we carefully marked straight lines using a level to ensure an even cut across the back of the chair.
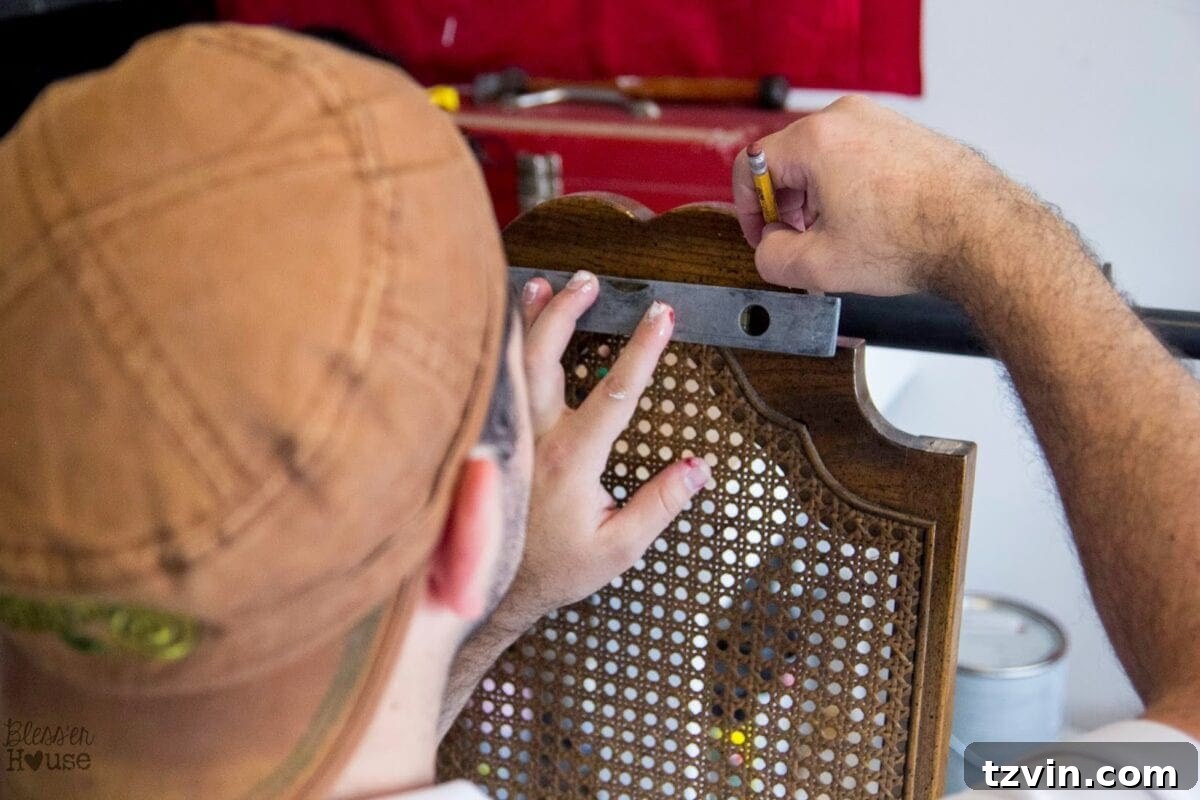
It was crucial to avoid cutting into the chair’s existing caning, as this provided a solid base for our upholstery.
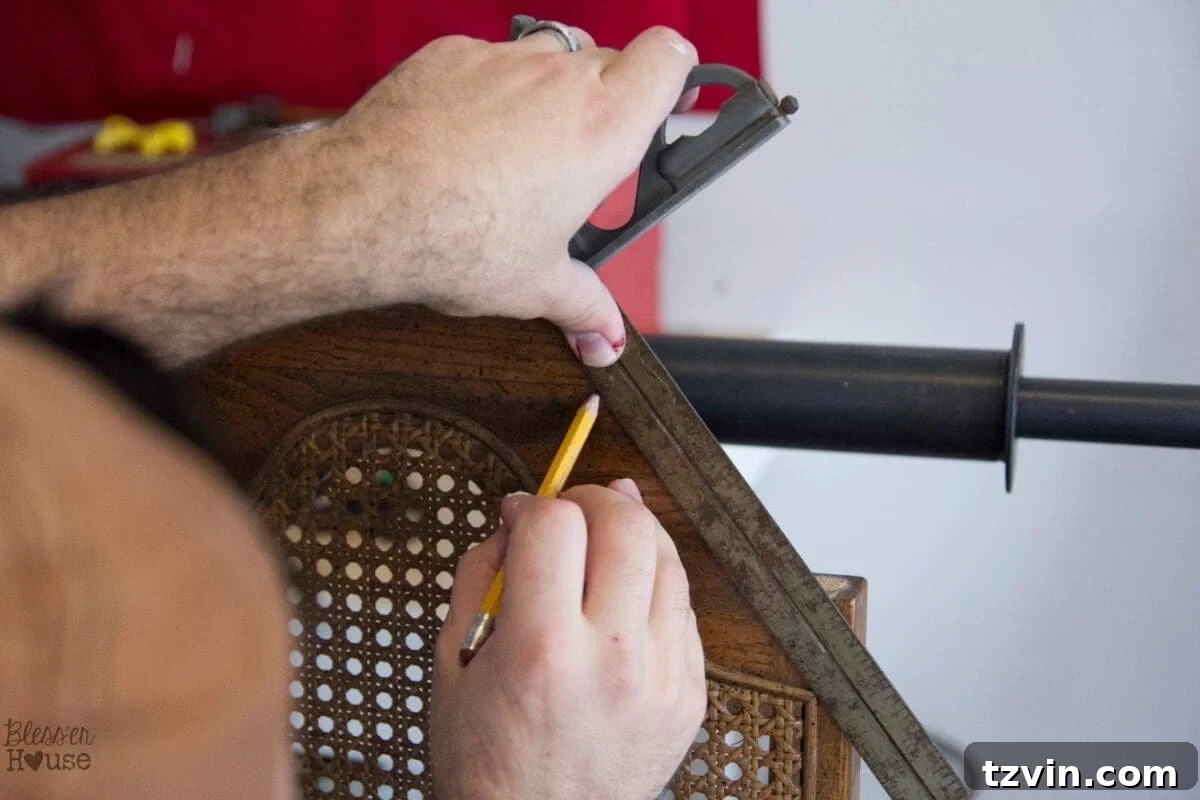
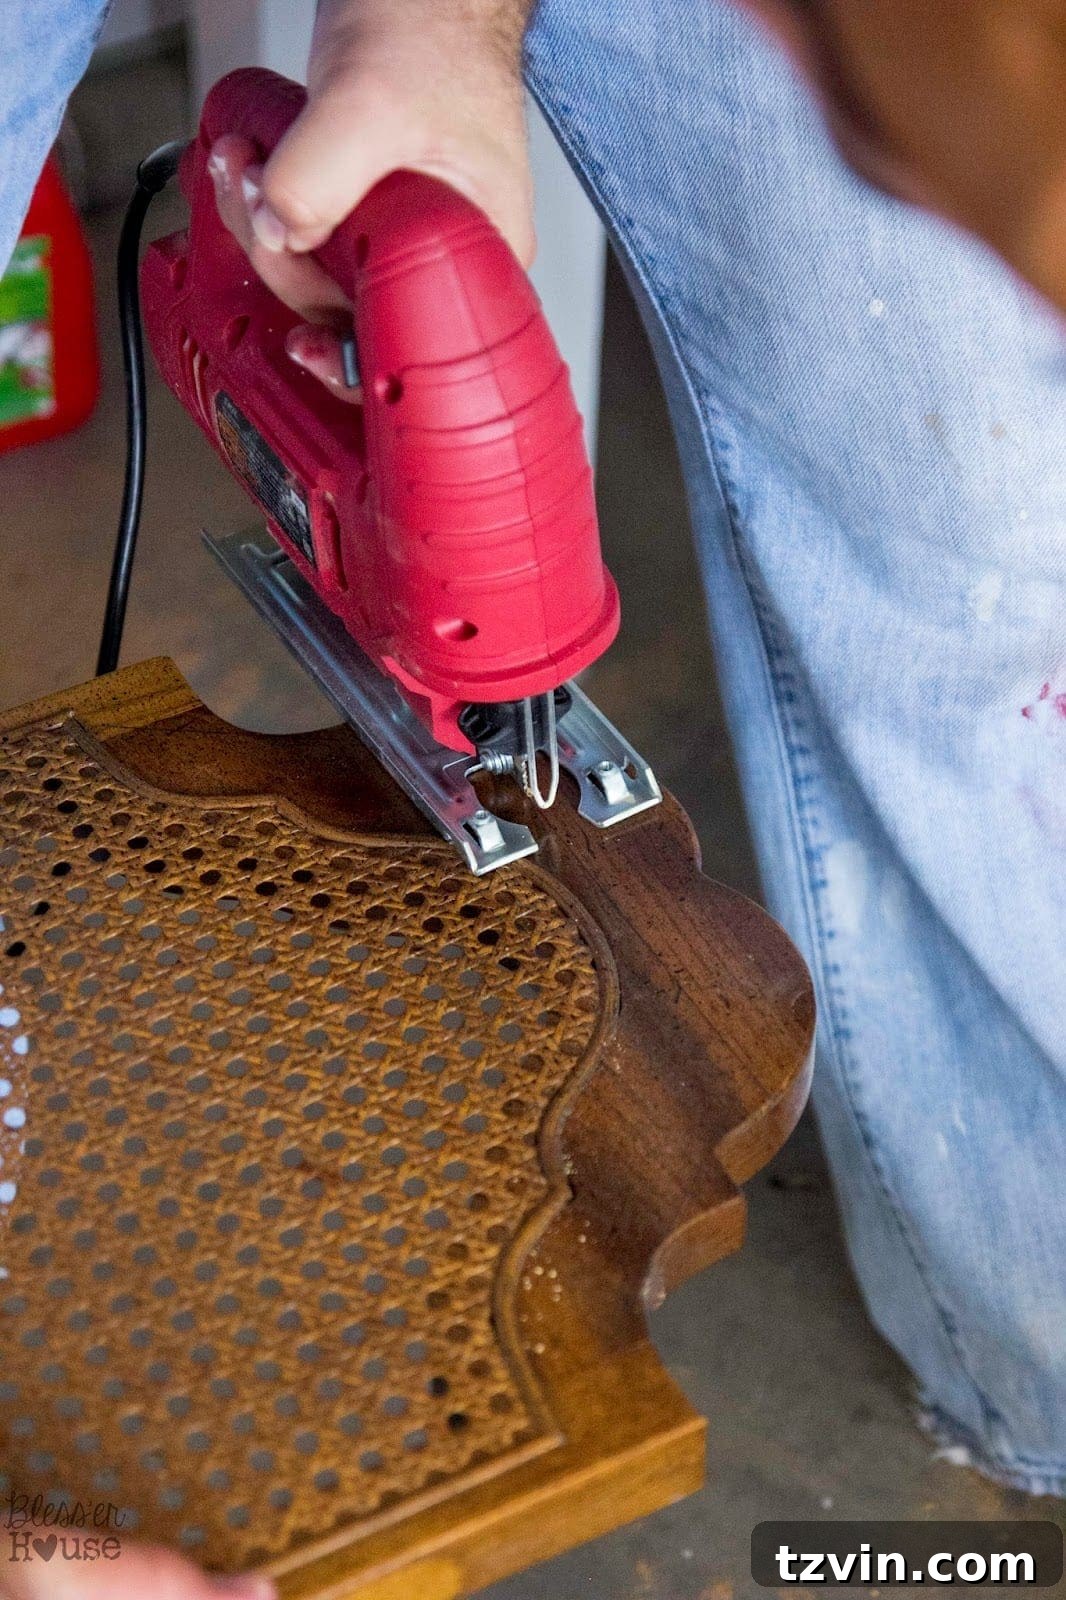
Then, we used the jigsaw to make precise cuts along the marked lines, creating a clean, flat top edge.
To ensure a smooth finish and prevent any snags, we thoroughly sanded down all the newly cut edges. (Side note: I truly appreciate my hardworking husband’s dedication to these projects!)
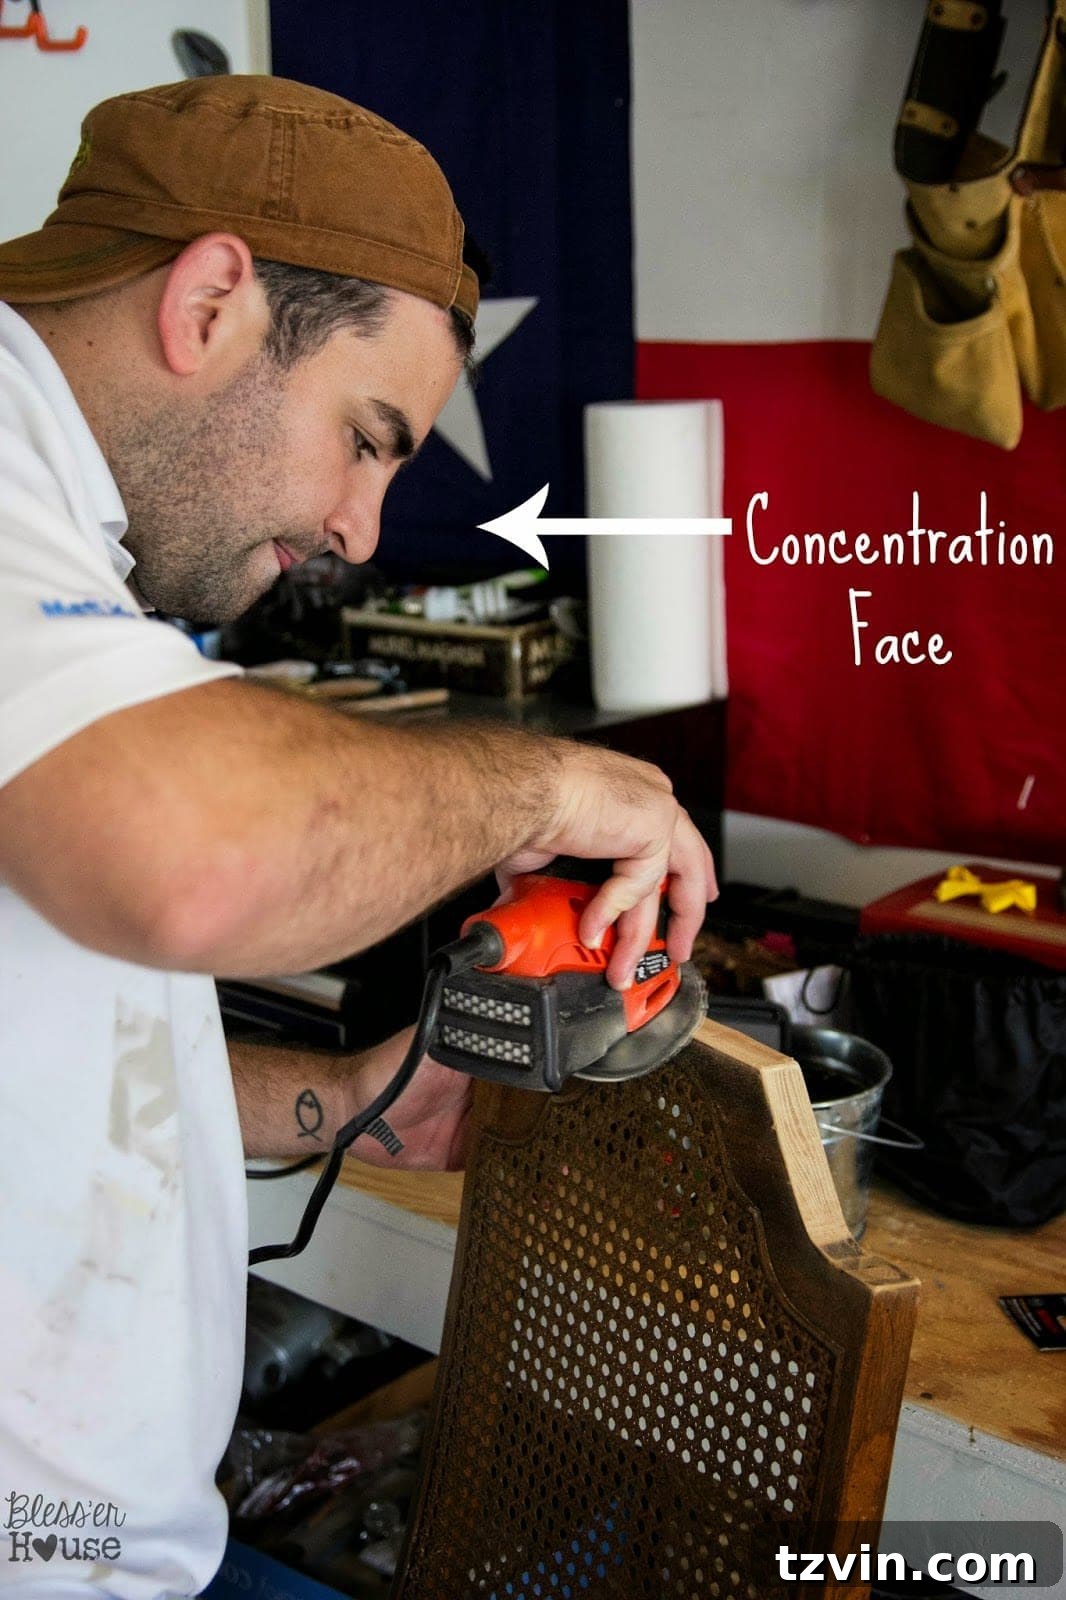
The tricky curves were gone, replaced by a clean, modern line – a huge relief! This simple step made the subsequent upholstery process significantly easier.
2. Achieving the Weathered Look: Painting and Staining the Chair Legs
With the structural modifications complete, it was time to address the chair’s finish. I began by priming the bottom half of the chairs with Kilz primer, which is excellent for covering old finishes and ensuring paint adhesion.
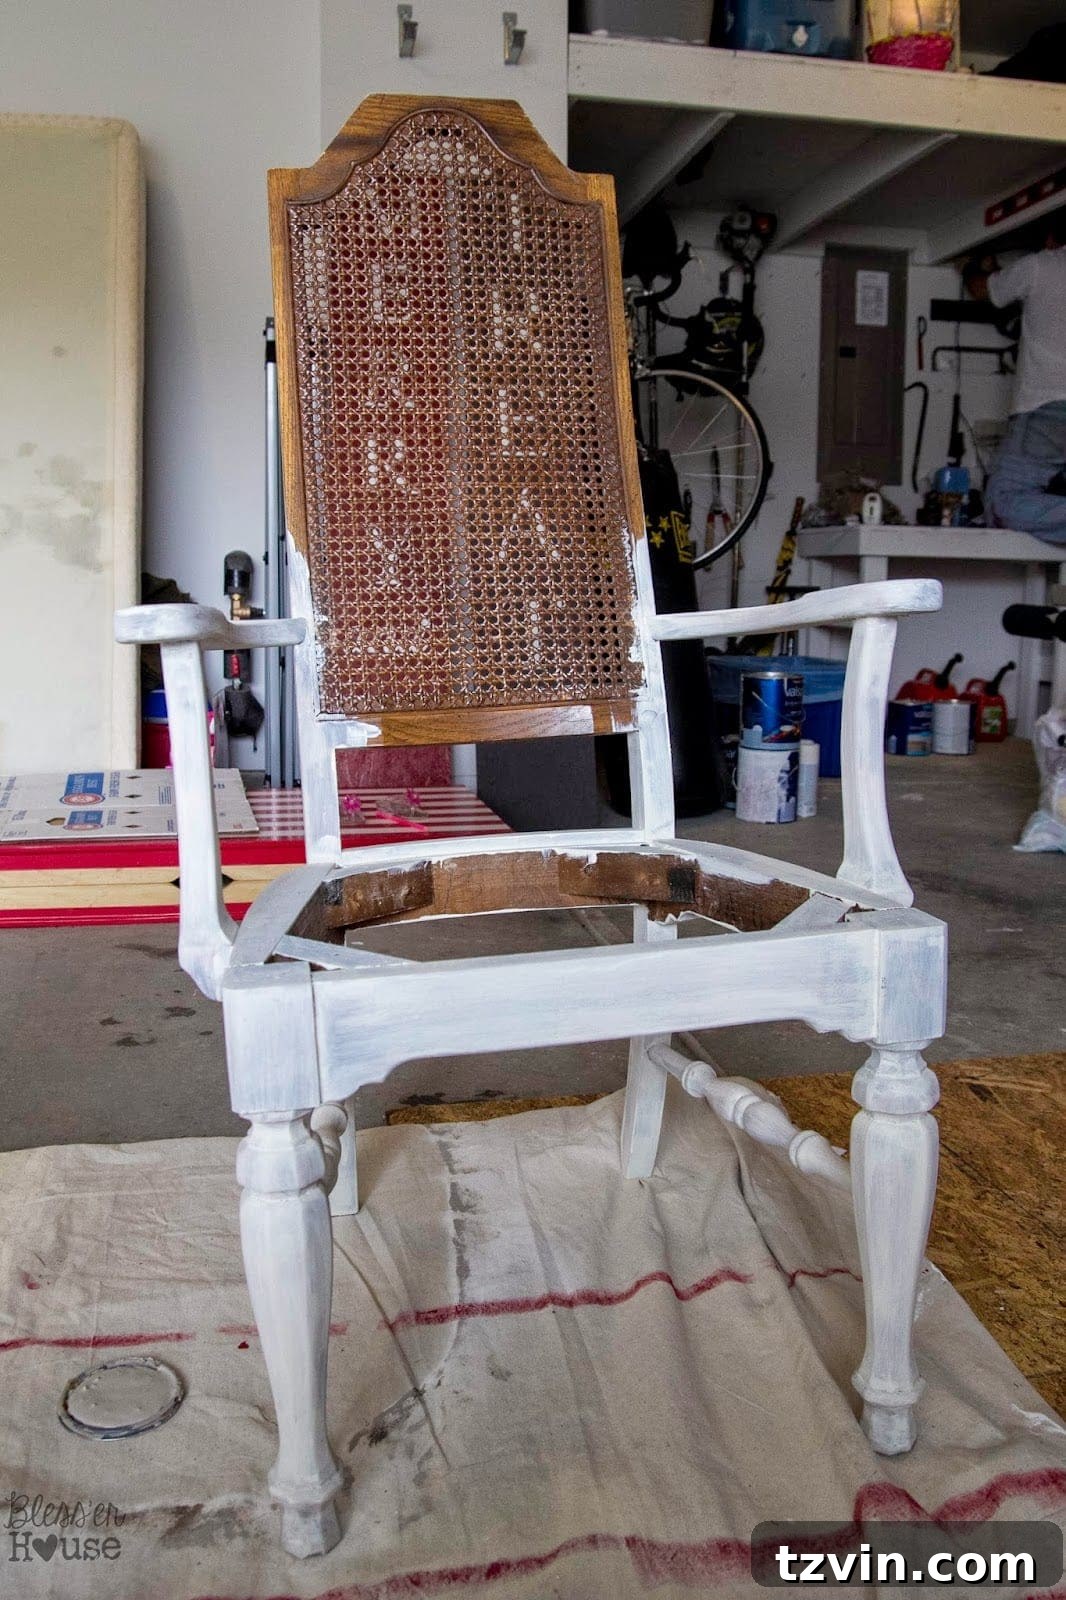
Once the primer was dry, I applied two coats of Valspar Montpelier Ashlar Gray paint in a flat finish. This soft gray provides the perfect base for our weathered effect, allowing just enough undertone to peek through later.
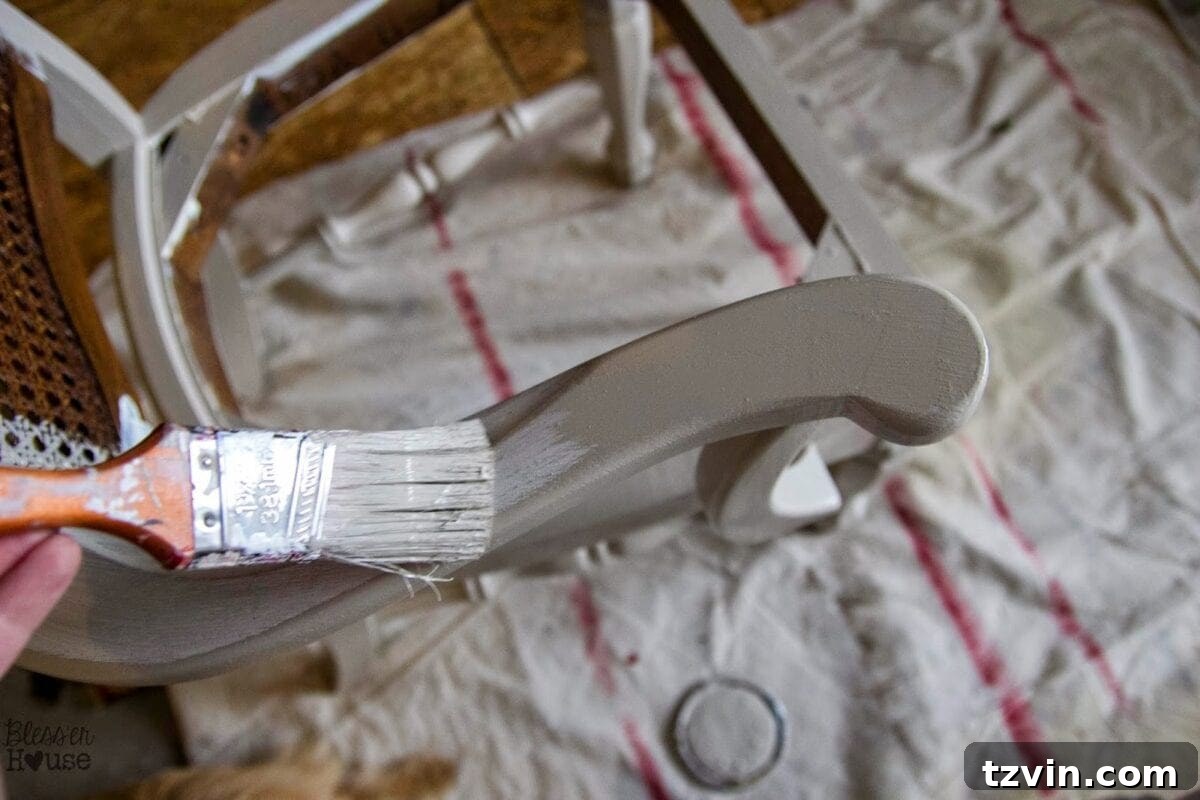
After the paint was completely dry, I used a sponge brush to apply a coat of Minwax Dark Walnut stain. The key to the weathered look is allowing the stain to sit for only about 10 minutes before wiping it off with a rag. I worked in small sections to control the depth of the stain and prevent it from drying too much.
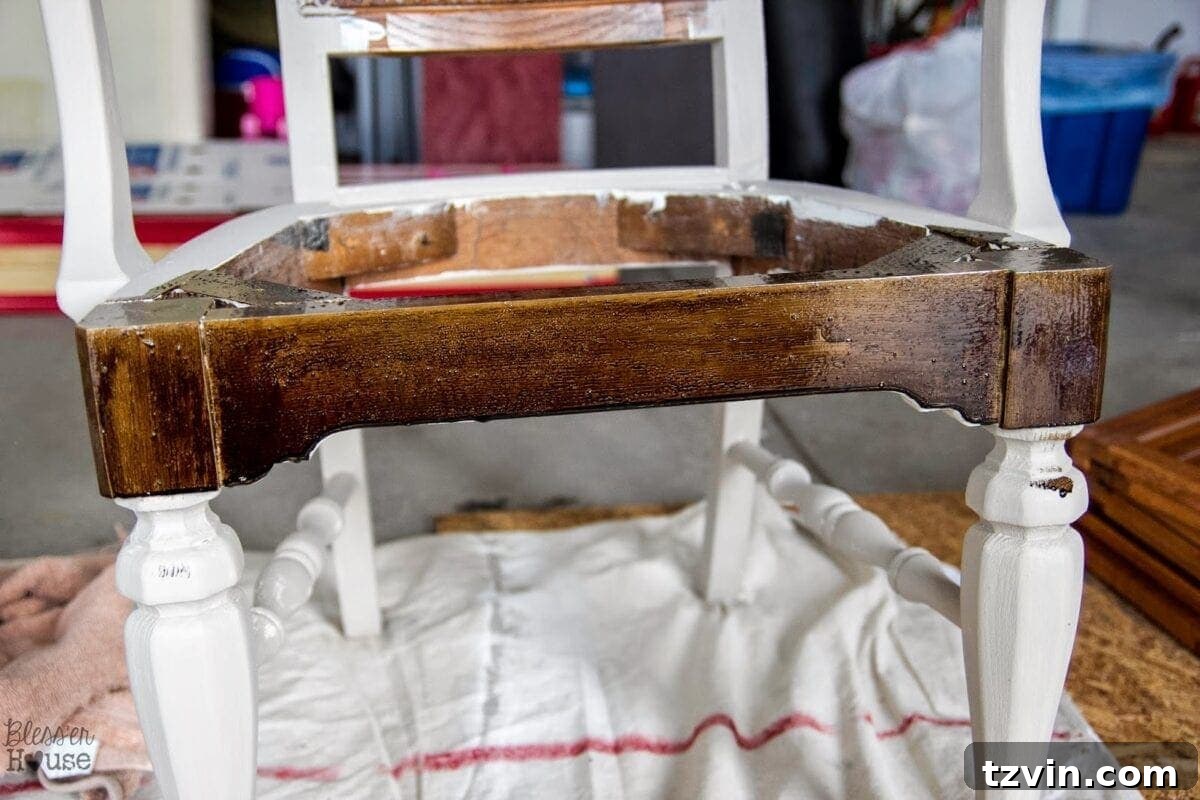
This technique resulted in a rich wood tone with subtle hints of gray showing through, mimicking the coveted weathered oak finish found on high-end furniture. The original wood grain texture of these American Drew chairs truly shone through, adding to the authentic, aged appearance.
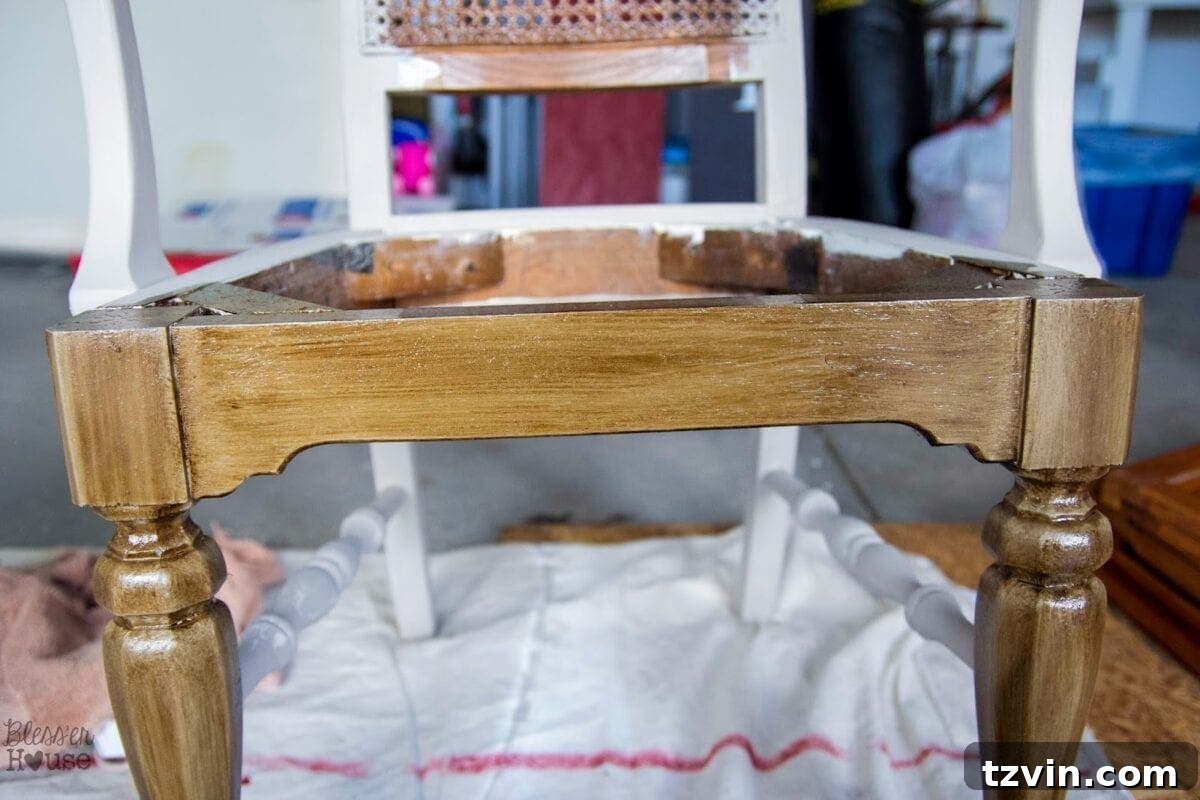
With the painting and staining complete, the chairs were dried and ready for the upholstery phase – often the most daunting, but also the most rewarding, part of such a project.
3. No-Sew Upholstery: Adding Comfort and Form
A smart tip for budget upholstery: mattress egg crate foam toppers are a significantly cheaper alternative to specialized upholstery batting, and they provide incredible comfort! We chose this for our chairbacks.
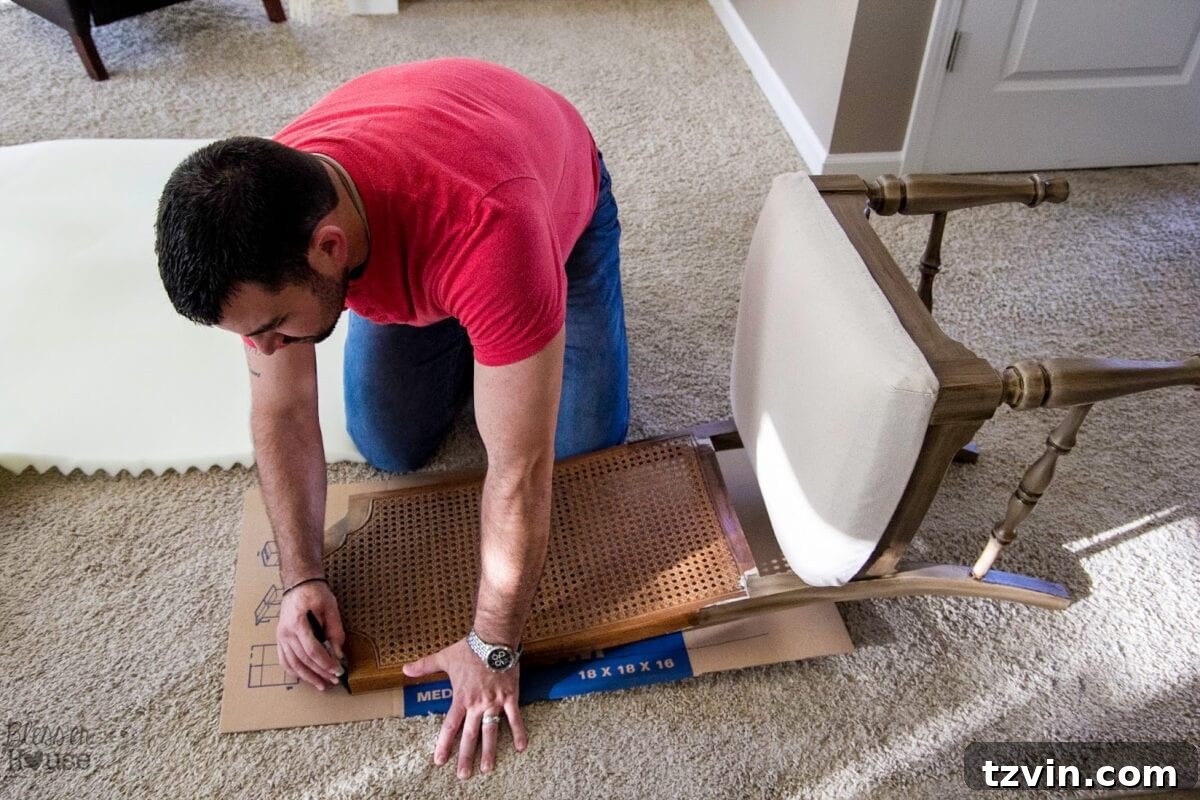
To create a perfectly fitted batting, we first traced the exact shape of the chairback onto a piece of cardboard using a Sharpie. (I promise I did much more than just take pictures of Robert!).
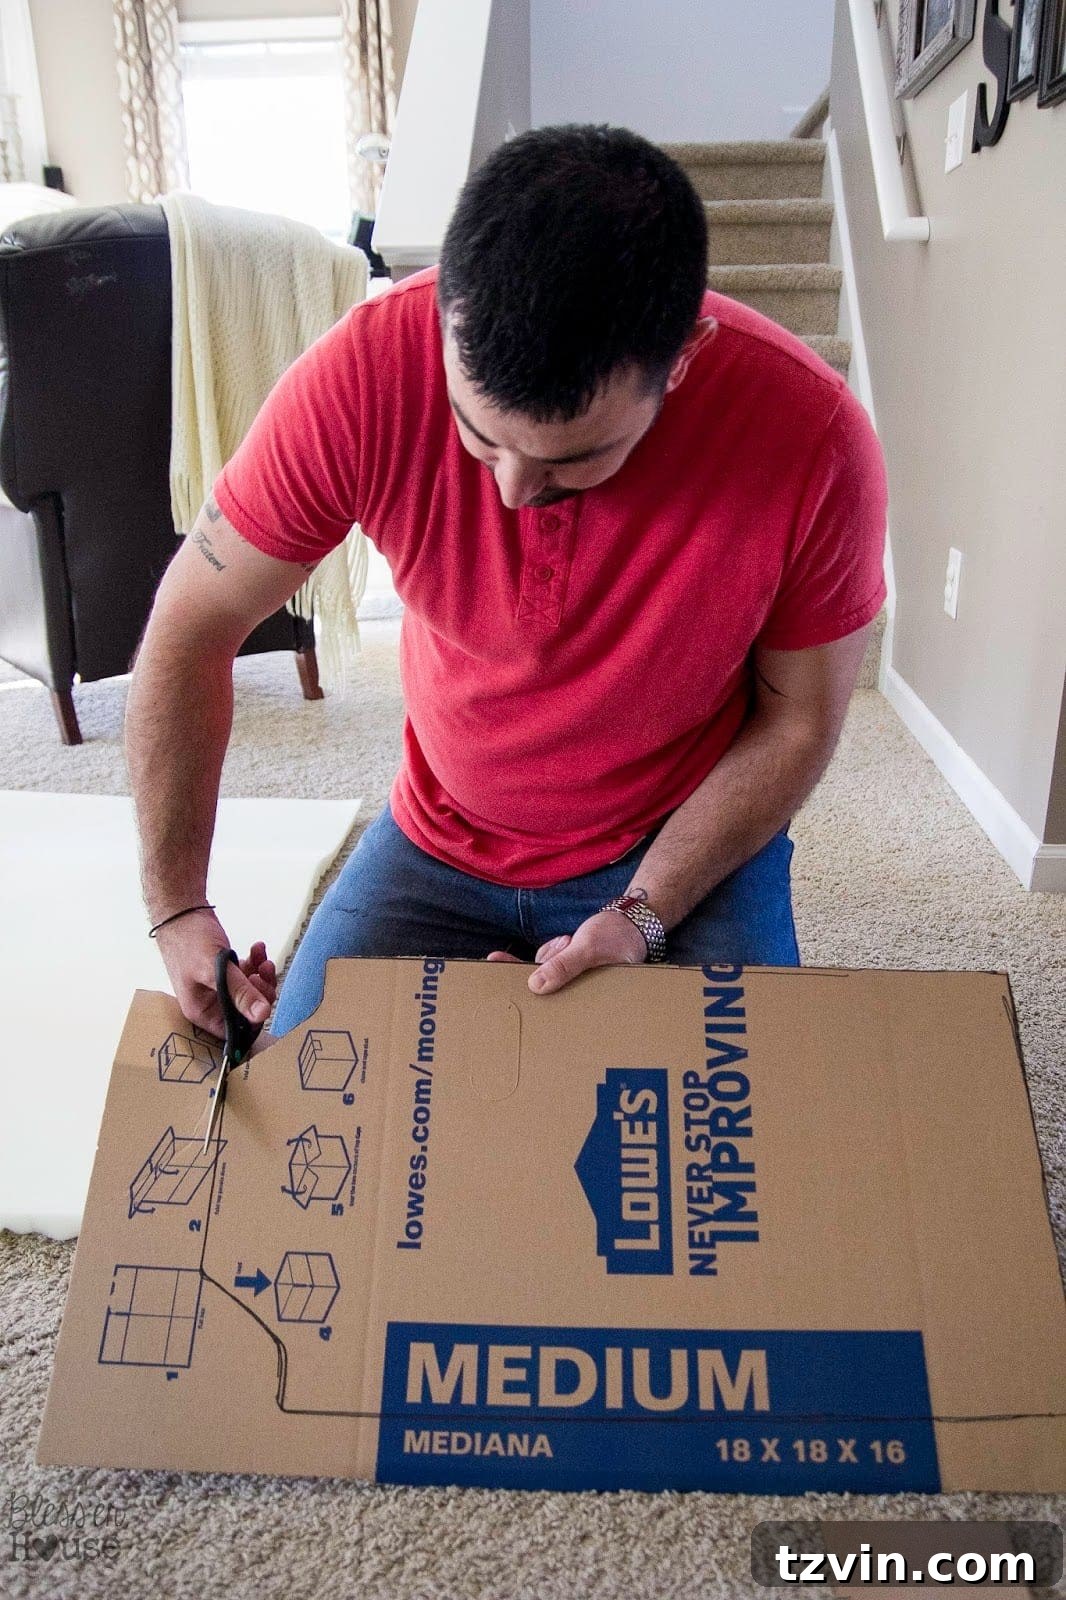
Once traced, we carefully cut out the cardboard shape, which would serve as our precise template.
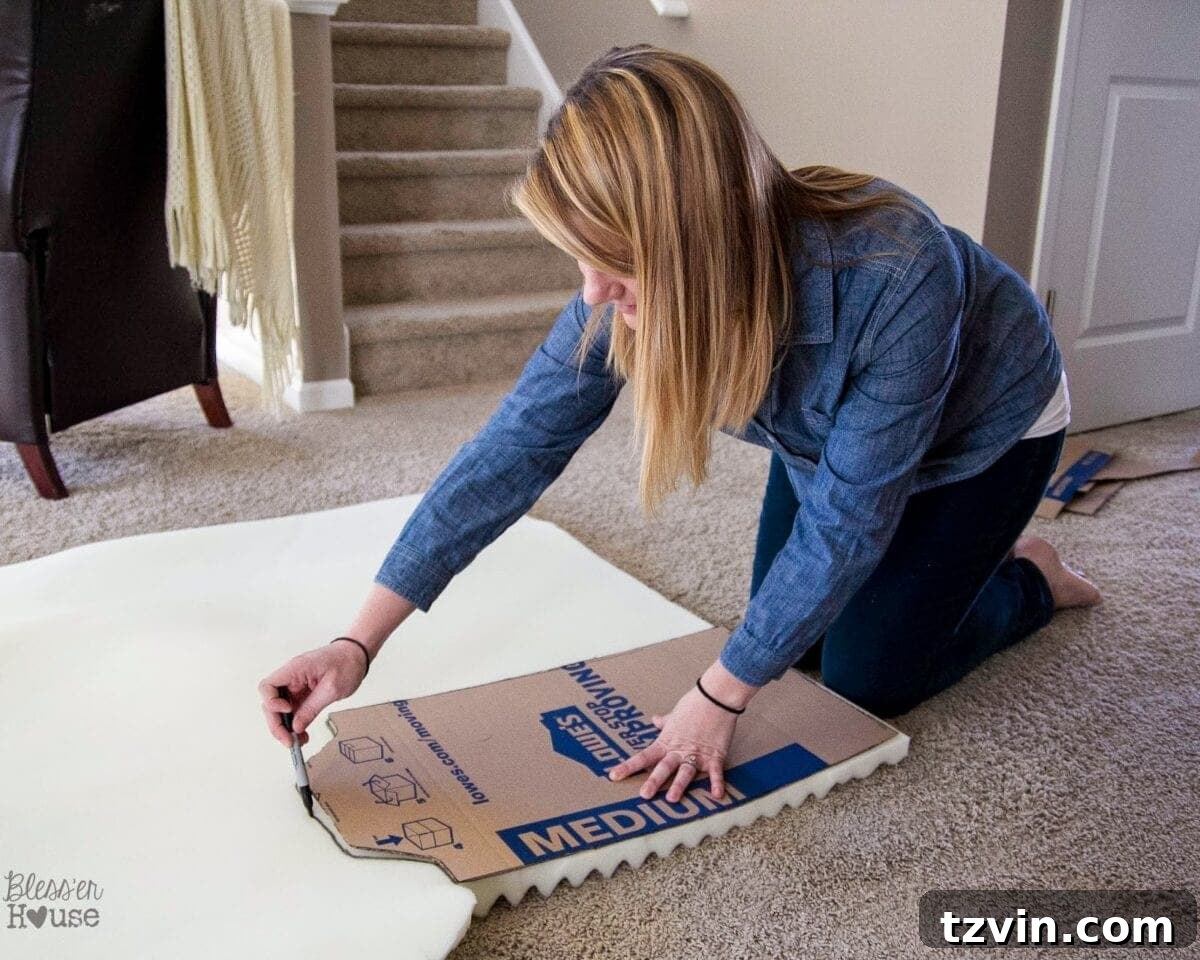
Using the cardboard template, I then traced the exact shape onto the egg crate foam, ensuring a perfect fit for the chairback.
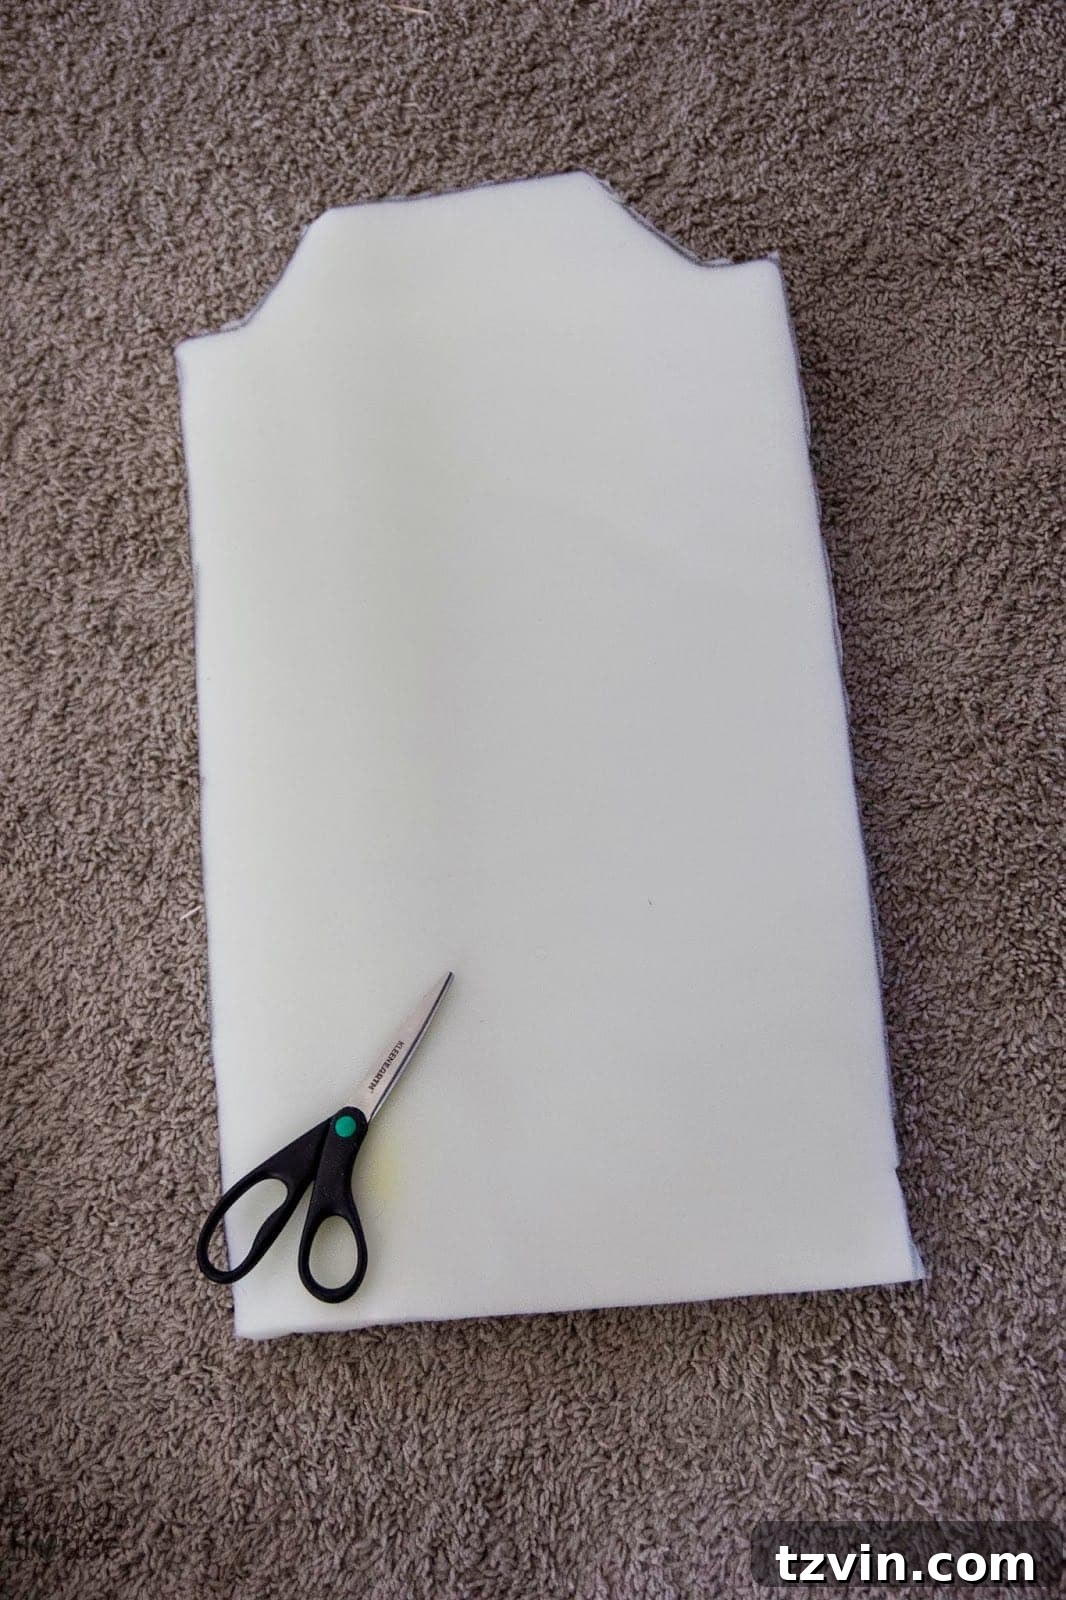
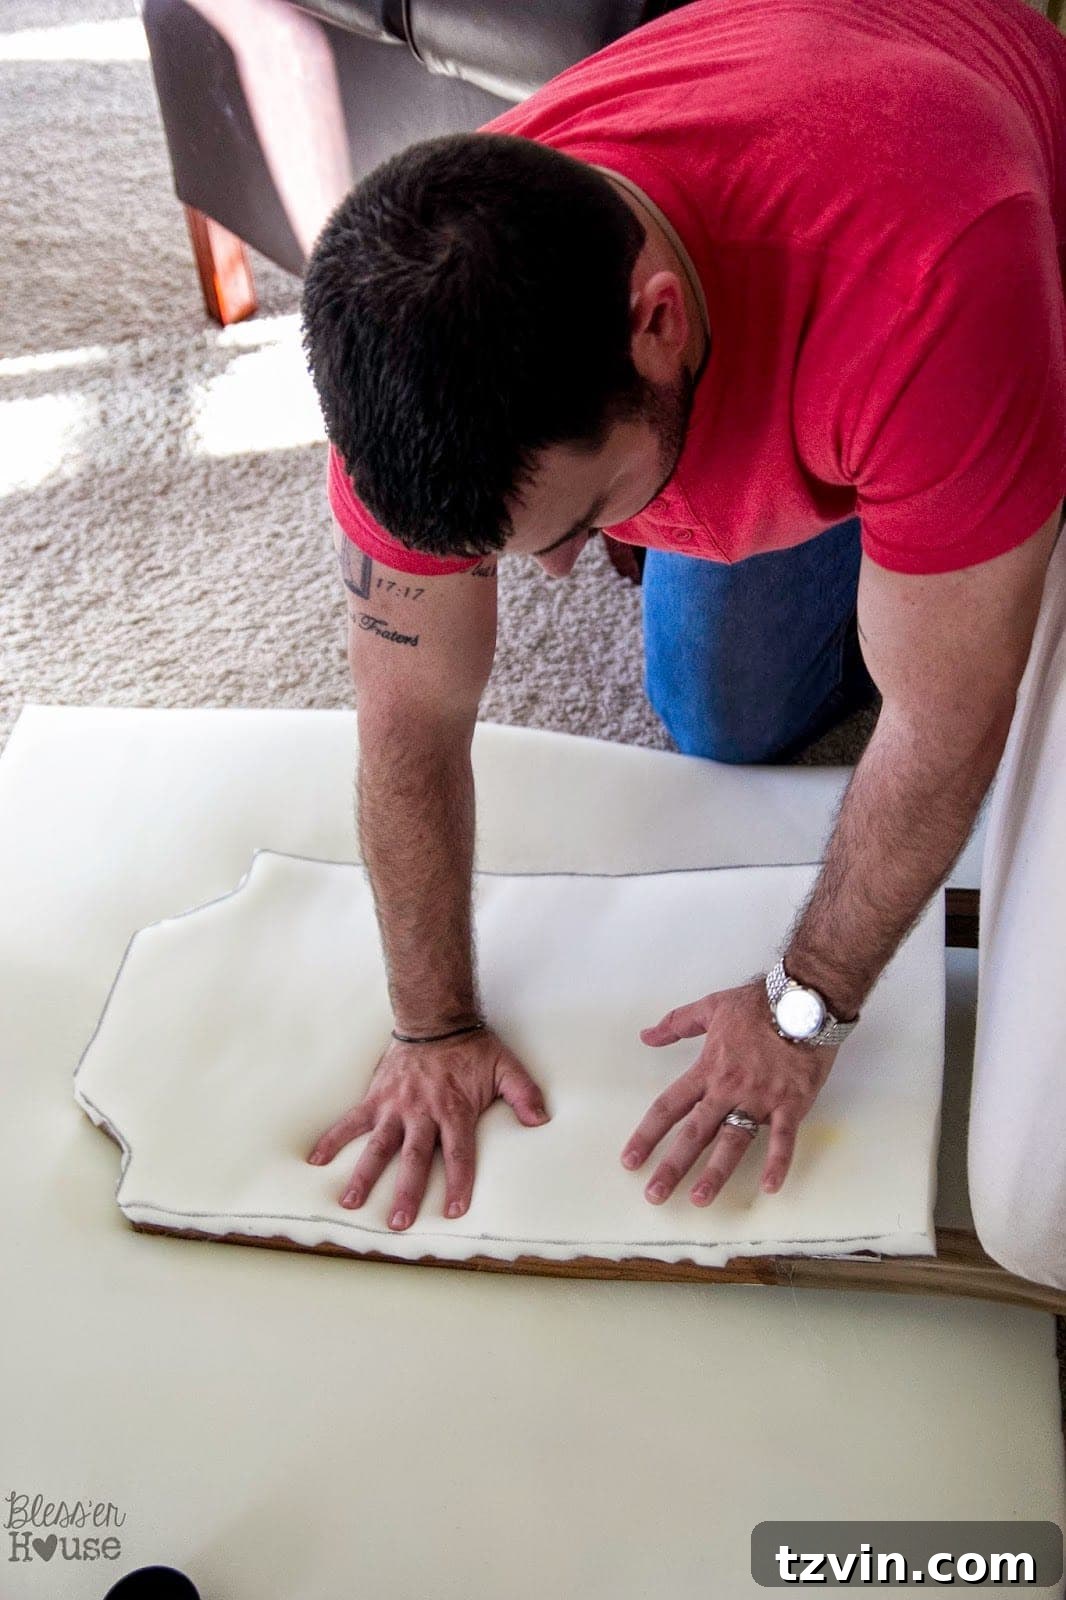
I then cut out the foam batting using regular fabric scissors. The egg crate foam is easy to cut and molds well to the chair’s surface.
Next, we generously sprayed the front of the chairback with upholstery adhesive, creating a tacky surface for the foam.
We carefully pressed the cut foam batting onto the adhered chairback, ensuring it was centered and firmly attached. This creates a soft, comfortable layer under the fabric.
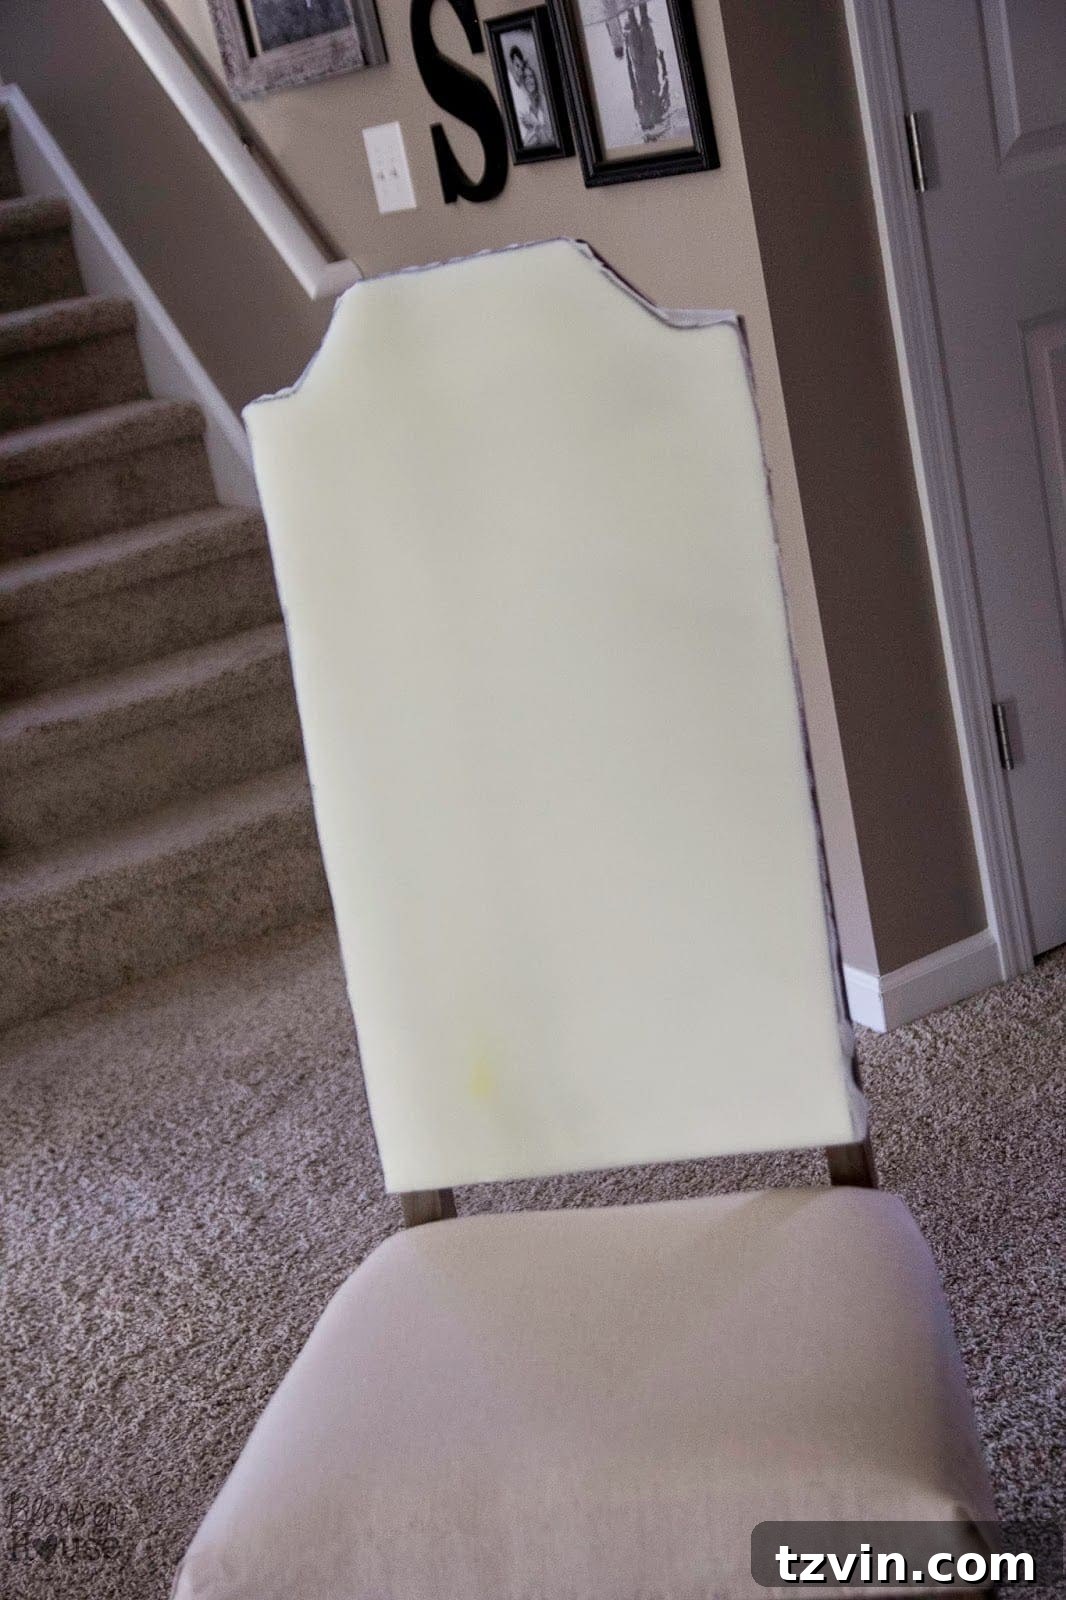
The chair was now prepped and ready for its new fabric! (Note: We had already stapled the drop cloth fabric to the seat cushion while the chairs were drying earlier, ensuring it was taut and smooth.)
4. Fabric Application: Achieving a Smooth, Professional Finish
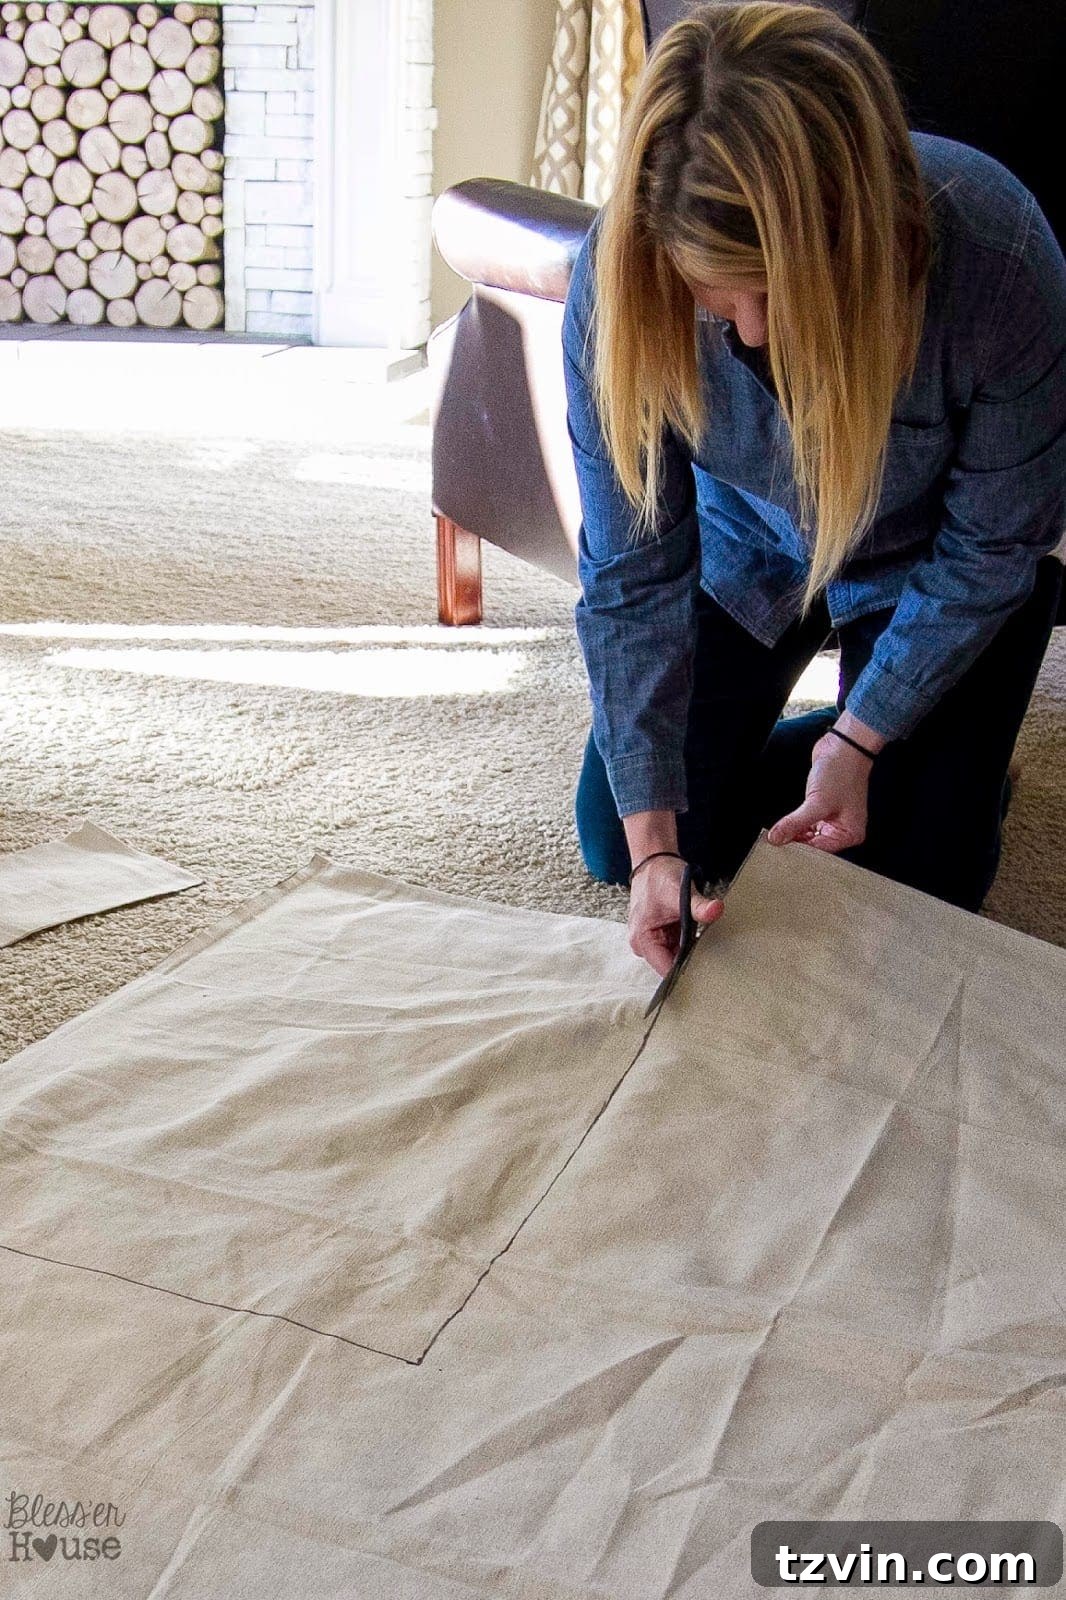
To determine the correct amount of drop cloth fabric needed for the front of the chairback, we measured its width and height, then added a generous 4 inches to all sides. Our chairbacks were 16″x28″, so we marked the fabric to be 24″x36″ for the front piece. This extra allowance is crucial for pulling the fabric taut and stapling it securely.
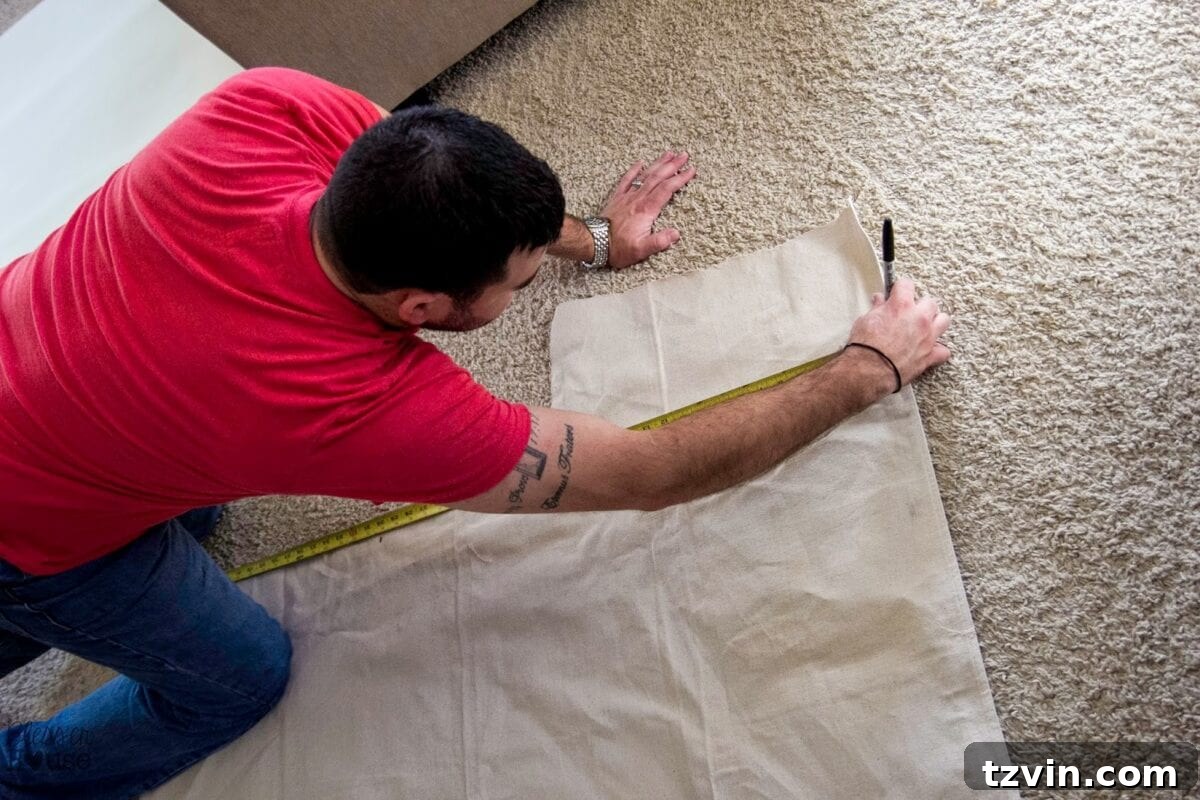
Using sharp fabric scissors, we cut out the precisely measured front fabric pieces.
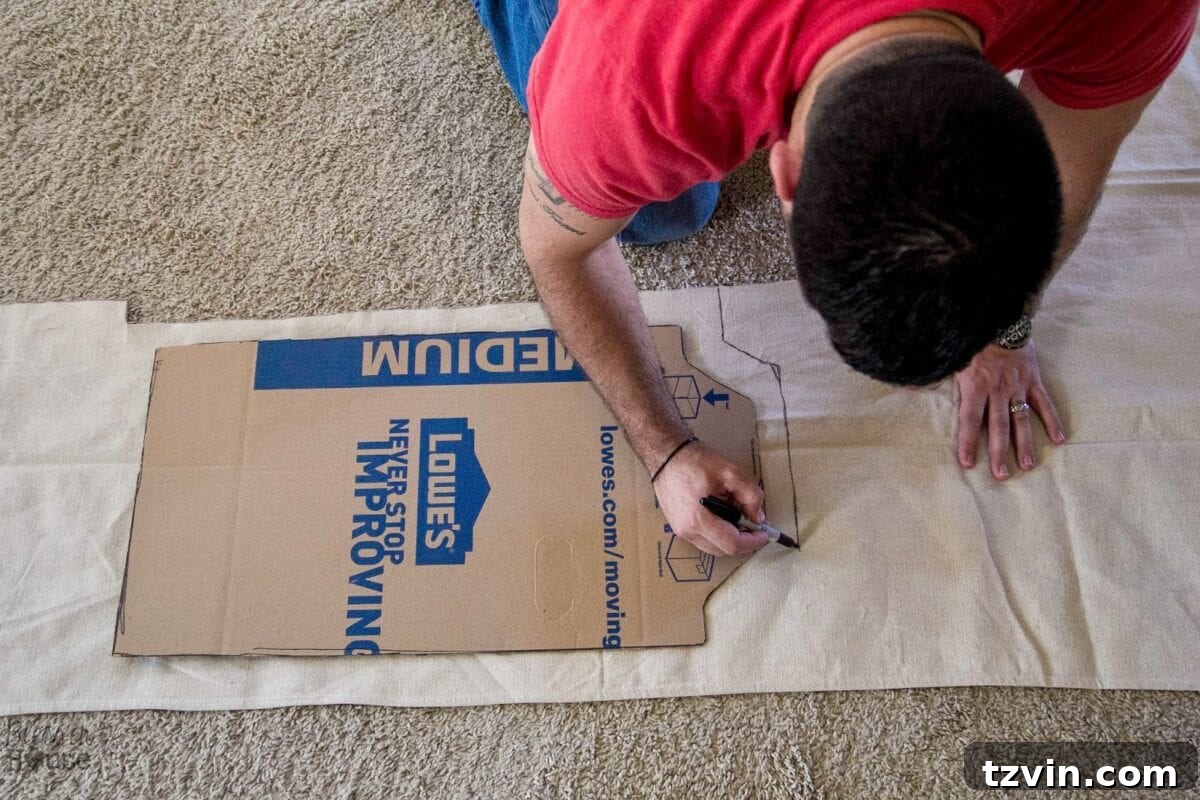
For the back panel, we reused the cardboard template, tracing around it and adding an allowance of about 2 inches on all sides for wrapping. These back fabric pieces were set aside for the final step.
Positioning and stapling the front fabric piece required patience and a methodical approach. We started by stapling the bottom center of the fabric to the chair’s underside, ensuring it was aligned.
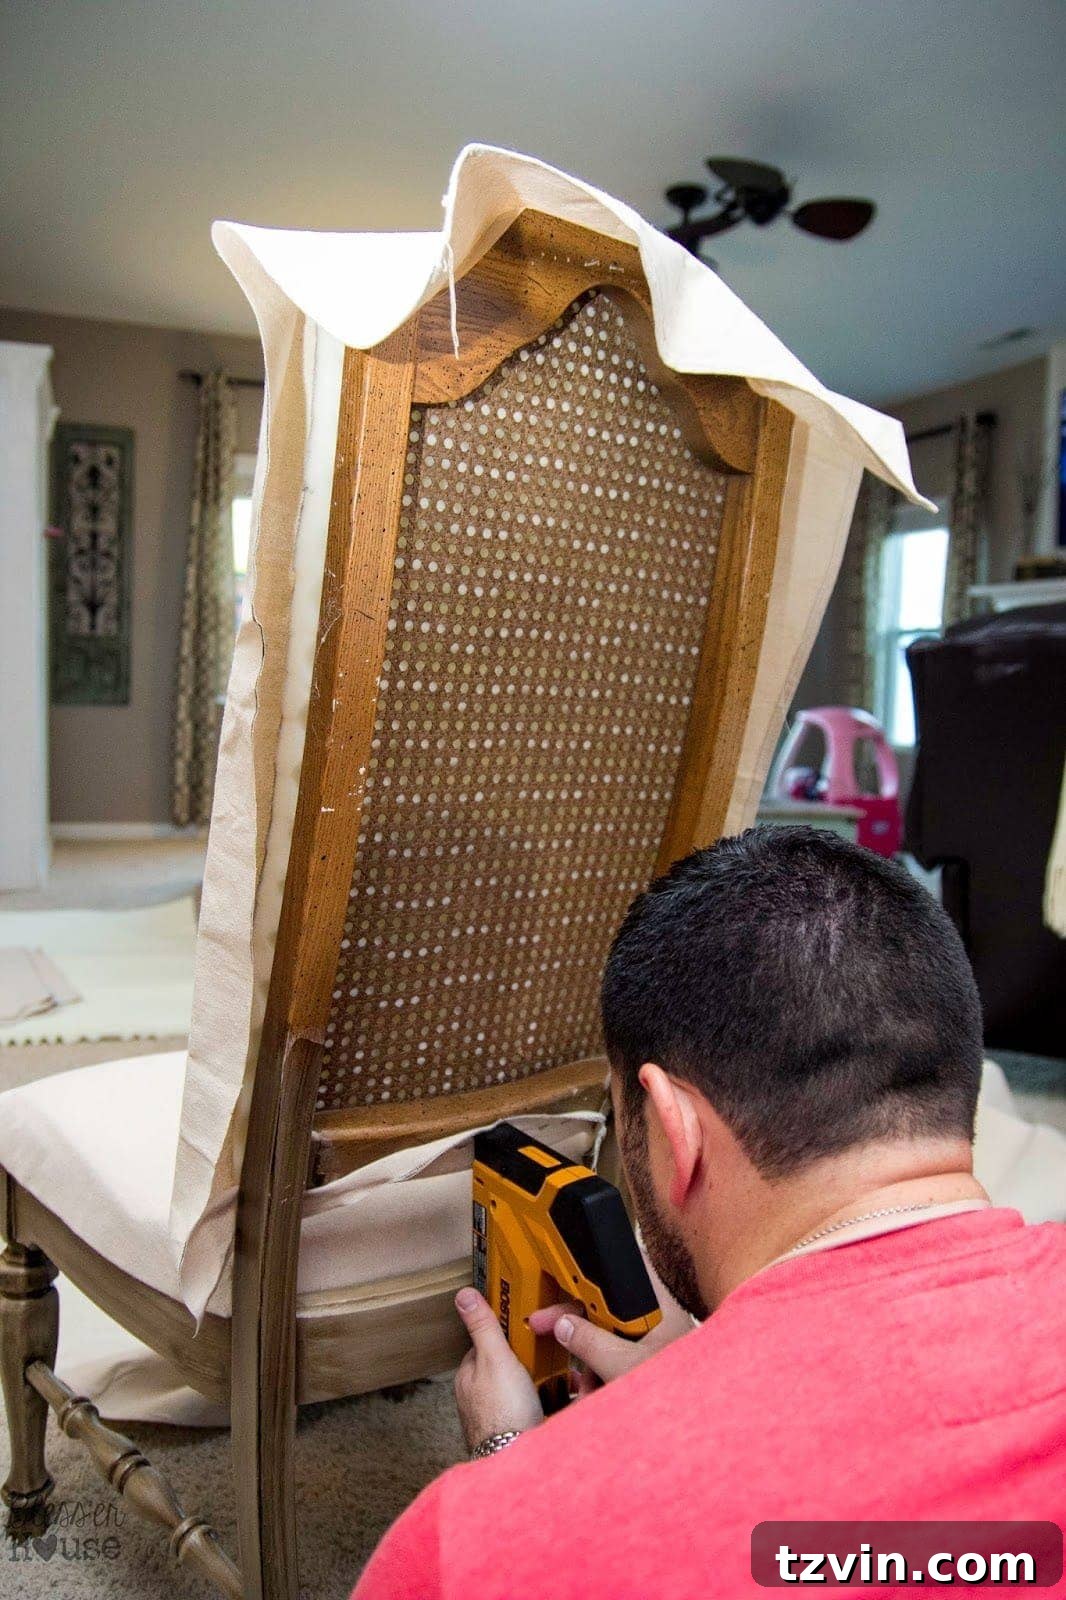
For the sides, I began by folding the bottom flap of the fabric neatly under to create a straight edge. Then, I stapled it around to the back of the chair, working my way up.
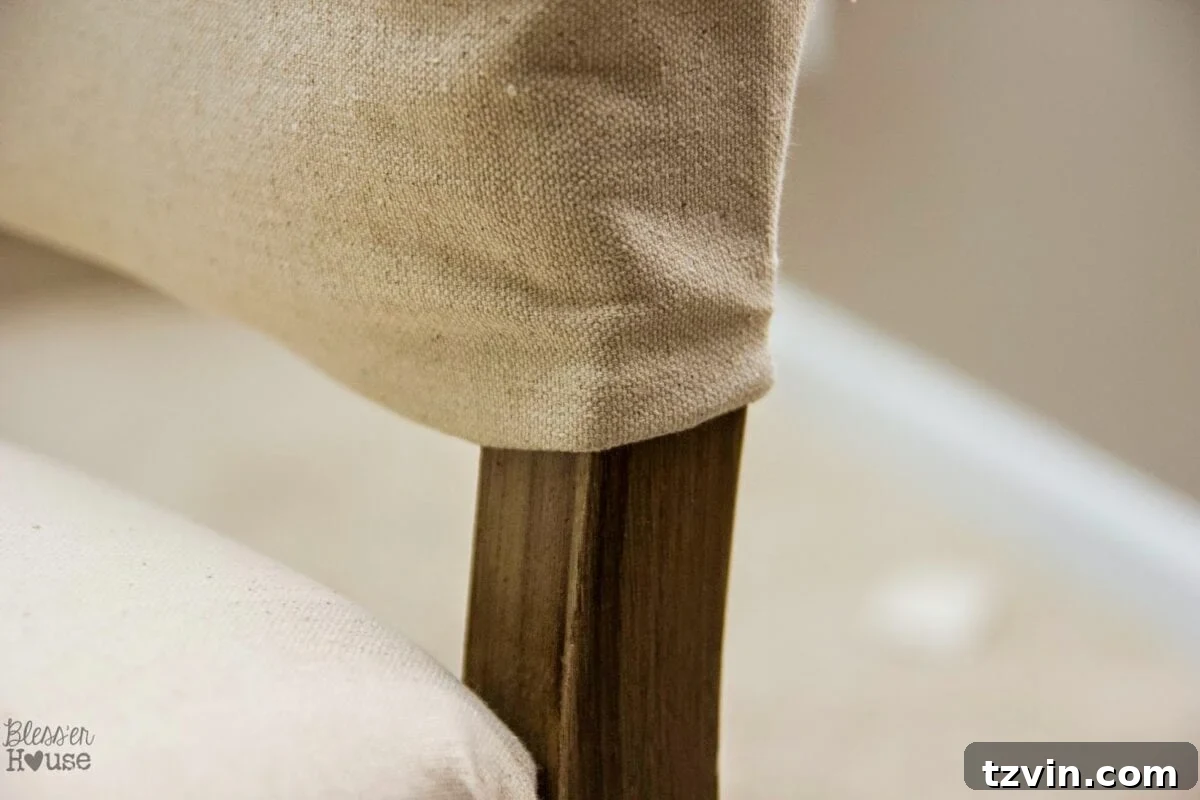
This was definitely a two-person job for optimal results. As we progressed up the sides, I continuously stretched the fabric upwards to keep it taut, while Robert pulled the fabric tightly around the side and stapled it securely. We meticulously checked the front to ensure there were no puckers or wrinkles, aiming for a perfectly smooth finish.
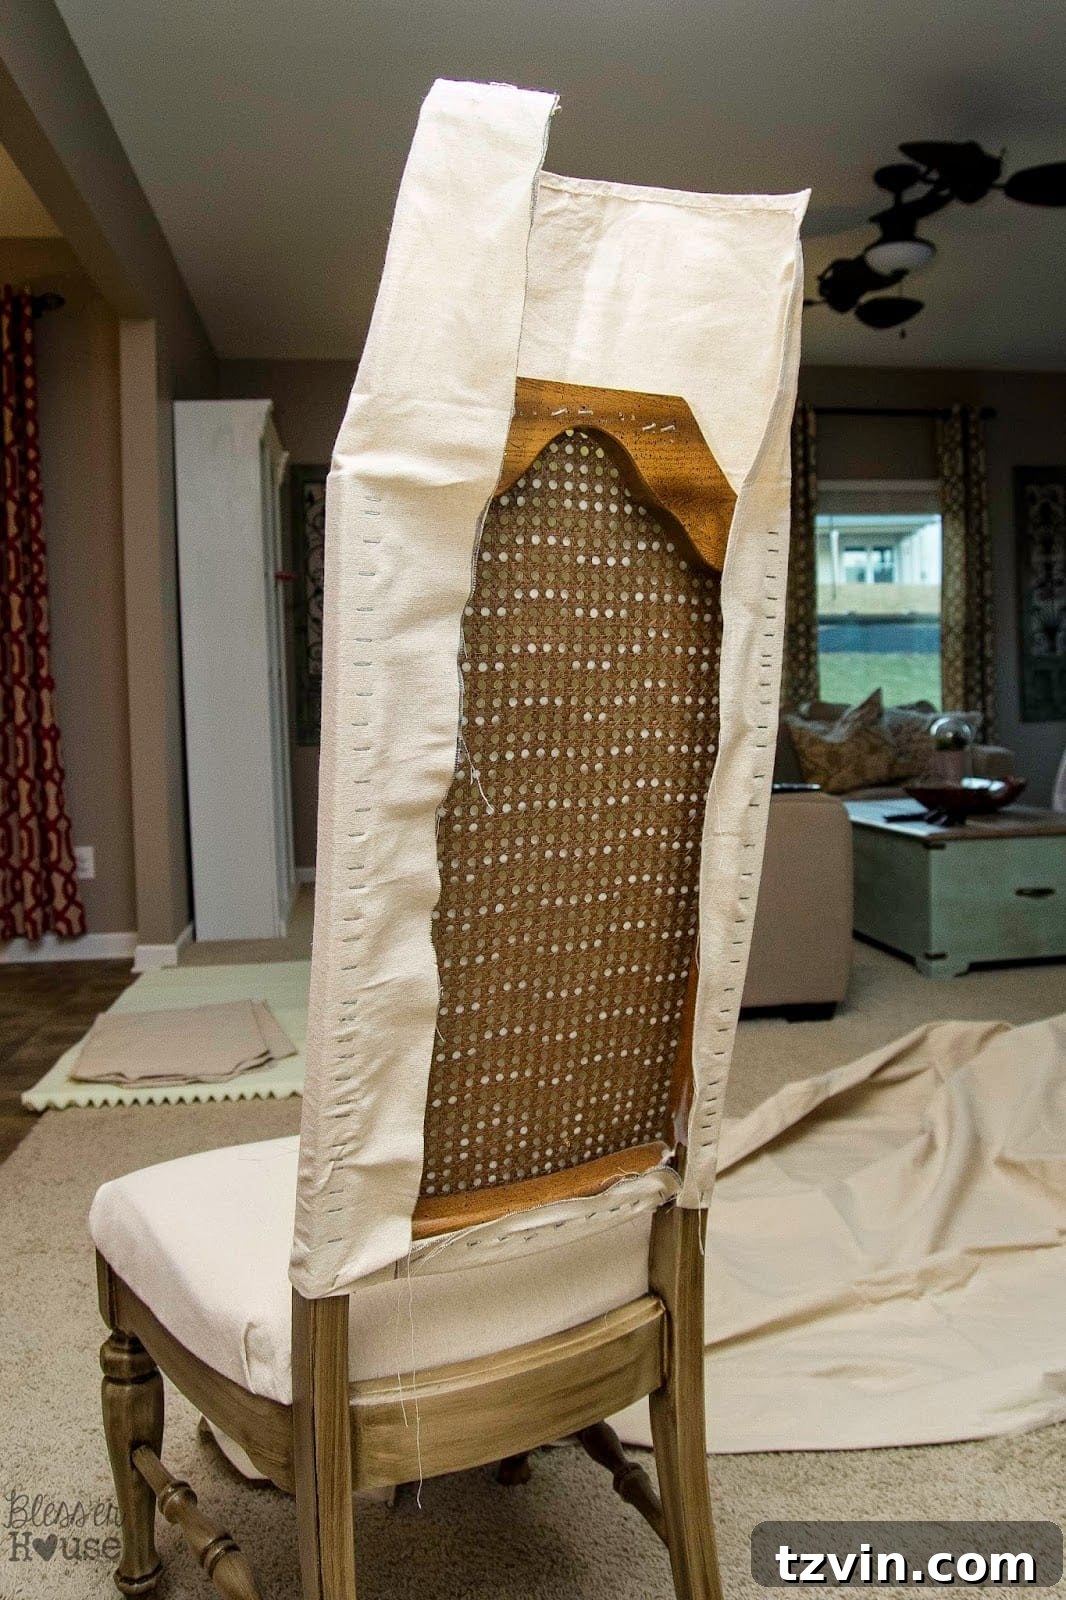
It was tricky, I won’t lie, but the careful coordination paid off, resulting in a beautifully upholstered front.
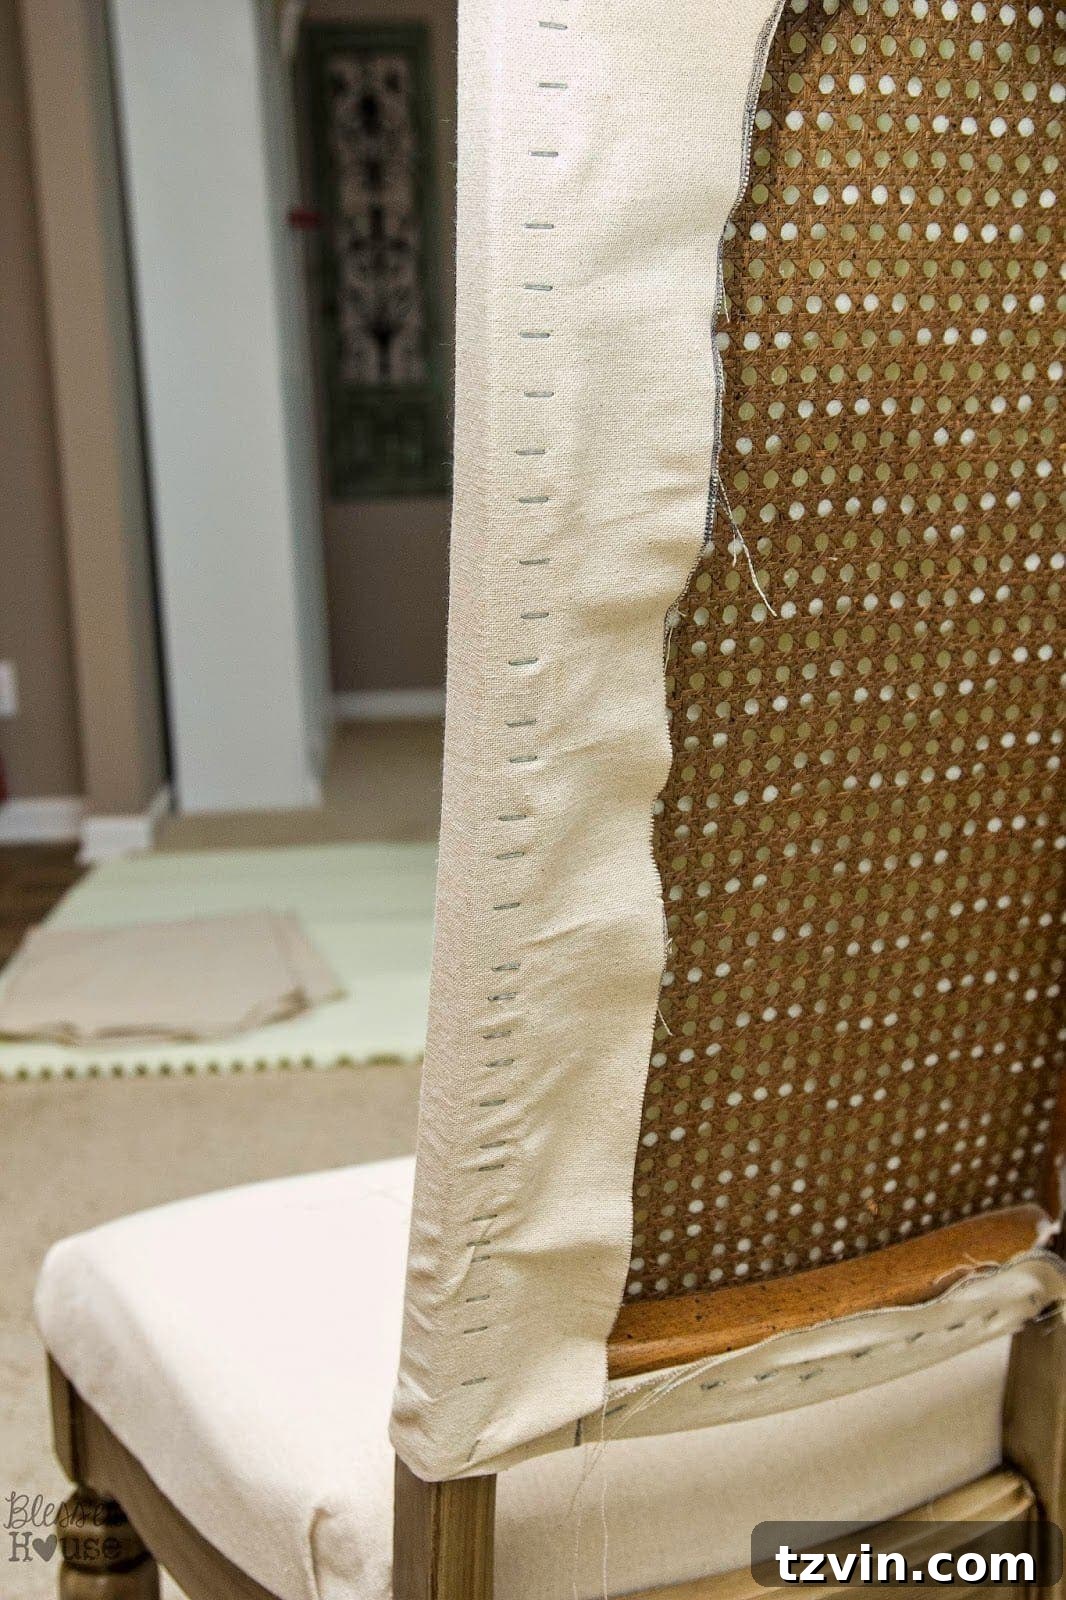
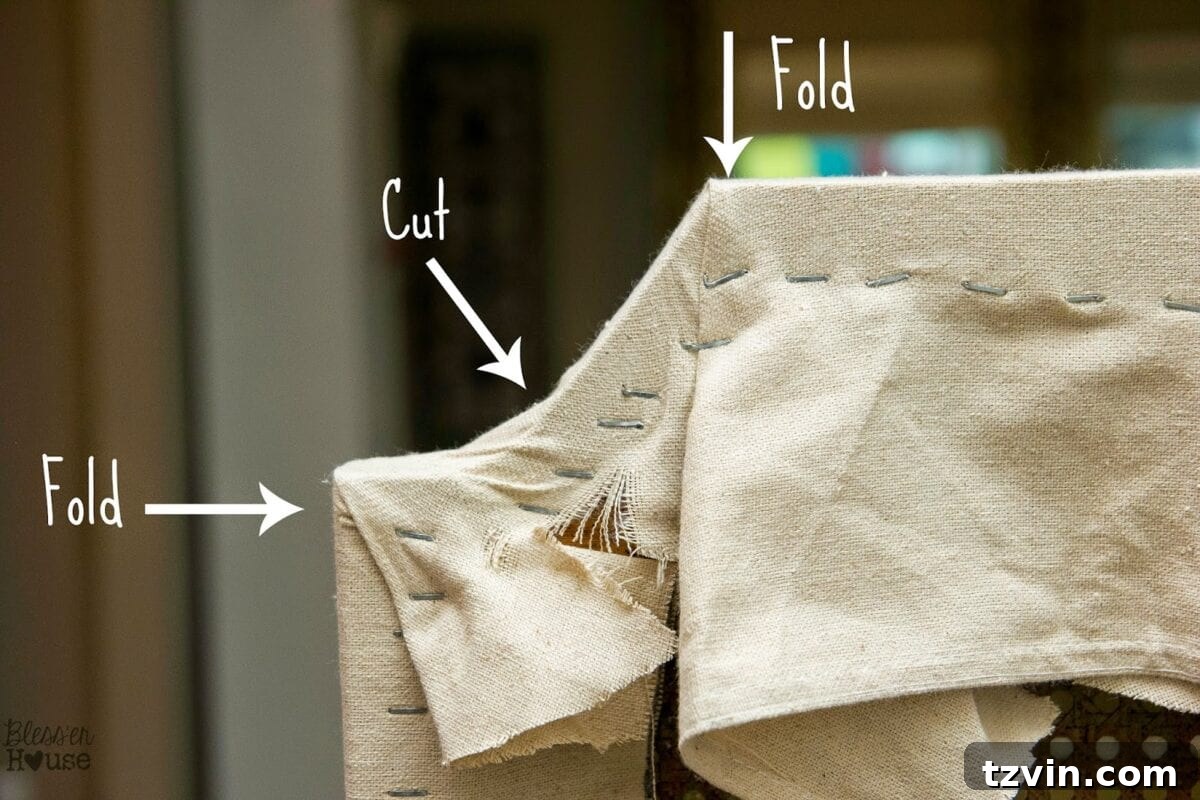
At the top of the chair, I was incredibly grateful that we had opted for the straight cut. We handled the corners by folding them neatly and made small relief cuts where necessary to pull the fabric even more tightly and smoothly.
Finally, we breathed a collective sigh of relief as the most challenging part was done! The front of the chair was flawlessly upholstered.
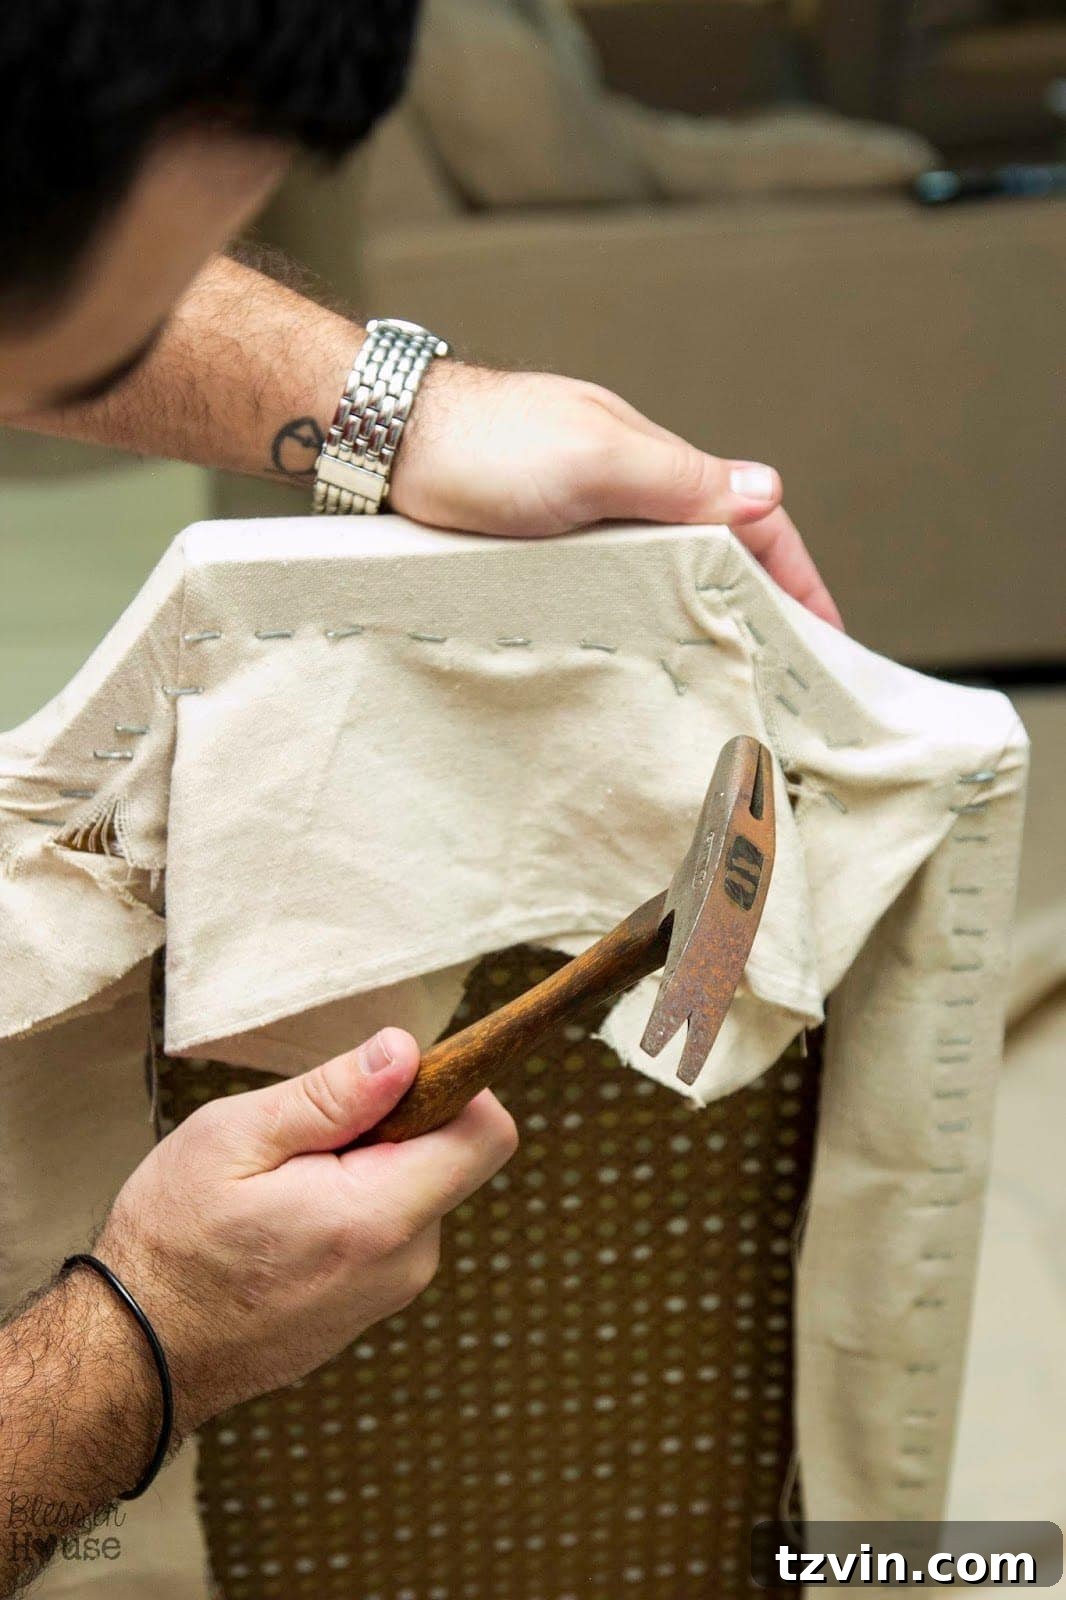
We went over all the staples with a hammer to ensure they were flush and secure, then trimmed any excess fabric on the back of the chair, preparing it for the back panel.
5. Finishing Touches: The Back Panel and Elegant Nailhead Trim
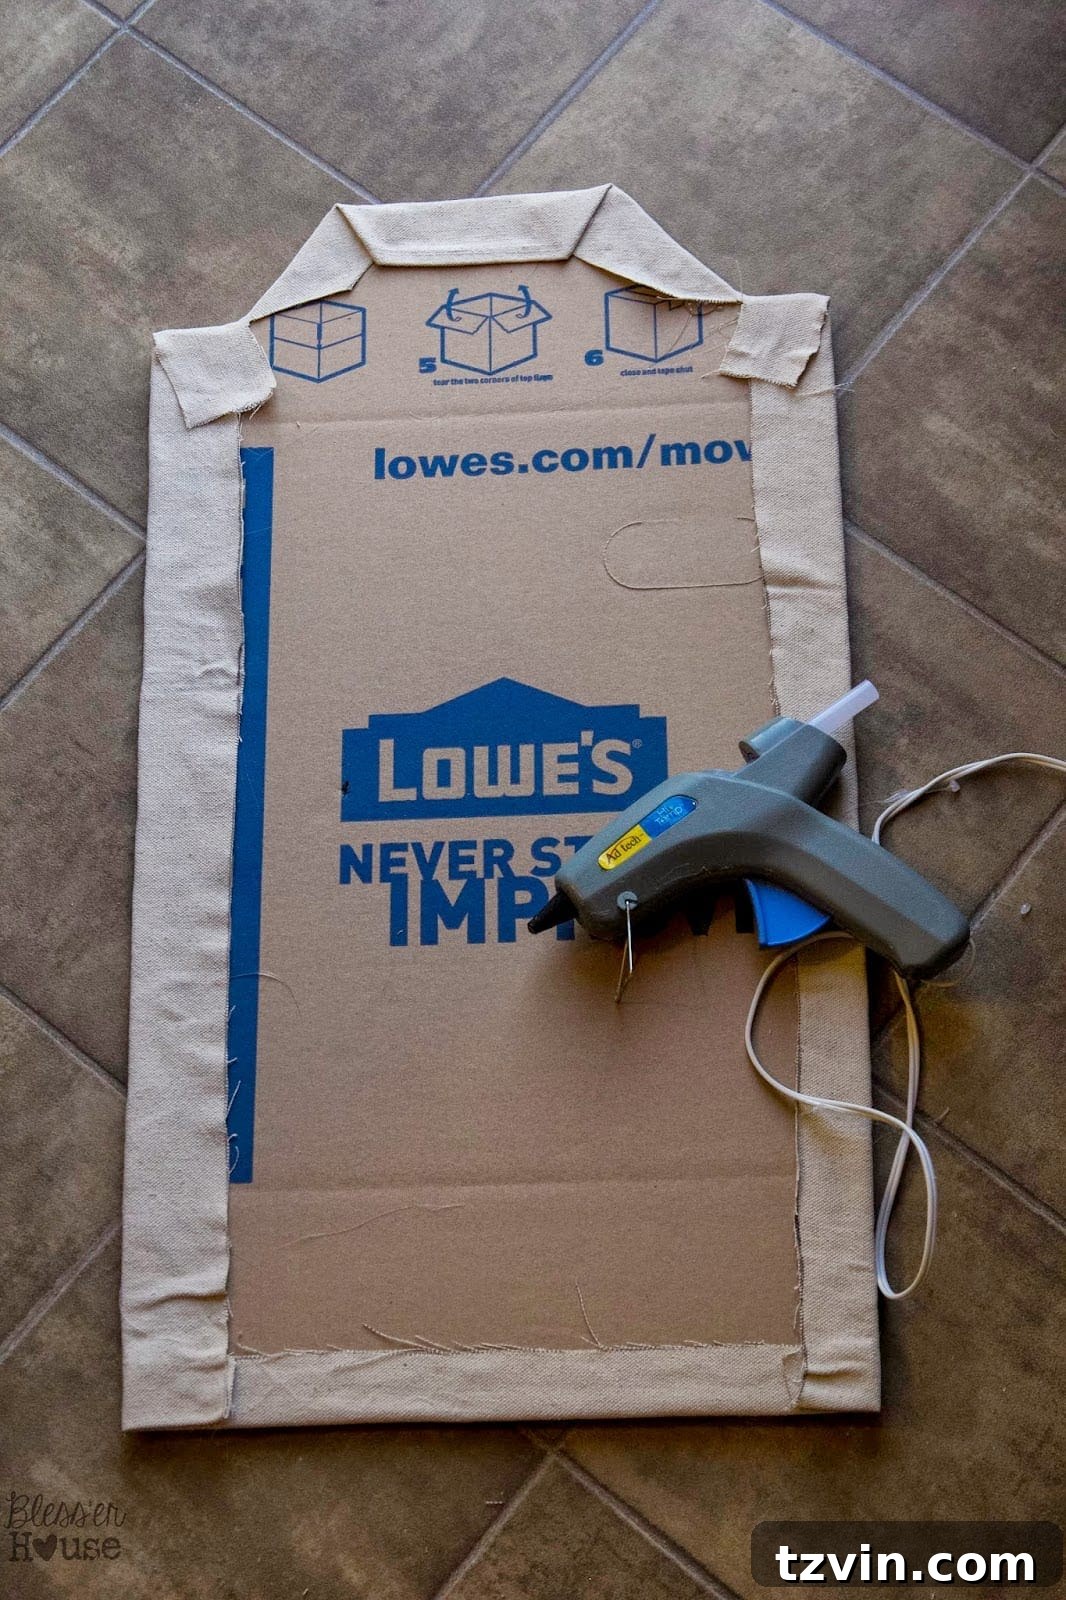
To create a clean, finished look on the back of the chair, I used the fabric piece we had cut earlier for the back panel. I hot glued the edges of the fabric around the cardboard cutout, pulling the fabric taut and starting from the bottom, working my way up.
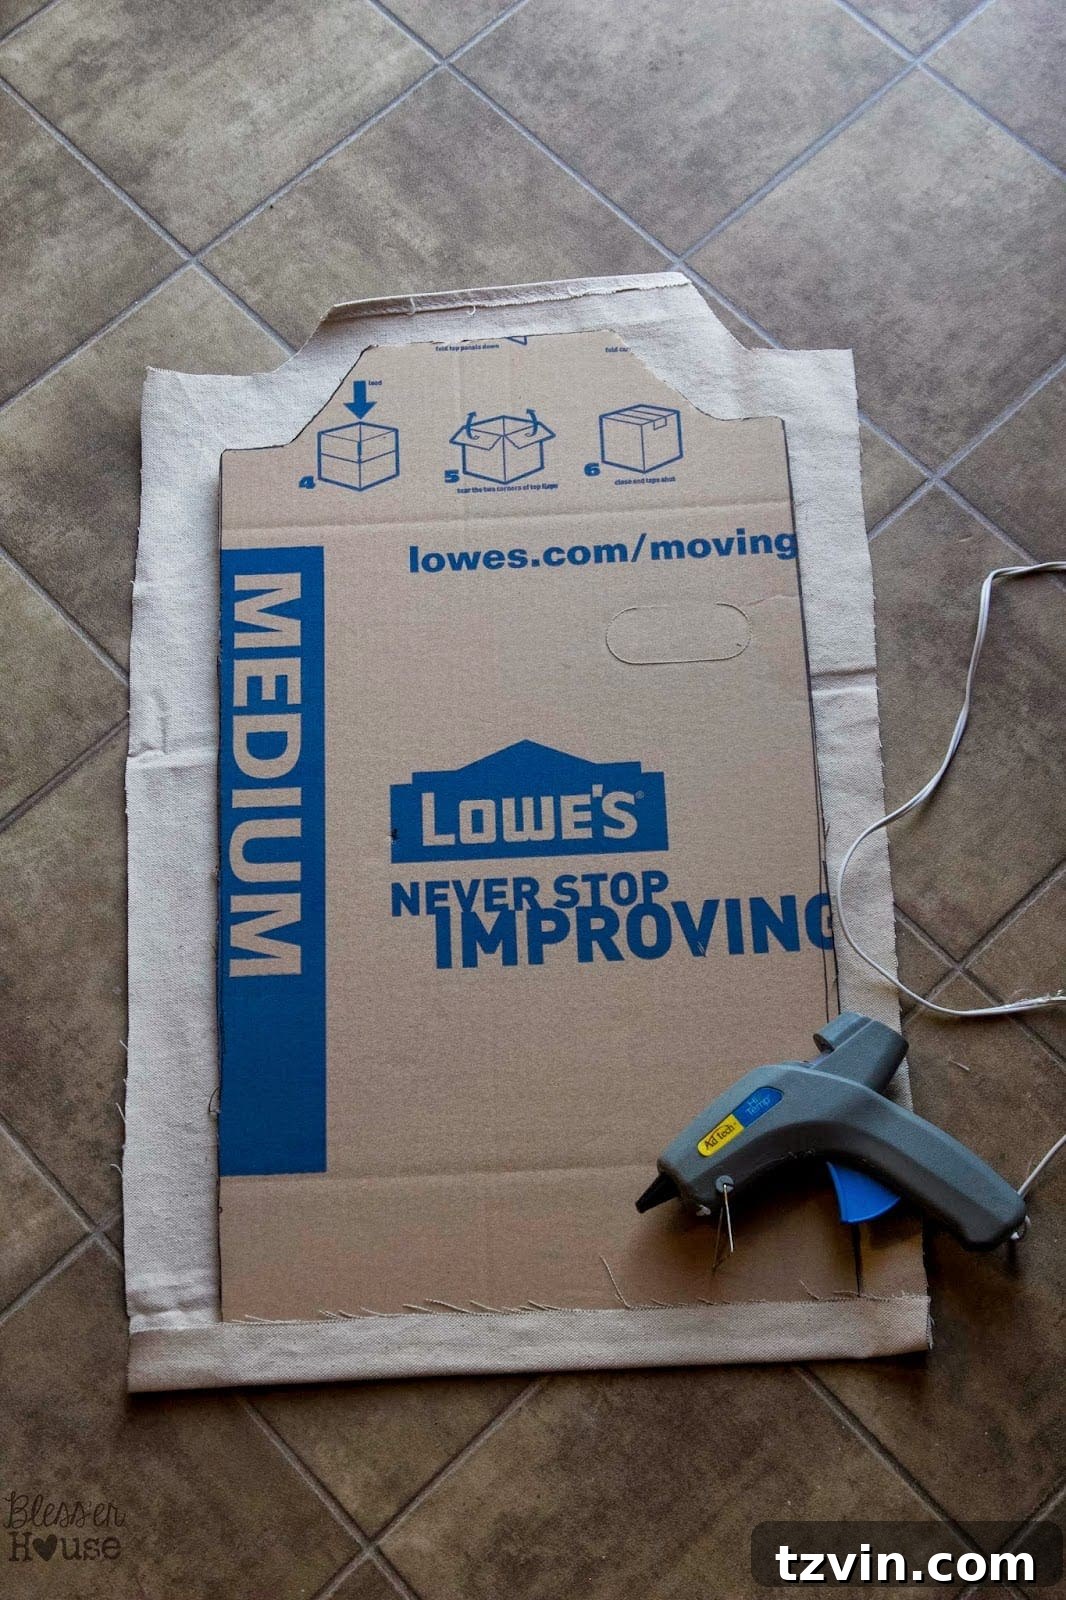
For the top corners of the panel, I made careful cuts and folded the fabric precisely, gluing it down to create crisp, clean edges.
Next, I applied a generous brushing of DAP Contact Cement to both the finished edges of the fabric-covered panel and the stapled edges on the back of the chair. Contact cement provides a powerful, long-lasting bond.
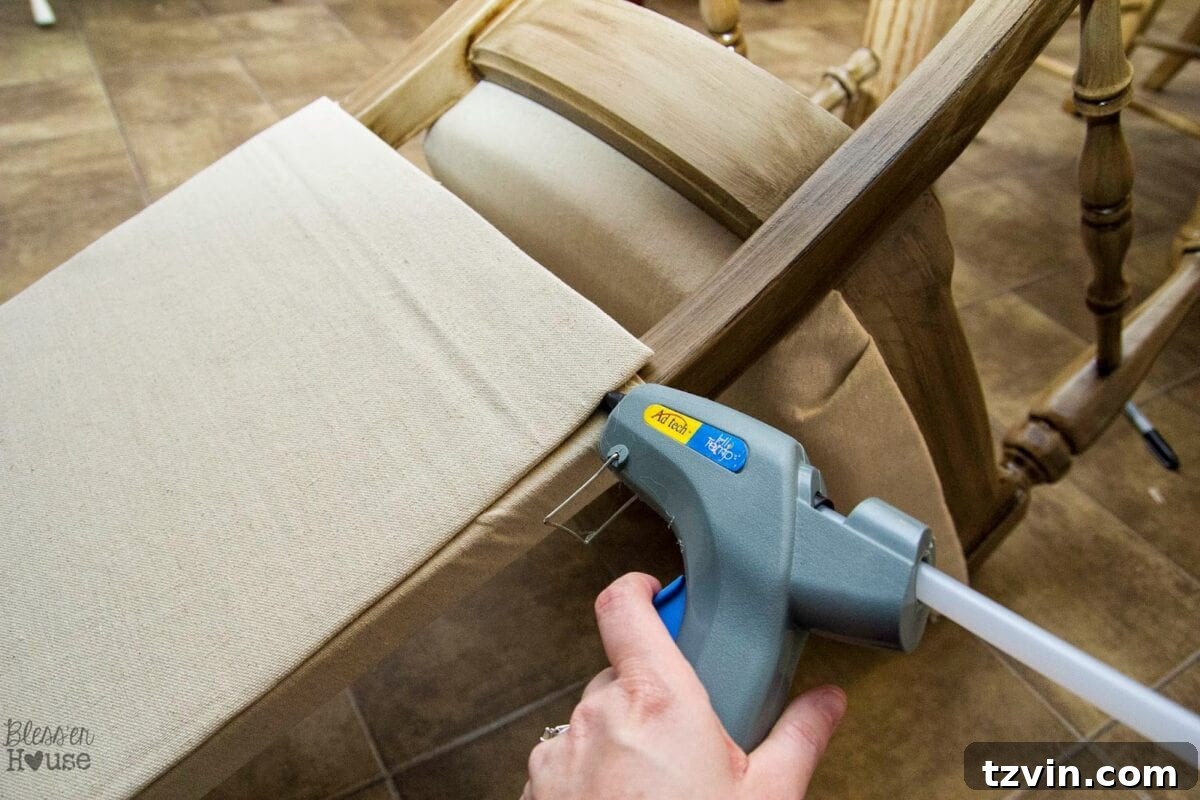
After allowing the contact cement to dry for about 10 minutes (as per instructions), I carefully pressed the upholstered back panel onto the back of the chair. To reinforce the bond and ensure a perfectly flush fit, I also applied hot glue strategically under the edges.
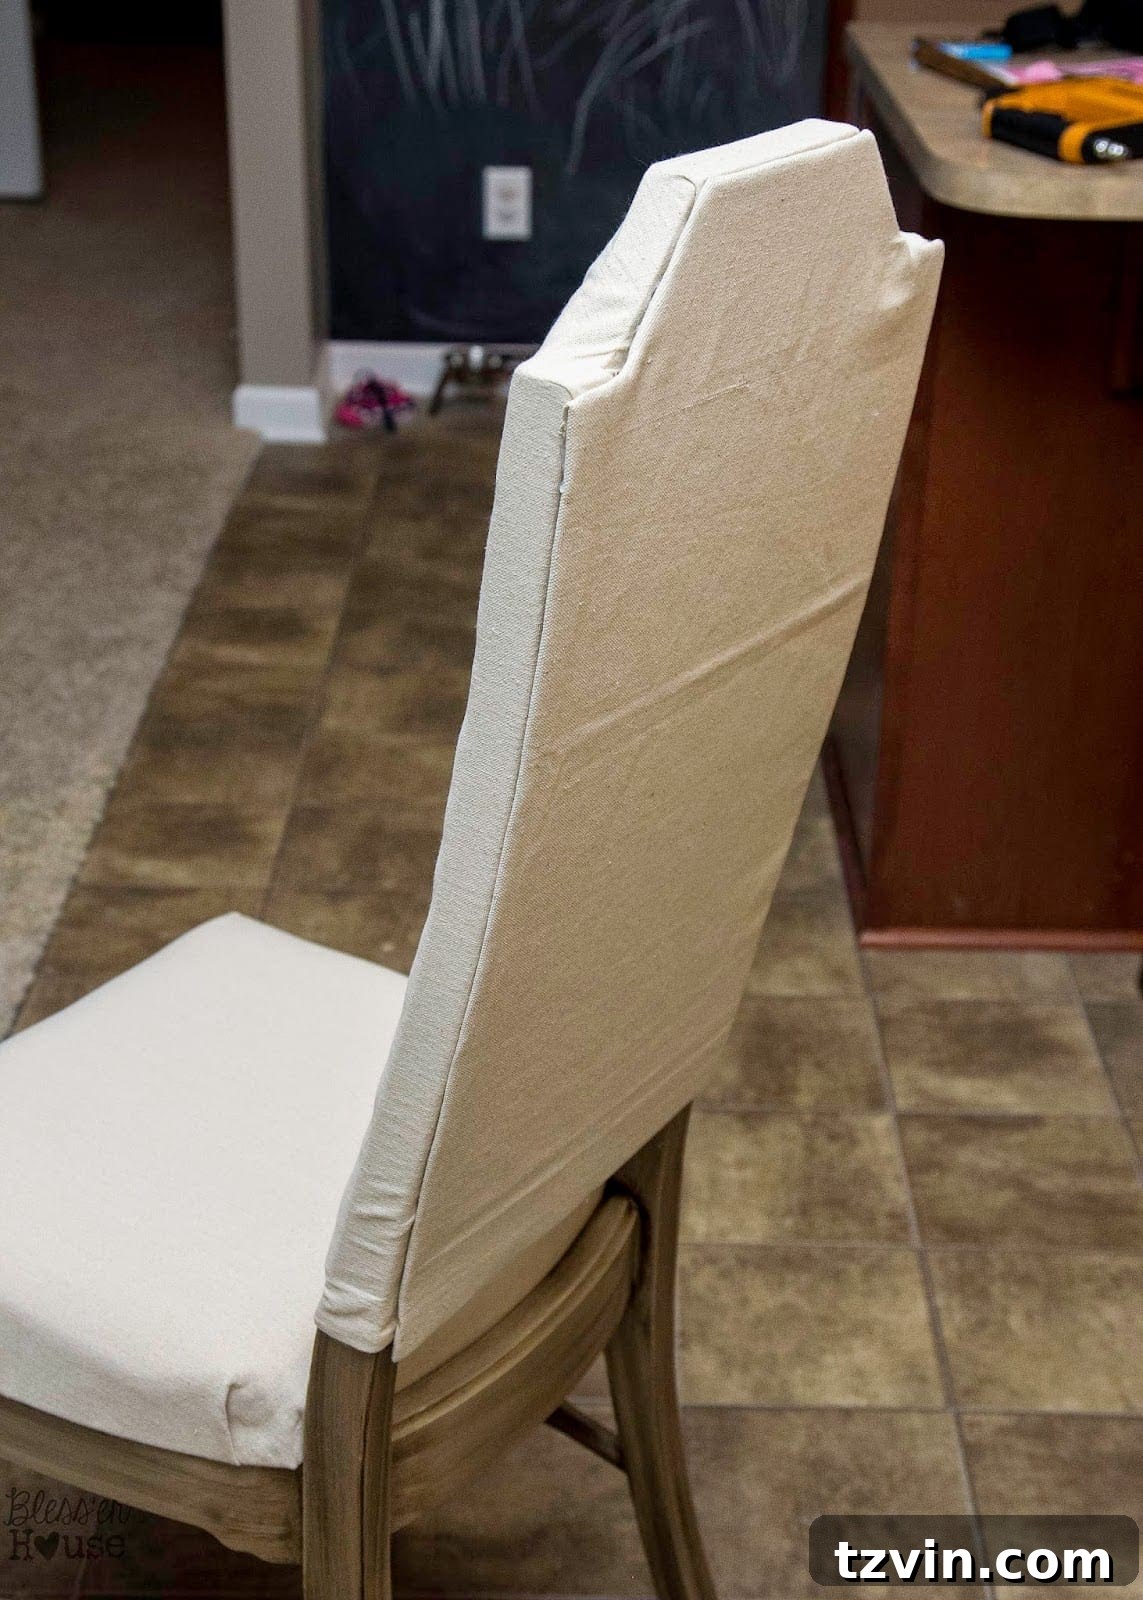
Behold! A fully upholstered chair! Not bad for someone who was largely improvising this entire process. I made sure to press out any remaining wrinkles afterward; this photo actually served as a good reminder that it needed a final smoothing.
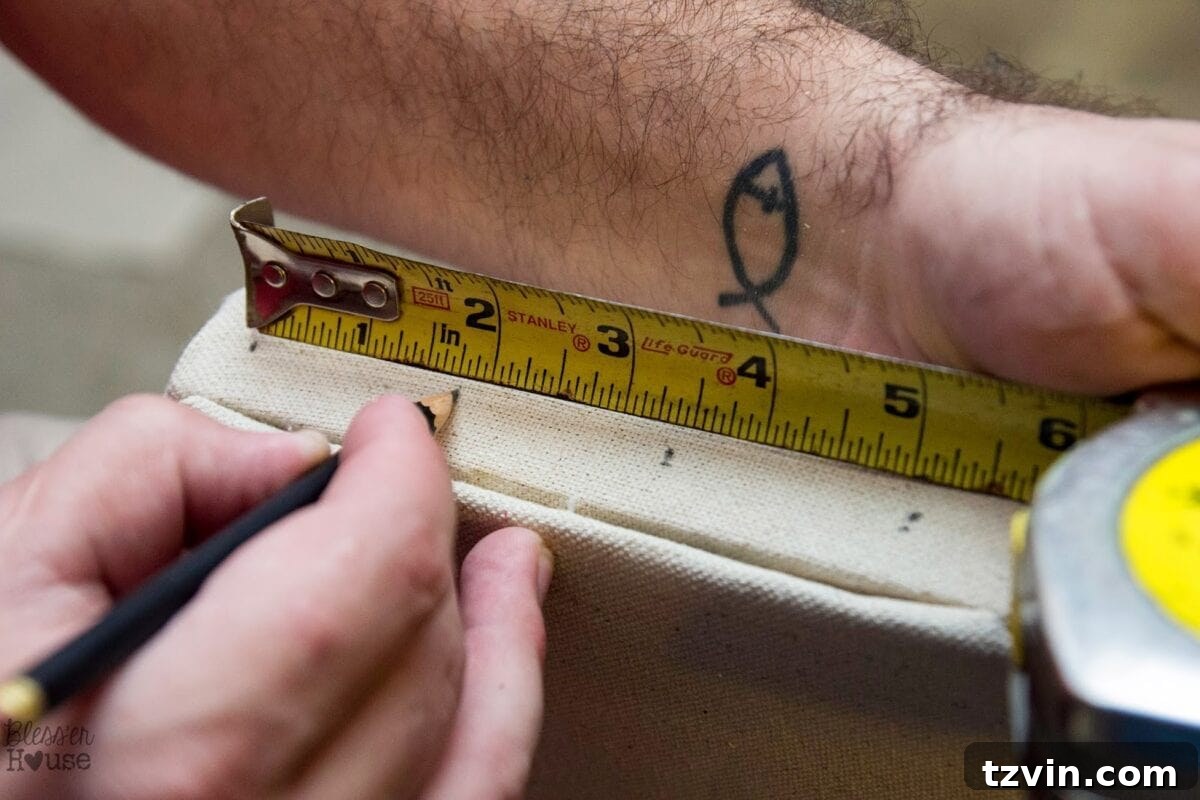
For the statement-making nailhead trim, we used a tape measure and a pencil to meticulously mark the placement for each nailhead, spacing them evenly at 1.75-inch intervals. Precision here is key for a professional look.
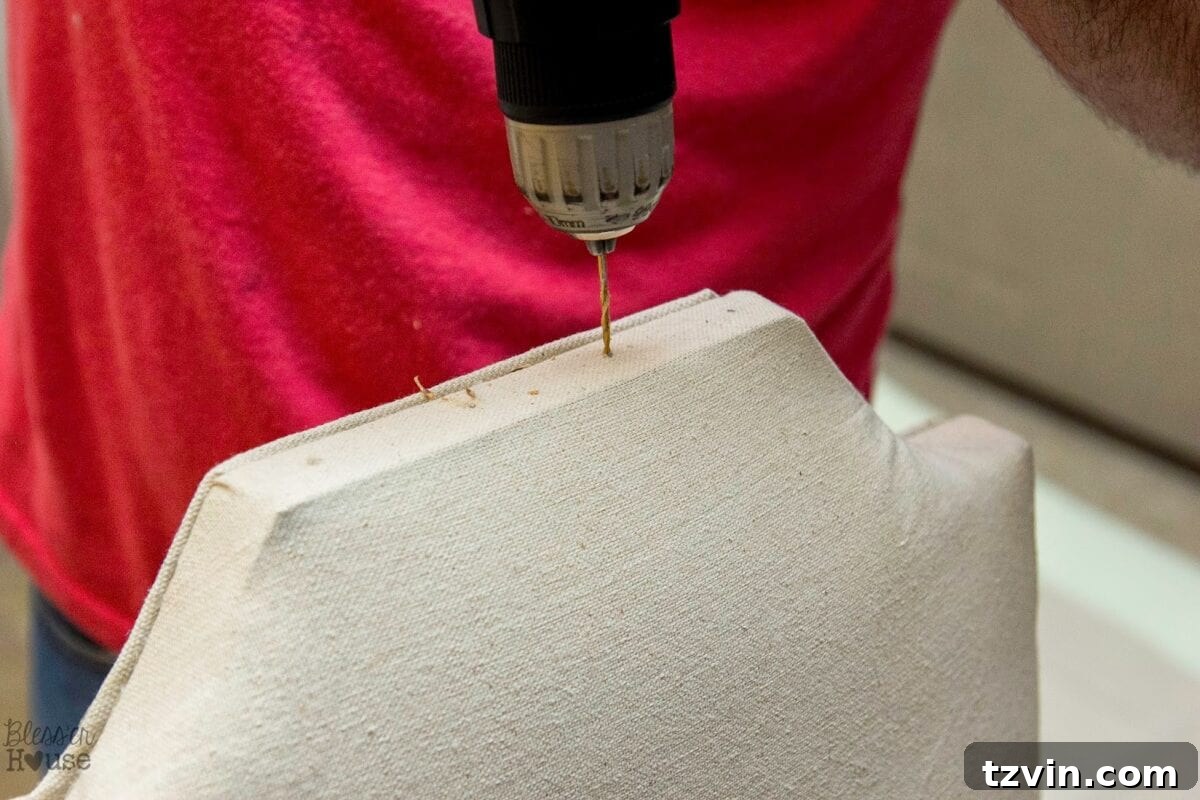
Because the wood of these vintage chairs was exceptionally hard, we had to pre-drill small pilot holes with an electric drill before hammering in the nailheads. This prevented the wood from splitting and ensured the nailheads went in straight and securely.
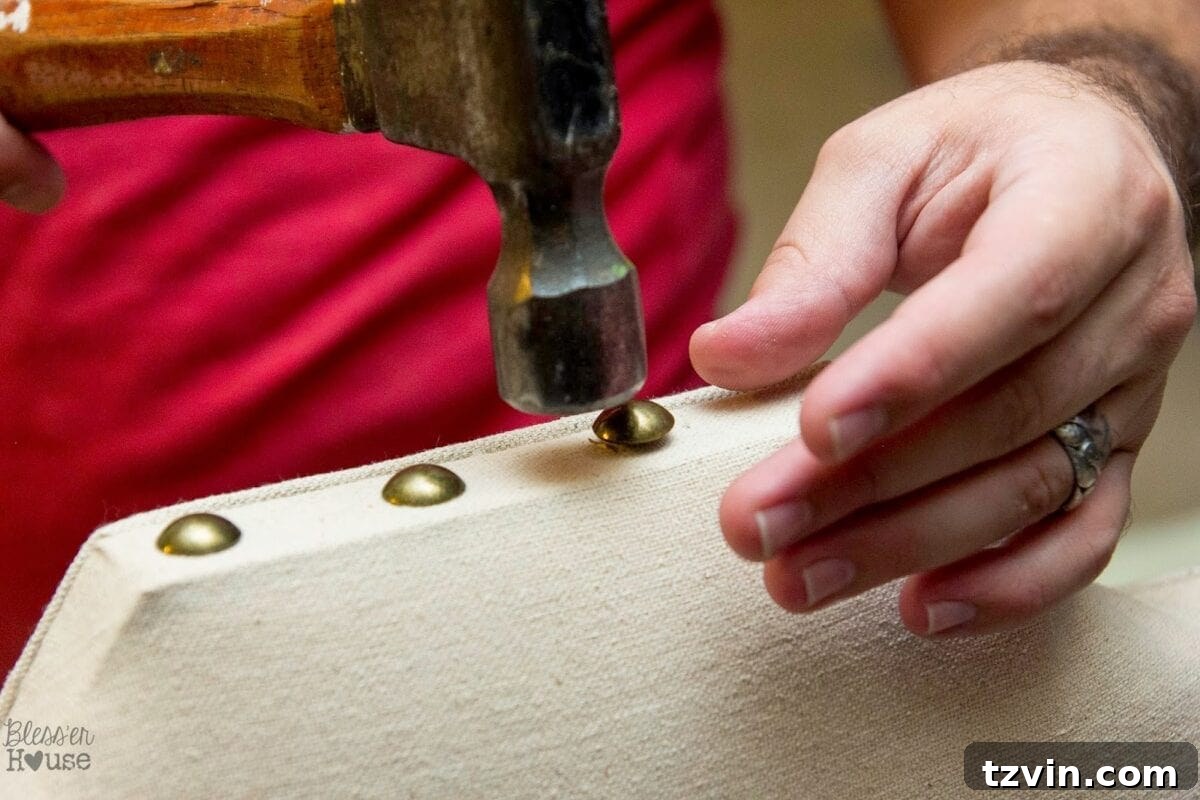
Then, it was simply a matter of hammering away, carefully tapping each antique gold nailhead into place. The nailheads add that perfect touch of vintage luxury, elevating the chair’s aesthetic dramatically.
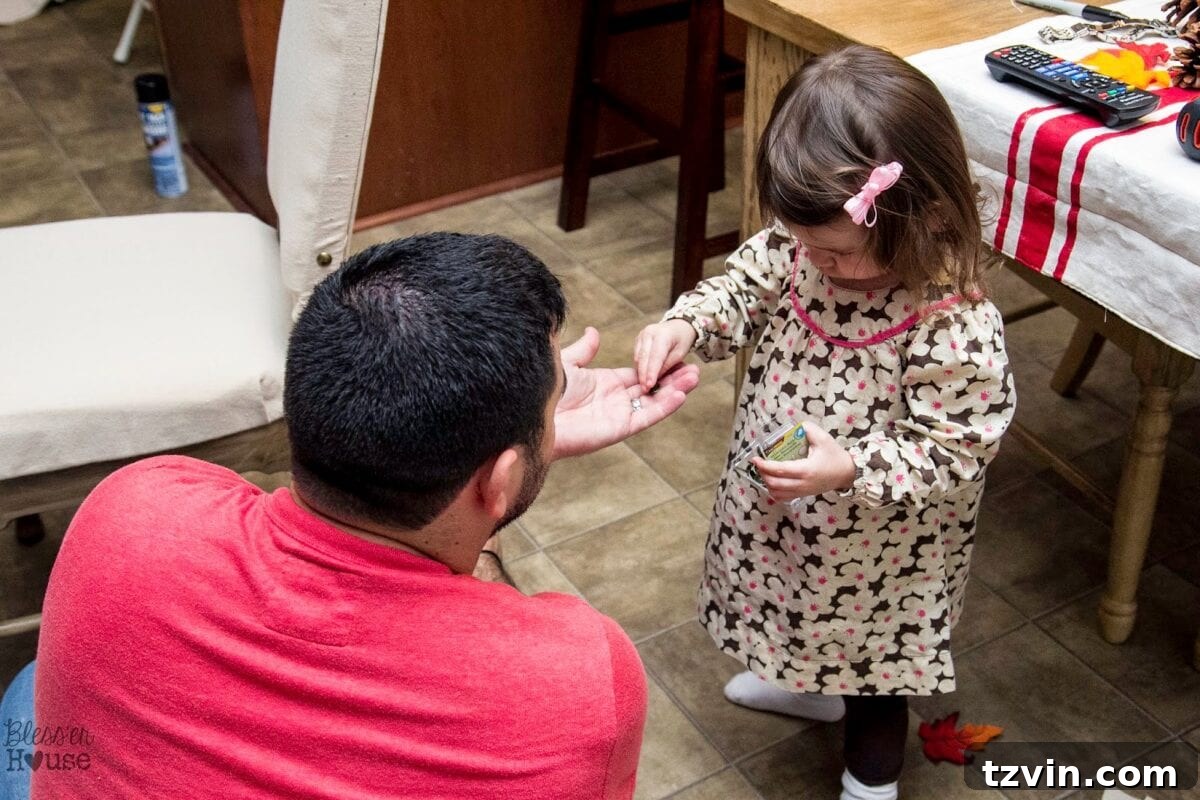
We were lucky that my parents and grandmother took our daughter, Olivia, on an outing, allowing us to focus on this intensive project. However, Olivia insisted on helping with the very last step! It was a sweet moment watching her pass nailheads to her daddy.
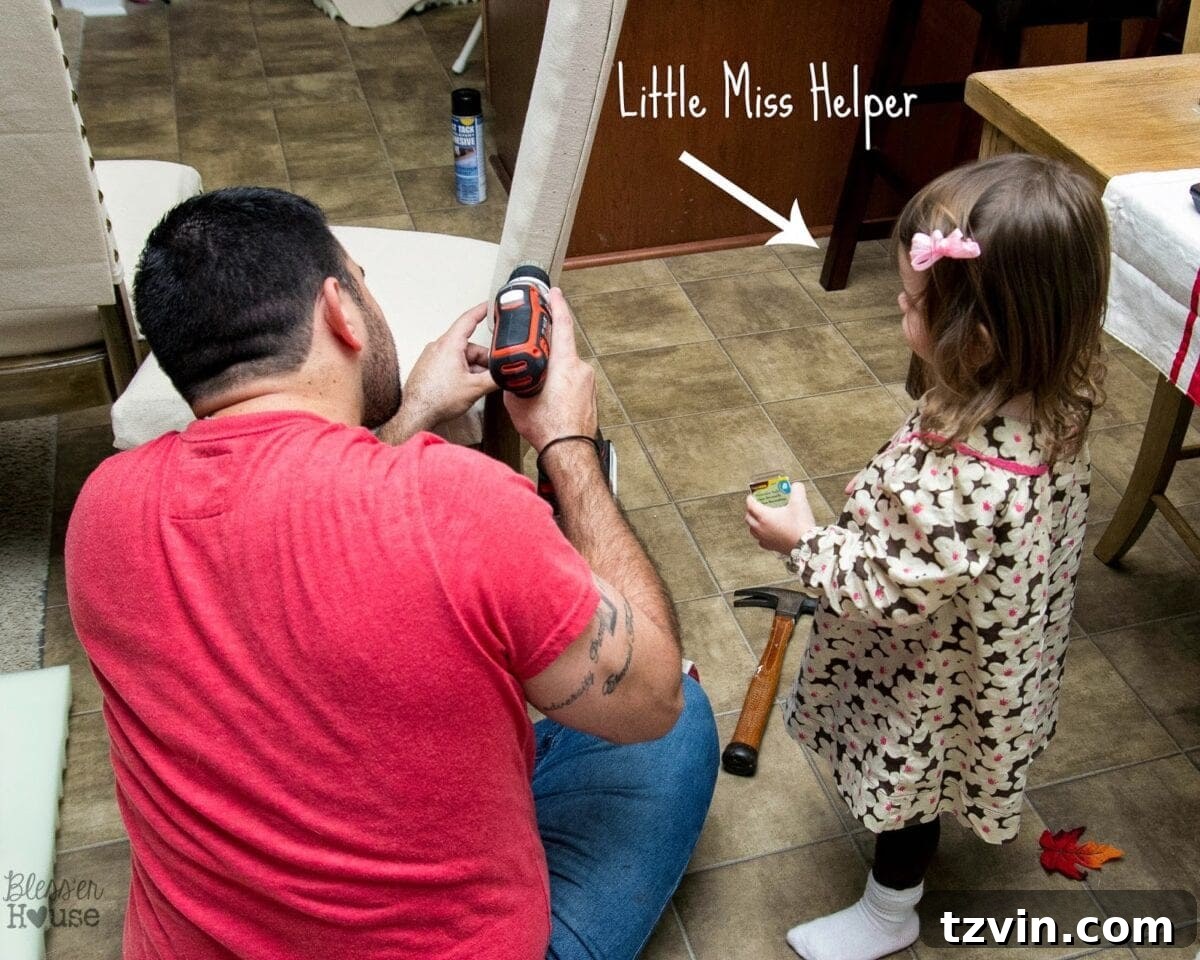
Her little hands were busy, passing each tiny nailhead, making her an essential part of the grand finale.
The Grand Reveal: A Dining Room Transformed
And just like that, the first chair was complete! The transformation was absolutely breathtaking.
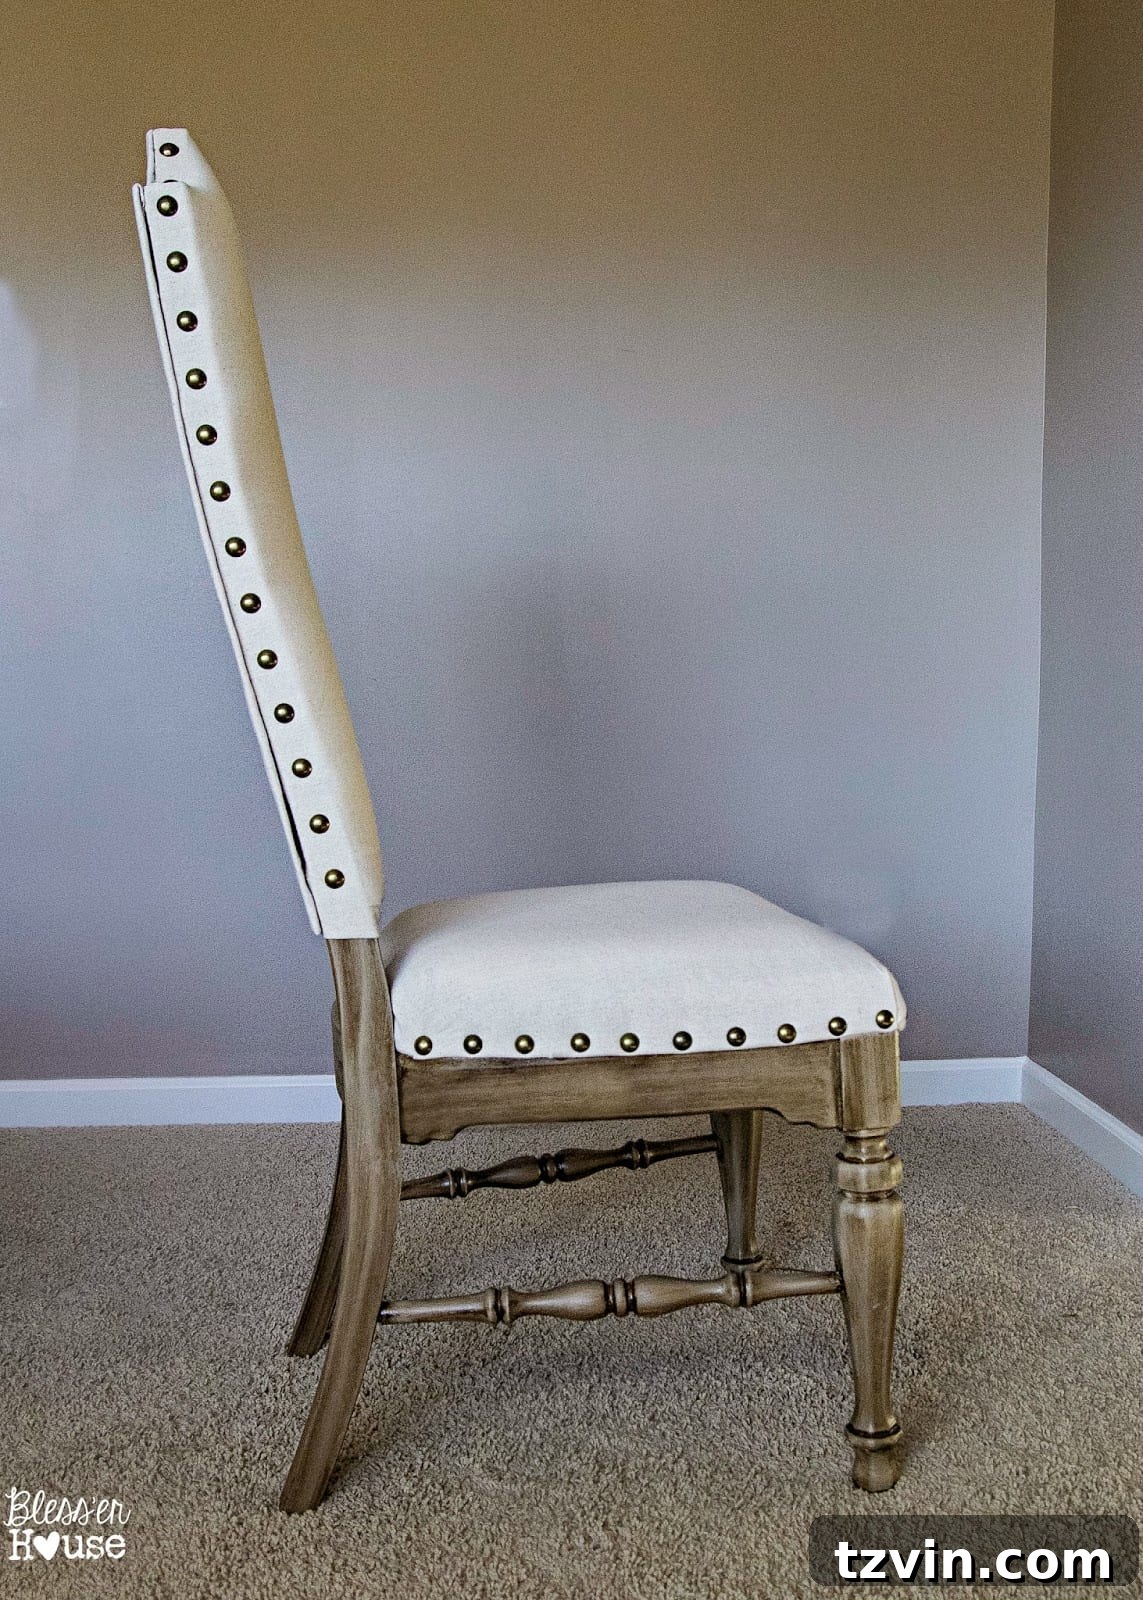
While it may not be absolutely perfect, and I certainly have much more to learn in the realm of upholstery (perhaps even how to wield a needle and thread one day!), I am incredibly proud of how these chairs turned out. They perfectly capture the high-end aesthetic I dreamed of, all for a fraction of the cost.
My dining room, once a blank canvas, is now beginning to feel like a thoughtfully designed space, radiating warmth and sophisticated charm.
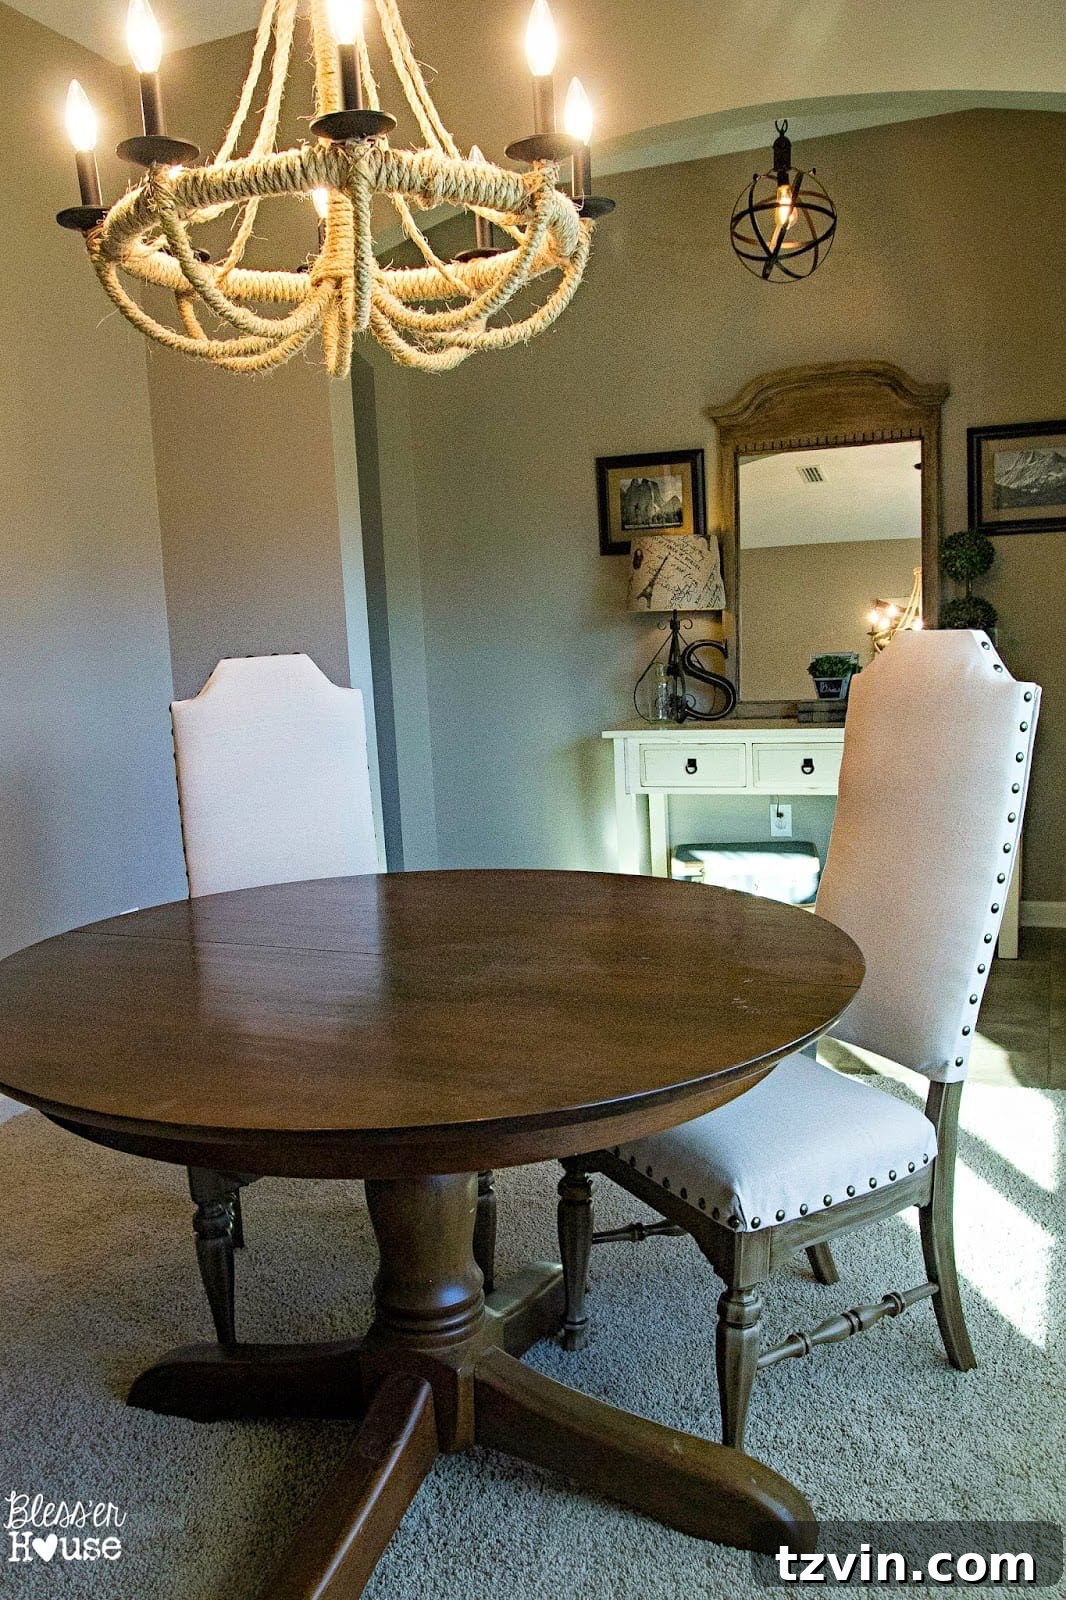
Two chairs down, four more to go! The remaining chairs have arms, which will present a slightly trickier challenge, but the goal is to have them all finished by Thanksgiving, ready to welcome our family around a beautifully appointed table. It’s amazing what a little vision, elbow grease, and smart budget choices can achieve.
UPDATE: They’re all finished! And they are absolutely marvelous, truly transforming our dining area into a luxurious and inviting space.
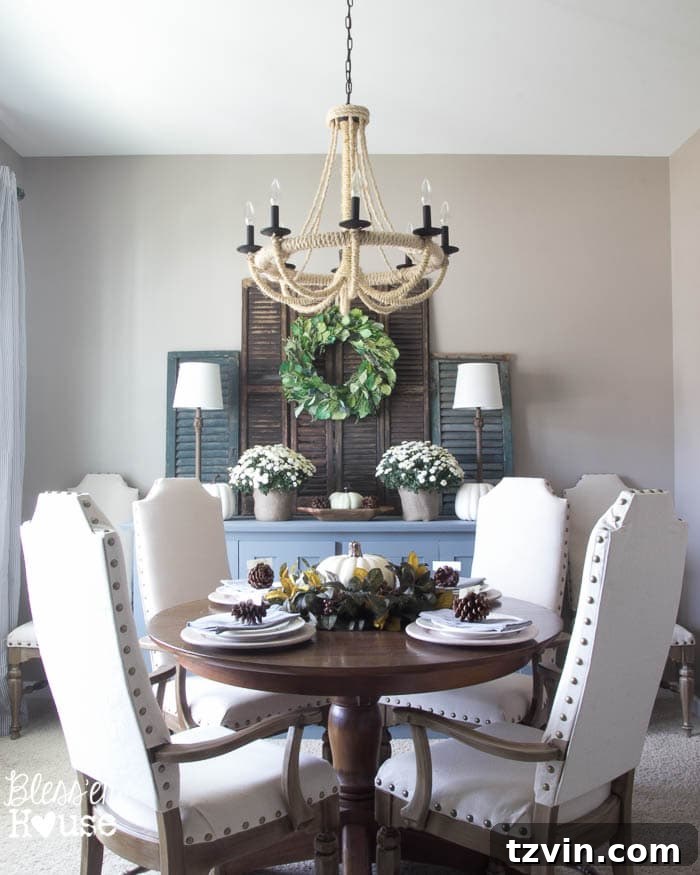
I still can’t believe the incredible journey this project took us on and the stunning results we achieved. It’s a testament to the power of DIY and seeing potential where others might see only castoffs.
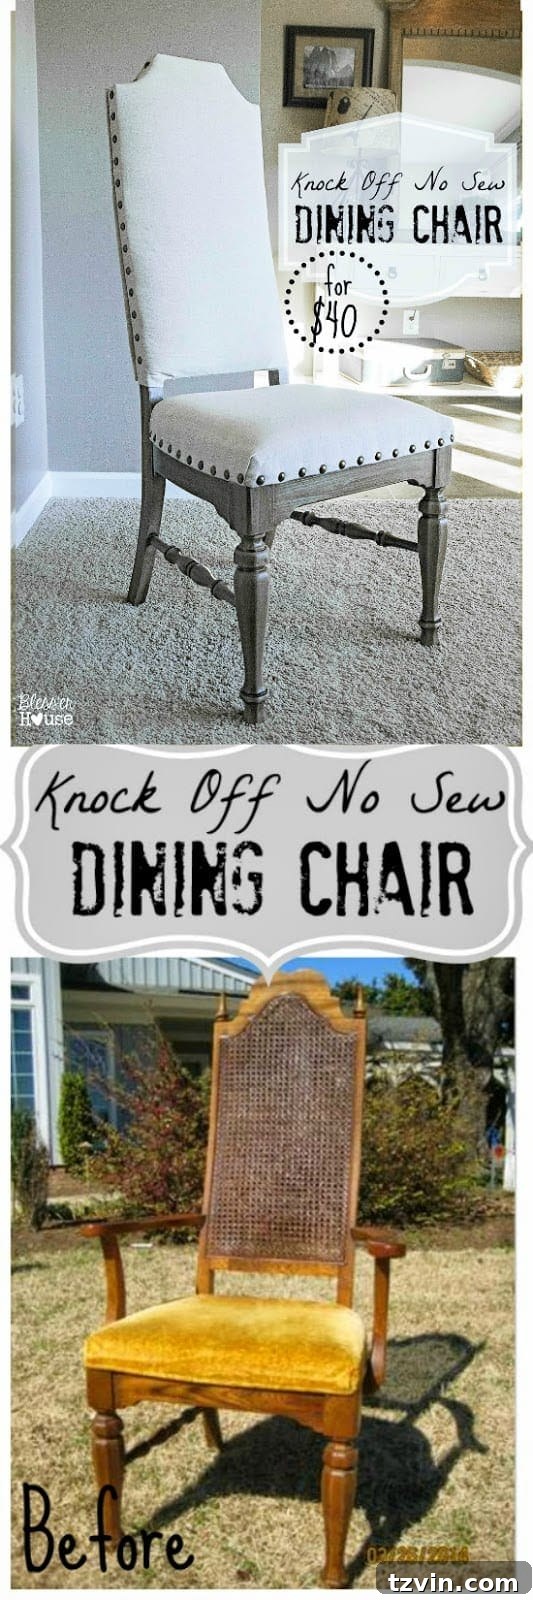
What do you think? Pretty convincing for high-end knock-offs, wouldn’t you say?
Join the DIY Community: More High-End Looks for Less!
If you’re a Restoration Hardware aficionado like me, but also love a good bargain, you might enjoy some of my other DIY projects that capture that coveted style without breaking the bank. (Just click the images to discover the full tutorials!)
I might just have an addiction to creating high-end looks on a DIY budget. 😉

Follow my DIY adventures on:
Or find me on:
Facebook |
Twitter |
Pinterest |
Google+
Shared with: Thrifty Decor Chick