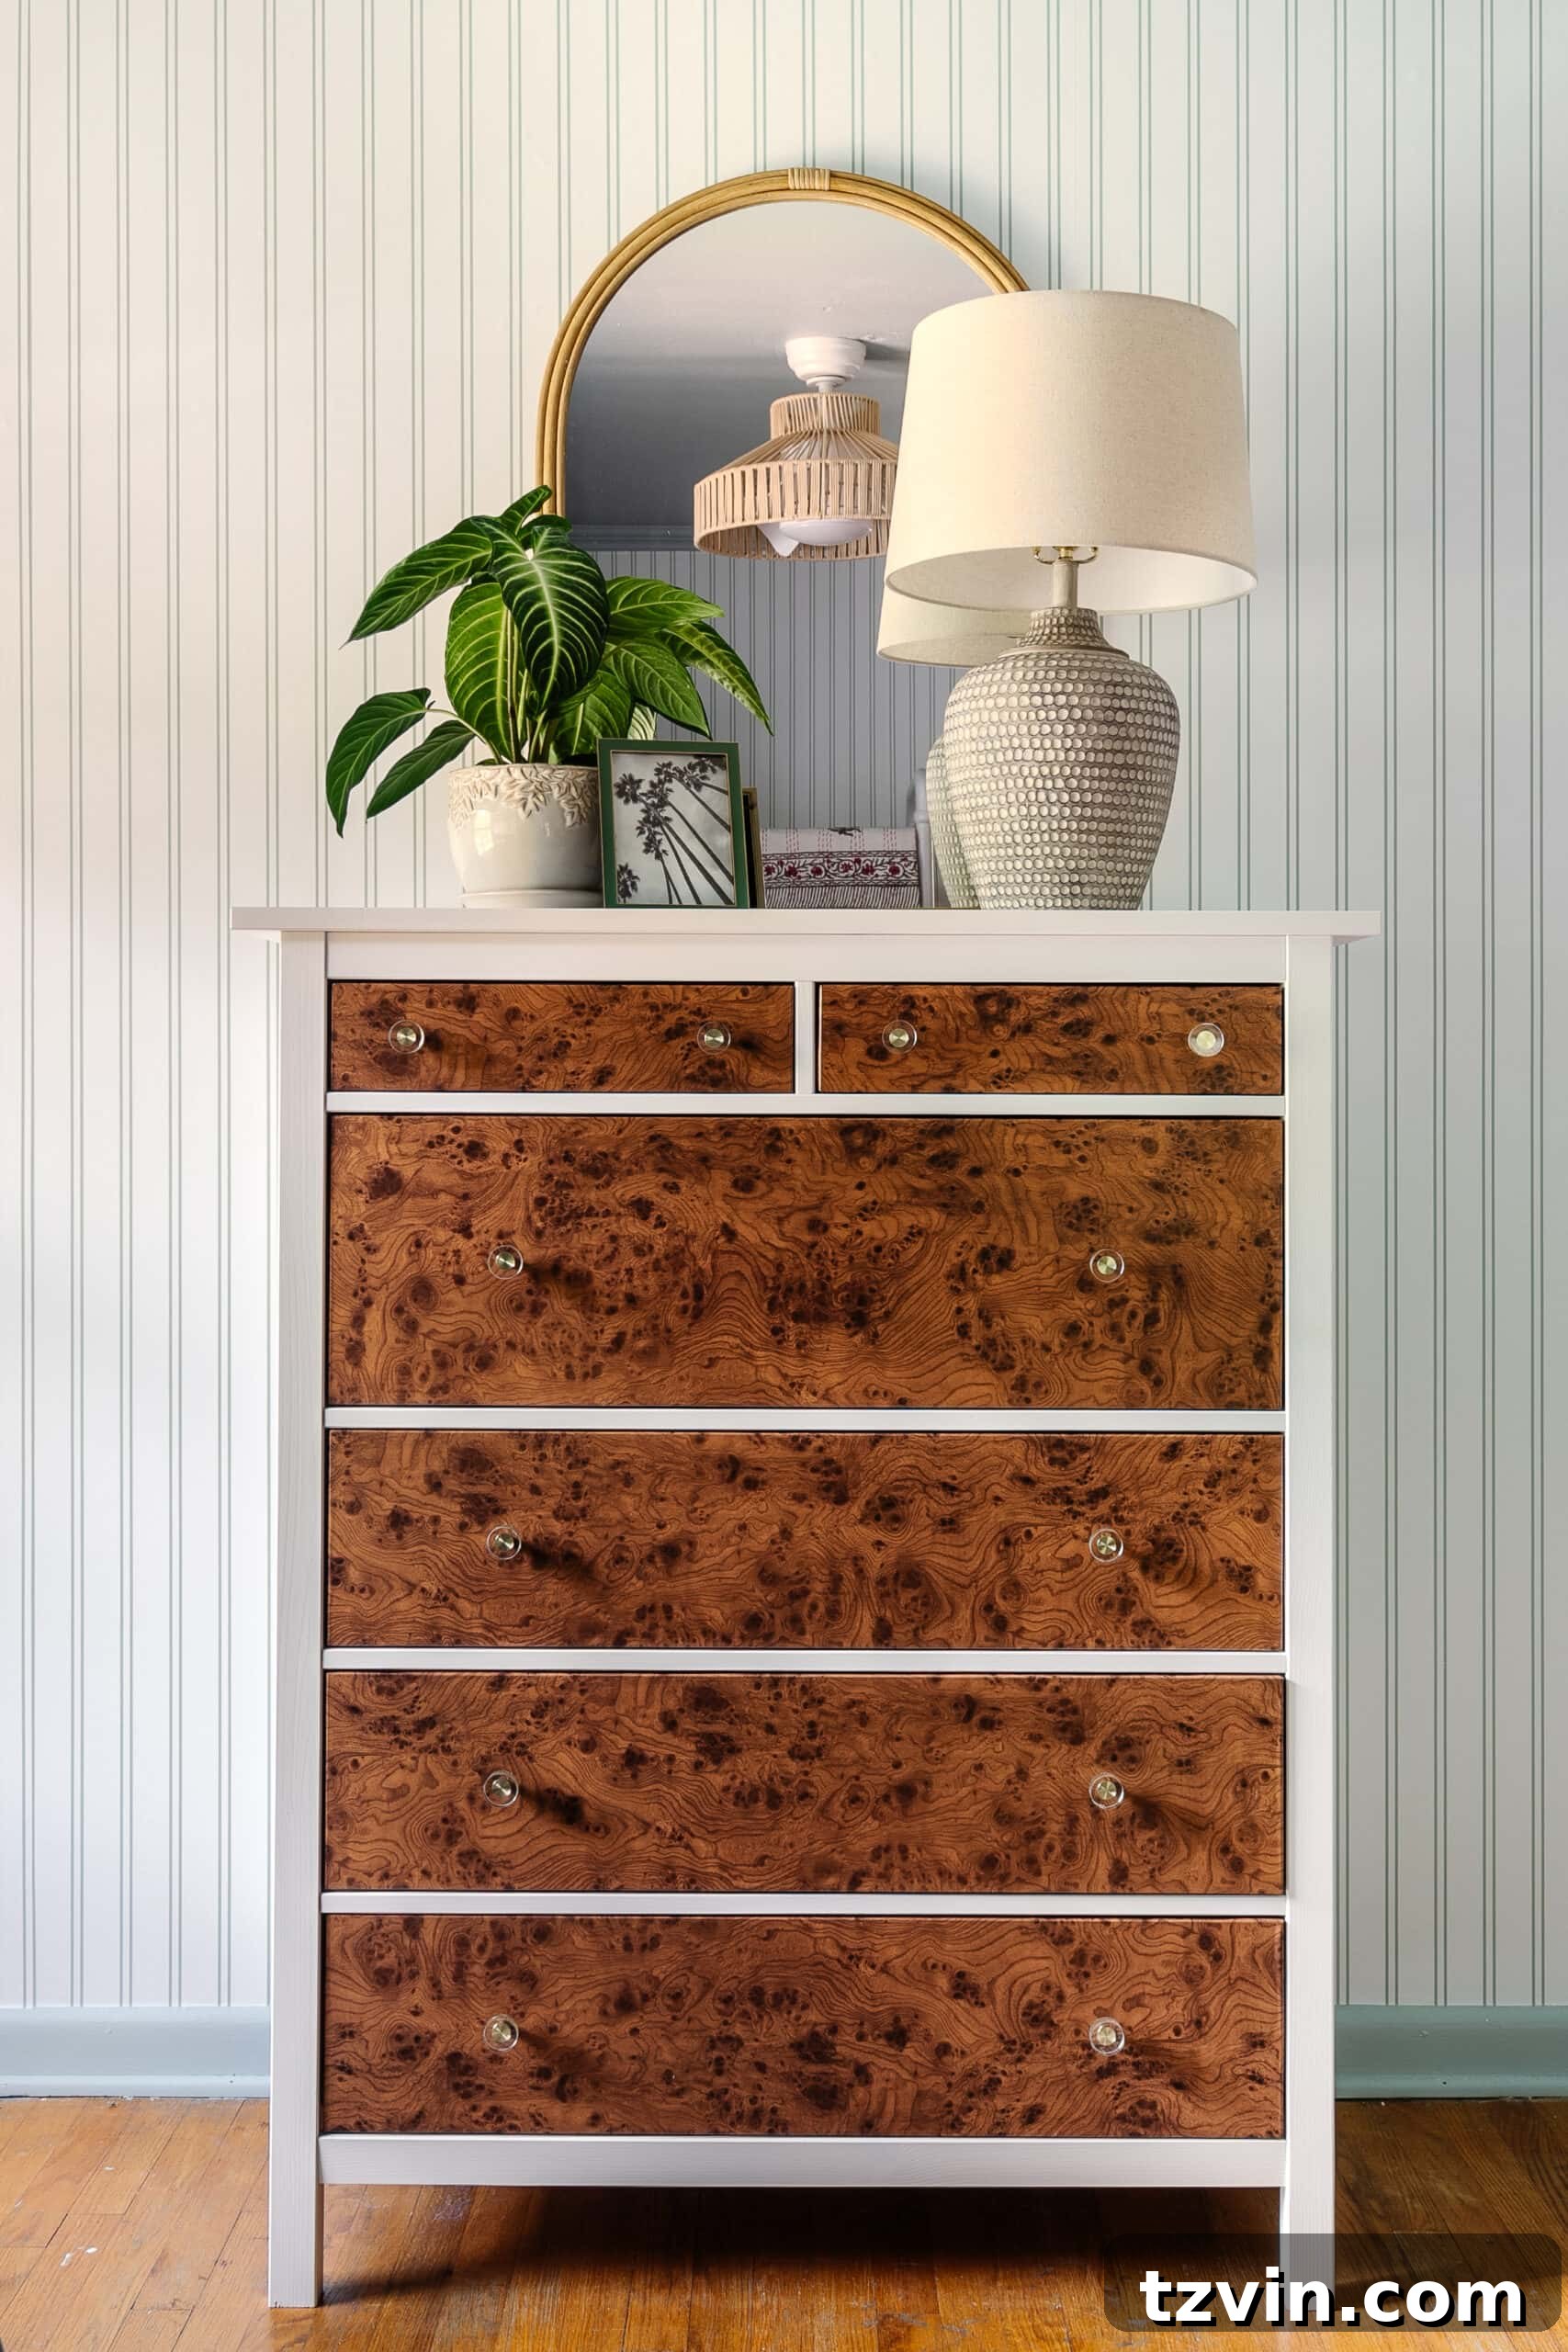
Transform Your IKEA Dresser: Achieve a High-End Burl Wood Furniture Finish for Just $30 with This Brilliant IKEA Hack!
Dreaming of a high-end, vintage aesthetic for your home without the exorbitant price tag? This ultimate IKEA dresser hack will show you how to achieve a luxurious burl wood furniture finish on a plain dresser using simple contact paper, all for an astonishingly low cost of around $30. Prepare to transform your furniture and elevate your space with this chic, budget-friendly DIY project!
There’s a captivating allure to burl wood, with its unique patterns and rich textures that evoke a sense of timeless sophistication. Often seen in high-end, bespoke furniture pieces, true burl wood can command prices upwards of several thousand dollars. While the elegance is undeniable, the cost can be a significant barrier for many design enthusiasts looking to infuse their homes with luxurious touches.
Recently, we embarked on another exciting room makeover, a Bless’er House Takeover project, to create a stylish shared bedroom for three pre-teen girls at our neighbors’ house. The vision for this space was a delightful blend of beachy tranquility, vintage charm, refined elegance, and a touch of rustic warmth. As the design concept solidified, a distinct image popped into my head: a stunning burl wood dresser, perfect for adding that touch of old-world glamour and organic texture to the room.
The challenge was clear: how to integrate this opulent finish into a budget-conscious project without compromising the overall aesthetic. The solution? An ingenious IKEA dresser hack! Instead of investing in a genuine burl wood dresser – which can easily cost upwards of $2,000, like this real deal burl wood dresser version – we decided to recreate the look using an affordable IKEA piece and decorative contact paper. The result is a piece that looks incredibly authentic, adding a touch of vintage sophistication that perfectly complements our design vision, all while saving a substantial amount of money. This guide will walk you through every step to achieve this remarkable high-end transformation yourself.
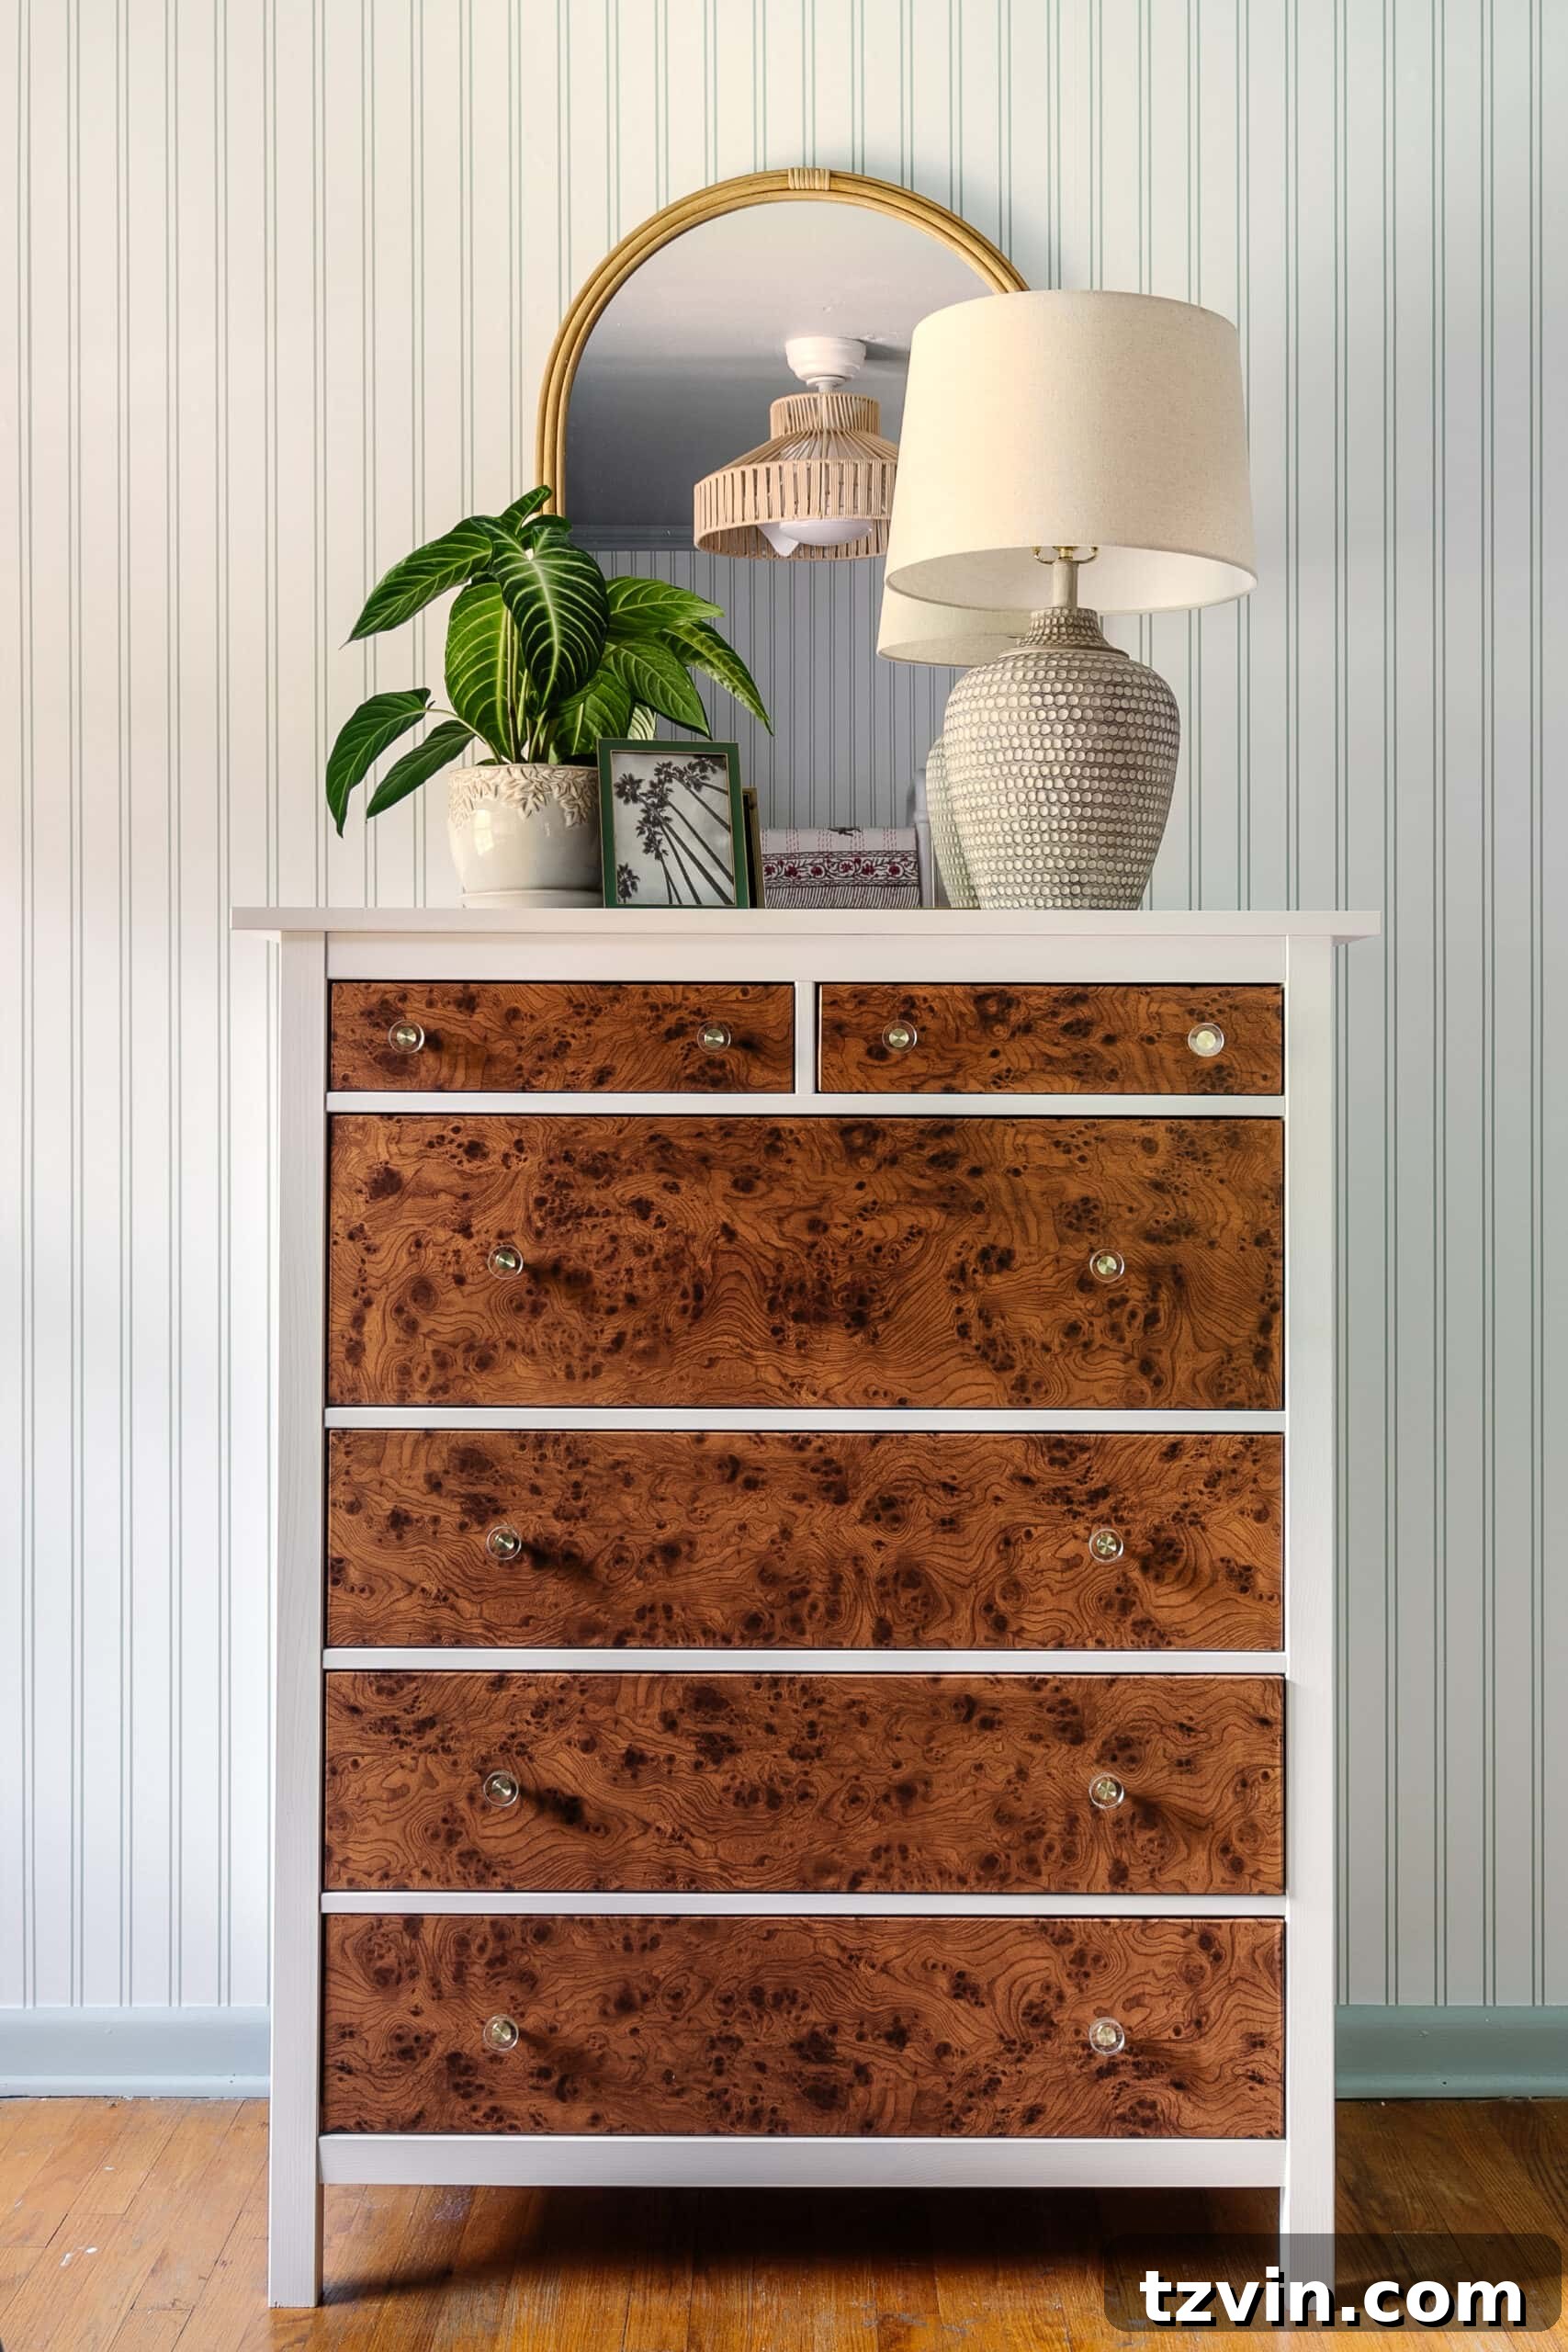
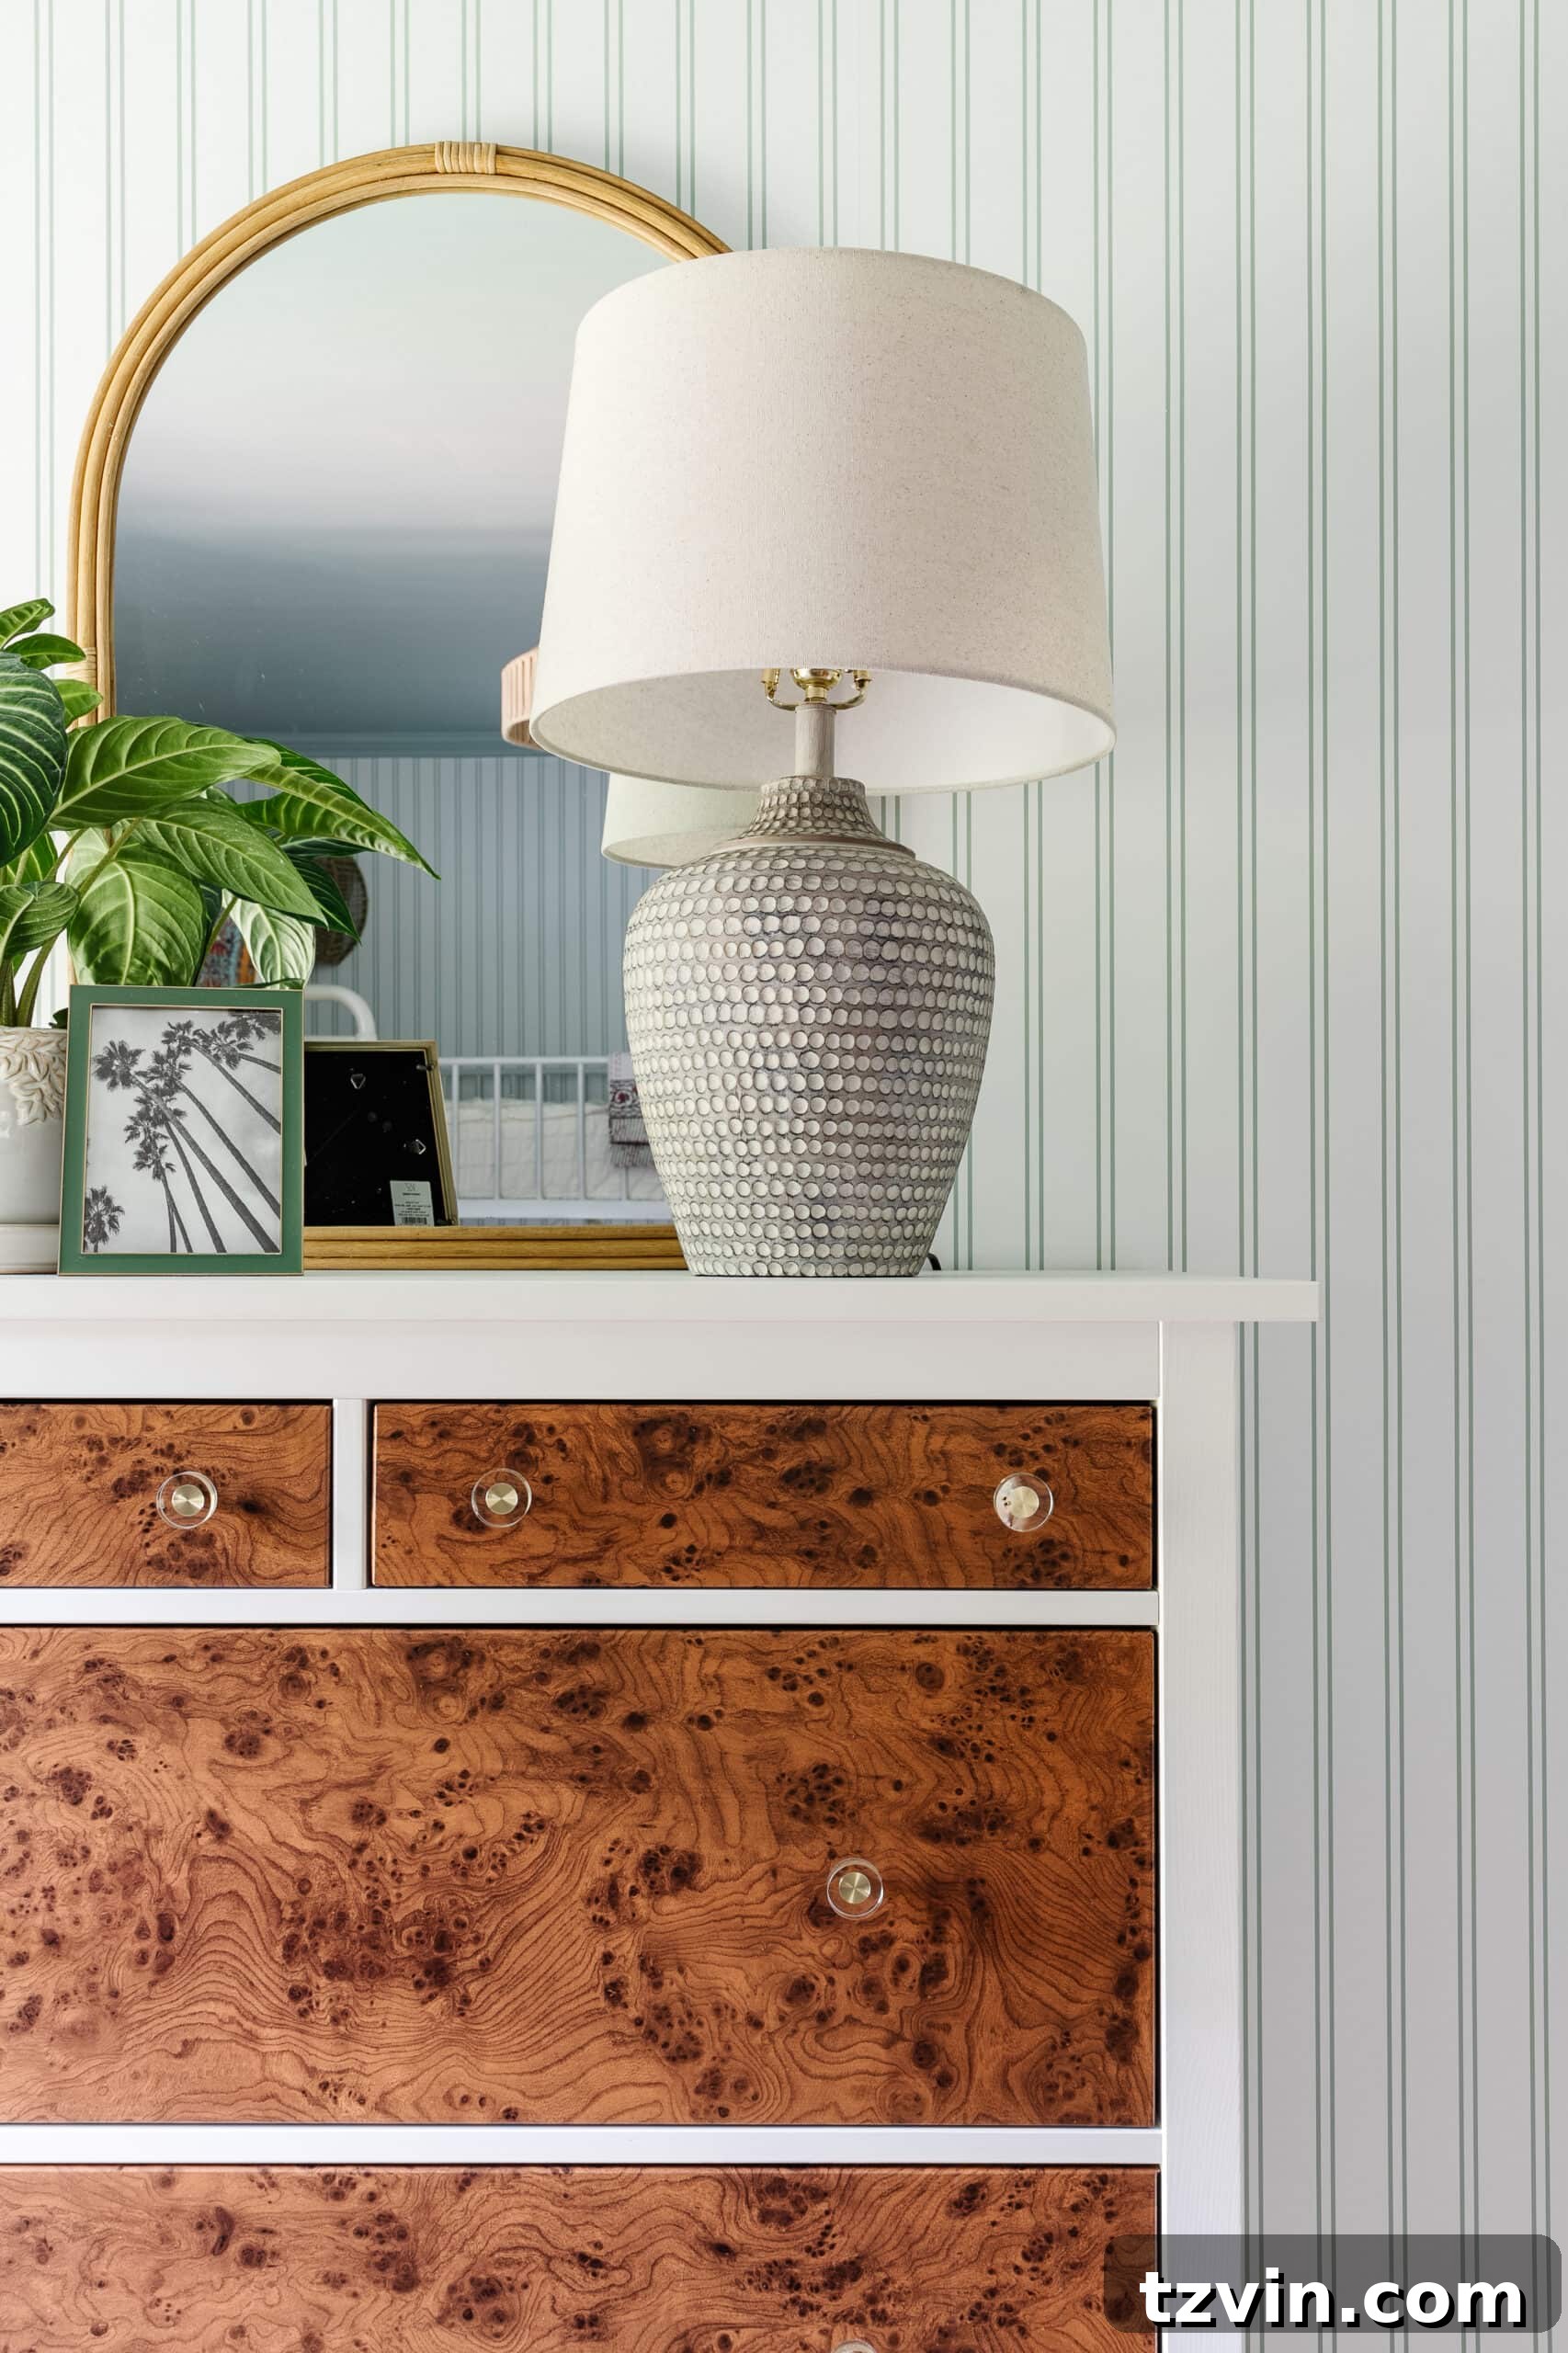
Can you believe this luxurious, vintage-inspired finish was achieved with just about $30 worth of contact paper and roughly an hour of effort? The visual impact is simply stunning, giving an ordinary piece of furniture the appearance of a treasured antique. It’s a testament to how creative DIY solutions can replicate expensive trends on a tight budget.
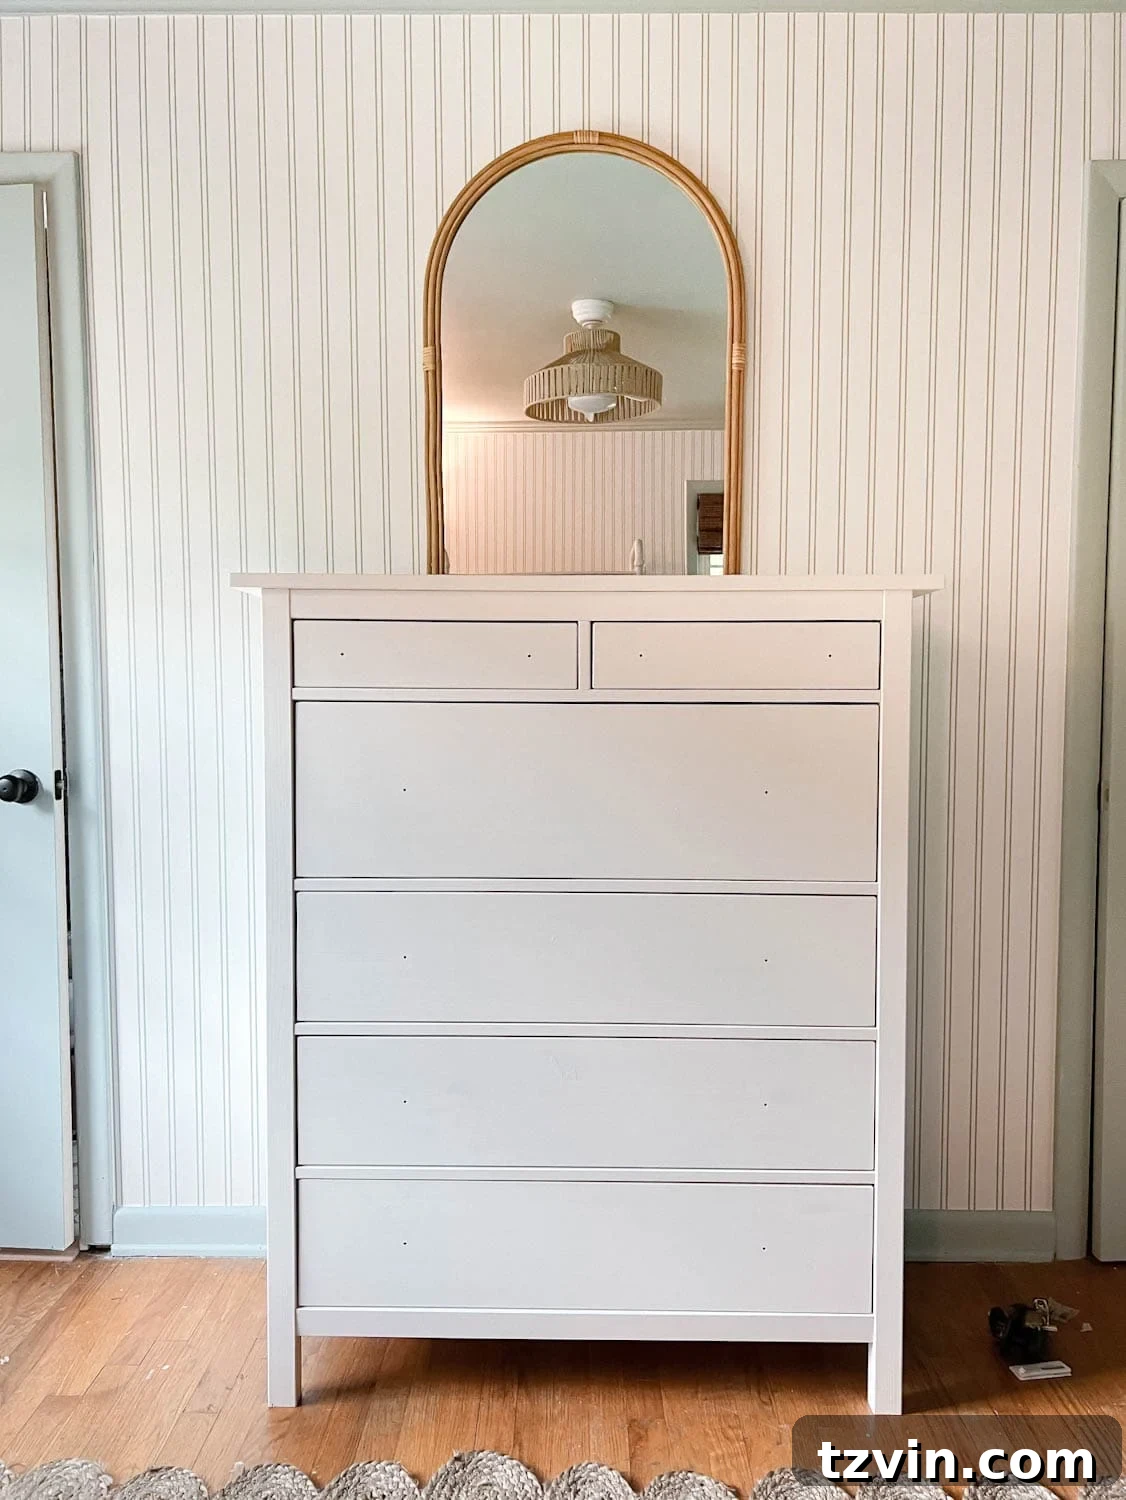
IKEA Hack Ideas Using Contact Paper: Versatility and Affordability
For this specific project, we opted for an IKEA Hemnes chest dresser, which provides a sturdy and spacious base for customization. However, the beauty of this hack lies in its incredible versatility. Any dresser or furniture piece featuring flat drawer fronts or expansive flat surfaces can be an ideal candidate for this contact paper transformation. Consider popular lines such as the IKEA MALM series, known for its clean lines and minimalist design, which would also work exceptionally well.
But why stop at dressers? The possibilities for applying this burl wood contact paper hack extend far beyond. Imagine transforming a plain flat front door on an IKEA PAX wardrobe, adding a sophisticated touch to an IKEA LACK side table, or giving an IKEA BESTA storage cabinet an entirely new personality. The sleek and simple designs characteristic of these IKEA ranges, with their impeccable clean lines, make them perfectly suited for contact paper applications, ensuring a smooth and professional finish.
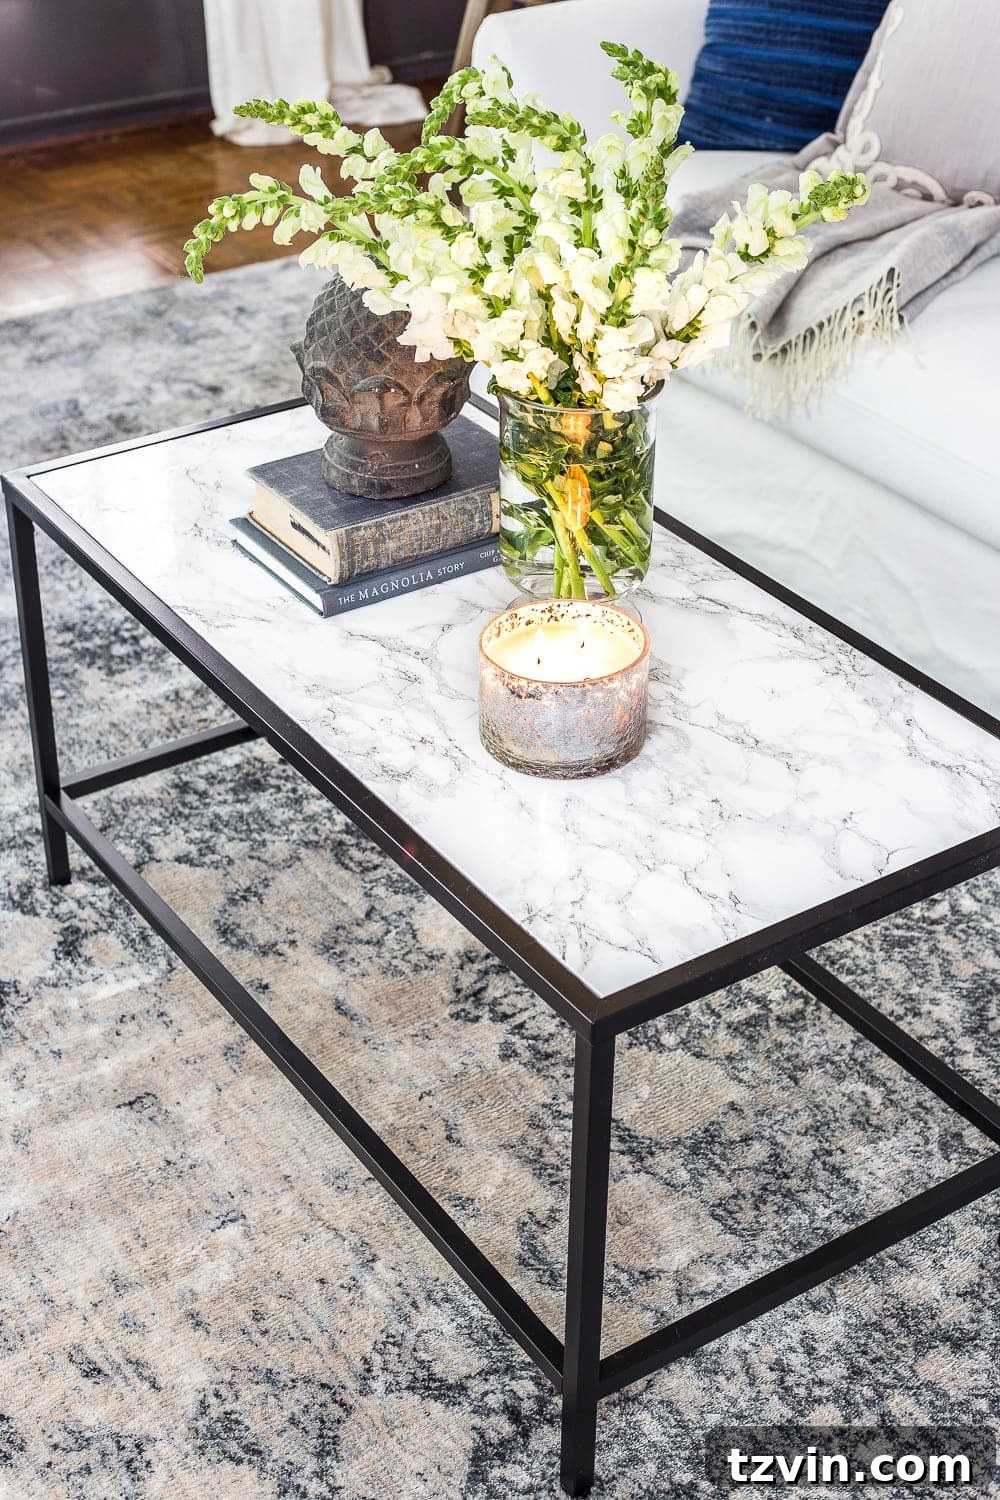
The secret to successful contact paper hacks lies in selecting furniture pieces with flat, even surfaces, as this minimizes bubbles and ensures a seamless application. (If you’re curious about other contact paper transformations, see how we used marble contact paper to revitalize an IKEA coffee table years ago.) Moreover, don’t limit yourself to new IKEA purchases. This technique is also fantastic for revamping plain, low-budget secondhand finds from places like Facebook Marketplace, giving them a high-end burl wood look for next to nothing.
DIY Burl Wood IKEA Dresser Hack: Step-by-Step Guide
Ready to embark on this exciting furniture transformation? This DIY project is surprisingly straightforward and incredibly rewarding. Follow these detailed steps to give your plain dresser a stunning burl wood makeover.
Supplies You’ll Need
Gathering your materials beforehand will ensure a smooth and efficient process. You’ll be amazed at how few items are required to achieve such a dramatic effect!
- Dresser of your choice: As mentioned, we used this IKEA Hemnes chest of drawers, but any flat-front dresser will work.
- Burl wood print contact paper: This is the star of our show, bringing the luxurious pattern to life. Ensure you purchase enough for all surfaces you plan to cover, plus a little extra for mistakes or future small projects.
- A smoothing tool: An old credit card, a gift card, or a dedicated wallpaper smoothing tool is essential for pressing out air bubbles and ensuring perfect adhesion.
- Sharp scissors: For precise cutting of the contact paper.
- Pen/pencil: For marking your measurements.
- Knobs of your choice (optional): If you plan to upgrade from the standard IKEA hardware. We enhanced our dresser with these elegant gold and glass knobs to add a touch of feminine charm.
Once you’ve collected these items, you’ll be well on your way to creating a piece that looks like it cost hundreds, if not thousands, more. It’s truly remarkable how contact adhesive paper can achieve such a convincing, high-end look!
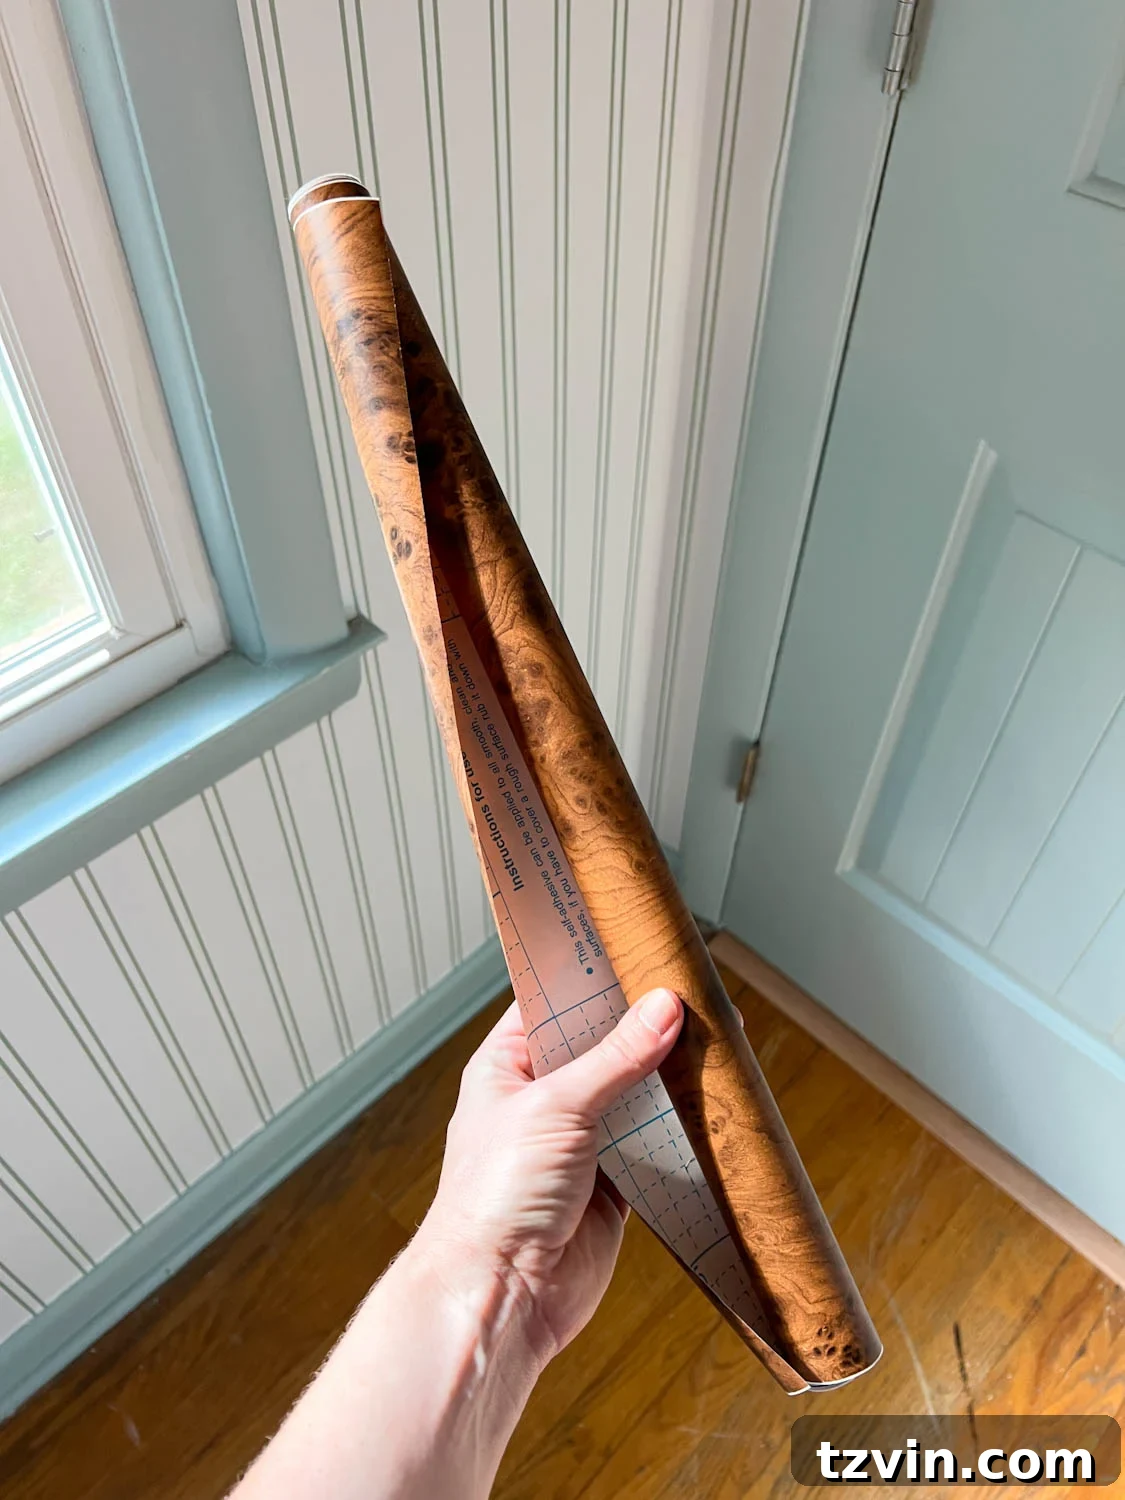
Step-by-Step Transformation
Step 1 – Measure and Cut Your Contact Paper
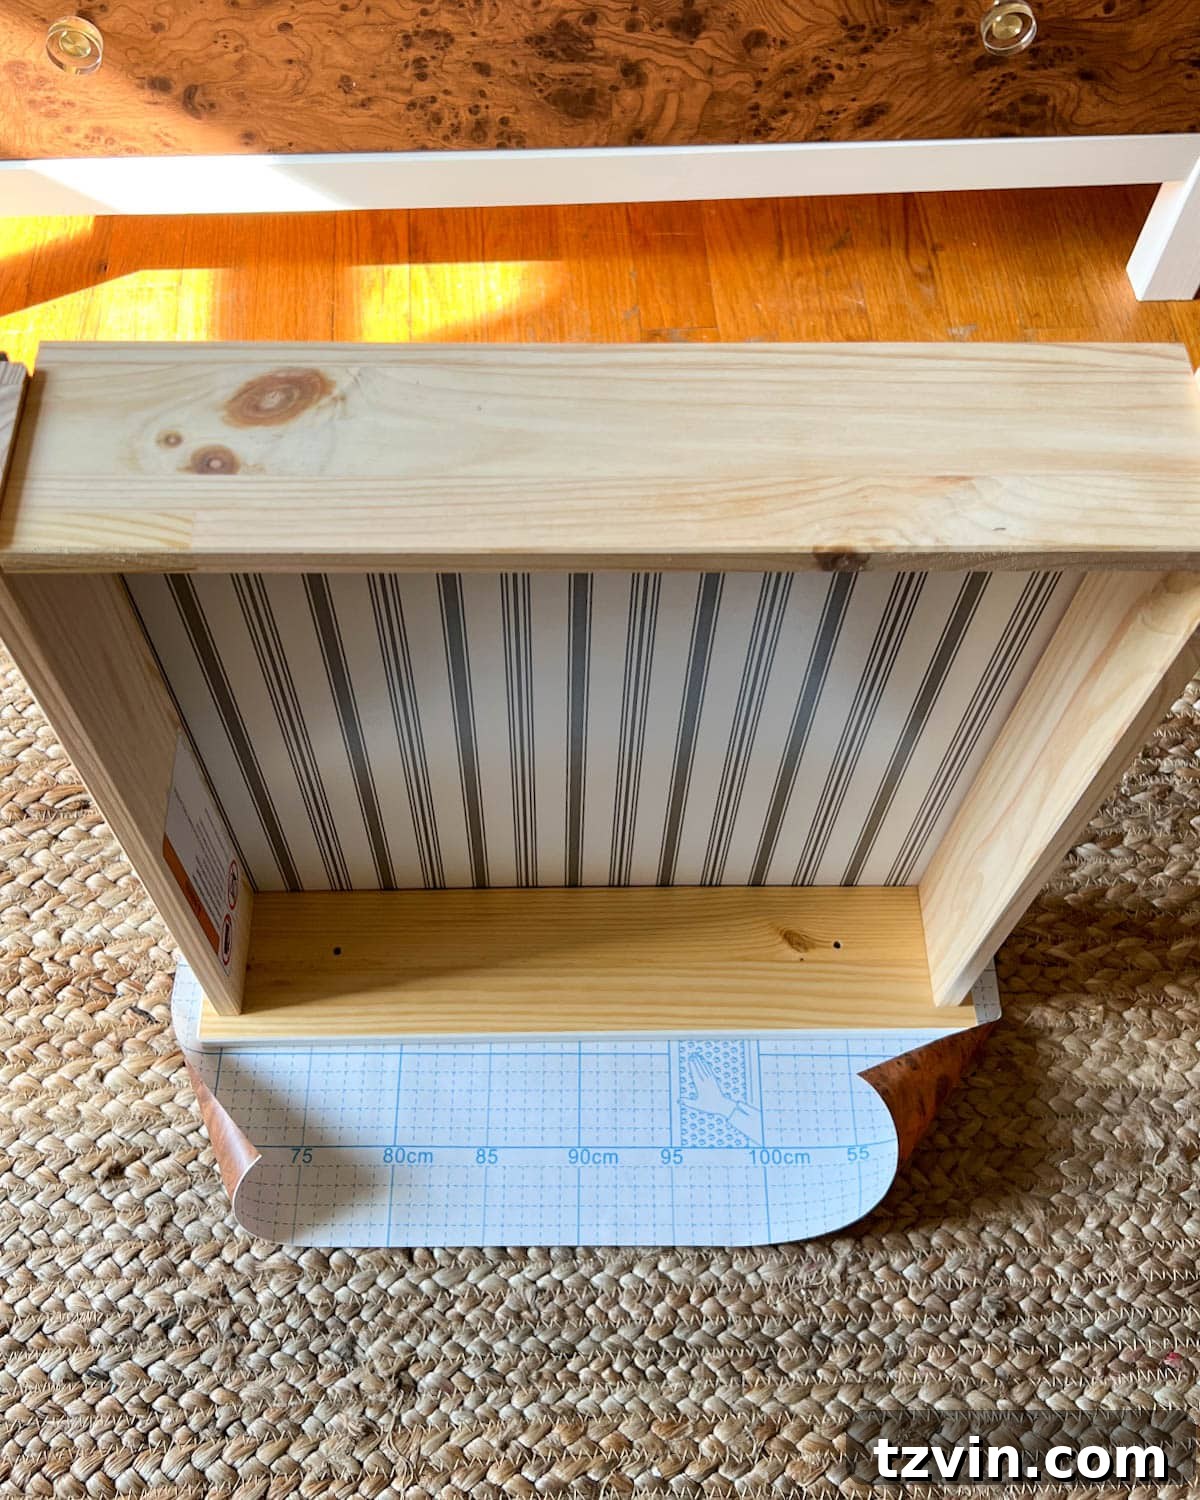
Begin by unrolling your burl wood contact paper. Take one dresser drawer front and place it face down onto the back of the contact paper. Using your pen or pencil, carefully mark the dimensions of the drawer front, adding an allowance of 1-2 inches around all sides. This excess is crucial for wrapping the paper neatly around the edges of the drawer, creating a professional and finished look without visible seams on the front surface.
Step 2 – Precisely Trim the Contact Paper
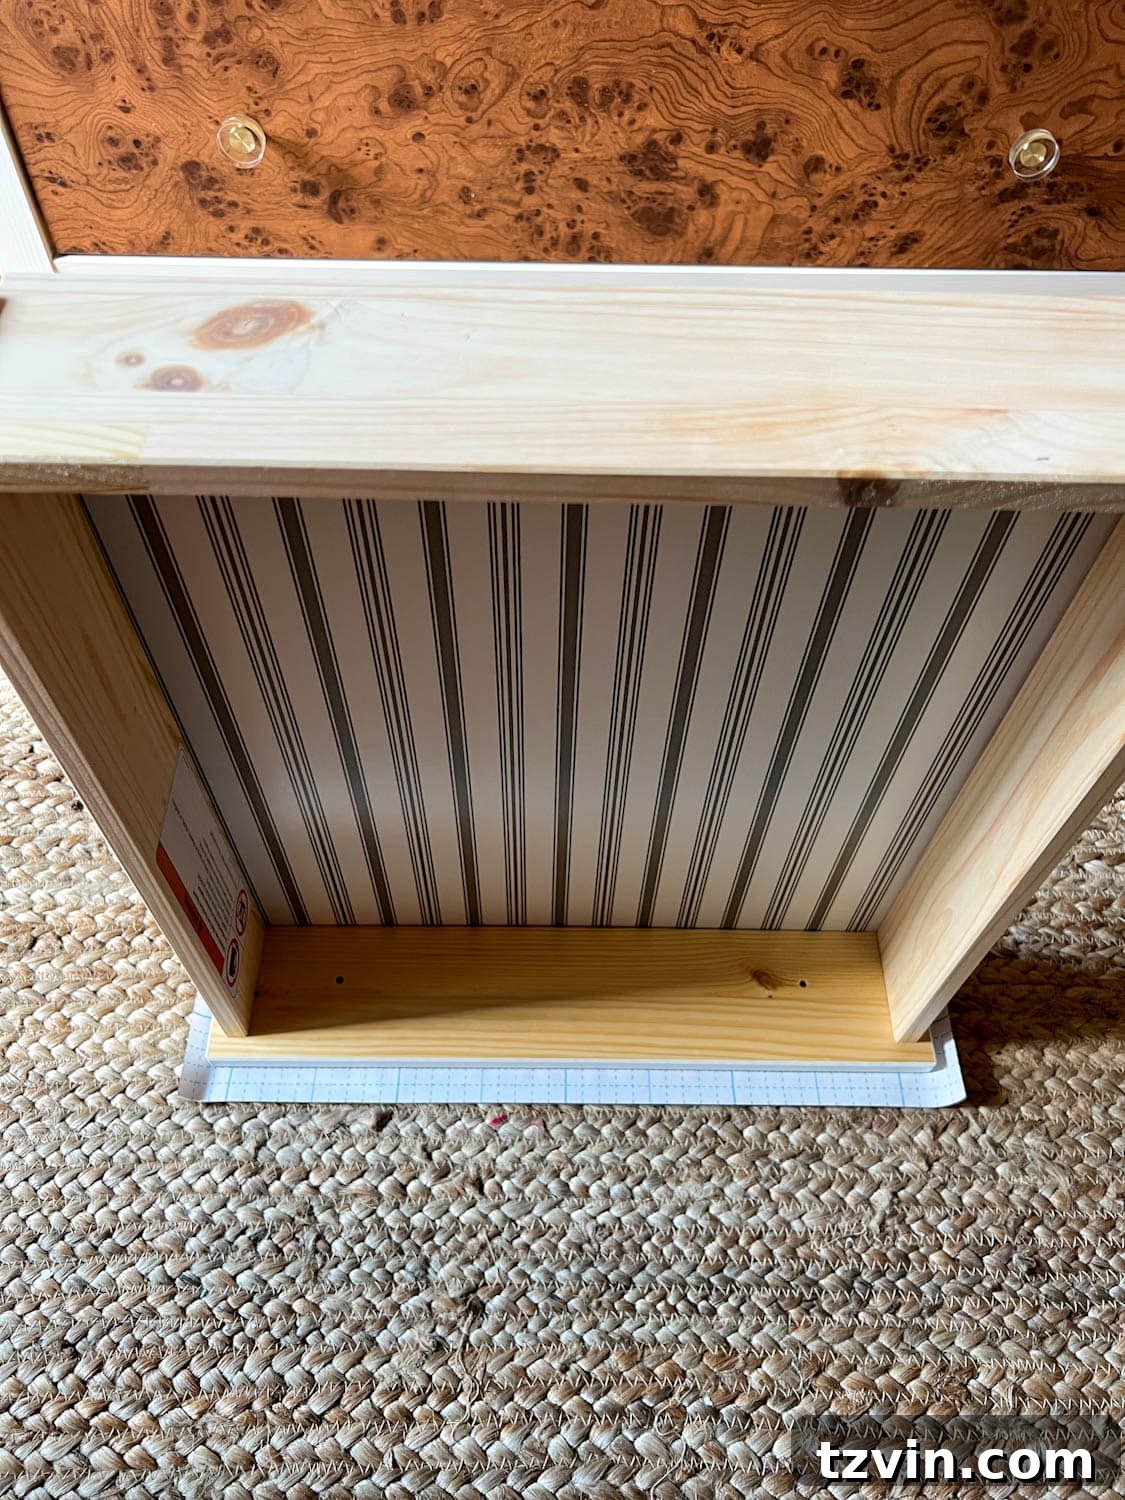
Using your sharp scissors, carefully trim the contact paper along the marks you just made. Remember, accuracy here is key to a smooth application. By leaving 1-2 inches of excess paper on each side, you’ll have ample material to wrap around the drawer’s sides, ensuring that the burl wood pattern flows seamlessly and covers all visible edges once the drawer is reinstalled. This excess prevents any gaps and gives a truly custom, built-in appearance.
Step 3 – Align and Apply the Contact Paper
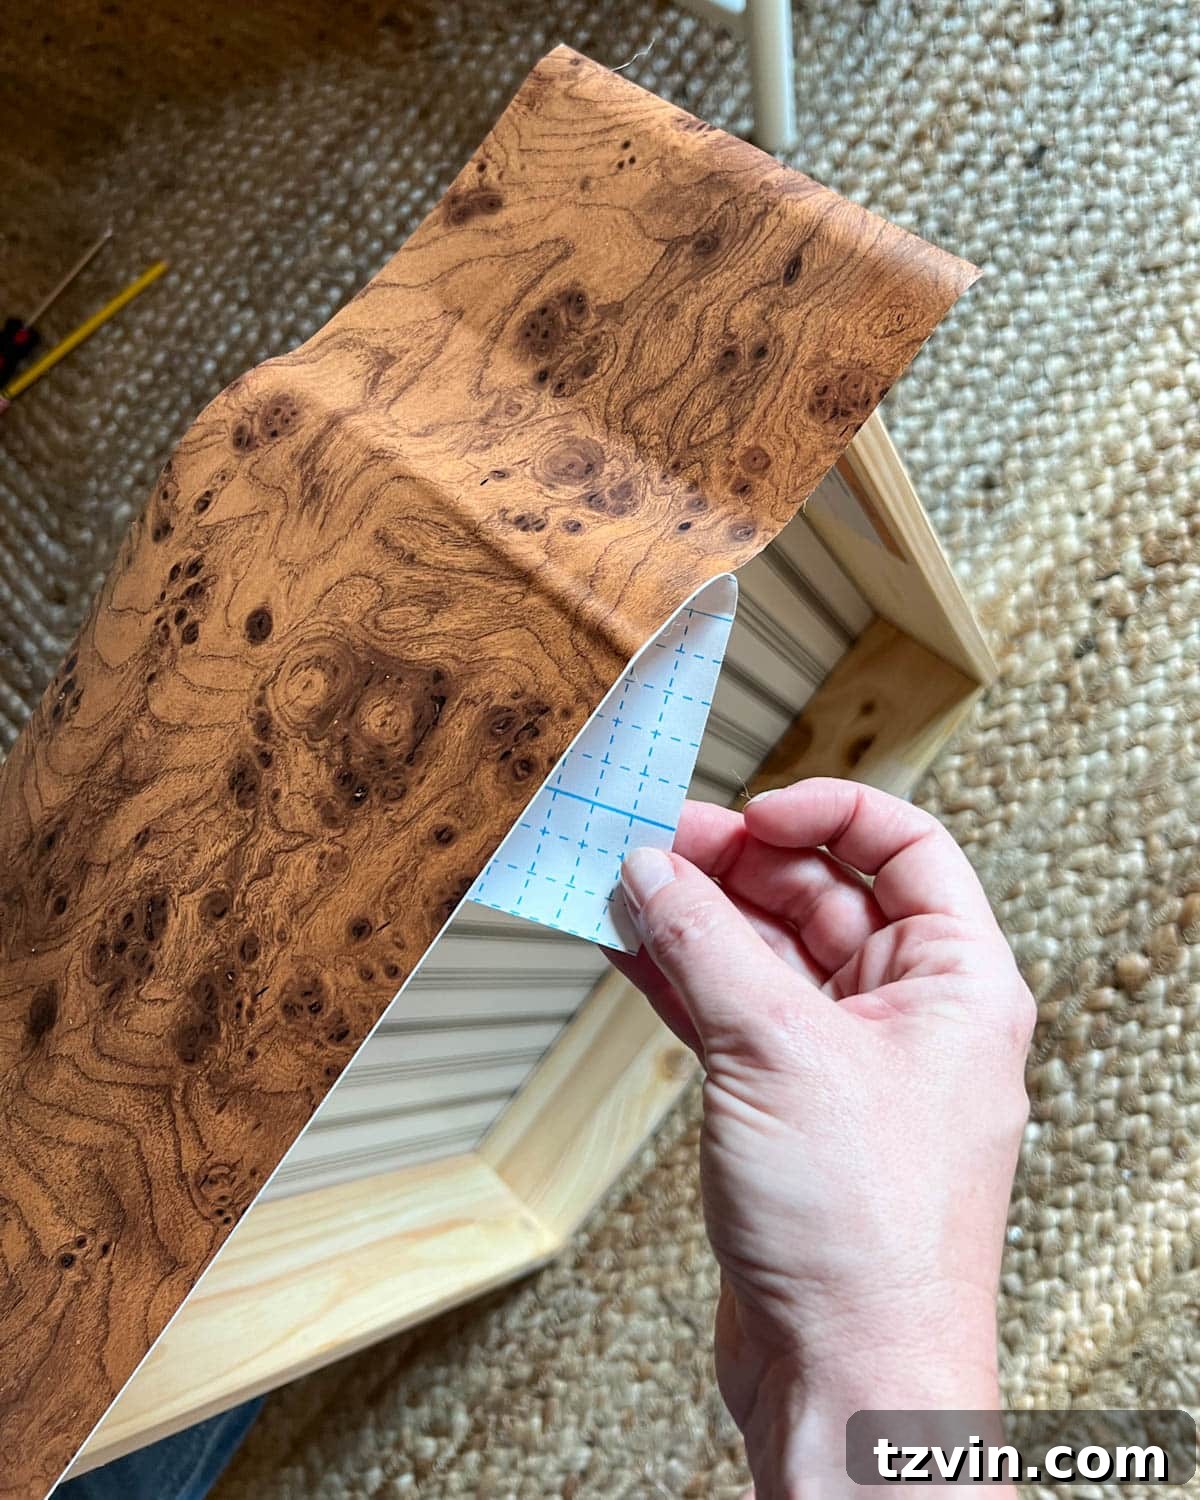
This step requires a steady hand and a bit of patience. Peel away approximately 3-4 inches of the paper backing from one edge of the sticky contact paper. Fold this peeled-off backing paper down to keep it out of the way. Carefully turn the contact paper over and align the exposed sticky edge precisely with the top edge of your dresser drawer front. Once aligned, gently press down this initial strip. Now, slowly and steadily, begin to peel away the remaining paper backing, working your way down the drawer. As you peel, continuously smooth the contact paper onto the drawer front.
Step 4 – Smooth Out Any Air Bubbles for a Flawless Finish
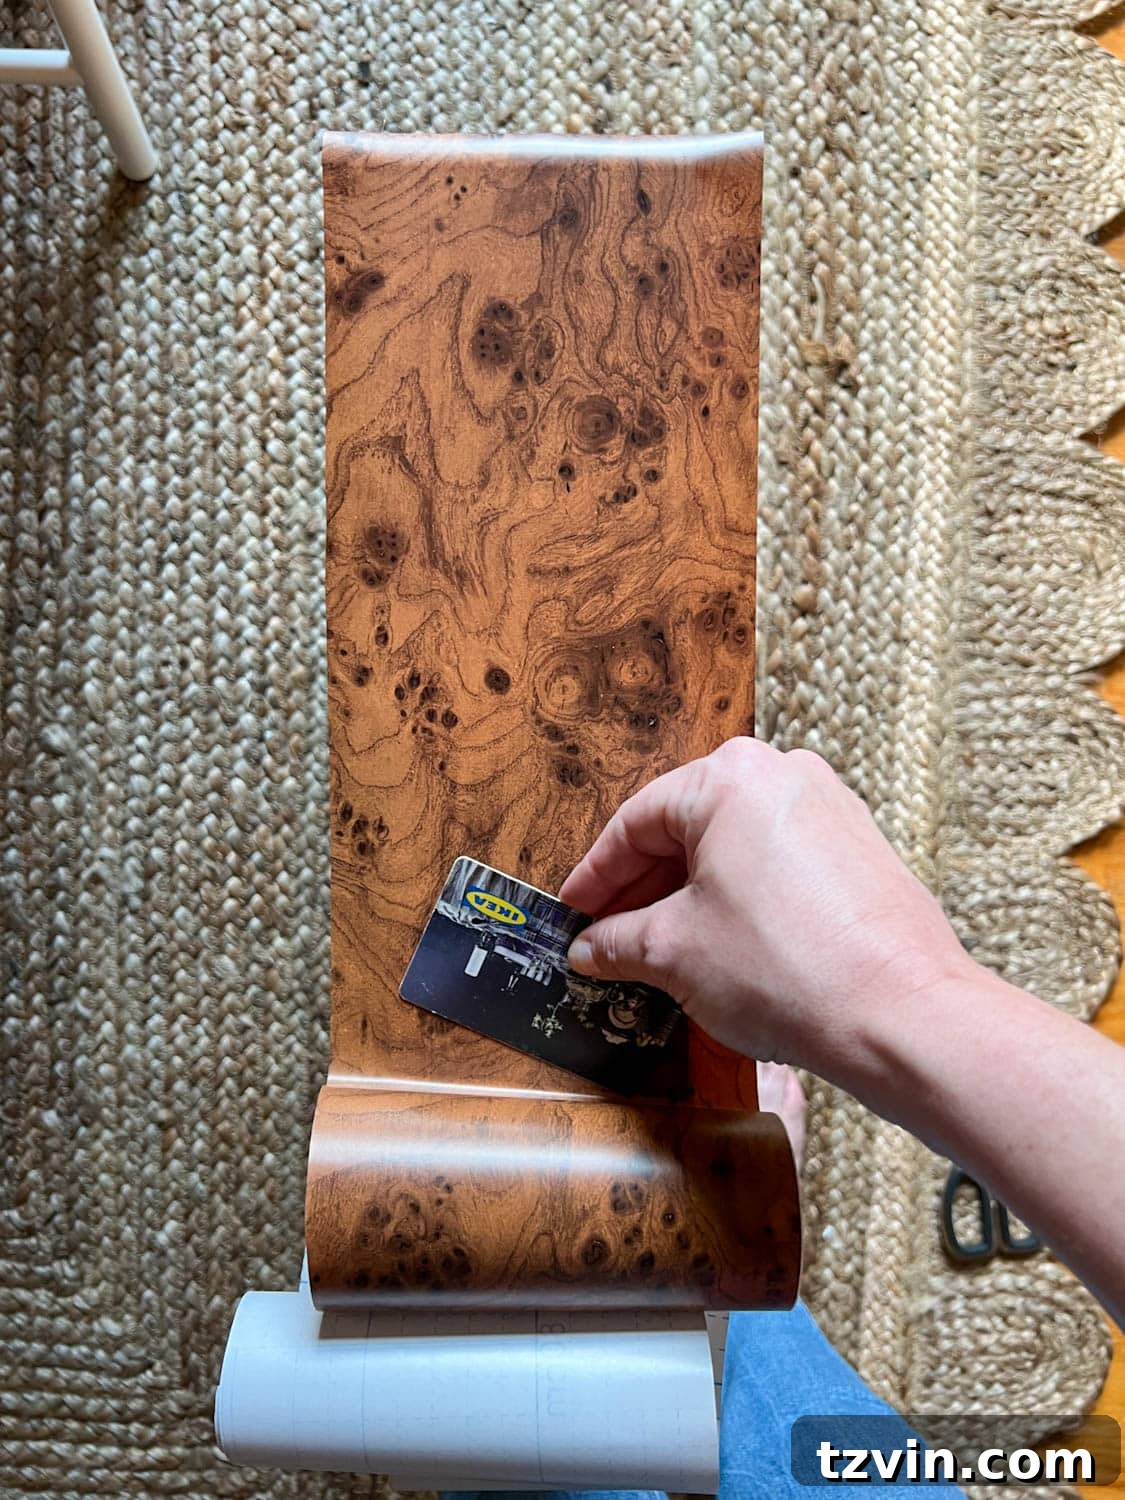
As you continue to slowly peel away the paper backing and apply the contact paper, simultaneously use your smoothing tool (an old gift card or credit card works perfectly if you don’t have a dedicated tool) to press out any air bubbles. Work in a consistent scraping motion, starting from the center and moving outwards towards the edges. This technique ensures that the contact paper adheres fully and smoothly to the drawer front, eliminating any unsightly bumps or wrinkles. Take your time with this step – a perfectly smooth application is key to achieving that high-end look.
Step 5 – Prepare Corners with Small Slits
Once the contact paper is perfectly smoothed onto the front surface of the drawer, you’ll have an excess of about an inch or two extending beyond the sides. To neatly wrap these edges, you’ll need to create flaps, similar to how you’d wrap a present. At each corner of the drawer front, carefully cut a small, diagonal slit into the excess contact paper, stopping precisely at the corner of the drawer. This will create distinct flaps that can be folded independently, ensuring crisp, clean corners.
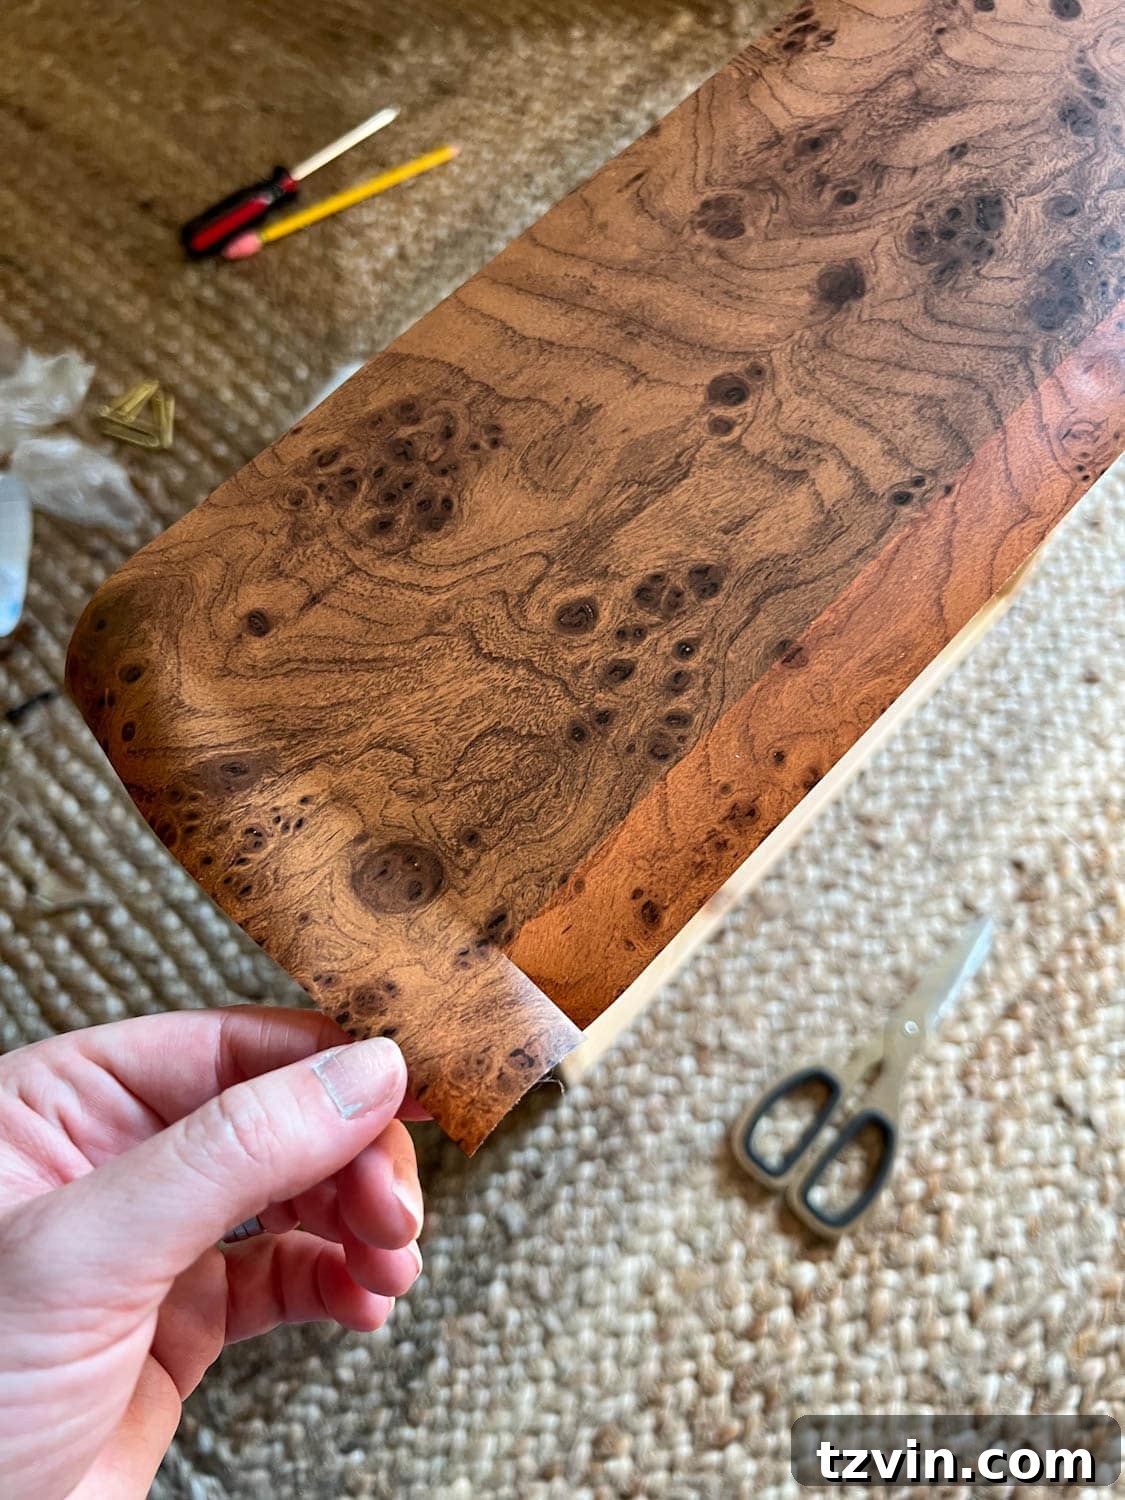
Step 6 – Wrap and Smooth One Side Flap
Now, take one of the side flaps you’ve created and gently fold it over the edge of the drawer front, pressing it firmly onto the side surface. Use your smoothing tool to ensure it adheres completely and smoothly, just as you did for the main surface. This step is much like wrapping a gift, aiming for a taut, wrinkle-free finish on the side.
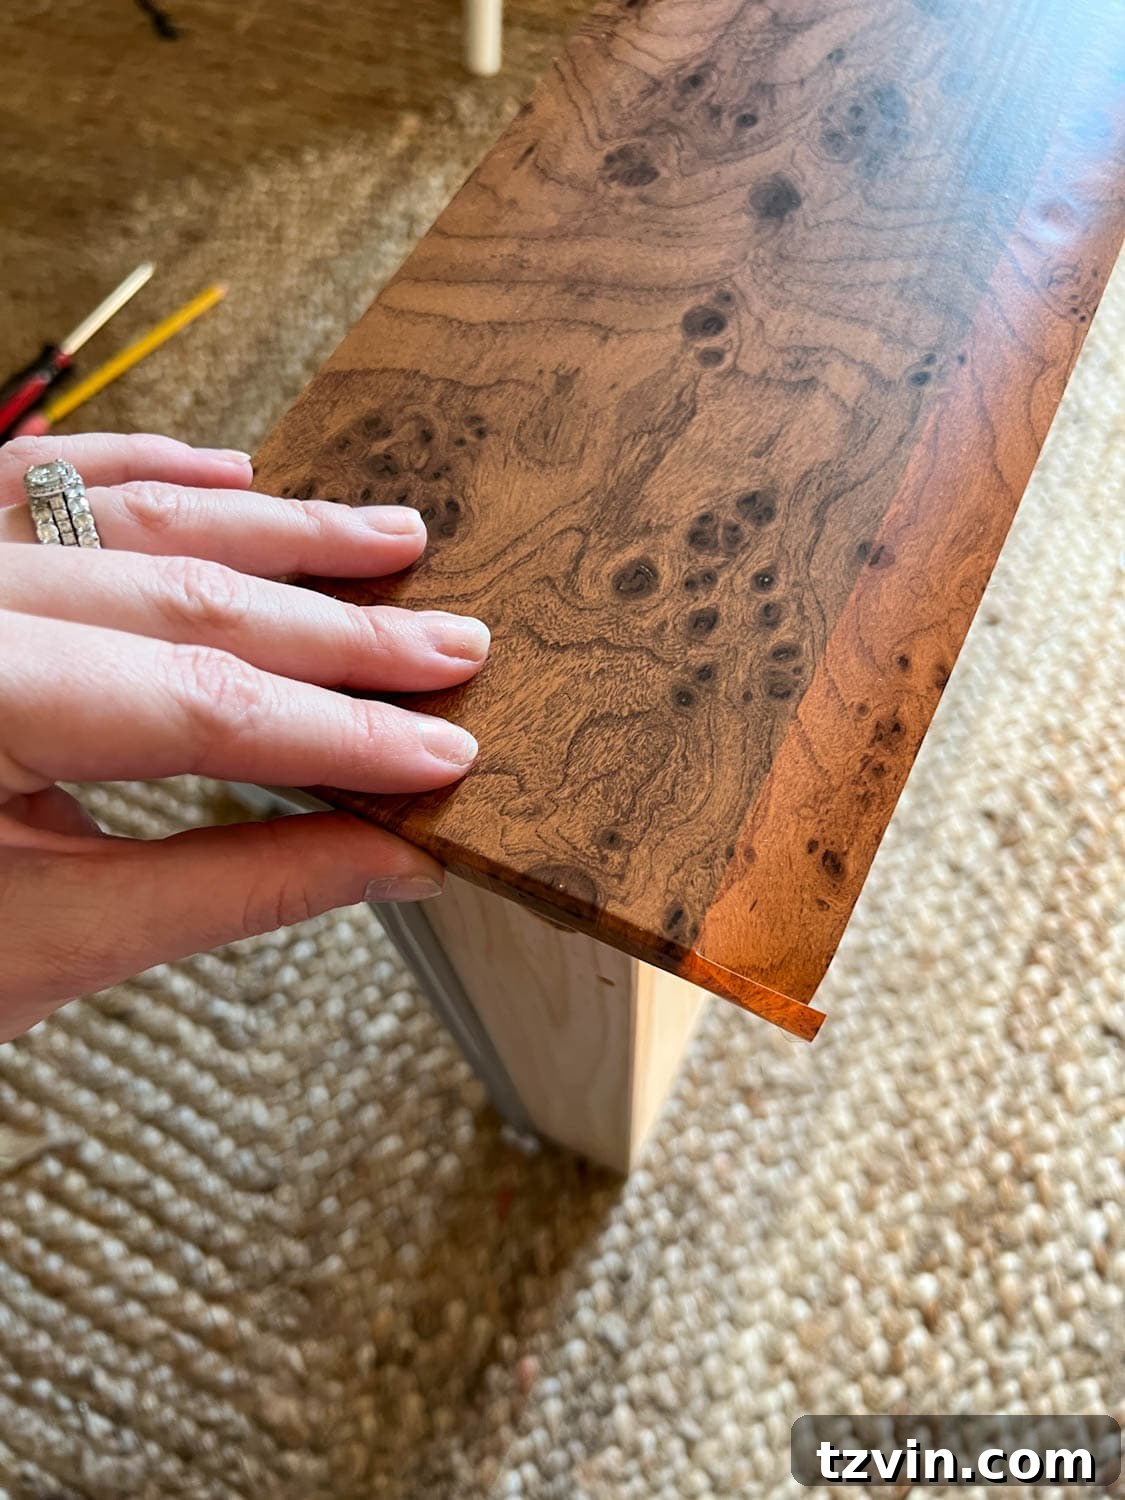
Step 7 – Neatly Tuck the Corner
After smoothing down one side flap, you’ll notice a small triangular piece of contact paper at the corner from your previous cut. Carefully tuck this small flap underneath the adjacent side flap of the drawer front. This creates a clean, mitered-like corner that looks professional and prevents any raw edges from showing. Repeat Steps 5 and 6 on the opposite side of the drawer to mirror this neat finish.
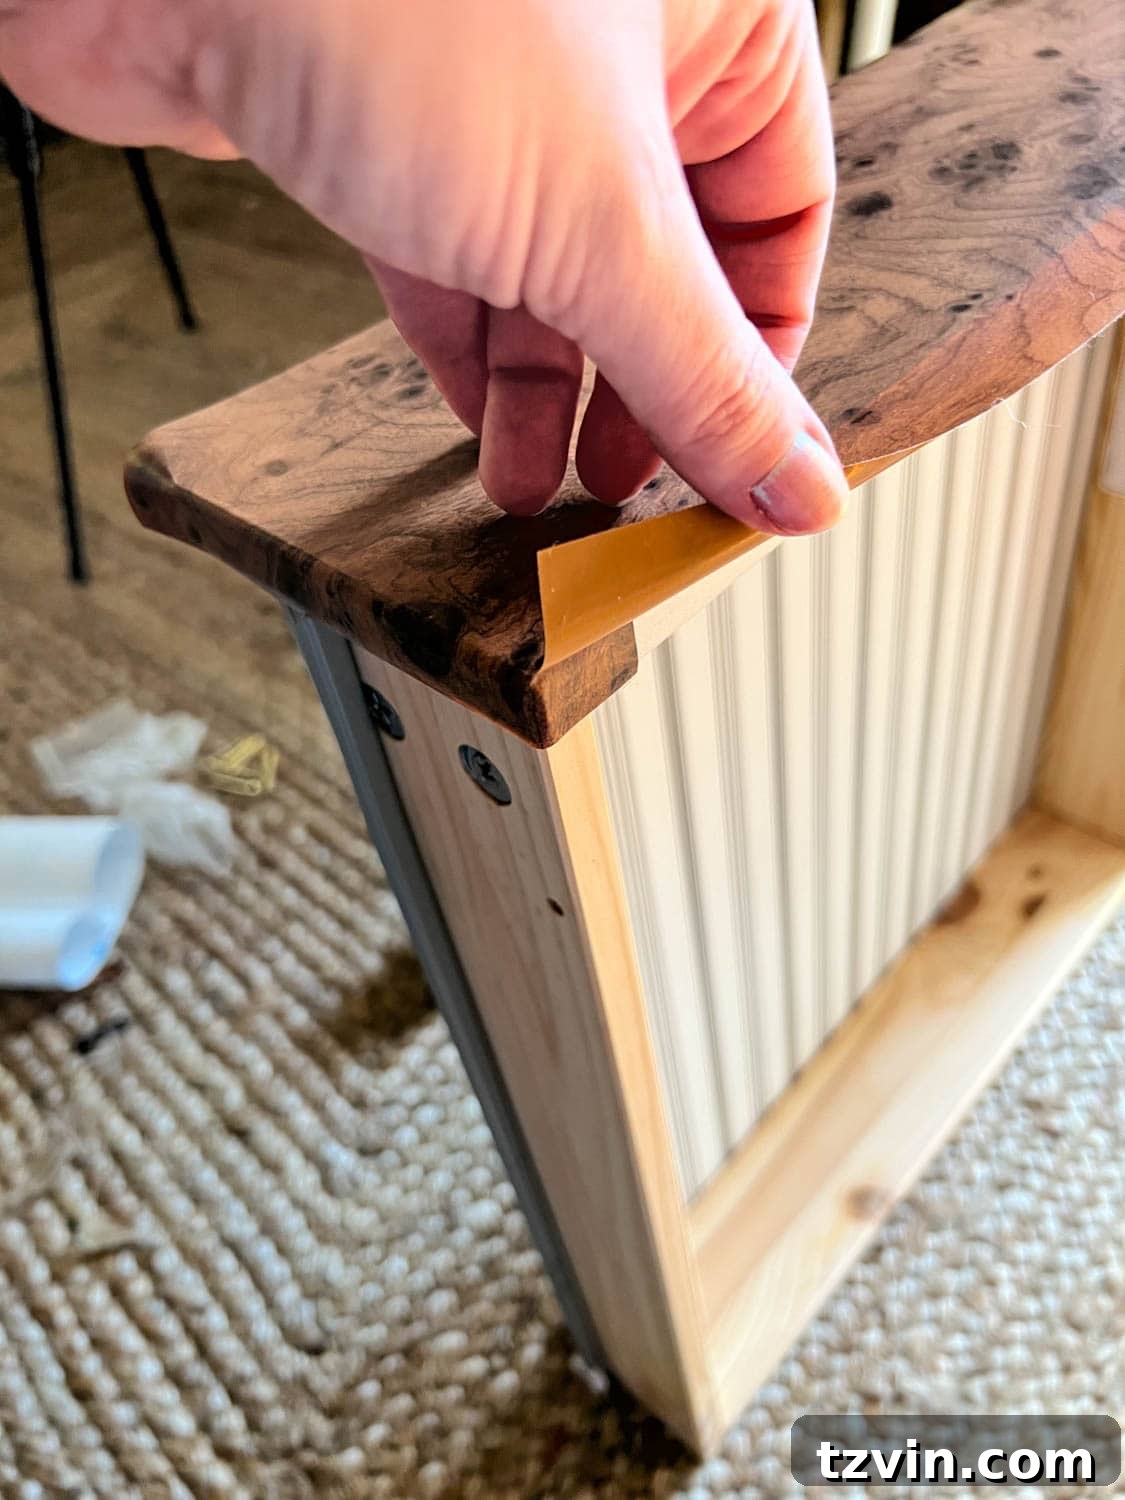
Step 8 – Complete the Wrap by Smoothing Top and Bottom Flaps
Finally, address the top and bottom flaps of the drawer front. Smooth these down over the previously wrapped side flaps, ensuring they fully cover any tucked corners from Steps 5-7. Press firmly and use your smoothing tool to eliminate any air pockets and create crisp, neat edges. This layering technique ensures all raw edges of the contact paper are hidden, resulting in a perfectly wrapped, factory-finish look for your transformed drawer front.
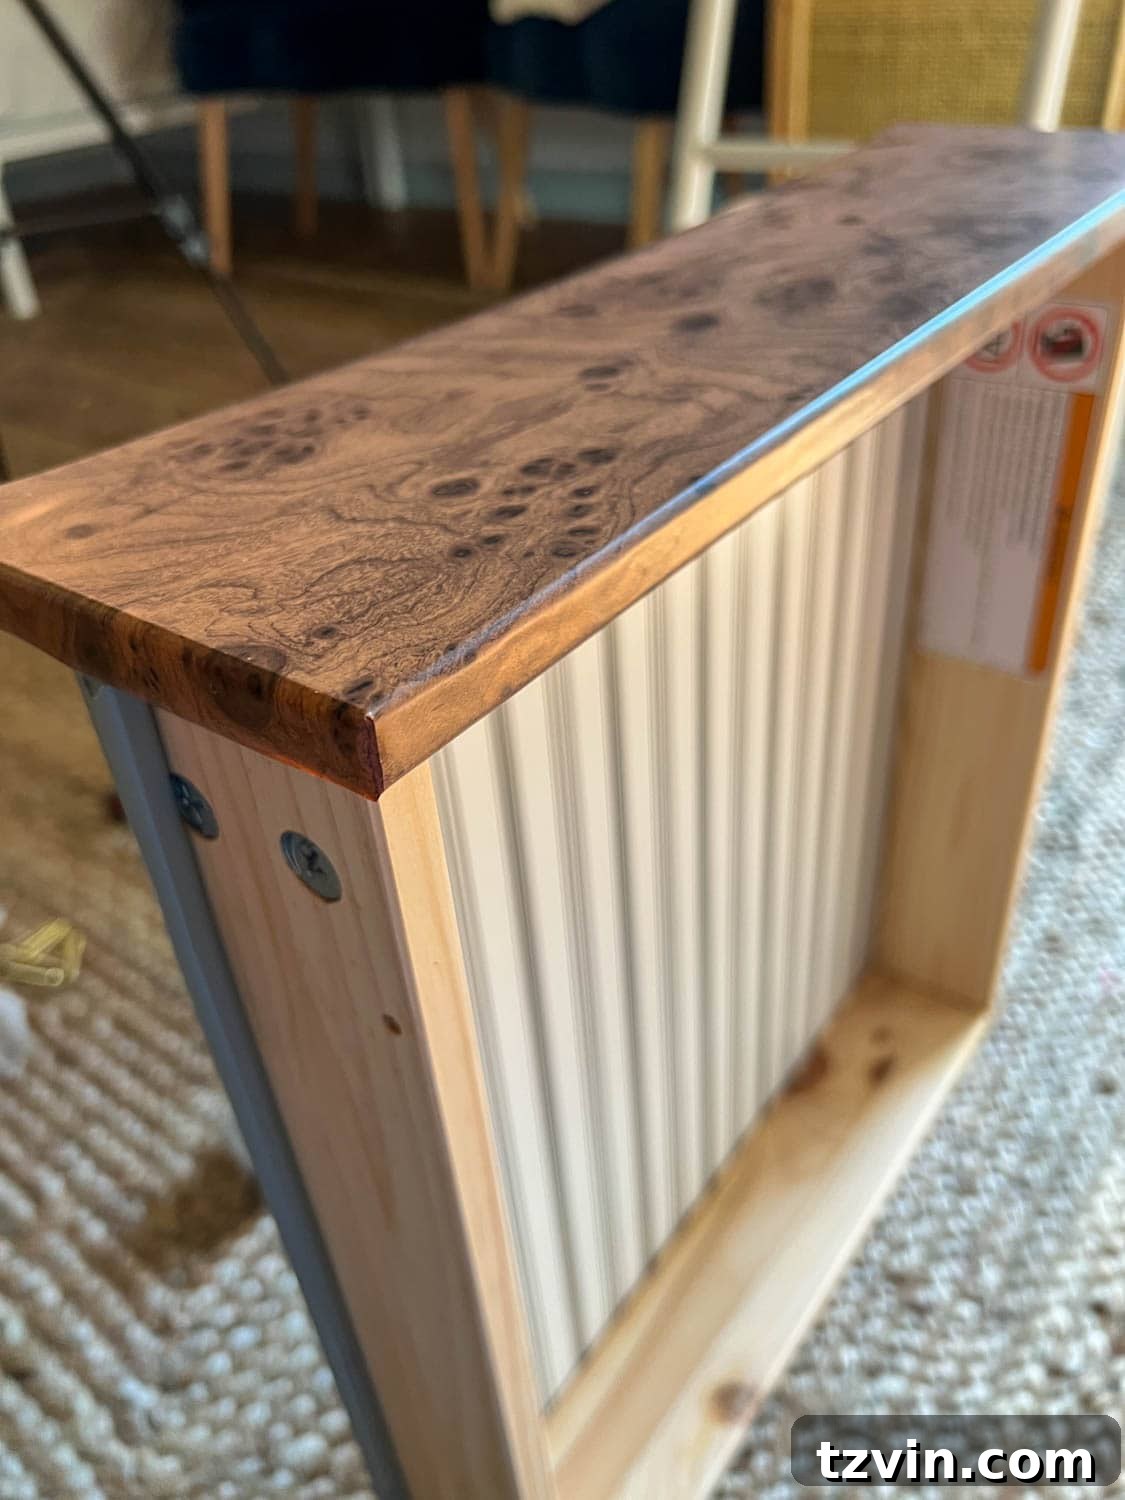
Step 9 – Enhance with New Knobs or Pulls (Optional but Recommended)
To truly elevate your newly transformed dresser, consider adding unique knobs or pulls. This is where you can infuse even more personality and achieve a truly custom look. If your dresser had existing hardware, carefully remove it. If you’re drilling new holes for pulls or repositioning knobs, measure carefully to ensure symmetry. We chose these exquisite gold and glass knobs, which beautifully complemented the burl wood pattern and added a subtle, feminine touch, enhancing the overall high-end feel. For more inspiration on upgrading your furniture’s hardware, explore these great places to find unique furniture hardware.
Project Cost Breakdown: Luxury on a Budget
Voila! The transformation is complete. Let’s take a moment to appreciate the incredible value achieved with this IKEA dresser hack. The entire project, including the IKEA dresser itself, the burl wood contact paper, and the new knobs, came to an astounding total of just $405. This is truly remarkable when you consider that our original high-end burl wood dresser inspiration piece retailed for an eye-watering $2,495! That’s a saving of over $2,000, allowing you to achieve a luxurious aesthetic without breaking the bank.
To bring the whole bedroom space to life and complement our new burl wood masterpiece, we styled it with a cute, subtly beachy table lamp, a charming rattan mirror, a simple picture frame, and a touch of greenery with a plant. These thoughtful additions further enhance the vintage, art deco feel of the dresser, creating a cohesive and inviting atmosphere. What was once a plain, unassuming dresser now stands as a stunning focal point, exuding character and sophistication.
Beyond Burl Wood: Contact Paper Style Options for Easy IKEA Hacks
While the burl wood furniture look is undeniably chic and incredibly popular right now, it might not be everyone’s preferred aesthetic. The fantastic news is that the world of contact paper offers a vast array of styles, allowing you to customize your furniture to perfectly match your personal taste and home decor. The same simple application techniques can be used to achieve countless different looks.
Do you remember our white marble contact paper coffee table hack from years ago? It was a huge hit and demonstrates the power of contact paper to mimic natural materials like stone, elevating even the simplest furniture pieces.
Explore Diverse Contact Paper Styles for Furniture
Here are some of my favorite contact paper styles that are perfect for making plain, inexpensive furniture look custom, bespoke, and undeniably high-end. Each offers a unique texture and visual appeal, allowing for endless design possibilities for your IKEA hacks or other furniture makeovers:
- White marble contact paper: Ideal for a clean, minimalist, or modern luxury look. Perfect for kitchen counters, desk tops, or coffee tables.
- Black wood grain contact paper: Adds a sophisticated, dramatic touch. Excellent for creating an industrial chic or moody aesthetic on cabinets or bookshelves.
- Gray linen contact paper: Offers a subtle textile texture for a soft, contemporary, or Scandinavian-inspired feel. Great for drawer fronts or wardrobe panels.
- Beige wood grain contact paper: Provides a natural, understated warmth, suitable for farmhouse, rustic, or transitional styles.
- Brown wood grain contact paper: Mimics richer, darker wood tones, perfect for adding traditional warmth or a classic look.
- Blue marble contact paper: A unique option for adding a pop of color and artistic flair, bringing a serene or vibrant energy to any piece.
- Black marble contact paper: For a bold, opulent statement, creating a dramatic and luxurious surface on tables or cabinet doors.
- Grasscloth contact paper: Introduces an organic, textured, and slightly coastal or bohemian vibe, perfect for an accent piece or a feature wall on furniture.
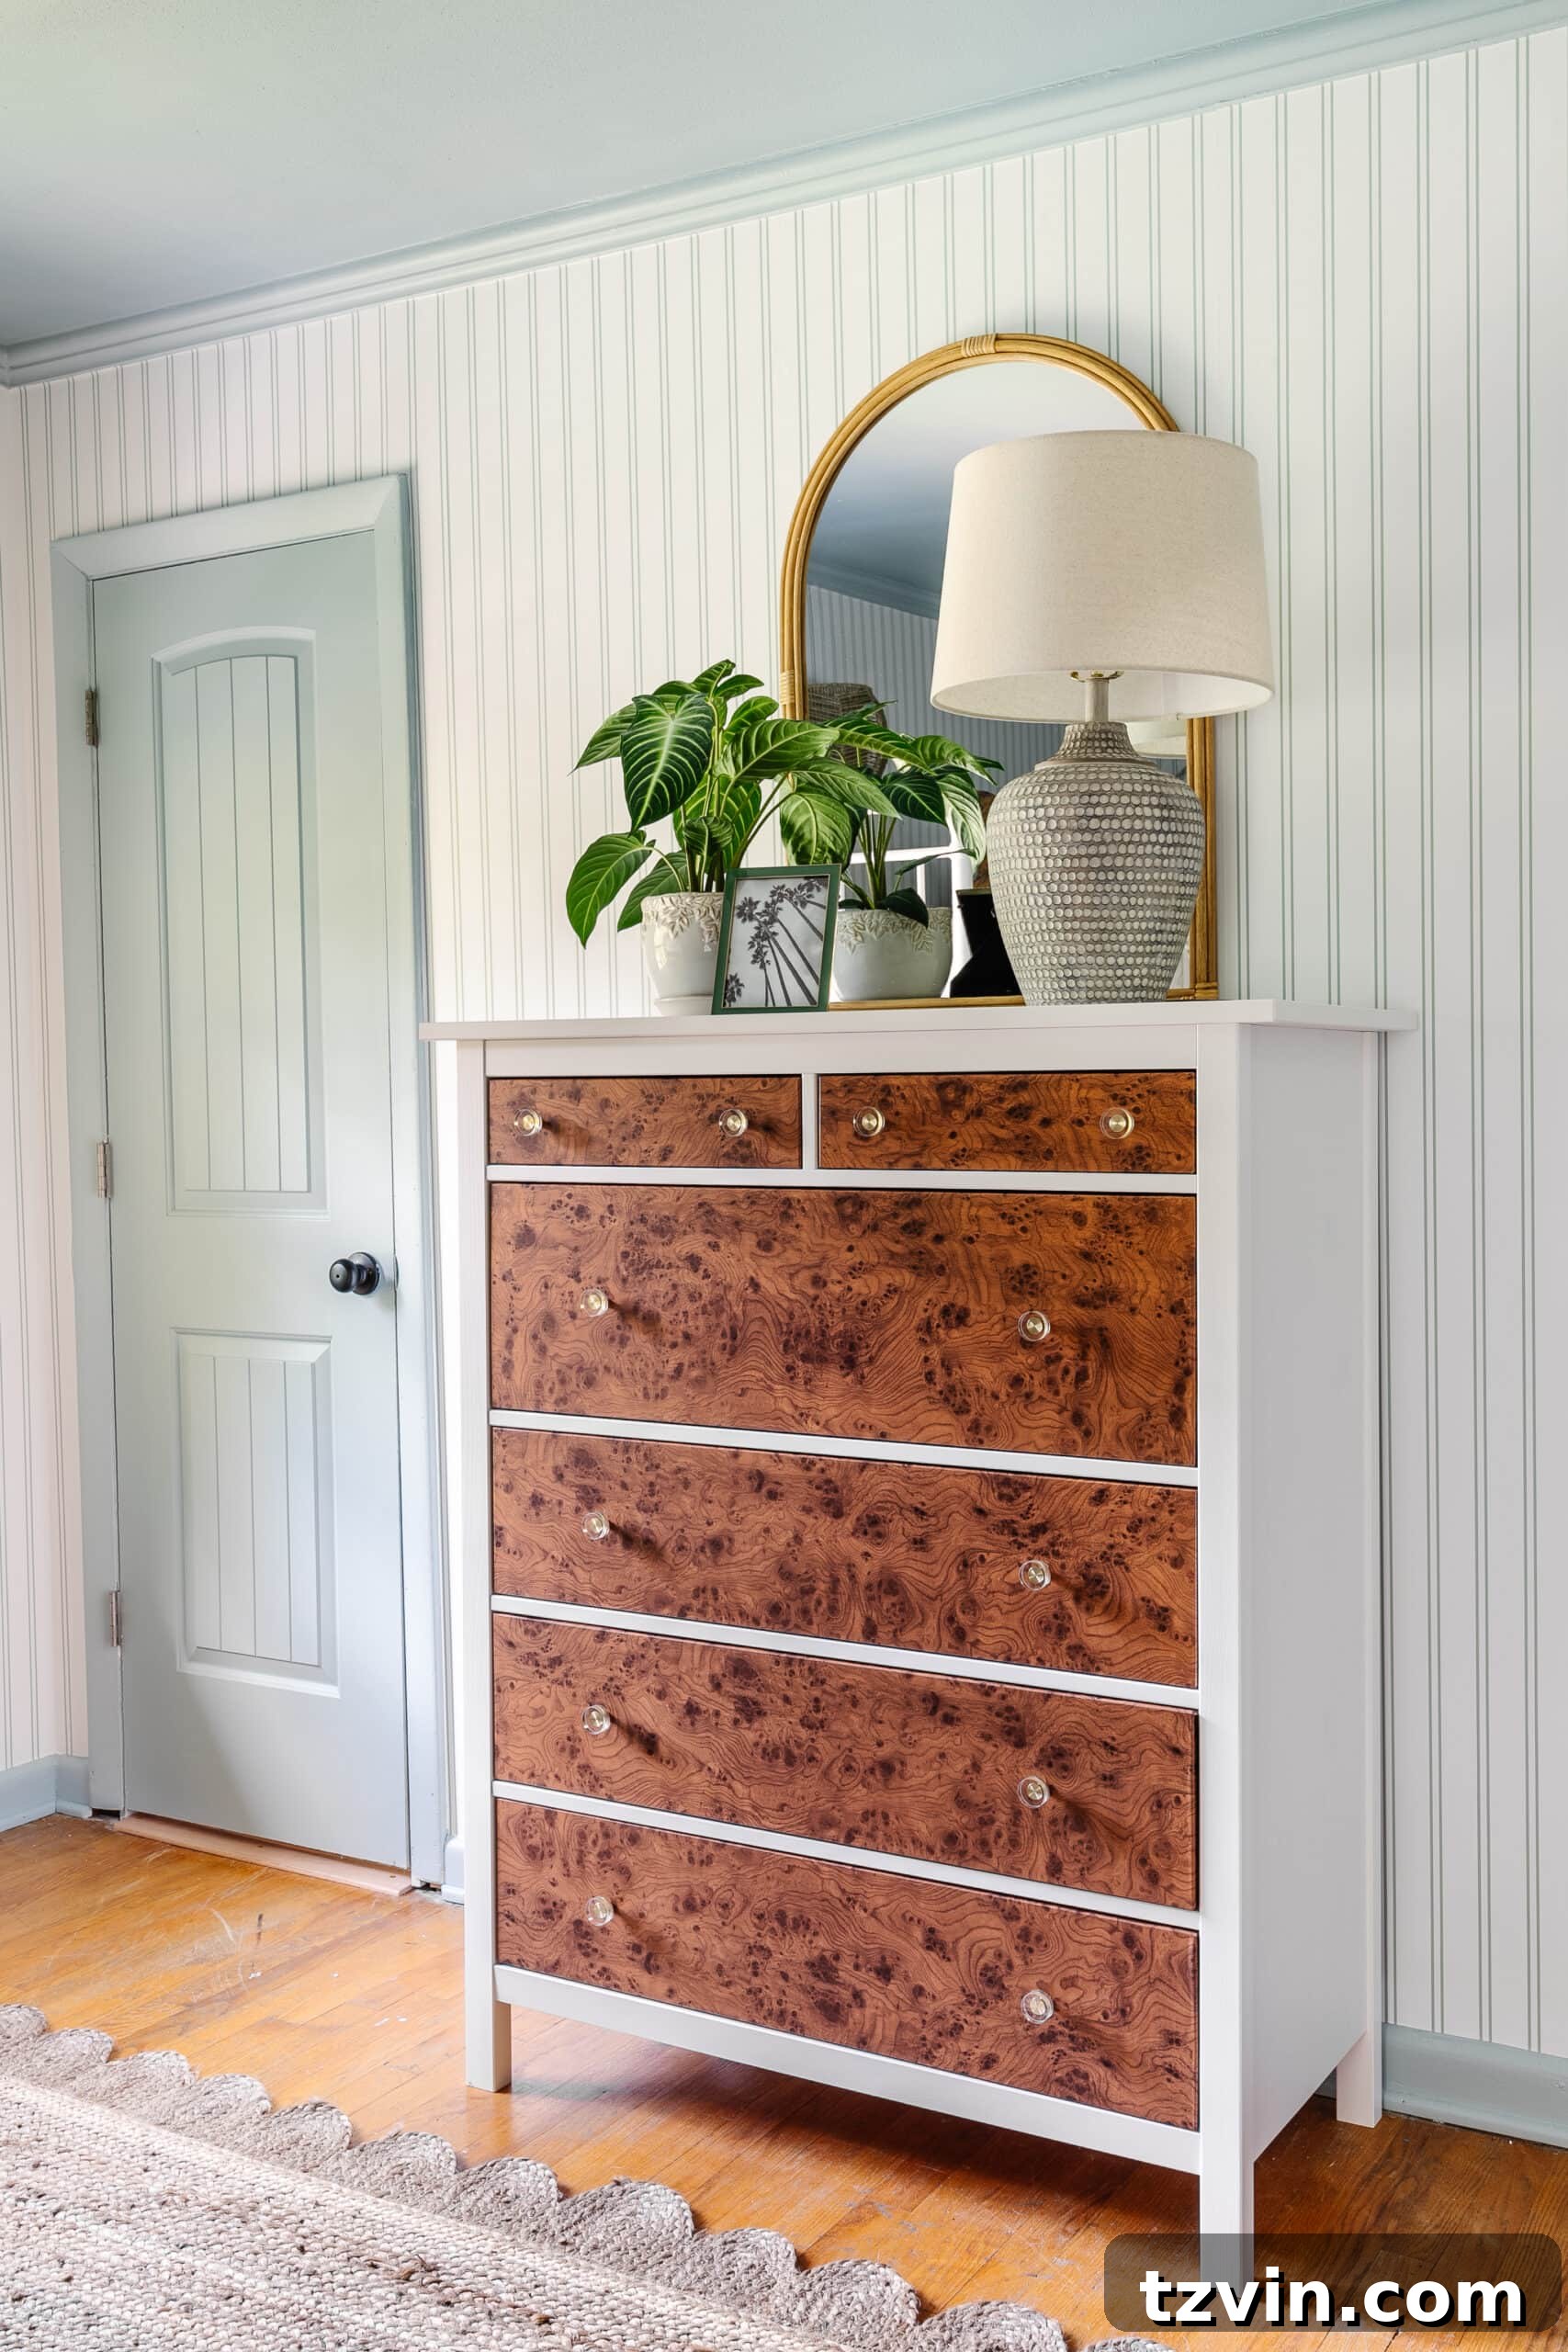
Honestly, after seeing how incredibly realistic and impactful this burl wood contact paper looks, I’m already envisioning other pieces of furniture in our own home that could benefit from this luxurious touch! The ability to achieve such a convincing, high-end look with an affordable and removable material is truly game-changing for DIY enthusiasts. (For more inspiration and creative furniture transformations, explore our collection of furniture makeover ideas here.)
This entire room makeover project is truly taking shape beautifully, and the burl wood dresser is a standout element. I absolutely cannot wait to share the final reveal of this stunning space with you all very soon!
More Inspiring IKEA Hack Ideas
If you love the concept of transforming affordable IKEA pieces into custom, high-end furniture, you’re in luck! There’s a vibrant community of DIYers constantly finding new and creative ways to hack IKEA products. Here are a few more popular IKEA hack ideas to spark your next project and demonstrate the endless possibilities of customizing these versatile pieces:
- DIY Built-In Bookshelves Using the IKEA Billy Bookcase Hack
- 5 DIY IKEA Storage Hacks We’ve Used and Recommend
- The Trick to Painting Laminate IKEA Furniture for a Durable Finish
- Applique IKEA Hemnes Dresser Hack for Added Dimension
- Faux Marble Top Coffee Table with Contact Paper
- Creative Window Film Ideas to Create Decorative Glass Around Your Home for Less