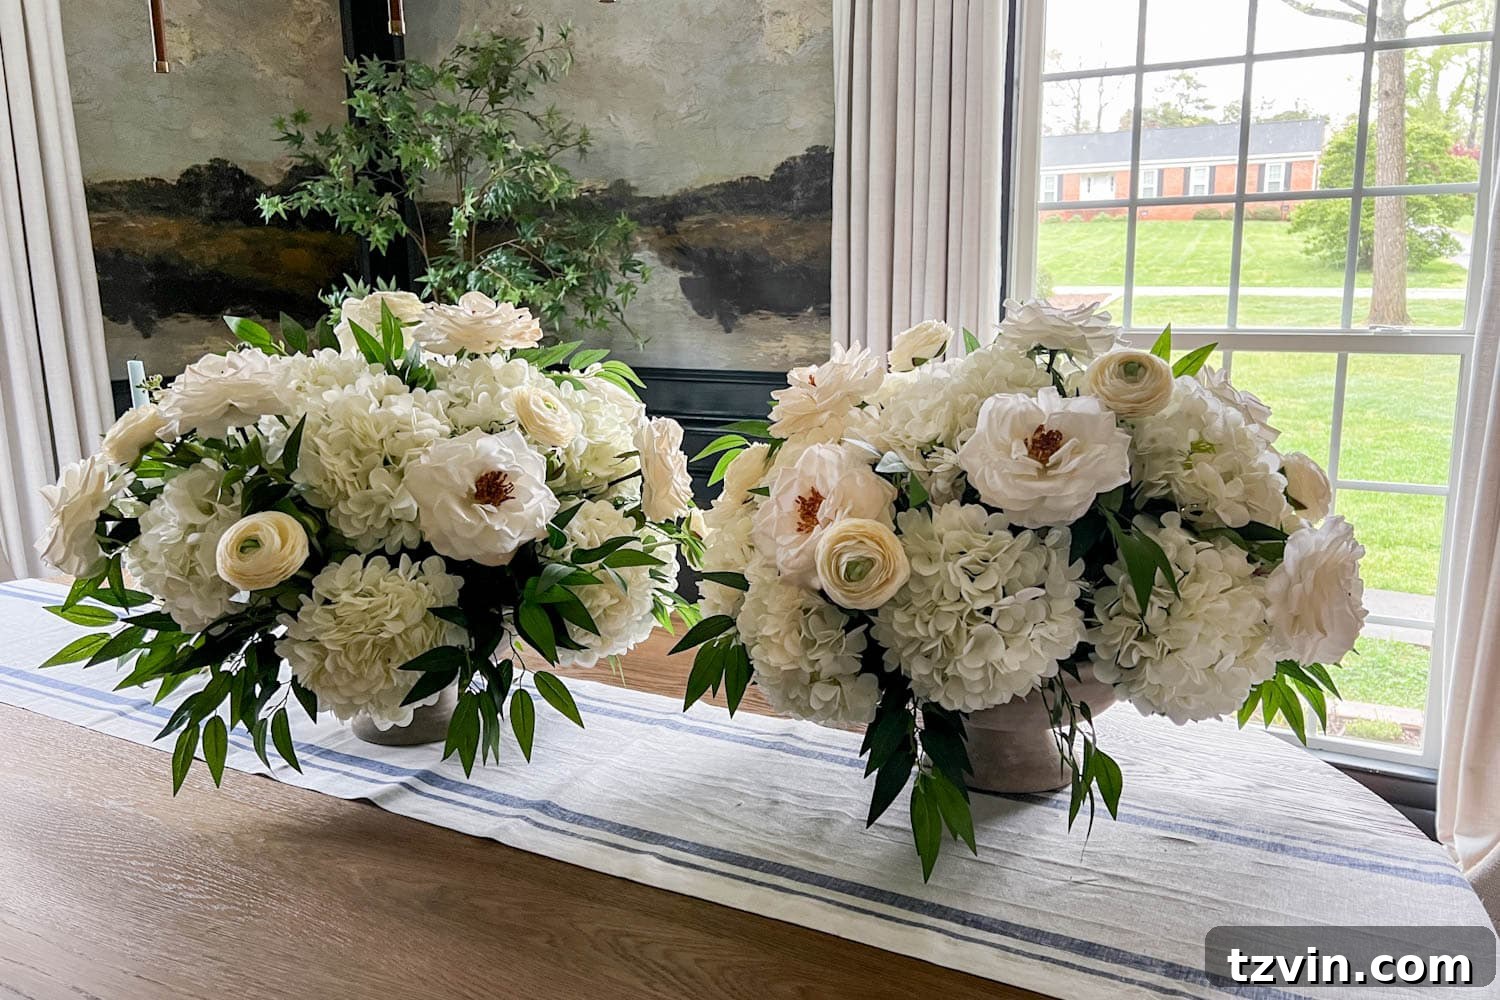
Master the art of creating breathtaking, classic DIY flower arrangements for centerpieces with this comprehensive step-by-step tutorial, utilizing the beauty and practicality of realistic faux flowers. Elevate your home decor or special events with stunning, long-lasting floral displays.
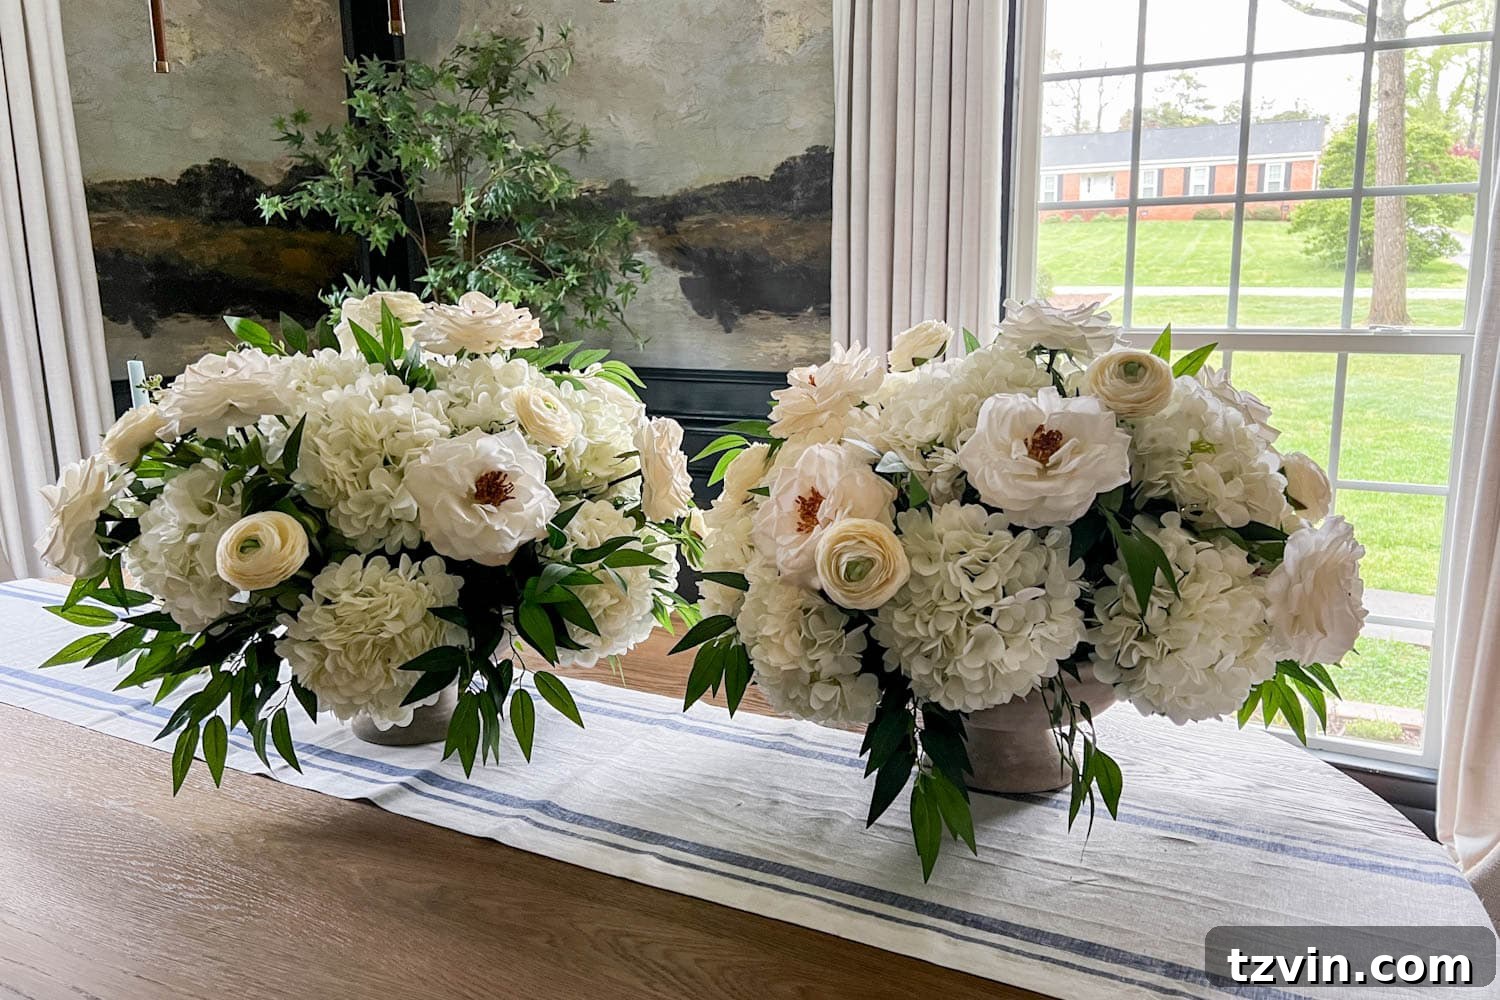
Years ago, when I embarked on the exciting (and slightly daunting) journey of crafting my own DIY wedding centerpieces, I wholeheartedly wish I had possessed the knowledge and insights I’ve gained since. The world of floral design, especially with artificial blooms, has truly transformed, offering incredible possibilities for both seasoned crafters and eager beginners.
While I make no claim to be a professional florist, my practical side often steers me towards realistic faux flowers over their expensive, ephemeral real counterparts. Fresh flowers, as beautiful as they are, often come with a hefty price tag, create inevitable mess, and sadly wilt within a week. For someone seeking enduring beauty and value, the choice becomes clear: high-quality artificial blooms offer a fantastic, sustainable alternative that doesn’t compromise on aesthetic appeal. This approach perfectly marries elegance with practicality, allowing for stunning displays that last far beyond any single occasion.
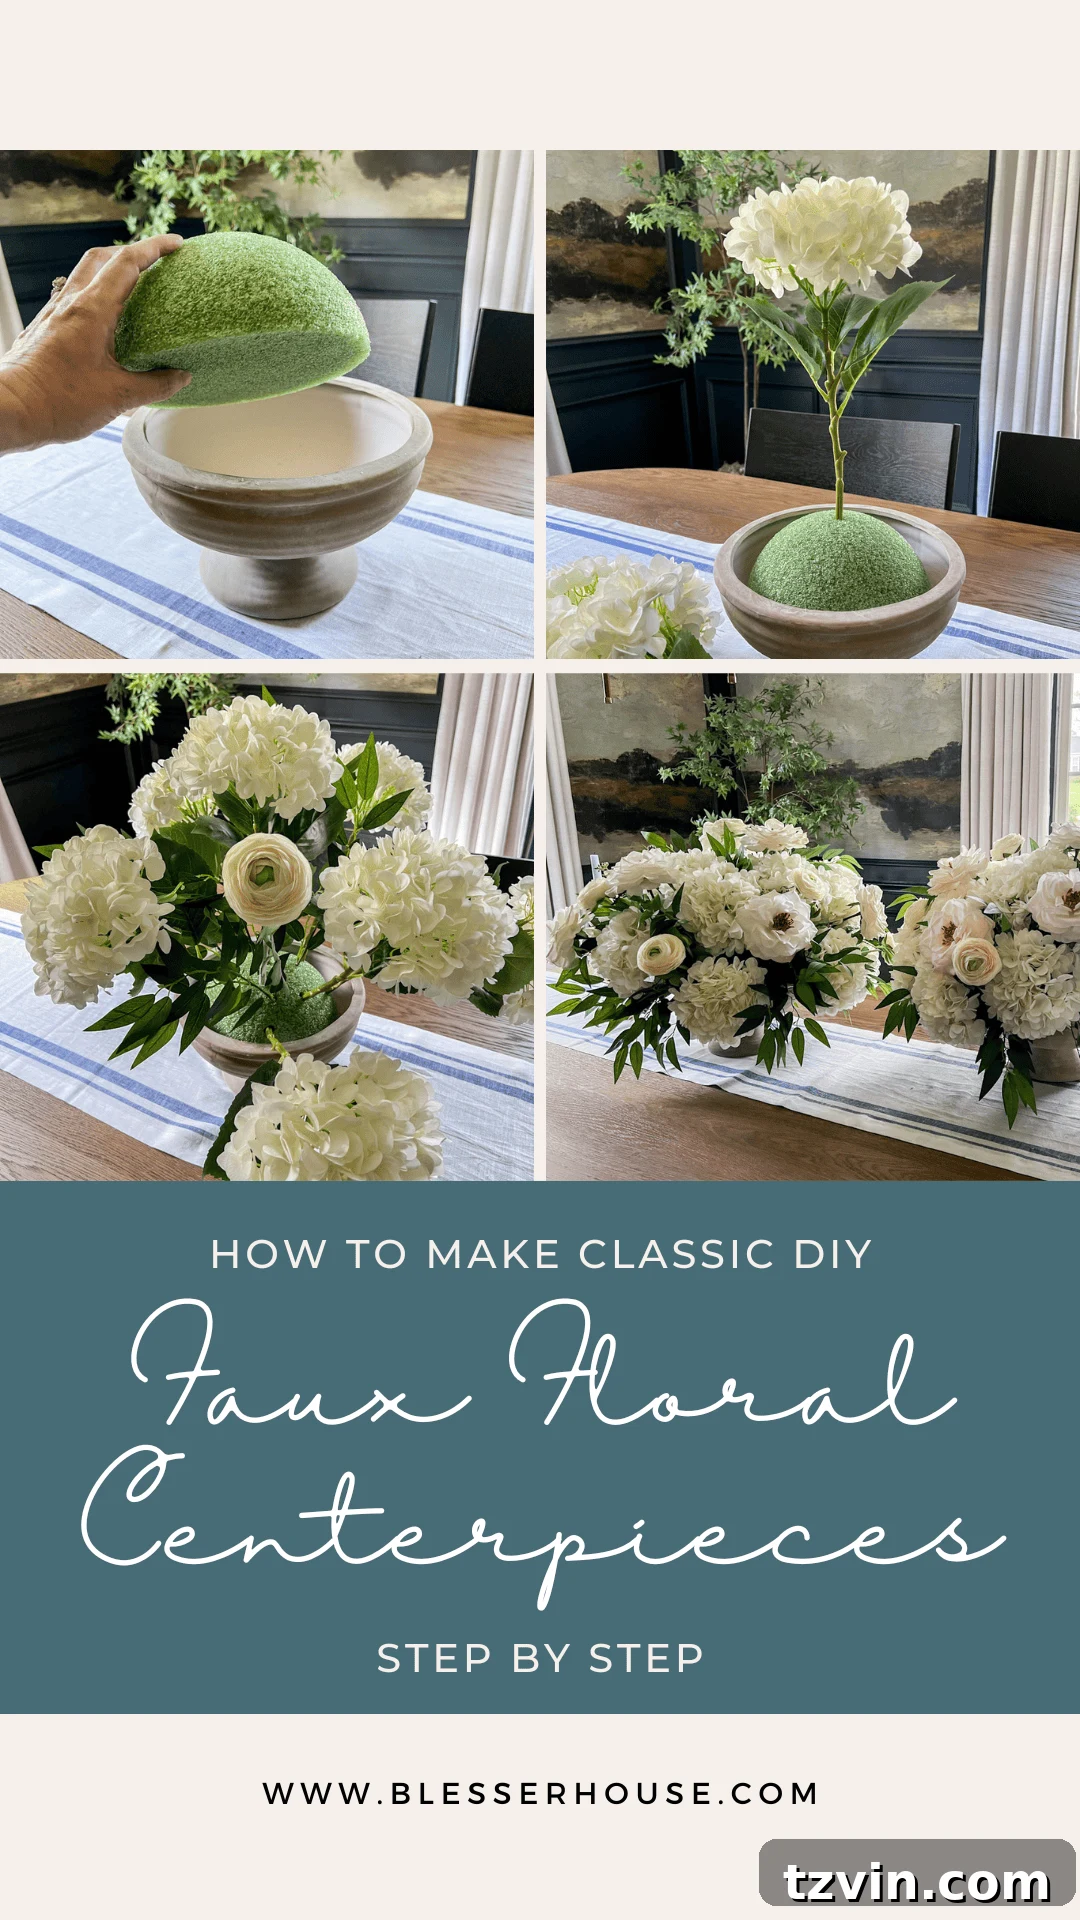
Just the other week, I found myself creating a pair of beautiful DIY altar flower arrangements for our church. As I worked, it became clear that documenting this straightforward, step-by-step tutorial would be incredibly helpful for anyone looking to craft their own elegant centerpieces using realistic faux florals. Whether you’re planning a grand event or simply want to add a touch of lasting beauty to your home, this guide will equip you with the skills to design impressive floral displays.
This versatile design is perfect for recreating for special occasions like Mother’s Day, Easter, birthdays, or adapted for any other holiday throughout the year. The beauty of using artificial flowers lies in their reusability, allowing you to effortlessly update your decor for multiple seasons and events, making them a truly smart and sustainable choice for both event planning and everyday home styling.
How to Craft Stunning DIY Artificial Flower Arrangements for Centerpieces
Creating your own beautiful artificial flower centerpieces is a rewarding project that allows for immense creativity and significant savings. With the right tools and a little guidance, you can achieve professional-looking results that will impress your guests and enhance any space. This guide focuses on crafting elegant, classic arrangements that are perfect for a wide range of events, from intimate dinner parties to grand wedding receptions.
Essential Supplies for Your Faux Floral Masterpiece
Before diving into the arrangement process, gathering all your materials is crucial. Investing in quality faux flowers will make a significant difference in the final look, ensuring your centerpieces appear realistic and luxurious. Here’s a detailed list of what you’ll need to create beautiful DIY artificial flower centerpieces:
- Footed Bowl: Opt for an elegant footed bowl that will serve as the sturdy and stylish base for your arrangement. The elevated design adds a touch of sophistication.
- Half Sphere Florist Foam: Select a dry foam half-sphere that fits snugly into your chosen bowl. This provides the structure to hold your faux stems securely in place. (Note: Use wet floral foam if you ever opt for real flowers.)
- Wire Cutters: Essential for trimming the sturdy wire stems of artificial flowers to your desired length. Regular scissors won’t be sufficient for this task. (Florist shears are suitable for real flowers.)
- 12 Stems Large Faux Hydrangeas: Hydrangeas provide a lush, voluminous base for your arrangement, filling out space beautifully with their full blooms.
- 12 Stems Large Faux Roses: Classic and elegant, roses add a touch of timeless romance and sophistication, serving as a primary focal point.
- 4 Stems Faux Ruscus: This versatile greenery offers a lovely textural element and helps to create depth and movement within the arrangement.
- 8 Stems Faux Ranunculus: With their delicate, layered petals, ranunculus add intricate detail and soften the overall look of the centerpiece.
- 1 Bush Faux Mixed Eucalyptus: Eucalyptus branches are fantastic for adding a wispy, modern touch and beautiful silver-green foliage, enhancing the natural appeal.
Expert Tip: While this guide focuses on faux florals, if you’re interested in fresh flowers, consider this video tutorial for arranging real flowers. For large events like weddings, ordering wholesale flowers in bulk from a local grocery store or floral supplier well in advance can significantly help manage your budget and ensure you have all the blooms you need.
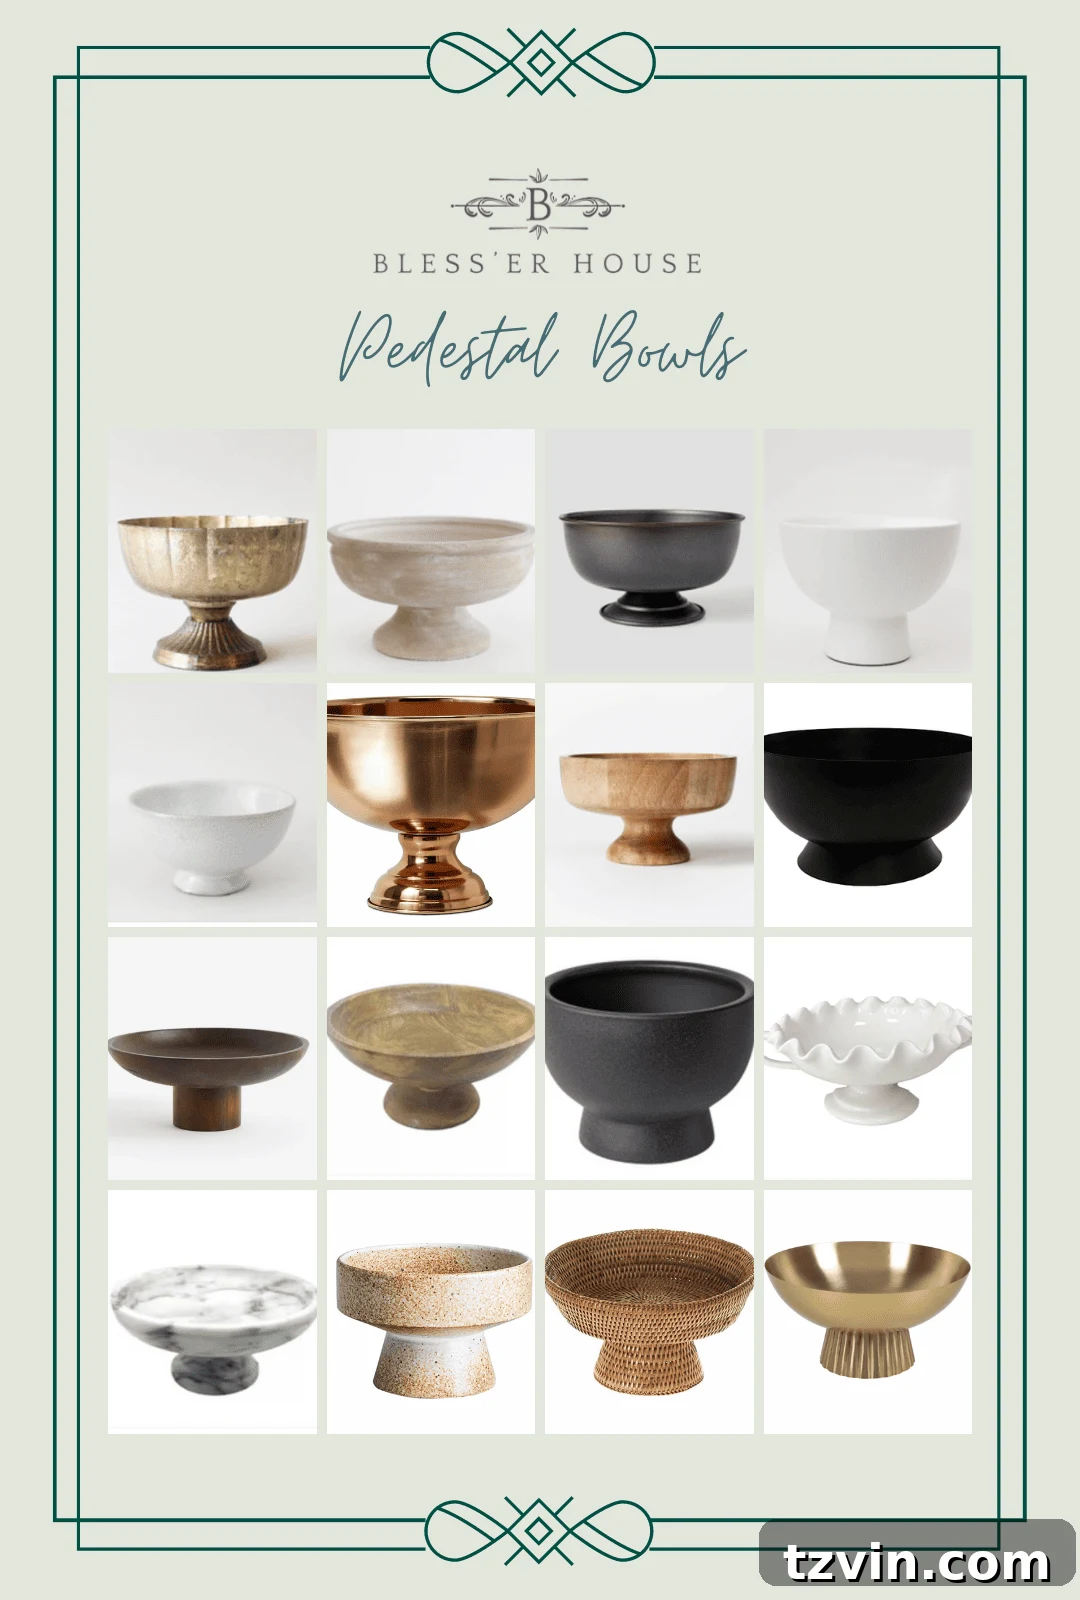
Footed Bowls for Every Budget and Style
The base of your floral arrangement, particularly a footed bowl, plays a significant role in its overall elegance and stability. A footed bowl elevates the entire arrangement, giving it a more substantial and luxurious presence on any table or surface. While there are many exquisite options available at various price points, you don’t necessarily need to break the bank to achieve a high-end look. Consider exploring antique shops, thrift stores, or even discount home goods retailers for unique and affordable finds. If you’re on a very tight budget or simply love a good DIY challenge, you can easily create your own stunning footed bowl, making this project accessible to everyone.
Step-by-Step Guide to Assembling Your Faux Floral Centerpiece
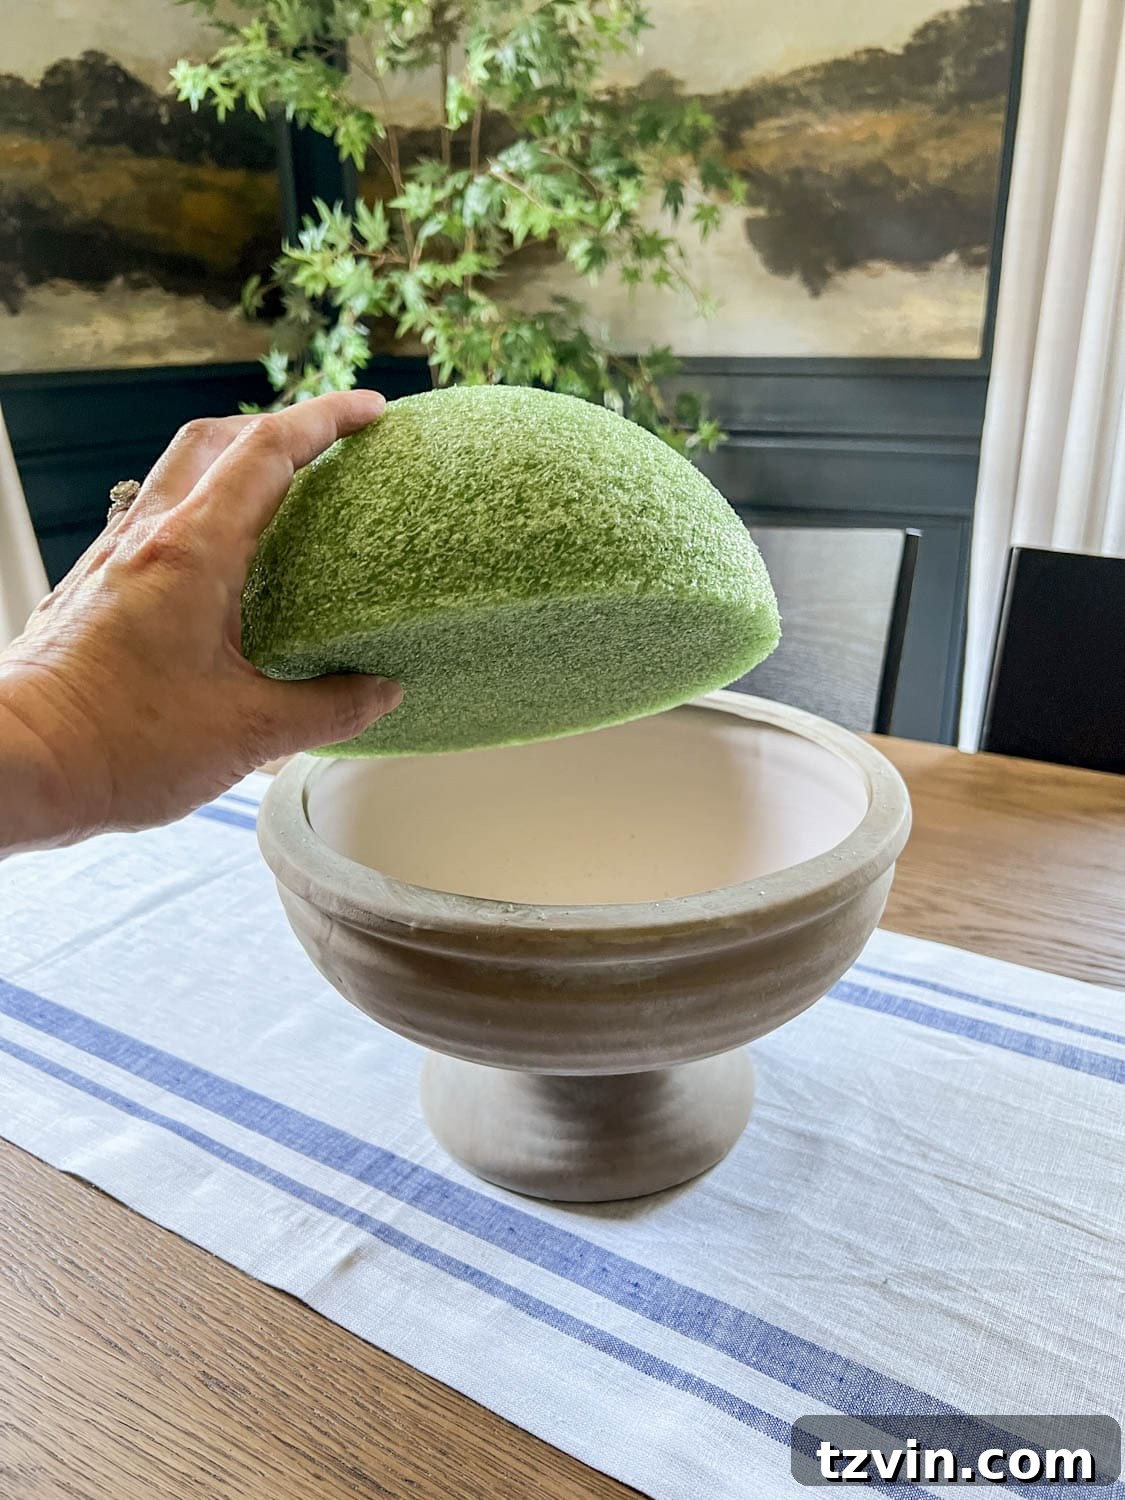
Step 1: Secure Your Floral Foam Base
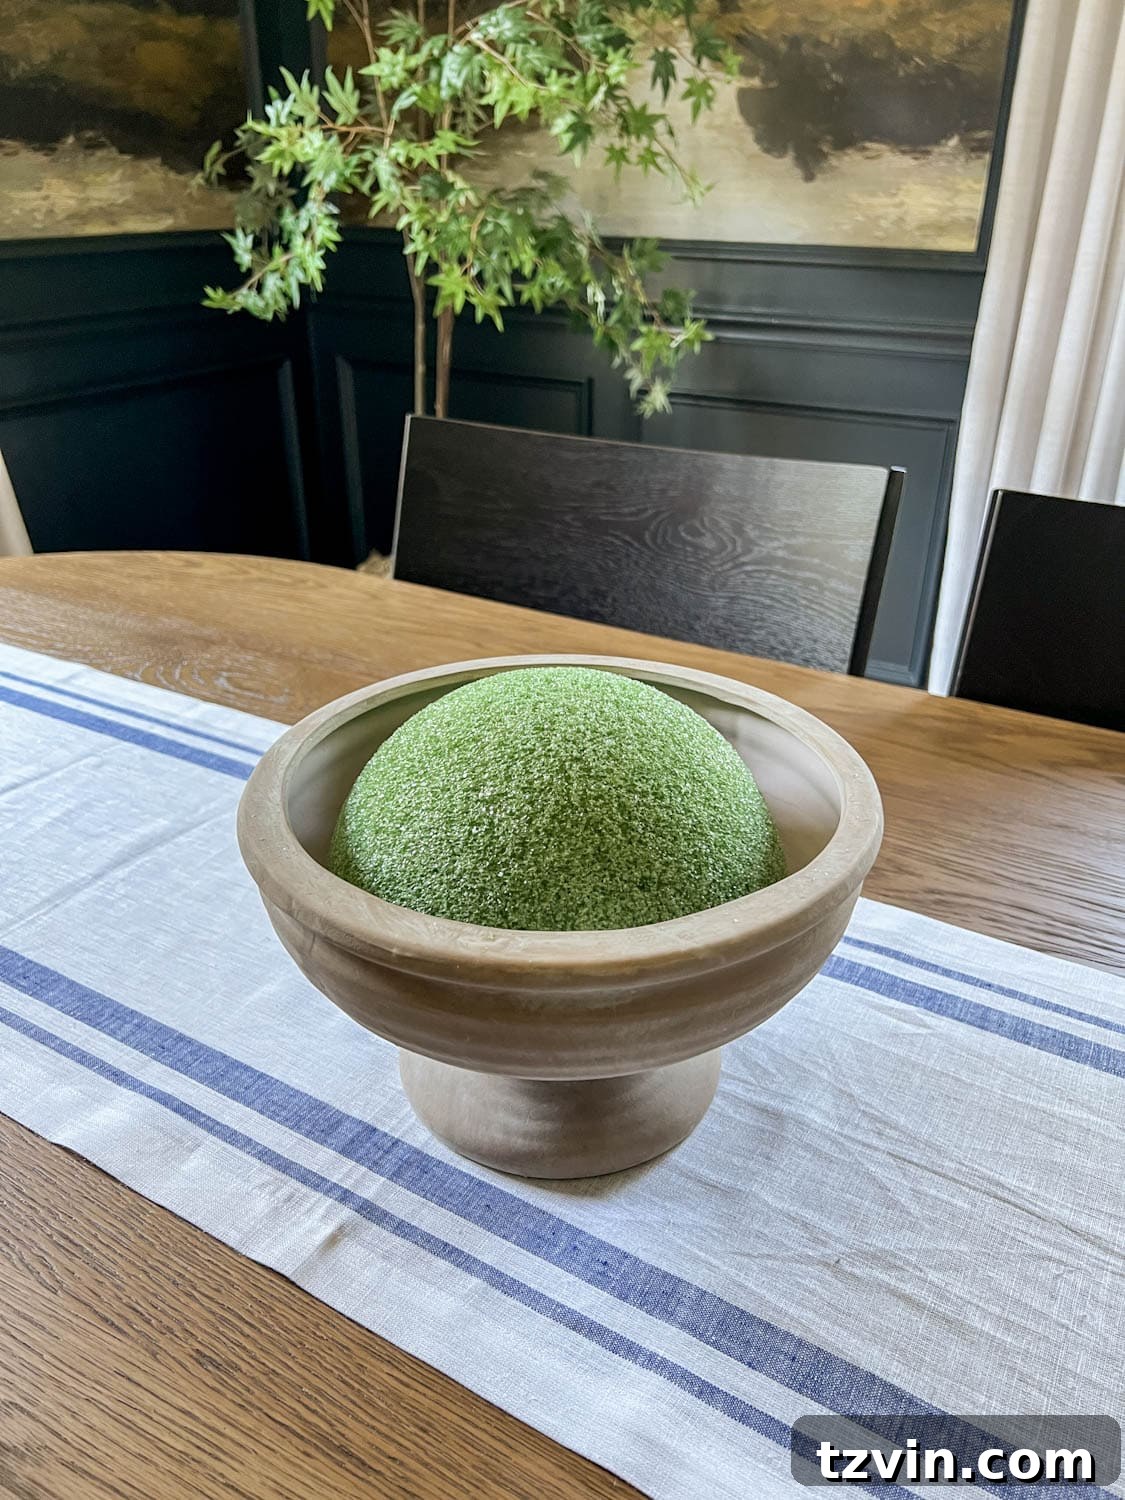
The foundation of any good floral arrangement starts with a stable base. Begin by placing the half sphere of florist foam securely into your chosen footed bowl. If your foam doesn’t perfectly fit, you can easily trim a larger foam block with a knife to achieve the desired half-sphere shape. To ensure the foam remains firmly in place, especially if the centerpiece will be transported or is very large, I highly recommend securing it. A small amount of double-sided duct tape or a few dots of hot glue at the bottom of the bowl will prevent any movement as you work with the flowers.
Creative Alternative: For those who enjoy a true DIY spirit, you can craft your own inexpensive footed bowl! Simply glue together a dollar store bowl and candle holder using strong E6000 adhesive. Once dry, spray paint it with a texture spray paint for a sophisticated, custom look.
Flexibility Tip: I often keep my foam unattached if I plan to change out the flowers seasonally, allowing me to reuse the elegant footed bowl as a versatile base throughout the year. However, for centerpieces that will be moved frequently or used at events like weddings, securing the foam to the bowl provides essential stability and peace of mind.
Alternative Foam-Free Method: If florist foam isn’t readily available, a great alternative is to use a chicken wire floral cage placed at the bottom of the bowl. Crumple the chicken wire into a loose ball and secure it. This provides a grid for inserting stems. Alternatively, you can create a grid over the rim of the bowl using floral tape to help separate and hold your stems in place, though this method works best with shorter, lighter arrangements.
Step 2: Prepare Your Faux Flowers for Optimal Realism
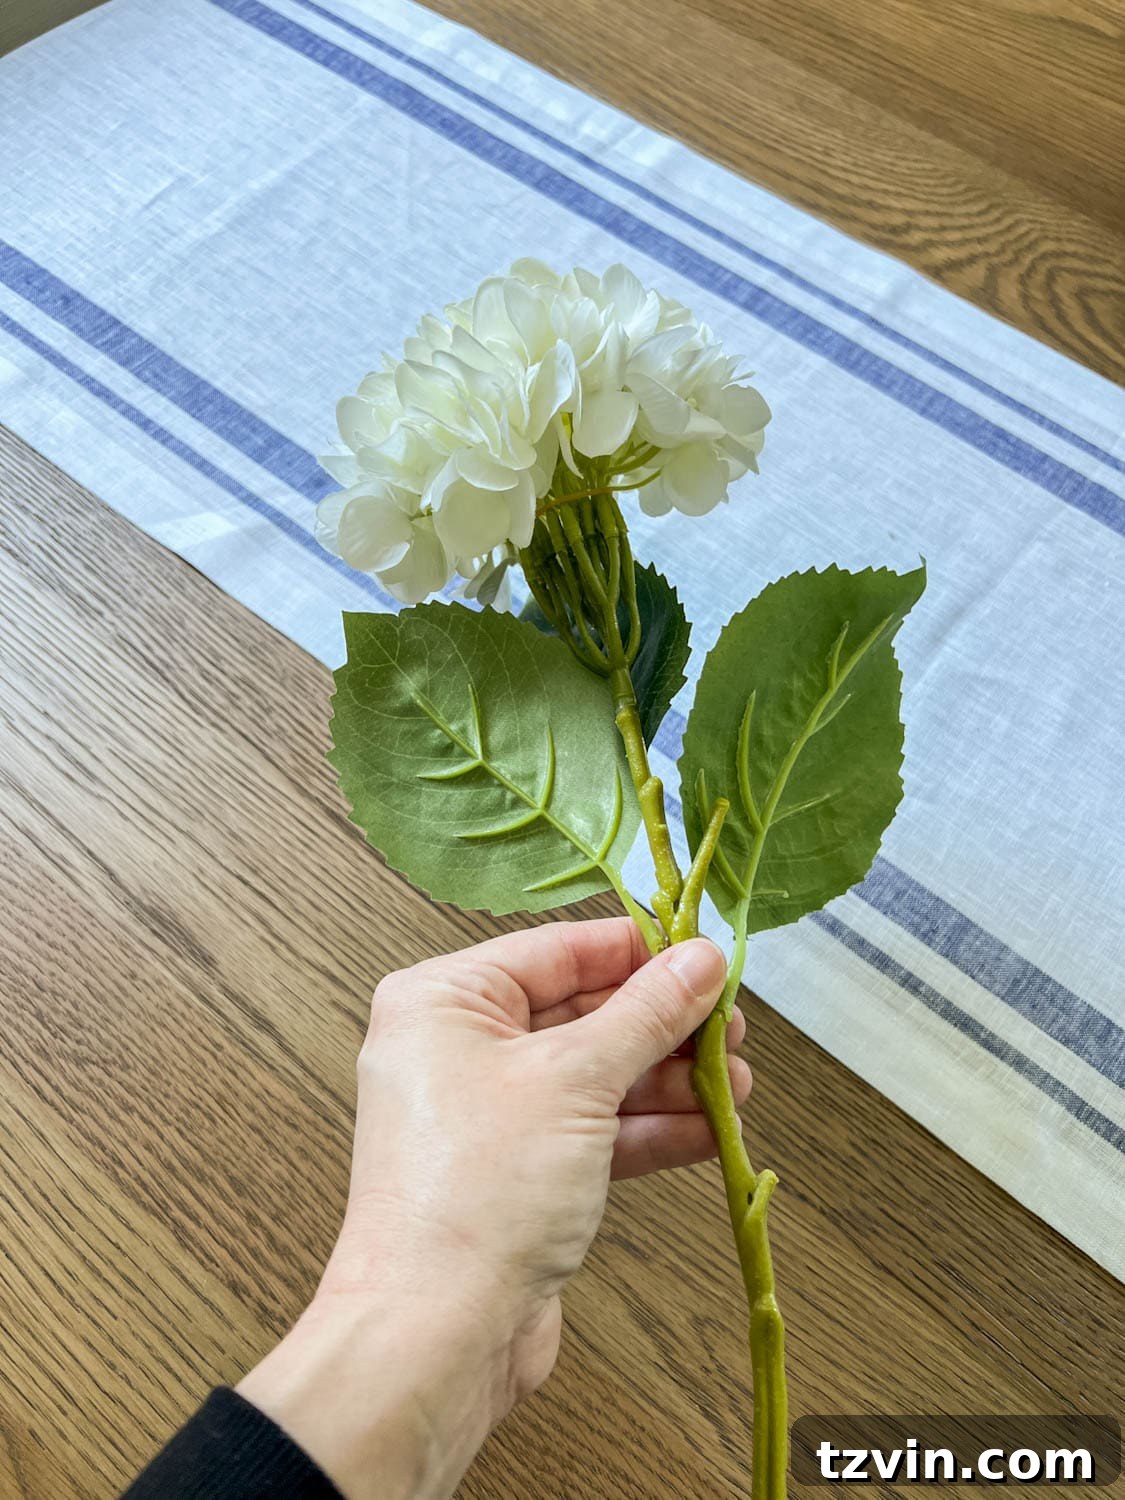
The secret to truly realistic faux flower arrangements lies in proper preparation. Artificial flowers often come compressed from packaging, and a little “fluffing” can dramatically enhance their appearance. Gently shake each stem to help the petals naturally spread out. For tougher cases, a quick blast with a hair dryer on a low, cool setting can help loosen and soften the petals. Alternatively, carefully use your hands to gently spread and shape each faux petal, making the blooms appear fuller and more lifelike.
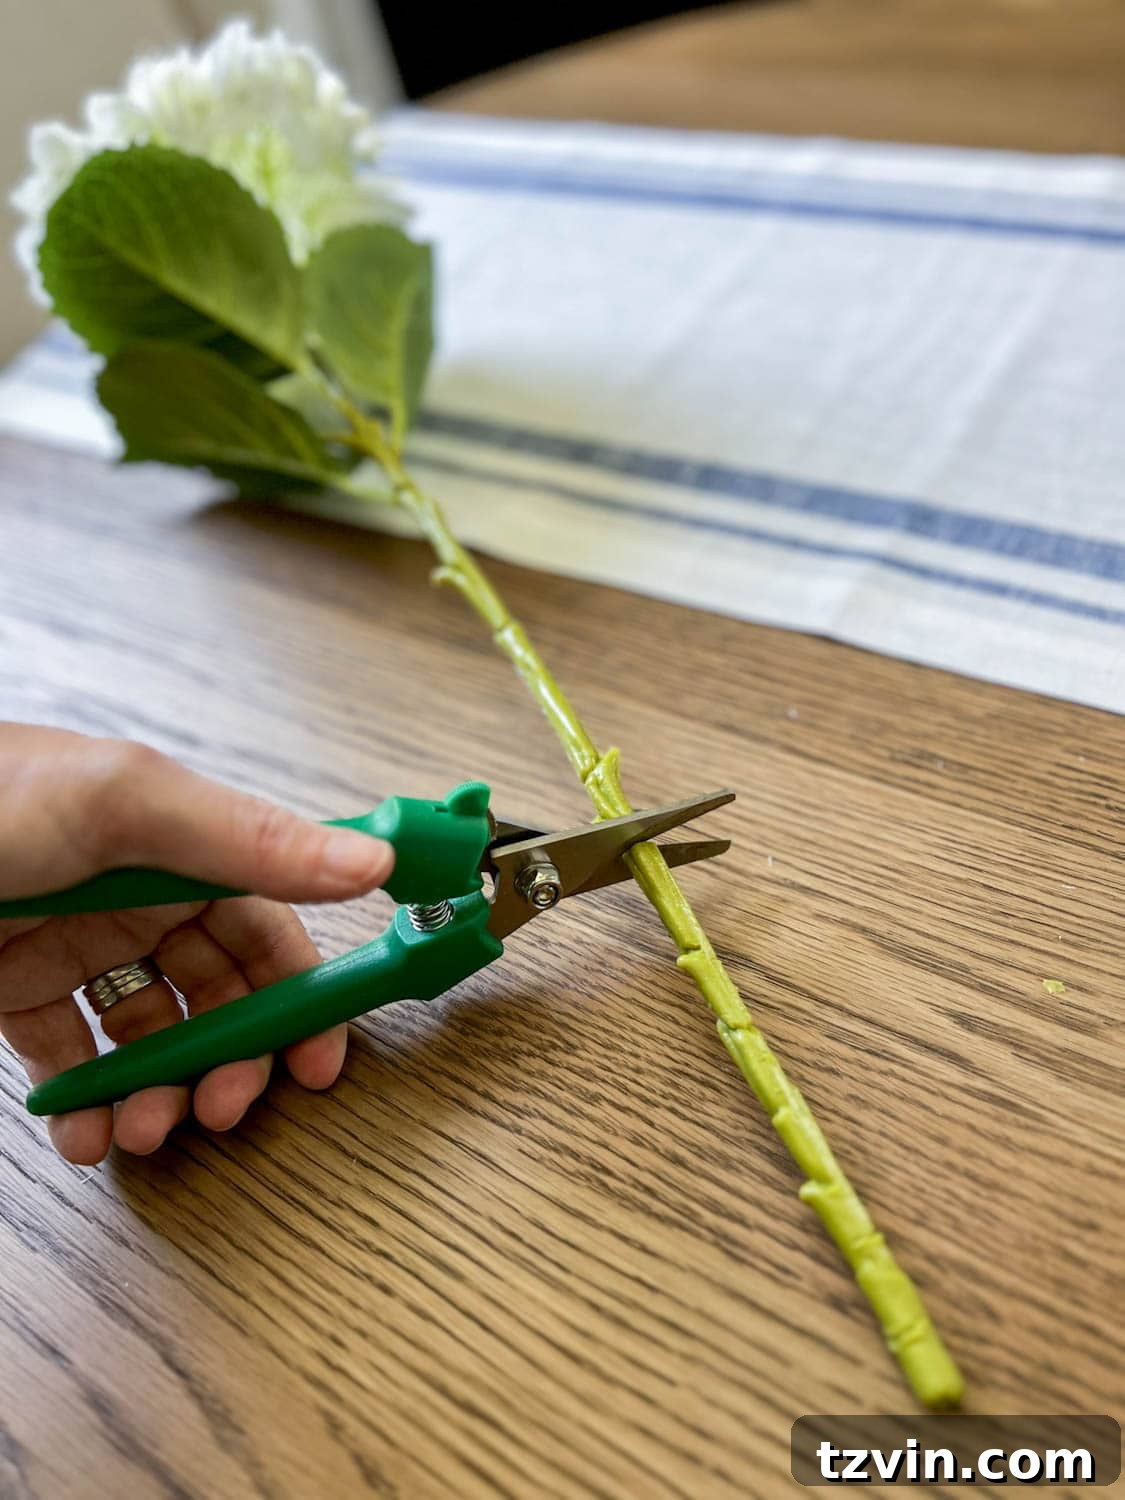
Once fluffed, decide on the desired height for your centerpiece. For a classic, balanced arrangement, aim for your tallest flowers to be roughly 1.5 to 2 times the height of your bowl. Using sturdy wire cutters, trim the stems to your chosen length, ensuring you leave at least 2 inches of extra length. This additional length is essential for securely pushing the stems into the florist foam, providing stability and allowing for minor adjustments. For this particular arrangement, I found that cutting the main stems to approximately 16 inches long worked perfectly to achieve a graceful, elevated silhouette.
Quality Matters: I was particularly delighted to discover these incredibly realistic faux hydrangeas, which came in a convenient pack of 5 stems for less than $25. Investing in high-quality faux flowers like these truly elevates the entire arrangement, making it difficult to distinguish them from their fresh counterparts.
Step 3: Establish the Central Height and Shape
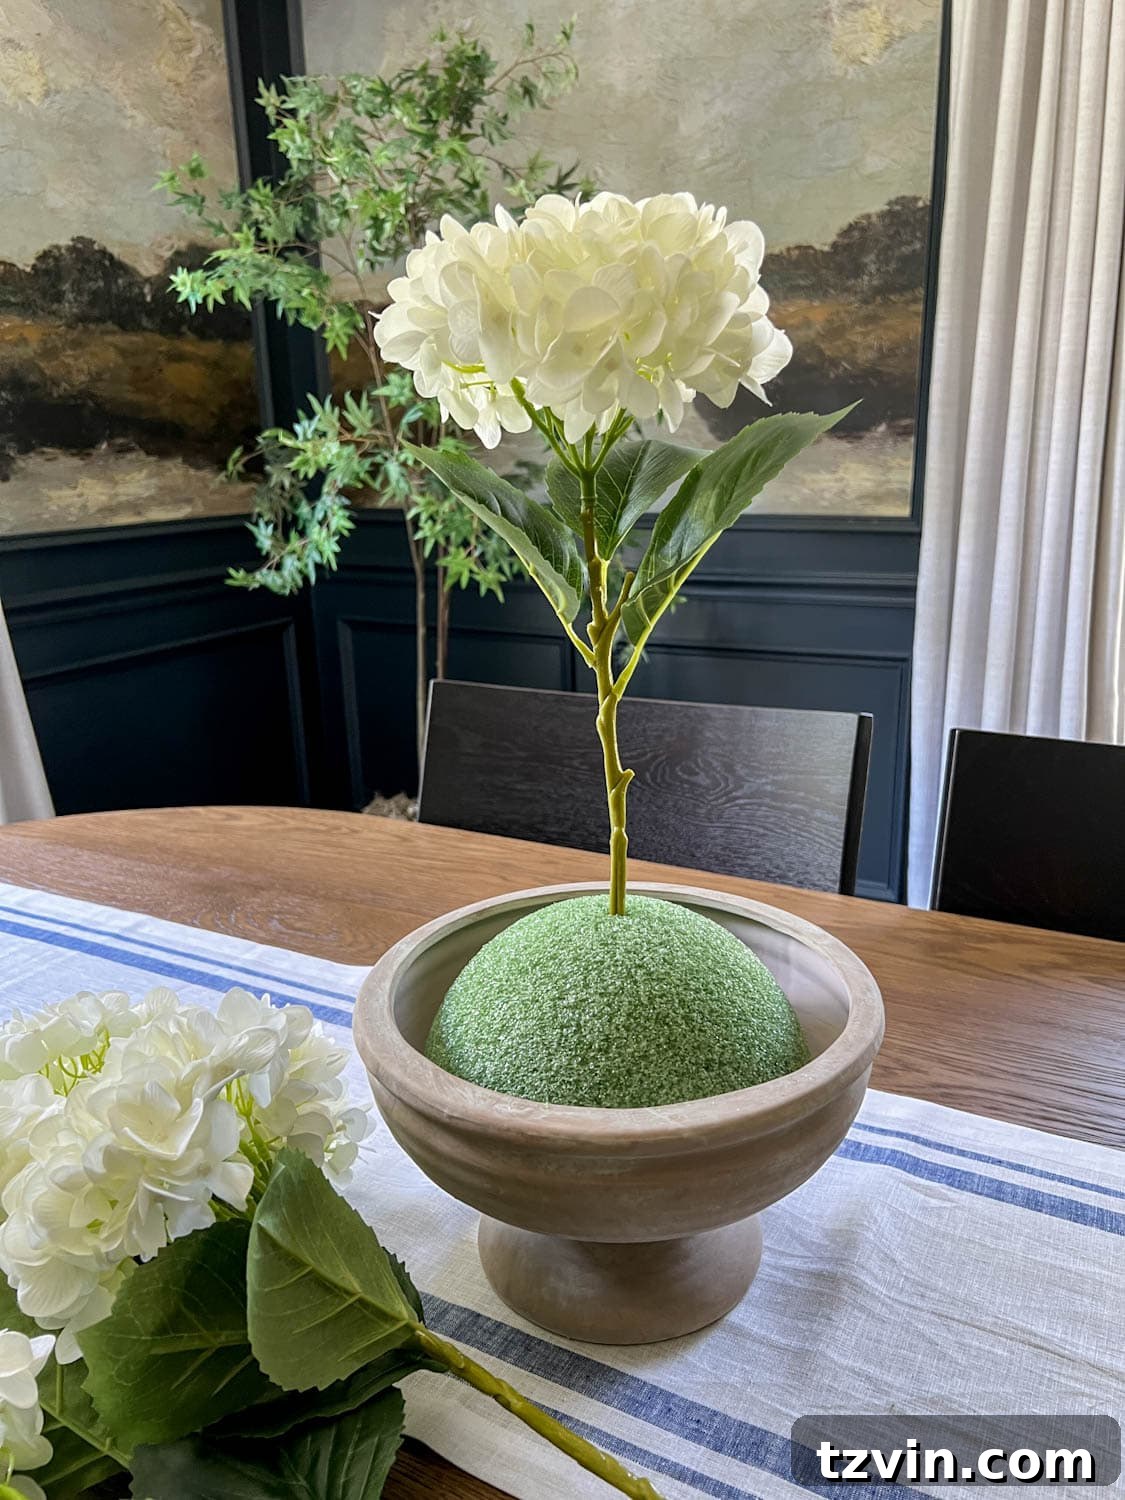
This critical first step sets the overall height and initial silhouette of your entire arrangement. Take one of your prepared faux flower stems, preferably one of the larger blooms like a hydrangea, and firmly push its end into the very center of the florist foam. Ensure the flower is standing straight up. This central bloom will serve as the highest point of your arrangement, guiding the placement and height of all subsequent flowers. It’s important to commit to this height, as it defines the vertical axis and overall grandeur of your centerpiece. Take a moment to step back and assess if this height feels balanced with your bowl and the intended display space.
Step 4: Build the Initial Triangular Framework with Main Blooms
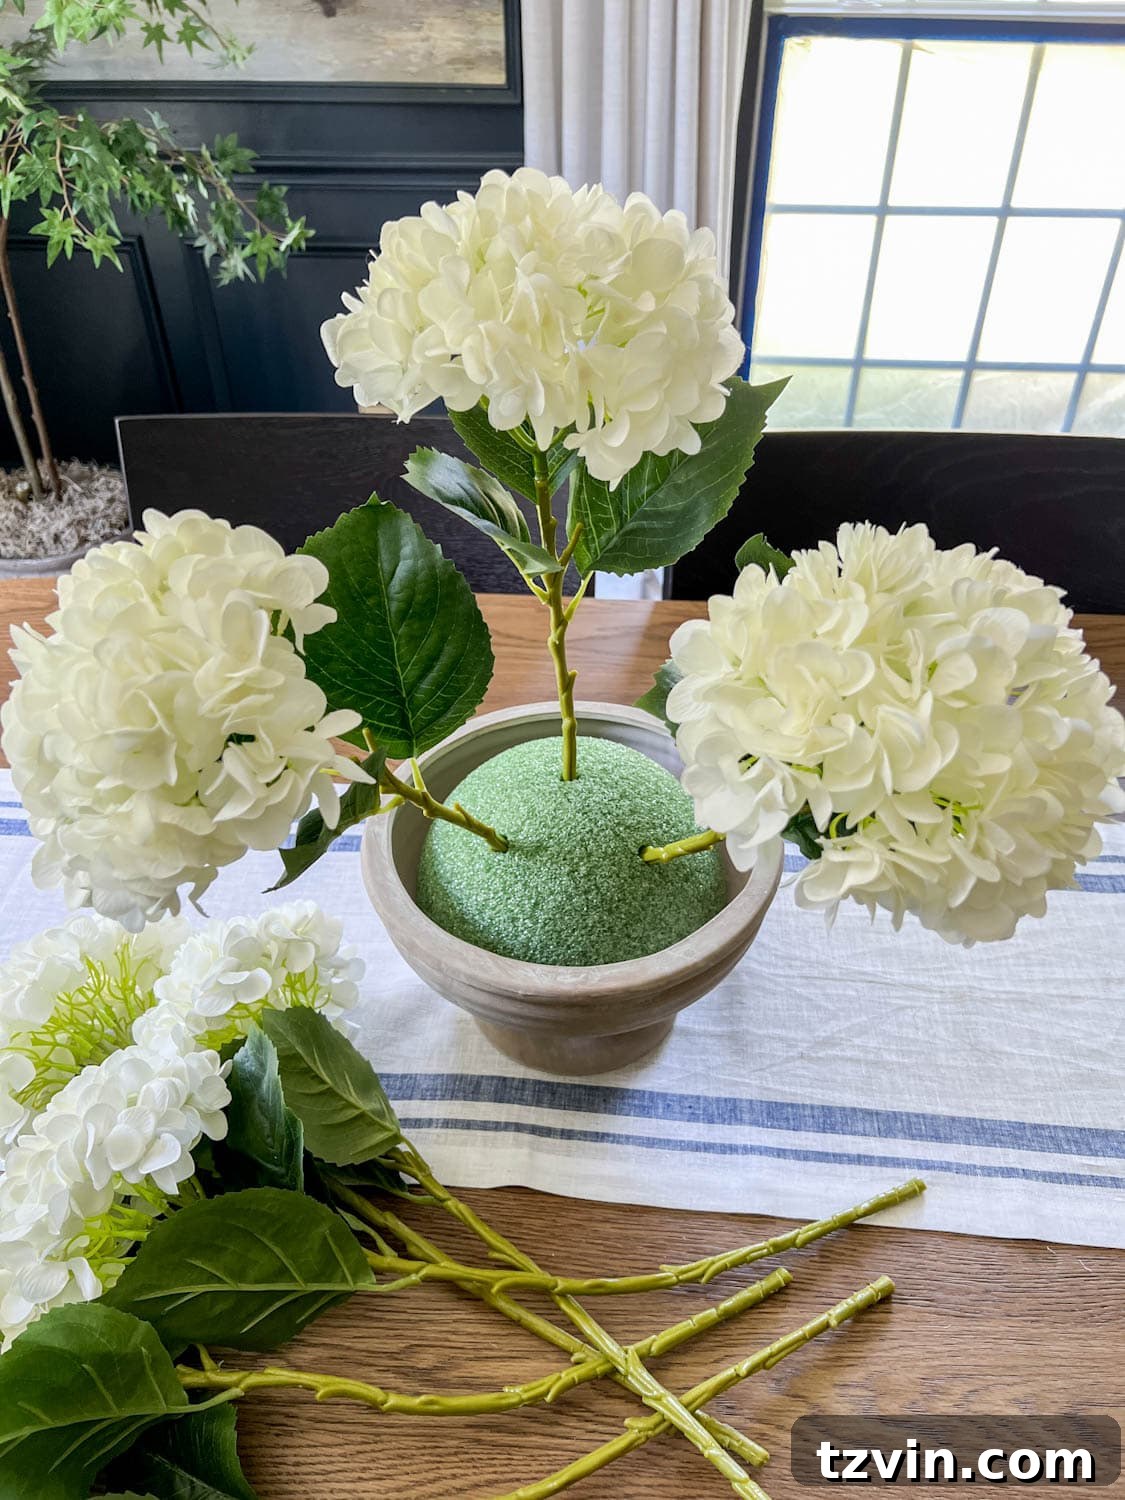
Once your central bloom is in place, you’ll begin to build out the core shape of your arrangement. Select two more stems of your main flower type (like hydrangeas) and place them strategically below the first central stem, forming an equilateral triangle. Visualize this triangle as having the central bloom at its apex and these two new stems forming the base points. These two stems should be slightly shorter than the central bloom to create a gentle, cascading effect. After placing these two, rotate your bowl 180 degrees and repeat the process, placing two additional stems on the opposite side in the same triangular pattern. This method ensures a balanced and symmetrical foundation. Remember, when designing floral arrangements, it’s a common and effective technique to arrange in clusters of odd numbers (like 3 or 5) as this naturally creates a more dynamic and aesthetically pleasing visual.
Step 5: Expand the Main Floral Layer, Creating Fullness and Flow
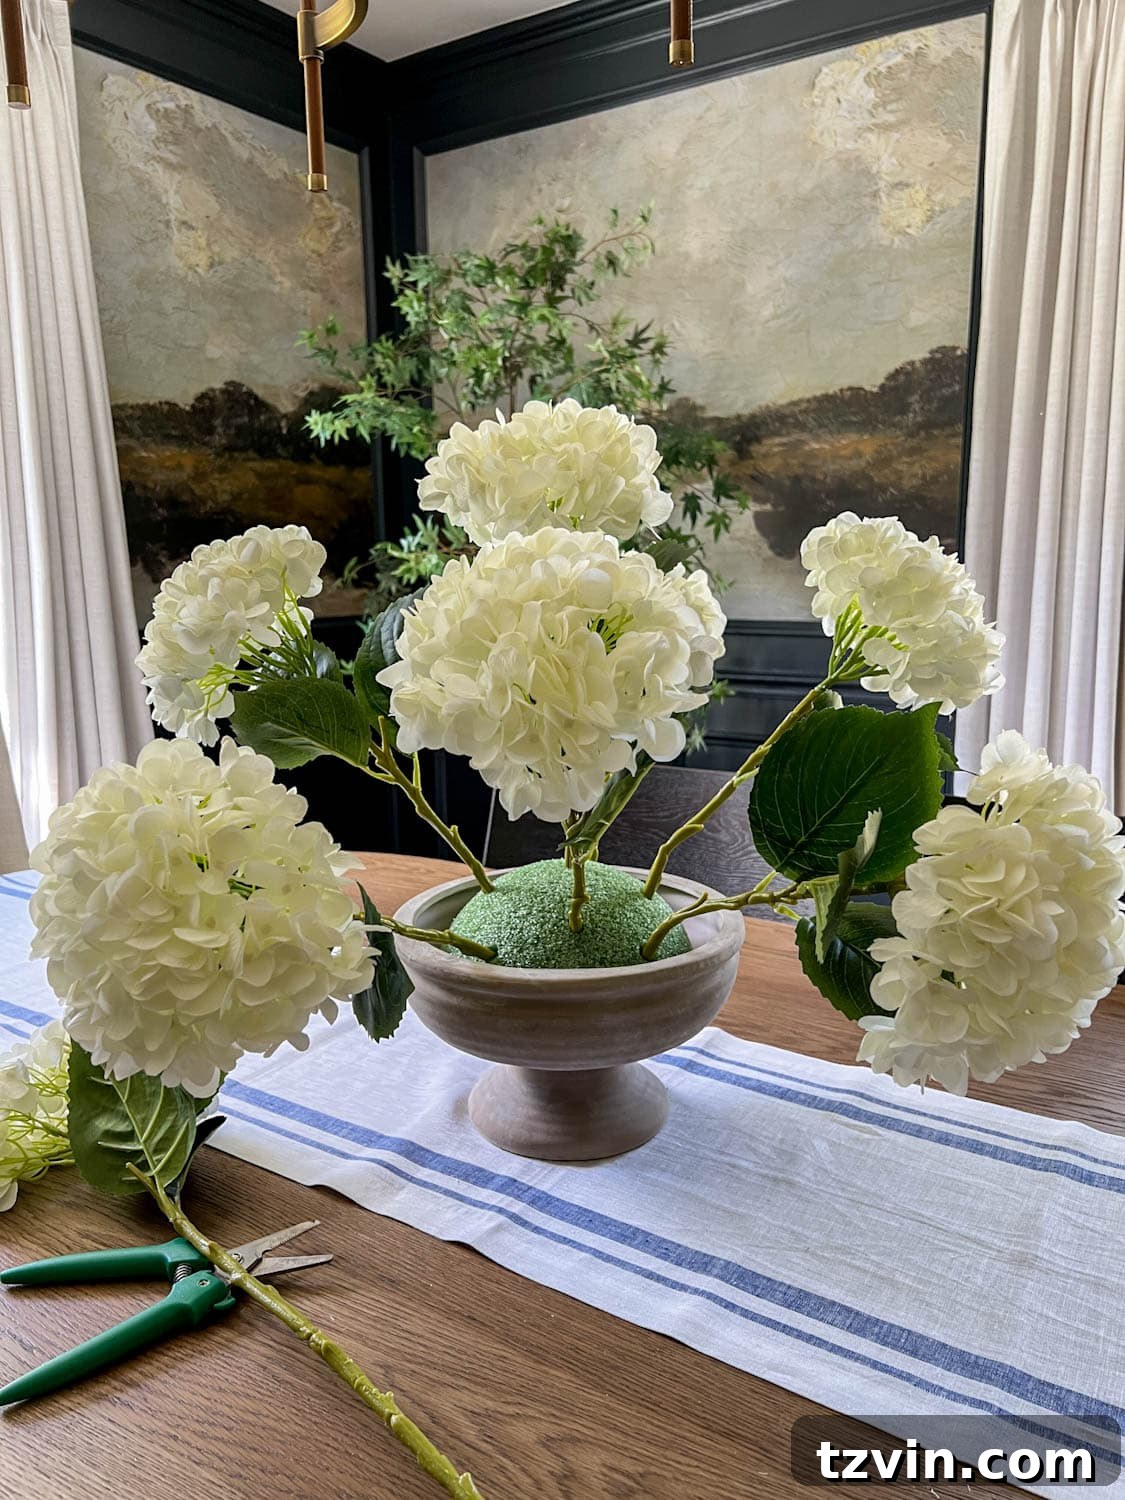
With the initial triangular framework established, continue to build out the main body of your centerpiece. Take the remaining stems of your primary blooms and strategically place them around the circumference of the foam. The goal here is to create a full, rounded shape, ensuring that the florist foam is completely covered from view. Continue using the triangular pattern method, staggering these new placements from the previous row of stems you placed in Step 4. This staggering technique helps to create a natural, organic flow, preventing the arrangement from looking too stiff or uniform. As you place each bloom, step back and view the arrangement from all angles to ensure an even distribution and a pleasing silhouette. Aim for a lush, abundant feel, where the main flowers form a cohesive and generous display.
Step 6: Integrate Greenery with Dissected Ruscus Stems
Now it’s time to introduce the vital element of greenery, which adds texture, depth, and a natural feel to your artificial flower arrangement. Start with your large ruscus stems. These are typically quite full, and for a more versatile and natural look, it’s best to break them down. Using your wire cutters, carefully separate the larger ruscus stem into several smaller sections of leaves. This technique allows you to distribute the greenery more evenly throughout the arrangement, filling smaller gaps and creating delicate wisps of foliage rather than bulky clumps. These smaller pieces are much easier to manipulate and will contribute to a more organic and professional finish.
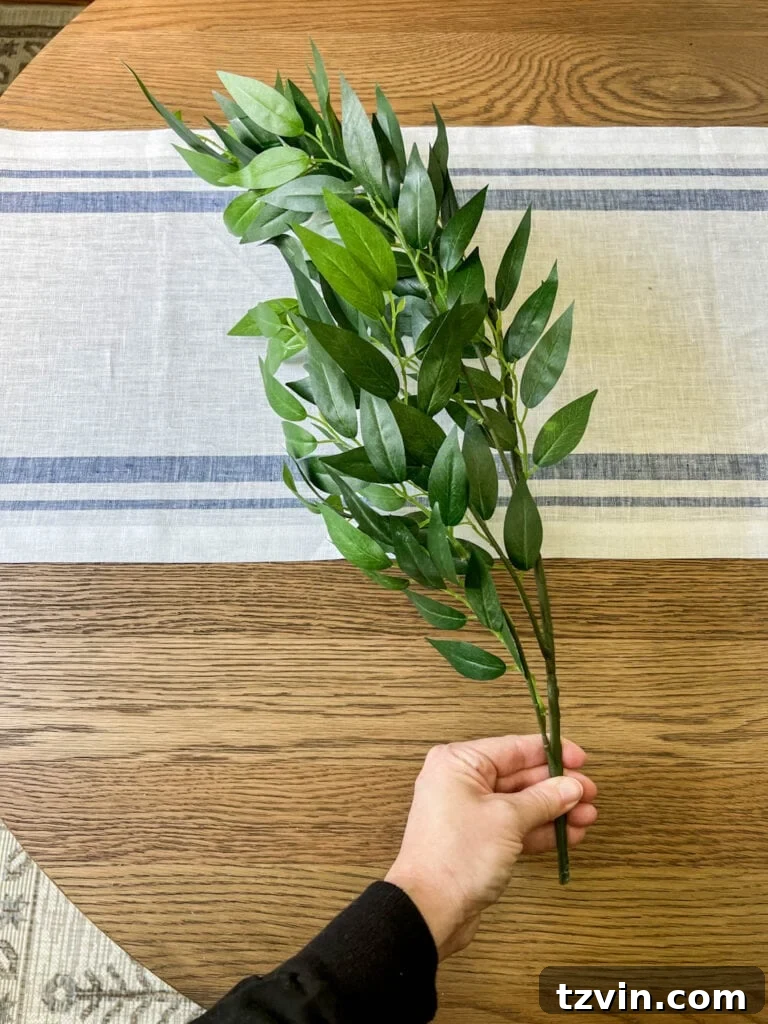
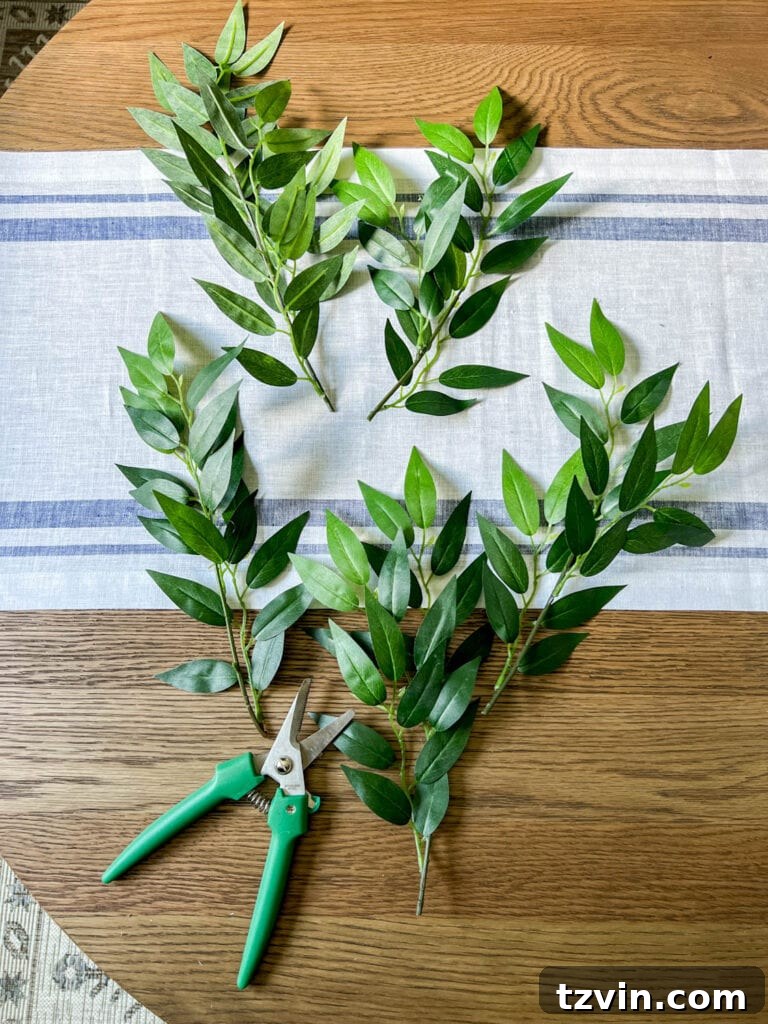
Step 7: Fill in Gaps and Add Secondary Blooms for Depth
With the main structure of your hydrangeas in place, it’s time to refine the arrangement and add layers of interest. Begin by placing the separated ruscus stems strategically between the larger hydrangea blooms, pushing them into the florist foam. This fills any noticeable gaps, creating a lush backdrop and hiding the foam entirely. Don’t just place them flat; try to create some natural movement and depth with the greenery.
Next, introduce your secondary blooms: the large roses and ranunculus stems. These flowers will add different textures, shapes, and a pop of contrasting color or softness. Repeat the process of filling in gaps, ensuring these blooms are evenly spaced and distributed throughout the arrangement. Tuck them in between the hydrangeas and ruscus, varying their heights slightly to create a more dynamic look. The goal is to achieve a full, harmonious arrangement where every bloom and leaf contributes to a cohesive, elegant display, leaving no visible holes or empty spaces.
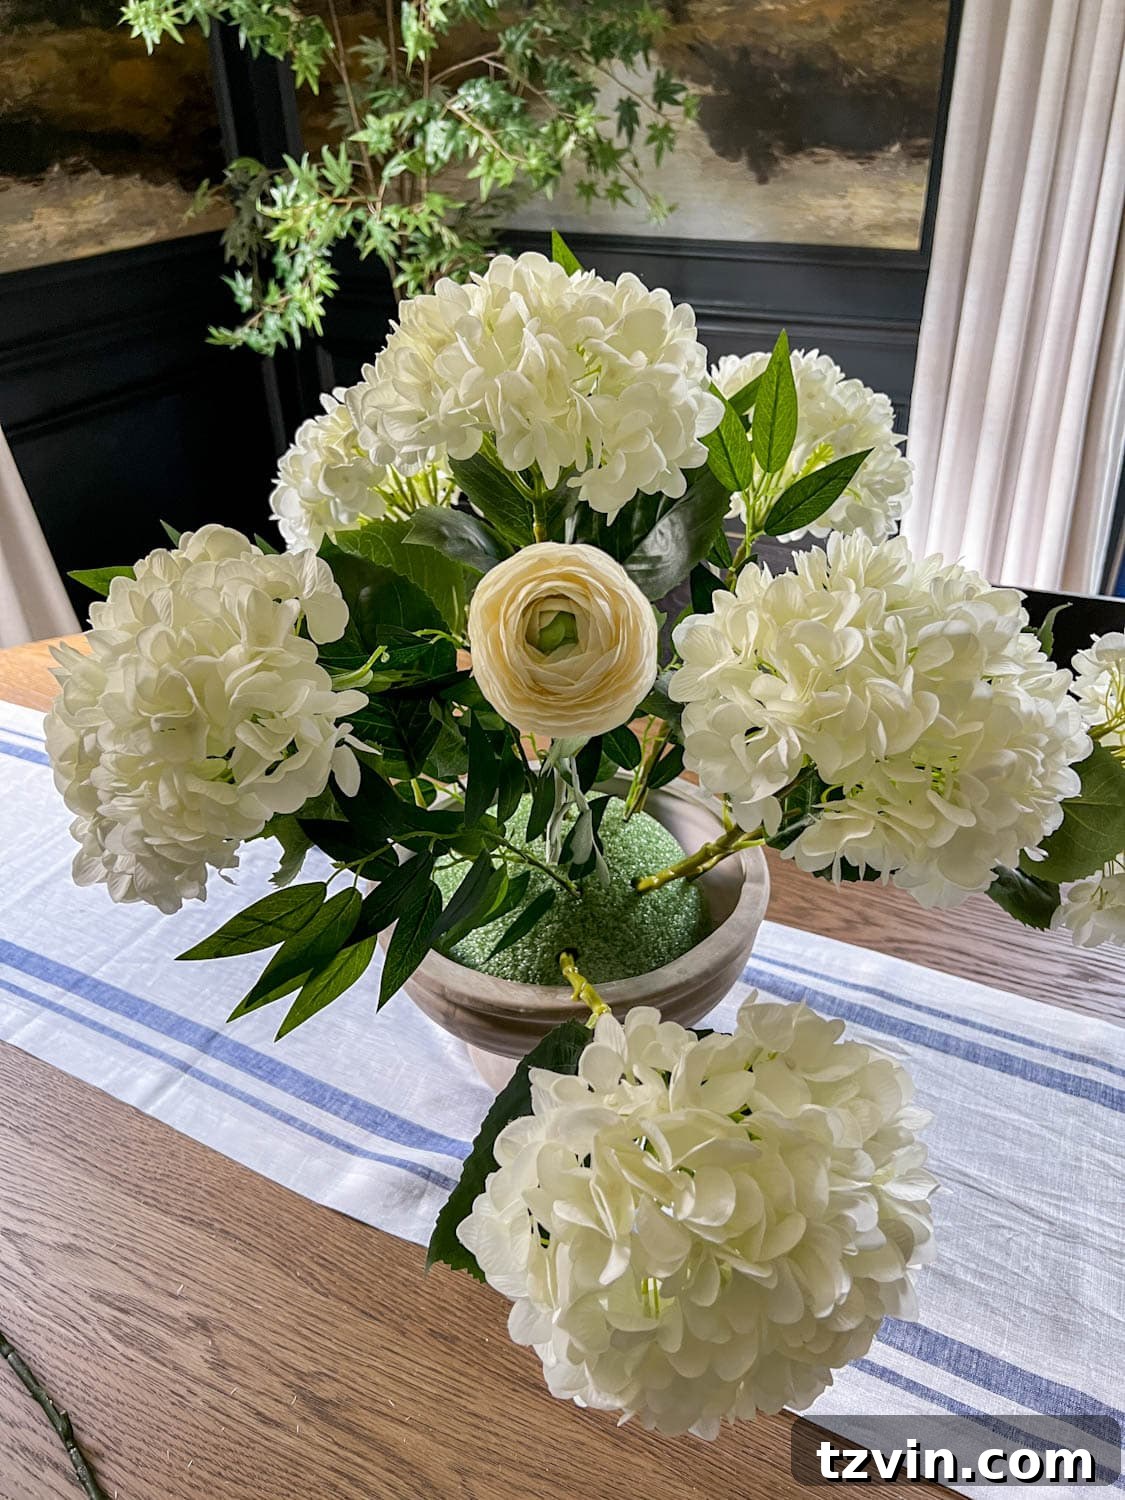
Step 8: Final Touches with Elegant Floral Accents
The final step in crafting your stunning DIY faux flower arrangement involves adding those delicate floral accents that elevate the design and give it a polished, professional finish. These accents introduce subtle textures, varied shapes, and a touch of organic movement. For this particular arrangement, I chose to incorporate a few stems of faux seeded eucalyptus. Its unique texture and slightly drooping branches create a beautiful, natural cascade that softens the edges of the centerpiece and adds visual interest. Place these accent stems strategically, allowing some to subtly drape over the rim of the bowl, while others can be tucked deeper within the arrangement to add depth. Step back and observe your creation from all angles, making any final adjustments to ensure balance, fullness, and that every bloom is beautifully showcased. These small details are what transform a collection of flowers into a truly artistic and cohesive centerpiece.
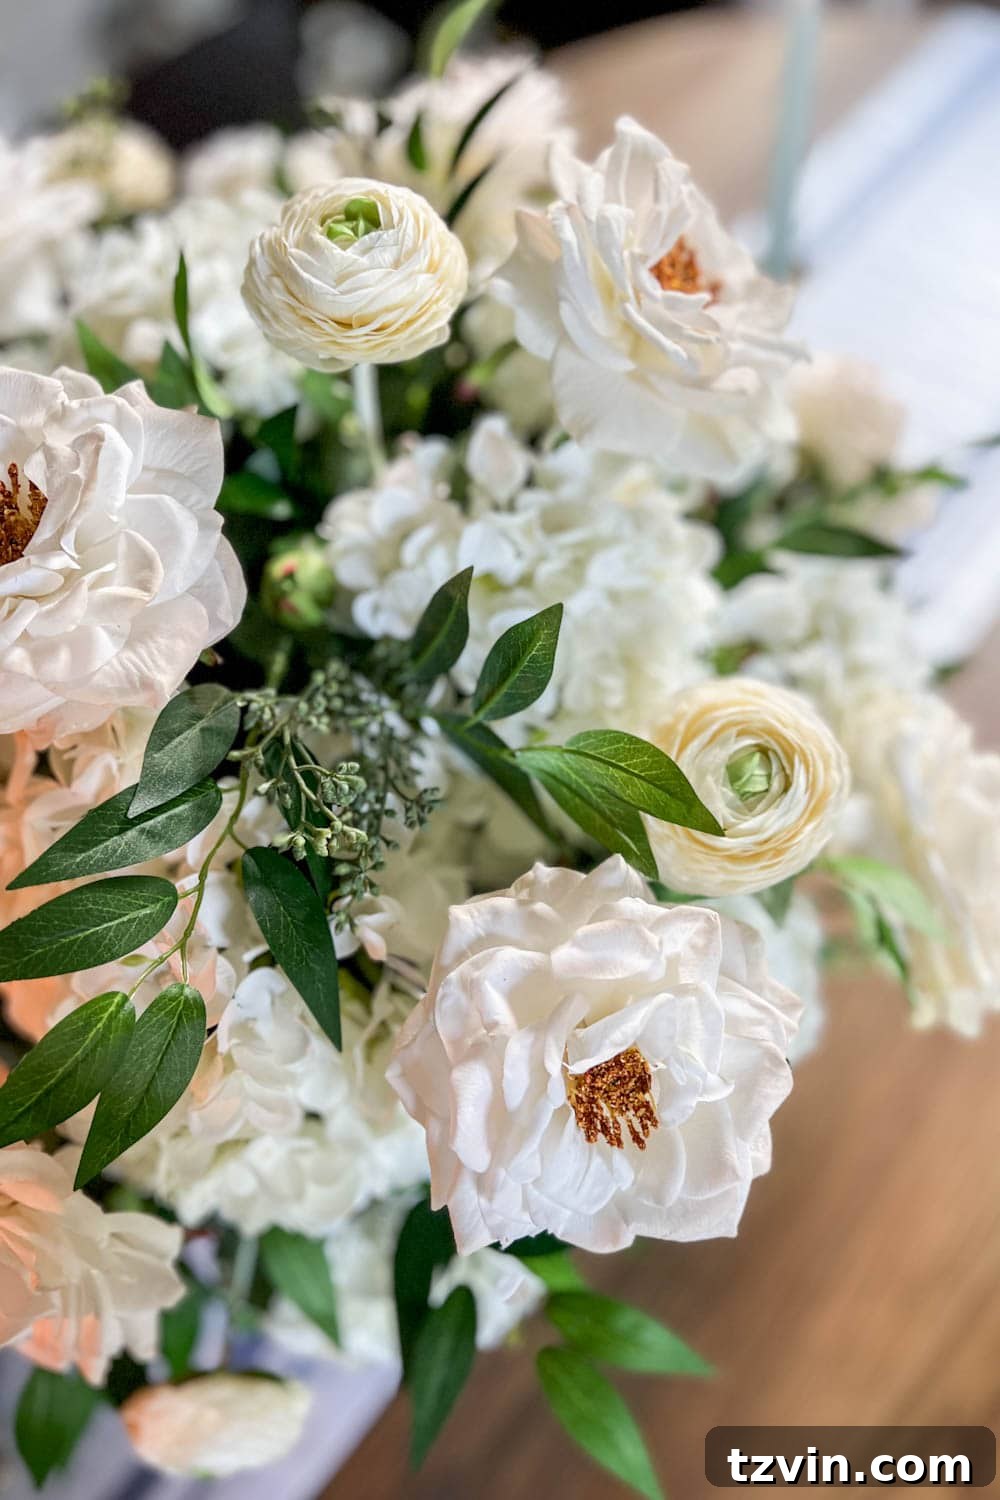
Your Exquisite Finished DIY Faux Flower Arrangement
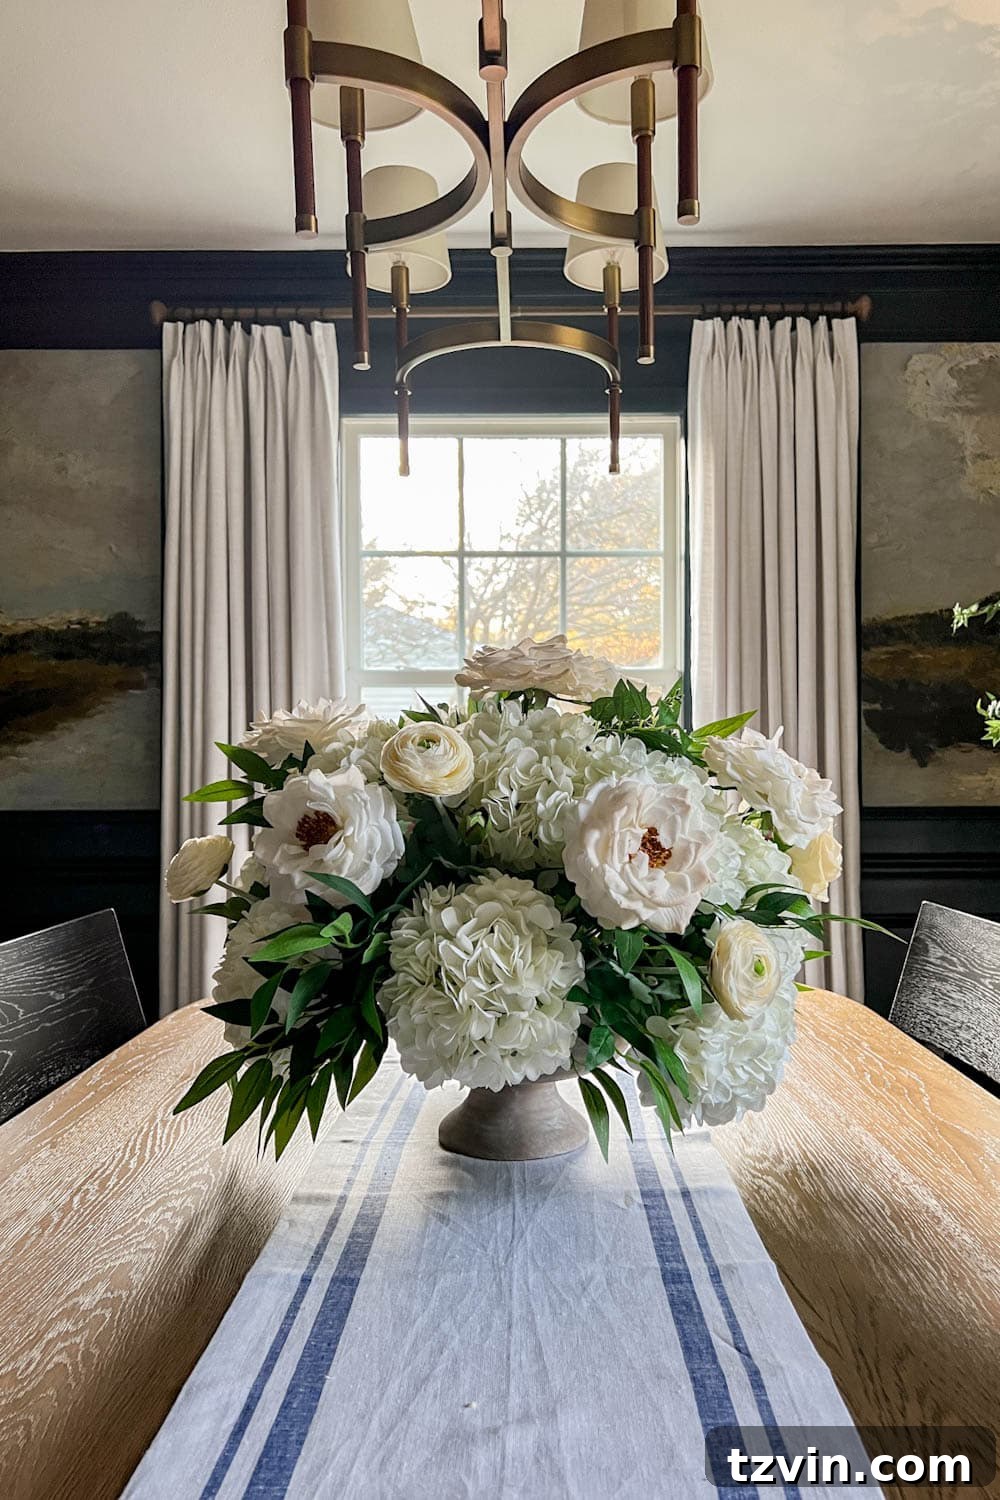
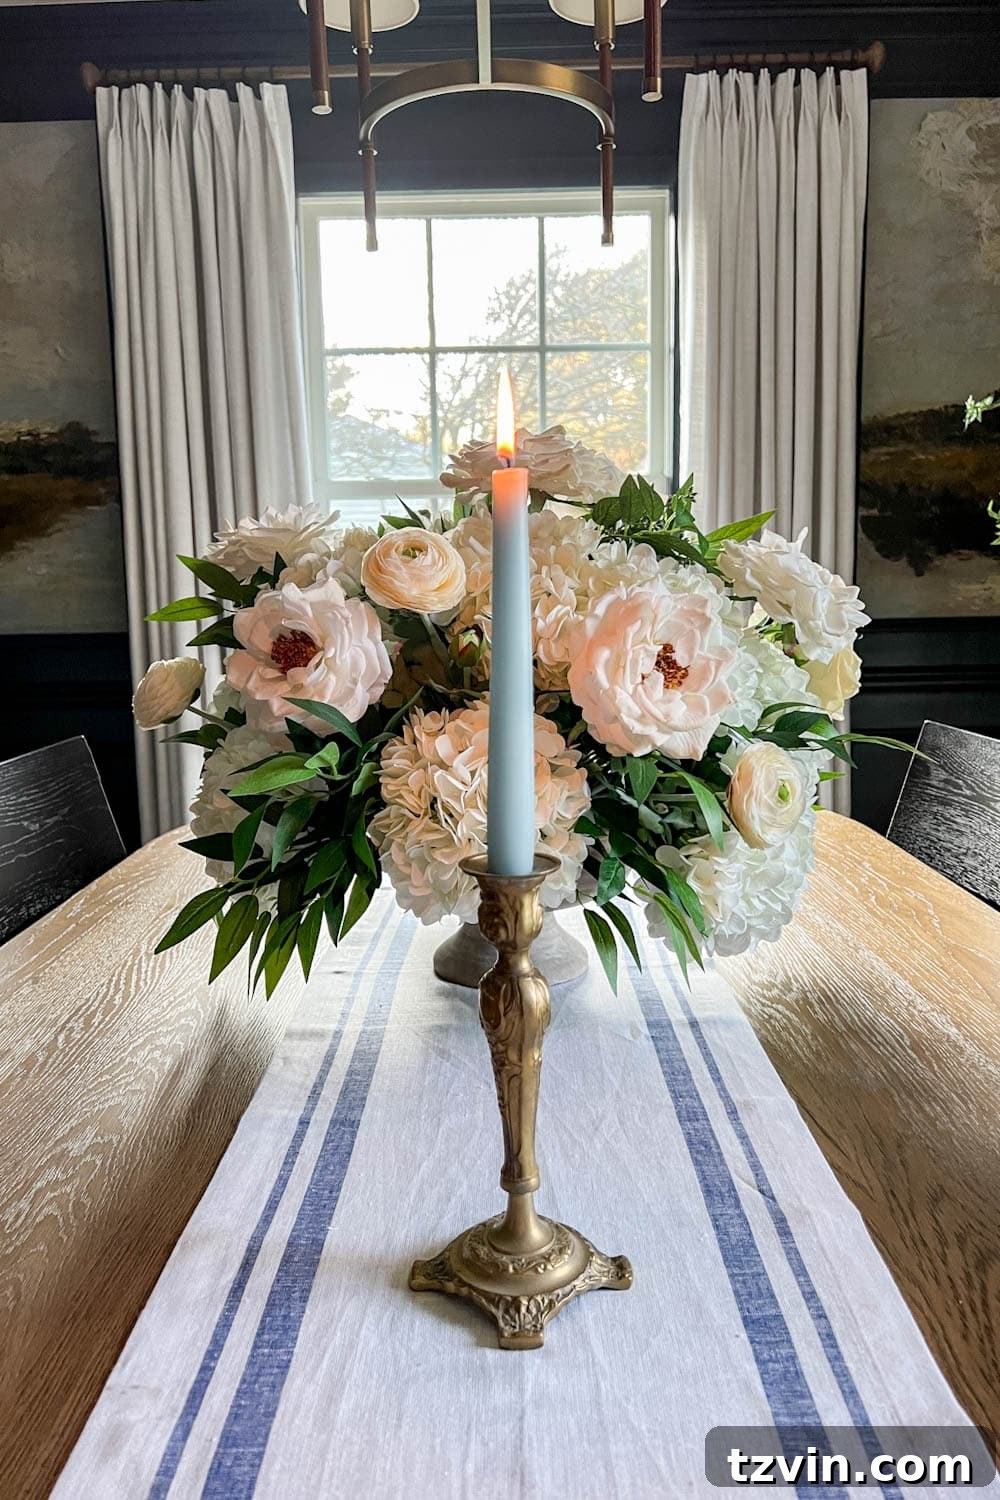
And there you have it! A truly stunning and professional-looking DIY faux flower arrangement, ready to grace any table or altar. While I may not possess formal training in floral design, I can confidently say that if I can assemble this elegant faux flower centerpiece, anyone can. The process is intuitive, rewarding, and requires no advanced skills, just a keen eye for balance and a love for beautiful decor.
One of the most remarkable advantages of working with artificial flowers is their incredible versatility. This neutral arrangement, featuring classic white hydrangeas and roses, serves as a perfect canvas. You can effortlessly introduce or substitute brighter accent colors like soft pinks, vibrant blues, sunny yellows, or deep purples to adapt the centerpiece to any holiday, event, or specific color scheme. Imagine the possibilities for seasonal transformations!
I’m already envisioning adding beautiful blue flowers to this design for a Father’s Day celebration, creating a masculine yet elegant touch. And for the Fourth of July, a few strategically placed red and blue blooms will instantly transform it into a patriotic masterpiece. This adaptability means your investment in quality faux flowers pays dividends throughout the year, keeping your decor fresh and relevant for every occasion without the constant expense of fresh floral purchases.
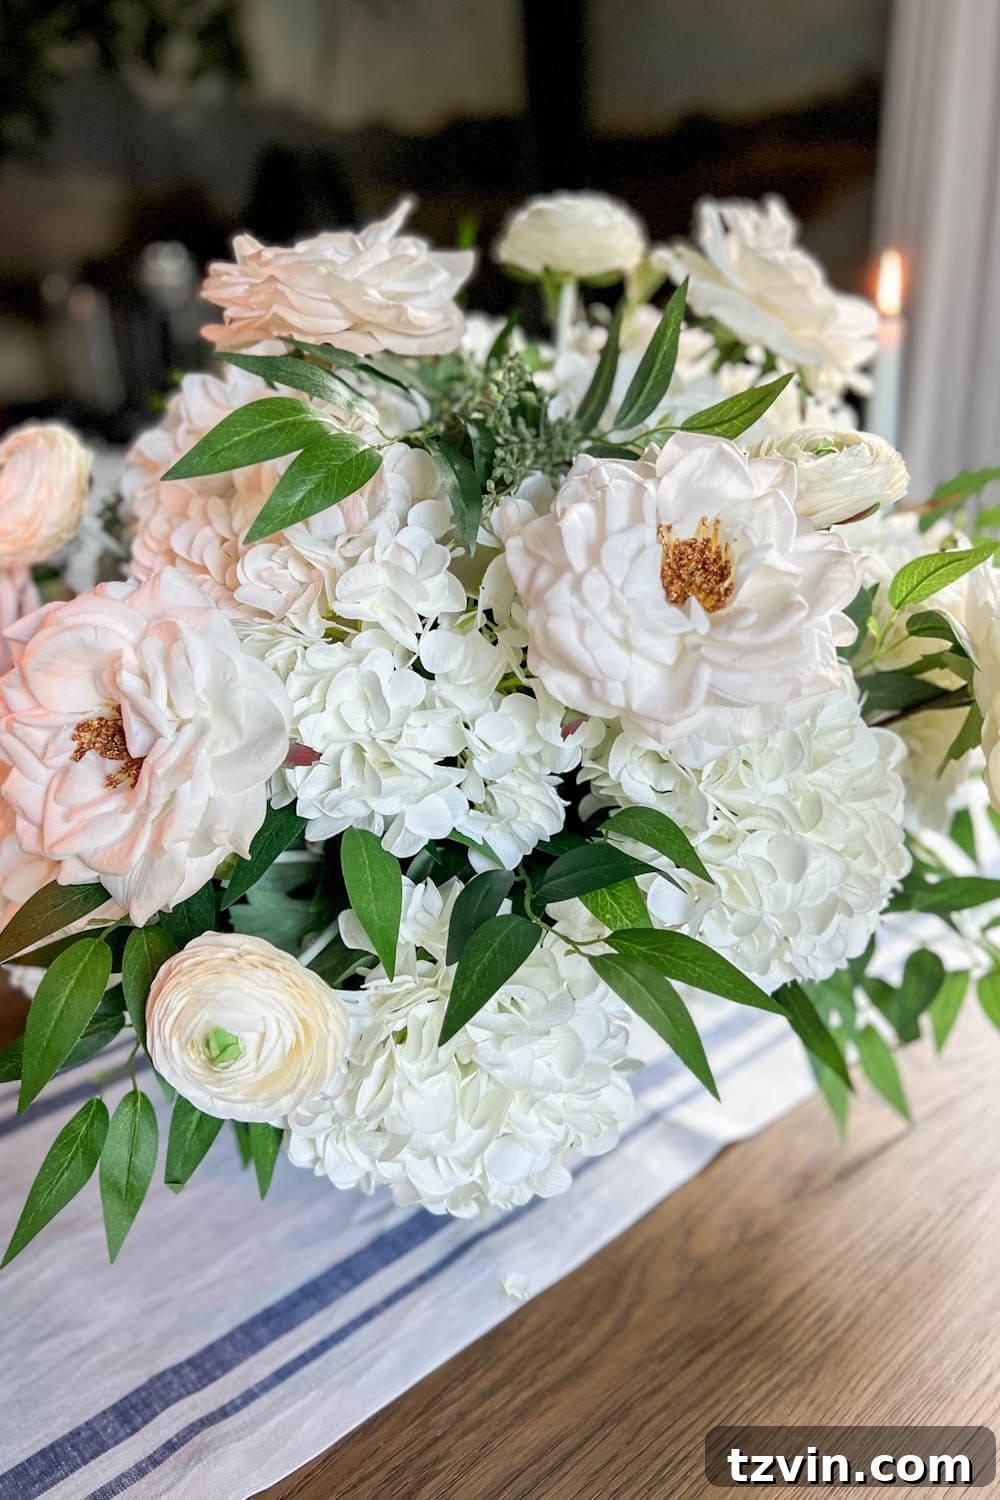
Explore Further: For more inspiration and resources on creating captivating floral displays, delve into my collection of favorite realistic faux flowers and innovative floral centerpiece ideas! You’ll find a wealth of information to help you select the best artificial blooms and design concepts.
These classic DIY arrangements are not only perfect for home decor but also shine as elegant wedding day floral arrangements, whether gracing an altar with timeless beauty or serving as stunning dinner table centerpieces at a wedding reception. The enduring quality of faux flowers means your special day’s decor will look pristine from the first guest’s arrival until the last dance.
For couples who embrace the joy of DIY projects and prefer to handle wedding preparations well in advance of their big day, these centerpieces offer an unparalleled advantage. They are an excellent way to significantly cut down on the wedding budget, allowing you to shop for high-quality faux flowers during off-season sales and assemble them without the time pressure and logistical challenges associated with fresh flowers. This approach provides both financial relief and invaluable peace of mind, ensuring your wedding decor is exactly as you envisioned.
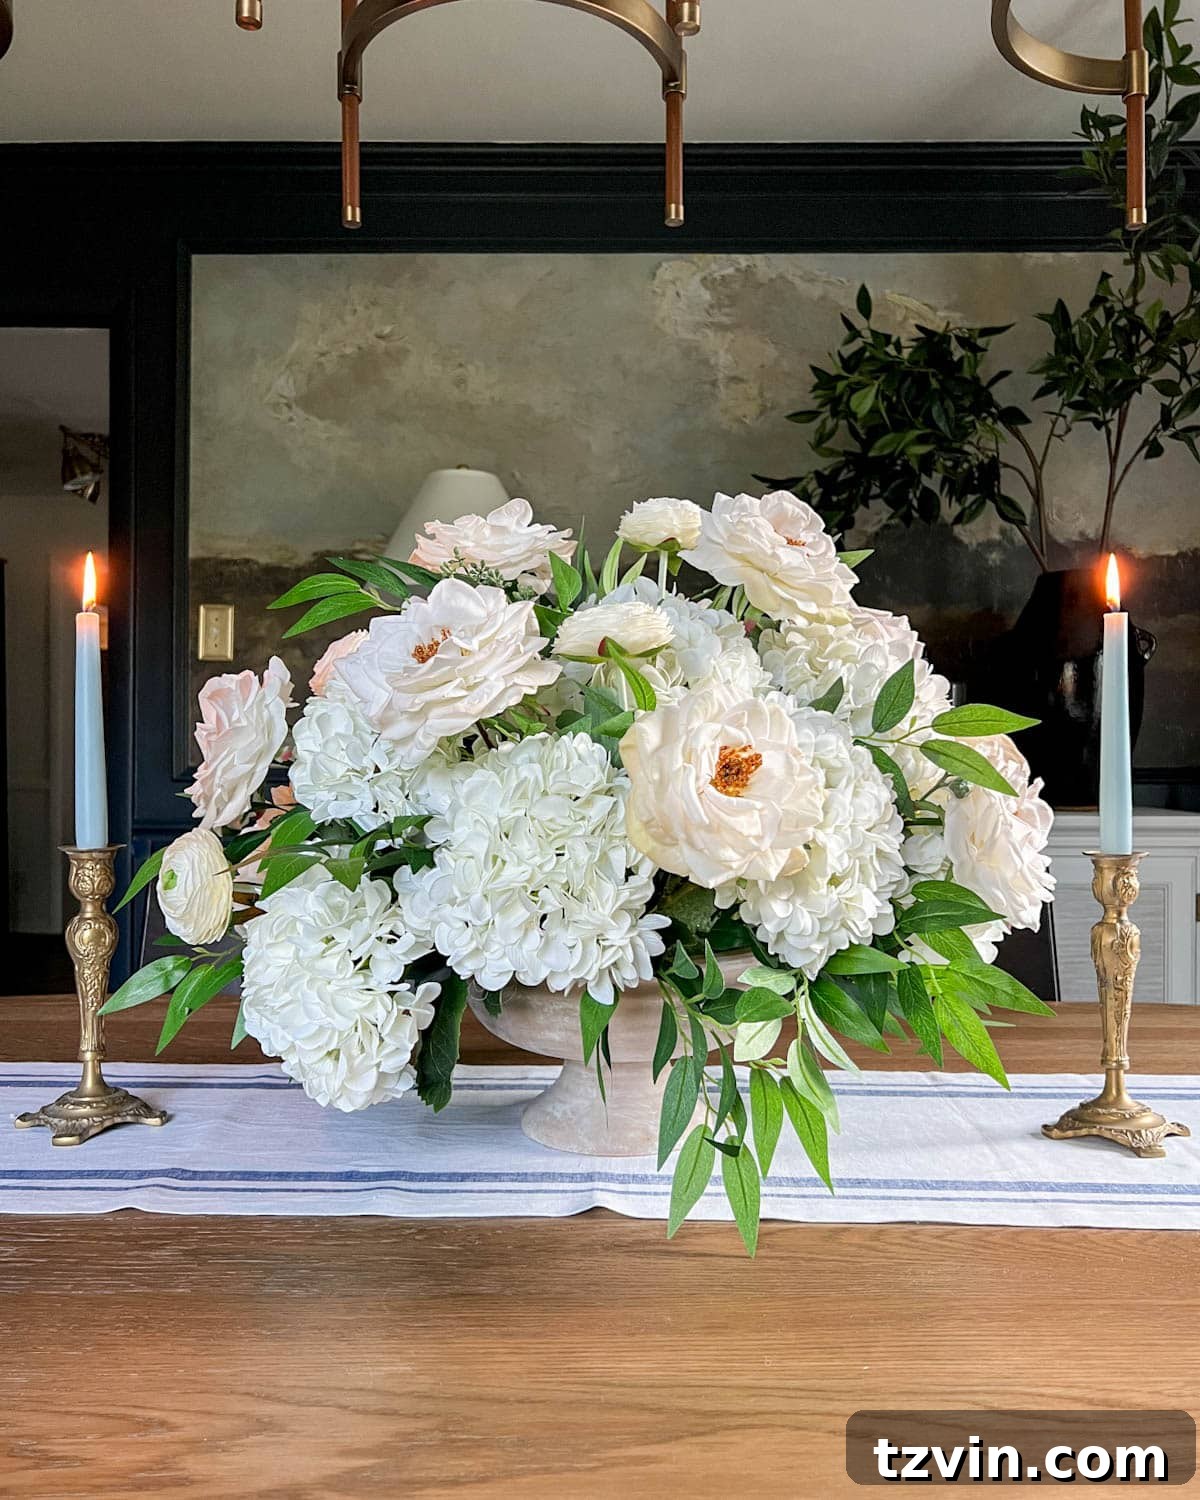
Are you inspired to try this DIY fake flower arrangement yourself? I sincerely hope so! The process is incredibly satisfying, and the results speak for themselves. Even though these particular arrangements were initially crafted for our church to be used as altar flowers, I was so delighted with how beautifully they turned out that I’m seriously considering making another one to keep right here at home. They add such an inviting and elegant touch to any living space, offering lasting beauty without any upkeep.
Embrace the world of realistic faux florals and unleash your inner florist. You’ll be amazed at the stunning, enduring beauty you can create with your own hands, transforming your home or event into a picture-perfect setting.
Expand Your Floral Decorating Horizons
Ready to dive deeper into the world of floral design and home decor? Explore these additional resources to find more inspiration and practical tips for incorporating beautiful blooms, both real and artificial, into your living spaces:
- Where to Find the Best Fake Flowers That Look Real: Discover my top recommendations for sourcing artificial flowers that genuinely mimic nature’s beauty, ensuring your arrangements are always convincing and chic.
- Best Artificial Indoor Trees and Tips to Make Them Look Real: Extend your greenery expertise beyond flowers by learning how to select and style artificial trees that seamlessly blend into your indoor environment.
- DIY Pressed Flower Art: For those who appreciate the delicate beauty of real flowers, this guide offers a charming way to preserve and display their fleeting elegance in unique artistic pieces.
- Simple DIY Fall Centerpiece Ideas + the Best Fall Branches: Get seasonal inspiration with easy-to-create fall centerpieces, focusing on the rich textures and colors of autumn branches for a cozy, inviting atmosphere.