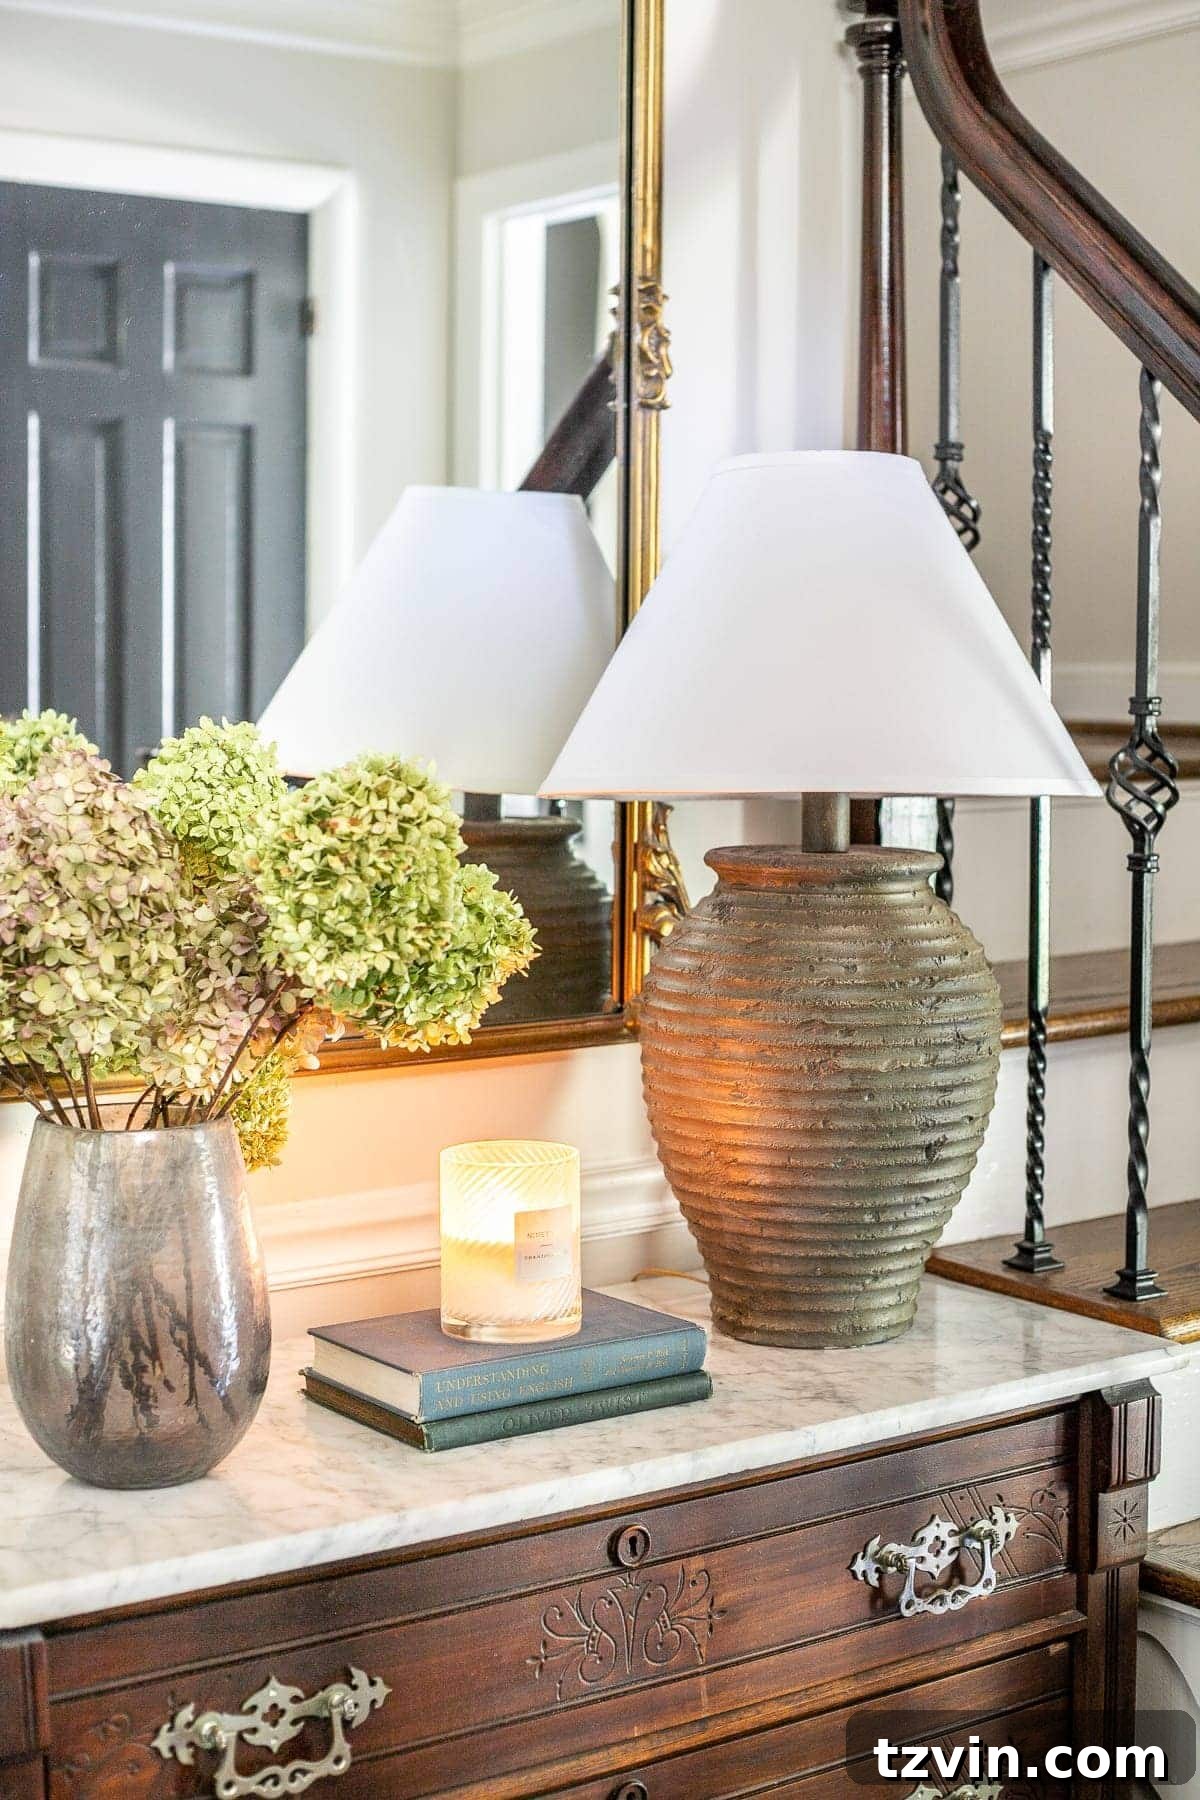
Unearthing Style: A $5 Thrift Store Lamp Transforms into a High-End Terra Cotta Dupe
There’s a unique thrill in the hunt, an unparalleled joy that washes over you when you step into a treasure trove of forgotten items – a thrift store. After what felt like an eternity, I finally found myself back in my happy place, browsing aisles filled with potential. The atmosphere was almost ethereal; I swear I could hear angels singing as I navigated through the eclectic collection of pre-loved items. It’s in these moments that inspiration strikes, often in the most unexpected forms.
And what gem did my wandering eyes behold? Not a relic from another era, but a humble table lamp, priced at a mere $5. It was, admittedly, a piece that could easily be described as “dated” or even “unremarkable” at first glance. Yet, my creative eye saw beyond its faded glory. Its robust shape and distinct texture held a secret – an uncanny resemblance to the highly coveted, earthy-toned lamps gracing the shelves of high-end home decor stores today. This wasn’t just any old lamp; it was a diamond in the rough, a blank canvas waiting for a modern transformation.
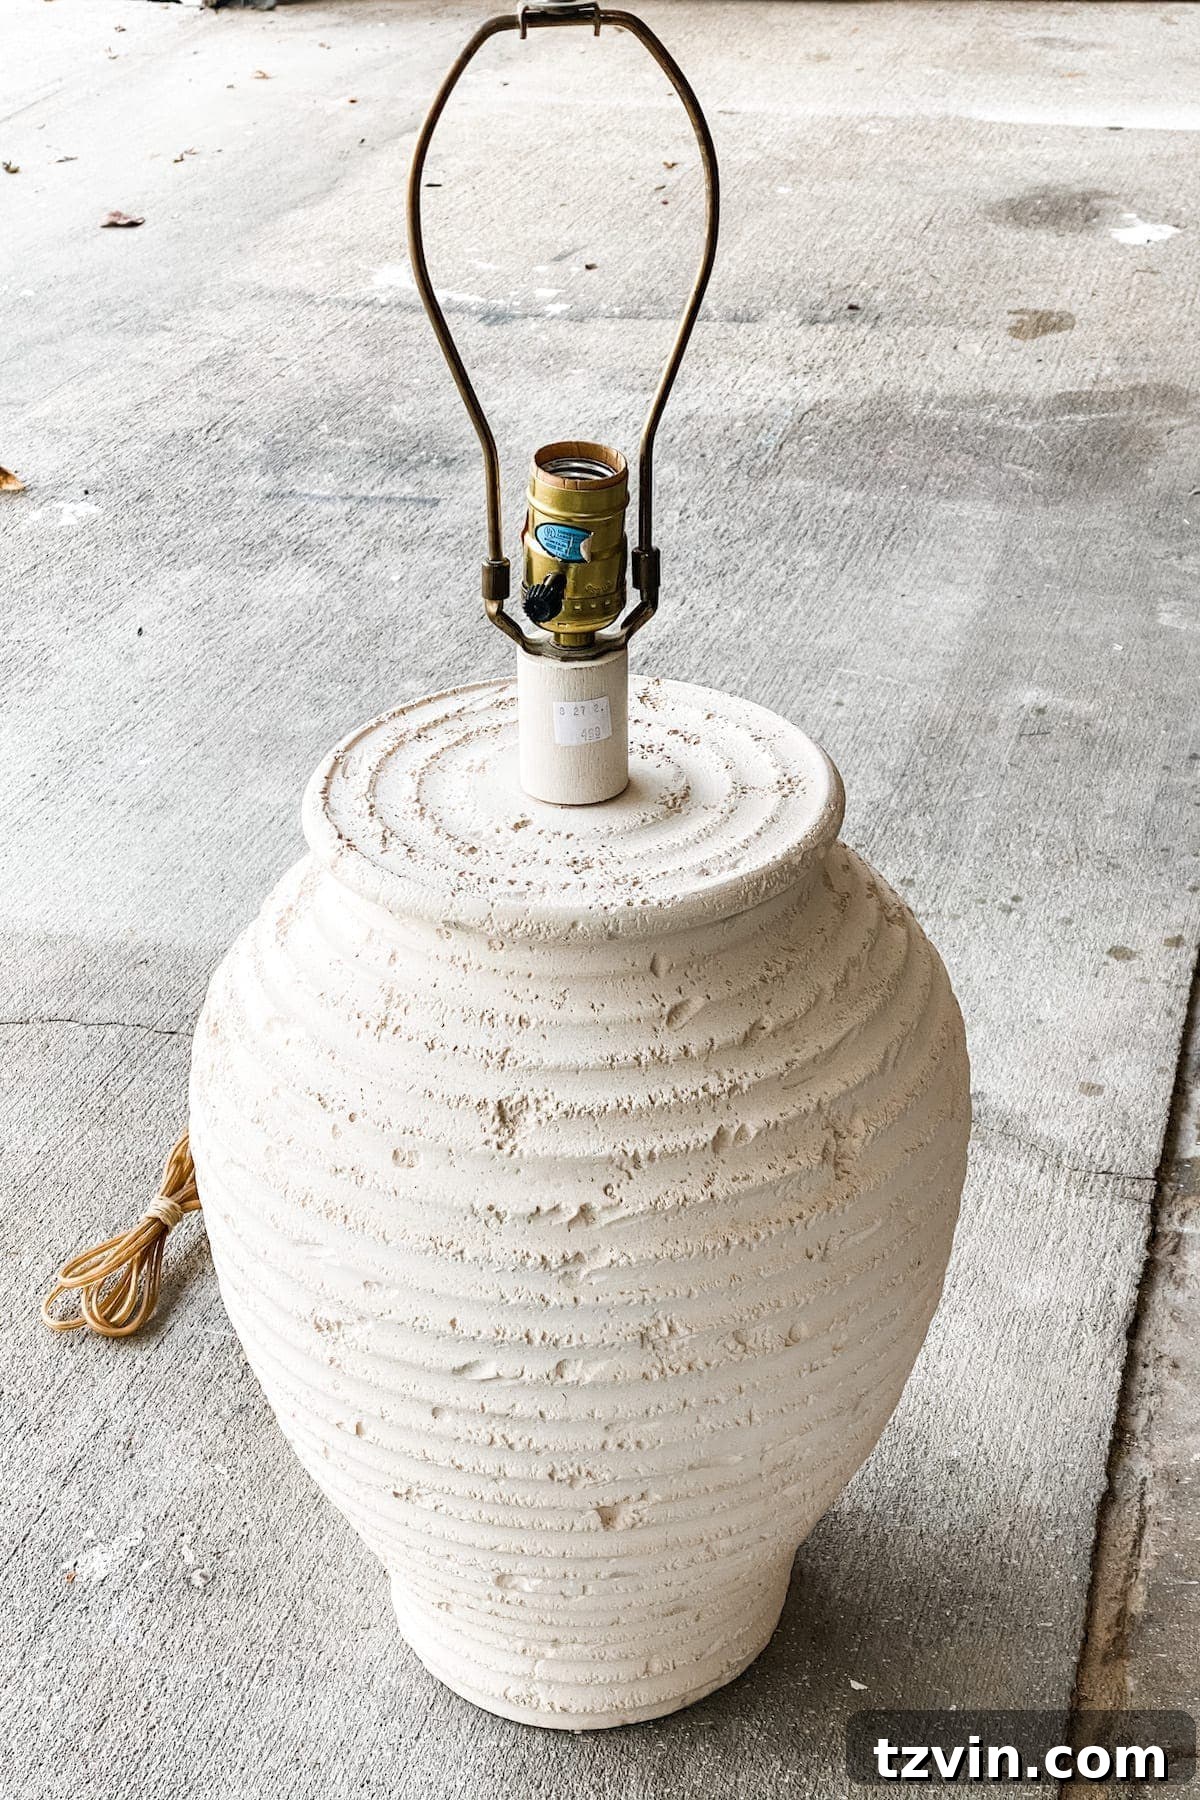
The decision was instantaneous. I snatched it up, my mind already racing with ideas. I knew, with absolute certainty, that this $5 find could be reimagined to rival a lamp easily costing upwards of $300 from designer retailers like Pottery Barn. The secret? A bit of creative vision and a handful of paint supplies I already had stashed away in my workshop. This wasn’t just a lamp makeover; it was an affordable design coup, proving that luxurious aesthetics don’t always come with a hefty price tag.
Why Embrace the DIY Terra Cotta Trend? Crafting Your High-End Look for Less
The allure of terra cotta and other natural, earthy textures in home decor is undeniable. They bring warmth, organic beauty, and a sense of grounding to any space. From rustic farmhouse to bohemian chic, these elements blend seamlessly, adding character and timeless appeal. However, acquiring pieces with this sought-after finish from high-end retailers can quickly deplete your decor budget. This is where the magic of DIY steps in. Creating a designer dupe not only saves you a significant amount of money but also allows for unparalleled customization and the immense satisfaction of crafting something beautiful with your own hands.
This project is a perfect example of sustainable decorating. Instead of discarding a perfectly functional item, we’re giving it a new lease on life, transforming it from a forgotten relic into a stylish statement piece. Upcycling reduces waste and encourages a more mindful approach to consumption, aligning perfectly with modern sensibilities. Moreover, it’s an incredibly rewarding creative outlet. There’s a distinct pride that comes from pointing to a stunning piece in your home and saying, “I made that,” especially when it looks like it came straight out of a high-end catalog.
DIY Terra Cotta Table Lamp Dupe: A Step-by-Step Guide to Affordable Elegance
Ready to transform your own thrift store find or an existing lamp that needs a refresh? This project is surprisingly simple, requiring minimal supplies and no advanced artistic skills. The beauty lies in the imperfect, textured finish, which is quite forgiving for beginners. Follow these steps to achieve a stunning, high-end terra cotta look without the designer price tag.
Supplies Used: Your Toolkit for Transformation
Before diving into the creative process, gather your materials. The beauty of this project is its reliance on common craft supplies, many of which you might already have on hand. Resourcefulness is key, as demonstrated by my own clever paint mix!
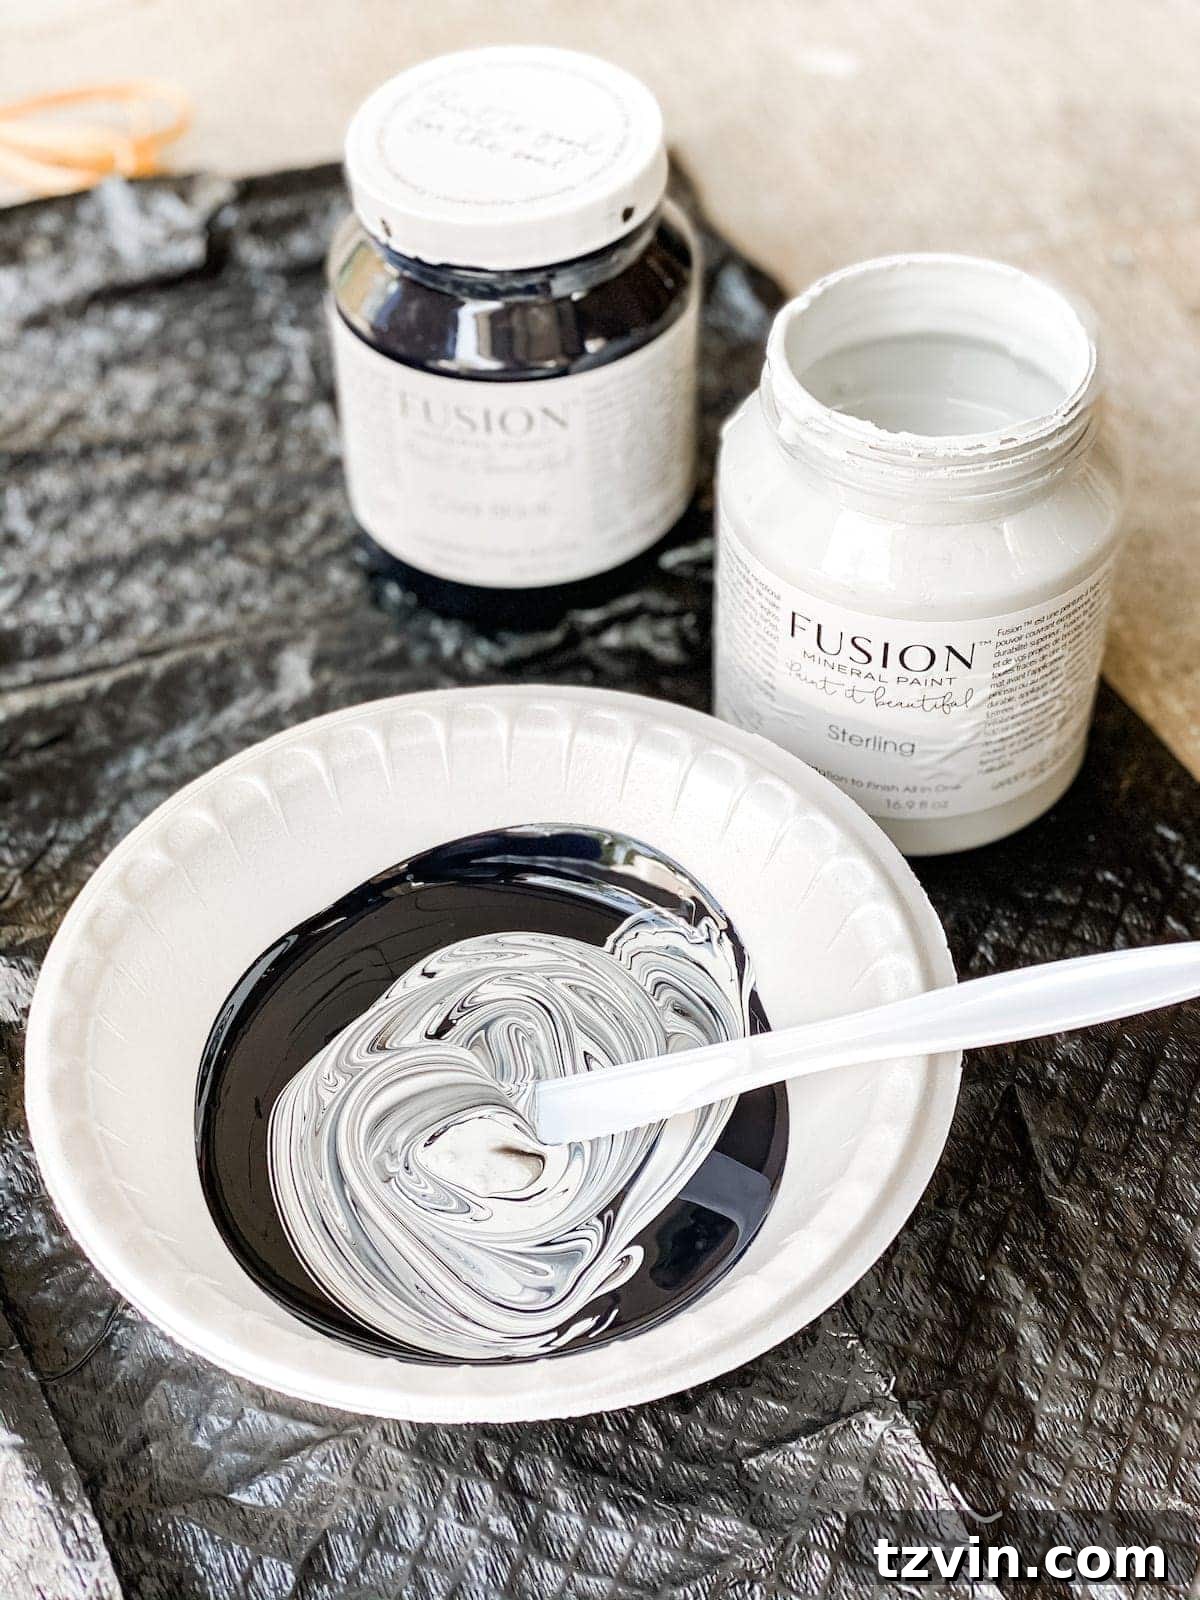
- Medium Gray Acrylic Paint: This will serve as our base coat, providing a neutral and grounding foundation for the terra cotta effect. I improvised by mixing together white and black Fusion Mineral Paint to achieve my desired medium gray tone. Don’t be afraid to experiment with paint colors you already possess! Any interior acrylic paint in a suitable gray will work.
- White Acrylic Paint: Essential for the dry-brushing technique, which adds crucial texture and a weathered appearance, mimicking the natural imperfections of genuine terra cotta.
- Chip Brush: An inexpensive, sturdy brush perfect for both applying the base coat and for the dry-brushing technique. Its rough bristles are ideal for creating texture.
- Paper Towels: Indispensable for blotting excess paint during dry-brushing and for cleaning up any minor spills.
- Dark Wax: This is the secret ingredient for adding depth, dimension, and an aged patina to the lamp, truly bringing out the “terra cotta” feel. It also provides a protective finish.
- Wax Brush: A specialized brush designed for applying wax smoothly and working it into crevices. While a regular brush can work, a wax brush makes the process much easier and more effective.
The Transformation Steps: From Thrifted to Trendsetter
1. Laying the Foundation: The Medium Gray Base Coat
Our journey begins with establishing a solid base. I started by meticulously mixing my white and black Fusion Mineral Paints until I achieved the perfect medium gray hue. This resourcefulness not only saved me a trip to the store but also allowed me to custom-blend a shade that I knew would complement the final look. Once happy with the color, I applied a single, even coat of this gray mixture all over the lamp, ensuring complete coverage. This initial layer is crucial, as it provides the neutral backdrop upon which we’ll build our textured finish.
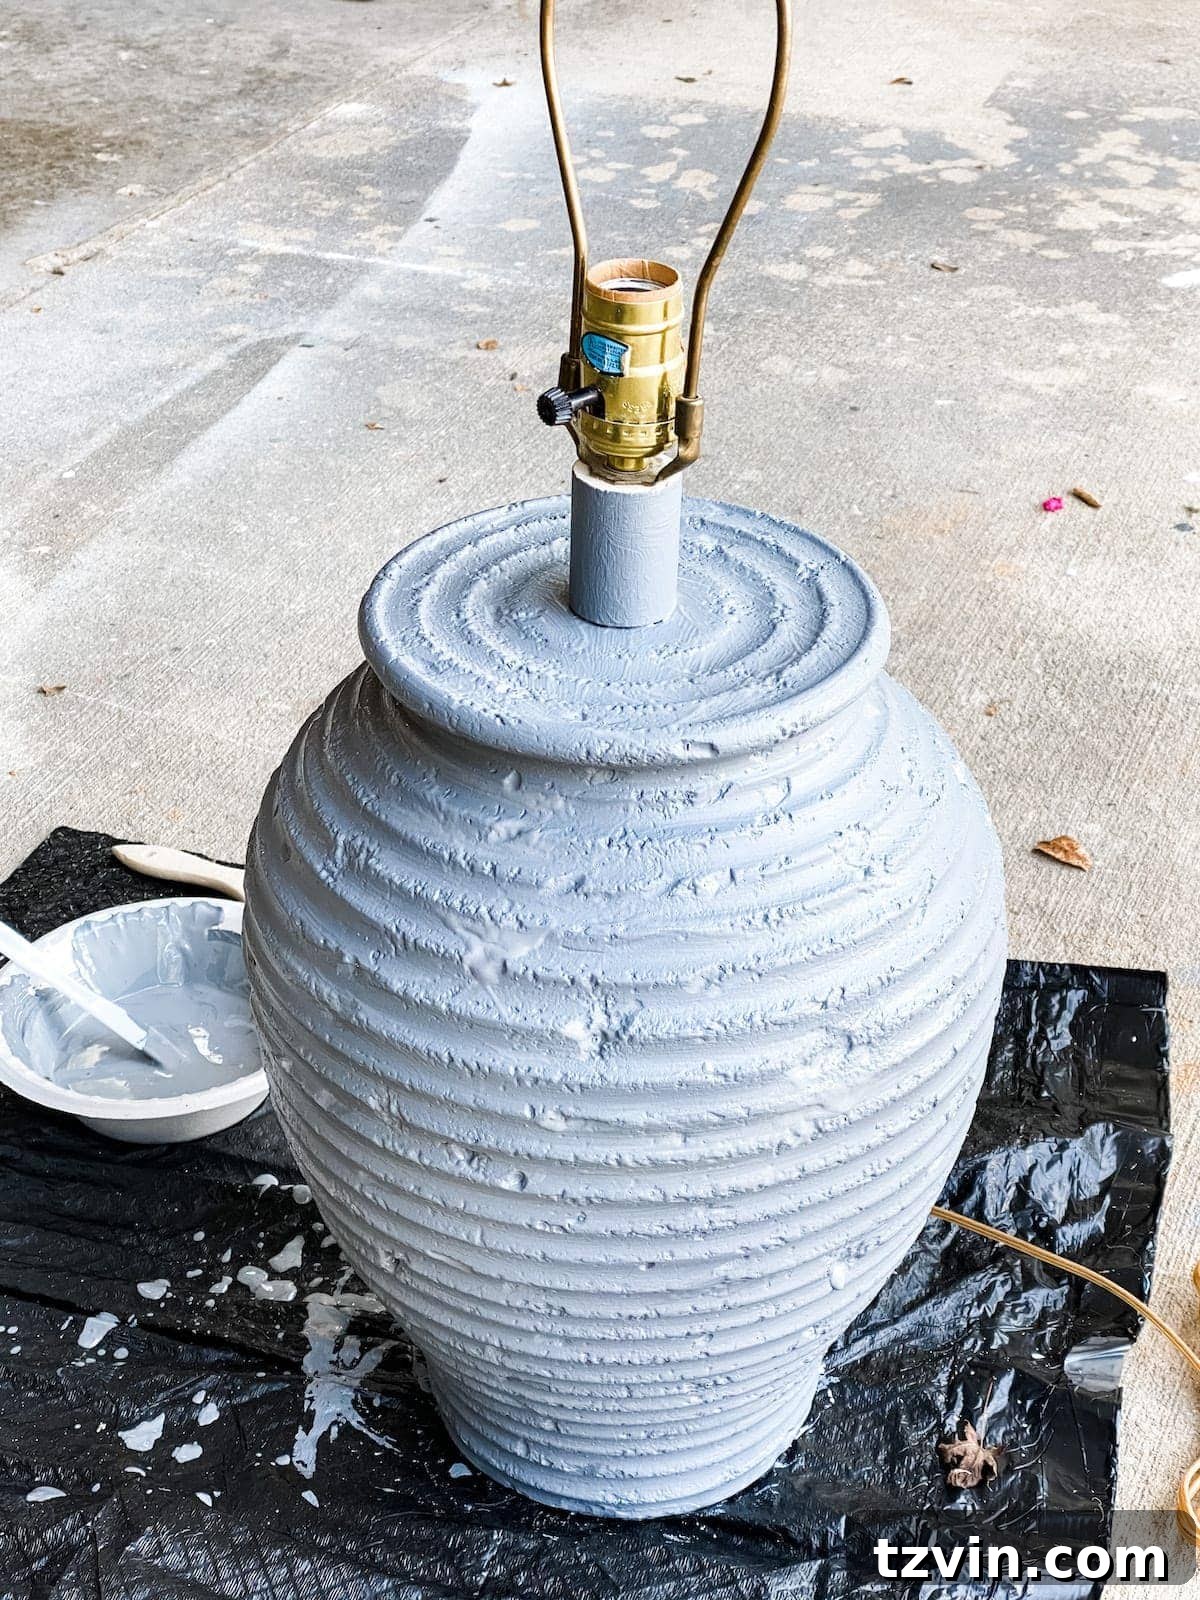
Allow the gray paint to dry completely according to the manufacturer’s instructions. Patience here ensures that the subsequent layers adhere properly and don’t smudge.
2. Adding Dimension: The Art of Dry-Brushing with White
Once the gray base was thoroughly dry, it was time to introduce texture and visual interest using the dry-brushing technique with white paint. If you’re new to dry-brushing, don’t fret – it’s incredibly straightforward and yields fantastic results. Dip just the very tip of your chip brush into the white acrylic paint. The key is to have very little paint on the brush. Immediately blot off almost all of the excess paint onto a paper towel until the brush feels nearly dry to the touch. You want barely any visible paint, just a whisper of color.
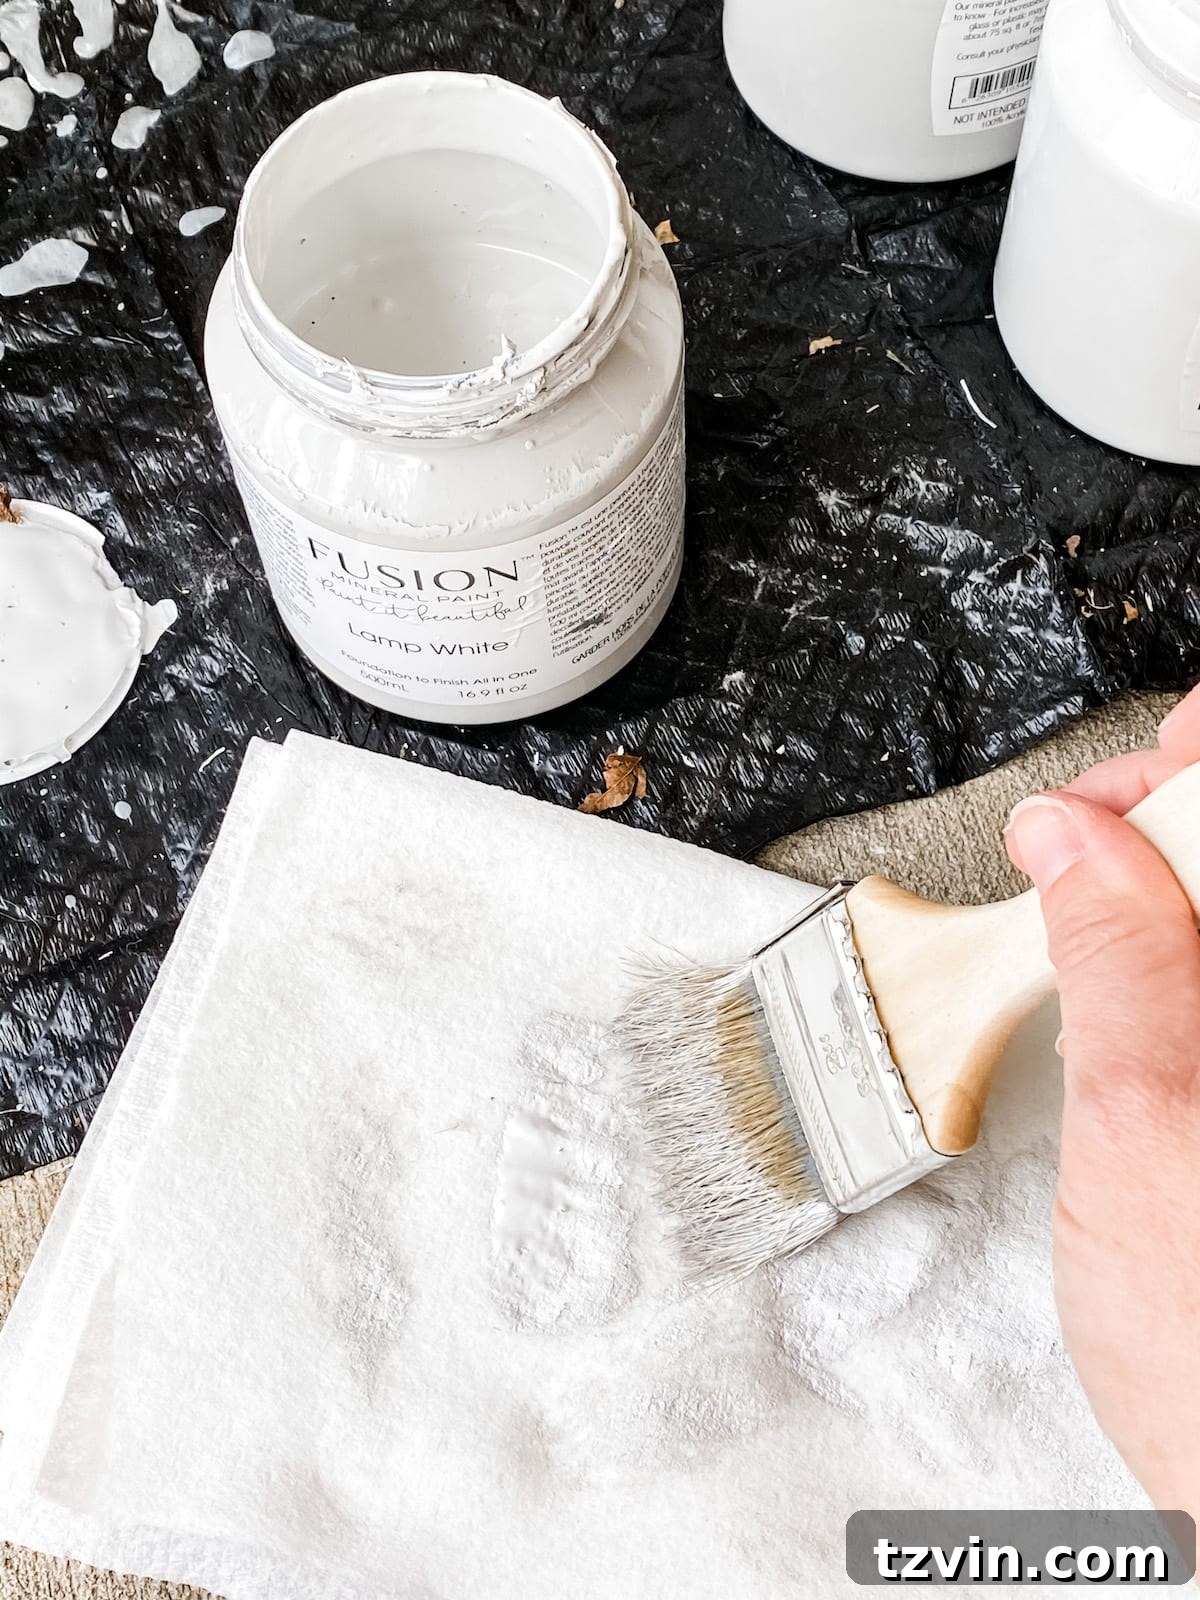
With your nearly dry brush, lightly sweep it across the surface of the lamp. Focus on applying light, feathery strokes that pick up on the existing texture of the lamp, highlighting its contours and creating a beautifully weathered effect. This technique is what truly gives the lamp its aged, almost sun-baked appearance, mimicking the natural texture of terra cotta. Continue adding layers of dry-brushed white until you achieve the desired level of texture and visual softness. Remember, you can always add more, but it’s harder to remove, so build up the effect gradually.
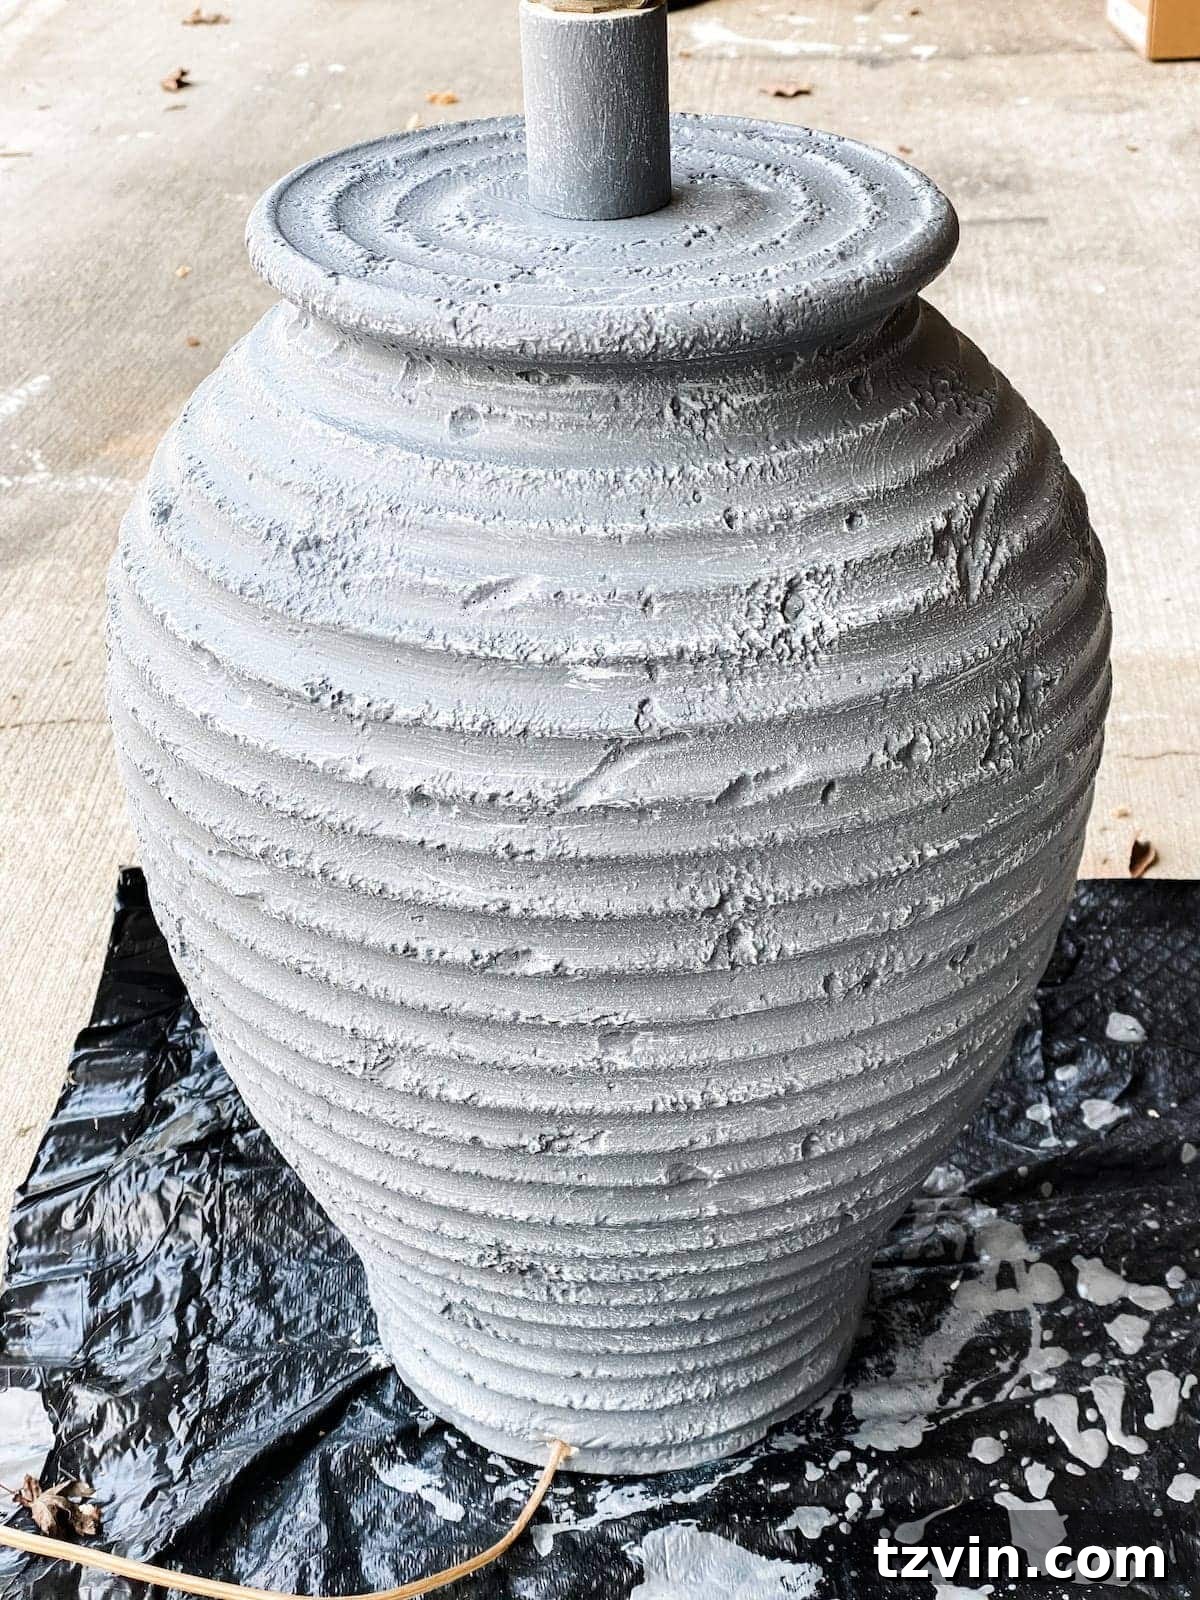
3. The Finishing Touch: Enriching with Dark Wax for Patina
Once you are completely satisfied with the dry-brushed white texture, it’s time for the final, transformative step: applying dark wax. This step is crucial for adding depth, antique character, and sealing the paintwork. Dip just the tip of your wax brush into the dark wax. A little truly goes a long way here, so start with a minimal amount.
Begin working the wax into all the grooves and textured areas of the lamp using a circular motion. This method helps the wax settle into the imperfections, enhancing the layered look we’ve created. Spread the wax out as much as possible, buffing it gently as you go. The goal is to create a subtle, aged patina, not a thick, sticky coating. Applying too much wax can result in a tacky finish that struggles to fully cure, so err on the side of caution. Continue until the entire lamp has a beautiful, rich, and antiqued appearance that perfectly emulates genuine terra cotta.
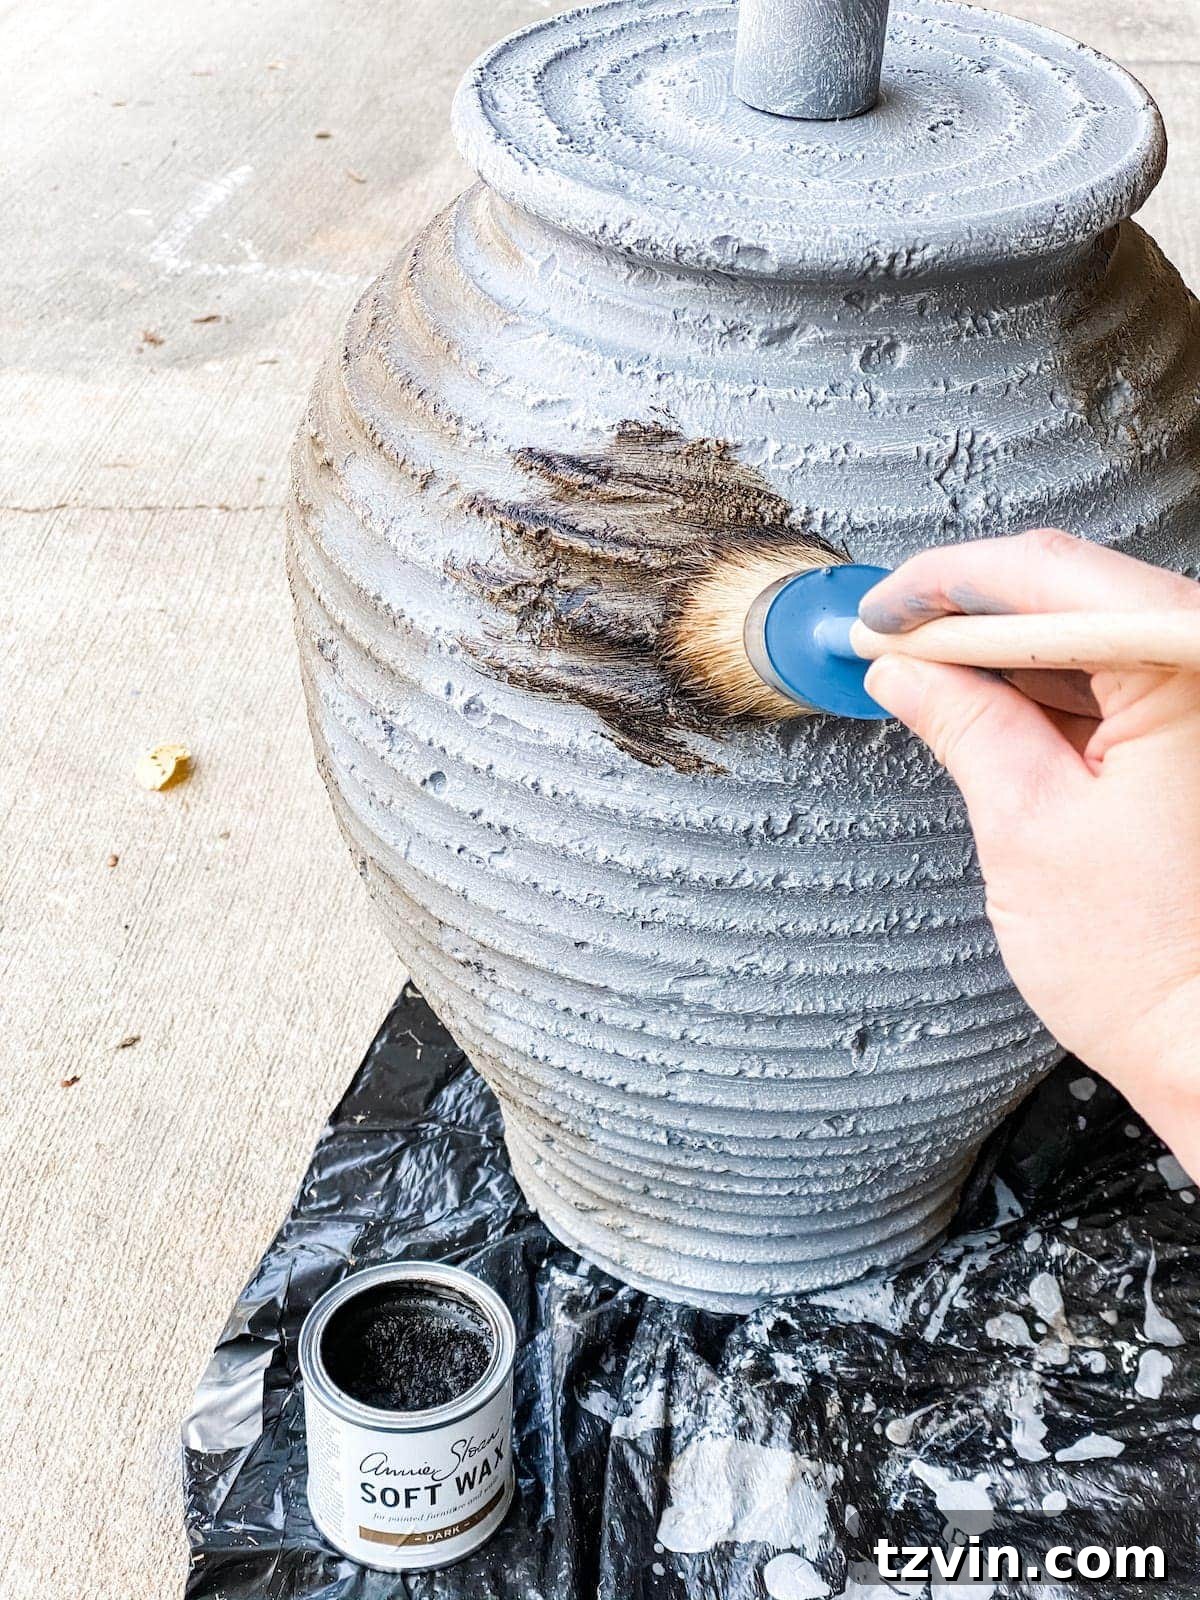
Allow the wax to cure fully, which can take anywhere from a few hours to a day, depending on the product and application thickness. During this time, the wax hardens and provides a durable, protective layer for your newly transformed lamp.
4. Completing the Vision: Add a Modern Lampshade
The final, yet equally important, step is selecting the right lampshade. A modern, minimalist lampshade will perfectly complement the newly textured terra cotta base, elevating its designer appeal. Consider simple drum shades in natural linen, crisp white, or a subtle neutral tone. The right shade can dramatically alter the perception of the lamp, taking it from a mere base to a complete, stylish lighting fixture. Once the shade is in place, your $5 thrift store find is officially transformed into a high-end designer dupe!
The Grand Reveal: A Testament to Creativity and Budget-Friendly Design
And there it stands – a testament to the power of imagination and a little paint. What began as a forgotten $5 table lamp is now a sophisticated, textured piece that effortlessly blends into contemporary decor schemes, exuding an earthy elegance that would cost a fortune from a designer boutique. The satisfaction is immense, knowing that this entire transformation cost me nothing more than the initial $5 purchase, thanks to my well-stocked craft supplies.
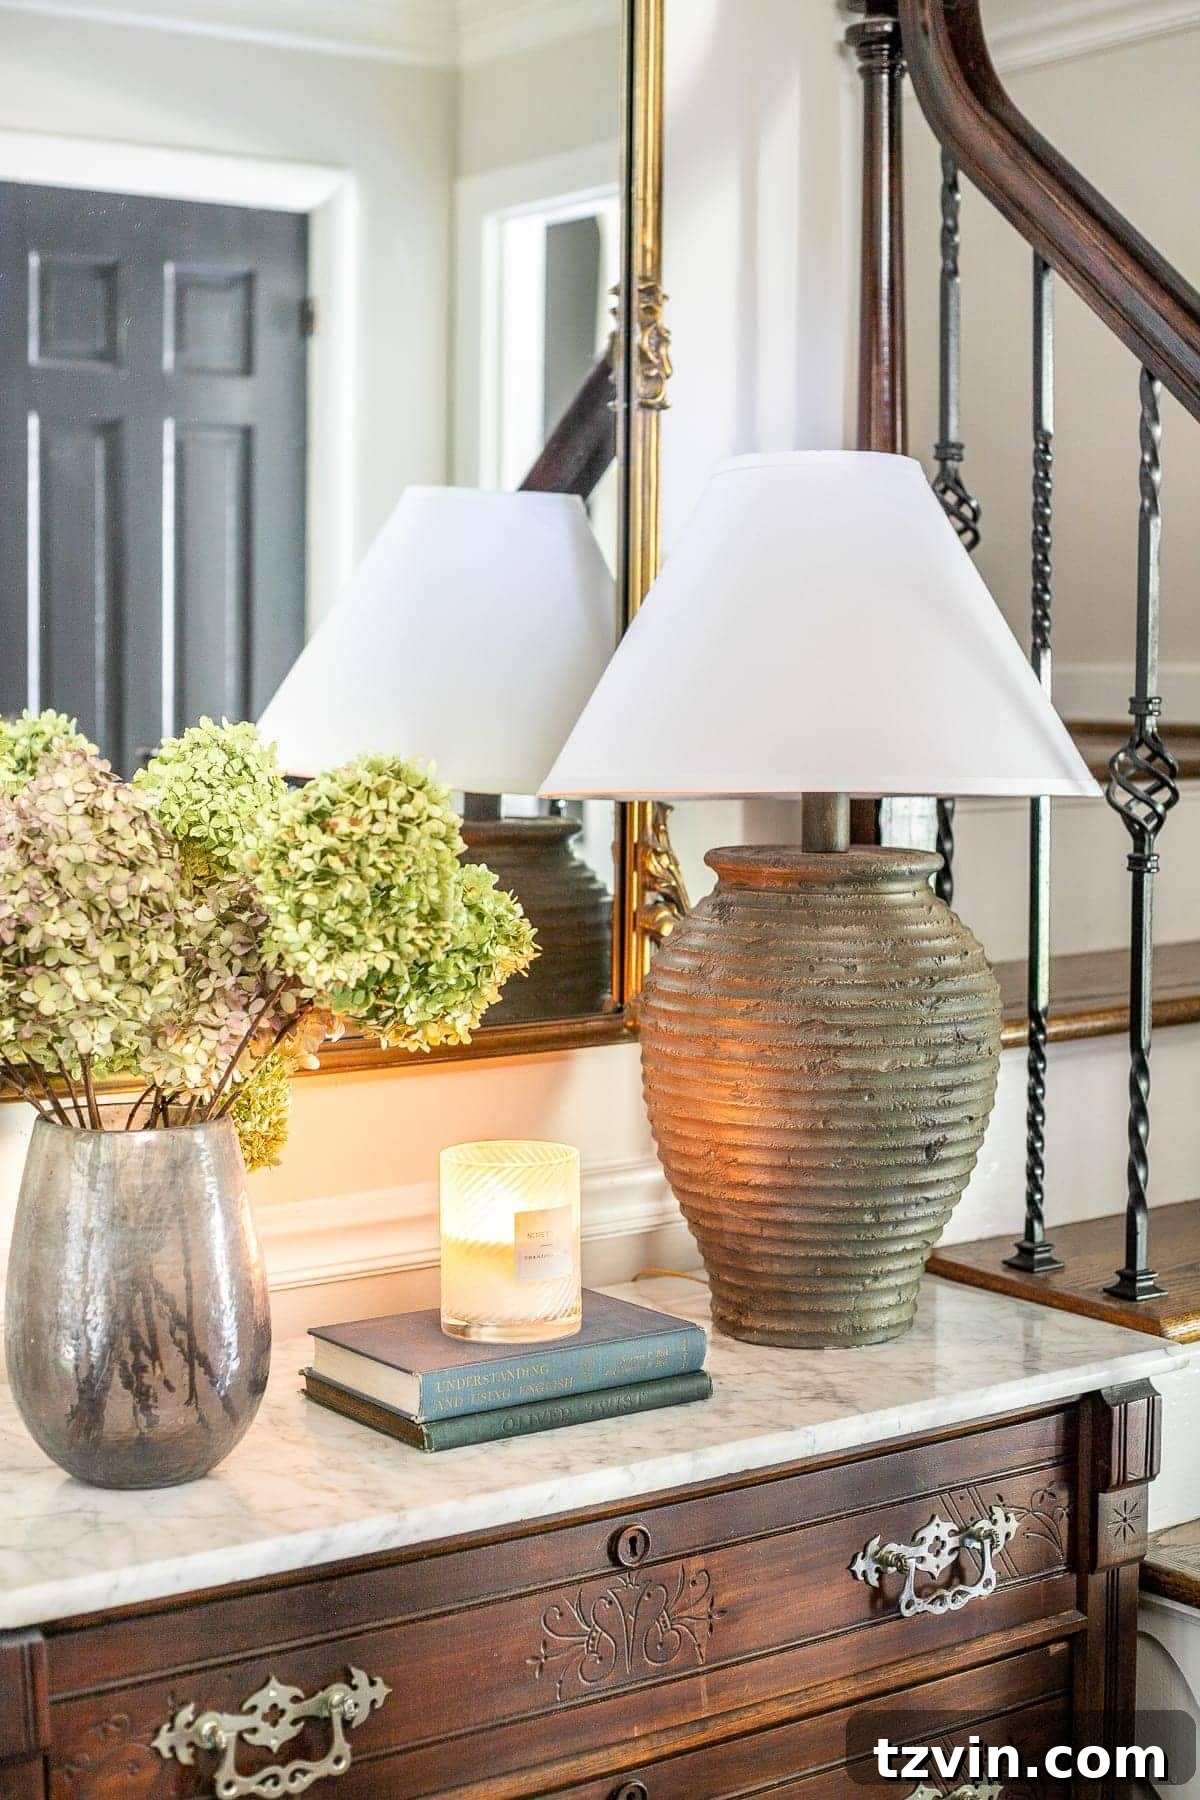
This project might be a departure from my usual decor style, but I’ve found myself increasingly drawn to the calming and organic appeal of earthy elements lately. The fact that I achieved this look without spending a single extra dime on supplies makes it even more delightful. It’s a wonderful example of how embracing what you already have can lead to truly stunning results. And yes, to all the “craft haters” out there – sometimes, being a craft supply hoarder truly does pay off!
I’m already envisioning this beautiful lamp gracing the McNays living room makeover, a project I’m incredibly excited about and will be sharing more details on very, very soon! Stay tuned for more transformations and design insights.
Unlock Your Inner Designer: Embrace Thrifting and DIY Decor
This terra cotta lamp makeover is more than just a DIY project; it’s an invitation to view everyday objects with a fresh perspective. It encourages you to explore the vast potential hidden within thrift stores, flea markets, and even your own forgotten corners. By embracing thrifting and DIY, you’re not just saving money; you’re creating a home that is uniquely yours, filled with personality, stories, and sustainable choices.
So, next time you’re browsing a thrift store, challenge yourself to look beyond the surface. Imagine what a coat of paint, a new texture, or a simple alteration could do. The possibilities are endless, and the rewards are immeasurable. From transforming dated furniture to creating bespoke lighting fixtures, DIY allows you to manifest your design dreams on a budget.
If this project has sparked your imagination and you’re eager for more inspiration, I encourage you to delve into my other successful thrift store makeovers here. Discover more creative ideas and empower yourself to create beautiful, personalized spaces that reflect your style without breaking the bank.