Transform Your Outdoor Space: Crafting a Designer Floral Block Rug with Your Cricut Machine
This post is sponsored by Cricut Official.
Ever dreamed of achieving a high-end designer look for your home without breaking the bank? A custom outdoor rug, featuring a sophisticated floral block pattern, can instantly elevate your porch or patio. What if I told you that creating such a statement piece is not only achievable but also incredibly fun and satisfying with the help of a Cricut machine? This guide will walk you through the process of making your own reusable stencil with a Cricut and then applying that beautiful design to a plain outdoor rug, transforming it into a luxurious focal point for a fraction of the cost.
My journey into DIY stenciling isn’t entirely new; last summer, I tackled a stenciled front porch floor that completely revamped our entryway. Building on that success, and with a newfound appreciation for customized patterns, I was eager to explore the world of DIY stencils further. Once you experience the creative freedom and cost savings of making your own stencils, those expensive store-bought options might just become a thing of the past.
The inspiration for this particular project struck a few months ago when I stumbled upon stunning floral block rugs at Pottery Barn and textile designs from Studio McGee. There was an undeniable charm in their blend of masculine geometric shapes and feminine floral motifs, creating a perfectly balanced, Scandinavian-inspired aesthetic that I simply adored. I knew immediately I wanted to replicate this sophisticated style for our outdoor living area.
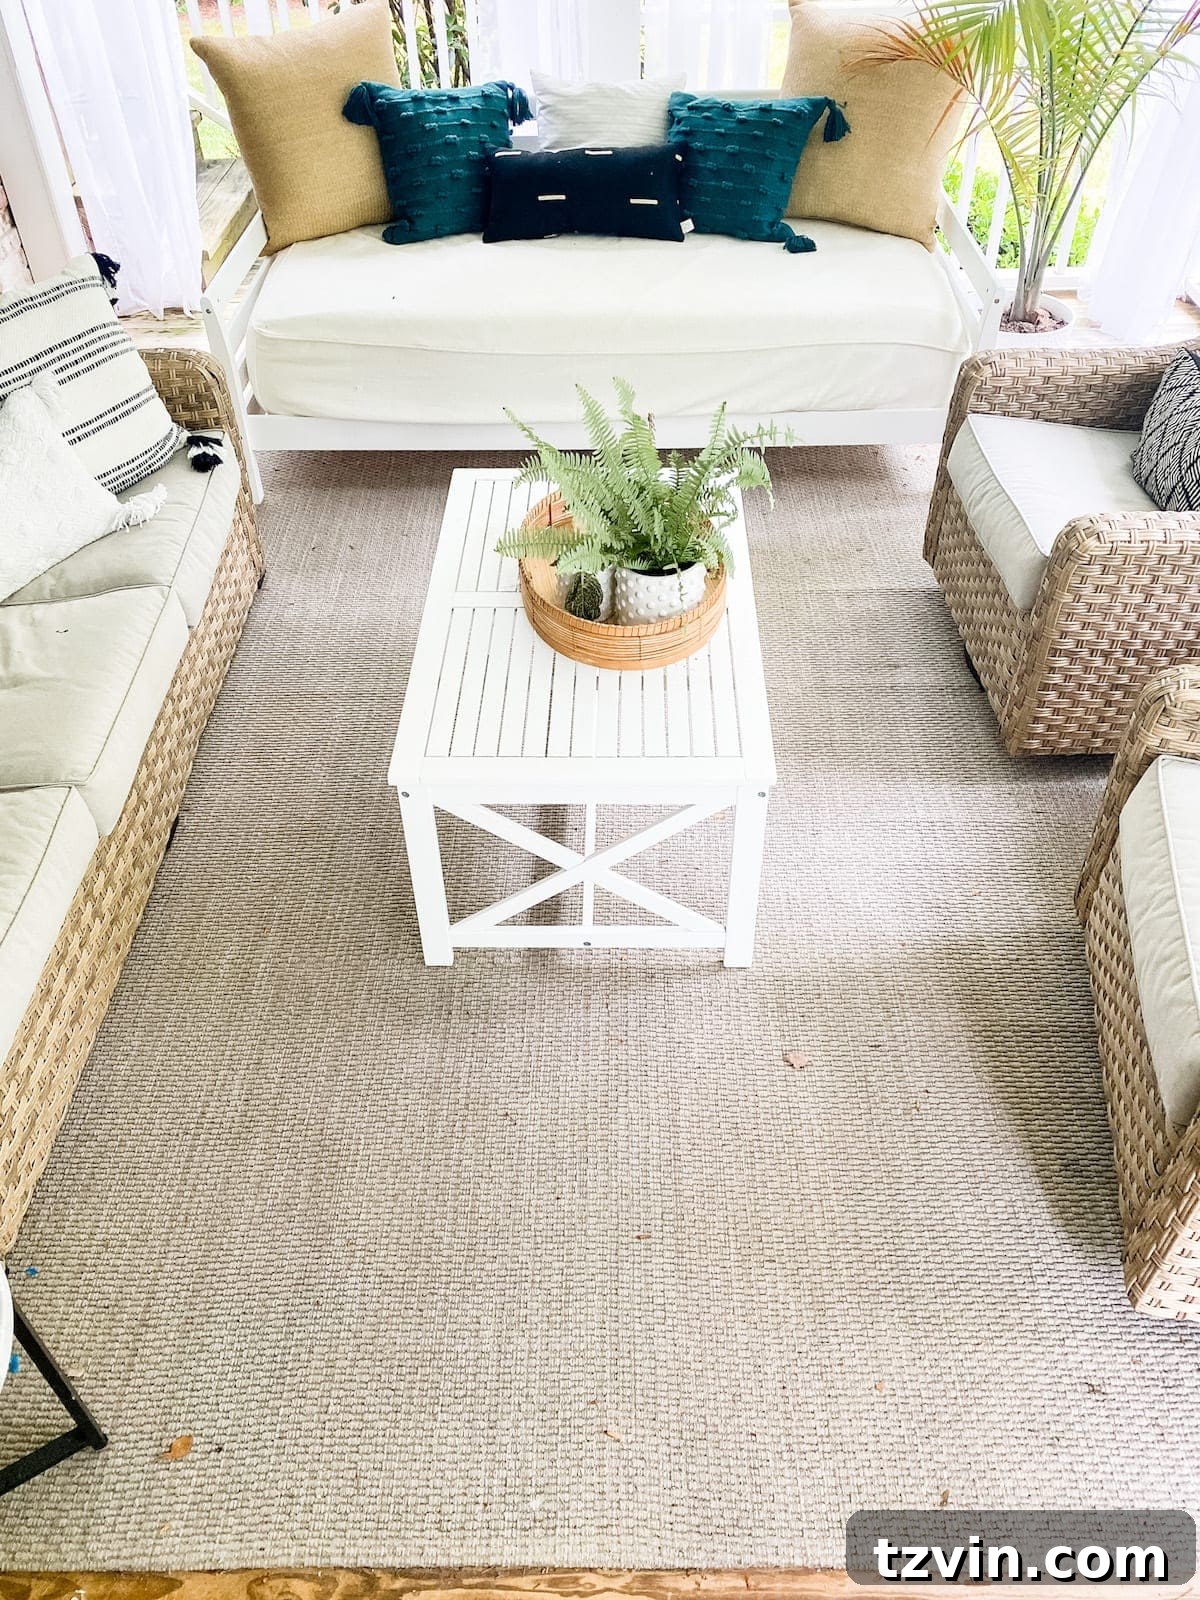
With an “outdoor project itch” that needed scratching – and persistent rain preventing me from staining our pergola – I decided to turn what could have been a dreary day into a creative opportunity. Instead of succumbing to the rainy-day blues, I resolved to give our plain outdoor rug, originally purchased last summer for our back porch, a stunning floral block transformation. This project was not only a fantastic way to add character to our space but also served as my true initiation into the world of Cricut.
While I admit I was a complete novice to the Cricut machine (it had been on my wishlist for years!), this project quickly turned me into a devoted fan. If you’re a fellow crafter who’s felt intimidated by die-cutting machines, fear not! This guide will prove that making a custom stencil is an incredibly rewarding and surprisingly beginner-friendly project that will unlock a world of creative possibilities for your home decor.
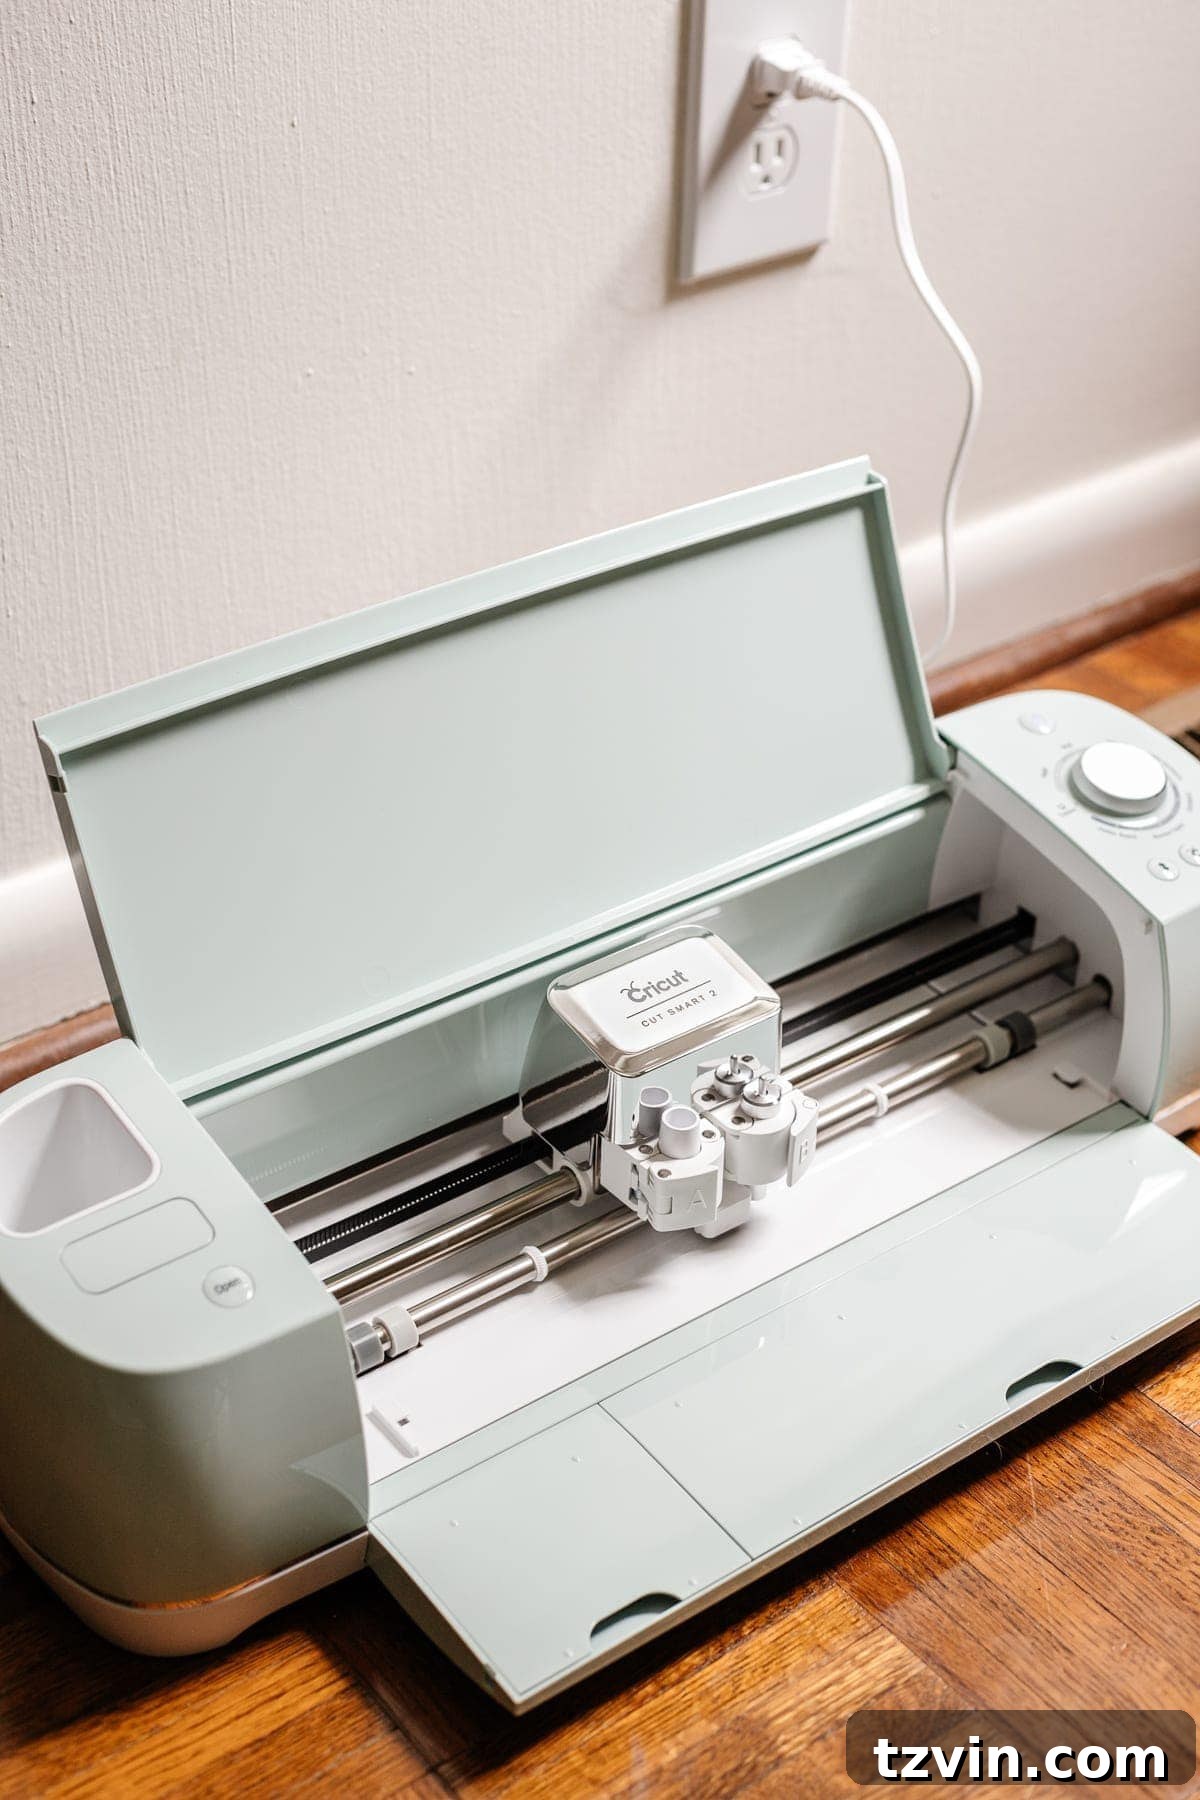
Mastering Your Cricut: How to Make a Custom Reusable Stencil
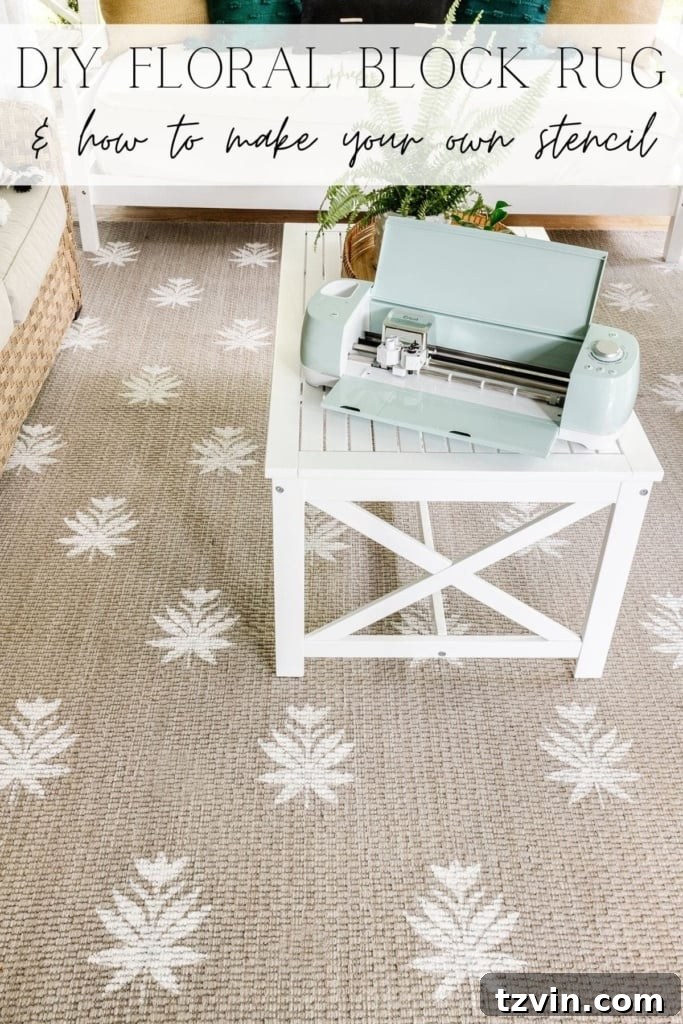
Creating your own stencil with a Cricut machine opens up a world of possibilities for customizing home decor, gifts, and crafts. For this project, we’ll focus on making a durable, reusable stencil from acetate, perfect for repeated use on large surfaces like rugs or even floors. The precision of the Cricut ensures clean, crisp lines, making your finished product look professionally done.
Essential Supplies for Your DIY Reusable Stencil:
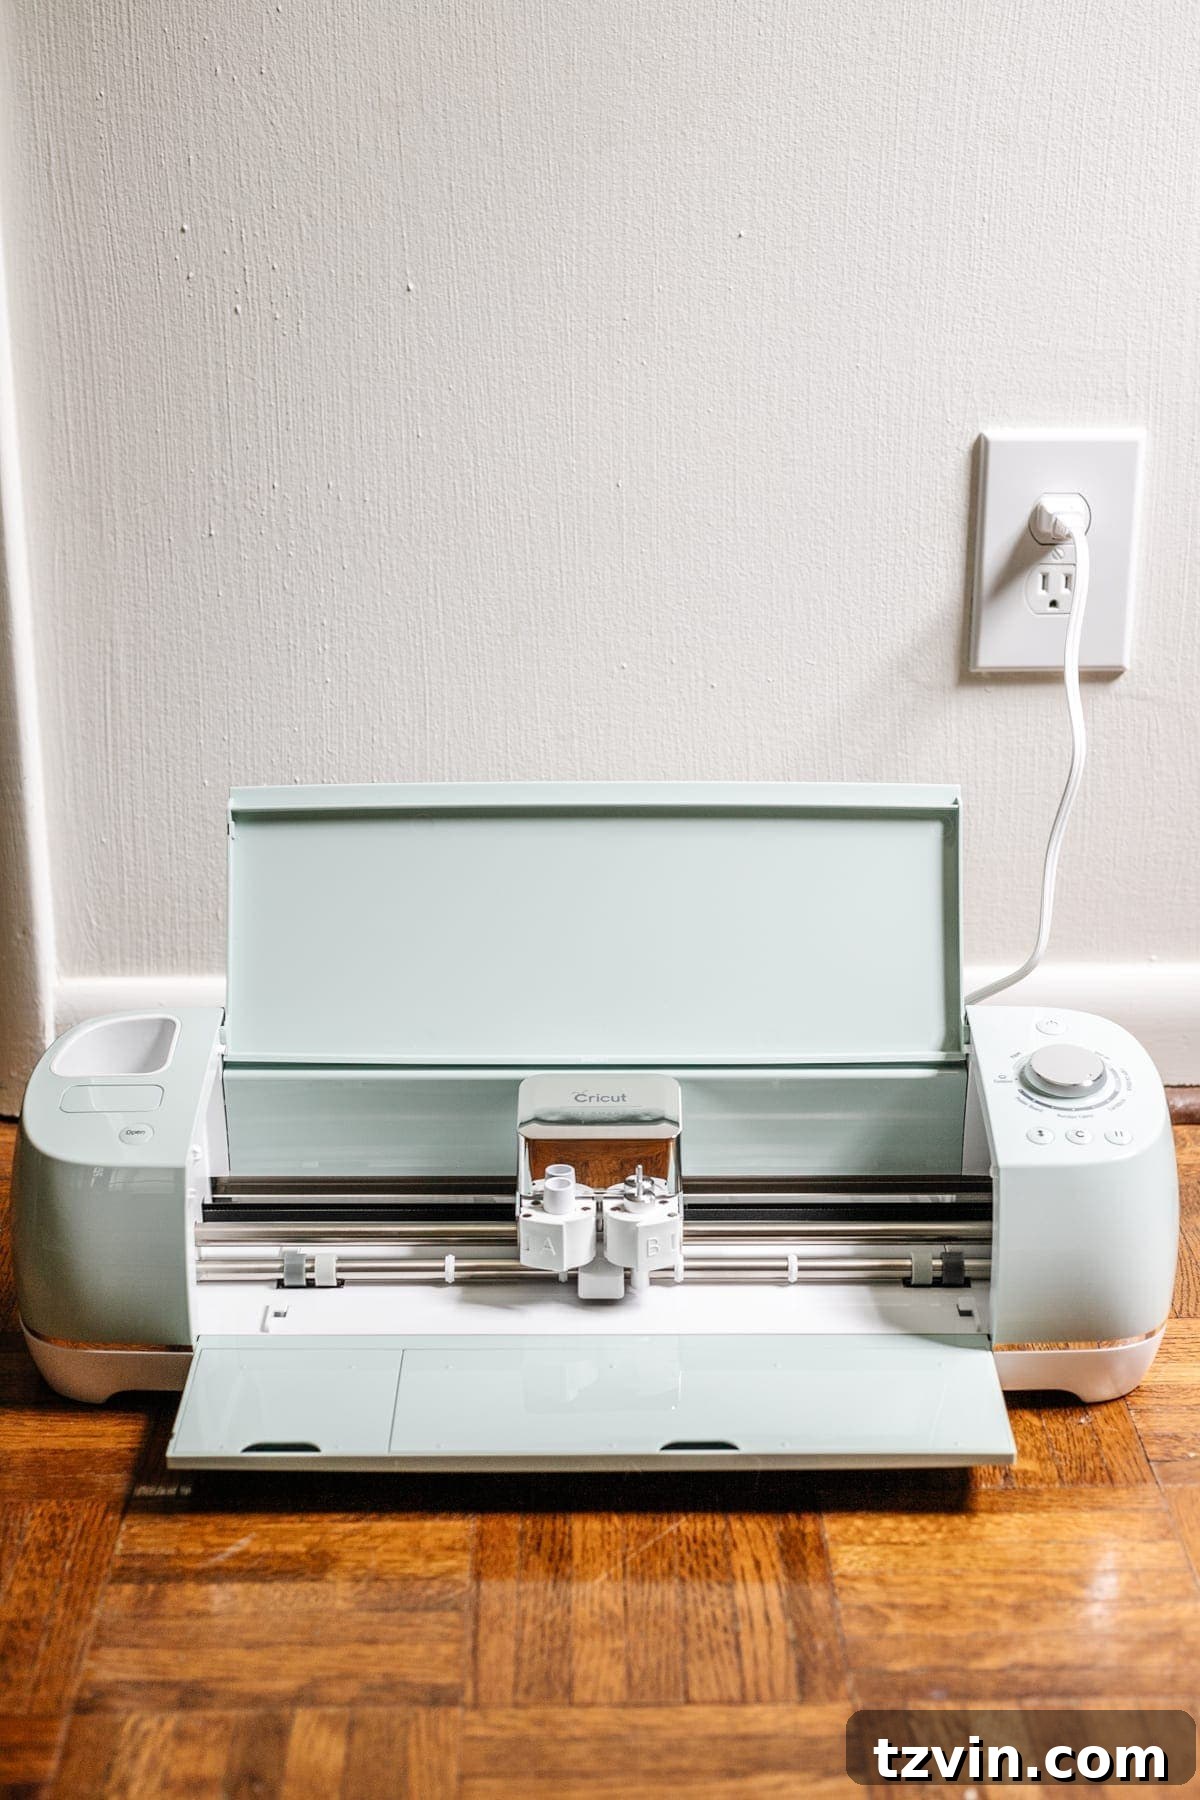
- Cricut Explore Air 2 (or any compatible Cricut machine like a Maker or Joy, adjusting material sizes as needed). The Explore Air 2 is fantastic for its versatility and ease of use for various projects.
- Light Grip Machine Mat: This mat offers the perfect adhesive level for delicate materials like acetate, ensuring it stays in place without tearing when removed.
- Deep Point Blade & Housing: Crucial for cutting thicker materials like acetate. While a standard blade might work for very thin stencil materials, the deep point blade ensures a clean, complete cut through the acetate, which is essential for a durable stencil.
- Cricut Basic Tool Set: Includes a spatula, weeder, scraper, tweezers, and scissors—all invaluable for working with vinyl and delicate cuts. The spatula is particularly useful for lifting your cut stencil from the mat without damage.
- 12″x12″ acetate sheets: These transparent sheets are ideal for reusable stencils due to their durability and flexibility. If you’re only making a single-use stencil for a project that won’t require repeated application, regular vinyl can also be an option, but acetate is highly recommended for longevity.
Step-by-Step Guide: Crafting Your Reusable Stencil
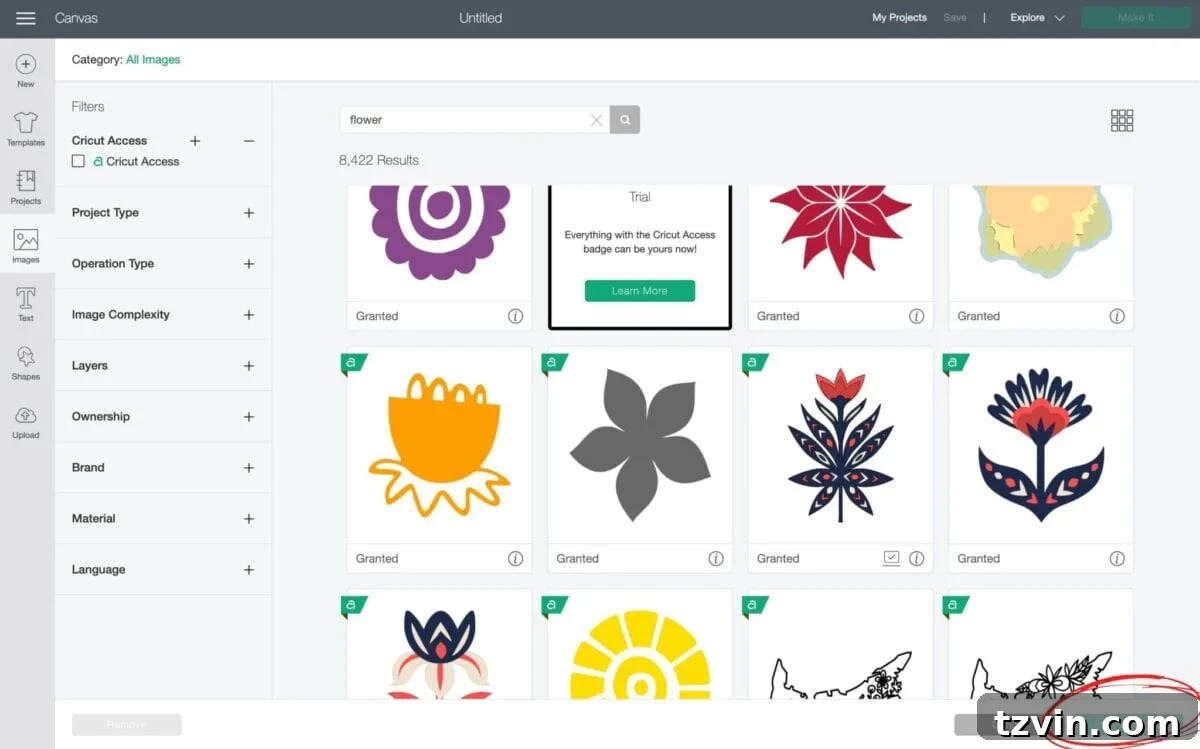
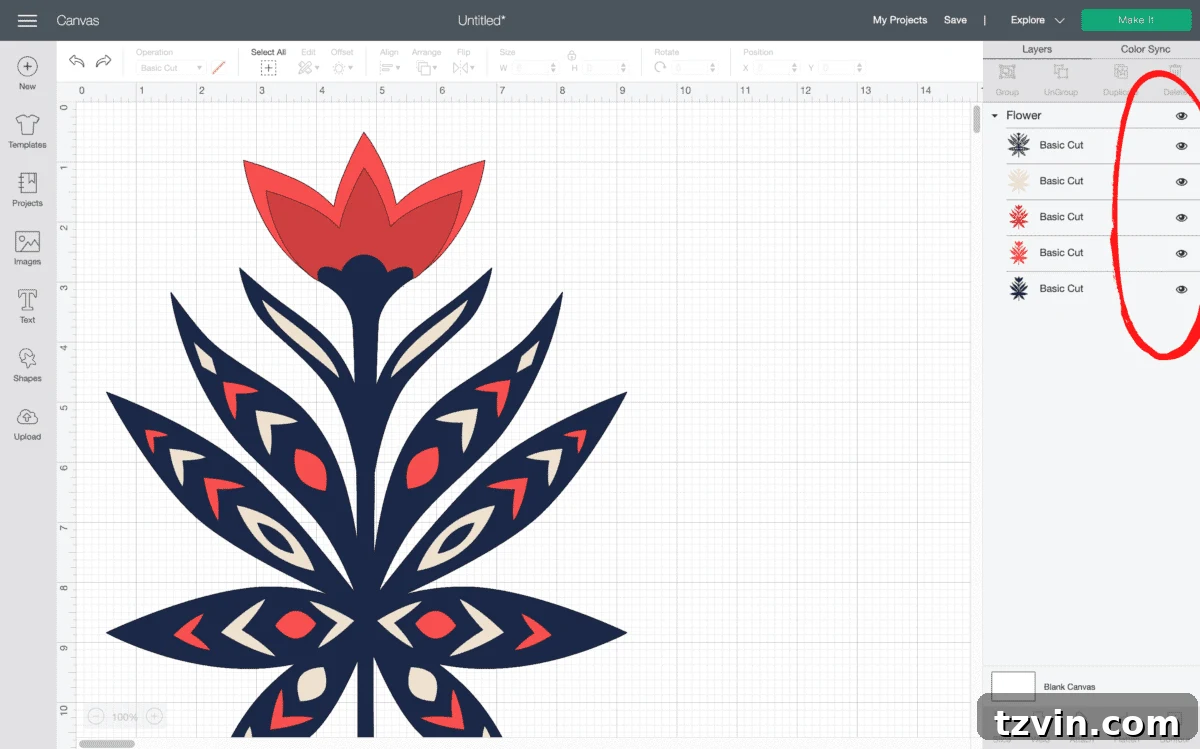
- Design Your Stencil in Cricut Design Space: Begin by opening the Cricut Design Space software, your creative hub for all Cricut projects. Navigate to the “Images” tab and search for a suitable design. For our floral block rug, I searched “flower” and browsed until I found a simple yet elegant bloom that would translate well into a clean, cut-out stencil. Look for designs that don’t have too many intricate details or floating elements, as these can be challenging to stencil without “bridges.”
- Insert Your Chosen Image: Once you’ve selected your ideal flower image, click the “Insert Images” button located at the bottom right of the screen. This will place the image onto your blank canvas, ready for manipulation.
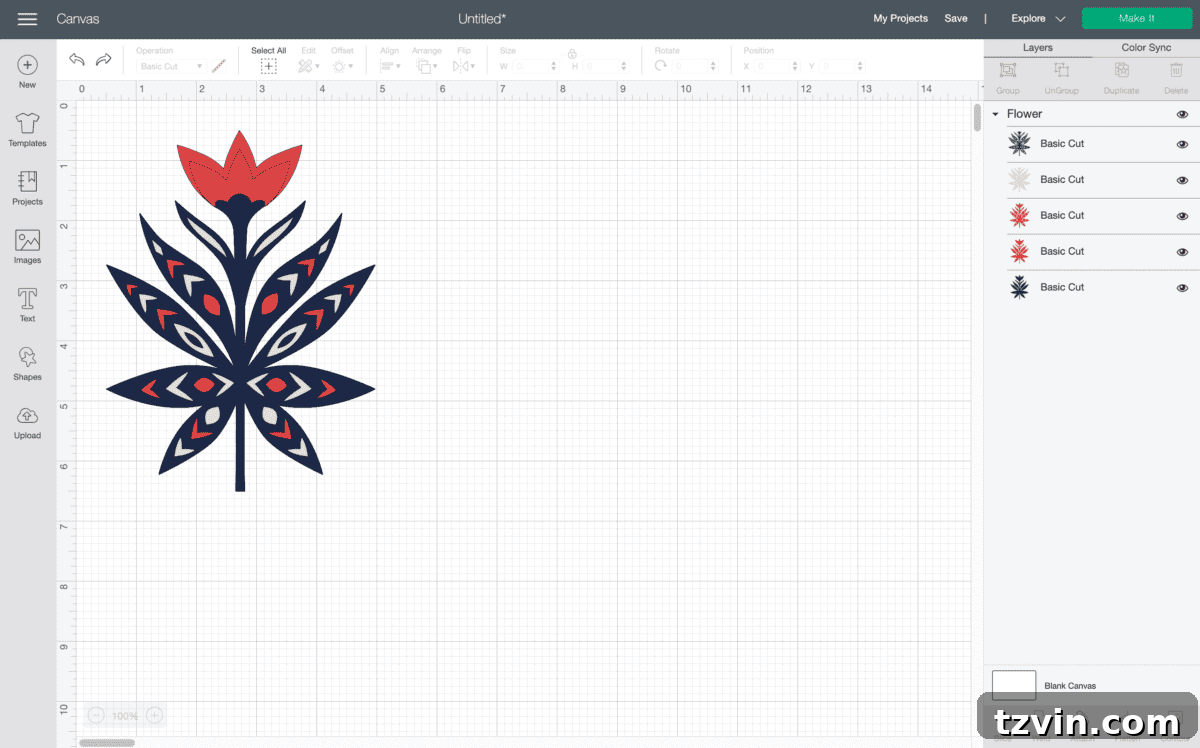
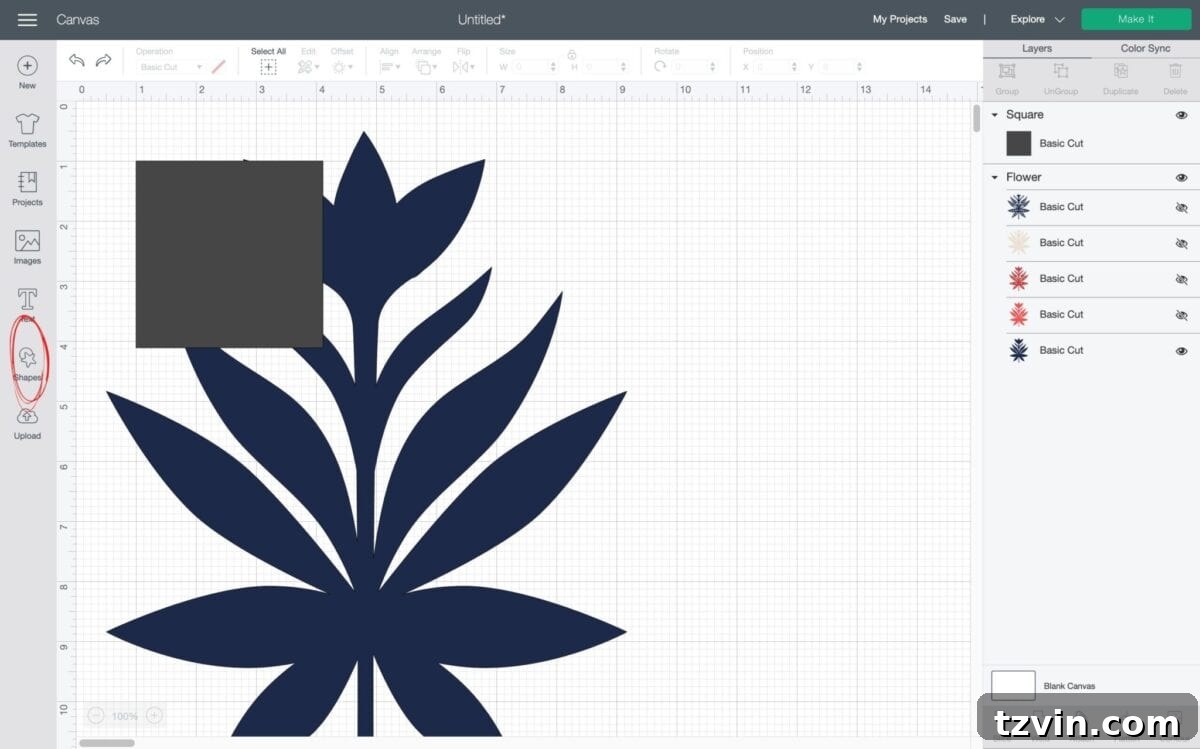
- Simplify for Stenciling: For a clean stencil, you typically want a single silhouette. On the right-hand side of the Design Space screen, locate the Layers panel. If your chosen image has multiple color layers, click the “eyes” icon next to any colors or elements you wish to hide, leaving only the primary silhouette of your design. This ensures a straightforward cut for your stencil.
- Add a Stencil Frame: A stencil needs a sturdy frame. Click on the “Shapes” tab on the left sidebar and select the “square” option. A square shape will appear on your canvas, likely on top of your flower image. This square will become the outer boundary of your stencil.
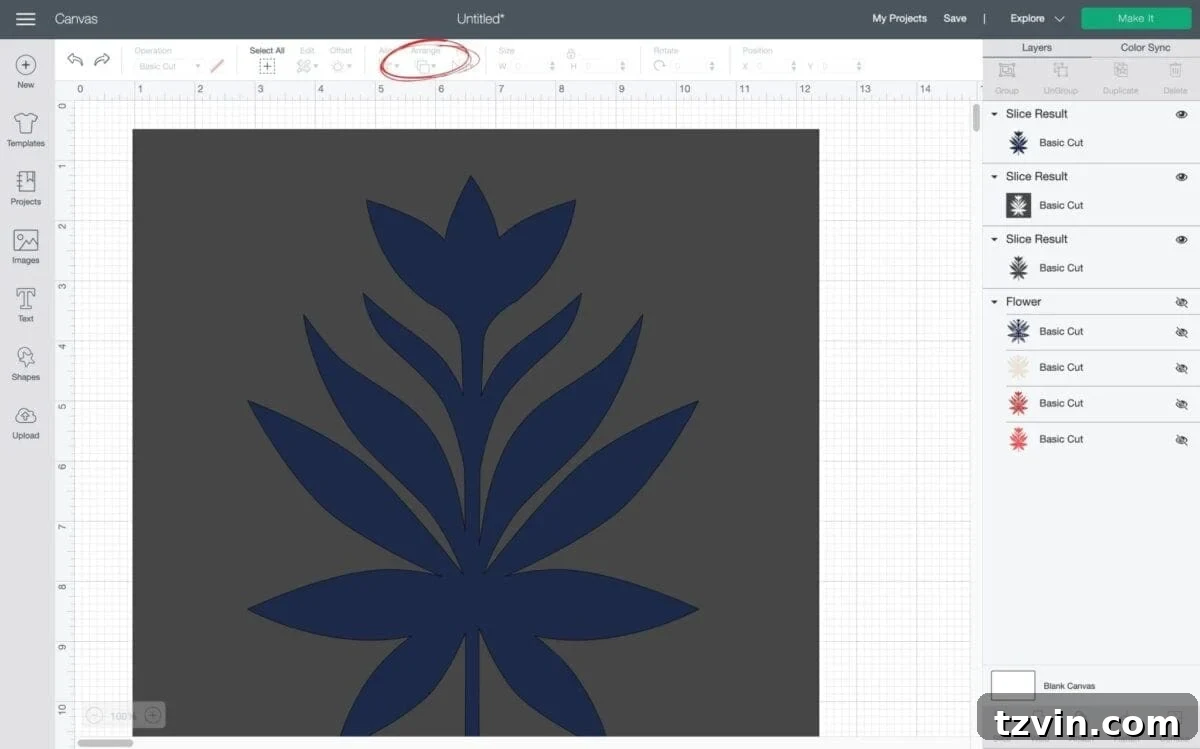
- Arrange and Position Your Design: Drag the corners of the square to resize it so that it comfortably encompasses your flower image, leaving a border around it. Next, ensure the flower is visible above the square. If the square is covering the flower, select the square, click “Arrange” at the top of the screen, and choose “Send to Back” or select the flower and choose “Bring to Front.” Position the flower within the square exactly where you want the cut-out to be.
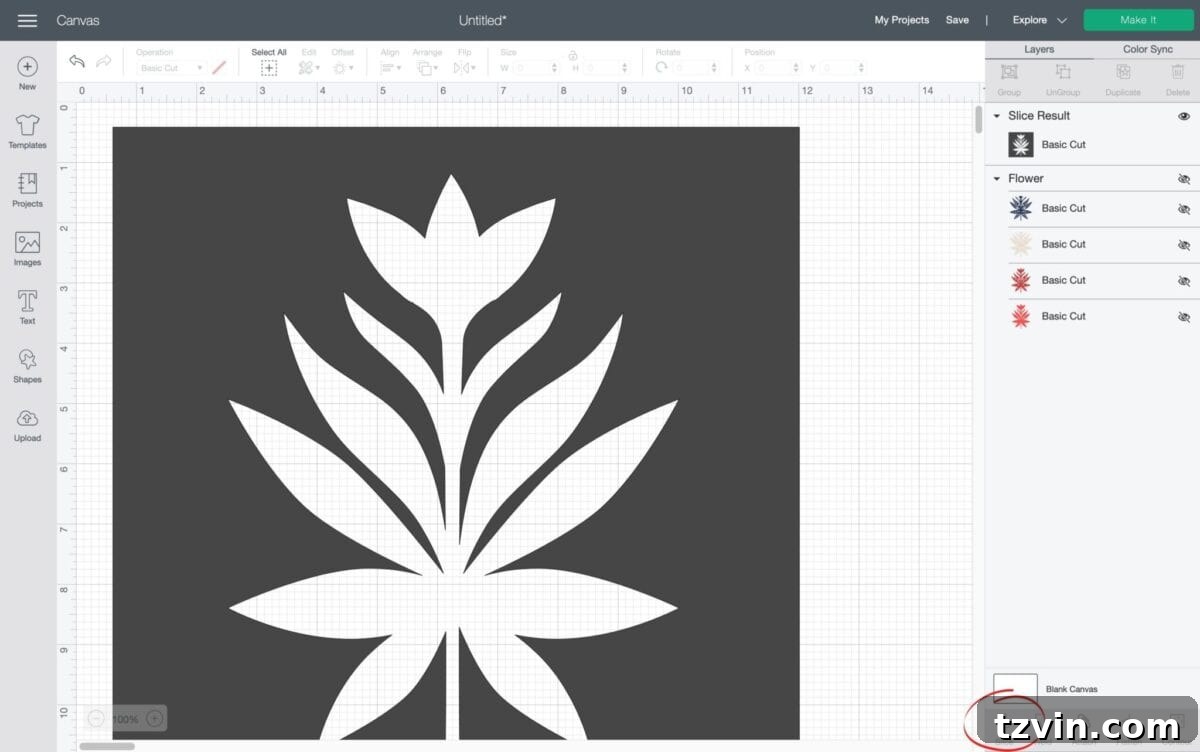
- Use the “Slice” Function: Select both the flower image and the square simultaneously (you can do this by dragging your mouse over both or holding Shift and clicking each layer in the Layers panel). With both selected, click the “Slice” tool at the bottom right of the screen. This powerful tool will cut the flower shape out of the square. Delete the leftover flower image remnants, leaving you with a square stencil frame with your flower cut out of its center.
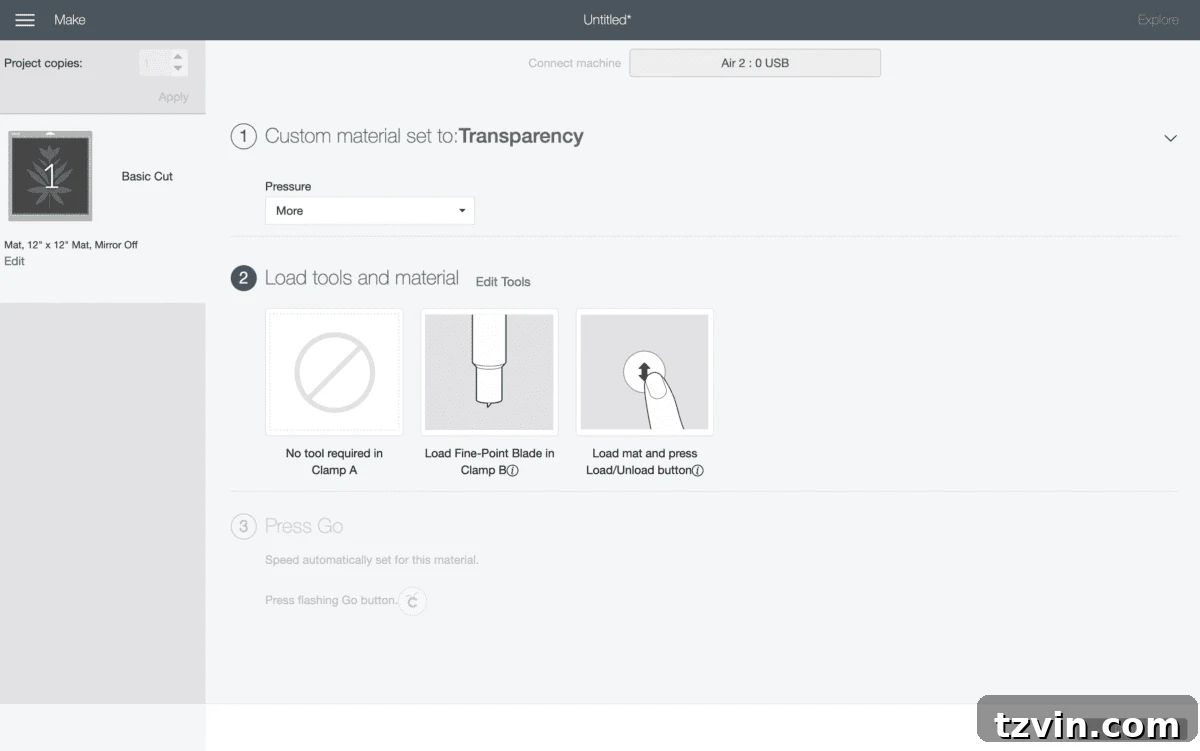
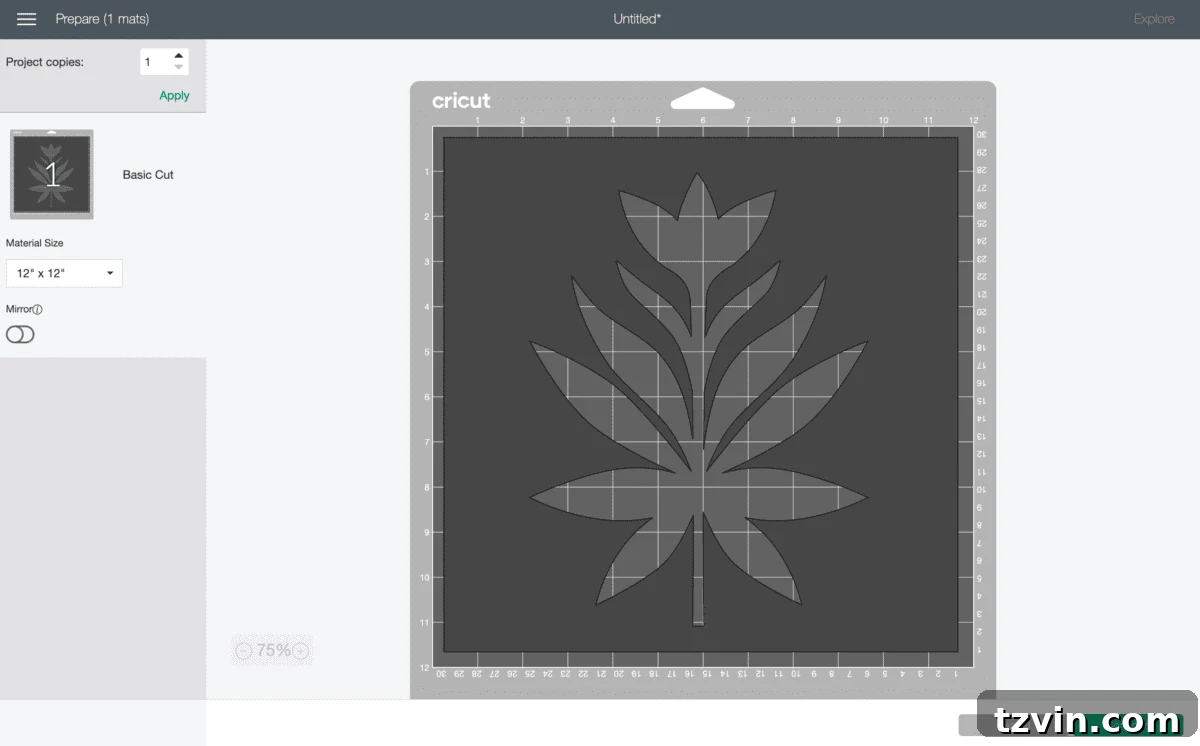
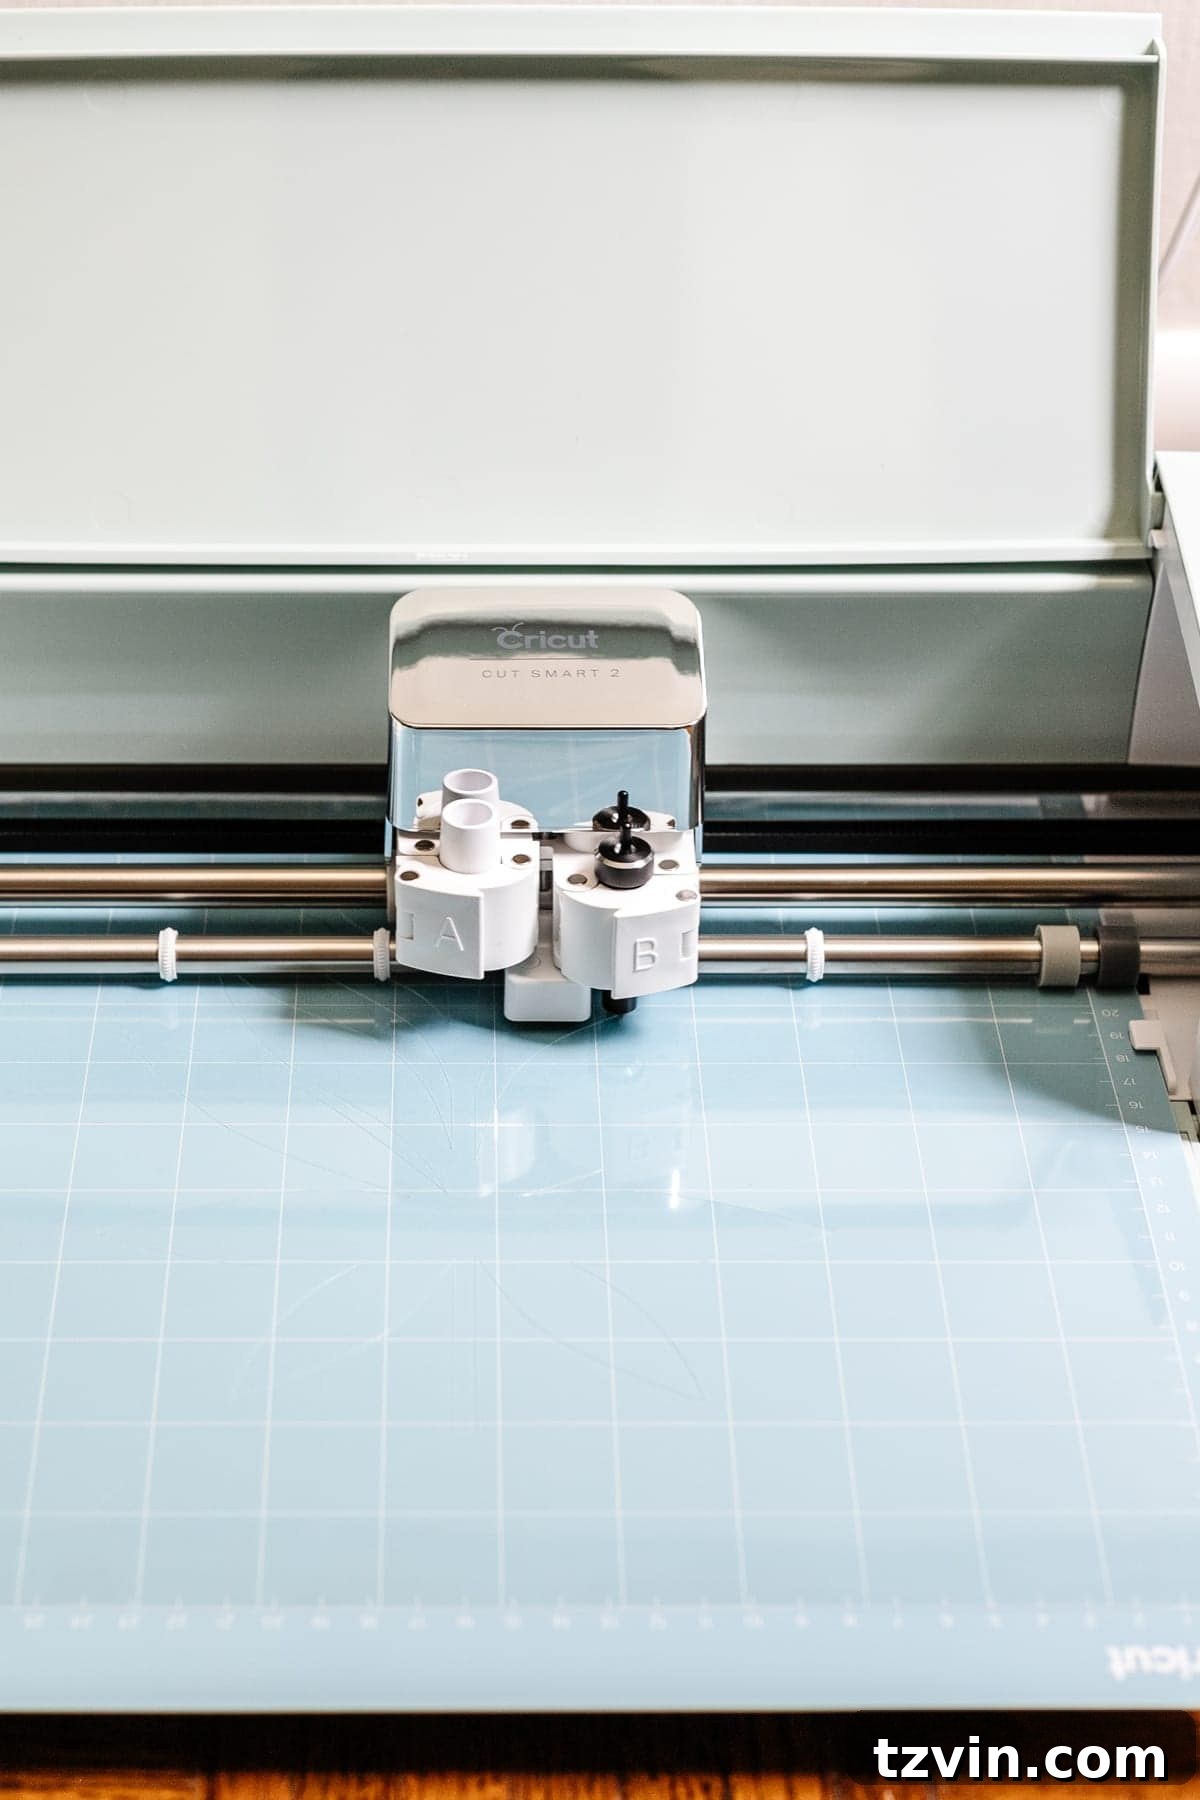
- Prepare for Cutting: Click “Make It” in the top right corner of Design Space. On the next screen, you’ll confirm your mat layout. Then, proceed to the material selection. Choose “transparency” as your custom material setting. It’s crucial to also set the pressure to “more” to ensure the deep point blade cuts cleanly through the acetate.
- Change Your Blade: Before loading your material, remove the standard fine-point blade from your Cricut machine and replace it with the deep point blade. This blade is specifically designed for thicker materials like acetate, ensuring a precise and clean cut without requiring multiple passes.
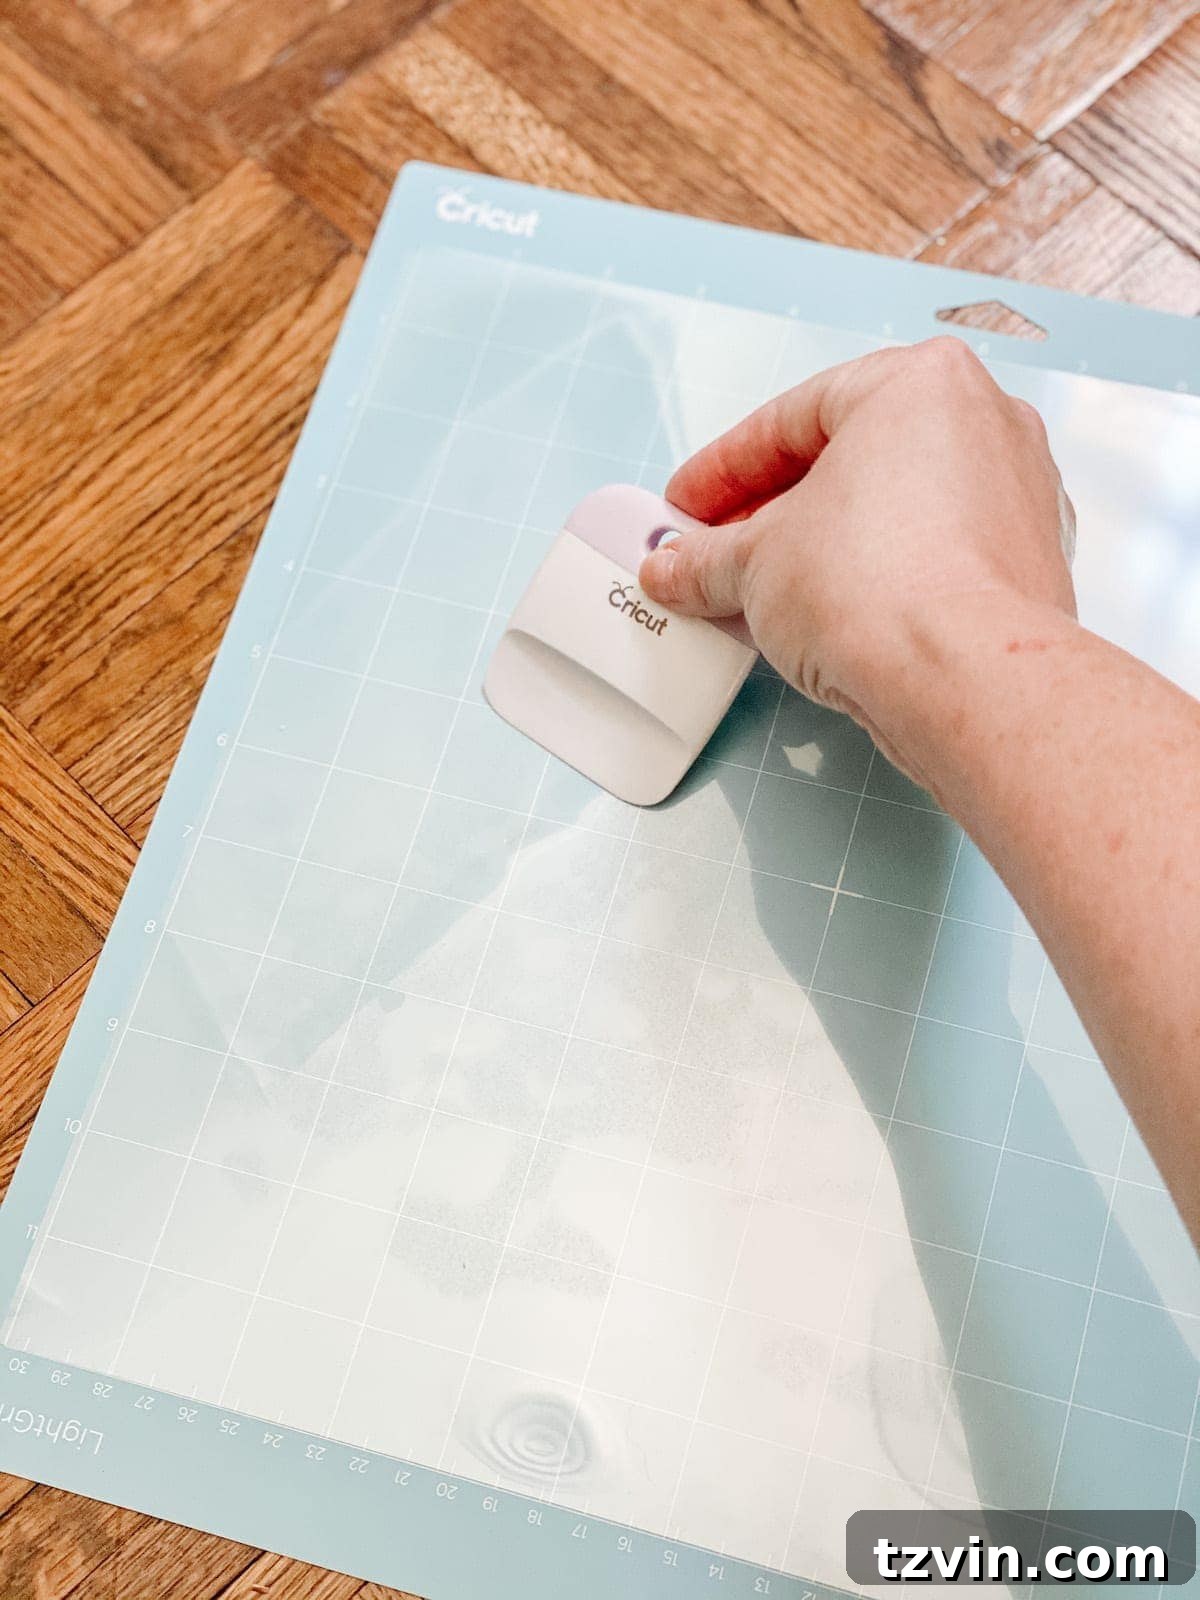
- Load Your Material: Carefully place an acetate sheet onto your light grip machine mat. Press it down gently to ensure it adheres well, preventing any shifting during the cut. Align the mat with the guides on your Cricut machine and press the Load/Unload button.
- Initiate the Cut: Take a final glance at your screen to confirm all settings and the design are correct. Then, press the flashing “Go” button on your Cricut machine to begin the cutting process. The machine will precisely cut your design into the acetate.
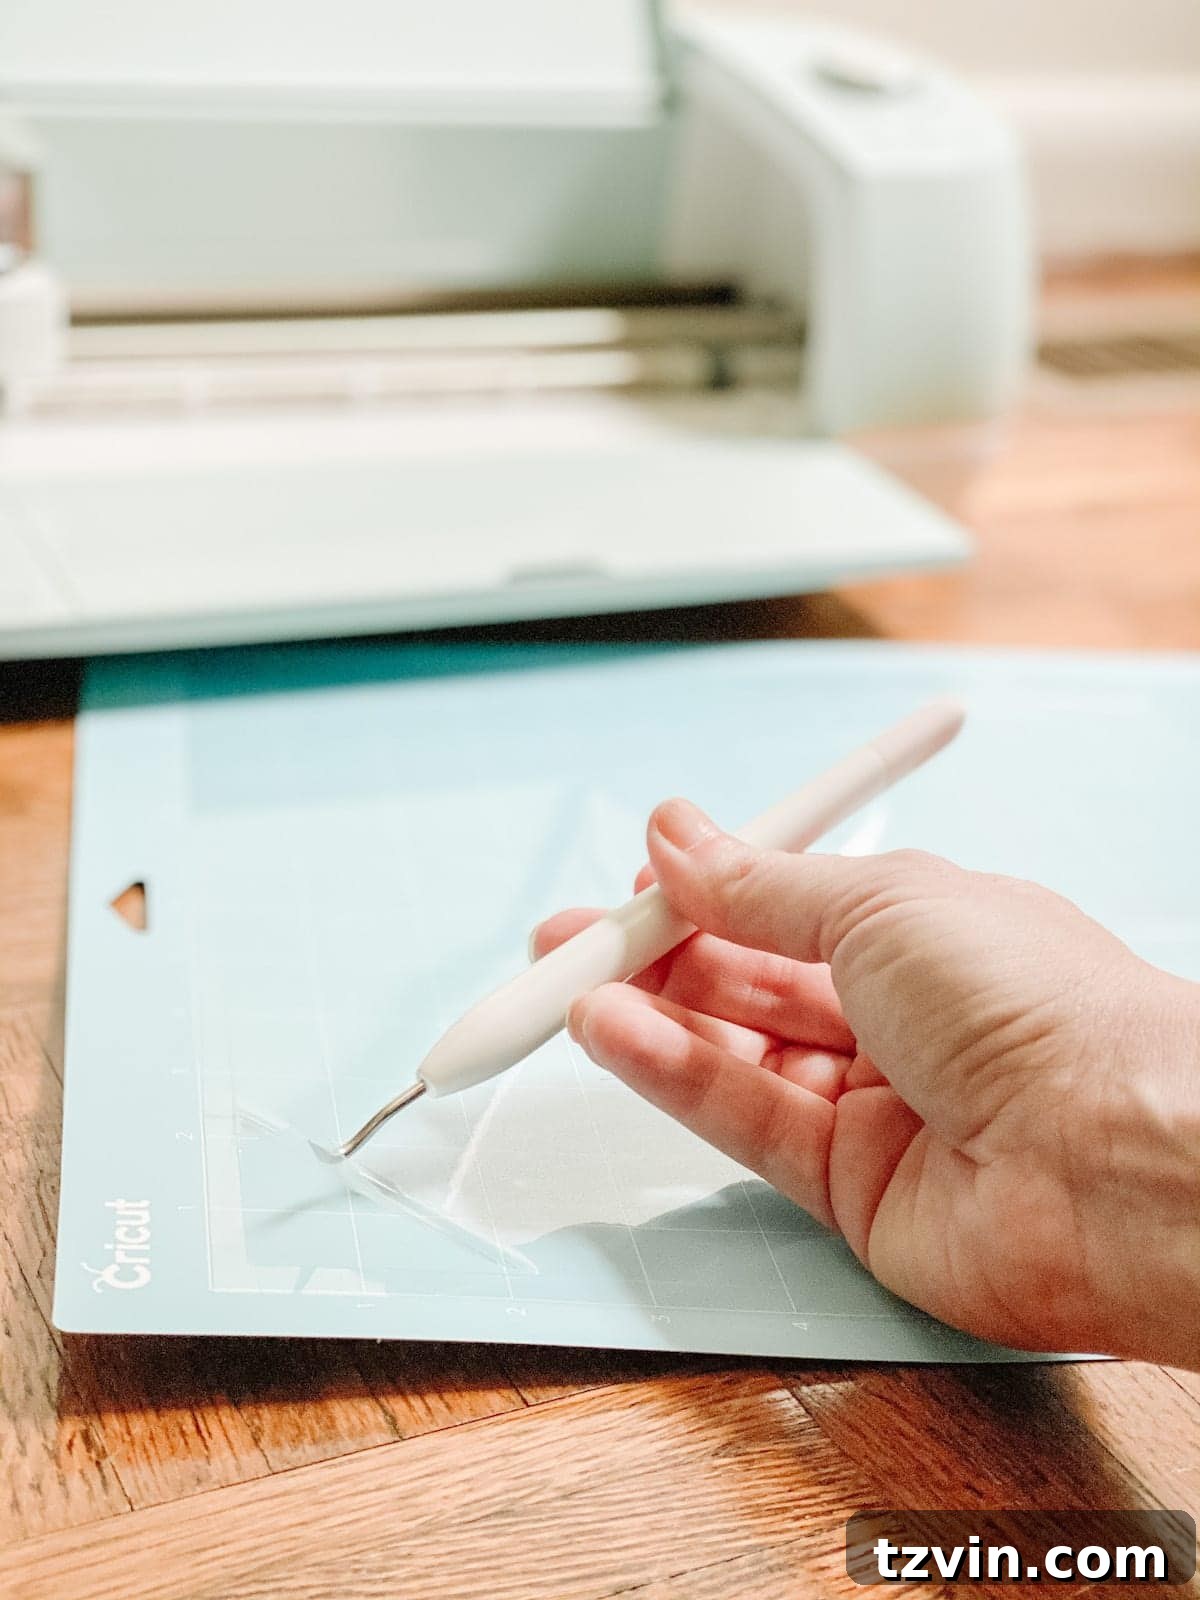
- Unload and Weed Your Stencil: Once the Cricut has completed its cut, carefully unload the mat. Use your Cricut Basic Tool Set, particularly the spatula or weeder, to gently peel the acetate sheet away from the mat. This minimizes curling or tearing of your new stencil. Remove any small cut-out pieces from the design, revealing your clean stencil.
- Your Reusable Stencil is Ready! Congratulations, you now have a custom, reusable stencil. This versatile tool can be used for countless projects, from adding a faux patterned tile look to floors, creating unique designs on pillow covers, personalizing wooden signs, or, as we’ll do next, transforming a plain outdoor rug.
- Plain outdoor rug: Choose a durable rug with a relatively flat weave for the best stenciling surface. A solid color will allow your floral block pattern to truly pop.
- Stencil brush: Essential for controlled paint application and preventing bleed under the stencil. Look for a brush with stiff, flat bristles.
- Acrylic or exterior enamel paint: For an outdoor rug, an exterior-grade paint is vital for weather resistance and durability. Acrylic craft paint can work if sealed, but enamel paint offers superior longevity. Choose a color that complements your outdoor decor.
- Easy Tack Spray (optional but highly recommended): This repositionable adhesive helps the stencil temporarily stick to the rug, drastically reducing paint bleed and ensuring crisp edges.
- Tape measure: For accurate grid marking.
- Washable marker or tailor’s chalk: To mark your grid layout without leaving permanent traces.
- Prepare Your Rug: Start with a clean slate. Ensure your rug is completely free of dust, dirt, leaves, and any debris. For an outdoor rug, a quick pass with a leaf blower or a thorough vacuuming usually does the trick. A clean surface ensures better paint adhesion and a smoother finish.
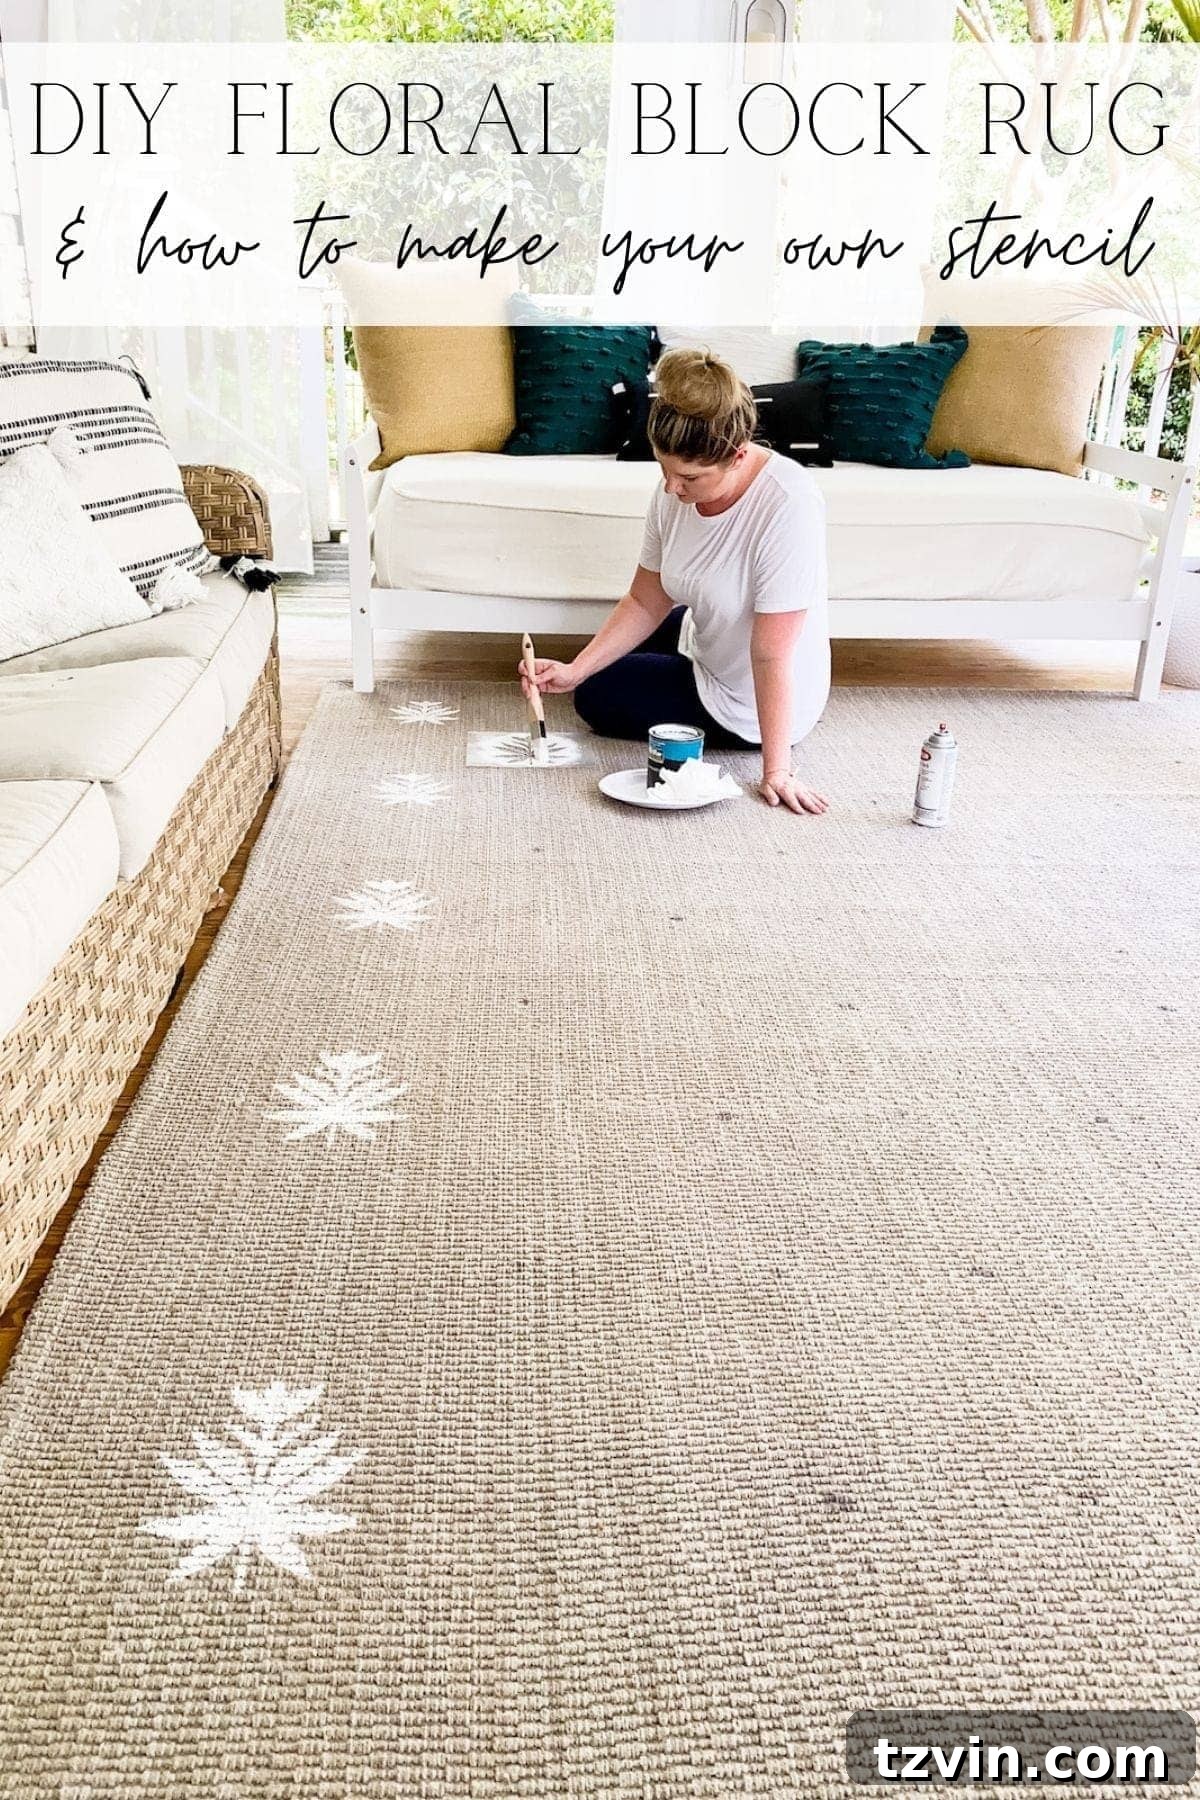
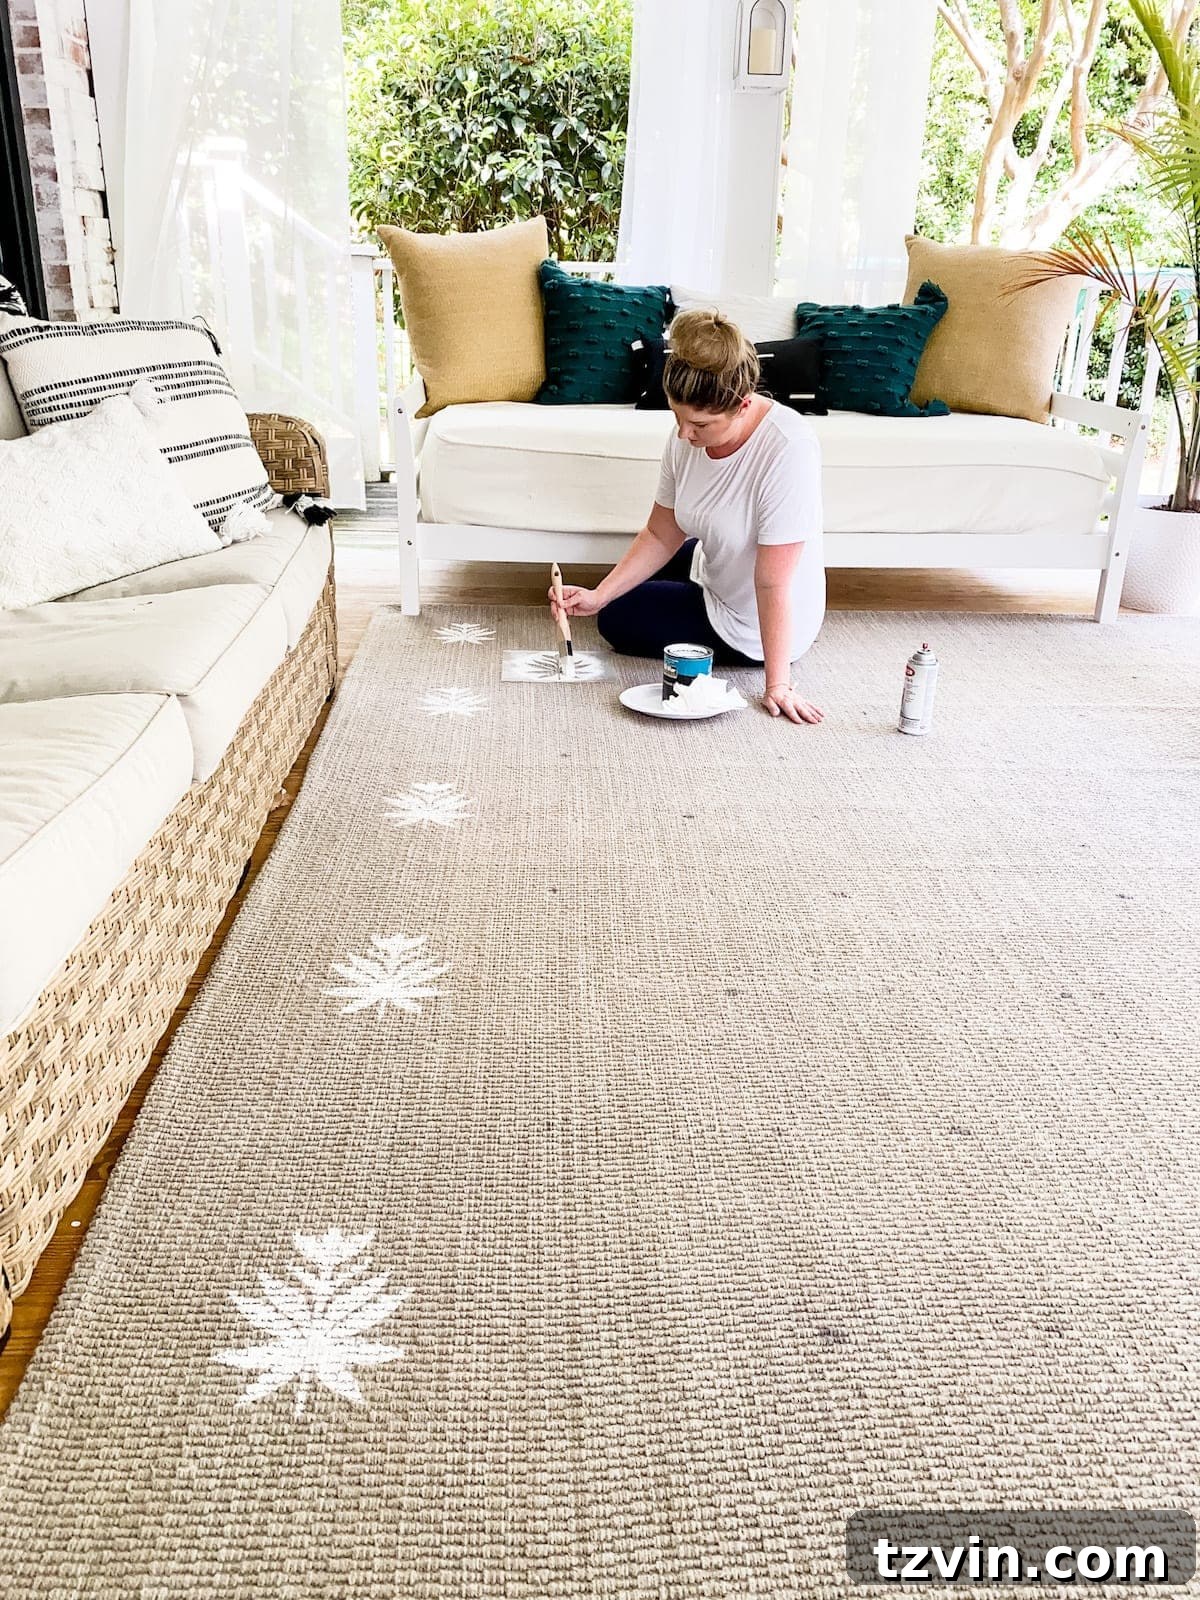
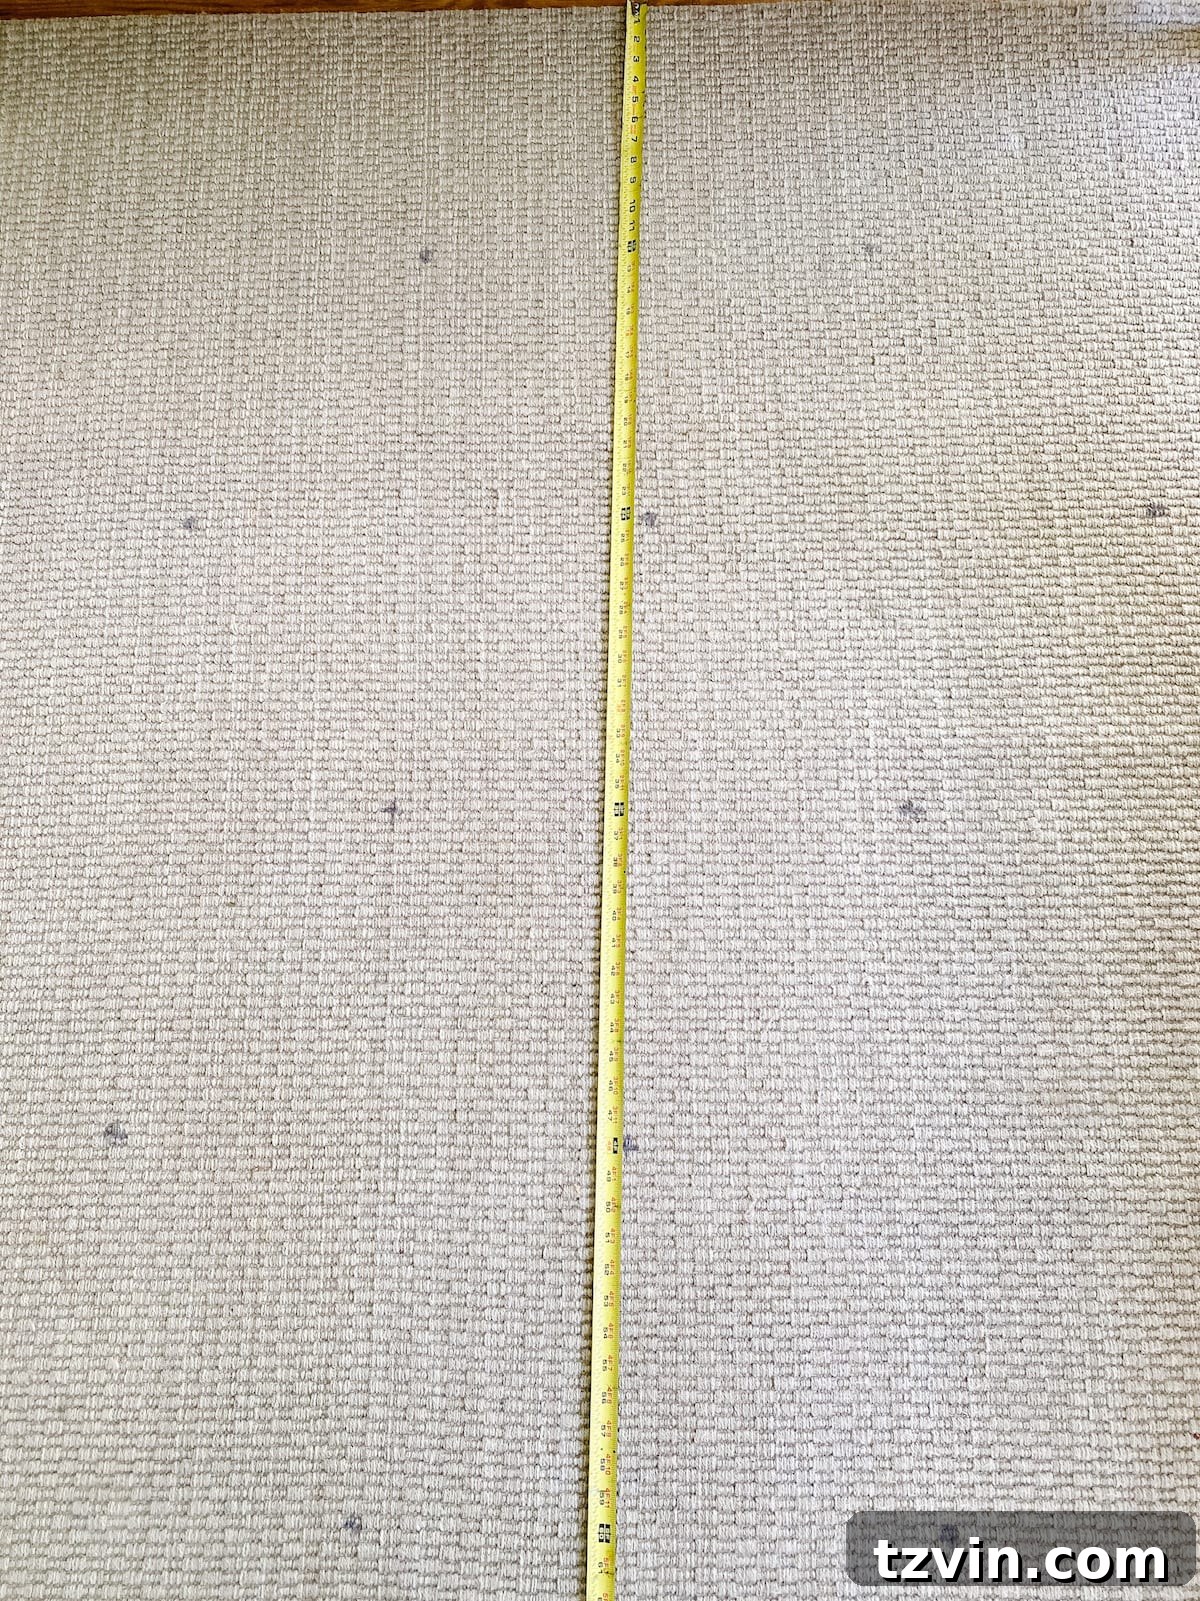
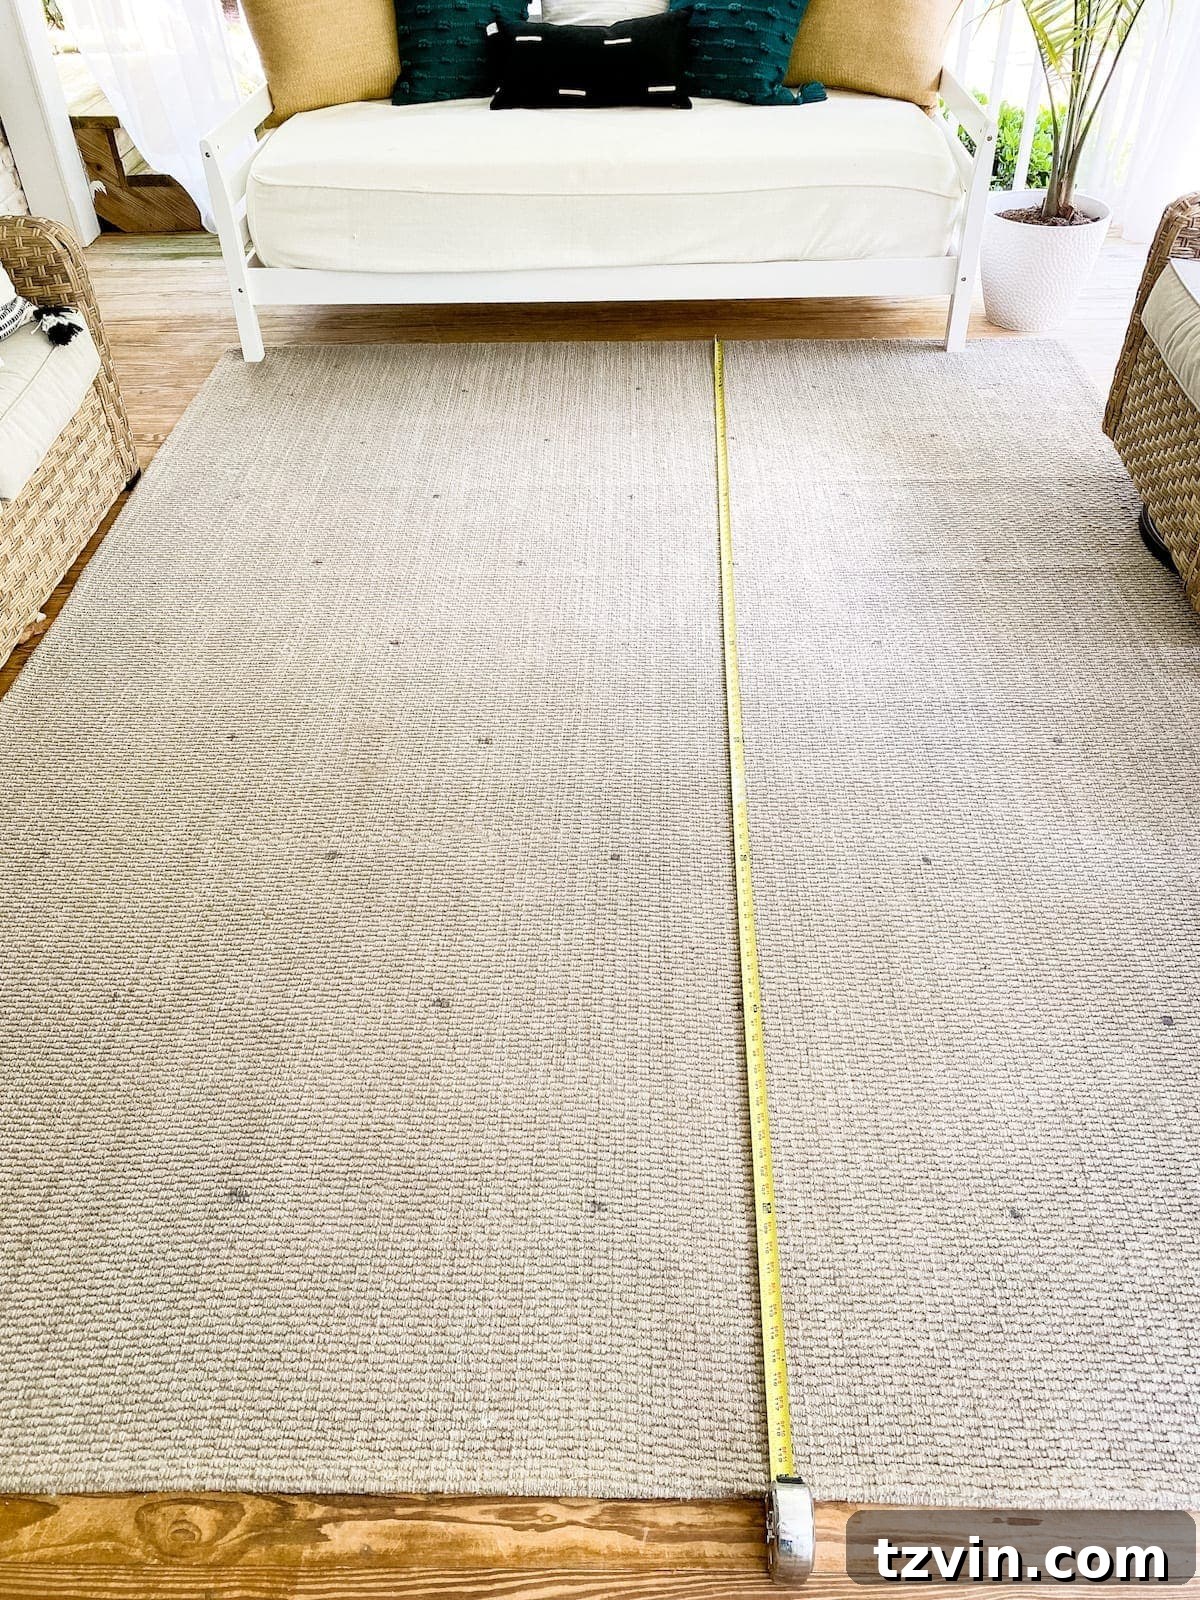
- Map Out Your Grid Pattern: This step is crucial for achieving a uniform and symmetrical floral block design. Using your tape measure and a washable marker, begin marking a grid on your rug. I started by placing the tape measure about 12 inches from one edge of the rug and made a small dot every 24 inches along that line. For the next row, I slid the tape measure over another 12 inches. This time, I started marking my 24-inch intervals *24 inches from the rug’s edge*, creating an offset pattern. This alternating offset is what gives the “block” effect, ensuring your floral motifs are perfectly staggered. Take your time with this step, as precision here will pay off in the final look.
- Complete Your Grid: Continue the process described in step 2, marking dots every 24 inches across the entire rug, alternating the starting point for each row to maintain your offset grid. These dots will serve as the precise center points for each stenciled floral block.
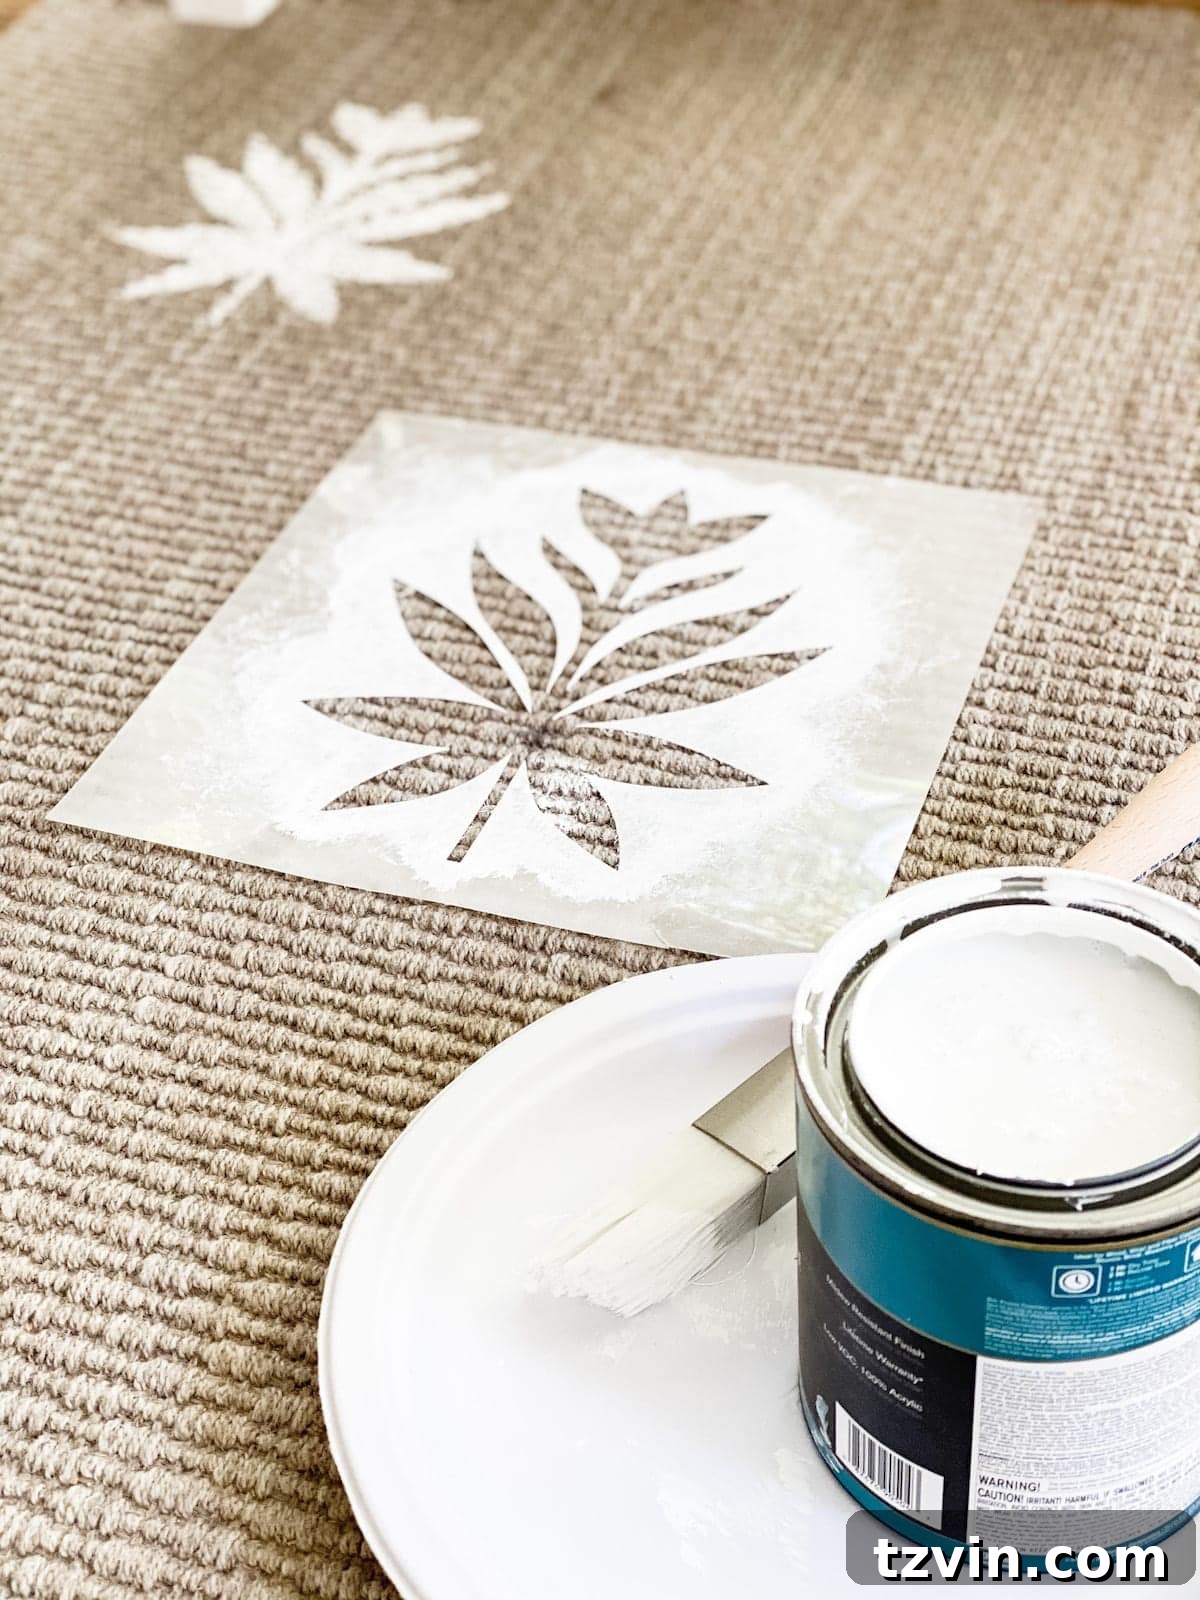
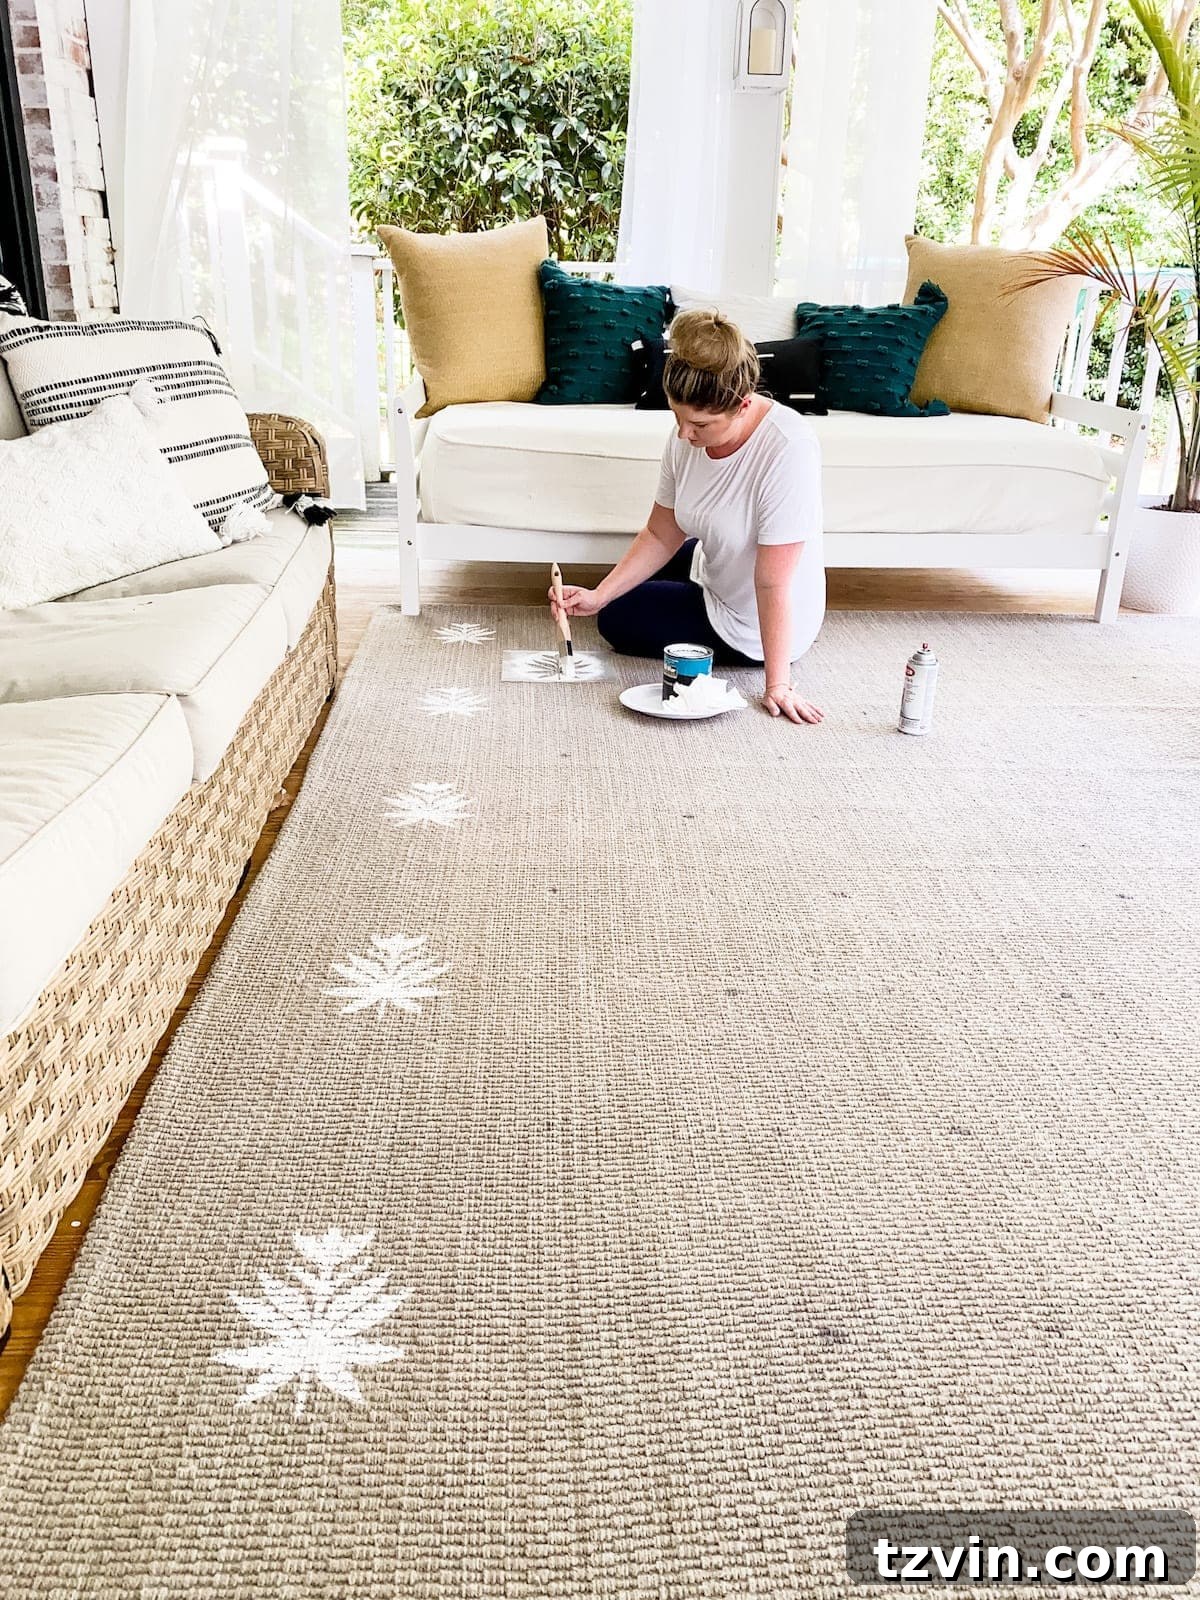
- Prepare for Stenciling: If you’re using Easy Tack Spray, lightly spray one side of your custom stencil. Allow it to become tacky for a few moments before applying it to the rug. This adhesive layer will help hold the stencil firmly in place, significantly reducing the chances of paint bleeding under the edges and giving you cleaner lines. Even without the spray, proceed carefully. Before you start painting, take a moment to plan your path across the rug. Start from one side and work your way across, ensuring you don’t stencil yourself into a corner or accidentally smudge freshly painted areas.
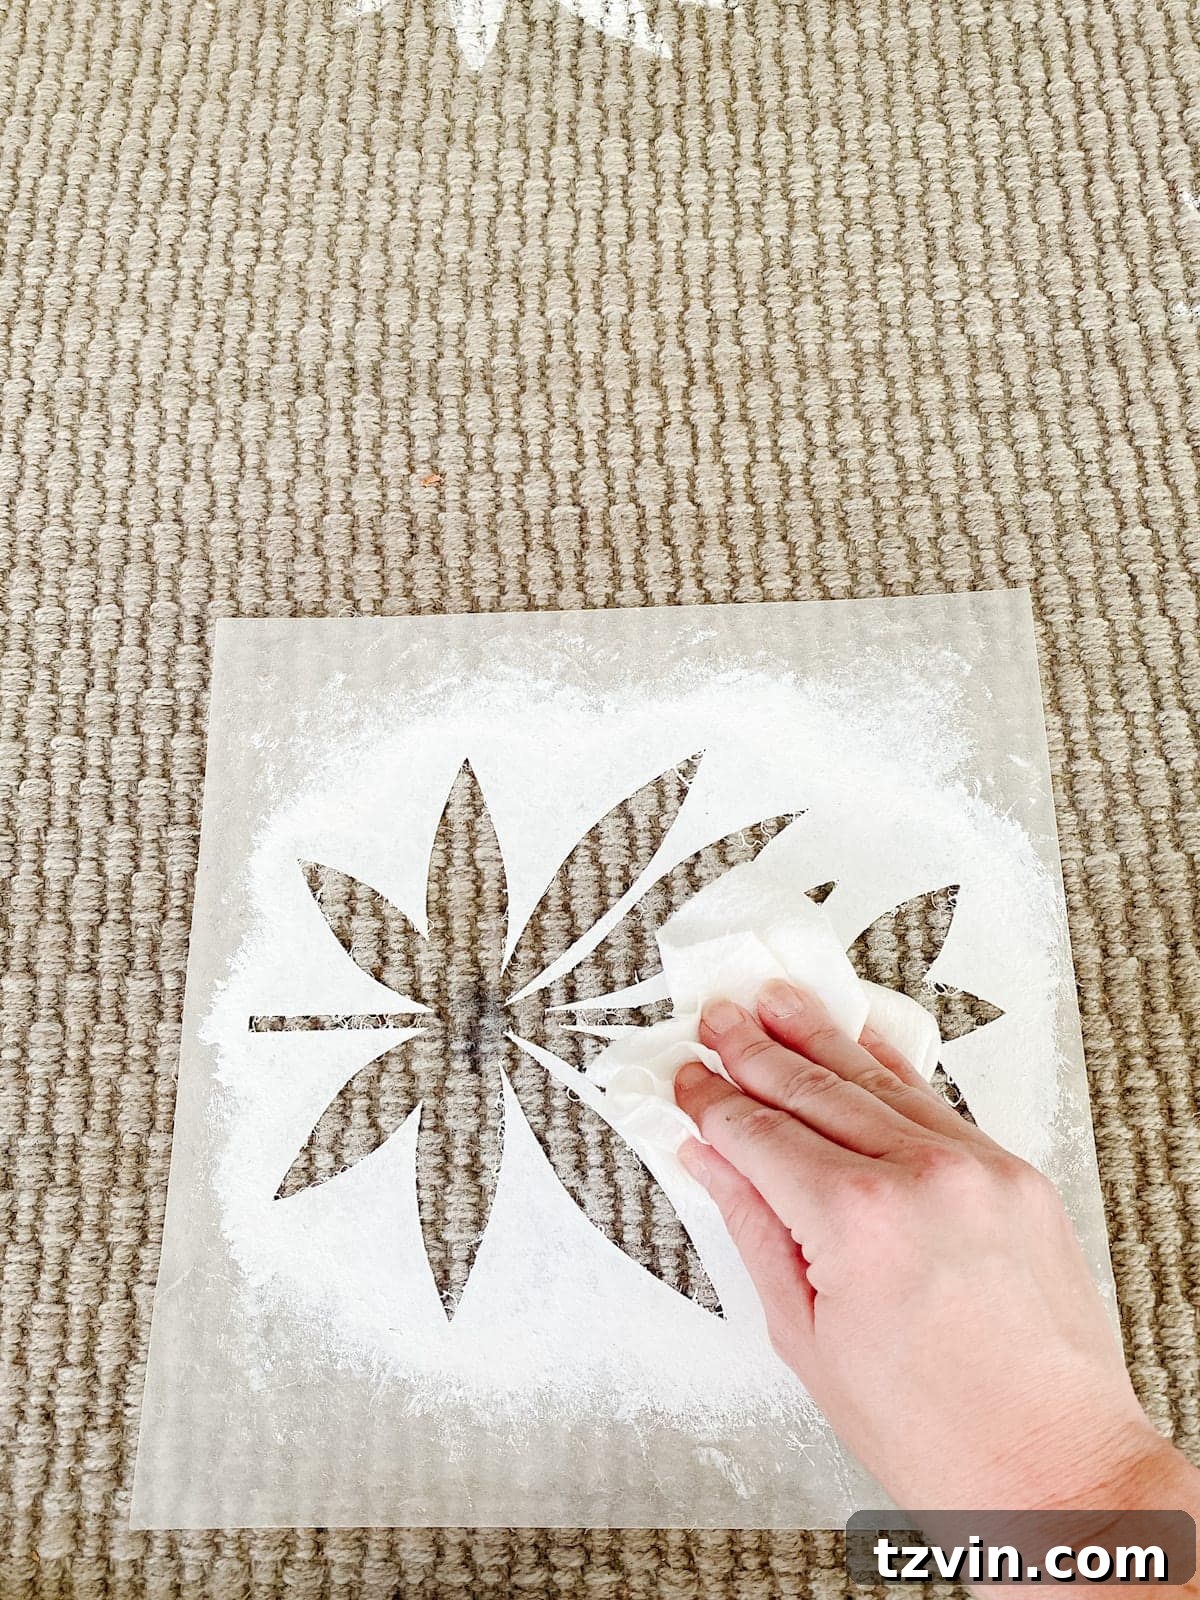
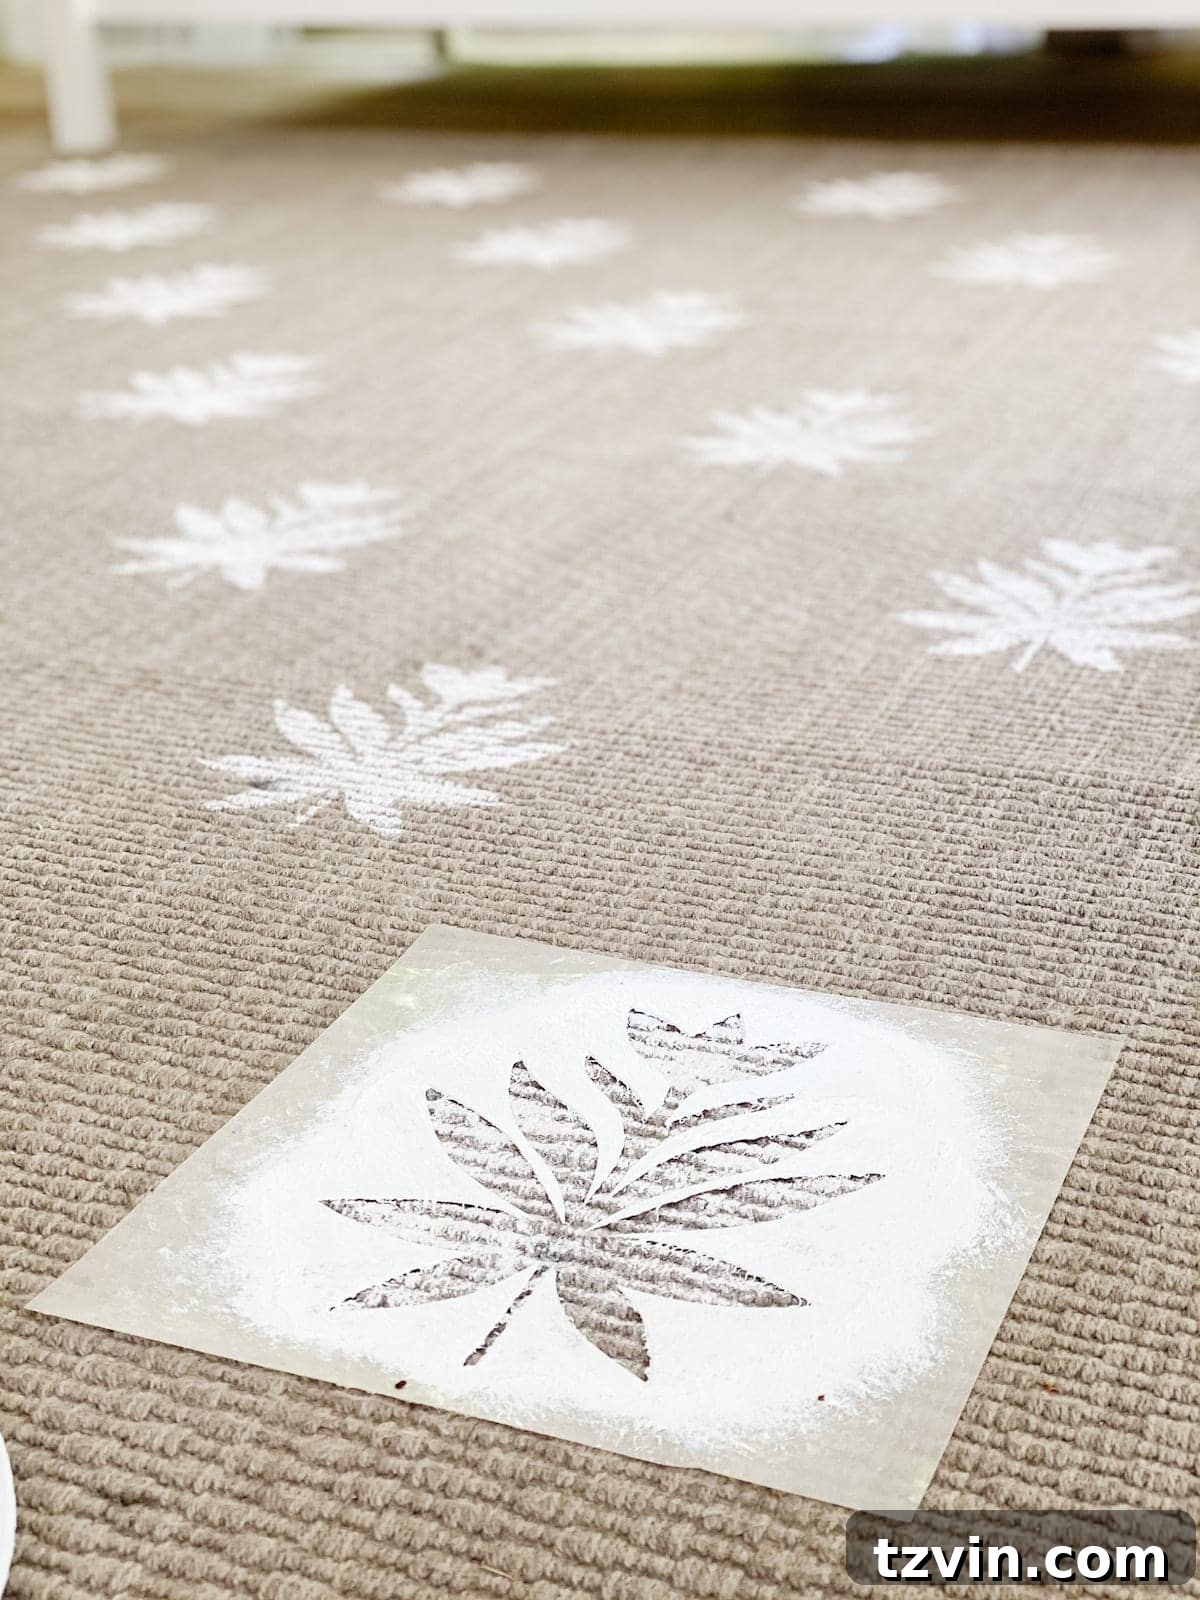
- Position Your Stencil: Place your stencil over the very first dot you marked on the rug, aligning the center of your stencil’s cut-out design directly over the dot. Gently pat down the stencil, especially if you’ve used Easy Tack, to ensure good adhesion to the rug fibers. You can use a paper towel for this, which also prevents paint from getting on your hands.
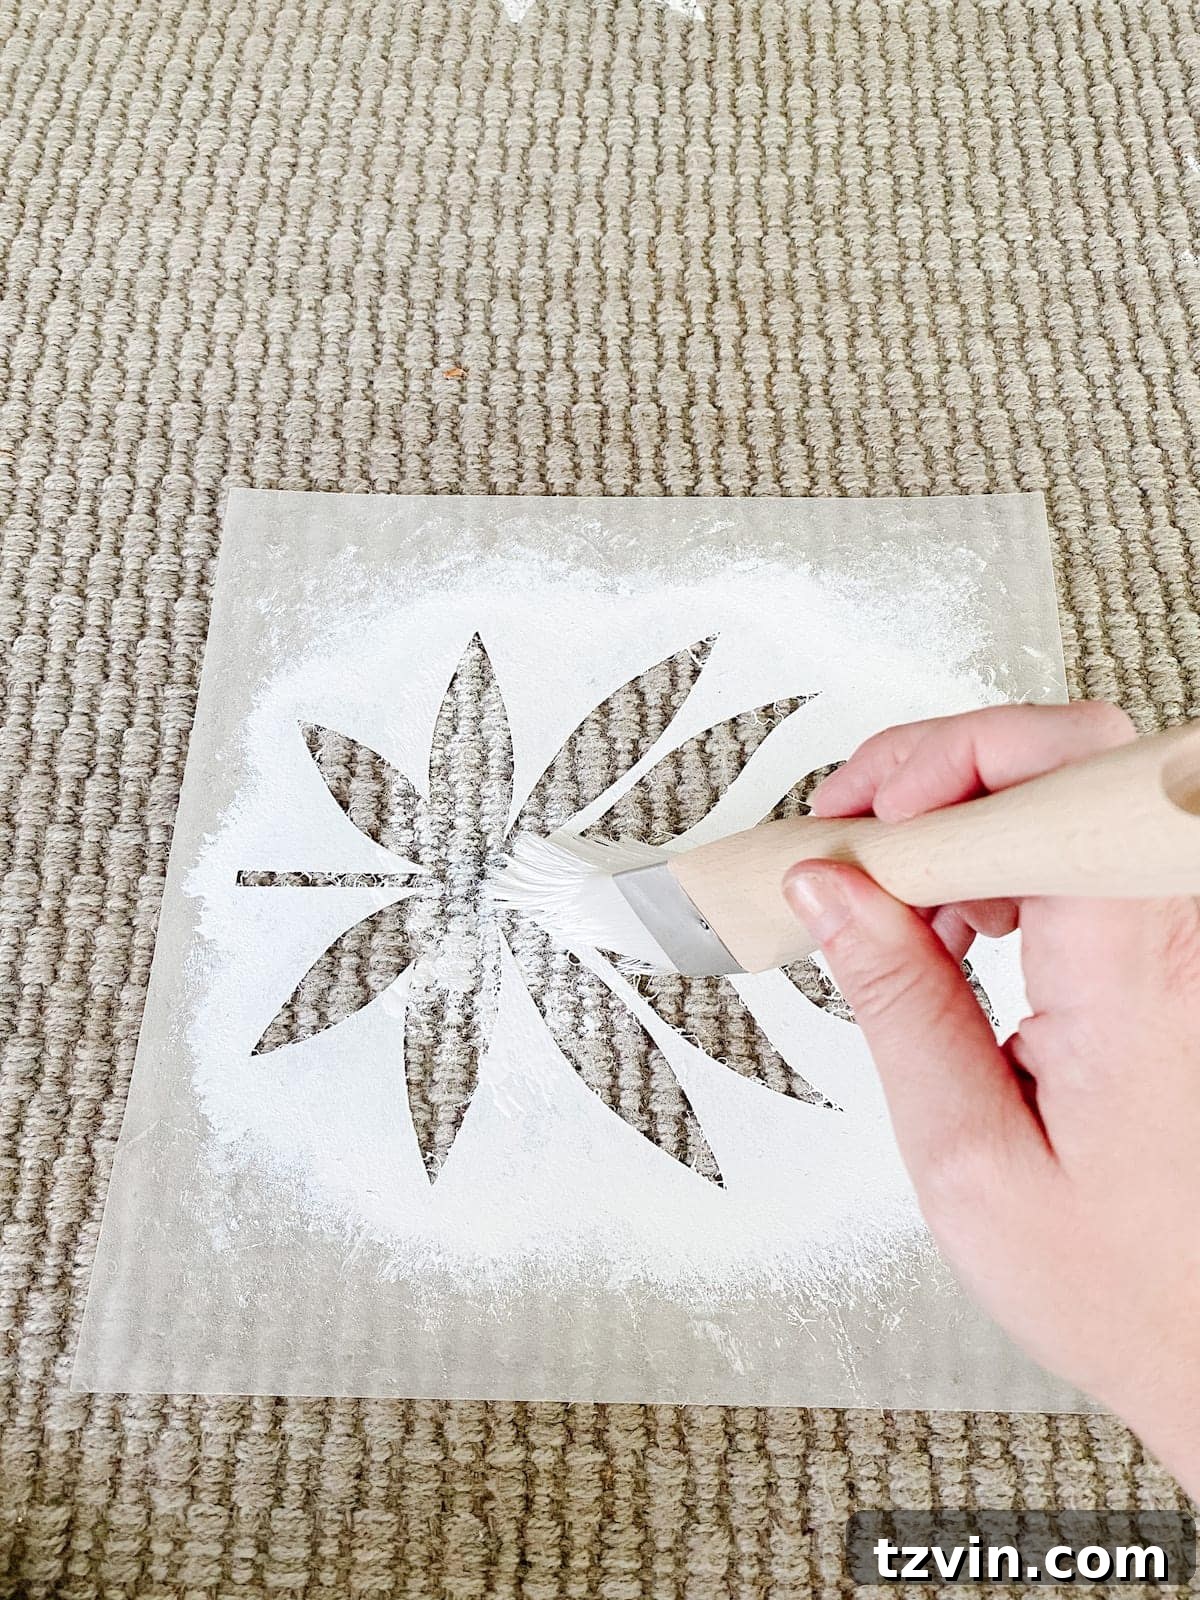
- Apply the Paint: Dip only the very end of your stencil brush into the paint. It’s crucial to use minimal paint to prevent saturation and bleeding. Remove any excess paint by dabbing it off on a paper towel. Now, using a light, upright “pouncing” motion (think gentle dabbing), apply the paint through the stencil. Avoid traditional brush strokes, as these can push paint under the stencil edges. Apply several thin coats if necessary to achieve full coverage, rather than one thick coat.
- Reveal and Repeat: Carefully peel up the stencil from the rug. Admire your crisp floral design! Immediately move to the next dot on your grid pattern and repeat the stenciling process. If paint builds up on the back of your stencil, gently wipe it clean between applications to prevent transferring excess paint to the rug. Continue until your entire rug is covered with the beautiful floral block pattern. Once completed, allow the rug to dry thoroughly for at least 2-3 hours, or as recommended by your paint’s instructions, before walking on it or placing furniture.
Achieving the Designer Look: Your DIY Floral Block Outdoor Rug
With your custom stencil ready, it’s time to bring your vision to life and transform that plain outdoor rug into a chic, designer-inspired piece. This process is straightforward, but careful preparation and technique will ensure a professional-looking result that stands up to the elements.
Supplies for Your Stunning DIY Floral Block Rug:
Crafting Your Floral Block Rug: Step-by-Step Instructions:
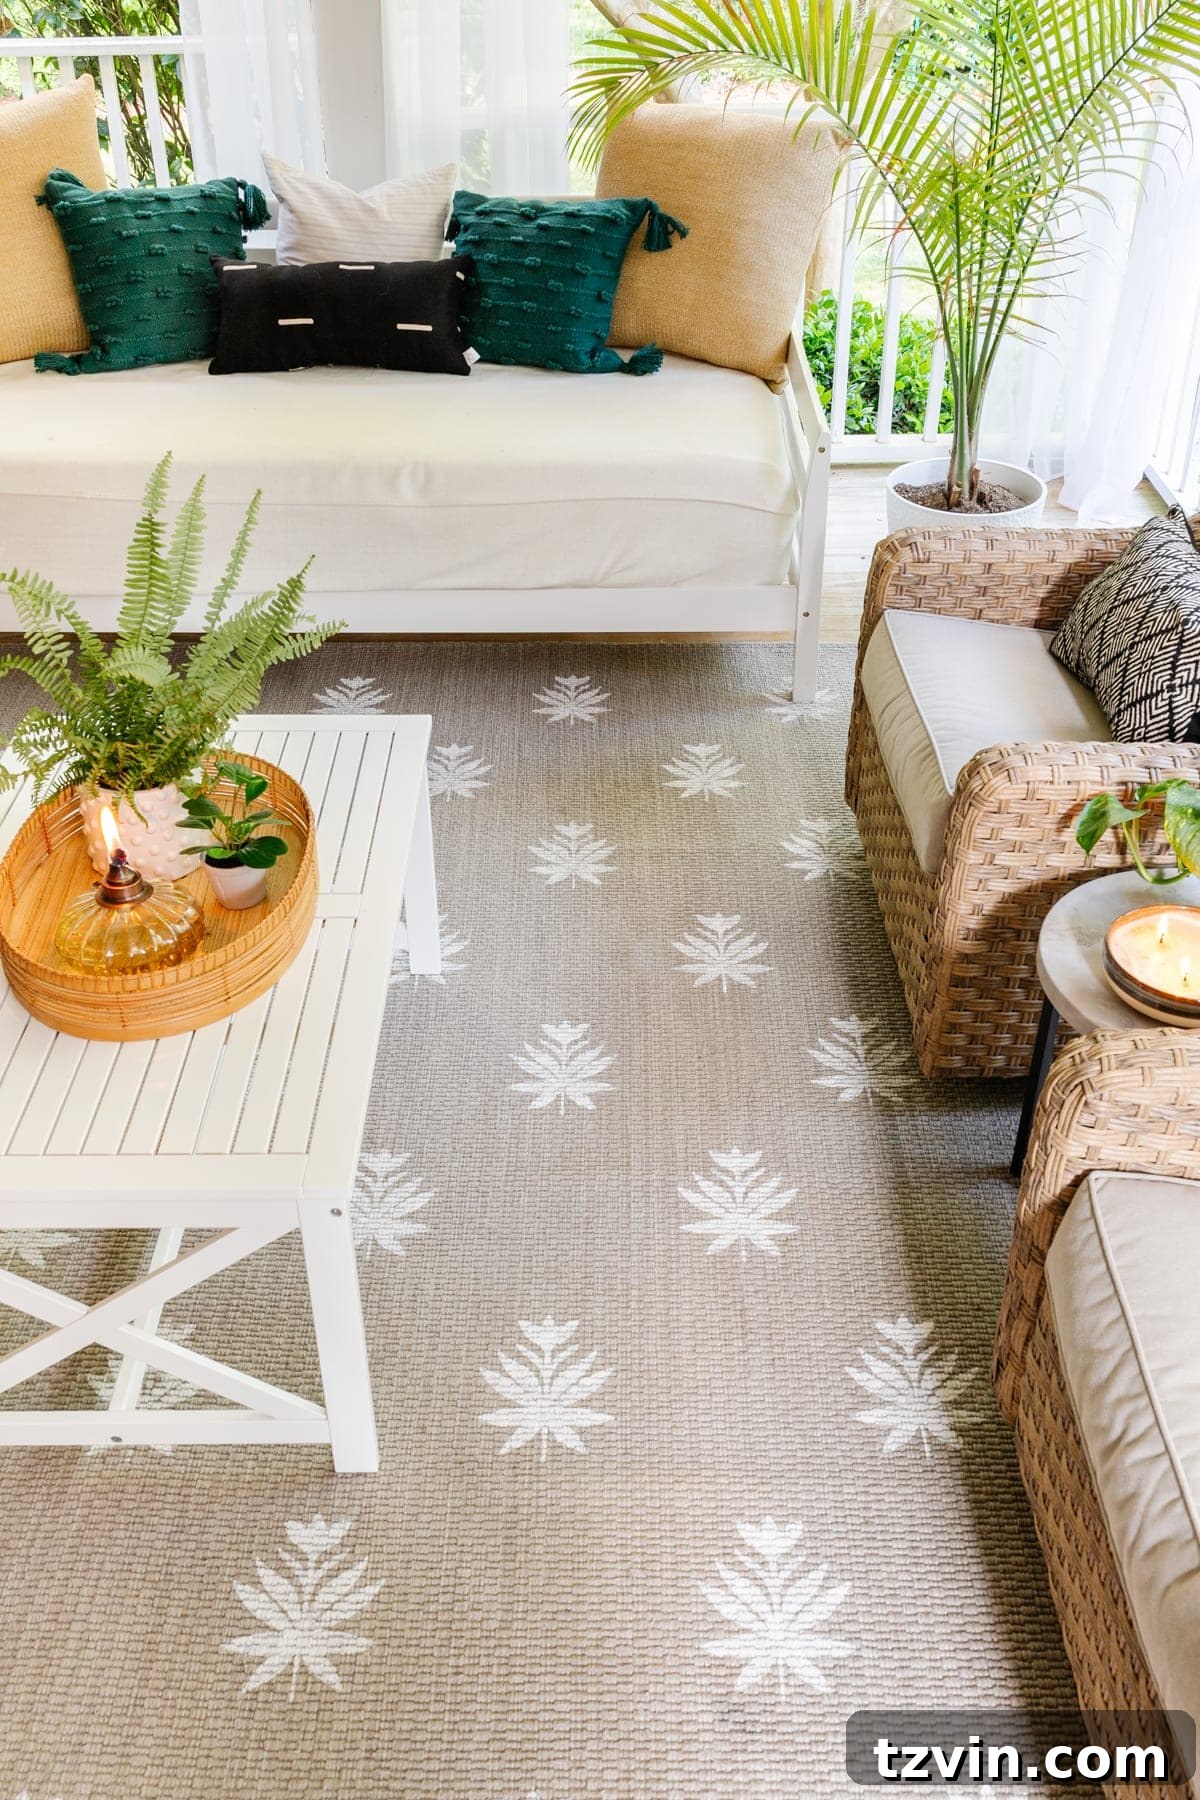
The Stunning Reveal: A Designer Rug, DIY Style!
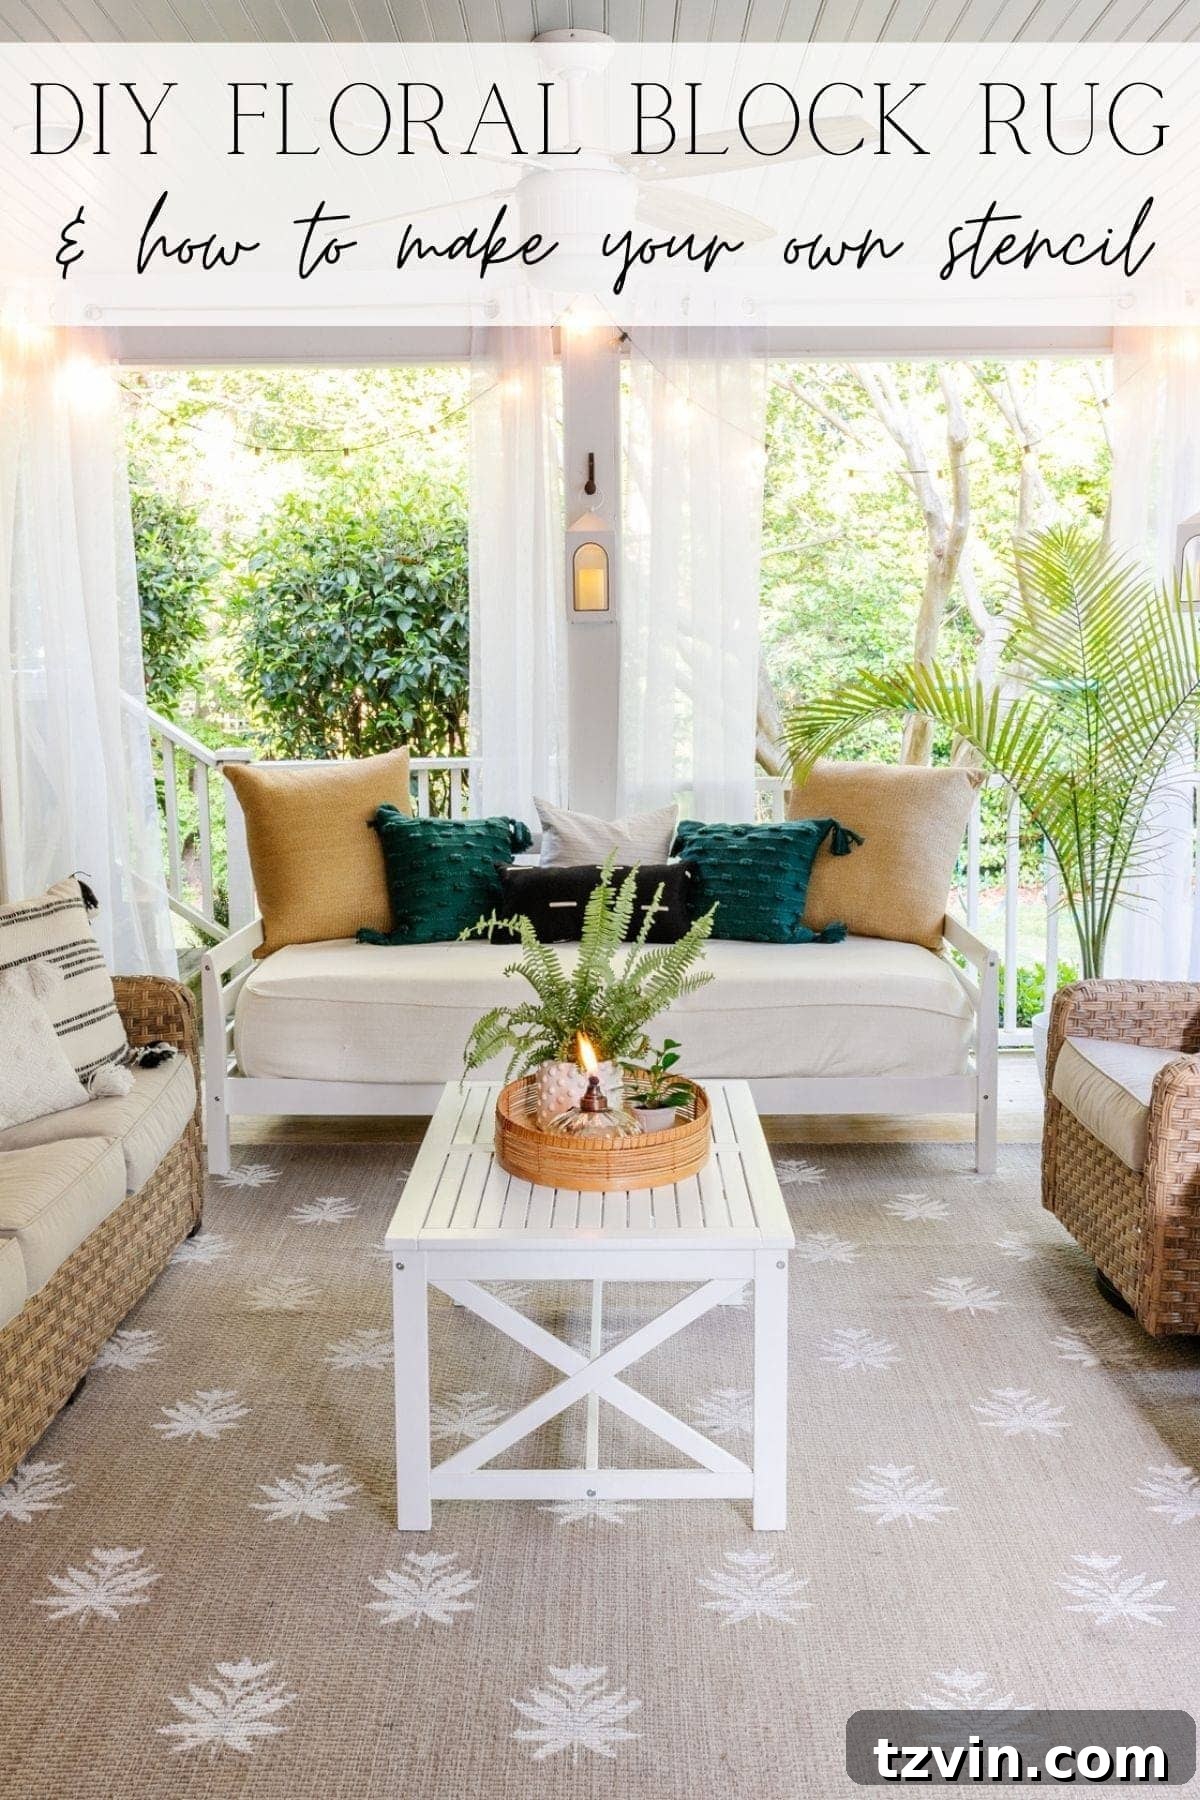
The transformation is truly remarkable! I honestly wasn’t entirely sure if this ambitious project would turn out as envisioned, but the result exceeded all my expectations. Our once-plain outdoor rug now boasts a sophisticated floral block pattern that looks like it came straight from a high-end designer showroom. It’s precisely the touch of character and charm our back porch needed, perfectly complementing its existing style.
That subtle yet striking floral block design was indeed the missing piece, bringing a cohesive and polished feel to the entire outdoor living area. The combination of geometric structure and delicate floral elements strikes the perfect balance, evoking that sought-after Scandinavian elegance that initially captivated me.
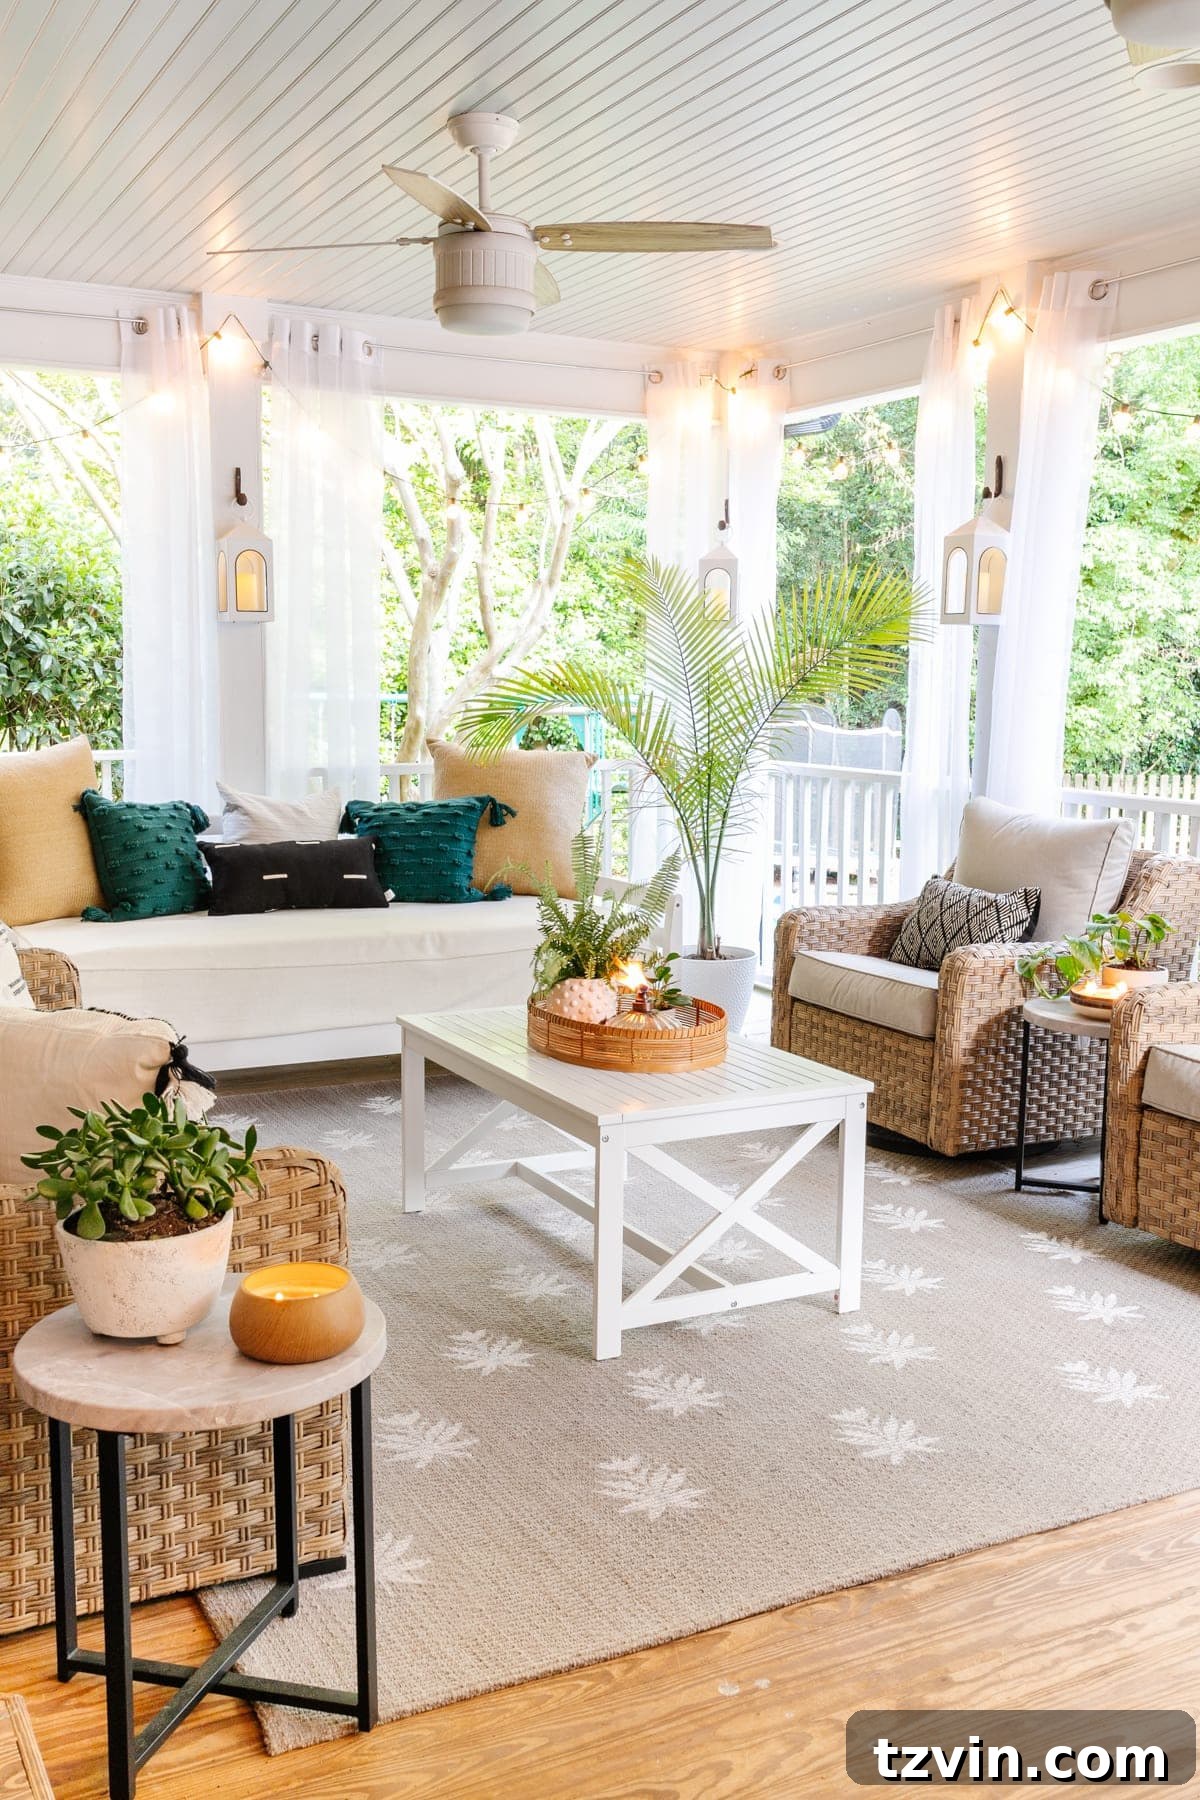
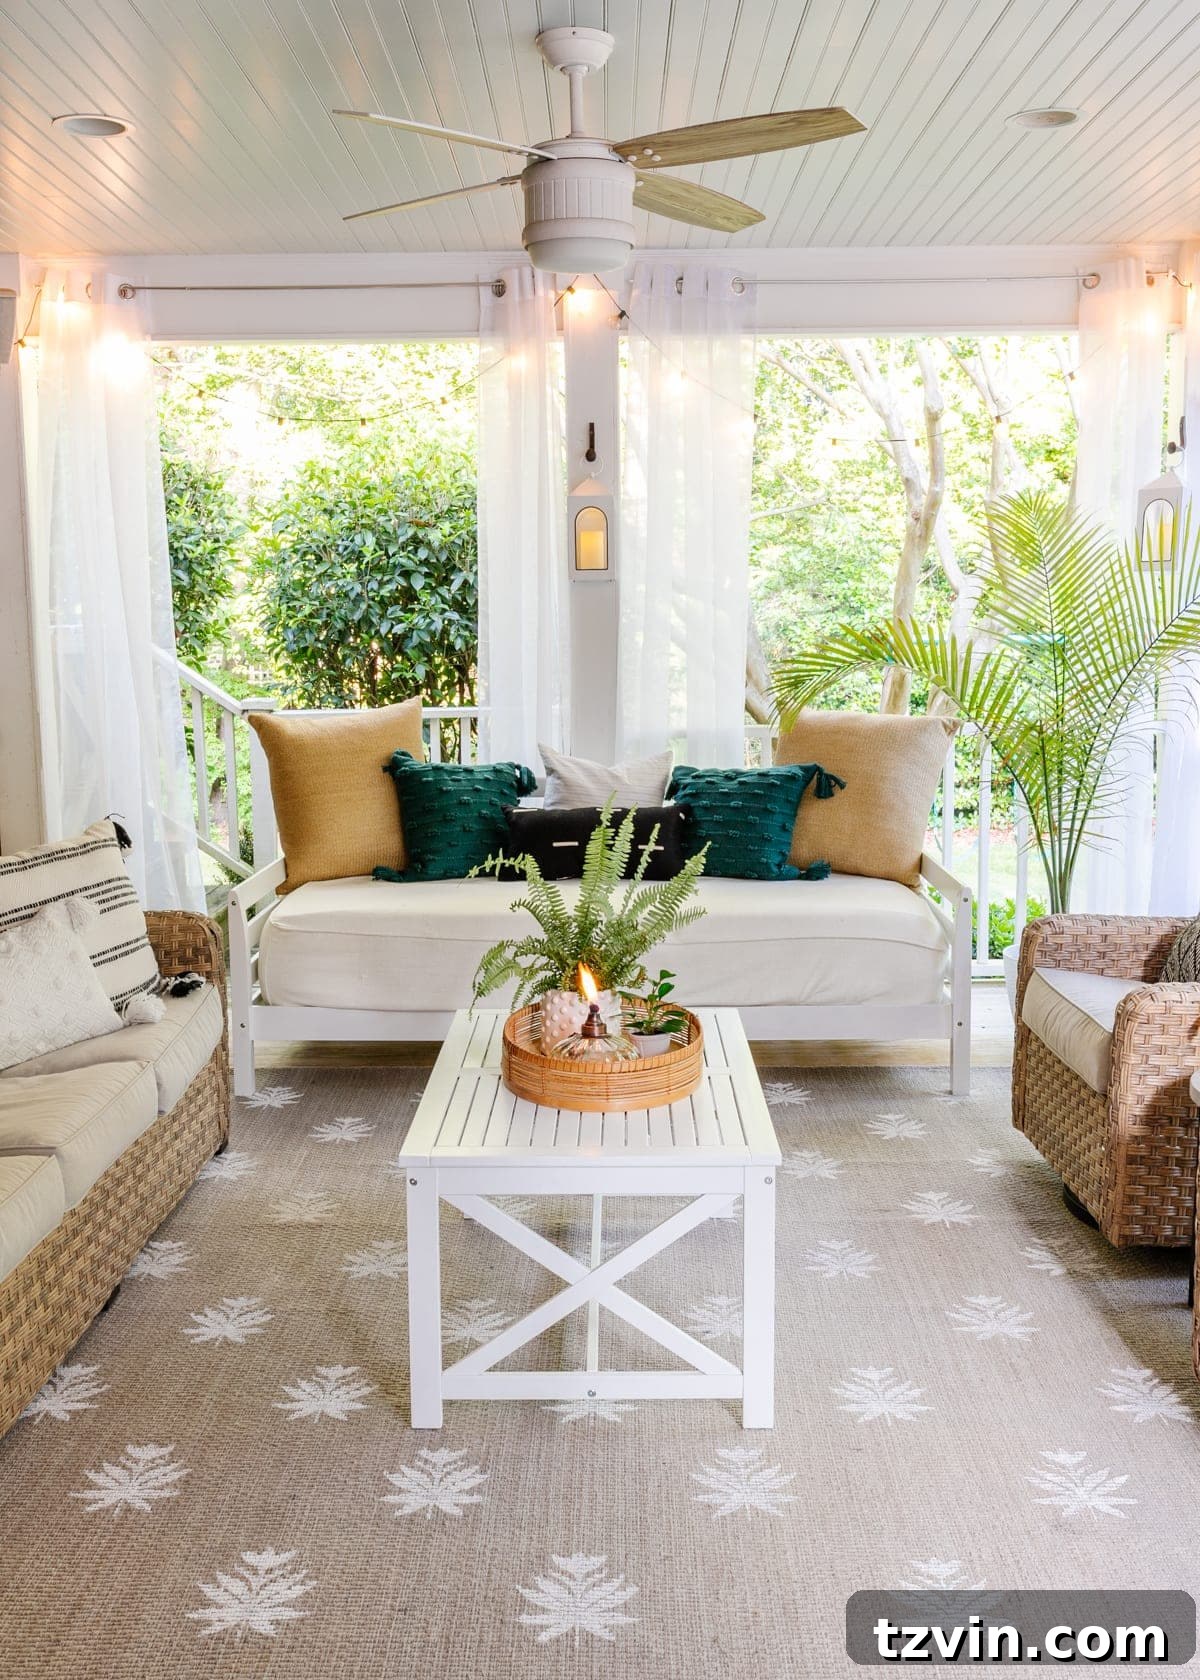
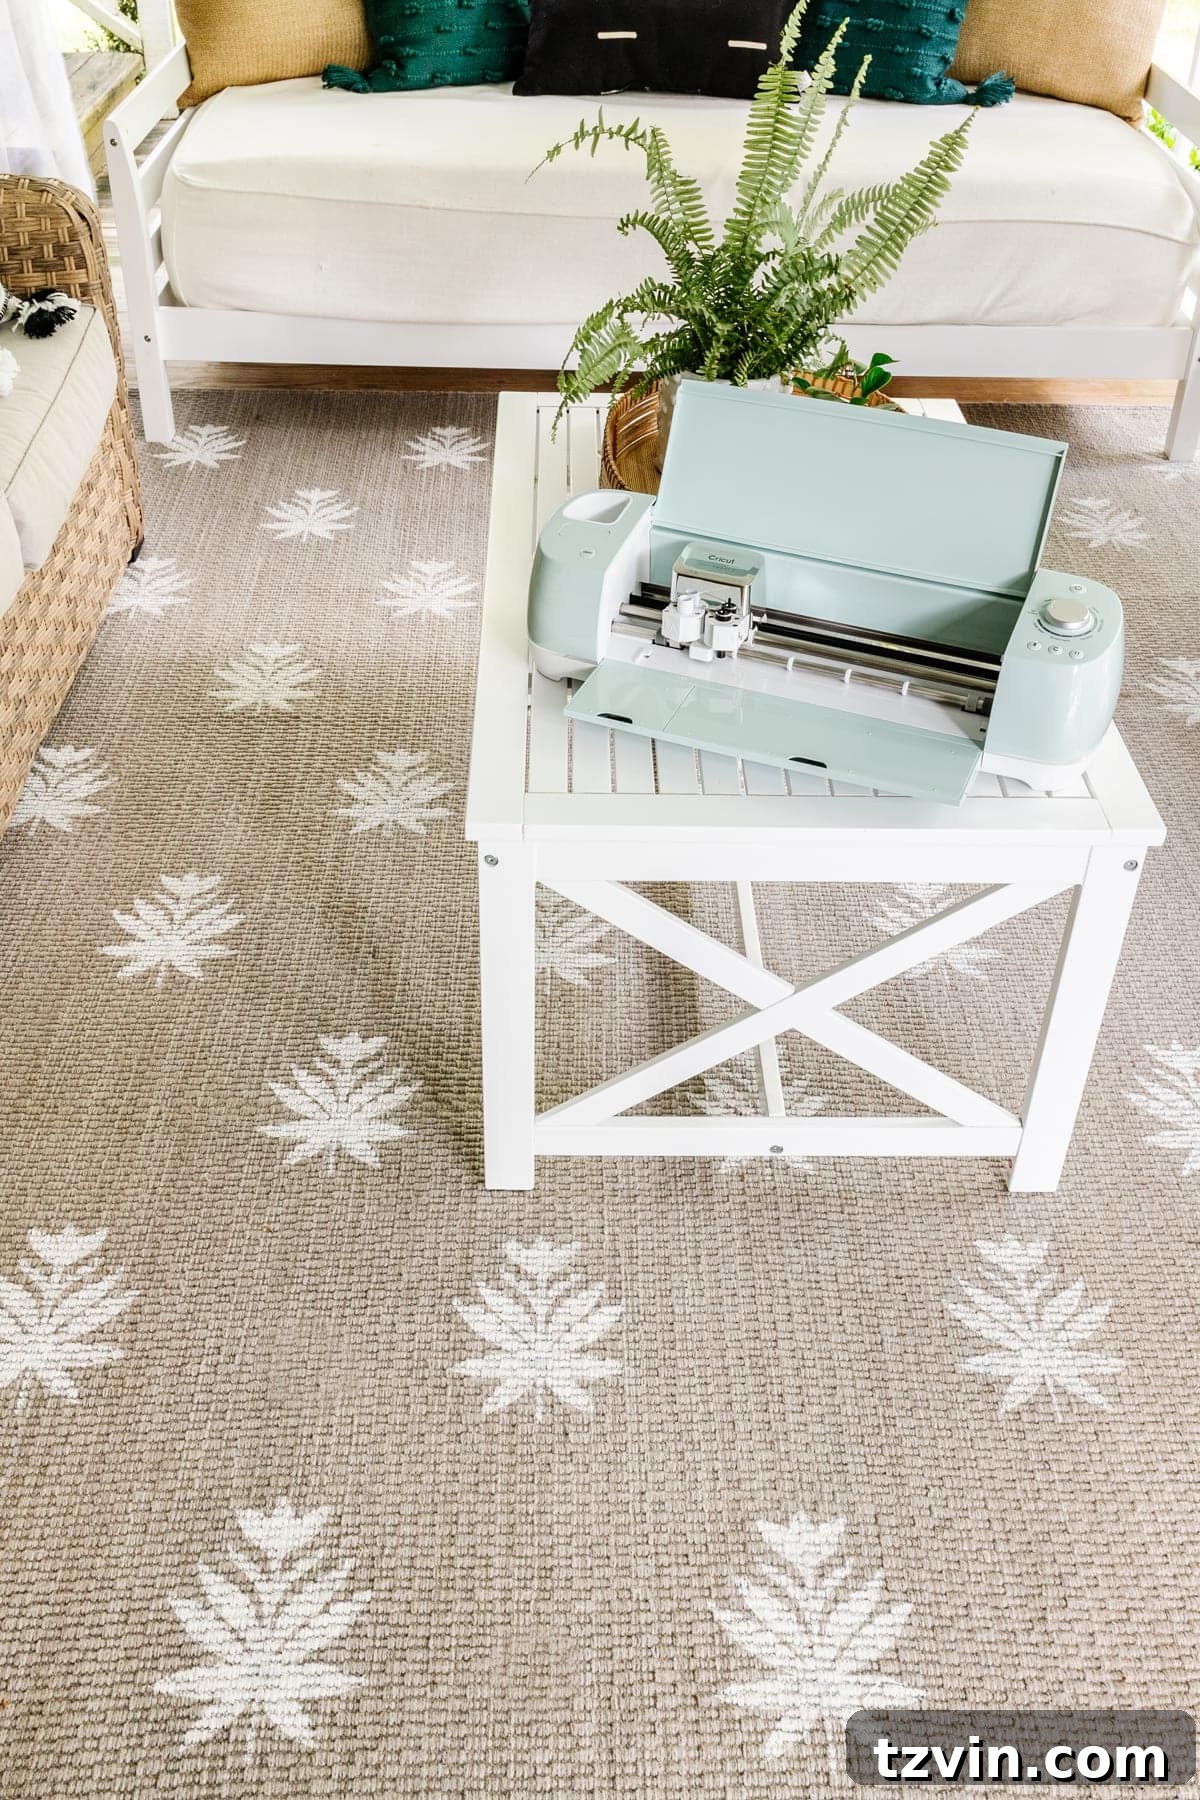
And of course, no outdoor reveal is complete without capturing that magical glow as evening falls. The new rug, illuminated by twinkling lights and candles, adds an extra layer of warmth and ambiance to our porch, making it an even more inviting space for relaxation and entertaining.


This project was so incredibly gratifying that I’m already envisioning other areas of our home that could benefit from a custom stenciled touch. Perhaps a stenciled floor somewhere indoors, or personalized accents on walls and furniture. The possibilities are truly endless once you harness the power of your Cricut machine to create custom stencils.
What are your thoughts on this DIY transformation? Have you ever ventured into stenciling home decor, or are you a seasoned Cricut user with amazing tips to share? As a relatively new Cricut enthusiast, I’m always eager to learn new tricks and techniques from the crafting community!
If you’re inspired to try this project yourself, save it for later inspiration by pinning these images: