
Crafting Our Dream Faux Fireplace: A Comprehensive DIY Guide to Building an Airstone & Whitewashed Mantel
When my husband, Robert, and I first embarked on the exciting journey of selecting upgrades for our new, typical suburban home, a fireplace was undeniably at the very pinnacle of my wish list. I wasn’t even concerned about its functionality; the mere aesthetic presence of a fireplace conjured images of warmth, comfort, and the quintessential feeling of “home.” It felt like an indispensable element for creating a cozy and inviting living space.
However, the hefty price tag of a builder-installed fireplace—a staggering $5,000 for a standard, non-custom unit—quickly put a damper on my aspirations. Living in the Carolinas, where truly cold weather is a rare occurrence, lasting perhaps only a month out of the entire year (a fact that often elicits chuckles from friends in northern states), the practicality of such an expense was hard to justify. Yet, the emotional appeal of a fireplace remained undeniable. That little piece of me felt a pang of sadness during our first Christmas in the new house, just six months after moving in, when there was no mantel upon which to hang our festive stockings. But, as one does, I quickly brushed off this “first-world problem” – after all, I had a beautiful new house!
Fortunately for us, Robert’s incredibly skilled dad came to the rescue. With his invaluable carpentry expertise and guidance, we were able to bring my vision for a custom fireplace to life at a fraction of the cost the home builder had quoted. This DIY approach not only saved us thousands of dollars but also allowed us to create a truly unique piece tailored precisely to our home’s aesthetic. If you’re keen to follow our journey from the very beginning, you can explore the foundational steps in Part One and Part Two of our series, detailing the initial construction of the fireplace frame.
The Transformation Takes Shape: Our Living Room’s New Centerpiece
After an intensive, marathon weekend dedicated to the intricate work of cutting, shaping, and building the stonework, meticulously laying down the hearth, and applying the final coats of paint, our living room has been completely transformed. What once was an empty wall now proudly showcases a magnificent, custom-built faux fireplace!
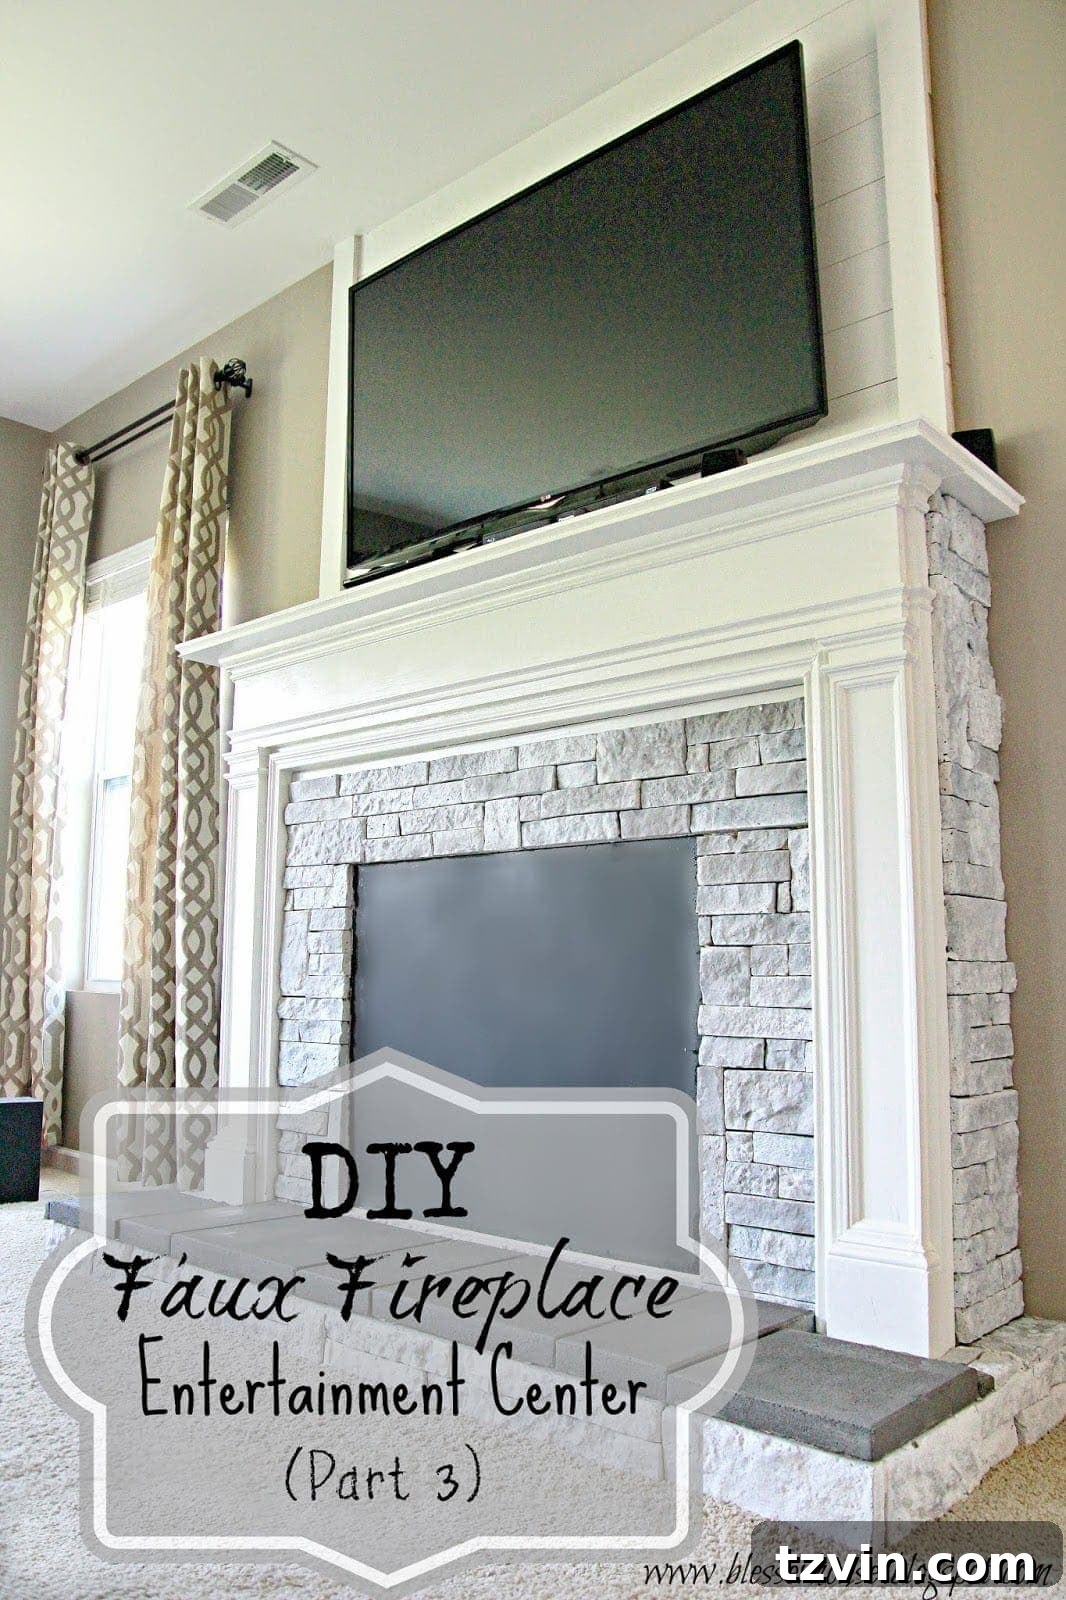
This fireplace is truly a substantial piece, in the best possible way. While we’re still working on a few final touches, we are incredibly close to calling this ambitious project complete.
Essential Supplies for Your DIY Faux Fireplace Project
Embarking on a DIY project like this requires careful planning and the right materials. Below is a comprehensive list of the supplies we used to bring our vision to life. Please note that some links are affiliate links, and for more information regarding this, please refer to my full disclosure.
- Primer: We opted for Kilz Original. This was a crucial choice because our very old, recycled mantel had multiple layers of unknown paint, and Kilz is renowned for its excellent stain-blocking and adhesion properties, ensuring a smooth, uniform base for our new paint.
- White Semi-Gloss Paint: We used Sherwin Williams Pure White. A semi-gloss finish is ideal for high-traffic areas and surfaces that need to be easily cleaned, like a mantel. The Pure White provided a crisp, clean aesthetic that brightens the room.
- 1-1/2 Inch Angle Paint Brush: My Purdy brush is a personal favorite. Its angled bristles are perfect for cutting in clean lines and reaching tricky spots, and it has impressively withstood countless DIY projects.
- Paint Bucket: Essential for holding a manageable amount of paint and making the process cleaner.
- A Cup or Two of Water: Necessary if you plan to create a whitewash effect on your stone, allowing you to dilute the paint to the desired consistency.
- Clean, Lint-Free Rag: Indispensable for dabbing off excess whitewash, cleaning up drips, and ensuring a smooth finish.
- 3 Boxes of Air Stone: Airstone is a fantastic lightweight faux stone product that’s relatively easy to cut and adhere, making it a popular choice for DIY stone projects. Its ease of installation significantly reduces the labor compared to traditional stone veneers.
- 2 Buckets of Air Stone Adhesive: Specifically designed for Airstone, this adhesive ensures a strong and lasting bond. Applying it correctly is key to a durable finish.
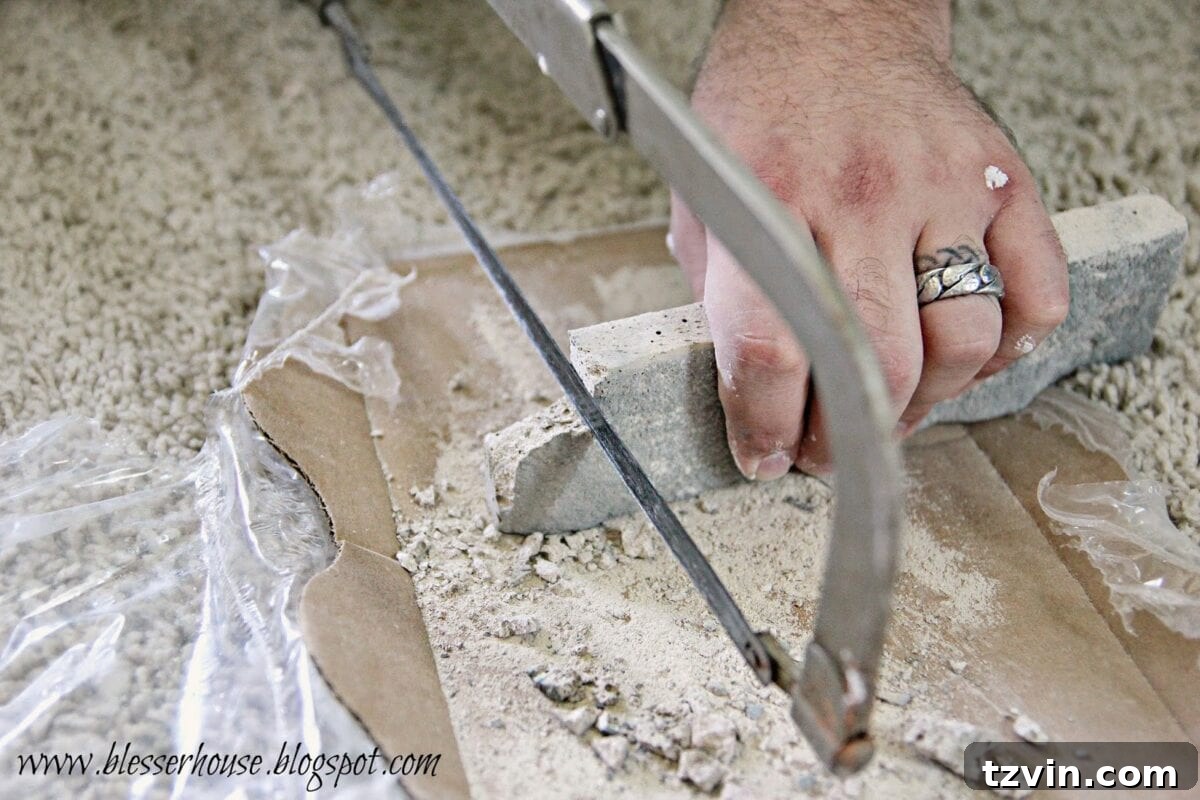
- Hack Saw: The primary tool for cutting Airstone. While it requires some effort, it’s effective for shaping the lightweight stone pieces.
- Putty Knife: Useful for applying adhesive and scraping off any excess that might squeeze out between stones.
- Matte Black Paint: I used some leftover chalkboard paint, which worked perfectly. The matte finish creates a realistic depth for the faux firebox interior.
- 7 Concrete Patio Stones: (Adjust quantity based on your fireplace’s measurements.) These inexpensive, durable stones were repurposed to form the sturdy and attractive hearth of our fireplace, providing a solid and rustic base.
Step-by-Step Guide to Building and Whitewashing Your Faux Fireplace (Part 3)
Following the construction of the basic frame and the plank wall that creates the illusion of a chimney, our next phase involved painting the woodwork and tackling the stone facade. This stage is where the fireplace truly began to take on its character and charm.
First, we meticulously primed and painted all of the wood elements with Sherwin Williams Pure White in a semi-gloss finish. To keep costs down without compromising on quality, we had this high-quality paint mixed into a more affordable can of Valspar paint. This careful preparation ensures a uniform, durable, and aesthetically pleasing base for the entire structure.
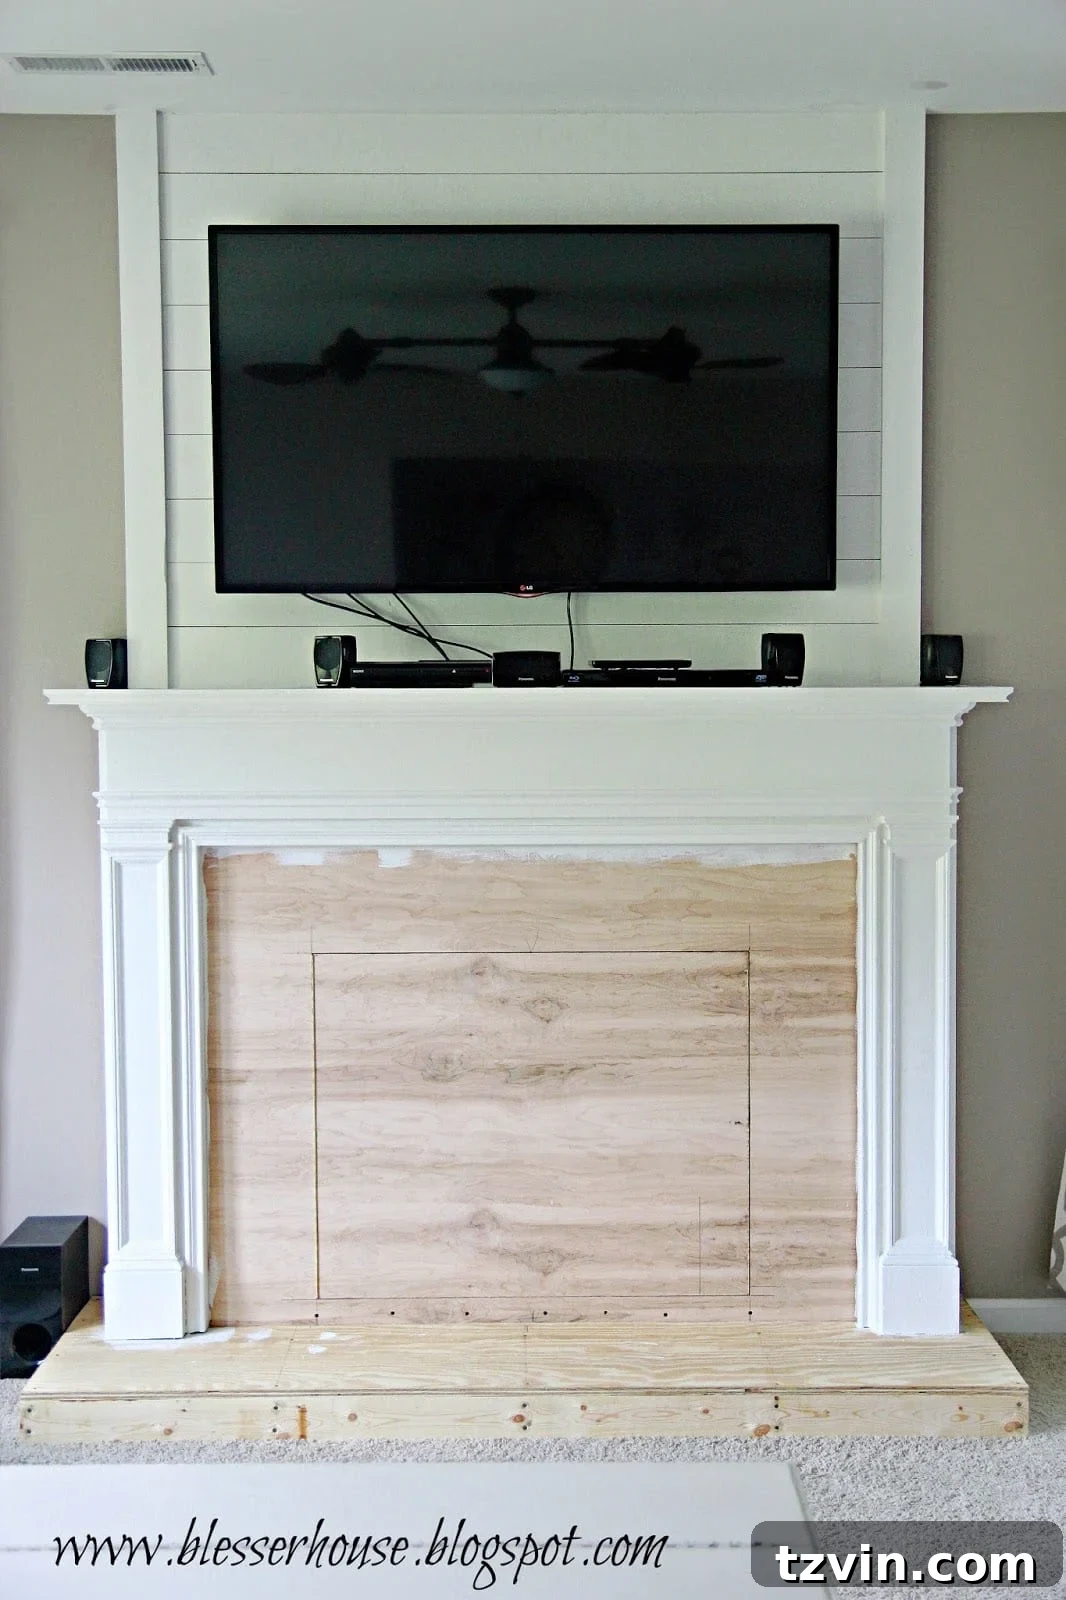
Creating the Faux Firebox and Hidden Storage
For the interior of the faux firebox, which I’ll delve into with much more detail in Part 4 (and hopefully the final installment of this series!), I opted to paint the interior access door with some leftover chalkboard paint. This matte black paint is not only versatile, having been used for countless projects around our home, but it also creates a deep, authentic look for the fireplace’s opening.
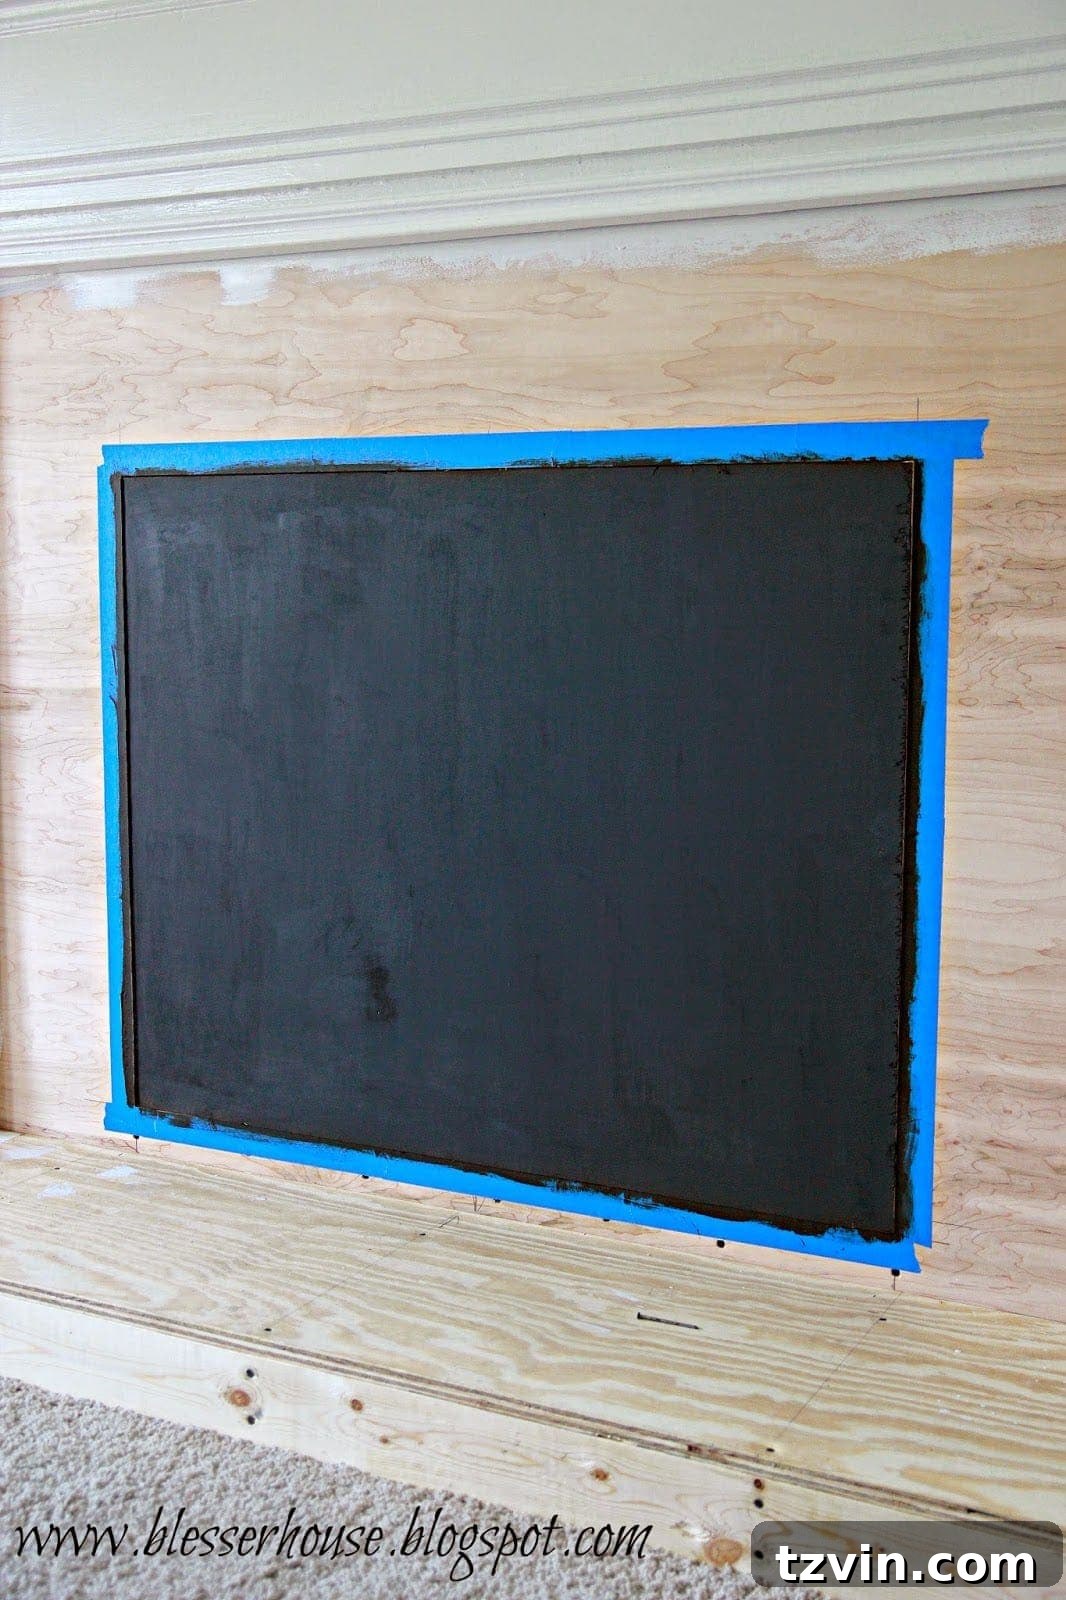
The ingenuity of this design lies in its hidden functionality. This painted door masterfully disguises our “command central” – a secret access point to the electrical outlet on the wall behind the fireplace. More importantly, it conceals all of our television and media center wiring, along with the various devices. It’s a chaotic tangle of cables and gadgets back there, but thankfully, with the door closed, it’s completely out of sight, maintaining a clean and uncluttered living space. This feature is a game-changer for modern home aesthetics, offering practical storage without sacrificing style.
Embracing the Whitewashed Airstone Look
Initially, I envisioned a warm gray ledgestone for our hearth and fireplace surround. However, after considering both the cost and the relative ease of installation, Airstone emerged as the most sensible and budget-friendly option. What truly excited me was the prospect of experimenting with whitewashed Airstone. I hadn’t found many tutorials for this specific technique online, so I decided to take the plunge and see what magic we could create. After all, there’s only one way to find out if it works, right?
To prevent any accidental whitewash splatters on our newly installed carpet, I adopted a proactive approach. I first dry-fitted all the Airstone pieces along the bottom edge of the hearth. This allowed me to map out their placement and ensure a perfect fit before any permanent adhesion or painting began.
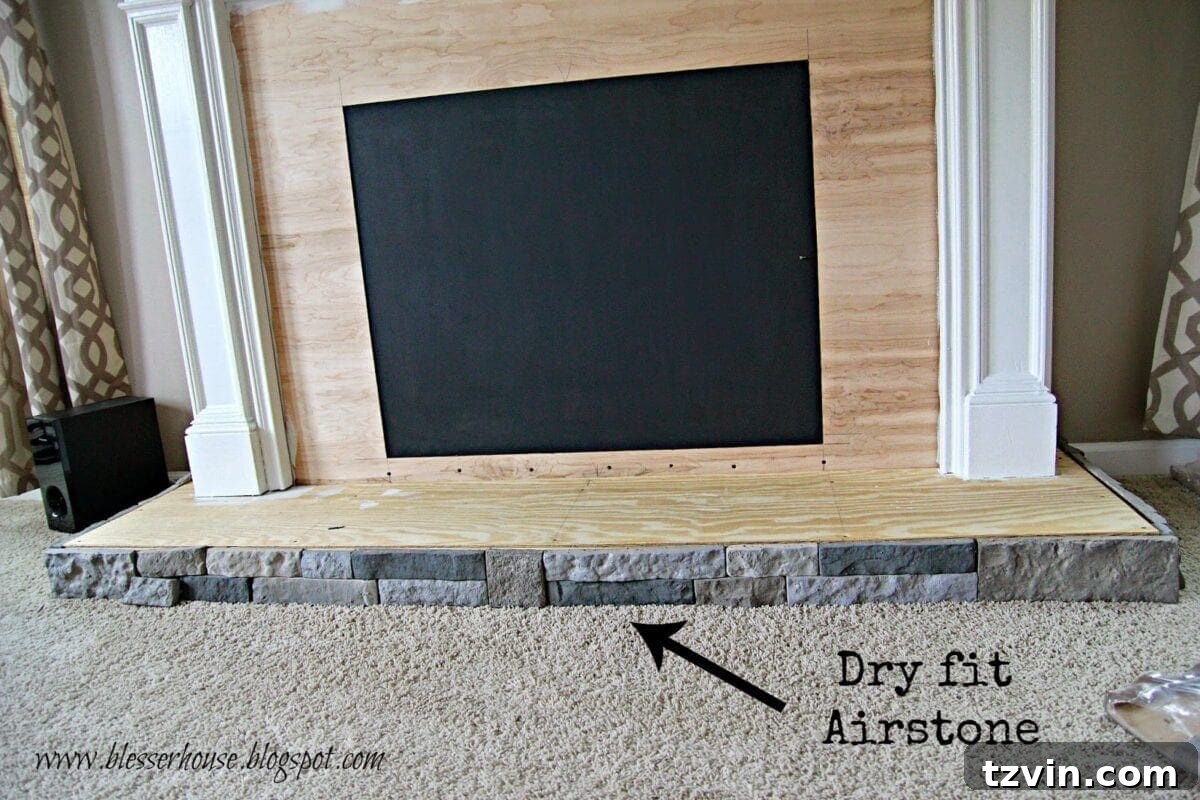
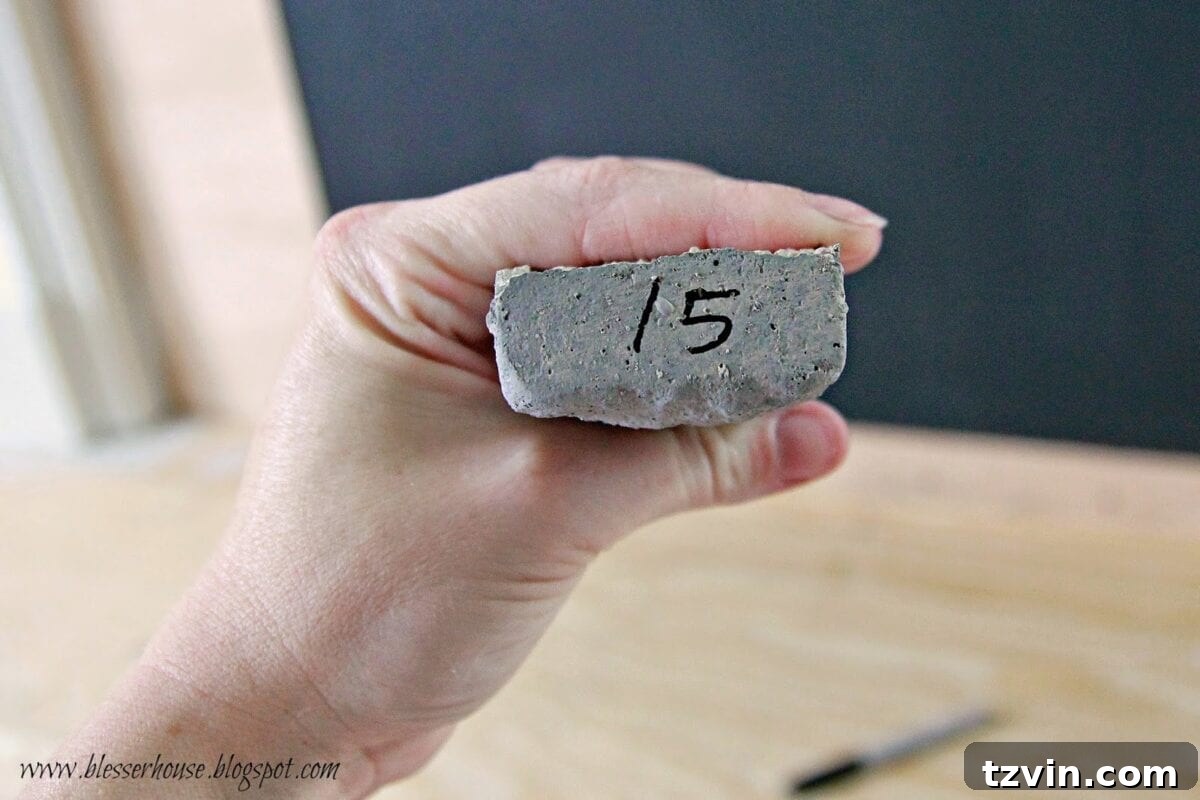
Once the dry-fit was complete, I carefully numbered each end of the stone pieces. This simple yet effective organizational step was crucial, as I transported all the stones to our garage for the whitewashing process. The numbers, though faintly visible, remained just clear enough after the whitewashing to easily put each piece back in its designated spot, ensuring a seamless reassembly.
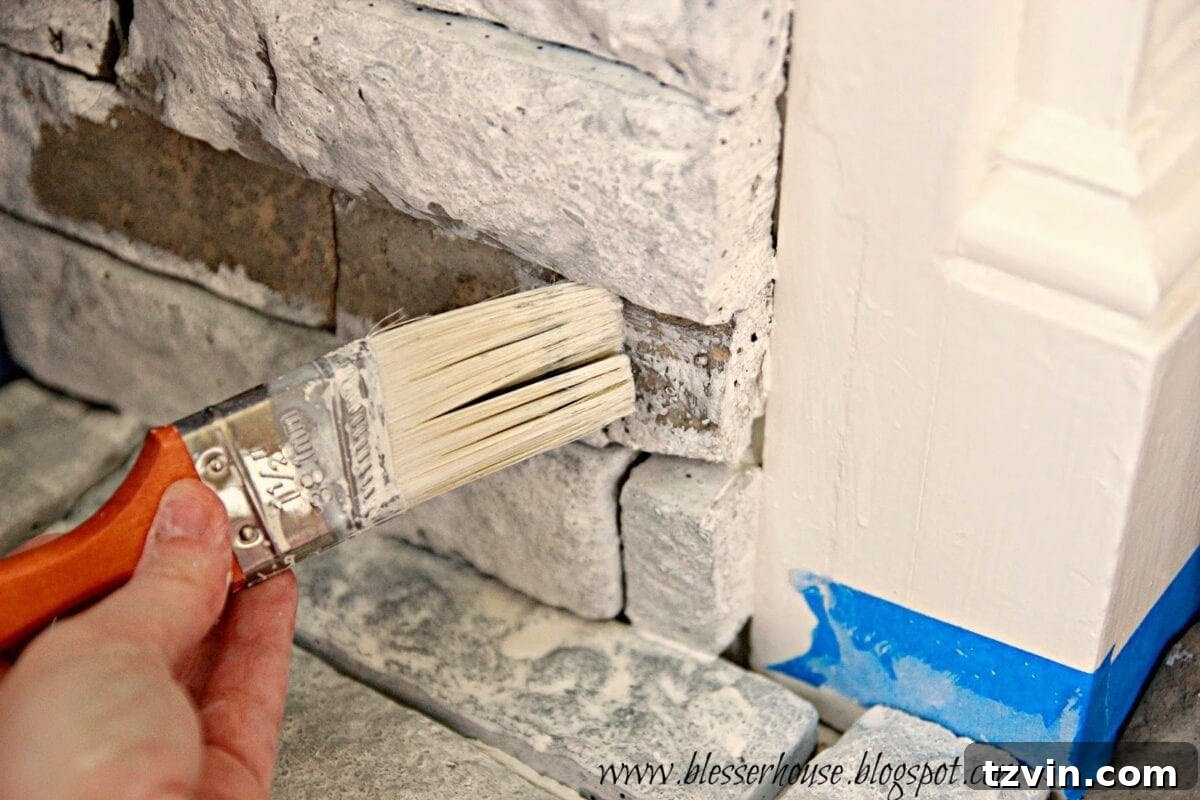
For the whitewash mixture itself, I used the same Sherwin Williams Pure White paint that we applied to the mantel. The ideal ratio was one part paint to one part water. This dilution creates a translucent wash that allows the natural texture and some of the original stone color to show through, resulting in a beautifully soft, aged appearance.
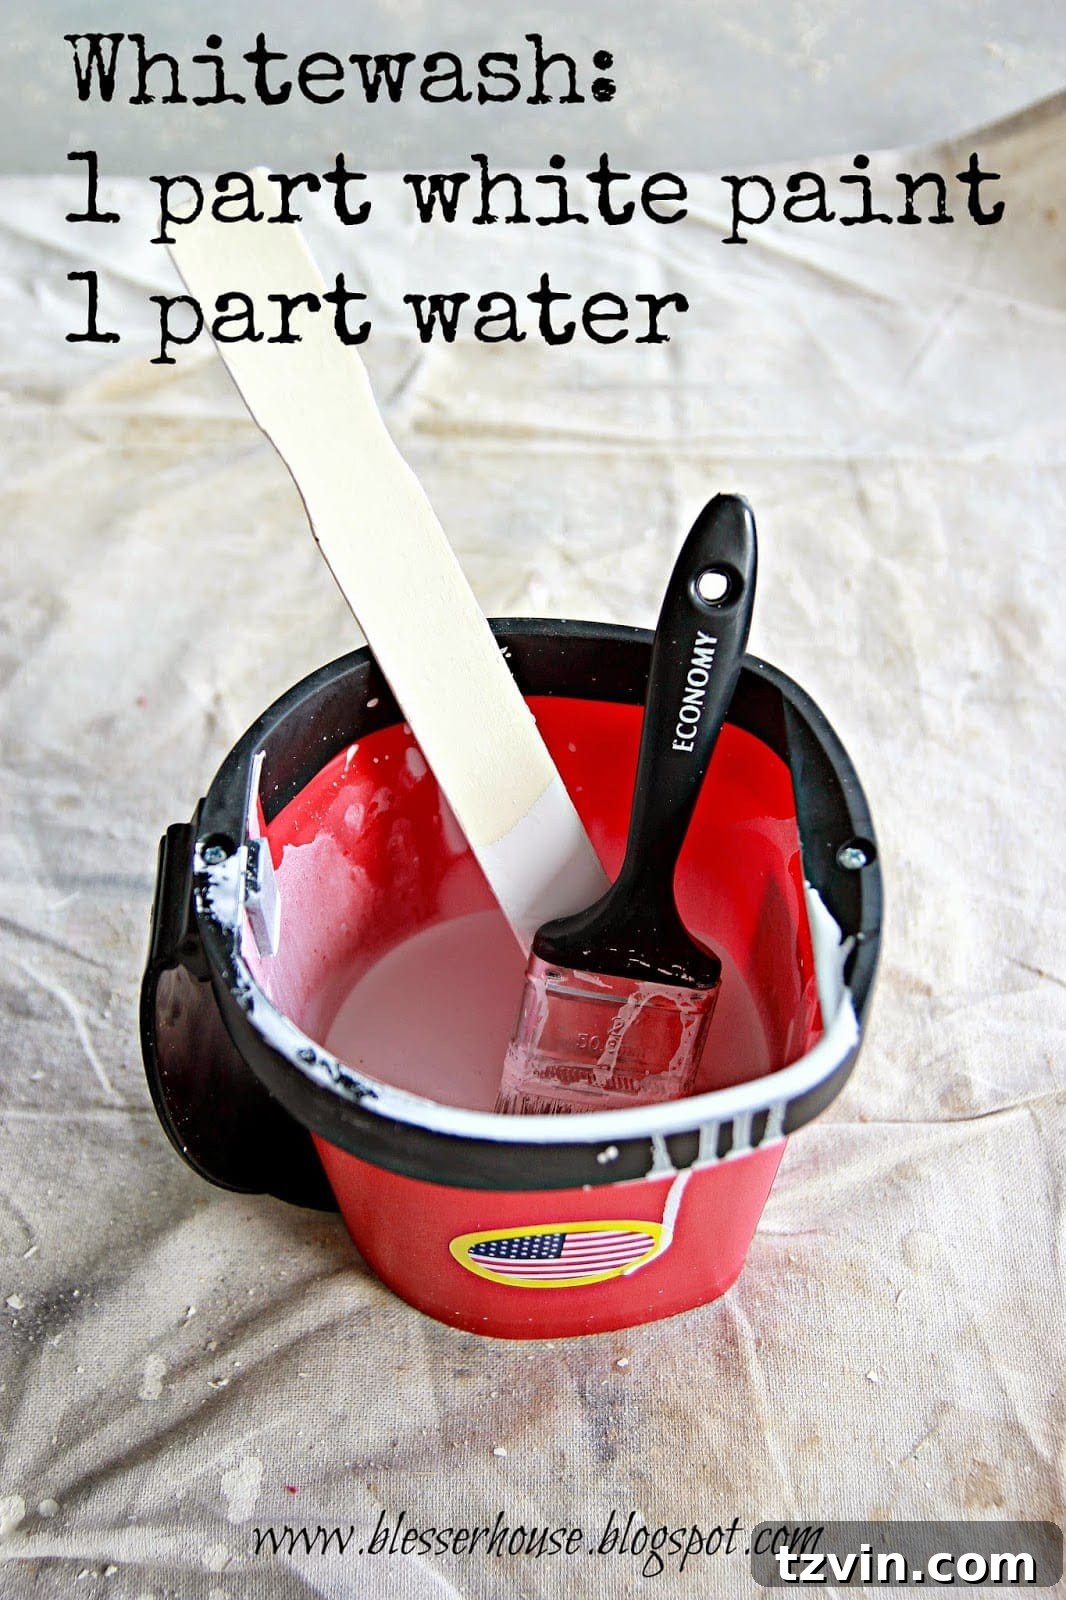
Applying the whitewash was straightforward: I simply swiped the diluted paint onto each stone piece using a standard paintbrush. The goal wasn’t to achieve opaque coverage but rather a light, even coating.
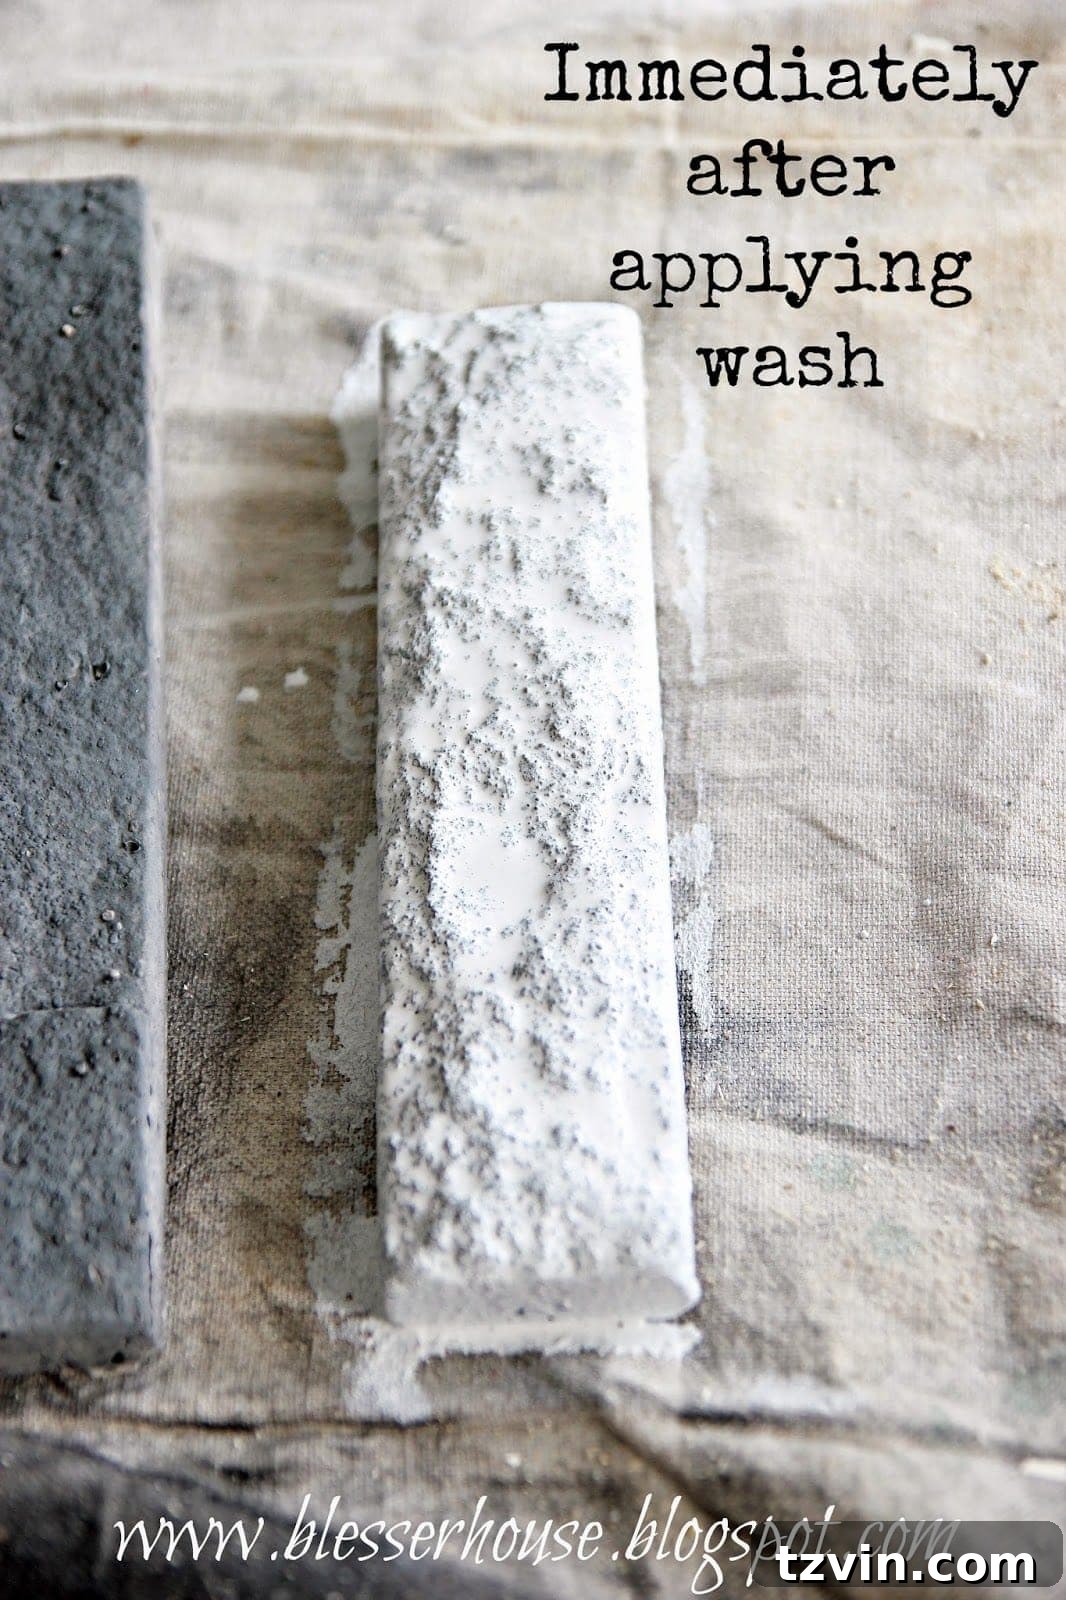
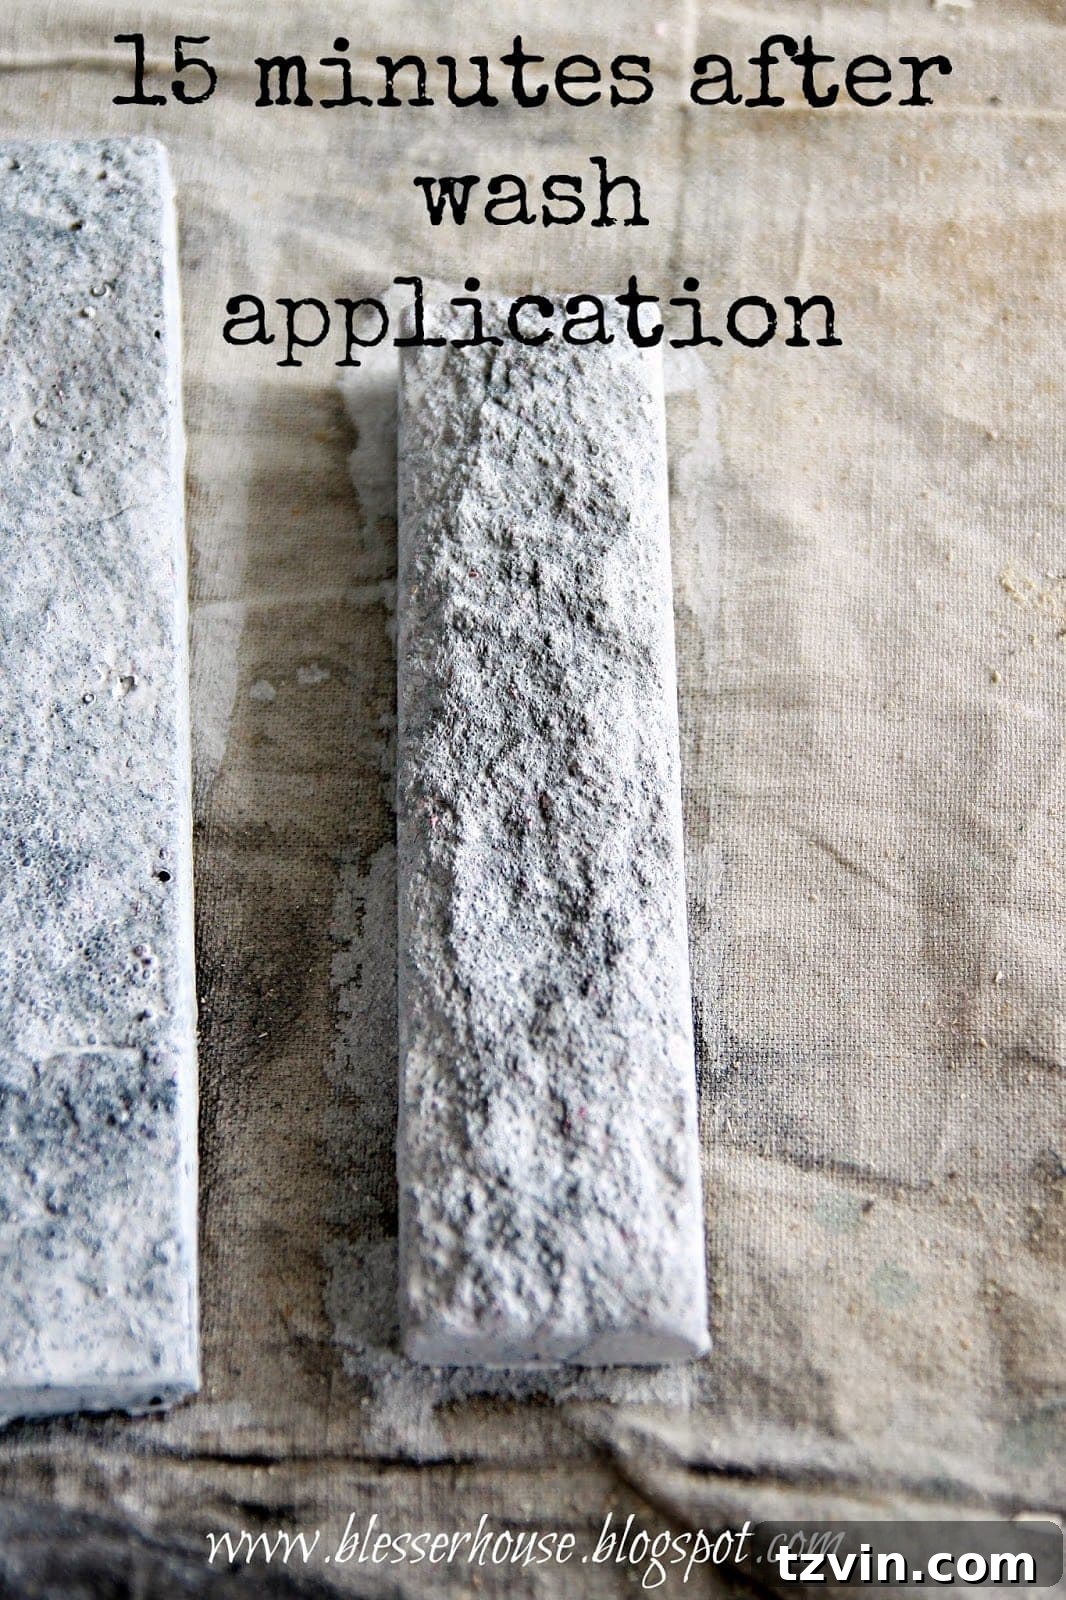
After applying the wash, it’s essential to let it set for a minute or two. The porous nature of the Airstone allows it to absorb a significant amount of the mixture. Following this brief absorption period, I gently dabbed off any excess paint with a clean, lint-free rag. This step is critical for achieving that desirable soft, translucent whitewashed effect, preventing the paint from looking too heavy or opaque.
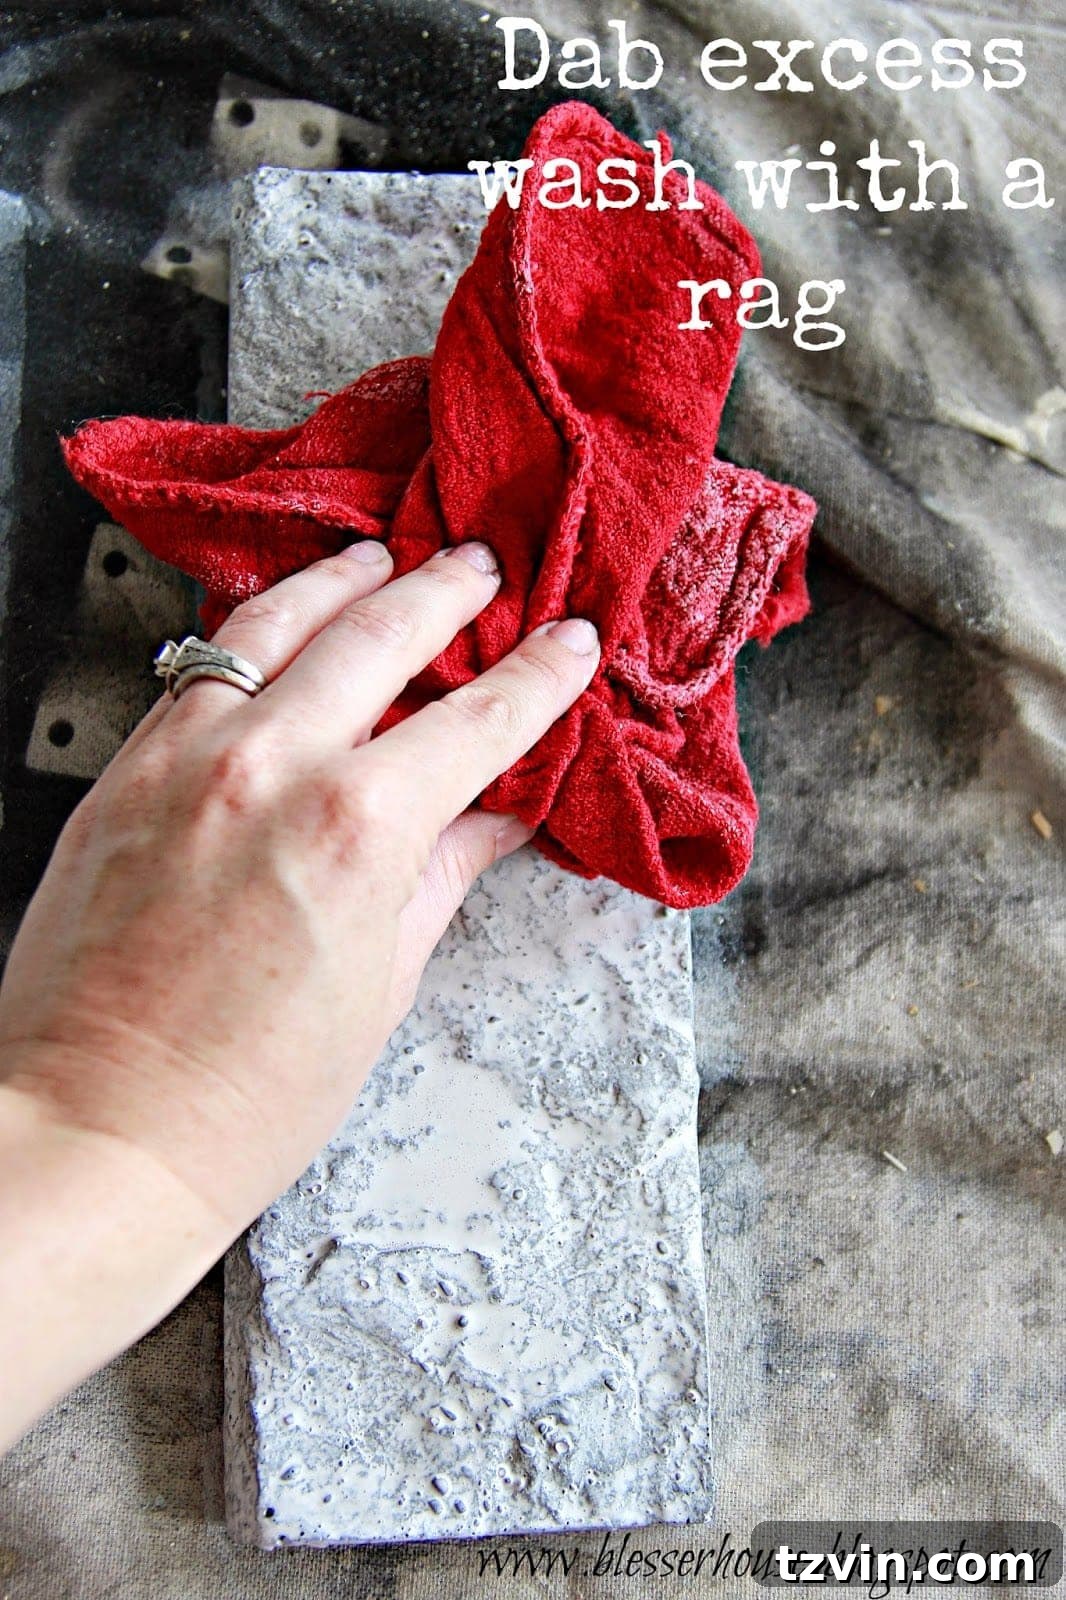
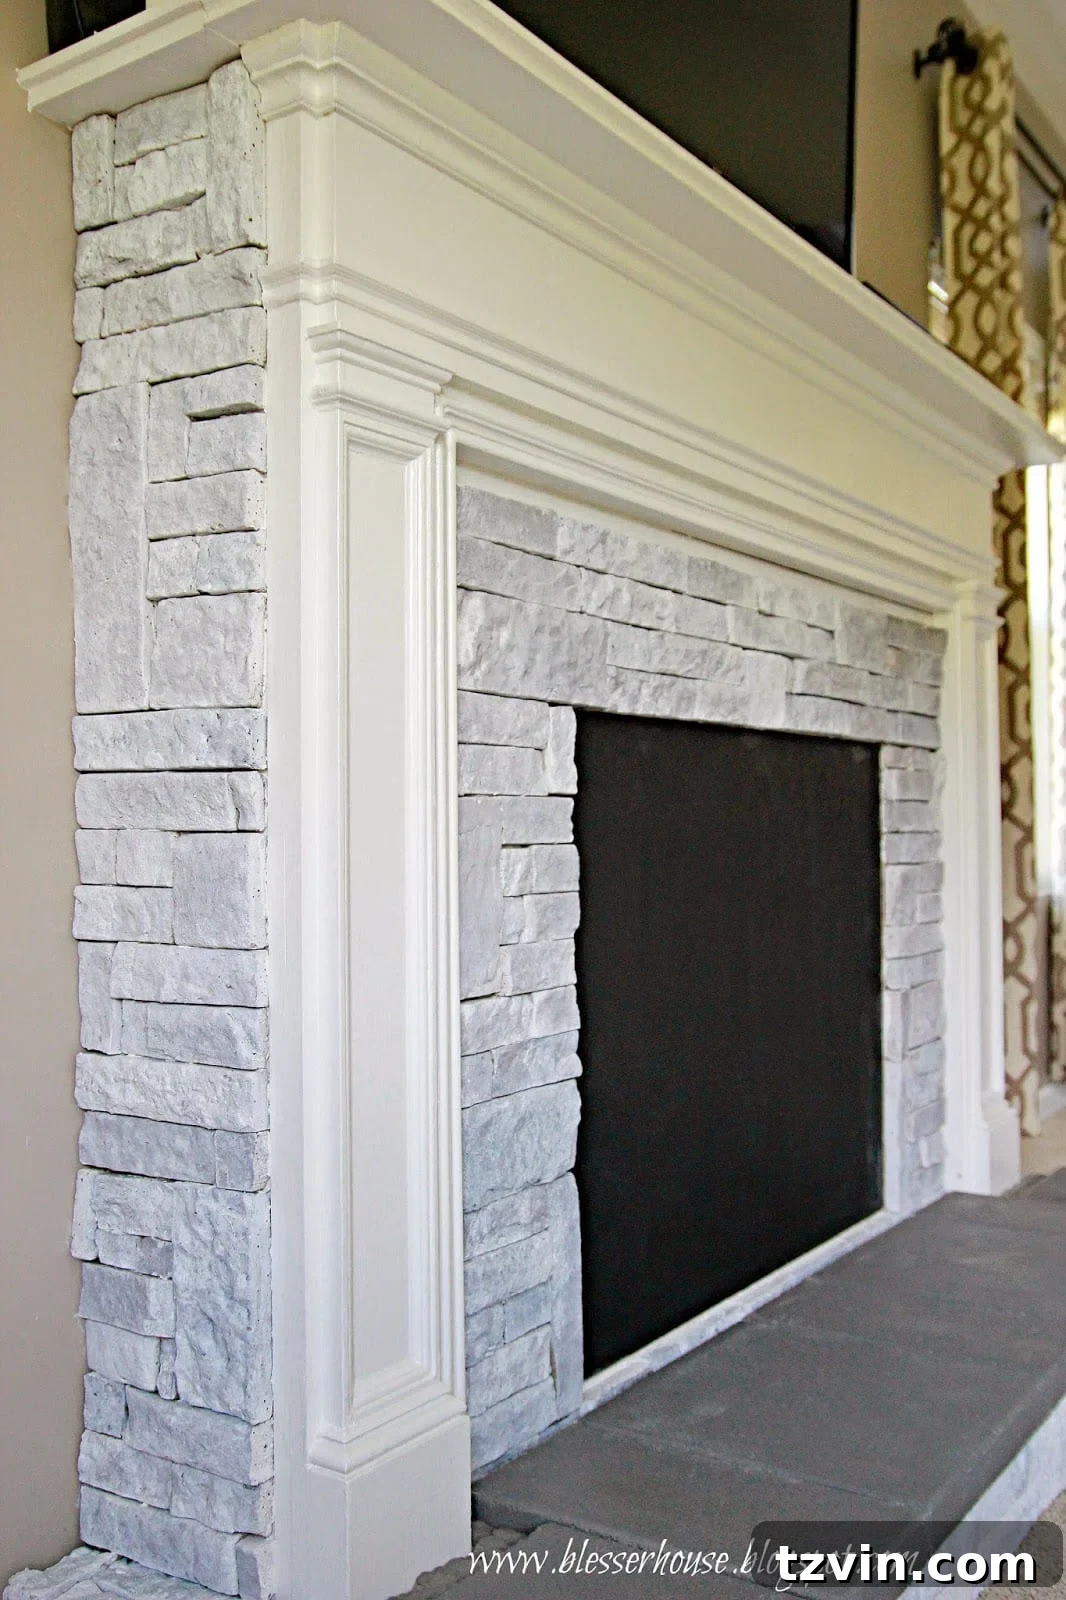
The result was exactly what I had hoped for. After dabbing off the excess and allowing the wash to settle, the Airstone displayed just the right amount of gray tone peeking through the white. It created a beautifully subtle and sophisticated finish that still allowed the natural texture of the stone to be appreciated.
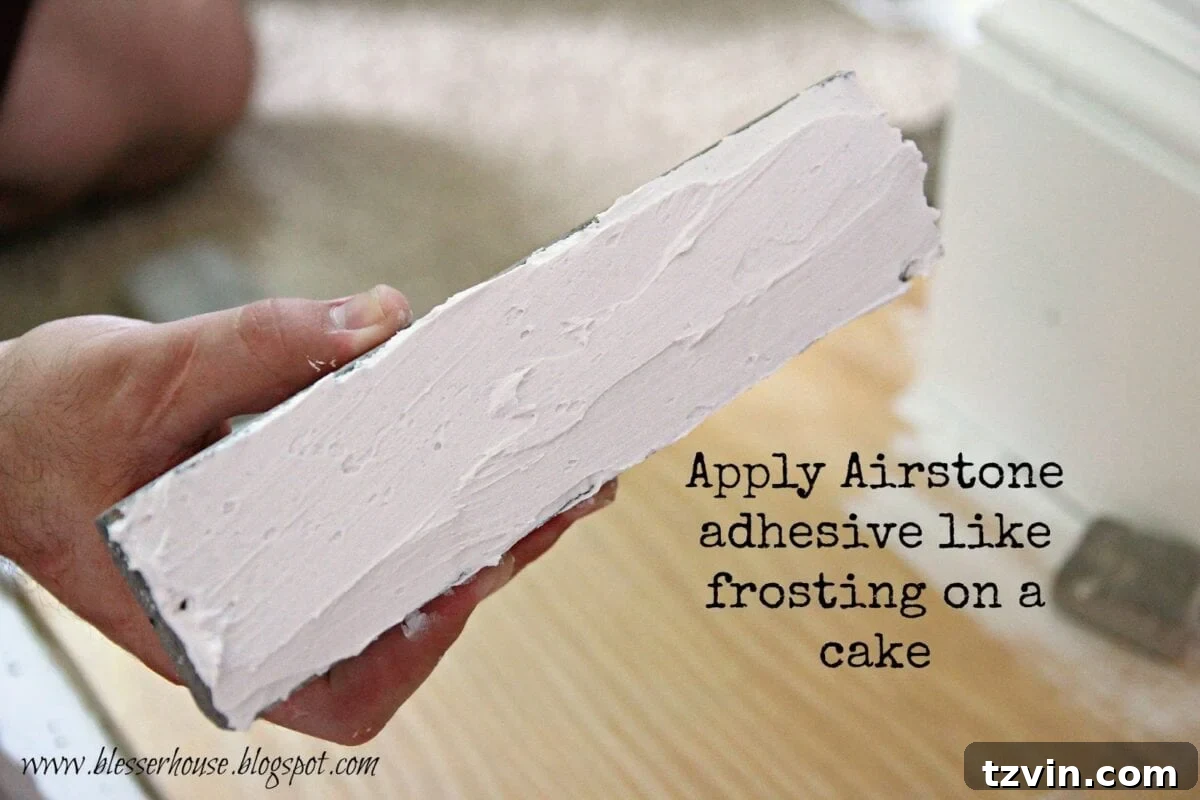
With the whitewashing complete, Robert and I began the task of adhering the stone to the hearth. We discovered that applying the Airstone adhesive generously, much like “frosting on a cake,” provided the best adhesion. Simply applying it like “butter on bread” wasn’t quite enough to ensure a secure bond. Any excess adhesive that squeezed out from between the stones could easily be scraped off with a putty knife once the stone was pressed firmly into place.
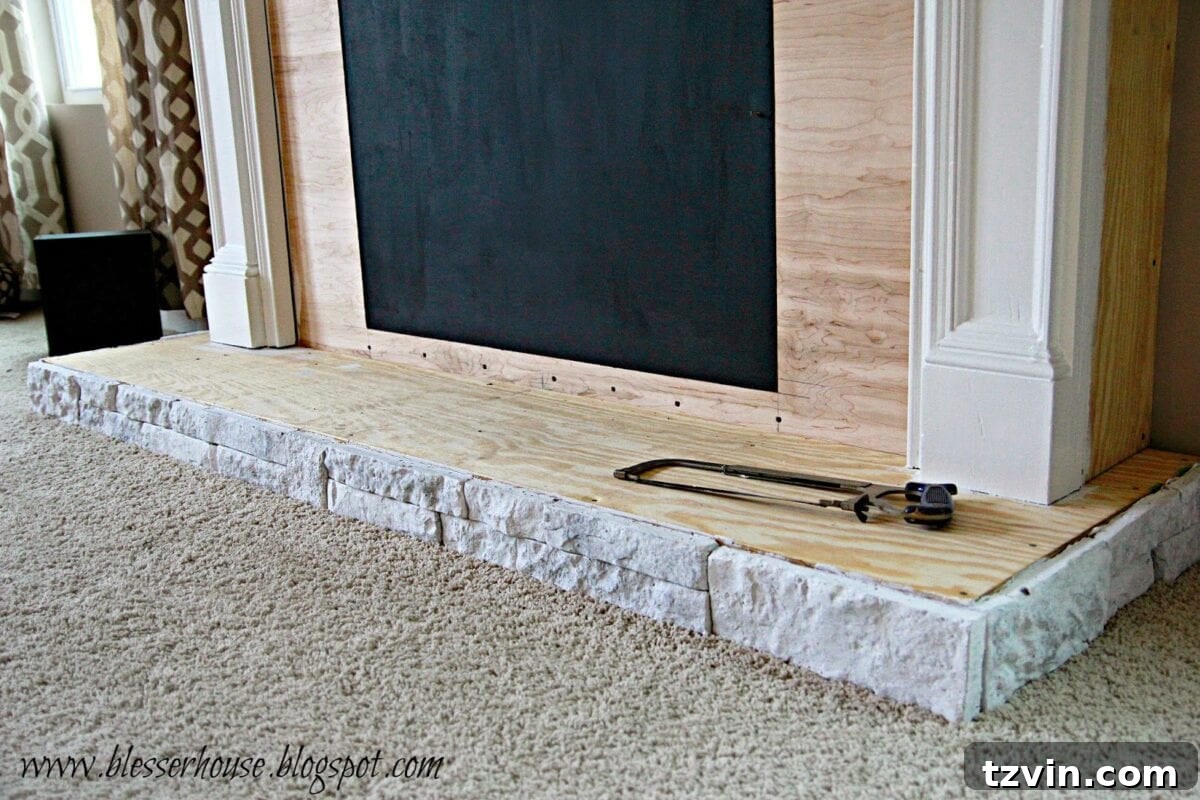
Progress was steady, but the work was indeed intensive. We quickly completed the first 30 stone pieces for the hearth – a satisfying milestone, with many more to go to complete the entire fireplace surround!
Compared to other stone veneers on the market, Airstone is indeed easier to work with. However, “easy” is a relative term when it comes to such a comprehensive project. The entire fireplace, from start to finish, still consumed an entire weekend. We estimated that we collectively clocked about 15 hours on this ambitious endeavor. Robert, with his impressive strength and patience, handled the hacksaw for approximately 99% of the time. This was largely due to my less-than-efficient stone-cutting skills, which took me twice as long! Perhaps he also enjoyed demonstrating his “macho” carpentry prowess (and just so you know, the hairy hand you might spot in some photos is definitively not mine!).
To ensure a solid base for the upper sections, we began by attaching the Airstone to the bottom of the fireplace surround first. This strategic approach allowed us to then build upwards, carefully layering the stones onto the top of the hearth, creating a cohesive and stable structure.
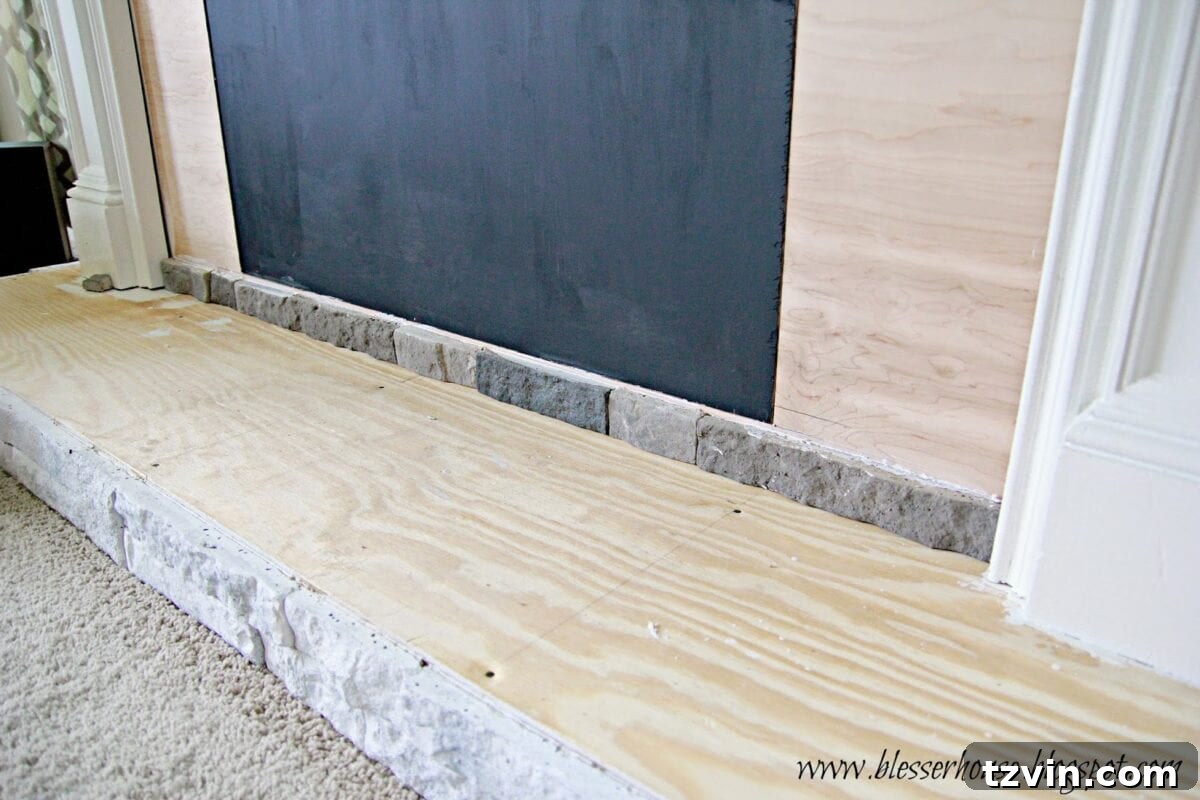
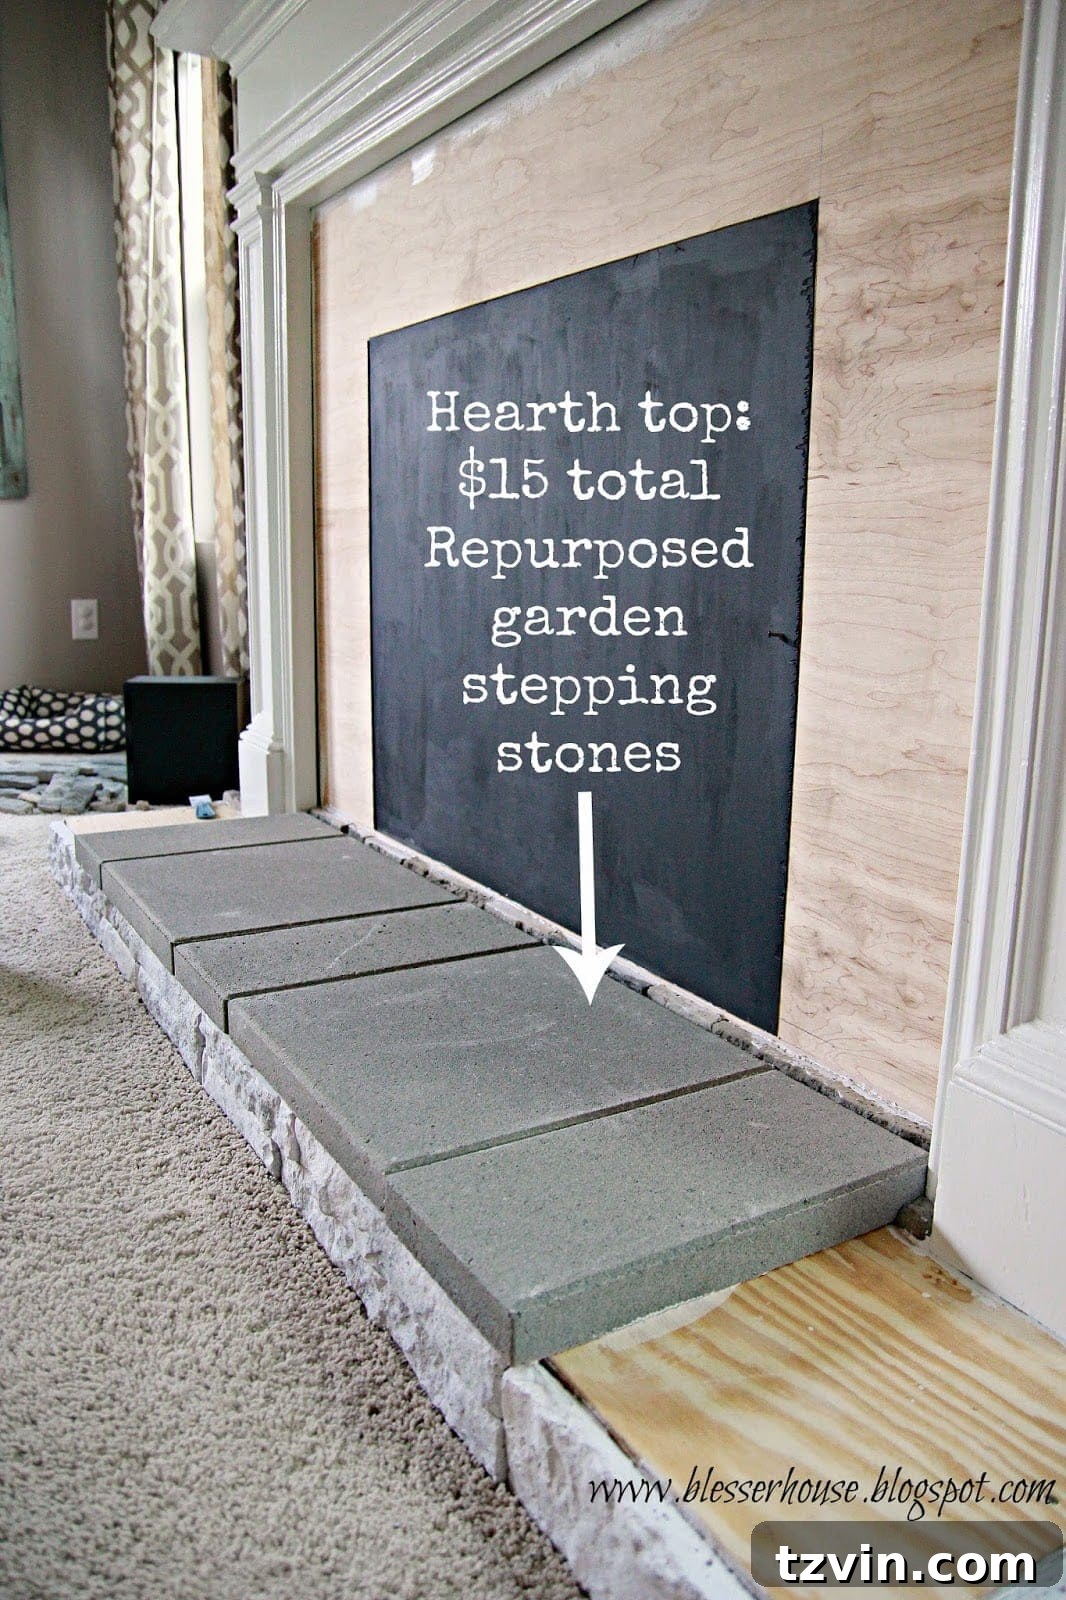
The choice for the hearth material involved considerable discussion. Ultimately, the most cost-effective, straightforward, and durable solution proved to be repurposing concrete stepping stones from the garden department of Lowe’s. At approximately $2 each, these heavy, robust stones were an unbeatable value. We secured them firmly in place with adhesive, guaranteeing they wouldn’t shift – they’re not going anywhere!
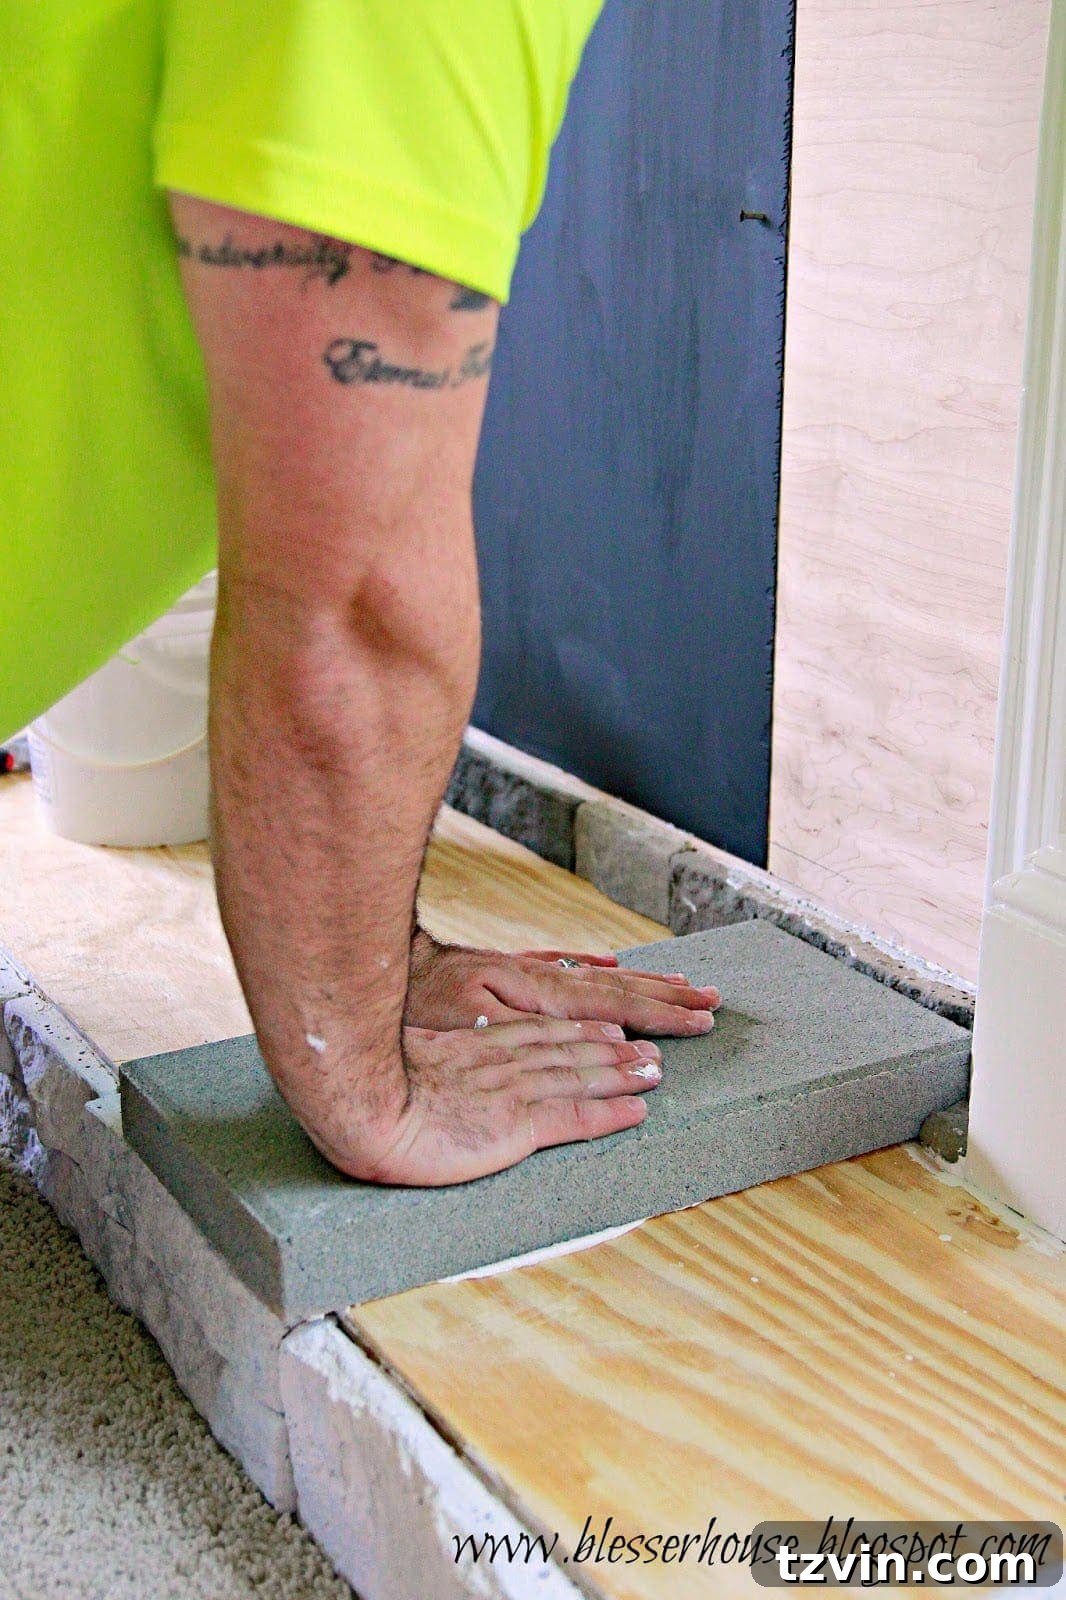
At this stage, I admit it looked a bit raw, perhaps even a touch “redneck chic” as a temporary phase. But bear with me; the transformation was still underway!
As we continued adhering the Airstone to the surround, we encountered a minor but tricky issue at the very top. We realized we were about half a stone’s height short of reaching the top edge cleanly. Cutting 6-8 stones lengthwise with a hacksaw was simply not feasible; they would undoubtedly crumble into unusable pieces. Our innovative solution was to install a thin strip of wood trim at the top of the surround, which we then painted white to seamlessly blend with the mantel. Additionally, we strategically spaced out some of the upper stones using popsicle sticks. These small sticks created just enough of a gap to make a difference, preventing an awkward strip of bare wood at the very top of the stone facade and ensuring a continuous, finished look.
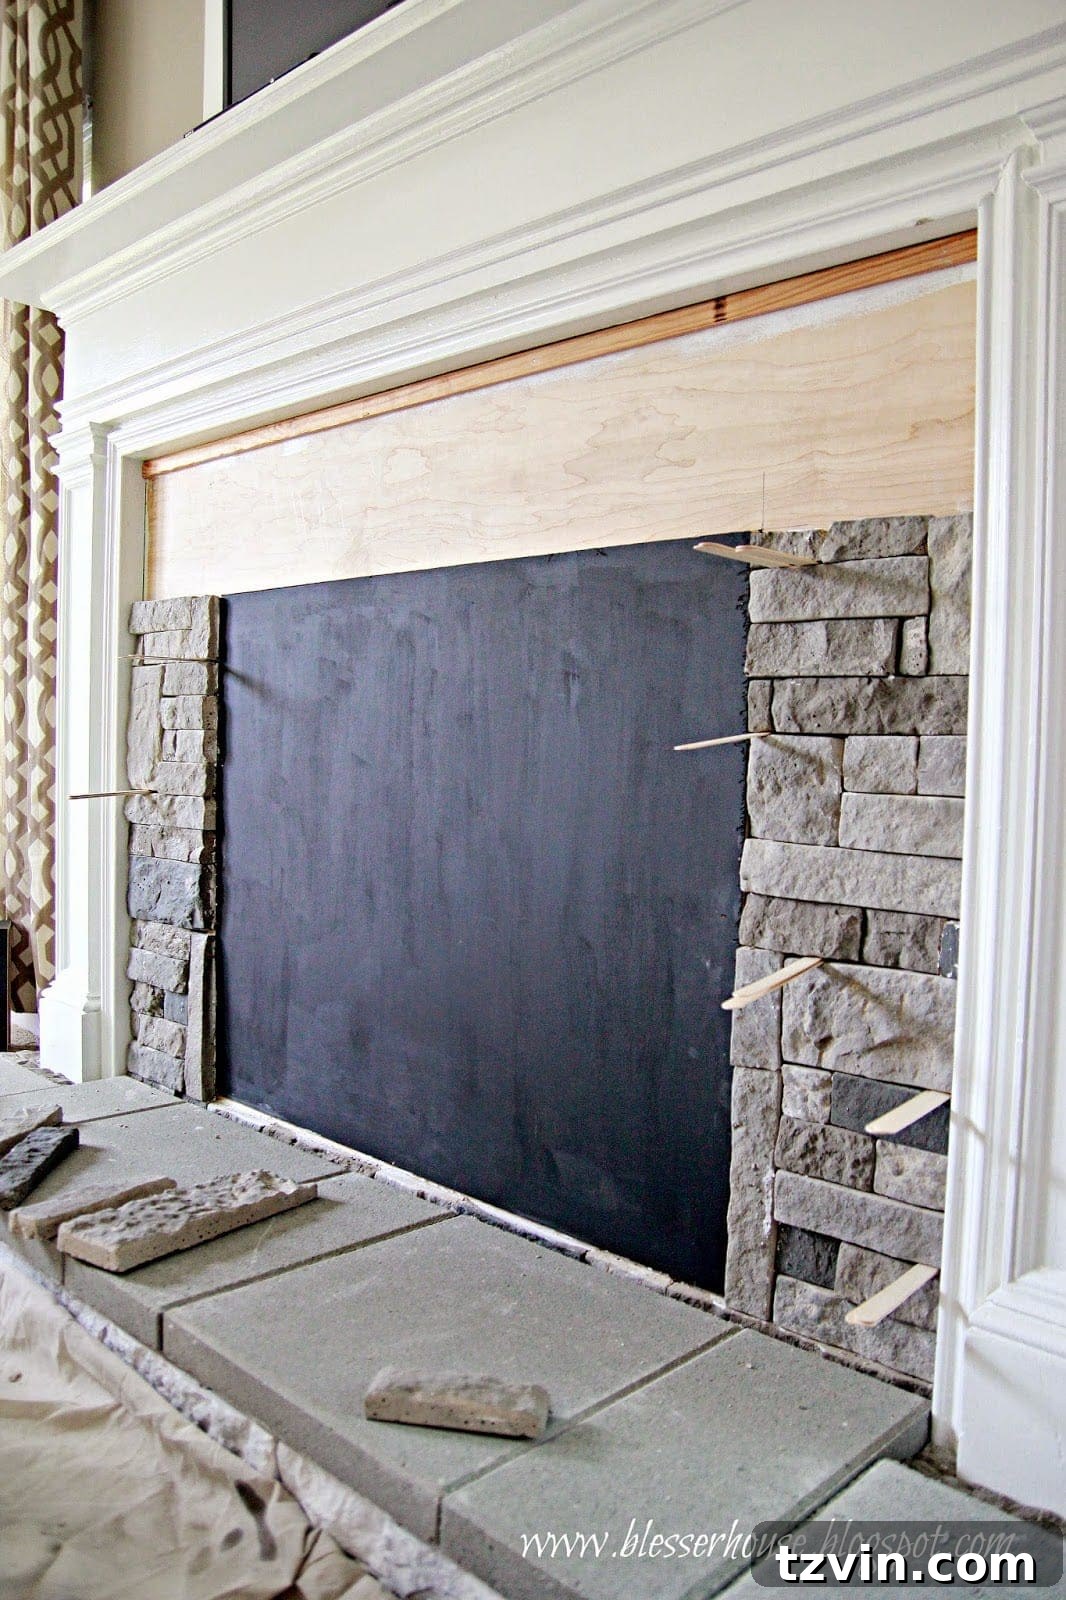
Another challenging point was applying stones to the top of the firebox opening. Without any underlying support, the stones would simply fall before the adhesive had a chance to dry. Our solution once again involved the humble popsicle stick. We carefully wedged more popsicle sticks into the top of the doorframe, creating temporary supports that held the stones firmly in place until the adhesive fully cured.
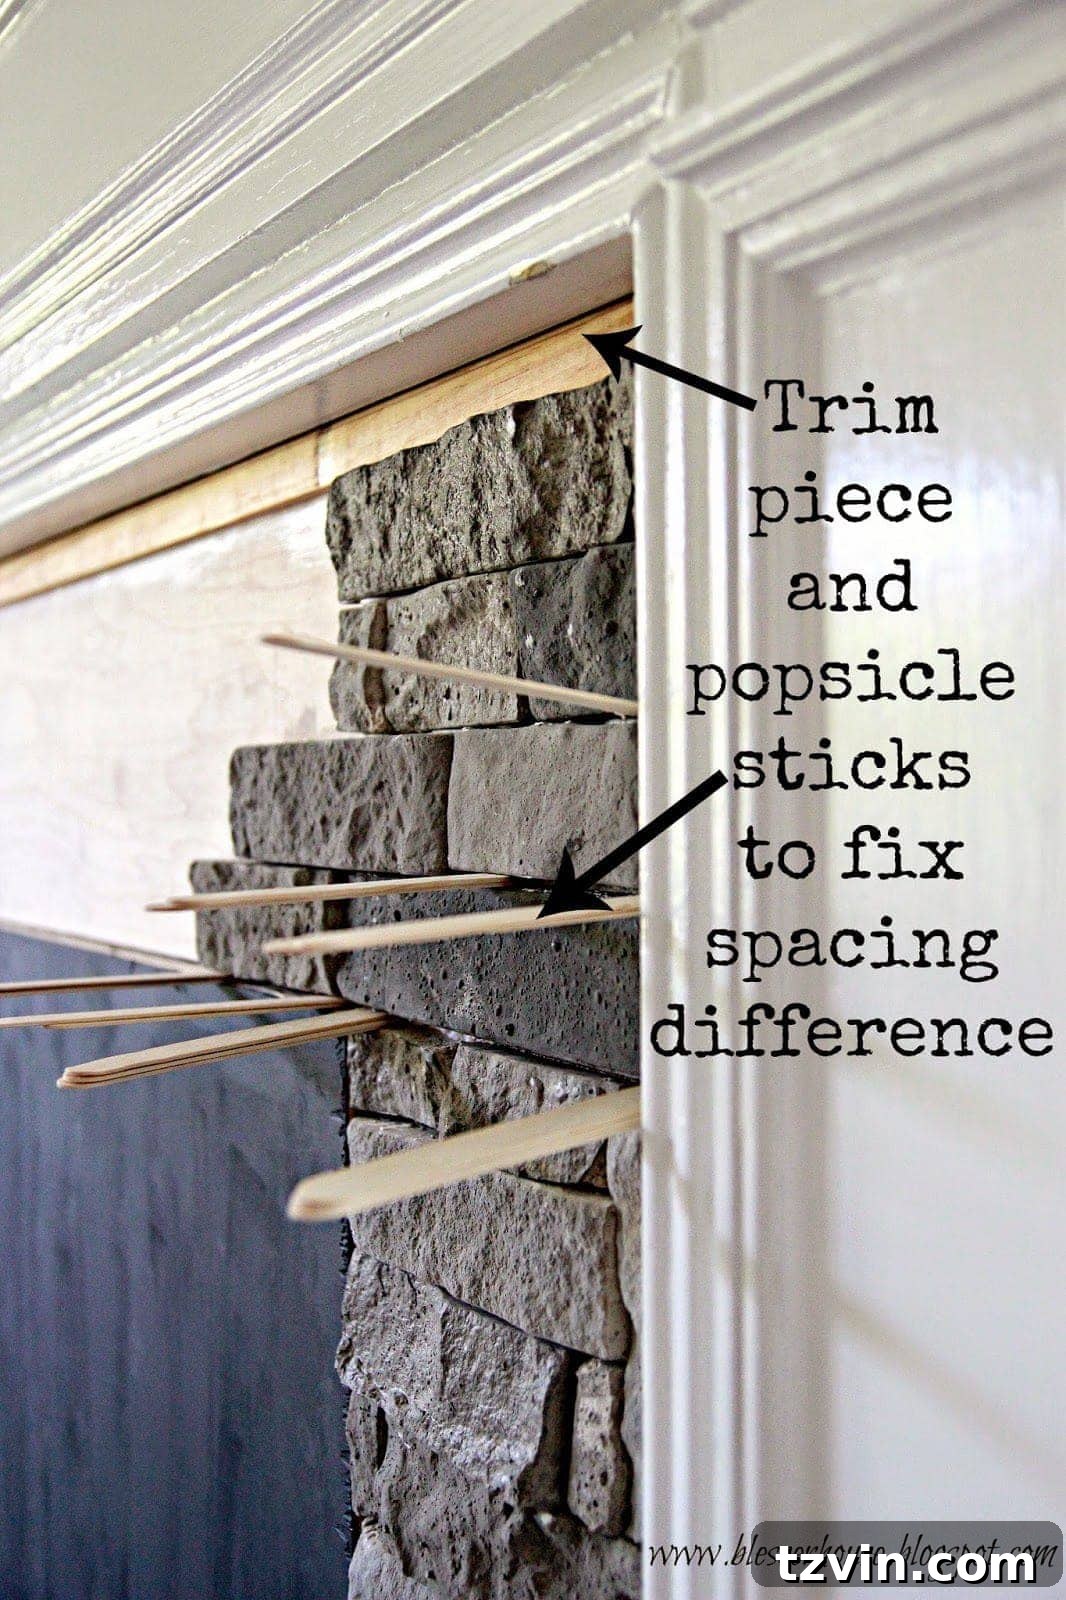
With all those sticks in place, our fireplace looked like it was undergoing a very unique acupuncture treatment, wouldn’t you agree?
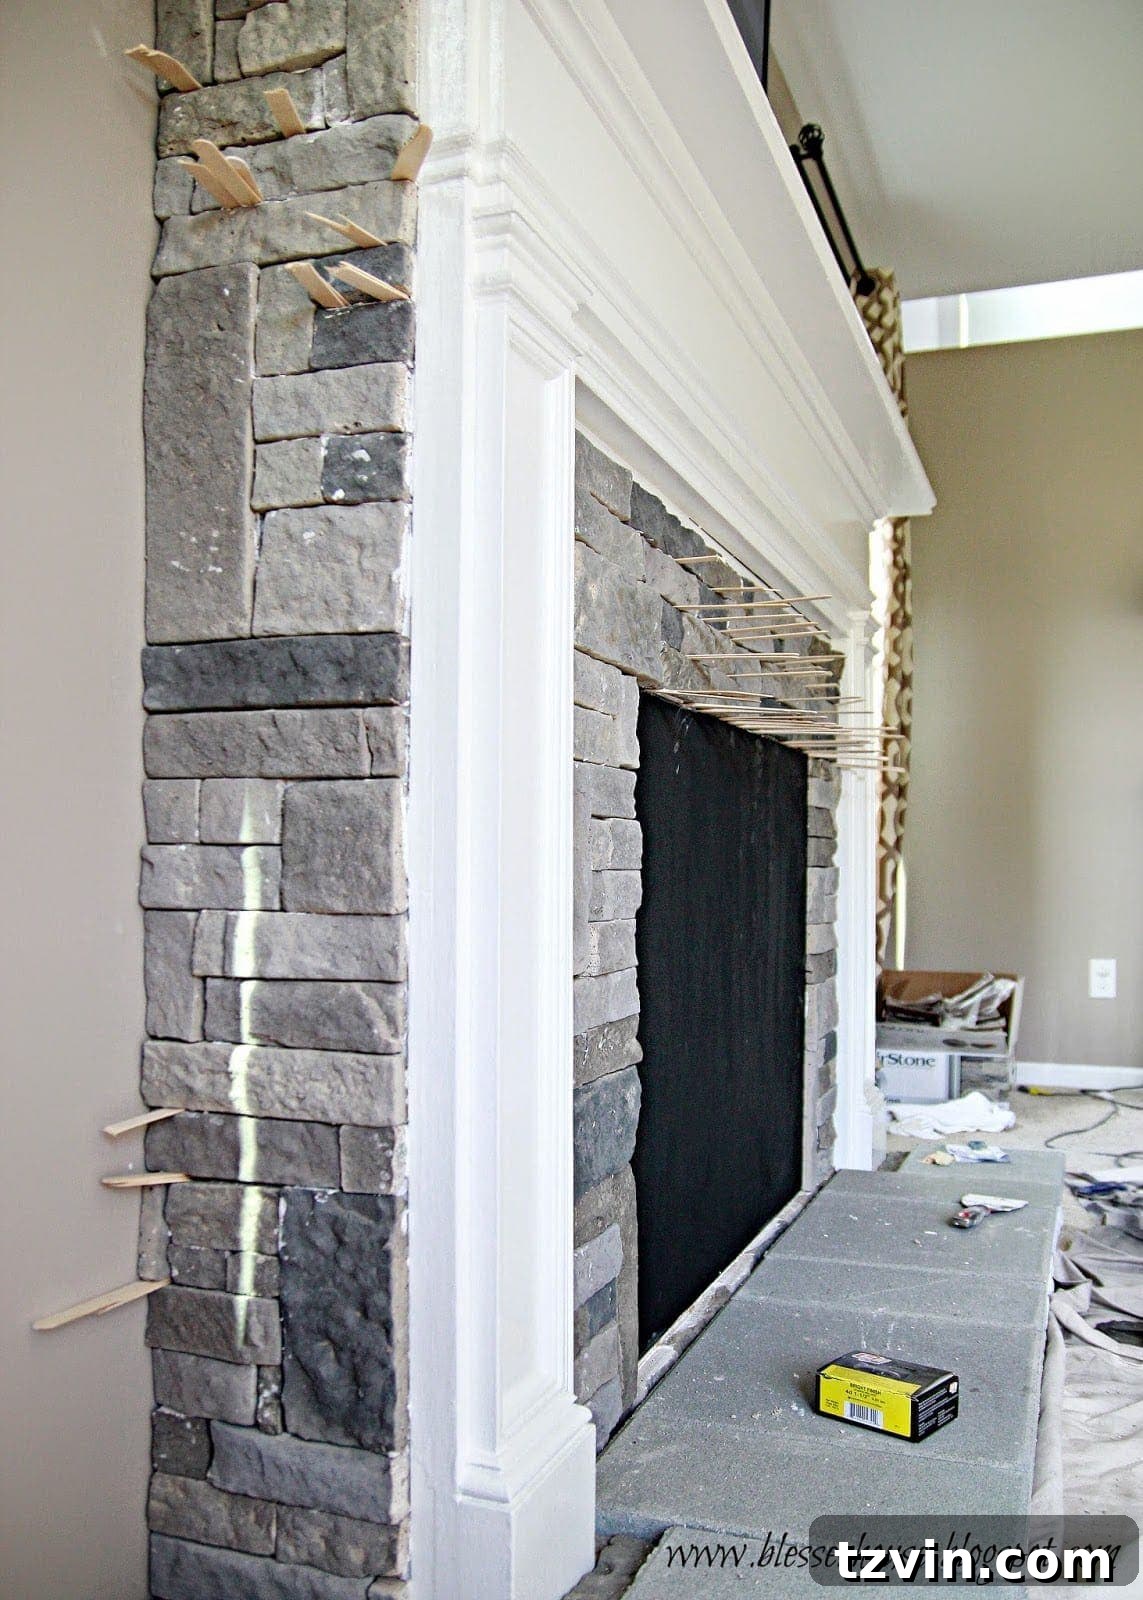
The following morning, after carefully removing all the popsicle stick supports, we were greeted by a complete stone fireplace! I must admit, I was strongly tempted to leave the Airstone in its beautiful natural gray state. However, having already whitewashed a portion of the hearth, consistency dictated that I continue with the whitewash technique. Moreover, the original gray might not have perfectly harmonized with the overall decor and color scheme of the rest of the living room anyway.
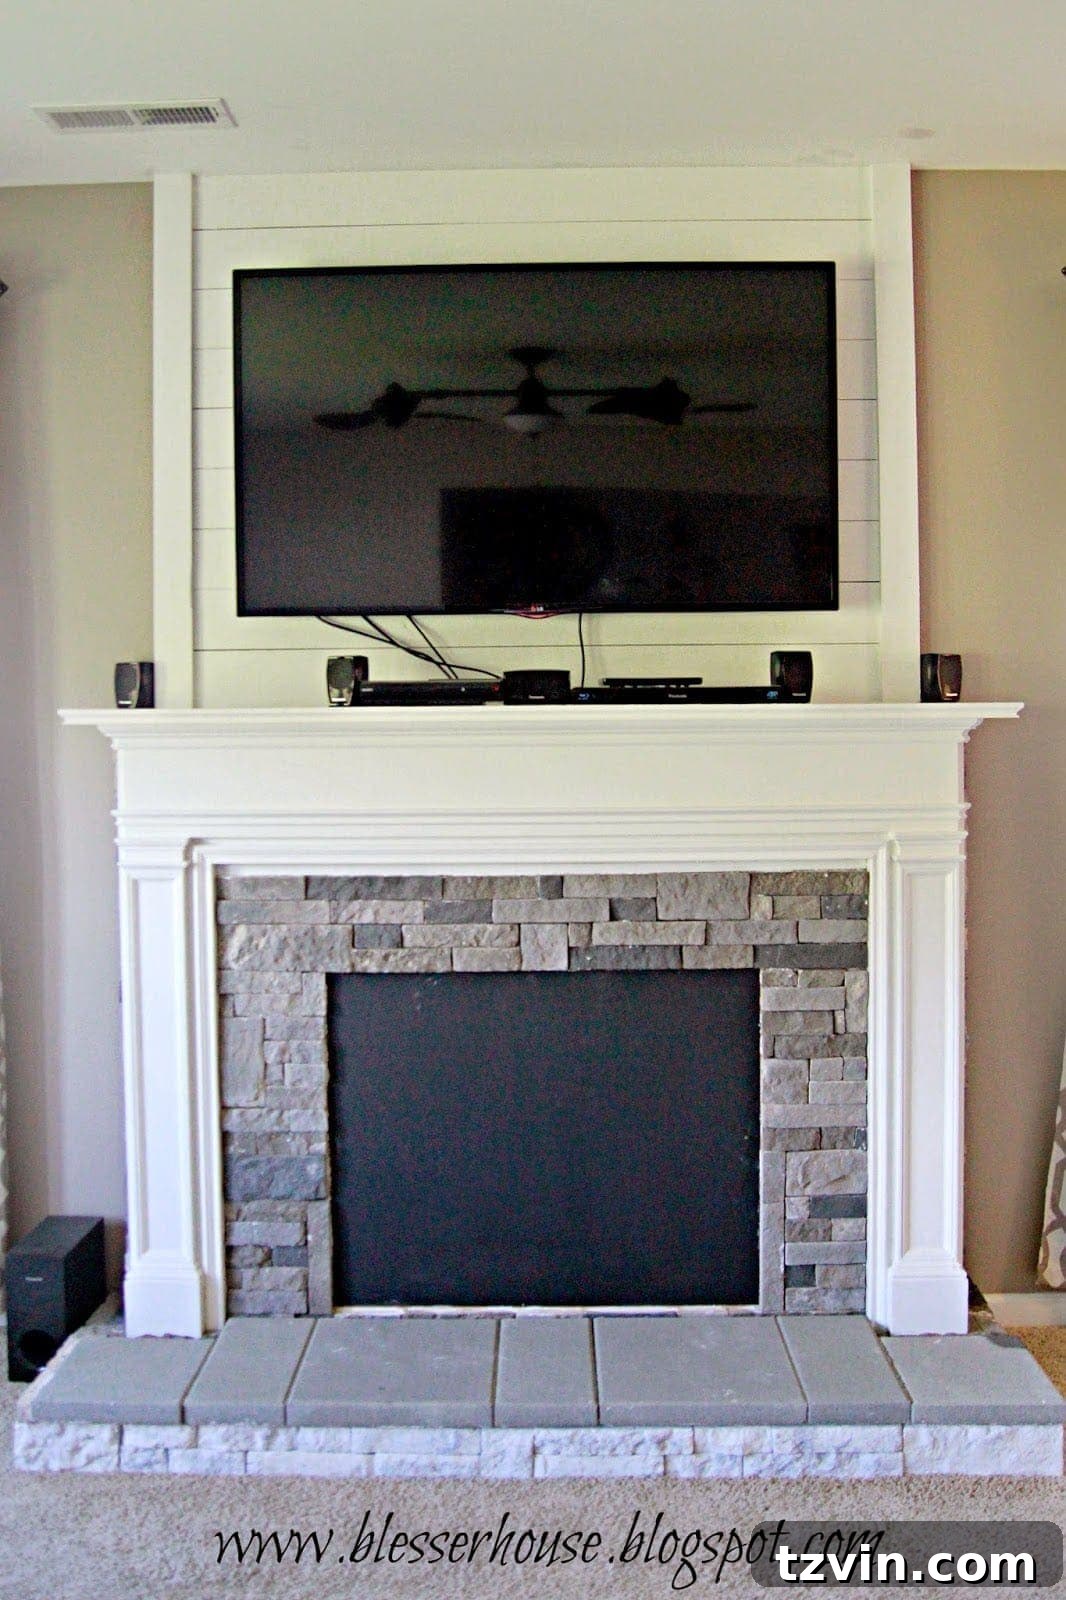
So, I proceeded to apply the whitewash technique to the entire stone surround, similar to how I did the hearth. This time, I diluted the paint a bit more, using a ratio of one part paint to two parts water. This made the wash even more translucent, allowing more of the underlying stone texture to subtly show through. The beauty of whitewashing is its flexibility; I can always go back and add more paint if I decide a second, slightly more opaque coat is needed to achieve the perfect finish.
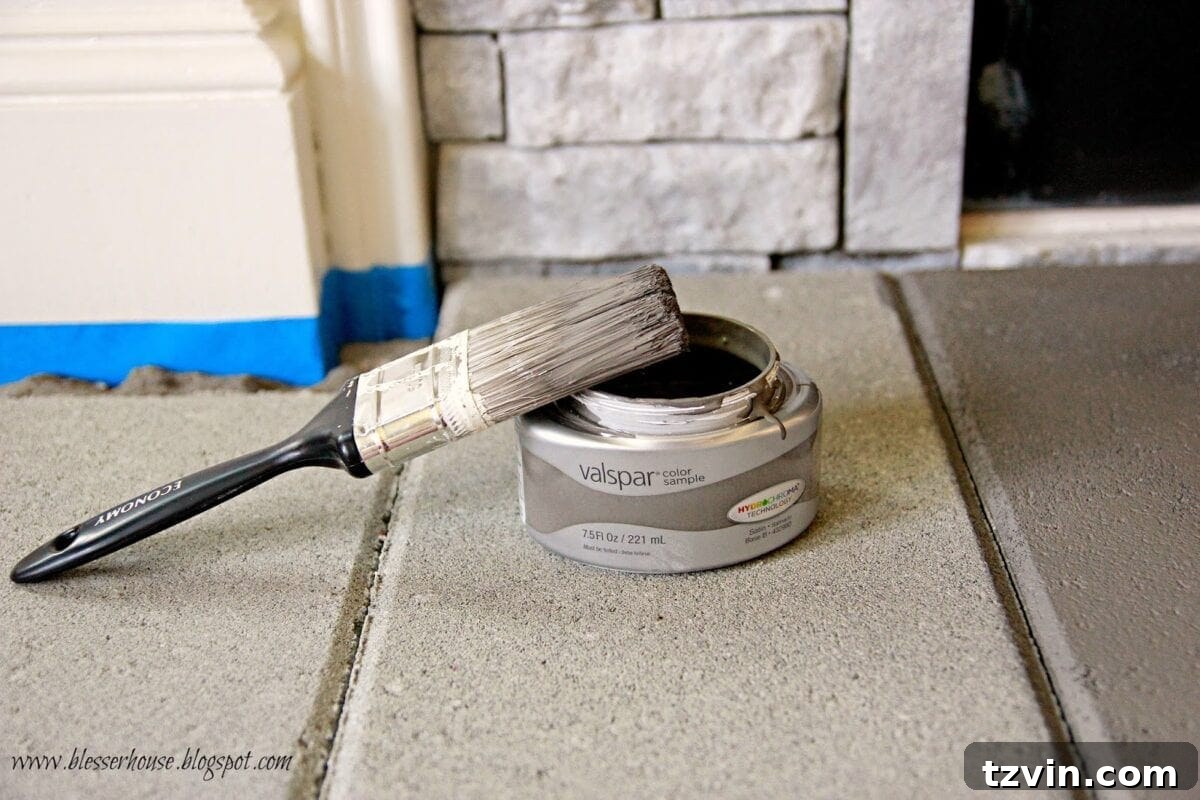
For the stepping stone hearth, I chose a sample pot of Valspar paint called “Rugged Suede.” This rich, earthy tone provided a wonderful contrast to the whitewashed stone and complemented our overall decor, adding warmth and depth to the base of the fireplace.
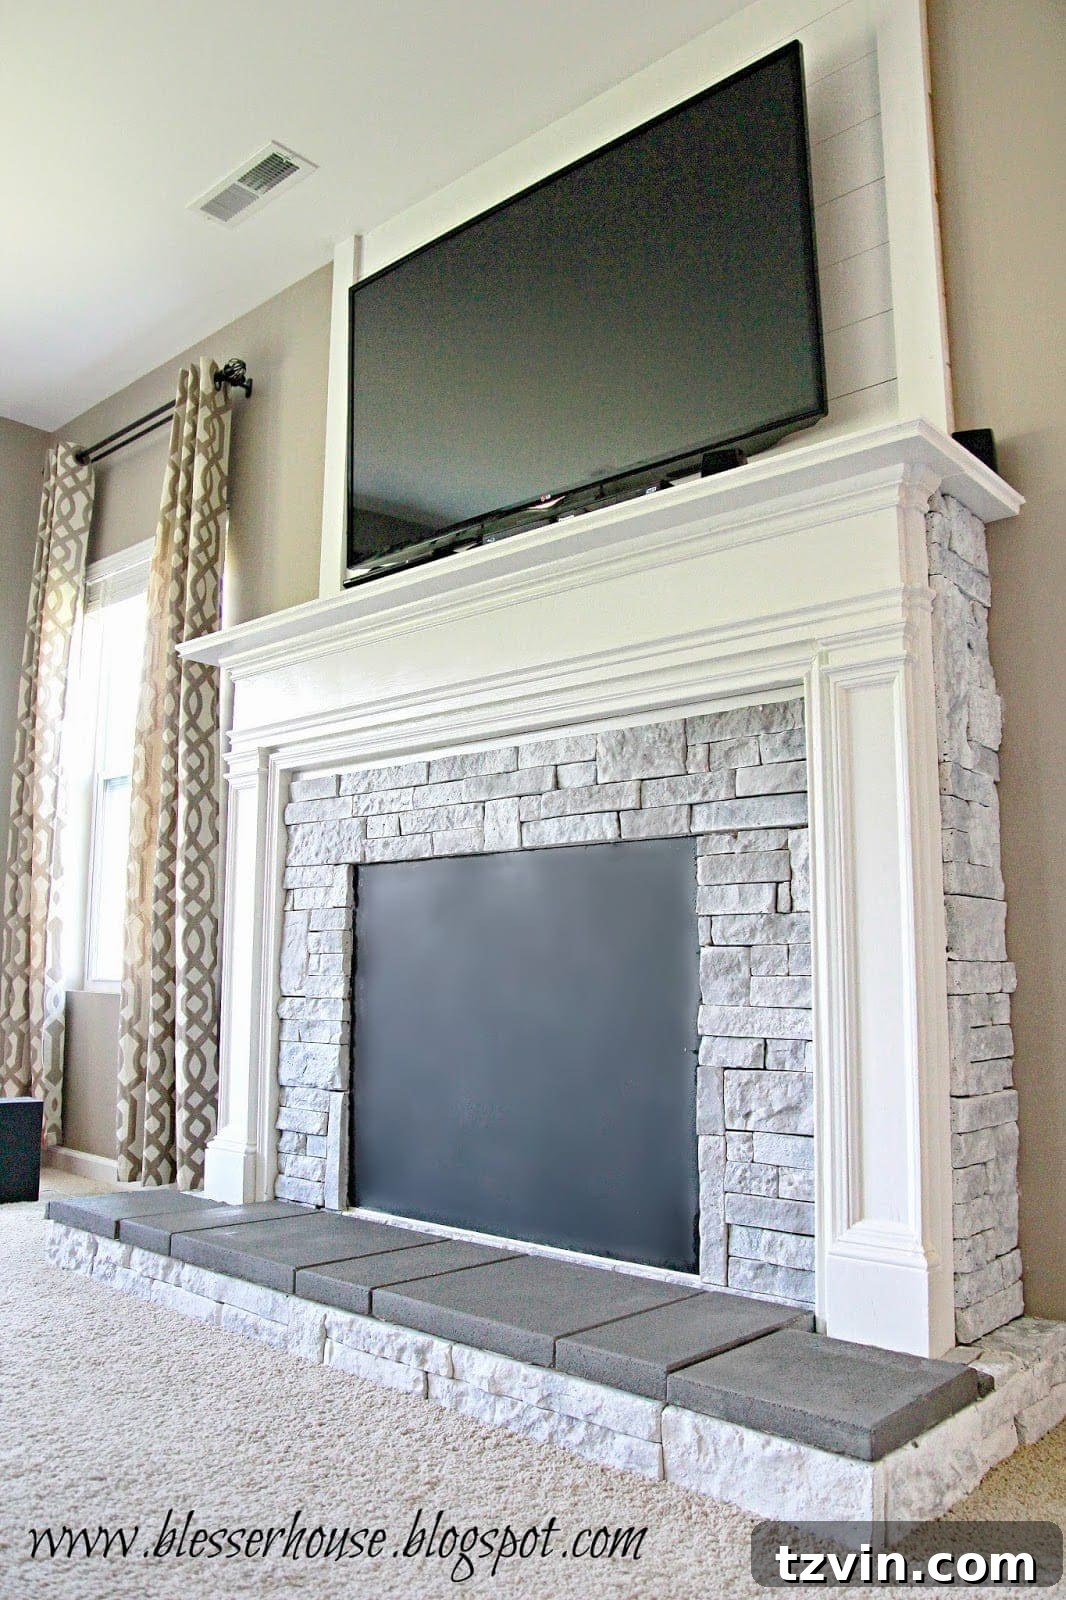
And with that, we now have a ginormous, almost-finished fireplace proudly standing in our living room! Hallelujah! The transformation is truly remarkable, and we couldn’t be happier with the progress we’ve made on this significant DIY project.
The Final Touches: Addressing Media Clutter and Decor
One of the top priorities on our list for the last few steps is to tackle the issue of unsightly cords and strategically hide the speakers and DVD player that currently sit beside our new focal point. I’ve already devised a solution for managing the cords, which will significantly tidy up the area. However, effectively concealing the other electronics is proving to be a creative challenge for me, and I’m still feeling a bit stumped. If any of you have brilliant suggestions for integrating or hiding media components stylishly, please do share them my way!
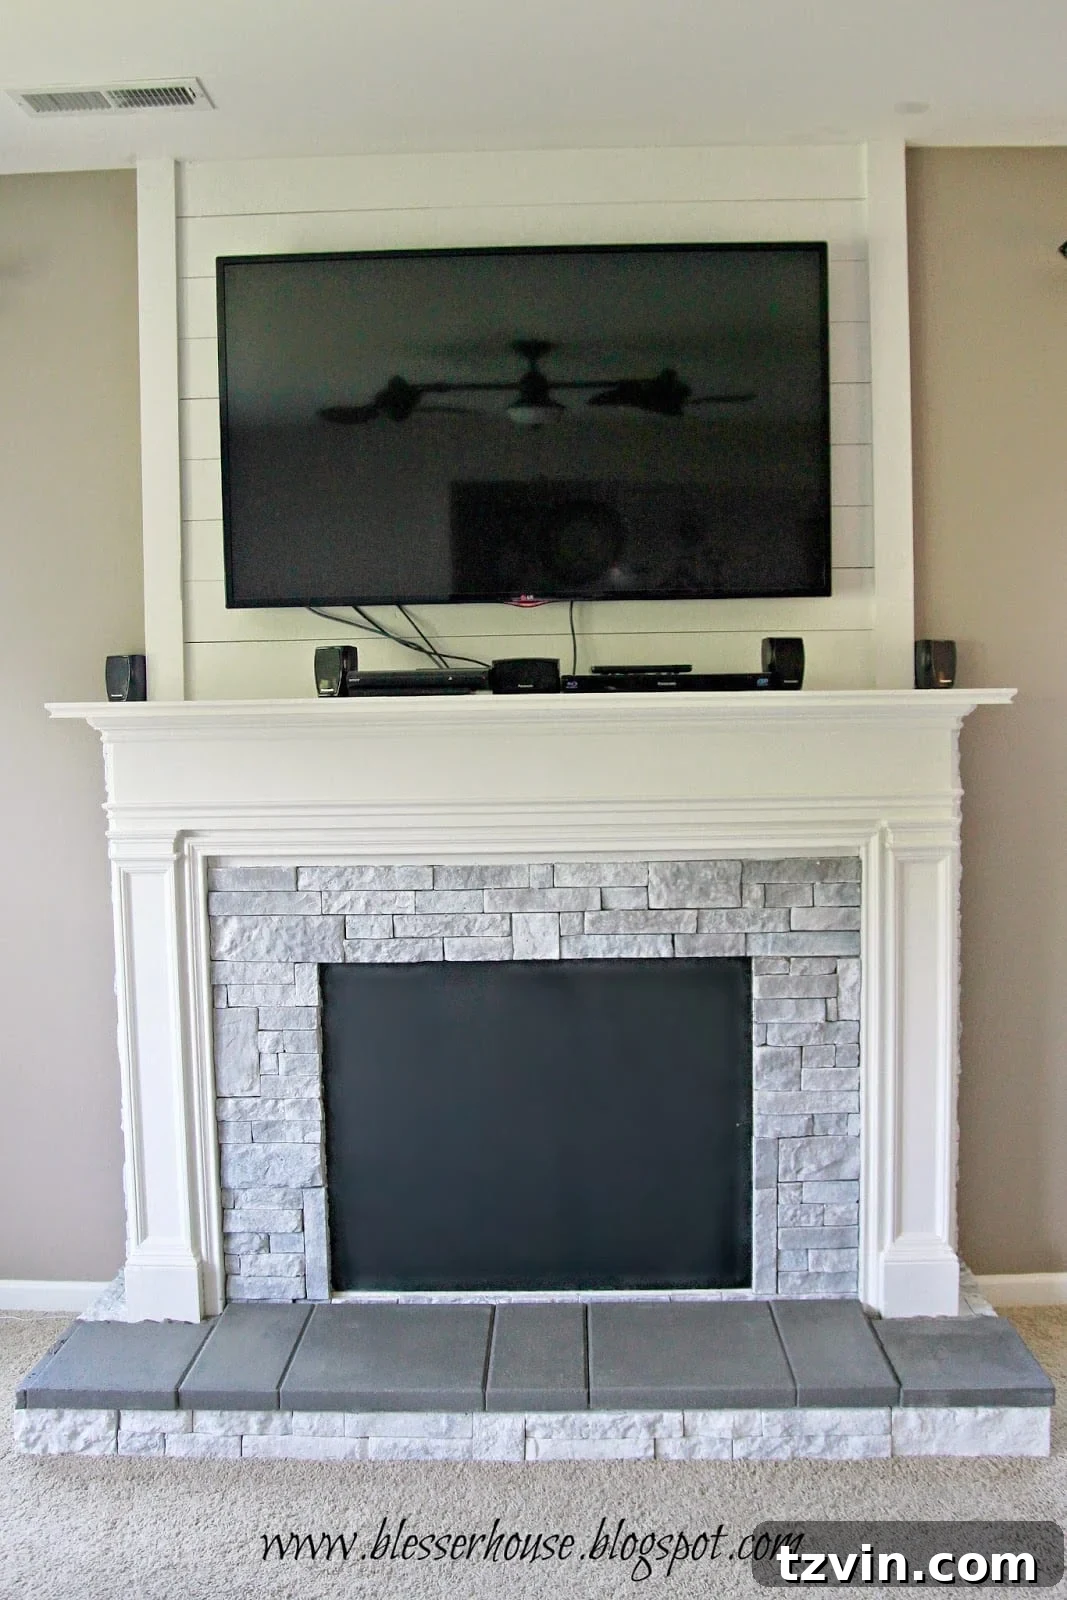
Concurrently, I’m planning out some ideas for mantel decor. Obviously, any decorations must not obstruct the television (I confess, I despise that term!). This limitation certainly narrows down the possibilities, but I am determined to find a way to create a beautifully styled mantel that complements the fireplace and the room, even with the presence of the screen above it.
As for the faux firebox interior, I’ve drawn significant inspiration from this brilliant log front fireplace insert featured on Pepper Design Blog. I encourage you to check it out; seeing it might help you visualize the concept a little better for our space. It’s an ingenious solution for creating the illusion of a working fireplace without the actual fire, adding a layer of cozy realism to our DIY project.
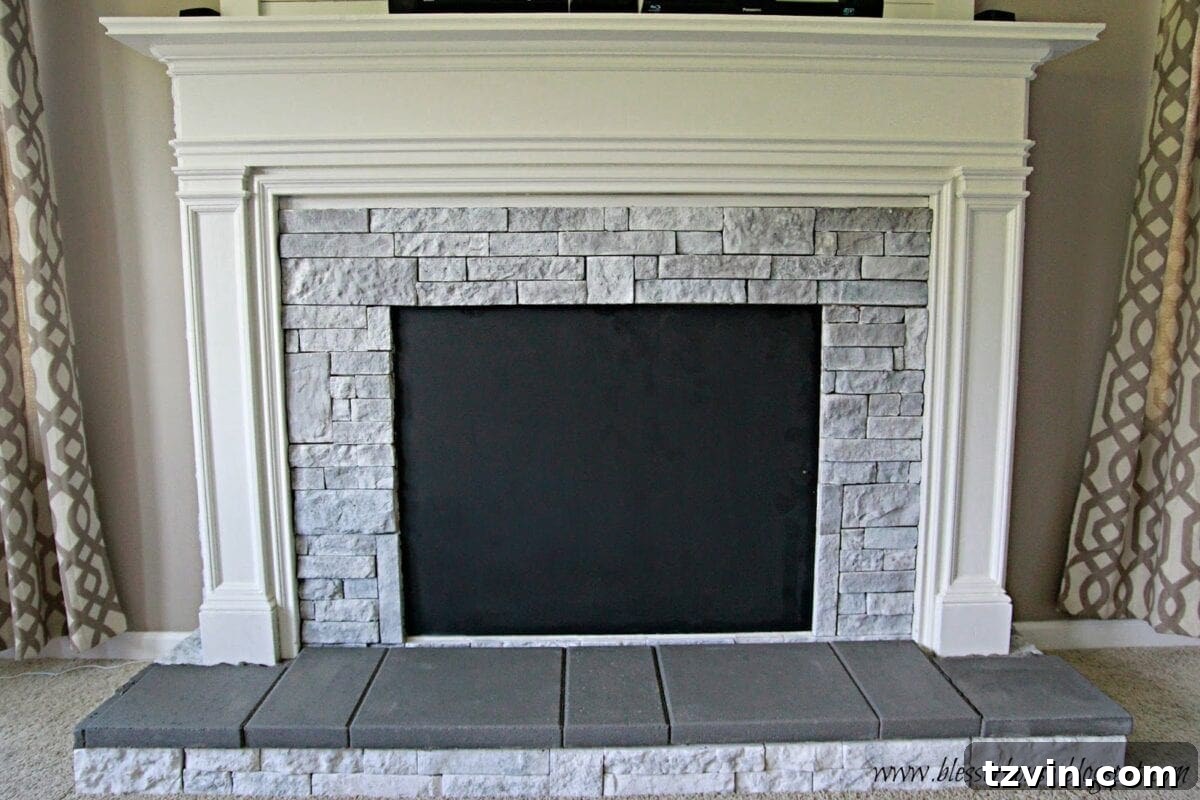
As I sit here typing this, reviewing the photos and seeing the subtle difference in the whitewash between the hearth base and the surround, I’m definitely leaning towards adding another coat to the surround. The beauty of this technique is its iterative nature. I might also experiment with warming up the tone slightly by incorporating a small amount of our wall color, Sherwin Williams Perfect Greige, into the whitewash mixture and testing it on a spare stone piece. This fine-tuning will ensure the fireplace integrates seamlessly with the rest of our living room’s color palette.
Update: Don’t miss the exciting final reveal of our DIY Faux Fireplace here!

Follow us for more DIY projects and home inspiration:
Facebook | Pinterest | Instagram | Twitter | Google+ | Bloglovin | Hometalk