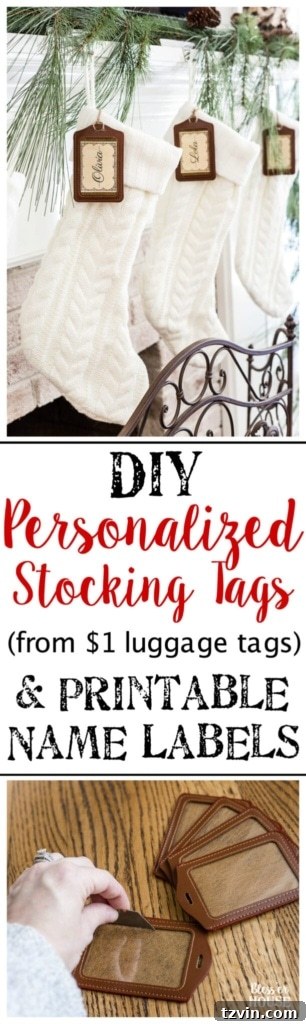
Craft Your Own Personalized Stocking Name Tags for Under $1 Each: The Ultimate DIY Guide
Transform your Christmas stockings into cherished keepsakes with this incredibly simple and budget-friendly DIY project! Discover how to create elegant, personalized stocking name tags using an unexpected item – ordinary luggage tags – for less than a dollar each. Plus, get access to our exclusive collection of free, customizable printable labels to make your holiday decorating even easier.
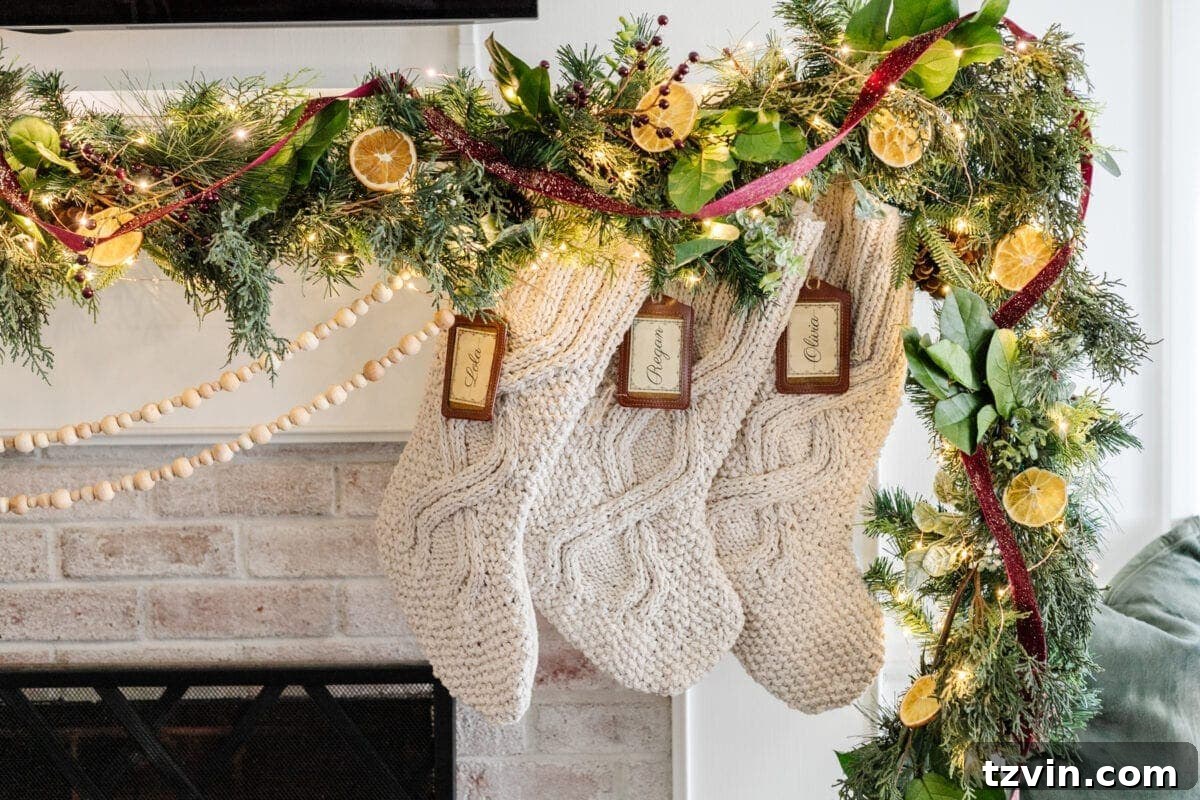
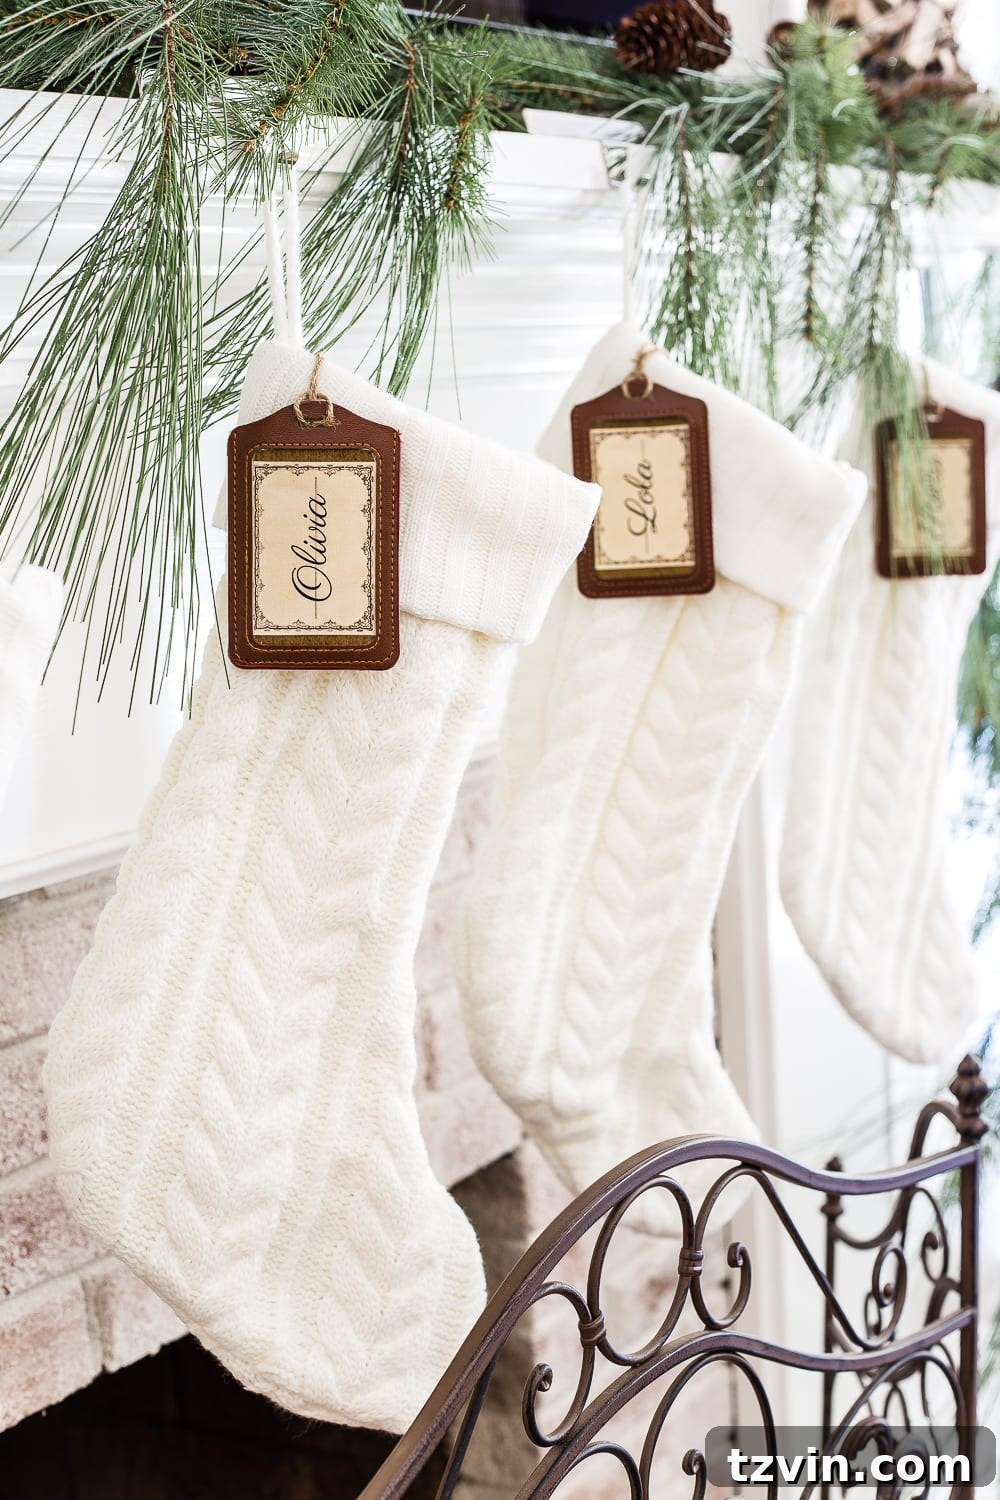
DIY Personalized Stocking Tags: Affordable Elegance for Your Holiday Decor
As the holiday season deepens, it’s those small, thoughtful details that truly bring the magic of Christmas to life in our homes. From festive garlands to twinkling lights, every element contributes to a warm and inviting atmosphere. This year, one of my favorite projects has been creating these charming DIY stocking name tags, proving that personalized holiday decor doesn’t have to come with a hefty price tag.
If you’re anything like me, you’re always on the lookout for creative ways to enhance your home’s festive appeal without overspending. That’s precisely why these easy-peasy, customizable stocking name tags are a game-changer. Imagine personalized heirlooms for your family, crafted with love and ingenuity, all starting with something as unexpected as—you guessed it—luggage tags!
The allure of custom stockings is undeniable, but the reality of their cost can be a festive buzzkill. Spending upwards of $300 for a set of customized stockings seemed extravagant, especially when aiming for a cozy, budget-friendly Christmas. My solution? A little improvisation and a stroke of DIY genius that transformed simple materials into stunning, bespoke stocking labels. This project not only saves a significant amount of money but also adds a unique, handcrafted touch that mass-produced items simply can’t replicate.
Related: 24 Thrifty Christmas Decorating Ideas You Can Make Inexpensively in 2023
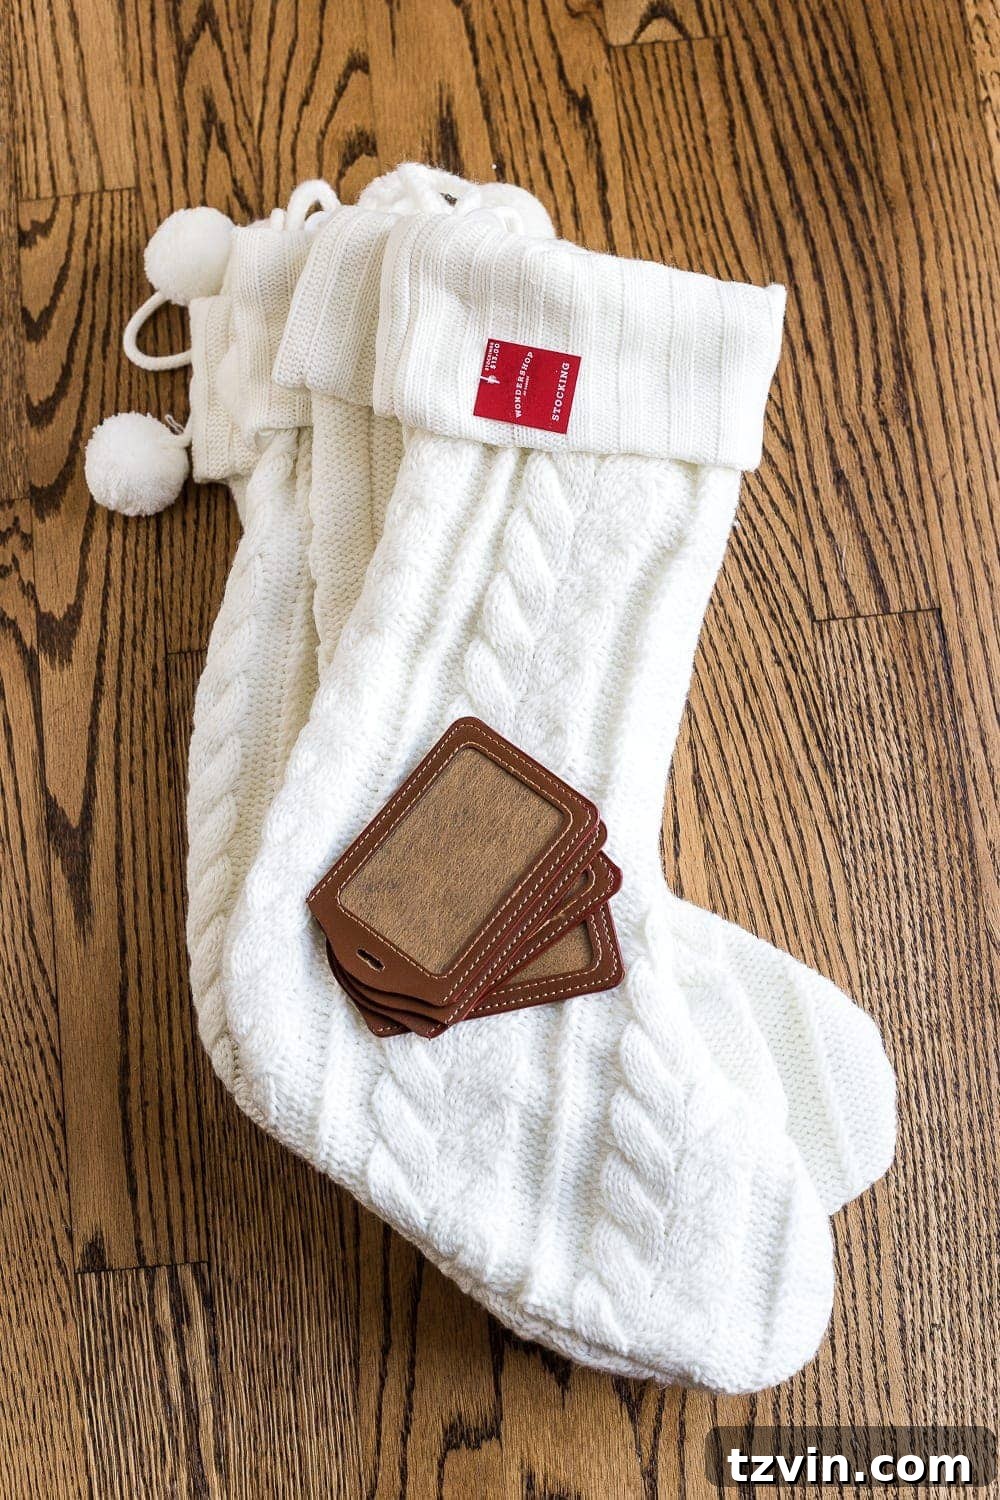
Why Choose Luggage Tags for Your Stocking Labels?
You might be wondering why luggage tags are the secret ingredient for these personalized stocking labels. It’s simple: they’re incredibly versatile, durable, and surprisingly stylish. Most luggage tags come in classic designs and materials like faux leather, which perfectly complements traditional and modern Christmas aesthetics. Their inherent structure, designed to hold identification, is ideal for neatly displaying names. Plus, they often come in multi-packs, making them incredibly cost-effective for families of all sizes. This innovative repurposing allows you to achieve a high-end, custom look without the designer price tag, giving you more to spend on the joyous traditions of the season.
Gather Your Materials: What You’ll Need
As an Amazon Associate, I earn from qualifying purchases. Full disclosure.
The beauty of this project lies in its simplicity and minimal material requirements. Here’s a detailed list of what you’ll need to create your own personalized stocking tags:
- Basic Christmas stockings: Choose plain stockings in colors and textures that match your holiday decor. This project is perfect for elevating simple, inexpensive stockings.
- Luggage tags: This is the star of our project! Look for a set of sturdy, attractive luggage tags. I found a pack of 10 for under $8, proving just how affordable this DIY can be.
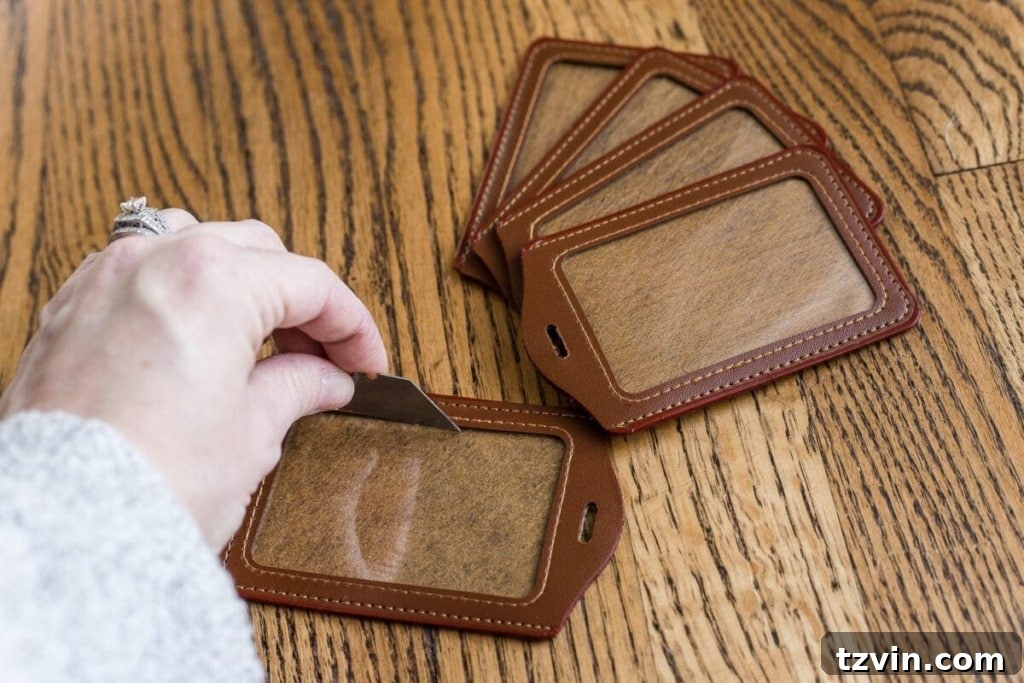
- Utility knife blade: Essential for carefully removing the plastic window from the luggage tags, ensuring a clean, glare-free finish for your name labels.
- White cardstock paper & printer: For printing your personalized names. Cardstock provides a professional, durable feel that regular paper can’t match.
- Twine: A natural, rustic material perfect for attaching the tags to your stockings, adding to their handmade charm.
- Safety pins: These will secure the twine inside the stocking, keeping your name tags perfectly in place without being visible.
I’ve successfully used these very same leather luggage tags for organizing our pantry cabinet, which is where the brilliant idea for Christmas stocking personalization first sparked. Their robust quality and classic appearance made them a perfect candidate for adding a bespoke touch to our plain stockings this year.
Step-by-Step Guide: Crafting Your Custom Stocking Tags
Creating these personalized stocking name tags is a straightforward process that yields beautiful results. Follow these simple steps to bring your vision to life:
Step 1: Preparing Your Luggage Tags for Personalization
The first crucial step involves preparing your luggage tags to house your custom name labels. Most luggage tags come with a clear plastic window designed to protect identification cards. For our stocking tags, we want the names to be clearly visible and free from any reflective glare. Using a sharp utility knife blade, carefully cut out and remove this clear plastic window from each luggage tag. Take your time to ensure a clean cut, as this will prevent any unwanted reflections and give your finished tags a more authentic, open-face look. Always exercise caution when using sharp tools.
Step 2: Designing and Printing Your Personalized Name Labels
Now for the fun part – personalizing your labels! We’ve made it incredibly easy with our vintage-style blank stocking label set. To access these exclusive printables and a treasure trove of other DIY resources, simply subscribe to get access to my full printable library here. If you’re already a cherished subscriber, you’ll find the printable library password conveniently located at the bottom of every email newsletter I send.
Once you have the blank label file, you can easily add your family’s names using various free and user-friendly online tools. I recommend:
- Canva (Free Version): A fantastic graphic design platform perfect for adding text over images.
- PicMonkey: Another excellent online photo editor that offers great text overlay features.
- Google Docs: A simple, accessible option for basic text insertion and formatting.
- Kapwing: An intuitive tool for various image and video edits, including adding text.
For a classic, elegant aesthetic, I used the beautiful “Parisienne” font for my labels. Experiment with different fonts to find one that best suits your personal style and holiday theme. After typing and perfectly sizing your names on the label image, print them onto white cardstock paper. Cardstock provides a sturdier, more premium feel than regular printer paper, enhancing the overall look and durability of your name tags. Carefully cut out each name card along the outlines. Finally, slide the printed name card into the slot of your prepared luggage tag, ensuring it fits snugly and is centered for a polished finish.
Step 3: Attaching Your Elegant Name Tags to Stockings
With your personalized name cards nestled inside the luggage tags, it’s time to attach them to your stockings. This step is incredibly simple yet effective. Take a piece of twine and loop it through the eyelet of the luggage tag. Then, on the inside top edge of your stocking, secure the twine with a small safety pin. This method ensures that the name tag hangs beautifully from the stocking while the safety pin remains discreetly hidden, maintaining the tag’s elegant appearance. Voila! You now have a beautifully personalized stocking ready to be filled with holiday cheer.
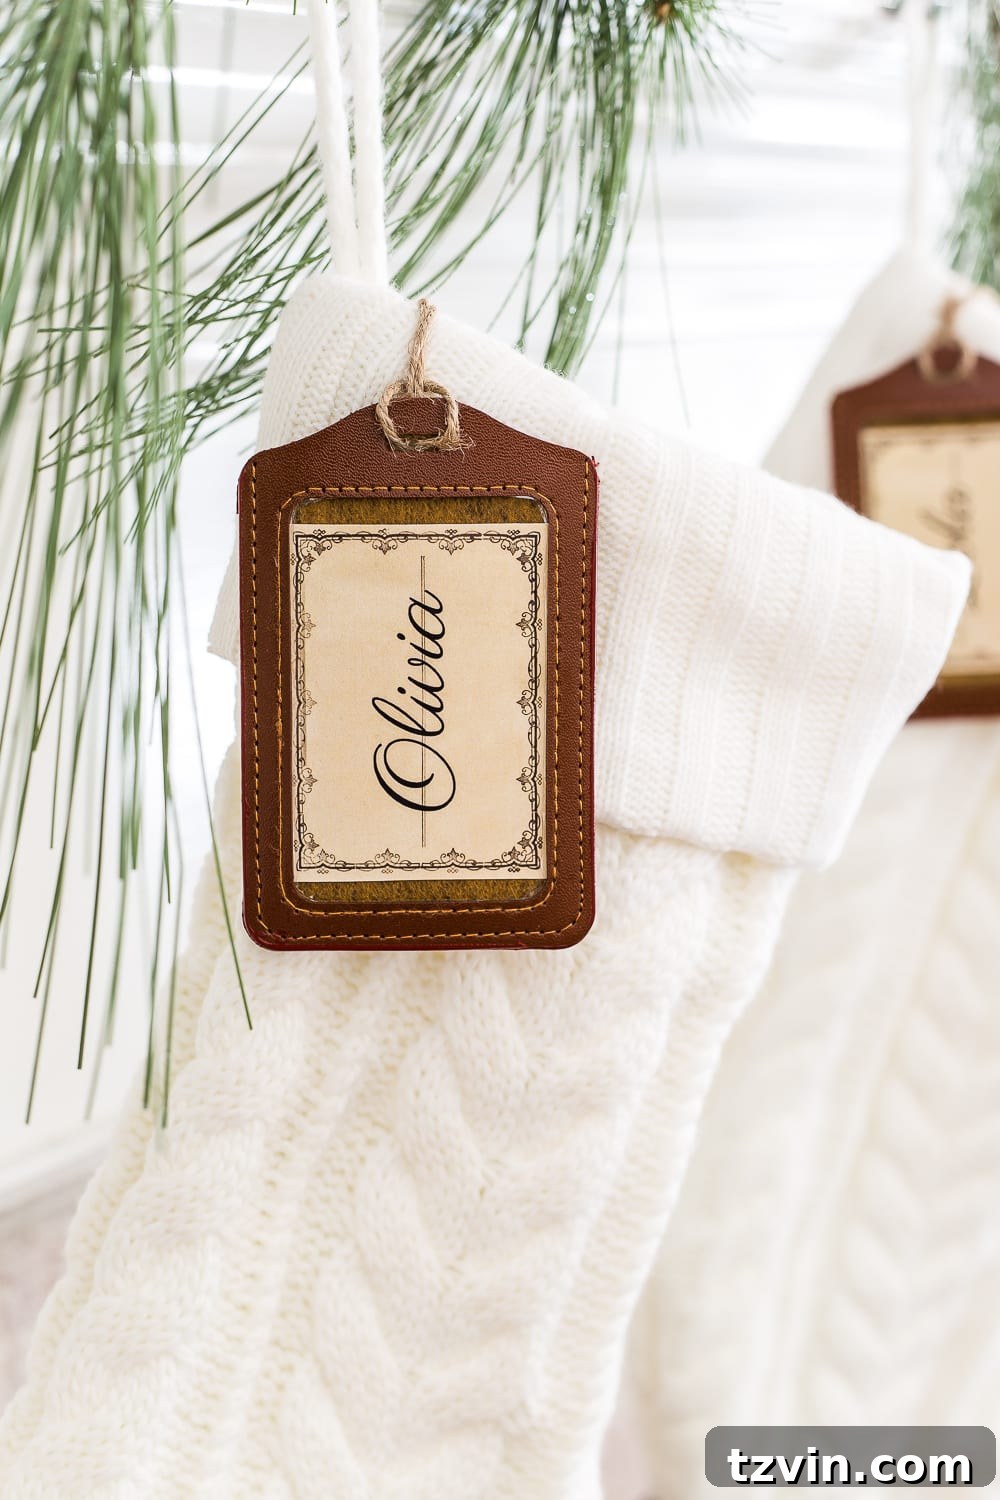
I utilized the same charming, simple labels that I designed for our pantry, appreciating their versatile aesthetic that perfectly blends simplicity with a touch of antique charm. This consistency in design helps create a cohesive look throughout your home’s decor, whether it’s for practical organization or festive embellishment.
Detailed Instructions: Adding Text to Your Stocking Name Tag Printables
For those who might need a little extra guidance, here are more detailed steps for adding your names to the printable labels using popular editing tools:
If you’re a PicMonkey user, follow these steps after downloading the printable file to your computer:
- Begin by visiting the Picmonkey.com homepage.
- Click on the prominent “Edit a Photo” button to start your project.
- Select “Open New,” then choose “Computer” from the options, and navigate to select the printable file you downloaded from our library.
- On the left-side toolbar, click the “Tt” button, which represents the text tool.
- Click “Add Text” and then browse through their font library to select your desired font style.
- Type your family member’s name into the text box that appears on your image. Adjust the size and position of the text box until it perfectly fits onto one of the blank label templates.
- Repeat this process for each name, ensuring each label is personalized.
- Once all your names are in place, click “Export” to save your customized file.
- Finally, print your design onto white cardstock paper to create your beautiful antique-style labels for your Christmas stockings.
If you prefer to work in Google Docs, you can use this helpful video tutorial to guide you through adding names to the labels. Google Docs offers a simple, accessible way to customize your printables, especially if you’re already familiar with its interface.
Alternatively, if you possess beautiful handwriting, feel free to simply “wing it” with a fine-point Sharpie directly onto the cardstock labels. I must confess, I’d be incredibly jealous of your artistic skills! 😉 The beauty of DIY is that it allows for personal touches and unique expressions.
The Unbeatable Value: Designer Look for a Dollar-Store Price
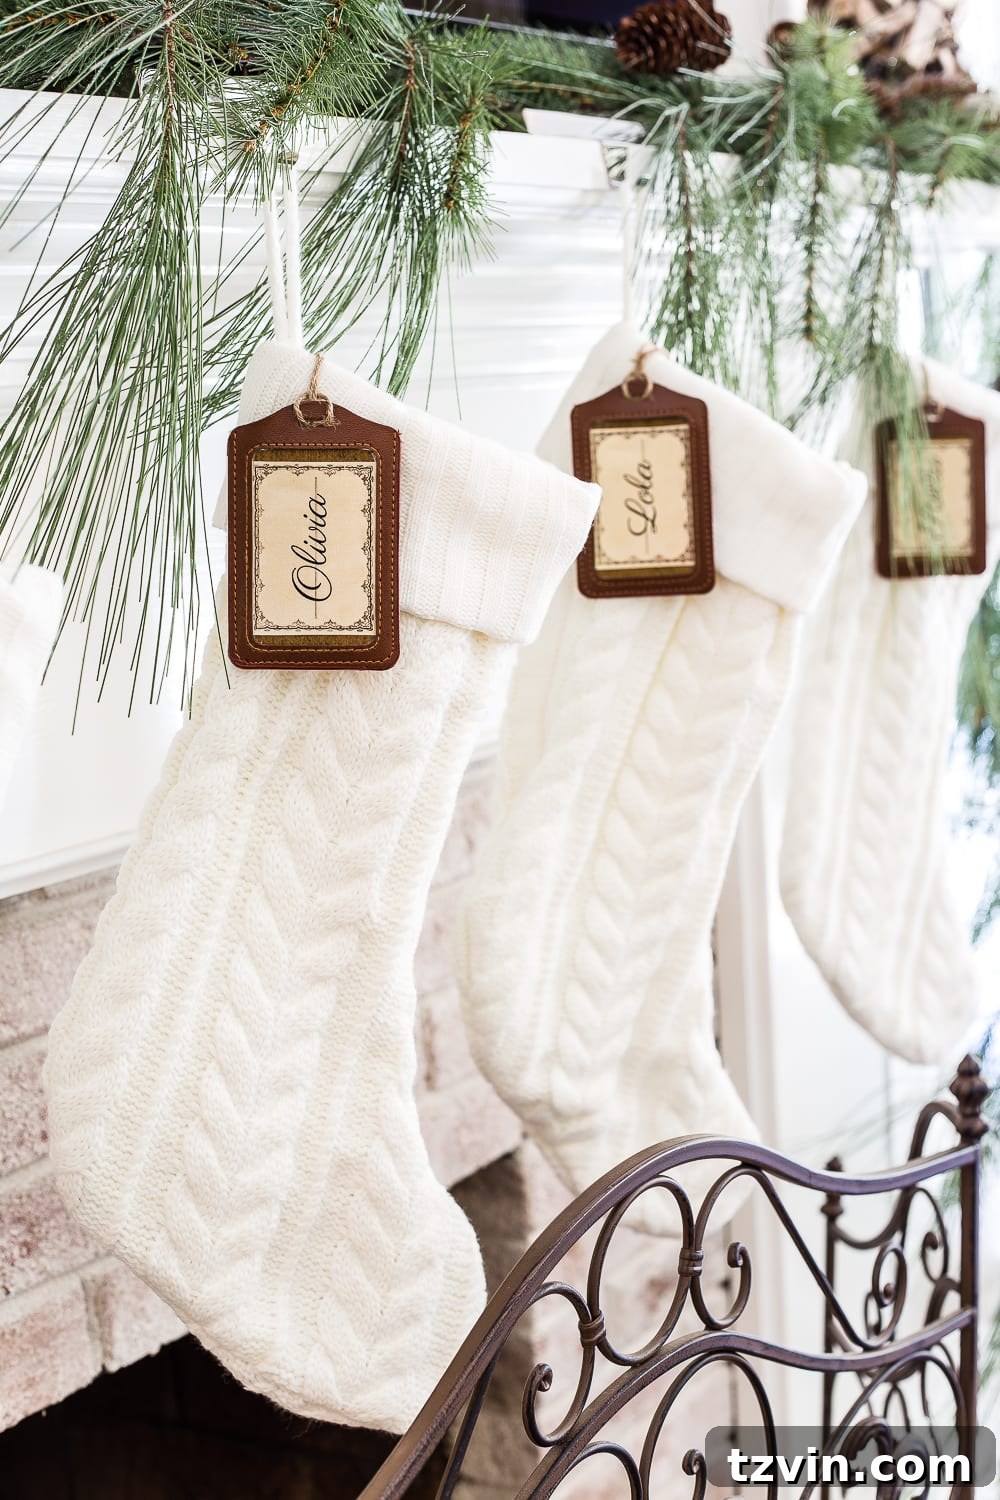
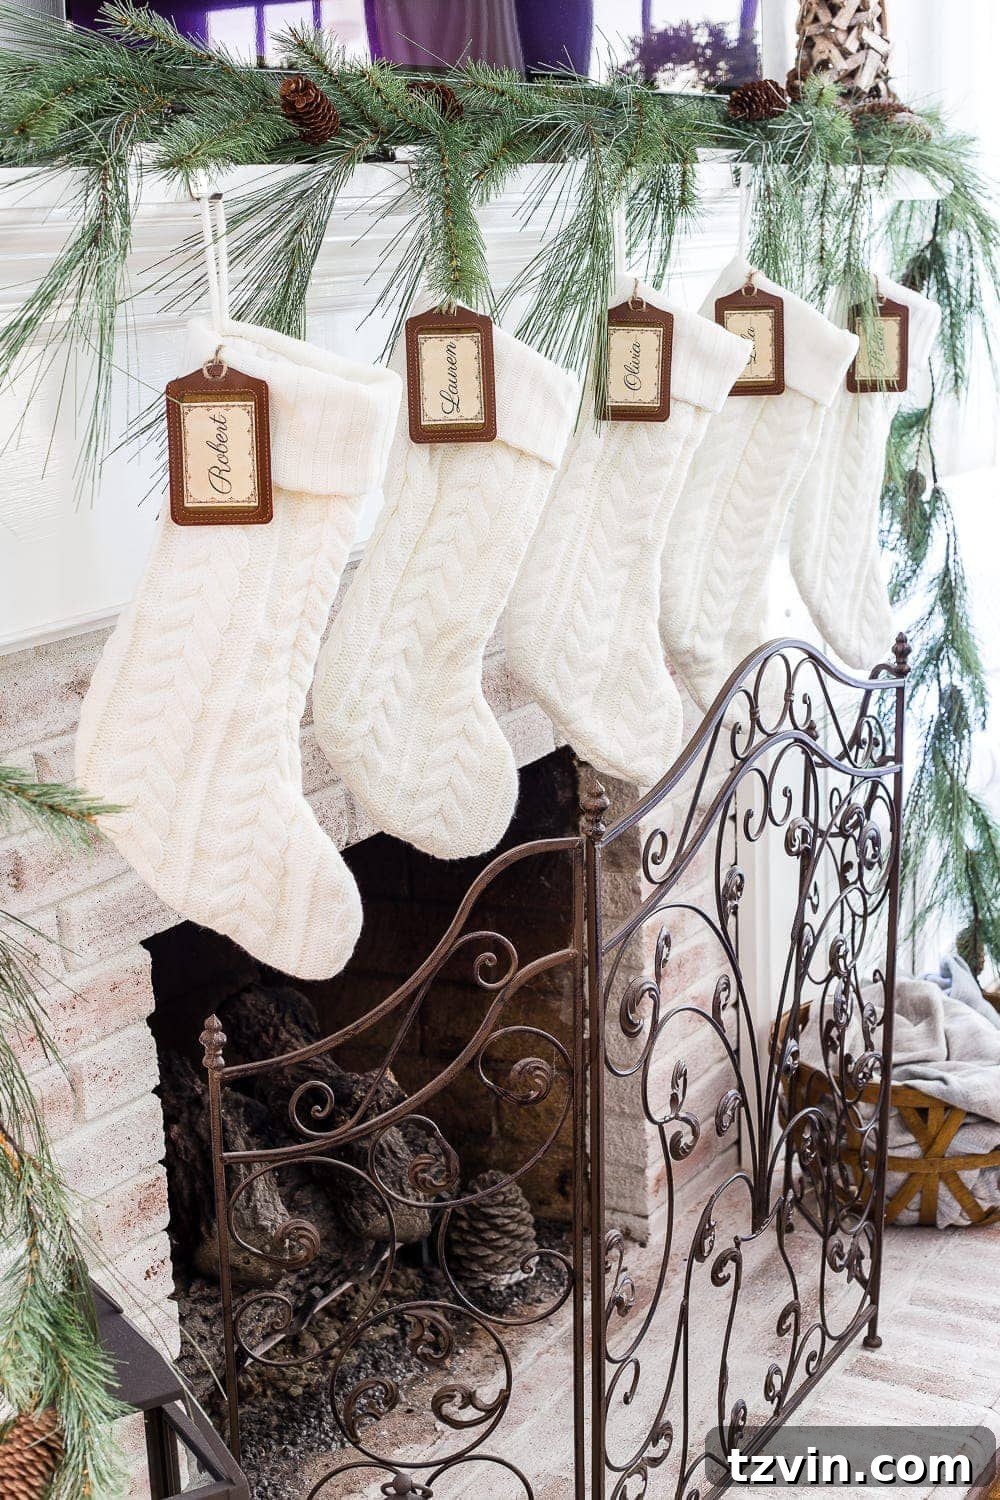
These customized stocking tags truly elevate the festive ambiance of your home, looking incredibly fancy despite their incredibly low cost. For all five personalized stockings, the total investment was a mere $38 – a stark contrast to the hundreds of dollars that custom designer versions often demand. Each name tag, a stylish addition to your holiday decor, cost just 87 cents. This price point is virtually unbeatable, especially when individual stocking tags from specialty stores typically retail for around $10 each.
Achieving such a chic, personalized look for so little is incredibly satisfying and leaves more room in your budget for other holiday joys. These DIY tags are not just cost-effective; they carry the invaluable charm of being handmade, adding a deeper sense of warmth and personal connection to your holiday celebrations. They are every bit as adorable and impressive as their pricier counterparts, embodying the true spirit of resourceful and creative holiday decorating.
Beyond Luggage Tags: Creative Alternatives for Stocking Labels
While luggage tags offer a unique and stylish solution, there are many other creative ways to craft personalized stocking name tags. For those who enjoy exploring different materials and aesthetics, here are a few alternative DIY ideas:
- Lettered Christmas Ornaments: Browse your local craft store for small, individual letter ornaments. These can be easily attached to stockings with ribbon or twine for a festive and personal touch.
- Initial Keychains: Similar to ornaments, initial keychains are a fantastic alternative. I once discovered charming initial keychains for just $1 at Hobby Lobby. A quick spray with gold spray paint transformed them into elegant, custom stocking tags that looked far more expensive than they were.
- Wooden Letters: Small wooden craft letters can be painted, glittered, or stained to match your decor, then glued onto fabric or small wooden discs for a rustic, personalized look.
- Embroidered Fabric Tags: For those with a sewing machine or a love for hand embroidery, small fabric scraps can be embroidered with initials or names, then edged and attached.
These alternatives ensure that no matter your crafting skill level or preferred style, you can achieve beautifully personalized stockings that reflect your family’s unique charm.

Stocking Stuffer Ideas for Every Family Member
Once your beautifully personalized stockings are hanging, the next joyful task begins: filling them! There’s something uniquely delightful about curating those “itty bitty treats” for stockings, often more exciting than even the larger gifts. It’s a chance to add thoughtful, small surprises that bring big smiles on Christmas morning.
To help you with this festive endeavor, I’ve compiled an extensive list of ideas. You can find 250 stocking stuffer ideas for everyone in your family here, ensuring you’ll have plenty of inspiration for Robert, Olivia, and Regan, or whoever is on your list. From practical gadgets to sweet indulgences, and quirky novelties to miniature luxuries, this guide covers all ages and interests. My Amazon cart is practically overflowing with goodies as I meticulously plan out each family member’s stocking surprises!

More DIY Christmas Decorating Ideas to Inspire Your Home
If you’ve enjoyed crafting these personalized stocking tags, you’ll love exploring more of our creative and budget-friendly DIY Christmas decorating projects. Infuse every corner of your home with handmade charm and festive cheer with these inspiring tutorials:
- How to Make Beautiful DIY Mantel Garland for Christmas: Create a lush, custom garland that perfectly frames your fireplace, setting a stunning focal point for your holiday decor.
- Easy Tutorial: How to Make DIY Dried Orange Garland: Add a touch of natural elegance and a delightful aroma to your home with this simple yet beautiful garland project.
- How to Put Christmas Tree Ribbon Decorations on Trees: Learn professional techniques for draping ribbon on your Christmas tree, adding depth, texture, and a luxurious feel.
These projects are designed to help you create a truly magical and personalized Christmas home, filled with items crafted with love and care.
If you want to save this post for later, you can pin it here: