
The Ultimate Beginner’s Guide to Painting Cabinets: Achieve a Professional Finish
Get ready to celebrate your next home improvement victory! Painting your cabinets is a fantastic way to revitalize any space, whether it’s a tired kitchen or a dated bathroom. This comprehensive, step-by-step guide is designed specifically for beginners, covering everything from essential supplies to expert tips, ensuring you achieve a beautiful, smooth, and professional-looking finish. Prepare to transform your home and express your unique style without the hefty cost of replacement!
For those who might be hesitant about painting over existing finishes, particularly natural wood, we understand completely. It’s a significant decision! However, sometimes a fresh coat of paint is the most impactful and cost-effective way to modernize a room and truly make it feel like your own. This guide aims to empower even the most novice DIY enthusiast to tackle this rewarding project with absolute confidence.
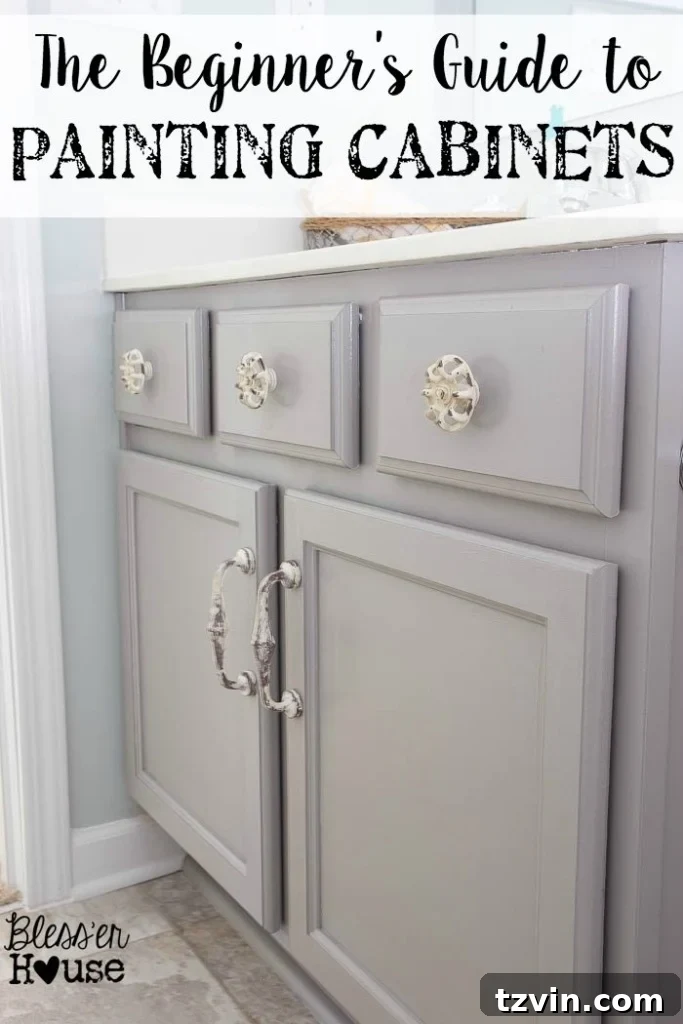
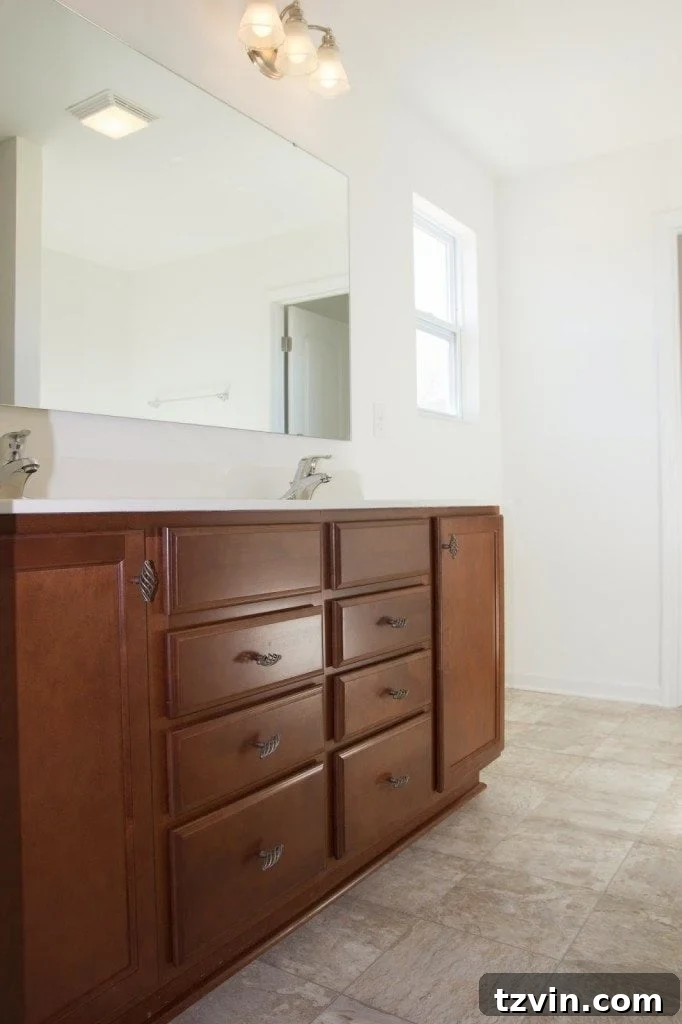
We were fortunate to have sturdy, basic builder-grade cabinets, but their original cherry stain, while classic, didn’t align with our desired aesthetic. The truth is, there’s no reason to live with a style that doesn’t inspire you, especially when a dramatic transformation is so achievable. Updating your cabinets can profoundly change the entire ambiance of a room, often serving as the focal point, all without the expense and upheaval of a full renovation.
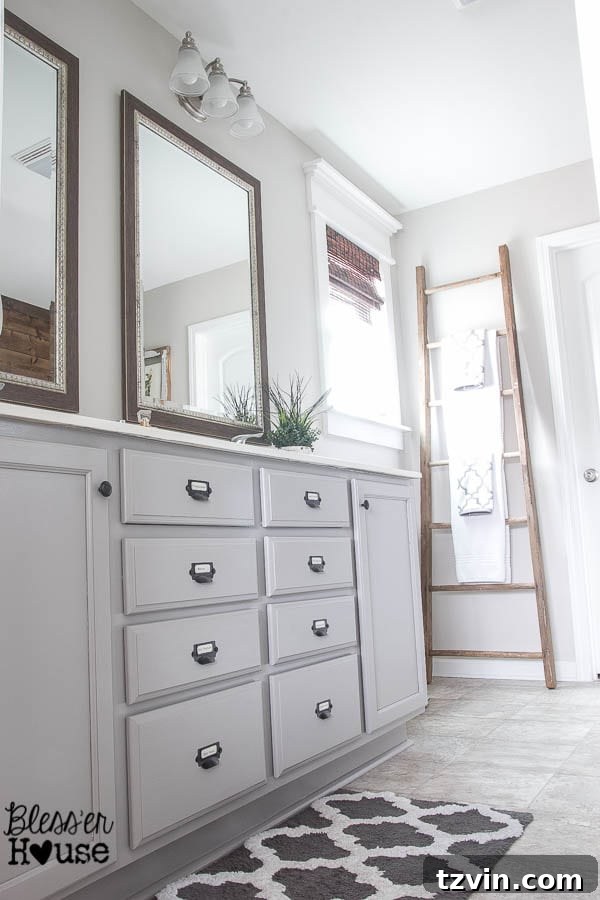
After successfully refreshing our master bathroom cabinets, many readers reached out, eager to learn more about the exact painting process. It’s true that there are countless tutorials on cabinet painting available online, which can sometimes feel overwhelming. Finding a guide that truly simplifies the process for beginners, while ensuring professional results, can be a challenge. This article aims to be that comprehensive, easy-to-follow resource.
This truly is the beginner’s roadmap to painting cabinets. While I’ve only undertaken this project a couple of times, I’ve dedicated considerable time to researching and testing various methods to discover what truly yields the best, most durable, and smoothest finish. If you find yourself contemplating those old cabinets you’ve grown to dislike, or if you feel a tinge of guilt about painting relatively new ones, I’m here to tell you, from one beginner cabinet painter to another: you absolutely have the skills to transform them. Don’t compromise on living in a space you don’t love.
When we first outlined the design plan for our hallway bathroom, eliminating these reddish wood cabinets was the absolute top priority. We knew that this single change would unlock the room’s full potential and create a much brighter, more contemporary feel.
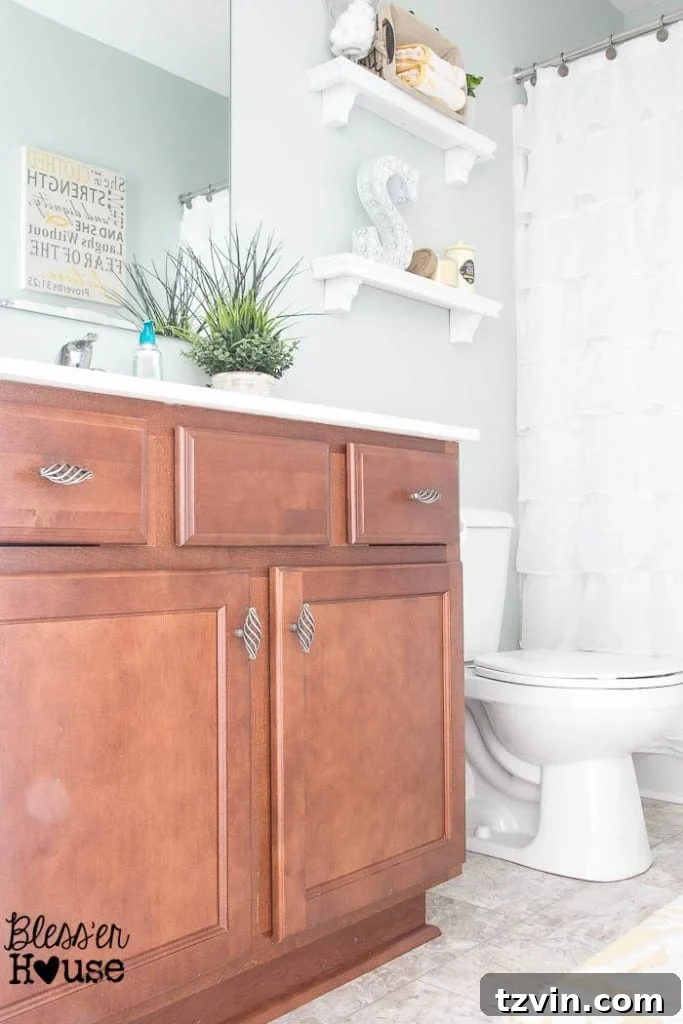
Ready to embark on your cabinet painting journey? Below, you’ll find a detailed account of every step I took, along with invaluable insights into a couple of things I would consider doing differently next time to further optimize the process and results.
Essential Supplies for Your Cabinet Painting Project
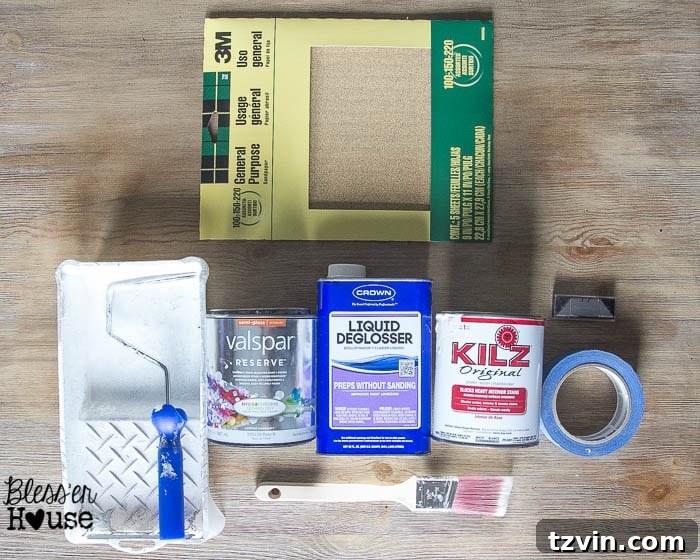
Gathering the correct tools and materials is the foundational step to any successful cabinet transformation. Investing in quality supplies will not only save you time and frustration but also significantly contribute to achieving that coveted professional-looking finish. Here’s a comprehensive list of what you’ll need to get started:
- Plastic Sheeting or Drop Cloths: Absolutely essential for protecting your floors, countertops, and surrounding walls from paint drips, dust, and spills. A budget-friendly alternative for smaller areas can be a plastic shower curtain liner.
- High-Quality Painter’s Tape*: Don’t skimp on this! Good painter’s tape is critical for achieving crisp, clean lines and protecting areas you don’t want painted. FrogTape or ScotchBlue are popular choices.
- Razor or Utility Knife*: Indispensable for scoring painter’s tape before removal, which prevents paint from peeling away along with the tape, ensuring a sharp edge.
- Assorted Sandpaper (Medium to Fine Grit)*: You’ll need various grits. Start with medium (e.g., 120-150 grit) for initial scuffing or smoothing repaired areas, and fine (e.g., 220-320 grit) for sanding between primer and paint coats to achieve an ultra-smooth finish.
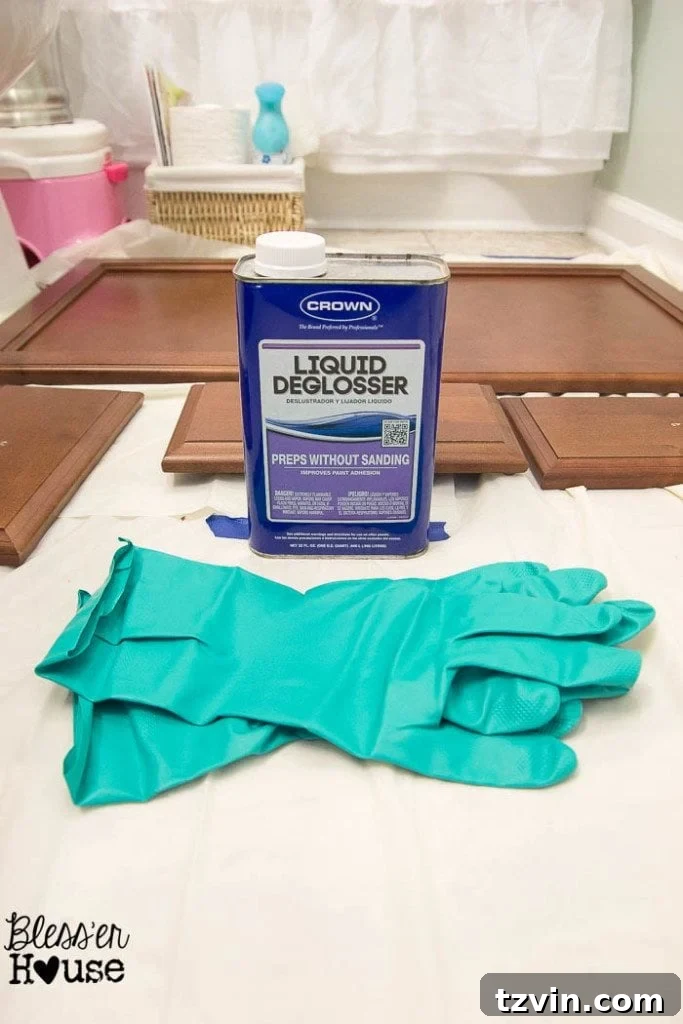
- Liquid Deglosser/Degreaser: A powerful cleaning agent that thoroughly removes grease, grime, and dulls the existing finish to promote paint adhesion, often reducing the need for extensive sanding.
- Chemical-Resistant Gloves: Your hands need protection from harsh chemicals like deglosser, primer, and paint.
- Respirator Mask*: Non-negotiable for safety when working with chemical fumes from deglosser and many primers/paints, especially in poorly ventilated areas.
- Wood Filler*: For filling any existing hardware holes you won’t be reusing, as well as minor dents or imperfections, creating a seamless base.
- Paint Roller Tray: A standard paint tray for conveniently loading your rollers.
- 1.5″ Economy Grade Paint Brush: Useful for initial cut-ins, getting into tight corners, and less critical areas.
- 1.5″ Angled Purdy Paint Brush* (or similar high-quality synthetic brush): My absolute favorite for precision work, clean edges, and smoothing out paint in corners. A high-quality brush minimizes visible brush strokes.
- Cabinet Paint Foam Roller* (at least two, preferably high-density): These are crucial for achieving a super smooth, spray-like finish without a sprayer. Use one exclusively for primer and a separate one for paint to avoid cross-contamination.
- High-Quality Primer: Essential for proper adhesion, blocking stains (especially from cherry wood or knots), and ensuring your topcoat color appears true. (Refer to the detailed note below for recommendations.)
- Interior Enamel Semi-Gloss Paint: A durable and easy-to-clean finish that stands up well to the wear and tear cabinets experience. (Refer to the detailed note below for paint considerations.)
Approximate total cost for supplies: $75.00 (This estimate covered cabinets in two bathrooms, demonstrating that this is a highly cost-effective way to update your home.)
Important Notes on Primer and Paint Selection for Best Results
Every DIY project is a learning experience, and I’m always refining my techniques and material choices. While Kilz Original Primer provided excellent adhesion on our cabinets, the fumes were intensely strong. For future projects, I would strongly recommend opting for a low-VOC (Volatile Organic Compound) or odorless primer. Brands like Zinsser B-I-N Shellac-Base Primer (which seals knots incredibly well) or low-VOC acrylic primers offer effective priming with a much more pleasant, and safer, indoor air quality during application.
Regarding paint, I initially used Valspar Reserve semi-gloss. While the final finish was undeniably beautiful, I noticed two key aspects: it took several weeks to fully cure to its maximum hardness, and its self-leveling properties weren’t as pronounced as I’d hoped. Self-leveling paint essentially “flows out” to smooth away brush and roller marks as it dries, giving a much more professional finish. I also didn’t observe a significant difference in performance between the pricier Reserve line and Valspar’s more affordable Signature line for this application. For optimal results and faster curing times, I’m now open to investing a bit more in specialty cabinet paints. Many experienced DIYers and professionals highly recommend products like Benjamin Moore Advance, Sherwin-Williams ProClassic (this water-based acrylic-alkyd enamel), or premium cabinet-specific paints from reputable brands like Ace Hardware. These often offer superior durability, better self-leveling, and quicker cure times, truly making a difference in the final outcome.
For this project, I achieved my desired color by having “Winter Gates” by Benjamin Moore mixed into the Valspar Reserve paint. Always test your chosen color on a small, inconspicuous area (like the back of a door) to ensure it’s exactly what you envision before committing to the entire project.
The Step-by-Step Process to Painting Your Cabinets Flawlessly
Follow these detailed instructions carefully to transform your cabinets and achieve a smooth, durable, and aesthetically pleasing finish that will stand the test of time.
Step 1: Meticulously Disassemble and Label All Components
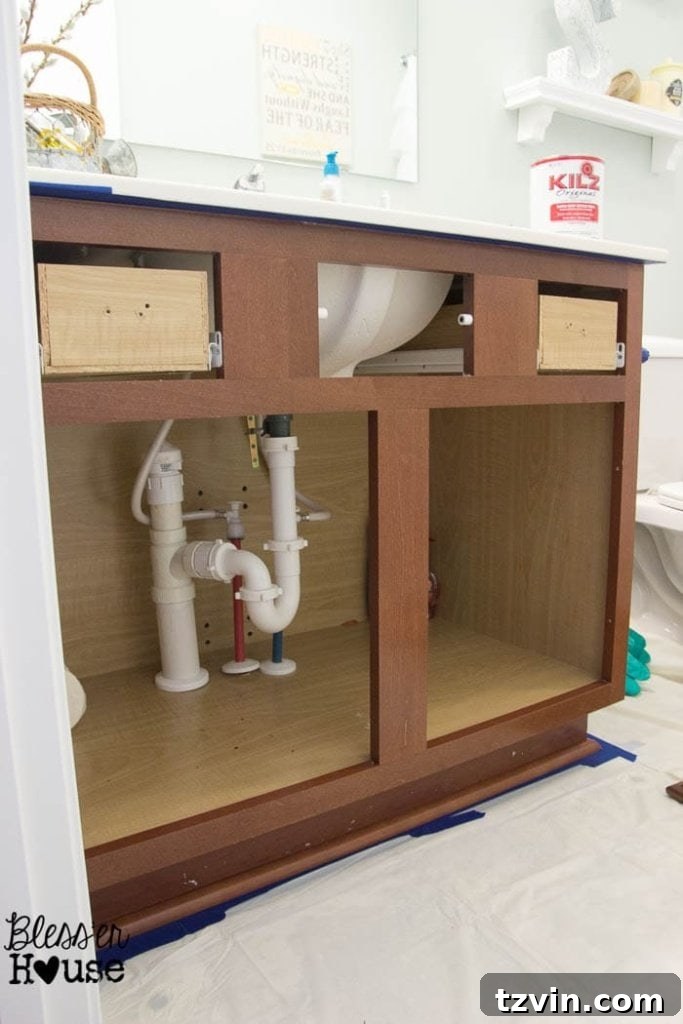
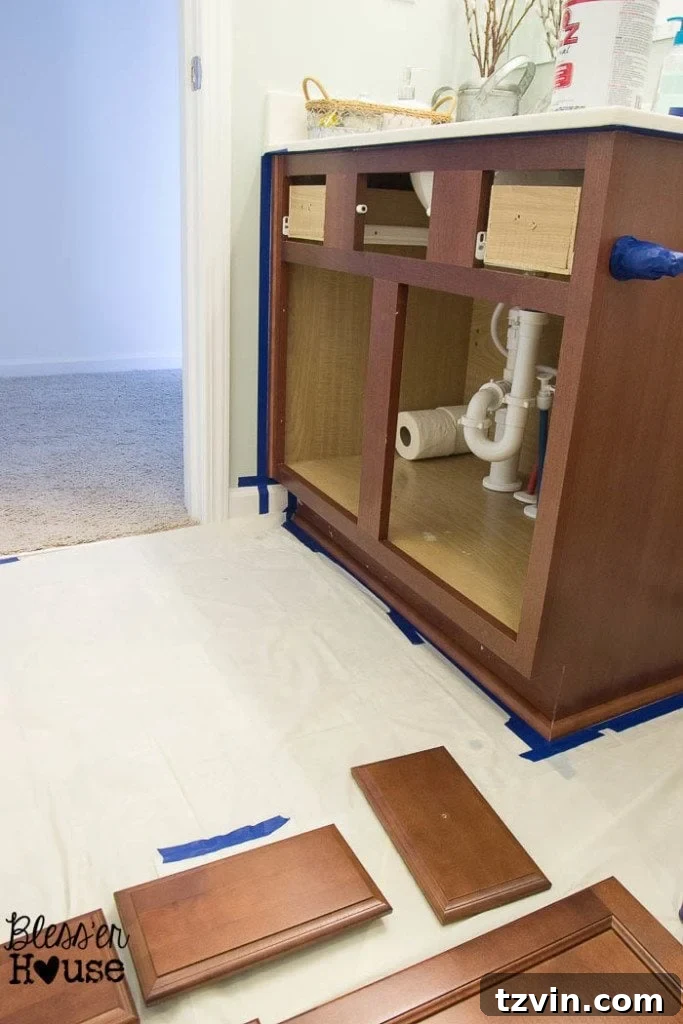
Begin by systematically removing all cabinet doors, drawer fronts, and existing hardware (hinges, knobs, pulls). This initial step is paramount for achieving a truly professional and uniform finish. To avoid future headaches during reassembly, create a detailed labeling system. Use masking tape to number each door and drawer front, corresponding to its original position on the cabinet box. Crucially, also label the matching hinges for each door. A simple sketch of your cabinets indicating the number for each piece can be immensely helpful. This meticulous organization ensures that every component returns to its precise location, guaranteeing a perfect fit.
Step 2: Diligently Protect Your Entire Workspace
Thorough protection of your work area is vital. Completely cover your floors, countertops, adjacent walls, and any nearby appliances with plastic sheeting or sturdy drop cloths. Secure all edges firmly with painter’s tape to prevent any shifting and to create a barrier against drips and dust. If you’re not entirely confident in your freehand brushing (like many of us, who might be a bit “Shakey McGee” with a brush!), generously apply painter’s tape around the cabinet boxes where they meet the wall, ceiling, or floor for clean, sharp lines. As a cost-effective alternative to traditional drop cloths, a plastic shower curtain liner can be surprisingly effective for covering large surfaces.
Step 3: Thoroughly Clean, Degloss, and Repair Surfaces
Equip yourself with chemical-resistant gloves and your respirator mask. Using a clean rag, liberally wipe down all cabinet doors, drawer fronts, and the cabinet boxes with liquid deglosser. This is a critical preparation step: it effectively removes years of accumulated grease, grime, and kitchen residue, and simultaneously dulls the existing finish. This creates an ideal etched surface for paint adhesion, often significantly reducing the need for heavy sanding. While I typically rely on deglosser for most of the prep, a light scuff-sanding with fine-grit sandpaper (e.g., 220-grit) after the deglosser has dried can provide even better adhesion, especially for very glossy or stubborn existing finishes.
After the deglosser has completely dried (always check the product’s specific drying times), meticulously inspect your cabinet components for any imperfections. Use wood filler to patch any dings, dents, or existing hardware holes if you plan to change the hardware’s location or style. Once the wood filler is fully dry, sand these repaired areas smooth with fine-grit sandpaper (220-320 grit) until they are perfectly flush with the surrounding surface. Finish by thoroughly wiping away all sanding dust with a tack cloth or a slightly damp microfiber cloth to ensure a pristine, clean surface ready for priming.
Step 4: Prime Your Cabinets for Optimal Adhesion and Finish
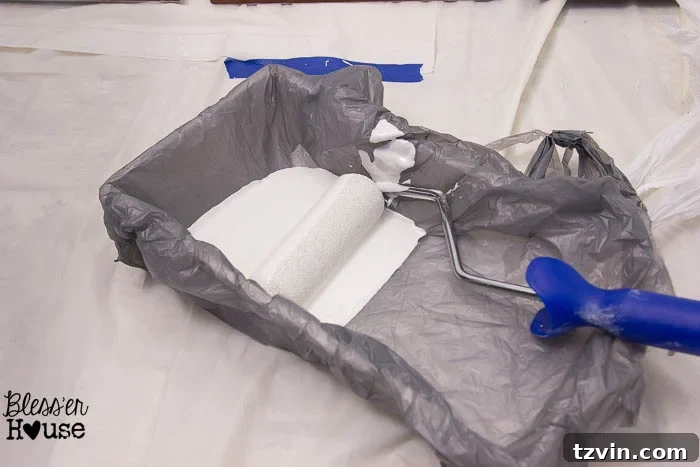
For incredibly easy cleanup, a clever trick is to line your paint roller tray with a plastic grocery bag before pouring in your primer. This prevents primer (especially oil-based ones) from contaminating your sink and makes disposal effortless. Pour your chosen primer into the lined tray.
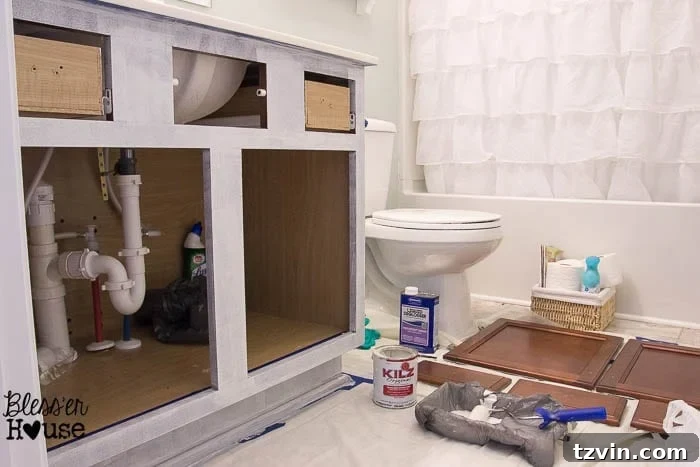
Using your economy-grade brush, apply primer to any corners, intricate profiles, and hard-to-reach areas on the cabinet boxes, doors, and drawer fronts. Immediately after, use a dedicated cabinet foam roller to smooth out any brush marks and apply a thin, even coat of primer across all flat surfaces. The key here is thin layers to prevent drips and ensure even coverage. Always begin by priming the backsides of your cabinet doors first; this allows you to practice your technique on less visible areas. Once the first coat of primer is dry (always refer to the product’s instructions for specific drying times), lightly sand the entire primed surface with fine-grit sandpaper (220-320 grit). This crucial step creates a silky-smooth base, removes any minor imperfections, and helps the subsequent coat adhere perfectly. Thoroughly wipe away all sanding dust with a tack cloth before proceeding.
Step 5: Apply Your Chosen Paint for the Final Color
Once the primer is completely dry and you’ve cleaned up your primer tray (simply by tying up and discarding the plastic bag), it’s time for the final topcoat application. Repeat the precise application process outlined in Step 4, this time using your interior enamel semi-gloss paint, a separate clean foam roller, and your high-quality angled Purdy paint brush. Use the brush for meticulously cutting in edges and corners, and the fresh cabinet foam roller for all flat surfaces. Always strive for thin, even coats to prevent drips and ensure consistent coverage. Typically, two coats of paint are sufficient for full opacity and durability, but depending on your chosen color and the original cabinet finish, a third thin coat might be necessary to achieve a truly rich and even tone.
For an exceptionally smooth, factory-like finish, it is highly recommended to lightly sand between each coat of paint once it’s dry to the touch. Use very fine-grit sandpaper (320-400 grit is ideal here). This step helps to knock down any subtle texture left by the roller or brush and ensures that the subsequent coat adheres flawlessly, culminating in that highly coveted professional, spray-like appearance. After each sanding, remember to thoroughly wipe away all dust with a tack cloth.
Step 6: Allow Adequate Drying and Curing Time (Patience is Key!)
This step is arguably the most crucial for long-term durability, yet often overlooked. While your paint may feel dry to the touch within a few hours, it takes days, or even several weeks, for the paint to fully “cure” and achieve its maximum hardness and resistance to scratches, dents, and moisture. Avoid placing heavy items on shelves, reattaching hardware, or subjecting your freshly painted cabinets to heavy use until they are completely cured. Refer to your specific paint manufacturer’s instructions for recommended drying and curing times, as these can vary significantly. Rushing this step is the most common cause of nicks, scratches, and a compromised finish down the line.
Step 7: Carefully Remove Painter’s Tape
Once the paint is dry enough to be handled but before it has fully hardened and become brittle (typically within a few hours to a day, depending on humidity and paint type), score the edge of your painter’s tape with your utility knife. This scoring creates a clean break in the paint film, effectively preventing the paint from peeling up along with the tape. Then, slowly and steadily peel away the tape at a low, 45-degree angle. If you wait too long, the tape adhesive can become excessively strong, or the paint can become too hard, significantly increasing the risk of damaging your fresh paint job.
Step 8: Reassemble and Savor Your Incredible Handiwork!
With patience and precision, carefully reattach all your cabinet doors and drawer fronts. Utilize your carefully created labeling system to ensure each piece returns to its exact original position. Finally, install your chosen hardware – the knobs and pulls that add that perfect finishing touch. Step back and truly admire the incredible transformation you’ve personally achieved! The immense pride of completing such a significant DIY project yourself is truly immeasurable.
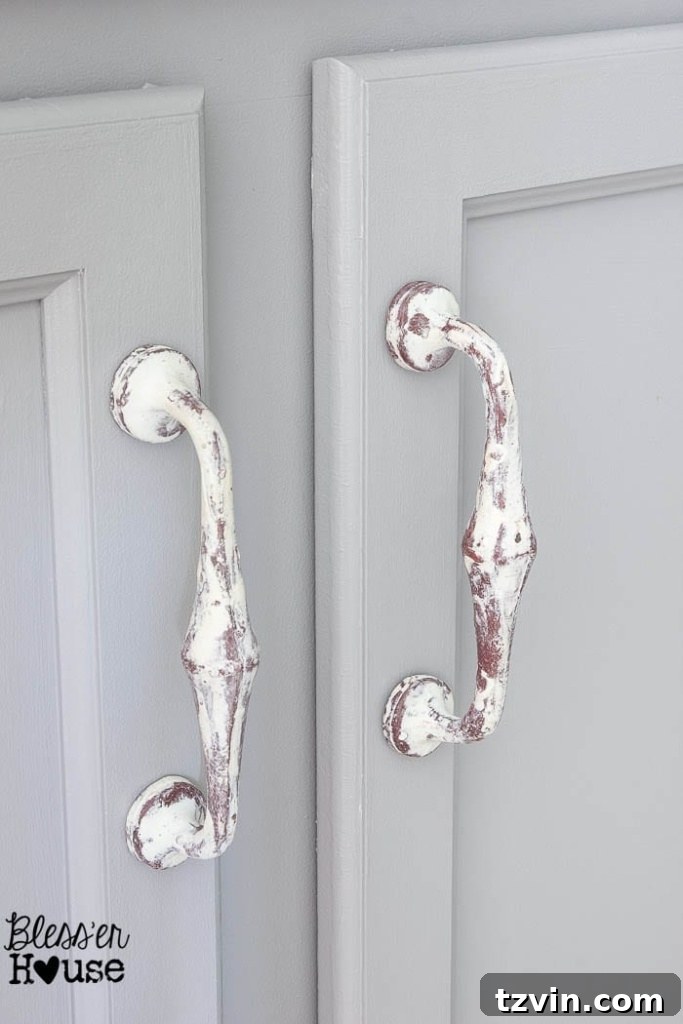
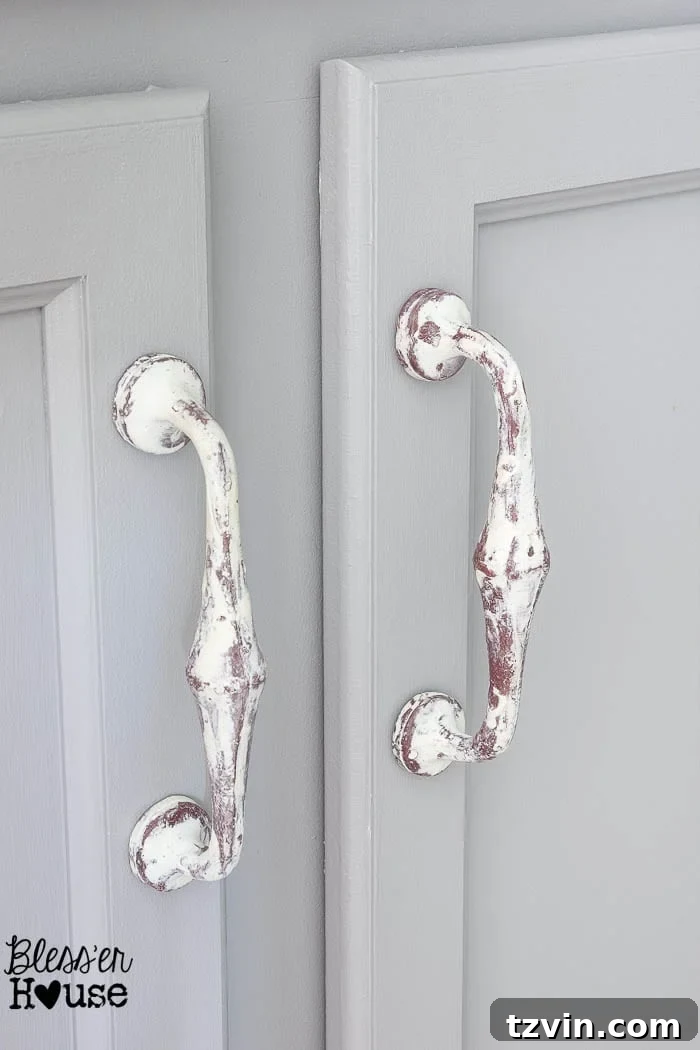
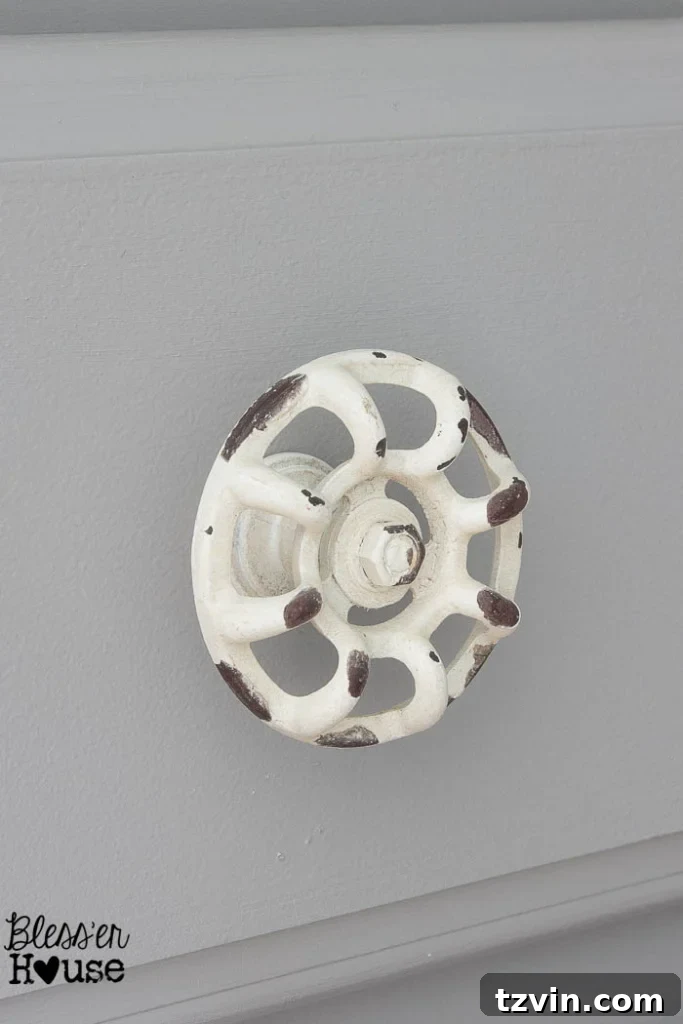
For this particular bathroom update, I was thrilled to discover these charming handles and unique spigot-looking knobs at Hobby Lobby during a fantastic 50% off sale – a true bargain! It’s amazing how new hardware can instantly elevate the entire aesthetic of your freshly painted cabinets. They truly add that essential layer of personality and polished detail.
Achieving a Flawless, Professional Cabinet Finish: Extra Tips
Beyond the step-by-step instructions, a few additional practices can significantly enhance the final quality and durability of your painted cabinets:
- Ensure a Dust-Free Environment: Dust is the ultimate enemy of a smooth paint finish. Before you begin priming and painting, thoroughly clean your workspace. Consider using a shop vacuum, wiping down surfaces, and even damp-mopping floors to minimize airborne dust particles.
- Thin Coats, Always: This is a golden rule in painting. Always apply multiple thin coats of primer and paint rather than one thick coat. Thick coats are prone to unsightly drips, uneven drying, and a textured, unprofessional finish. Thin coats dry faster and bond better.
- Master Proper Brush and Roller Technique: Load your brush and roller evenly, avoiding excessive paint. For rollers, use light, consistent pressure and overlap each pass slightly to prevent lines. When using a brush, employ long, even strokes, always working in the direction of the wood grain to minimize visible brush marks.
- Vigilantly Watch for Drips and Sags: Continuously inspect edges, corners, and detailed areas for any drips or sags, especially during the first few minutes after paint application. It’s much easier to smooth them out immediately than to sand them down later.
- Patience is Your Best Tool: We cannot stress this enough. Rushing through drying times between coats or cutting short the crucial curing period will compromise both the durability and the aesthetic quality of your finish. Good things come to those who wait.
- Ensure Excellent Ventilation: Always work in a well-ventilated area. Open windows and use fans to ensure good air circulation. This not only helps to dissipate fumes (even from low-VOC products) but also aids in faster and more even drying of the paint.
Long-Term Maintenance for Your Newly Painted Cabinets
Once your cabinets have fully cured and reached their maximum hardness, maintaining their pristine look is straightforward. For general cleaning, simply use a soft, damp cloth with a mild, non-abrasive soap. Avoid using harsh chemical cleaners, abrasive sponges, or strong detergents, as these can gradually degrade or damage the paint finish over time. Regular, gentle cleaning will keep your beautifully painted cabinets looking fresh and new for many years to come.
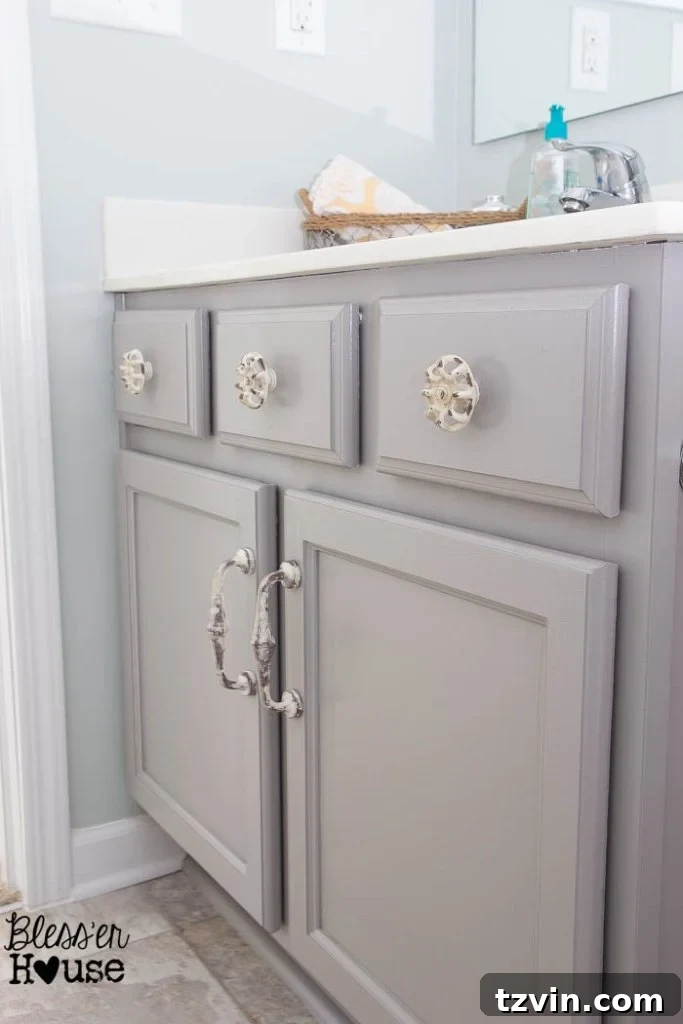
What an incredible difference a little paint and a lot of dedication can make! We are absolutely thrilled with the refreshed, brightened look in our hallway bathroom, even with the challenging lack of natural light in this space. This project powerfully demonstrates that you truly don’t need to be a seasoned expert to achieve stunning, professional-quality results in your own home.
Have you recently painted any cabinets that have you doing a happy dance? Or perhaps you’ve gained some invaluable tips and tricks during your own DIY cabinet painting projects that you’d love to share with the community? We’re always eager to learn from your experiences! Our kitchen’s cherry wood cabinets might just be next on the makeover list, so all advice is warmly welcome.