
This post contains affiliate links. For more information, see my full disclosure here.
Transform Your Chaos: The Ultimate Guide to Organizing a Craft Closet Like a Rockstar
Every home has that one space. You know, the one where good intentions go to die, and miscellaneous items magically multiply into an overwhelming, disorganized mess. For us, that space was the playroom closet – once a mere storage area, it had devolved into what I affectionately (or not-so-affectionately) called the “junk closet.” But no more! Today, we’re celebrating a major victory in home organization, and I’m here to share how you can conquer your own cluttered craft space, turning it into a functional and inspiring haven for creativity. Get ready to bid farewell to chaos and hello to a craft closet that truly rocks!
Before we dive into the glorious transformation, let’s take a moment to appreciate the sheer magnitude of the “before.” It’s important to acknowledge where we started to truly appreciate how far we’ve come. Picture this: a closet overflowing with forgotten projects, random supplies, and an assortment of items that lacked any logical home. This wasn’t just a mild mess; it was a black hole of disarray, sucking in every stray object that didn’t have an immediate purpose. It was the kind of space that made you want to shut the door quickly and pretend it didn’t exist. Frankly, it was an eyesore that zapped any creative energy right out of me.
The Closet Before: A Glimpse into the Chaos
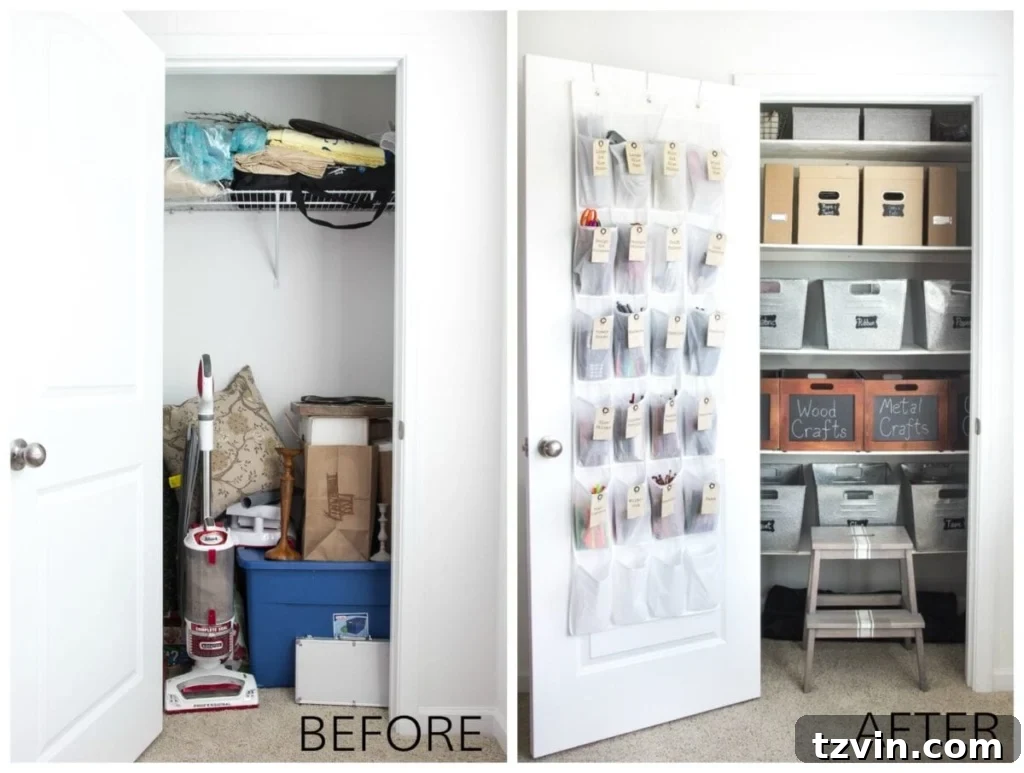
I’m just a teensy bit excited that the once cluttered closet in our playroom no longer looks like this.
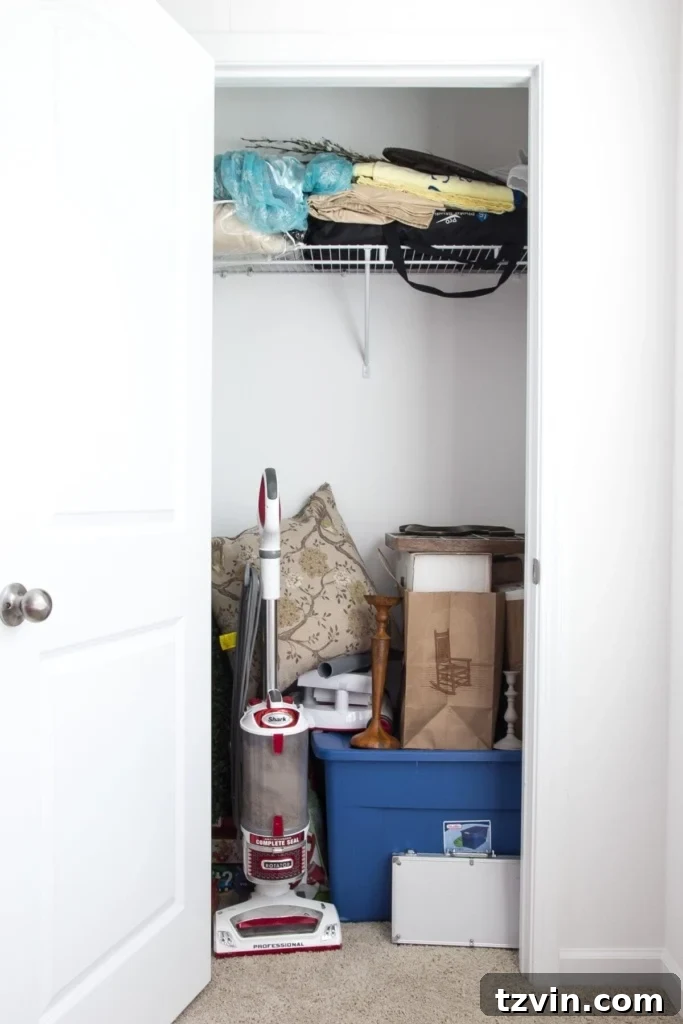
Ew. Make it stop!
This was pretty much the “I-have-no-idea-what-to-do-with-this-random-object-so-let’s-dump-it-here” space. It was a dumping ground for anything and everything, leading to frustration every time I needed to find something specific. Craft supplies were mixed with office essentials, toys mingled with tools, and the sheer volume of items made it impossible to see what we actually owned, let alone use it. This dysfunctional space was not only wasting valuable storage potential but also hindering any spontaneous creative endeavors. We desperately needed a reset button. (Side note: Don’t you wish reset buttons existed in real life? Along with magic cleaning wands? One can dream!)
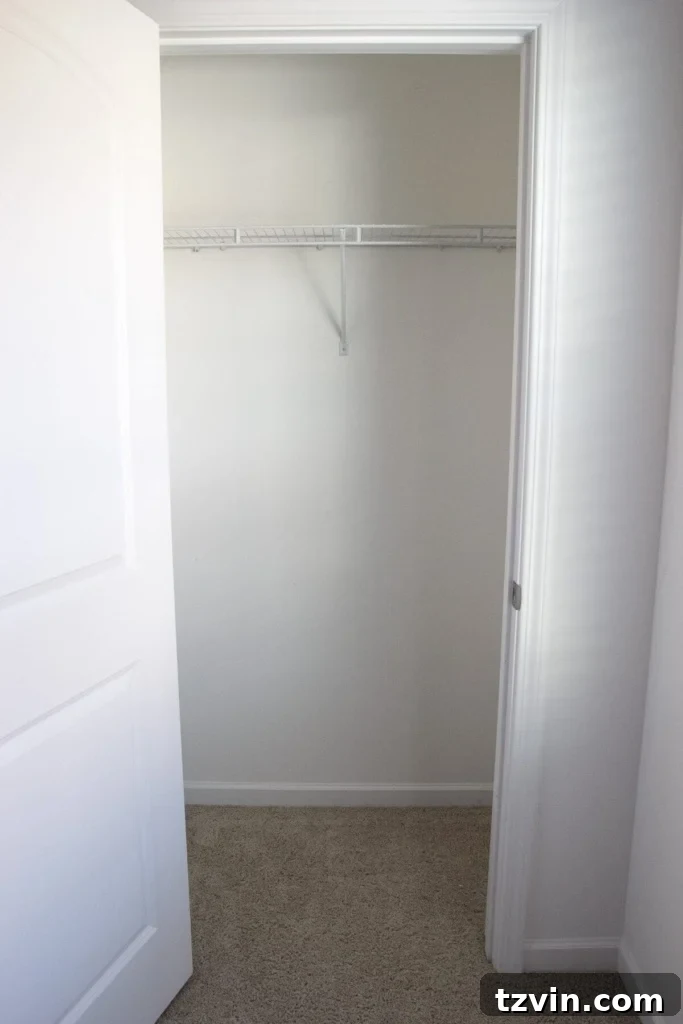
Enter DIY Shelving: Building the Foundation for Functional Craft Storage
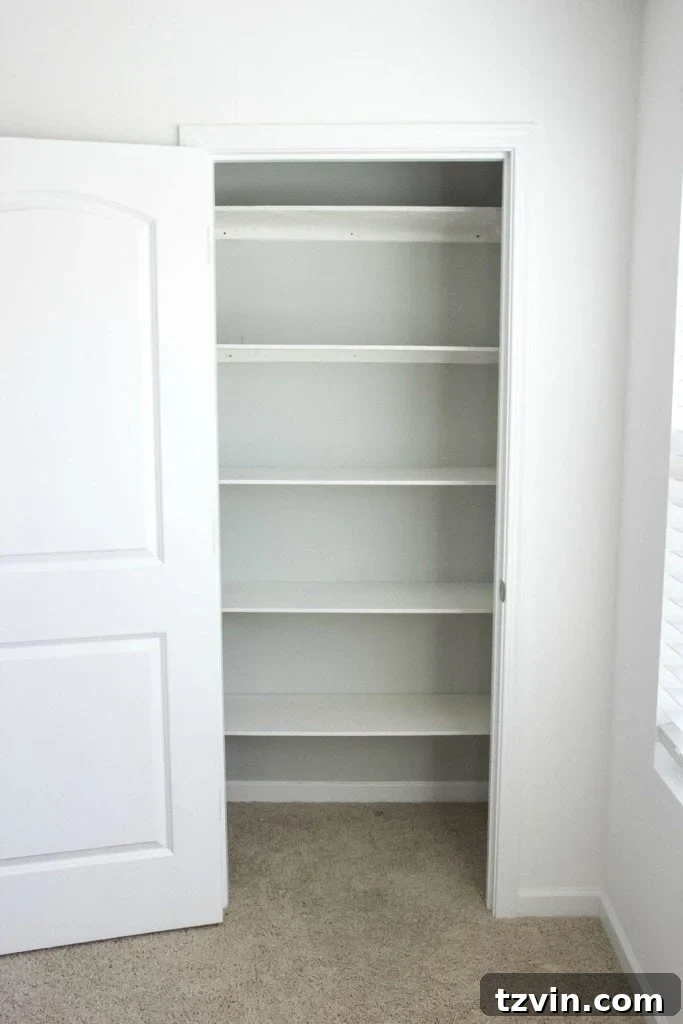
Our first major step in remedying this chaotic situation was to address the lack of proper shelving. The existing setup was minimal and inefficient, contributing significantly to the clutter problem. We decided to install custom DIY shelves, a project that laid the essential groundwork for everything else. DIY shelving offers incredible advantages: it allows you to maximize every inch of space, tailor shelf heights to your specific storage needs, and often comes with a lower cost compared to pre-made systems. This foundational step transformed a cavernous, underutilized space into a structured environment ready for serious organization.
If you’re considering a similar project for your craft closet or any other storage area, I highly recommend exploring DIY shelving. It’s a game-changer for spatial efficiency. You can read all about the tutorial for our basic DIY closet shelving right here. The process involved simple measurements, cutting wood to size, and secure installation, creating robust surfaces capable of holding all our craft supplies. This initial investment of time and effort immediately made the closet feel more purposeful and less like a bottomless pit.
Spiffing It Up: The Rockstar Craft Closet Transformation Unveiled
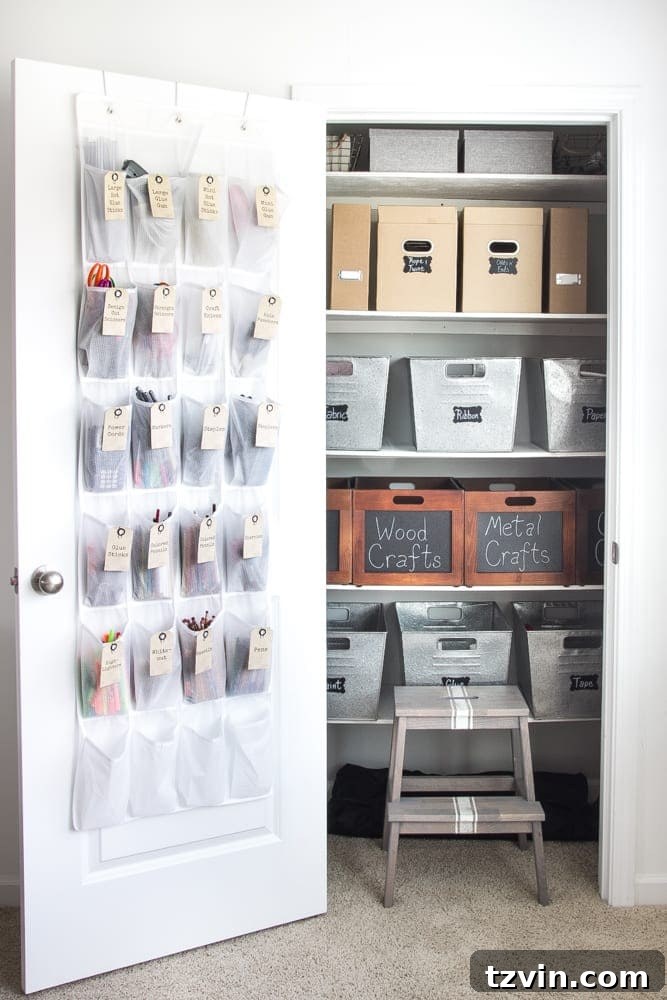
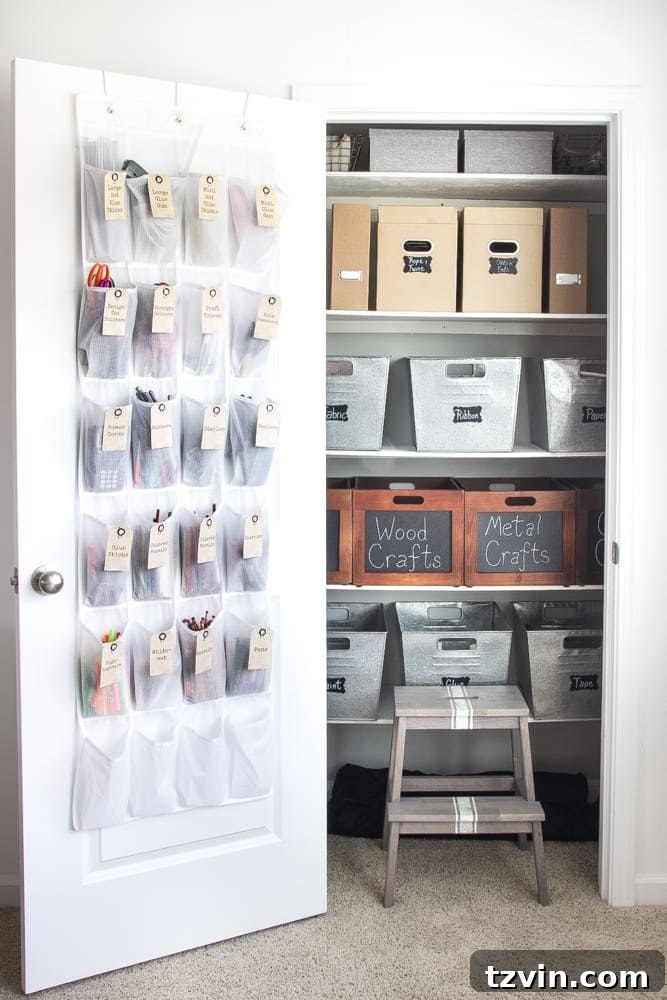
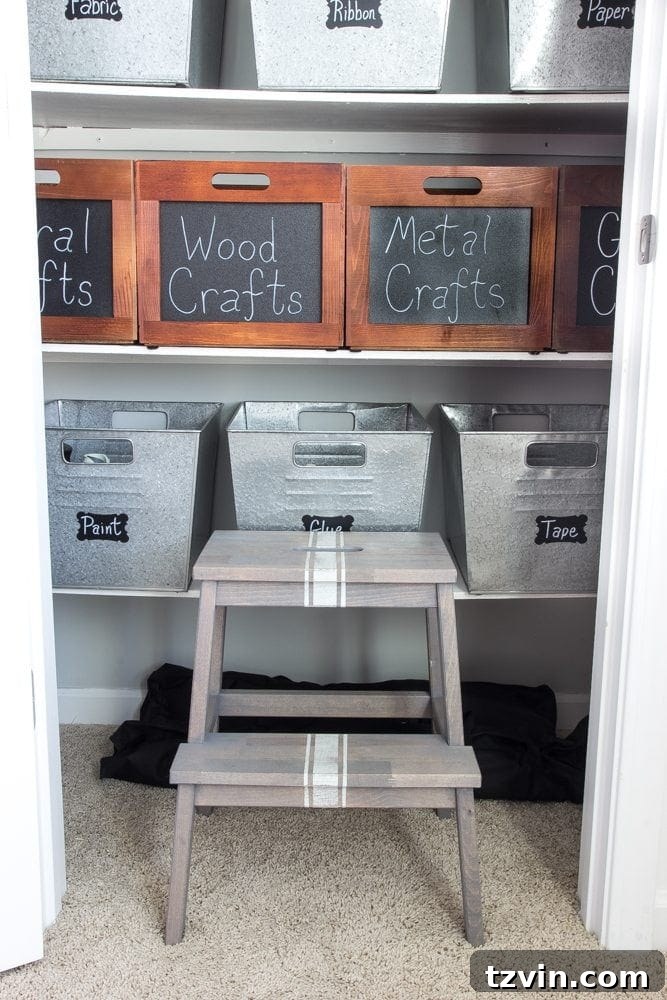
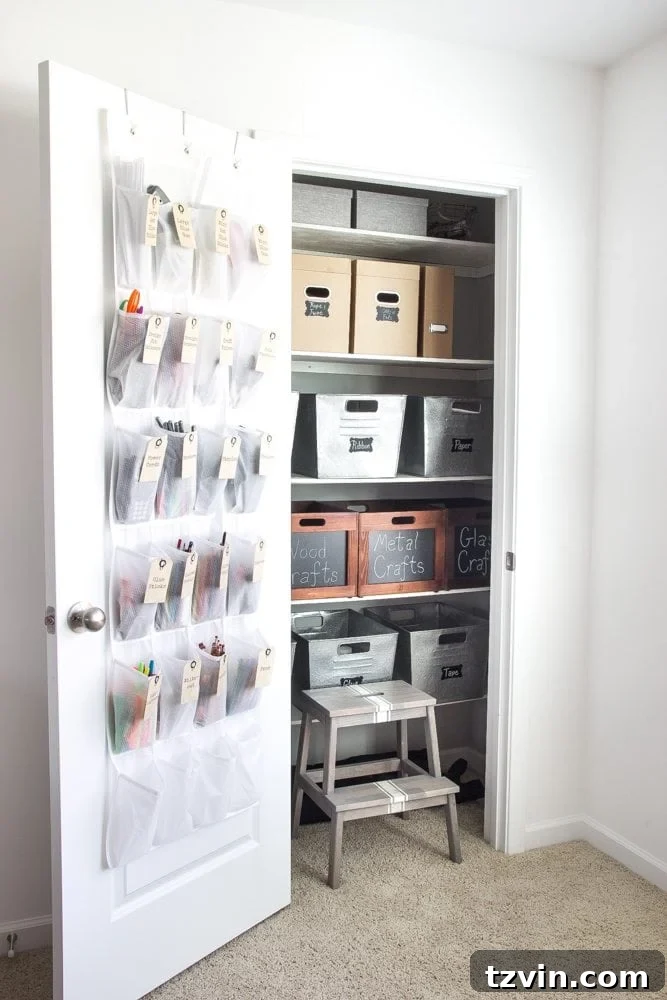
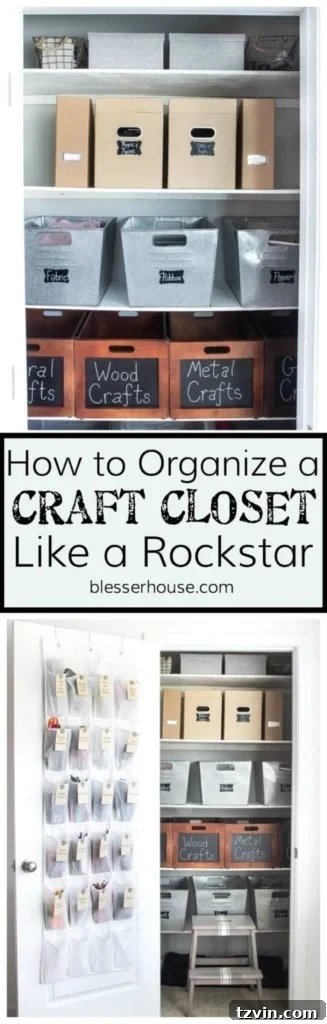
And now… the once black hole looks like THIS! If you listen very carefully, you can hear tiny angel voices singing. This organized craft closet is more than just tidy; it’s a source of joy and inspiration, a testament to the power of thoughtful organization. With the shelves in place, the real fun began: filling them with purpose and style. The goal was to create a functional storage system that also looked aesthetically pleasing, encouraging creativity rather than stifling it.
The Great Storage Bin Debate: DIY vs. Buy
I started out at first with a plan to employ my good ol’ diaper box storage trick that I used in my pantry organization. This hack had worked wonders for our pantry, where I creatively disguised mundane diaper boxes into attractive, functional storage. I’d even stored 10 leftover diaper boxes for an entire year with this plan in mind, eagerly anticipating their transformation into beautiful craft storage.
Only this time, I had the ambitious idea to wrap them in rope to make them look like rustic baskets. It seemed like a brilliant, cost-effective DIY solution for craft supply storage. However, after wrapping just one diaper box only halfway, I quickly realized that DIY is not always the answer. This was an epic fail! The amount of rope required, combined with the sheer number of hours I’d spend with a hot glue gun permanently attached to my hand, made the project far less appealing. The cost of materials alone for the rope was turning out to be more expensive per box than simply purchasing attractive bins and baskets from a store like Walmart.
This was a valuable lesson in the often-overlooked balance between time and money. While I love a good DIY project, sometimes the most frugal and efficient approach is to invest in ready-made solutions. I made the executive decision to ditch the rope-wrapped diaper boxes. Sold! Sometimes it’s better just to spend the money than waste that much precious time on a project that doesn’t yield the desired results or prove to be truly cost-effective. This realization freed me up to find stylish and sturdy craft storage solutions without the added DIY stress.
Smart & Stylish Storage Solutions
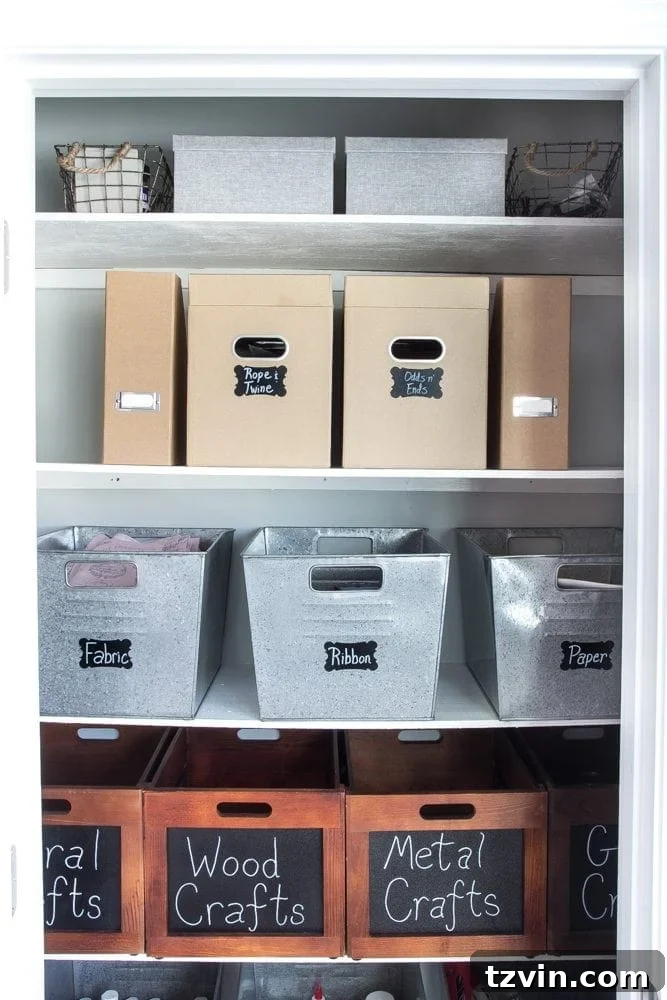
So, with a renewed focus on efficiency and aesthetics, I skipped off to Wally World to pick up some galvanized metal bins and wooden crates. These were around $12 each, proving that stylish and functional craft storage doesn’t have to break the bank. (It looks like they’re currently sold out online, but you can find similar ones here and here.) I shopped all over the place, comparing prices and quality, and these particular bins and crates were the cheapest, sturdiest, and in my opinion, the prettiest options I could find. Their industrial-chic look added a touch of character while providing robust storage for various craft supplies, from paints and brushes to fabrics and papers.
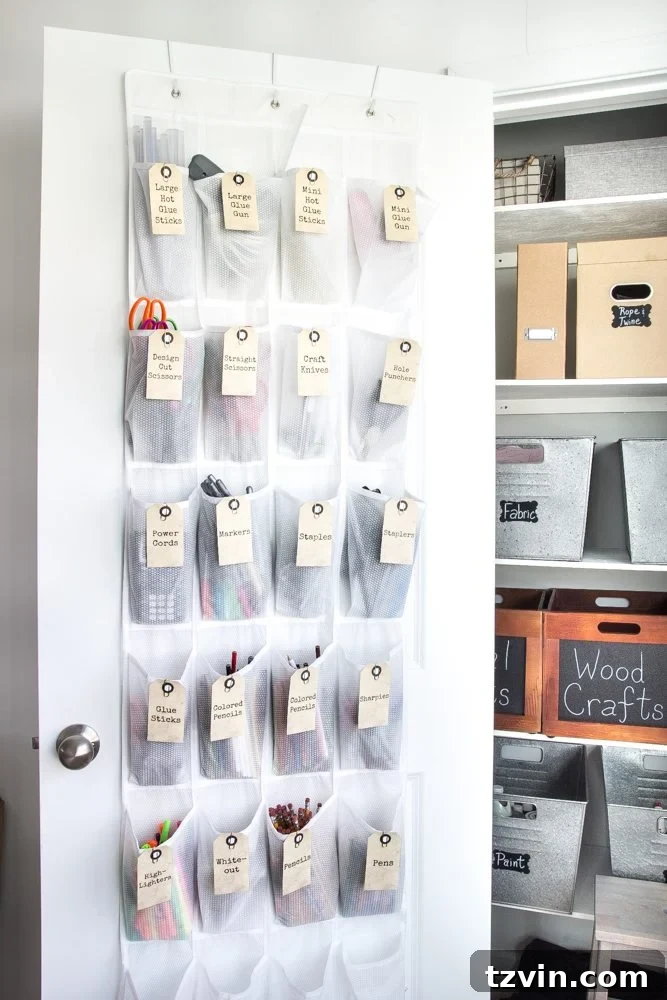
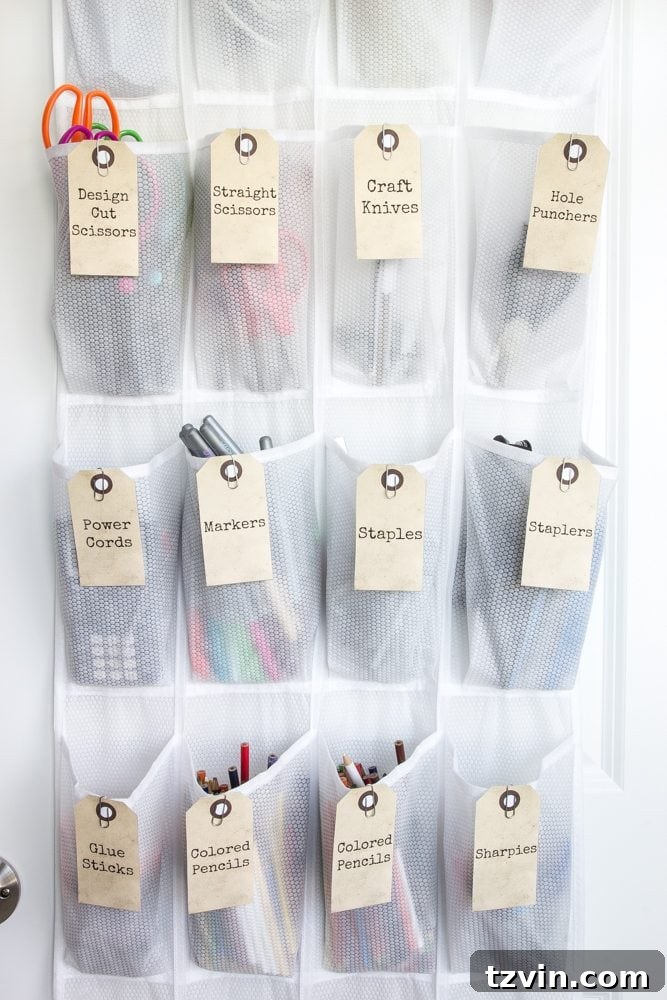
I also wanted to utilize the back of the door for all of the smaller, frequently used office-supply-type items. This is a brilliant, often-underestimated space for maximizing storage in any closet. I’ve long relied on an over-the-door shoe organizer trick to stash all of my school supplies during my teaching days in my classroom. The transparent pockets are perfect for keeping everything in plain sight and easily accessible. No more digging through drawers for a specific pen or a small pack of glitter! It’s incredibly nice to have every little thing organized and visible, making craft time much more efficient and enjoyable.
The Magic of Labels: Keeping Things in Place
No organized space is truly complete without proper labeling. Labels are the silent heroes of sustained organization, ensuring that everything has a designated home and making it easy to put items back where they belong. I made those cute vintage label tags using PicMonkey along with this fantastic freebie from The CoffeeShop Blog. Yay free! These personalized labels not only add a touch of charm and cohesiveness to the craft closet but also serve a vital function. They eliminate guesswork, making it simple for everyone in the family to find what they need and, more importantly, return it to its correct spot. This prevents the “junk closet” syndrome from creeping back in over time.
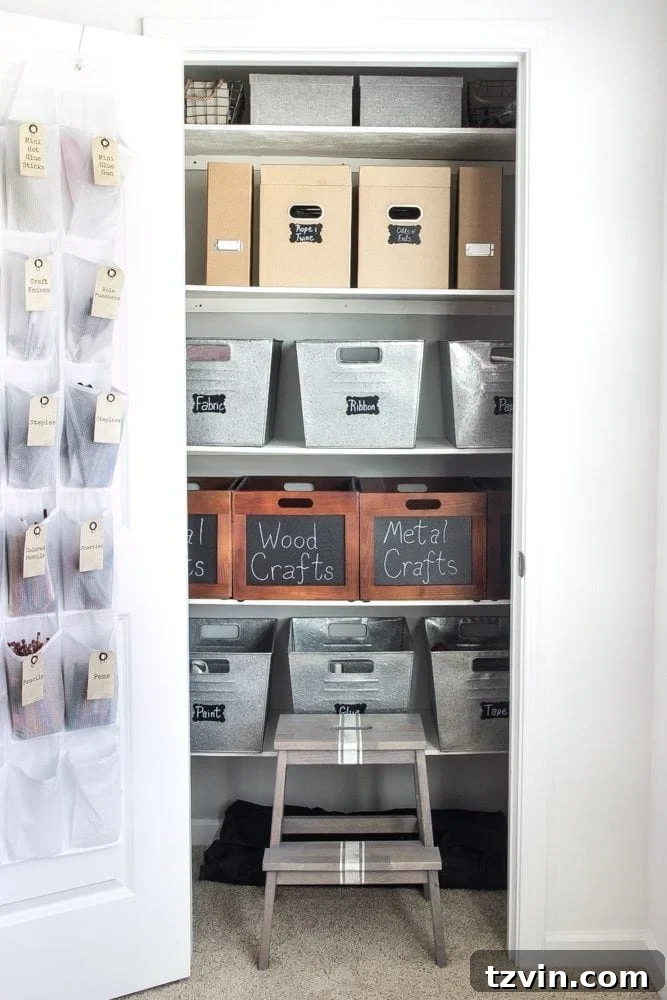
And, of course, I had to throw in my beloved driftwood grain sack step stool for good measure. This stool isn’t just a pretty accent; it’s incredibly functional! I swear, I need 3 more of these stools. Olivia and I both end up dragging it all over the house to reach things. (Although, she does it really sneakily trying to climb up into the candy cabinet in our kitchen – classic kid move!) Having an accessible step stool is crucial for maximizing vertical storage in any closet, ensuring even the highest shelves are within reach for both adults and little helpers. It promotes independence and makes retrieving supplies a breeze.
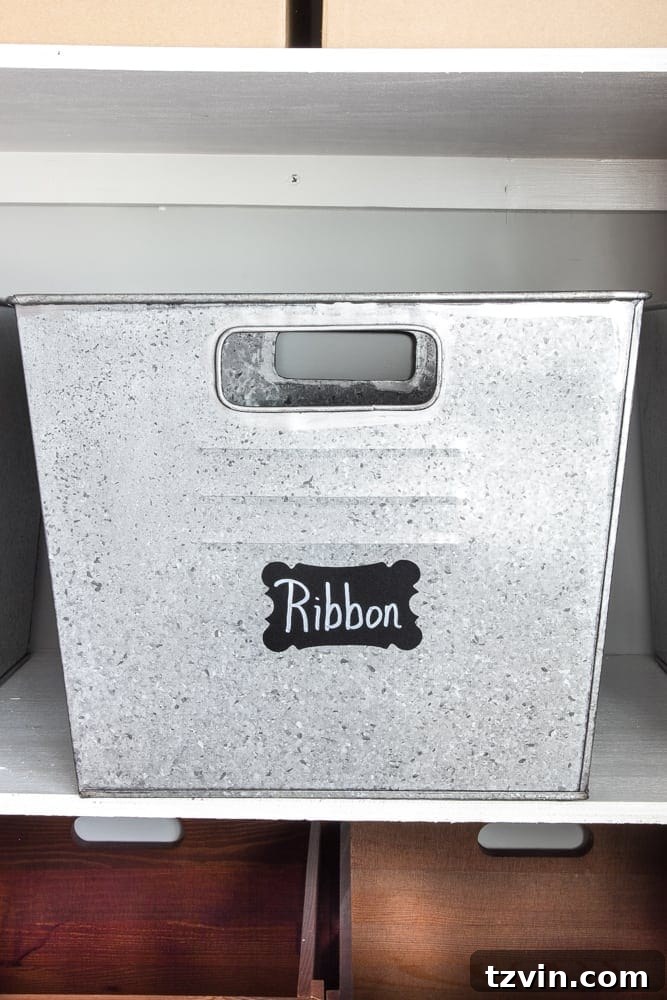
Since some of the bins and boxes didn’t already have chalkboard labels, I added my own that I got on Amazon. Chalkboard labels are fantastic for areas where contents might change over time, offering flexibility and easy updates without having to print new tags. This blend of vintage printed labels and versatile chalkboard labels creates a harmonious and highly functional labeling system tailored to the diverse needs of a craft closet.
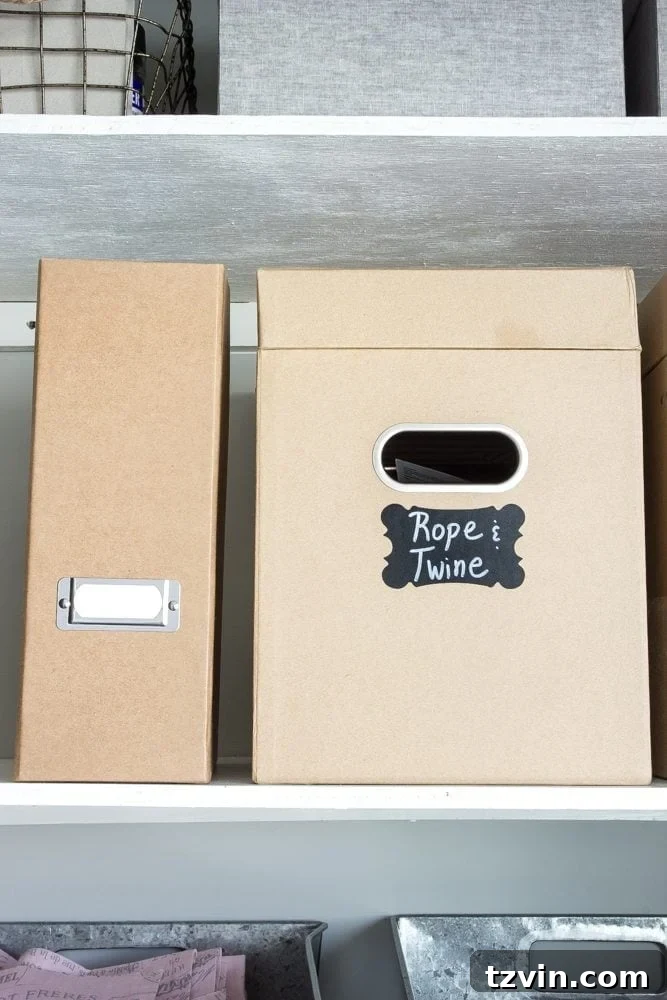
And last year, I bought these file boxes and magazine holders from Target in my feeble attempt to organize my growing craft clutter. While those initial efforts didn’t fully solve the problem, these items still proved incredibly useful in the newly organized space. The file boxes are perfect for categorizing papers, cardstock, and larger sheets of craft material, keeping them flat and protected. The magazine holders are excellent for storing smaller project kits, specialty papers, or even thin rolls of vinyl. Finding cost-effective storage solutions is always a win; I found the gray paper boxes there too, but they’ve since been discontinued. And I scooped up the two small wire baskets at the Target Dollar Spot for $3 each just before Christmas. Don’t underestimate the power of budget-friendly finds for adding both style and function to your organization projects!
Eventually, I plan to put labeled binders in a crate on the floor underneath all of the shelves too, to help me organize paperwork and blog-related resources. This demonstrates that organization is an ongoing process, often evolving with your needs. For now, some of my photography gear is neatly tucked away down there, proving the versatility of the space. The key is to create a flexible system that can adapt as your craft projects, supplies, and life change.
Beyond the Closet: Envisioning a Creative Playroom
So now that this craft closet space is spick and span, I hope it will inspire lots more craft time around here! The fact that this closet is nestled within our playroom is an added bonus. It means that craft supplies are easily accessible during playtime, encouraging spontaneous bursts of creativity from Olivia and, let’s be honest, from me too! An organized craft space directly fuels inspiration and reduces the friction associated with starting a new project. Instead of spending precious minutes searching for materials, we can jump straight into the fun part of creating.
This organized closet is just one piece of a larger puzzle. I hope to eventually tackle this very blank space in the playroom by the end of this year, because currently, it looks like this:
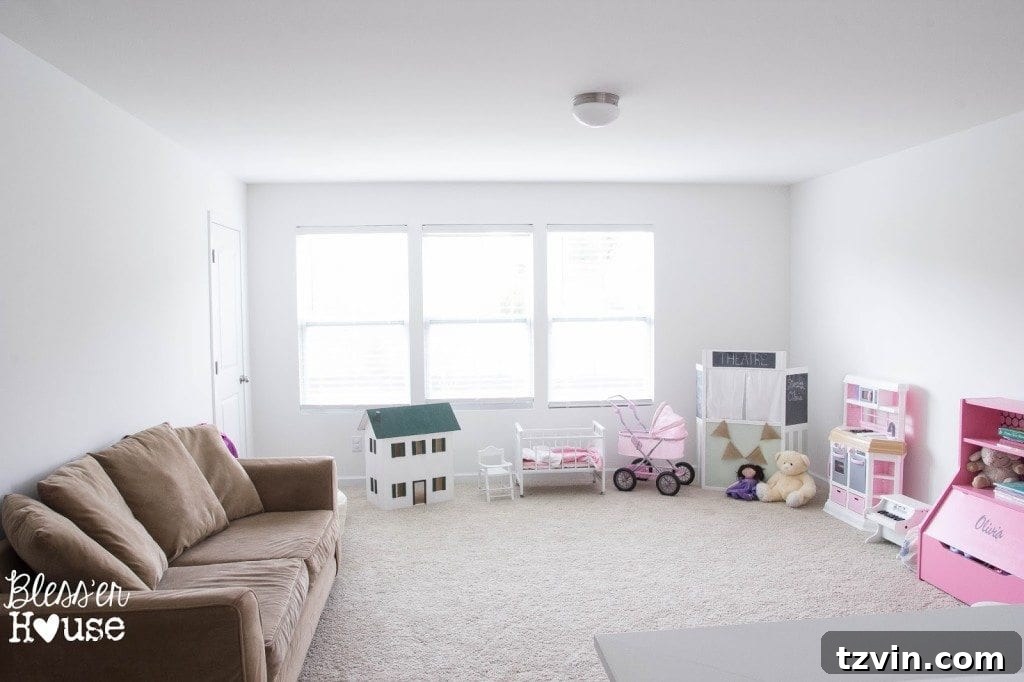
Womp womp.
It has so much potential that I hope will eventually be home to a great creation station for Olivia and I (and probably Robert too) to get our craft on together. Imagine a dedicated workspace, complete with comfortable seating and even more specialized storage – a true hub for artistic expression. But the craft closet is a magnificent start so far, a powerful first step in transforming this entire area into a vibrant and functional playroom. We still have our master bedroom and kitchen makeovers to contend with first, but seeing this closet radiate order and charm gives us the motivation to keep going. Maybe if I can stop drooling over the prettiness of it, we might take it for a test drive soon. 😉
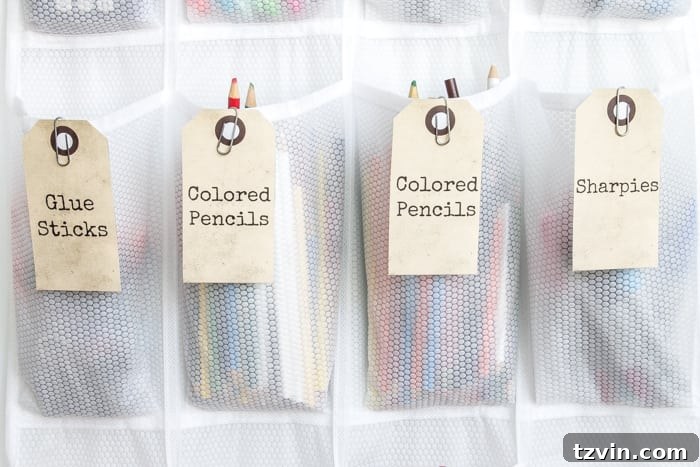
Anyone want to come over for a craft sesh now? We’re ready to create, mess-free and inspired! An organized space simply invites more activity and engagement, making hobbies more accessible and enjoyable. It’s truly amazing how much better I feel after I’ve organized something. Ahh, a cleansing breath of fresh, clutter-free air! The mental clarity and reduced stress are undeniable benefits that extend far beyond the closet itself.
Before & After: The Power of Organization
And just because it’s fun to see a side-by-side comparison, here’s the dramatic before and after. This visual representation truly highlights the incredible transformation and serves as a powerful motivator for anyone contemplating their own organization project. It’s proof that with a little planning, effort, and smart storage solutions, even the most chaotic spaces can become functional works of art.
Have you jumped on the organization bandwagon yet for your New Year’s resolutions? Or perhaps you have some organizing tips of your own to share? I’d love to hear your triumphs and challenges! Now that this incredible craft closet makeover is complete, I guess it’s time to start that weight loss resolution. Something tells me that one won’t be quite as fun as decluttering and organizing, but a girl can try!
To save this post to come back to later for inspiration or practical tips, be sure to pin it to your favorite Pinterest board:
And if you’re looking for more budget-friendly organizing ideas, you can see last January’s organizing project with my tips for The Most Frugal Way to Organize a Pantry:

Follow Bless’er House:
Facebook | Pinterest | Instagram | Twitter | Google+