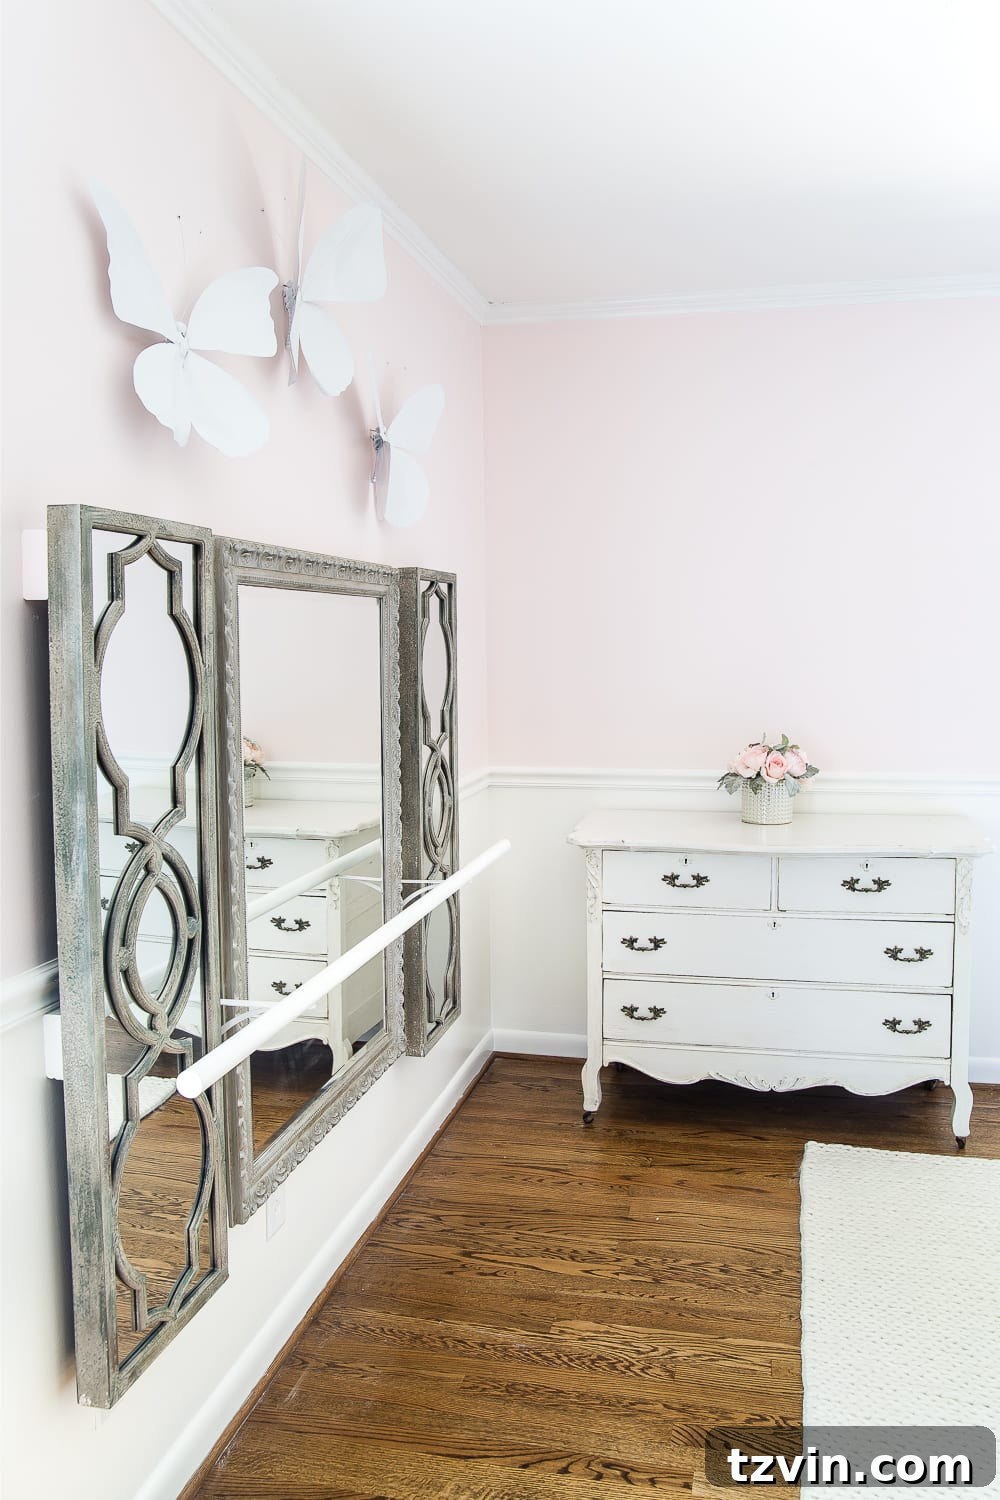
DIY Ballet Barre with Mirrors: A Charming & Practical Addition to Any Child’s Room
There’s nothing quite like witnessing the sheer joy of a child embracing their passions, and for us, this latest project fills my mama heart to the brim with happiness. It might just outshine our previous endeavors, like the DIY storybook art, custom kiddie desks, and even the magical reading nook, especially when it comes to capturing that adorable “little girl” essence.
Perhaps it’s the former ballerina in me, undeniably biased, but building a ballet barre right in Olivia’s room has been a complete game-changer. Since its completion this past weekend, she has been in a constant state of delightful twirling, pirouetting, and imaginative dance sessions in front of it. It’s truly a dream come true for her, and for any aspiring dancer.
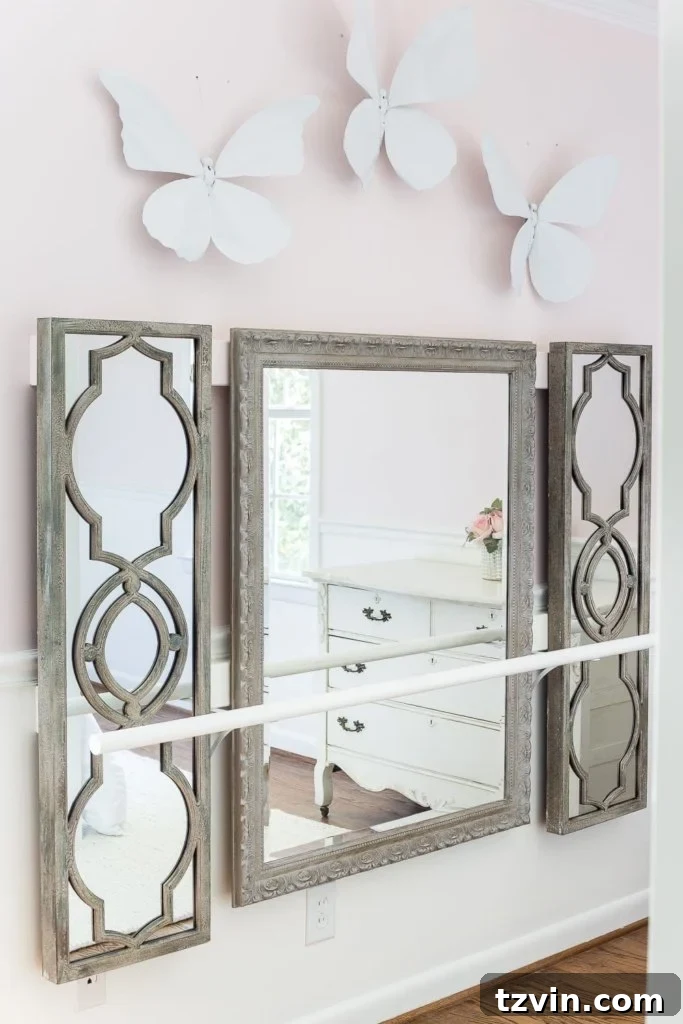
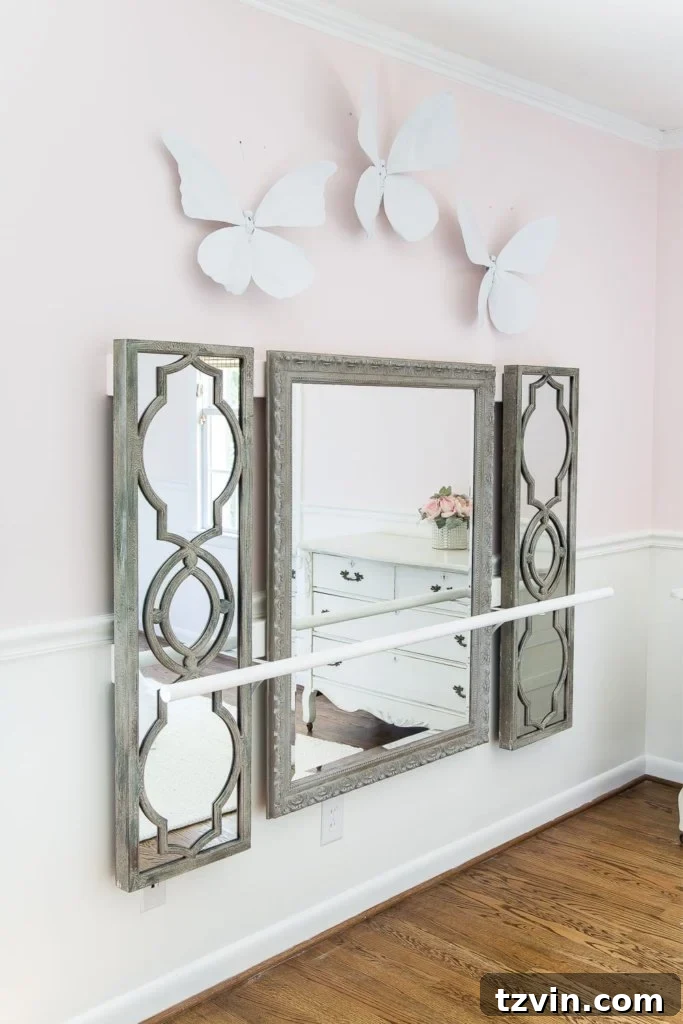
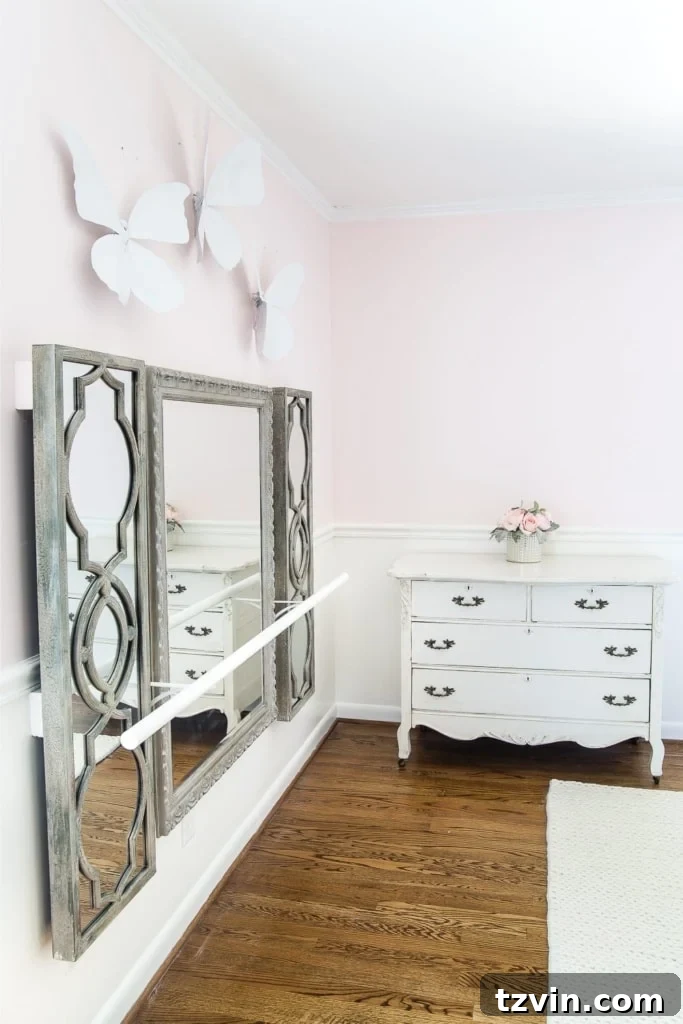
Isn’t it absolutely enchanting? I wish I could have captured Olivia dancing in front of it, but she was at preschool while I was able to sneak in and snap these photos. The joy this little corner brings to her room is immeasurable, transforming it into a personal dance studio where she can explore movement and express herself freely.
This project actually marks a second rendition of a beloved feature, as we had a ballet barre in her old room at our previous home. However, this time, we aimed for a design with a little more flair and stability, incorporating beautiful mirrors to enhance the experience. Moreover, we encountered a unique challenge with hanging the mirrors and barre above a chair rail. This presented an opportunity to devise a clever solution, which I’m excited to share with you, should you ever face a similar design dilemma.
Why Create a DIY Ballet Barre for Your Child’s Room?
Beyond the undeniable cuteness factor, a DIY ballet barre offers numerous benefits for both children and parents. For children, it fosters creativity, encourages physical activity, and provides a dedicated space for imaginative play and skill development. It’s a fantastic way to support their interests, whether they dream of becoming a prima ballerina or simply enjoy twirling around.
For parents, a DIY approach allows for complete customization to fit your space, style, and budget. You can select materials that match your existing decor, ensuring the barre seamlessly integrates into the room’s aesthetic. It’s often significantly more cost-effective than purchasing a pre-made system, and the satisfaction of building something special for your child is truly rewarding. This project, in particular, showcases how thoughtful design can overcome common architectural challenges like chair rails, proving that a home ballet studio is within reach for almost anyone.
Essential Supplies for Your DIY Ballet Barre Project
Before diving into the construction, gathering all your materials is crucial for a smooth and efficient build. Here’s a detailed list of what you’ll need, including some helpful tips for selection:
- Mirrors of Your Choosing: We opted for a versatile arrangement. The stunning middle mirror was a sentimental piece from my parents’ dining room that I revitalized with a quick paint job (using this tutorial), while the two slender side mirrors were a fortunate find from Kirkland’s a couple of years ago. Consider sourcing mirrors that are sturdy and provide a clear reflection. You can find beautiful options at home decor stores, thrift shops, or even online retailers.
- 2 2″x4″ boards: These are fundamental for anchoring the entire structure securely to the wall, especially when dealing with chair rails or uneven surfaces. They provide a flush mounting surface for your mirrors and brackets.
- 1″ diameter dowel rod: Cut this to the precise length required for your wall space. A 1-inch diameter is comfortable for small hands to grasp and sturdy enough for light practice. You can find these at most hardware or craft stores.
- 2 shelf brackets: Choose brackets that are robust and can support the dowel rod securely. Their design should complement your room’s style. Make sure they have a flat surface to screw the dowel into.
- Primer: Essential for preparing your 2x4s and dowel rod for painting, ensuring a smooth, durable finish that matches your wall color.
- Paint of your choice: Select a color that seamlessly blends with your wall for a polished and integrated look.
- Hangman picture hanger(s): These heavy-duty hangers are excellent for securely mounting mirrors, particularly when working with wooden backing boards like our 2x4s.
- Power driver: An indispensable tool for quickly and efficiently driving screws.
- 2 1/2 inch wood screws: For securing the 2x4s to wall studs and the shelf brackets to the 2x4s.
- 4 50-pound drywall anchors: These are crucial for additional stability when attaching brackets to drywall where studs aren’t available, especially important for a piece that will be actively used.
- Level: Absolutely critical for ensuring your barre and mirrors are perfectly straight.
- Tape measure: For accurate measurements and placement.
- Circular saw (or miter saw): For precisely cutting the 2×4 boards and the dowel rod to your desired lengths.
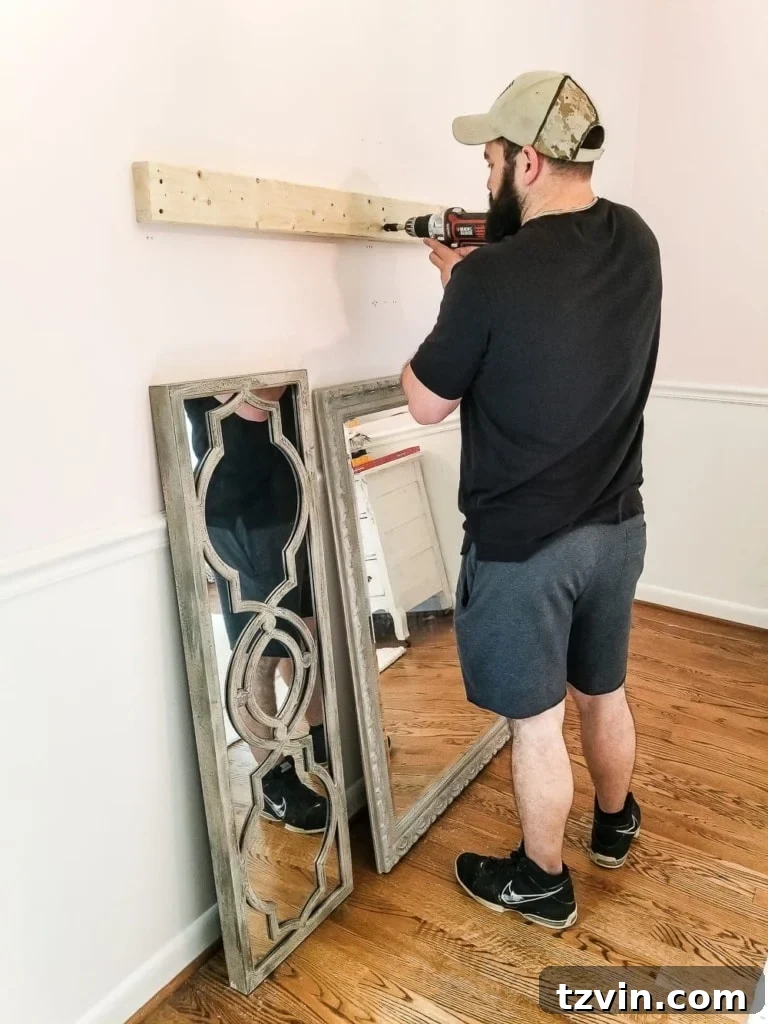
The strategic use of the 2″x4″ boards is key to this project’s success, particularly when contending with wall features like chair rails. These boards allowed us to create a robust mounting surface for the mirrors, eliminating the need to align the mirrors directly with studs. This approach provides flexibility in placement and ensures the mirrors lay perfectly flat against the wall, effectively clearing the chair rail that runs behind them, creating a seamless and professional finish.
Step-by-Step Guide to Building Your DIY Ballet Barre with Mirrors
Follow these detailed steps to construct a sturdy and elegant ballet barre setup for your child’s room, thoughtfully addressing the challenge of mounting over a chair rail:
Preparation and Board Installation
- Measure and Cut 2″x4″ Boards: Begin by precisely measuring the overall width needed for all your mirrors, including the desired gaps between them (we accounted for 3-inch gaps). This total measurement will be the length for both of your 2″x4″ boards. Use your circular saw to cut the boards accurately.
- Mark Mirror Height and Barre Position: On your wall, mark the exact height where you want the tops of your mirrors to hang. This mark will guide the placement of your upper 2″x4″ board. Then, consider the ideal height for the ballet barre itself (typically elbow height for your child when standing comfortably) and mark the position for the lower 2″x4″ board just below the chair rail.
- Locate Wall Studs: Using a reliable stud finder, meticulously scan the wall to locate and mark all available studs within the area where your 2″x4″ boards will be installed. Anchoring into studs is paramount for the stability and safety of the entire structure.
- Install the Top 2″x4″ Board: Position your first (top) 2″x4″ board at the marked height for the mirror tops. Use a level to ensure it is perfectly horizontal. Once aligned, secure the board firmly to the wall studs using your 2 1/2 inch wood screws and a power driver. Drive screws at each stud location for maximum strength.
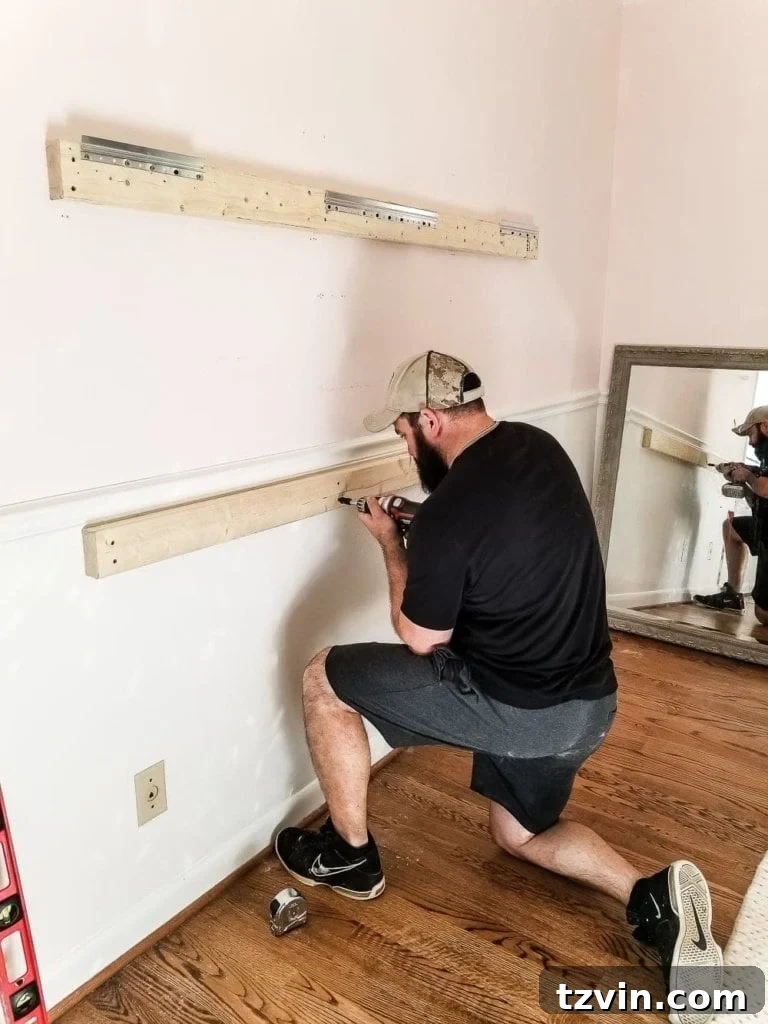
- Install the Lower 2″x4″ Board: Repeat the previous step for the second (lower) 2″x4″ board. Place it just below the chair rail, ensuring it is level and securely fastened to any studs within its length. This board will serve as the anchor for your ballet barre and also helps create a uniform mounting surface behind the mirrors.
Mirror Hanging and Finishing Touches
- Attach Hangman Hangers for Mirrors: Carefully measure and mark the positions for your Hangman picture hangers along the top 2″x4″ board. These hangers provide a robust and level mounting system for your mirrors. Screw the hangers securely into the upper 2″x4″ board at the designated locations.
- Prime and Paint the Boards: To achieve a seamless, built-in look, prime the installed 2″x4″ boards thoroughly. Once the primer is dry, paint them with the same color you used on your wall. This step helps the boards visually disappear into the wall, creating a clean backdrop for your mirrors and barre.
- Hang the Mirrors: Once the paint on the boards is completely dry, carefully lift and place your mirrors onto the Hangman hangers. Double-check that they are level and spaced evenly. The 2″x4″ boards provide ample depth for the mirrors to clear the chair rail and sit flush against the newly painted surface.
- Install Shelf Brackets for the Barre: Position your two shelf brackets underneath the lower 2″x4″ board, ideally centered within the gaps between your mirrors. For maximum security, use 50-pound drywall anchors if you’re not hitting a stud, in conjunction with wood screws driven directly into the lower 2″x4″ board. This dual anchoring ensures the barre can withstand the weight and movement of a child using it.
- Attach and Finish the Dowel Rod: Finally, place your cut dowel rod onto the installed shelf brackets. Screw the dowel rod firmly into the brackets. For a cohesive look, we chose to prime and paint our dowel rod to match the wall. Alternatively, you could opt to leave it as natural wood and seal it with polyurethane or polycrylic for protection and a warm finish.
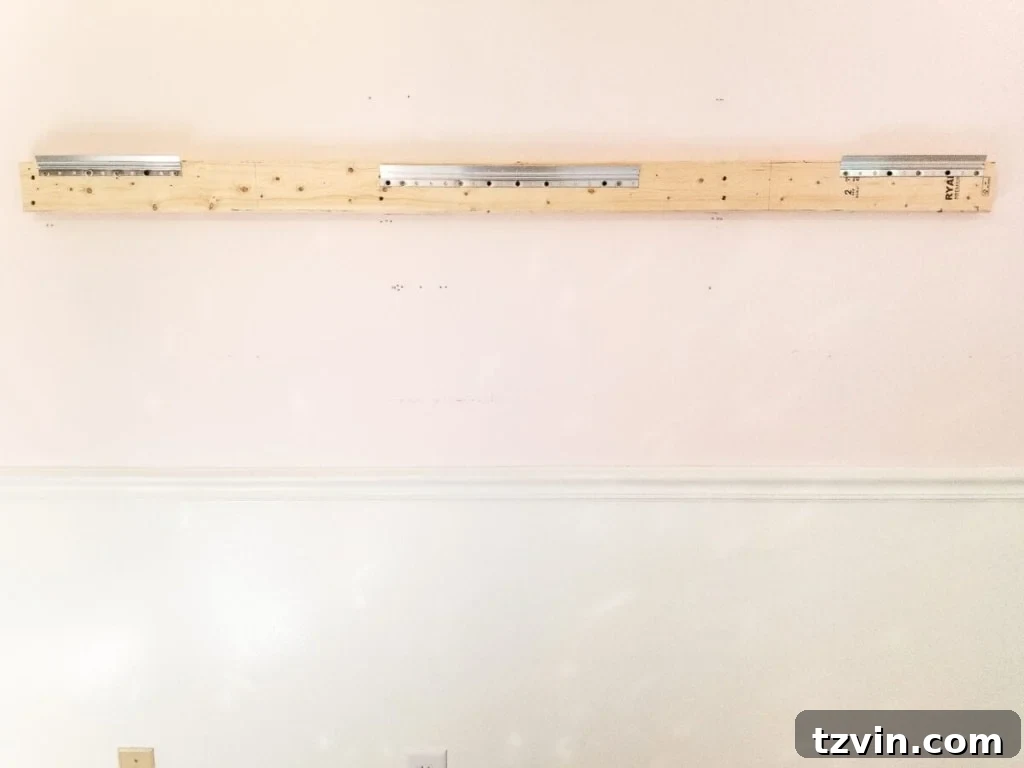
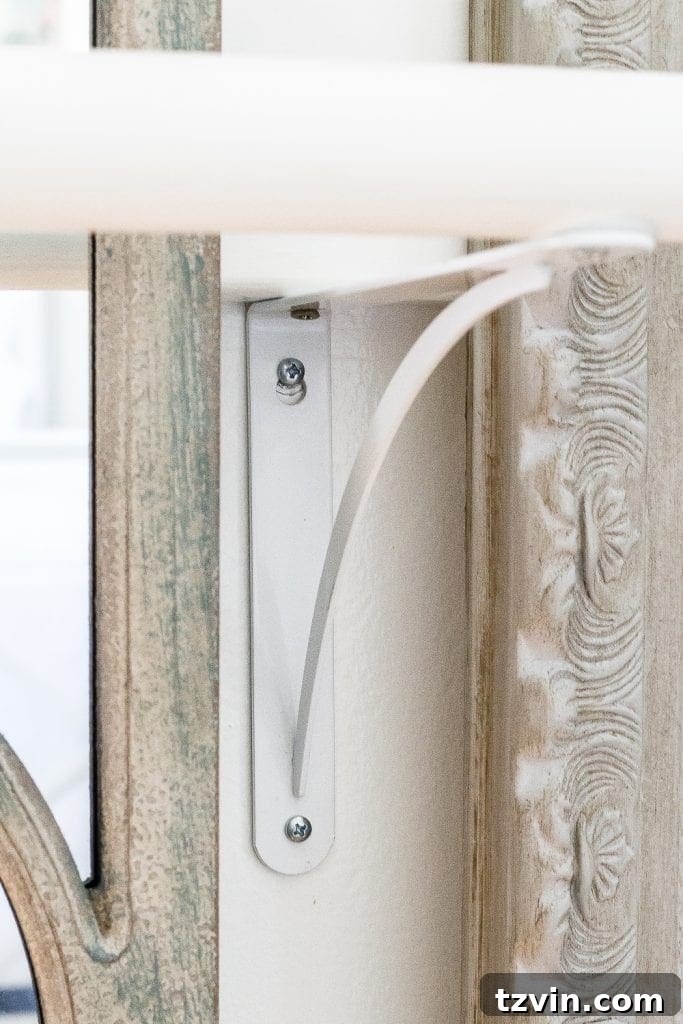
And that’s it! The ingenious use of the 2″x4″ boards proves to be an invaluable trick for securely mounting wall decor or fixtures like this ballet barre, especially when navigating architectural elements such as chair rails, board and batten, or other types of molding. This method ensures your decor is flush, stable, and beautifully integrated into your space.
The Impact and Future of Olivia’s Dance Corner
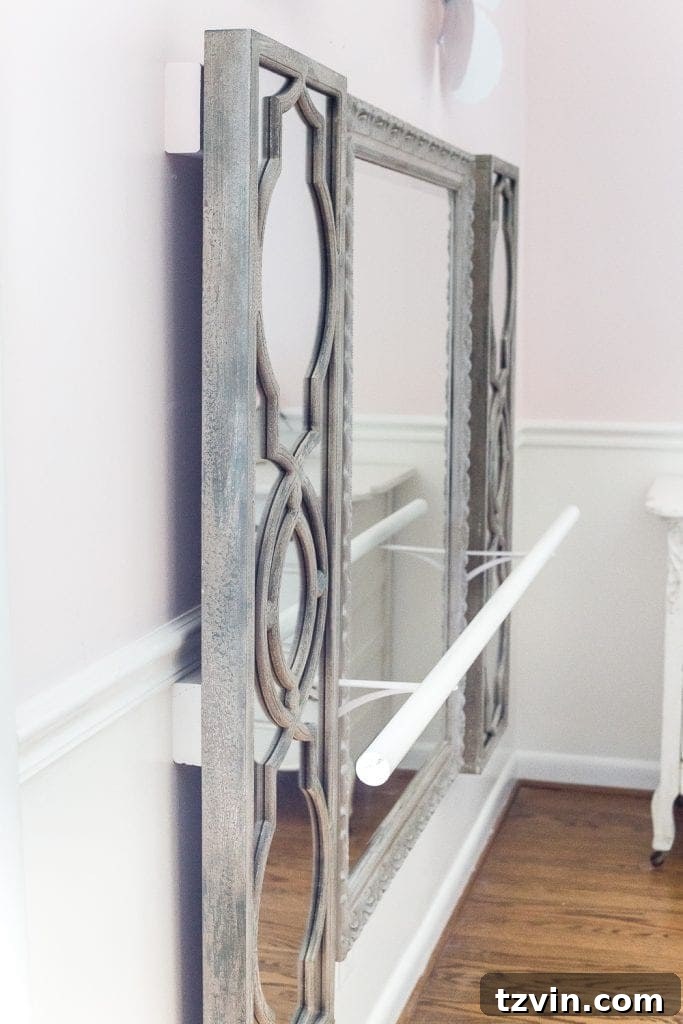
The transformation of Olivia’s room with this ballet barre and mirror setup has been truly magical. It’s more than just a decorative feature; it’s a functional space that encourages creativity, physical development, and self-expression. Witnessing her continuous twirling and imaginative play in front of it underscores the immense value of creating spaces tailored to a child’s passions. This personalized corner has quickly become a cherished part of her room, sparking joy and inspiring countless little performances.
One of the best aspects of this DIY design is its adaptability. Should Olivia grow taller in the coming years and need a higher barre, the adjustment process is straightforward. We can simply remove the mirrors, unscrew the lower 2″x4″ board, move it up above the chair rail, repaint the newly exposed sections for a fresh look, and then reattach the dowel rod. This flexibility ensures the ballet barre can evolve with her, supporting her passion for dance for many years to come. Something tells me she’ll still be twirling around, even as she grows!
Olivia’s Room Makeover: Progress and Final Touches
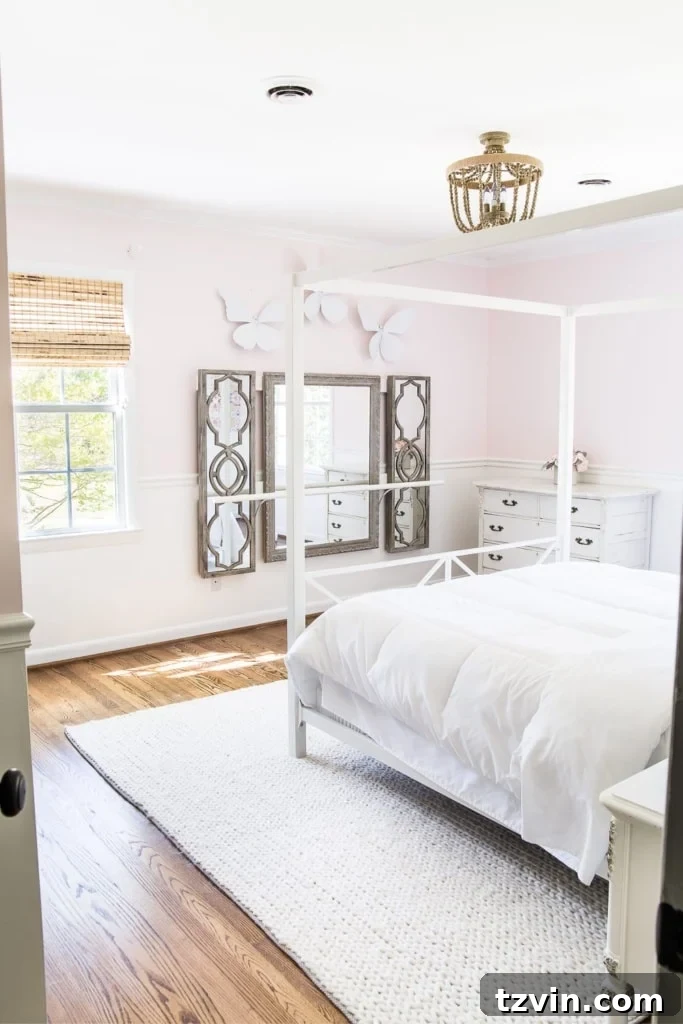
This ballet barre project is a significant milestone in Olivia’s overall room makeover, and we are thrilled with how it’s shaping up. The room has truly blossomed, turning out even sweeter and more cohesive than I could have imagined. With the barre now complete, there are only a handful of items left on our ambitious to-do list before this space is fully realized.
Here’s what’s left to complete the dream room:
Paint walls/ceiling/trim/doorsHang wallpaperPut together bedFind a light fixture to work with a canopy bed on 8′ ceilingsHang Roman shadesFind a cozy rug that doesn’t distract from busy wallpaperHaul in nightstands from master bedroomPaint thrift store lamps- Get bedding
- Put up curtains
- Paint dresser
- Hang up artwork
Sources and Materials Used in Olivia’s Room:
For those curious about the other elements contributing to this charming space, here’s a breakdown of the sources we’ve incorporated so far:
- Wall color: Behr My Sweetheart
- Trim/ceiling color: Benjamin Moore Simply White
- Door color: Benjamin Moore Wrought Iron
- Wallpaper
- Bed
- Roman shades
- Light fixture
- Rug
- Nightstands (A clever Craigslist makeover!)
- Lamps (Another fantastic thrift store makeover!)
- Large butterfly wall decor: This was achieved using this one, this one, and this one, all spray painted white for a cohesive look.
- Skinny mirrors: (As mentioned in the supplies, from Kirkland’s)
Hopefully, the next time you see this space, it will be fully finished and ready for its grand reveal! We are so ready for that moment, and I know one little girl who is even more excited to have her dream room complete.