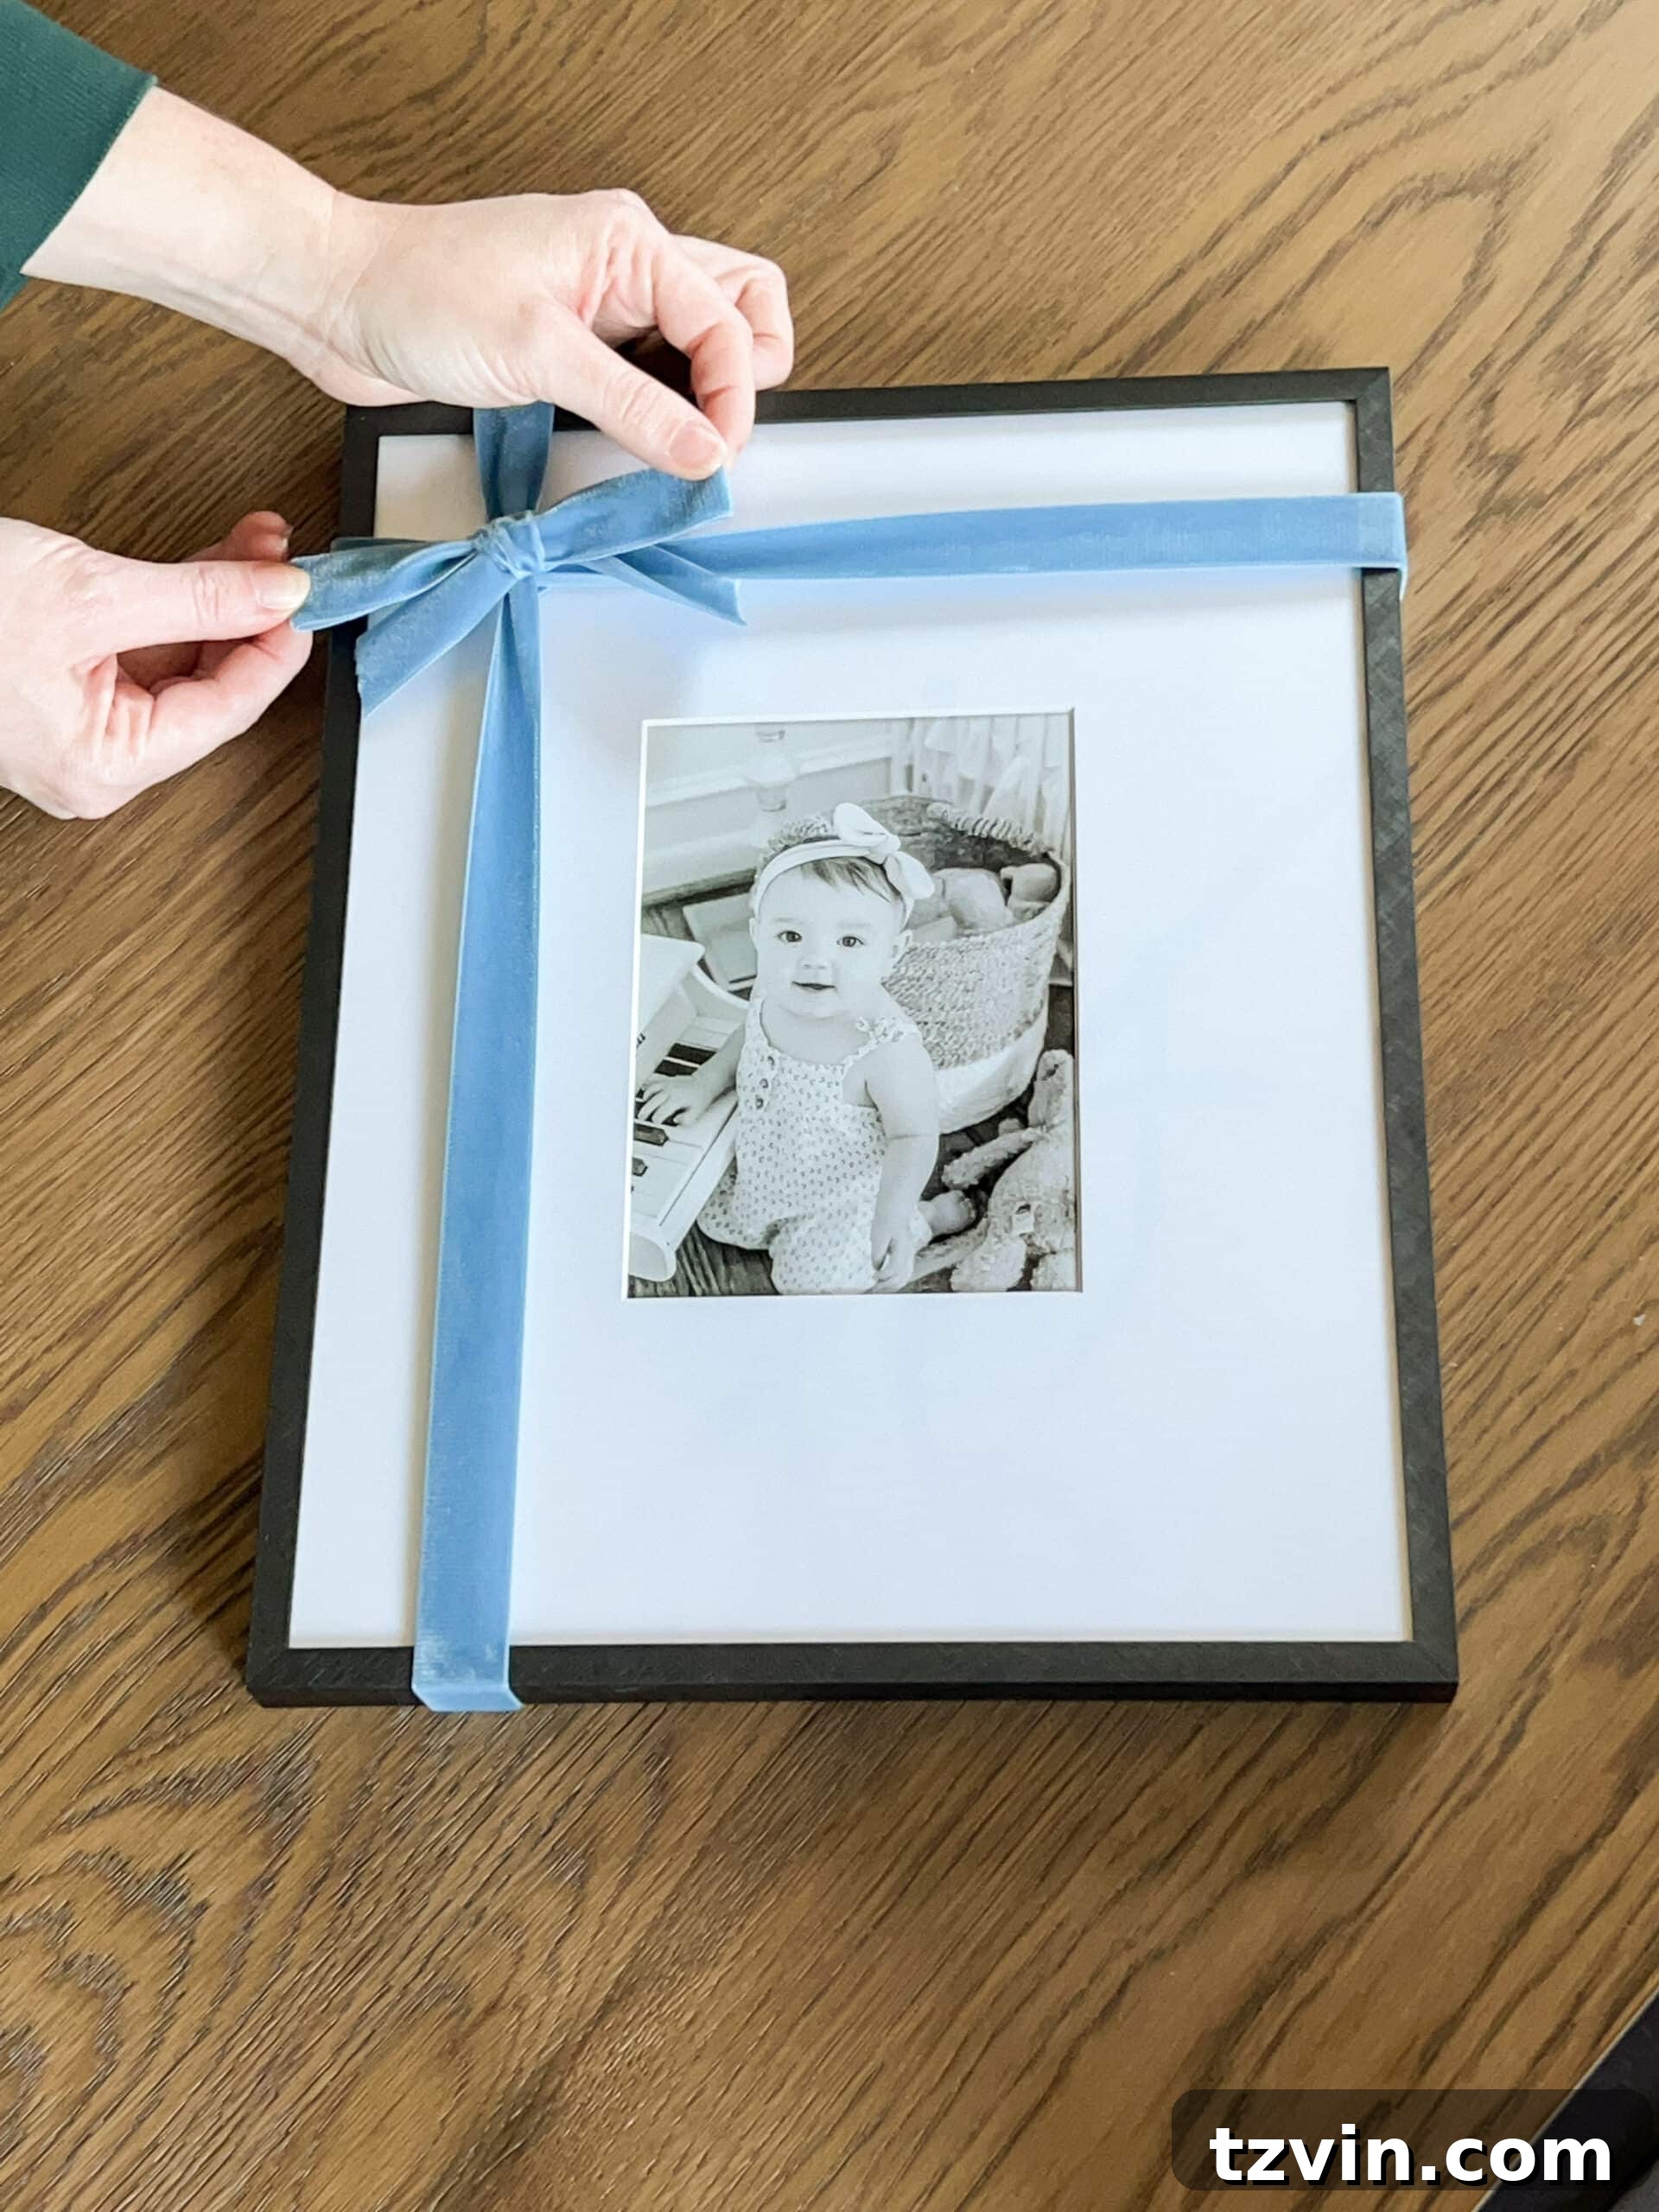
Transform Your Home: Easy 5-Minute Christmas Ribbon Art for Gallery Walls and Picture Frames
Are you searching for a quick, impactful, and budget-friendly way to infuse your home with festive cheer this holiday season? Look no further! This brilliant DIY project will show you how to effortlessly transform any hanging art or picture frame into stunning Christmas wall decor in mere minutes. By simply adding elegant ribbons and festive bows, you can create a personalized holiday display that looks both sophisticated and inviting. It’s truly one of those ingenious, thrifty Christmas decorating ideas that makes you wonder, “Why haven’t I thought of this sooner?”
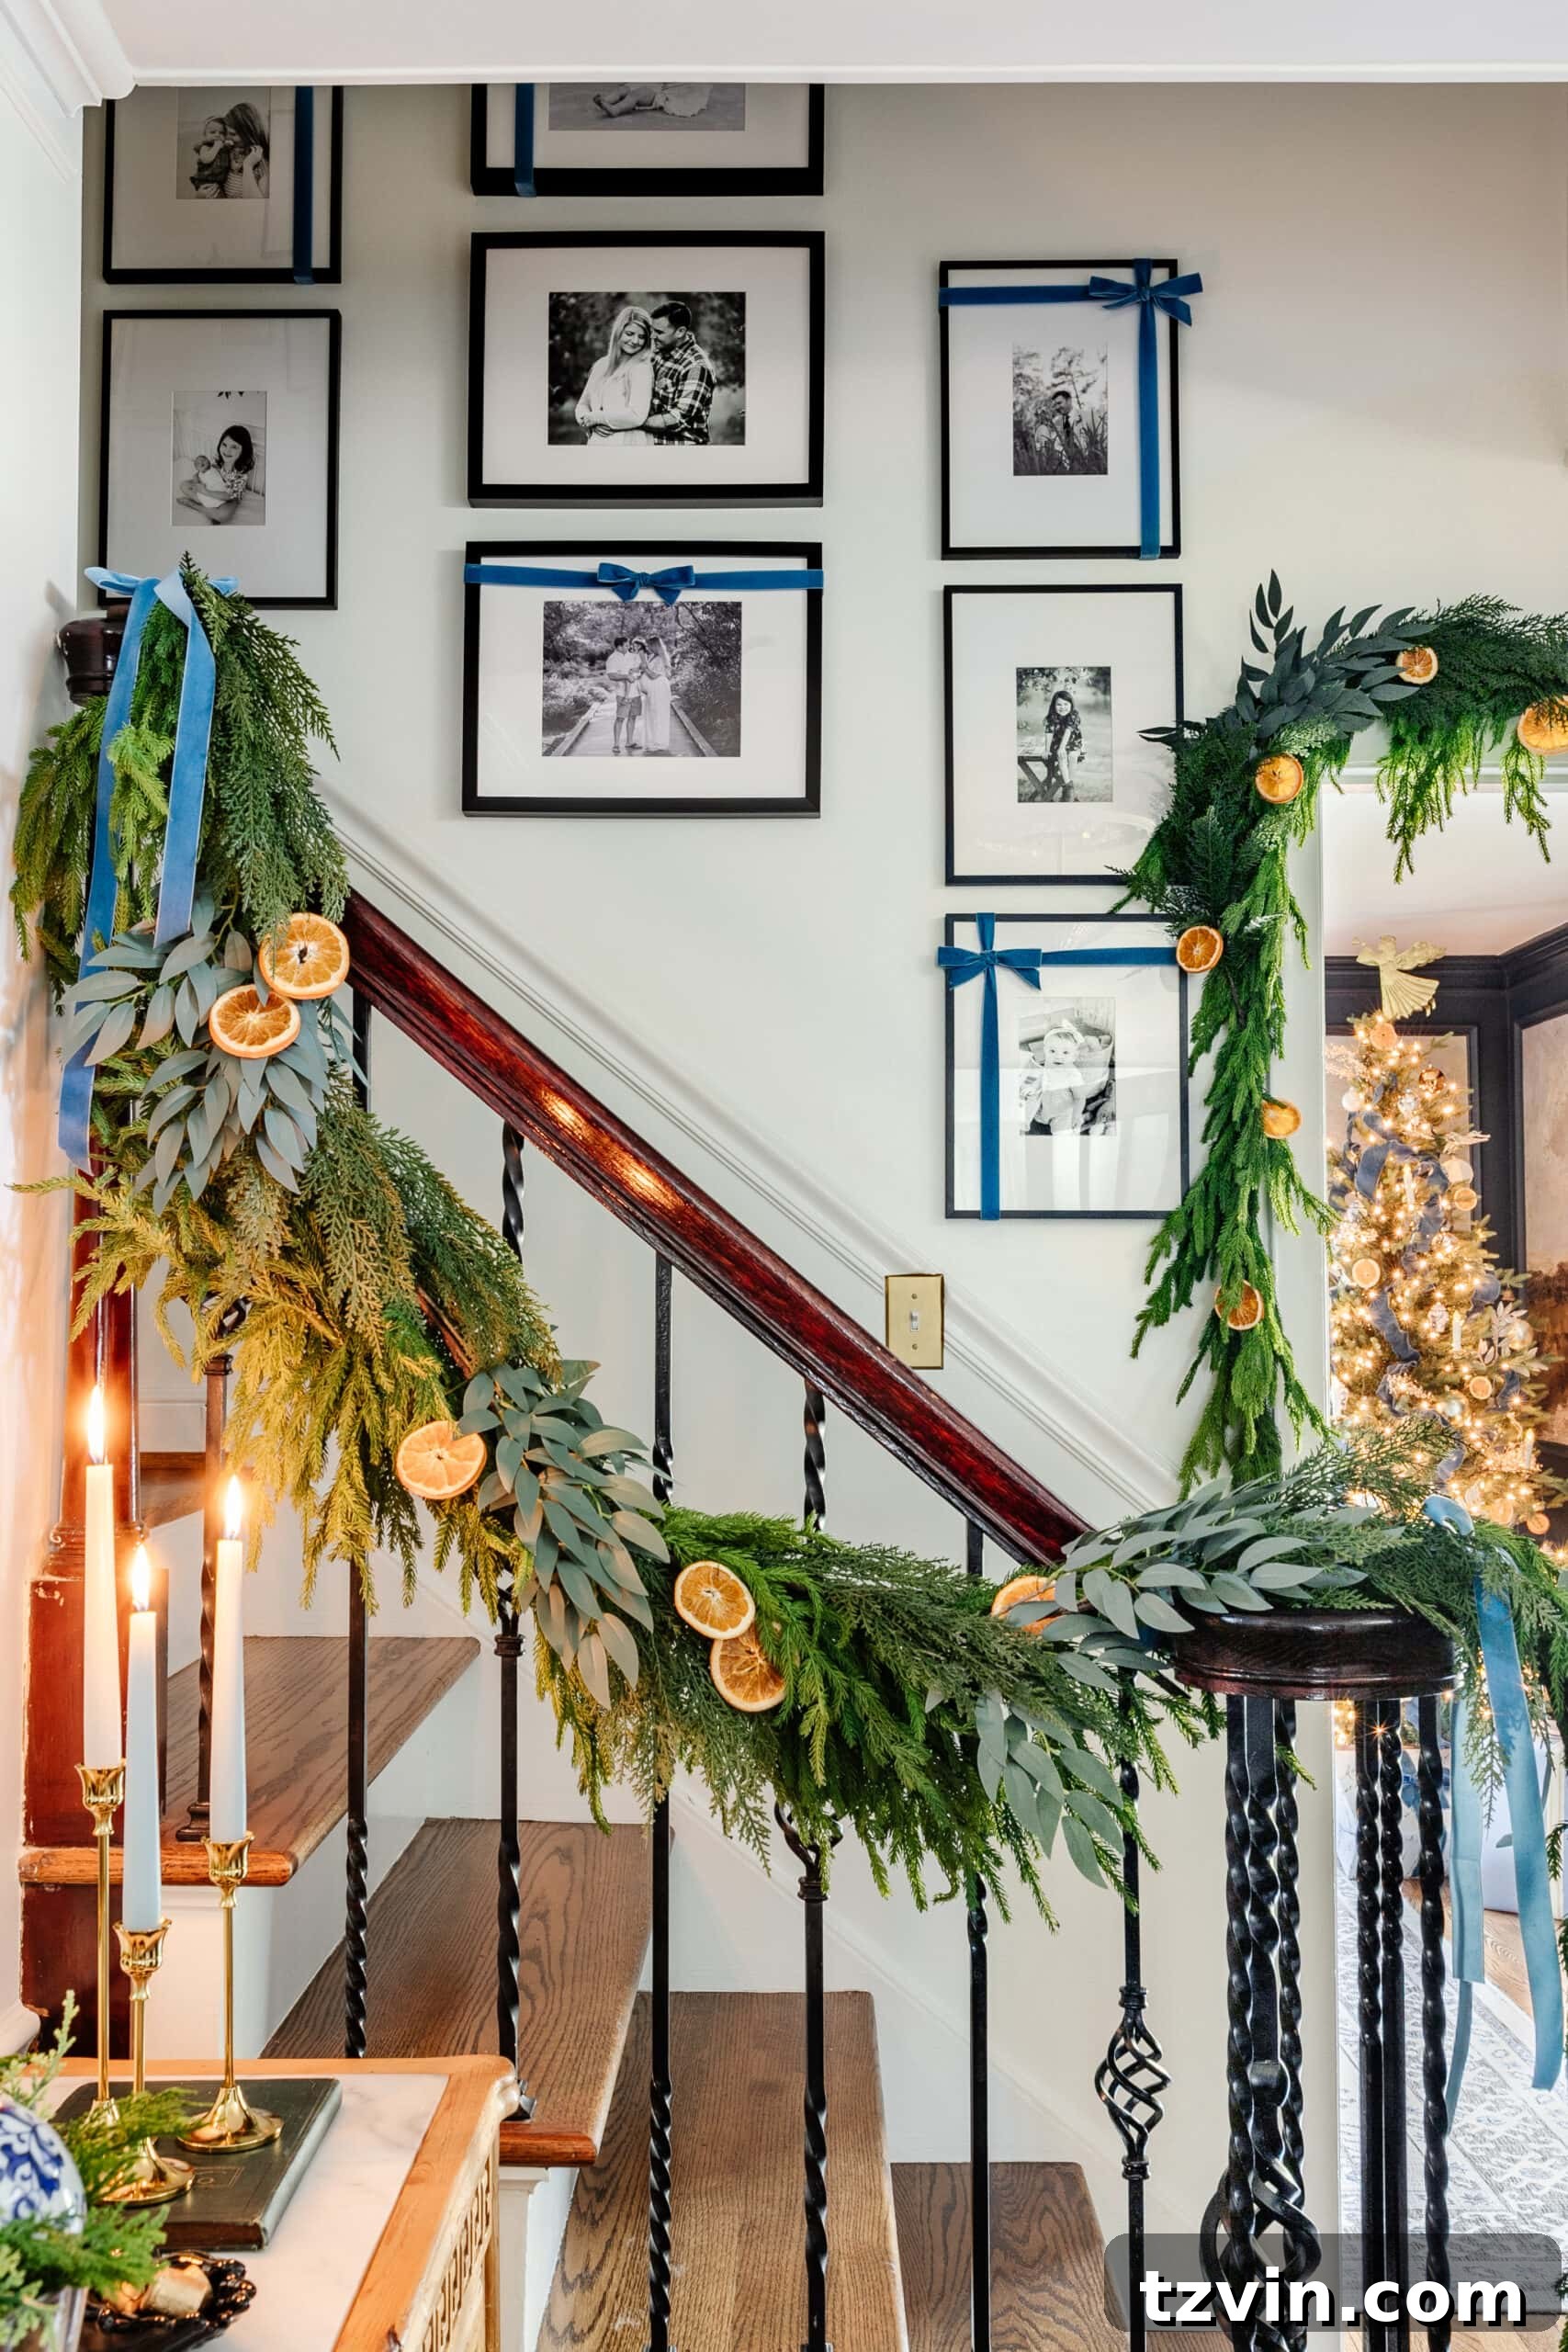
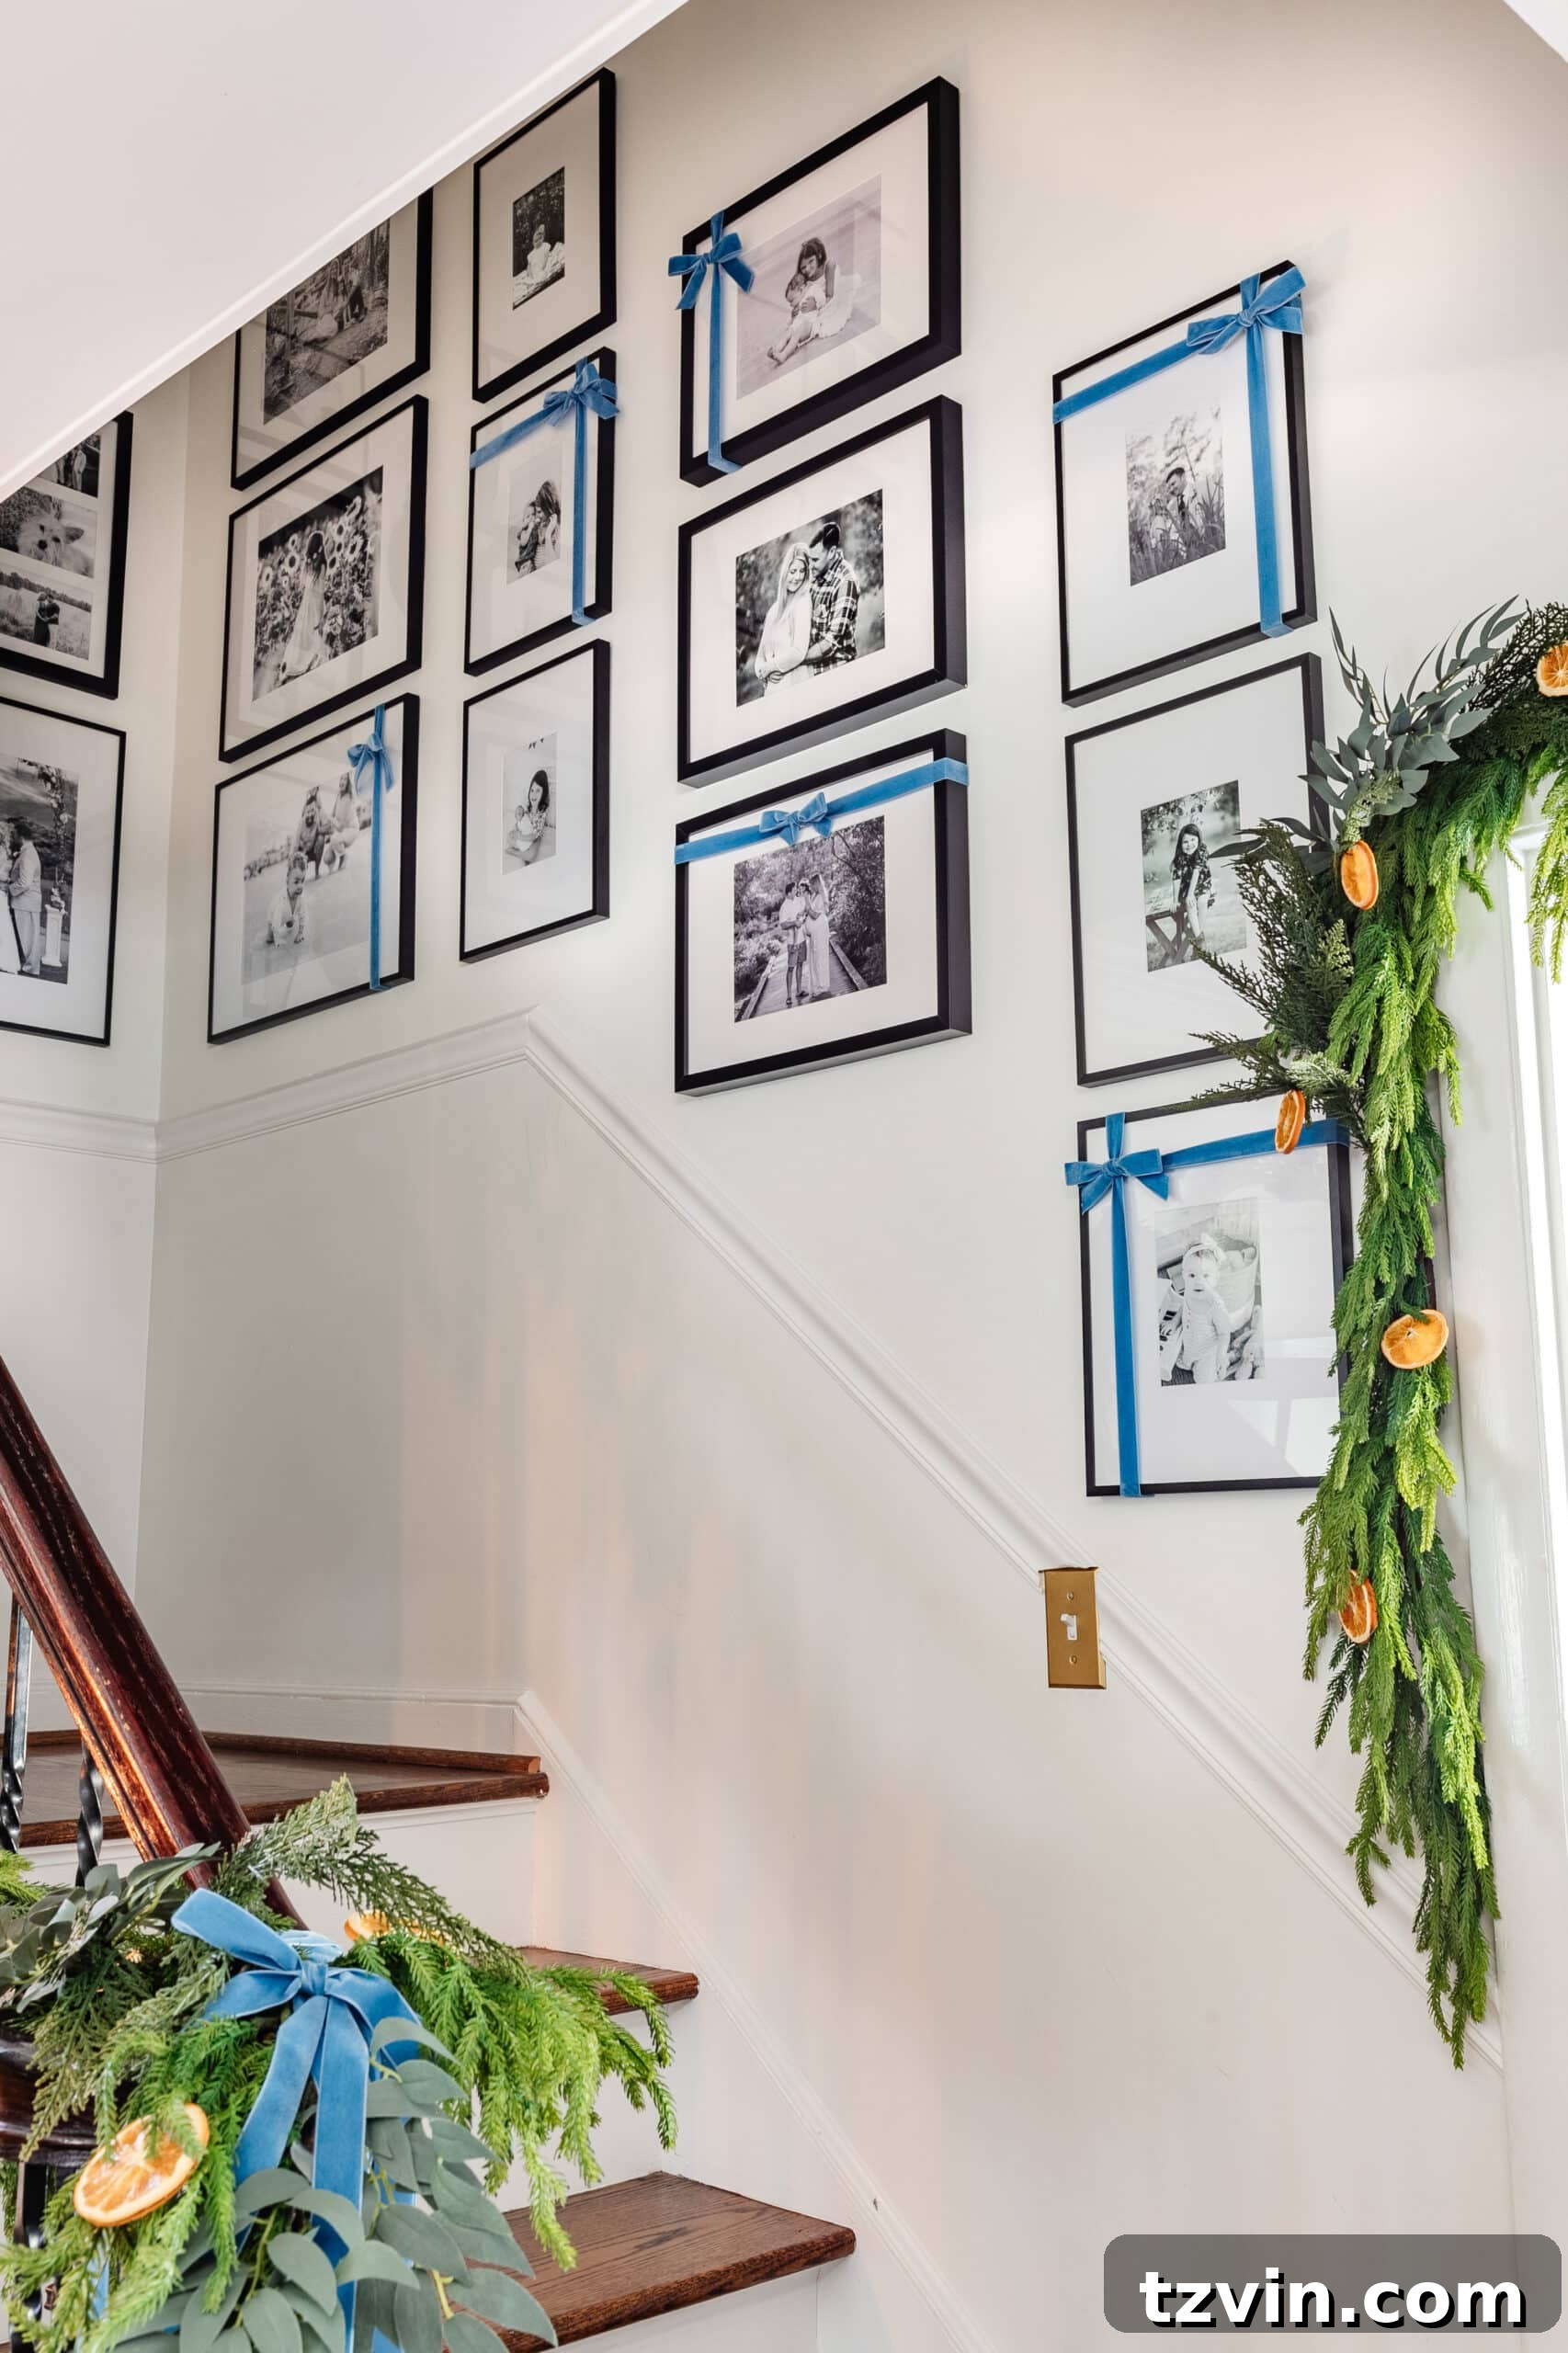
One of the most cherished spaces in our home is our expansive family photo gallery wall, which gracefully ascends our stairway from the foyer. This personal touchpoint, filled with treasured memories, felt like the perfect candidate for a magical Christmas transformation. With just a few lengths of ribbon, each frame received a delightful Christmas bow, instantly elevating the entire display into a whimsical holiday wonderland. This project is not only incredibly cute but also an ideal Christmas craft for utilizing any leftover ribbon you might have from previous decorations, making it an eco-conscious choice too.
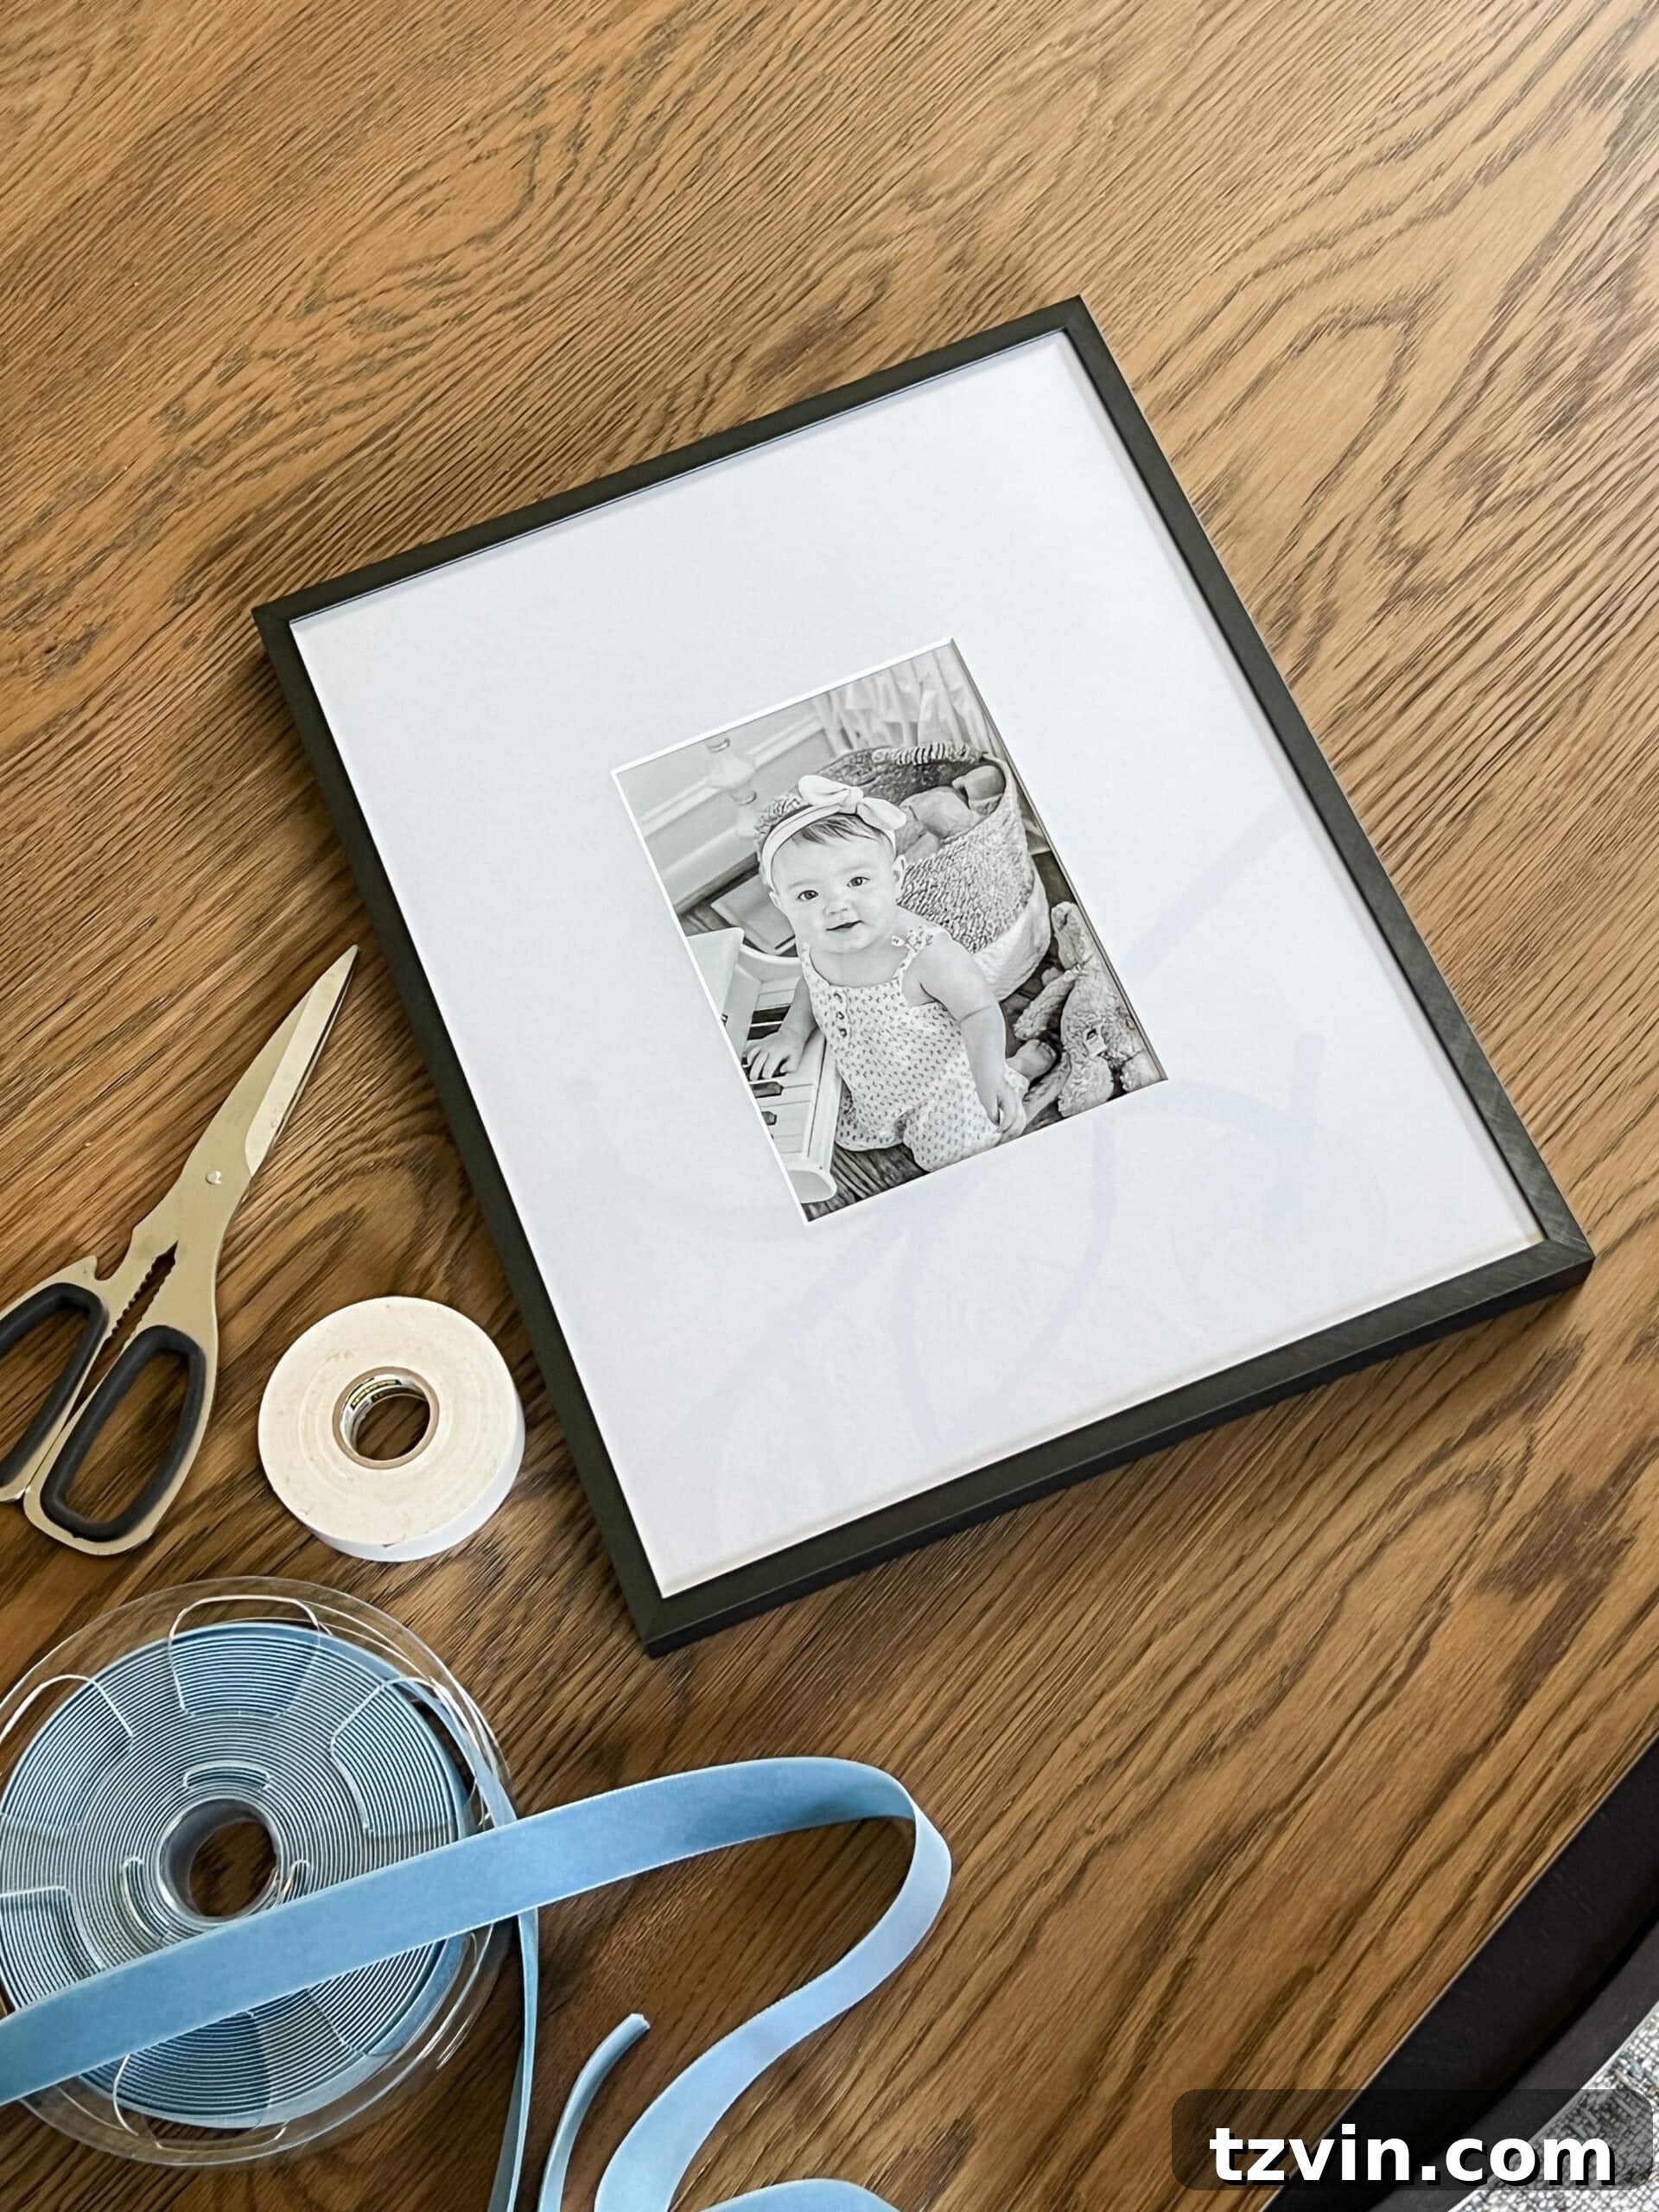
The beauty of this Christmas ribbon art lies in its accessibility. Chances are, you already have a collection of picture frames gracing your walls, eliminating the need to buy new decor. This project requires minimal craft supplies, making it both economical and convenient. Simply gather a bit of leftover ribbon, some reliable tape, and a pair of scissors – that’s truly all you’ll need to get started. I personally had some beautiful velvet ribbon remaining from our Christmas tree decorations, which made this the perfect complementary project, ensuring a cohesive look throughout our home.
How to Create Captivating Christmas Bow Ribbon Art in Minutes
This simple yet stunning DIY project promises to add a touch of holiday elegance to your home without demanding much of your precious time or resources. Whether you’re decorating for a festive gathering or simply want to enjoy the seasonal charm, follow these straightforward steps to craft beautiful Christmas bow ribbon art.
Essential Supplies for Your Ribbon Art Project
Before you begin, ensure you have these basic items on hand. The key to a seamless project is having everything ready!
- Picture Frame(s) of Your Choice: Any existing frame will work wonders. I particularly love how these simple black matted frames look on our wall, providing a sophisticated backdrop for the festive ribbon. Consider the size and style of your frames to best complement your chosen ribbon.
- Ribbon: The star of the show! My 1-inch wide velvet ribbon created a luxurious look, but feel free to experiment with different widths, textures, and patterns. Wired ribbon can offer more structured bows, while satin or grosgrain ribbons provide a softer aesthetic. Choose colors that align with your overall Christmas decor theme – classic red, rich green, shimmering gold, or even unexpected blues and silvers can be beautiful.
- Masking Tape or Electrical Tape: A strong, reliable tape is crucial for securely attaching the ribbon to the back of your frames without causing damage. Masking tape is gentle and easily removable, while electrical tape offers a firmer grip and can be more discreet on darker frames.
- Scissors: A sharp pair of scissors will ensure clean cuts, preventing frayed edges and making your bows look crisp and professional.
Step-by-Step Guide to Crafting Your Holiday Frames
This process is so simple, you’ll be amazed at how quickly you can transform your everyday frames into festive masterpieces. (By the way, looking at old baby pictures while crafting is always a fun distraction – can we talk about how quickly children grow? This baby picture of Regan is absolutely melting my heart!) Let’s dive into the steps:
Step 1 – Measure and Cut Your Ribbon
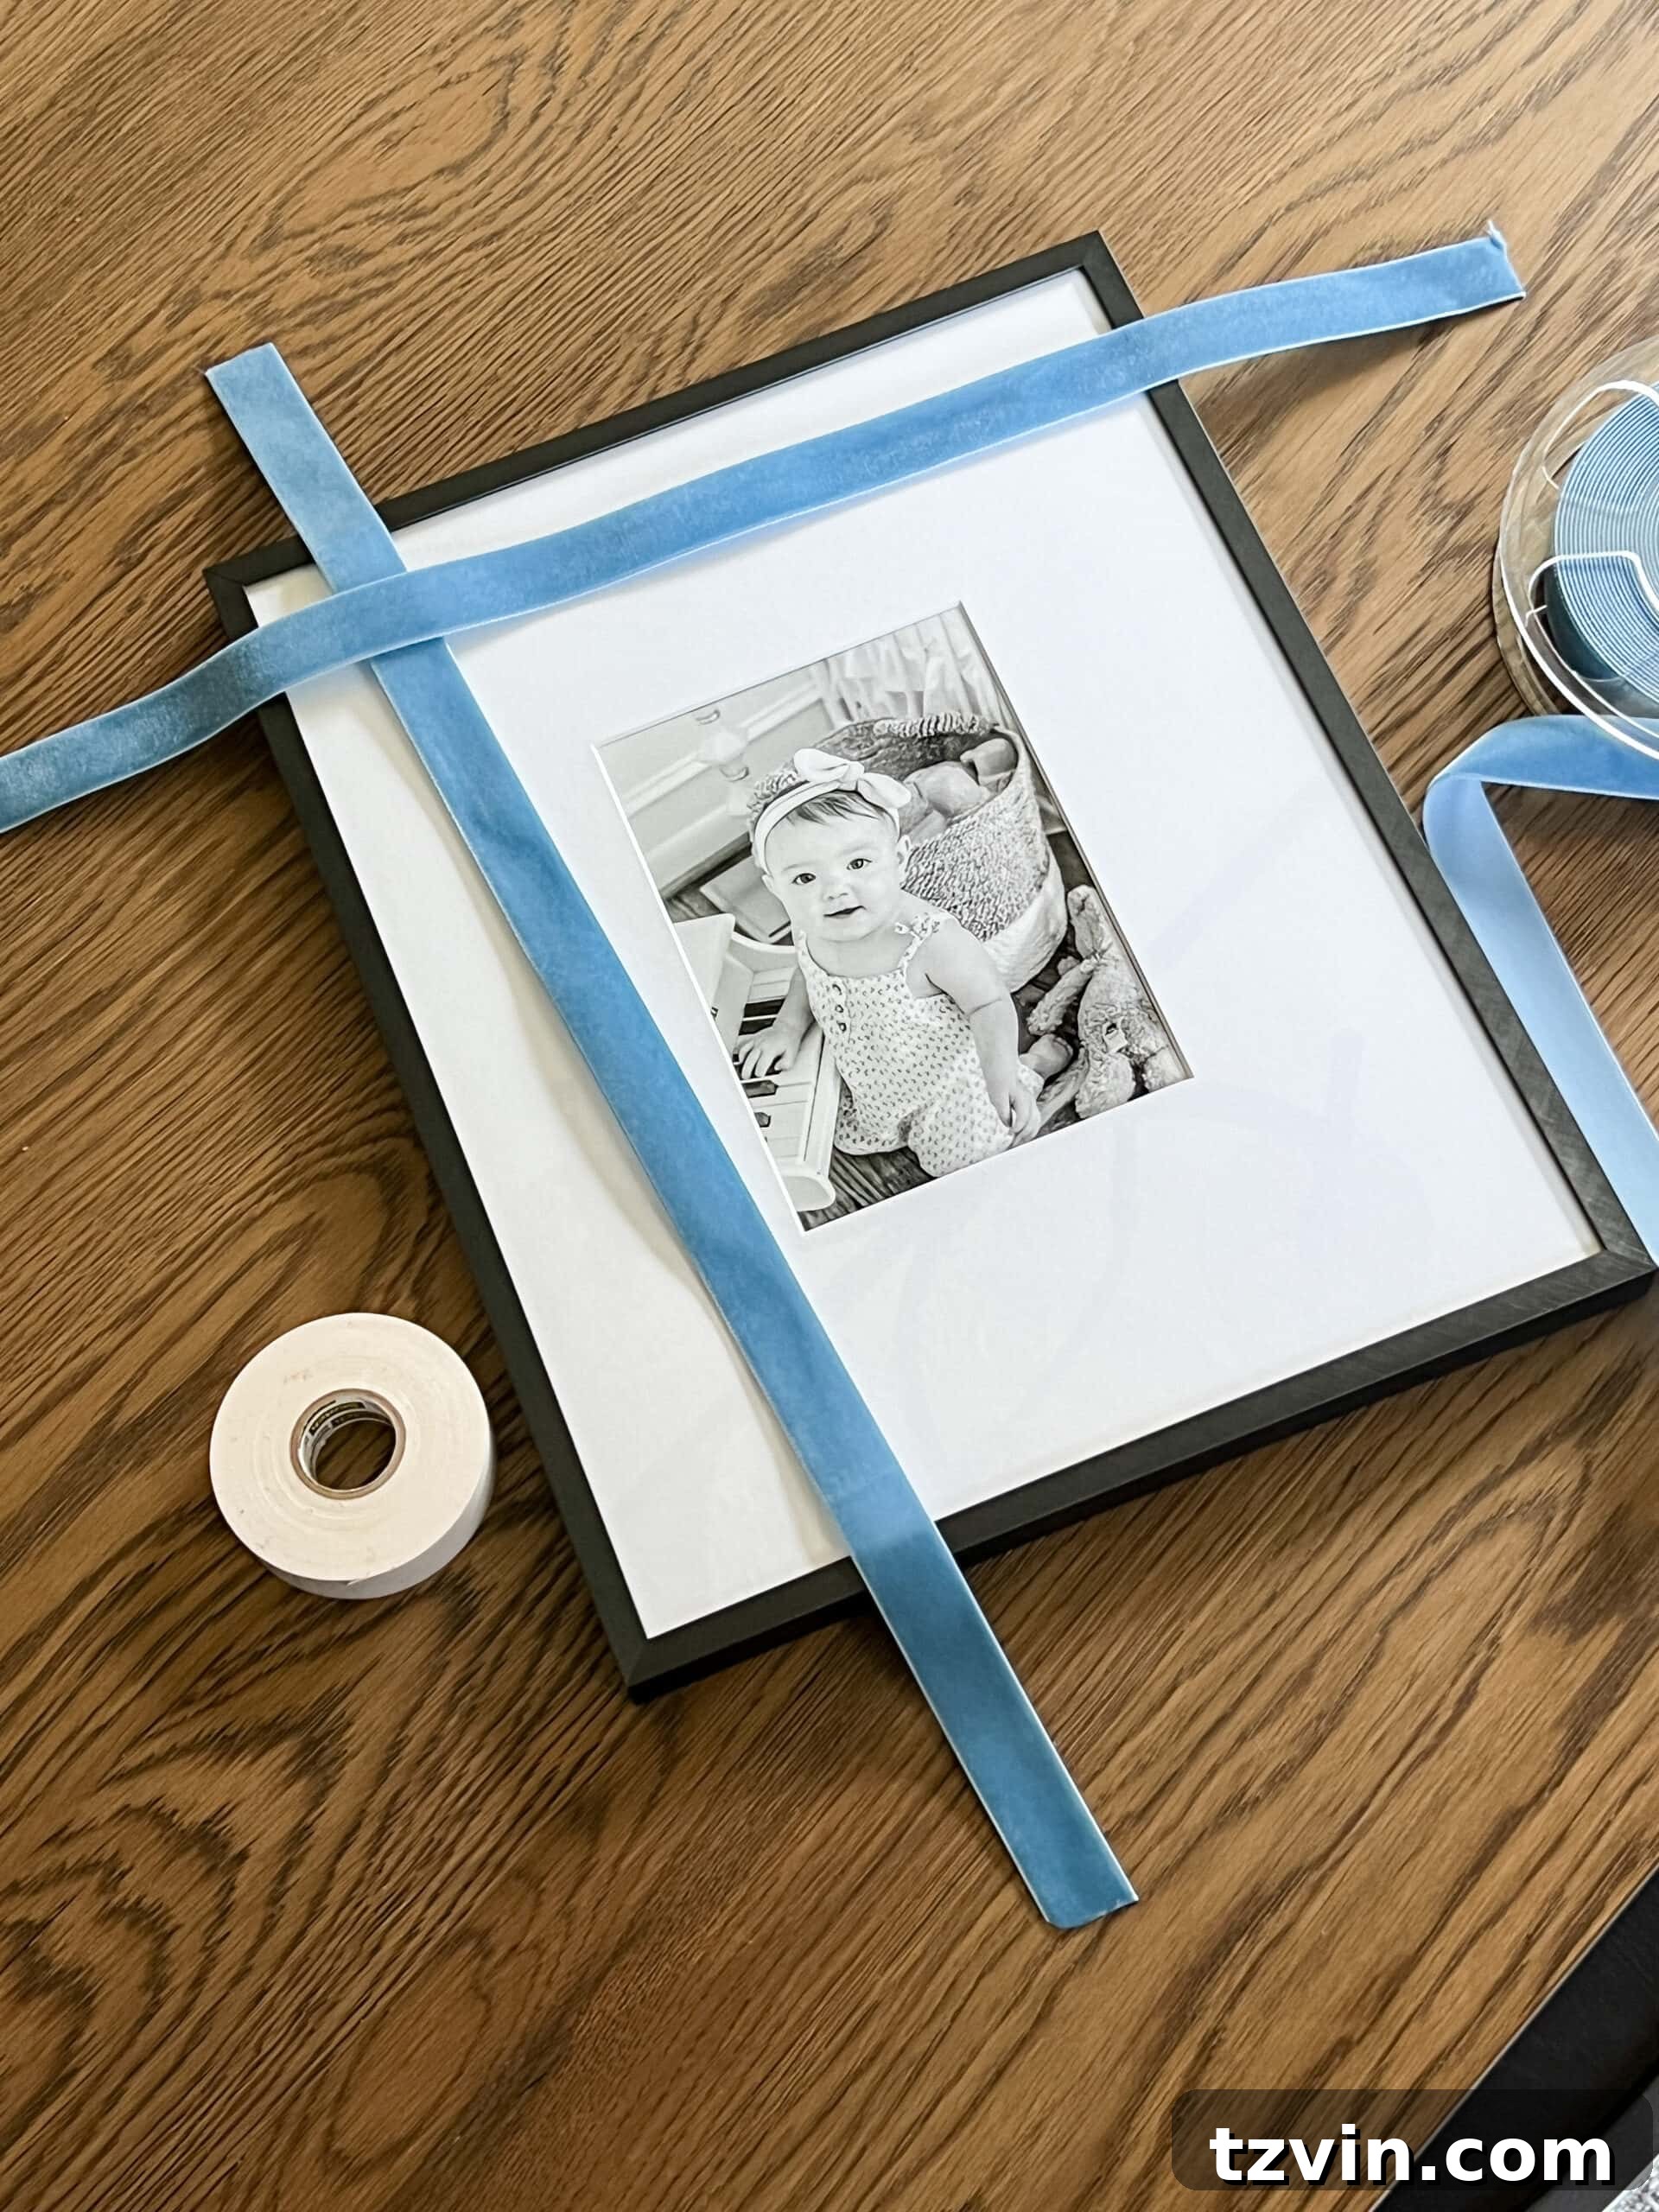
Begin by taking your chosen ribbon and stretching it across the front of your picture frame. Decide where you want the ribbon to appear on the front of the frame – typically vertically or horizontally across the center. Once you have determined the desired length for the visible portion, extend the ribbon an additional 2 to 4 inches beyond each side of the frame. This extra length is essential for securely taping the ribbon to the back of the frame, ensuring it wraps around the depth of the frame and provides enough overlap for a strong hold. For thicker frames, lean towards the 4-inch allowance. Use your scissors to make a clean, precise cut. Repeat this process for each frame you plan to decorate, ensuring consistent lengths for a uniform look, or vary them if you desire different ribbon placements.
Step 2 – Secure the Ribbon to the Frame with Tape
With your ribbon cut, carefully turn your picture frame face down. Position the ribbon on the back of the frame, ensuring the desired portion of the ribbon is visible on the front. Press the ends of the ribbon firmly against the frame’s backing, pulling it taut but not so tight that it distorts the frame or image. Using your masking or electrical tape, securely attach the ribbon ends to the back of the frame. Make sure the tape lies flat and smooth to avoid any bumps once the frame is rehung. This method of taping the ribbon to the back is far superior to trying to wrap the entire frame and tie a bow on the front, as it’s much easier, uses less ribbon, and results in a cleaner, more professional finish that protects your frame from potential damage.
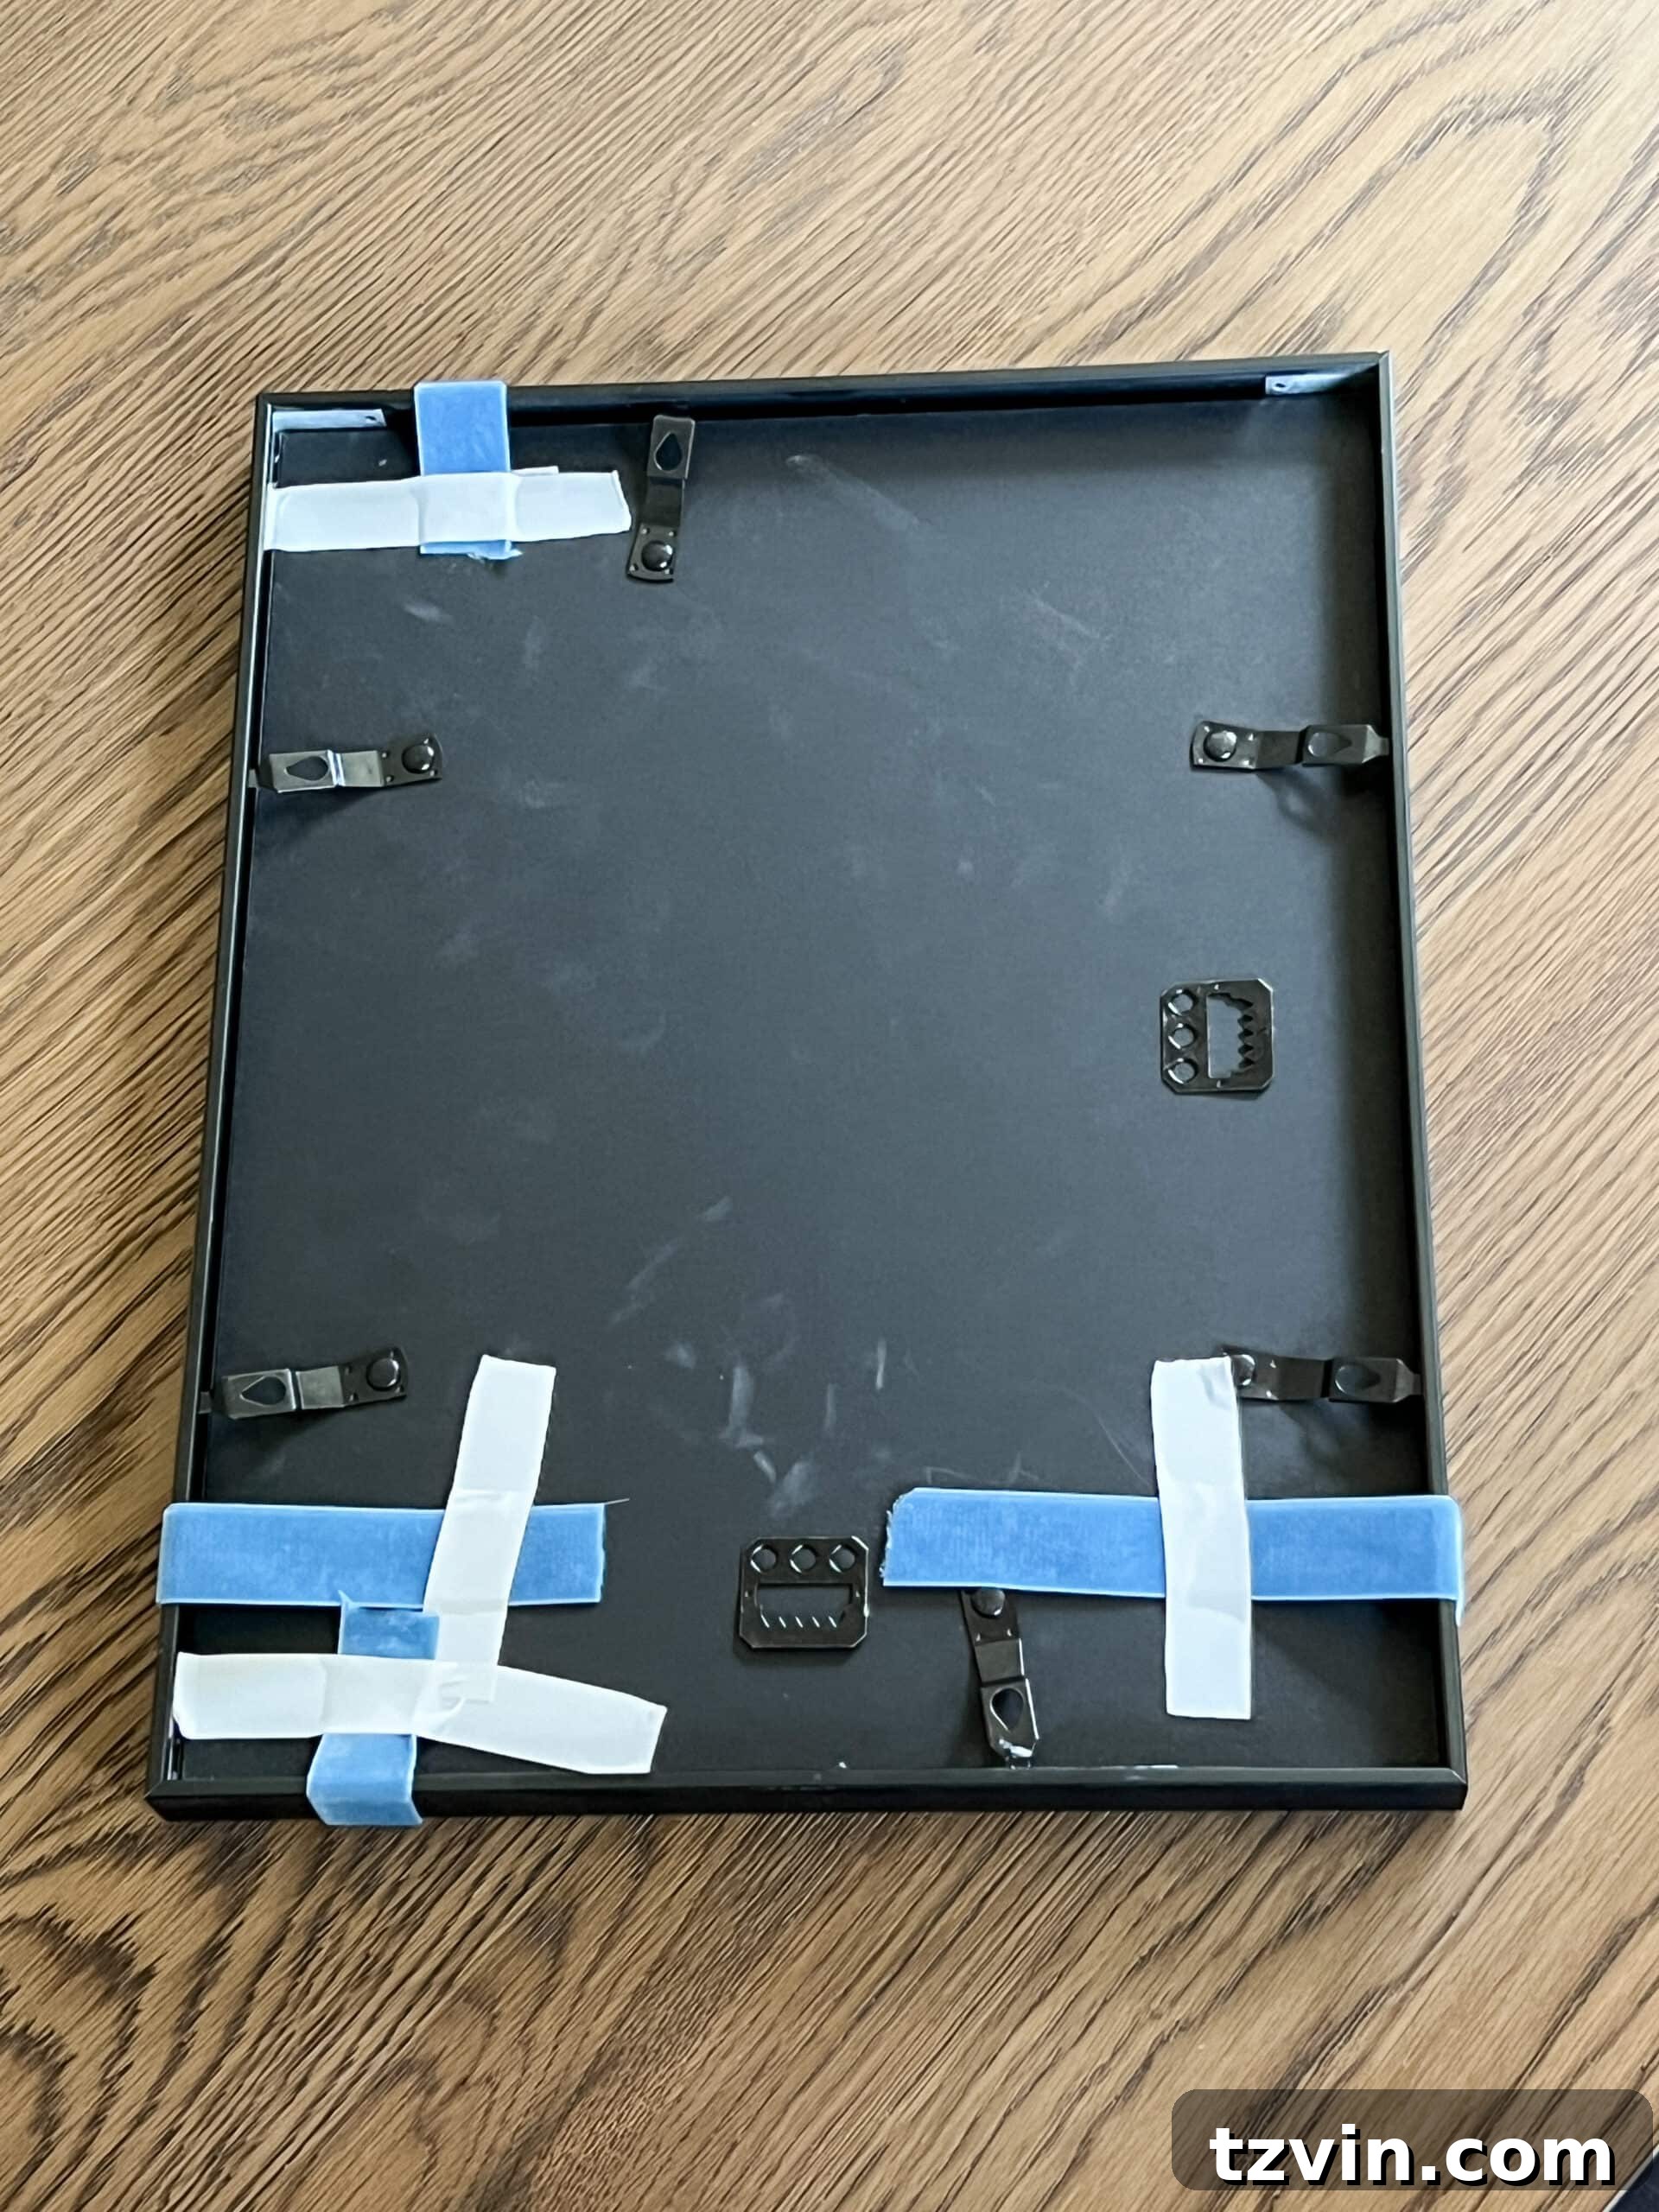
Consider trying different configurations for your ribbon. A single vertical strip through the center of the frame offers a classic, elegant look, while a horizontal strip can also be quite charming. For larger or more elaborate frames, you could even try a diagonal ribbon, or create an “X” shape by using two pieces of ribbon for a truly unique display. The key is to ensure the ribbon is stretched evenly and taped securely to prevent any sagging or shifting once the frame is back on the wall. This simple step is all it takes to lay the foundation for your beautiful ribbon art.
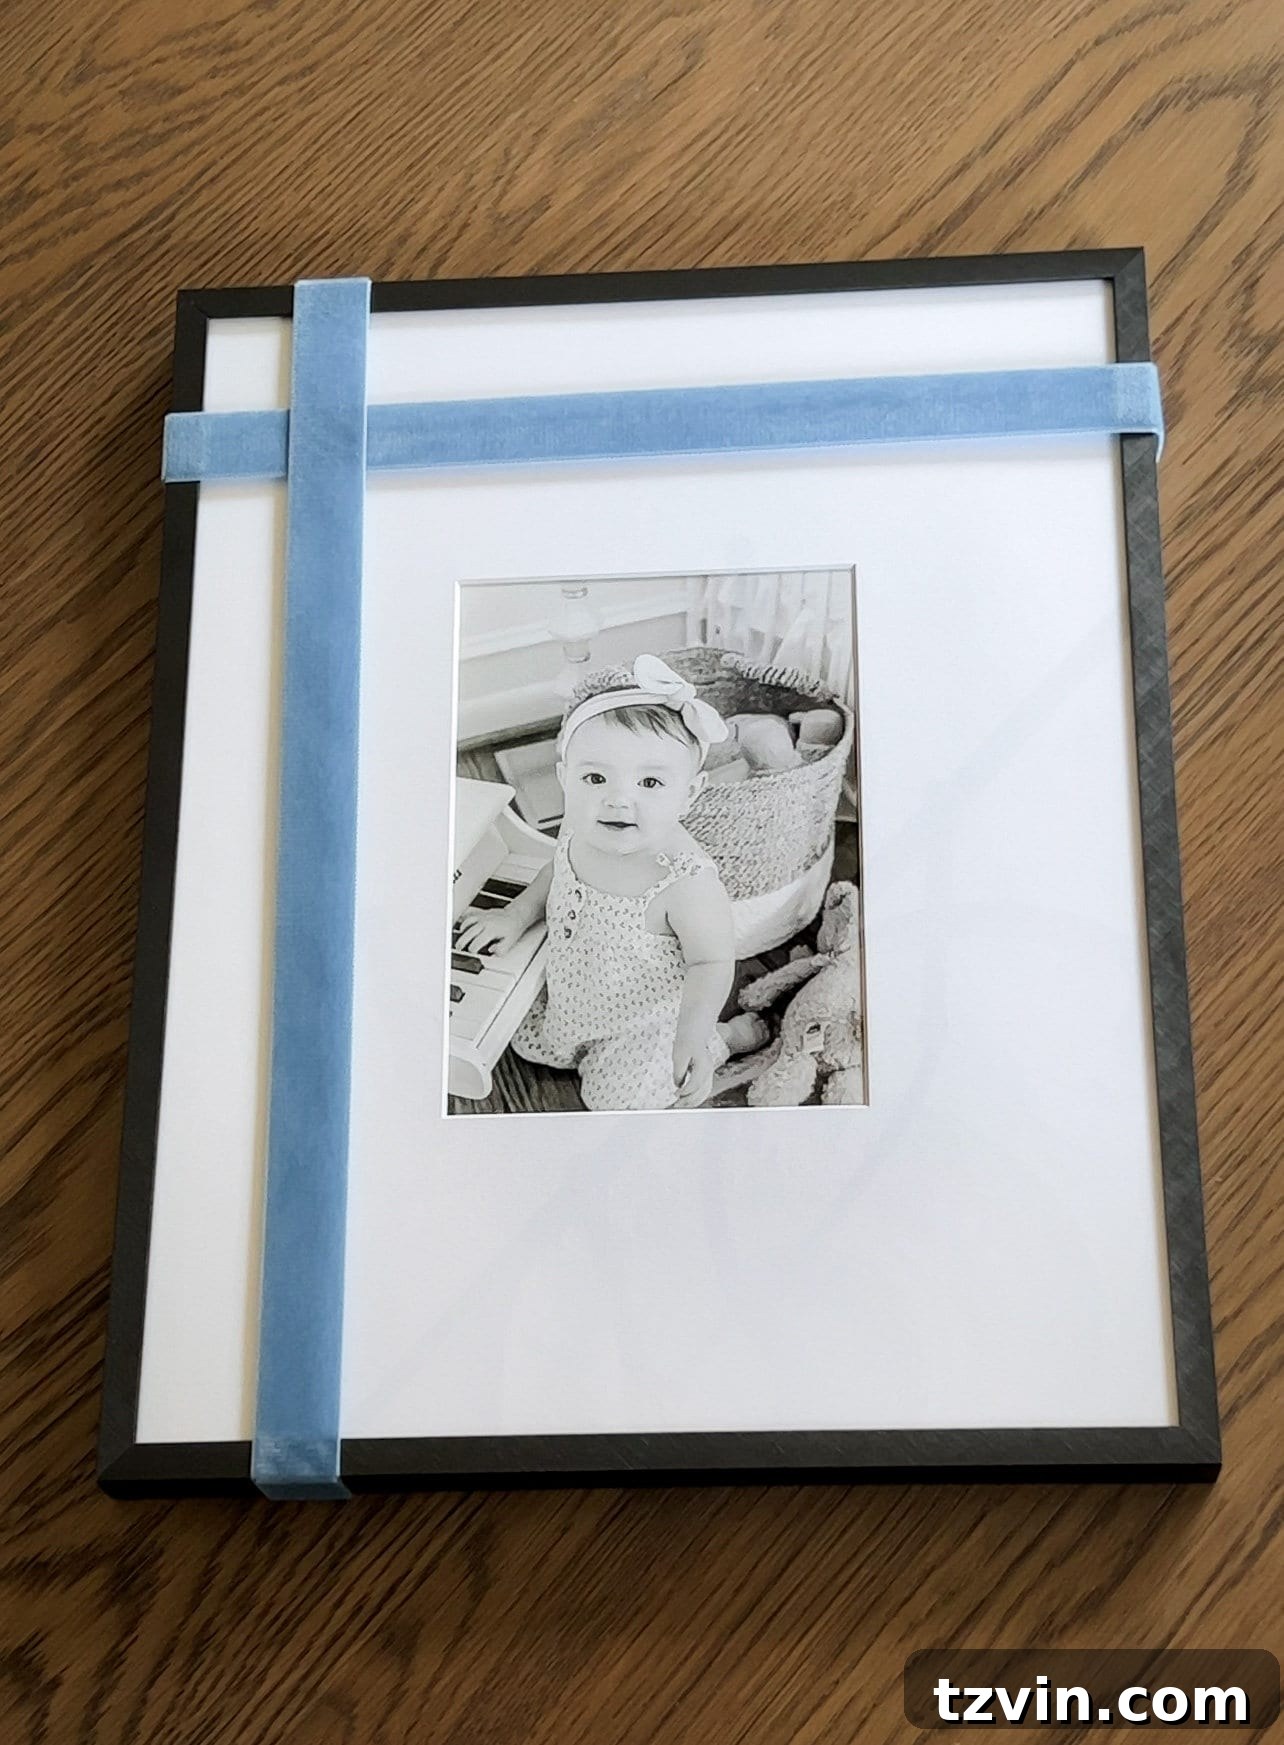
Step 3 – Tie a Beautiful Bow
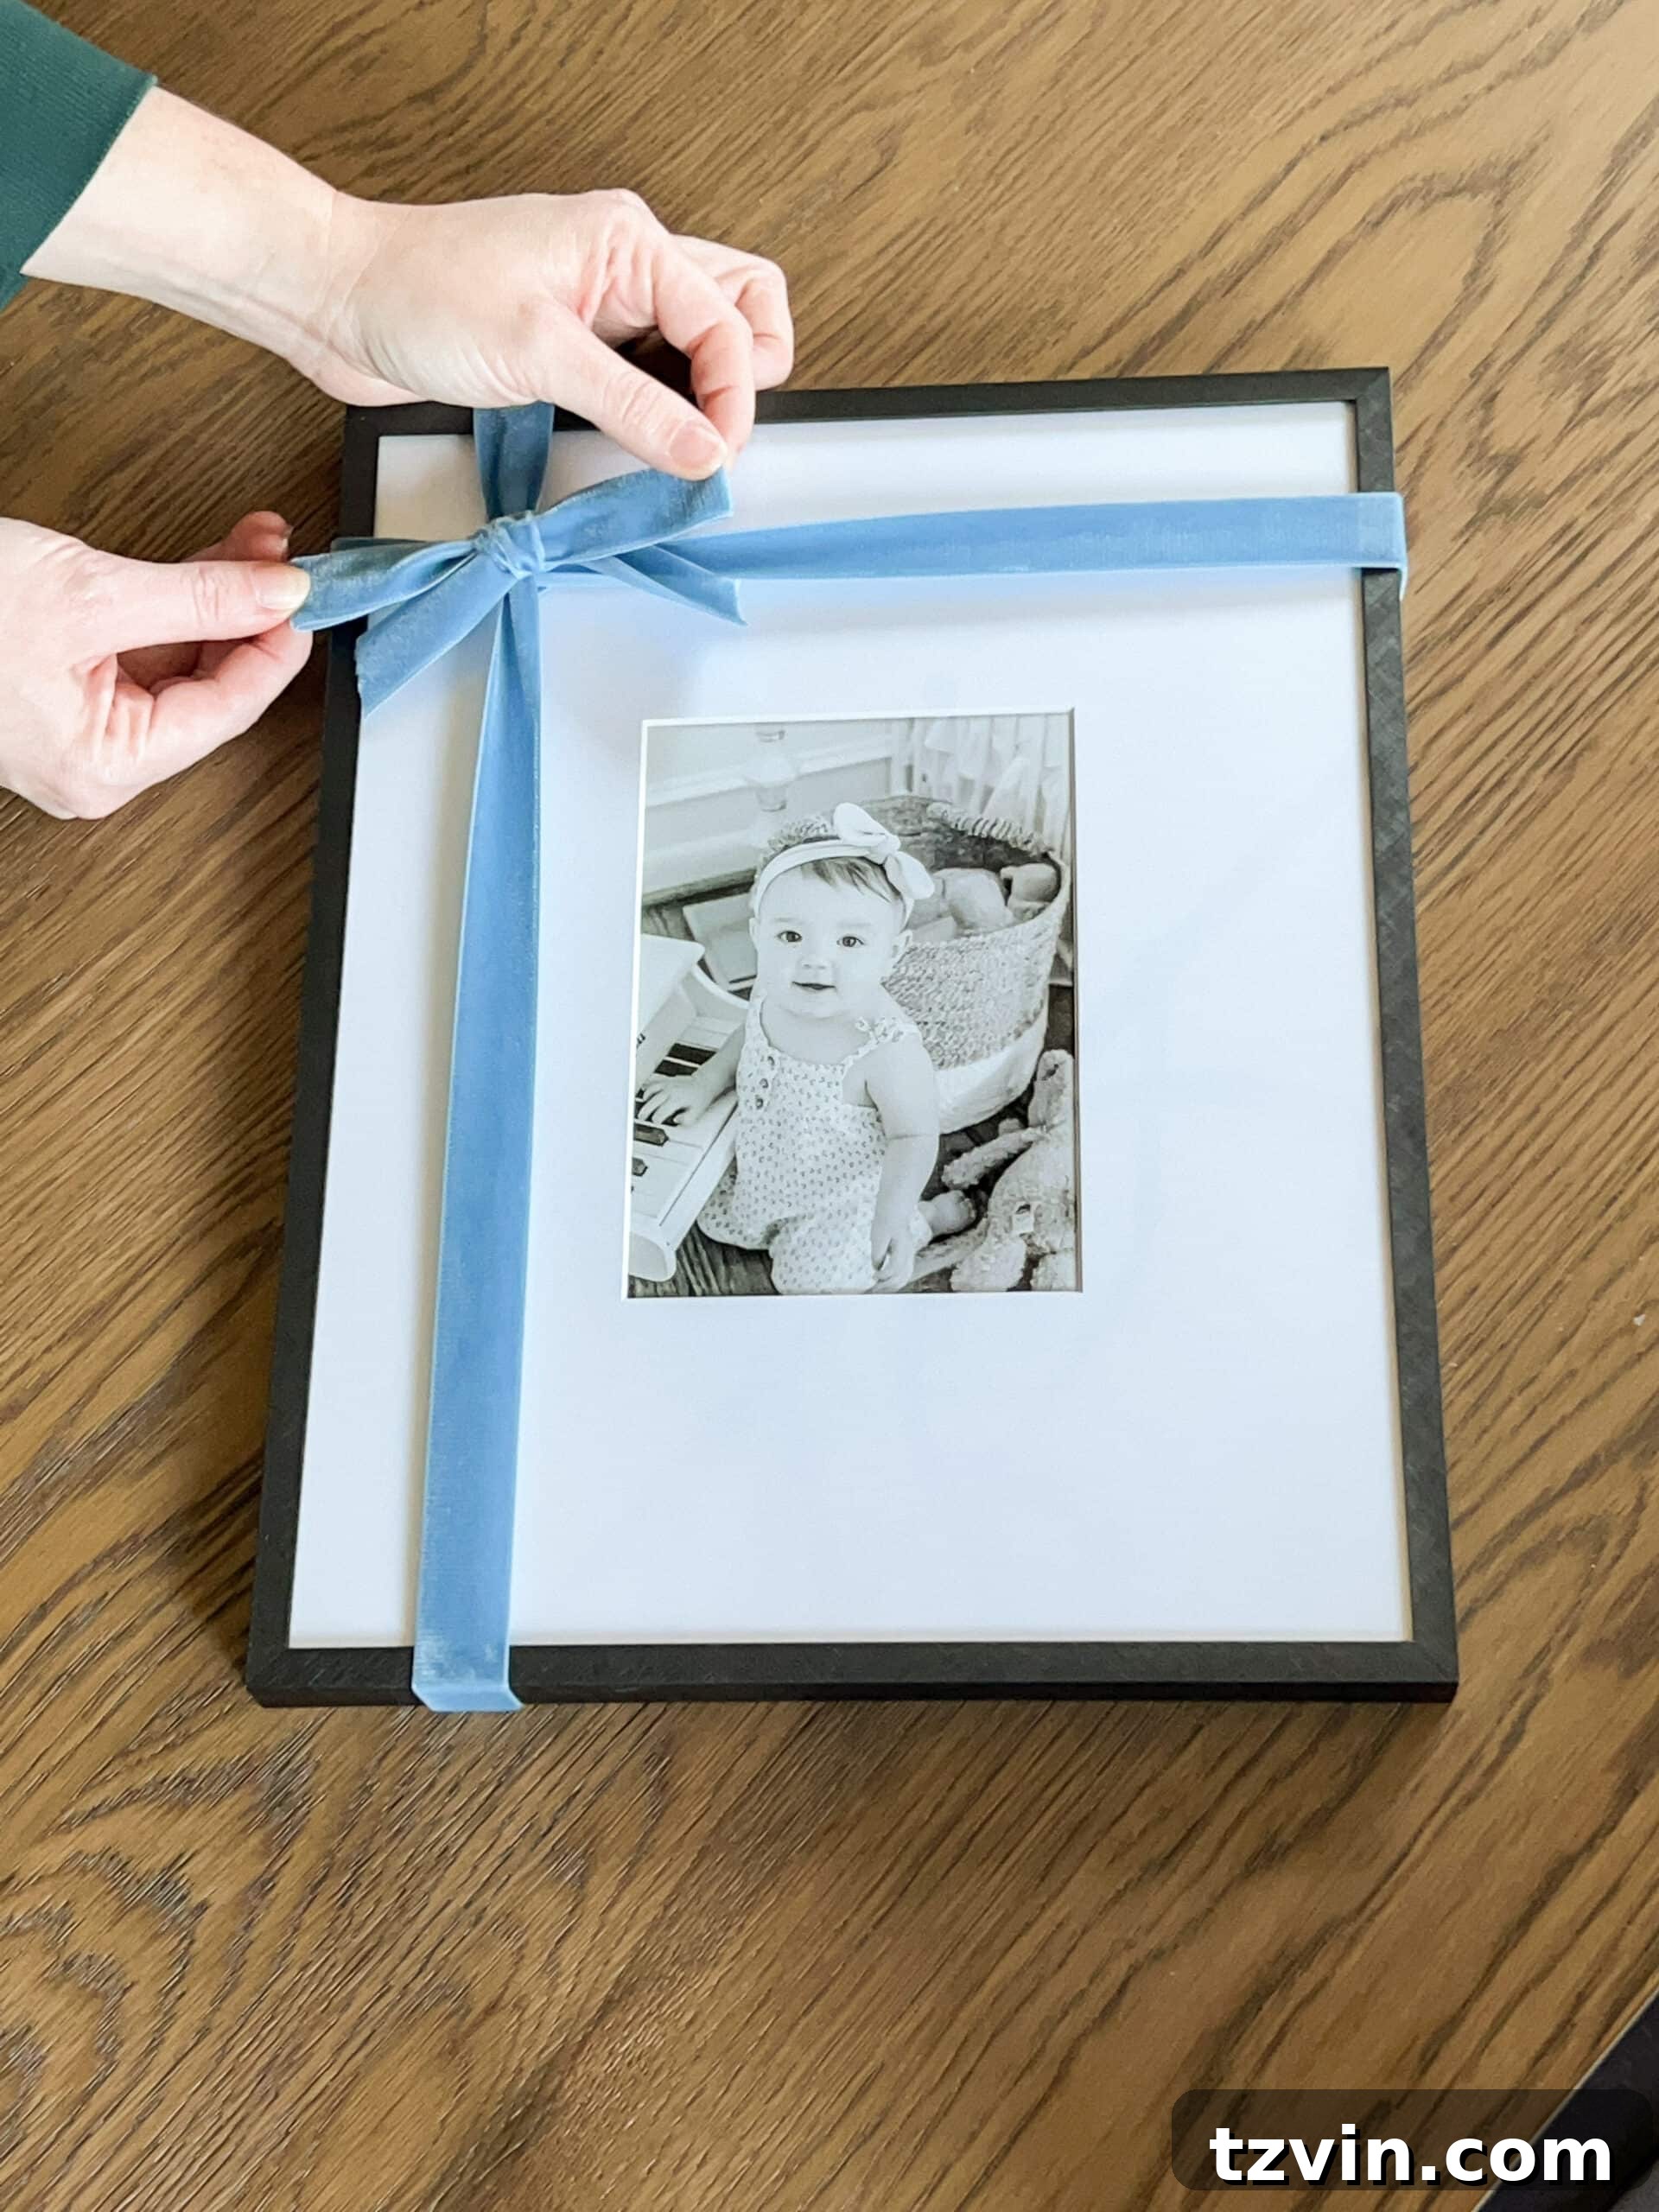
Now for the finishing touch! Take an additional piece of ribbon, approximately 10-12 inches long (adjust based on your desired bow size and ribbon width), and tie a festive bow directly onto the strip of ribbon that is already stretched across the front of your frame. You can choose a simple classic bow, or get creative with a double-loop bow for added volume. For wired ribbons, you can shape the loops and tails to create a fuller, more dramatic effect. Once tied, gently adjust the loops and tails of your bow to achieve a symmetrical and aesthetically pleasing shape. You can use a tiny dot of hot glue (applied sparingly to the back of the bow, not the frame) if you want to ensure the bow stays perfectly in place, especially if it’s a high-traffic area. Repeat this step for all your decorated frames, and watch as your art transforms into a stunning Christmas display!
Create a Dazzling Christmas Bow Ribbon Art Gallery Wall
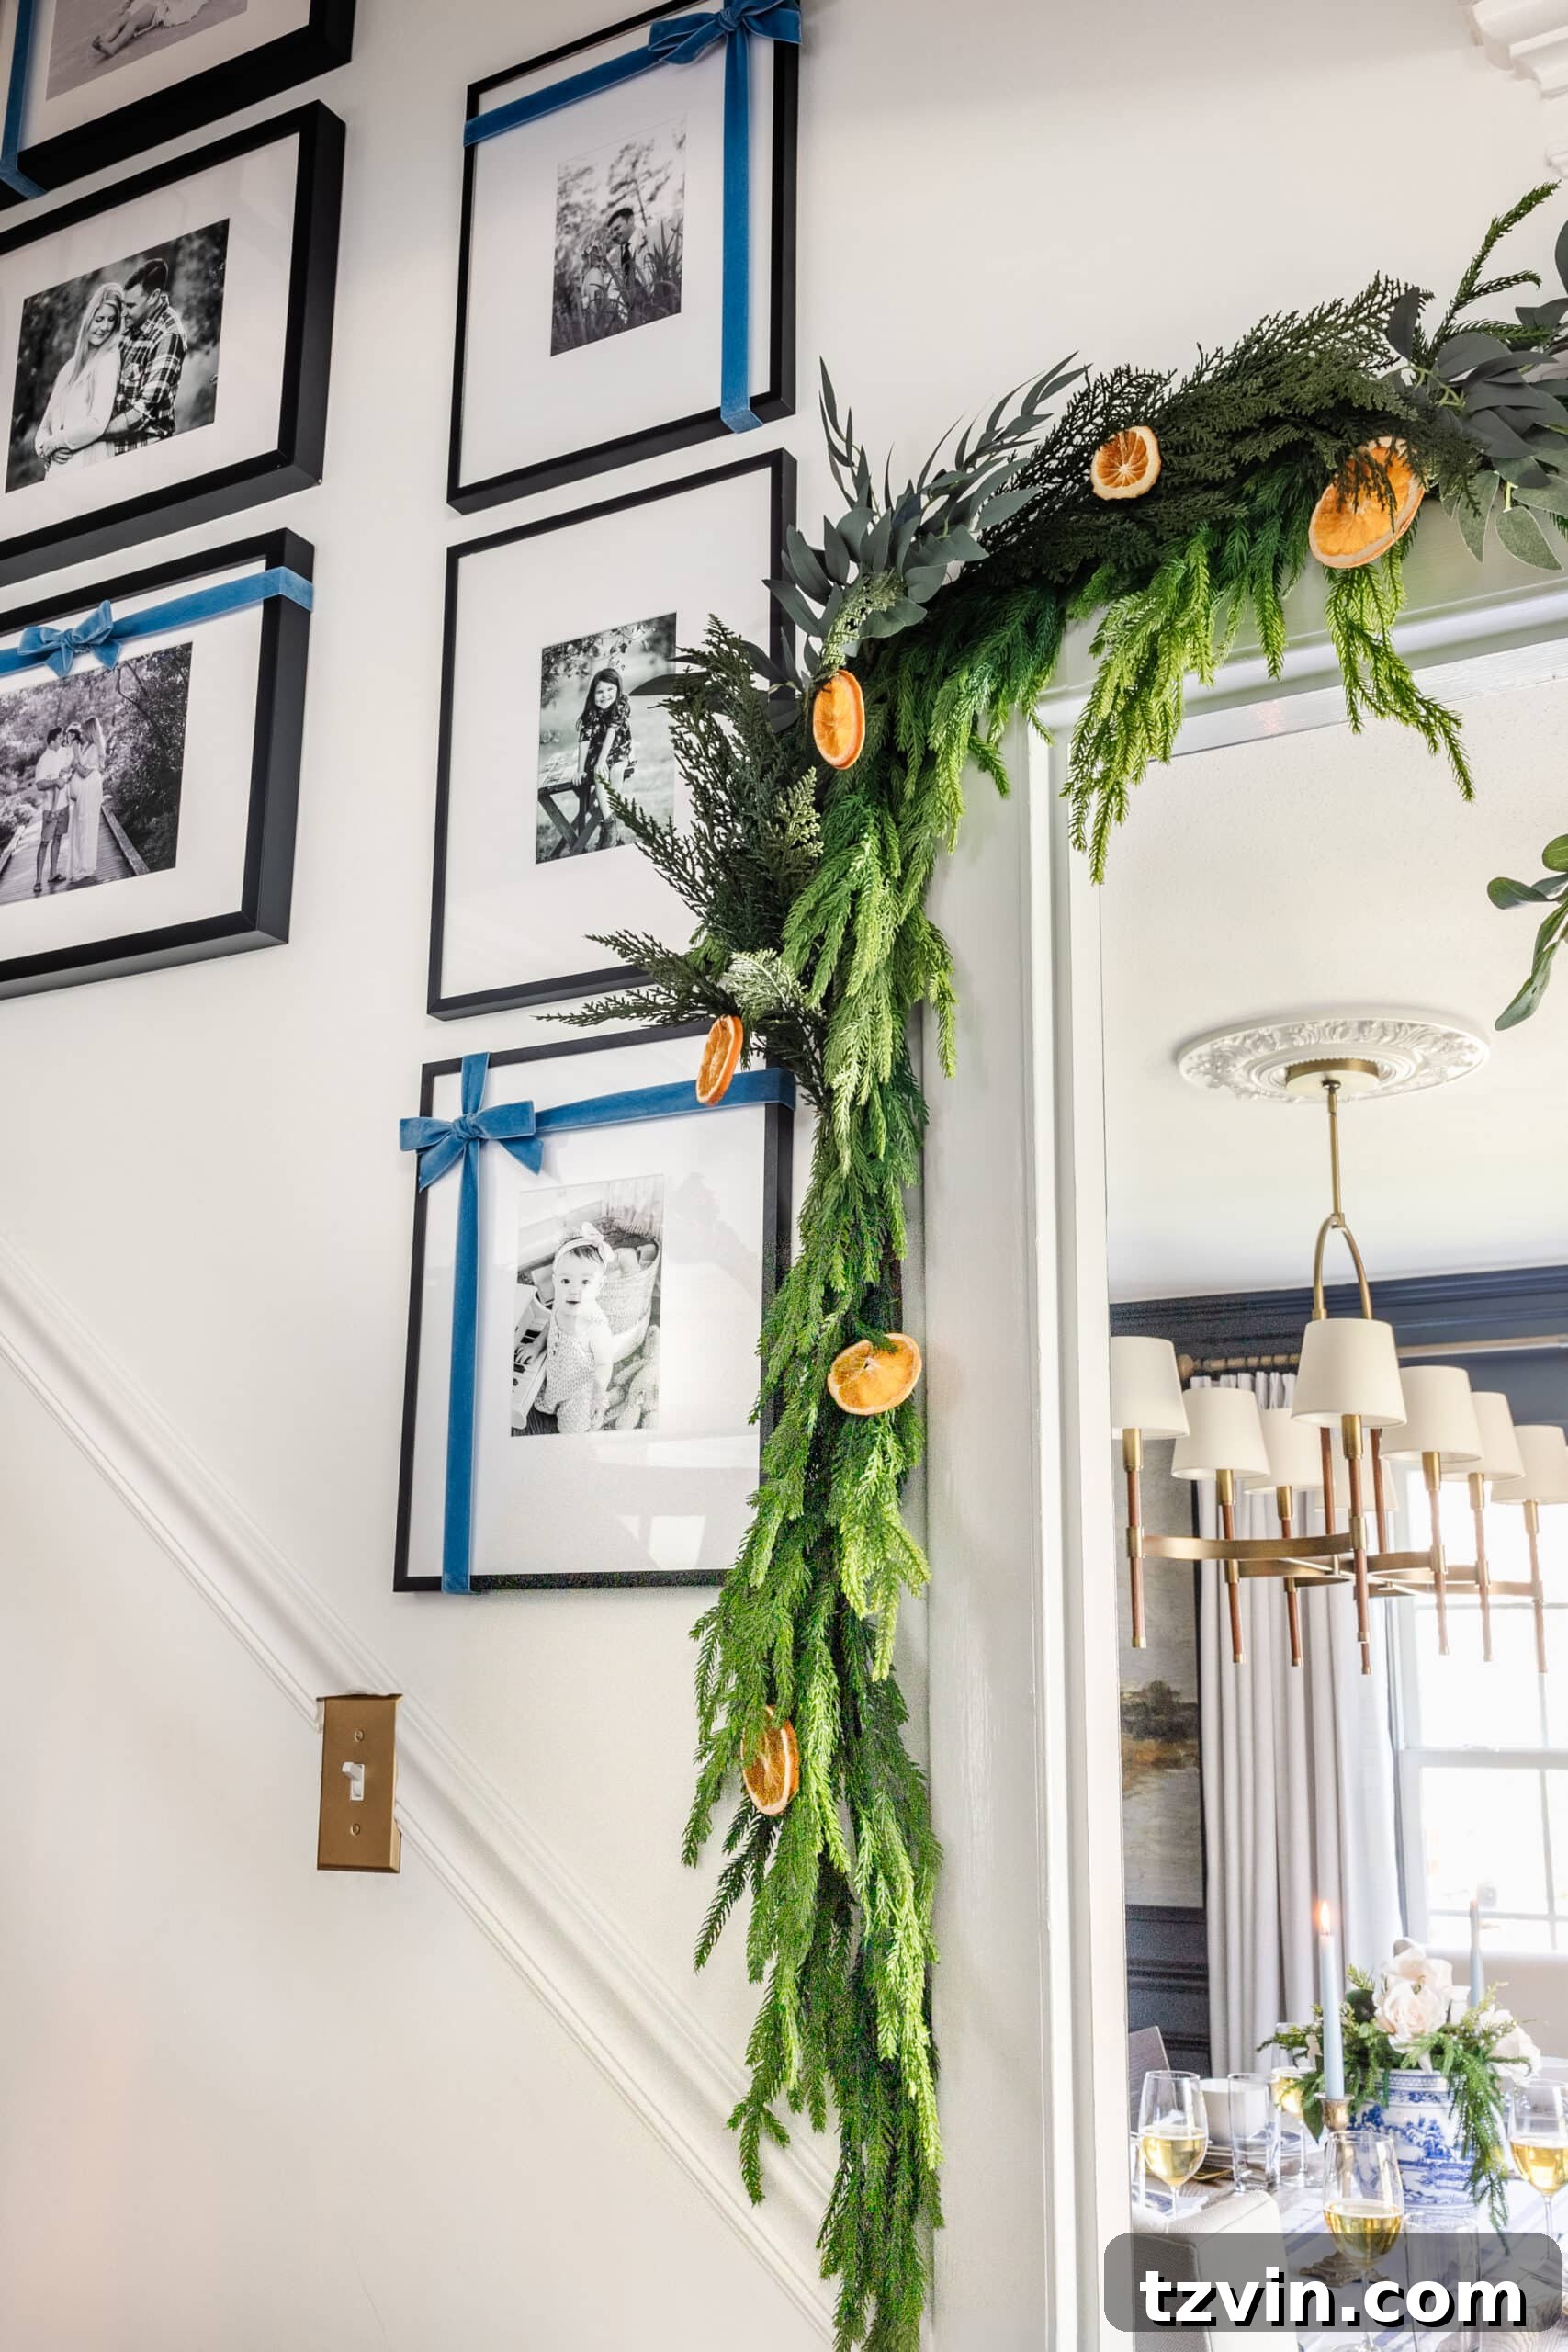
The finished look is undeniably adorable! For our family photo gallery wall, I opted for a curated approach, choosing to embellish only every other picture frame with these delightful Christmas bows. This created a balanced, yet festive, visual rhythm up the stairway. However, the beauty of this project is its flexibility – you could absolutely transform every single frame on your wall into a piece of ribbon art if you desire a more abundant holiday statement!
The entire wall, with its numerous frames, was completed in a mere 30 minutes, which speaks volumes about the project’s efficiency. One of the greatest advantages is how incredibly easy it is to remove the ribbon once the Christmas season concludes, leaving your original art completely unharmed. Although, I must admit, it will be quite challenging to take them down in January! The blue ribbon I chose has a slightly less overtly “Christmas” feel, perhaps allowing me to sneakily keep them up a little longer without anyone noticing. 😉
This project also offers wonderful opportunities for seasonal creativity year after year. Imagine changing up the colors of your ribbon to match evolving decor trends or your personal preferences. Experiment with different textures, from plush velvet to crisp linen or shimmering satin, and explore ribbons with various patterns – plaids, stripes, or even subtle metallics. For those who love a grander display, consider using wide, wired ribbon to craft bigger, more dramatic bows that truly command attention. However, for a touch of understated elegance, I often prefer the simple, charming route that these smaller, sleeker bows provide.
Expert Tips for Designing a Stunning Family Photo Gallery Wall
While we’re discussing the magic of transforming your walls, it’s worth taking a moment to share some invaluable advice for creating an impactful family photo gallery wall, especially one that gracefully climbs a stairway. Crafting a cohesive and aesthetically pleasing gallery wall can seem daunting, but with a few clever tricks, the process becomes much simpler and more enjoyable. Be sure to check out this post for a fantastic gallery wall hanging trick that utilizes scrap wrapping paper – it’s a game-changer for layout planning!
Here are some fundamental principles to guide your gallery wall design:
- Plan Your Layout Meticulously: Before even thinking about nails, cut out paper templates of your frames (or use the wrapping paper trick!) and arrange them on the floor or directly on the wall with painter’s tape. This allows you to visualize the arrangement, play with spacing, and ensure a balanced composition before committing to screw or nail holes.
- Anchor with Larger Pieces: Begin by placing your largest picture frames first. These act as anchors, establishing the main points of your gallery. Once the large pieces are positioned, gradually fill in the gaps with smaller frames, working your way down from the largest to the smallest frames. This creates a natural flow and prevents the wall from looking cluttered.
- Mind the Spacing: For a professional and intentional look, aim to hang frames approximately 2 to 6 inches apart. This consistent spacing helps the individual pieces relate to one another, forming a unified display rather than a collection of disconnected elements. Adjust slightly based on the size of your frames and the overall wall space.
- Ensure Level Perfection: Always, always check your frame placement with a level. A slight tilt can distract from the beauty of your display. A traditional bubble level works perfectly, but for extensive gallery walls or trickier stairwell angles, a laser level can be an invaluable tool for ensuring perfectly straight lines and consistent heights.
- Consider Frame Cohesion: While mixing frame styles and finishes can add character, ensure there’s an overarching theme. This could be consistent matting, a shared color palette (e.g., all black frames, or a mix of gold and white), or a similar aesthetic style (e.g., all modern, or all vintage).
- Photo Selection: Curate your photos carefully. A gallery wall is a narrative of your life. Mix candid shots with professional portraits, and consider using a consistent filter or black and white treatment for a sophisticated, cohesive look.
- Lighting: If possible, consider how natural light interacts with your gallery wall. For areas with less natural light, strategically placed picture lights can highlight your cherished memories and make the display truly pop.
Do you think you’ll give this delightful Christmas ribbon art project a try this year? Or perhaps incorporate any other DIY holiday decorating ideas into your festive preparations? This simple transformation is a true testament to how small changes can make a huge impact. I’m completely sold on making this ribbon art a cherished Christmas tradition every single year. It’s an effortless way to bring holiday cheer and a personalized touch to your home, proving that beautiful festive decor doesn’t have to be complicated or expensive.
More Inspiring Christmas Art Ideas for Your Home
If you’re looking for even more creative ways to enhance your holiday decor with art, explore these fantastic ideas that can be easily incorporated into any room:
- Winter Painting Free Art Printable to Frame Anywhere: Discover beautiful, downloadable art that evokes the serene beauty of winter, perfect for framing and displaying throughout your home.
- Christmas Sheet Music Art Gallery Wall: Create a nostalgic and elegant gallery wall using vintage or classic Christmas sheet music, offering a unique and charming touch to your holiday decor.
- Snow Cabin Art Printable: Add a cozy, rustic feel to your kitchen or any space with a printable artwork featuring a charming snow-covered cabin scene.