
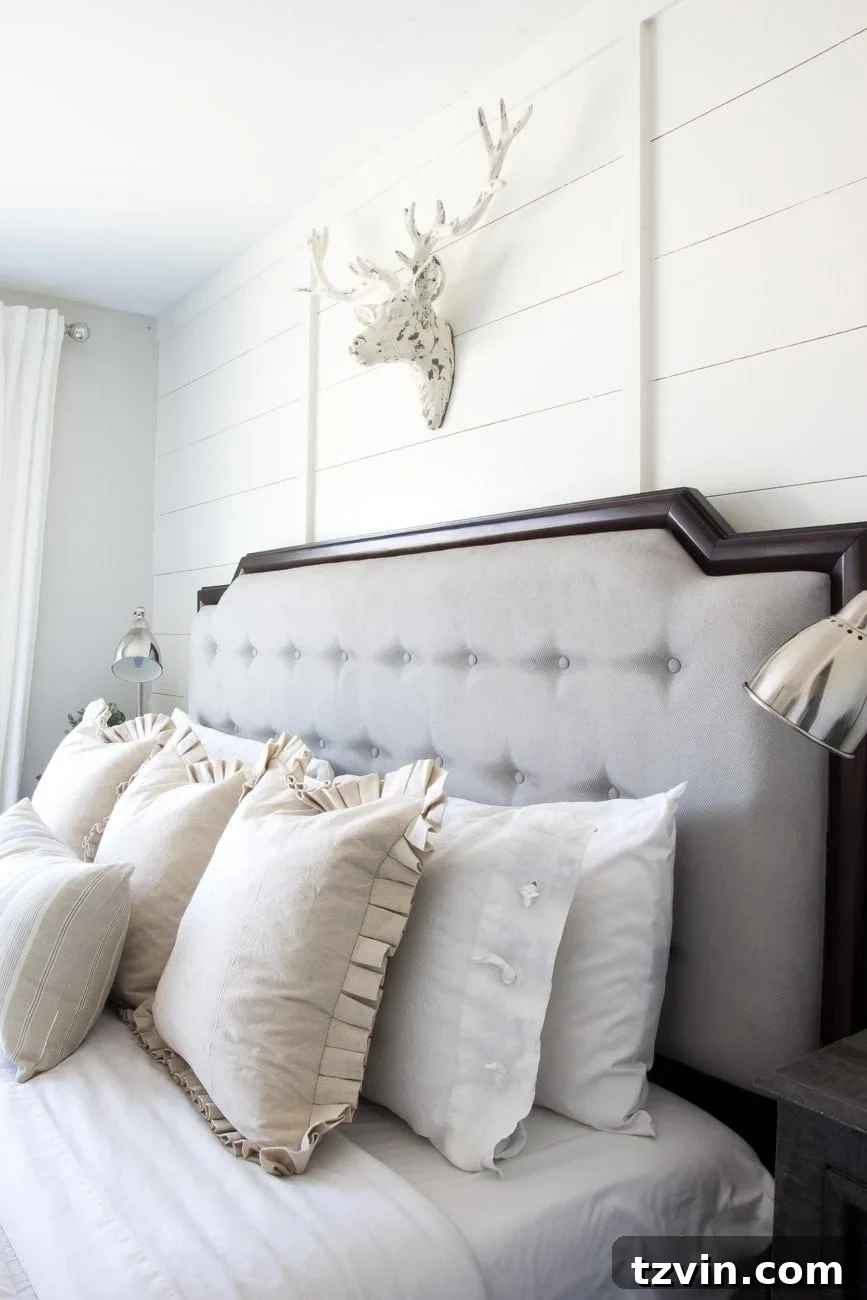
Welcome to another exciting DIY adventure! Today, we’re diving into a project that might seem intimidating at first glance but is incredibly rewarding: painting upholstery. If you’ve ever found yourself pondering whether you can truly transform fabric furniture with paint, rest assured – it’s not only possible but also remarkably simple, offering a fresh new look for your home without the hefty cost of reupholstering.
You might recall the extensive internal debate about whether to paint our upholstered headboard. The decision was made, the brush was dipped, and the transformation began. I’m thrilled to share that this project, though it filled me with a fair share of apprehension initially, turned out to be a resounding success!
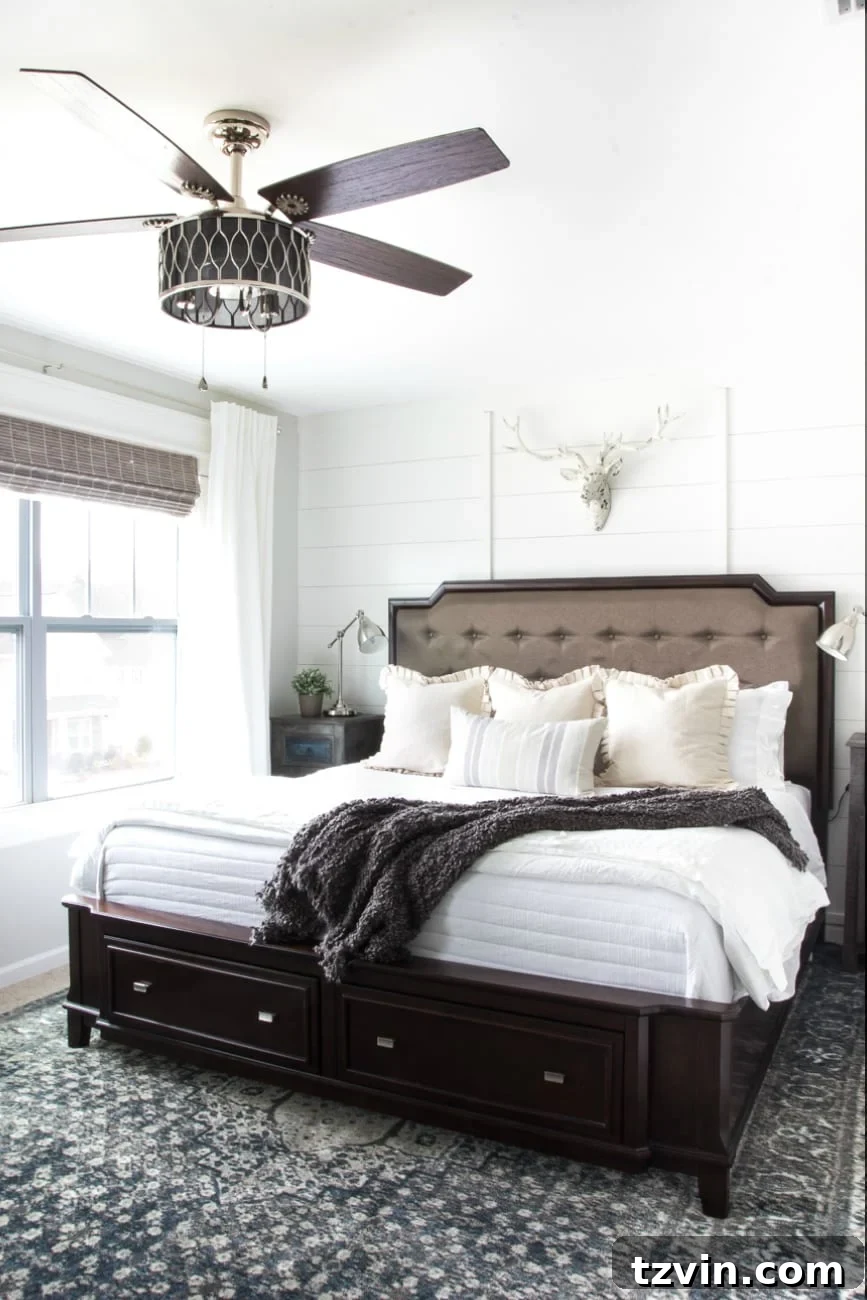
UPDATE: See the full master bedroom makeover reveal + source list here!
For anyone dreaming of giving a beloved piece of upholstered furniture a new lease on life, this comprehensive guide will walk you through the process step-by-step. Forget the fear, embrace the paint, and get ready to create something beautiful. It truly is a project anyone can tackle, and the results are incredibly satisfying. So, let’s get started on revitalizing your fabric furniture!
Why Paint Upholstery? The Benefits of a Fabric Furniture Makeover
Painting upholstery with chalk paint is a fantastic and budget-friendly alternative to traditional reupholstering. It allows for complete color customization, enabling you to perfectly match a piece to your existing decor or create a bold new statement. Unlike traditional methods that can be costly and labor-intensive, painting offers a quicker, more accessible route to a fresh aesthetic. This DIY approach not only saves money but also gives you the creative freedom to experiment with different shades and finishes. It’s an eco-conscious choice too, giving old furniture new purpose and preventing it from ending up in a landfill. Whether you’re refreshing a thrift store find or updating a piece you already own, painting fabric furniture is a transformative technique worth exploring.
Essential Supplies for Painting Upholstery
Gathering the right tools is the first step towards a successful upholstery painting project. While the process is simple, the quality of your supplies can make a significant difference in the final outcome. Here’s a detailed list of what you’ll need:
- Chalk Paint: This is your star player. Chalk paint adheres wonderfully to fabric without requiring extensive prep work like priming. Its matte finish and ability to be easily thinned make it ideal for creating a soft, pliable surface once dry. For a king-sized headboard like mine, approximately one quart of Annie Sloan Chalk Paint was sufficient to achieve full coverage. Always consider the size and absorbency of your specific piece when estimating paint quantity.
- Mixing Container: A large cup or a small pail is perfect for mixing your paint and water solution. I find a container with a sturdy handle, like this one (link to product), makes it easier to carry around as you work, ensuring your paint mixture is always at hand.
- Painter’s Tape (If Needed): Essential for protecting any adjacent wood frames, trim, or other elements you don’t want painted. We highly recommend a high-quality tape like Frog Tape for clean, crisp lines and to prevent bleeding.
- Quality Paint Brush: Invest in a good quality brush, such as a 3-inch angle brush. A well-made brush will provide smoother, more even application, reduce brush strokes, and minimize shedding bristles on your fabric.
- Fine Grit Sandpaper: Around 320 grit sandpaper works wonders. This is crucial for achieving that soft, velvety texture after the paint has dried, helping to break down any stiffness in the fabric.
- Drop Cloth: A canvas drop cloth is indispensable for protecting your floors and surrounding furniture from paint drips and splatters. A little prevention goes a long way in avoiding unfortunate messes.
- Clear Soft Wax (Optional): While optional for pieces that don’t see heavy use, like a headboard, a clear soft wax (such as Annie Sloan Clear Soft Wax or your preferred brand) can provide an extra layer of protection and a subtle sheen. It’s particularly recommended for chairs or sofas that experience more wear and tear.
- Your Upholstered Piece: Of course, the star of your project! Make sure it’s clean and ready for its transformation.
The Victim: Our Upholstered Headboard Dilemma
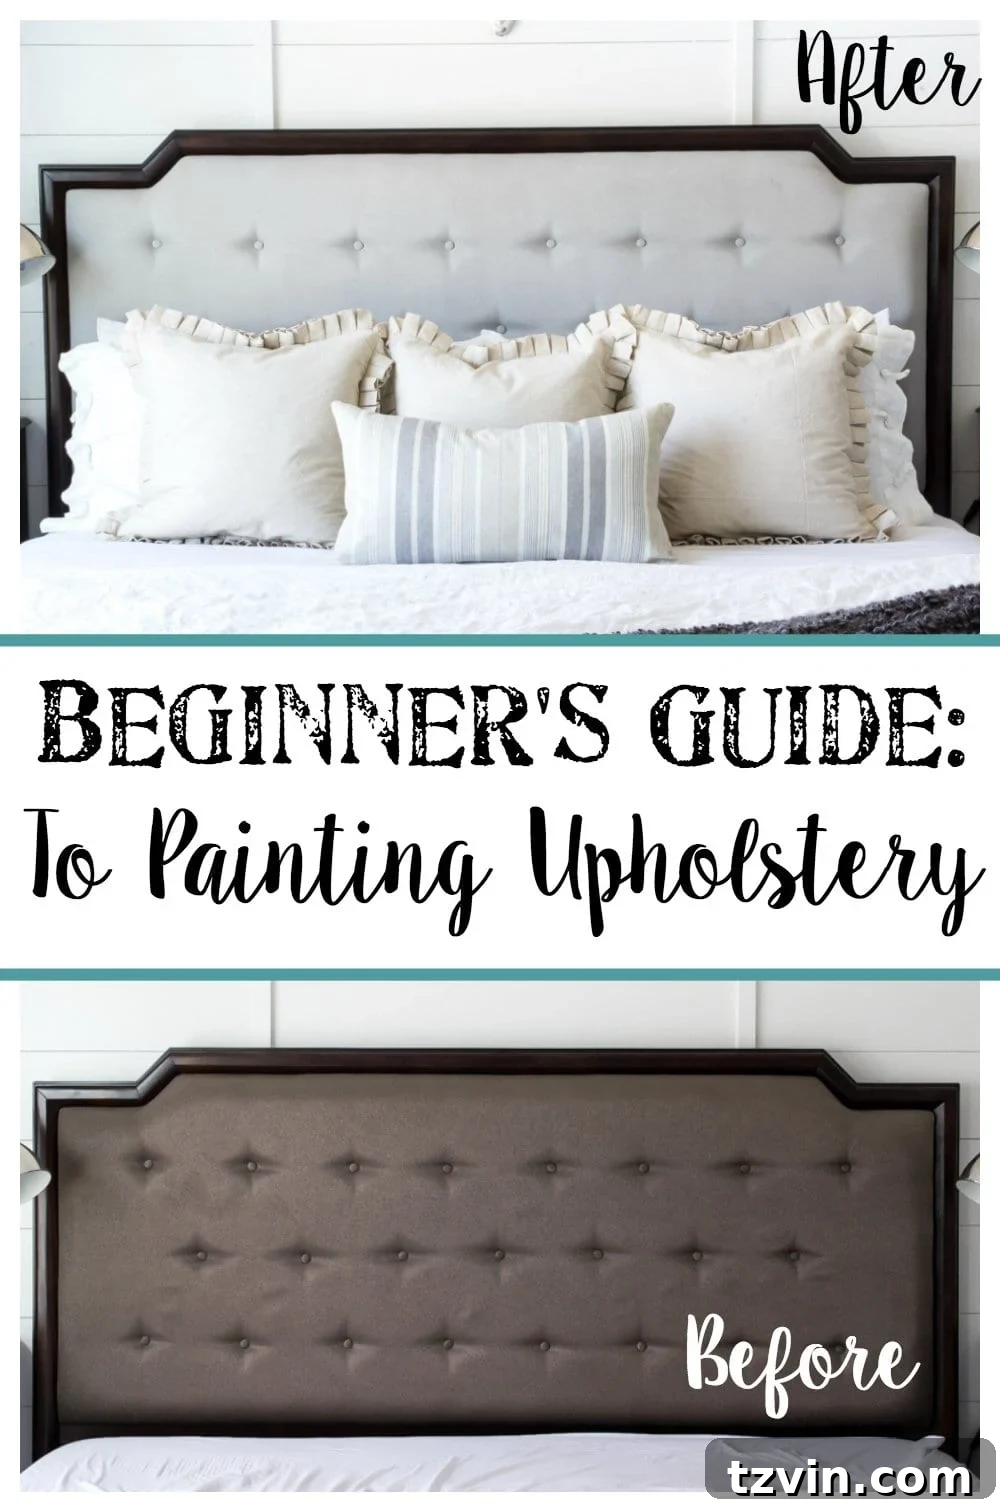
My chosen project for this experiment was our upholstered bed, purchased from Ashley Furniture a couple of years prior. It was a beautiful piece in its original state, but the rich brown fabric had begun to clash significantly with the evolving blue and gray color palette of our master bedroom. While it looked acceptable in photographs, in person, the discord was noticeable and frankly, driving me a little crazy.
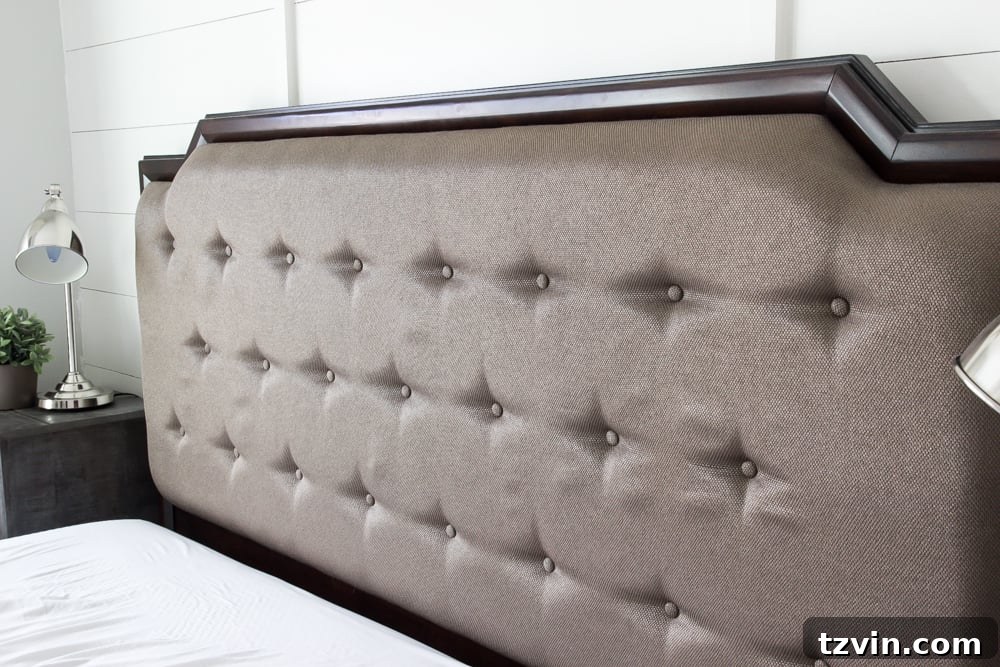
The conflicting tones were a constant reminder that the room lacked the cohesive, serene atmosphere I envisioned. This internal struggle led me to the bold decision of painting the headboard, hoping to integrate it seamlessly into our rustic modern master bedroom design plan. It was time for a change, and paint seemed like the perfect solution.
Step-by-Step Guide: How to Paint Upholstery with Chalk Paint
Step 1: Prepare Your Upholstered Furniture
Before you begin painting, proper preparation is essential. Start by thoroughly cleaning your upholstered piece. Use a vacuum cleaner with an upholstery attachment to remove any dust, crumbs, or debris that might be embedded in the fabric. For any stains, gently spot clean and allow the fabric to dry completely. Next, carefully tape off any areas you wish to protect from paint, such as wood frames, metal accents, or adjacent walls. I meticulously applied painter’s tape to the wooden frame of our headboard, and I’m happy to report it successfully prevented any paint from seeping underneath, ensuring a clean edge.
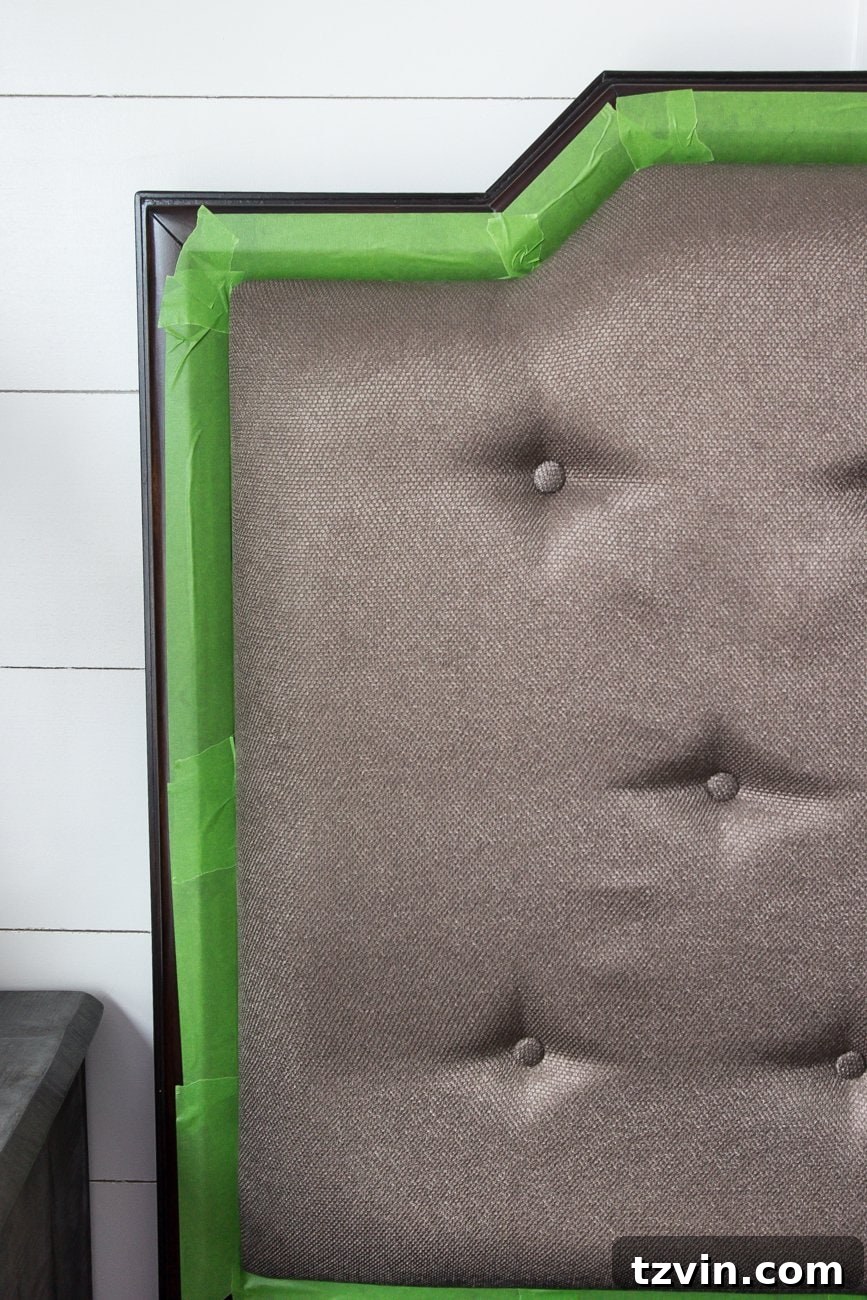
Lastly, spread a drop cloth generously over your mattress, flooring, and any surrounding items. This provides crucial protection against accidental spills and drips, making cleanup much easier in the long run.
Step 2: Mix Your Chalk Paint and Water Solution
The secret to painting upholstery successfully lies in thinning your chalk paint. This allows the paint to truly penetrate and dye the fabric fibers, rather than just sitting on top, which can result in a stiff, plastic-like feel. In my paint pail, I mixed three parts paint to one part water. For this project, I used Annie Sloan Chalk Paint in a beautiful Paris Grey shade. Don’t be afraid to improvise if you’re short on dedicated stir sticks; I certainly did, using wooden take-out chopsticks to achieve a perfectly smooth consistency!
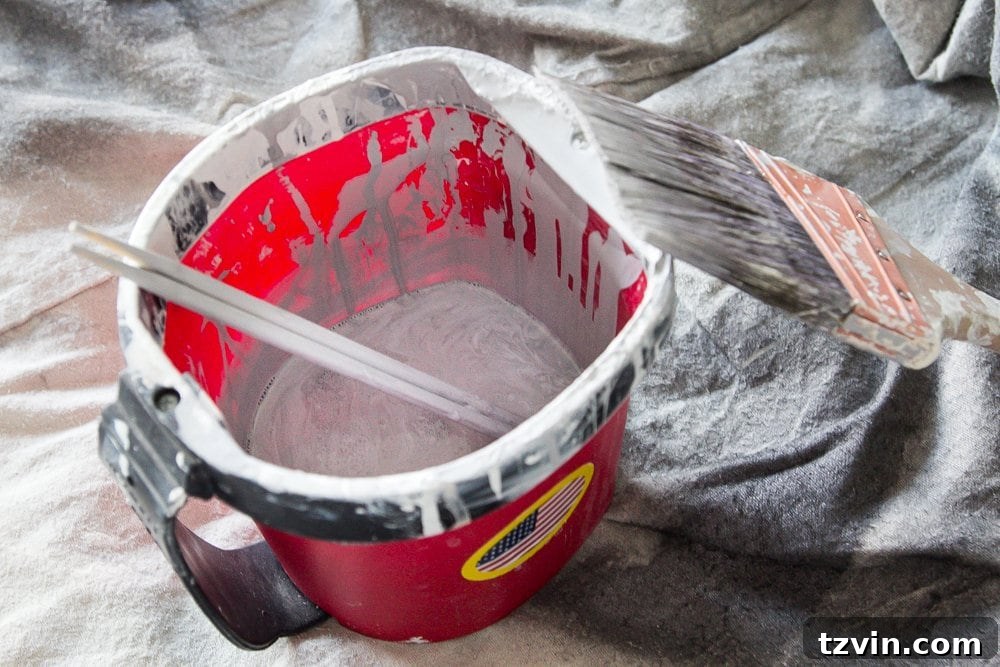
The goal is a consistency similar to thin cream or even watery yogurt. This diluted mixture will spread more easily, absorb better into the fabric, and contribute to a softer finish. Remember to stir your paint frequently throughout the entire painting process to maintain a consistent mixture, as the paint pigments can settle.
Step 3: Apply the First Coat – Embrace the “Ugly” Stage
With your paint mixed and your drop cloth in place, it’s time to start painting. Begin brushing the paint onto your upholstery, paying close attention to the direction of your brush strokes. I maintained consistent straight up and down strokes across the entire headboard for a uniform finish. Ensure you work the paint into the fabric fibers, not just on the surface.
Now, brace yourself: the first coat can be incredibly disheartening. I confess, after applying the initial layer, I seriously considered giving up. It looked splotchy, uneven, and far from the elegant gray I envisioned. I was already mentally preparing my apology to my husband, Robert, for potentially “destroying” our bed!
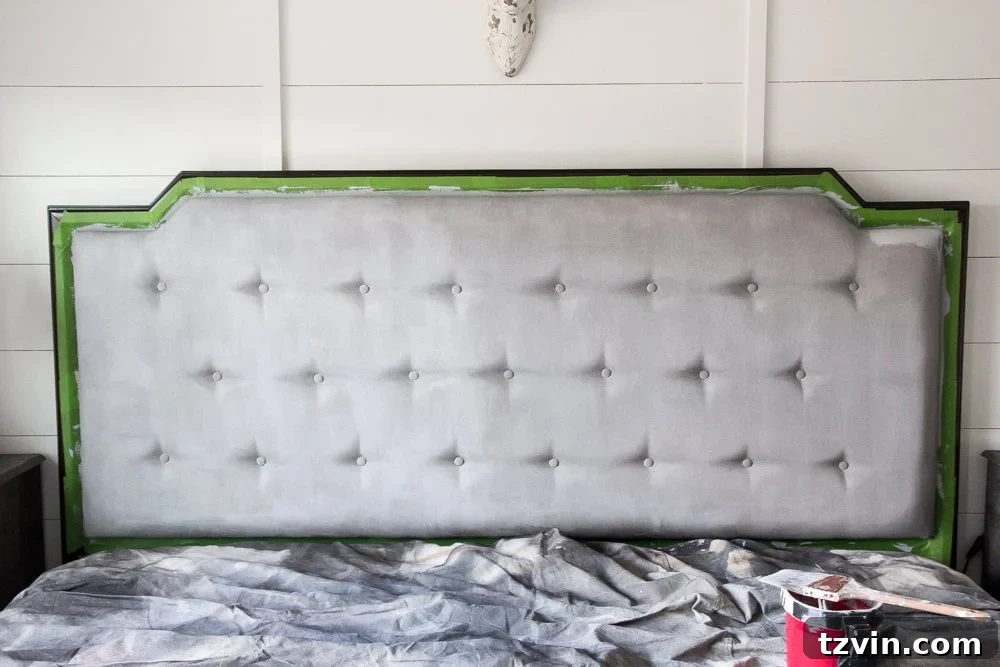
This “ugly” first coat is completely normal for fabric painting. The initial layer acts as a primer, allowing subsequent coats to build up color more effectively. Don’t get discouraged! Let the first coat dry completely, which typically takes a few hours, depending on humidity and ventilation. Resist the urge to apply a thick coat to try and cover everything at once; thin, even coats are key.
Step 4: Build Up Color with Subsequent Coats
Once the first coat is dry, it’s time for the second. You’ll be amazed at how much better it looks. The color will start to even out, and your confidence will undoubtedly return. Continue to apply thin, even coats, allowing each layer to dry fully before moving on to the next. For my headboard, a total of three coats of the paint/water mixture were necessary to achieve the desired depth of color and eliminate any remaining splotchiness.
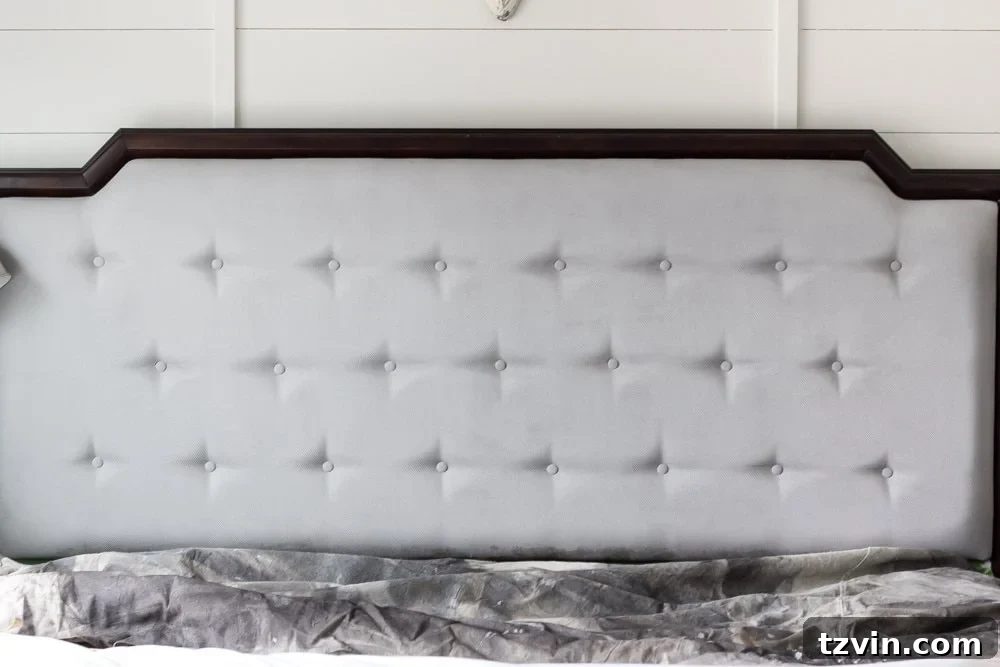
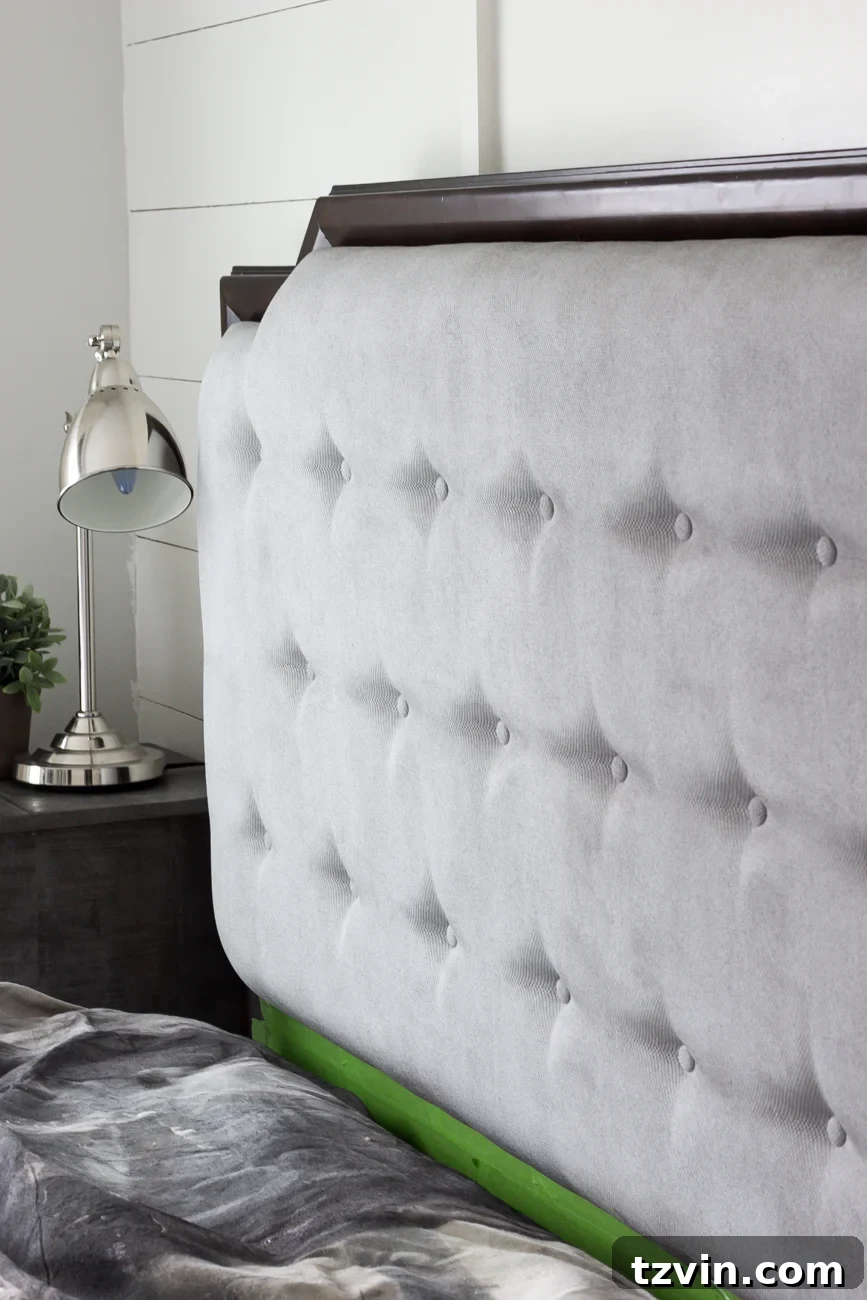
Patience is key during this stage. Each coat contributes to the overall finish, and rushing the drying process can lead to a less durable or uneven result. You’ll notice the fabric becoming stiffer with each layer of paint, but don’t worry – the next step will address this.
Step 5: Sand for a Soft, Velvety Texture
After the third and final coat of paint has thoroughly dried, the fabric will likely feel quite stiff, almost like painted canvas. This is perfectly normal and where the magic of sanding comes in. Using fine-grit sandpaper (I used 320 grit), gently sand down the entire painted surface. Apply light pressure and use circular motions to break down the dried paint particles.
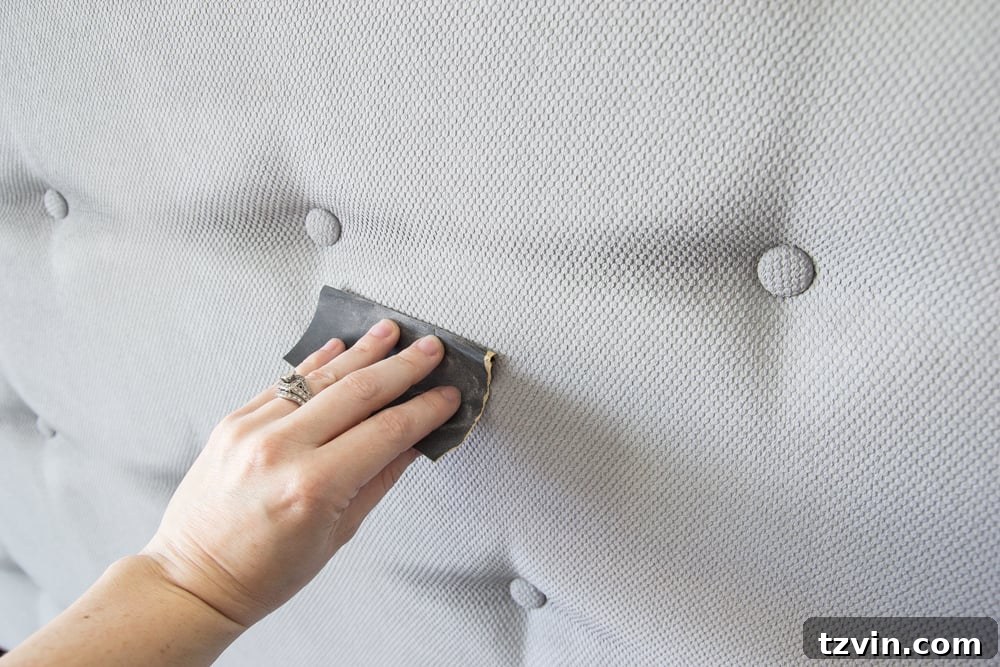
As you sand, you’ll feel the fabric transform beneath your hands. The stiffness will give way to a surprisingly soft, velvety texture, remarkably similar to the original fabric. This step is crucial for achieving a comfortable and appealing finish, making your painted upholstery feel as good as it looks. After sanding, lightly wipe down the surface to remove any dust.
Step 6: To Wax or Not To Wax? (Sealing Your Masterpiece)
The decision to apply a clear wax after sanding is entirely up to you and depends largely on the functionality of your furniture piece. I researched several different methods, with some DIYers choosing to wax and others opting out. For high-traffic items like a chair, sofa, or ottoman, applying a clear soft wax provides an invaluable layer of protection against daily wear, spills, and helps maintain the integrity of the paint over time. It can also deepen the color slightly and add a subtle luster.
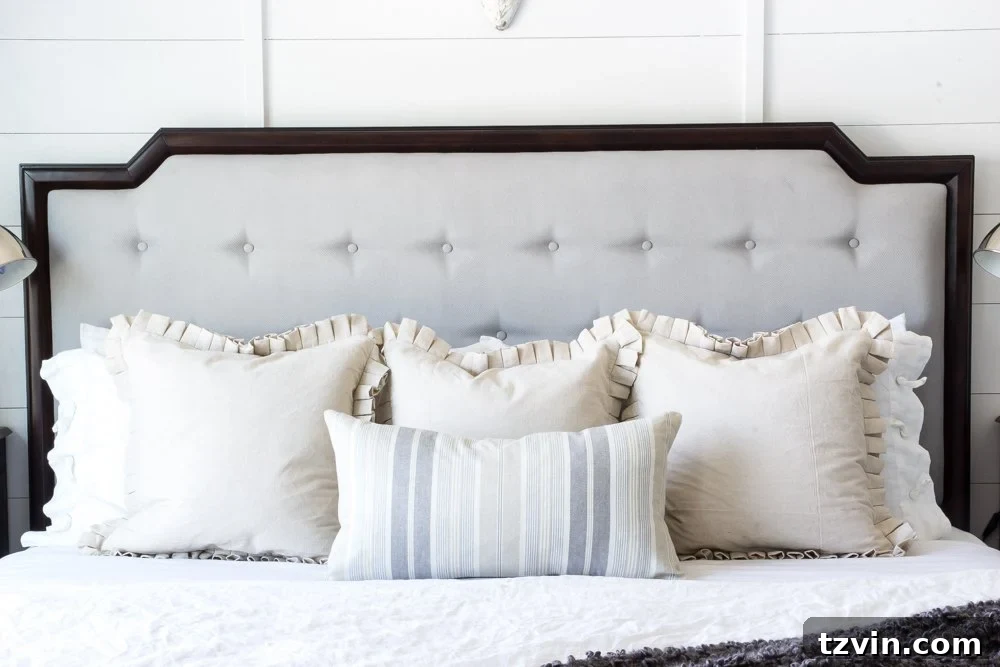
However, since my project was a headboard – a piece that doesn’t endure sitting or heavy contact – I chose to skip the waxing step. The sanded finish was already wonderfully soft and durable enough for its purpose. If you decide to wax, apply it thinly with a soft cloth, working it into the fabric, then buff off any excess to prevent a sticky residue.
The Stunning Transformation: A Cohesive Master Bedroom
I am absolutely overjoyed with the final result! The headboard’s new Paris Grey hue flawlessly complements the blue and gray tones throughout our master bedroom, creating a much more harmonious and sophisticated aesthetic. It ties in beautifully with our nightstands and the vintage-inspired rug, making the entire space feel thoughtfully curated and complete. Every time I walk into the room, I’m still pleasantly surprised by the elegant transformation.
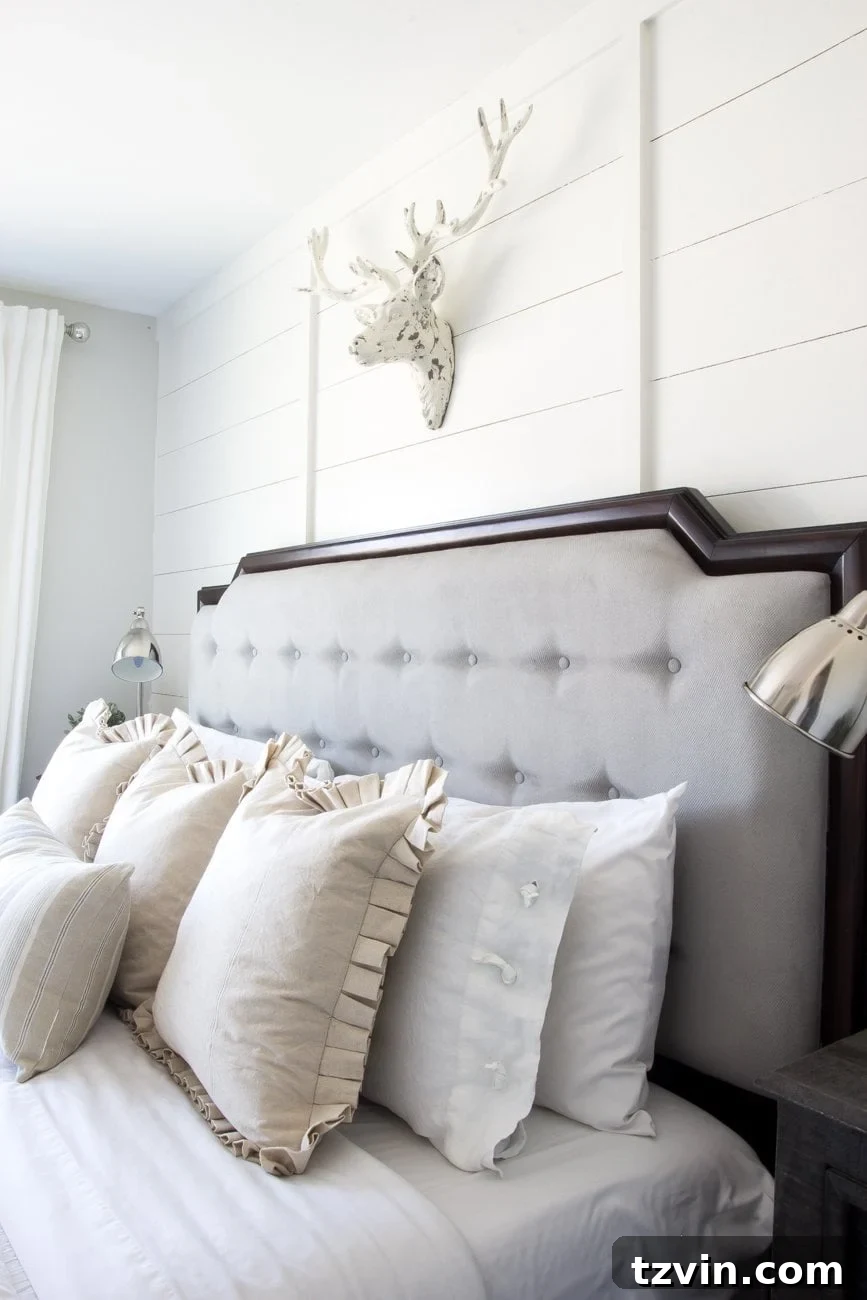
This project proves that with a little paint and effort, you can achieve remarkable results, breathing new life into tired furniture and perfectly aligning it with your evolving home style. It’s truly a testament to the power of DIY to create a custom, high-end look on a budget. And yes, even Pat the Deer approves of the updated ambiance!

Beyond the Headboard: Care and Inspiration for Your Painted Upholstery
This beginner’s guide is designed to empower you to tackle your own upholstery painting projects. While a headboard is a great starting point, consider applying these techniques to other pieces like dining chairs, ottomans, or even small accent sofas. The possibilities for transforming your space are endless! To ensure the longevity of your painted fabric furniture, a few care tips are important. For everyday cleaning, simply vacuum or use a lint roller. For spills, blot immediately with a clean, damp cloth – avoid harsh scrubbing. With proper care, your newly painted piece will remain a beautiful and functional part of your home for years to come.
Explore More Master Bedroom Makeover Projects
The headboard transformation was just one piece of the puzzle in our master bedroom makeover. If you’re looking for more inspiration and DIY guides, explore these related projects that helped bring our rustic modern vision to life:
- Master Bedroom Design Plan
- How to Get Designer Paint Colors on the Cheap
- DIY Planked Board and Batten Focal Wall
- Quick and Easy Dresser Makeover
- 3 Tricks to Upgrade Plain Windows
- Choosing the Perfect Blue Vintage Rug
- DIY Metal Industrial Initial Sign
If you’re planning an upholstery painting project in the future, be sure to save this post for easy reference:
In other exciting news related to our bedroom makeover, our custom doors have finally arrived, meaning “Operation Sliding Barn Doors” is just around the corner! Get ready for more inspiring updates next week.
On a different note, you might notice some subtle enhancements around the site soon. I’m dedicated to making your experience here even better, focusing on faster loading speeds and a more streamlined, user-friendly interface. Soon, I’ll also be launching a comprehensive home resource page, a one-stop-shop for all the paint colors and decor items I frequently get asked about, making it incredibly easy for you to find everything in one place. For my fellow bloggers, check out the new Blogging Resources page on the menu bar, detailing the tools I use daily to keep this creative space thriving.
Your feedback is invaluable to me. Please share your thoughts in the comments below – what improvements would you love to see, or what topics are you most interested in? I genuinely enjoy hearing from each of you!

Follow Us:
Facebook | Pinterest | Instagram | Twitter | Google+
Affiliate links are provided in this post. For more information, see my full disclosure here.