
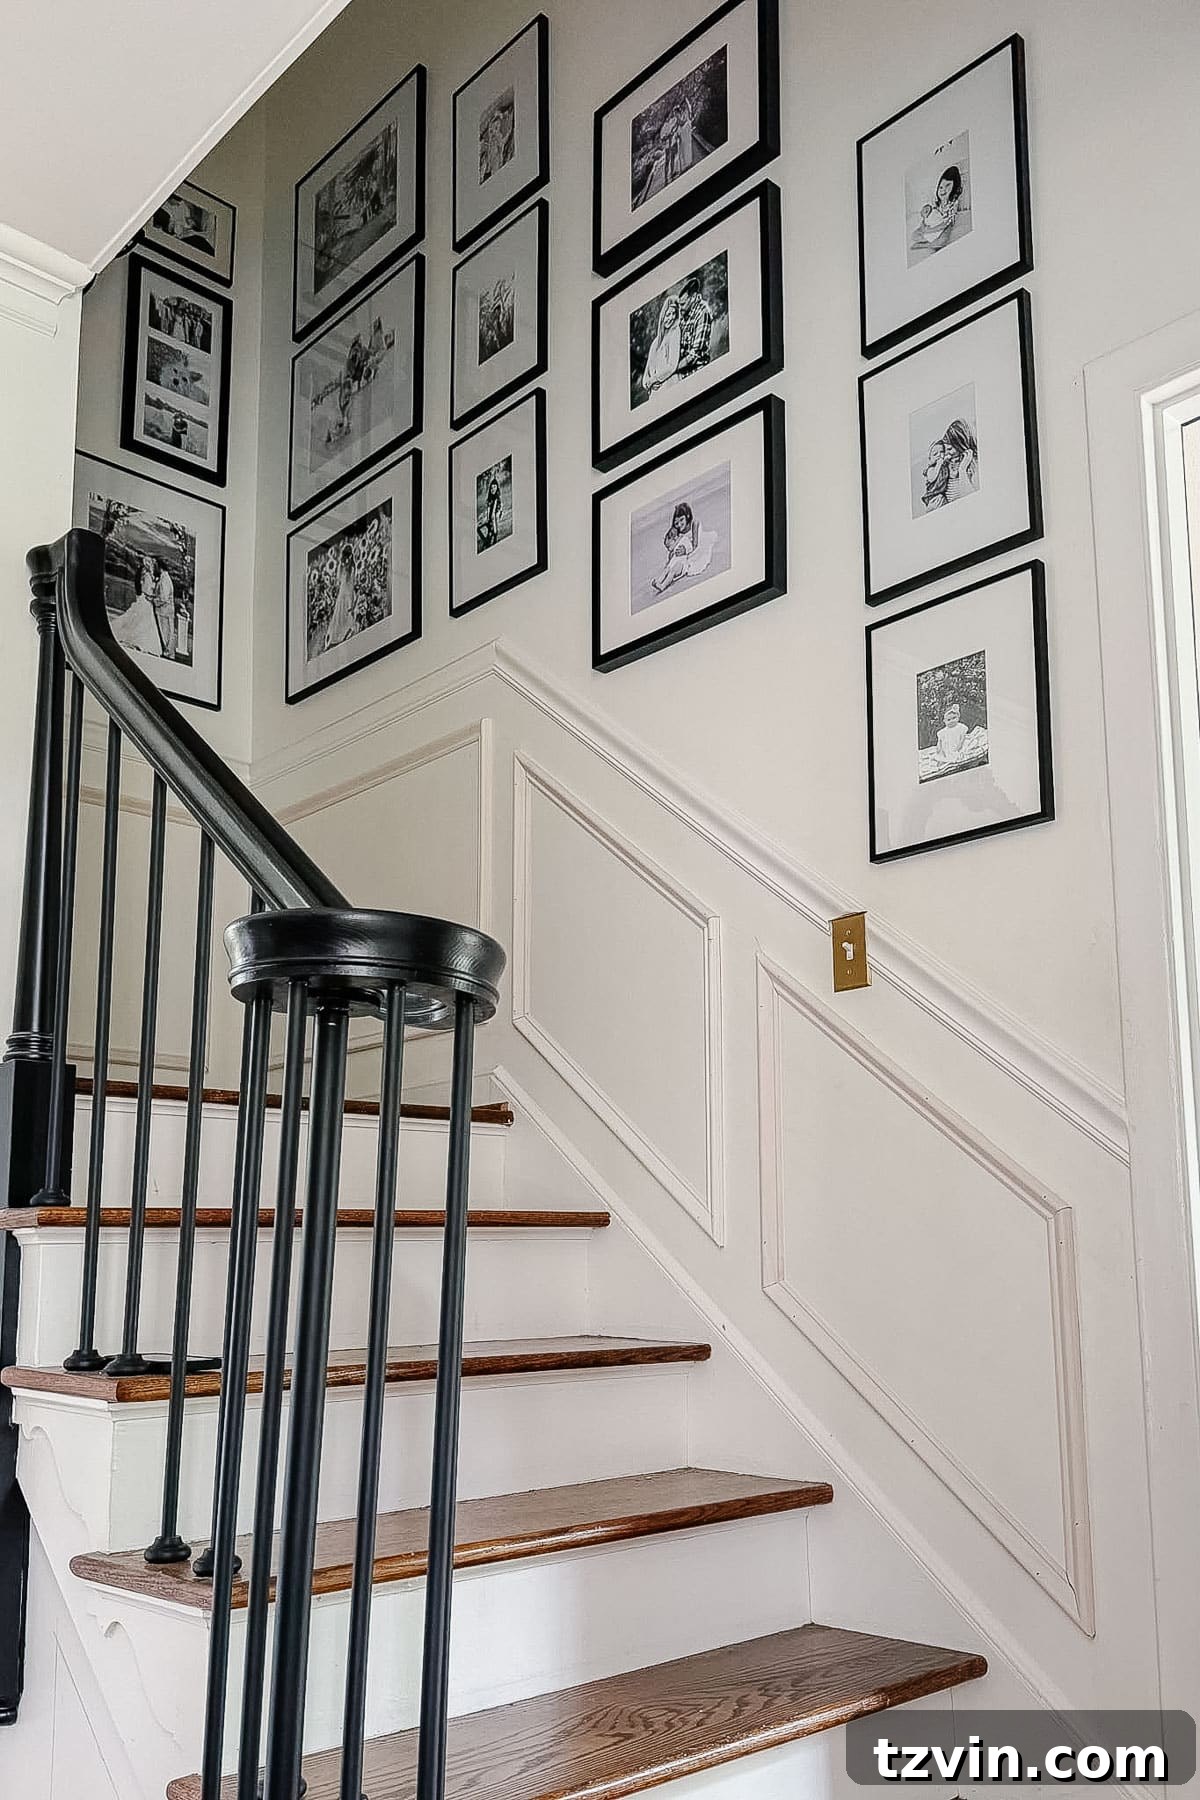
Transform Your Staircase: A DIY Guide to Installing Picture Frame Wainscoting
Embarking on a home renovation journey can be incredibly rewarding, especially when it involves transforming a high-traffic area like your foyer, stairway, or hallway. For years, the vision of elegant molding gracing the walls below our existing chair rail on the stairs lingered. The initial thought of intricate angles and precise cuts felt daunting, reminiscent of challenging high school geometry lessons. However, we discovered that this project, specifically installing picture frame wainscoting, is far less complicated than it appears and yields truly stunning results. It’s time to elevate your home’s aesthetic with this timeless architectural detail.
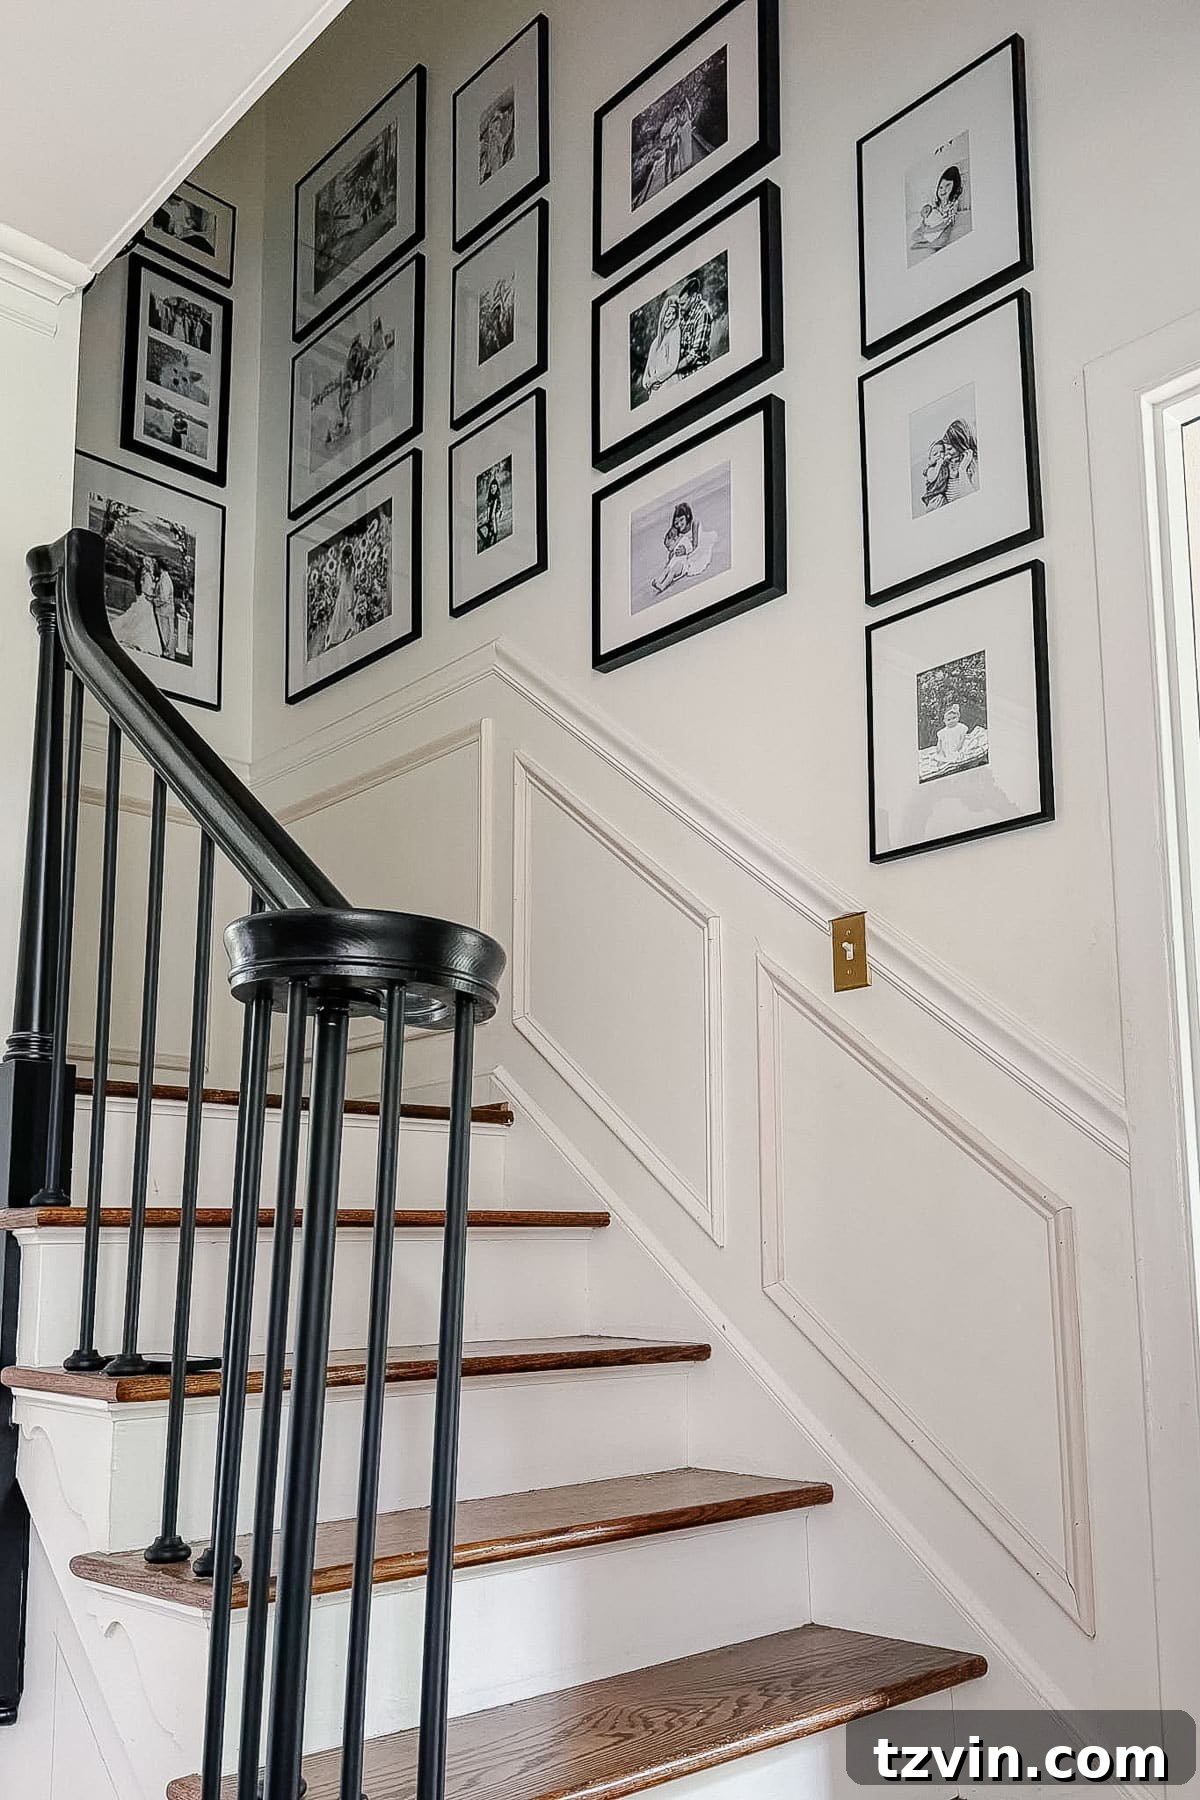
Why Picture Frame Wainscoting is the Perfect Choice for Stairs
When my husband, Robert, and I decided to enhance our staircase, picture frame molding emerged as the ideal solution for several compelling reasons. This style of wainscoting, also known as box molding, offers an unparalleled combination of elegance, simplicity, and versatility. It’s an incredibly effective method for adding depth and architectural interest to a wall without the complexities often associated with more elaborate paneling systems. Its inherent charm perfectly complements our traditional style colonial house, where we’ve successfully incorporated picture frame molding in several other rooms, consistently achieving a cohesive and sophisticated look.
Beyond its aesthetic appeal, picture frame molding is a highly DIY-friendly option. It requires fewer specialized tools and a less demanding skill set compared to full raised panel wainscoting, making it accessible for homeowners looking to add character on a budget. The clean lines and classic design provide a subtle yet significant upgrade, instantly making a space feel more refined and custom. If you’re seeking to infuse your home with a touch of classic charm and visual texture, this style of molding is an excellent starting point.
However, if the traditional aesthetic of picture frame molding doesn’t quite align with your personal style, there are numerous other wall molding ideas that can add character to your home. The world of decorative trim is vast and offers options to suit every taste, from rustic to ultra-modern.
Exploring Different Types of Molding for Wainscoting Projects
While picture frame molding is our preferred choice for its ease and classic appeal, you can certainly adapt other wainscoting styles to seamlessly flow up your staircase. Each type offers a distinct aesthetic:
- DIY Board and Batten: This style creates a grid-like pattern with vertical boards (battens) and horizontal boards (boards). It’s incredibly versatile, ranging from farmhouse chic to modern minimalist, depending on the width and spacing of your battens.
- DIY Traditional Grid Molding: Similar to board and batten but typically using thinner strips to create a more intricate grid pattern. This look often evokes a more formal or transitional feel and can be very impactful on a large wall.
- DIY Picture Frame Molding: As showcased in this guide, this involves attaching decorative trim pieces directly to the wall to form rectangular or square “frames.” It’s elegant, cost-effective, and adds subtle dimension.
Once we complete a few more carpentry projects in this area, our next step is to paint the trim a contrasting color to the walls. This will further emphasize the beautiful new architectural details and add a dramatic flair to the space. For now, we wanted to share our detailed process, ensuring you have a clear, broken-down tutorial to guide you through your own staircase wainscoting installation.
Essential Supplies for Your Staircase Wainscoting Project
As an Amazon Associate, I earn from qualifying purchases. Full disclosure
Gathering the right tools and materials before you begin is crucial for a smooth and efficient project. Here’s a comprehensive list of everything you’ll need to install elegant picture frame wainscoting on your stairs:
- 5/16 in. x 11/16 in. panel colonial moulding: This is the decorative trim that will form your picture frames. Choose a profile that complements your home’s existing trim.
- Finger joined chair rail moulding: If you don’t already have one, this piece provides the top boundary for your wainscoting.
- Miter saw: Essential for making precise angle cuts on your molding. Accuracy here is key for seamless joints.
- Cordless brad nailer: (We love our Porter Cable one.) A brad nailer makes attaching molding quick and easy, leaving minimal holes to fill.
- Carpentry pencil: For marking your measurements and cut lines clearly.
- 2×4 board cut to 24″ long: This will serve as a consistent spacer to ensure even gaps between your frames and the chair rail/baseboard.
- Wood filler: To conceal nail holes and minor imperfections, creating a smooth finish.
- Paintable caulk: For sealing any gaps between the molding and the wall, giving a professional, seamless look.
- Fine grit sandpaper: To smooth out wood filler and any rough edges before painting.
- Military protractor: This is truly the secret ingredient for this project! It allows you to accurately measure the unique angles of your staircase, making what seems complex incredibly straightforward.
Tool Alternatives and Tips for Beginners
Don’t own all the power tools? No problem! Many home improvement stores like Home Depot and Lowe’s, or rental companies like Sunbelt Rentals, offer miter saw and brad nailer rentals. If renting isn’t an option, a miter box and hand saw can be used instead of a miter saw. This method might require a bit more patience and practice to achieve precise cuts, but it’s entirely feasible for the determined DIYer. Remember, practice cuts on scrap pieces are always a good idea.
Related: The Best DIY Tools for Beginners
How to Install Picture Frame Wainscoting on Stairs: A Step-by-Step Tutorial
Achieving a professional-looking wainscoting installation on a staircase involves careful planning and precise execution, especially when dealing with angles. Follow these steps to transform your stairway with beautiful picture frame molding.
Step 1 – Install the Chair Rail
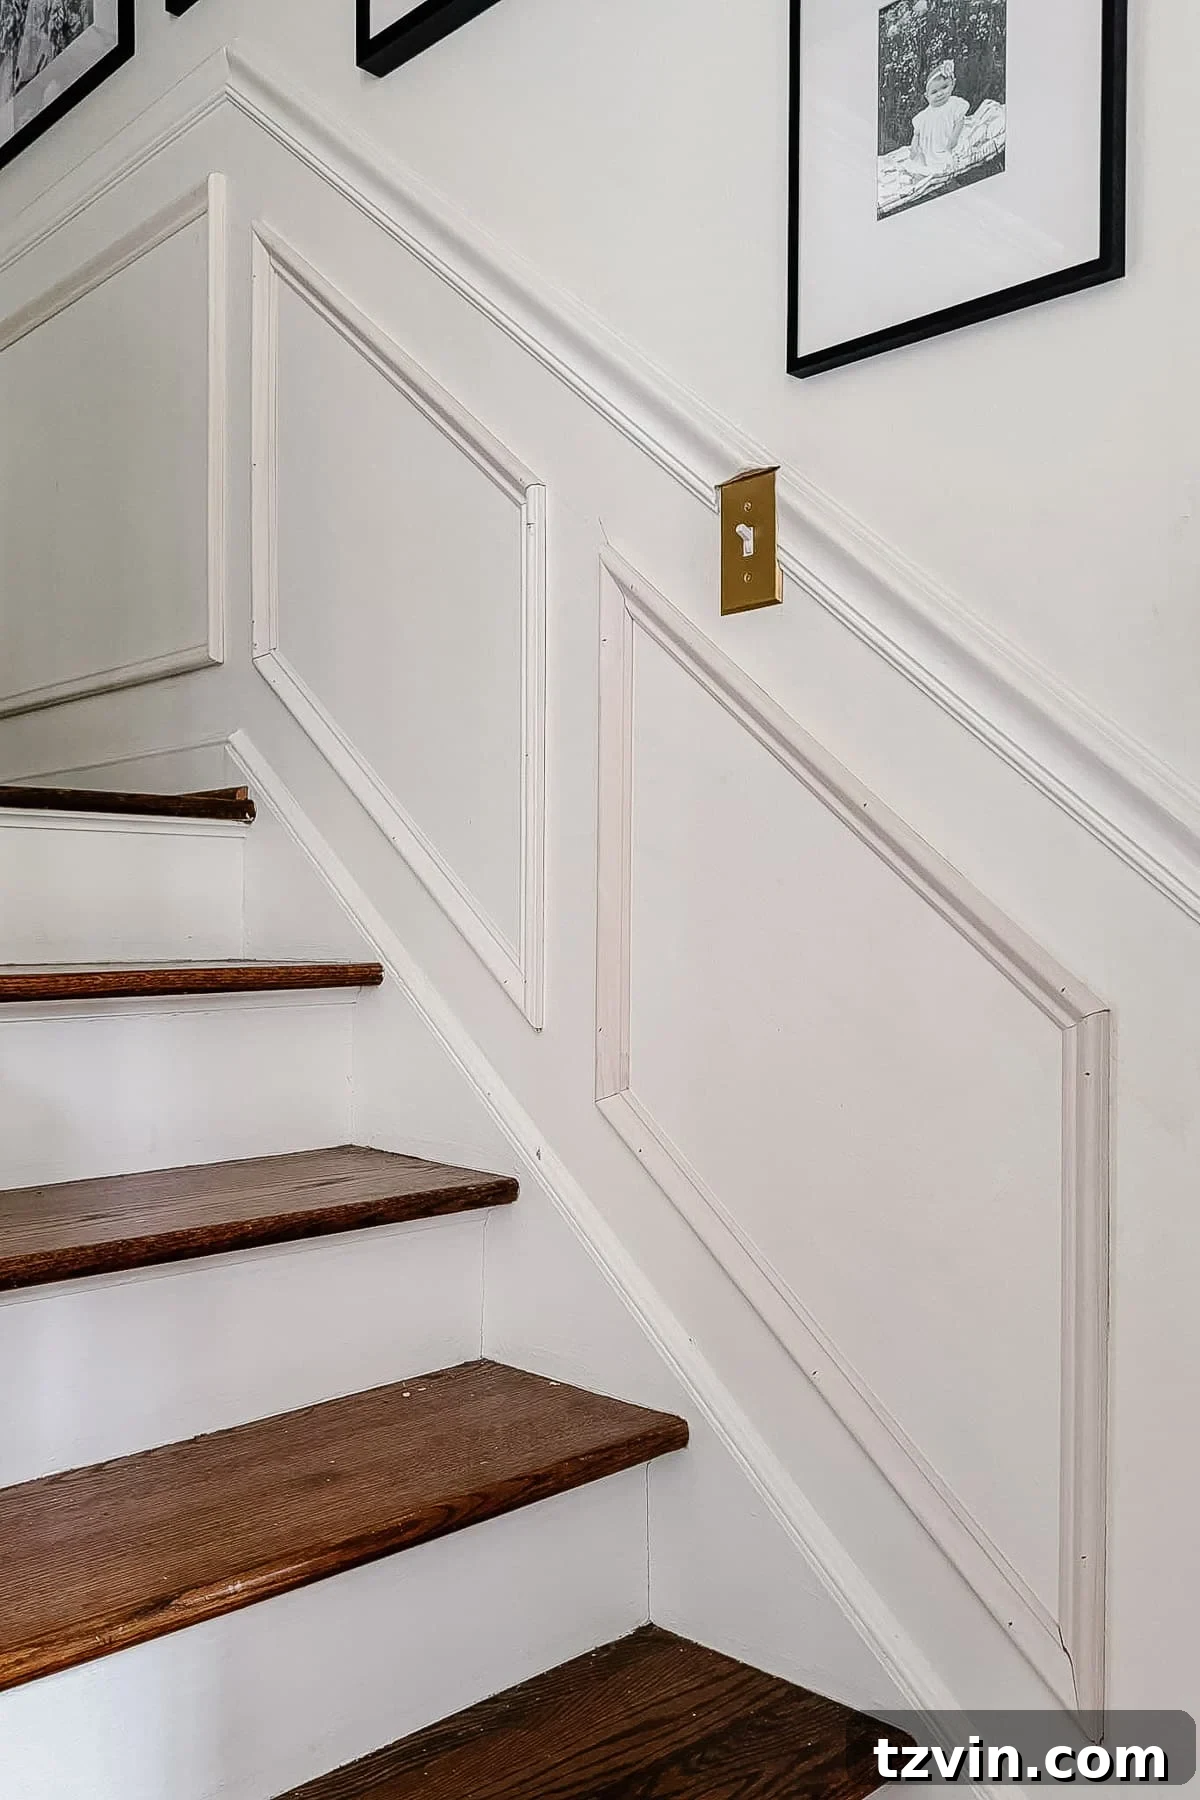
While our chair rail was already in place when we moved in, installing one is a fundamental first step for defining the top boundary of your wainscoting. To set the appropriate height, measure 36 inches from the floor (the stair tread) up the wall. Using a level and following the angle of your existing baseboard, draw a continuous pencil line all the way up the stairs at this 36-inch height. This line will serve as your guide for the top edge of the chair rail.
Begin by cutting your first chair rail piece straight to the width of the wall where it starts. Position this piece precisely along the angled pencil line you just marked. Using your brad nailer, secure the chair rail to the wall. For optimal holding power and minimal drywall damage if removed later, angle the nailer in alternating directions as you drive in the brads. This technique helps keep the molding flush and prevents it from bowing. For subsequent chair rail pieces that join the first, cut the end at a 45-degree angle. Then, use a coping saw to carefully carve out the profile of this 45-degree cut, ensuring it fits snugly against the design of the already installed chair rail piece, creating a seamless joint.
Step 2 – Precisely Mark the Box Molding Layout
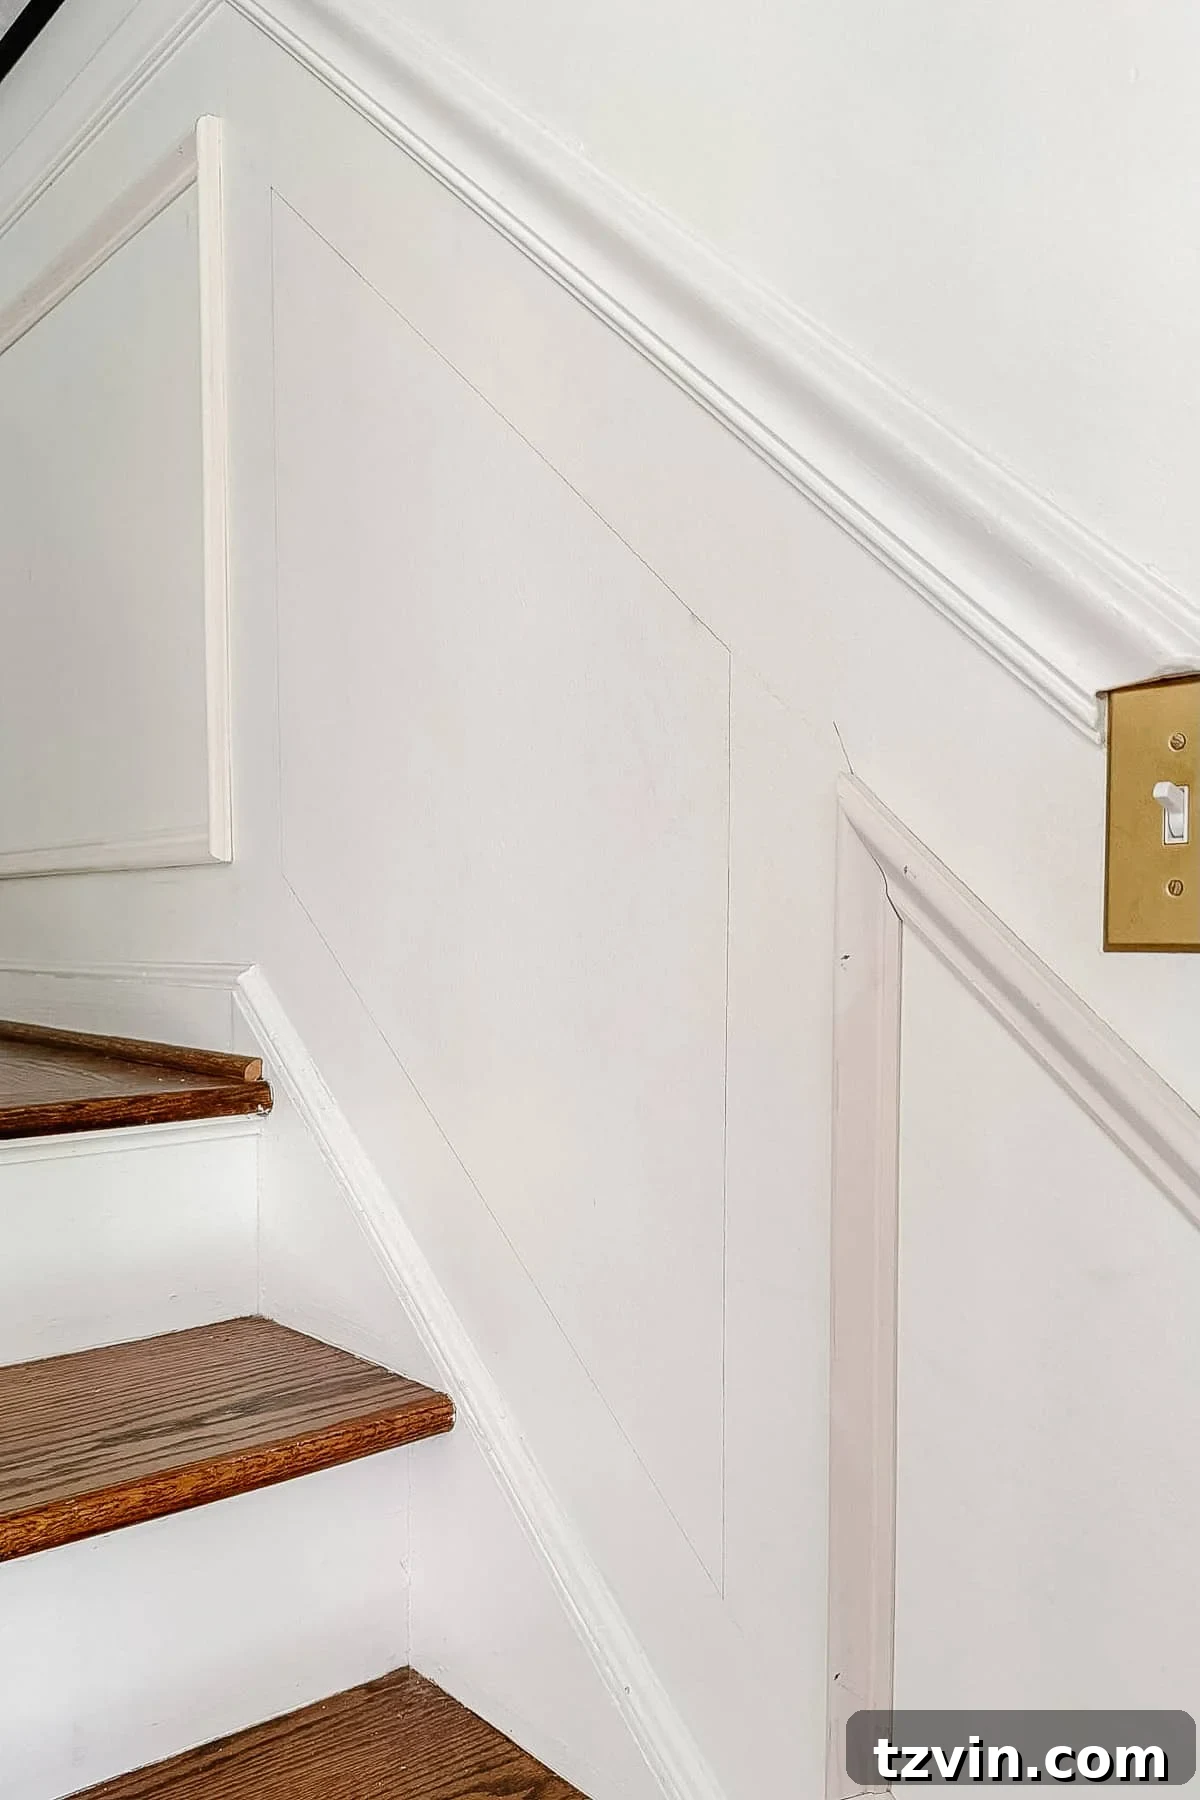
Careful planning of your box layout is essential for a balanced and visually appealing result. First, determine the desired width for each picture frame box you want below your chair rail. Consider the overall length of your wall and aim for consistent spacing. Once you have a width in mind, use a level to mark the first vertical side of a box, ensuring it is perfectly plumb (straight up and down). Repeat this for the other side of the box, maintaining your preferred width.
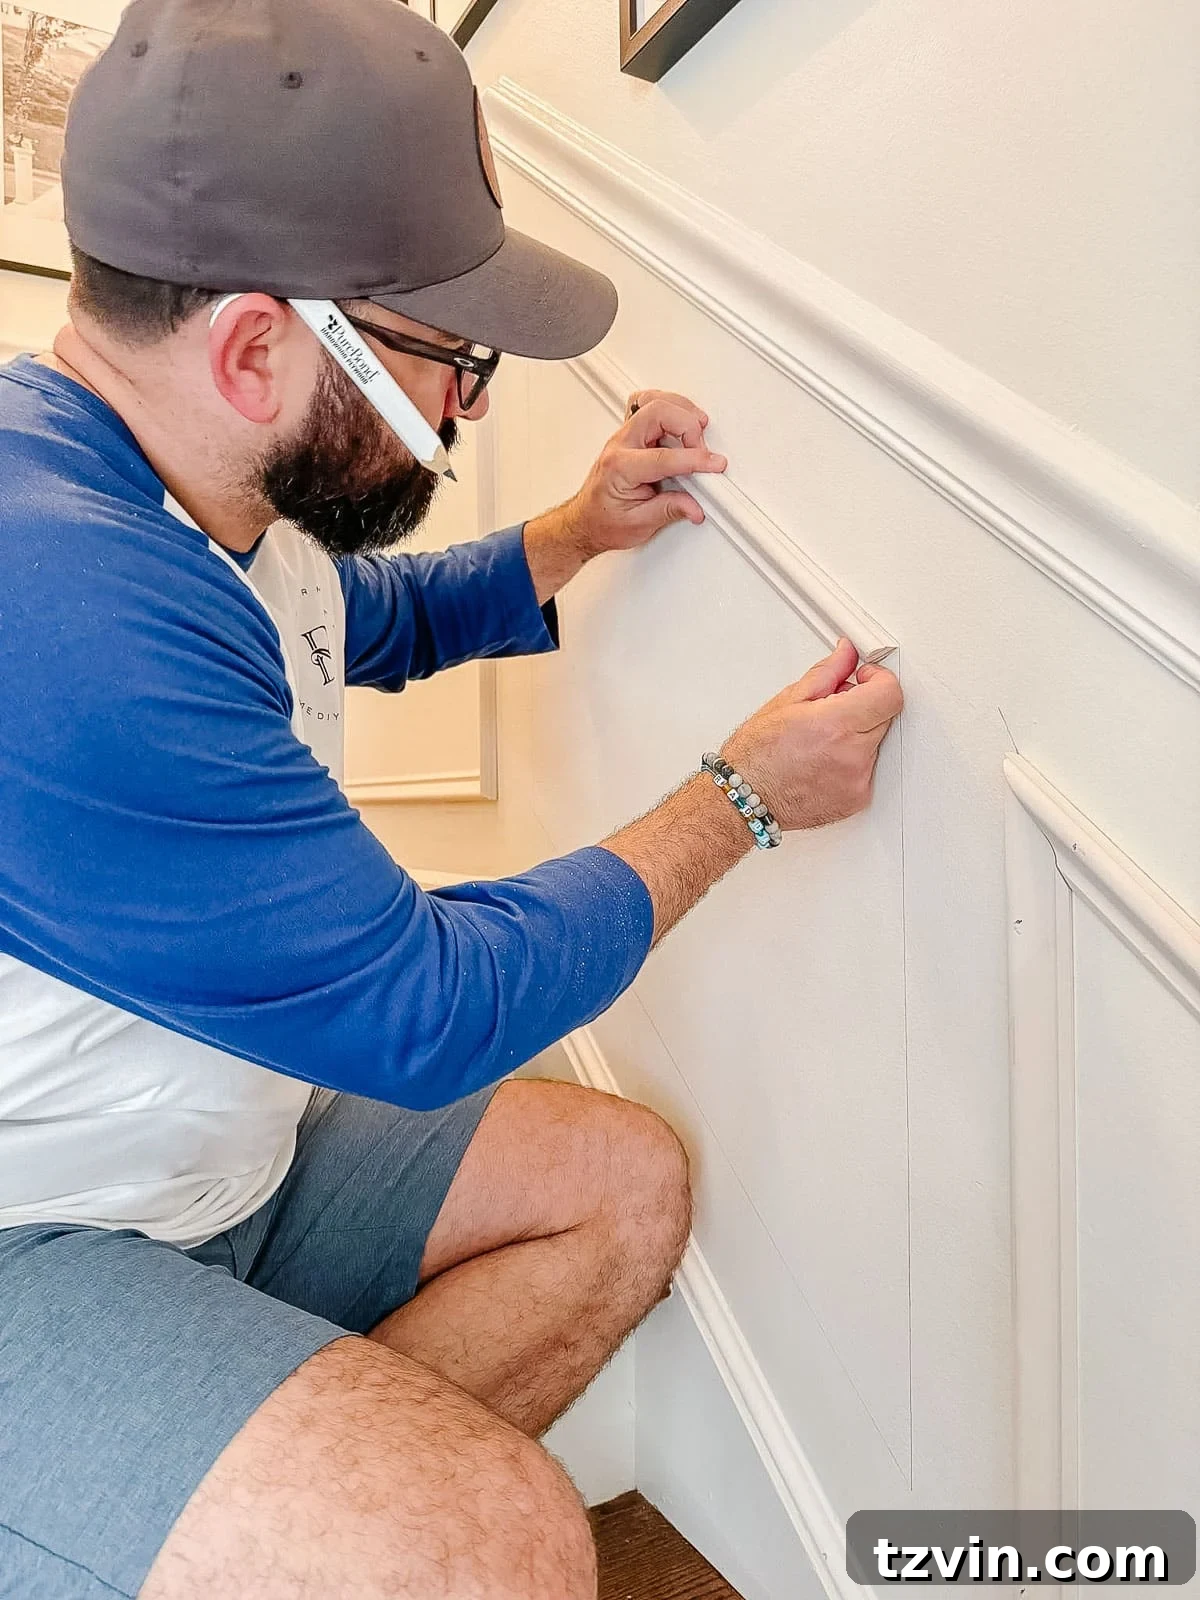
Now, to establish the horizontal lines, use your 2×4 board (cut to 24 inches) as a consistent spacer. Press the 2×4 firmly against the bottom of the chair rail and mark the edge of the spacer to connect your two vertical pencil marks. This forms the top horizontal line of your picture frame. Repeat this process for the bottom of the box, pressing the 2×4 against the baseboard (often called the wall stringer on stairs) and marking its edge. Continue these steps to mark all the subsequent boxes along your staircase wall. These pencil lines will serve as the exact boundaries for placing your molding pieces later.
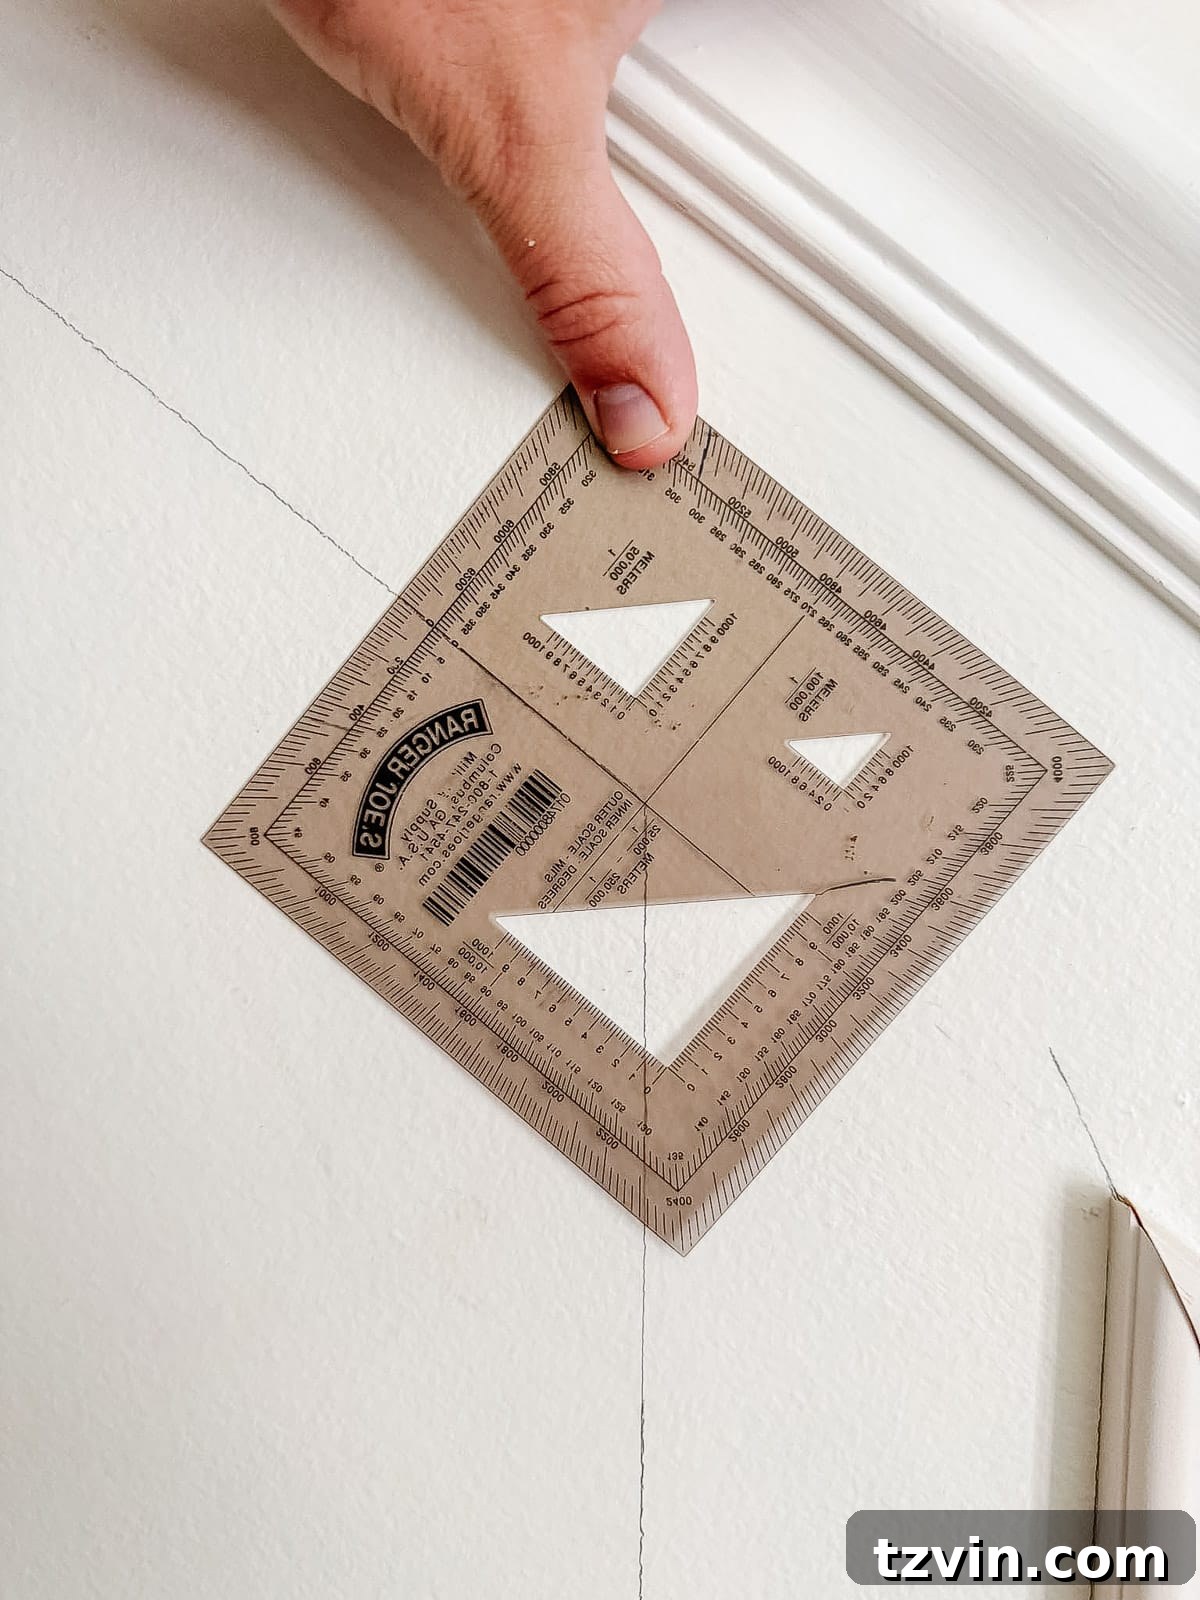
Step 3 – Calculate Molding Cuts for Stair Angles
This is where the military protractor becomes your best friend and eliminates all the guesswork! With the molding frame lines clearly marked on your wall, use your protractor to find the exact angles of your molding corners. Staircases present unique challenges with their sloped nature, leading to both obtuse (greater than 90 degrees) and acute (less than 90 degrees) angles where your molding pieces will meet.
Obtuse Angles Calculation
First, measure your obtuse angle (the largest angle) using the protractor. For instance, if your measurement is 130 degrees. To find your miter saw setting, divide this measurement by 2 (130 / 2 = 65), then subtract that result from 90 degrees (90 – 65 = 25). This gives you your obtuse angle cut. In our project, our calculation resulted in a 25-degree setting on the miter saw platform.
Acute Angles Calculation
Next, use your protractor to find your acute angle measurement (the smallest angle). For example, if your measurement is 50 degrees. To determine your cutting angle for the miter saw, subtract your acute angle measurement from 180 degrees (180 – 50 = 130). Then, divide that number by 2 (130 / 2 = 65). This will be your cutting angle. In our specific case, our calculation led to a 65-degree setting on the miter saw platform.
These calculations ensure that when two pieces of molding are cut and joined, they form a perfect, tight corner that mirrors the angle of your staircase.
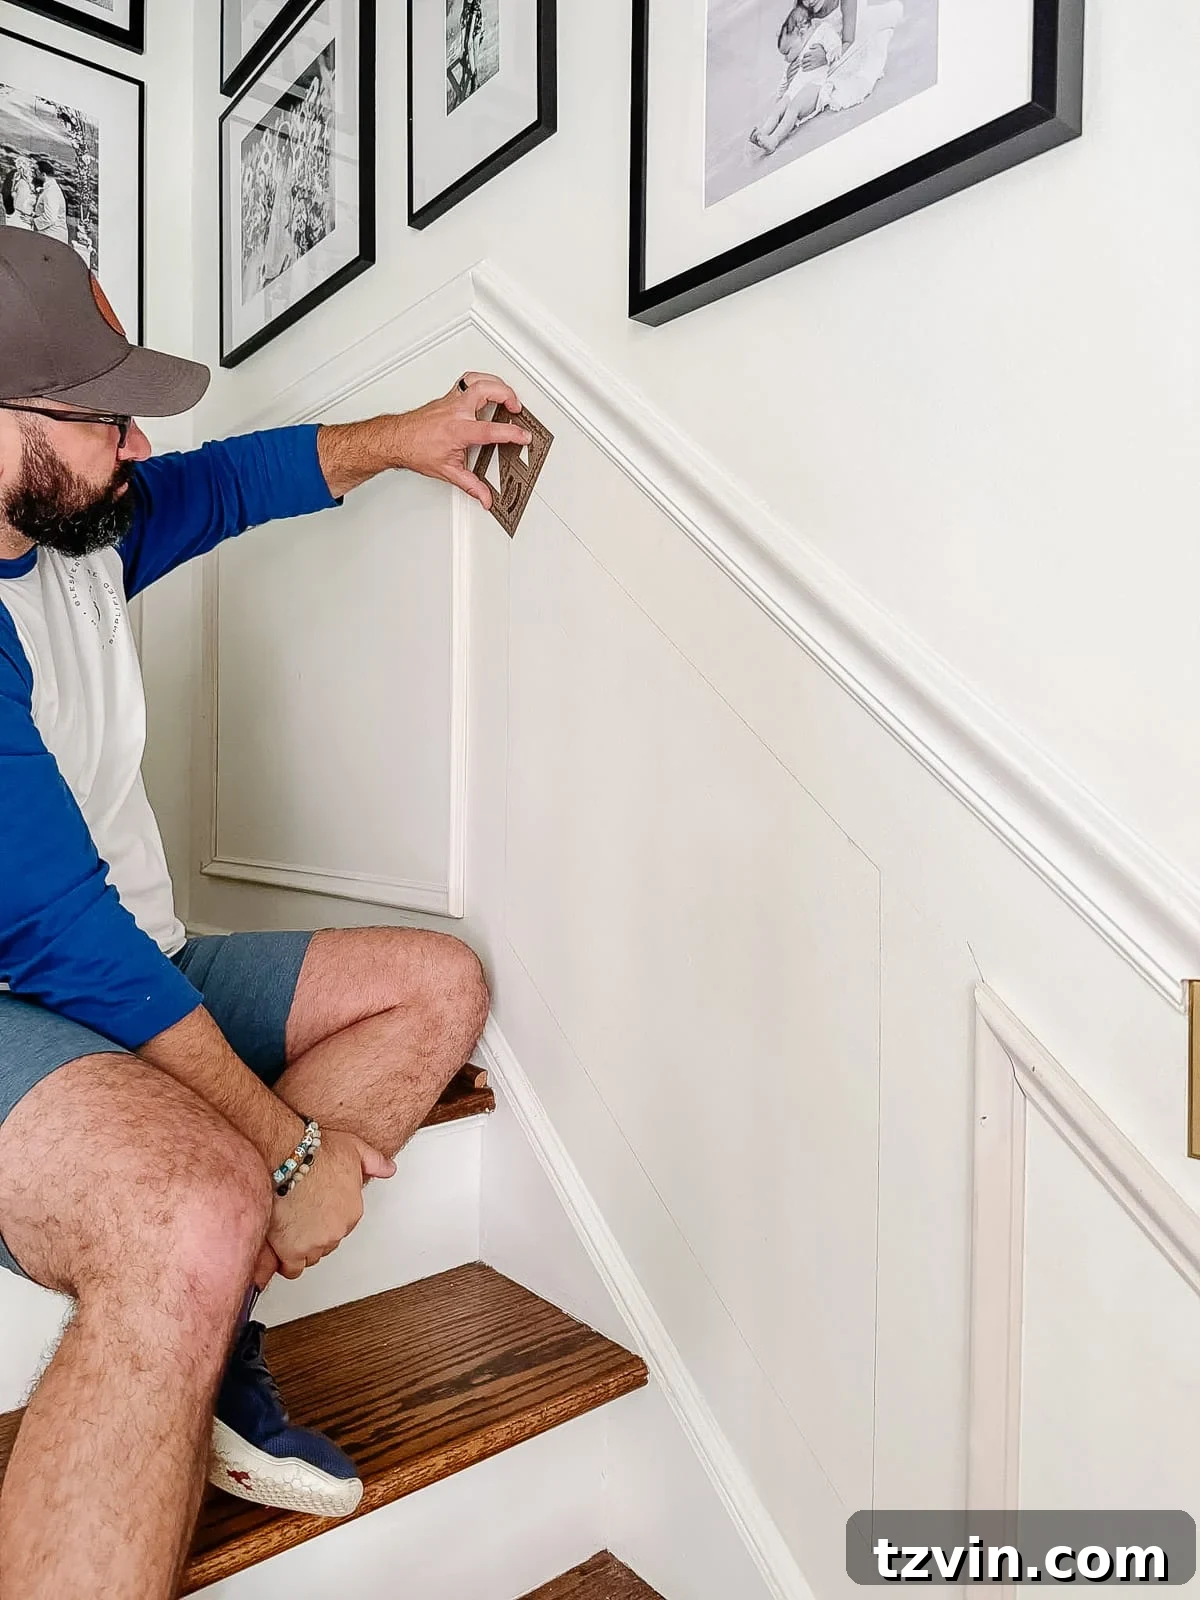
Step 4 – Construct a Custom Saw Guide for Precision Cuts
One of the trickiest aspects of cutting molding for staircases is achieving extremely precise angles, especially if your miter saw doesn’t naturally accommodate every desired angle with its standard settings. To overcome this, we created a simple yet effective saw guide. This guide will essentially “trick” your miter saw, allowing you to achieve a wider range of angles by changing the starting point of your angle measurement from 90 degrees to 45 degrees.
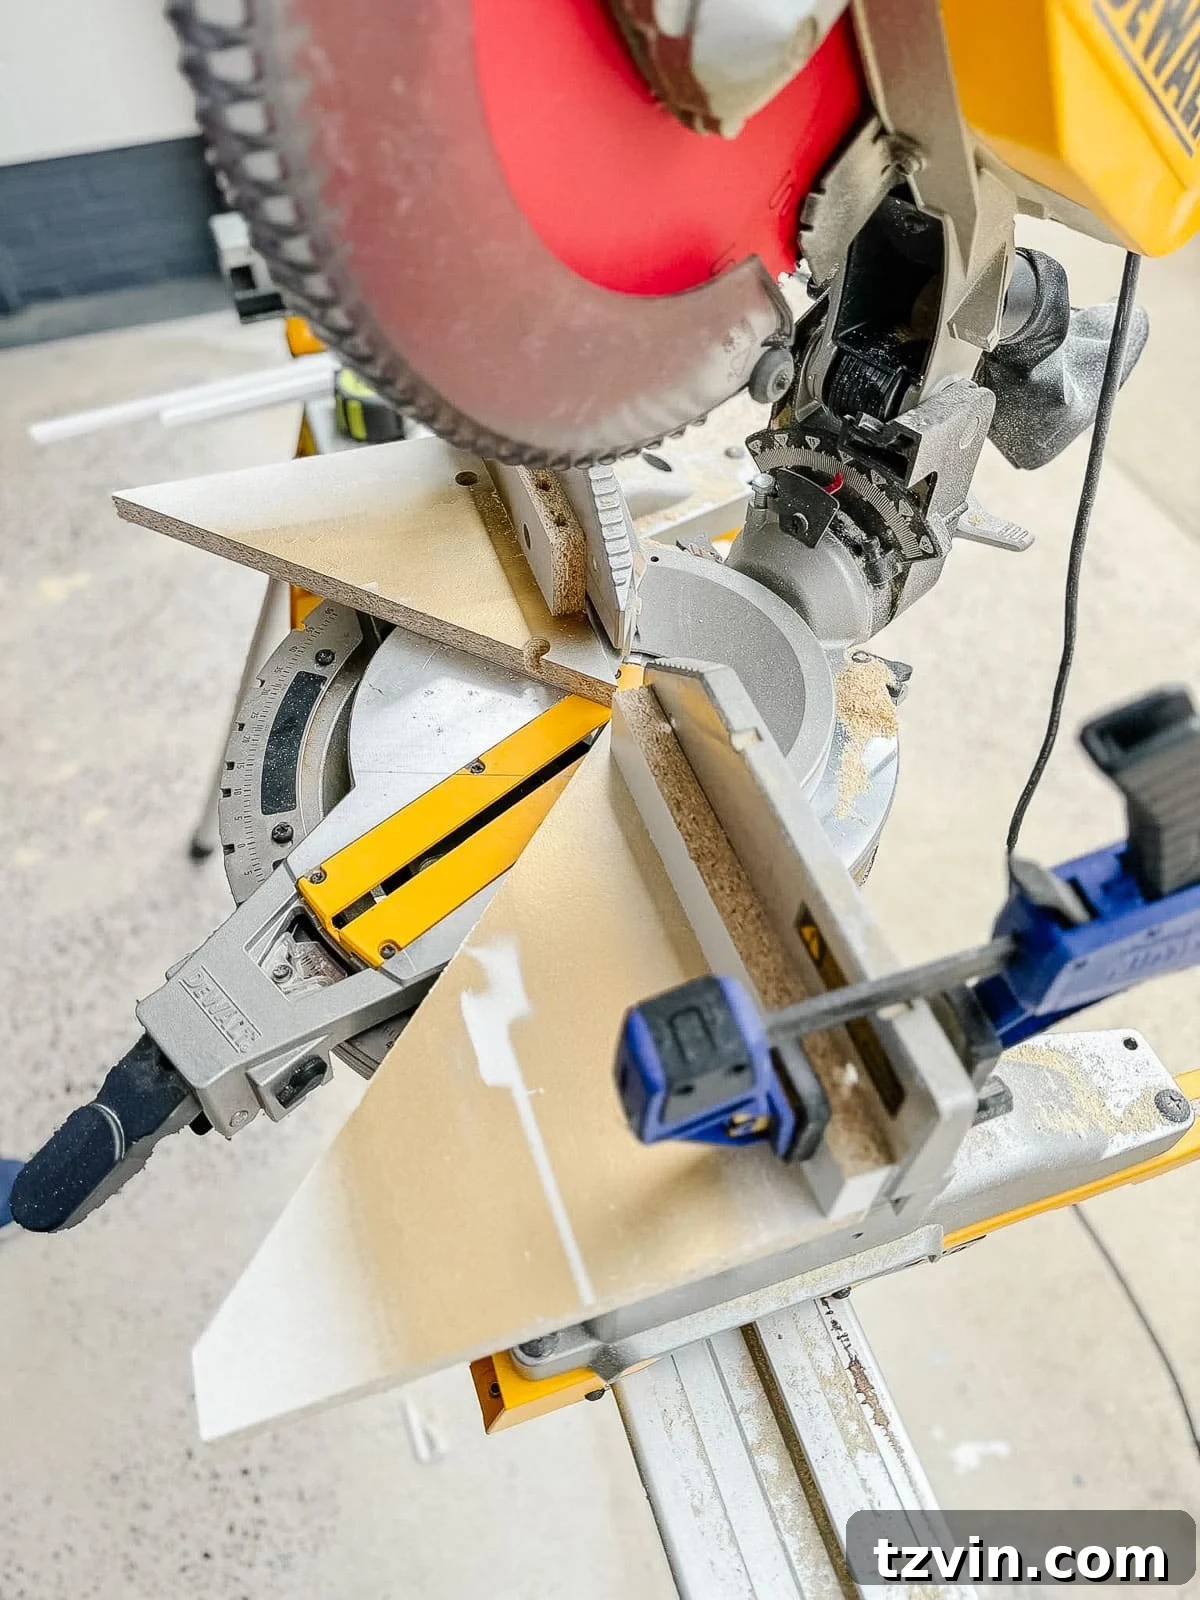
To construct this guide:
- Take a 1×6 board and cut it to form a 10”x6” 90-degree triangle. You’ll need two of these.
- Mark 10 inches along one edge of the 1×6 board. Set your miter saw to a 45-degree angle and make the cut at this mark to create the triangular shape. Repeat this step to create a second identical triangular guide.
- Next, cut a 1×2 board to a length of 10 inches.
- Screw this 10-inch 1×2 board to the 10-inch side of one of your triangles. This 1×2 piece will act as a fence to push your molding against.
- Place the 10-inch side of the triangular guide onto your miter saw platform, with the 2-inch portion (the 1×2 fence) sticking up. Position the second triangular guide on the opposite side of the saw blade, mimicking the first.
- Carefully clamp both triangular guides firmly to the back of the miter saw platform. Ensure the tips of the triangular guides do not extend under the saw blade, leaving sufficient clearance for the blade to pass through during cuts. This setup creates a stable and accurate guide system for all your angled molding cuts.
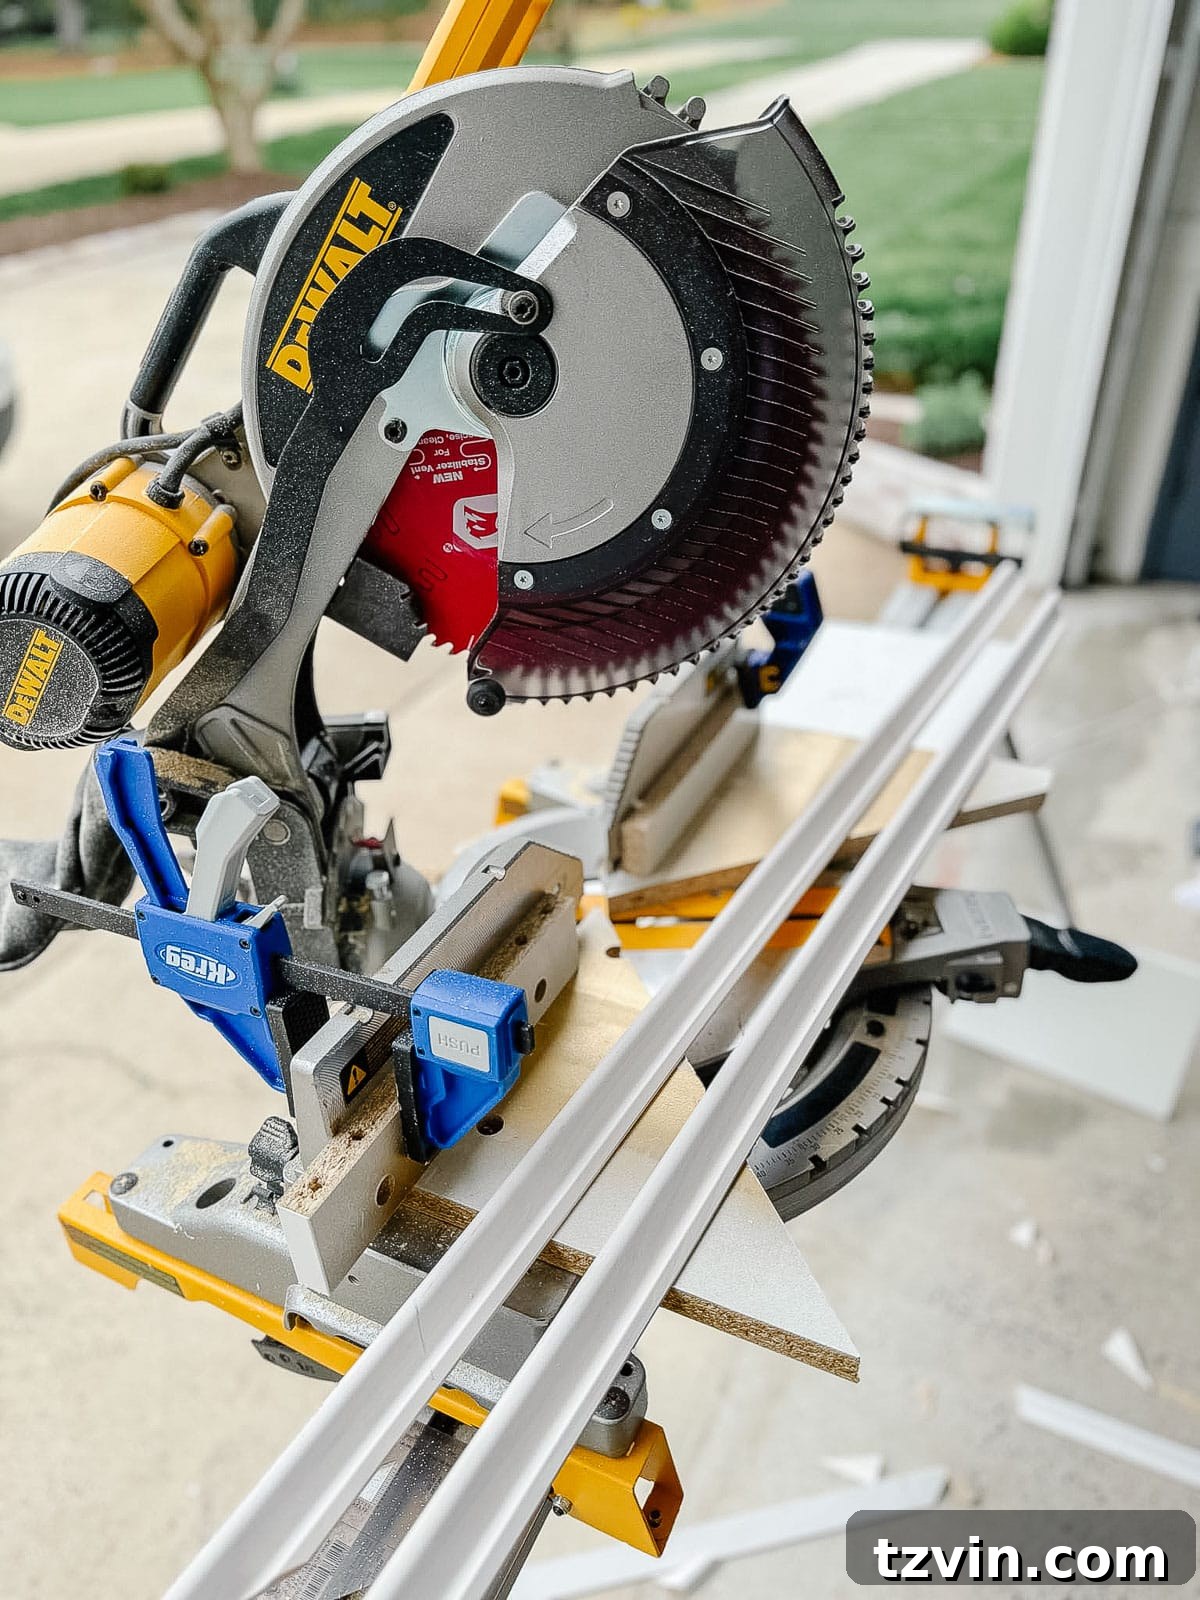
Step 5 – Master Your Molding Cuts with the Saw Guide
With your triangular guides securely in place on the miter saw, your saw’s new 0-degree setting effectively becomes 45 degrees relative to your workpiece. This ingenious setup allows for much finer angle adjustments. To determine your new miter saw setting for cutting, subtract 45 degrees from the acute cutting angle you calculated in Step 3.
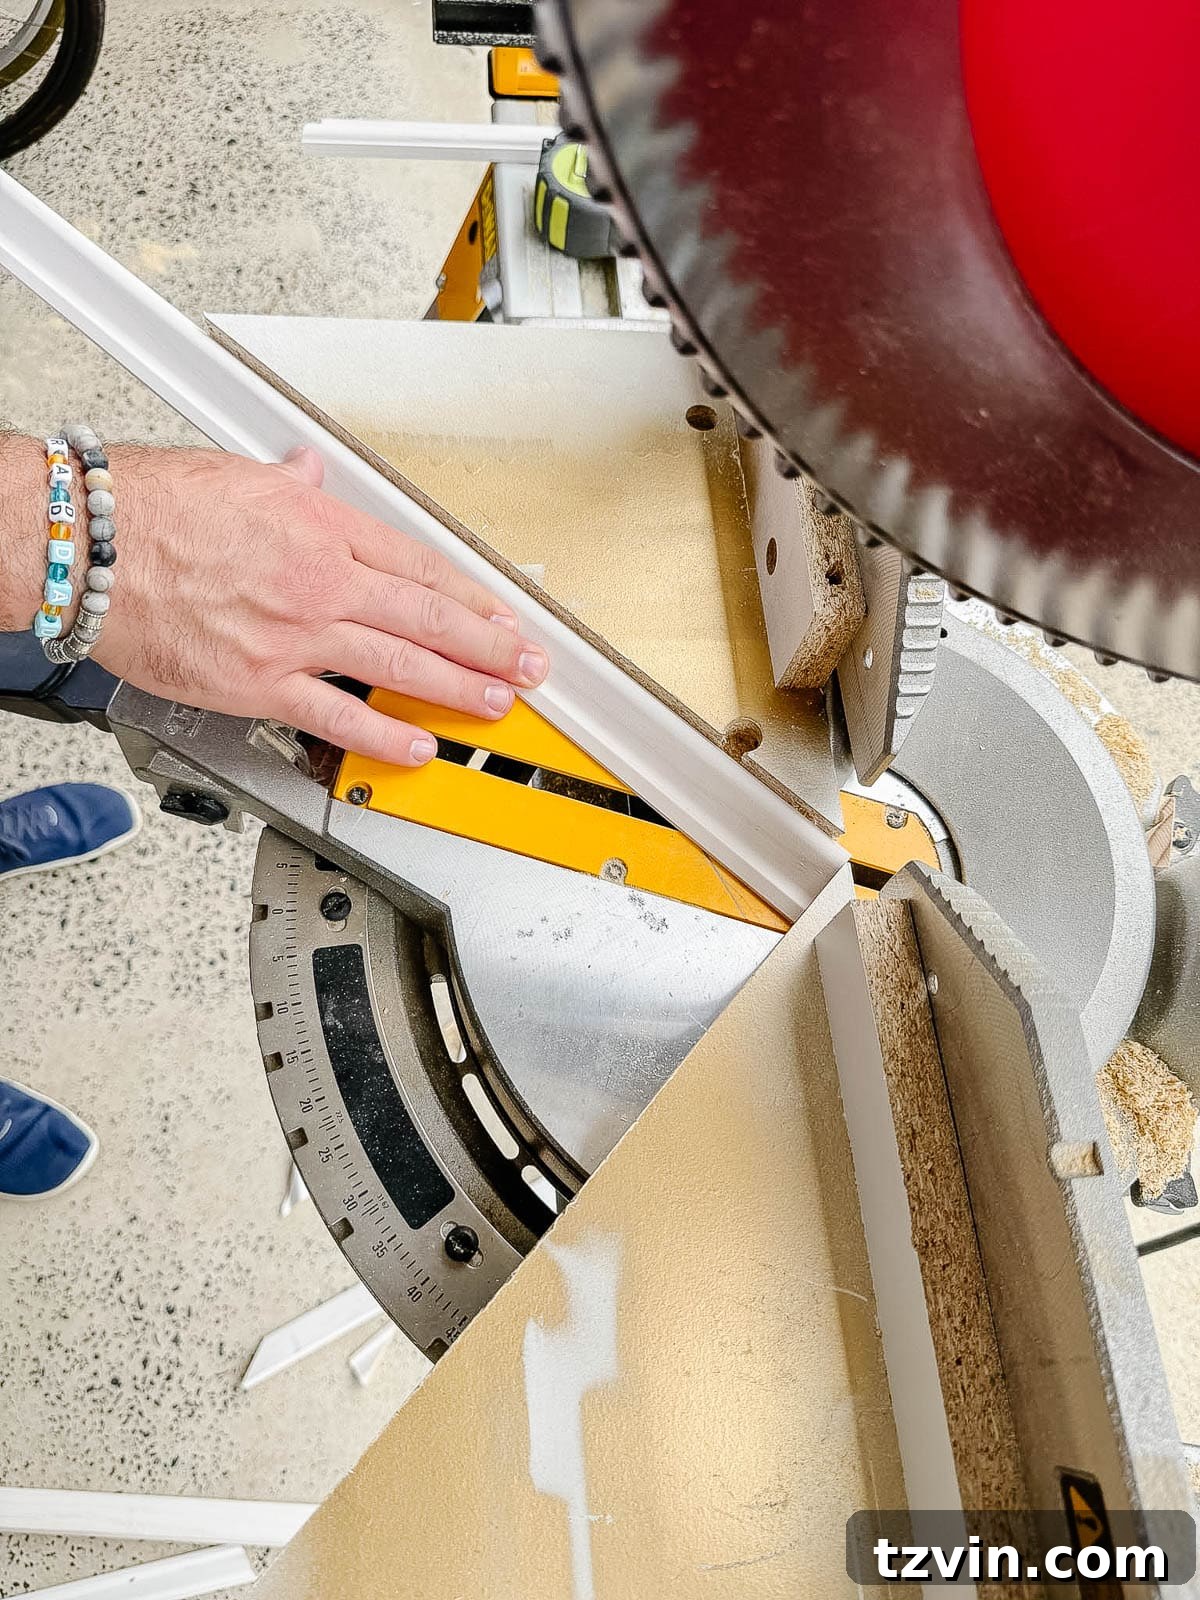
For example, if your acute cutting angle from Step 3 was 65 degrees, your new miter saw setting would be 65 – 45 = 20 degrees. Robert set the saw blade to 20 degrees, positioned the molding snugly against the guide, and made the cuts on each side to create perfectly adjoining acute molding pieces.
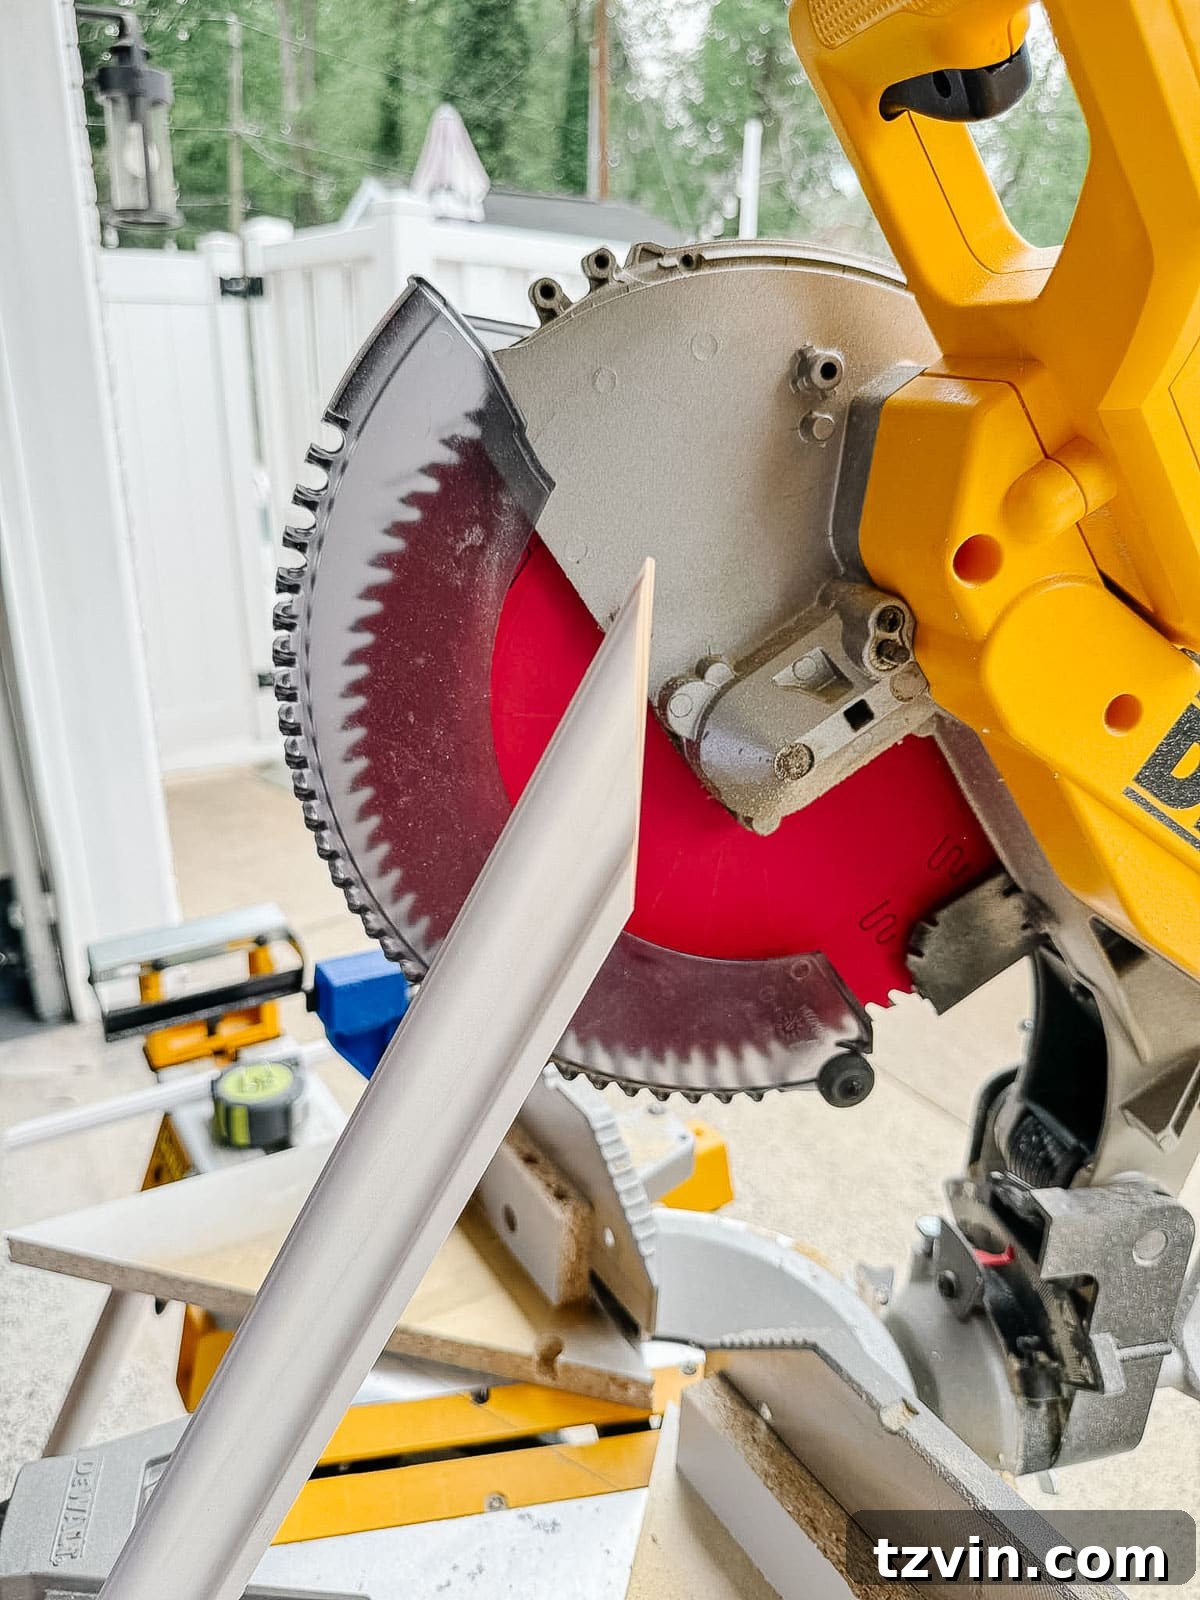
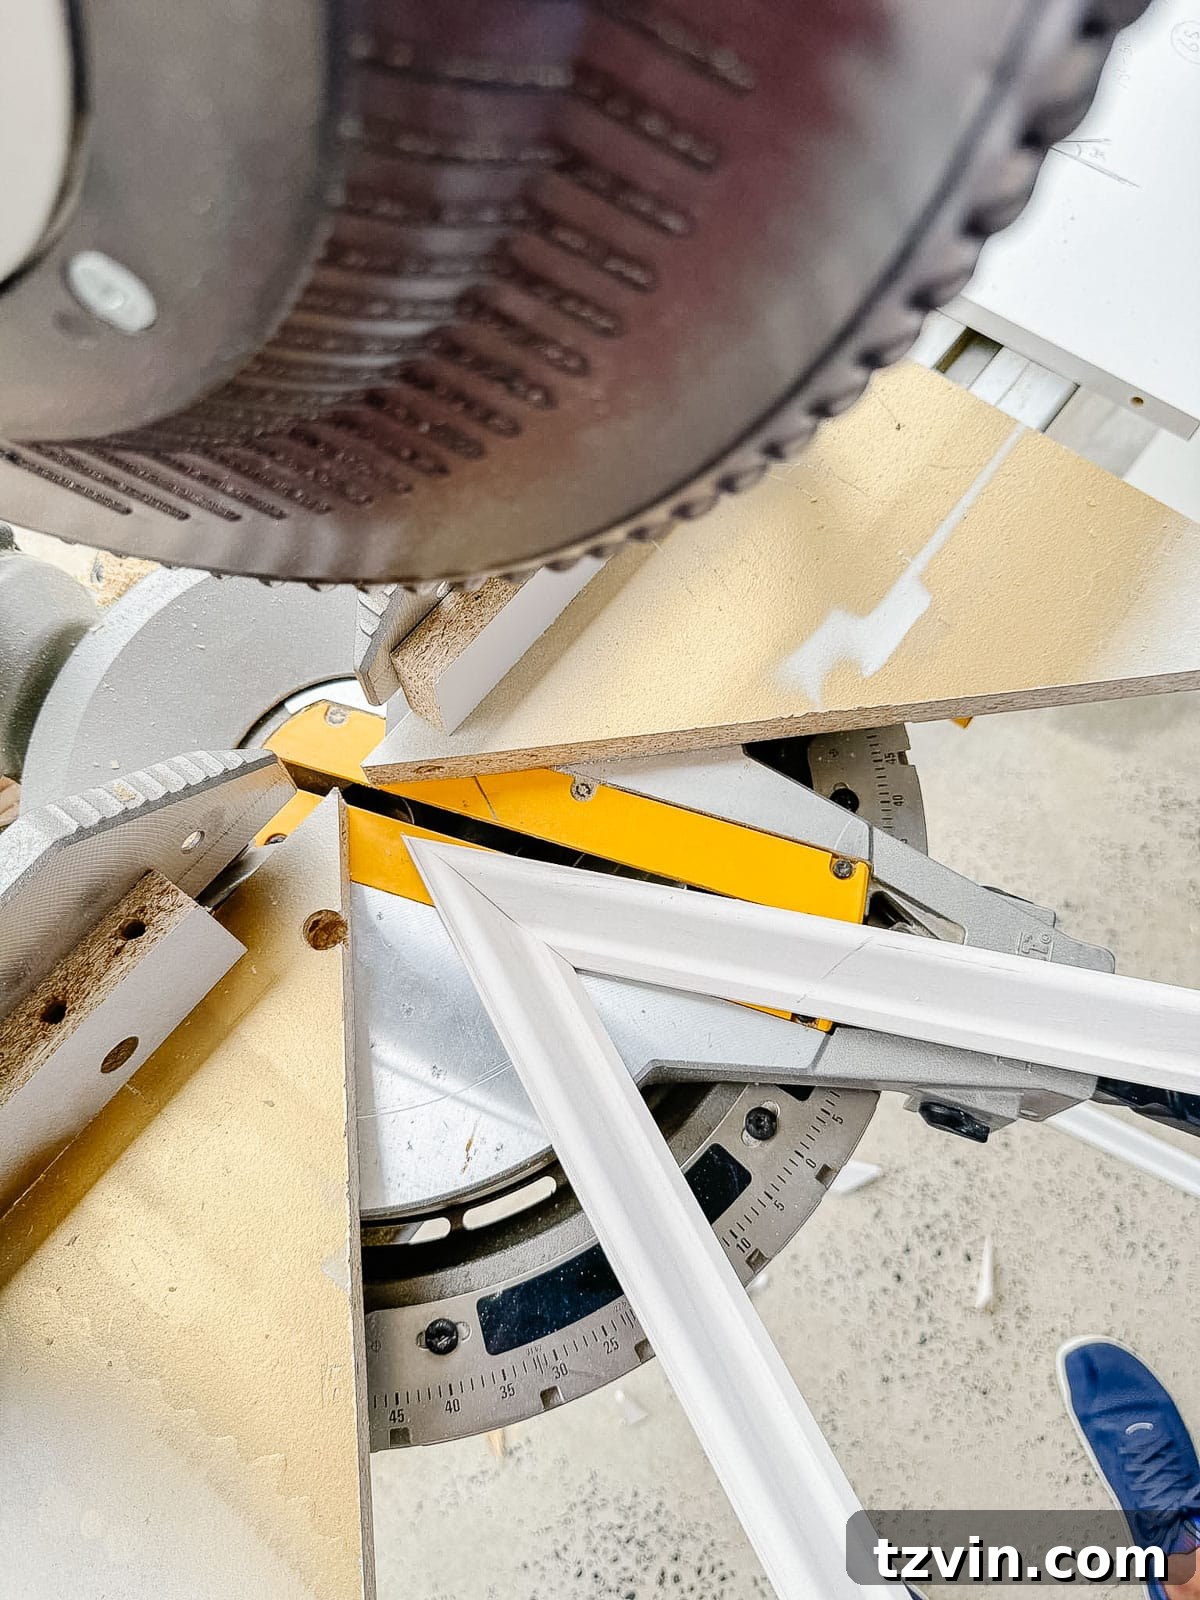
Next, we tackled the obtuse angles. In our scenario, the calculated obtuse cutting angle was 25 degrees. For this, Robert set the miter saw directly to 25 degrees (as it’s typically within the saw’s standard range for these types of cuts) and carefully cut each piece. When joined, these pieces will meet seamlessly to form the desired obtuse angle, creating perfectly framed boxes that follow the unique slope of your staircase.
Step 6 – Securely Nail Up Your Molding
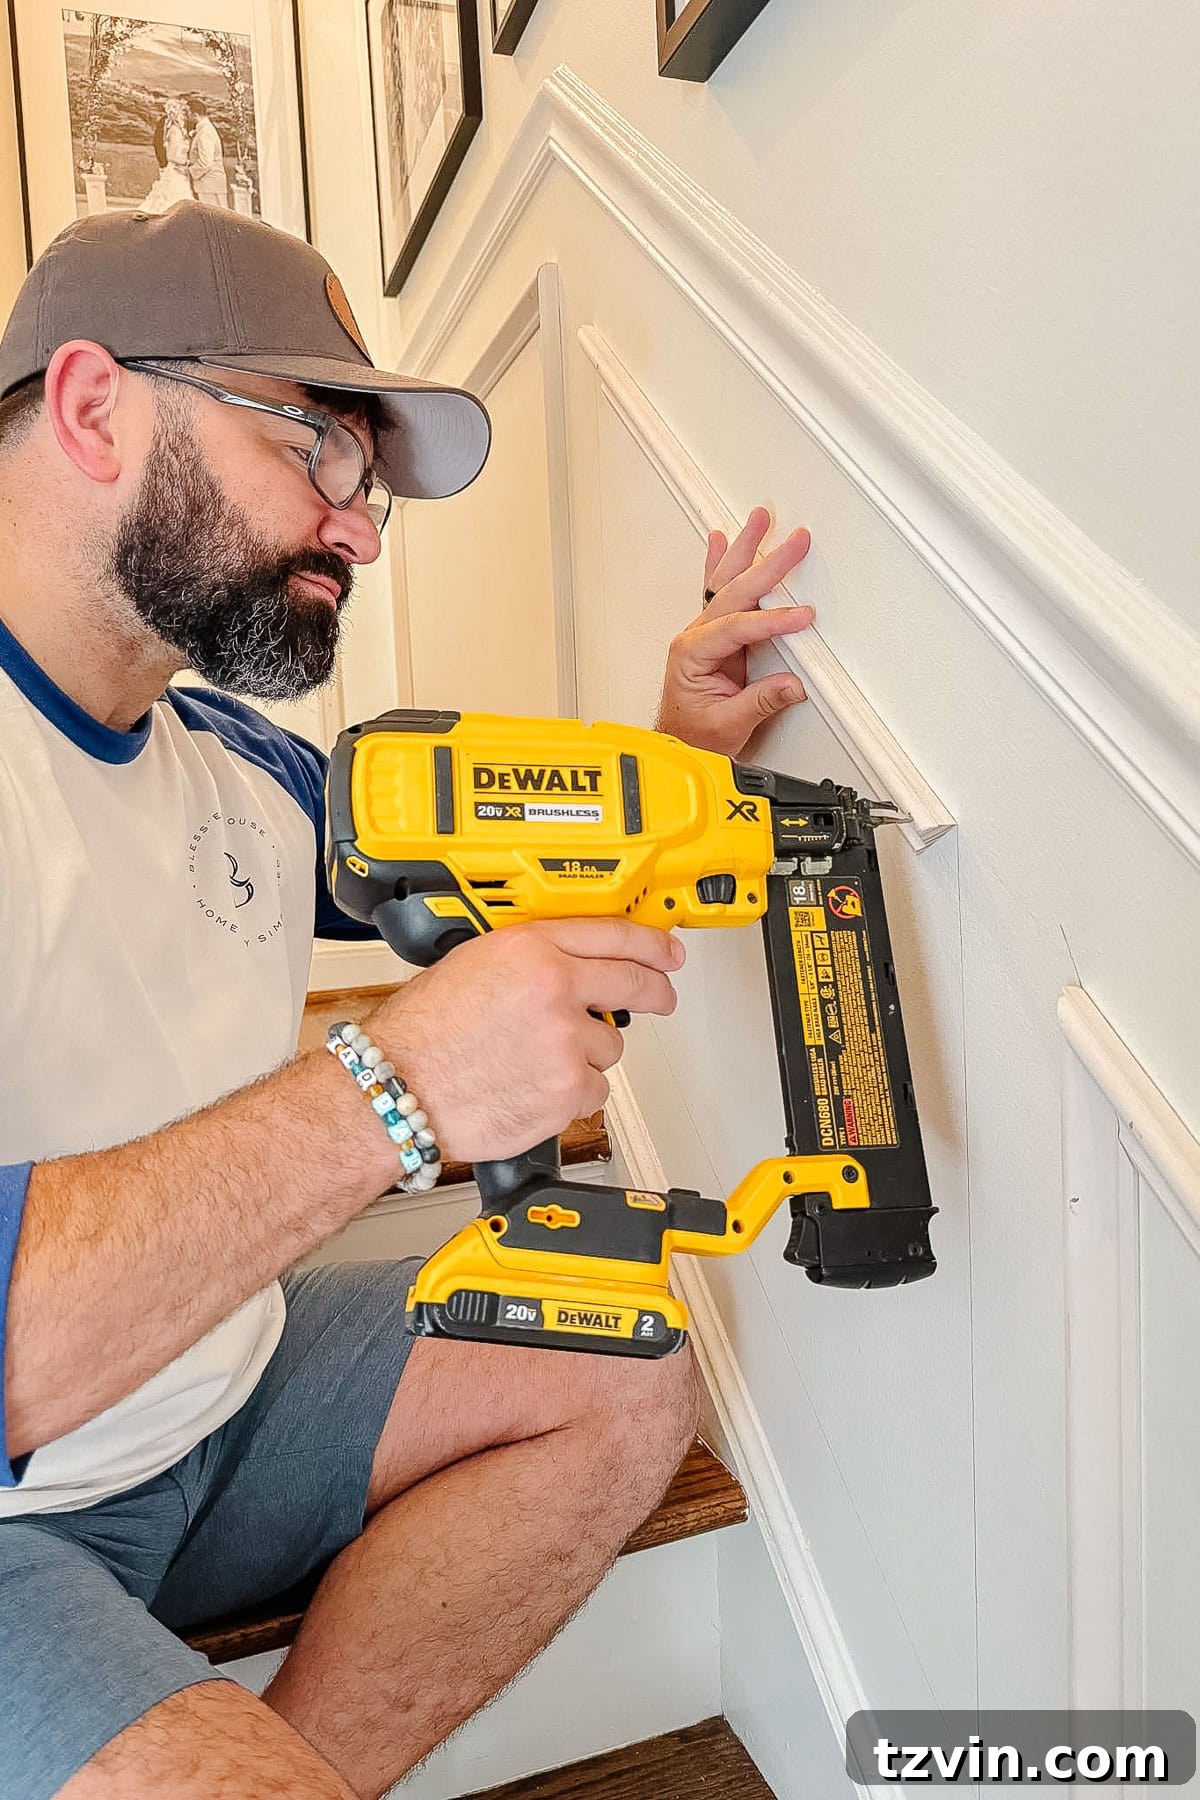
Once all your picture frame molding pieces are precisely cut, it’s time to attach them to the wall. Carefully position each piece according to your pencil markings. Using your brad nailer, secure the molding to the wall. For the best hold and to minimize future damage if removal is ever desired, place the nailer at an angle in alternating directions as you drive in the brads. This technique ensures the molding stays flush to the wall and creates a more robust attachment than straight-on nailing.
Step 7 – Caulk and Wood Fill for a Flawless Finish
With all your molding firmly in place, the next crucial step is to achieve a seamless, professional finish. Apply wood filler to all nail holes. It’s important to use wood filler here, not caulk, as caulk can shrink and crack over time, potentially exposing the holes. Once the wood filler is completely dry (following manufacturer instructions), sand it smooth with fine-grit sandpaper until it’s perfectly flush with the molding surface. After addressing the nail holes, apply paintable caulk to any small gaps or cracks where the molding meets the wall or where two pieces of molding join. This will seal the seams and create a polished look, making the molding appear as though it’s an integral part of the wall structure.
Step 8 – The Final Touch: Painting Your Wainscoting
The final step in your staircase transformation is to apply your chosen paint color. Ensure all surfaces are clean and dust-free before priming, if necessary, then apply an even coat of your paint. The choice of paint color can dramatically impact the final look. After completing a few more carpentry projects in this area, we will soon paint this stair wainscoting. I’m still debating the perfect shade, but you can be sure it will be a statement-making contrasting trim color that truly highlights the new architectural detail. This final coat of paint will unify the molding with the wall, completing the sophisticated look.
Related: How to Replace Stair Spindles – DIY Stair Makeover
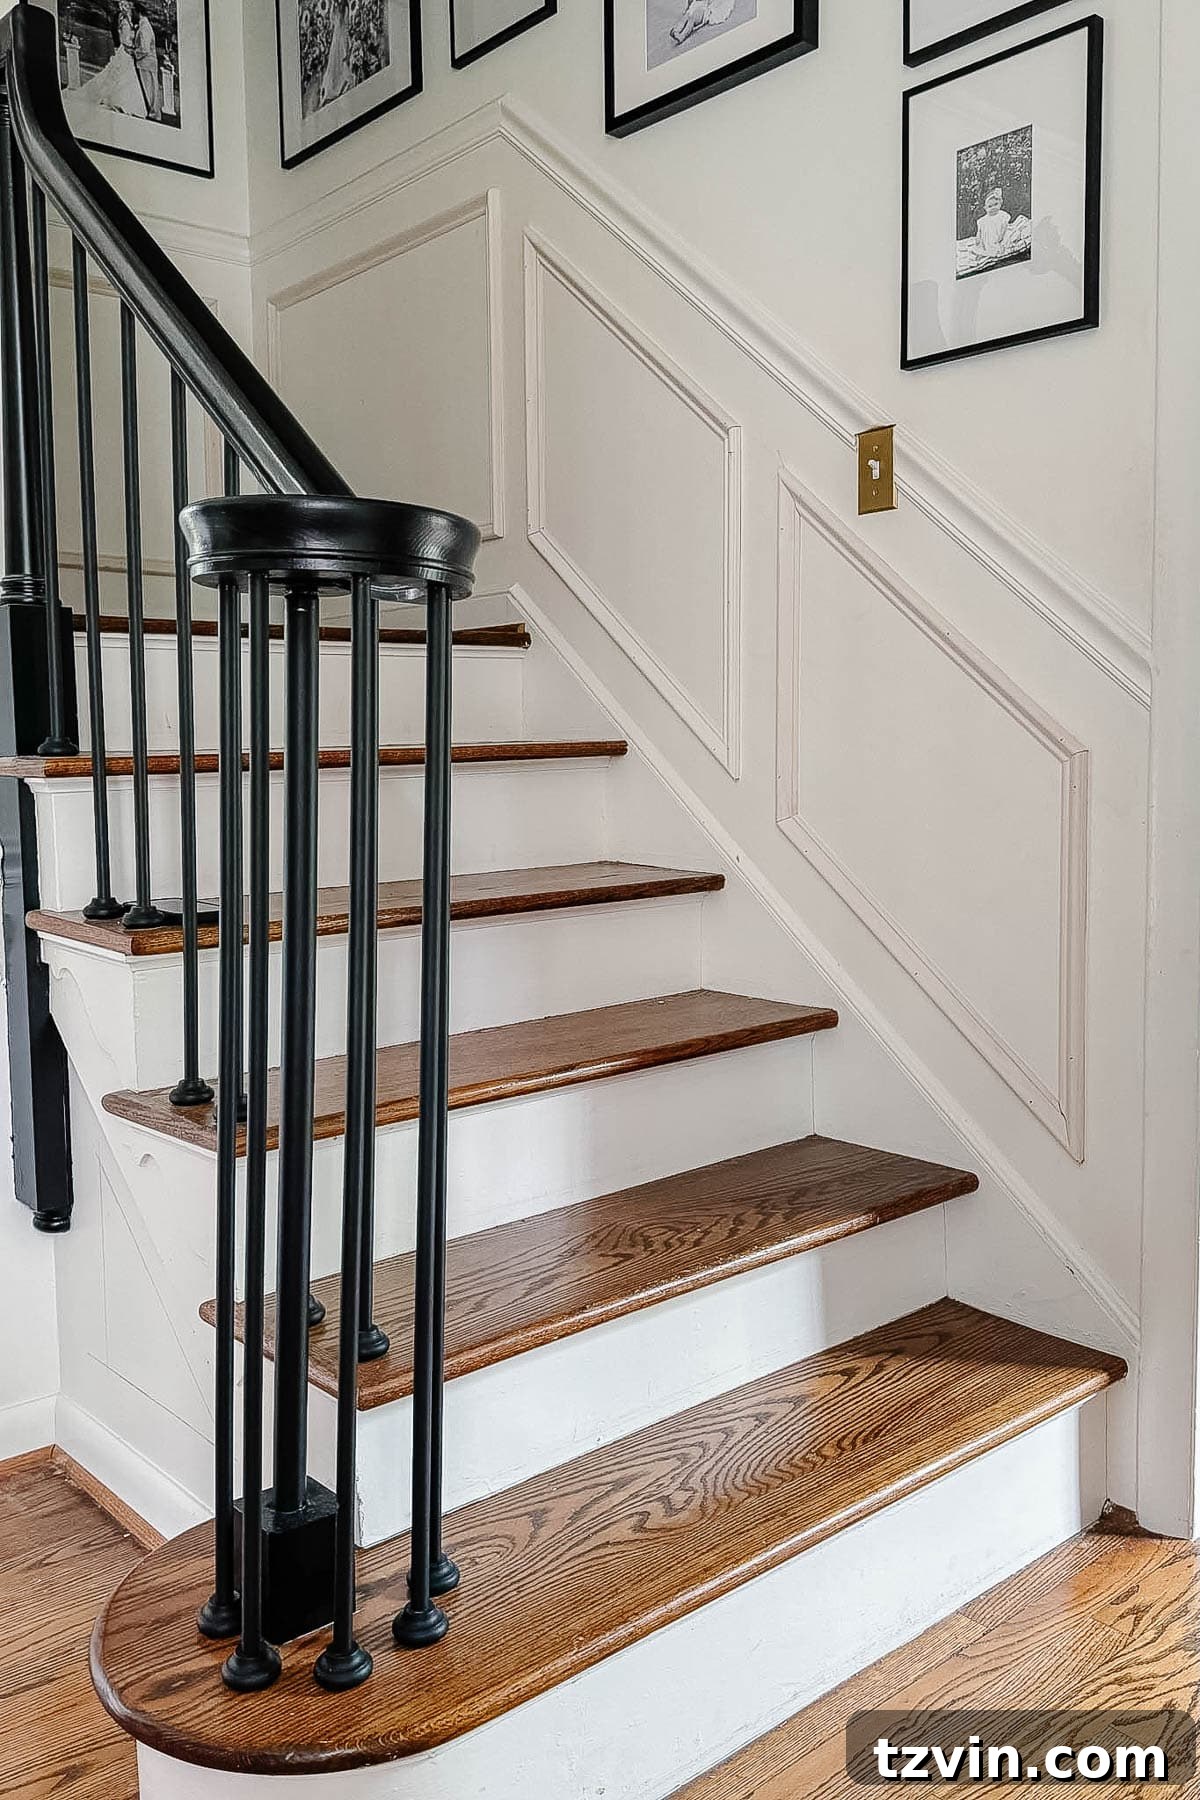
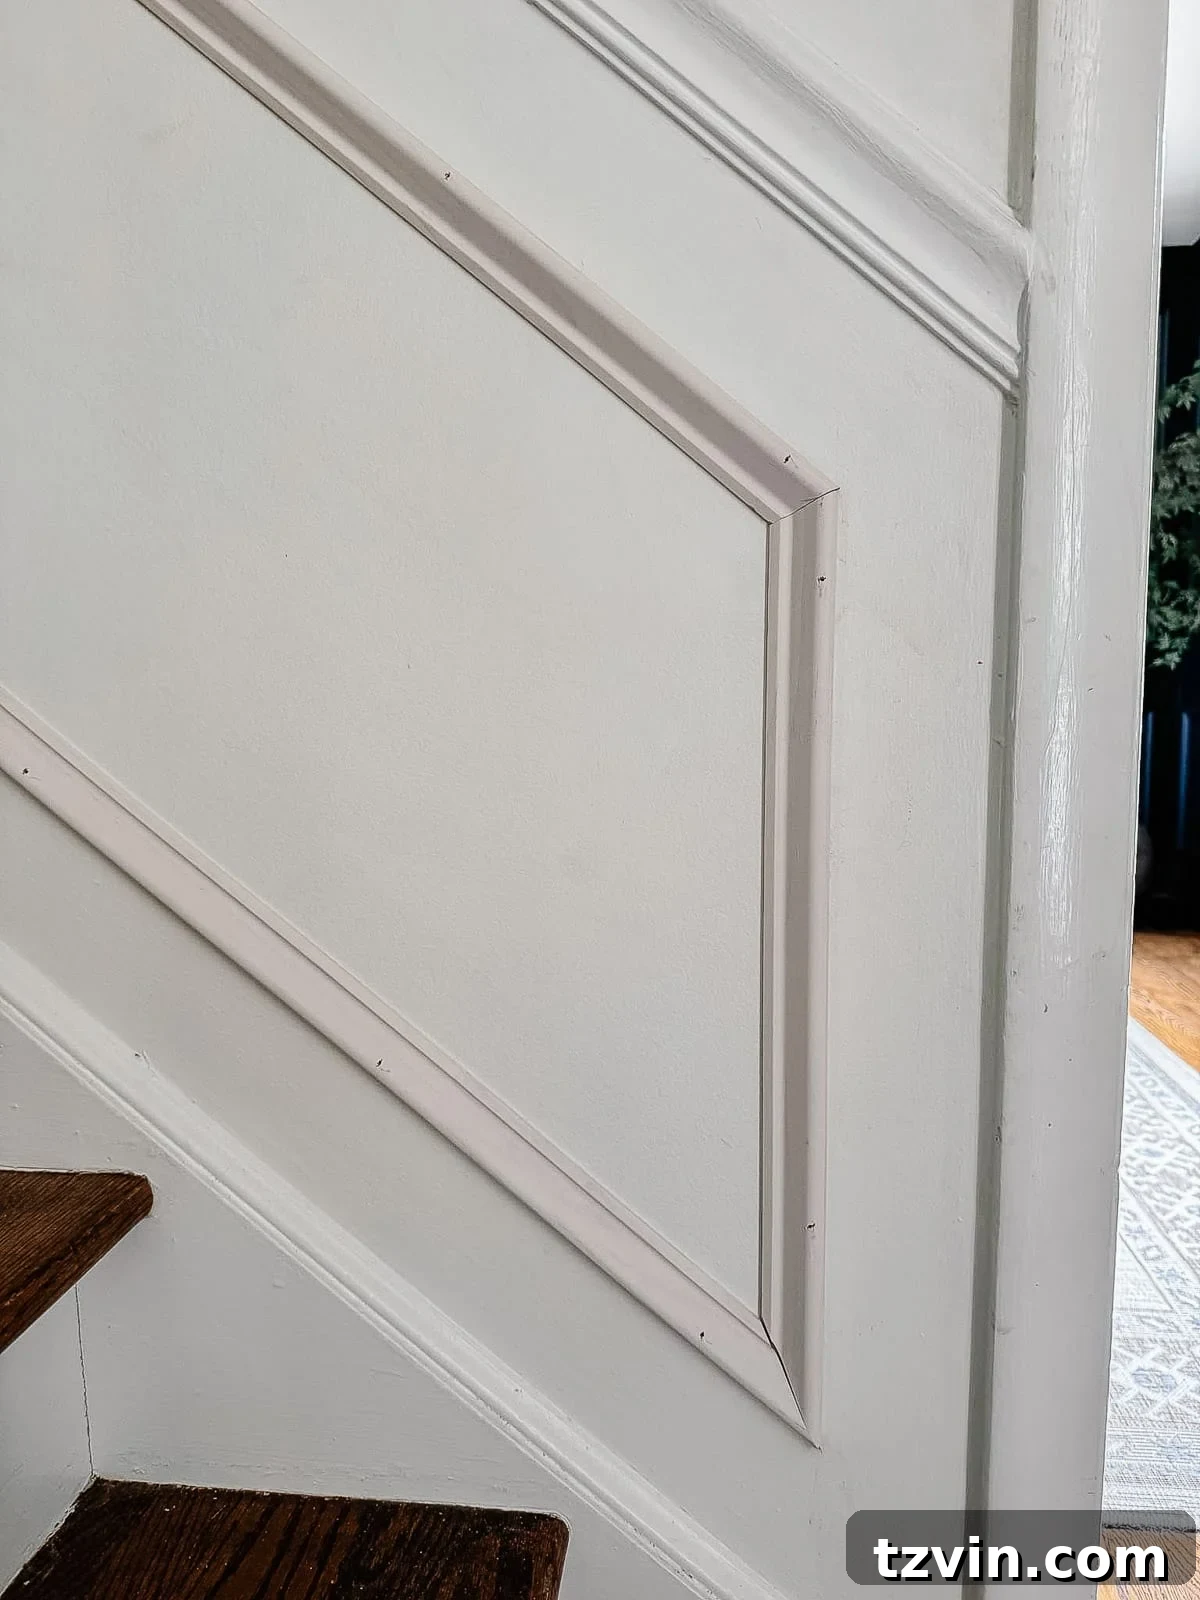
The addition of this picture frame molding has created a subtle yet profound difference on our stairs, instantly elevating the space and making it feel significantly more upscale. It’s undeniably one of my favorite and most effective ways to make a house look more expensive on a budget. I envision it one day complemented by a beautiful, traditional runner rug on those stairs, but we’re still working towards that final touch. The impact of these DIY details on our home’s character and perceived value is truly remarkable.
Frequently Asked Questions About Wainscoting and Trim
For trim and wainscoting, the best type of paint is typically a urethane alkyd enamel, such as Benjamin Moore Advance. This type of paint cures to a much harder, more durable finish than standard latex paints, making it highly resistant to wear, chipping, and scuffs over time, which is essential for high-traffic areas like staircases.
Traditionally, wainscoting should be approximately one-third of the wall’s total height. When transitioning from a flat wall to a staircase, a good rule of thumb is to place the top of your staircase wainscoting (or chair rail) about 2 to 2 1/2 inches lower than the height of your wainscoting panel on the first floor. This creates a visually pleasing flow and prevents the staircase wainscoting from appearing too tall.
While adding wainscoting may not directly increase your home’s appraised value in the same way a new kitchen or bathroom might, it significantly enhances its appeal to potential buyers. It adds perceived value, character, and a custom, high-end feel that can make your home stand out in the market, ultimately making it easier and potentially quicker to sell at your desired price point.
More Inspiring DIY Molding Ideas for Your Home
If this staircase wainscoting project has ignited your passion for adding architectural detail, you’re in luck! We’ve tackled numerous other DIY wall molding projects around our house, and each comes with a detailed tutorial to guide you:
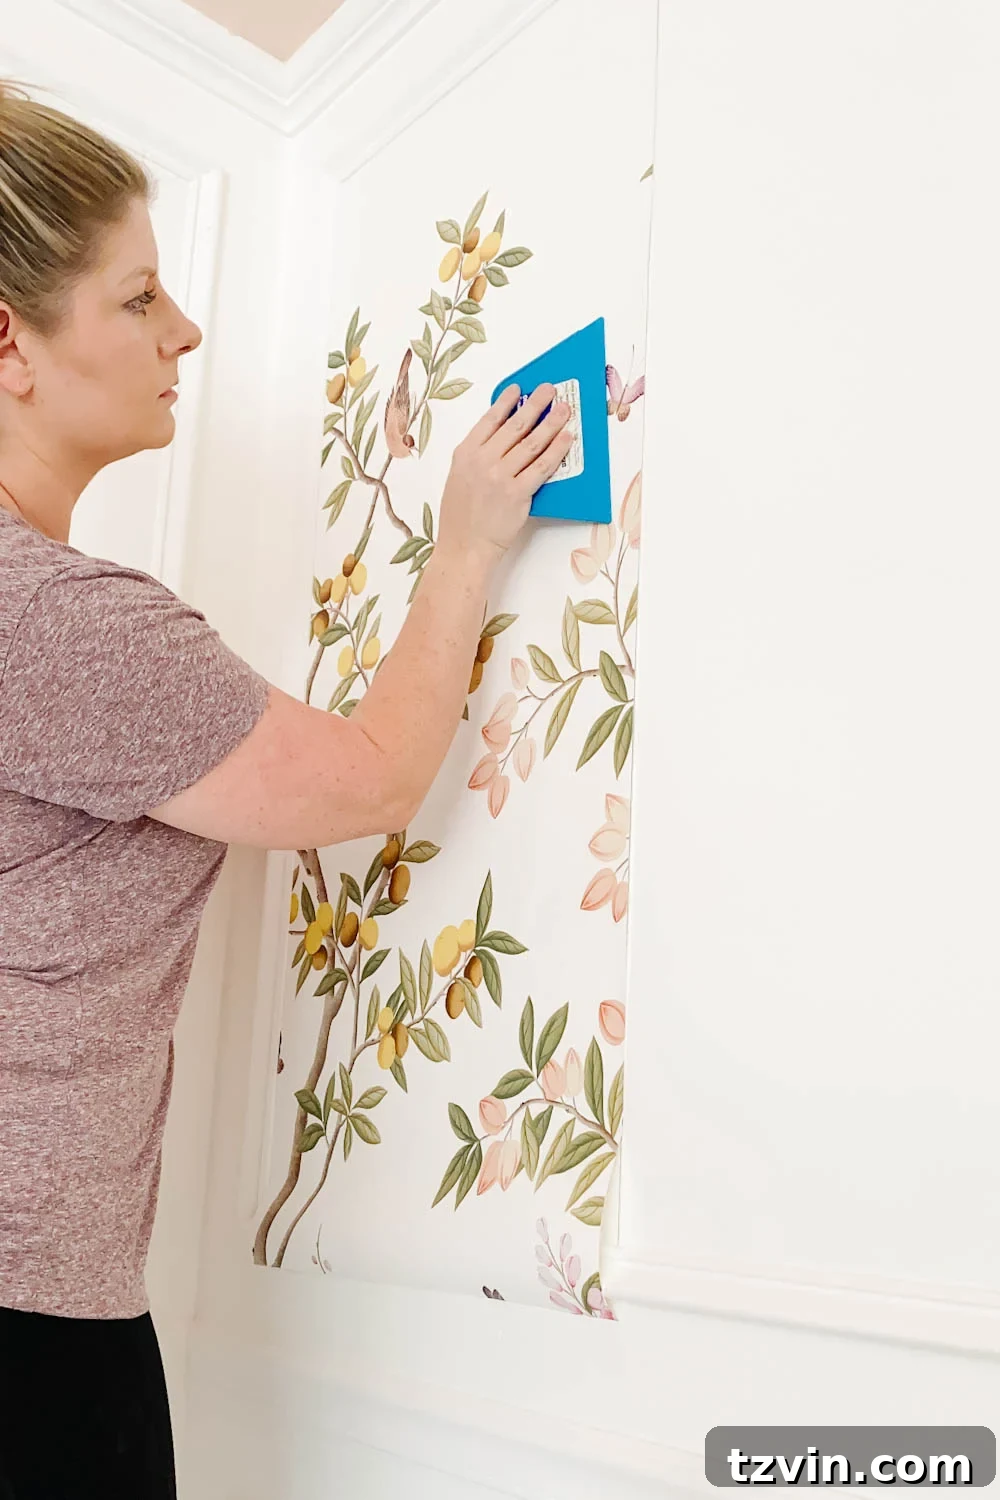
How to Wallpaper Inside Picture Frame Molding
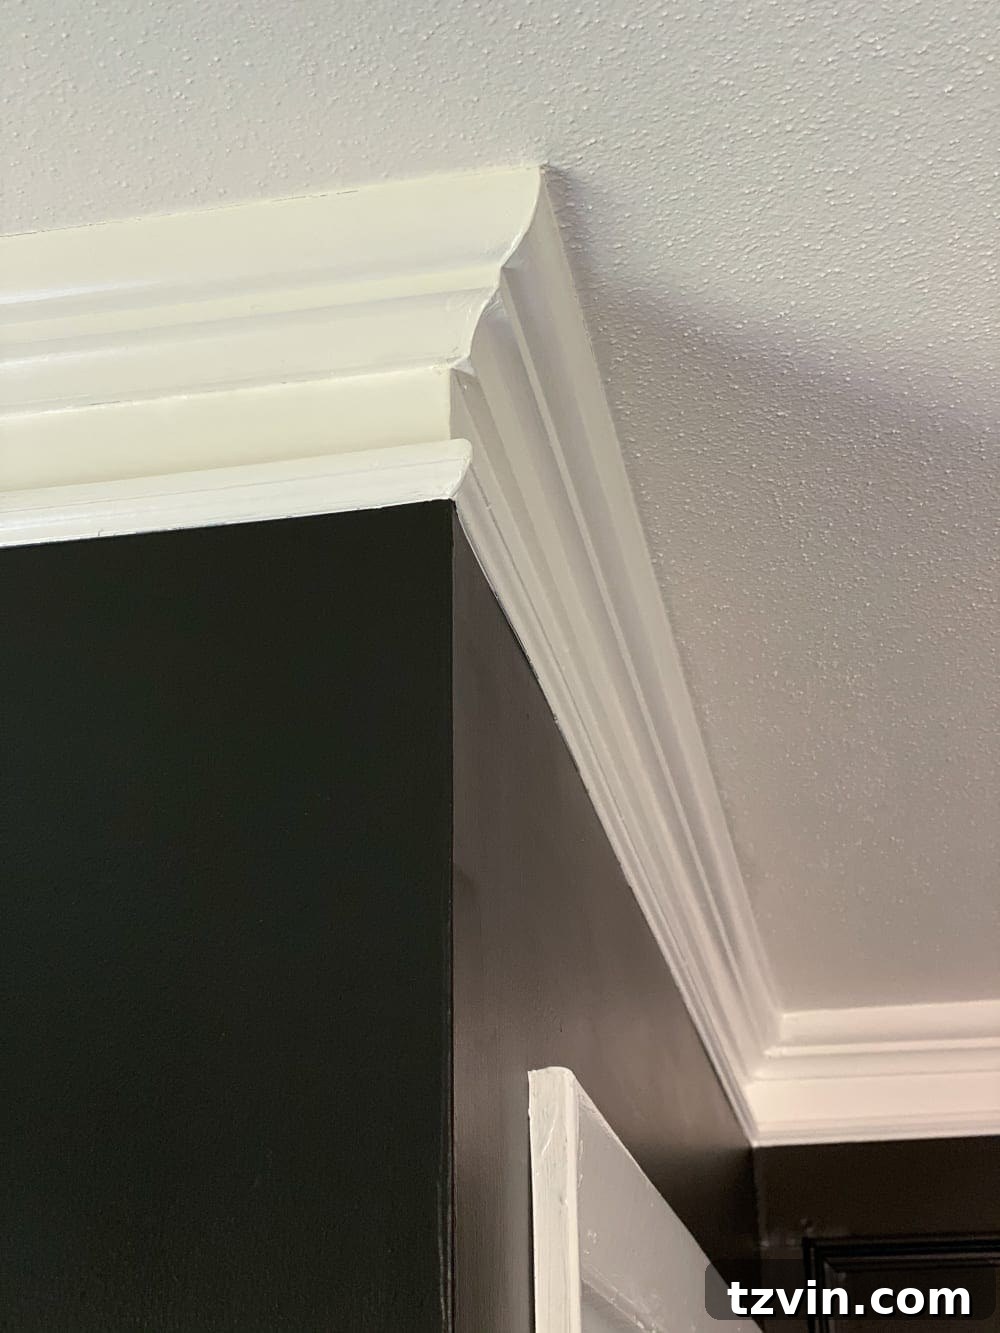
How to Quickly Beef Up Crown Molding and Baseboards
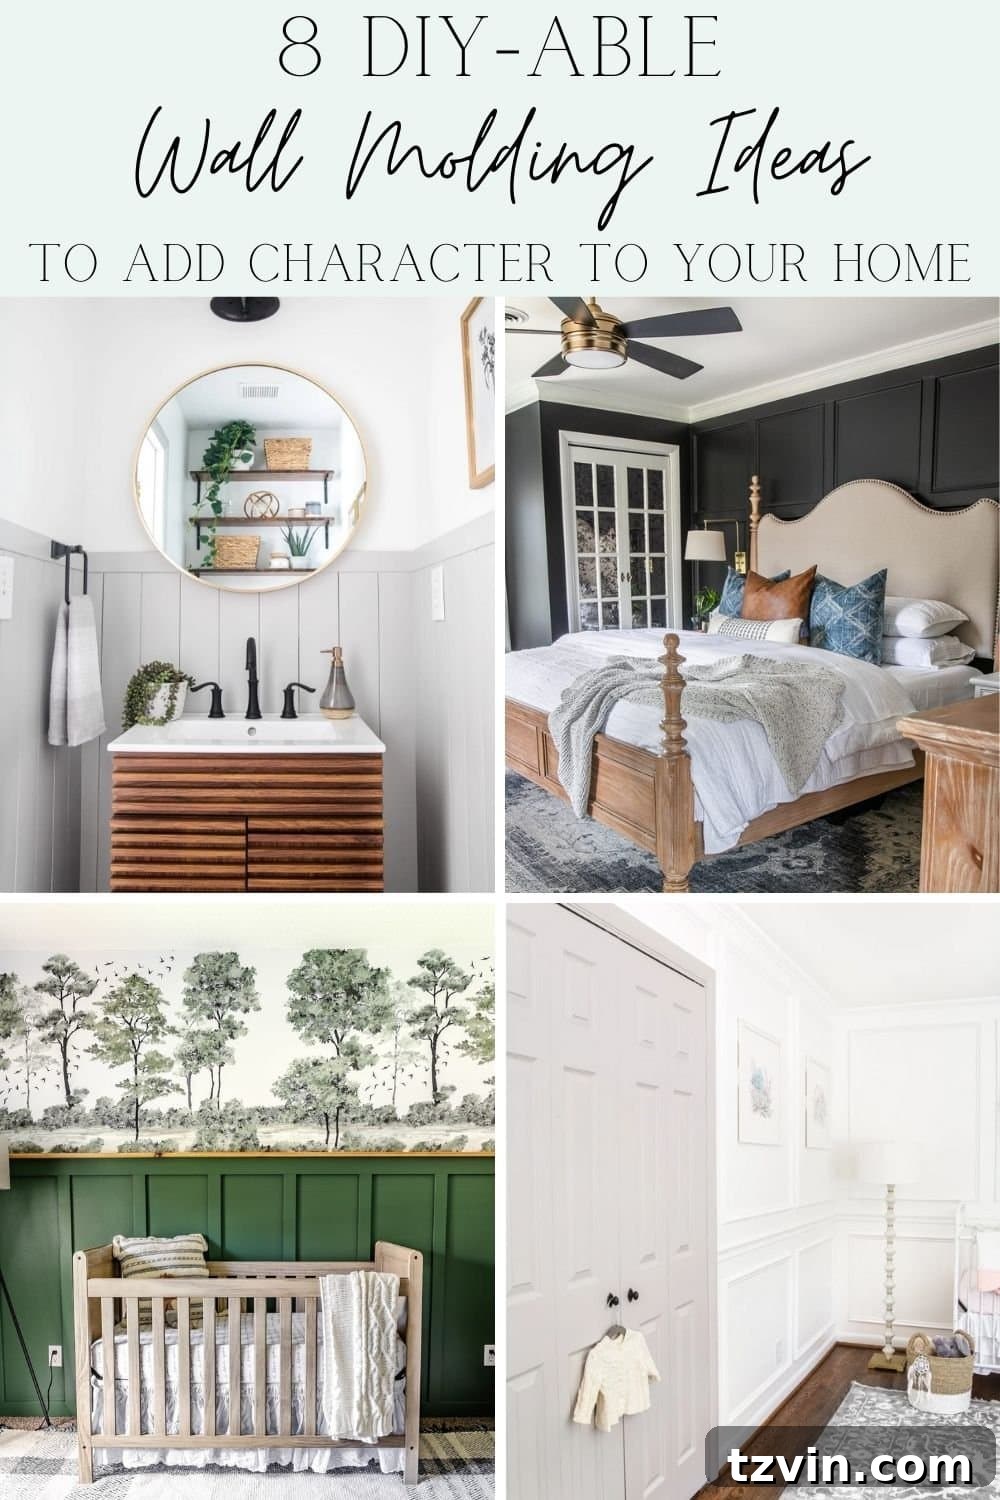
DIY-able Wall Molding Ideas to Add Character to Your Home
We’ll be diligently working on this staircase, foyer, and hallway over the next several weeks. You can follow along with our project progress and get real-time updates on our Instagram Stories. Join us as we transform this space one DIY step at a time!
What are your thoughts on this project so far? Is this a DIY challenge you’re considering tackling yourself? Believe me, we’ve had our fair share of 10th-grade math flashbacks during this project, but the results are undeniably worth it. If you decide to give it a try, please don’t hesitate to ask any questions in the comments below, and I’ll be happy to assist you!