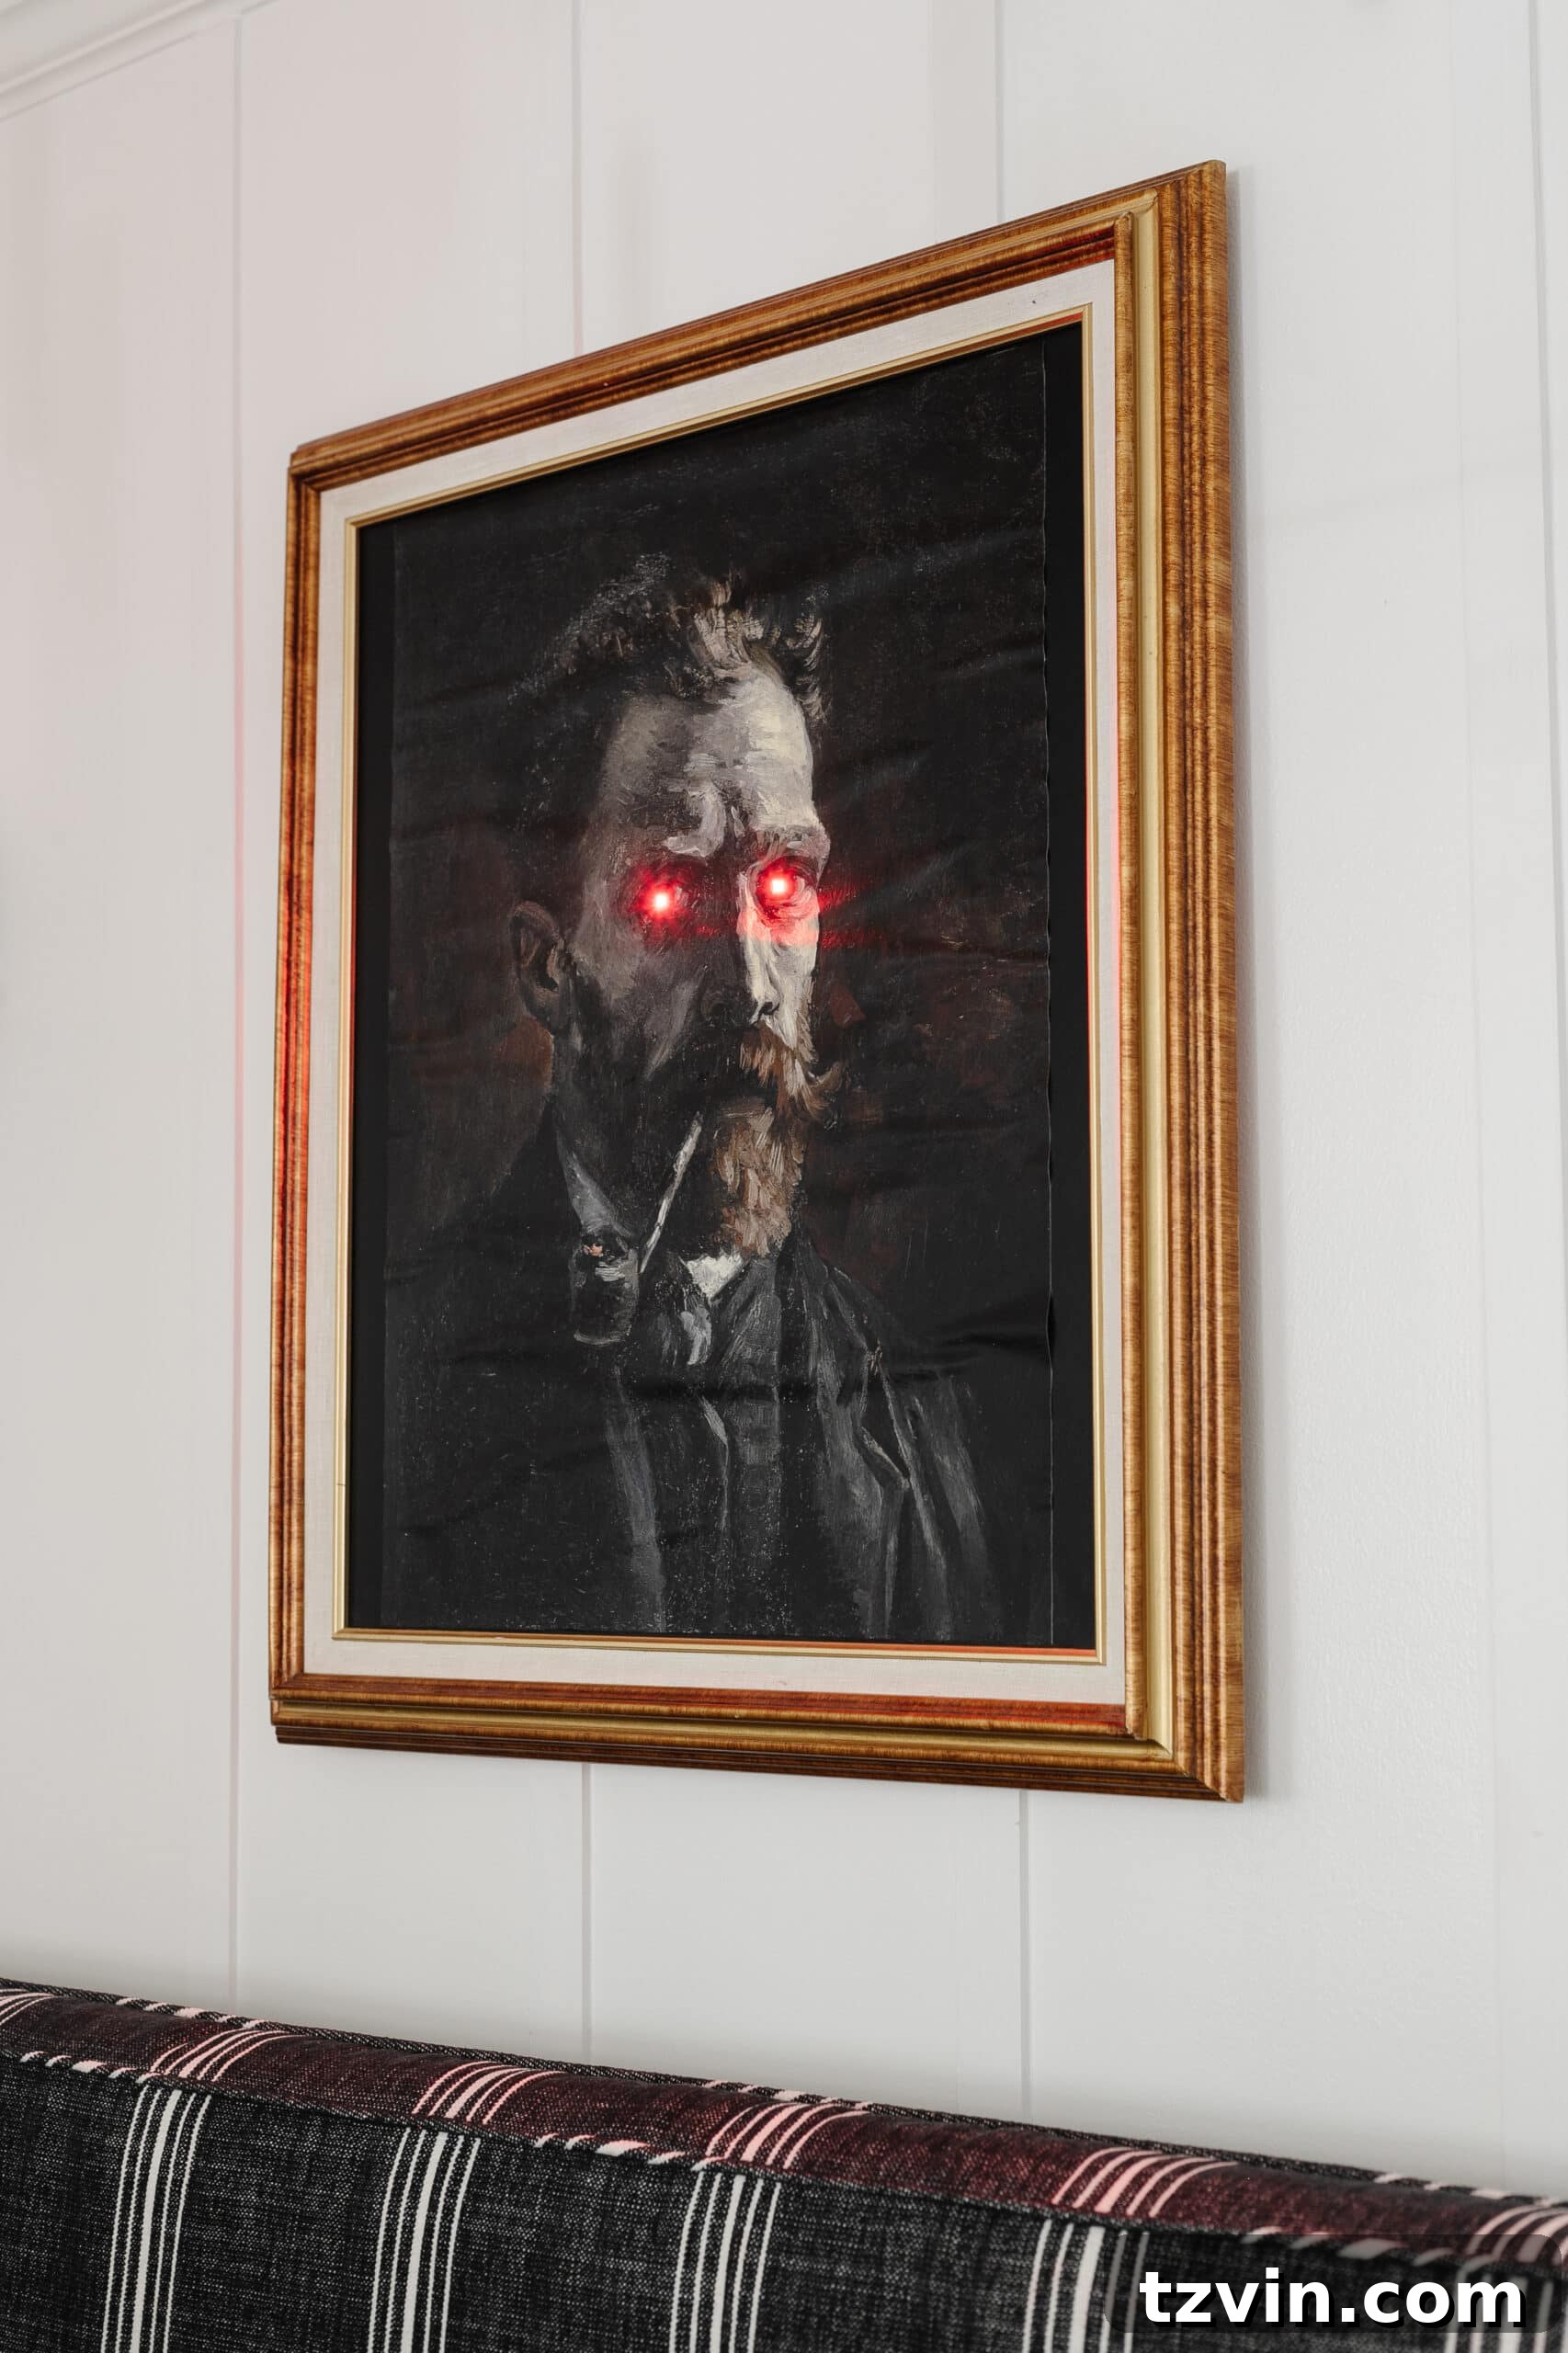
Transforming a simple thrift store find into captivating, light-up creepy Halloween art is easier than you think. This guide will show you how to craft macabre style wall decor that will be the centerpiece of your spooky celebrations.
Have you ever stumbled upon a hidden gem at a thrift store, a piece with untold potential, and just *knew* it needed a special purpose? This project is living proof that grabbing a budget-friendly picture frame from your local second-hand shop and patiently waiting for the perfect creative spark is always a brilliant idea. What started as a whimsical urge to create something unique for Halloween quickly turned into a stunning piece of macabre art, designed to cast an eerie glow on your walls.
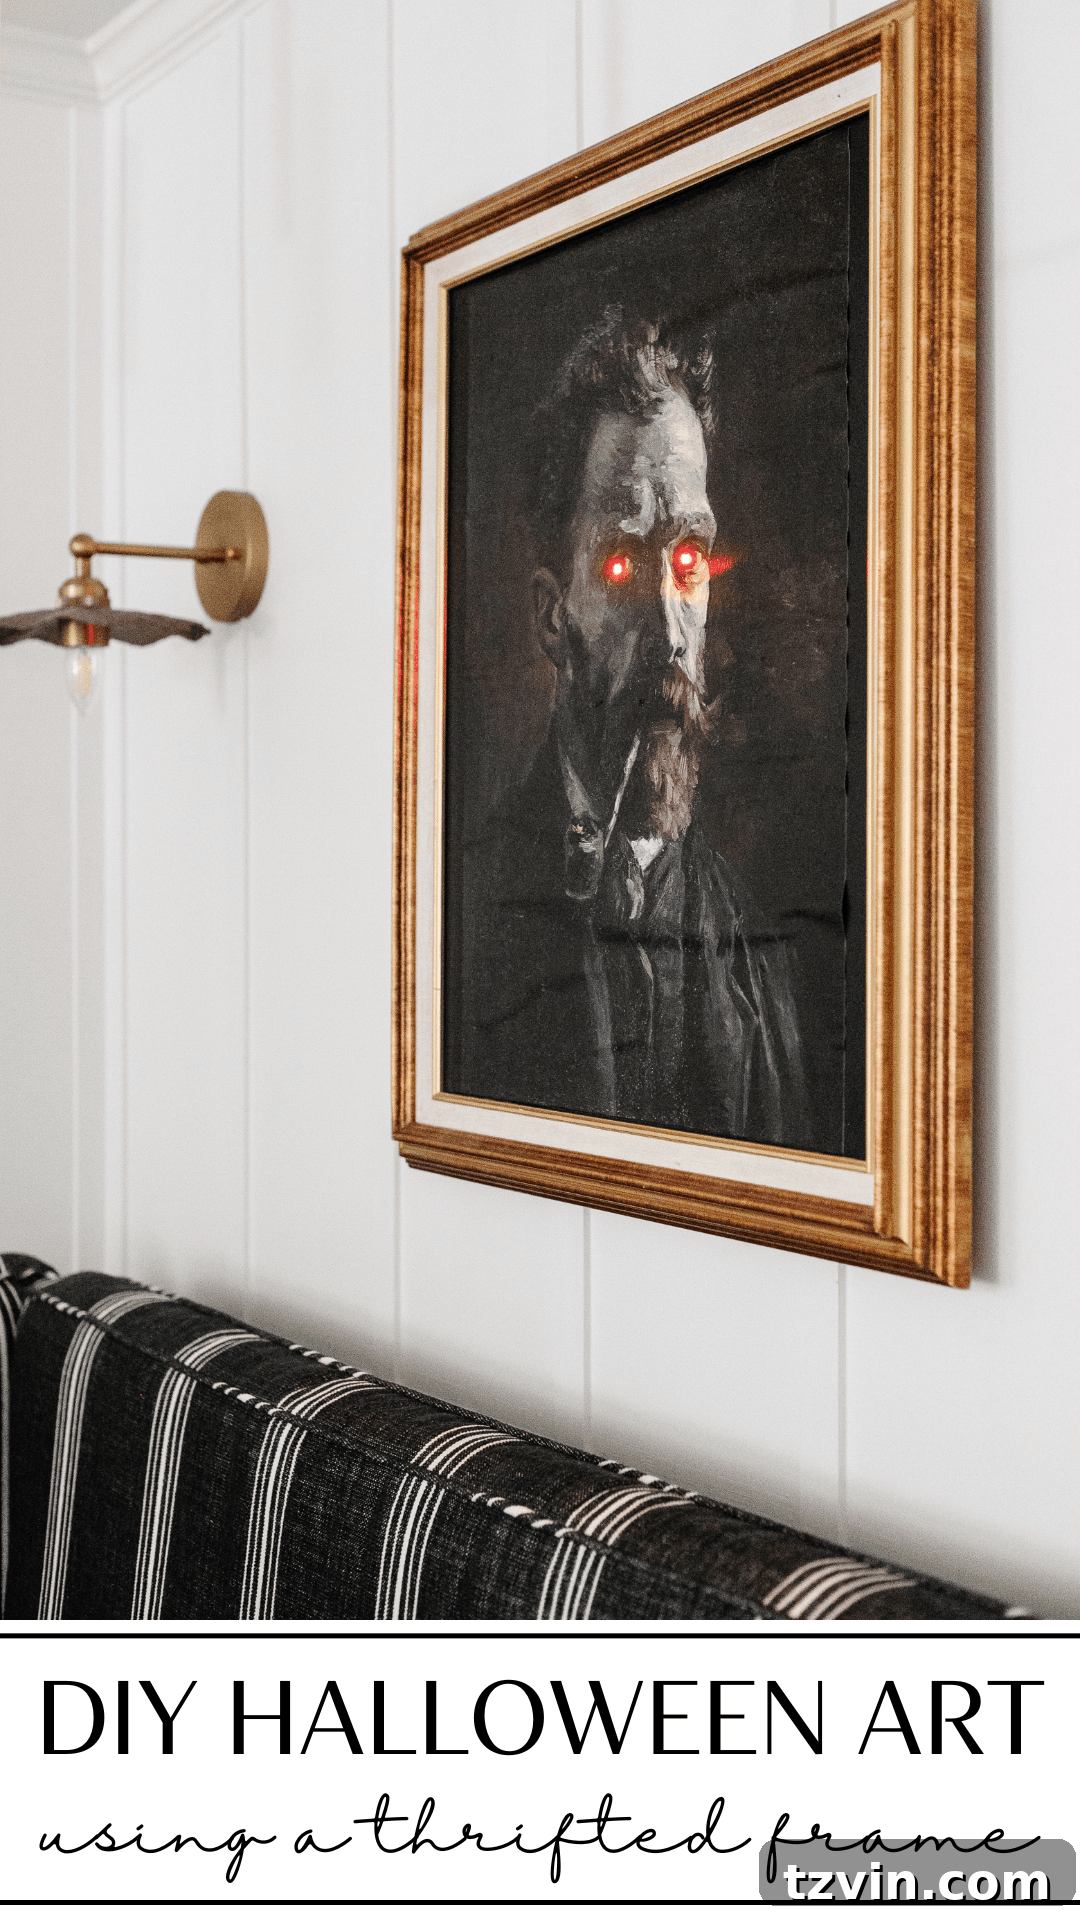
This mesmerizing wall art craft is not just a decorative piece; it’s an experience. Imagine it greeting your trick-or-treaters at the front door, adding an unforgettable touch to your Halloween party decor, or simply setting a chilling ambiance in your living space. Its unique glowing eyes will surely captivate and slightly unnerve anyone who encounters it, making it the ultimate conversation starter for any Halloween gathering.
The journey of this particular piece began over the summer when I found a magnificent vintage picture frame at Goodwill for merely $5. Its grand size and intricate details screamed potential, even though its ultimate destiny remained a mystery at the time. Thrift store picture frames are incredibly versatile and are among the top thrift decor items I always seek out, knowing they can be transformed into countless creative projects.
My inspiration for this spooky creation harks back to childhood memories of riding through Disney’s iconic Haunted Mansion. The way those ghostly portraits seemed to watch you, their eyes following your every move, left a lasting impression. That chilling, macabre art, with its subtle animated creepiness, sparked the idea for a DIY version that could replicate that haunting allure right at home.
Thus, the vision for a DIY creepy Halloween art piece, complete with blood-red glowing eyes, was born! The idea of a classic portrait subtly transformed into something truly unsettling, yet completely within my creative control, was too exciting to pass up. The goal was to create something that would elicit a delighted “shudder” from guests, perfectly embodying the spirit of spooky season.
Craft Your Own Spooky Masterpiece: DIY Creepy Halloween Art with Glowing Eyes
Creating this captivating piece of glowing Halloween wall art is a straightforward and rewarding project. It combines the charm of vintage aesthetics with a delightfully spooky twist, perfect for enhancing your holiday decor. This detailed guide will walk you through each step, ensuring you achieve a professional-looking, haunting masterpiece that will impress all your Halloween guests.
Essential Supplies for Your Glowing Halloween Art Project
Gathering the right materials is the first step to success. Most items can be found at craft stores, office supply stores, or even your local dollar store, making this a truly accessible DIY project. Remember, the beauty of DIY lies in creativity, so feel free to adapt or substitute materials where appropriate.
- Picture Frame: The star of our show! Any size or style will do, as long as it speaks to you. Thrift stores are an excellent resource for unique, often ornate frames at unbeatable prices. I found a grand 20×24 inch frame for just $5, offering ample space for a dramatic portrait. Don’t be afraid to choose a frame that might need a little paint or touch-up; it just adds to its character.
- Old Portrait Painting Printed (printable below): This is where the magic truly begins. You’ll need a digital copy of a classic, somewhat serious portrait. Printing it on blueprint or poster paper ensures a large, impactful display. I used Office Depot’s same-day print services, which cost around $20 for a large print, ensuring quality and convenience.
- Black Foam Poster Board: This will serve as the rigid backing for your art print. Its smooth surface makes it ideal for adhering your printed portrait. While a scrap piece of cardboard can work in a pinch, black foam board is preferable, especially if your art print doesn’t perfectly fill the frame, as it provides a dark, unobtrusive background.
- Spray Adhesive: Essential for securely attaching your art print to the foam board. Look for a strong, permanent adhesive that dries clear. This ensures your print remains smooth and securely mounted without warping.
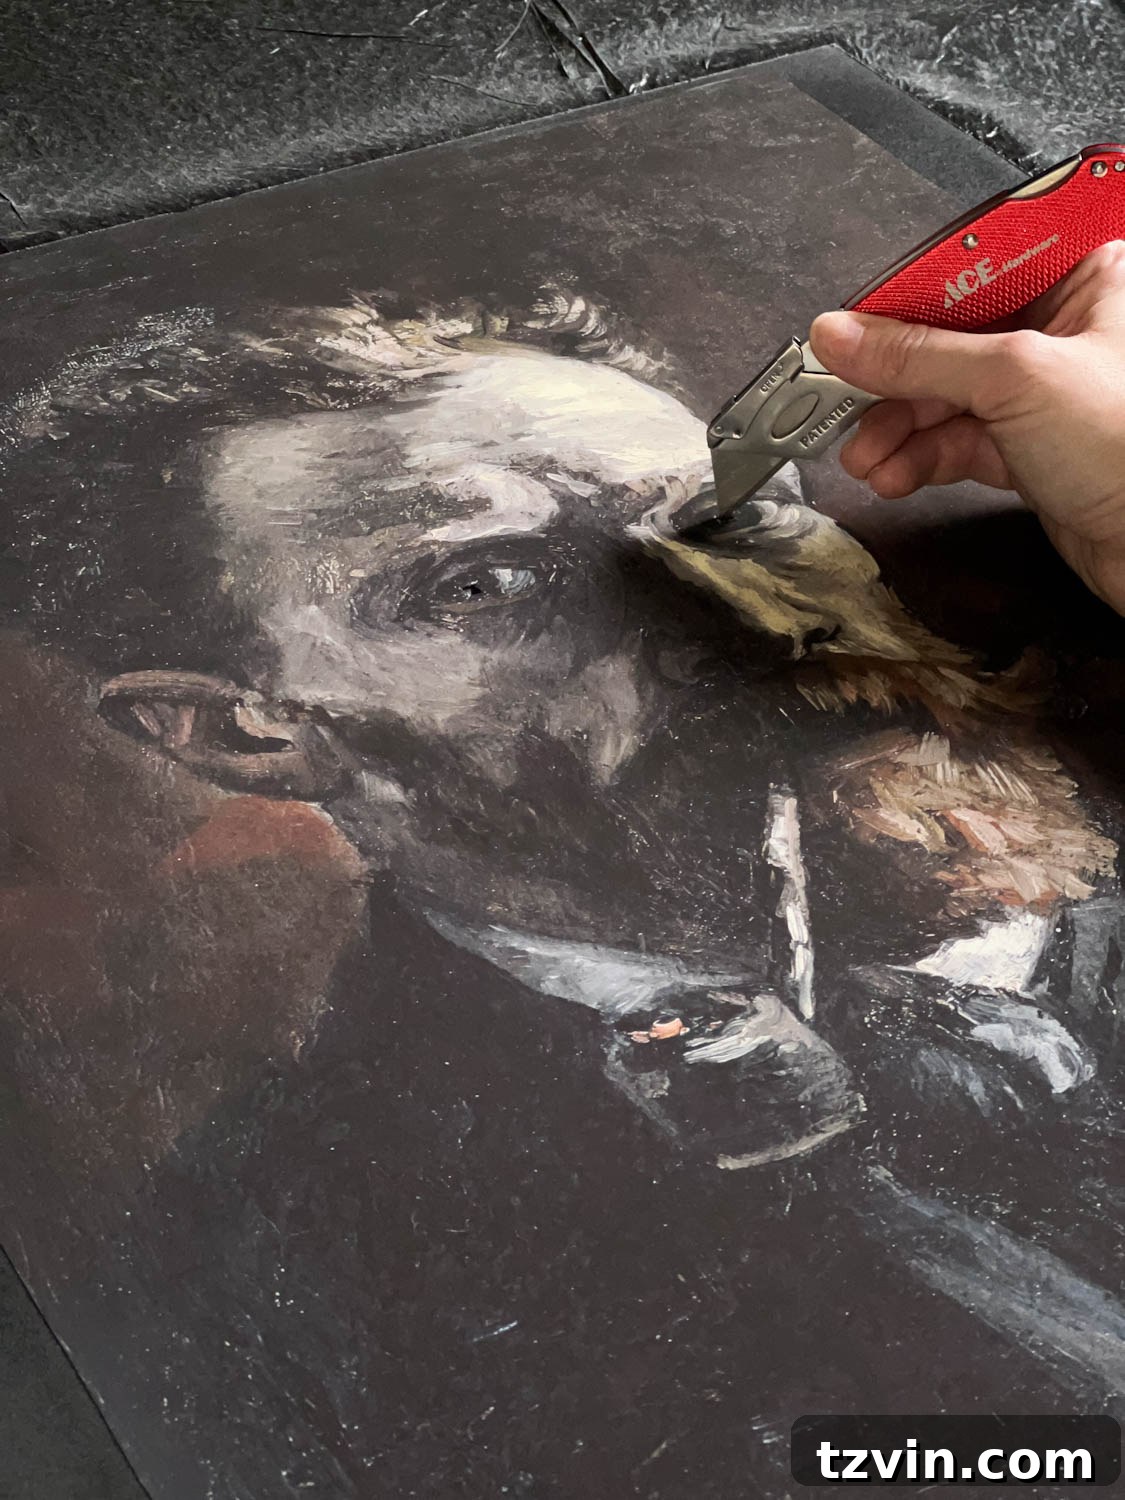
- Utility Knife: A sharp utility knife is crucial for precise cuts, especially when trimming the foam board and creating the eye holes. Always use caution and a cutting mat when handling sharp tools.
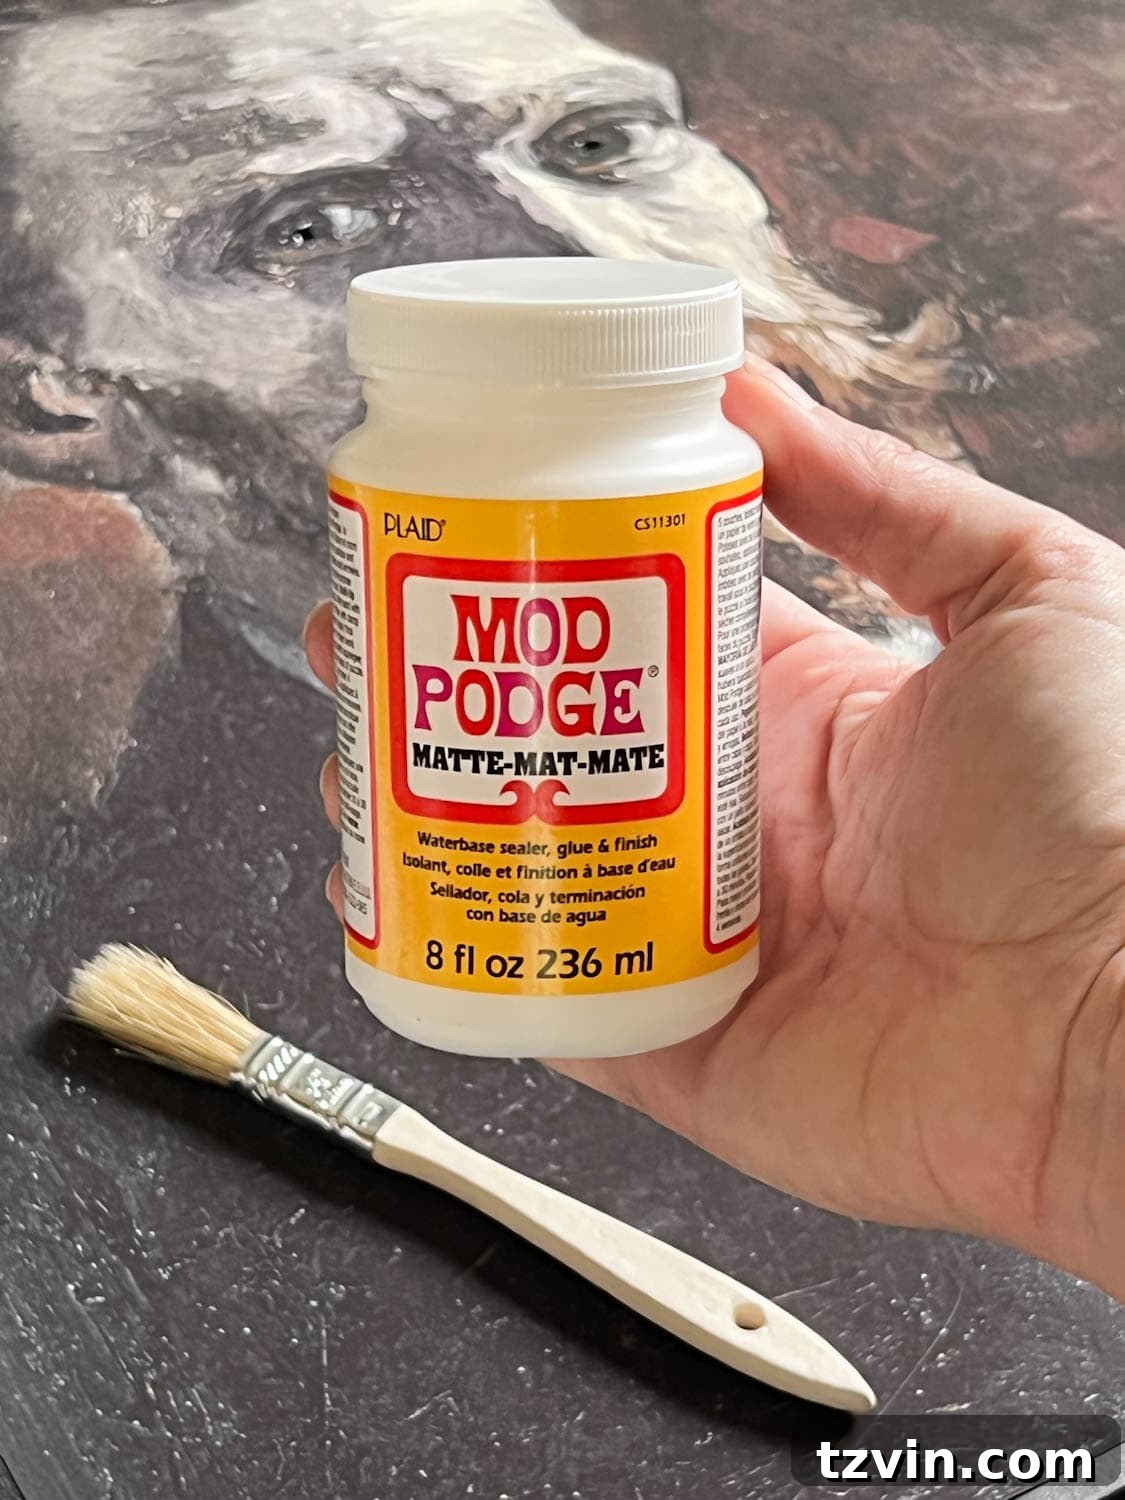
- Matte Mod Podge: This versatile decoupage medium will be used to create a realistic, brush-stroke texture on your print, giving it the appearance of an authentic painted canvas. The matte finish helps to reduce glare and enhances the vintage feel.
- Chip Brush: An inexpensive chip brush is perfect for applying Mod Podge. Its stiff bristles help create visible brush strokes, contributing to the painted effect.
- Masking or Painter’s Tape: This will be used to secure the foam board within the frame and to hold the battery lights in place. Duct tape can also be used if you have it on hand and prefer a stronger hold.
- Red Battery Lights: The key to those captivating glowing eyes! Opt for small, individual LED lights or a string of mini lights where the bulbs can be easily isolated. Battery-operated lights offer flexibility for placement anywhere, without needing an outlet.
- Command Hanging Strips: Ideal for hanging your finished art without damaging walls, especially if this is temporary Halloween decor. Choose strips appropriate for the weight of your frame.
Unlock Your Free Spooky Art Printable
To help you get started immediately, I’m offering the exact Halloween portrait printable I used for this project! This classic image provides the perfect canvas for those eerie glowing eyes.
If you’re eager to get your hands on this unique Halloween portrait, simply click here or use the button below to subscribe to my email list. As a welcome, you’ll gain instant access to this free, high-quality digital download, ready for printing and transformation.
For those who are already cherished members of my email community, there’s no need to subscribe again! The file should either be waiting in your inbox, or you can easily access it directly from the printable library here. Remember, the password for the library is conveniently located at the bottom of every email I send. Enjoy crafting your creepy art!
Step-by-Step Guide to Creating Your Light-Up Halloween Masterpiece
Now that you have all your supplies and your chosen portrait, it’s time to bring this haunting vision to life. Follow these steps carefully to ensure a stunning and durable piece of creepy Halloween art.
Step 1 – Secure Your Art Print to Foam Board for a Sturdy Base
Before you begin, ensure your work surface is well-protected with old newspapers, a drop cloth, or cardboard, as spray adhesive can be messy. First, size your foam board to fit snugly within your chosen picture frame. If necessary, use your utility knife to trim the foam board to the correct dimensions. Accuracy here is key to a professional finish. Once sized, apply a generous, even coat of spray adhesive to one side of the foam board. This will create a robust backing for your art print, preventing it from sagging or wrinkling over time.
Carefully center your printed portrait onto the adhesive-coated foam board. Start by pressing down in the middle and gently smooth outwards, removing any trapped air bubbles to achieve a perfectly flat surface. Work slowly and methodically to prevent creases. As a practical tip, if your art print is slightly smaller than the frame’s opening, using a black foam board (as opposed to white cardboard) ensures that any visible backing blends seamlessly, maintaining the macabre aesthetic. Allow the adhesive to dry completely for at least 15 minutes, or according to the product instructions, before moving to the next step.
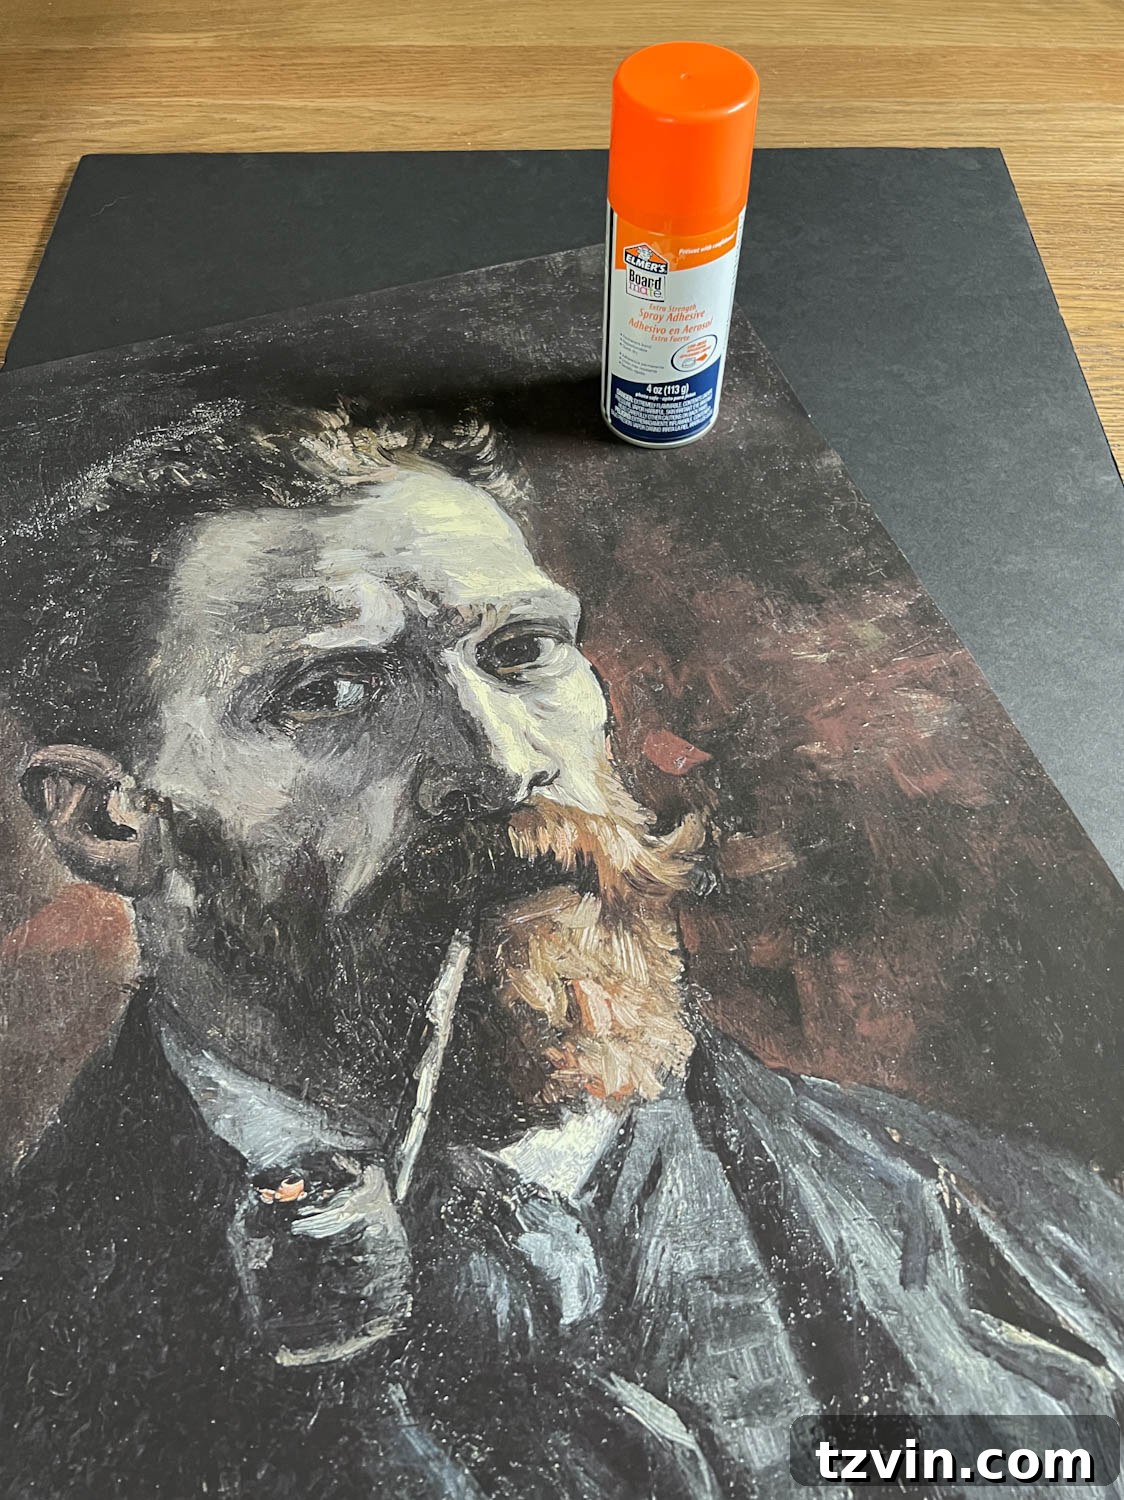
Step 2 – Precisely Cut Small Eye Holes for the Glowing Effect
This is where your portrait gains its haunting glow. Place a scrap piece of cardboard underneath your adhered art print to protect your work surface from knife marks. Carefully identify the exact center of each eye on your printed portrait. Using your battery light bulbs as a guide, or a small circular template, meticulously cut a small, neat hole in each eye using your utility knife. The goal is for the light bulb to fit snugly but not fall through. Start with a smaller incision and gradually widen it if needed, as it’s easier to enlarge a hole than to fix one that’s too big. Precision in this step ensures the lights appear natural and sinister.
Always exercise extreme caution when using a utility knife. Keep your fingers clear of the blade’s path and cut away from your body. A self-healing cutting mat is highly recommended for safety and to preserve your tabletop. Once the holes are cut, you can gently test fit a light bulb to ensure it’s the right size before proceeding.
Step 3 – Apply Mod Podge for an Authentic Brush Stroke Texture
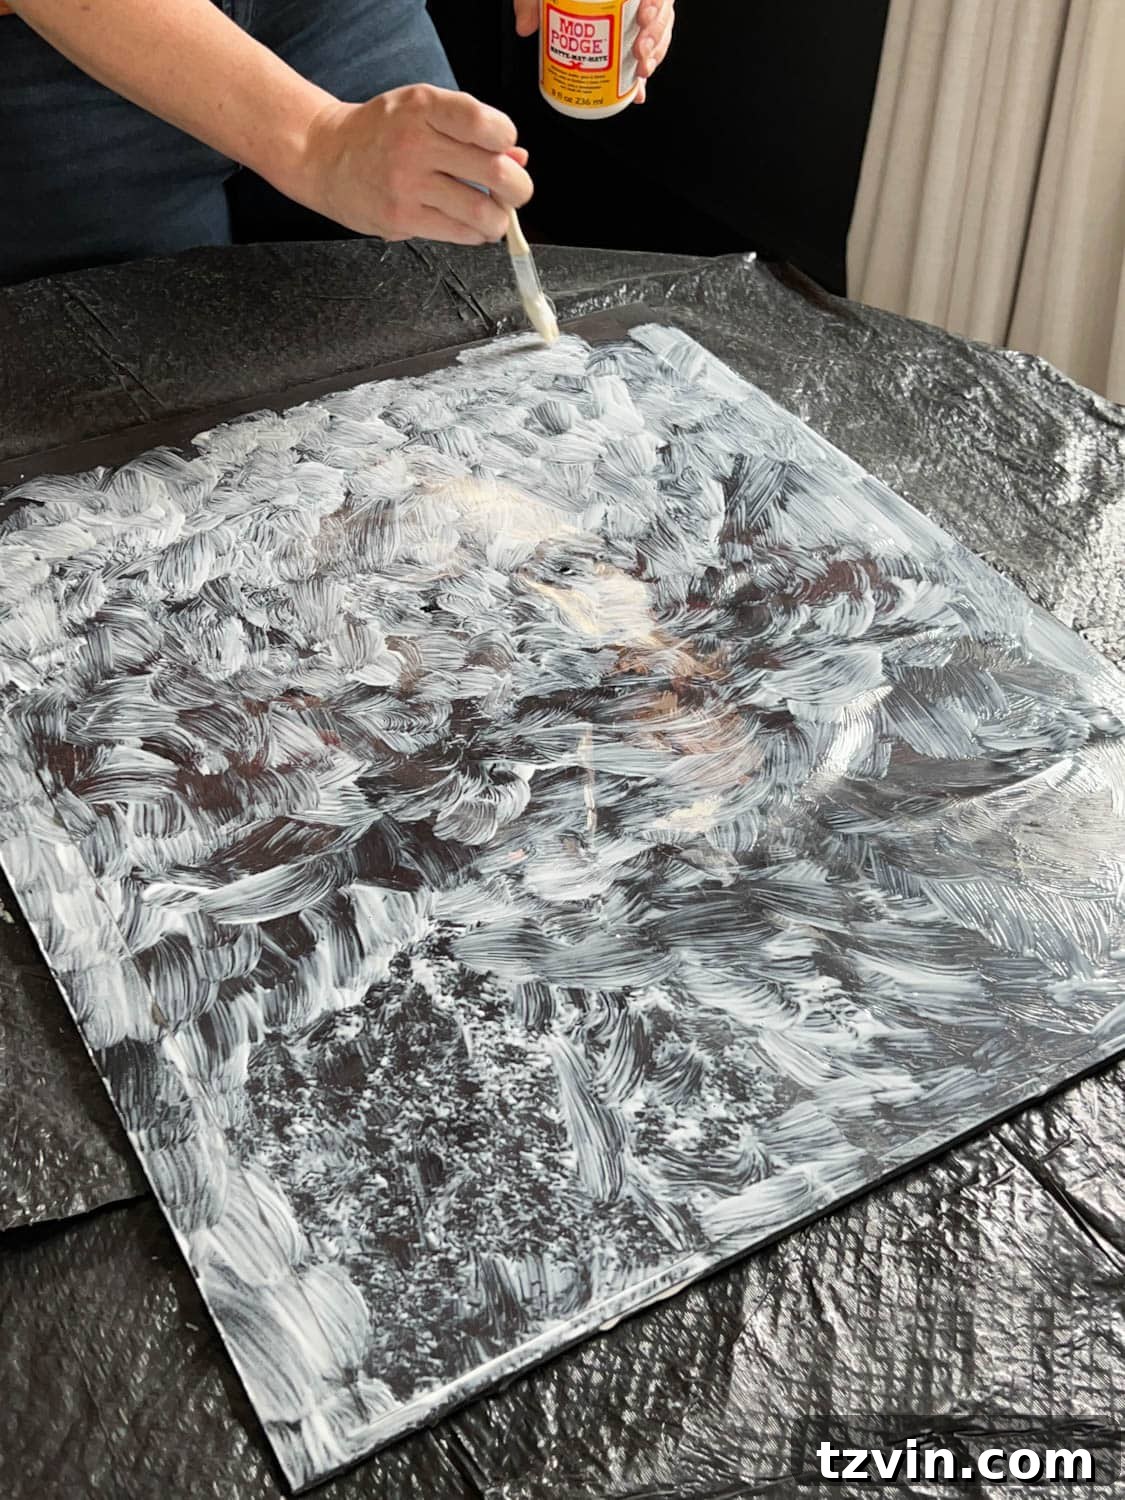
Once the spray adhesive is completely dry (this is critical to avoid wrinkling), it’s time to add depth and authenticity to your art. Using your chip brush, apply a coat of Matte Mod Podge all over the surface of your art print. Don’t strive for perfection; instead, use a haphazard, deliberate motion to create distinct brush strokes. The beauty of this step is that as the Mod Podge dries, it will leave behind a textured surface, mimicking the appearance of actual paint strokes on a canvas. This technique instantly elevates your printed art, giving it the rich, tactile quality of a genuine painting.
A crucial lesson learned during my own crafting process: ensure the spray adhesive has fully cured before applying the Mod Podge. If the underlying adhesive is still wet, the Mod Podge can cause the paper to wrinkle significantly. However, if this happens, don’t fret! Sometimes, these unexpected imperfections can actually enhance the overall aesthetic, lending a wonderfully distressed, aged look that perfectly complements a “haunted” or “creepy” art portrait. Embrace the slight wrinkles as part of its unique, vintage charm. Allow the Mod Podge to dry completely until clear, which may take an hour or more depending on humidity.
Step 4 – Securely Tape Your Art Board into the Picture Frame
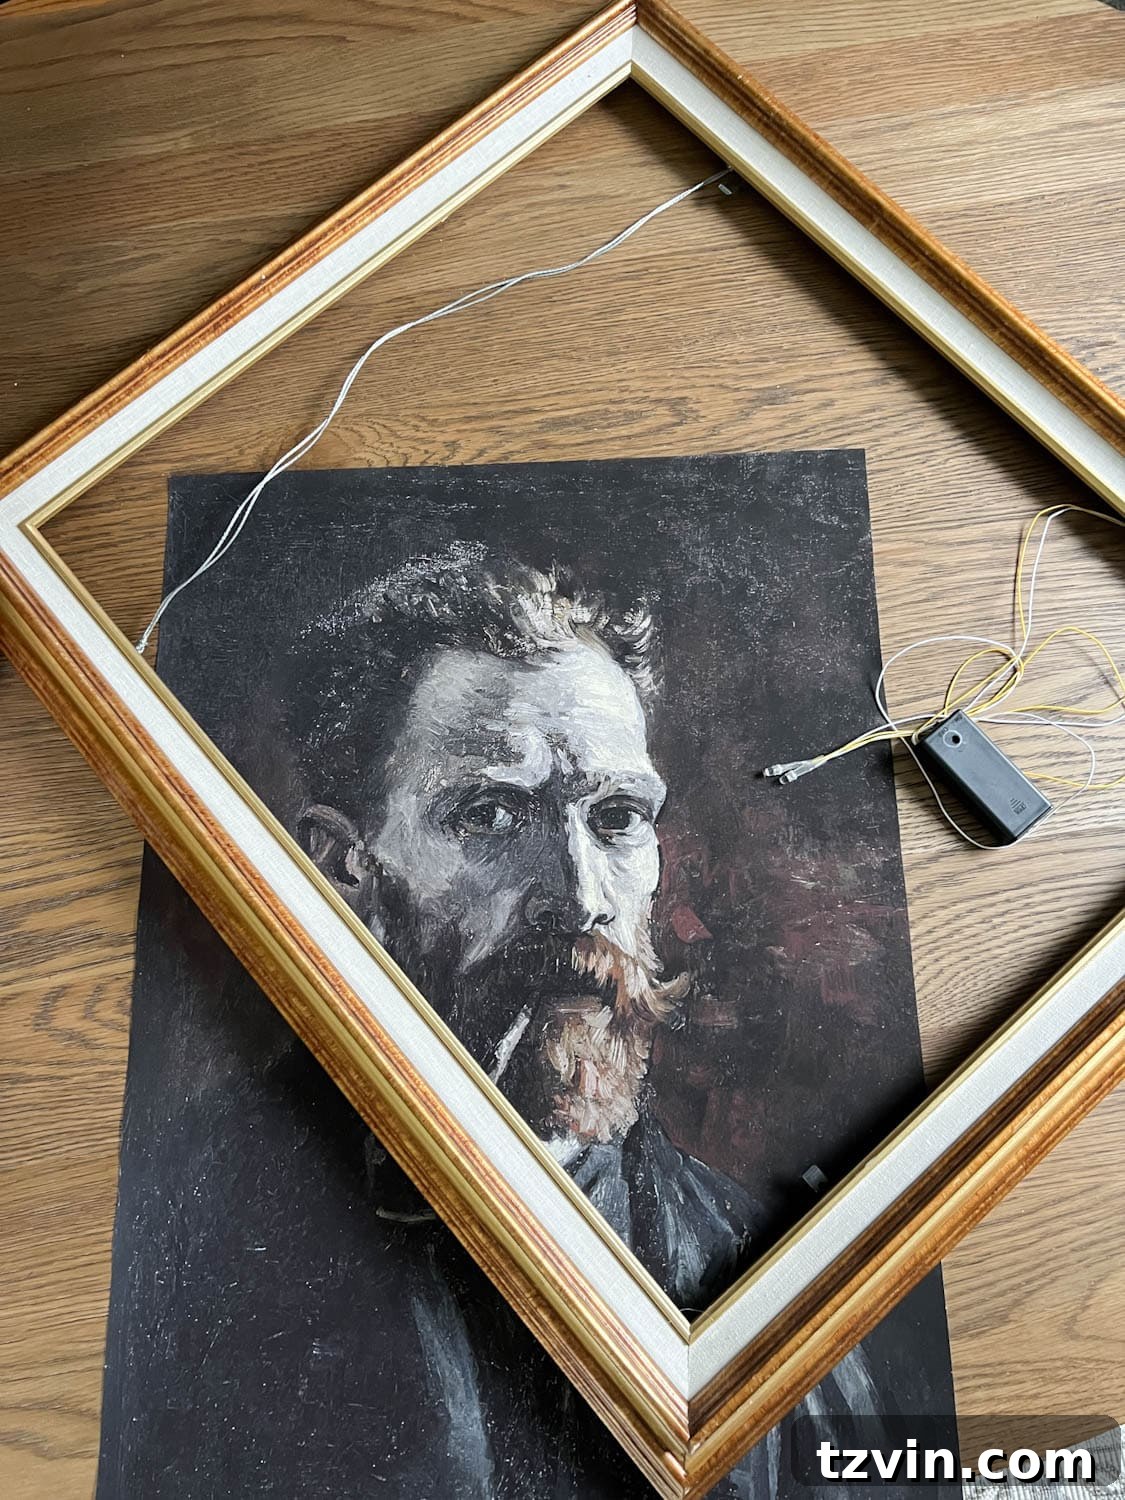
Once your Mod Podge is completely dry and clear, carefully place the foam board with your art print into the picture frame. Ensure it sits flush and is centered perfectly. If your picture frame has existing clips or a sturdy backing, you can use those to hold the art in place. However, many thrifted frames, like mine, may lack these features, offering only the decorative frame itself.
In such cases, masking tape, painter’s tape, or even duct tape (for a more robust hold) will be your best friend. Securely tape the foam board to the inner edges of the picture frame from the backside. Apply tape along all four edges, ensuring the art board is firmly attached and won’t shift. This step ensures your creepy art remains stable and pristine within its frame.
Step 5 – Strategically Tape the Battery Lights Behind Your Artwork
Now for the pièce de résistance: the glowing eyes! Turn the framed art face down. Carefully insert one red battery light bulb into each of the eye holes you cut earlier. Position the bulbs so they are flush with the front of the artwork and centered within the holes, ensuring a strong, even glow. Use masking tape or electrical tape to secure each individual light bulb firmly in place on the backside of the foam board. This prevents the lights from moving or falling out.
Next, take the battery pack for your lights and tape it securely to the back of the picture frame. Position it in a way that the on/off switch remains easily accessible, allowing you to turn the eerie glow on and off as desired without having to remove the frame from the wall. Ensure any excess wire is neatly taped down to prevent tangling or accidental damage.
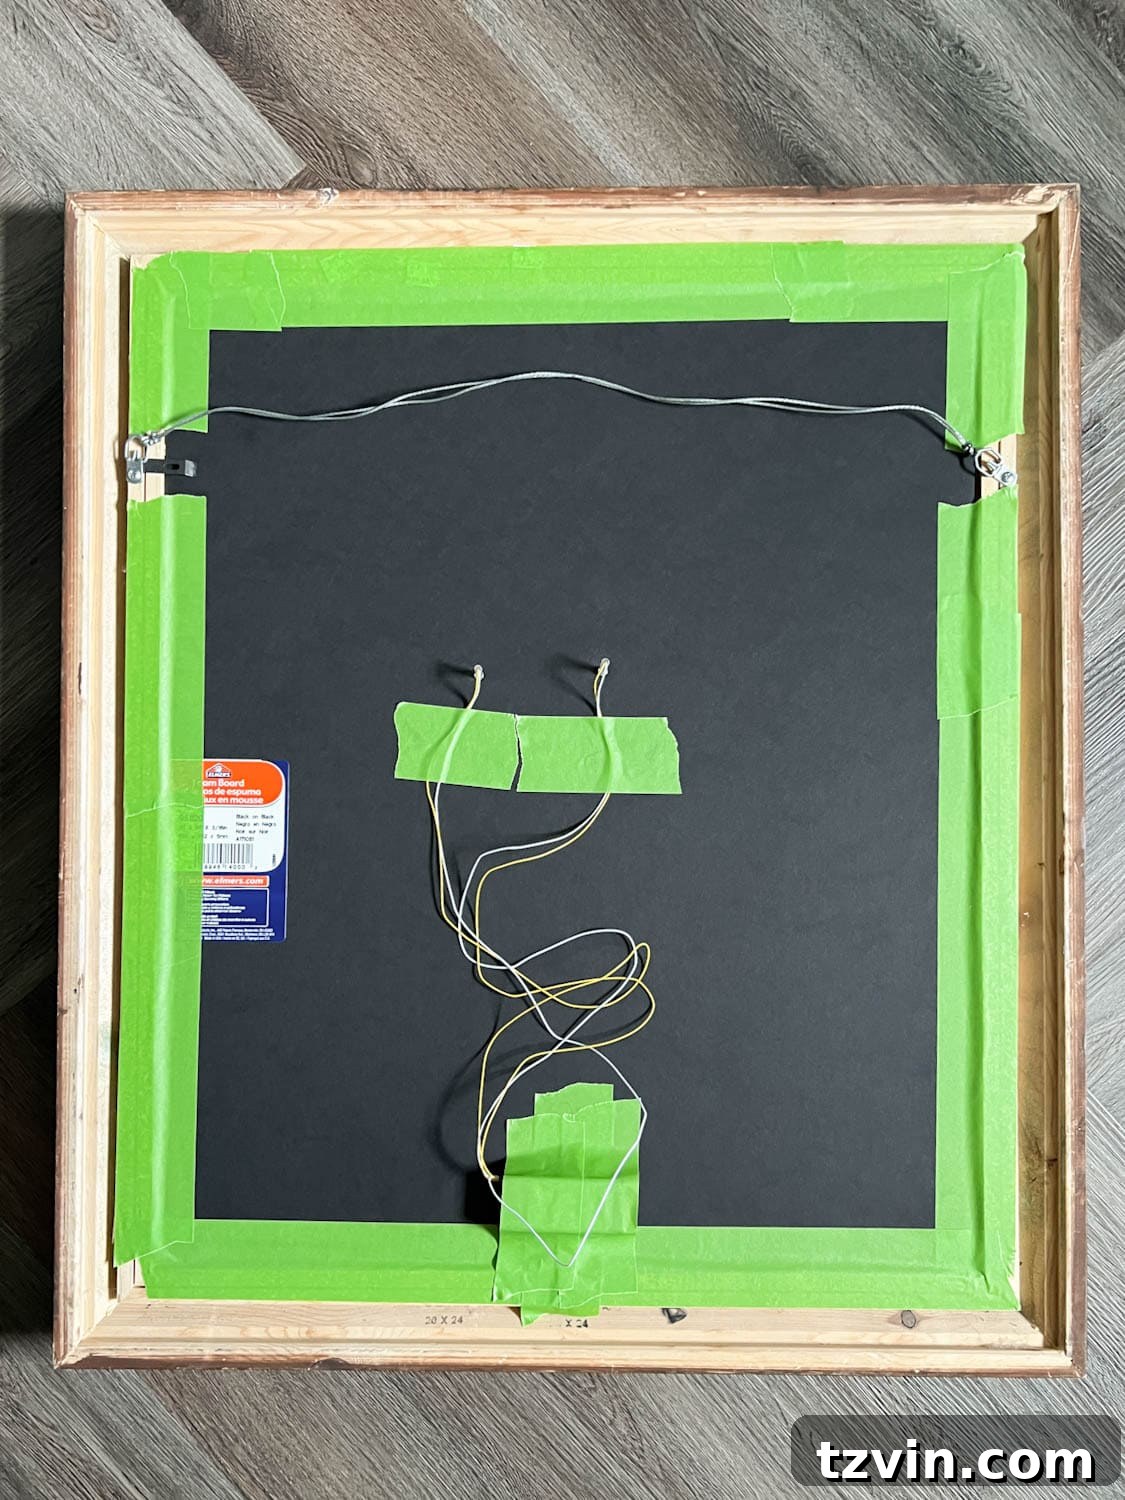
Step 6 – Hang Your Haunting Art with Command Strips for Easy Installation
With your glowing art assembled, it’s time to display it! For a temporary and damage-free hanging solution, especially fitting for seasonal decor, Command hanging strips are ideal. These strips use Velcro fasteners and strong adhesive to securely hold frames without nails. Be sure to follow the specific directions on the back of the Command package precisely to ensure maximum adhesion and stability.
Typically, this involves separating the strips, pressing them firmly together, attaching one side to the frame and the other to the wall, and then pressing each Velcro strip for at least 30 seconds. A crucial tip is to allow the adhesive to “set up” for at least an hour before actually hanging the picture frame on them. This curing time ensures the adhesive forms a strong bond, preventing your magnificent, creepy Halloween art from taking an untimely tumble. Choose a prominent spot in your entryway, living room, or even your Halloween party zone to showcase your chilling creation!
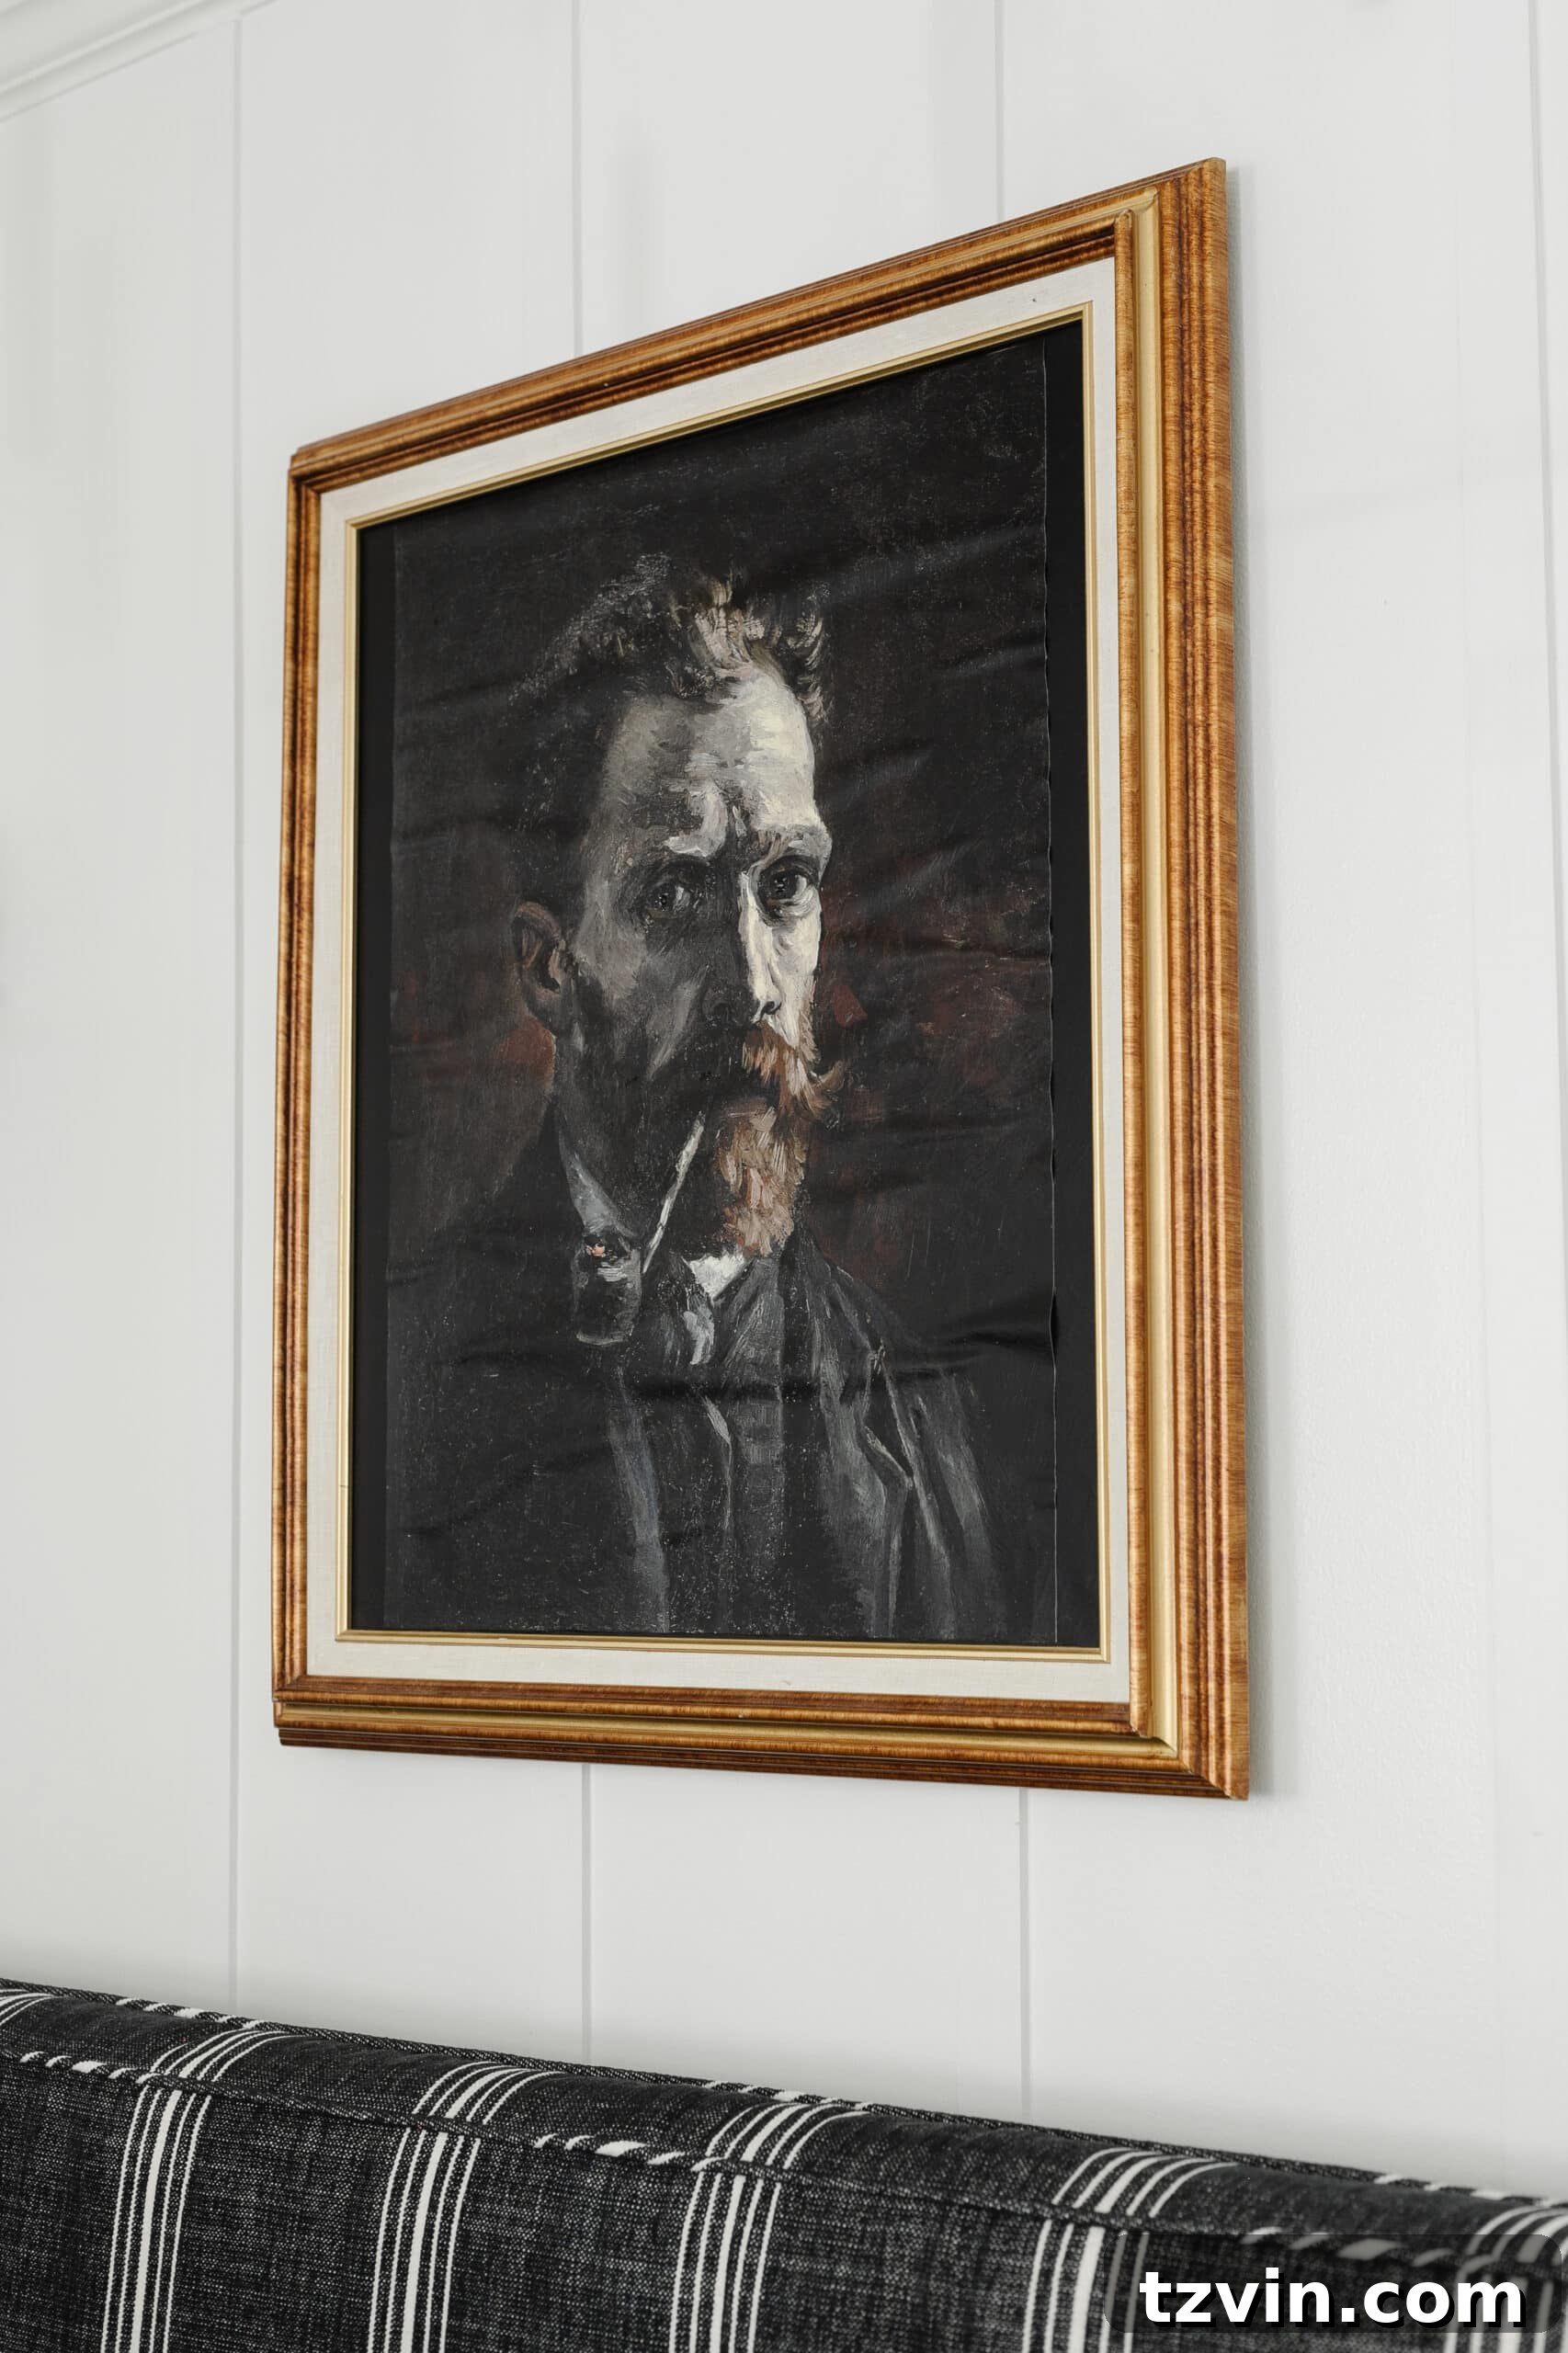
Behold: The Finished DIY Creepy Halloween Wall Decor
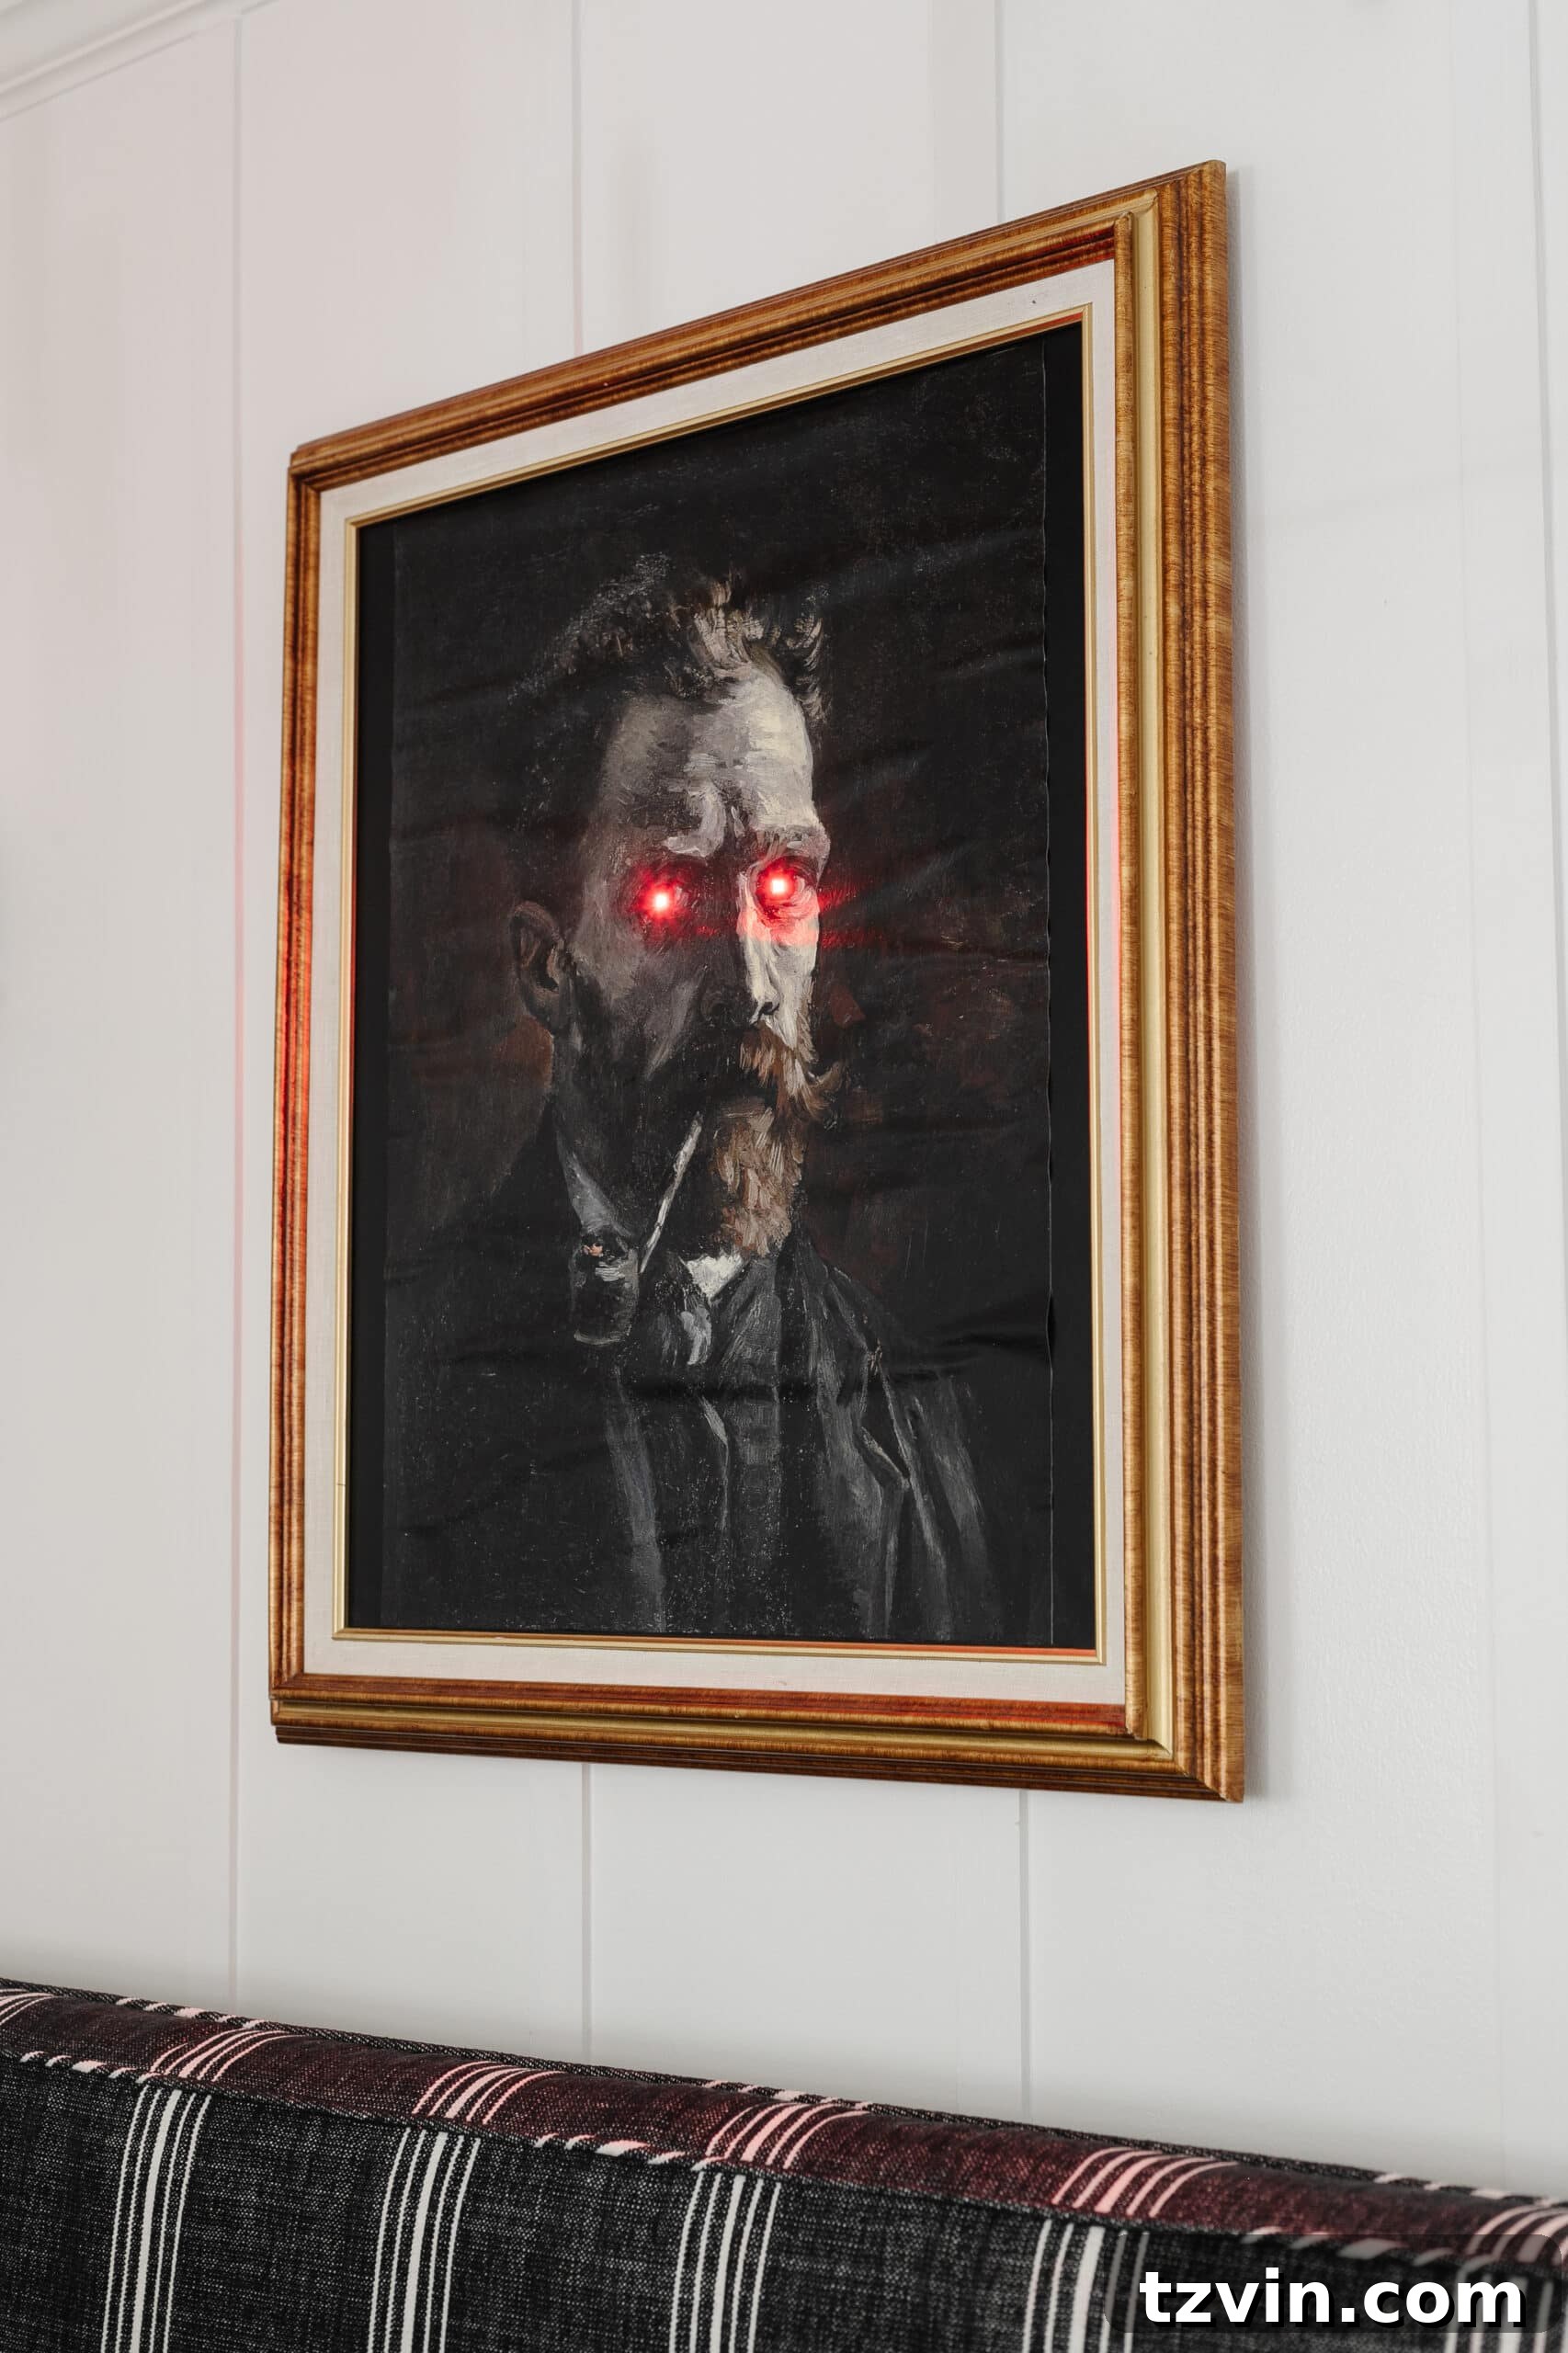
And there you have it! The transformation is complete, and the results are truly spectacular. This DIY Halloween art turned out to be even more wonderfully creepy and cool than I had envisioned. The moment those red eyes light up, the entire room takes on an instantly eerie and festive Halloween atmosphere. It’s the perfect blend of classic artistry and playful spookiness, a true highlight for any macabre decor enthusiast.
By the way, as you gaze into those glowing eyes, do you recognize the familiar face in this portrait? I’ll give you a few hints: He famously painted this very portrait of himself, and he’s equally renowned for another “glowing” starry artwork. Yes, it’s Vincent van Gogh, or as my kids, Regan and Olivia, affectionately call him, “Vinny.” They often walk past the art, cheerfully waving and saying, “Hi, Vinny!” It’s amusing how unfazed they are by the glowing eyes, which just goes to show how adaptable this piece is.
The beauty of this glowing portrait lies in its versatility. It’s just scary enough with the piercing red eyes to set a spooky mood. However, with a simple flick of a switch on the battery pack, you can turn off the glow, and “Vinny” reverts to being just a regular, intriguing portrait hanging on the wall. This makes it suitable for various occasions and comfort levels. Imagine the impact of this piece as front door decor on Halloween night, welcoming trick-or-treaters with its mysterious gaze, or as a focal point for your Halloween party’s wall hangings. It’s a statement piece that truly elevates your festive decor.
Now that this captivating Halloween art craft is complete, my next project is to whip up some enchanting table decor in the breakfast nook. The goal is to create a cohesive theme for a fun and slightly spooky Halloween dinner party with the girls. It’s truly amazing how deeply I’ve delved into the DIY Halloween craft scene this year compared to previous ones. I’m having an absolute blast exploring new creative avenues, and honestly, there’s no such thing as “too much fun” when it comes to crafting, is there?
The best part about this thrift store transformation is its potential for reusability. Once Halloween has passed and the spooky season winds down, this elegant picture frame and its sturdy backing can easily be repurposed. Perhaps it could host a festive Christmas art print, bringing new life to your holiday decor. The possibilities are endless, making this project not just a seasonal delight but a sustainable craft that keeps on giving. What do you think? Should Vinny transform into a jolly Santa next?
Explore More Vintage Halloween Decor and Spooky Art Ideas
If you’re inspired by this project and eager to dive deeper into creating a truly enchanting and eerie Halloween ambiance, you’ve come to the right place. We believe that Halloween decor doesn’t have to be garish; it can be elegantly spooky and infused with vintage charm. Expand your Halloween horizons with these additional resources, offering more ideas for vintage decor, printable art, and haunted house transformations:
- 30 Elegant Vintage Halloween Decor Essentials: Discover timeless pieces that bring a sophisticated chill to your home.
- 10 Vintage Halloween Art Printables & Spooky Entryway: Instantly download and print atmospheric art to adorn your walls and welcome guests with a ghostly charm.
- DIY Haunted House Halloween Decor in the Entryway: Learn how to transform your entryway into a captivating haunted space, setting the perfect tone for Halloween.
- Halloween Foyer Chest and Vintage Skeleton Printable: Get creative with a spooky foyer display, featuring an antique chest and a classic skeleton printable for a touch of Gothic elegance.