
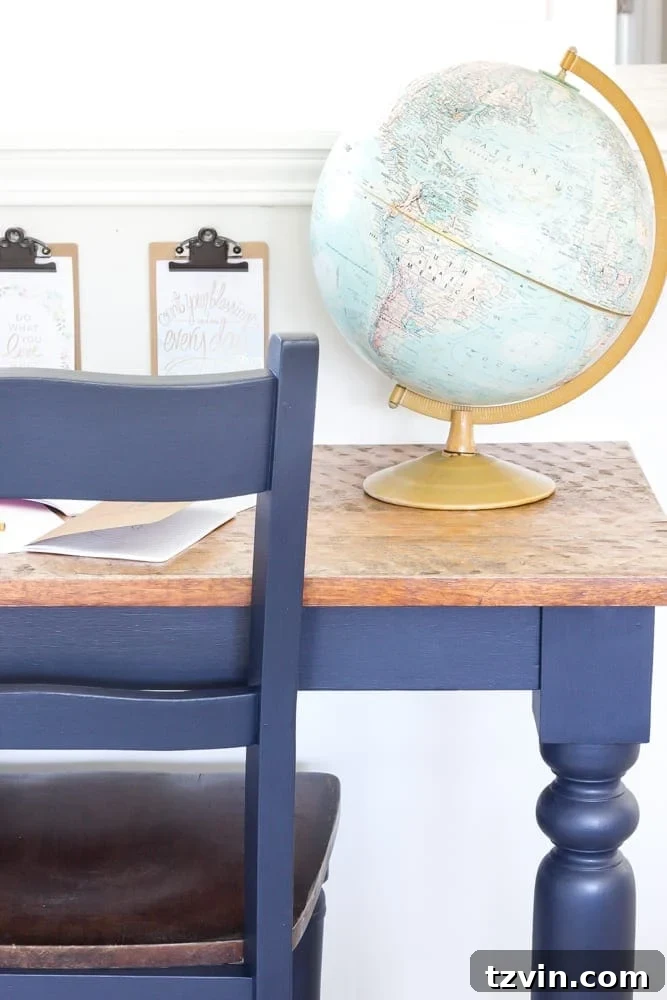
Boom! Just like that, we’ve crossed the halfway mark of the One Room Challenge, and what a journey it’s been so far! While some weeks leave me feeling like I need a paper bag to breathe, this past week has actually been incredibly smooth sailing. After the significant undertaking of installing our custom built-in bookshelves and painting the entire upstairs space, we moved on to a project that sounds a little… drastic: sawing a perfectly good kitchen table in half.
UPDATE: See the full eclectic farmhouse playroom makeover reveal here!
Transforming a Kitchen Table into Custom Wall-Mounted Desks for a Playroom
Yes, you read that right – sawing it right down the middle! I was so laser-focused on bringing this vision to life that I completely neglected my blogger duties and didn’t even snap a single photo of the actual cutting process. My apologies for that oversight, but sometimes creativity takes precedence over documentation! However, if you’ve been following our playroom makeover journey, you’ll remember the “before” state of this particular half-wall:
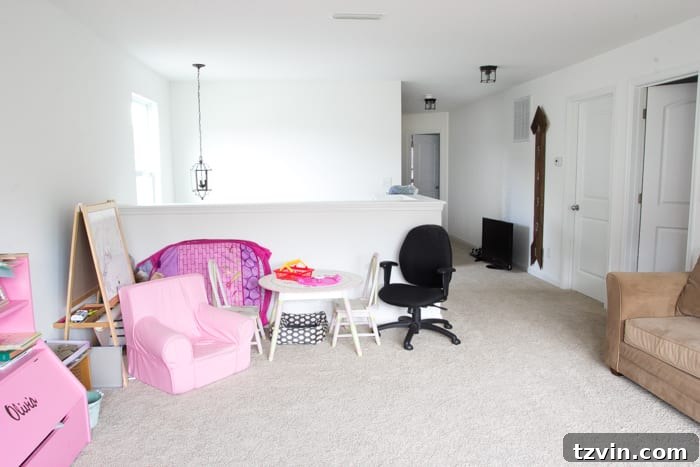
The Playroom Half-Wall Dilemma: From Awkward Space to Functional Workspace
This wall truly stumped me for an extended period. Half-walls can be notoriously challenging when it comes to furniture placement and maximizing a room’s potential. It took considerable thought to devise the best furniture arrangement that would not only look good but also serve a practical purpose in our evolving playroom. My ultimate goal for this area was to create dual workspaces – one for my daughter, Olivia, for her creative endeavors like Play-Doh, coloring, and eventually homework, and another for me, where I could blog, craft, or handle emails while still being fully present and interacting with her as she played. The dream was to achieve a multi-functional space, embodying the #MultitaskingMommyForTheWin philosophy.
The solution? Custom wall-mounted desks! This approach would utilize the otherwise wasted vertical space, provide designated activity zones, and maintain an open feel in the playroom. Turning an old kitchen table into two new desks was the perfect, budget-friendly DIY solution.
Sourcing the Perfect Table for Our DIY Desks
To kickstart this project, I scoured online marketplaces for a solid wood kitchen table. My search led me to a fantastic deal on Craigslist: a sturdy, solid wood kitchen table with four ladder-back chairs, all for a mere $100. I immediately recognized its potential; the robust construction made it an ideal candidate for cutting in half and transforming into two durable, wall-mounted desks. Finding a piece with good bones is crucial for upcycling projects like this, as it ensures longevity and stability.
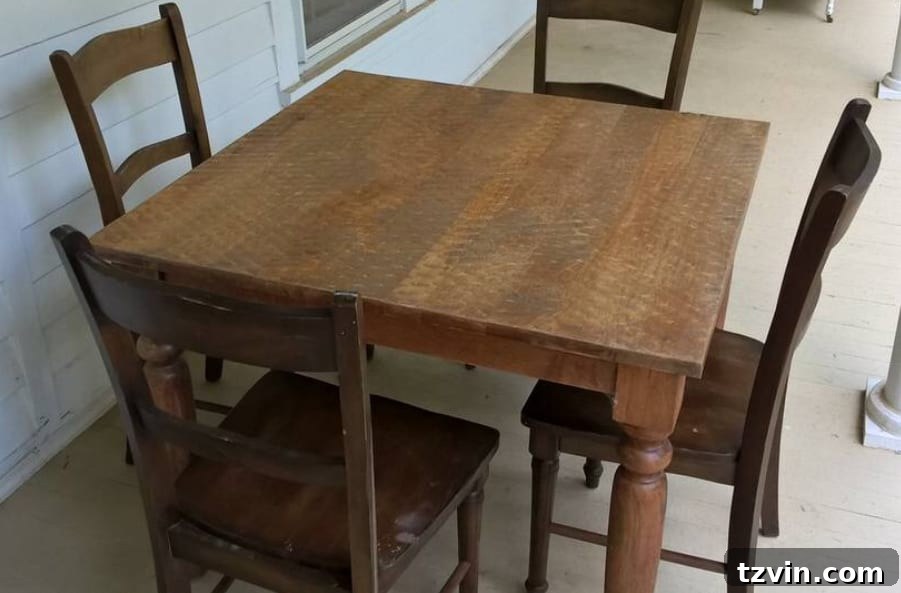
Essential Tools & Materials for Your Wall-Mounted Desk Project
Before diving into the construction, gathering your supplies is key. For convenience, I’ve provided affiliate links to some of the specific products I used. (For more details on affiliate disclosures, please see my full disclosure here.)
- Solid Wood Table: The foundation of your desks. Look for sturdy construction.
- Circular Saw: Essential for a clean, straight cut through your table. Safety precautions are paramount when operating power tools.
- Tape Measure: For precise measurements to ensure your desks are level and evenly sized.
- Pencil: To mark your cut lines and stud locations.
- Level: Absolutely critical for ensuring your desks are installed perfectly horizontal and stable.
- 2″x4″ Board: This will serve as the essential wall support system for your desks, distributing weight and providing stability.
- 1 3/4″ Wood Screws: For securely attaching the desk tops to the 2×4 support.
- 2 1/2″ Wood Screws: Longer screws needed to anchor the 2×4 support directly into wall studs.
- Fusion Mineral Paint in Midnight Blue: My choice for a durable, beautiful finish. This paint requires minimal prep and offers excellent coverage.
- 1 1/2″ Angle Brush: My preference for achieving smooth, even paint application, especially in corners and edges.
Step-by-Step Guide: Crafting Your Repurposed Wall-Mounted Desks
Even without a photo of the cutting itself, the process for transforming the kitchen table into two functional desks was straightforward. My husband, Robert, and his dad were instrumental in bringing this part of the project to life. Their assistance ensured a safe and efficient execution, especially when working with power tools.
1. Preparing the Table: Precise Measurement and Cutting
The first step involved careful measurement. We used a tape measure to pinpoint the exact center of the table top. Once the midpoint was identified, a straight line was traced down the middle with a pencil, serving as our guide. With the line clearly marked, we meticulously cut the table in half using a circular saw. Precision here is key for creating two symmetrical desk halves. Always ensure your workspace is clear and wear appropriate safety gear when using power tools.
2. Enhancing Stability: Notching the Table Apron
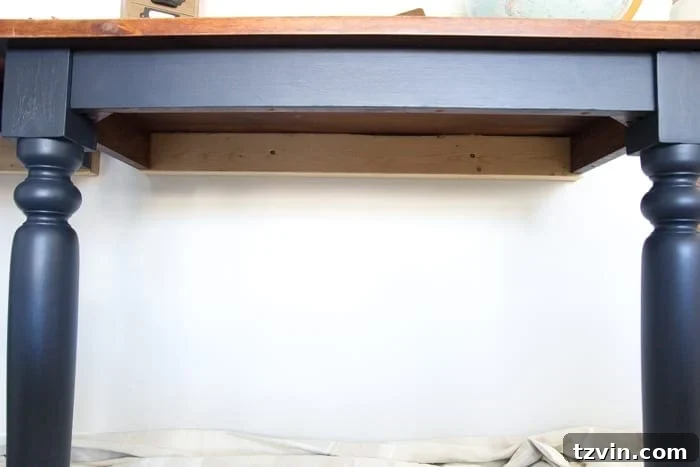
To provide extra security and ensure a flush, sturdy fit against the wall, we made a strategic modification. We carefully cut out a section from the table apron (the decorative frame beneath the tabletop) that matched the depth of the 2×4 support board. This allowed the 2×4 to sit snugly within the apron, reinforcing the connection and making the desk incredibly stable once mounted.
3. Installing the Wall Support: The Crucial 2×4
Next, we prepared our 2″x4″ board. It was cut to the exact width of one of the table halves. Using a stud finder, we located the wall studs, which are essential for anchoring the desks securely. With the studs marked, we then used a level to ensure the 2×4 was perfectly horizontal before screwing it to the wall. We used 2 1/2″ wood screws to fasten the 2×4 into the studs, making sure it was firmly attached and could bear weight.
4. Mounting the Desk Halves
With the 2×4 support securely in place, the final structural step was to attach the half-table tops. We positioned each half-table onto the 2×4 support. From the top side of the table, we then drove 1 3/4″ wood screws down into the 2×4, effectively creating an instant, sturdy, wall-mounted desk. It was incredibly satisfying to see the vision come to life so quickly and efficiently!
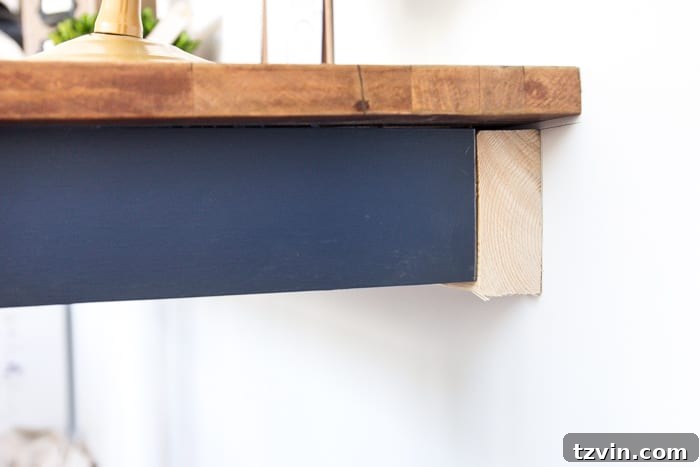
We performed one final check with the level to ensure everything was perfectly aligned and secure. These desks are incredibly sturdy; I’m confident they could withstand even the most enthusiastic play sessions from Olivia (though I sincerely hope she doesn’t use them as a climbing frame!). This robust installation provides peace of mind, knowing they are built to last and safe for a busy playroom environment.
Here’s a clear shot of the 2″x4″ support board, firmly secured with screws underneath one of the newly mounted desks, illustrating the simplicity and effectiveness of this robust installation method.
Adding a Pop of Color: Painting with Fusion Mineral Paint Midnight Blue
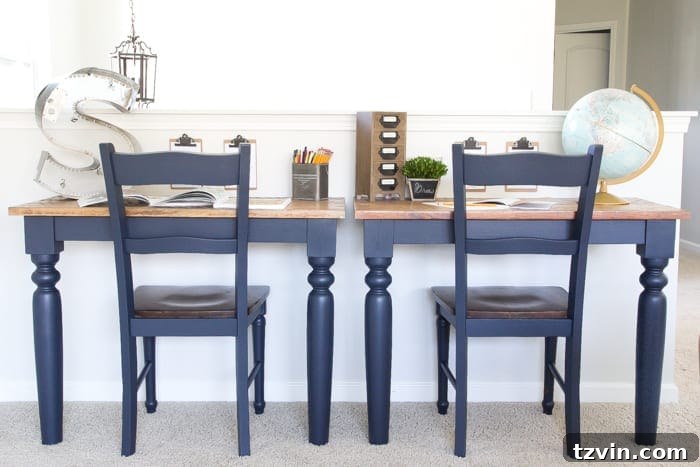
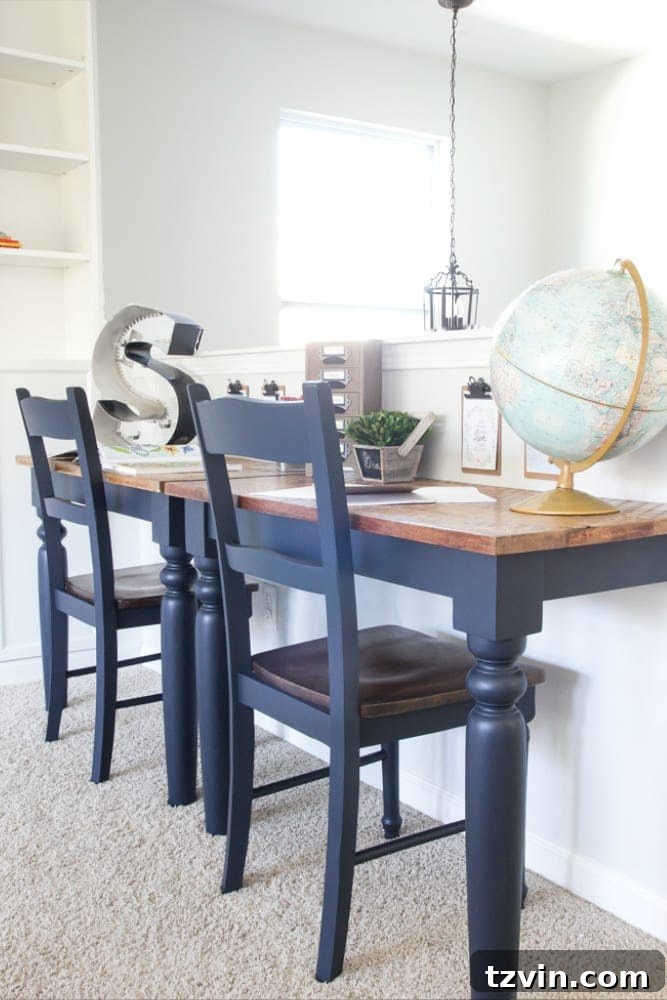
With the structural work complete, it was time to add some personality! Our playroom walls are painted in a very light, airy gray (Behr Seagull Gray), which provides a serene backdrop. To introduce a striking contrast and depth, I chose Fusion Mineral Paint in Midnight Blue for the desk bases. This rich, deep blue hue instantly elevates the repurposed tables, giving them a sophisticated and playful touch that fits perfectly with our eclectic farmhouse aesthetic. Fusion Mineral Paint is renowned for its exceptional coverage and built-in topcoat, making it an ideal choice for high-traffic areas like a playroom. It cured to a beautiful, durable matte finish that can withstand daily use and cleaning without compromising its vibrant color.

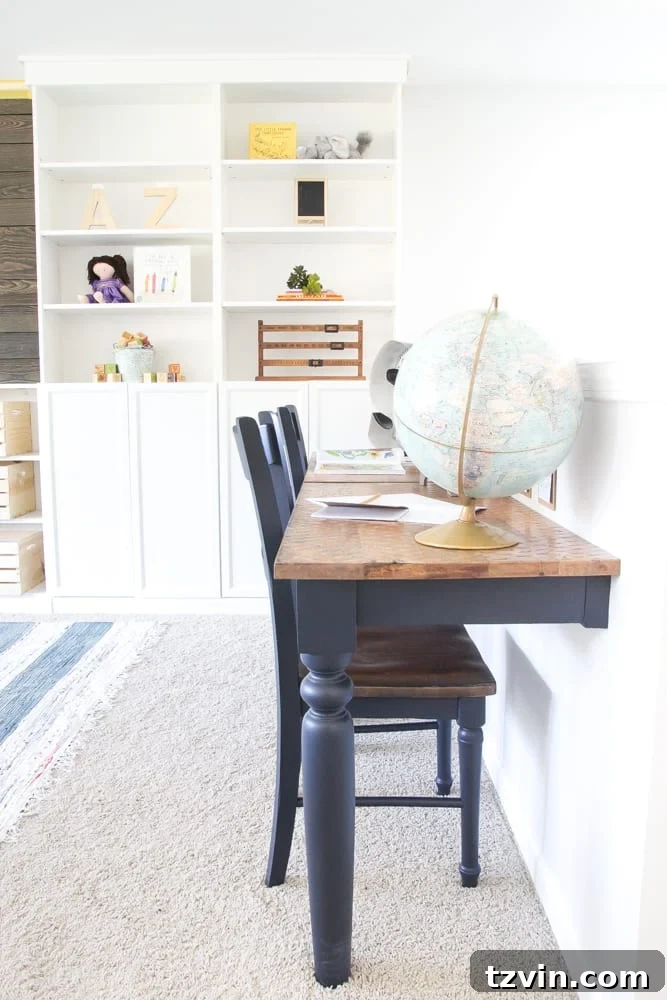
Since the original kitchen table came with four chairs, I decided to paint two of them to match the new desks. These two chairs now provide comfortable seating for both Olivia and me. The remaining two chairs will likely find a new home in a yard sale, turning our initial $100 investment for the entire set into an even more budget-friendly solution for two custom desks and two coordinating chairs – essentially $50 per desk setup! That’s an unbeatable deal for custom, high-quality furniture, showcasing the power of creative repurposing.
Styling Our New Desks: Personal Touches and Functional Decor
Now for the fun part: decorating and making these desks truly ours! I love incorporating unique, pre-loved items into our decor, giving our home a sense of history and personality.
One of my favorite finds is this fantastic “S” that a very sweet friend salvaged from a Starbucks dumpster. Yes, you read that right – a dumpster! After a thorough sanitization, of course, it found its perfect spot here. I’ve contemplated painting it, but for now, its raw, industrial charm adds an unexpected, edgy touch that I absolutely adore. It’s a true conversation starter!
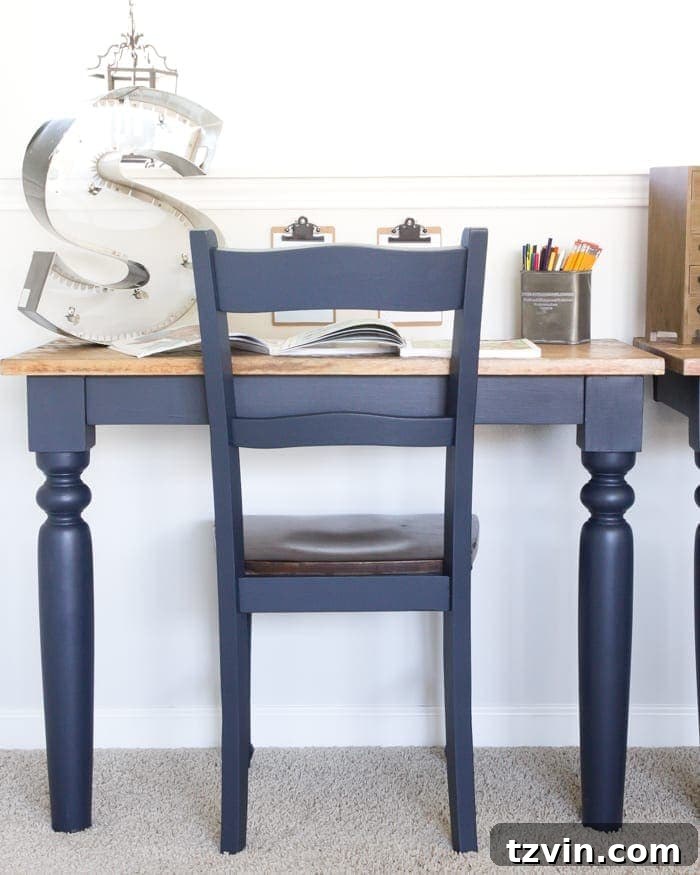
Another thrift store gem is this charming globe, which I snagged for a mere $5. It’s perfect for adding a touch of vintage appeal and a subtle educational element to Olivia’s workspace. Budget-friendly finds like these are often the most impactful in creating a curated and lived-in feel.
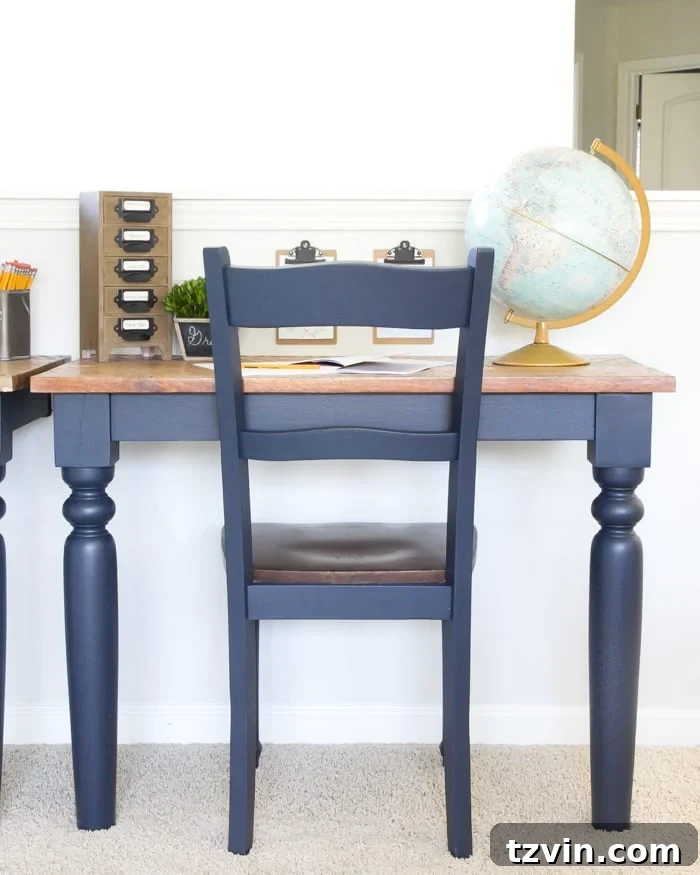
Now, Olivia has her very own handy-dandy coloring and creative desk. It’s a dedicated space where she can unleash her imagination, practice her drawing, or tackle future homework assignments. Providing children with their own functional and inviting workspace can greatly encourage creativity and focus.
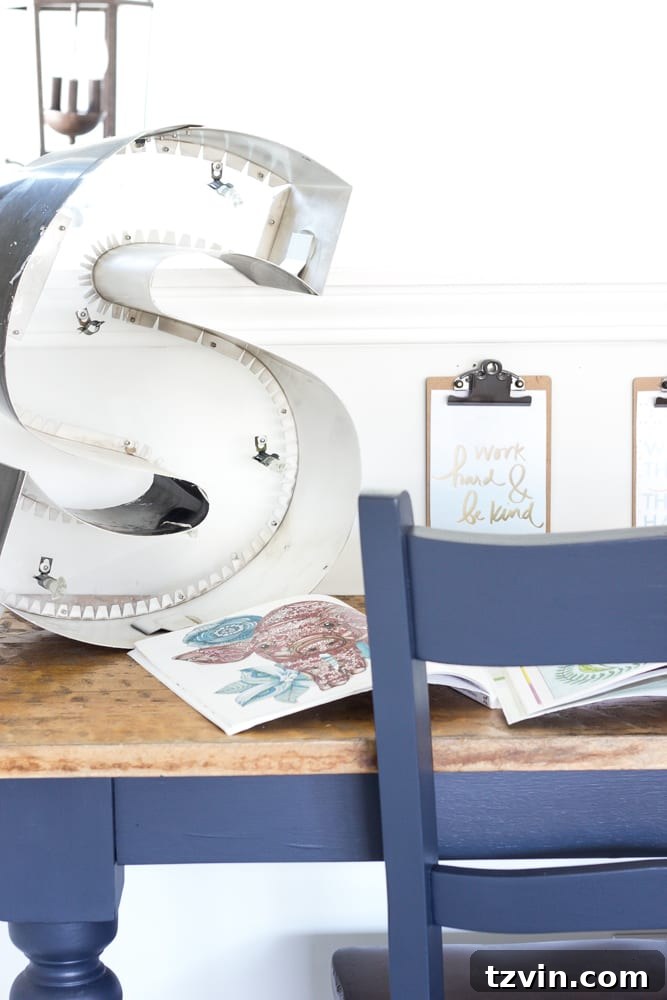
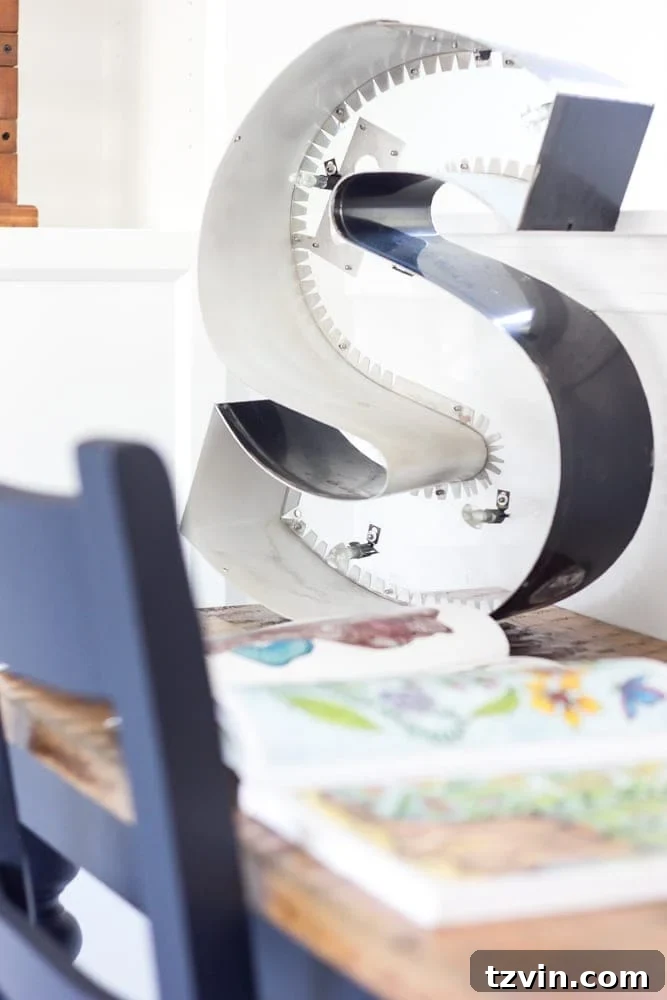
And I have my go-blog-crazy desk! This is where I can spread out my to-do lists, dive into emails, brainstorm new DIY projects, and wield my hot glue gun with abandon, all while Olivia happily tosses Legos around like confetti nearby. It’s the perfect setup for a busy mom who craves both productivity and connection. Woo to the hoo!
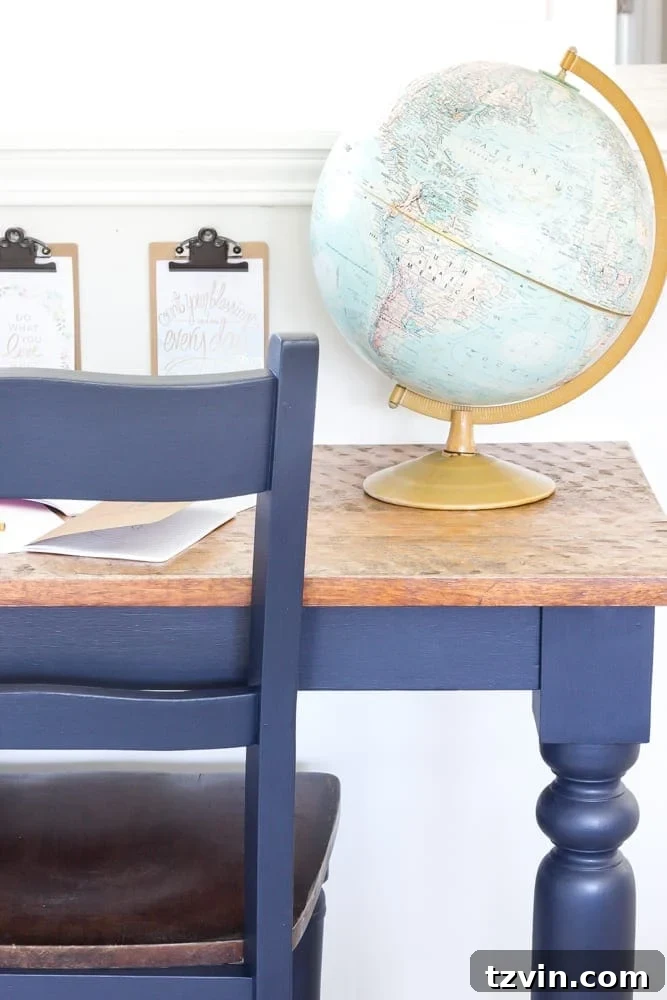
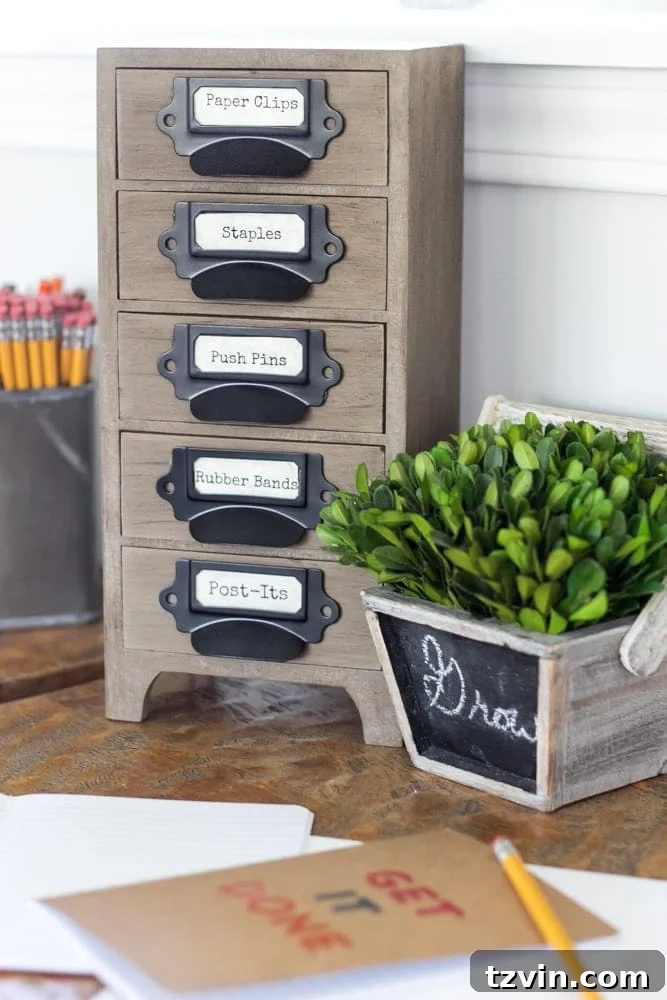
To keep my own office supplies neat and accessible, I repurposed this industrial jewelry box. It’s a stylish and practical way to store pens, notepads, and other essentials, keeping the desk clutter-free and ready for action.
Playroom Progress Update: What’s Next on the To-Do List?
With the installation and styling of these incredible wall-mounted desks, this side of the playroom is officially taking shape! While I’ve randomly placed a few items on the shelves for now, the final decorative touches will come later as I fine-tune the overall aesthetic. You might even catch a glimpse of the reclaimed wood wall in the background, which is nearing completion – I can’t wait to share more about that exciting feature soon! The creative energy in this space is truly building.
Next on the agenda are those wood crates, which are eagerly awaiting their paint transformation. And yes, we have a rug! I recently shared a roundup of some of my favorite playroom rug contenders, but this particular one fit the space perfectly and is even more stunning in person. Stay tuned for a dedicated post revealing its beauty and how it ties the room together. These elements, combined with the new desks, are making the playroom a truly inviting and functional space.
Our Playroom Makeover To-Do List: Progress Report
Here’s a snapshot of where we stand on our ambitious playroom transformation:
- DONE: Install built-in bookcases – Providing essential storage and display space.
- DONE: Paint and install desks – Our custom wall-mounted workstations are complete!
- DONE: Paint walls – A fresh, neutral backdrop for creativity.
- DONE: Find a great colorful rug – Adding warmth, texture, and a pop of color underfoot.
- DONE: Install ceiling fan – More on this functional addition soon!
- ALMOST DONE: Frame and paint window – Just a few finishing touches remaining.
- ALMOST DONE: Install reclaimed wood wall – Adding a beautiful focal point and rustic charm.
- Make oversized storybook art – A whimsical touch for a child’s space.
- Hang curtains – For privacy, light control, and added softness.
- Paint wood crates – Another DIY project to enhance storage.
- Slipcover sofa – Refreshing existing furniture for a cohesive look.
- Find and makeover a coffee table – A central element for play and relaxation.
- Decorate shelves – The final layer of styling and personality.
- Implement and organize a toy storage system – Essential for a tidy playroom.
Reflections and Anticipation for the Final Reveal
The progress we’ve made feels incredibly satisfying. Olivia and I are already planning our first official crafting session at our new desks – a perfect way to celebrate! This project has also sparked an idea: perhaps Robert and I should look for more “unconventional” items to saw in half and repurpose. Imagine a Willy Wonka-esque office, filled with unexpectedly transformed furniture pieces! It would definitely be all the rage, don’t you think?
I genuinely cannot wait to share our Week 4 update with you. Each step brings us closer to the grand unveiling. And, to be completely honest, I’m already eagerly anticipating the final reveal of the entire playroom makeover – but that’s probably pretty obvious to anyone following along!
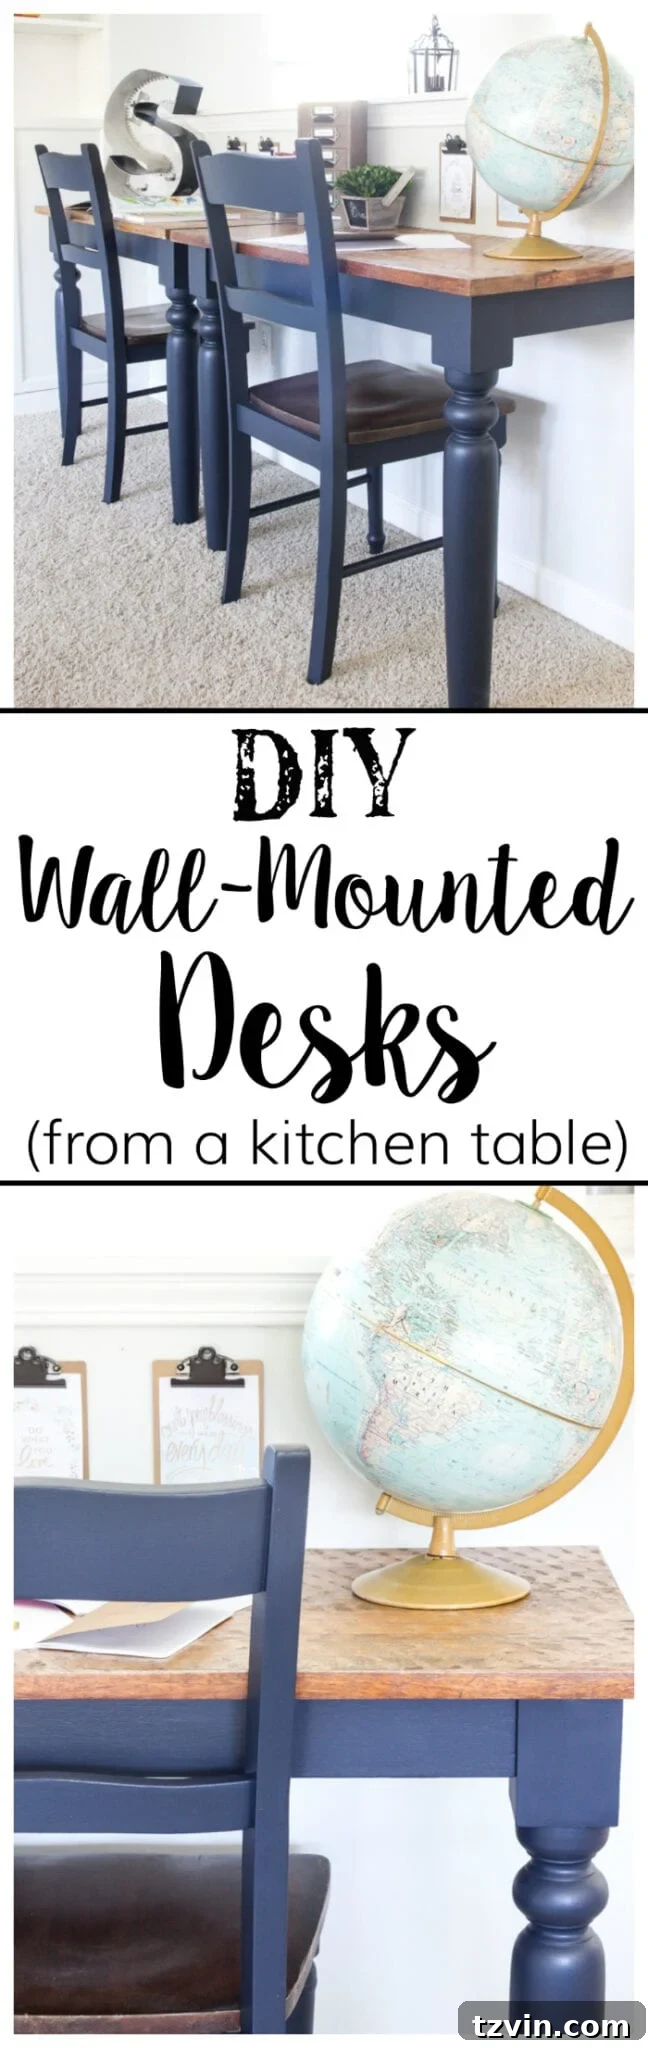
If you found inspiration in this DIY desk project and want to save it for your future home improvement endeavors, feel free to pin it here:

*This post was sponsored by Fusion Mineral Paint. As always, my opinion of my favorite furniture paint is 100% my own, and I only recommend products I genuinely love and use in my own home.