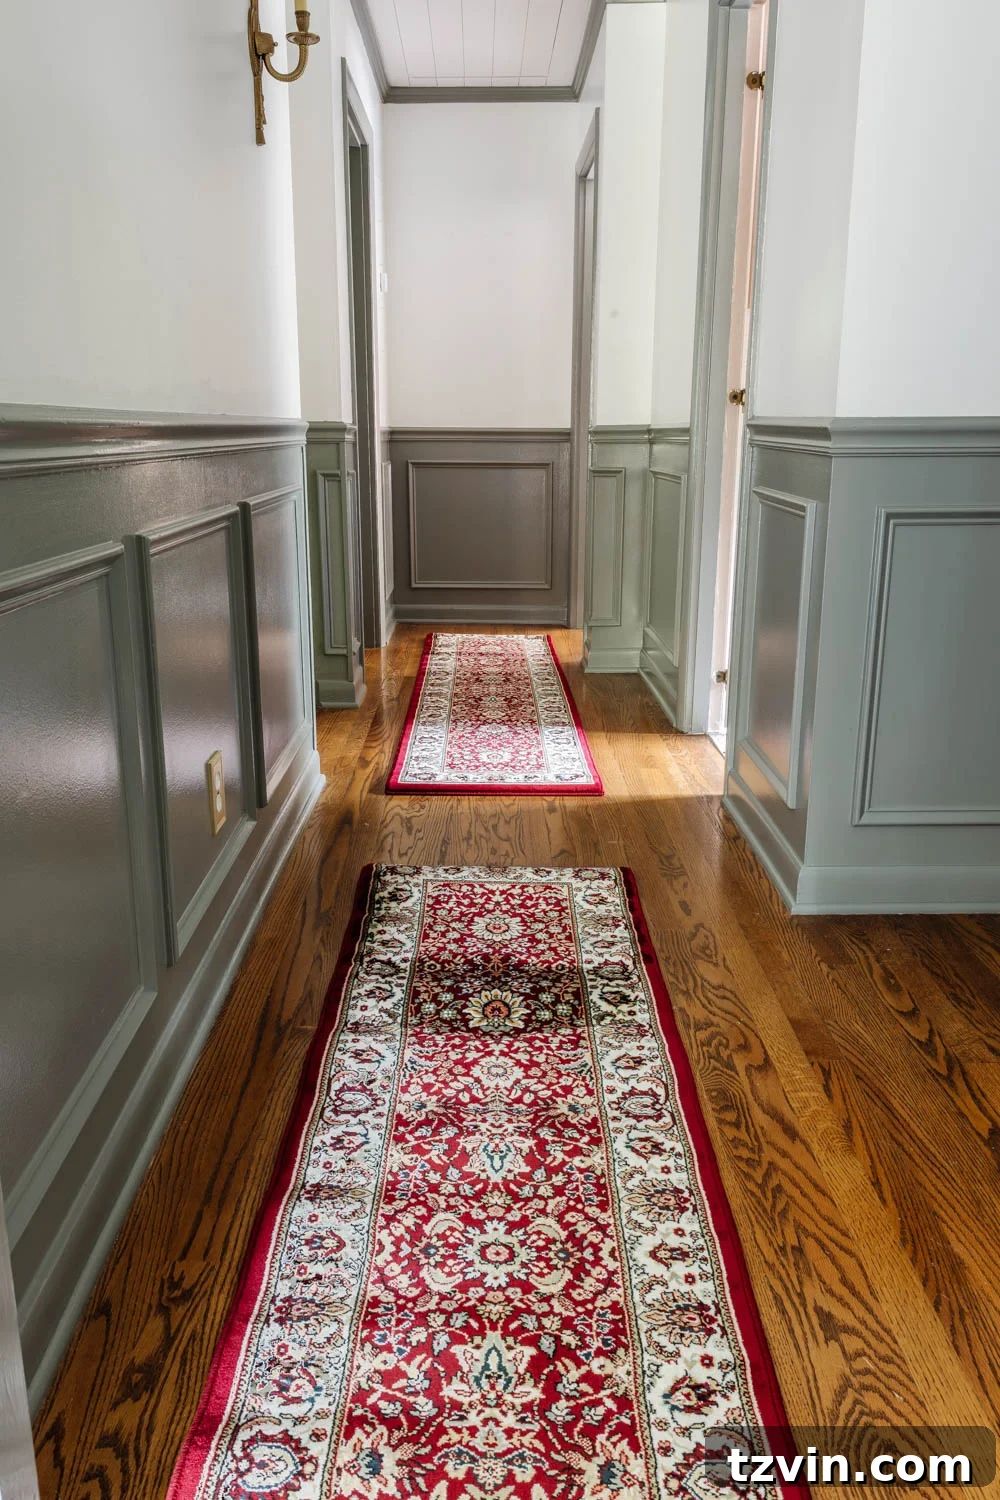
If you’ve ever embarked on the sometimes-treacherous journey of finding the perfect rug, you know it can feel like a quest for a mythical creature. The struggle is undeniably real when you’re searching for that ideal piece that perfectly aligns with your vision for color, pattern, material, and, crucially, size. More often than not, when you finally stumble upon “the one,” it’s either perpetually out of stock or carries a price tag that rivals a down payment on a new car. This common dilemma leaves many homeowners feeling stuck, forced to compromise on their design dreams or blow their carefully planned budget.
However, what if there was a clever, budget-friendly solution that allowed you to achieve that elusive custom fit and designer look without the exorbitant cost? Imagine being able to tailor a rug precisely to your space, transforming a design challenge into a creative triumph. This innovative DIY method empowers you to take control of your home decor, turning seemingly incompatible rugs into a cohesive, perfectly proportioned statement piece. Get ready to unlock the secret to creating a high-end, custom-sized rug runner that looks effortlessly integrated into your home, all while keeping your finances firmly intact.
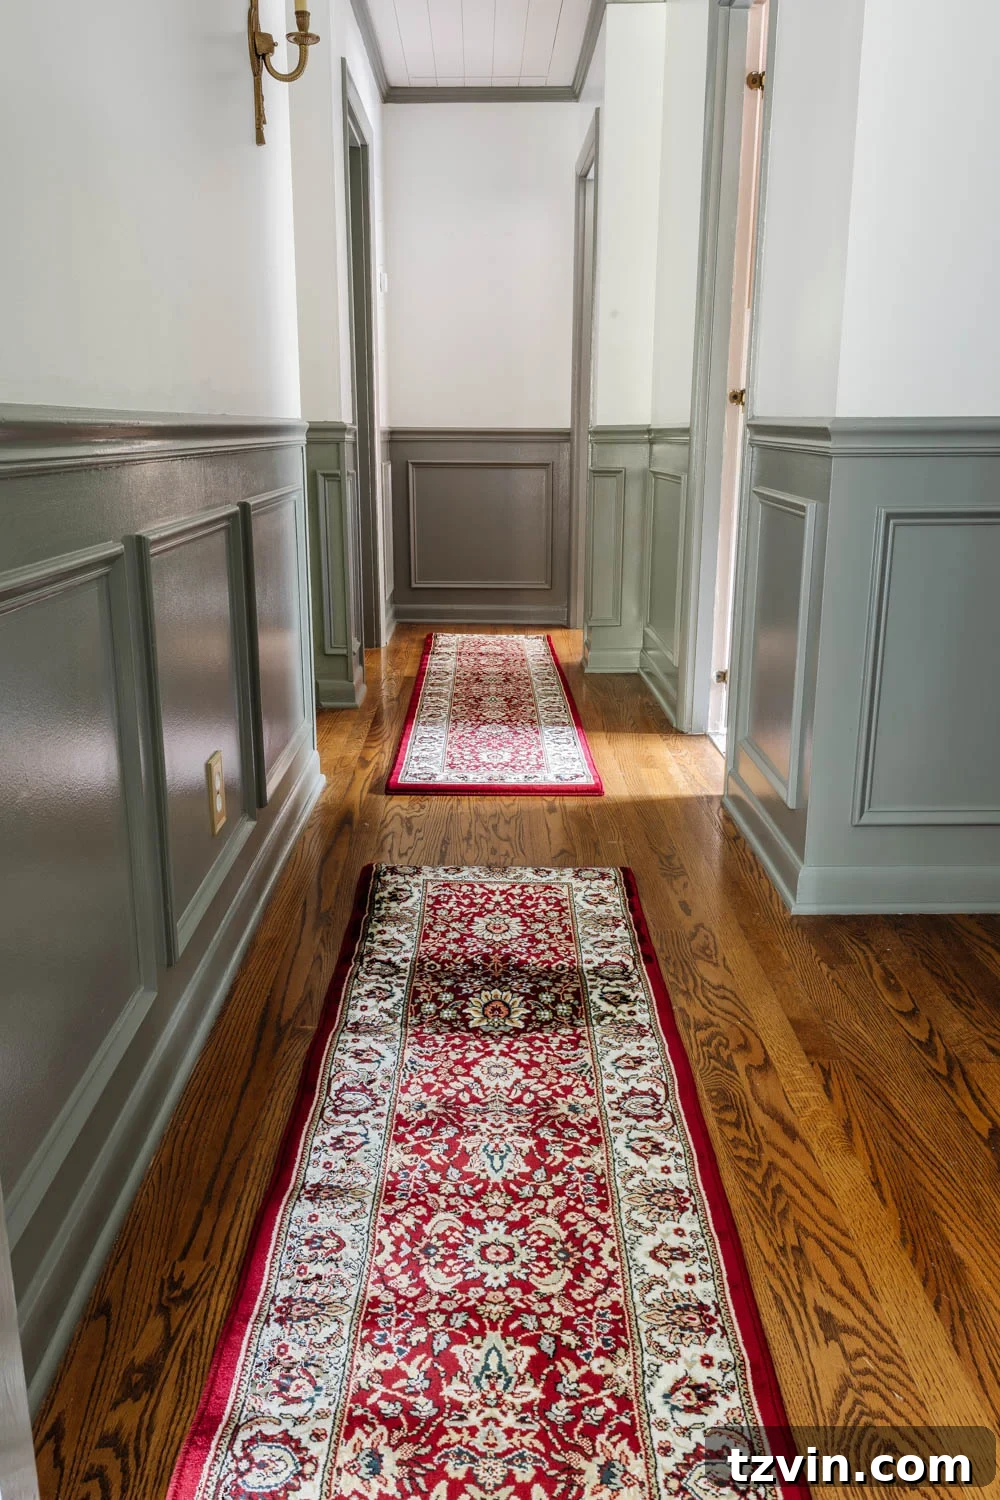
My own journey into this ingenious hack began while deep in the midst of our upstairs hallway makeover. I envisioned a specific aesthetic for the long, narrow space: a rich, vintage-style runner in a striking shade of red. This vibrant accent would provide a much-needed pop of color against our freshly painted Sherwin Williams Willowleaf wainscoting, tying the entire hallway’s design together. After extensive searching, I finally found what seemed like the perfect rug – an exquisitely patterned piece priced at an unbelievable $69. The only catch? It was approximately five feet too short for our expansive hallway. The disappointment was palpable, but giving up wasn’t an option when the style and price were so perfect.
Instead of abandoning my vision or settling for a compromise, I decided to embrace creativity. What if I could take two of those perfectly styled, affordably priced shorter runners and transform them into one seamless, custom-length rug? The idea sparked a new DIY adventure. I purchased two identical rugs and, with a bit of ingenuity and a few simple tools, successfully joined them together. The result was a stunning, long runner that fits our hallway with absolute precision, creating a truly bespoke look without the custom price tag. This clever rug hack proved to be a game-changer for achieving my desired aesthetic.
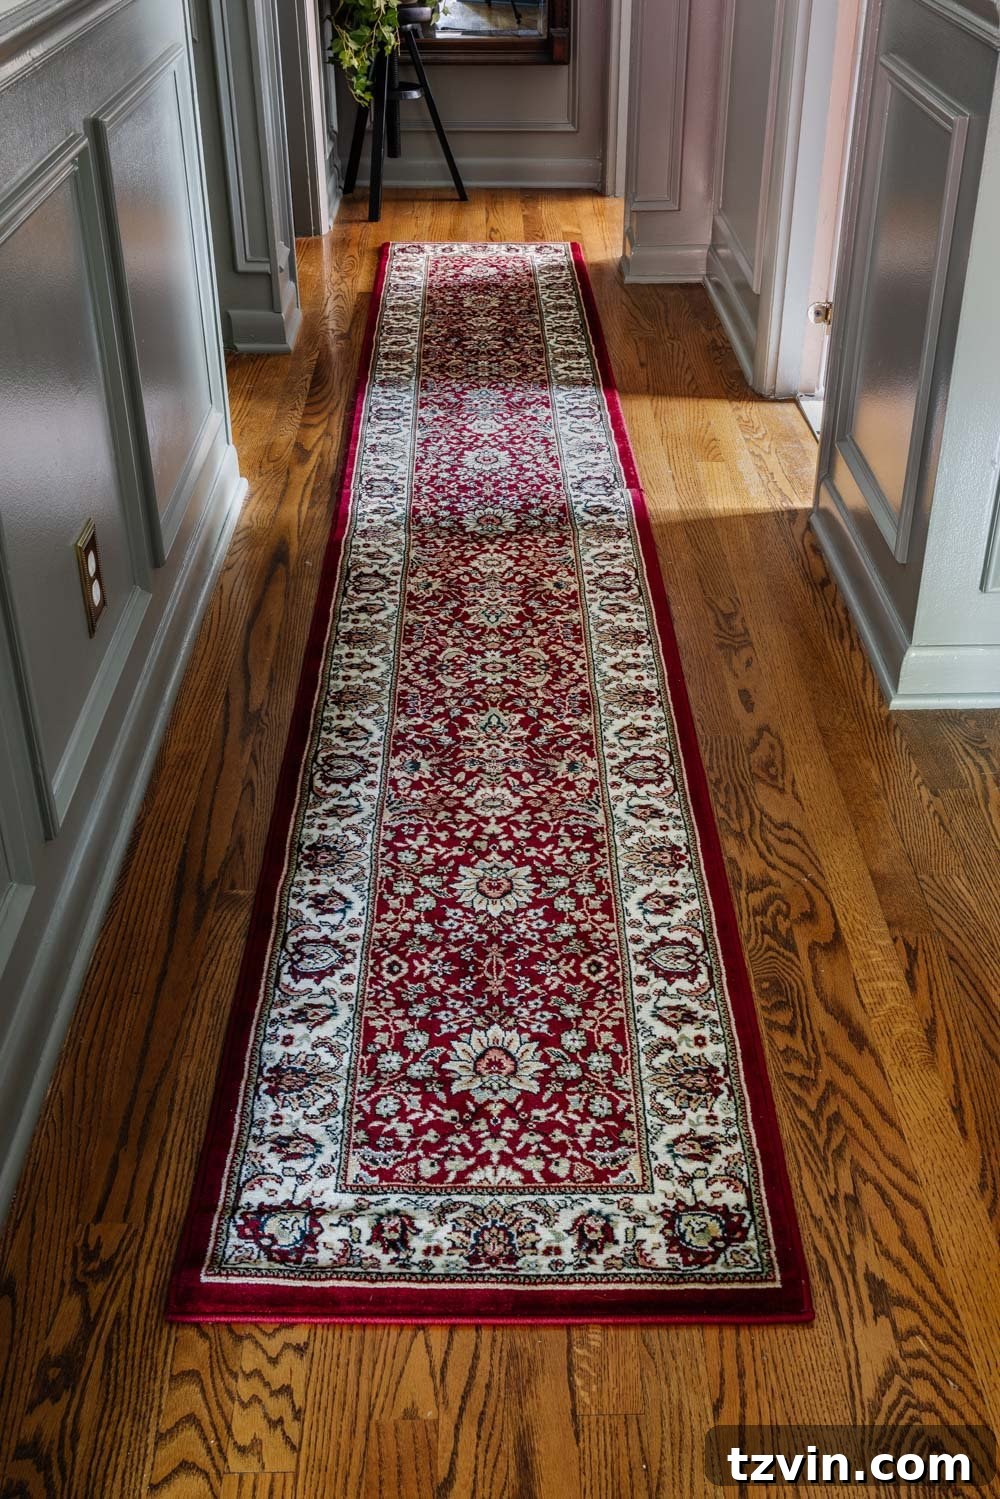
If you’ve ever grappled with the challenge of finding a rug that’s just the right size, or if you’ve wondered how to achieve a high-end, custom look without stretching your budget, then this guide is for you. I’m excited to share the exact method I used to combine two standard rugs into a single, perfectly tailored runner. This detailed, step-by-step tutorial will equip you with all the knowledge and tips you need to confidently tackle your own custom rug project, proving that a little DIY spirit can go a long way in home decoration. Let’s dive into how you can seamlessly join rugs to create a custom size runner that elevates your space.
How to Join Rugs to Create a Custom Size Runner: Your Essential DIY Guide
This little DIY trick isn’t just a craft project; it’s a strategic solution for anyone looking to customize their home decor on a budget. It allows you to transform readily available, affordable rugs into bespoke pieces that perfectly fit your unique spaces, from sprawling hallways to cozy nooks. The process is straightforward, requiring precision and a few basic tools, but the payoff is immense: a custom-sized rug that looks professionally made. Here’s a detailed breakdown of how to master this clever rug hack:
Essential Supplies You’ll Need to Join Two Rugs Seamlessly:
Gathering the right tools before you begin is key to a smooth and successful project. Each item plays a crucial role in achieving a durable and aesthetically pleasing custom rug.
- Two Identical Rugs: The foundation of your project! Opt for rugs with a repeating pattern, a geometric design, or a simple solid texture. I used this rug, and its intricate yet repetitive oriental pattern was ideal for a discreet seam. Identifying the pattern repeat is easier with these types of designs.
- Sharpie Marker: Essential for making clear, visible marks on the rug’s backing, guiding your cuts with accuracy.
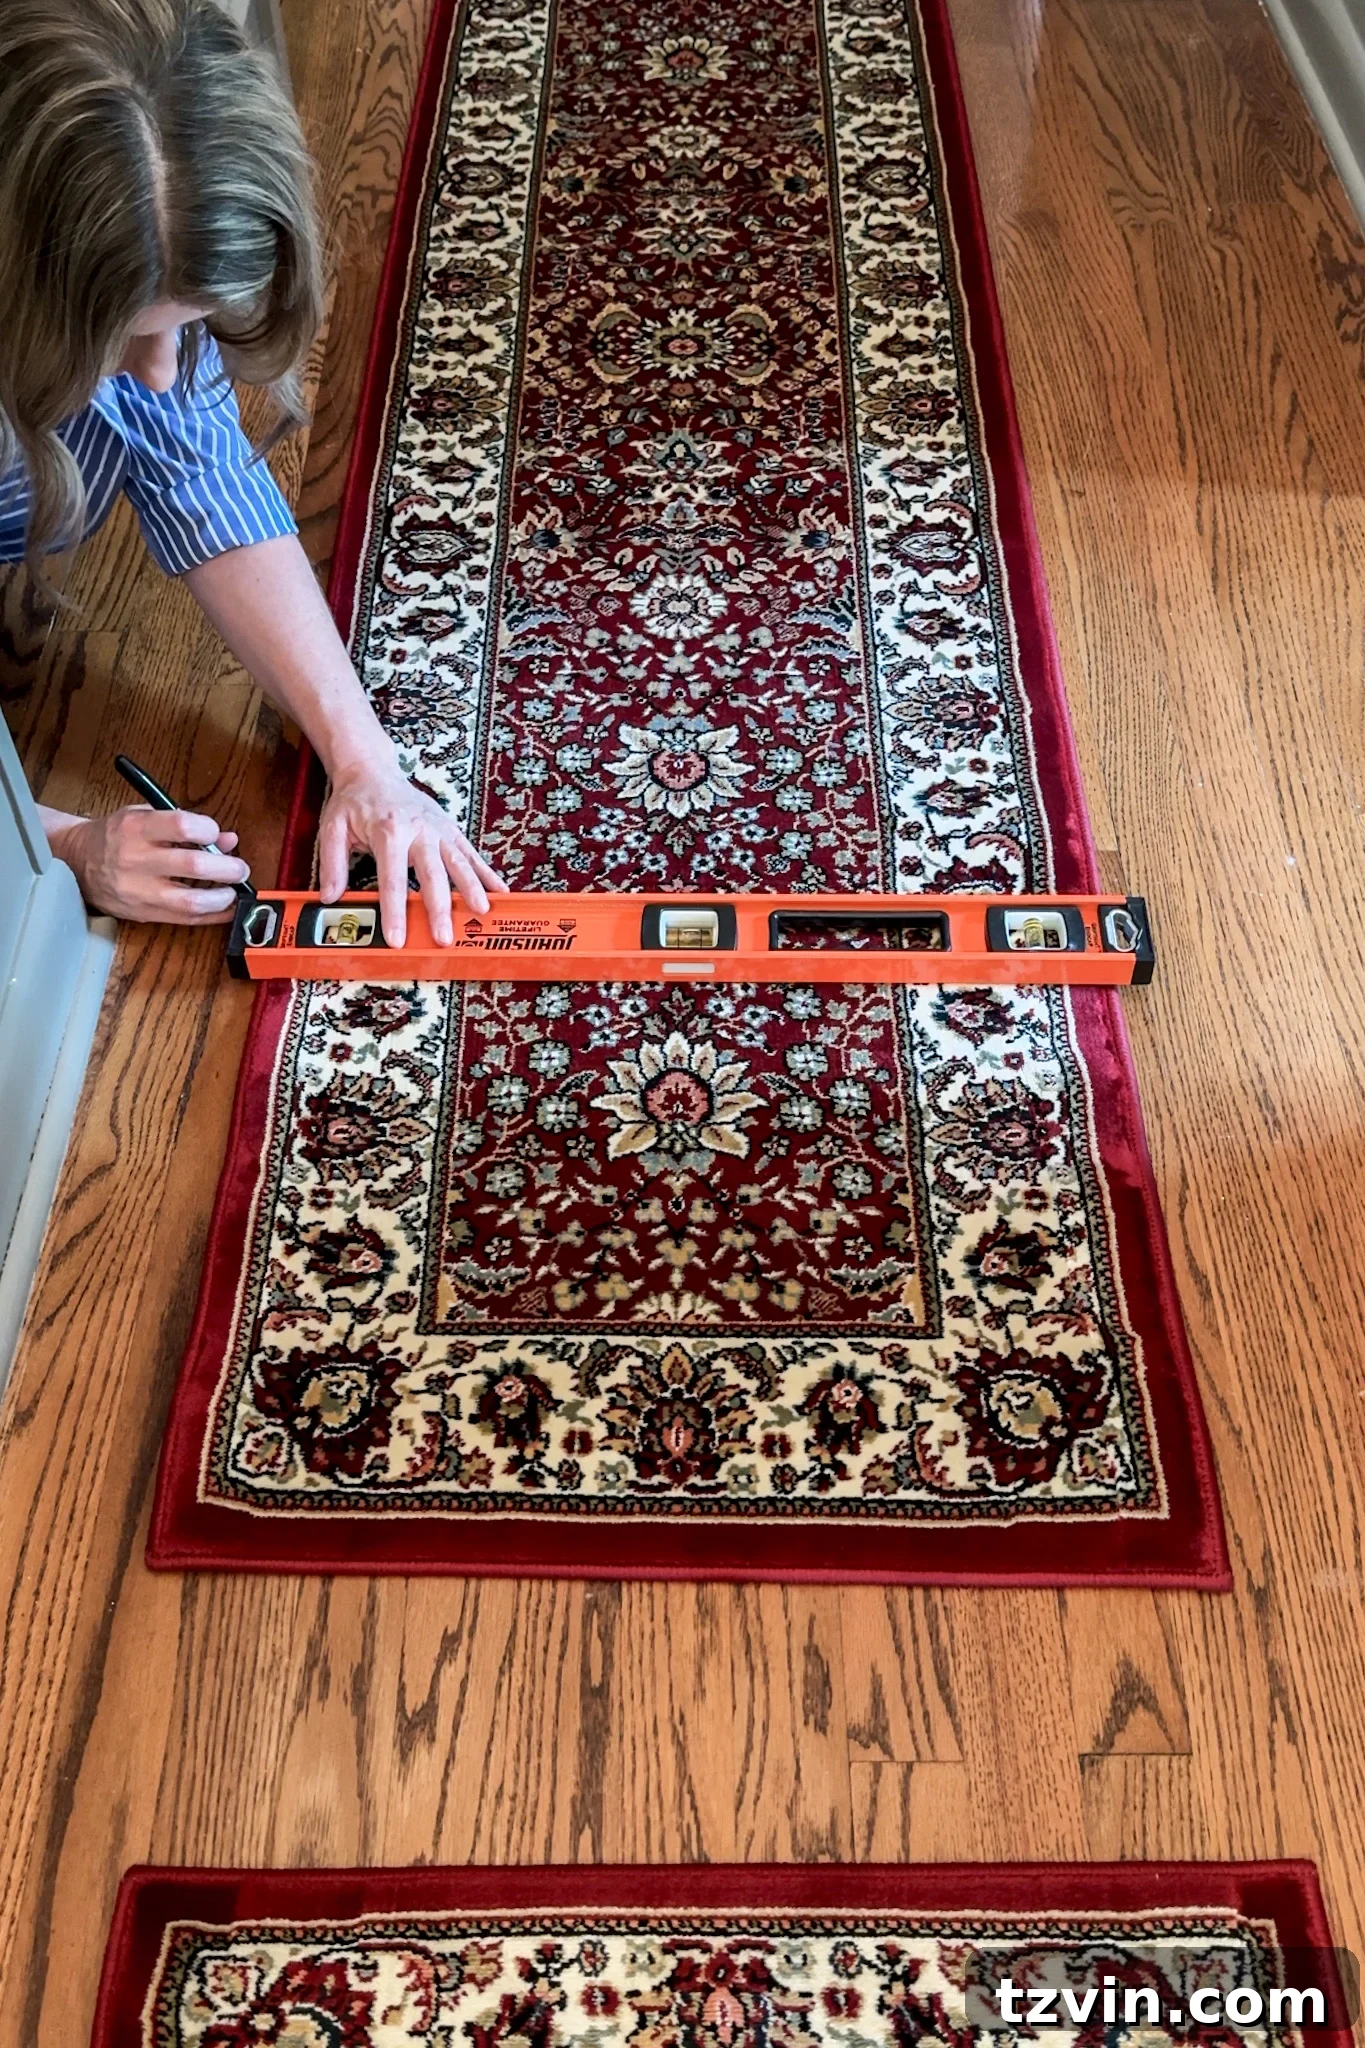
- Straight Edge: A yardstick, a long ruler, or a carpenter’s level will provide the perfect guide for drawing perfectly straight lines, ensuring your cut edges align flawlessly.
- Utility Knife or Carpet Cutter with a Fresh Blade: A sharp blade is paramount! A dull blade will snag, fray, and create uneven cuts, compromising the seamless look. Have a few spare blades on hand.
- Heavy Cardboard or Plywood: This protective layer is non-negotiable. Place it underneath the rug where you plan to cut to safeguard your floors from accidental damage.
- Single-Sided Carpet Tape: This is critical – ensure it’s *single-sided*! Double-sided tape will stick to your floor, making future adjustments or removal difficult. Single-sided tape creates a strong, lasting bond between the two rug pieces without adhering to the floor beneath.
- Vacuum (Optional, but Recommended): After cutting, rugs can shed a bit of fuzz. A quick vacuum will clean up any stray fibers, leaving your workspace tidy and your rug pristine.
1. Master the Pattern Repeat for a Seamless Join
This is arguably the most crucial step for achieving a truly invisible seam, especially with patterned rugs. Begin by laying both identical rugs out side by side on a large, flat surface. Take your time to carefully study their patterns. The goal is to identify a point where the design flawlessly repeats, allowing the two rug sections to merge as if they were always one continuous piece. Geometric or symmetrical patterns are often the easiest to work with, as their regular motifs provide clear reference points. For my vintage-style rug, I looked for a natural break in the oriental design that I could replicate on both ends. This visual analysis ensures that once joined, the pattern flows uninterrupted across the entire length of your new custom runner. Patience here will significantly impact the final, high-end appearance of your DIY rug.
2. Precisely Mark Your Cut Lines
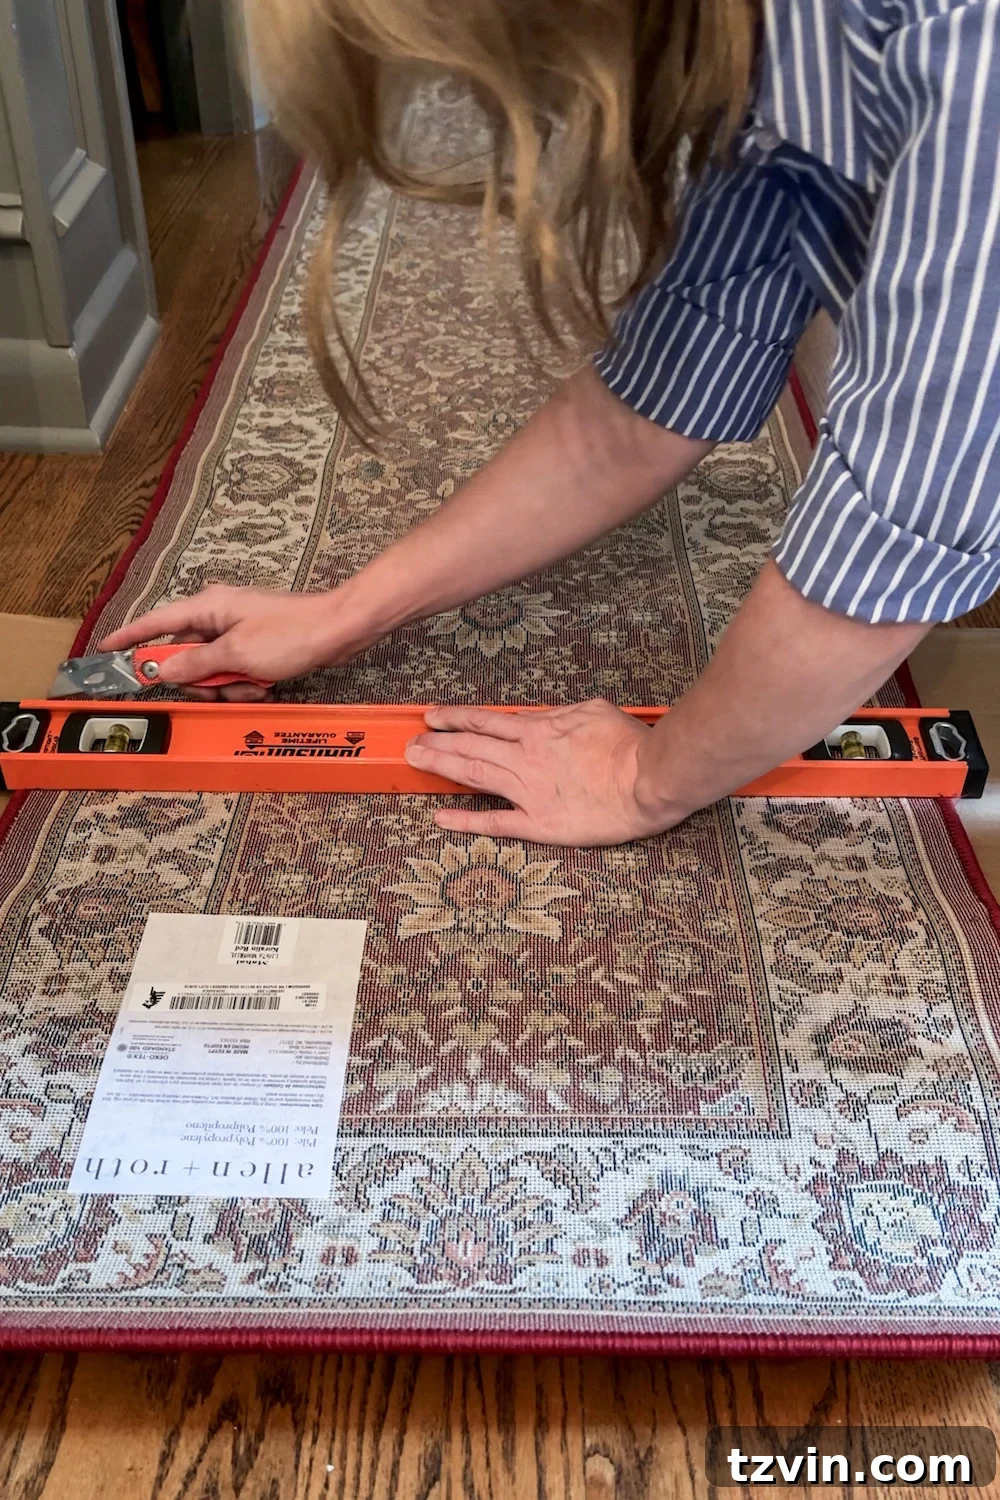
Once you’ve identified the perfect pattern repeat point, use your Sharpie marker to make a small, clear mark on the edges of both rugs where this seamless transition occurs. These initial marks are your visual cues. Now, carefully flip both rugs over so their backings are facing up. Using a long, sturdy straight edge—like a yardstick, metal ruler, or carpenter’s level—align it with your small Sharpie marks. Firmly draw a continuous, perfectly straight line across the entire width of the rug backing. Repeat this process for the second rug. The precision of these lines is paramount, as they will dictate the straightness and cleanliness of your final seam. Double-check that both lines are parallel and precisely where you want your cuts to be, ensuring consistent alignment between the two pieces.
3. Execute Clean Cuts with Precision
With your cut lines clearly marked, it’s time to make the cuts. Before you begin, position your heavy cardboard or plywood underneath the rug, directly beneath the marked line, to protect your flooring. Crucially, ensure your utility knife or carpet cutter has a brand-new, sharp blade. A dull blade will tear and fray the rug fibers, resulting in a messy, noticeable seam. Align the straight edge firmly along your drawn line. Using steady, even pressure, carefully cut along the marked line. For thicker rugs, you might need to make two or three passes to get all the way through, always keeping the blade against the straight edge. The goal is a perfectly straight, clean edge on both rug pieces, free from frayed edges or jagged imperfections. Take your time to achieve the cleanest cut possible, as this will significantly contribute to the seamless final look.
4. Verify and Refine Your Edges for a Perfect Match
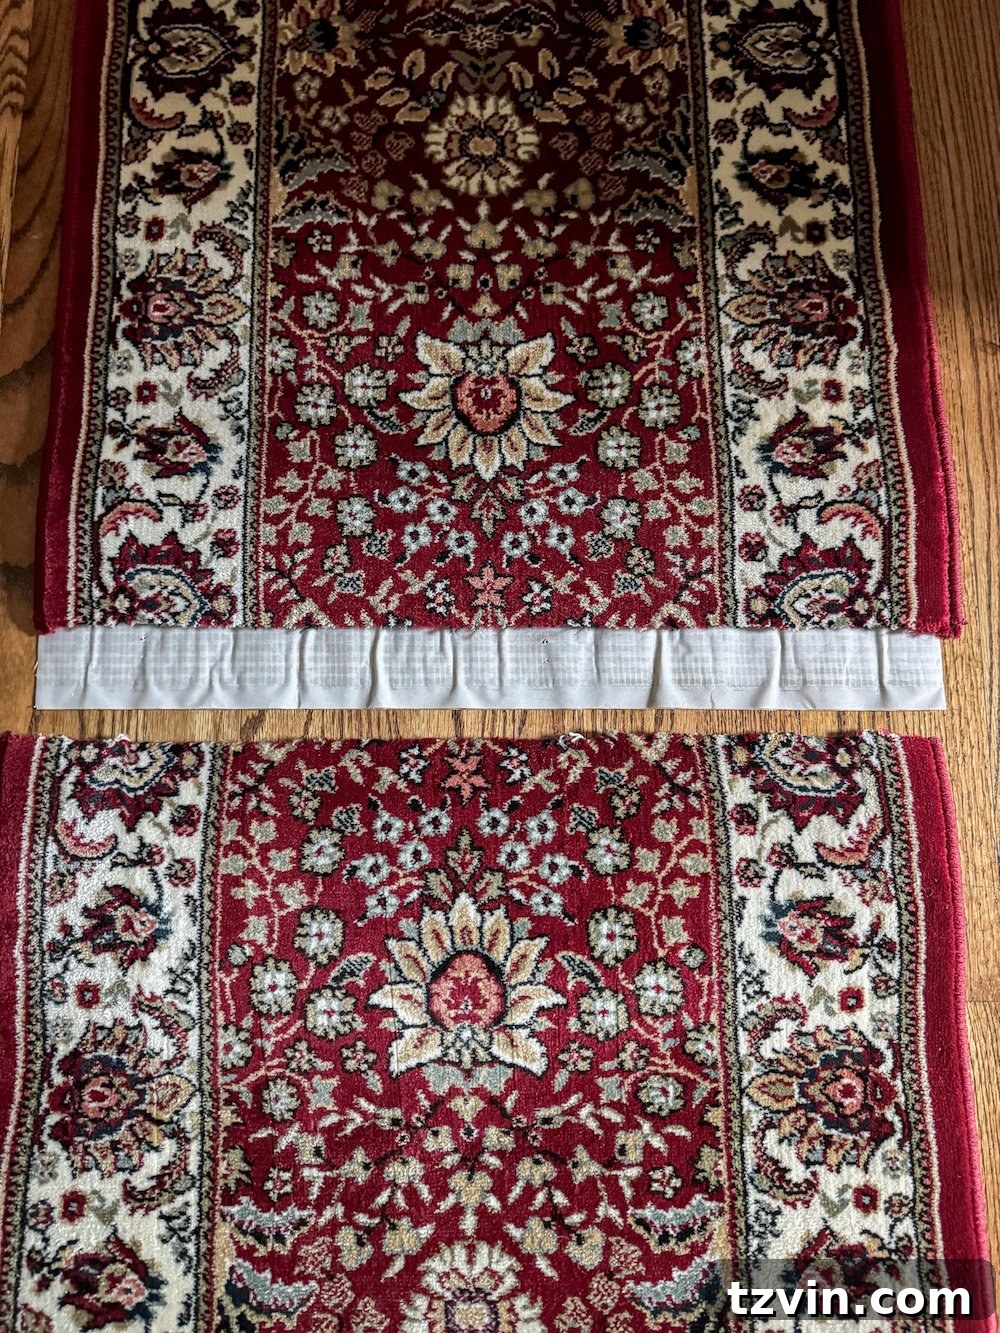
Before reaching for the carpet tape, it’s absolutely essential to perform a “dry run” with your newly cut edges. Lay both cut ends next to each other, carefully aligning them as if they were already joined. This step allows you to meticulously check for several critical factors. First, ensure the patterns align perfectly, creating that seamless visual flow you’ve been aiming for. Second, verify that the cuts are perfectly straight and that there are no gaps or overlaps between the two pieces. Look closely for any frayed edges or slight inconsistencies. If you notice any minor imperfections, use your utility knife to carefully trim them away, refining the edges until they meet snugly and cleanly. A little extra attention here will make a huge difference in the final, professional appearance of your custom rug, ensuring the seam is virtually undetectable.
5. Securely Join the Rugs with Single-Sided Carpet Tape
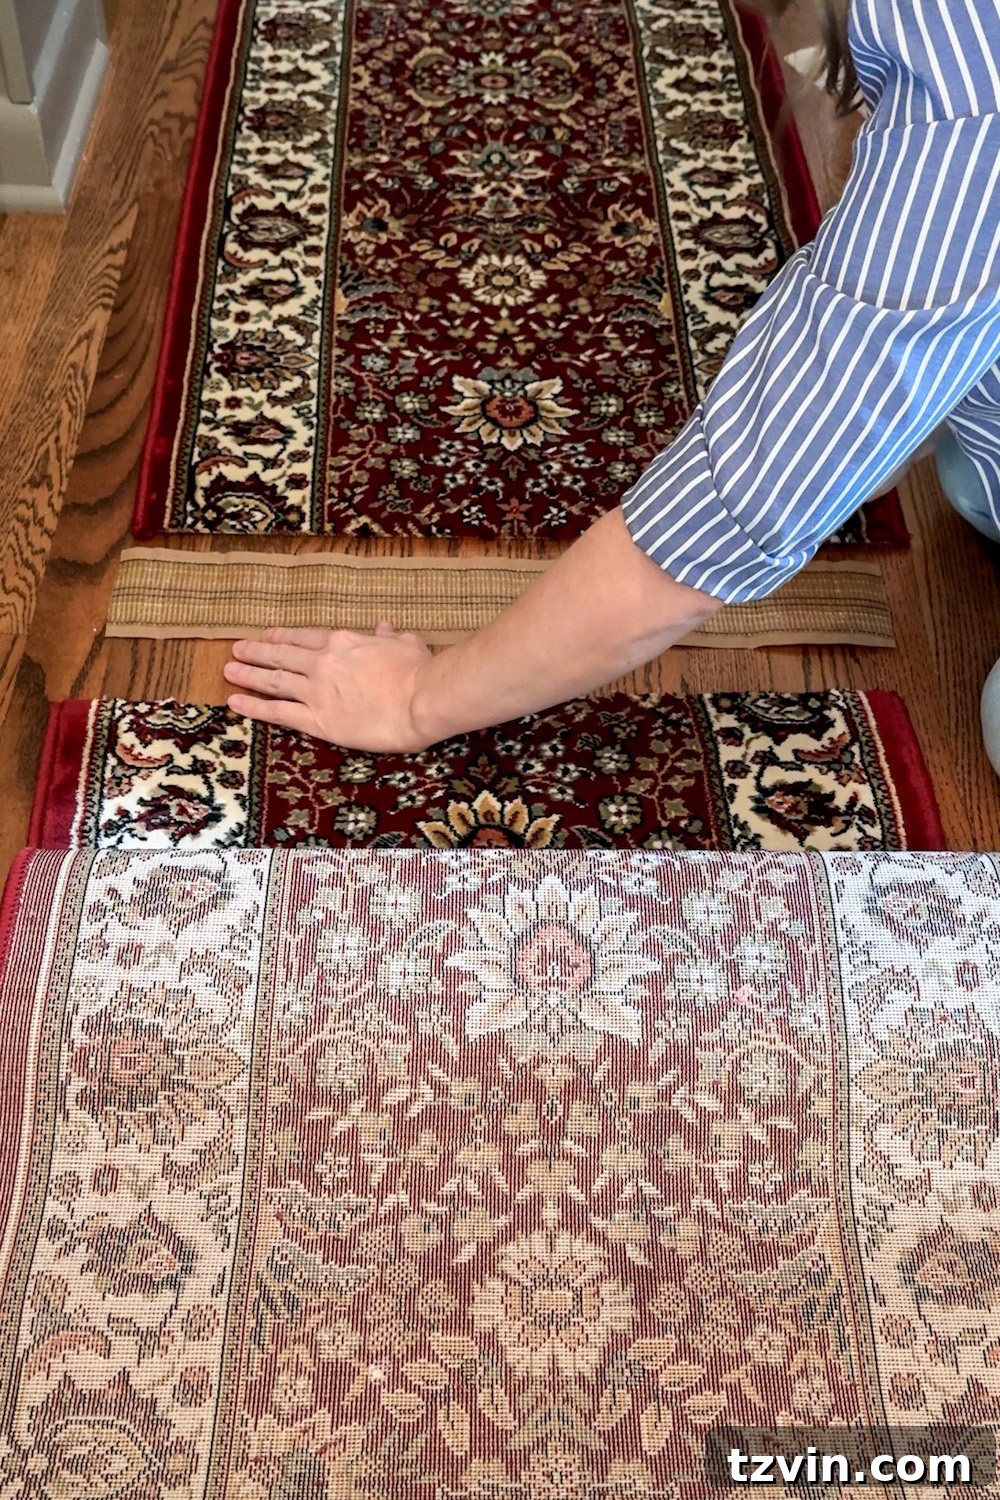
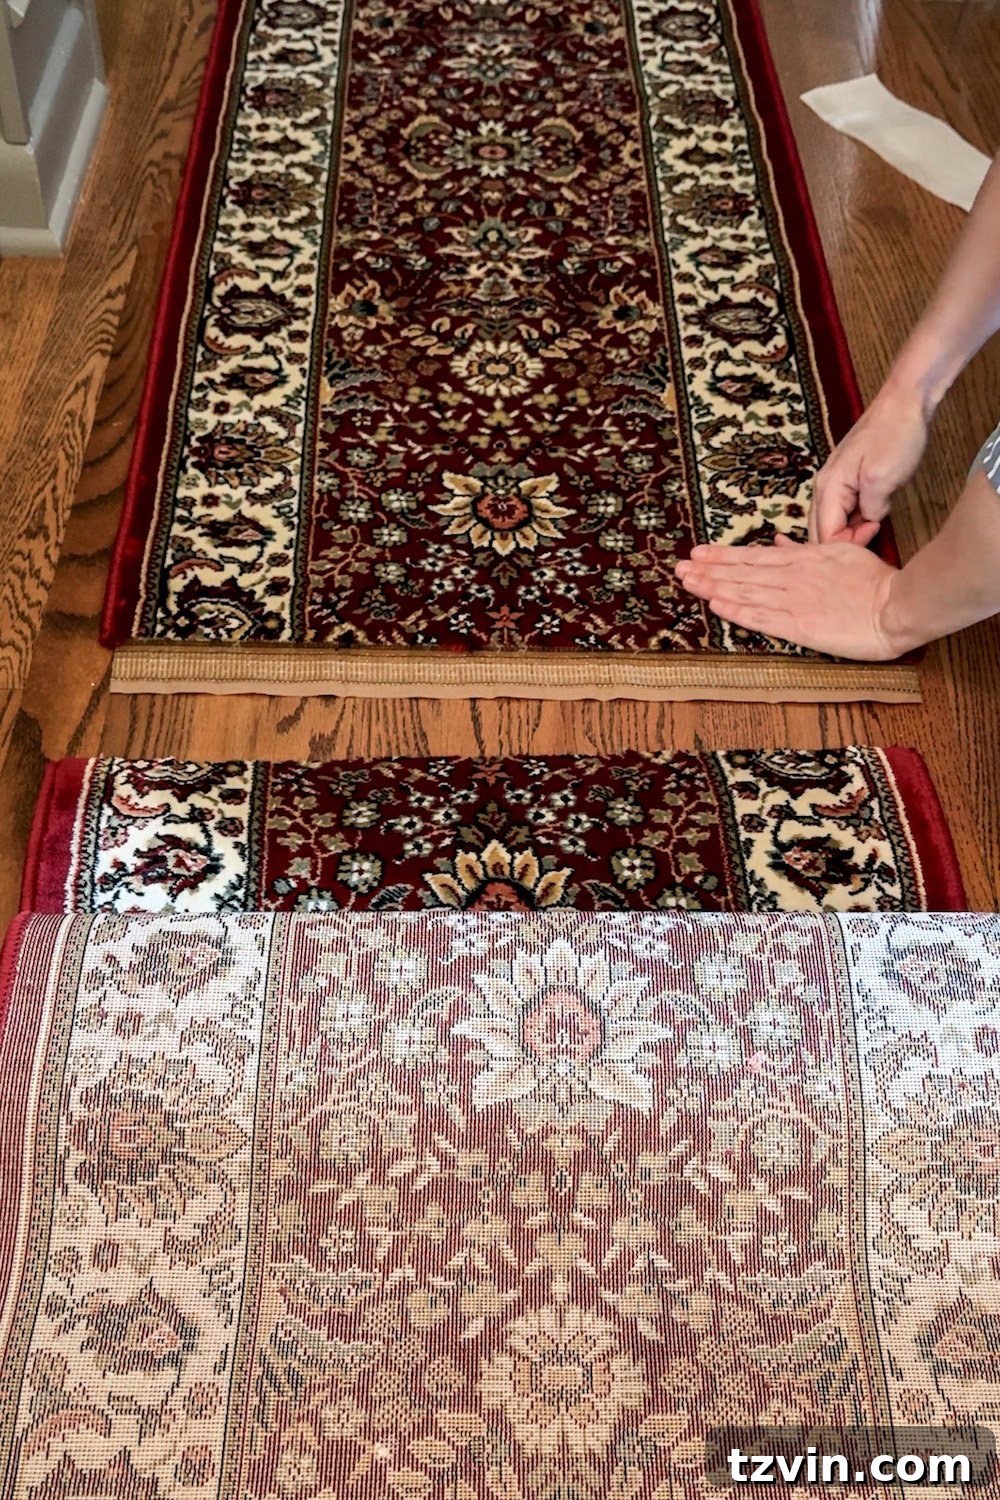
Now for the final bonding step. Lay the protective cardboard or plywood on the floor directly beneath where your seam will be. Unroll a long piece of your single-sided carpet tape, ensuring it extends the full length of the intended join, and carefully place it sticky-side up on the protective surface. Make sure the tape is perfectly straight. Slowly and carefully, peel off the protective backing from the carpet tape. Then, starting from one end, meticulously lower the first cut edge of your rug onto the tape, pressing it down firmly. Next, bring the second rug’s cut edge to meet the first, aligning the patterns and edges as closely and precisely as possible. Press down firmly along the entire length of the seam, ensuring both rug edges are securely adhered to the carpet tape. Walk along the seam, applying pressure to ensure maximum adhesion. This strong, single-sided bond will hold your two rug pieces together seamlessly, creating the illusion of one continuous, custom-made rug.
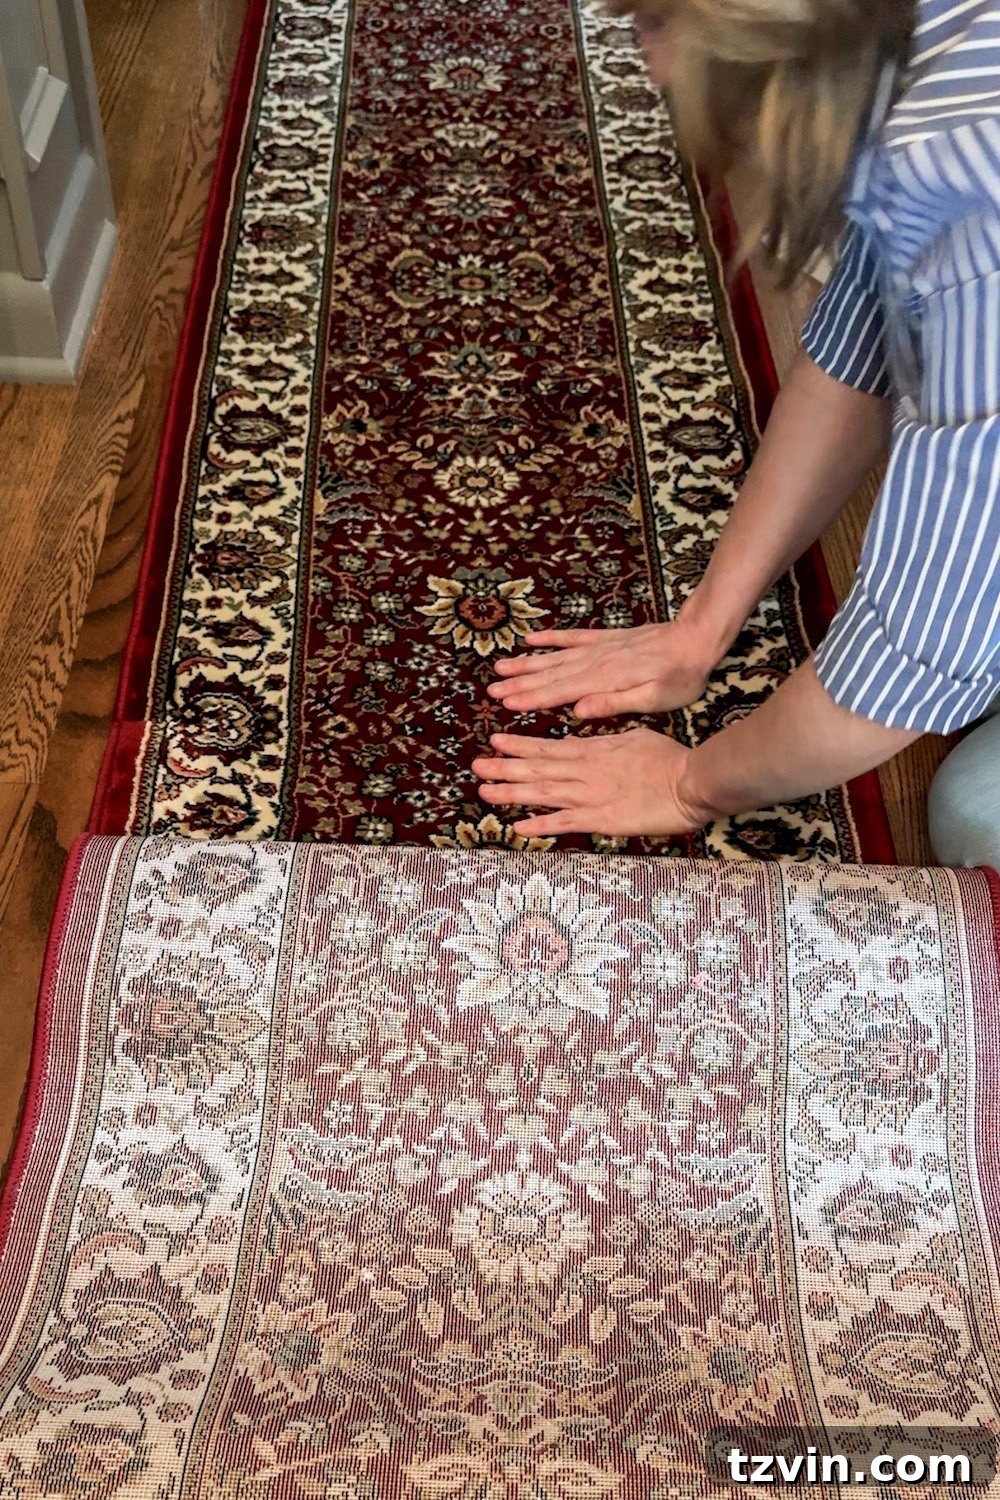
And that’s it! With these careful steps, you’ve successfully transformed two individual rugs into one grand, custom-fitted runner, perfectly designed to enhance your unique living space. Step back and admire your handiwork – a high-impact design solution achieved with smart DIY effort!
Achieve a High-End Look on a DIY Budget: The Power of Rug Unification
This DIY rug joining trick is more than just a craft; it’s a genuine budget-saver that delivers a surprisingly high-end aesthetic. In my hallway, this hack saved me from investing in a custom-sized runner, which would have easily cost several times more. Honestly, unless you get down on your hands and knees and scrutinize the rug, you would never suspect it wasn’t a single, continuous piece. The seam, thanks to careful alignment and precise cutting, is remarkably subtle and virtually disappears into the rug’s pattern, making it incredibly easy to overlook.
This method isn’t just for hallways; it’s an incredibly versatile solution to keep in your DIY arsenal. Imagine creating an extra-long runner for a galley kitchen, where standard sizes often fall short. Or, for those with a truly tight budget, this technique can be used to construct a full-size area rug by combining multiple smaller accent rugs – perhaps even those affordable finds from IKEA – to fill a large living space without the hefty price tag of a single, oversized piece. The possibilities for customization are vast, allowing you to achieve designer-level solutions in any room.
For our upstairs hallway, that vibrant pop of rich red from the oriental-style pattern has completely transformed the space. It instantly adds a layer of warmth, depth, and visual interest, making the previously stark hallway feel much more inviting and cohesive. The fact that this tailored, impactful design element cost me less than half of what a ready-made long runner of the same style would have? That’s not just a win; it’s a major triumph in smart home decor. This hack proves that with a little creativity, you can achieve luxurious results without the luxury price.
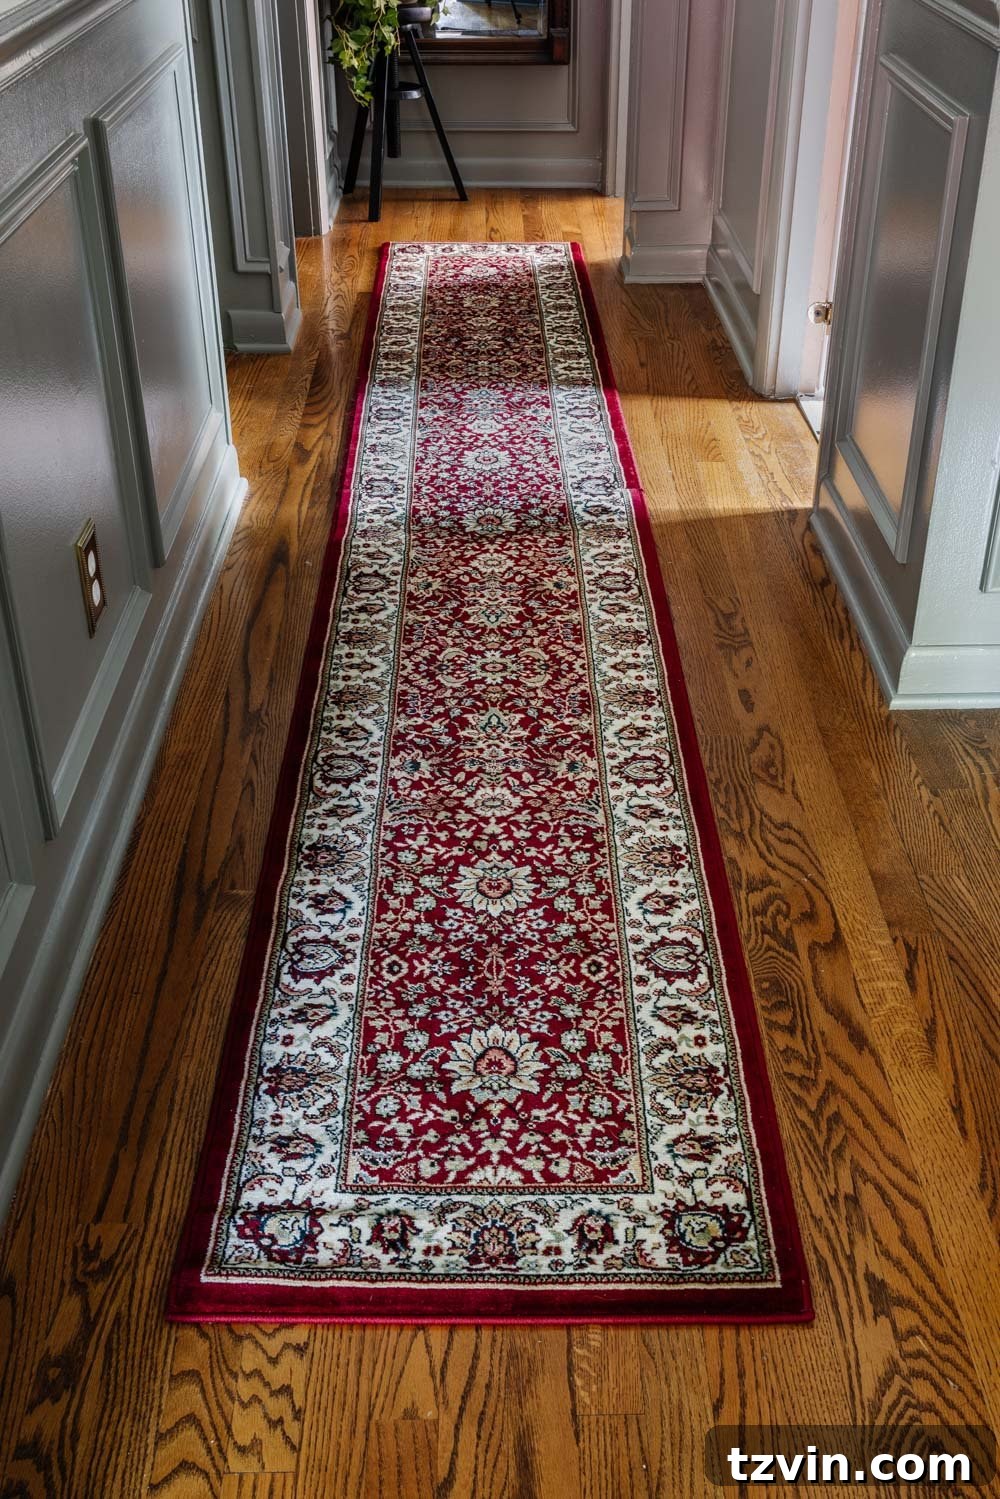
Our hallway makeover journey has been an exciting one, and this rug was a crucial puzzle piece. Now that the elegant tongue & groove ceiling is beautifully installed, the doors and trim are freshly painted, and our gorgeous custom runner is perfectly in place, we’re just a few accessories away from calling this entire hallway project complete. Each element, from the architectural details to the soft furnishings, has been thoughtfully chosen to create a cohesive and welcoming thoroughfare in our home. This rug truly anchors the space, providing both aesthetic appeal and practical comfort.
So, if you find yourself endlessly searching for the elusive “perfect” rug size and continually coming up empty-handed or facing exorbitant custom prices, don’t despair. Don’t immediately dismiss those smaller, more affordable rugs simply because they aren’t the exact length you need. With a dash of patience, attention to detail, and a few basic supplies, you absolutely can make them work. This innovative DIY approach offers a practical and stylish alternative, empowering you to create a truly bespoke floor covering that perfectly fits your space and budget.
Now you possess the knowledge and confidence to combine rugs like a seasoned interior designer! This simple yet effective hack allows you to overcome common decorating challenges and infuse your home with personalized charm. Embrace the creative freedom that comes with tailoring your own home decor elements.
Have you ever taken on the challenge of DIYing a custom rug or tackling a similar creative solution for your home? I’m always eager to hear about unique projects and experiences! Or, if you decide to try out this custom rug joining technique, please tag me in your photos or send me a message. I’d absolutely love to see how your project turns out and celebrate your DIY success!
More Rug Decorating Tips and Tricks from Our Blog
For more inspiration and practical advice on choosing, styling, and caring for rugs in your home, explore these popular posts from our blog. We’ve got you covered with everything from selecting the right material to finding the best deals.
- The Best Type of Rug for Under a Dining Table: Discover the secrets to choosing a durable, easy-to-clean rug that complements your dining area and stands up to daily life.
- My Unbiased, Brutally Honest Review of Ruggable: Get the real scoop on these popular washable rugs – are they truly worth the hype for busy households?
- 25 Best Places to Buy Rugs Affordably Online: Unlock a treasure trove of resources to find stylish and budget-friendly rugs from the comfort of your home.
- DIY Floral Block Outdoor Rug: Learn how to create a vibrant, custom outdoor rug to enhance your patio or deck using stenciling techniques and a Cricut machine.