A Fresh Perspective: Transforming Our Hallway Bathroom with Paint and Purpose
The exhilarating rush of nearing a project’s completion is truly a unique sensation. We’re on the precipice of unveiling our refreshed hallway bathroom, and the anticipation is palpable! This isn’t just another home improvement task; it’s a journey of transforming a once-dated space into something vibrant and welcoming, all achieved through thoughtful, budget-friendly choices and the incredible power of a paintbrush. While this post might not be a step-by-step tutorial (we’ve shared comprehensive guides on kitchen cabinet painting and another bathroom cabinet overhaul in our previous home), it’s an exciting reveal of what’s possible with a little creativity and elbow grease.
Our goal with this hallway bathroom makeover was to infuse it with new life without embarking on a full-scale, costly renovation—at least not yet. It’s a testament to how impactful strategic updates can be. The visual transformation, particularly with the cabinets, never ceases to amaze us. It’s truly incredible what a fresh coat of paint can achieve, completely altering the atmosphere of a room and making it feel brand new.
From Dated to Dazzling: A Glimpse at the Transformation
To truly appreciate the journey, it’s essential to remember where we started. Our hallway bathroom, before its recent revival, embodied an era that time had seemingly forgotten. It was functional but lacked character, warmth, and the modern aesthetic we envision for our home. The “before” images tell a story of a space yearning for an update, serving as a stark contrast to the bright and inviting room it is becoming.
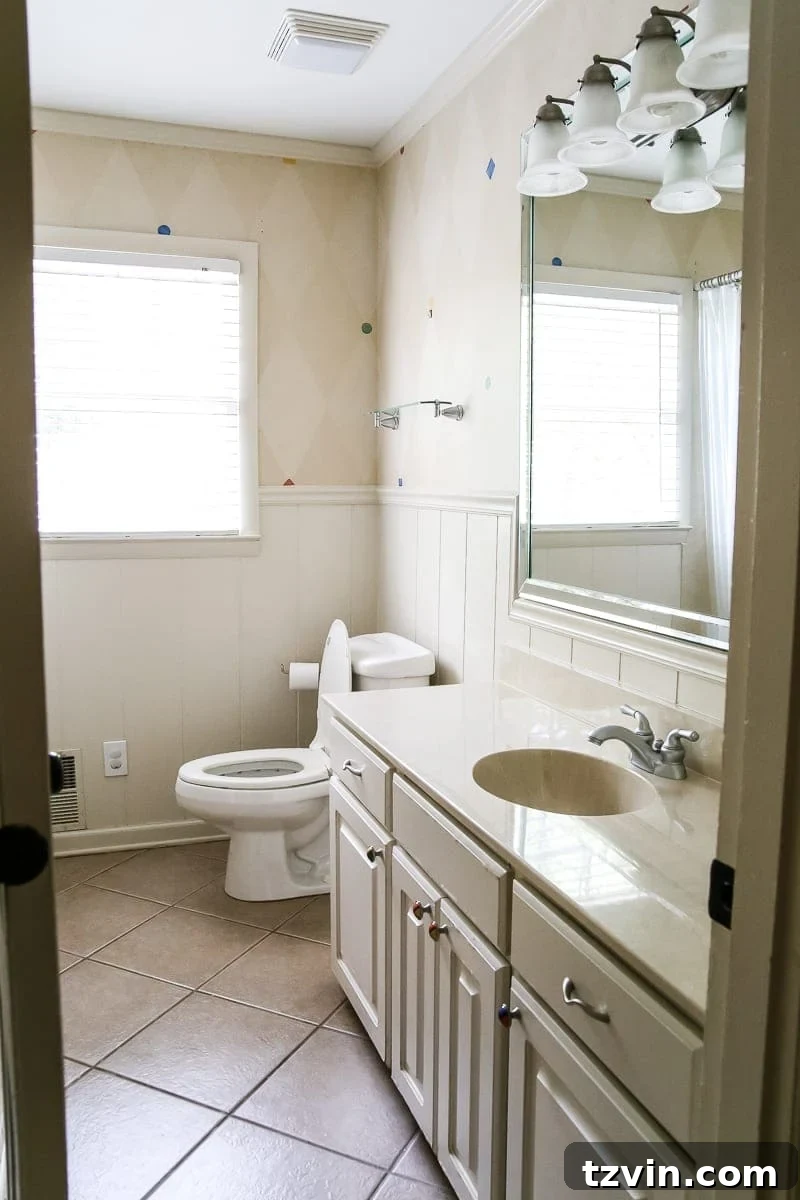
But behold the remarkable progress! With each stroke of paint and every carefully selected new detail, this bathroom has shed its past and embraced a promising future. The change is not merely cosmetic; it’s a fundamental shift in ambiance, making the space feel lighter, more spacious, and infinitely more appealing. It’s a testament to the power of vision and a commitment to transforming your surroundings, one project at a time.
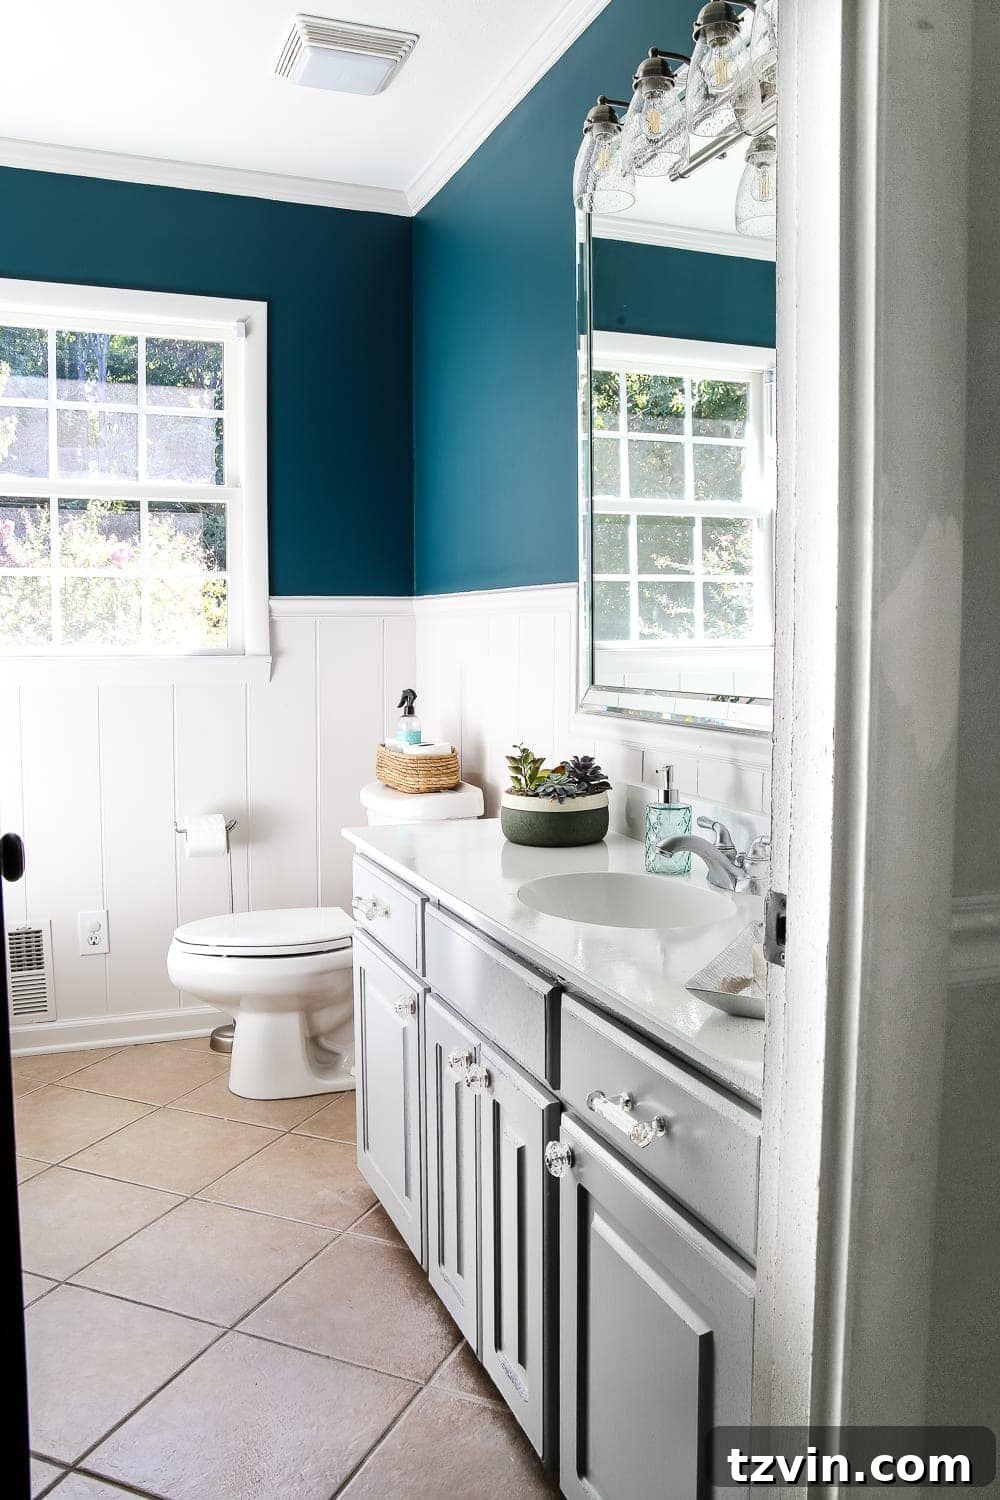
While we’re immensely proud of the progress, this particular makeover isn’t quite ready for its grand finale. There are still a few crucial elements to address before we can declare it fully complete. Our remaining to-do list includes tackling the flooring, adding carefully chosen decorative touches, and possibly incorporating a window treatment to enhance both privacy and style. We’ve also been contemplating a charming stencil design for the walls, a decision we’re still weighing back and forth. Each of these steps contributes to the holistic vision we have for this evolving space.
Strategic Choices: Painting Cabinets with Benjamin Moore Coventry Gray
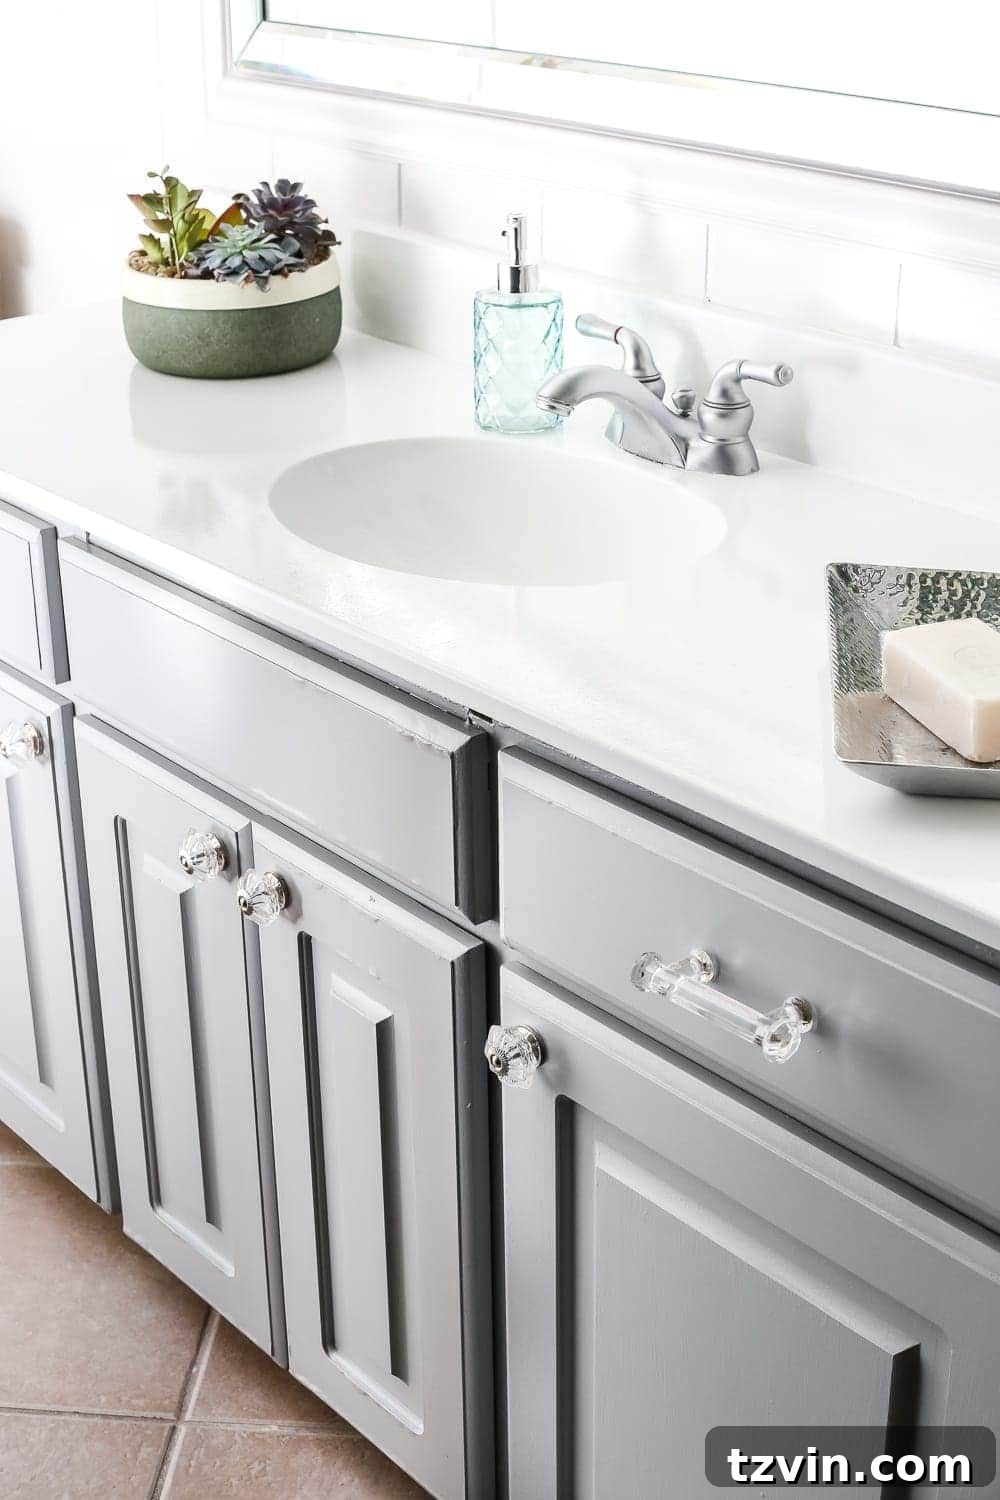
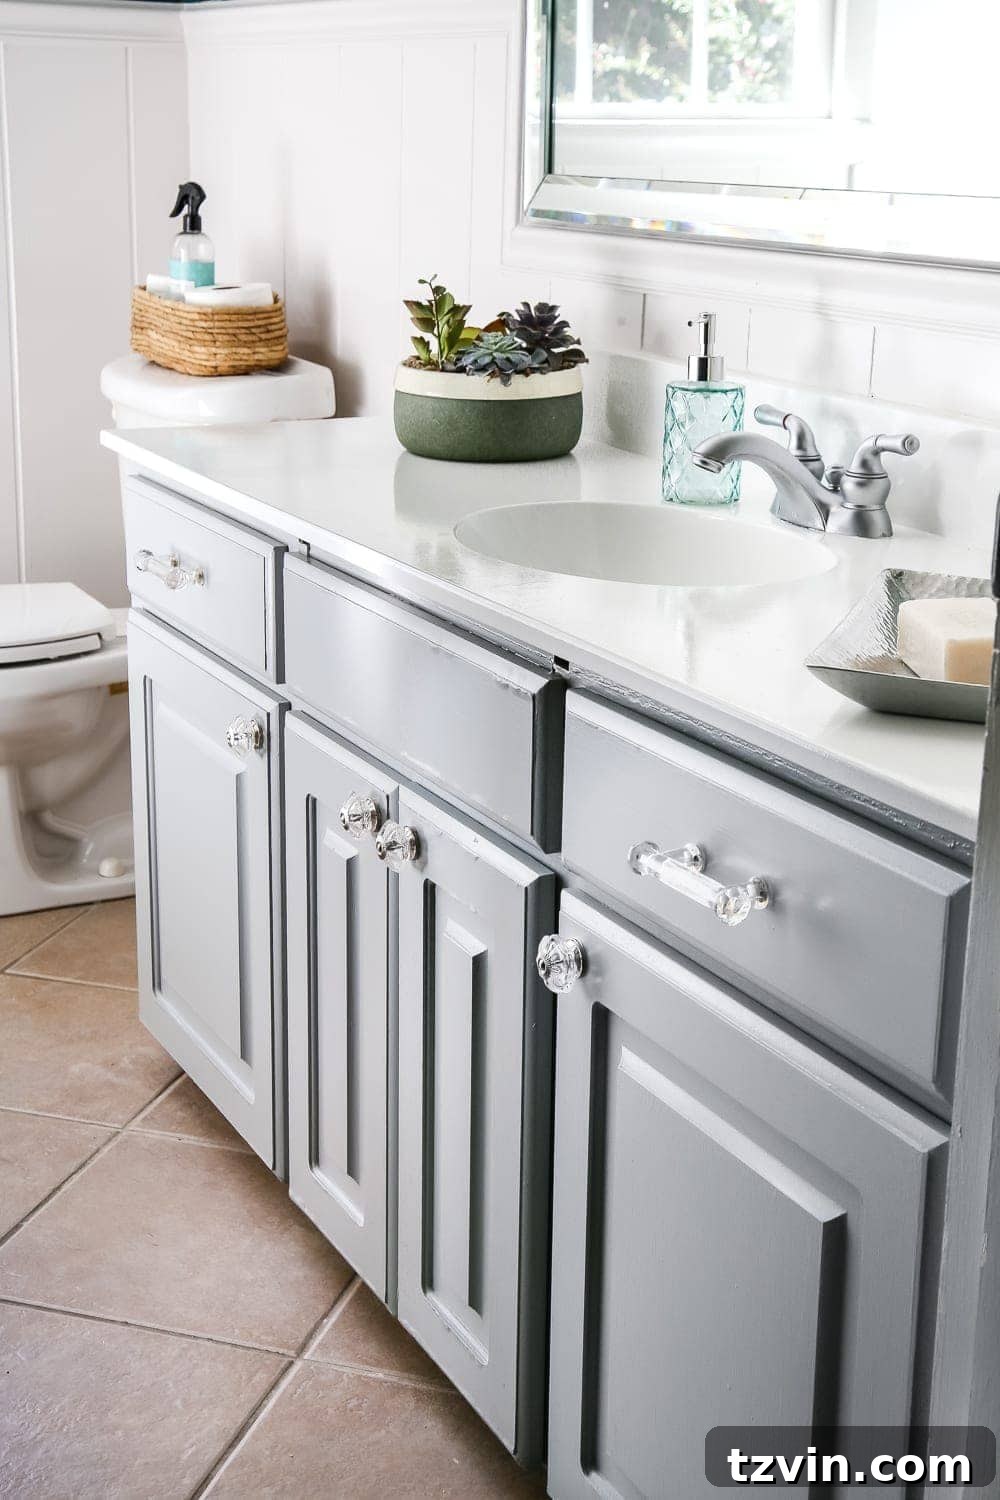
The cornerstone of this bathroom’s transformation has undoubtedly been the cabinet makeover, particularly the selection of Benjamin Moore Coventry Gray. This sophisticated mid-tone gray instantly elevated the entire space, transforming a tired vanity into a chic focal point. Coventry Gray is renowned for its remarkable versatility and depth; it’s a color that gracefully bridges the gap between classic and contemporary, offering a soothing yet stylish backdrop. It possesses a subtle blue undertone that prevents it from feeling stark or cold, instead imparting a calming and elegant quality that perfectly suits a bathroom environment.
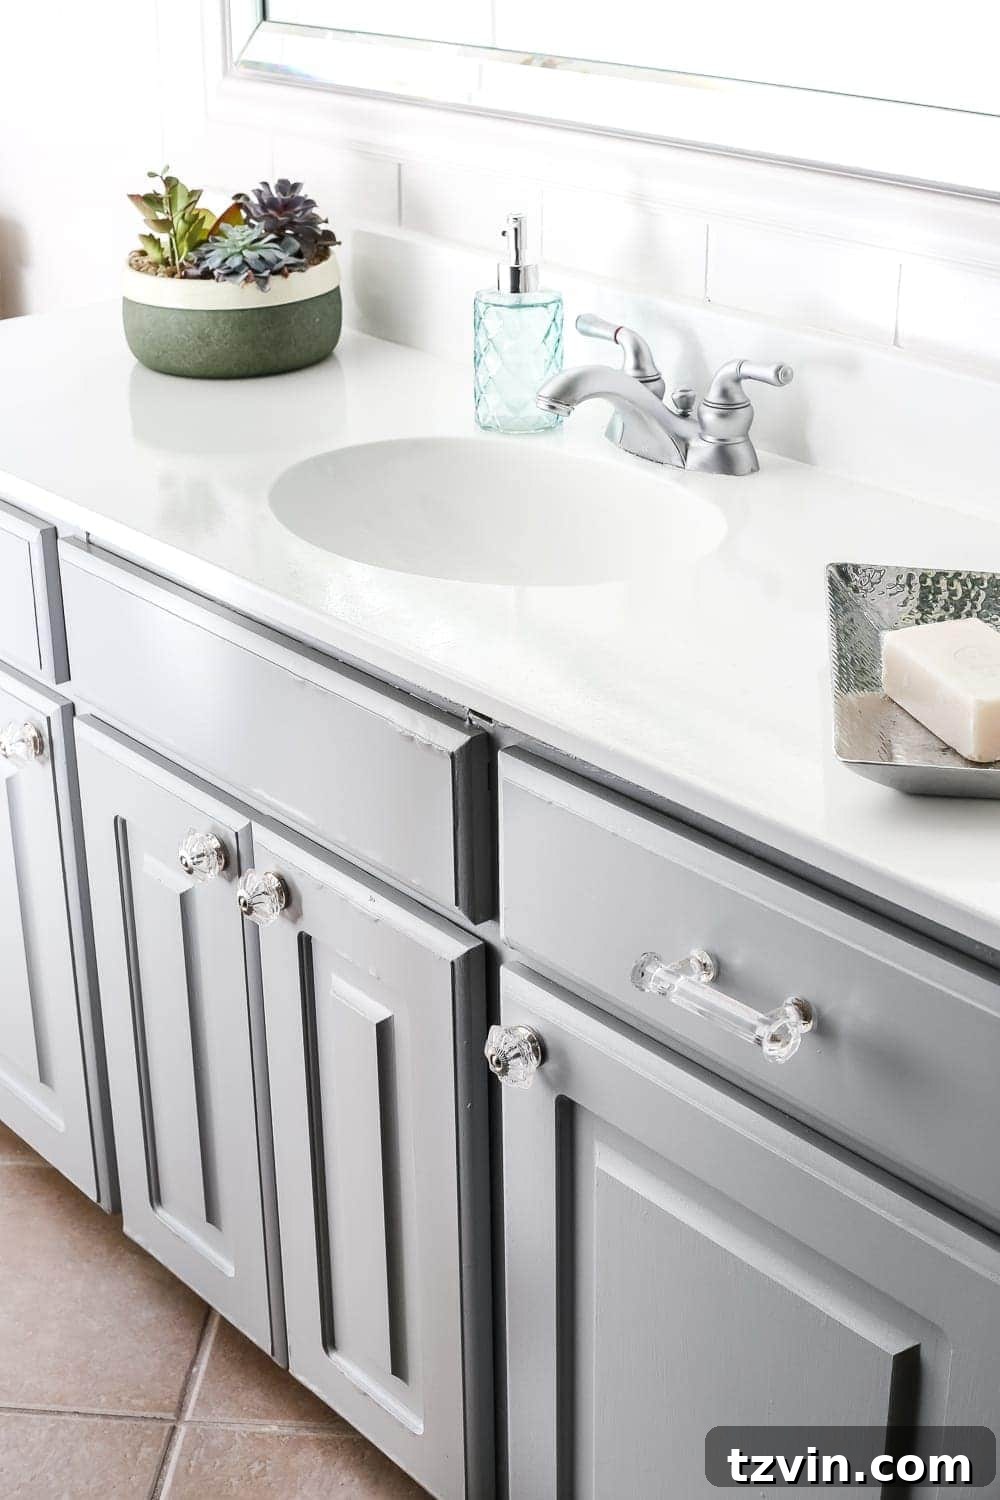
Choosing a sophisticated gray like Coventry Gray was a deliberate decision to create a more refined and appealing atmosphere. This paint color not only brightened the room but also provided a neutral yet impactful foundation upon which all other design elements could build. It’s incredible how a single color can breathe so much life into a space, offering a fresh, clean aesthetic that feels both modern and timeless. This particular shade has become a staple in many home designs for its ability to look stunning in various lighting conditions and complement a wide array of textures and finishes.
Working with Imperfection: Embracing the Vintage Character
It’s important to set realistic expectations when undertaking a budget-friendly makeover, especially in an older home. These particular cabinets are original to our house, which was built in 1960. While the foundational structure dates back decades, the doors appear to have been updated sometime in the 1980s, leaving them with their own set of unique “character flaws.” We’re talking about bubbling, evidence of old countertop demolition marks, and countless dings accumulated from years of use by who-knows-how-many children.
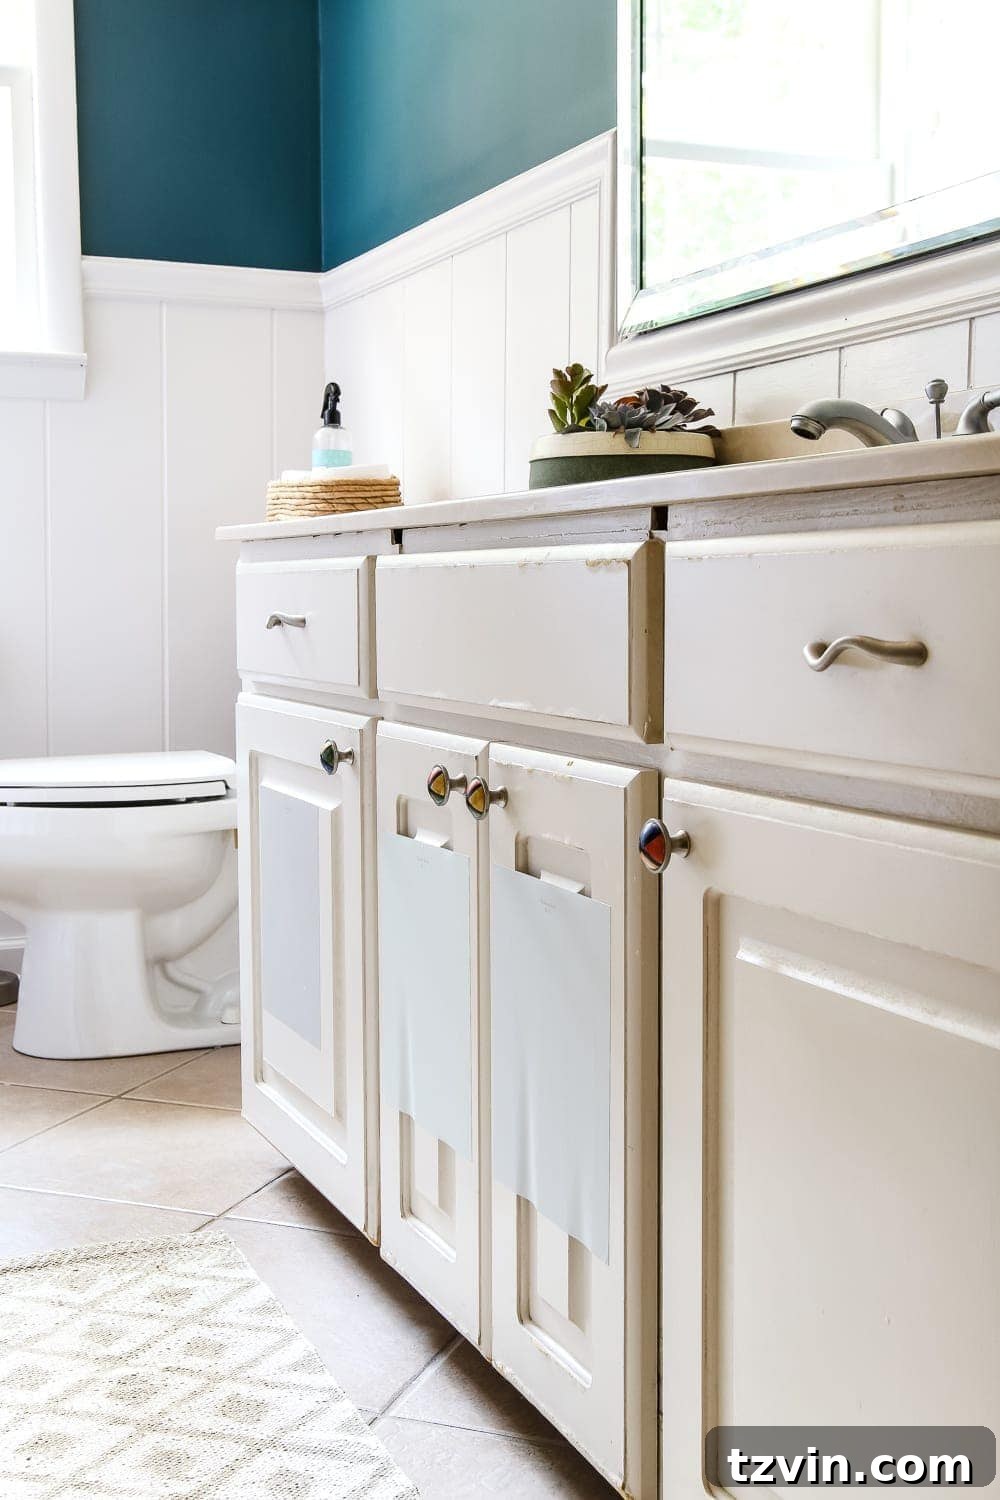
Despite our best efforts, no amount of sanding, wood filler, or primer could truly erase these historical battle scars. This realization led us to embrace a “Phase 1” approach for this bathroom makeover. It’s a temporary refresh, designed to make the space beautiful and functional for the next couple of years until we can undertake a full-scale demolition and renovation. Until that “forever” renovation becomes a reality, working with what we have is not just the best option, it’s a creative challenge. The key is to appreciate the significant visual improvement from a distance, perhaps avoiding too close an inspection! The overall aesthetic impact far outweighs the minor imperfections that remain.
The Finishing Touch: Hardware That Elevates
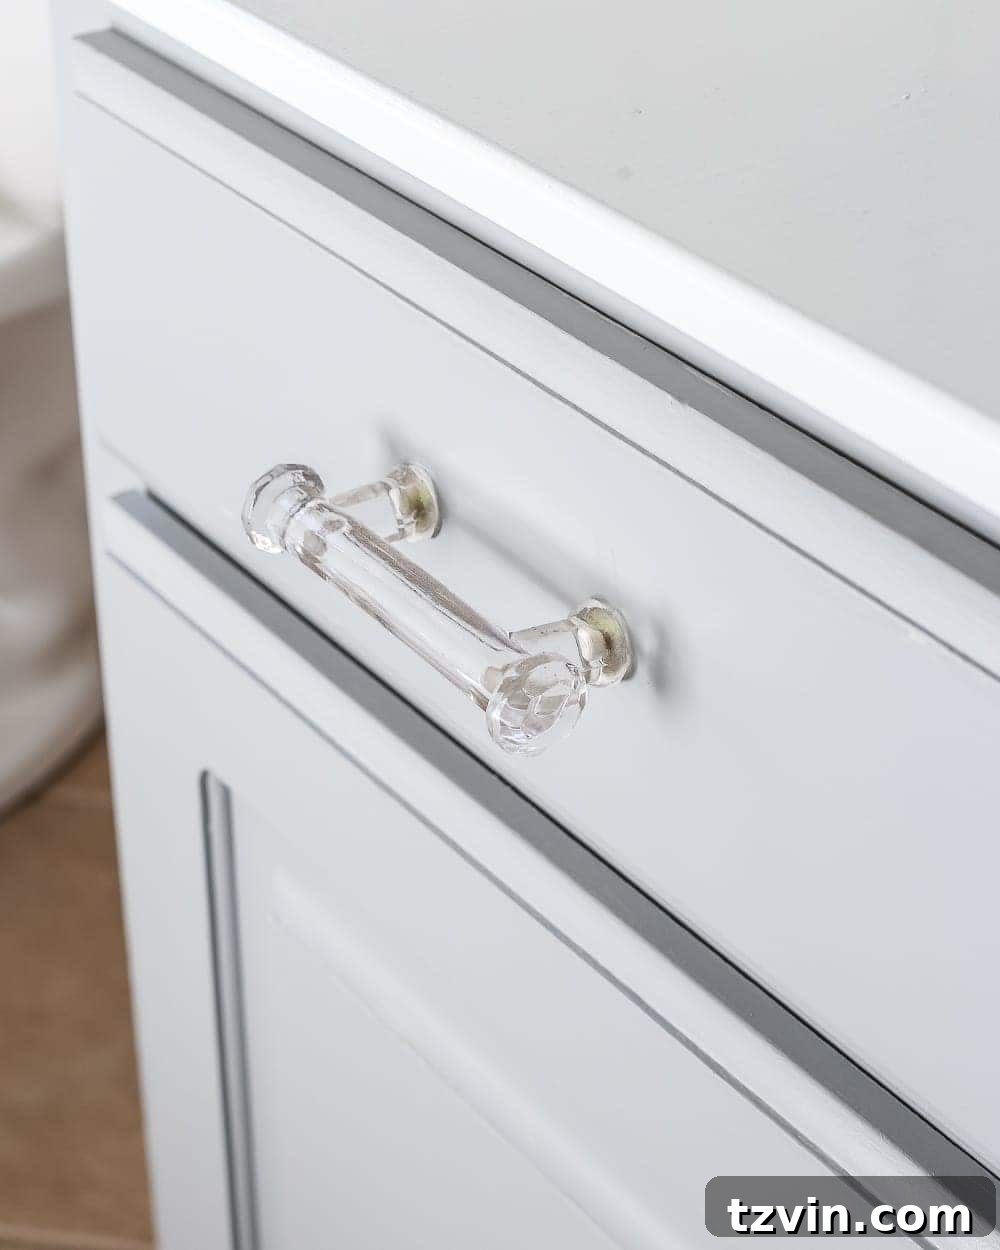
Beyond the fresh coat of paint, another element that profoundly impacted the cabinets’ transformation was the hardware upgrade. Swapping out the old, rather “clown-ish” looking knobs for new, elegant glass knobs and matching pulls from Hobby Lobby made an incredible difference. It’s a small change with monumental impact, instantly elevating the cabinets from dated to refined. Hardware acts like jewelry for your furniture and cabinetry, capable of completely altering its perceived style and value.
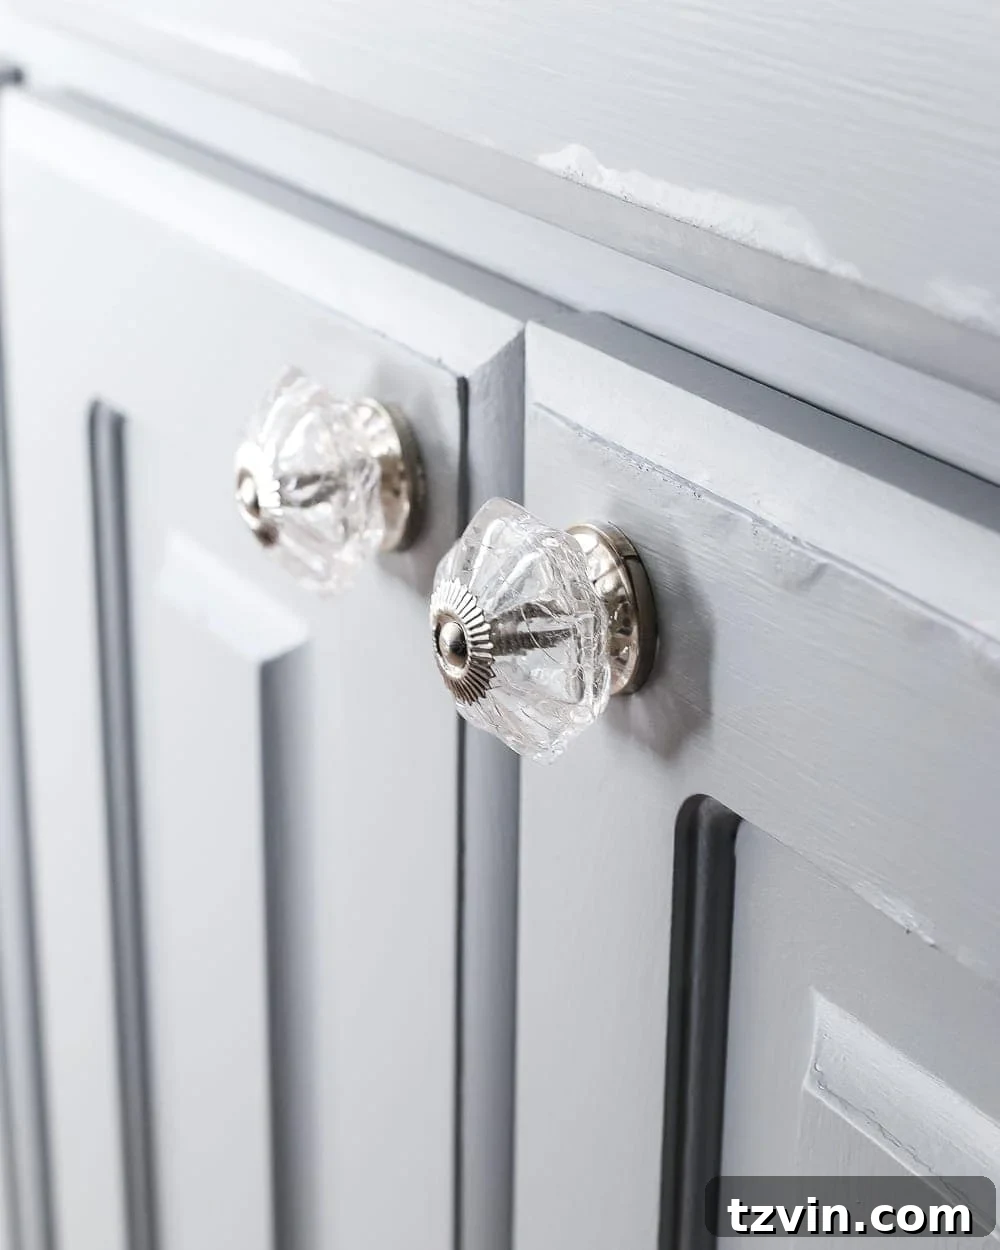
The choice of these particular glass knobs and pulls was deliberate. I wanted something that felt sophisticated and “grown-up” yet retained a touch of charm and femininity, aligning with the fact that this is primarily Olivia’s bathroom, which also doubles as a guest bath. The clear glass design catches the light beautifully, adding a subtle sparkle and a hint of vintage elegance without being overly ornate. This balance ensures the space feels appropriate for both a young resident and visitors, creating a cohesive and inviting atmosphere that is both practical and pretty.
Beyond Cabinets: The Painted Sink and Countertop
Our commitment to a budget-friendly yet impactful renovation extends beyond the cabinets. A significant portion of this bathroom’s visual overhaul was achieved by painting the sink and countertop. This DIY project made a world of difference, transforming a dingy, outdated surface into a bright, clean, and modern-looking vanity top. It’s a powerful reminder that you don’t always need to rip out and replace to achieve a dramatic update. What’s even better is that this painted surface has been holding up beautifully, exceeding our expectations for durability and daily wear and tear. It truly underscores the potential of refinishing kits to extend the life and aesthetic appeal of existing fixtures.
The Next Frontier: Tackling the Bathroom Floor
With the vanity cabinets, sink, and countertop looking fresh, our gaze now turns to the next major component: the floor. The existing ceramic tiles, while functional, contribute to the dated aesthetic of the space. This presents us with a new dilemma, and honestly, we’re seeking your wisdom and experience! Part of me strongly leans towards a simpler solution: thoroughly cleaning the tiles and then painting just the grout lines. This approach would brighten the floor and offer a cleaner look without the full commitment of painting the entire tile surface.
However, another part of me is daring enough to consider painting the entire ceramic tile floor. I’ve seen some incredible transformations online where painted tiles look fantastic, but I remain skeptical about the long-term durability of such a project, especially in a high-traffic area like a hallway bathroom. My concerns include potential chipping, scuffing, and whether the paint would evenly adhere and withstand moisture over time. The preparation required for painting tiles is also extensive, involving thorough cleaning, degreasing, sanding, and priming to ensure proper adhesion.
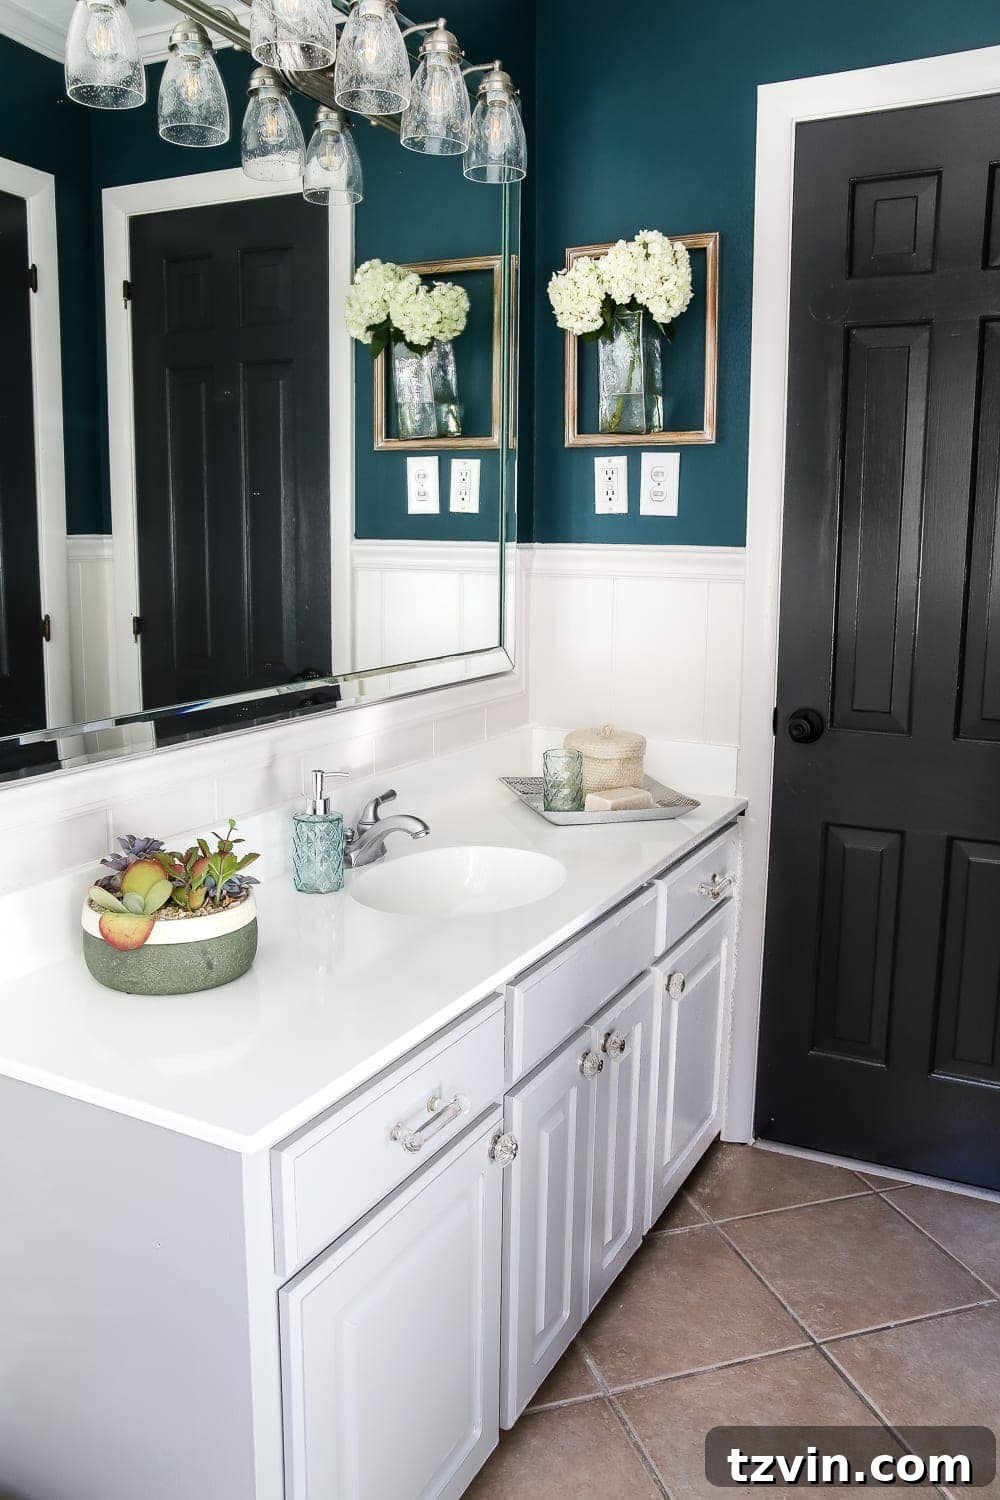
Have any of you embarked on painting ceramic tiles in your own bathrooms or other areas of your home? What were your experiences? Did you use a specific type of paint or sealer that proved exceptionally durable? Were there any unforeseen challenges or tips you’d share? Your insights would be invaluable as we navigate this decision. The goal is a floor that not only looks good but also stands the test of time and daily use.
Designing for Today and Tomorrow: Our Multi-Phase Renovation Plan
It’s crucial to reiterate that this current bathroom makeover is consciously a “Phase 1” project. Our long-term vision for this space includes a complete demolition and renovation, which would involve replacing the plumbing, reconfiguring the layout, installing new fixtures, and addressing any structural improvements that might be needed. That kind of comprehensive project, however, is likely a couple of years down the road, requiring significant planning and budget allocation.
In the interim, our Phase 1 approach is designed to provide maximum impact with minimal investment. It’s about leveraging the power of paint, clever cosmetic updates, and smart accessorizing to create a bathroom that feels fresh, inviting, and functional for our family and guests. This strategy allows us to enjoy an updated space now without feeling pressured to rush into a full renovation before we are fully prepared. It’s a practical and sustainable way to approach home improvements, ensuring that every effort contributes positively to our living environment.
The Final Touches: Decor, Windows, and Wall Accents
As we edge closer to completion, our minds are buzzing with ideas for the finishing touches that will truly personalize this space. Decorating is where the bathroom will fully embrace its identity as both Olivia’s personal haven and a comfortable guest retreat. We’re thinking about artwork, perhaps some charming storage solutions, and other decorative elements that tie into the sophisticated yet approachable vibe we’ve established with the Coventry Gray cabinets.
The wall treatment is another area of active debate. While the fresh paint has done wonders, I’ve been intrigued by the idea of adding a subtle stencil design to one or more walls. This could introduce an extra layer of texture and pattern, adding depth and visual interest without overwhelming the space. Alternatively, leaving the walls as-is maintains a clean, minimalist aesthetic that allows other elements to shine. Similarly, we’re deliberating over a window treatment. A stylish blind or curtain could enhance privacy and add a soft element to the room, but leaving the window bare might maximize natural light and maintain a simple, uncluttered feel. Each decision contributes to the overall narrative of the space.
Progress Check: Our Hallway Bathroom To-Do List
To keep track of our journey and share our progress transparently, here’s an updated look at our hallway bathroom renovation checklist. The strikethrough items mark our achievements, while the remaining points highlight the exciting tasks still ahead:
Paint walls Magnolia Home WeekendPaint trim Benjamin Moore Simply WhitePaint doors Benjamin Moore Wrought IronPaint sink and tub/shower with Rustoleum Tub & Tile Refinishing Kit- Refresh light fixture
Paint vanity cabinet- Paint tile / grout
- Hang wall decor (halfway finished)
- Decorate
- Install window treatment (optional)
- Consider wall stencil (optional)
Your Input Matters: Help Us Make the Final Decisions!
As you can see, we’re truly in the home stretch, but some pivotal design decisions still hang in the balance. Your thoughts and experiences are incredibly valuable to us as we work to finalize this charming bathroom makeover.
- Regarding the floor: Should we opt for the conservative approach of simply painting the grout, or take the bolder step of painting the entire ceramic tile surface, banking on durability?
- For the walls: Do you think a patterned stencil would add delightful character, or is the clean, freshly painted wall sufficient for a serene atmosphere?
- And the window: Should we introduce a window treatment for added softness and privacy, or keep it bare to maximize the natural light and maintain an uncluttered feel?
We’re facing some holy decisions, Batman, and every piece of advice helps! Let us know your opinions in the comments below. We’re eager to hear your suggestions and learn from your own home renovation journeys.