
Illuminate Your Space: Crafting a Custom Designer Dupe DIY Light Fixture with a Sunburst Mirror
Transforming a room often comes down to the details, and lighting plays a pivotal role in defining both the ambiance and style of any space. While scrolling through numerous online lighting stores, you’ve likely stumbled upon those captivating sunburst-style light fixtures that instantly elevate a room’s aesthetic. They exude luxury and a unique charm, yet their designer price tags often make them an unattainable dream for many homeowners, especially when decorating high-traffic areas like a kids’ playroom. But what if we told you that achieving that high-end look doesn’t require a designer budget?
Today, we’re diving into an incredibly clever and budget-friendly DIY project that repurposes an item you might never have considered for lighting: a sunburst mirror. We successfully transformed a simple flush mount light and a sunburst mirror into a stunning, custom-designer dupe light fixture for our playroom, and the results are absolutely enchanting! This project offers a fantastic way to introduce a large, statement-making, and whimsical element into your home without breaking the bank. Best of all, this impressive transformation can be completed in just about two hours, making it an ideal weekend project for any DIY enthusiast.
The finished piece turned out to be utterly adorable, radiating a charming and sophisticated glow that perfectly complements our playroom’s new look. This DIY approach not only saves a significant amount of money but also allows for complete customization, ensuring your new light fixture perfectly aligns with your home’s unique style.
The Vision Behind the Playroom Transformation
Our playroom has been undergoing a delightful makeover, and the lighting choice was crucial to tying the entire design together. Just last week, we completed installing cabinet doors on our IKEA built-ins and gave them a fresh coat of our favorite blue-grey paint color, Romabio Carolina Sky. This update brought a serene and cohesive feel to the space, but it also necessitated a change in our lighting approach.
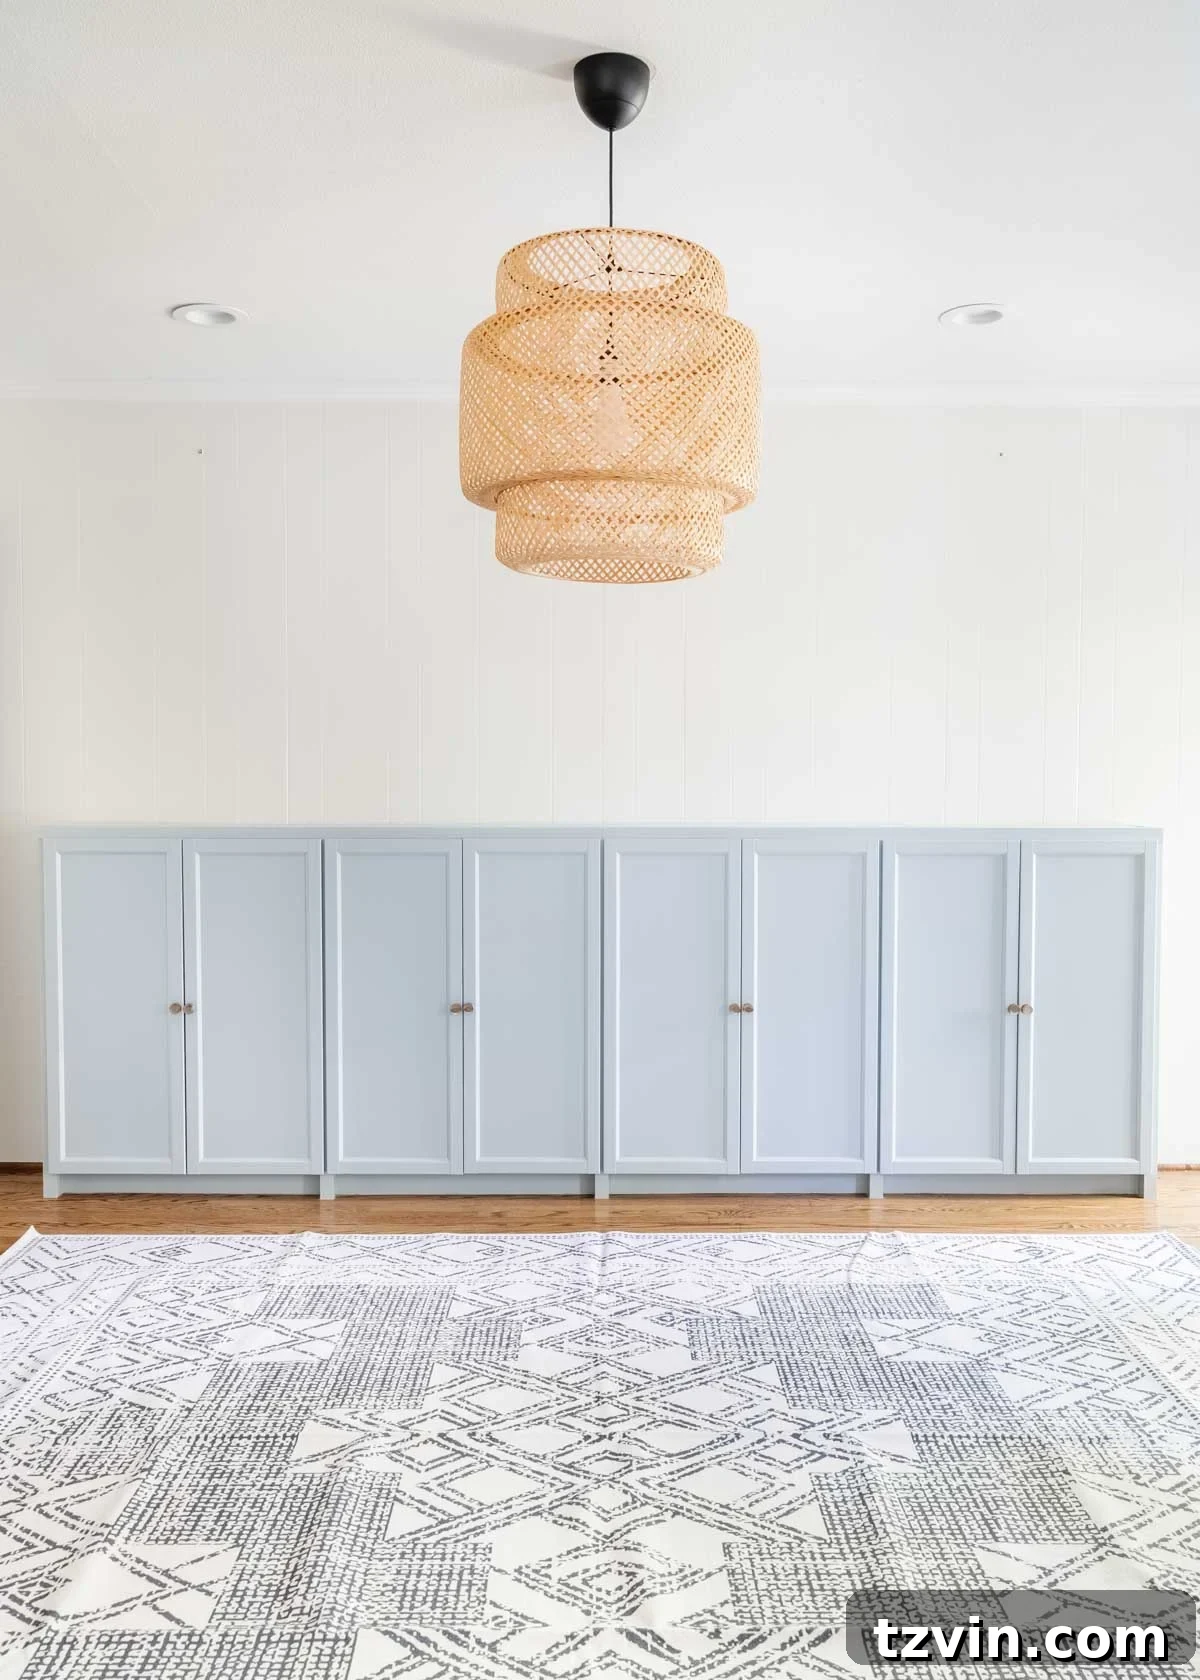
Previously, a pendant light hung prominently, but with our new furniture layout, which requires more flexibility and freedom from a permanent table underneath, a flush mount light became the more practical and aesthetically pleasing choice. Additionally, the existing boho weave light, while lovely in its own right, didn’t quite align with the refreshed style we were aiming for. We needed something that felt more integrated, elegant, and playful, yet still refined. The sunburst mirror concept immediately clicked as the perfect solution to marry functionality with high-impact design. This project proves that you don’t have to sacrifice style for practicality or budget when reimagining your living spaces.
DIY Sunburst Mirror Light Fixture: Step-by-Step Guide
Ready to create your own bespoke lighting masterpiece? Here’s everything you need to know to replicate this stunning designer dupe. With a little creativity and a few simple tools, you’ll be amazed at the transformation you can achieve in just a couple of hours.
Supplies You’ll Need:
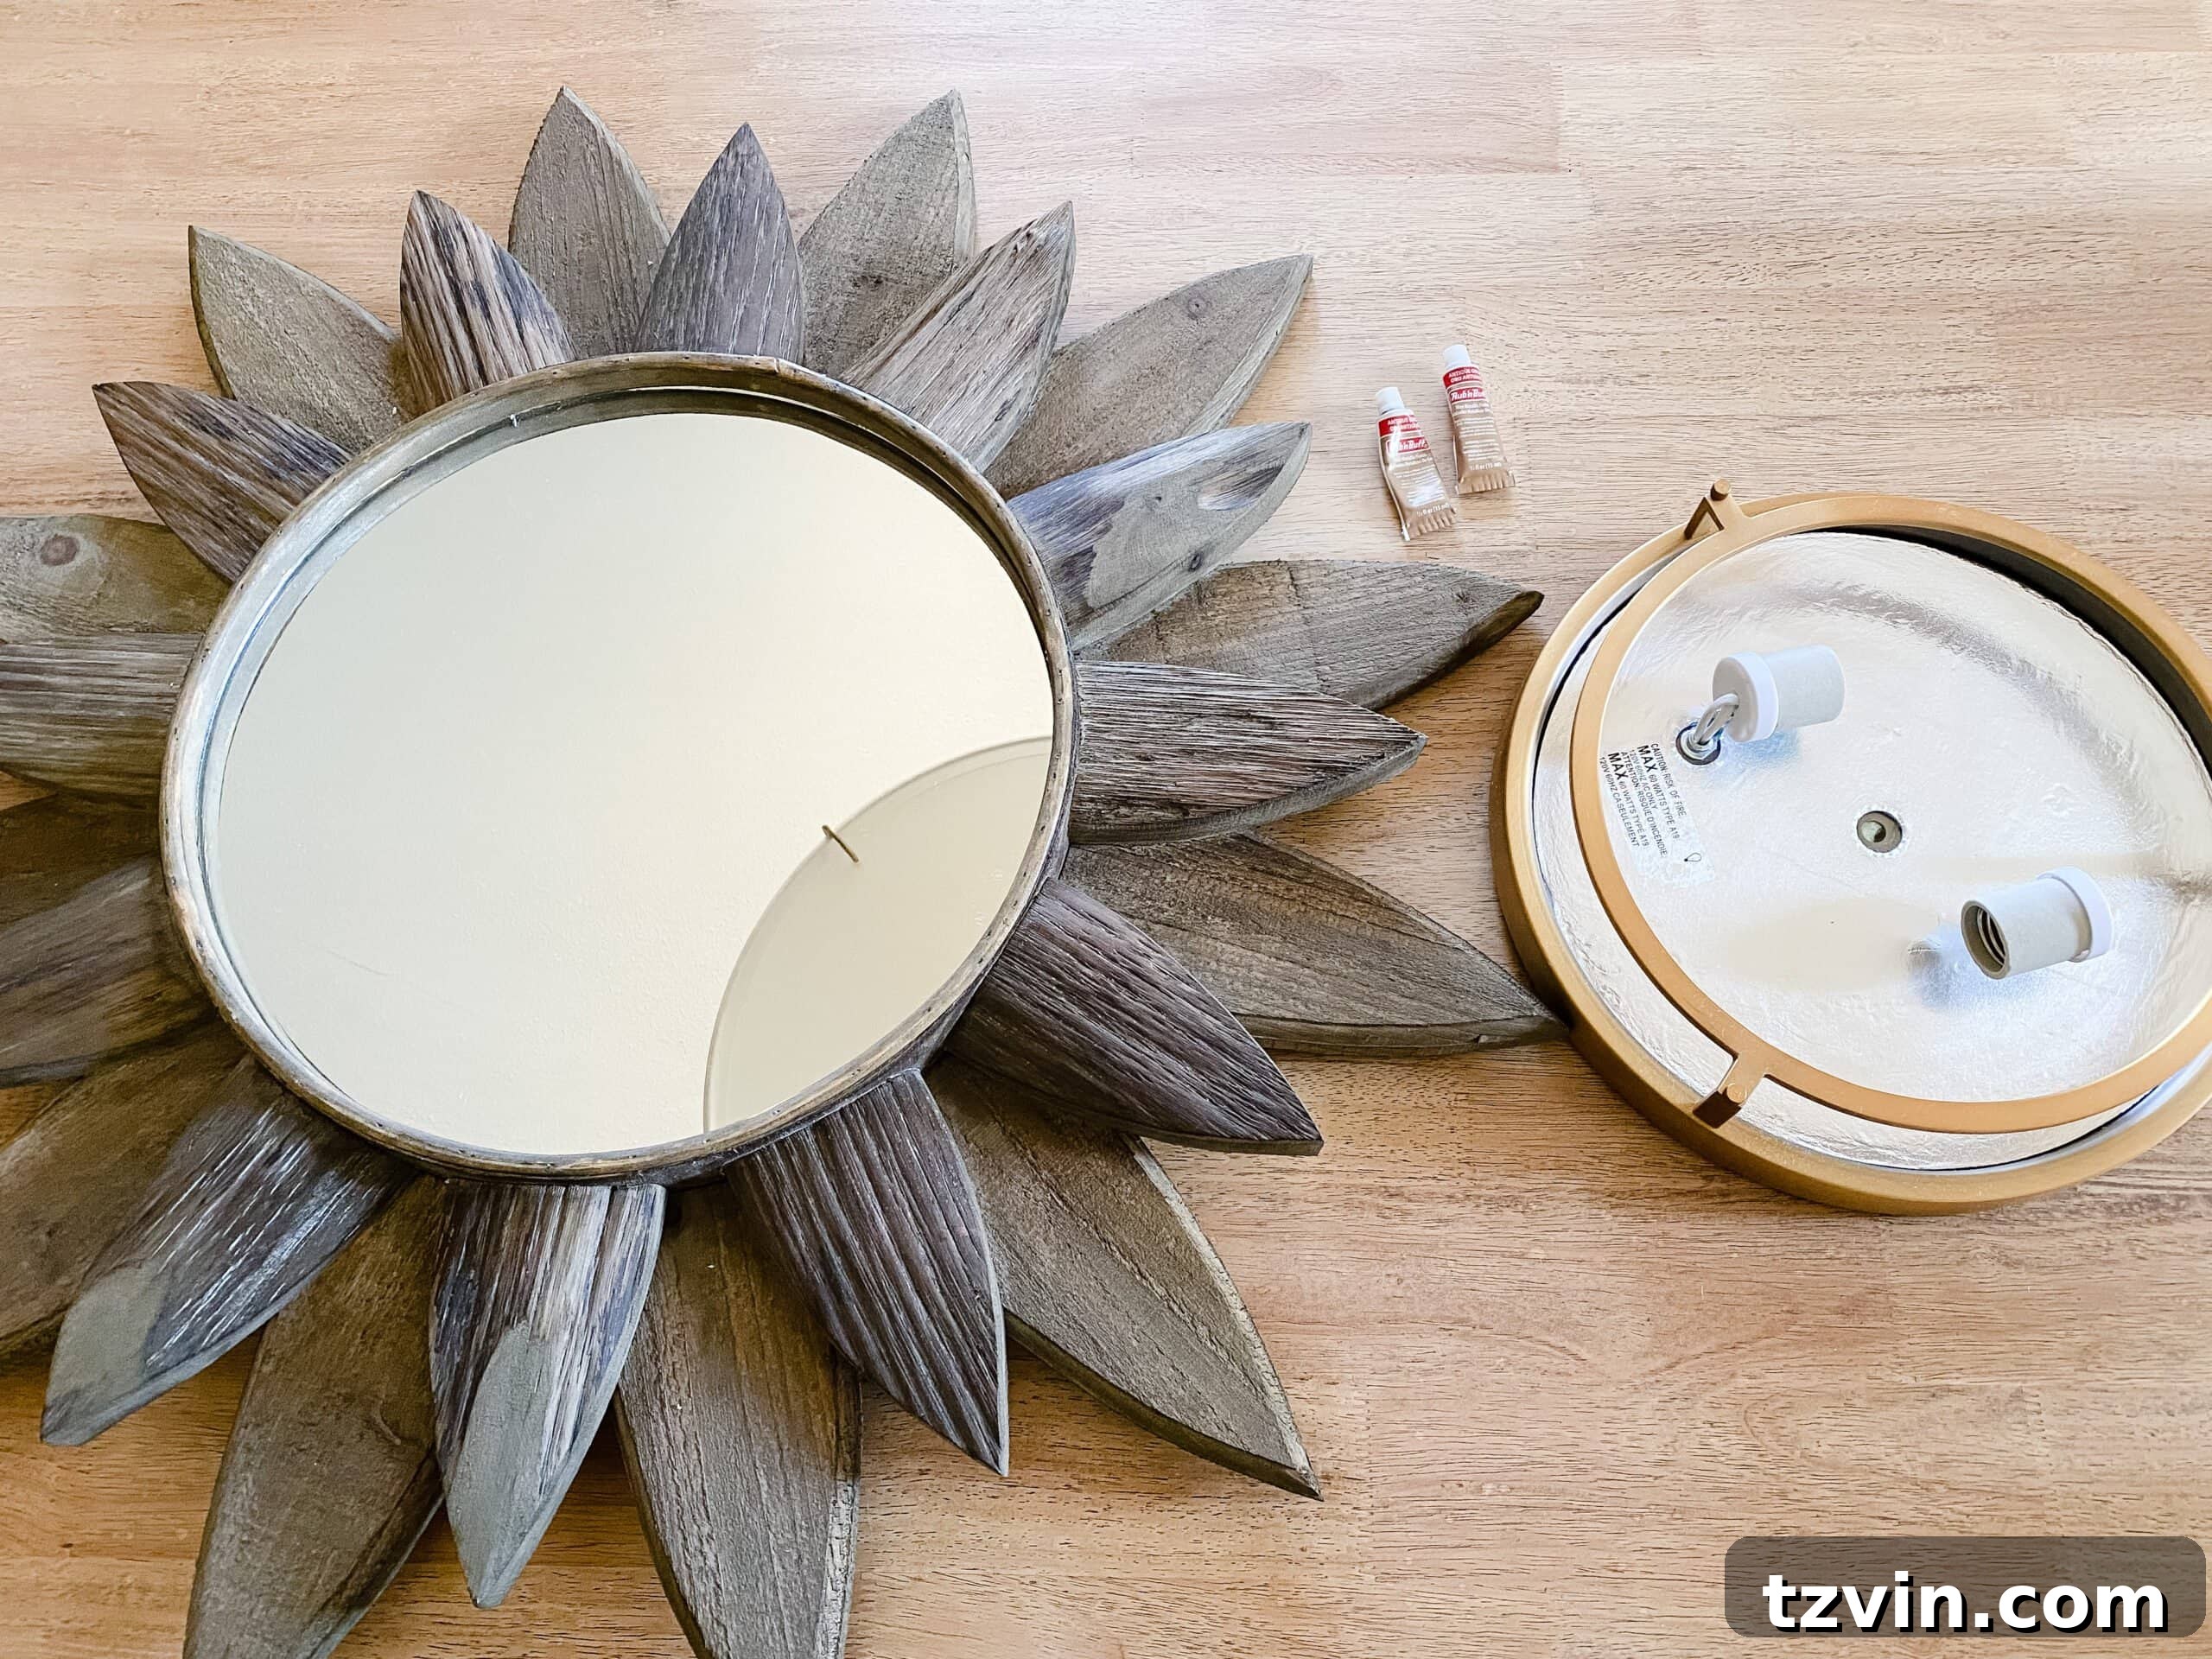
- Sunburst mirror of your choosing: The key here is to find a mirror with a frame that speaks to your style. We opted for this particular one, which offered the ideal size and aesthetic. Ensure the mirror’s overall design will complement your room even after the glass is removed.
- Flush mount light fixture: Select a fixture that is slightly smaller than the diameter of the central glass mirror section of your sunburst mirror. This ensures the flush mount light will sit neatly within the mirror frame, creating a seamless, integrated look. We used this specific model.
- Screwdriver: Essential for disassembling the mirror and for the light fixture installation. Have a set with various heads on hand.
- Gold spray paint (optional): This is needed if your sunburst mirror frame isn’t already the desired gold tone or if it needs a refresh. Choose a high-quality paint for an even finish.
- Rub n Buff Antique Gold: This magical product provides a rich, dimensional, and aged gold finish, perfect for achieving that high-end designer look. It’s fantastic for adding depth and blending different metallic elements.
- Small paint brush: Ideal for applying the Rub n Buff with precision, especially in smaller areas or for touch-ups.
- Stud finder: Absolutely critical for locating ceiling joists to securely mount the sunburst mirror frame. Safety and stability are paramount.
- 2″ drywall screws: For firmly attaching the mirror frame to the ceiling studs, ensuring it stays in place for years to come.
Detailed Steps to Craft Your Designer Light:
-
Carefully Remove the Mirror Glass from the Sunburst Frame
Begin by turning the sunburst mirror over to access its backside. Using your screwdriver, carefully loosen and remove the screws or clips that hold the glass mirror in place within its frame. Gently lift out the glass. Store the mirror glass safely if you plan to repurpose it for another project; otherwise, dispose of it properly. The goal here is to be left with just the decorative sunburst frame, which will form the outer layer of your new light fixture. Take your time with this step to avoid any damage to the frame or injury from the glass.
-
Transform the Sunburst Mirror Frame with Paint
This is where the magic begins! If your sunburst mirror frame isn’t already gold or needs a fresh coat, apply a layer of gold spray paint. Work in a well-ventilated area and use thin, even coats to prevent drips. Allow each coat to dry completely before applying the next. For our project, we were working with a wooden mirror frame and wanted to ensure a deep, uniform gold coverage, so spray painting was essential. If your frame is already a good shade of gold, you might skip this step. After the spray paint has dried, or if your frame was already gold, apply Rub n Buff Antique Gold using a small paint brush or a soft cloth. This adds an incredible layer of dimension, warmth, and an aged patina that makes the fixture look truly expensive and bespoke. It’s amazing how this product can transform a simple painted surface into a rich, antique-like metallic finish.
-
Paint the Visible Metal of the Flush Mount Light Fixture
To ensure a cohesive and seamless look, apply the same Rub n Buff Antique Gold to any visible metal parts of your flush mount light fixture. This step is crucial for making the light fixture and the sunburst mirror frame appear as one integrated, custom-designed piece rather than two separate components. Pay attention to areas that will be exposed once the light is installed. This attention to detail significantly elevates the final appearance of your DIY fixture.
-
Install the Flush Mount Light Fixture in the Ceiling
Safety First: Before beginning any electrical work, always ensure the power to the circuit is turned off at the breaker. Follow the manufacturer’s instructions to properly install your flush mount light fixture in the desired location on the ceiling. This typically involves connecting the electrical wires (matching colors: black to black, white to white, and ground to ground) and then securing the fixture base to the electrical box. Double-check all connections to ensure they are secure and safe. Once the wiring is complete, attach the fixture’s cover or diffuser.
-
Position and Secure the Sunburst Mirror Frame
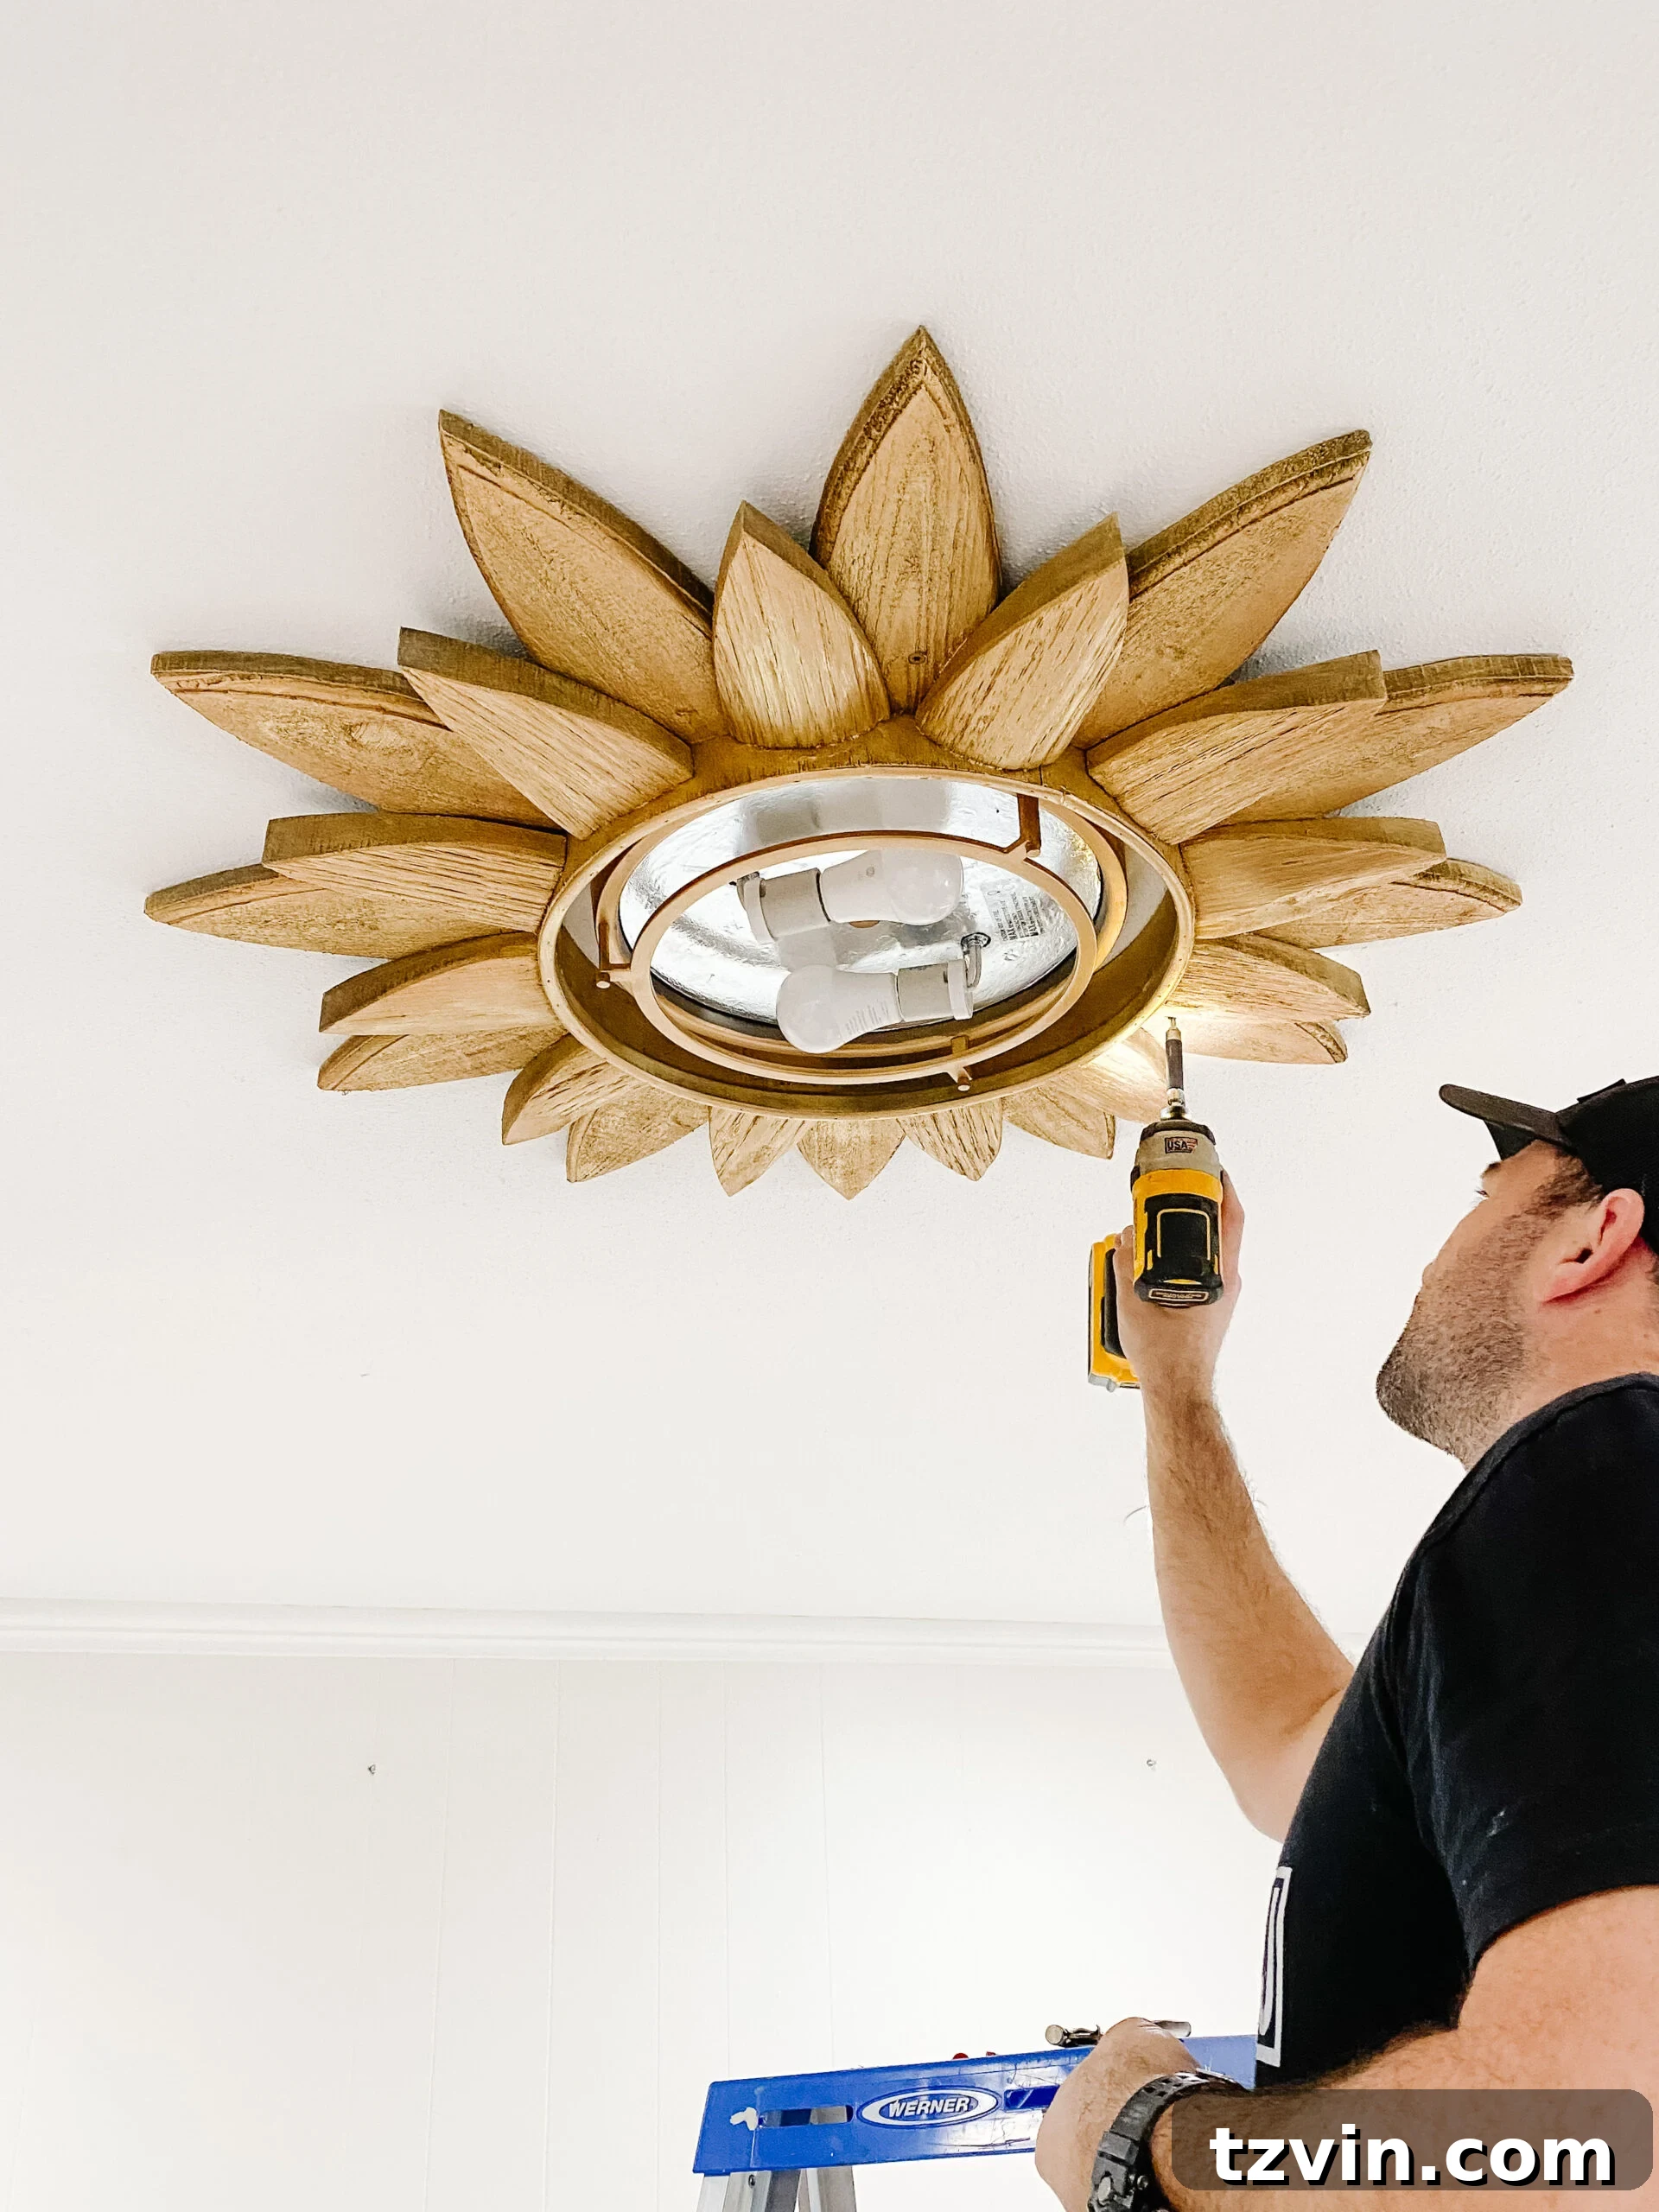
With the flush mount light securely in place, carefully position the sunburst mirror frame around it, ensuring the light fixture is centered within the mirror’s opening. This is where your stud finder comes in handy. Use it to locate ceiling studs around the perimeter where you plan to attach the mirror frame. It’s crucial to anchor the heavy mirror frame into these studs for maximum stability and safety. Using 2″ drywall screws, securely fasten the mirror frame to the ceiling, making sure it sits flush and snugly against the ceiling and around the light fixture. Take a step back to ensure it’s straight and perfectly aligned before tightening all screws.
-
Achieve a Seamless Finish with Rub n Buff
For that ultimate custom designer look, you’ll want to eliminate any visible gaps between the flush mount light fixture and the mirror frame where they meet the ceiling. Using a small paint brush, apply a bit more of the Rub n Buff Antique Gold directly to the ceiling in this seam. This subtle touch helps to visually blend the two components and hide any imperfections or small gaps, creating the illusion of a single, integrated light fixture. The metallic finish will camouflage the transition, giving your DIY creation a polished and professional appearance that truly rivals high-end designer pieces.
The Grand Reveal: A Magical Addition to the Playroom
Ta da! Your new sunburst DIY light fixture is complete, and ready to cast a beautiful glow! The transformation is truly remarkable.
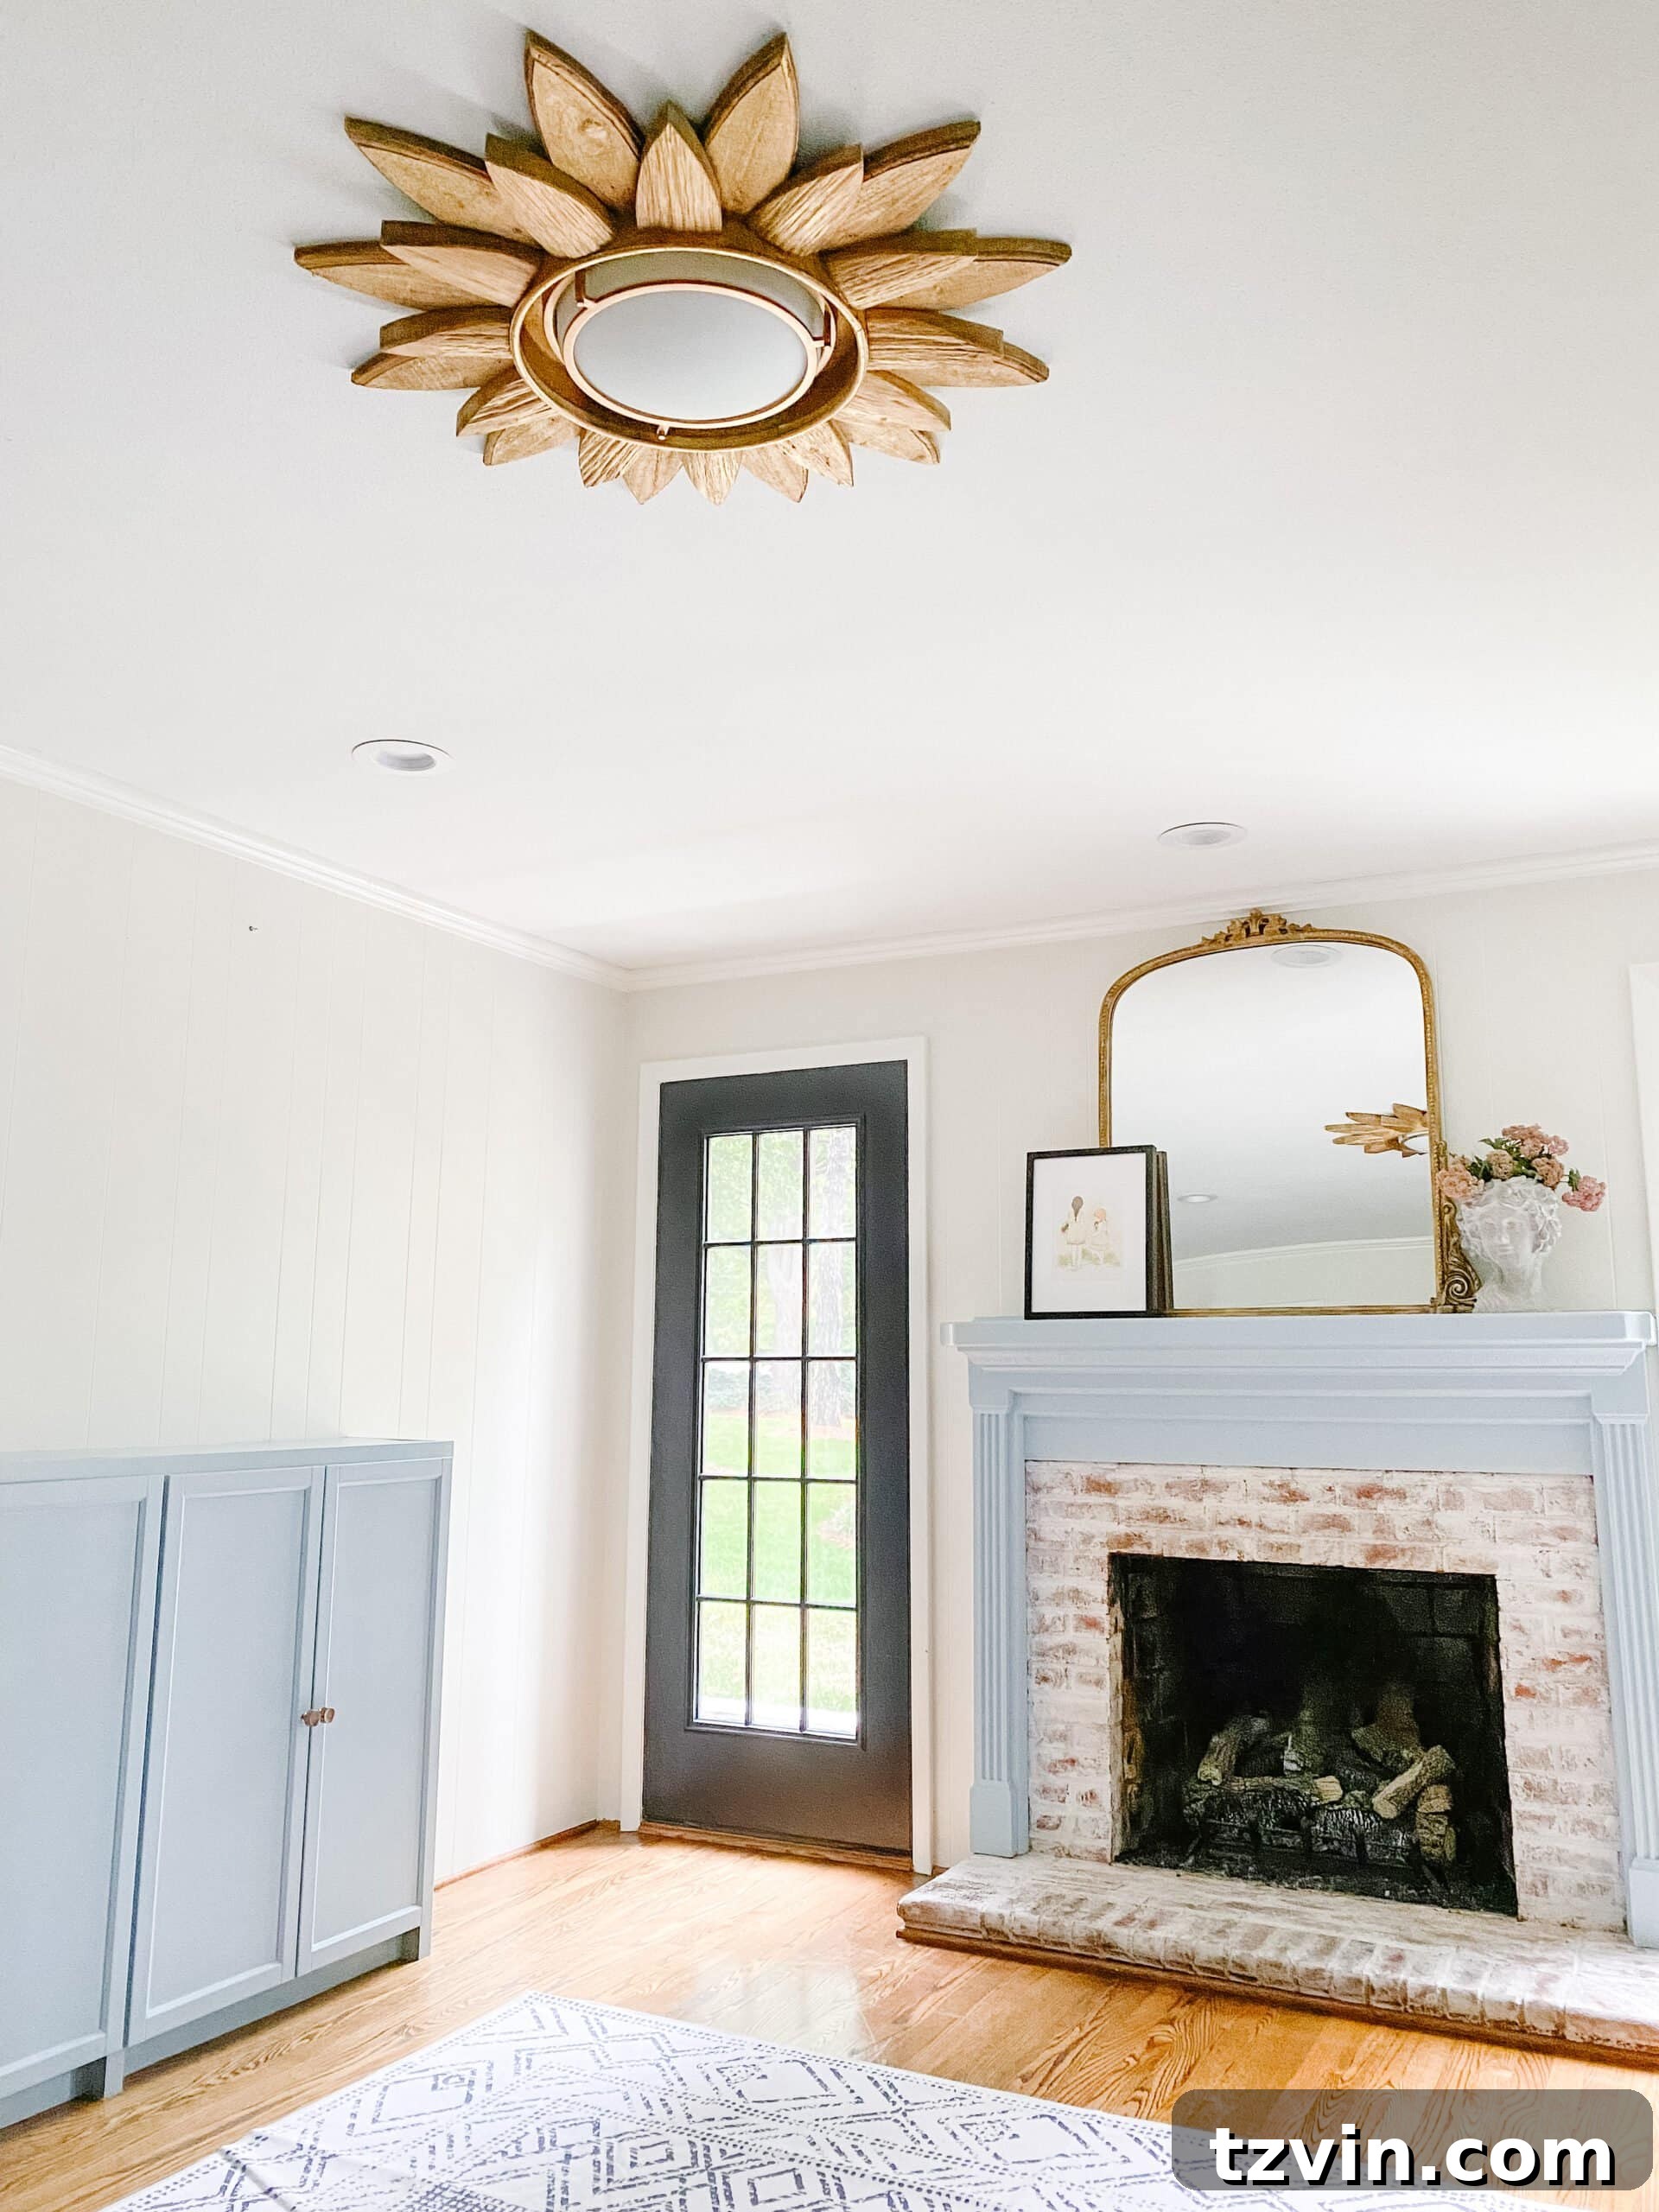
The moment our daughter, Regan, saw it in the playroom, her eyes lit up as she exclaimed, “It’s Rapunzel’s flower!” And she was absolutely right. The golden rays of the sunburst mirror, encircling the soft glow of the flush mount, evoke the enchanting imagery of the magical golden flower from Rapunzel. This spontaneous connection truly affirmed the whimsical and dreamlike quality we aimed to achieve in the playroom.
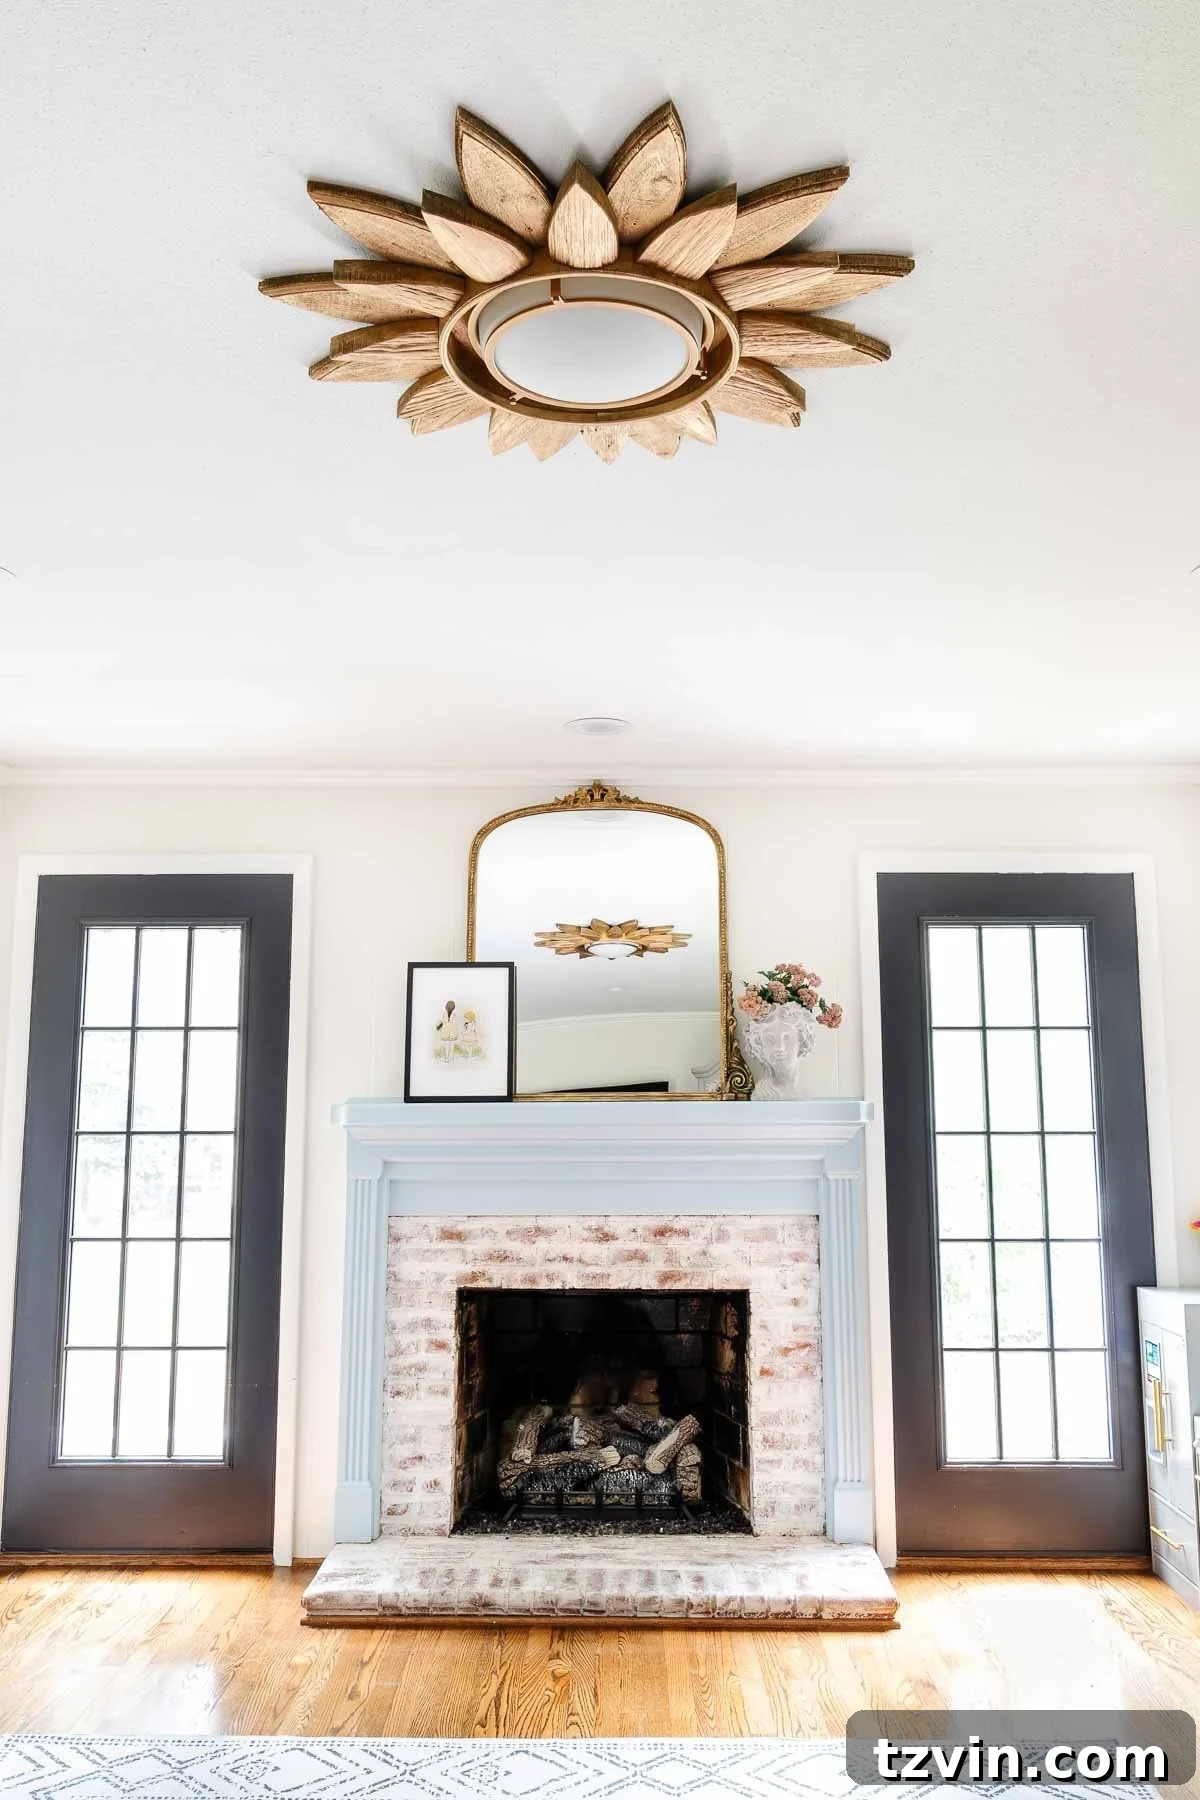
This “Rapunzel’s flower” aesthetic seems particularly fitting, especially considering the woodland fairytale and Renaissance princess artwork we have planned for the room. The light fixture effortlessly ties into this theme, adding a touch of golden magic and fantasy to the space. It’s a focal point that is both playful and elegant, perfectly balancing the needs of a child’s room with a sophisticated design sensibility.
Beyond the Playroom: Your DIY Lighting Possibilities
This project is a testament to how creative repurposing can yield truly unique and stunning results. It prompts the question: What do you think? Is a DIY light fixture like this something you’d be willing to try sometime? We hope this tutorial inspires you to look at everyday objects with a fresh, creative perspective. We’ll certainly never look at round mirror frames the same way again, that’s for sure! This technique can be adapted for various spaces – imagine a smaller version in a hallway, a grander statement in an entry foyer, or even a chic addition to a master bedroom. The possibilities for personalization are endless, from choosing different mirror styles and paint colors to experimenting with the flush mount fixture itself.
Embrace the challenge, unleash your inner designer, and create a truly custom piece that reflects your personal style. Not only will you save money, but you’ll also gain the satisfaction of crafting something beautiful and functional with your own hands. Happy DIYing!

Related Posts:
- The Best Wireless Lights from Amazon
- Antique Gold Frosted Crystal Light Fixture Makeover
- The Easiest Way to Refresh a Bathroom Vanity Light
- Splurge vs. Save Lighting Options