
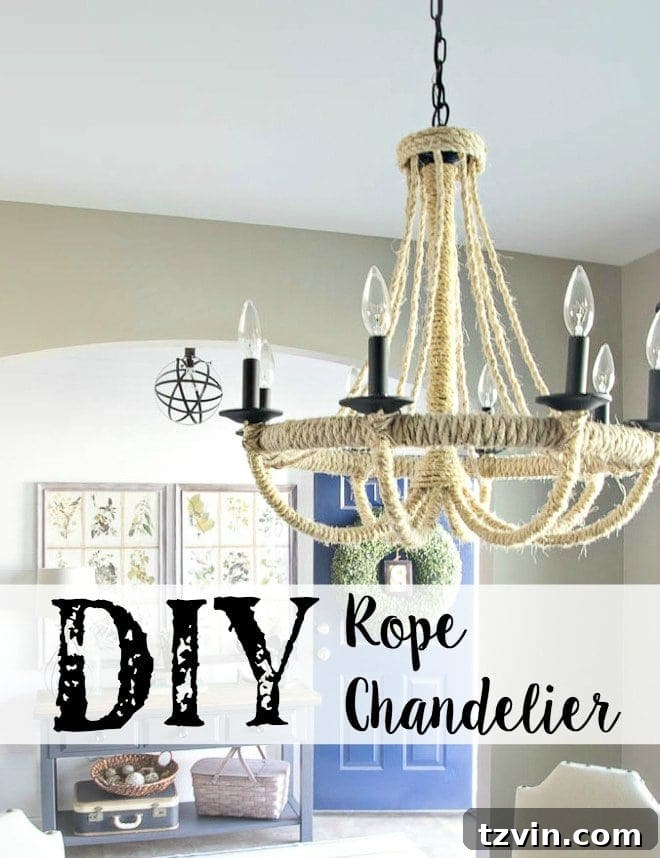
Transform Your Space: The Ultimate DIY Rope Chandelier (Restoration Hardware Dupe!)
Have you ever encountered a stunning designer piece and found yourself thinking, “I could absolutely create that for a fraction of the cost”? That moment of creative revelation struck me while I was gathering inspiration for our dining room. The idea for a dramatic, textured lighting fixture ignited, and I’m beyond thrilled to share the detailed journey and the fantastic results with you!
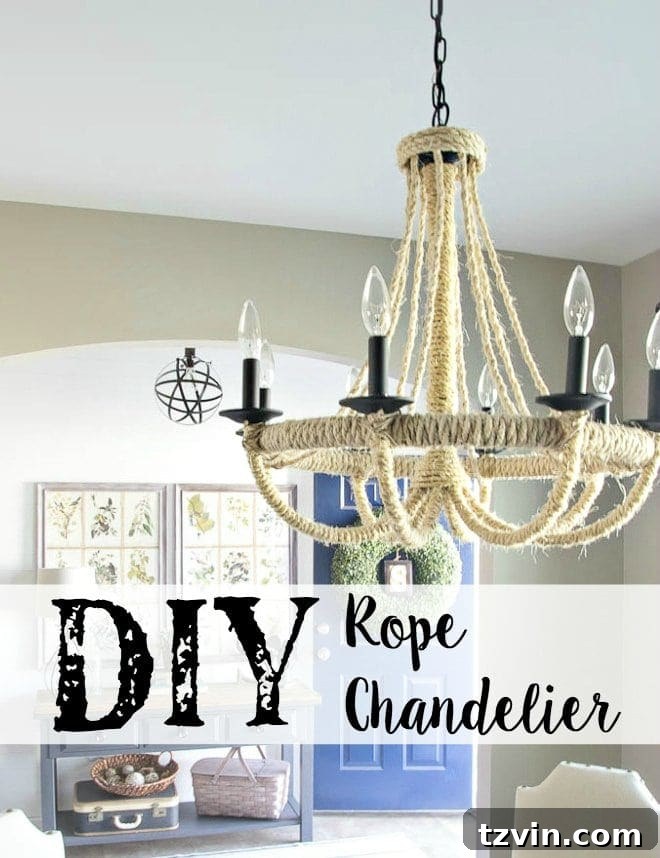
Let me be transparent: this project, while not inherently difficult, certainly required a dose of patience. It was a bit tedious at times, but the effort was unequivocally worth it. My goal was to replicate the grandeur of the Restoration Hardware French Empire Rope Chandelier, which carries a hefty price tag of $1,595, for an astonishingly low cost of around $30. Achieving a high-end look on such a budget is an incredibly satisfying accomplishment!
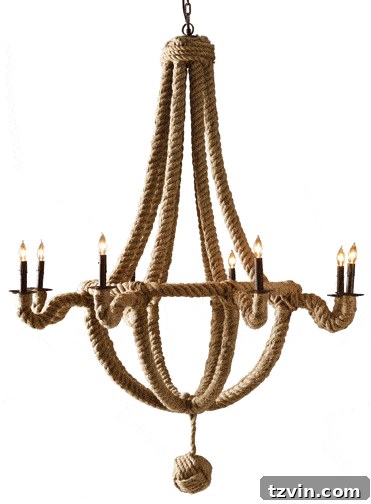
The Inspiration: High-End Design on a DIY Budget
My quest for this unique lighting fixture began with a simple desire for visual interest and texture. I initially stumbled upon a black chandelier on Craigslist at a fantastic price. It was perfectly functional and looked quite good on its own. However, my inner decorator, always seeking opportunities to elevate a piece, knew there was potential for something far more captivating. I have a profound appreciation for texture in design, and I envisioned transforming this basic fixture into a statement piece brimming with character.
The Restoration Hardware French Empire Rope Chandelier served as the ultimate muse. Its rustic elegance, achieved through meticulously wrapped sisal rope, offered a sophisticated yet approachable aesthetic. The challenge was to capture that same luxurious feel without the prohibitive cost. This DIY approach not only saved a substantial amount of money but also allowed for a completely personalized touch, making the final piece truly unique to my home.
Essential Supplies for Your DIY Rope Chandelier
Gathering the right materials is the first crucial step in any successful DIY project. For your convenience, I’ve included affiliate links below. Please see my full disclosure here for more information.
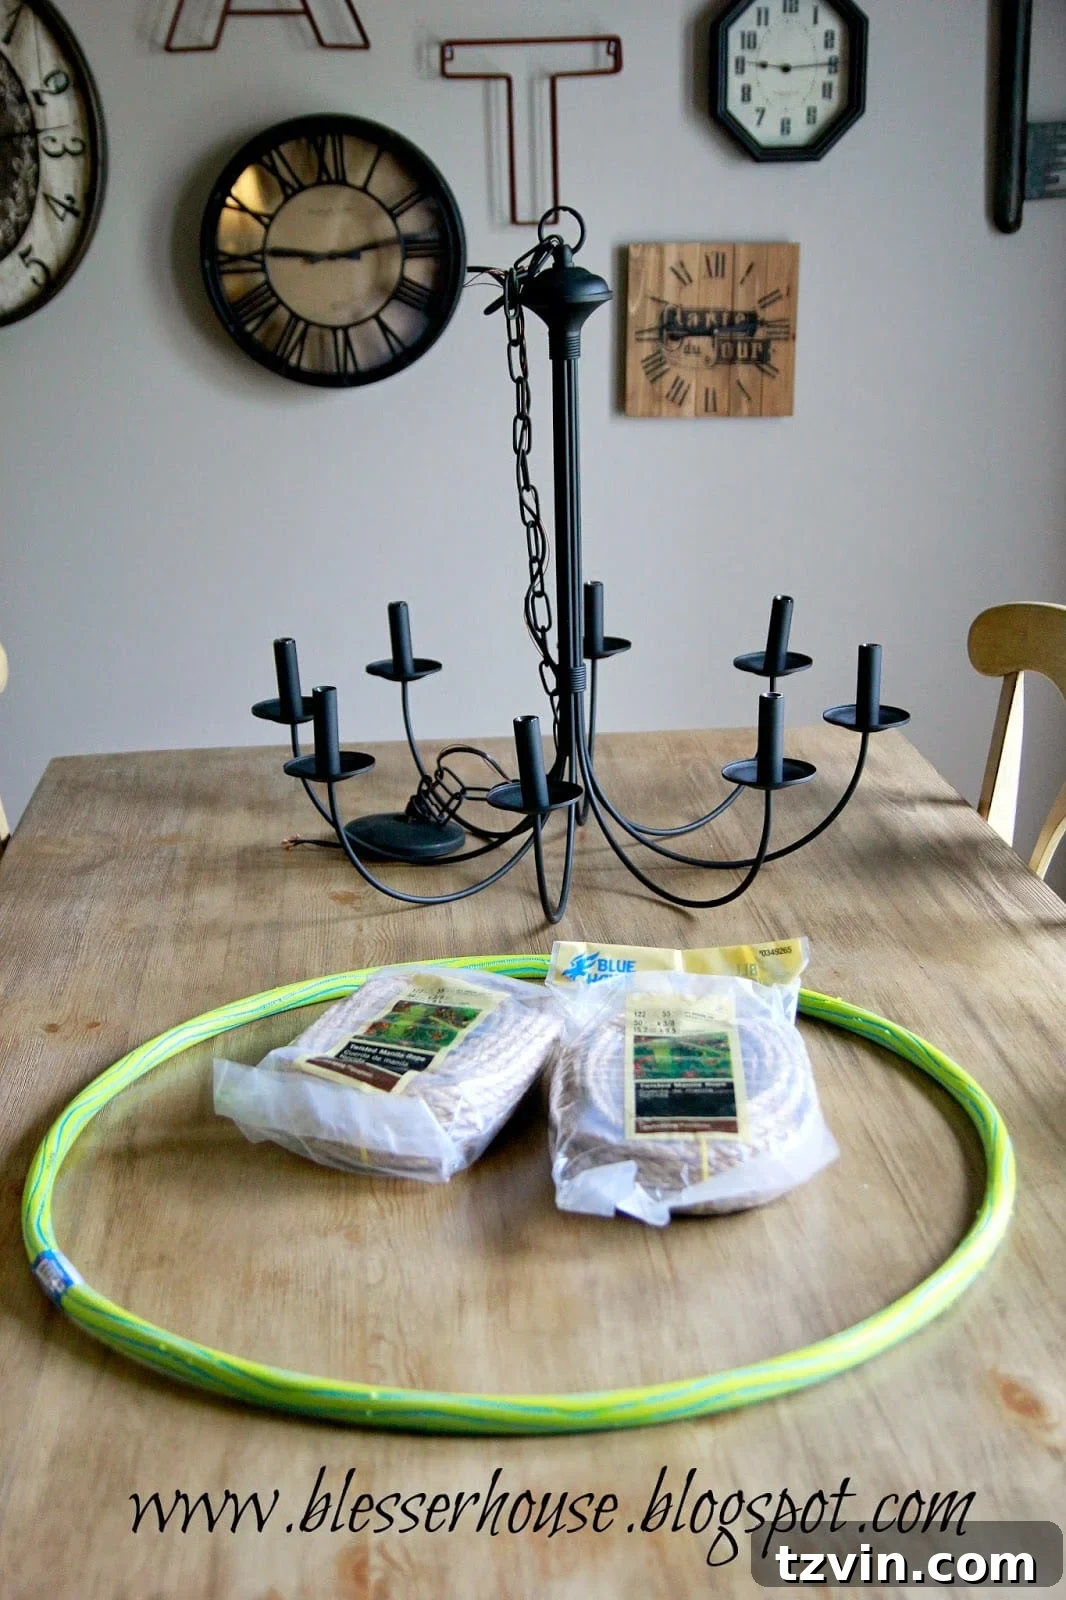
- Chandelier: Look for an affordable used chandelier on platforms like Craigslist or at thrift stores. A simple, basic design works best as it will be entirely covered. This one is similar to the one I found.
- Sisal Rope (3/8 inch, 100 ft): This thicker rope is ideal for wrapping larger sections and creating a more substantial look. Find it here.
- Sisal Rope (1/4 inch, 100 ft): The thinner rope is perfect for the chandelier arms and intricate detailing. Available here.
- Twine: Essential for securely finishing off the rope ends and adding decorative accents.
- Sharp Scissors: A good pair of scissors will make cutting the thick sisal rope much easier and cleaner.
- Hot Glue Gun and Sticks: Your primary adhesive for securing the rope. Ensure you have plenty of glue sticks on hand!
- A Wooden Spoon or Popsicle Stick: An indispensable tool for pressing down hot glue without burning your fingers.
- Small Hula Hoop: This will form the large lower ring of the chandelier, providing structure for the rope swags. I found mine along with the rope at Big Lots for just $18!
- Hand Saw: Needed to cut the hula hoop to the desired size. Purchase one here.
- Loctite Super Glue: For extra strong bonds, particularly where the hula hoop ends meet. Get it here.
- Duct Tape: Useful for temporarily securing the hula hoop while the super glue dries.
- Patience: This project is a labor of love, and a generous amount of patience will ensure a beautiful, stress-free outcome.
The total cost for the rope and hula hoop was an amazing $18 from Big Lots – an incredible bargain for such a transformative piece!
Preparing Your Hula Hoop for Integration
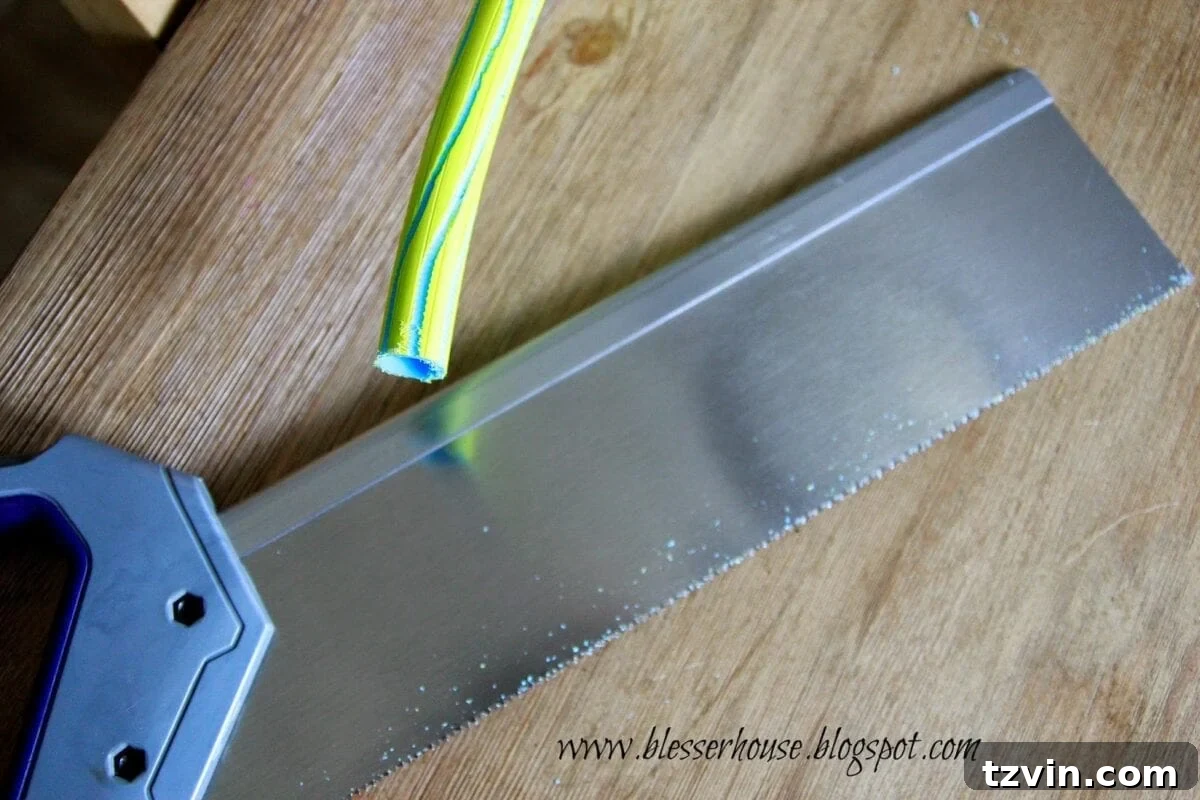
Before diving into the rope wrapping, I began by preparing the hula hoop. Using a hand saw, I carefully cut through the plastic ring. As I made the cut, a cascade of tiny beads spilled out – a truly surreal moment for my inner child, reminiscent of dissecting a Stretch Armstrong toy from my youth! This initial cut allows for flexibility in sizing and integration.
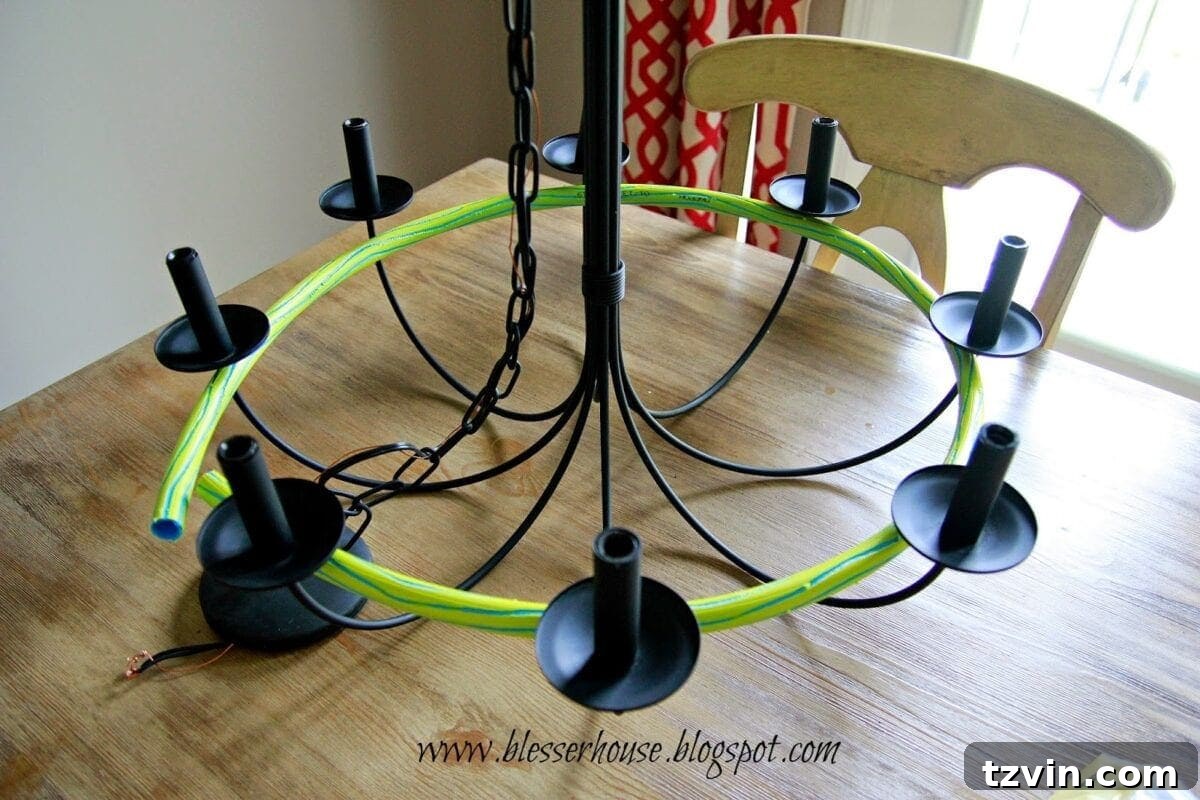
A brief (and rather memorable) pause was necessary at this stage. My two-year-old, upon discovering me “destroying” what she believed to be her new toy, threw quite the tantrum. A valuable lesson learned about crafting during naptime! Once the toddler meltdown subsided and she was happily dreaming, I resumed my work. I checked the circumference of the cut hoop against the chandelier to determine the ideal diameter, making a second cut to ensure a snug fit. While you might prefer to complete the chandelier’s rope wrapping first for a more precise measurement, I wanted to visualize the final structure early on to confirm my plan.
Wrapping the Chandelier Arms: A Test of Patience
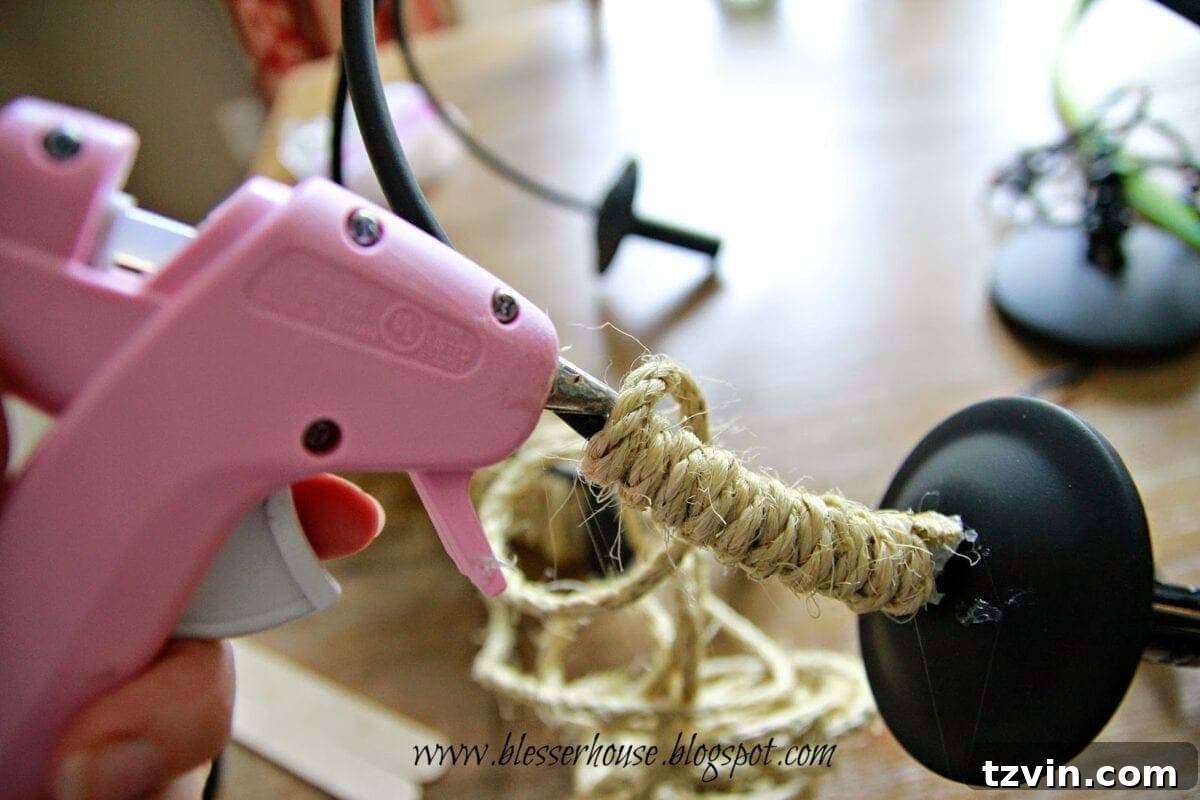
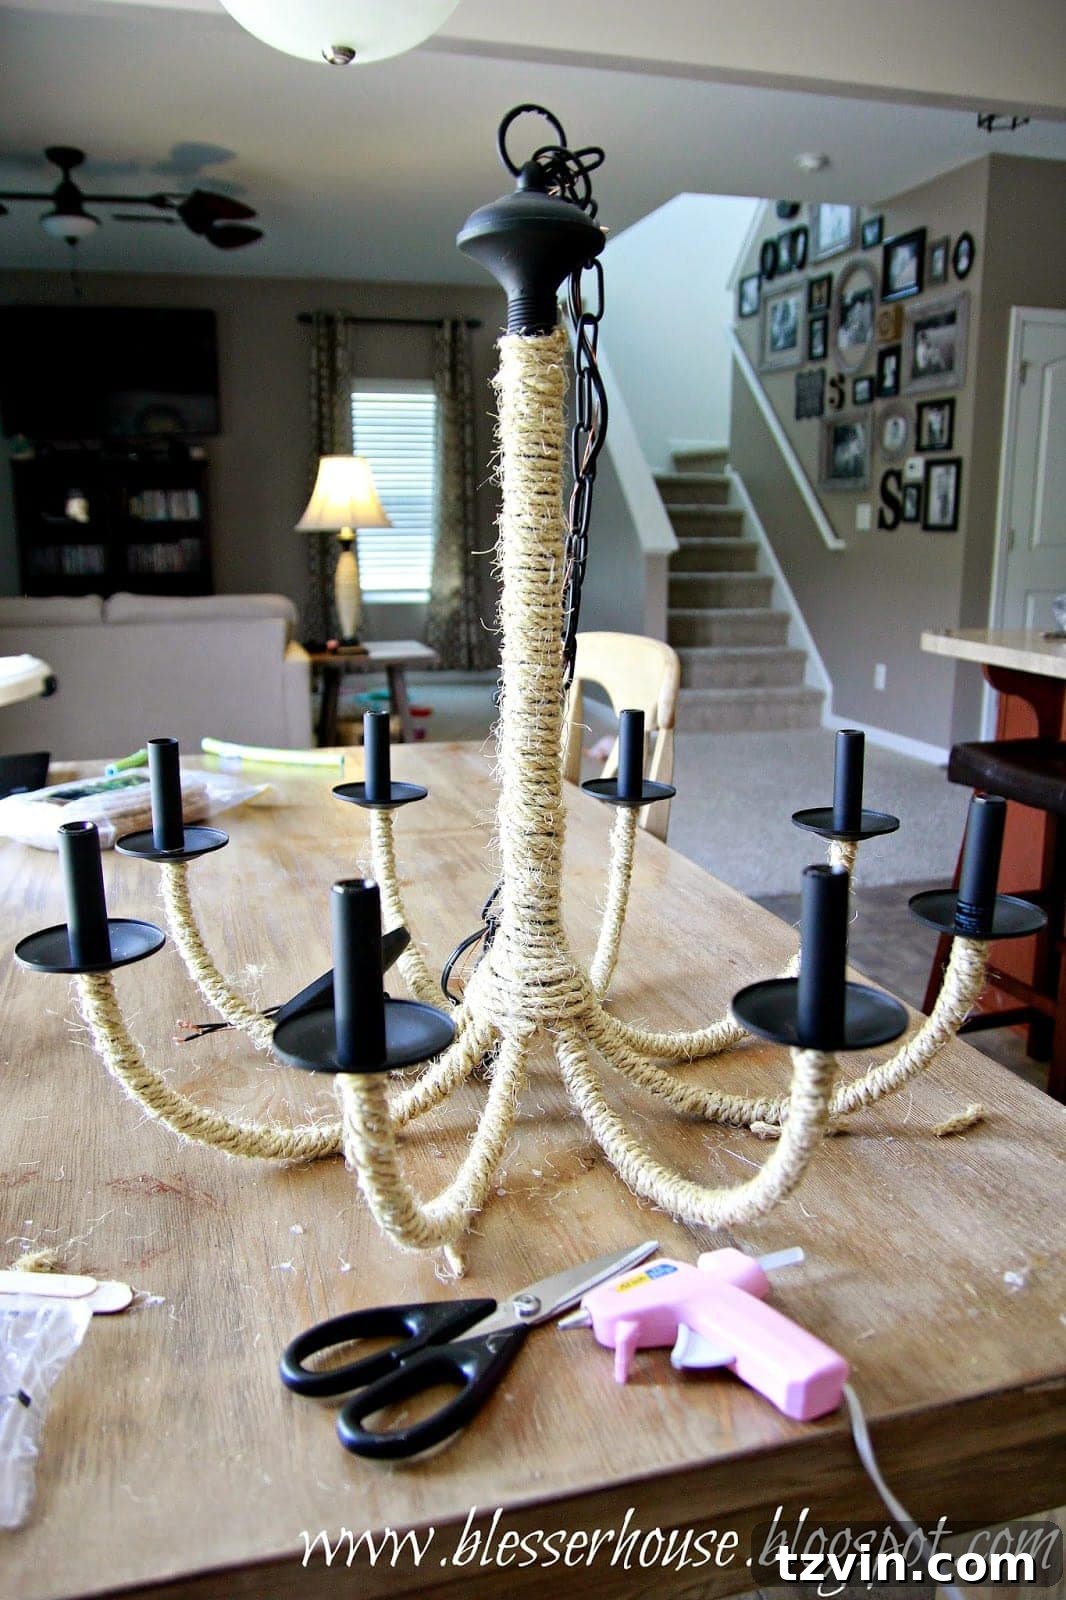
With the hula hoop ready, I removed it and flipped the chandelier upside down. This position makes wrapping the arms significantly easier. I began by meticulously wrapping the 1/4 inch sisal rope around each arm, securing it with hot glue. To protect my fingers from painful burns, I used a long wooden spoon to hold the rope firmly in place as the glue cooled. It’s crucial to work slowly and apply the hot glue liberally at first to prevent any slipping or unraveling of the rope. Consistency in your wrapping technique will ensure a smooth, professional finish.
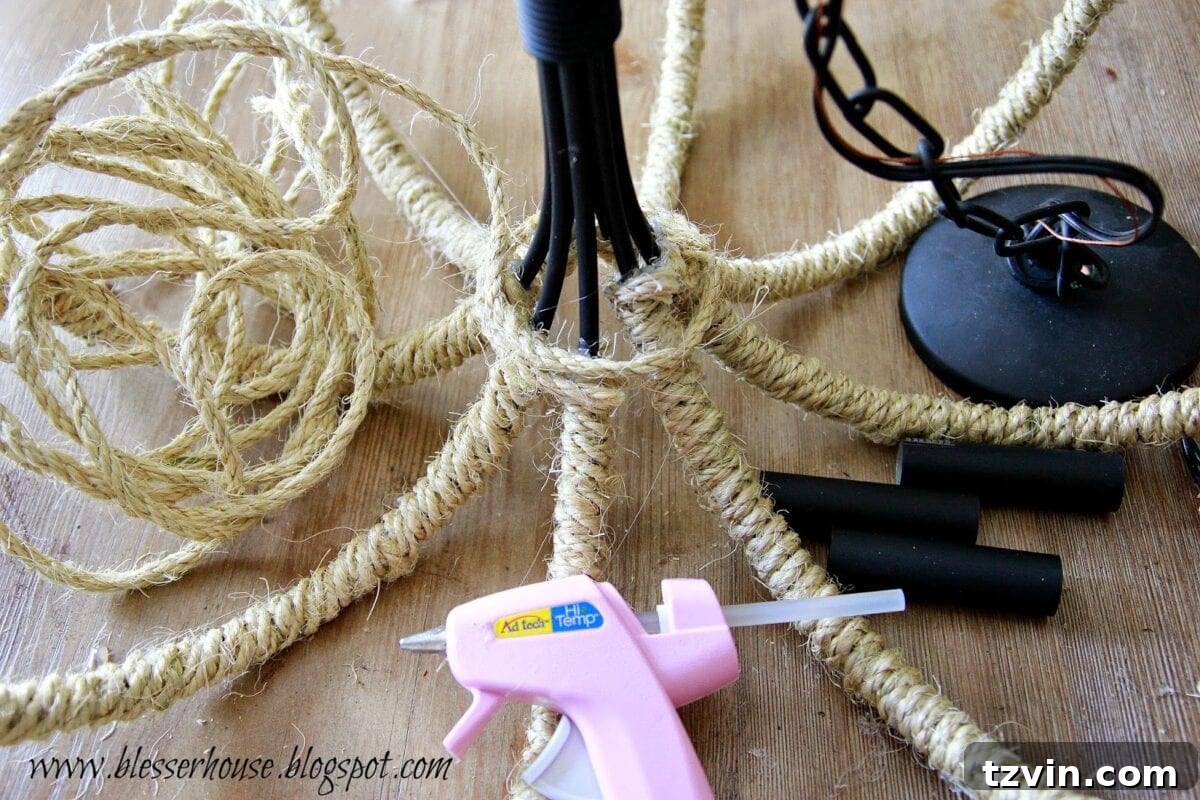
Wrapping all the chandelier arms was undoubtedly the most time-consuming part of the project, taking a solid two hours. As each arm was completed, I turned my attention to the central stem of the chandelier. To neatly conceal the rope ends from the arms, I continued wrapping more of the 1/4 inch rope upwards around the stem. This creates a seamless transition and a polished look.
A persistent challenge during this stage was the endless battle with hot glue strings – those notorious “spidery webs” that seem to cling to everything! If you share a phobia of spiders, these can be particularly unsettling. I often find stray glue strings for days after a hot glue project, which, given my frequent crafting, means almost constantly. It’s a small price to pay for the magic created by my trusty glue gun, “Pinky,” with whom I share a deep and productive friendship!
At this point, the chandelier was already looking fantastic! The transformation from a plain black fixture to a textured, natural beauty was remarkable. I was incredibly tempted to stop here and hang it as is, as it would have made a lovely statement. However, the insistent voice of my inner craft-addict urged me to press on, knowing that the addition of the hula hoop and swags would elevate it to another level of designer appeal.
Integrating the Rope-Wrapped Hula Hoop
Next, I focused on the hula hoop. I meticulously wrapped the entire hoop in the 3/8 inch sisal rope. While you could technically use the 1/4 inch rope, I was nearing the end of my supply, and the thicker rope provided a more substantial and visually impactful ring, which I felt was appropriate for the lower section of the chandelier.
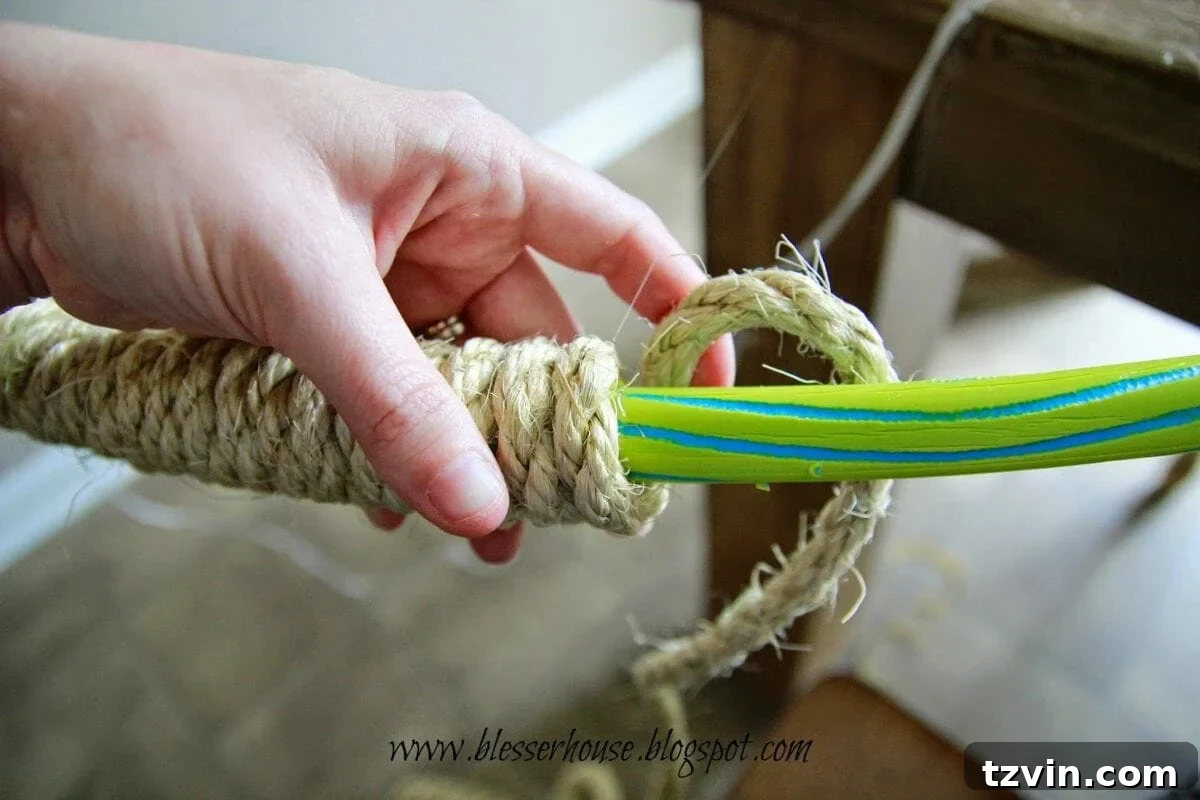
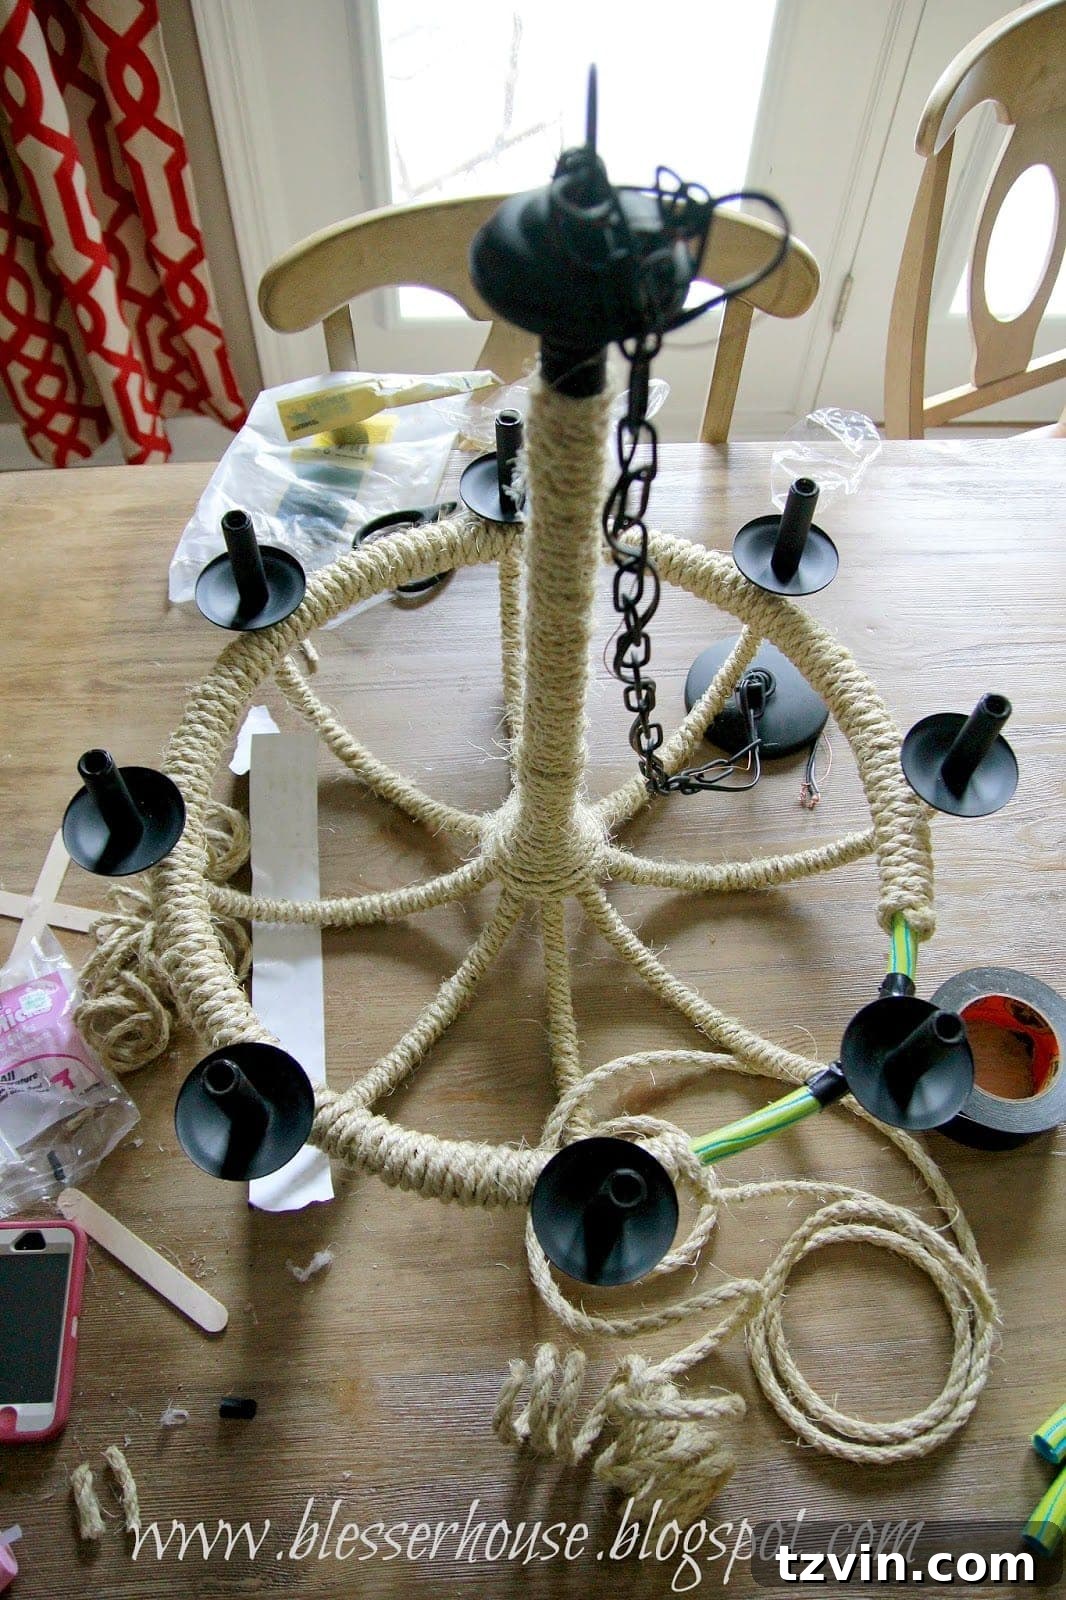
As I neared the end of wrapping the hula hoop, I carefully positioned it back into the chandelier, ensuring it sat snugly. Then, I used Loctite super glue to bond the two ends of the hula hoop together, creating a continuous ring. For extra security while the super glue cured, I wrapped a few strips of duct tape around the join. This temporary measure ensures the hoop maintains its shape and integrity.
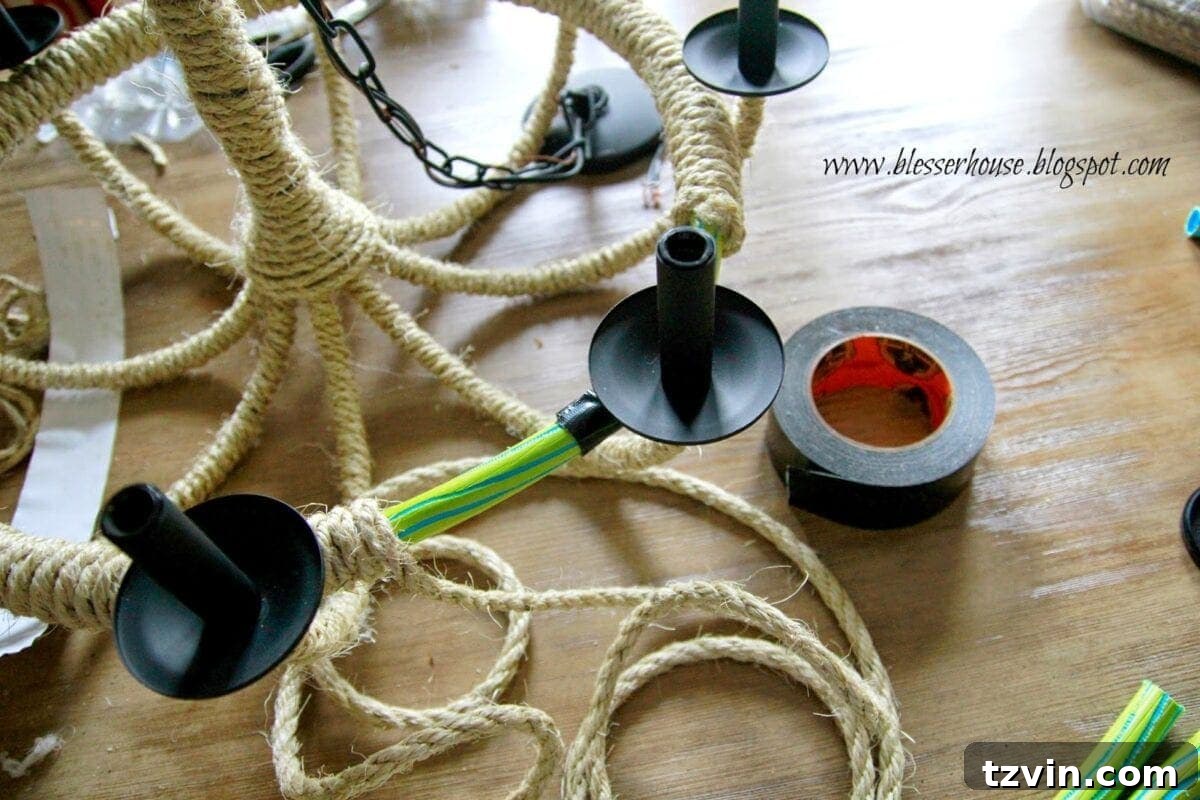
Once the rope wrapping of the hoop was complete, I decided to pause for the day. Dividing larger projects into manageable steps helps prevent burnout and ensures a fresh perspective for the final details.
Crafting the Elegant Rope Swags
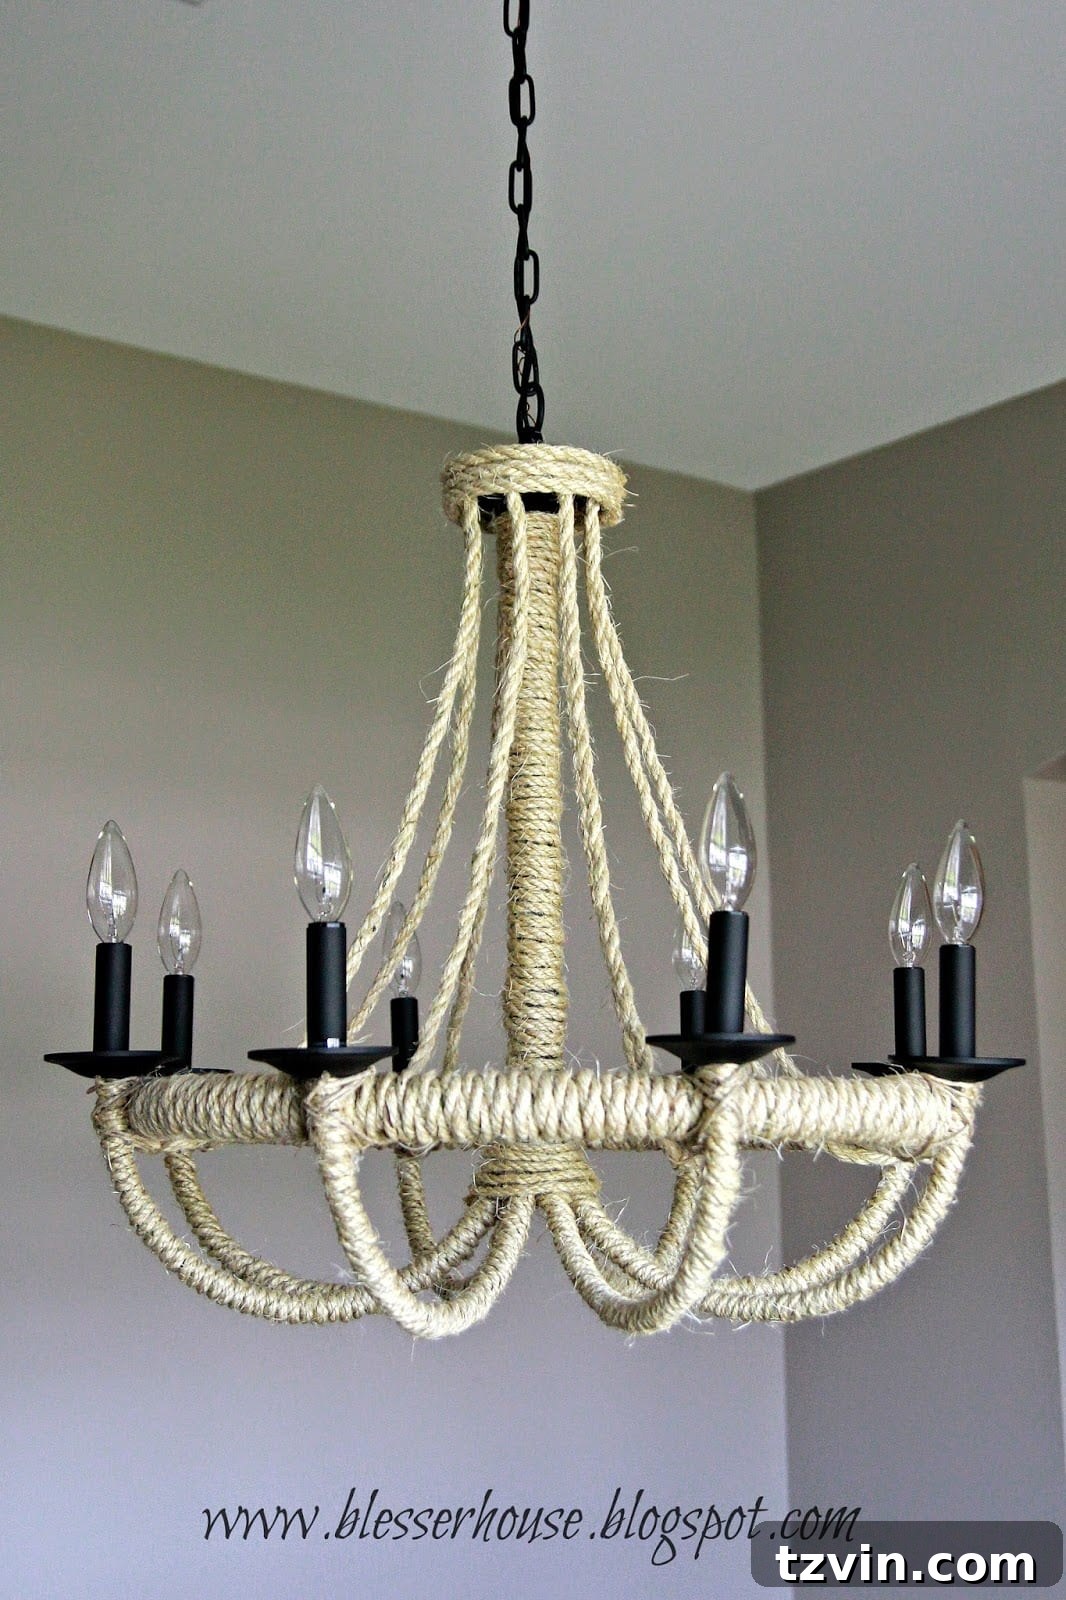
The final touch to achieve that authentic French Empire chandelier look is the addition of delicate rope swags. I began by cutting a single piece of rope to the precise length required to drape gracefully from the very top of the chandelier down to the base of one of the light sockets, passing underneath the hula hoop. Once I had this template, I cut seven more pieces of rope to the exact same length, giving me a total of eight swags for the chandelier’s eight arms.
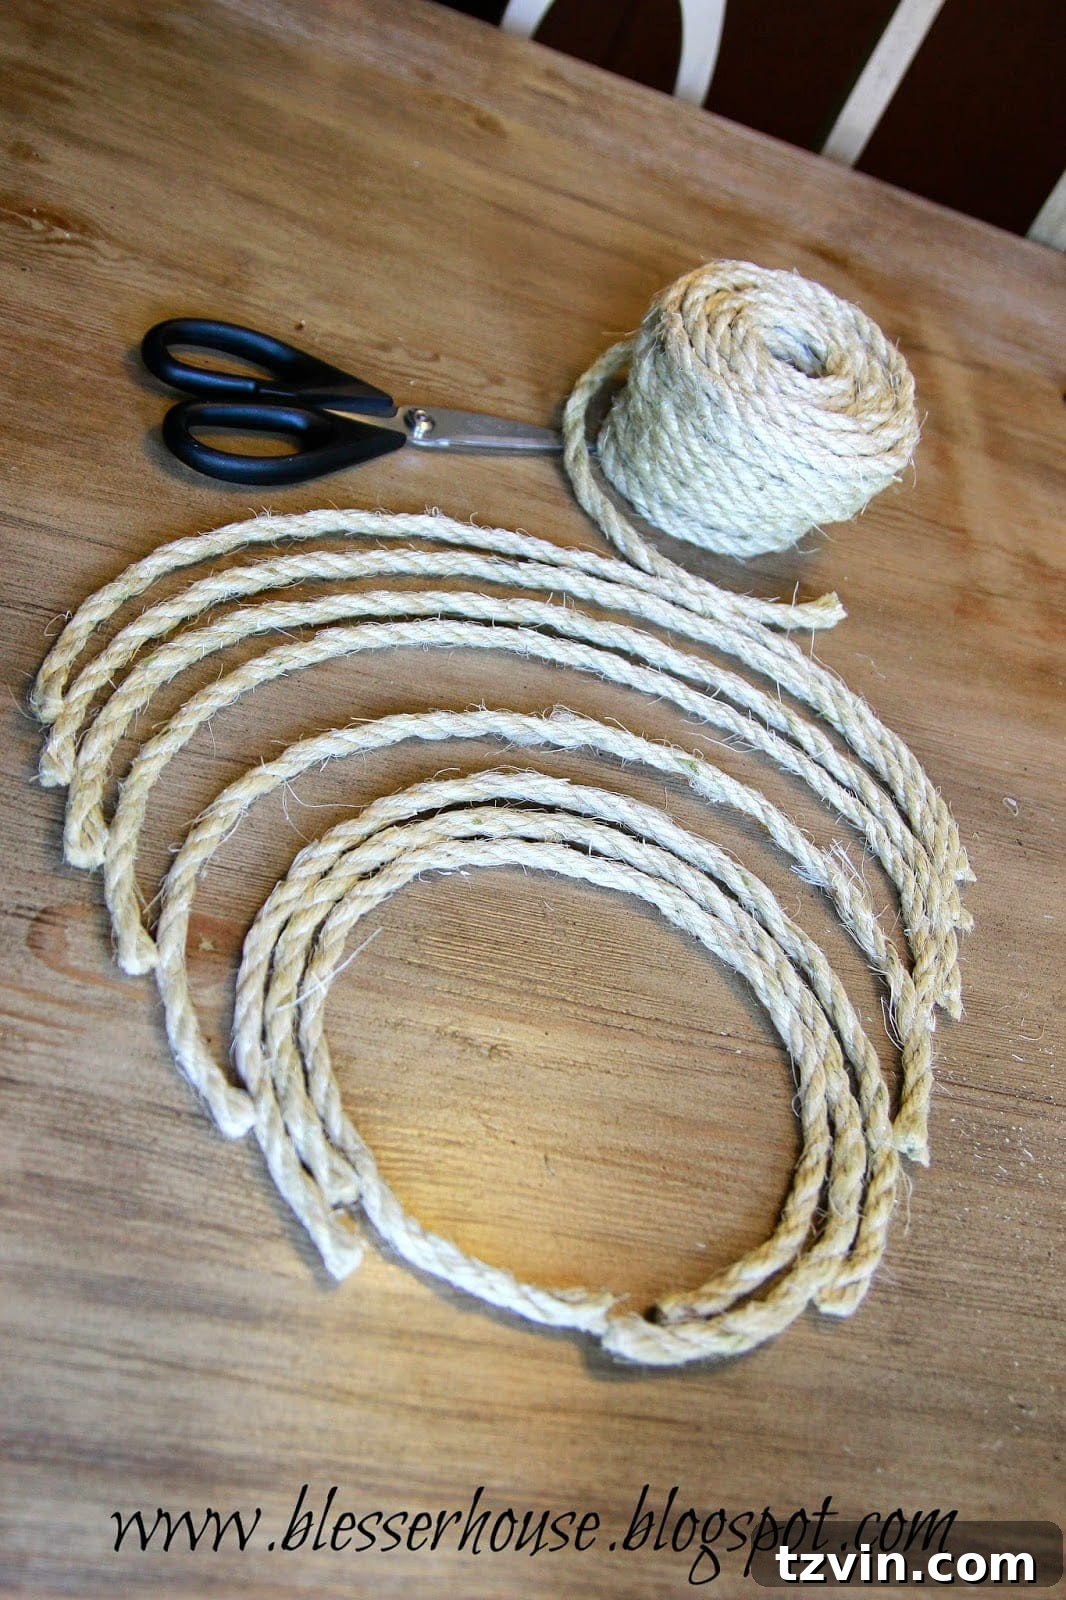
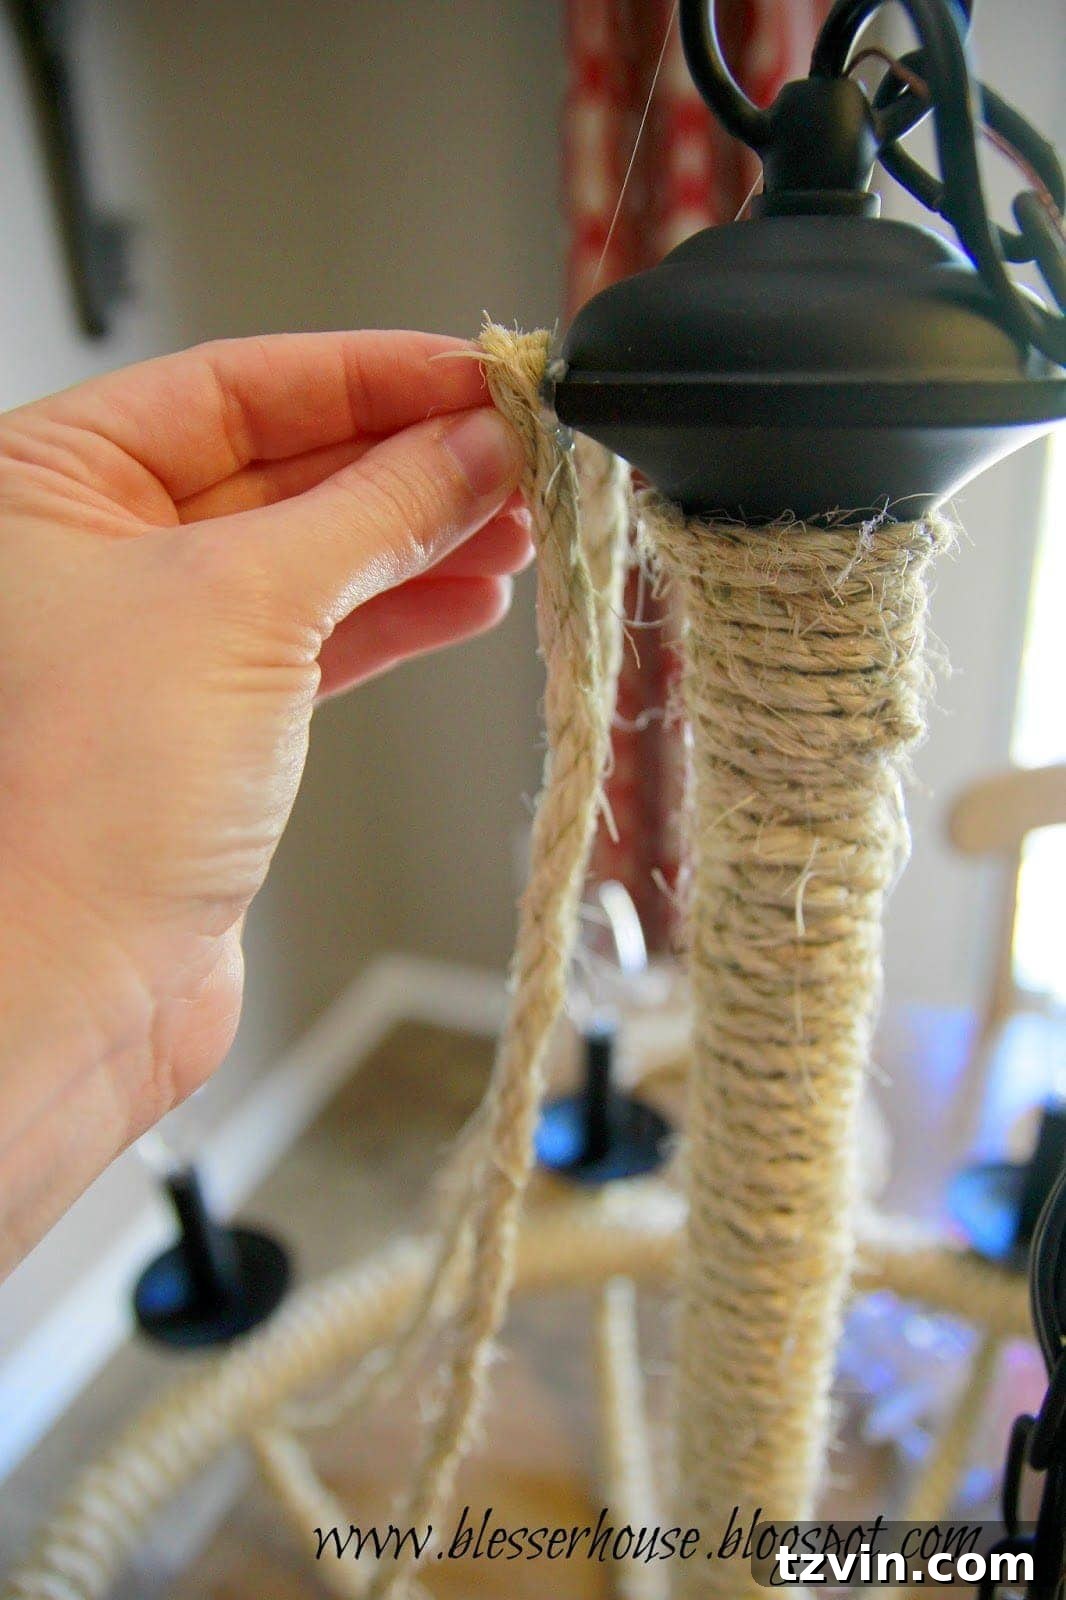
To attach the swags, I applied hot glue to one end of the first rope piece and firmly pressed it against the very top of the chandelier’s central stem. Holding it in place with steady pressure for a minute or two allowed the glue to set properly, ensuring a strong, lasting bond.
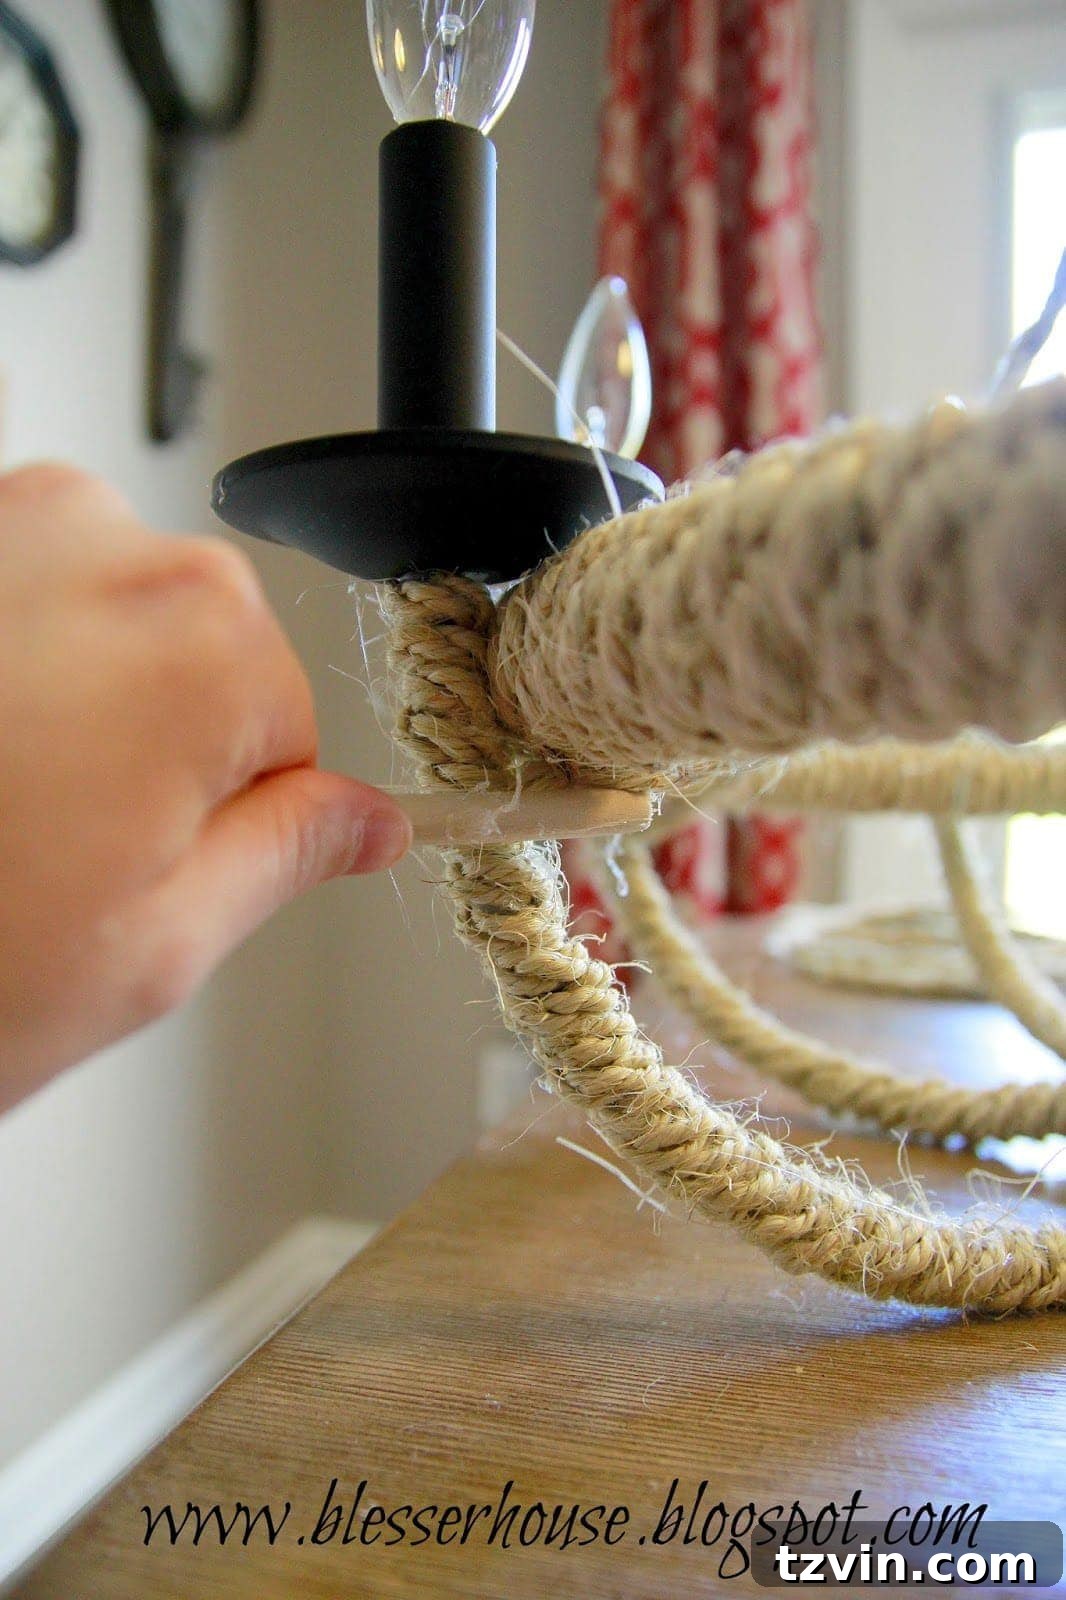
Next, I draped the rope swag down and hot glued the other end to the underside of the hula hoop, directly below one of the chandelier lights. Again, I used the long wooden spoon to apply firm pressure as the glue cooled and dried. This method prevents finger burns and ensures a solid attachment. I then repeated this process for all the remaining chandelier arms, ensuring each swag was evenly spaced and beautifully draped.
The Finishing Touches: Securing and Polishing
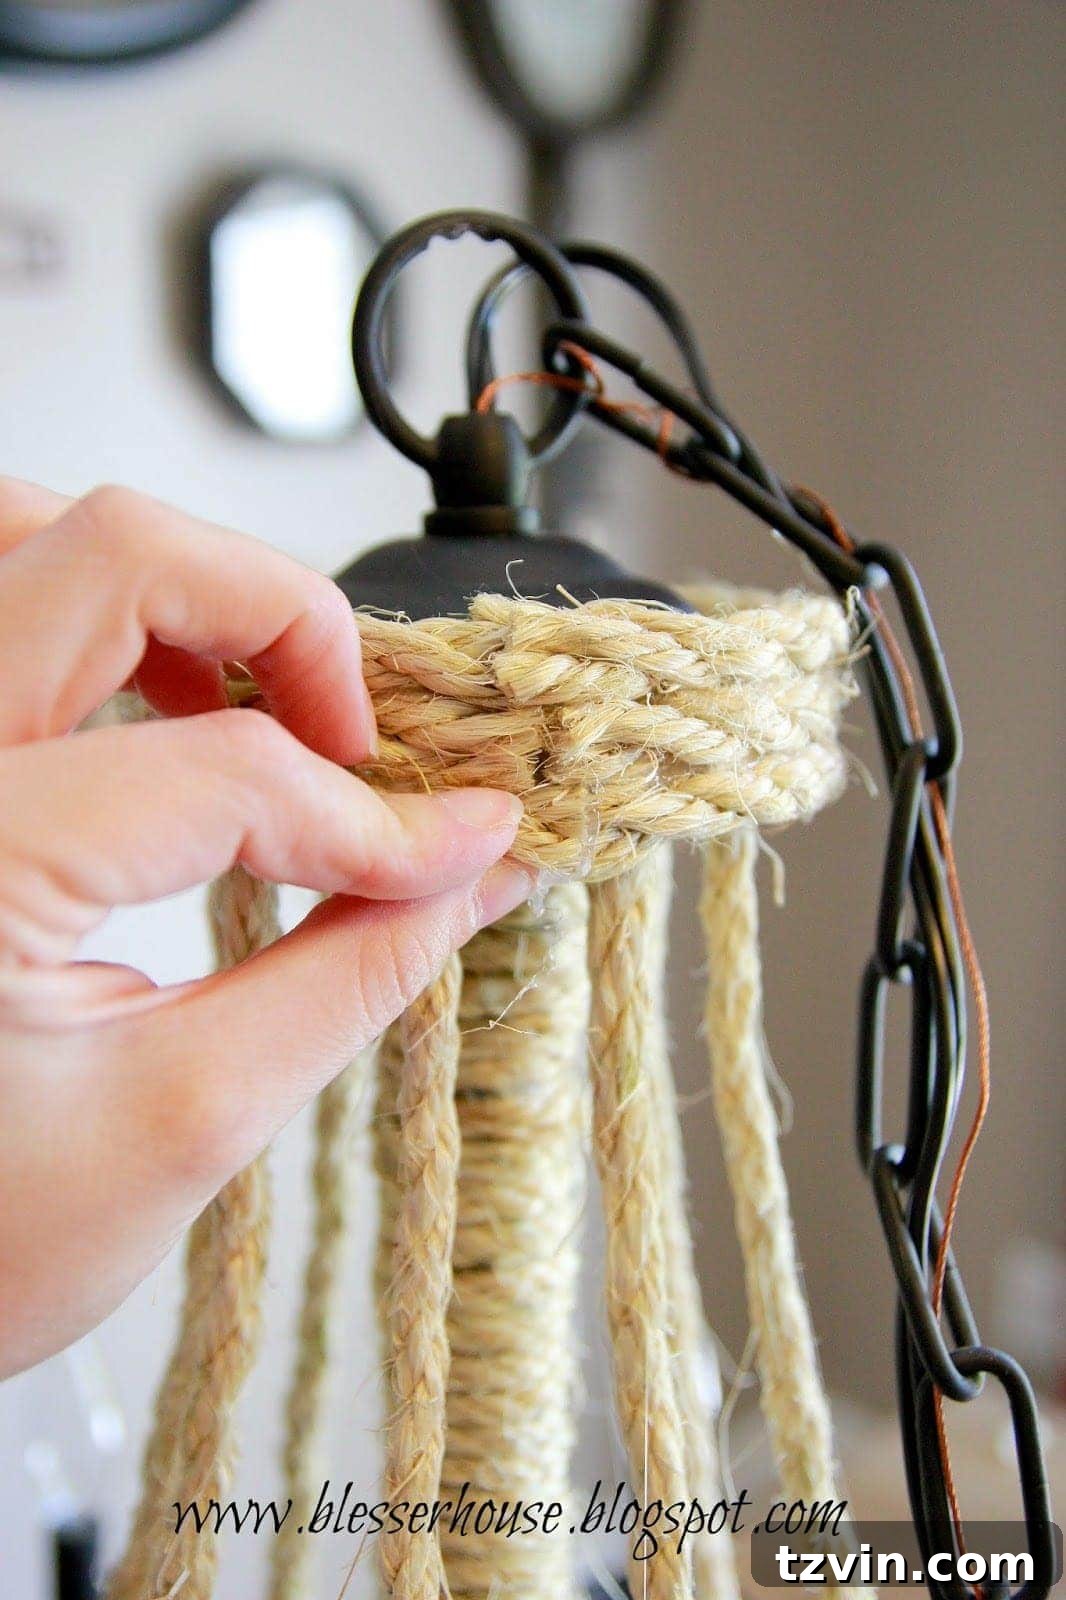
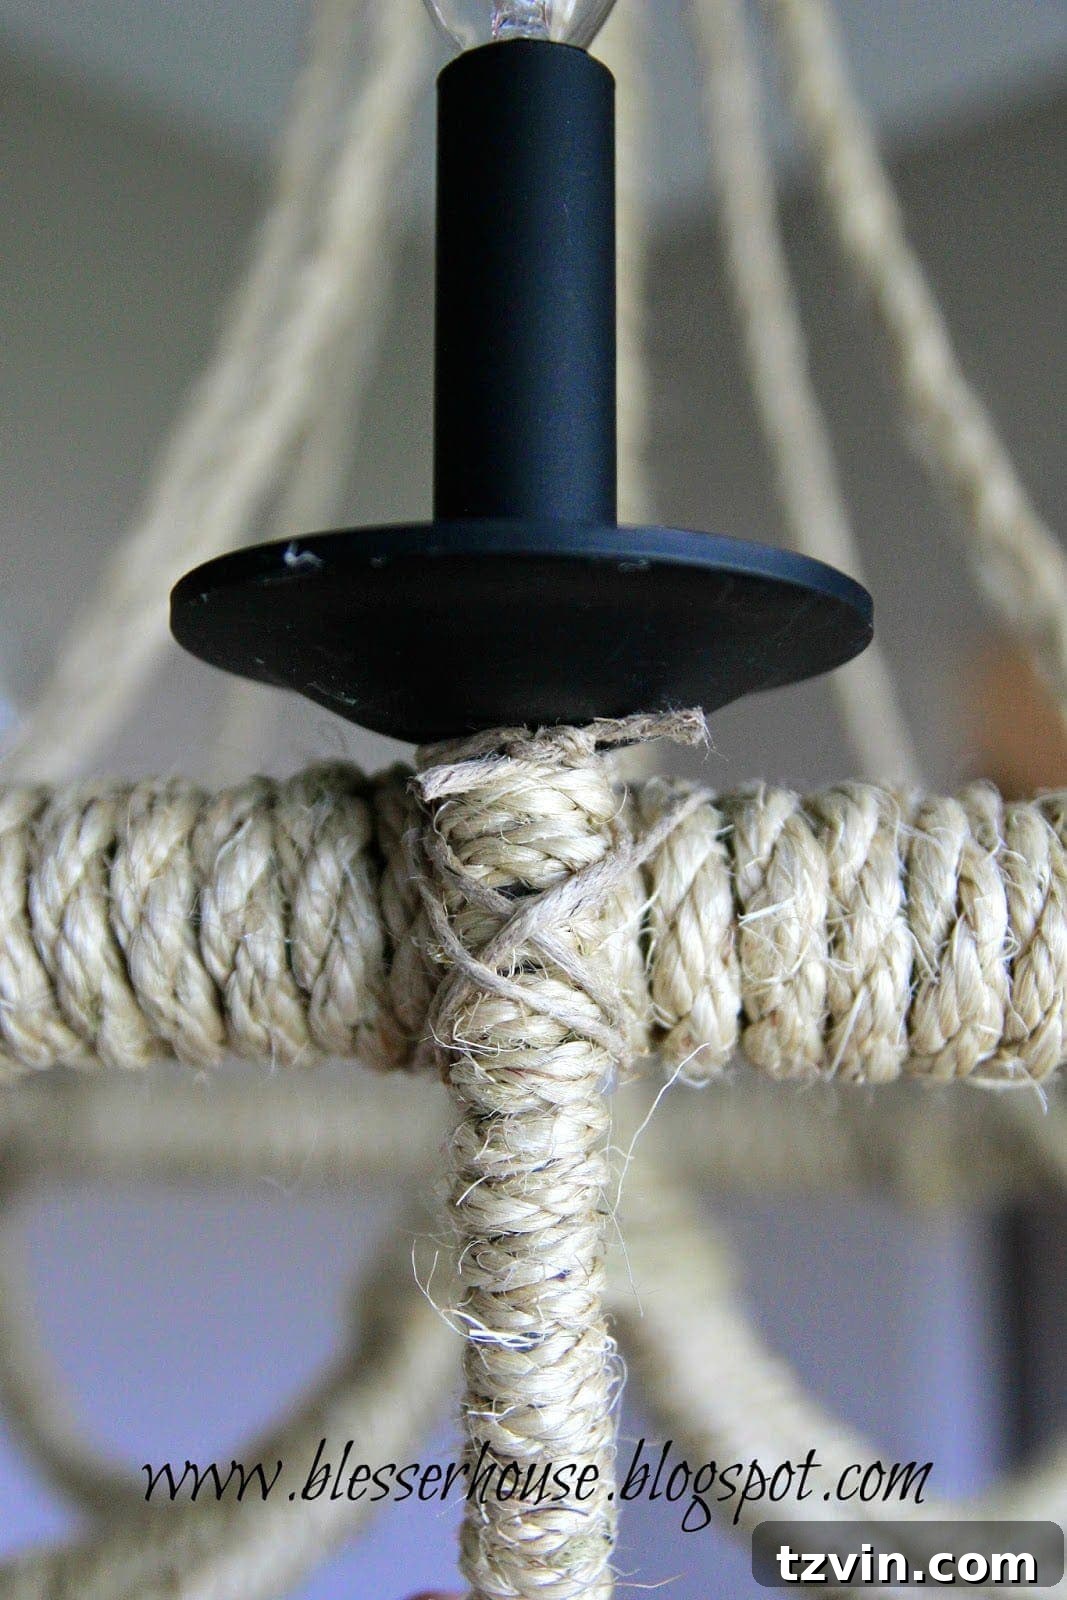
Once all eight rope swag pieces were carefully attached, it was time to address any exposed raw ends and give the chandelier a perfectly polished finish. I wrapped three additional pieces of rope around the top of the chandelier, precisely where the swags originated. This not only neatly conceals all the ragged ends but also creates a cohesive and professional appearance at the chandelier’s crown.
To provide extra security for the rope ends beneath the lights and to ensure the hula hoop remained firmly in place, I added a practical and decorative touch. For each chandelier arm, I wrapped and knotted a length of twine around the rope-wrapped section, directly above where the swag attaches to the hoop. This not only reinforces the structure but also adds a lovely, rustic detail that enhances the overall aesthetic.
Behold Your Stunning New Chandelier!
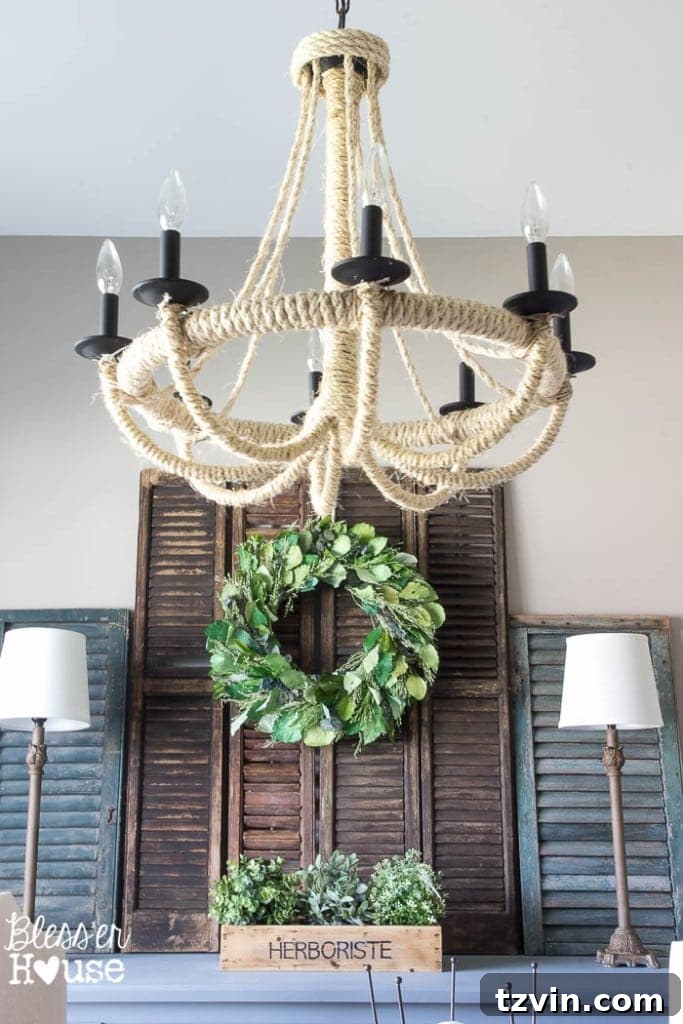
And with that, the masterpiece was complete! It was time to hang it up and admire the incredible transformation. The dining room instantly felt brighter, more inviting, and infused with a distinct sense of character and warmth. The sisal rope adds a beautiful natural texture that softens the space and creates a focal point that is both elegant and approachable.
Our dining room is still a work in progress, with many elements yet to be added, but this chandelier has set a beautiful tone. My current goal is to at least have proper dining chairs in place by Thanksgiving – a significant project that I’m tackling one step at a time! I’m still playing the “just moved in seven months ago” card, which grants a bit of grace for unfinished spaces.
What I particularly adore about this DIY rope chandelier is its versatility. It blends seamlessly with various decor styles, from modern farmhouse to coastal chic. The natural tones of the sisal rope complement the existing elements in our home, including the foyer, creating a harmonious flow between spaces. This project has truly opened my eyes to the endless creative possibilities that rope offers. I’ve already compiled a list of other rope-inspired decor ideas that I can’t wait to share with you all in future posts. It’s truly amazing what this simple material can achieve!
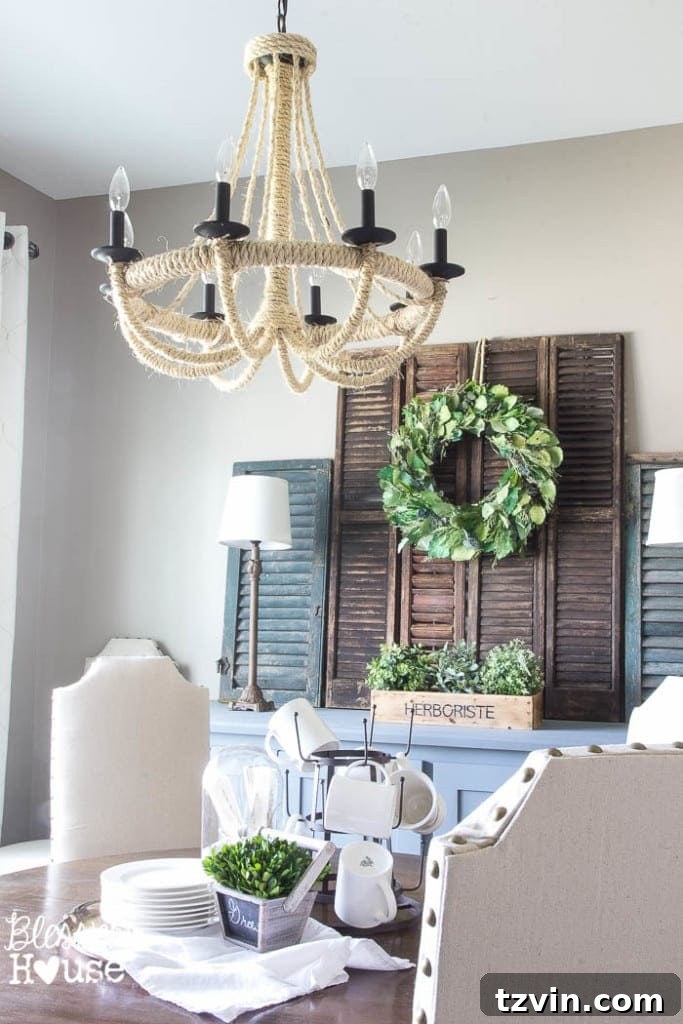
The satisfaction of crafting a designer-inspired piece for less than $30 is immense. This DIY rope chandelier is more than just a light fixture; it’s a testament to creative ingenuity and the power of transforming ordinary objects into extraordinary home decor. I hope this detailed guide inspires you to embark on your own DIY lighting adventure!
Explore More DIY Inspiration
If you enjoyed this project and are looking for more creative home decor ideas, you might also like these:
DIY Mason Jar Vanity Light
Create the Perfect Gallery Wall

Stay Connected! Follow Blesser House for More Home Decor & DIY Ideas:
Facebook |
Pinterest |
Instagram |
Twitter |
Google+ | Hometalk