Transform your kitchen on a budget with this incredible DIY project! Learn how to create a stunning whitewashed faux brick backsplash right over your existing tile for under $75. Achieve a fresh, modern farmhouse look without the mess and expense of a full renovation.
Are you dreaming of a kitchen refresh but dreading the idea of costly demolition and extensive construction? We understand the challenge of finding a beautiful, high-impact solution for updating an existing backsplash without the need for a major overhaul. After countless hours of research and experimentation, we believe we’ve finally cracked the code, offering a simple yet incredibly effective method that will revitalize your culinary space!
For years, the charm of a whitewashed brick backsplash has captivated homeowners, offering a timeless aesthetic that blends rustic warmth with modern appeal. However, the reality of installing genuine brick – with its associated mess, complex installation, and significant cost – often puts this dream out of reach for many. Our innovative approach allows you to achieve that coveted authentic brick look, complete with a charming whitewashed finish, without ever laying a single piece of real brick or enduring the dusty chaos of a traditional remodel.
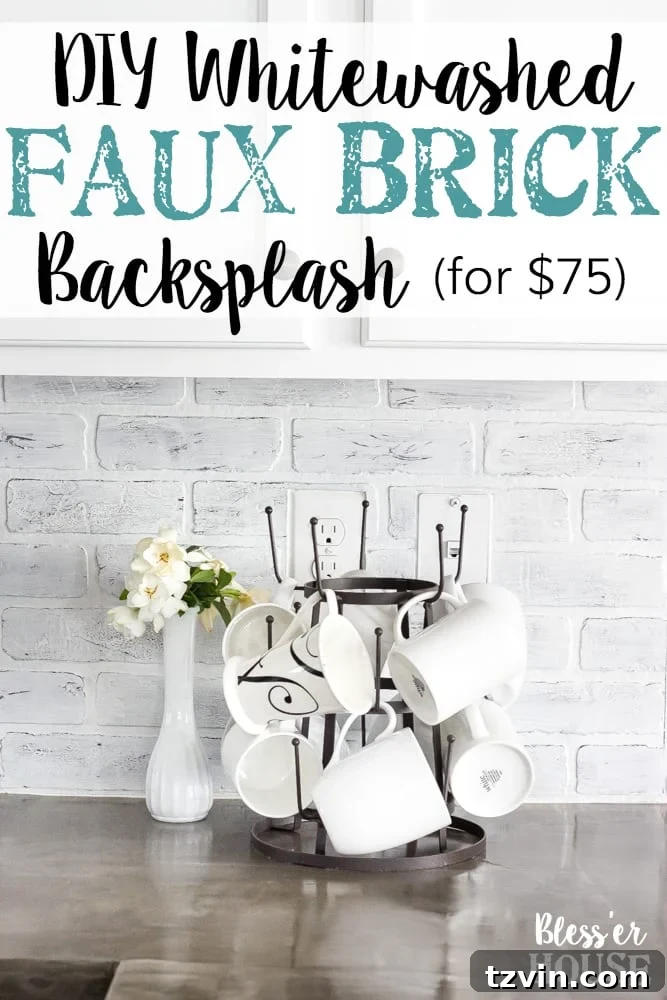
UPDATE: Discover the full transformation in our complete kitchen makeover reveal!
Creative Spaces for a Faux Brick Backsplash
The versatility of this faux brick paneling makes it an ideal choice for adding character and texture to various areas within your home. While it shines as a kitchen backsplash, offering a durable and stylish surface, its application extends far beyond. Imagine transforming a drab basement bar into a cozy pub-like retreat, or creating an inviting coffee bar nook that exudes rustic charm. This paneling is also perfect for introducing a feature brick wall in an open-plan living area, a cozy reading corner, or even a laundry room to elevate its functionality with a touch of design flair. Its budget-friendly nature allows you to achieve a high-end, custom look without breaking the bank, making it an excellent option for enhancing visual interest on any plain wall that needs a touch of warmth and personality.
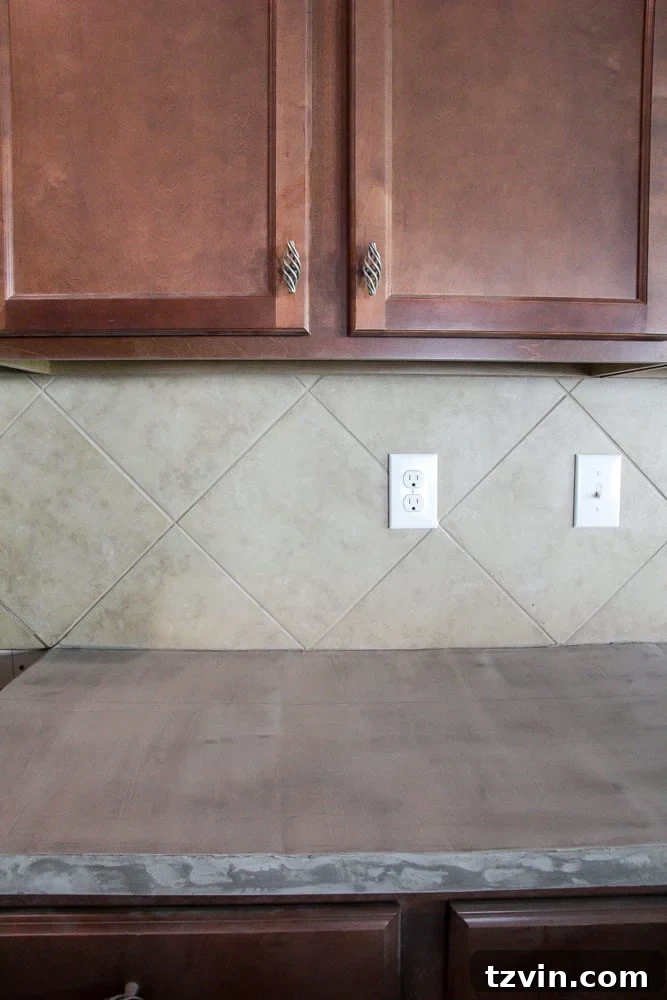
Truth be told, even we had moments of doubt at the project’s inception. The idea of completely transforming a kitchen backsplash for so little, and with such minimal effort, seemed almost too good to be true. But with a bit of planning and execution, the results speak for themselves. Before we embarked on this exciting journey, our kitchen featured a tile backsplash that, while functional, lacked personality and failed to align with our evolving aesthetic preferences. It wasn’t terrible, but it certainly wasn’t the inspiring backdrop we envisioned for our culinary adventures.
Why a Faux Brick Backsplash is the Ultimate Beginner DIY Project
One of the most appealing aspects of this faux brick backsplash project is its accessibility for DIY enthusiasts of all skill levels, especially beginners. Unlike traditional renovations that often demand extensive experience with tools, complex measurements, and significant physical exertion, this project eliminates the need for any heavy-duty demolition or intricate construction work. If you possess the basic ability to use a jigsaw to cut a relatively straight line, you are more than capable of tackling this project with confidence. It’s designed to be straightforward and rewarding, making it an excellent entry point into home improvement. We were genuinely amazed at how quickly we completed the entire transformation, managing to knock out the vast majority of the work in just a single afternoon, proving that a dramatic change doesn’t always require weeks of labor.
Step-by-Step Guide: Installing a Faux Whitewashed Brick Backsplash
Essential Supplies:
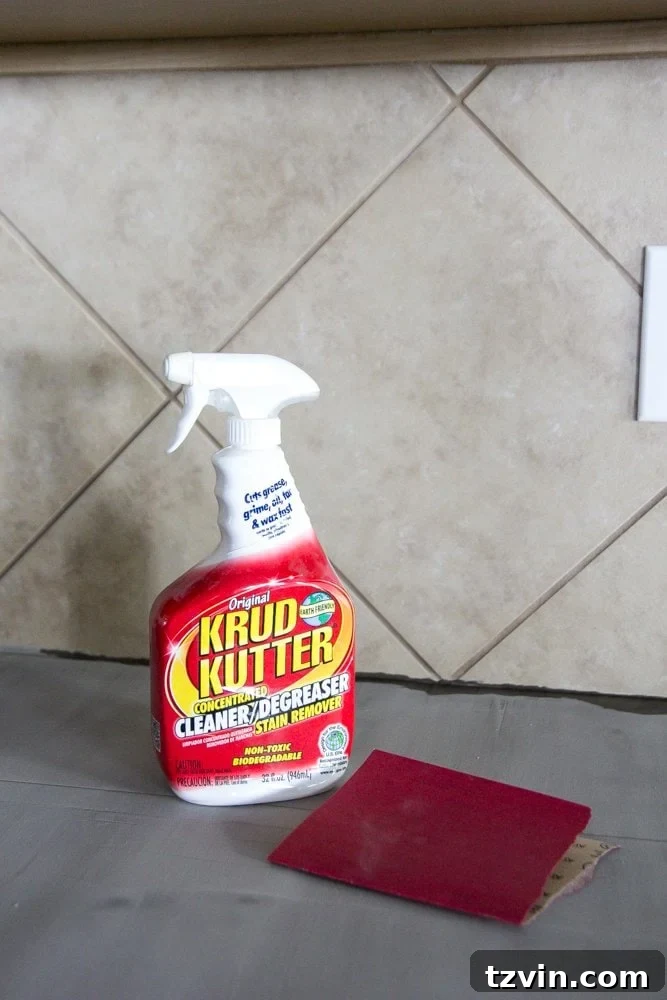
- Degreaser: A powerful solution like Krud Kutter is essential for thoroughly cleaning your existing surface, removing grease and grime.
- Clean Dry Rags: For wiping down surfaces after cleaning and during the whitewashing process.
- 120 Grit Sandpaper: To lightly abrade the existing surface, creating better adhesion for the faux brick panels.
- Tack Cloth: Crucial for picking up fine dust particles after sanding, ensuring a pristine surface.
- Liquid Nails (Heavy Duty Adhesive): Approximately 6 tubes may be needed, depending on the area. This ensures a strong, permanent bond for your panels.
- 2 Sheets of Faux Brick Paneling: The star of the show! Choose a high-quality HDF (High-Density Fiberboard) paneling for durability and realistic texture.
- Circular Saw or Table Saw: For making long, straight cuts in the paneling. A table saw offers more precision if available.
- Jigsaw: Indispensable for cutting intricate shapes, especially around outlets and corners.
- Chalk Line: For marking perfectly straight cut lines on your paneling.
- Measuring Tape and Pencil: For accurate measurements and markings.
- 1 Pint of White Semi-Gloss Paint: The base for your whitewash mixture. Semi-gloss is durable and easy to clean.
- Small Bucket: For mixing your whitewash solution.
- Paint Brush: For applying the whitewash evenly.
- Clean Damp Cotton Rag: For distressing the whitewash and creating that weathered look.
- Plastic Drop Cloth: To protect your countertops and surrounding areas from paint splatters.
- Painter’s Tape: For securing drop cloths and protecting adjacent surfaces.
- Latex Caulk: For sealing seams and edges, providing a professional and finished appearance.
- Fusion Mineral Paint Tough Coat: A clear, non-yellowing topcoat to protect your whitewashed finish in a high-traffic area like the kitchen.
Detailed Installation Steps
Time needed: 4 hours
-
1. Degrease Existing Backsplash (If Applicable)
Begin by thoroughly cleaning your existing backsplash surface. Kitchens accumulate grease, food splatters, and general grime over time, which can significantly hinder adhesive bonding. We used a heavy-duty degreaser like Krud Kutter to ensure every inch of the old tile was spotless. Apply generously, scrub if necessary, and then wipe down with clean, dry rags until the surface is completely clean and dry. While we chose to install our faux brick panels directly over the existing tile (the added thickness contributed to a more realistic brick depth), you have the option to carefully remove your old tile and apply the panels directly to the drywall if you prefer a thinner profile. This initial cleaning step is paramount for strong adhesion, so do not skip it!

-
2. Rough Up the Surface with Sandpaper
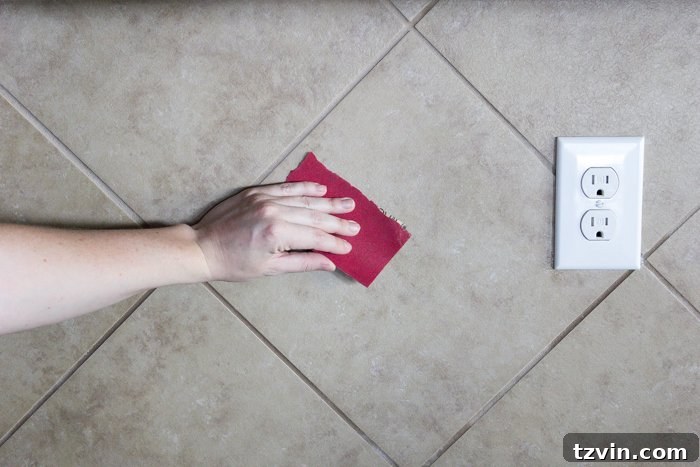
Once the existing backsplash is completely dry, use 120-grit sandpaper to lightly scuff the surface. This creates a slightly rough texture, giving the adhesive something to grip onto, which is especially important for smooth, glossy tiles. You don’t need to aggressively sand; a light, even abrasion across the entire area will suffice. After sanding, meticulously wipe away all sanding dust with a tack cloth. Any remaining dust can compromise the adhesive bond, so ensure the surface is perfectly clean and dust-free.
-
3. Measure and Plan Backsplash Sections
With the surface prepared, it’s time to tackle the faux brick panels. Accuracy is key here. Measure each section of your backsplash meticulously, taking into account any corners, edges, and irregularities. We recommend measuring one section at a time, cutting that piece, and then proceeding to the next to minimize errors and optimize panel usage. Careful planning ensures fewer seams and a more cohesive finished look. Double-check all measurements before marking your panels for cutting.
-
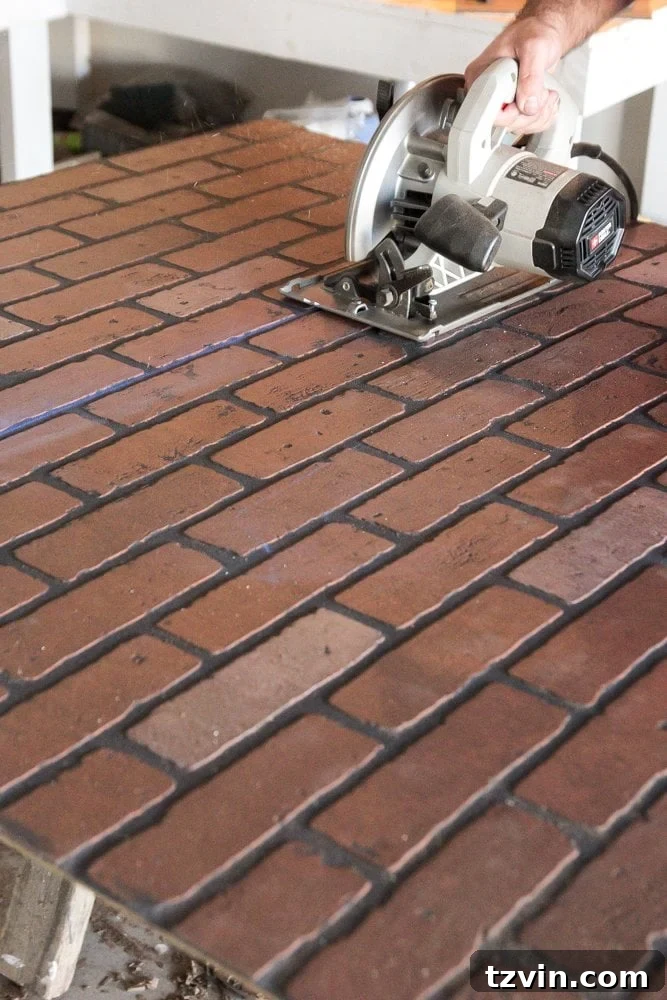
4. Precisely Cut the Brick Paneling
After taking your measurements, transfer them to the faux brick paneling. Use a chalk line to create perfectly straight cut guides. While a table saw provides the ultimate precision for long, straight cuts, a circular saw can achieve excellent results with a steady hand and a good guide. Always wear appropriate safety gear, including eye protection, when operating power tools. Take your time to ensure clean, straight cuts, as these will directly impact the finished appearance of your backsplash.
-
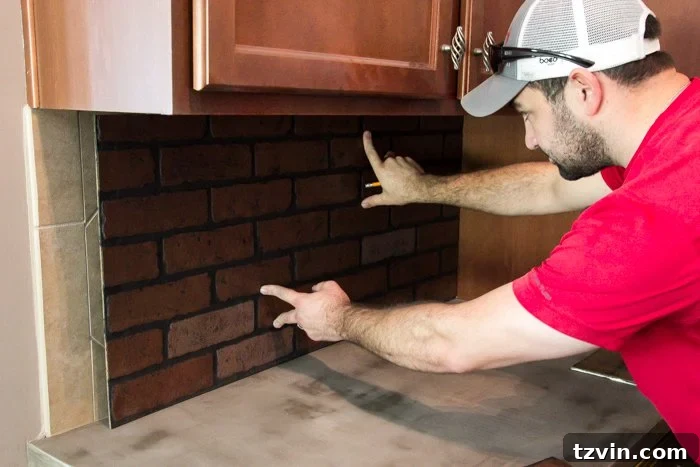
5. Dry Fit Cut Panels for Accuracy
Before applying any adhesive, it is crucial to dry fit each cut panel section. Place the panel against the backsplash area to ensure it fits perfectly. Check for any gaps, misalignments, or areas that need minor adjustments. This step is a lifesaver, allowing you to catch and correct any cutting errors before they become permanent. A snug fit will result in a seamless, professional finish that truly looks like real brick.
-
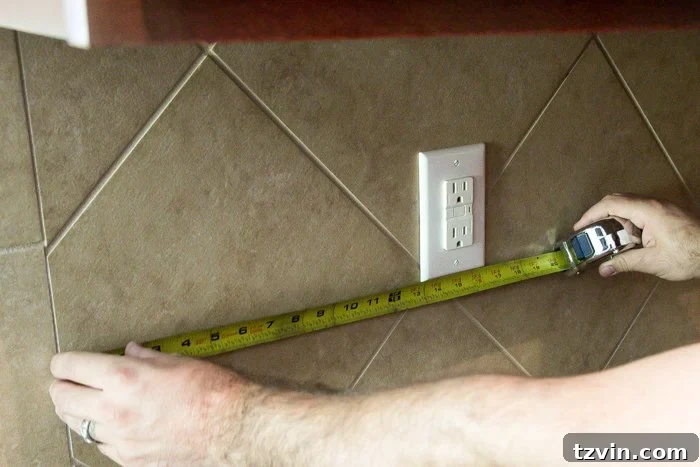
6. Mark and Measure for Outlets
Kitchen backsplashes almost always have outlets. Carefully measure the exact location and dimensions of any electrical outlets or switches on your backsplash. Transfer these measurements precisely onto the corresponding dry-fitted panel sections. It’s often helpful to remove the outlet covers before measuring and marking for the most accurate placement.
-
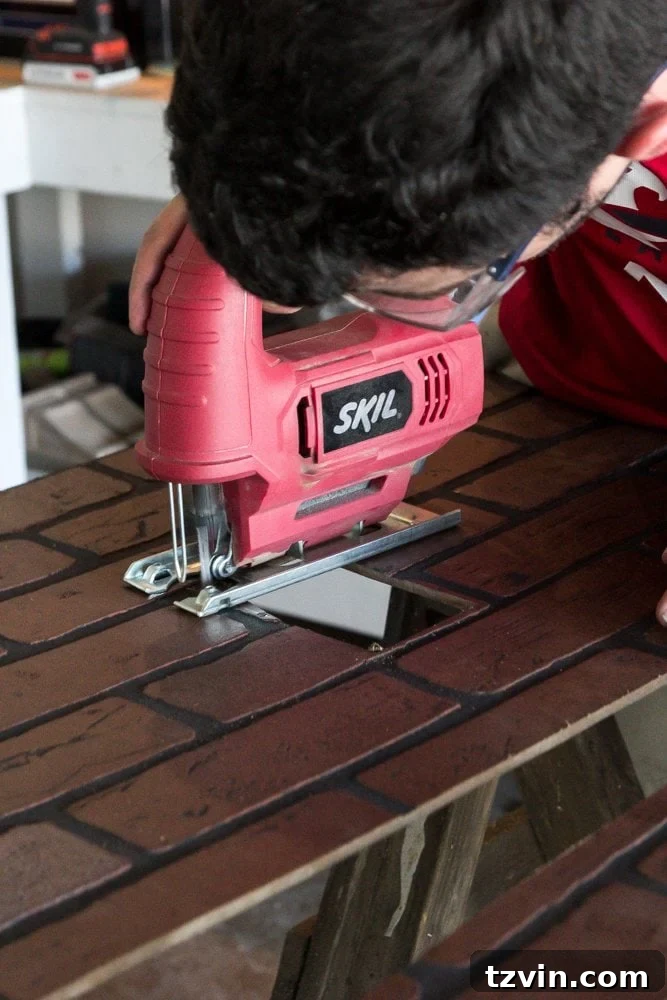
7. Cut Out Outlet Openings
Using a jigsaw, carefully cut out the marked openings for your outlets. Take your time with this step, as clean cuts will ensure your outlets sit flush and look professional. Start by drilling a pilot hole in each corner of the marked rectangular opening to allow the jigsaw blade to enter. Always double-check your measurements before cutting to avoid irreparable mistakes.
-
8. Final Dry Fit with Outlet Cuts
After cutting the outlet openings, perform one final dry fit of the paneling. This ensures that not only the overall panel fits but also that all outlet and switch openings align perfectly. This last check guarantees a smooth installation process when you apply the adhesive.
-
9. Securely Attach Brick Backsplash Panels
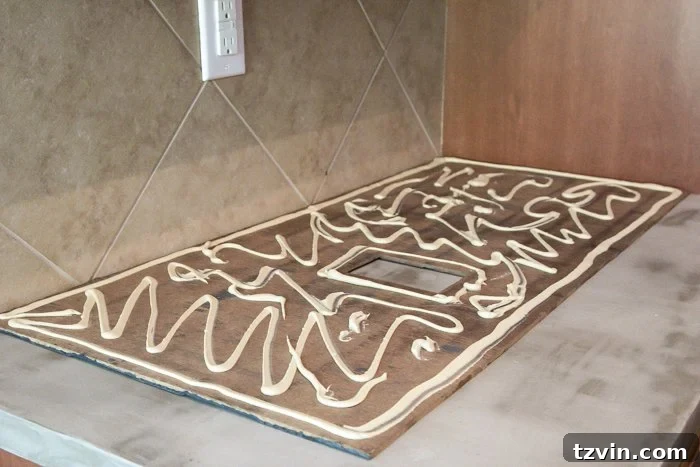
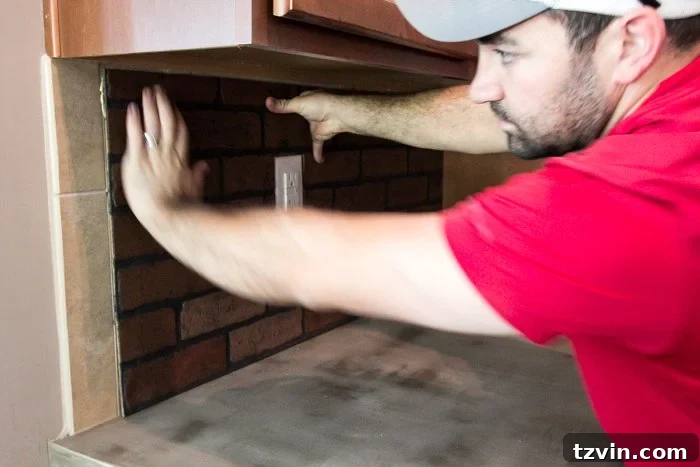
Now it’s time for permanent installation! Apply Liquid Nails adhesive generously and evenly across the entire back surface of the paneling. A zigzag pattern combined with dots around the edges and center provides optimal coverage. Carefully position the panel against the wall, aligning it precisely, and press firmly into place. Hold the panel against the wall for a minute or two, applying consistent pressure, to allow the Liquid Nails to begin setting. Once it grips, you’ll feel the panel hold securely – that panel is ON THERE for good!
-
10. Repeat for All Backsplash Sections
Continue this process of measuring, cutting, dry-fitting, and applying Liquid Nails until your entire backsplash area is covered. Work methodically, section by section, ensuring each piece is level and flush with the adjacent panels. The satisfaction of seeing the old, beige tile disappear beneath the charming faux brick is incredibly motivating! Remember to account for any corners or edges, making sure cuts are clean and seamless for a polished look.
-
11. Caulk All Seams for a Flawless Finish
Once all panels are securely in place, run a bead of latex caulk along all seams and edges where the paneling meets the wall, countertops, and adjacent panels. This not only creates a smooth, professional, and seamless look but also helps seal out moisture and food particles, making your backsplash easier to clean and more hygienic. Smooth the caulk with a wet finger or caulking tool for a clean line.
-
12. Protect Countertops from Paint Splatter
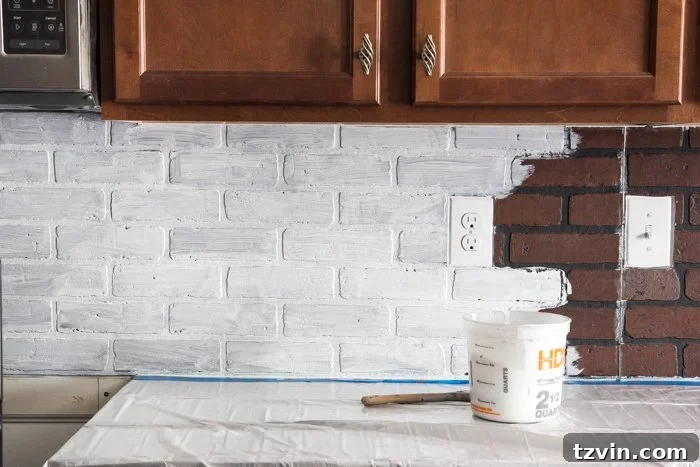
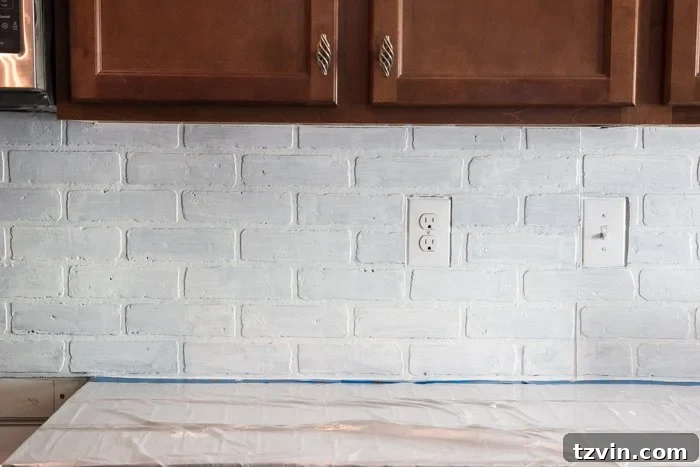
Before you start whitewashing, it’s vital to protect your countertops and any adjacent surfaces from paint splatters. Lay down plastic drop cloths over all countertops, ensuring they cover the entire surface. Secure the edges firmly with painter’s tape, creating a clean, crisp line where the backsplash meets the counter. This preventative step will save you considerable cleanup time later.
-
13. Mix and Apply Whitewash Solution
Prepare your whitewash mixture by combining approximately 1 part white semi-gloss paint with 1 part water in a small bucket. Stir thoroughly until you achieve a consistent, milky consistency. This ratio is a good starting point, but you can adjust it to your preference – more paint for a solid white look, more water for a transparent, weathered effect. Using a paintbrush, apply the whitewash evenly across the faux brick panels. Don’t worry about perfection in the first coat; the aim is to get good coverage. Allow the first coat to dry completely, which usually takes a couple of hours.
-
14. Apply Second Coat of Whitewash
Once the first coat has dried to the touch, apply a second coat of your whitewash mixture. This second layer allows you to build up the desired opacity and achieve a more even finish. Observe the bricks as you paint to ensure you’re getting the level of white and the amount of brick texture showing through that you desire. Allow this second coat to dry completely before proceeding to the distressing step.
-
15. Distress with a Damp Rag for Weathered Look
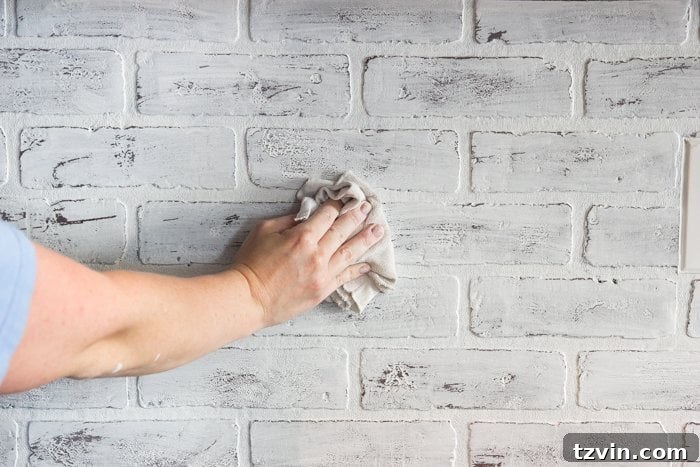
This step is where you truly personalize your backsplash. After the second coat of whitewash has dried, take a clean, damp cotton rag and gently rub away some of the white paint in various areas. Focus on the raised parts of the faux bricks and along the edges to create a natural, weathered, and aged appearance. This distressing technique adds incredible depth and character, giving your kitchen a charming, slightly rustic feel that mimics authentic old brick. Experiment with the amount of pressure and rubbing to achieve your desired level of distress. This step truly brings the faux brick to life!
-
16. Seal Your Brick Backsplash for Protection
To ensure your beautiful new whitewashed brick backsplash withstands the rigors of kitchen life – splashes, steam, and cleaning – it’s imperative to seal it. We applied two coats of Fusion Mineral Paint Tough Coat, a durable, non-yellowing clear topcoat. Unlike many polyurethanes, Tough Coat preserves the pristine white appearance without developing a yellowish tint over time, which is crucial for a bright, fresh look. Apply in thin, even coats, allowing adequate drying time between applications. This protective layer will make your backsplash easy to clean and highly resistant to stains and wear, ensuring its beauty for years to come.
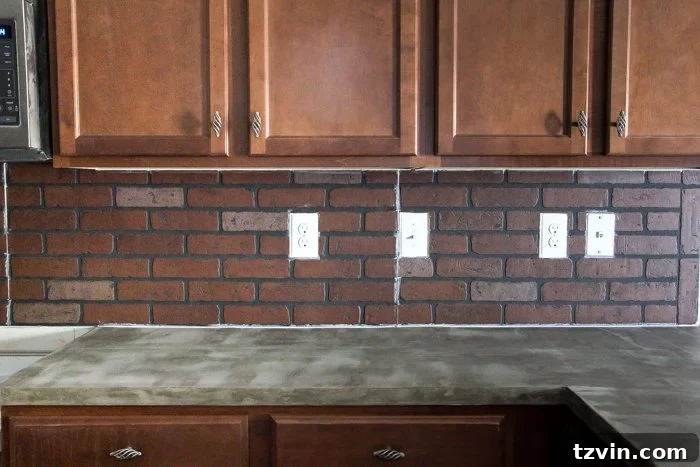
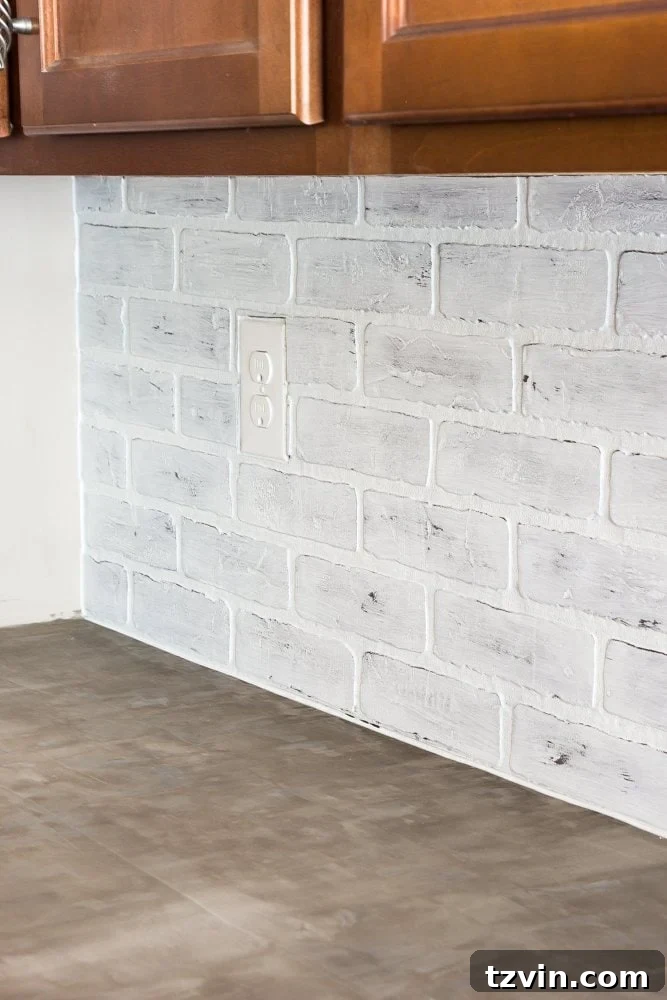
With the faux brick panels installed, whitewashed, and sealed, our backsplash now presents a dramatically different and infinitely more appealing appearance. As with many home improvement projects, a few touch-ups are usually required. We still need to fine-tune the wall paint around the edges after the new countertops were installed and the backsplash completed, but the core transformation is breathtaking.
The Stunning Finished Kitchen Transformation
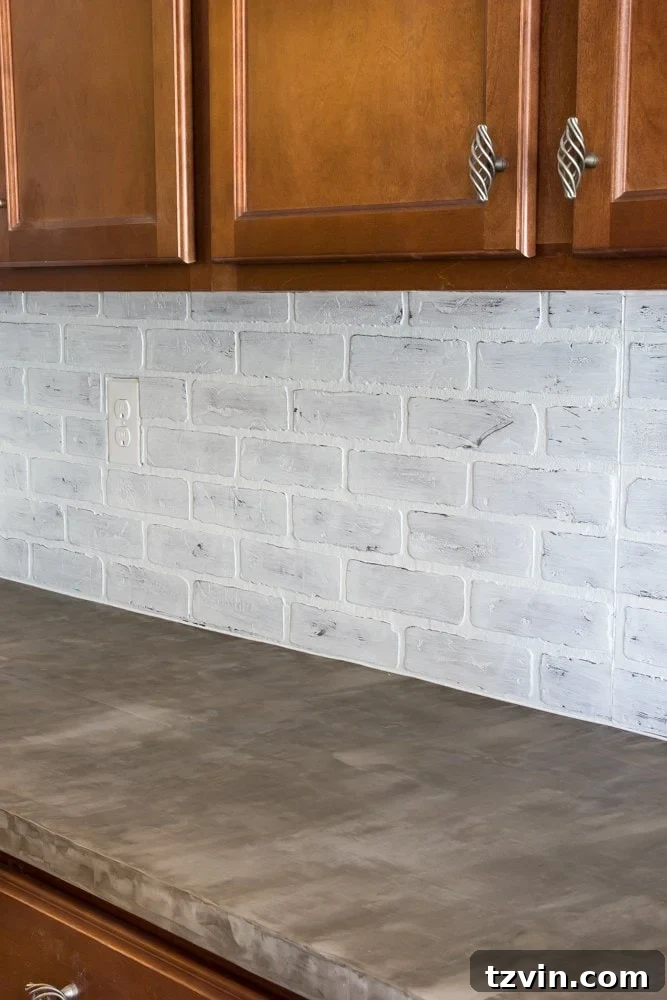
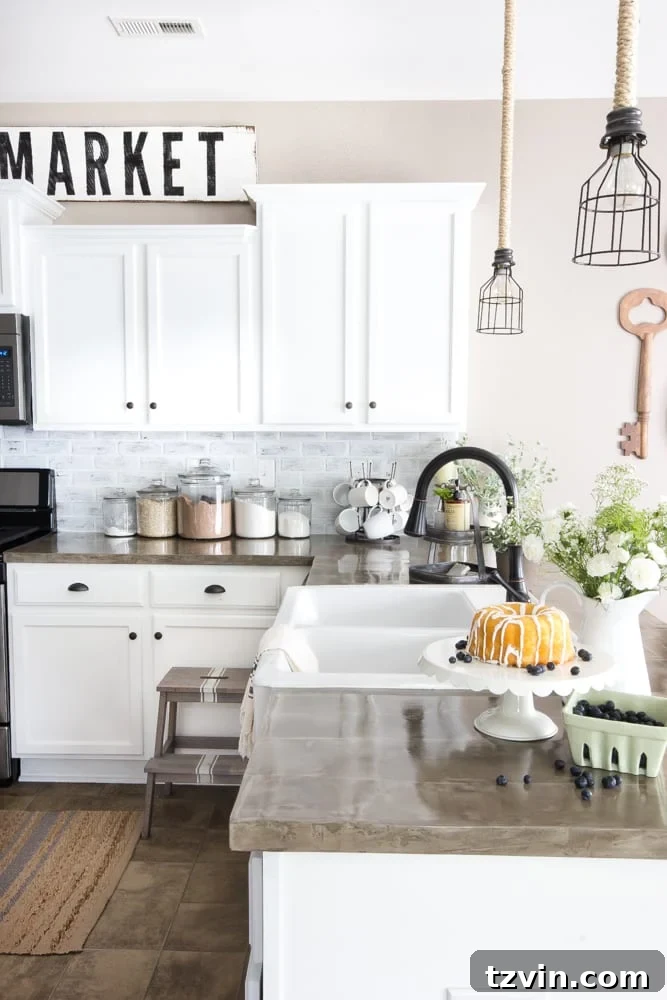
And here it is – the complete modern farmhouse style kitchen, fully transformed! Witnessing the integration of the freshly painted cabinets, the unique DIY concrete countertops, and our stunning faux brick backsplash, it’s truly incredible how different this space looks. The synergy between these elements creates an inviting, stylish, and highly functional kitchen that feels entirely new. The most astonishing part? Achieving this dramatic makeover for such a minimal investment speaks volumes about the power of thoughtful DIY. This project proves that high design doesn’t always come with a high price tag. We are absolutely thrilled with the outcome!
A testament to durability: We originally completed this DIY backsplash project over five years ago. Even though we’ve since moved out of that home, we’ve maintained contact with the new homeowners. We’re delighted to report that this faux brick backsplash has held up absolutely perfectly, enduring the daily wear and tear of a busy kitchen without any issues. This long-term success story further validates the quality and longevity of this simple, budget-friendly renovation technique.
Frequently Asked Questions About Faux Brick Backsplashes
Cleaning this faux brick backsplash is surprisingly simple and less intensive than cleaning real brick. Thanks to the protective sealant (like Fusion Mineral Paint Tough Coat), the surface is smooth and non-porous. Avoid abrasive scrubbers or harsh chemicals. Instead, simply wipe it down gently with a clean, damp rag and a mild all-purpose cleaner, such as Method All Purpose Cleaner. For tougher spots, a bit of extra cleaner can be used, but always wipe, don’t scrub, to maintain the finish.
While Liquid Nails creates a very strong, permanent bond, if you’re looking for a less permanent solution over drywall (not over existing tile), you could potentially install the panels using only finishing nails. This method would create minimal damage to the sheetrock underneath. When it comes time to remove the panels, you would simply pull out the nails and patch the small holes with spackle. However, for a kitchen backsplash, strong adhesive is recommended for durability and resistance to moisture.
The HDF (High-Density Fiberboard) material used for these brick panels is inherently fire-resistant, meaning it does not easily ignite and can withstand some heat exposure. However, it is not entirely fireproof. It can burn if exposed to sustained high temperatures or direct flames. Therefore, while suitable for most kitchen backsplash applications, it’s crucial to exercise caution if you plan to install it directly behind a powerful gas range or an open flame source without adequate clearance or an additional non-combustible barrier.
Unfortunately, no. The faux brick panels, typically made from HDF or similar composite materials, are designed and rated exclusively for indoor use. They are not manufactured to withstand the elements, such as moisture, humidity fluctuations, direct sunlight, or extreme temperatures found outdoors. Exposure to these conditions would likely lead to warping, degradation, or damage over time, compromising the integrity and appearance of the backsplash.
Absolutely! The beauty of faux brick paneling is its customizability. While we chose a classic whitewashed look, you can paint the panels any color you desire. Whether you prefer a solid, vibrant hue, a distressed gray, or a deep, rich red to mimic traditional brick, the possibilities are endless. Just ensure you use a good quality primer designed for HDF surfaces before applying your chosen paint color for best adhesion and durability.
Minor imperfections in your wall can sometimes be hidden by the rigidity of the faux brick panels and the adhesive. However, for significantly uneven walls, it’s best to address them before installation. You can use spackle or joint compound to skim-coat and level out obvious depressions or bumps. A relatively flat surface will ensure the panels adhere evenly and prevent unsightly gaps or bulges in your finished backsplash.
Explore More DIY & Decorating Ideas:
- Our Scalloped Marble Backsplash in the Bathroom Reno
- DIY Pressed Tin Kitchen Backsplash
- Simplified Decorating: How to Decorate Kitchen Countertops