
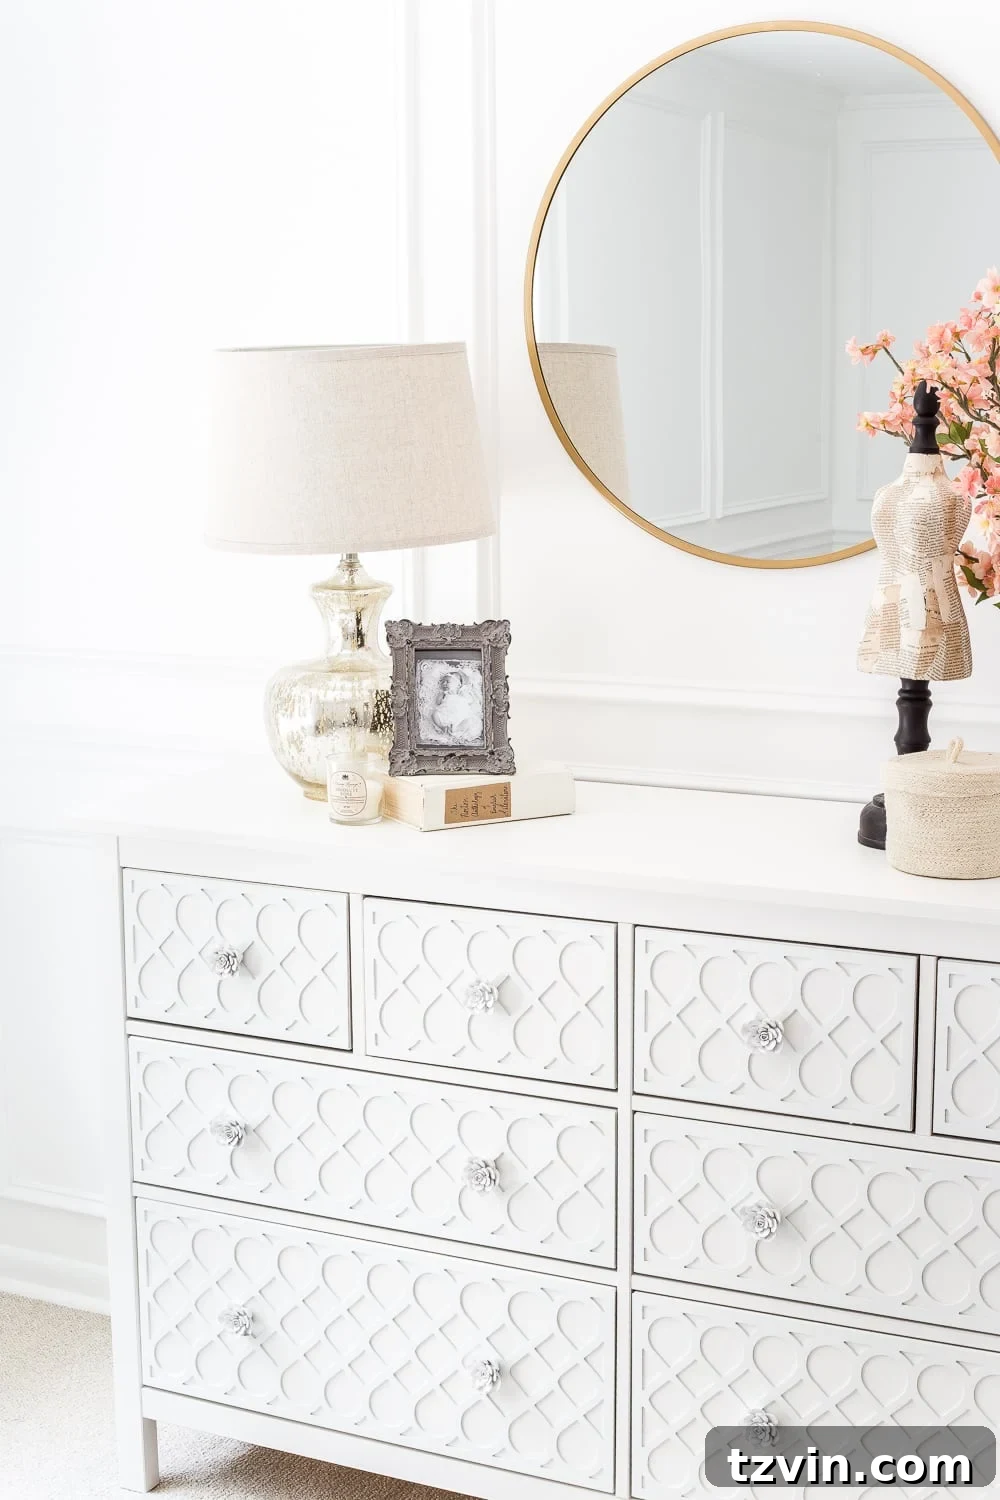
Transform Your IKEA Hemnes Dresser: Achieve a High-End Carved Look on a Budget with Appliques and Paint
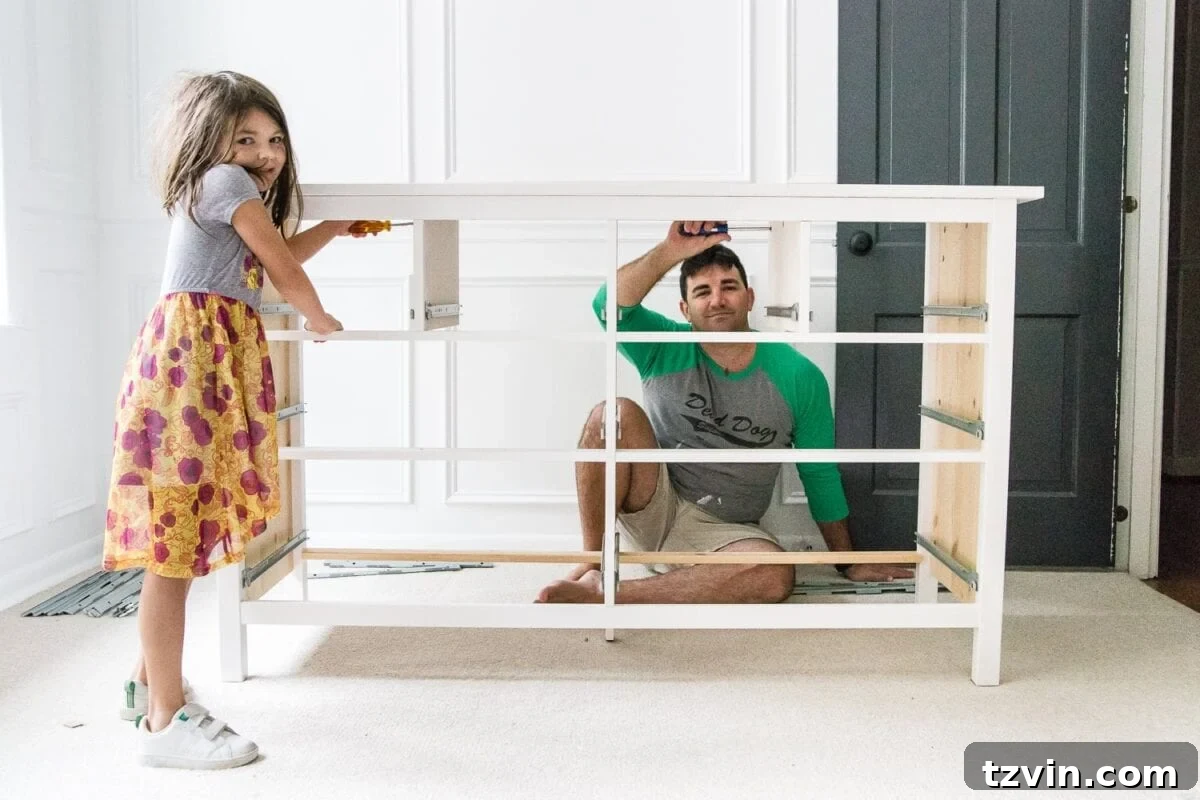
Embarking on an IKEA furniture assembly project is often a true test of patience and partnership. The infamous flat-pack challenge, particularly with a piece as substantial as the IKEA Hemnes dresser, can push even the strongest family bonds. However, the satisfaction of creating something beautiful and functional at a fraction of the cost of high-end alternatives makes it all worthwhile. In our case, building this dresser for our daughter Regan’s nursery proved to be a surprisingly smooth experience, free from the usual assembly-day dramas.
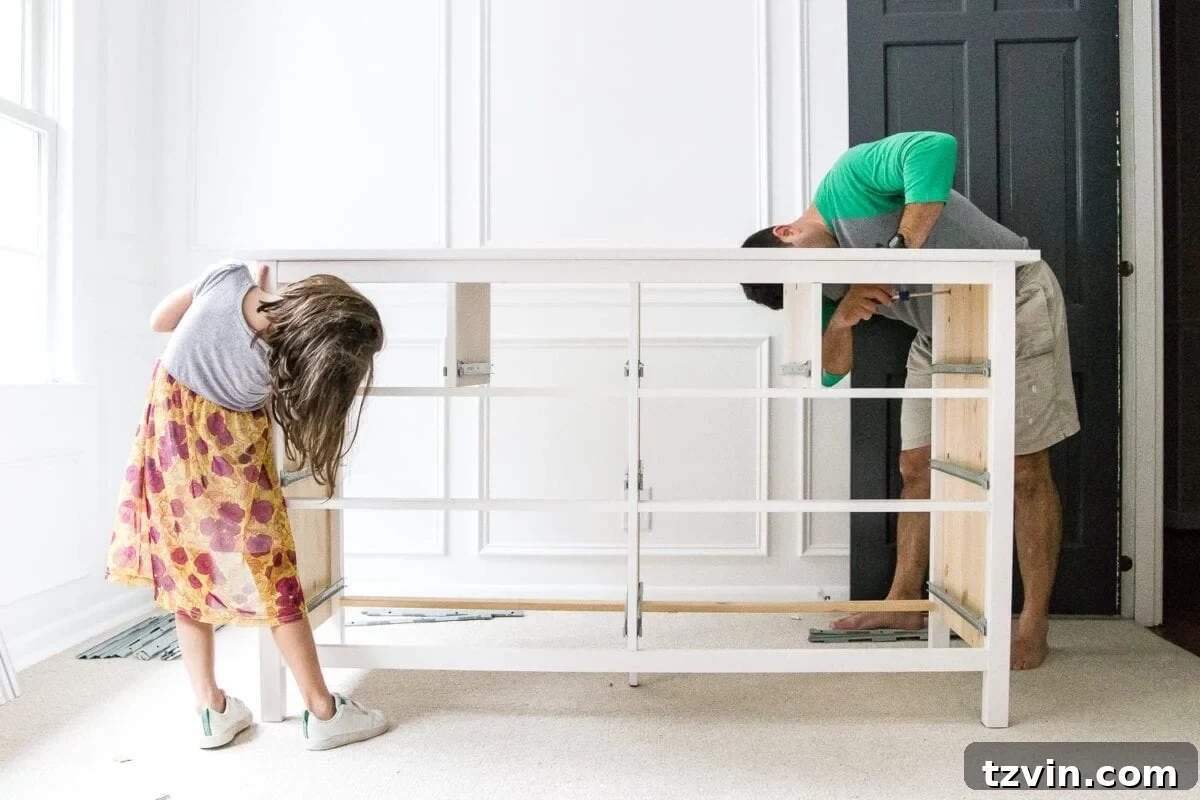
There’s truly nothing quite like pitching in with your daddy on a Saturday morning, fully clad in Disney princess pajamas and sporting classic bedhead, all in the name of DIY for your little sister’s room. It’s these shared moments of creation that make a house truly feel like a home, infusing each piece of furniture with personal stories and love.
UPDATE: See the complete nursery reveal, featuring this stunning IKEA Hemnes dresser transformation, here!
Why the IKEA Hemnes Dresser is a Smart Choice for DIY Furniture Makeovers
While our hearts usually lean towards rescuing, restoring, and re-imagining thrifted furniture, there are undeniably compelling reasons to opt for a new piece, especially when embarking on a significant DIY project. The IKEA Hemnes dresser, a beloved staple in many homes, presented itself as the ideal foundation for our nursery transformation, offering numerous advantages over hunting for a vintage find:
- Pristine Condition: Buying new eliminates the hassle of dealing with damaged or “wonky” drawers, ensuring a smooth start to your project without the need for extensive repairs or hidden structural issues. This means less time fixing and more time creating.
- Health & Safety Assured: You bypass concerns about lead paint, chemical residues, or lingering unpleasant odors often associated with older furniture pieces. This is a crucial consideration, especially when furnishing a baby’s nursery, providing peace of mind.
- Seamless Organization: IKEA’s ecosystem of perfectly sized organizing bins and inserts means you can effortlessly integrate storage solutions that fit the Hemnes dresser like a glove, making organization a breeze. This thoughtful design simplifies the process of keeping everything tidy and accessible.
- Cost-Effectiveness & Value: The Hemnes series is renowned for its affordability, allowing you to invest more in decorative elements and personal touches without breaking the bank. It provides an excellent, sturdy canvas for creative modifications, proving that you don’t need to spend a fortune to achieve a custom, high-end look.
These factors combined made the IKEA Hemnes dresser a clear winner for us, offering a fantastic blend of practicality, safety, and affordability. It truly is a versatile canvas just waiting for a creative touch to transform it into something extraordinary.
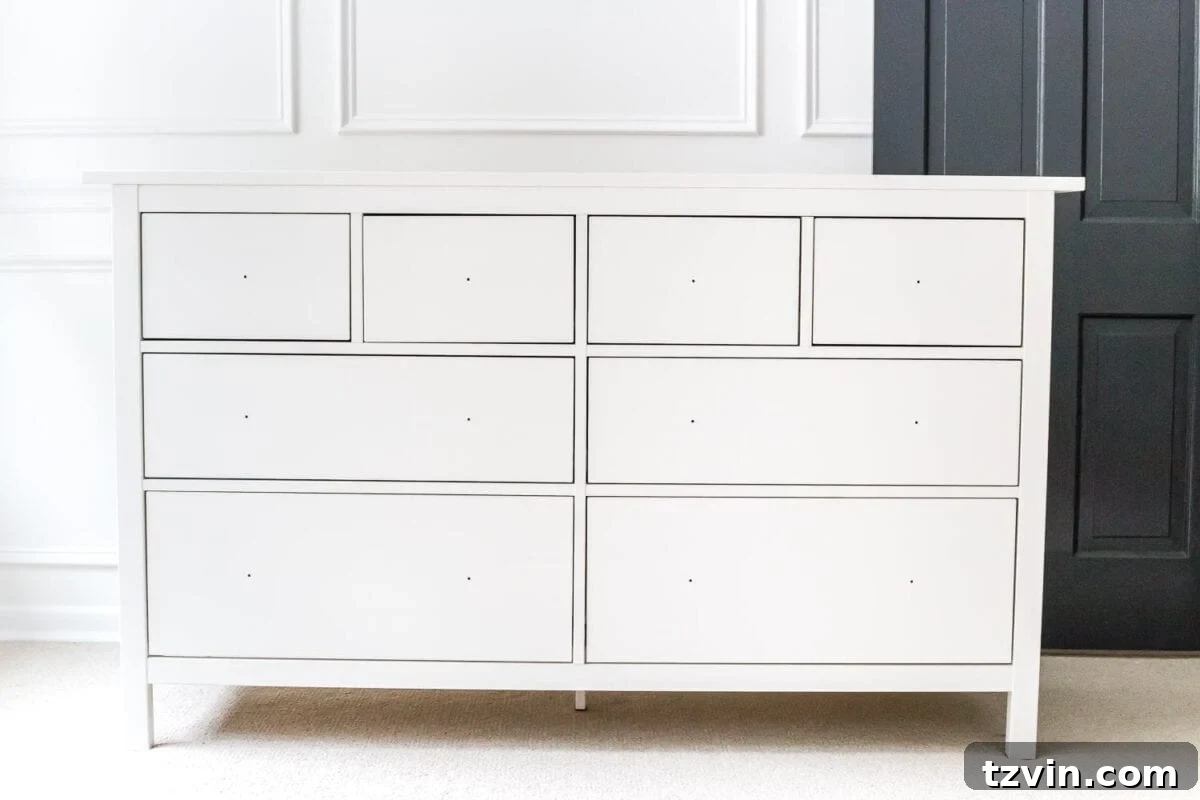
Achieving an Anthropologie-Inspired Look: Elevating Your IKEA Hemnes Dresser with Decorative Appliques
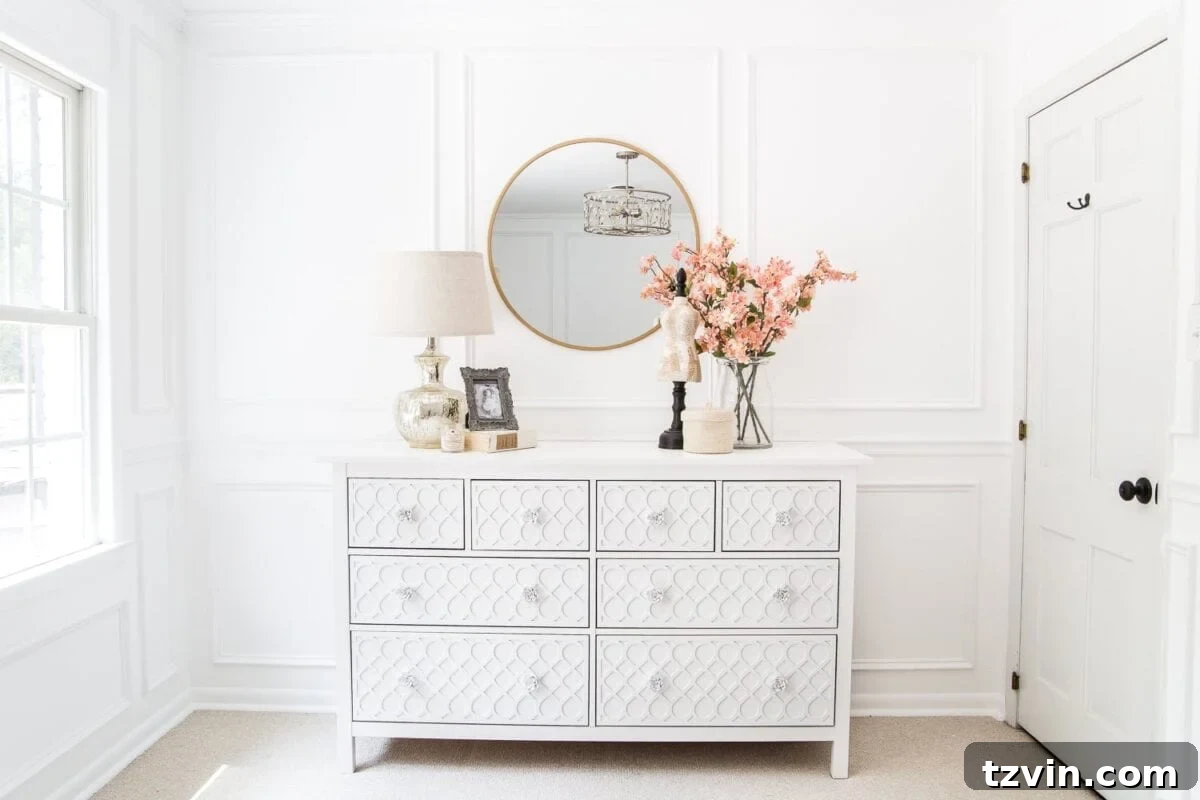
While I’ve always admired the exquisitely detailed and artfully carved dressers gracing the Anthropologie catalogs, their price tags often fall far outside a sensible budget. My heart yearned for that sophisticated, bespoke aesthetic, but my wallet had other plans. This common dilemma sparked a creative solution: transforming a humble IKEA white Hemnes dresser into a high-end designer dupe, making luxury accessible.
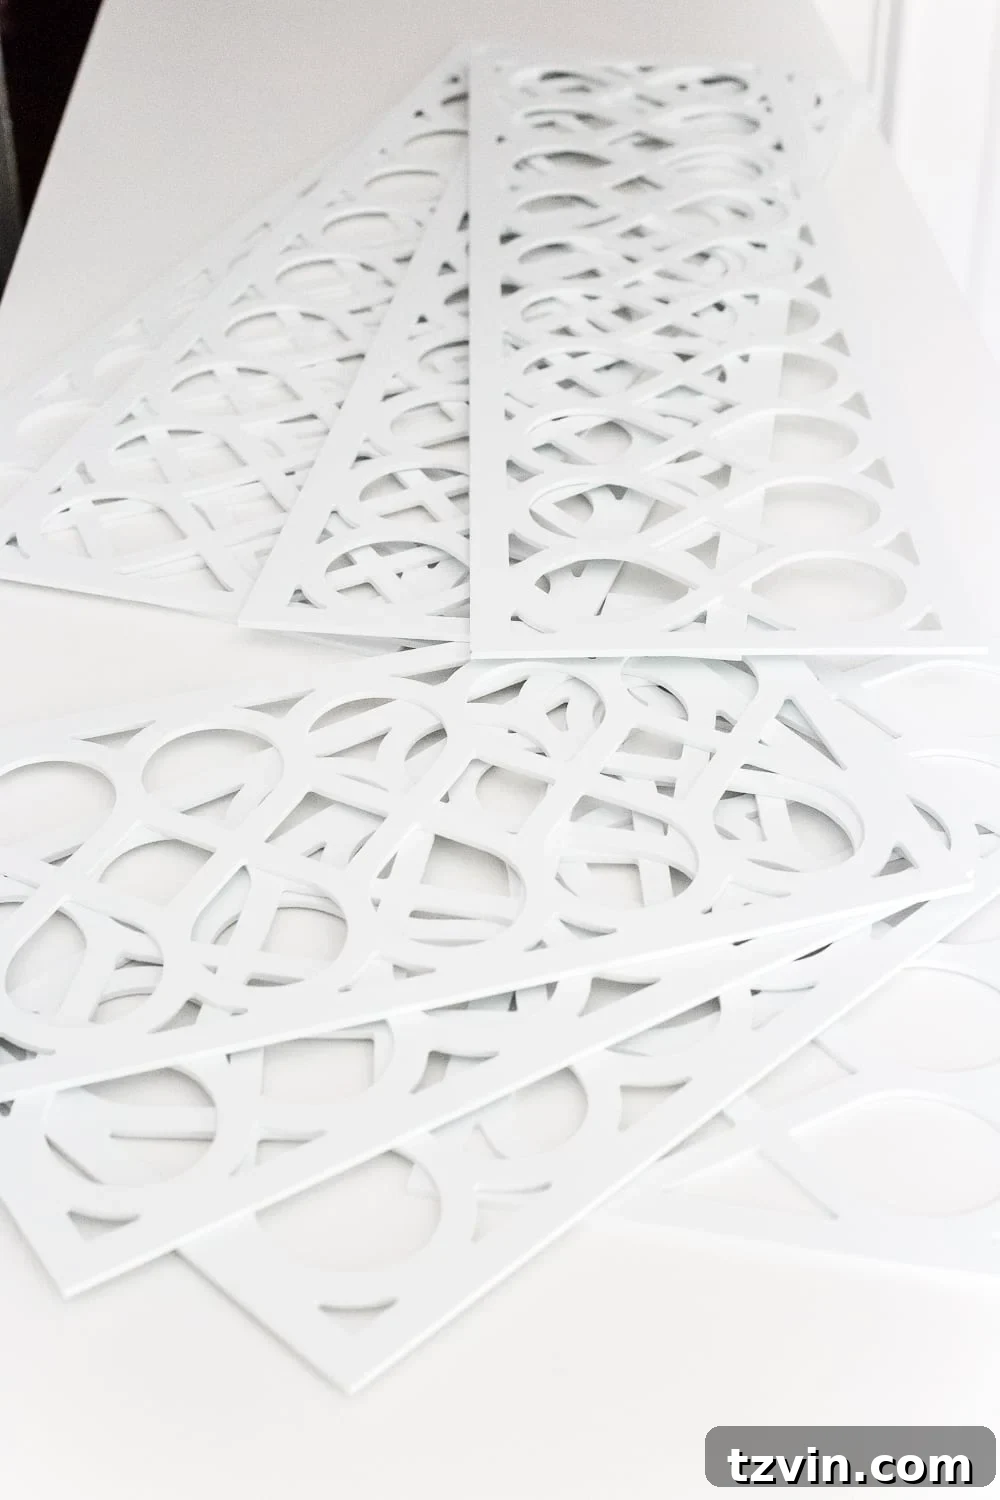
The secret weapon in this elegant transformation is a fantastic product I discovered years ago from a company called O’verlays. O’verlays provides an incredible range of decorative panels and accents specifically designed to add dimension, texture, and intricate patterns to flat-front furniture. They are particularly popular for upgrading plain IKEA pieces, instantly elevating them with a custom, architectural look. However, their versatility extends to any flat surface, making them a game-changer for DIY enthusiasts looking to personalize their space.
These lightweight, laser-cut panels come in various patterns, from classic geometric designs to ornate floral motifs, allowing for endless customization to match any interior style. Imagine turning a simple IKEA dresser into a piece that looks like it was meticulously hand-carved, or adding sophisticated architectural interest to plain cabinet doors. The possibilities are truly exciting and inspiring; I’m even contemplating using O’verlays on our master bedroom closet doors in the future to inject some much-needed visual flair and elevate the entire space.
DIY IKEA Hemnes Dresser Hack: Step-by-Step Guide to a Carved Look
Ready to give your IKEA Hemnes dresser a luxurious, custom upgrade that looks far more expensive than it is? This DIY project is surprisingly straightforward and yields stunning results that will have everyone convinced you splurged on a high-end piece. Here’s everything you’ll need and how to do it, transforming a basic dresser into a designer-inspired statement.
Essential Supplies for Your Dresser Transformation
- O’verlays Fiona Panel Kit: Ensure you select the kit specifically designed for the IKEA Hemnes 8-drawer dresser for a perfect, seamless fit. O’verlays offers a wide variety of patterns, so choose one that perfectly matches your desired aesthetic and complements your existing decor.
- High-Quality White Paint: A quart of Sherwin Williams Pro Classic Satin paint in a standard white base is highly recommended. This particular paint provides excellent coverage, exceptional durability, and an elegant satin finish that closely matches IKEA’s factory white, ensuring a consistent and professional look.
- Painting Tools: Prepare your workspace with a sturdy drop cloth to protect surfaces. For application, you’ll need either a high-quality 1.5″ angled paint brush for precise control and detail work, or a paint sprayer for an ultra-smooth, factory-like finish free of brush strokes. Choose the method you’re most comfortable with and that best suits your desired outcome.
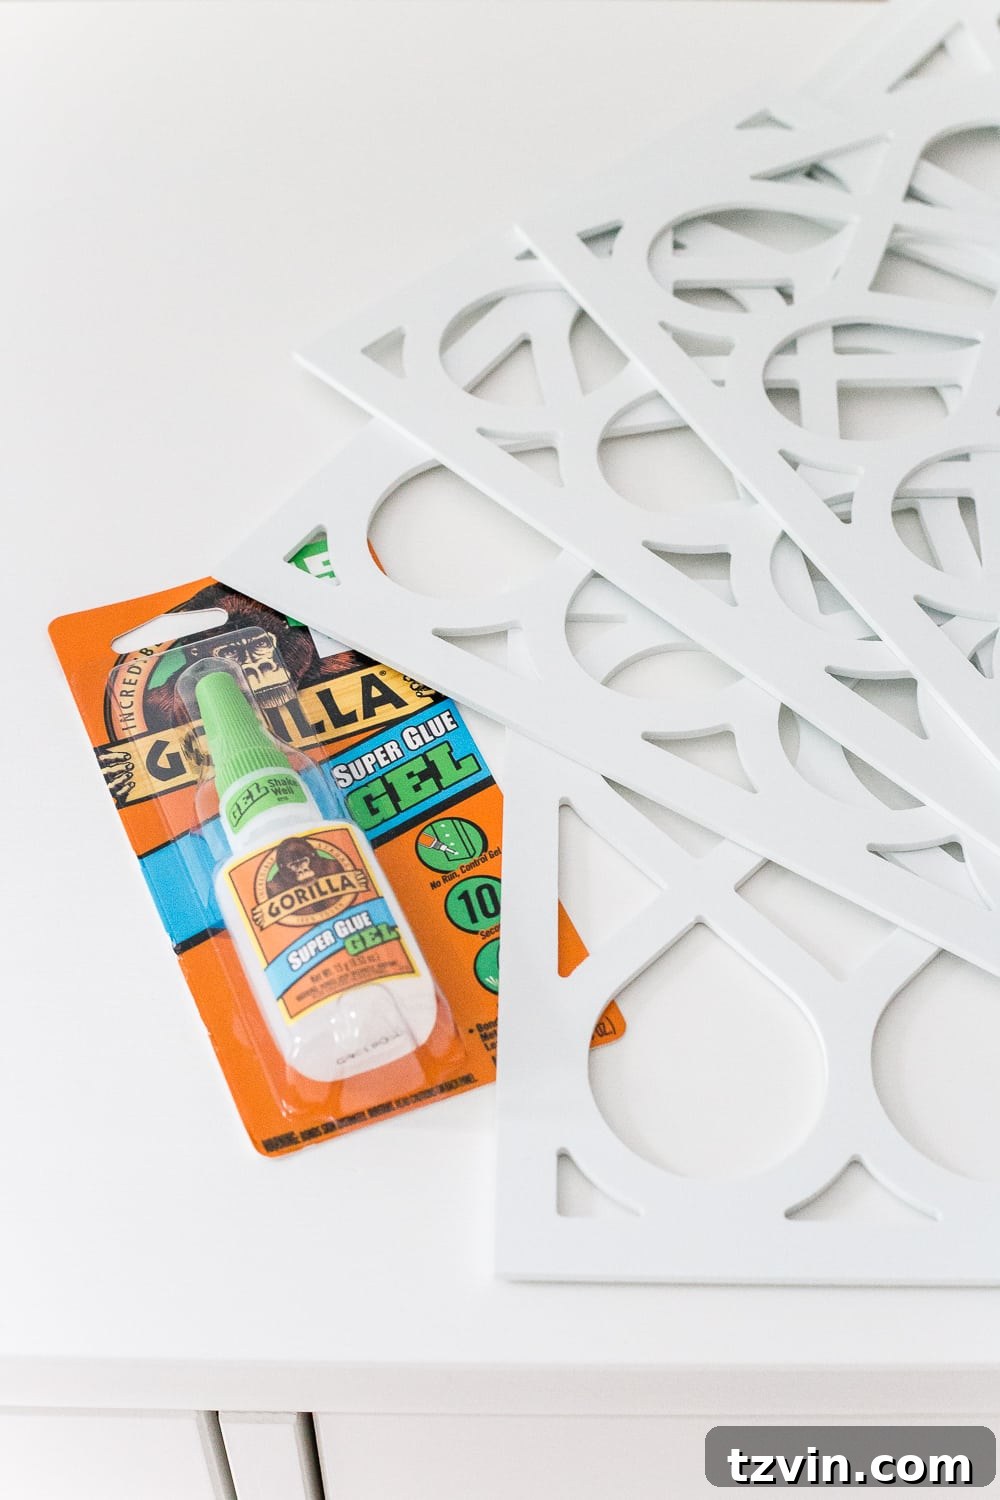
- Gorilla Super Glue Gel: Two bottles should be sufficient for securely attaching all the O’verlays panels. The gel formula is ideal as it prevents dripping and provides an incredibly strong, fast-setting bond, ensuring your appliques stay firmly in place.
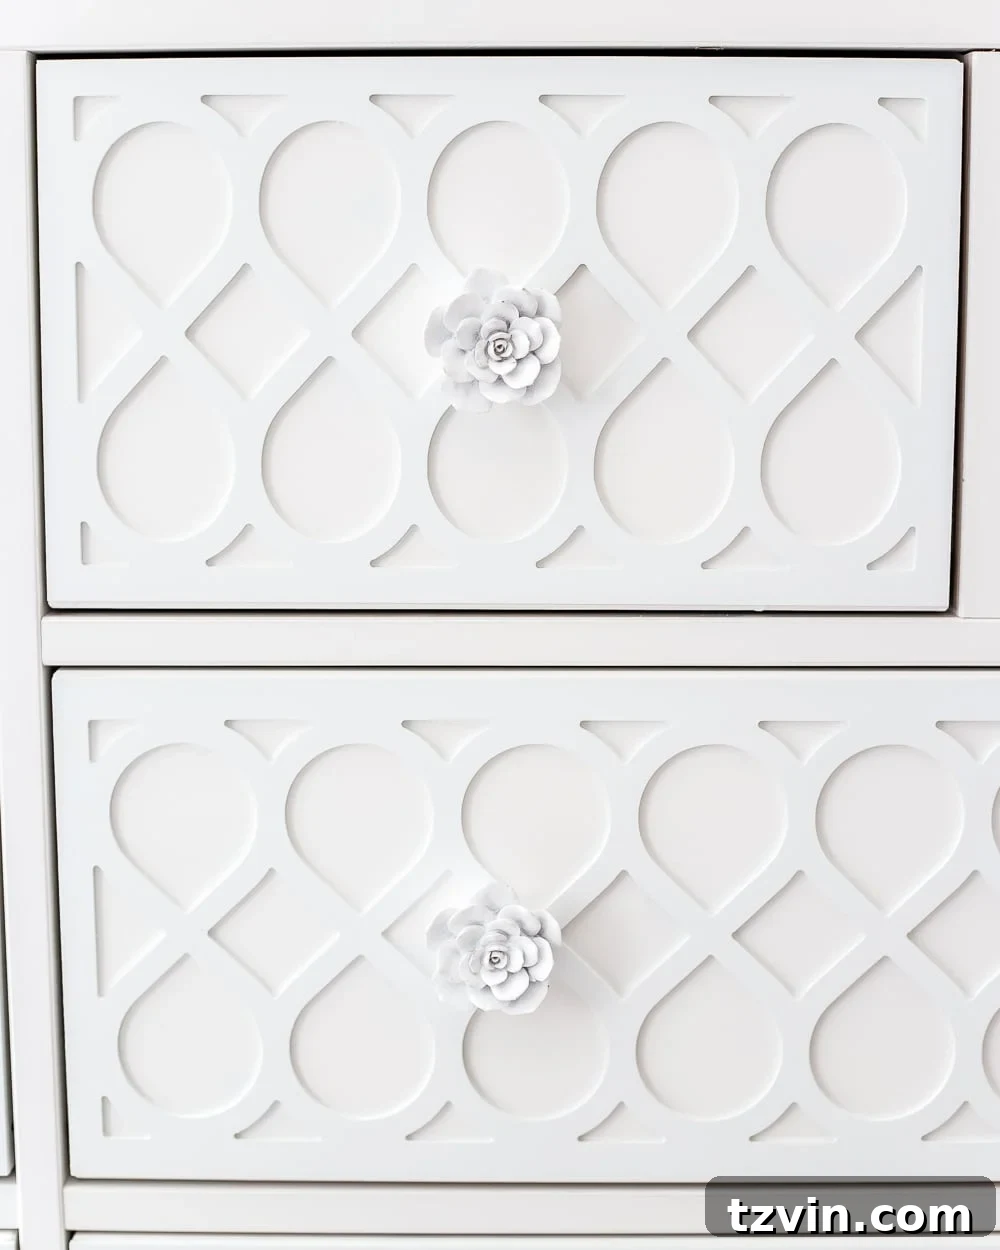
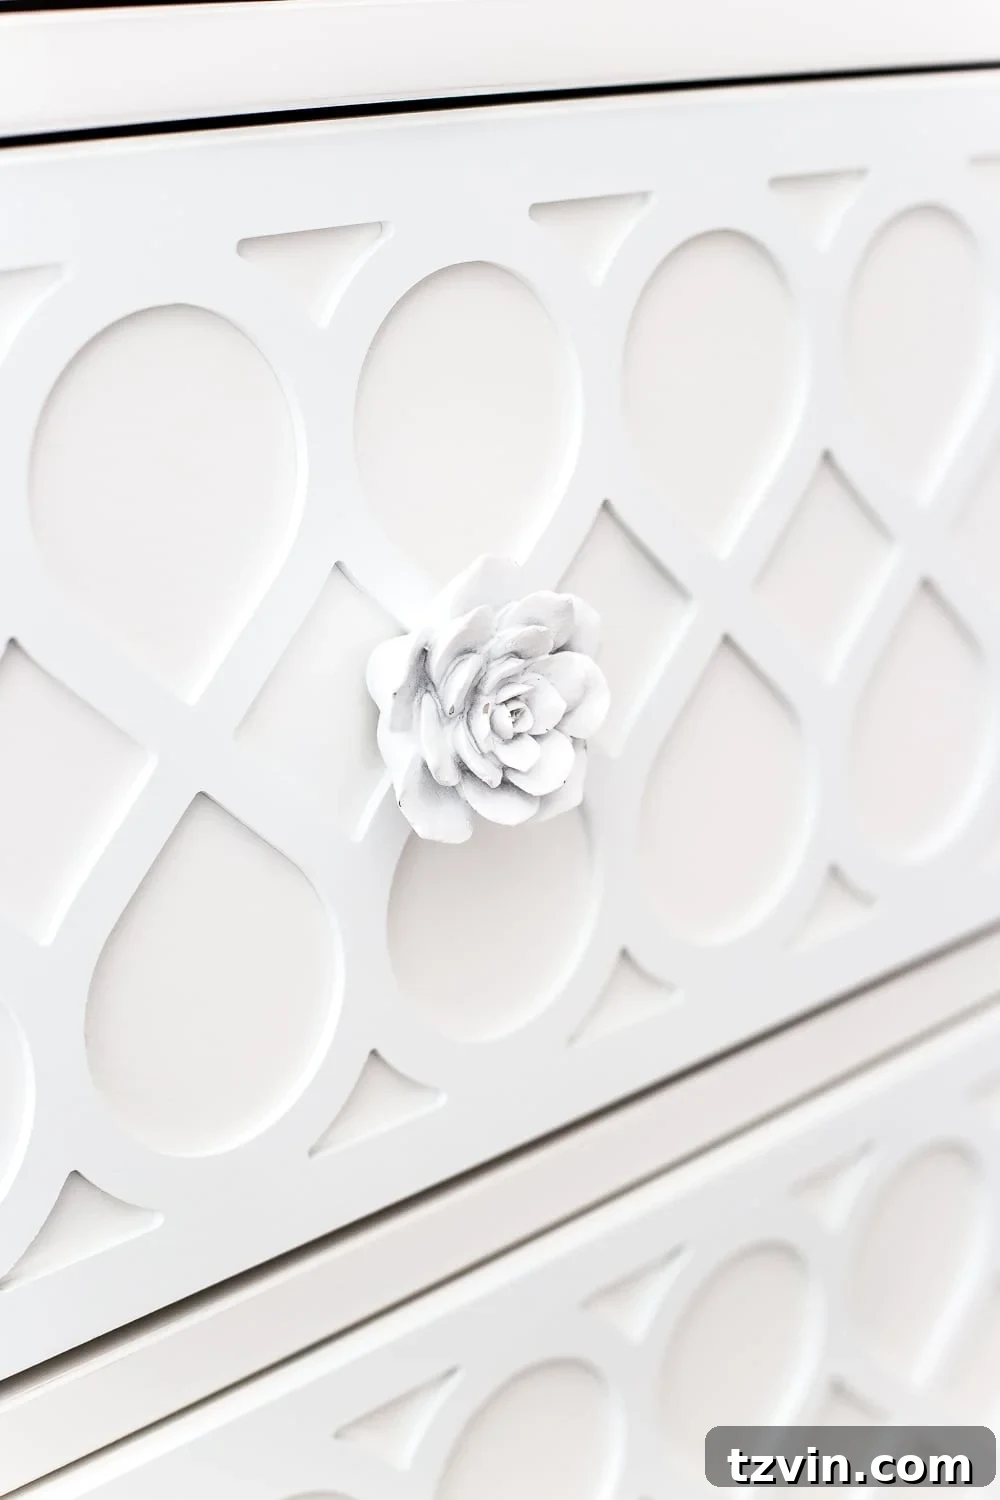
- Custom Knobs/Pulls (Optional but Highly Recommended): This is where you can truly personalize your dresser and infuse it with unique character. I opted for beautiful white cactus flower knobs, found at a fantastic discount from Hobby Lobby, to complement the feminine and detailed design. Explore options from various retailers like Etsy, Amazon, or local craft stores to find hardware that perfectly speaks to your style.
- Power Drill: An essential tool for creating new holes for your chosen hardware, or carefully widening existing ones through the O’verlays panels. Ensure you have the correct drill bit size for your hardware.
Step-by-Step Instructions for Your IKEA Hemnes Makeover
Since our goal was to maintain the crisp white aesthetic of the original IKEA dresser, and it was already assembled in white, we strategically focused our painting efforts on the O’verlays panels rather than undertaking the extensive task of painting the entire dresser. This streamlined the process significantly, saving both time and paint.
To ensure a perfectly cohesive look, I took one of the dresser drawers to Sherwin Williams. Their expert team was able to precisely color-match the existing IKEA white and recommend the exact satin sheen. This step is crucial because even slight variations in white shades can be noticeable and detract from the seamless, custom finish. The O’verlays panels, while white, weren’t an exact match to the dresser’s finish straight out of the box, making this color-matching step indispensable.
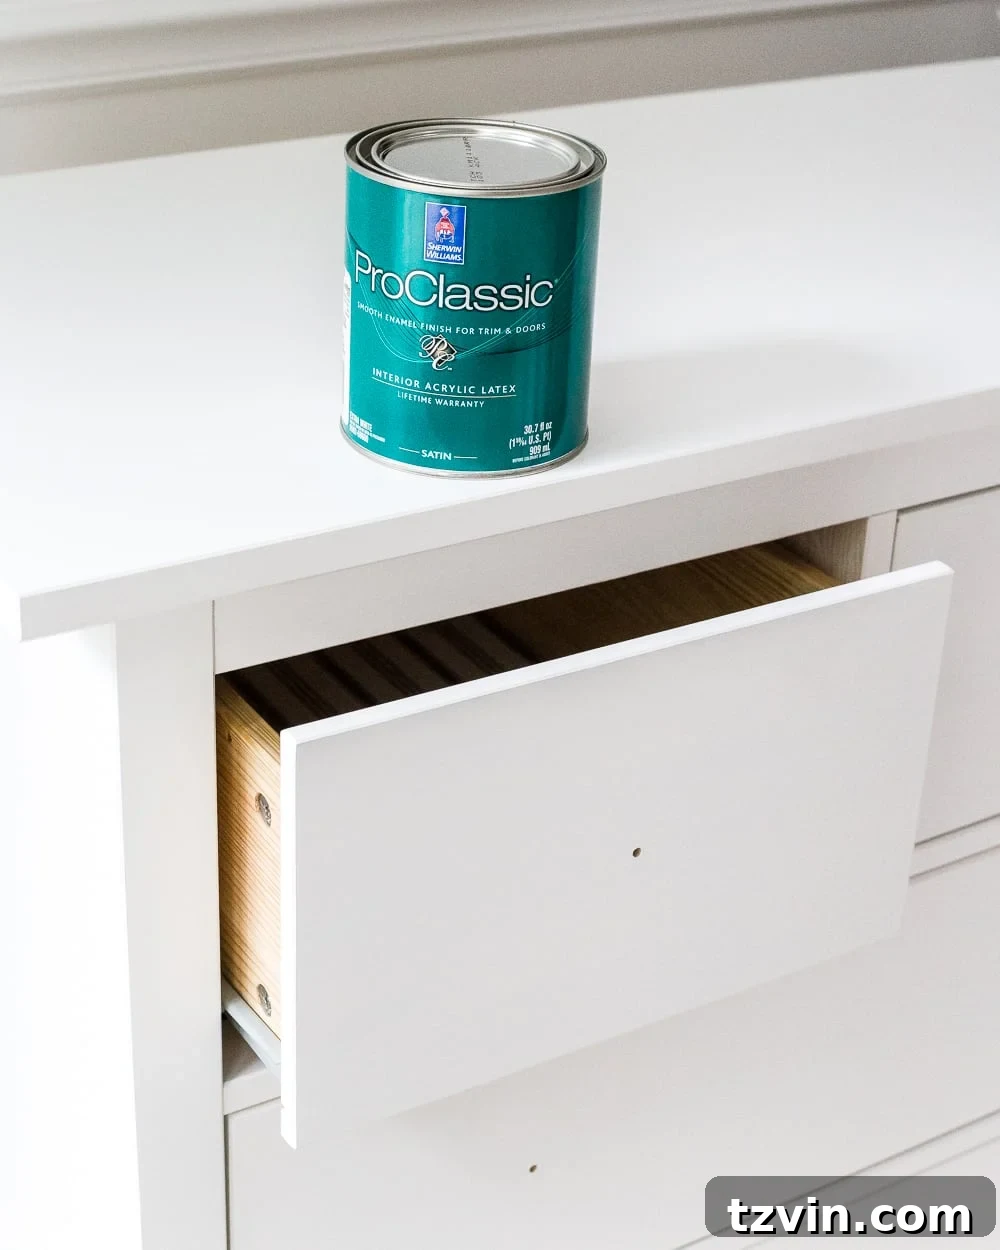
1. Prepare and Paint Your O’verlays Panels
Begin by laying your O’verlays panels on a clean canvas drop cloth in a well-ventilated area. If your O’verlays are not pre-primed, a light coat of primer can ensure better paint adhesion and a more durable finish. Using your chosen method – either a high-quality angled brush or a paint sprayer – apply two light, even coats of the color-matched Sherwin Williams paint. Light coats are essential to prevent drips and ensure a smooth, professional finish that highlights the intricate details of the appliques. Allow ample drying time between coats according to the paint manufacturer’s instructions, typically a few hours, to ensure proper curing and prevent stickiness.
Pro Tip: For an ultra-smooth, professional look that rivals a factory finish, a paint sprayer is highly recommended, especially on intricate designs. It eliminates brush strokes and provides exceptionally even coverage. If using a brush, opt for a synthetic brush designed for smooth finishes and avoid overloading it with paint.
2. Securely Adhere the O’verlays to the Drawer Fronts
Once your painted O’verlays panels are completely dry and cured, it’s time to attach them to the dresser drawers. Carefully apply the Gorilla Super Glue Gel to the backside edges of each panel. For larger panels, add a few small dabs of glue in the middle of the design as well to ensure full and lasting adhesion across the entire surface. Work methodically, one panel at a time, to ensure precise placement.
Precisely align each O’verlays panel with its corresponding drawer front. Take your time to get the alignment perfect, as this meticulous step will significantly impact the final, custom look of your dresser. Once positioned, press firmly on the panel for at least 10-15 seconds to allow the super glue to bond effectively. Repeat this process for all drawers, ensuring each panel is securely attached and perfectly centered for a flawless finish.
3. Install Your Chosen Hardware
With the O’verlays panels firmly in place and the glue fully cured, the final step is to install your new hardware to complete the transformation. For our chosen knobs, I carefully used a power drill to create a new hole through the center of the O’verlays panel, directly aligning it with the existing pre-drilled hole in the dresser drawer front. Precision is absolutely key here to avoid damaging the delicate applique or the drawer itself. Use a drill bit slightly larger than the screw of your knob to allow for easy insertion without stripping the wood.
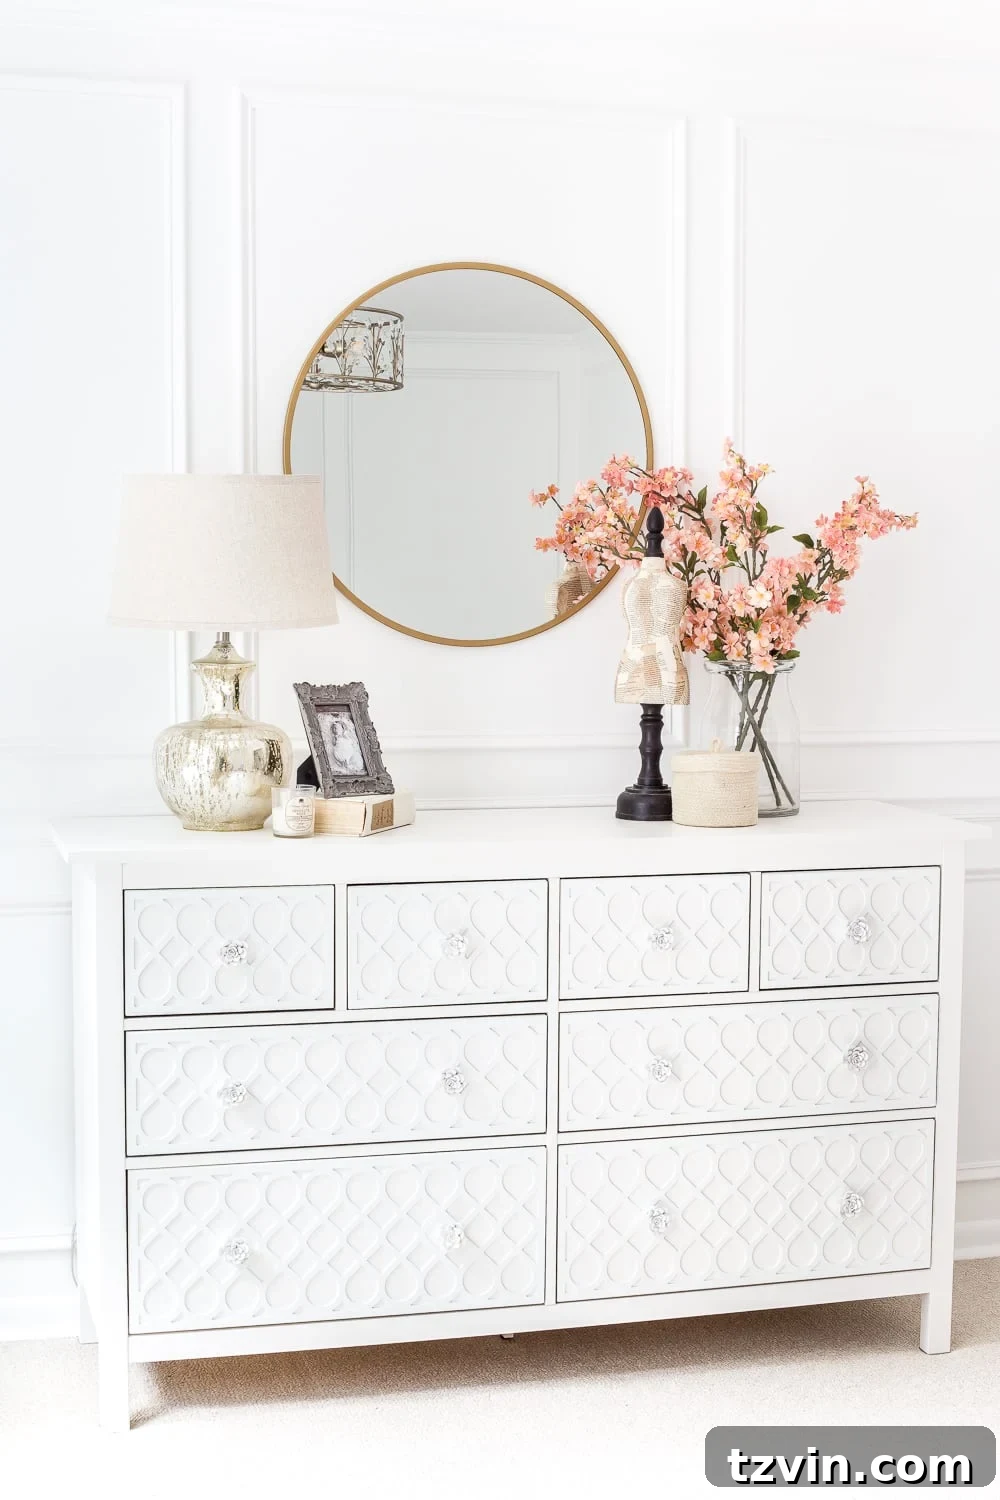
Once the holes are accurately drilled, simply screw in your chosen knobs or pulls. This seemingly small detail makes a huge impact, instantly completing the custom, high-end look and adding a touch of personality. The addition of our frilly, feminine cactus flower knobs instantly elevated the dresser from a plain IKEA piece to a unique, designer-inspired statement. And just like that, your stunning IKEA Hemnes dresser hack is complete and ready to adorn your space!
At this stage, the dresser was ready for its initial styling. I decorated it with a few cherished items I already had on hand, anticipating the joyful arrival of all the adorable baby essentials. The excitement for the nursery to be fully equipped and styled for our new family member was truly palpable!
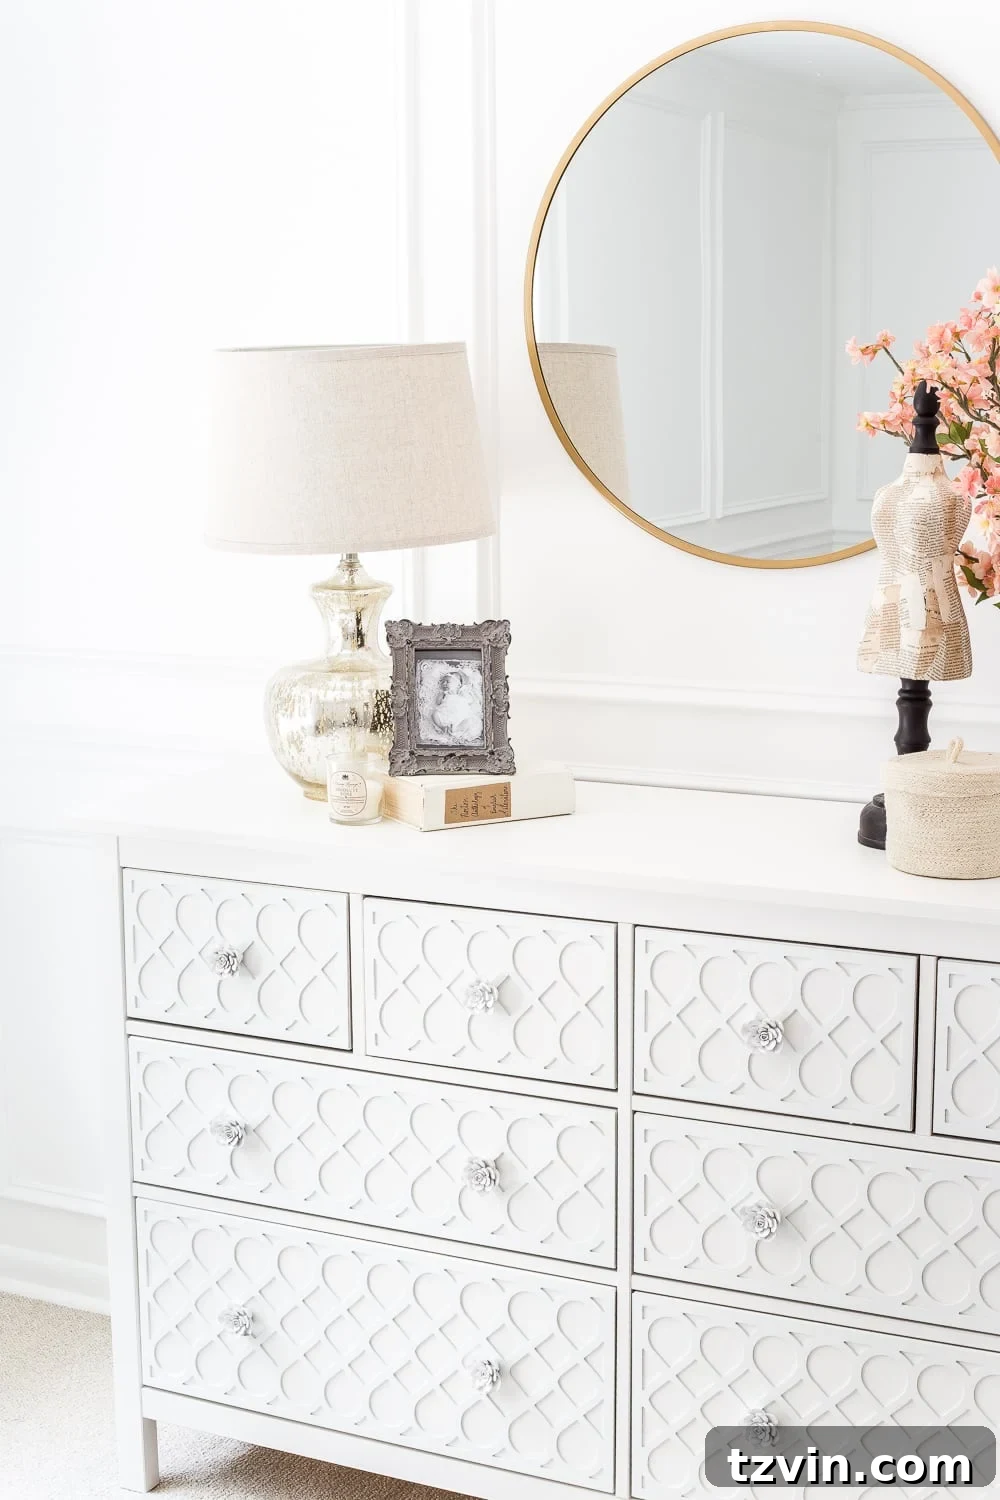
Styling and Functionality: Decorating the Transformed Dresser for a Nursery
Beyond its stunning aesthetic, this IKEA Hemnes dresser hack was designed with maximum functionality in mind for Regan’s nursery. Initially, we placed it against a wall, but our long-term plan was to strategically move it in front of the window. This placement not only creates a beautiful focal point but also ensures that the nursery door can swing open fully, optimizing the room’s overall layout and flow.
The dresser’s robust surface and ideal height make it a perfect candidate for a changing station. We envisioned adding a comfortable changing pad with a secure holder on top, flanked by a convenient basket stocked with all essential diapering supplies – diapers, wipes, creams, and extra onesies. This setup minimizes bending and strain during the countless diaper changes that lay ahead, offering a significant ergonomic benefit for new parents like us.
The generous drawer space, combined with IKEA’s custom-fit organizing bins, allows for meticulous categorization of baby clothes, swaddles, burp cloths, and other nursery necessities. Keeping everything neatly organized and within arm’s reach is invaluable for efficient and stress-free care routines, ensuring that every item has its designated place.
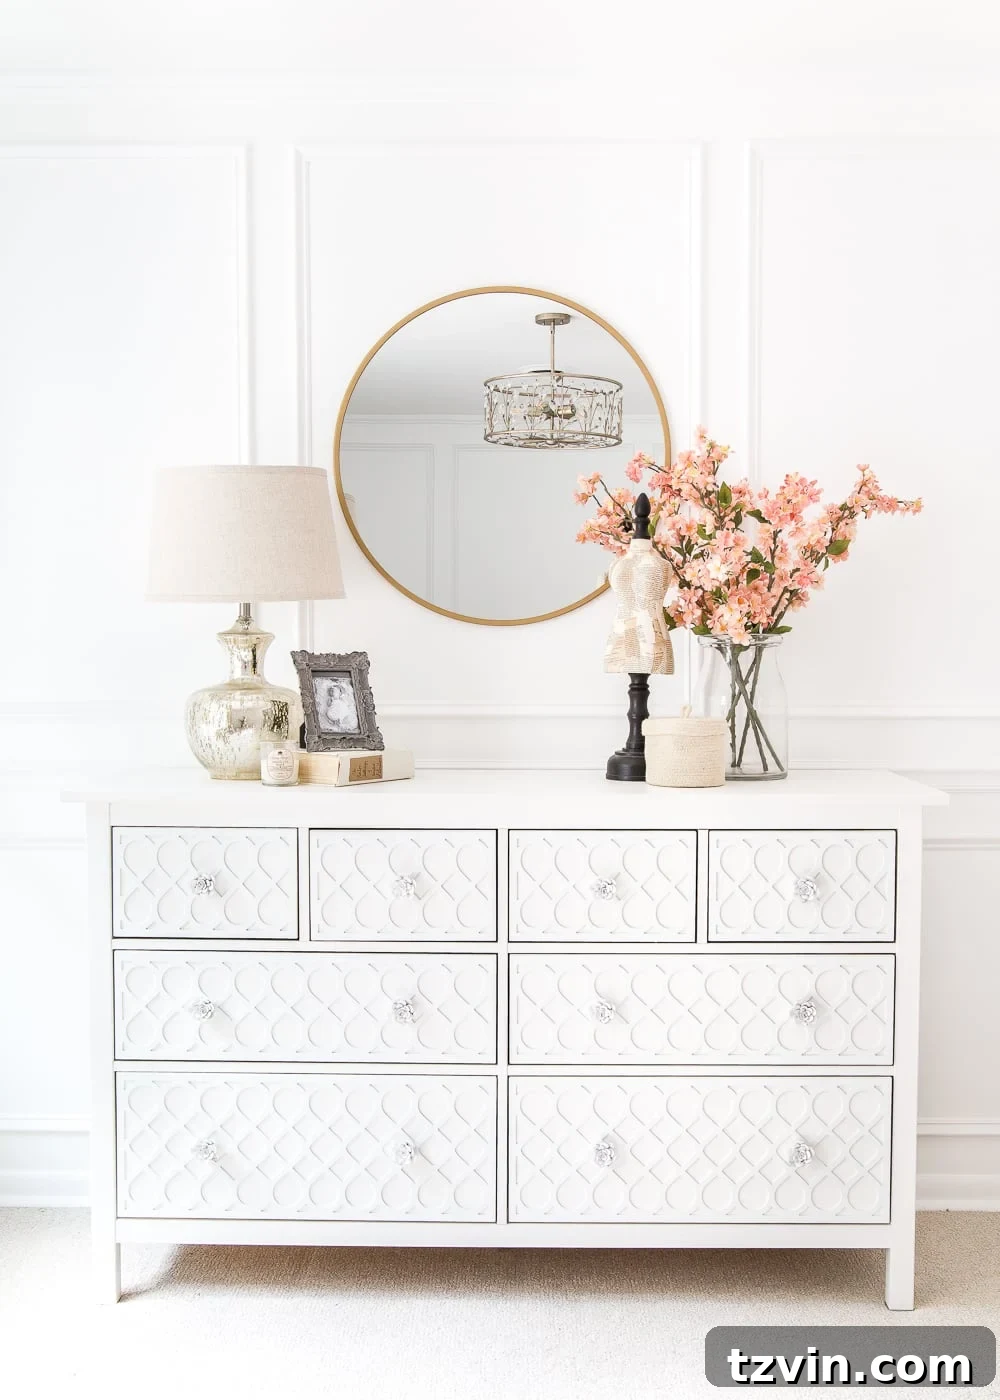
UPDATE: Discover how I perfectly styled the finished nursery dresser and the entire room in our full nursery reveal here!
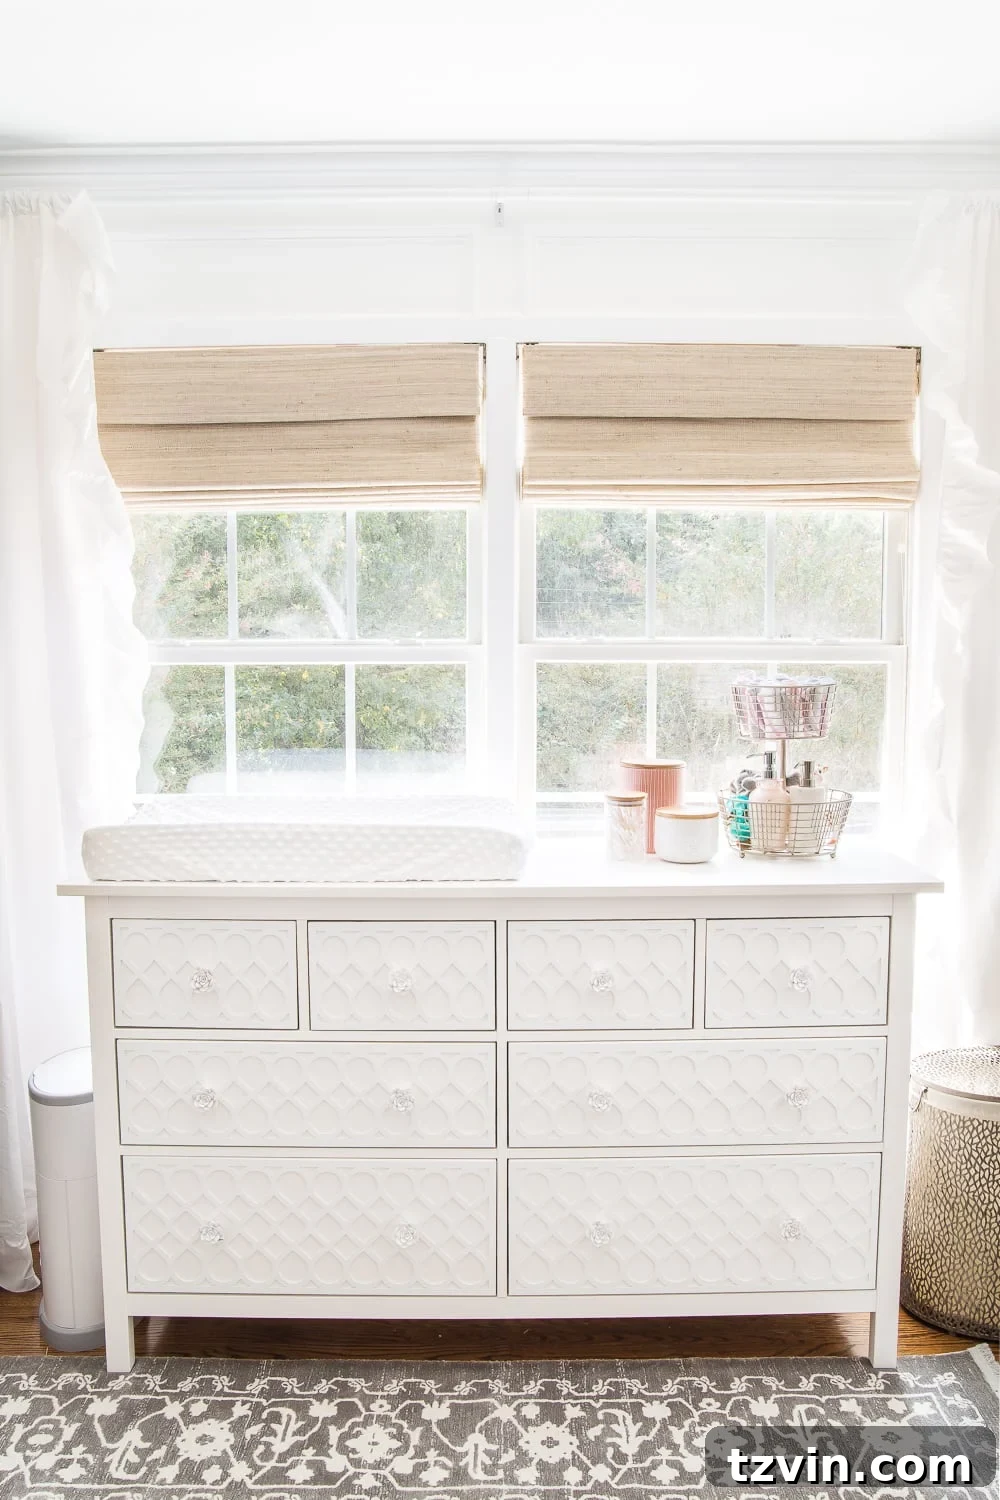
Unveiling the Cost: Achieving a High-End Look for Less with the IKEA Hemnes Hack
One of the most satisfying aspects of this DIY project is the incredible value it delivers, proving that luxury design doesn’t have to come with an exorbitant price tag. The total investment for the IKEA Hemnes dresser itself, the decorative O’verlays panels, the paint, and the new custom hardware came in at approximately $476. This figure encompasses all the materials needed to achieve this stunning transformation.
When you compare this total cost to the price tag of similar elaborately detailed and carved dressers from high-end retailers like Anthropologie, which can easily exceed $1,000, the savings are truly remarkable. Doesn’t this transformed dresser bear a striking resemblance to a white version of this luxurious dresser, but at a mere fraction of the cost? This project stands as a powerful testament to the ingenuity and power of creative DIY: you can absolutely achieve an expensive, designer aesthetic without the hefty price tag, making stylish home decor both accessible and sustainable.
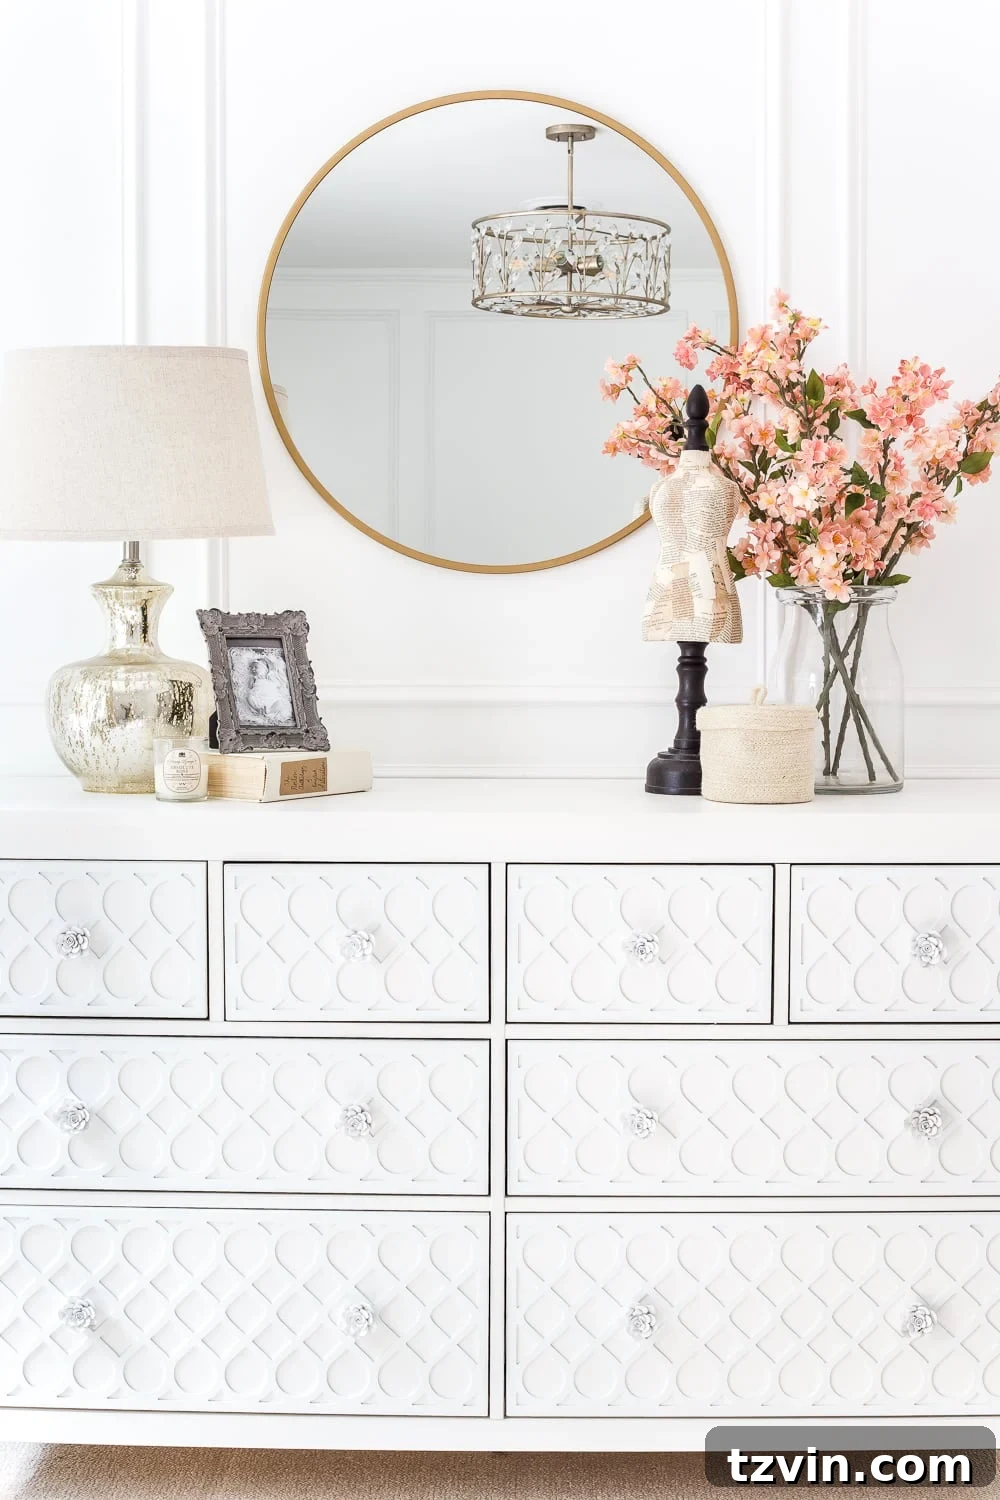
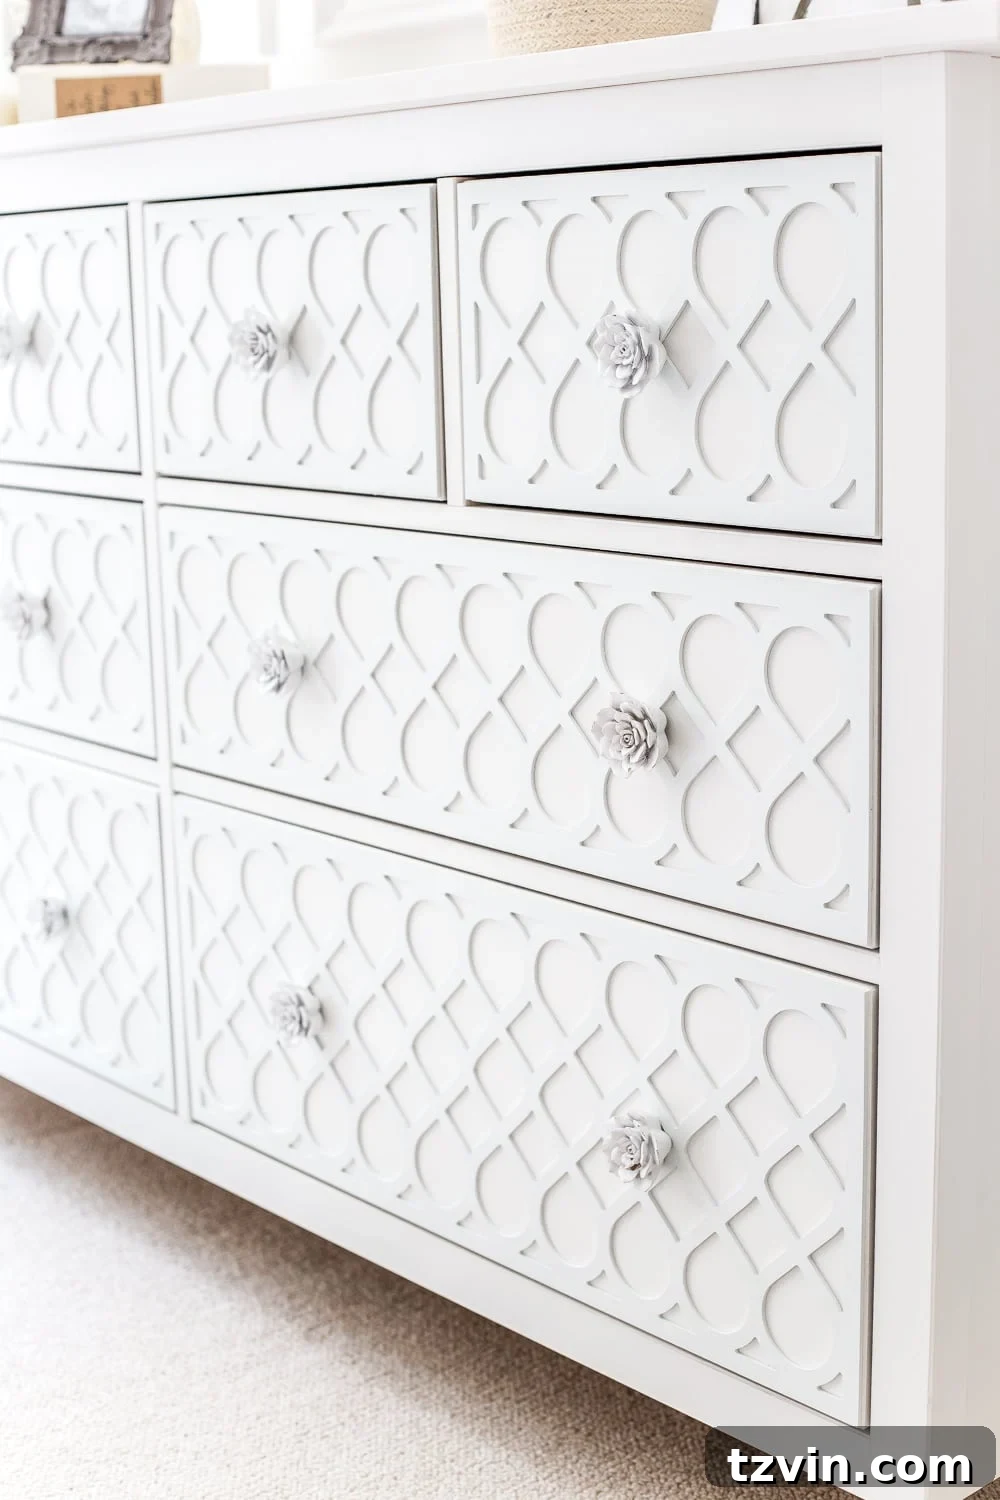
Maximizing Space: How to Efficiently Organize an IKEA Hemnes Dresser in a Nursery
An organized nursery is a functional nursery, and the IKEA Hemnes dresser, especially with its generous drawers, is an organizational dream come true for parents. For a detailed walkthrough on how I maximized every inch of space within this versatile piece, you can explore our complete nursery organization tour here. That comprehensive post dives deep into how I meticulously sorted and arranged each of the Hemnes dresser drawers to store baby clothes, diapers, wipes, and other essential nursery items.
Utilizing various drawer dividers and inserts (many of which are perfectly designed for IKEA furniture, enhancing their utility) allowed for a designated spot for every tiny item. This systematic approach ensures that everything needed for a quick diaper change or an outfit swap is always within arm’s reach, making daily routines smoother, faster, and significantly more efficient. An organized dresser not only looks tidy and aesthetically pleasing but also significantly reduces stress and saves valuable time during those often-hectic infant months.
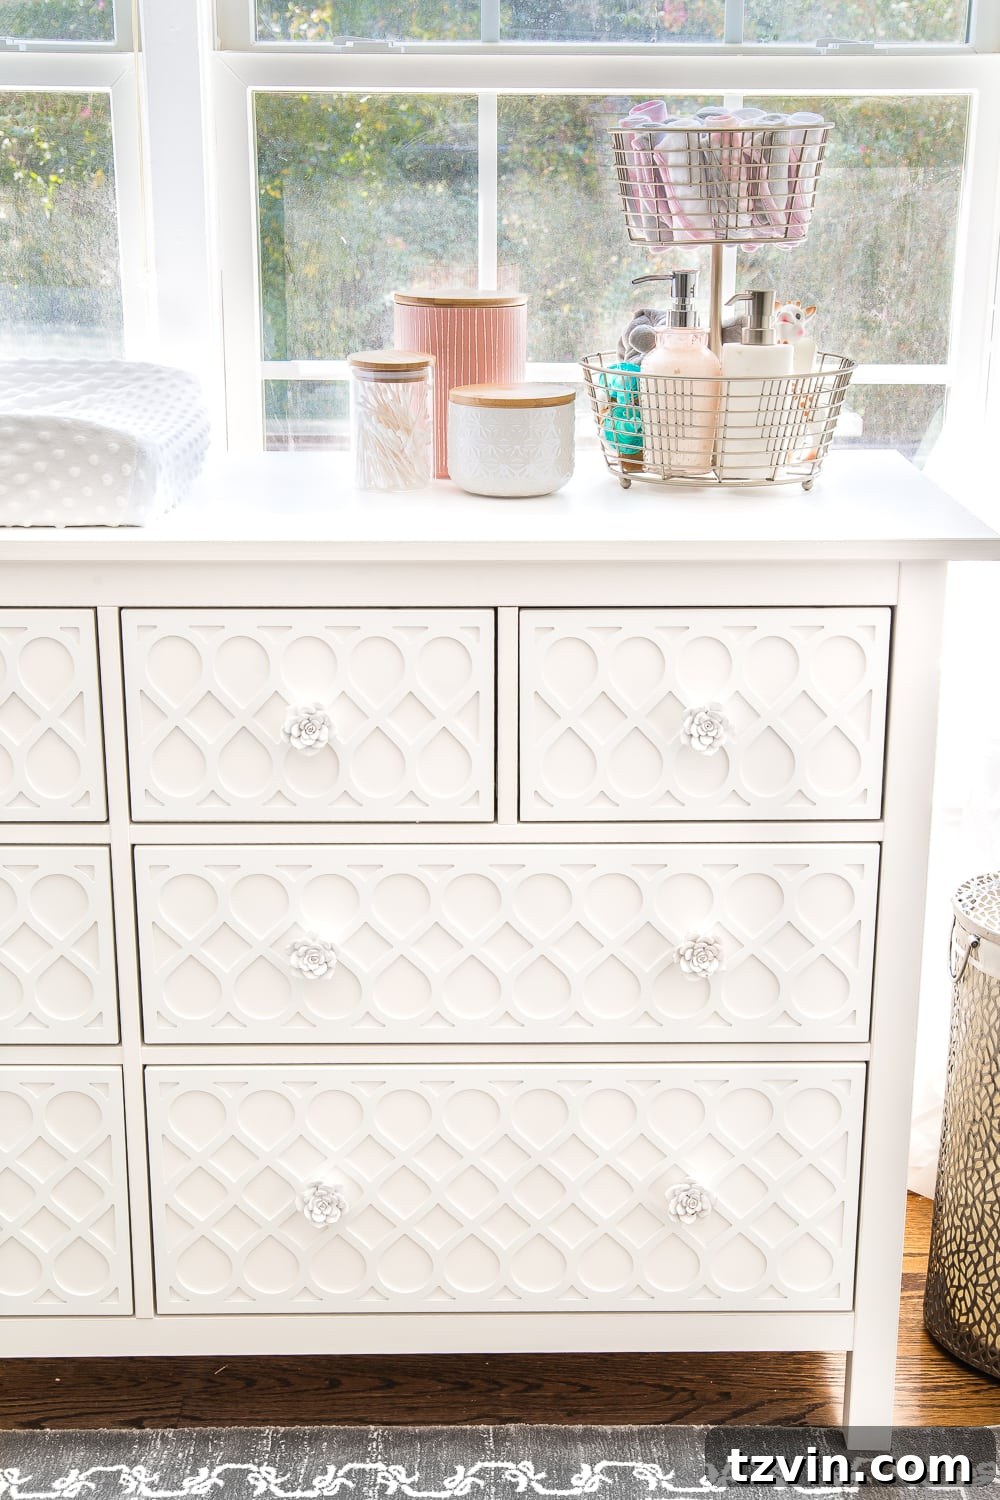
With the dresser transformation complete and its contents thoughtfully organized, we were ready for the next exciting phase of our nursery renovation. The dresser was temporarily moved to prepare for our flooring contractor to begin the exciting process of ripping out the old carpet and refinishing the original hardwood floors underneath. This step promises to add immense character, warmth, and a touch of timeless elegance to the room.
Exposing those beautiful hardwood floors and applying a fresh, serene coat of gray paint to the doors are just a few more steps in creating a truly dimensional, inviting, and personalized space. Even at this transitional stage, the room already exudes a clean, peaceful, and serene ambiance, perfectly setting the tone for our new arrival and the many cherished memories to be made within its walls.
Explore Decor Sources & Similar Products
UPDATE: Don’t miss the full nursery reveal, showcasing the final IKEA Hemnes dresser makeover and comprehensive room styling!
For an in-depth look at our entire nursery makeover journey, including the initial design plan, budget breakdown, and all subsequent nursery projects, explore our dedicated posts. We’re thrilled with the progress and can’t wait to share more as we continue refining this special space and welcoming our newest family member!

Frequently Asked Questions About the IKEA Hemnes Dresser Hack
What white paint color perfectly matches IKEA white furniture?
Where are the best places to purchase unique knobs and pulls for furniture makeovers?
What depth of O’verlays appliques did you use for this project?
Related DIY Furniture Makeover & IKEA Hack Posts
- The Essential Trick to Successfully Painting Laminate IKEA Furniture for Lasting Results
- A Beginner’s Comprehensive Guide to Painting Furniture Like a Professional
- Stunning Office Update: Hale Navy IKEA Liatorp Cabinet Makeover for a Sophisticated Look
- Creative DIY IKEA Pantry Cabinet Transformation Using Hemnes Components for Organized Storage
- 20 Inspiring IKEA Pax Closet Makeovers for Ultimate Organization and Elevated Style