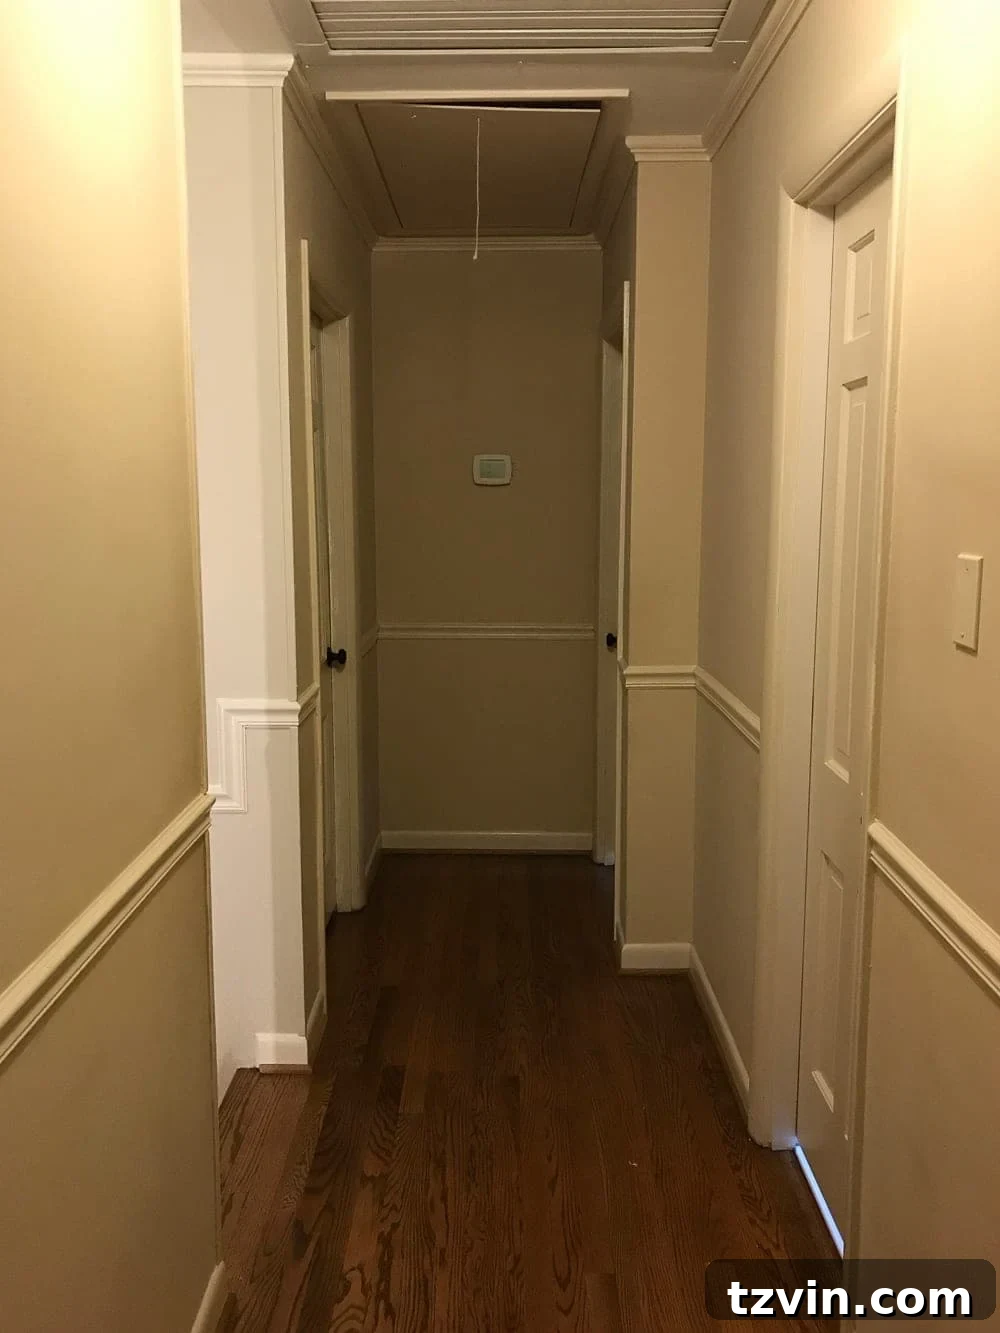
Do you have those nagging little home projects that, despite their small size, silently chip away at your sanity for years? The ones you constantly put off because, well, they’re literally “up there”? For us, that was the eyesore of an attic door in our hallway ceiling during our first year in this house.
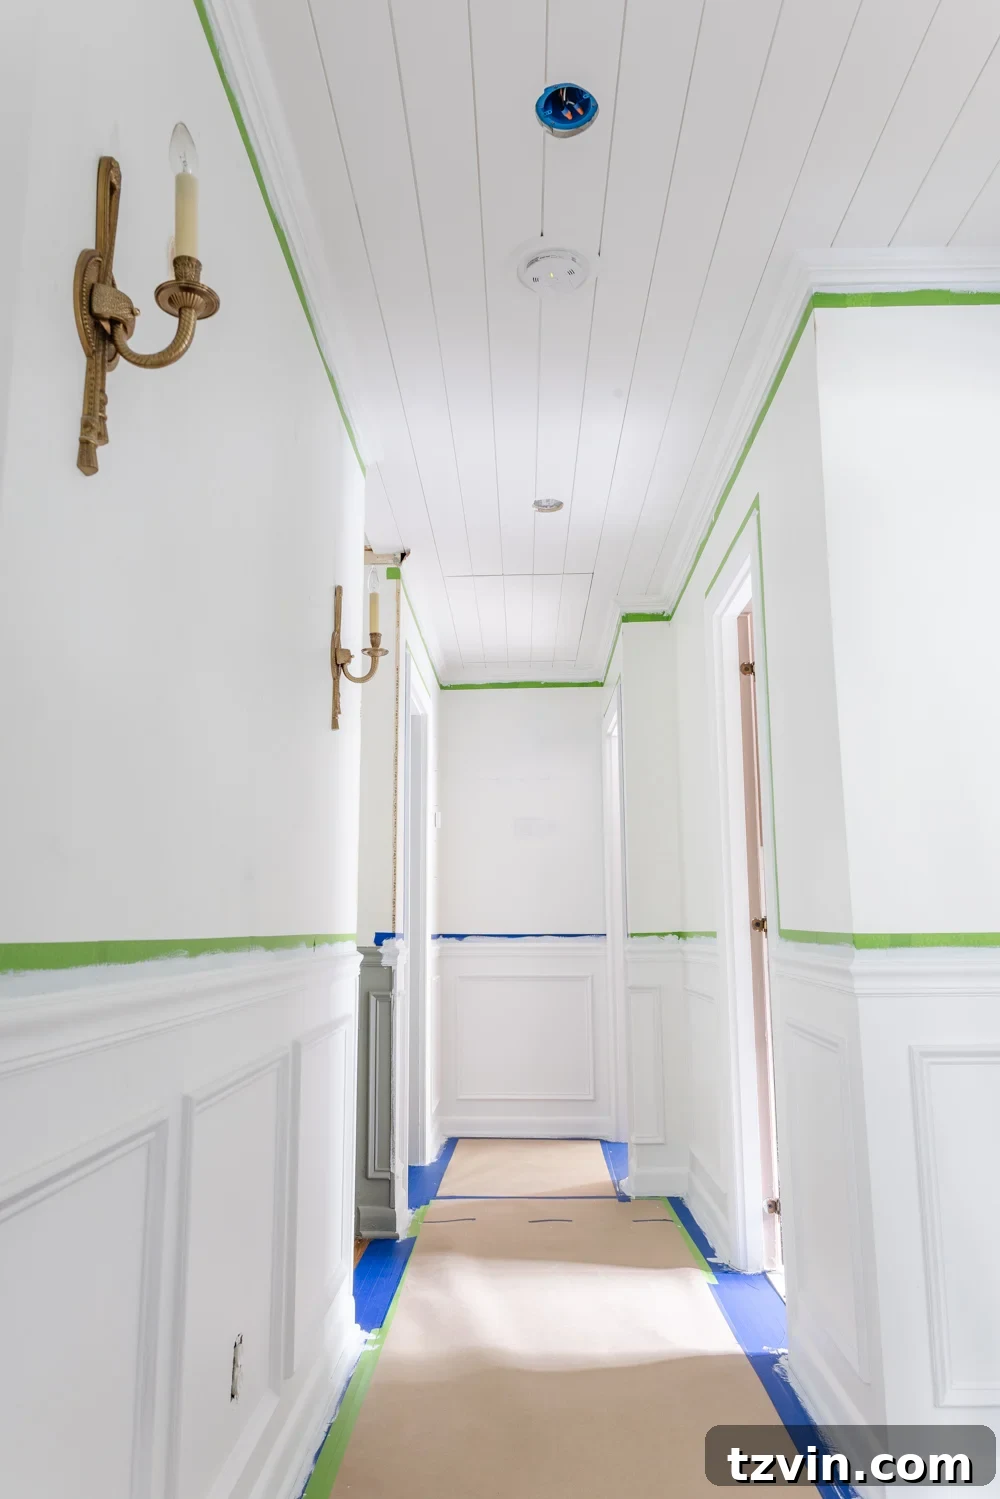
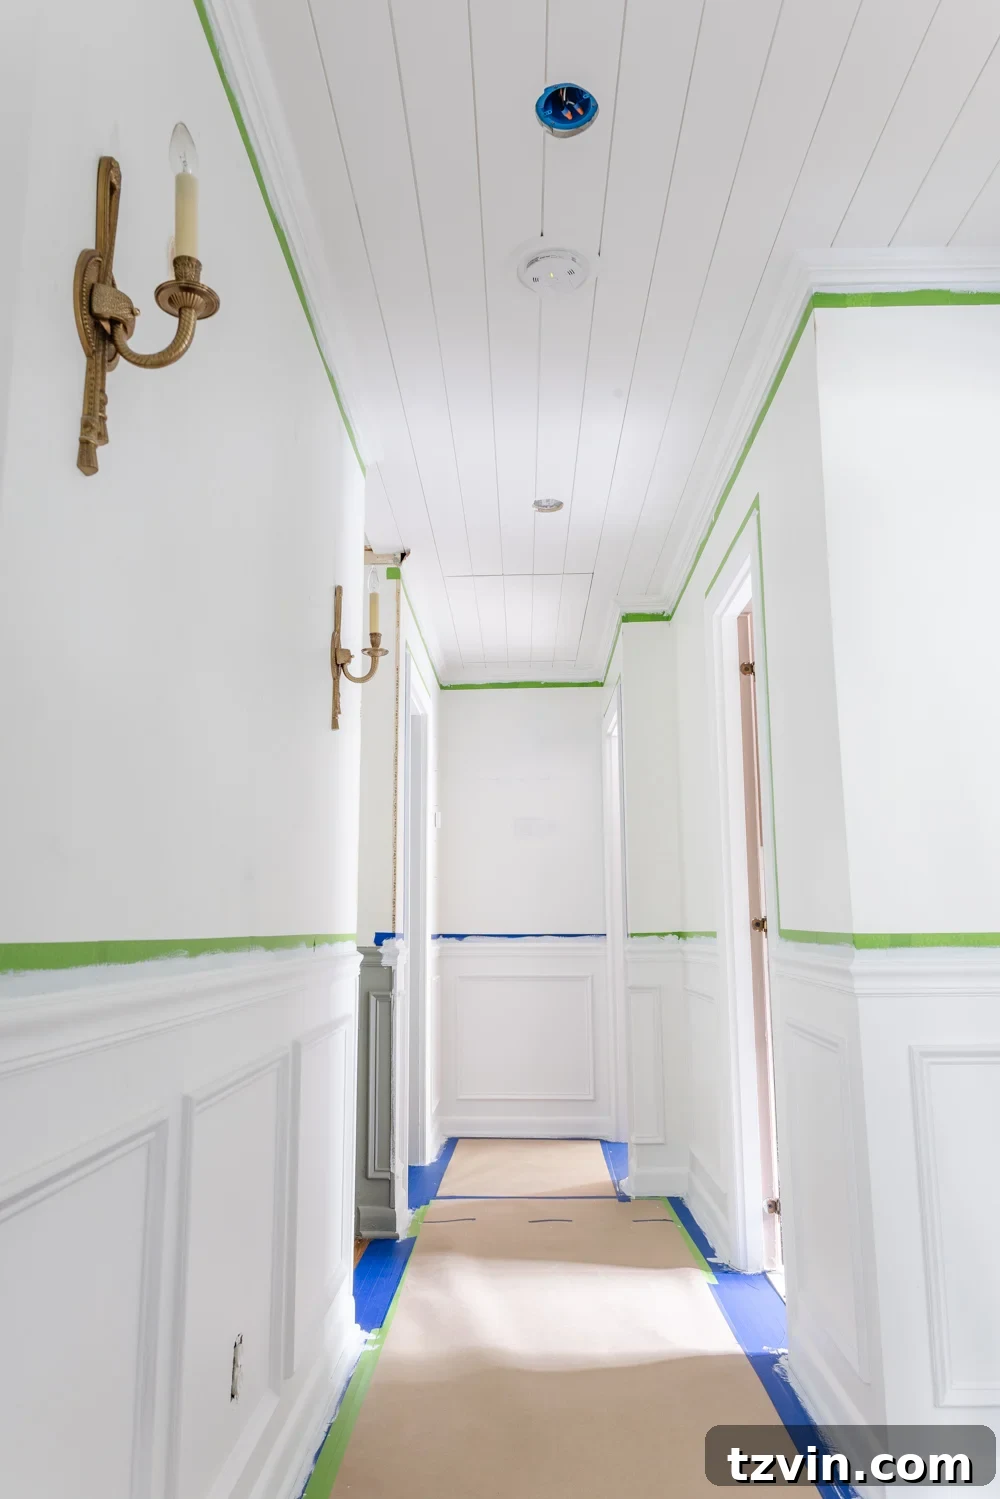
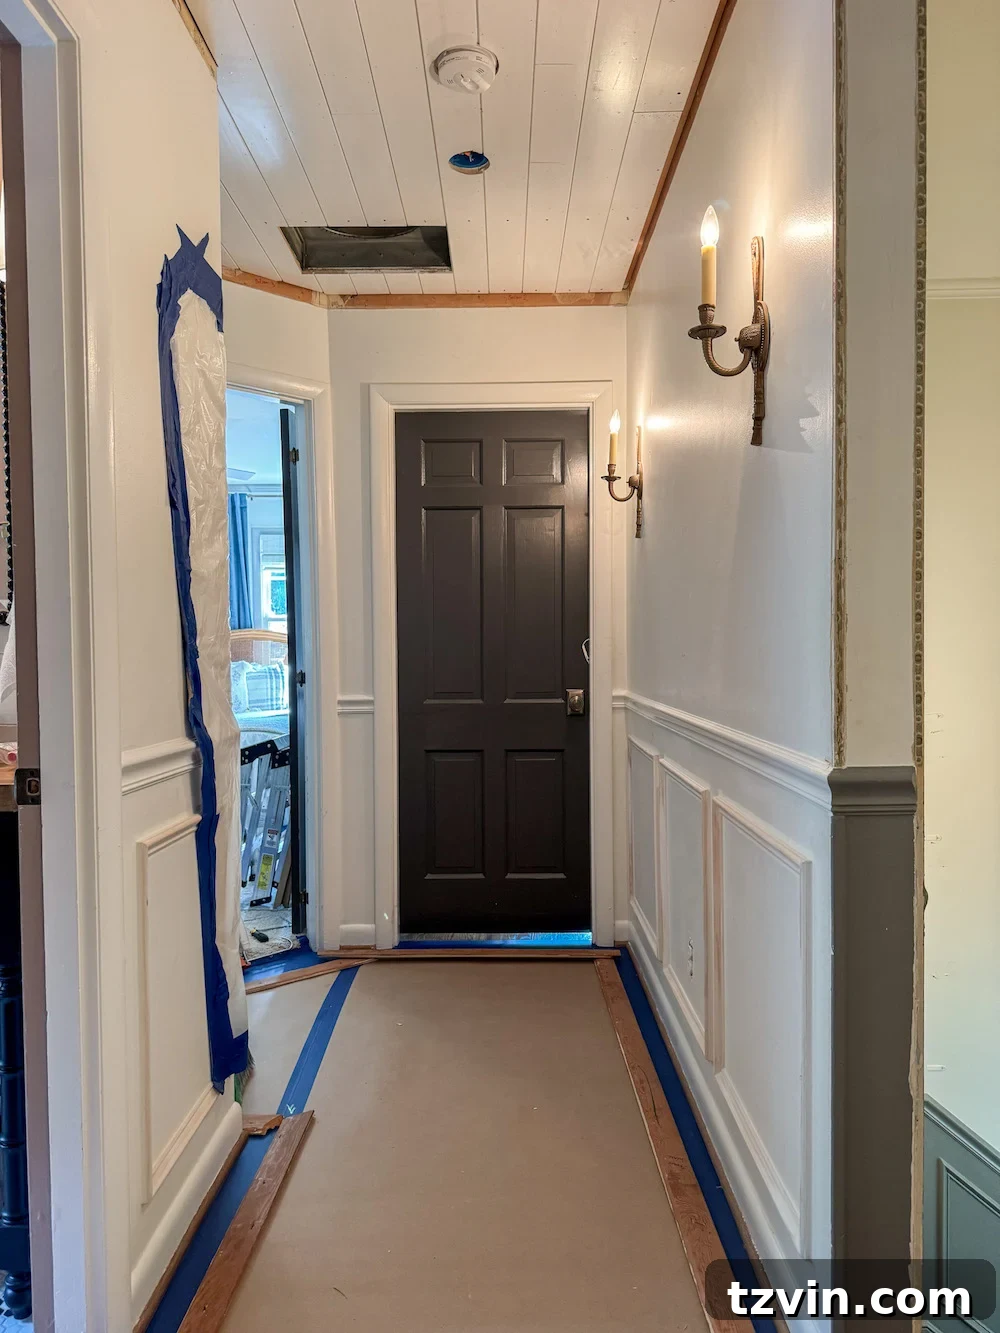
And here it is now. Can you even spot it? (Please excuse the painter’s tape; we’re still putting the finishing touches on this space!) What was once a glaring architectural flaw has been seamlessly integrated, transforming a forgotten corner into a highlight of our home.
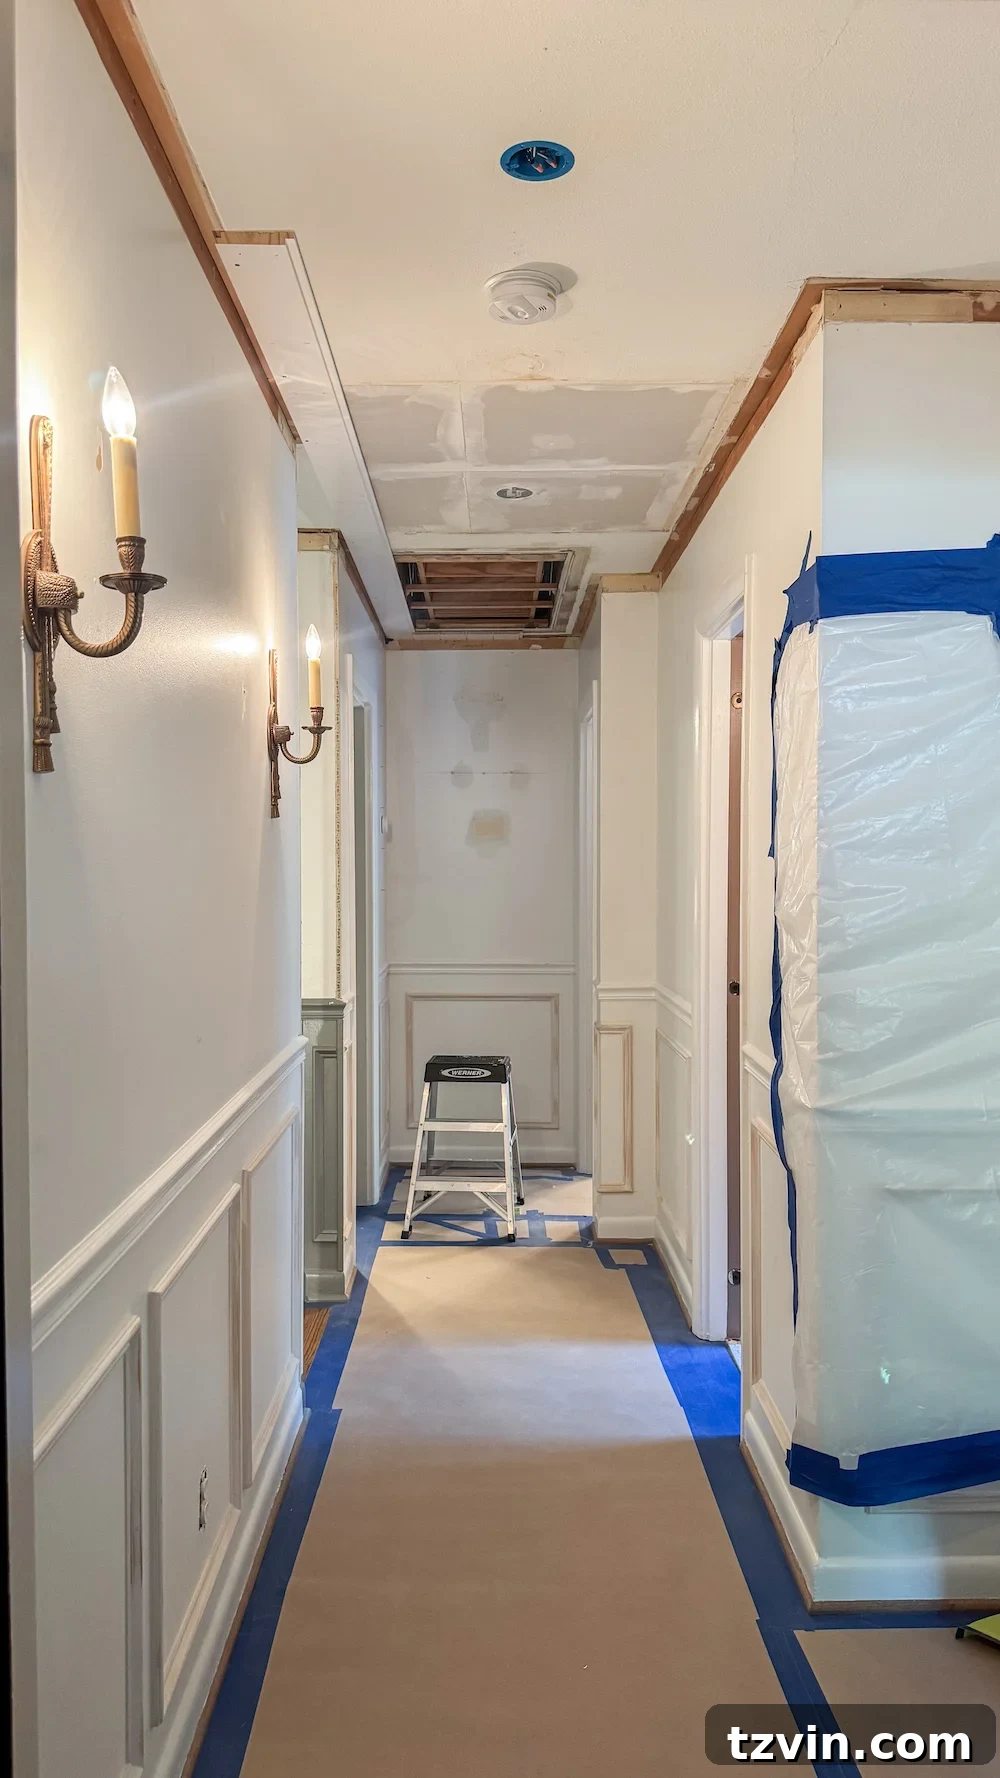
From the moment we first stepped into this house, our upstairs hallway ceiling declared war on my sense of aesthetics. It wasn’t just the attic door; it was a symphony of outdated elements: a defunct attic fan, a perpetually crusty vent, and that utterly uncharming, tattered string dangling from the attic access. Every single component screamed for a desperate upgrade, a plea for modernity and grace that had been ignored for far too long.
While the journey often looks worse before it gets better, the vision for this hallway is nothing short of transformative. Once we introduce contrasting trim and wainscoting, this space will shed its tired skin and emerge with a refined, sophisticated character.
Now, fully immersed in our ambitious hallway makeover, I finally found the motivation to tackle one of the most persistent eyesores in this area: the challenge of hiding that attic door in the ceiling and completely smoothing out all the visual clutter that had plagued us for years. The attic fan, a relic of a bygone era, has already been patched over – good riddance! The next, equally crucial mission was clear: make that attic door truly disappear, all while simultaneously infusing a much-needed layer of charm and architectural interest into the space.
The answer, a design choice that blended seamlessly with our desired aesthetic, presented itself: a stunning tongue and groove ceiling.
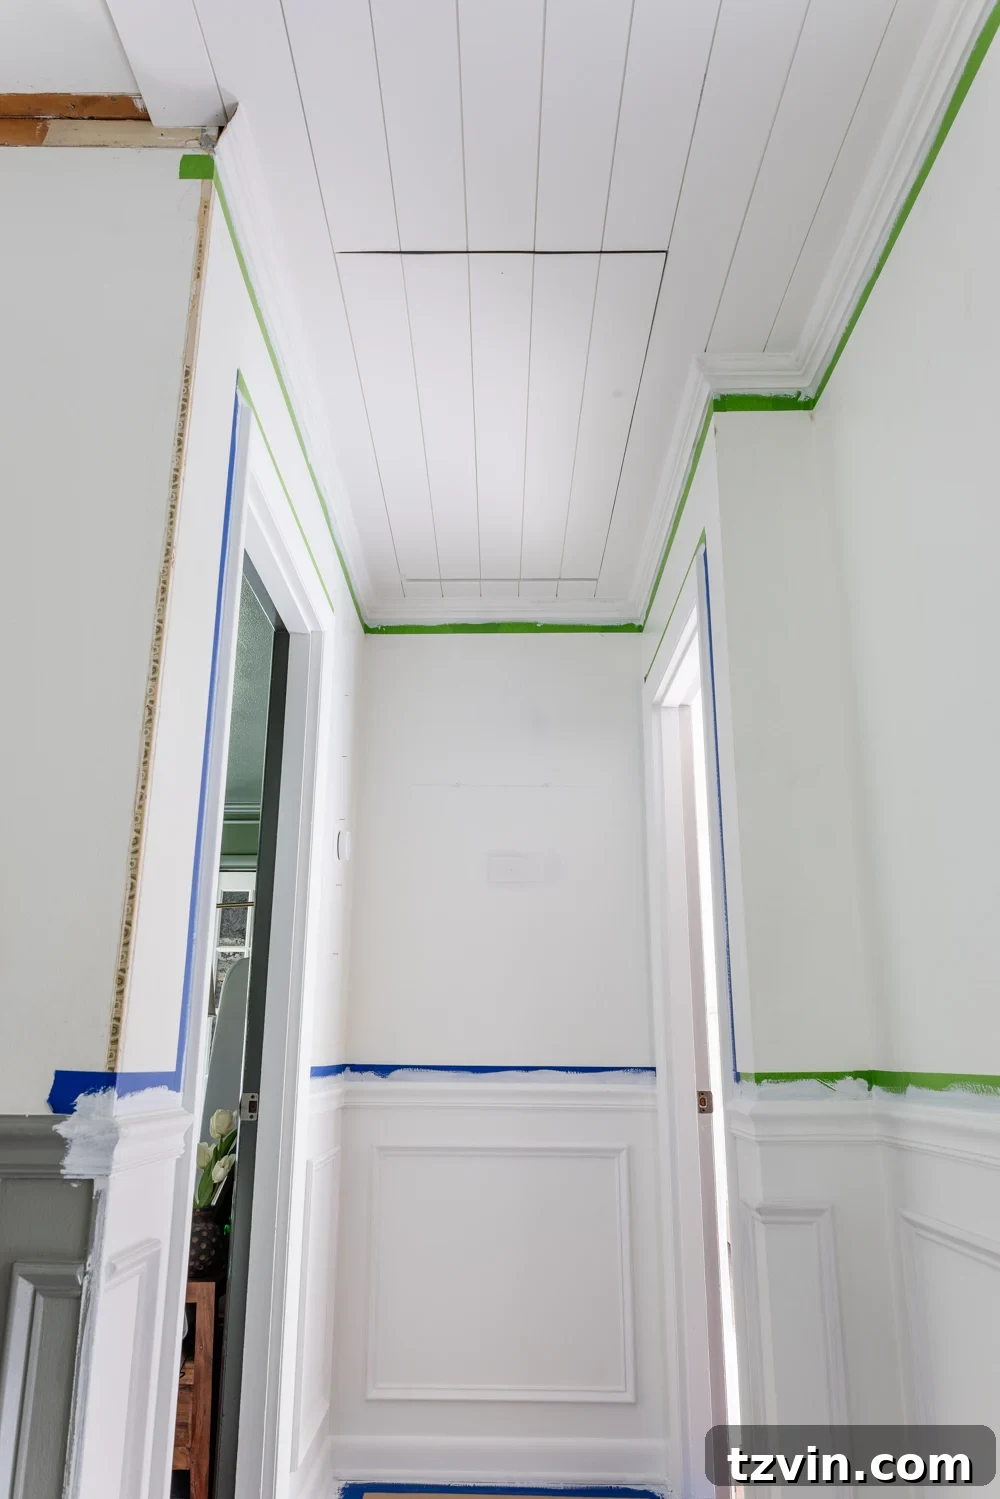
This project not only brilliantly solved our persistent “how to hide an attic door in the ceiling” dilemma, but it also bestowed upon our hallway a delightful cottage-core glow-up. The subtle texture and clean lines transformed the entire atmosphere, creating a cozy yet sophisticated feel that I simply can’t stop admiring. It’s truly a testament to how thoughtful design can completely alter the perception of a space.
Ready to embark on your own ceiling transformation? Here’s a detailed, step-by-step guide on how we achieved this seamless look:
How to Hide an Attic Door in the Ceiling with Tongue and Groove Planks
As an Amazon Associate, I earn from qualifying purchases. Full disclosure
Tools & Materials You’ll Need
Before diving into the installation, gathering the right tools and materials is crucial for a smooth and efficient process. Here’s a comprehensive list:
- Tongue and Groove Planks: We opted for 5 1/4″ wide pre-primed pine shiplap boards for their classic appeal and ease of installation.
- Miter Saw: Essential for precise, angled cuts, especially for the bevels around the attic door.
- Measuring Tape: For accurate measurements, ensuring a professional fit.
- Construction Adhesive: Provides a strong, lasting bond between the planks and the ceiling.
- 2-inch 16-gauge Finish Nails & Nail Gun: For securely fastening the planks. A nail gun significantly speeds up the process.
- Caulk & Wood Filler: To fill nail holes, seams, and ensure a smooth, paint-ready finish.
- Crown Molding (optional): If you want to add or reattach decorative trim around the ceiling perimeter.
- Coping Saw: Necessary for achieving perfect interior corner joints if installing crown molding.
- Primer and Paint: For a durable, aesthetically pleasing finish.
- Hook & Pull Kit: A modern, discreet alternative to the traditional attic door string.
Step 1: Prepare Your Canvas – Remove Old Trim, Molding, and the Attic Door
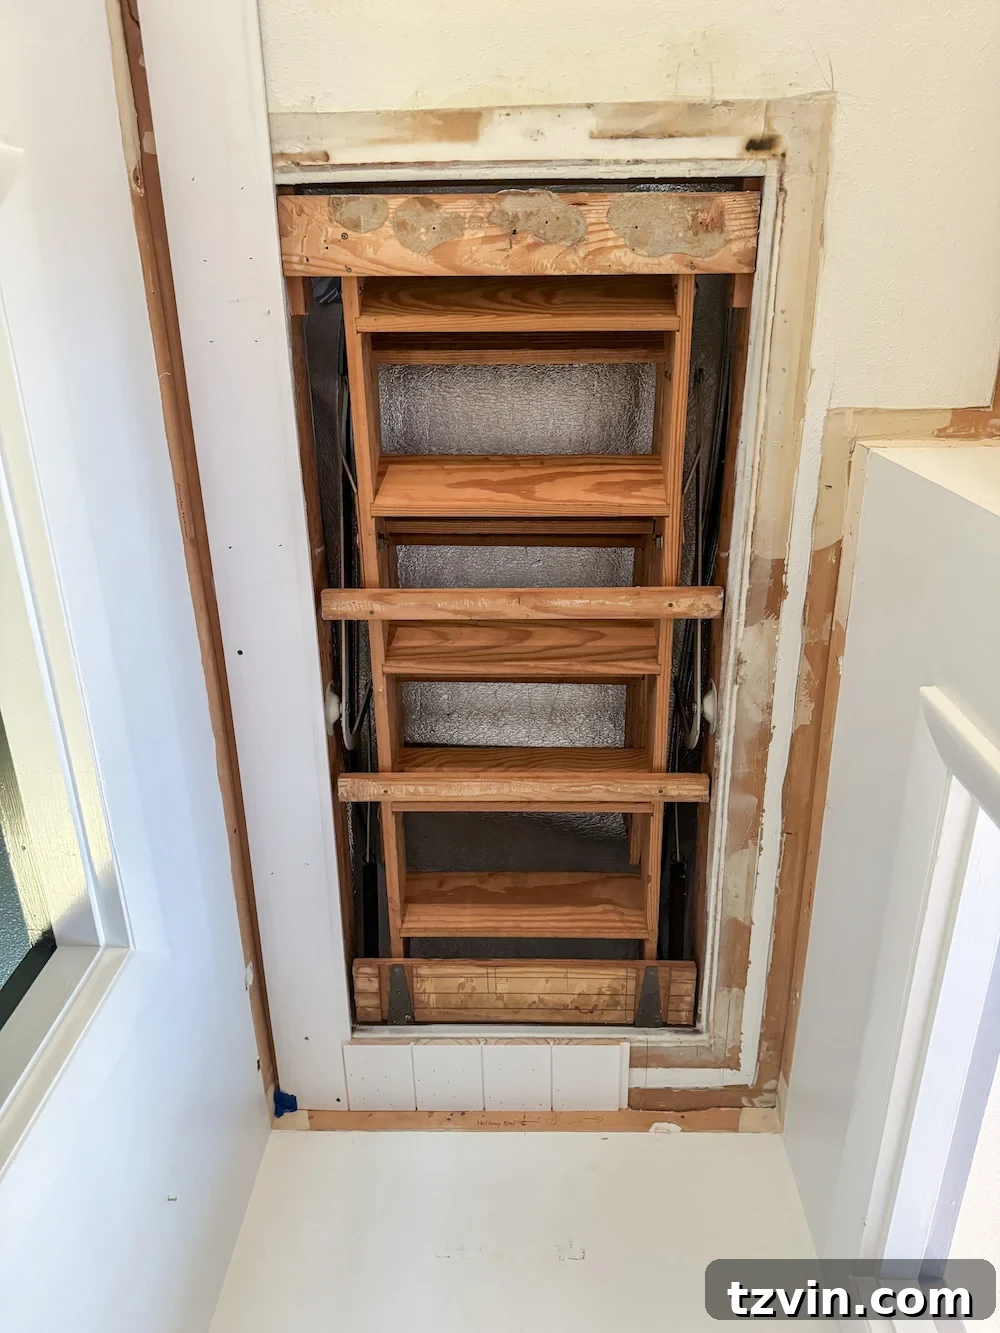
Begin by completely clearing your ceiling of any existing elements. This means carefully taking down the old attic door panel, any surrounding trim, and the existing crown molding. Working with a clean, unobstructed slate is paramount for achieving a seamless finish and accurately planning your new plank layout. Use appropriate tools for removal to avoid damage to the surrounding drywall.
Step 2: Meticulous Measurement and Strategic Plank Placement
Precision is key in this step. Measure the exact length and width of your ceiling to accurately calculate the quantity of planks you’ll need. To avoid any unwelcome surprises or awkward cuts later, take a scrap piece of your tongue and groove plank and use it to mock up your desired layout. With a pencil, mark the intended placement of your planks. This crucial planning stage ensures that you won’t be left with an unappealingly skinny plank against the crown molding or, more critically, right along the attic door opening. A little foresight here will save you significant frustration and rework in subsequent steps, guaranteeing a balanced and professional look.
Step 3: Begin Installation Along the Attic Door Edge for Symmetry
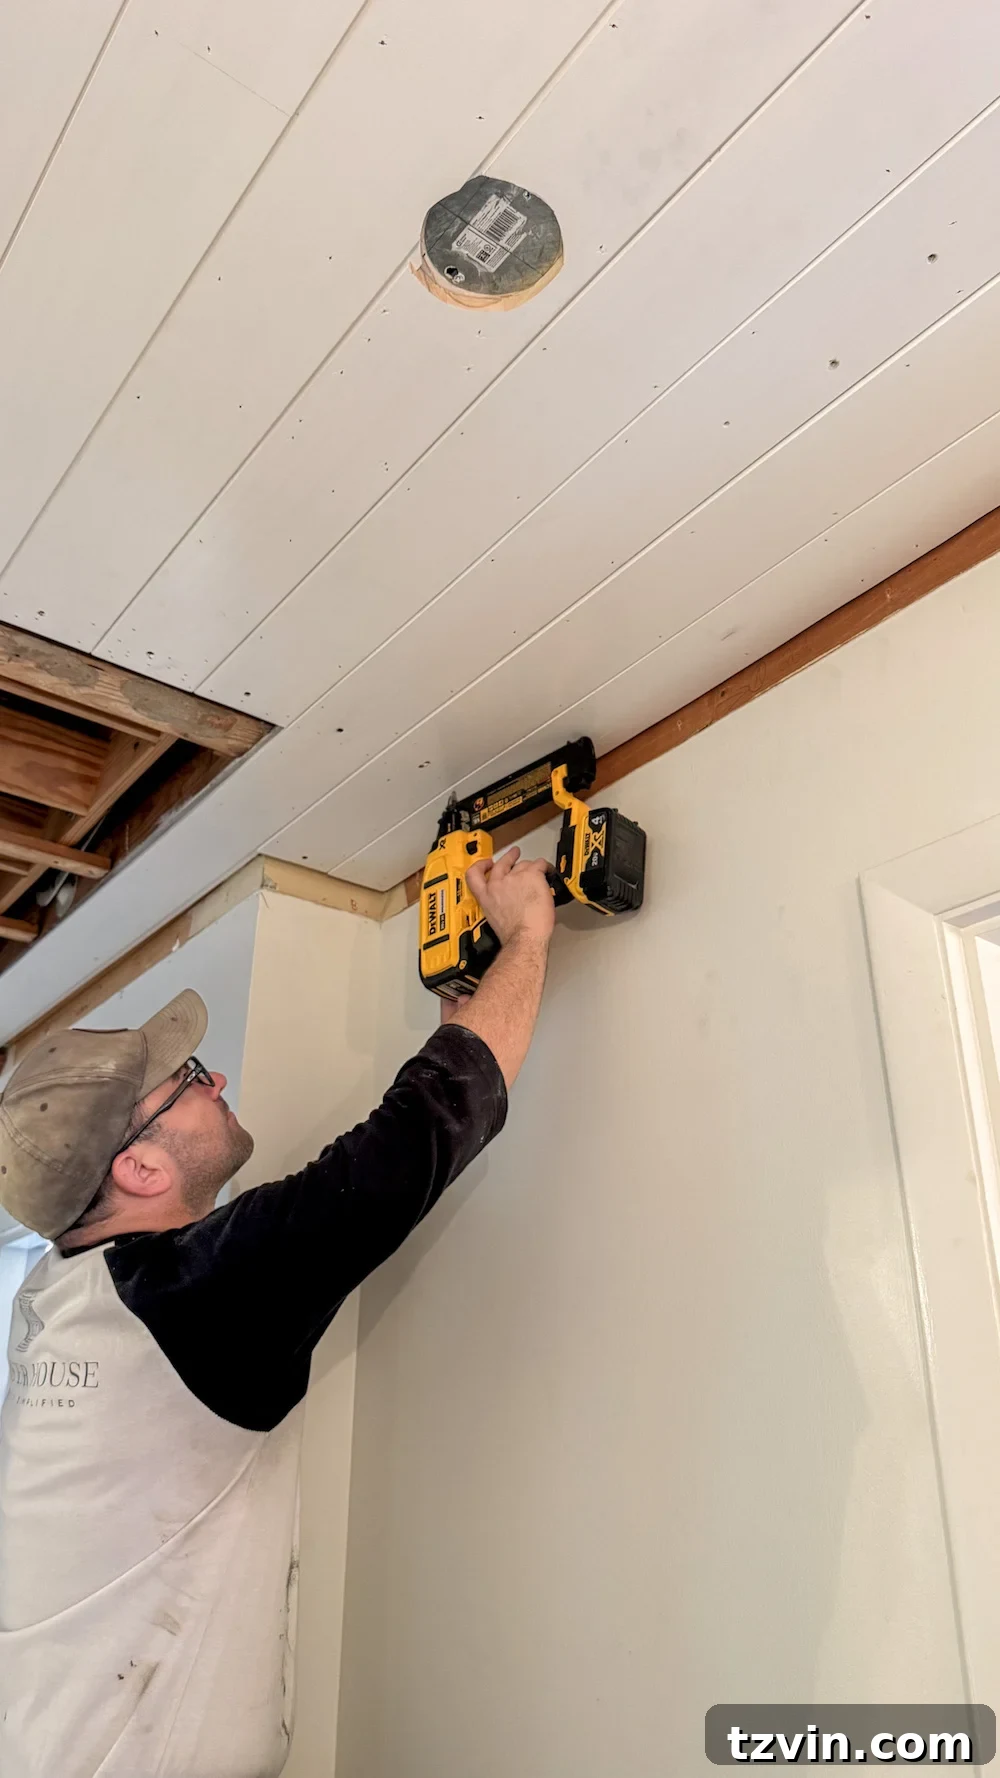
For a truly integrated and symmetrical appearance, we recommend starting your plank installation along the longest edge of the attic door opening. Apply a continuous bead of high-quality construction adhesive to the back of your first plank. Carefully position it and then secure it firmly to the ceiling using 2-inch, 16-gauge finish nails. This initial placement sets the tone for the entire ceiling, ensuring the planks radiate outwards in a balanced fashion from the critical focal point of the attic door.
Step 4: Crafting Seamless Joins with 45° Bevel Cuts
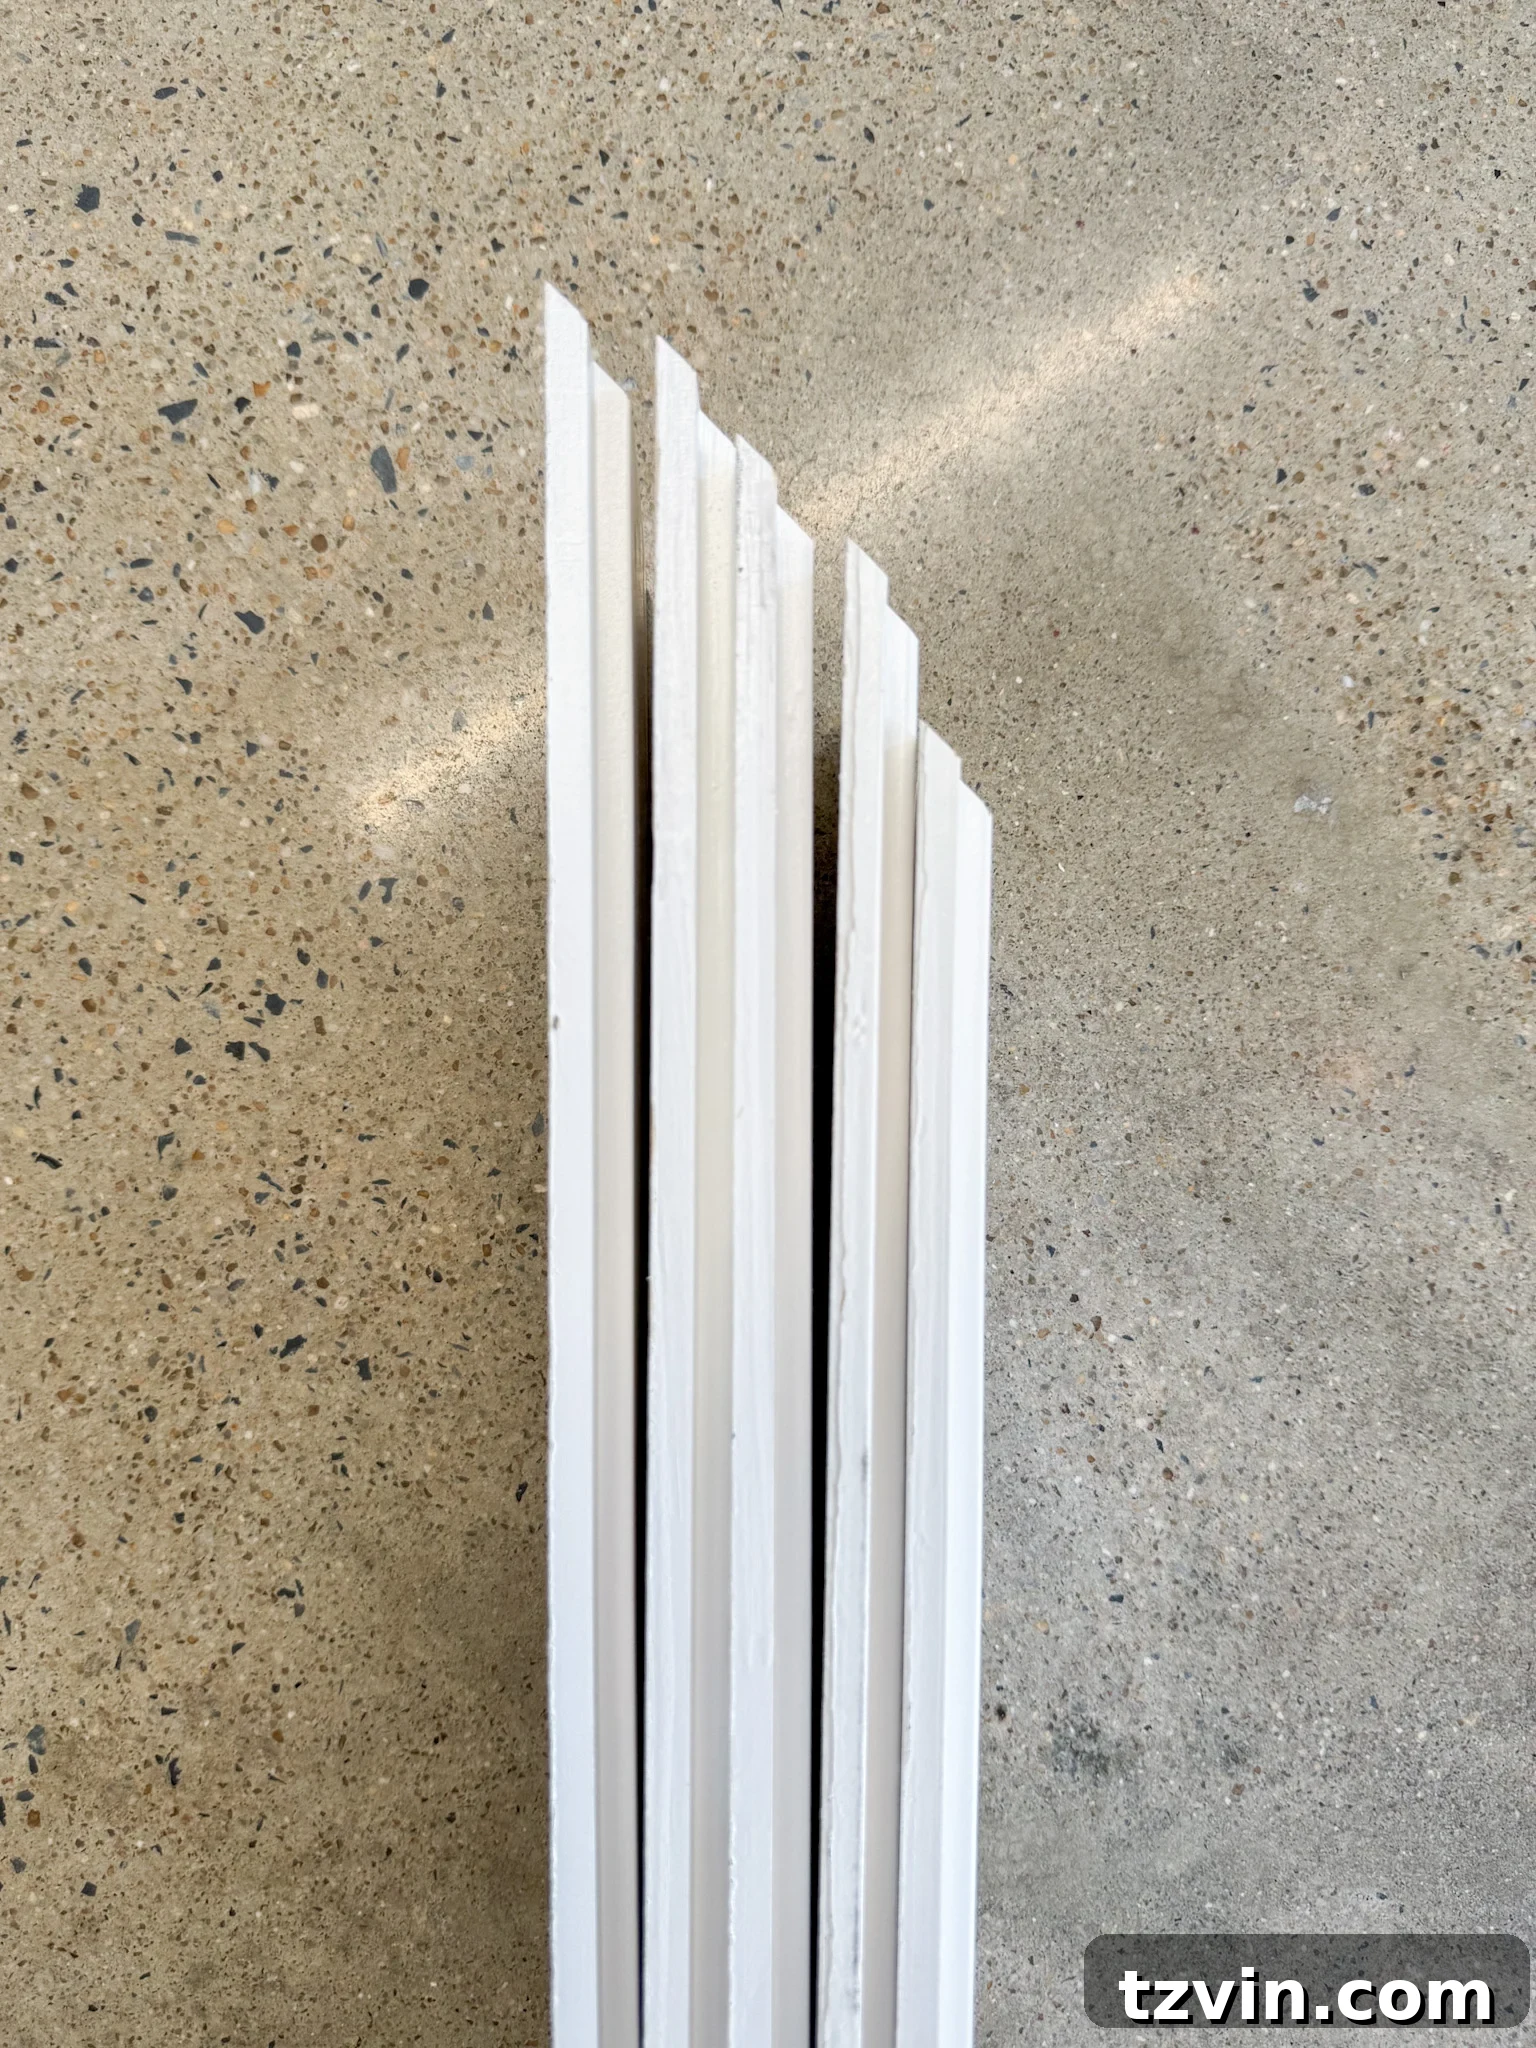
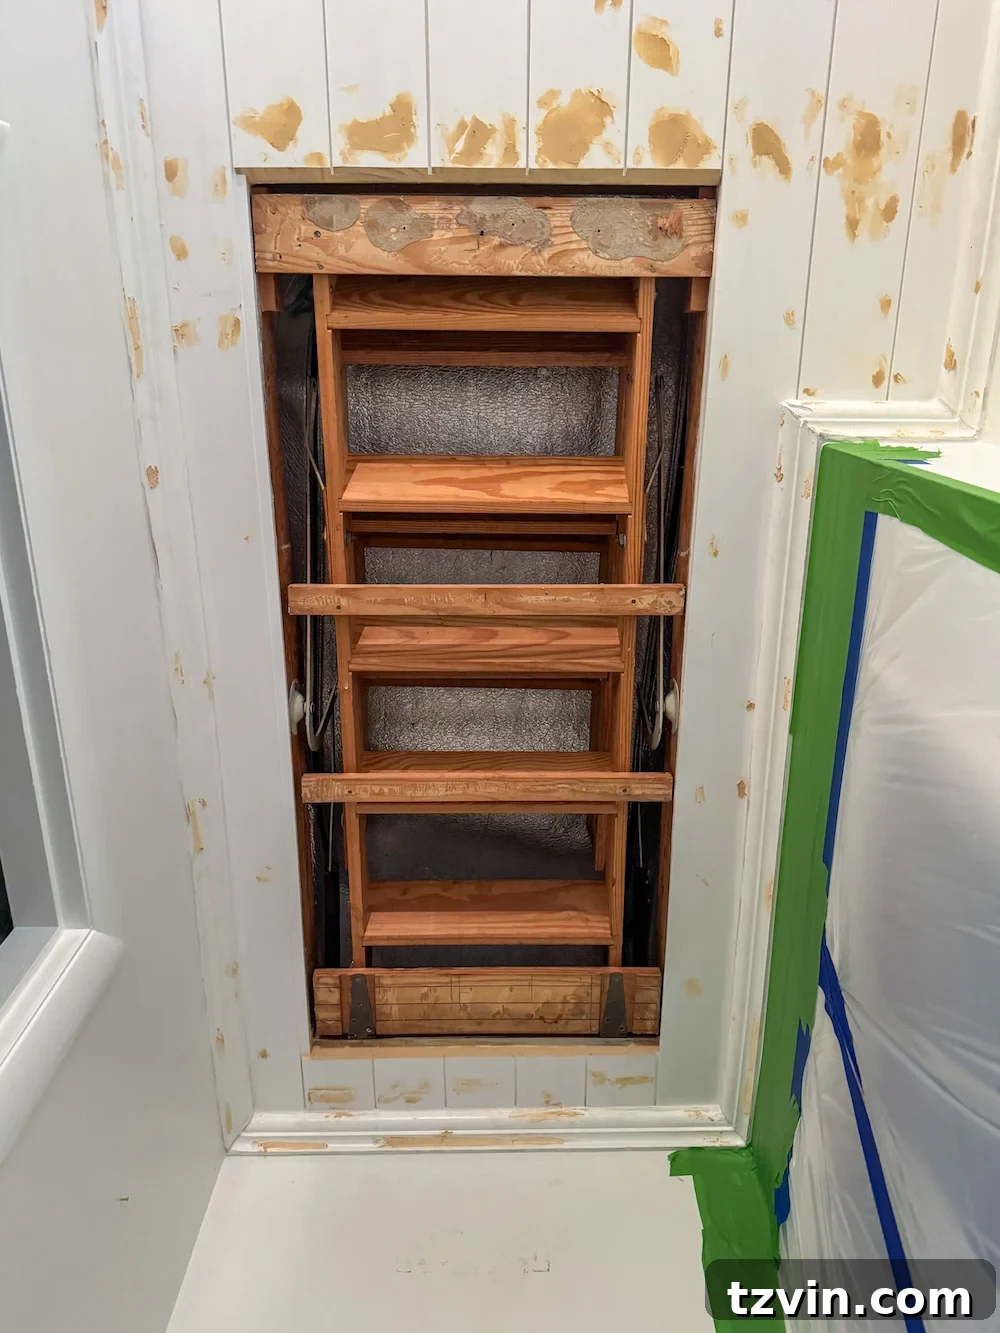
Here’s where the magic of “disappearing” the attic door truly begins. For each plank that will meet the edge of the attic door opening, use your miter saw to create a precise 45° bevel cut on that end. This angling is not merely decorative; it’s a critical technique that allows the planks to nestle tightly against the door frame, creating a much more refined and almost invisible seam. Once everything is painted, these expertly cut angles will blend together, giving the illusion of a continuous, unbroken surface around the attic access point.
Step 5-6: Continuous Installation with Precision Beveled Cuts
Continue this meticulous process across your entire ceiling. For every plank that interfaces with the attic door frame, repeat the 45° bevel cut on its end. Apply construction adhesive to the back of each plank and secure it with finish nails. The inherent design of the tongue and groove system is your ally here; the planks interlock snugly, pulling them together and minimizing gaps. This consistent application of beveled cuts, combined with the interlocking planks, ensures the ceiling maintains a continuous, uniform appearance, masterfully concealing the presence of the attic door within its elegant design.
Step 7: Elevate the Finish with Crown Molding (Optional but Recommended)
Once your beautiful tongue and groove ceiling planks are fully installed, consider adding crown molding around the perimeter. While optional, crown molding truly elevates the finished look, providing a polished transition between the walls and the new ceiling. For seamless interior corner joints, we highly recommend using a coping saw. This technique creates a superior fit compared to simple miter cuts, preventing gaps as wood naturally expands and contracts. If you need a more in-depth guide on this process, our comprehensive DIY Picture Frame Molding tutorial offers detailed instructions on coping molding.
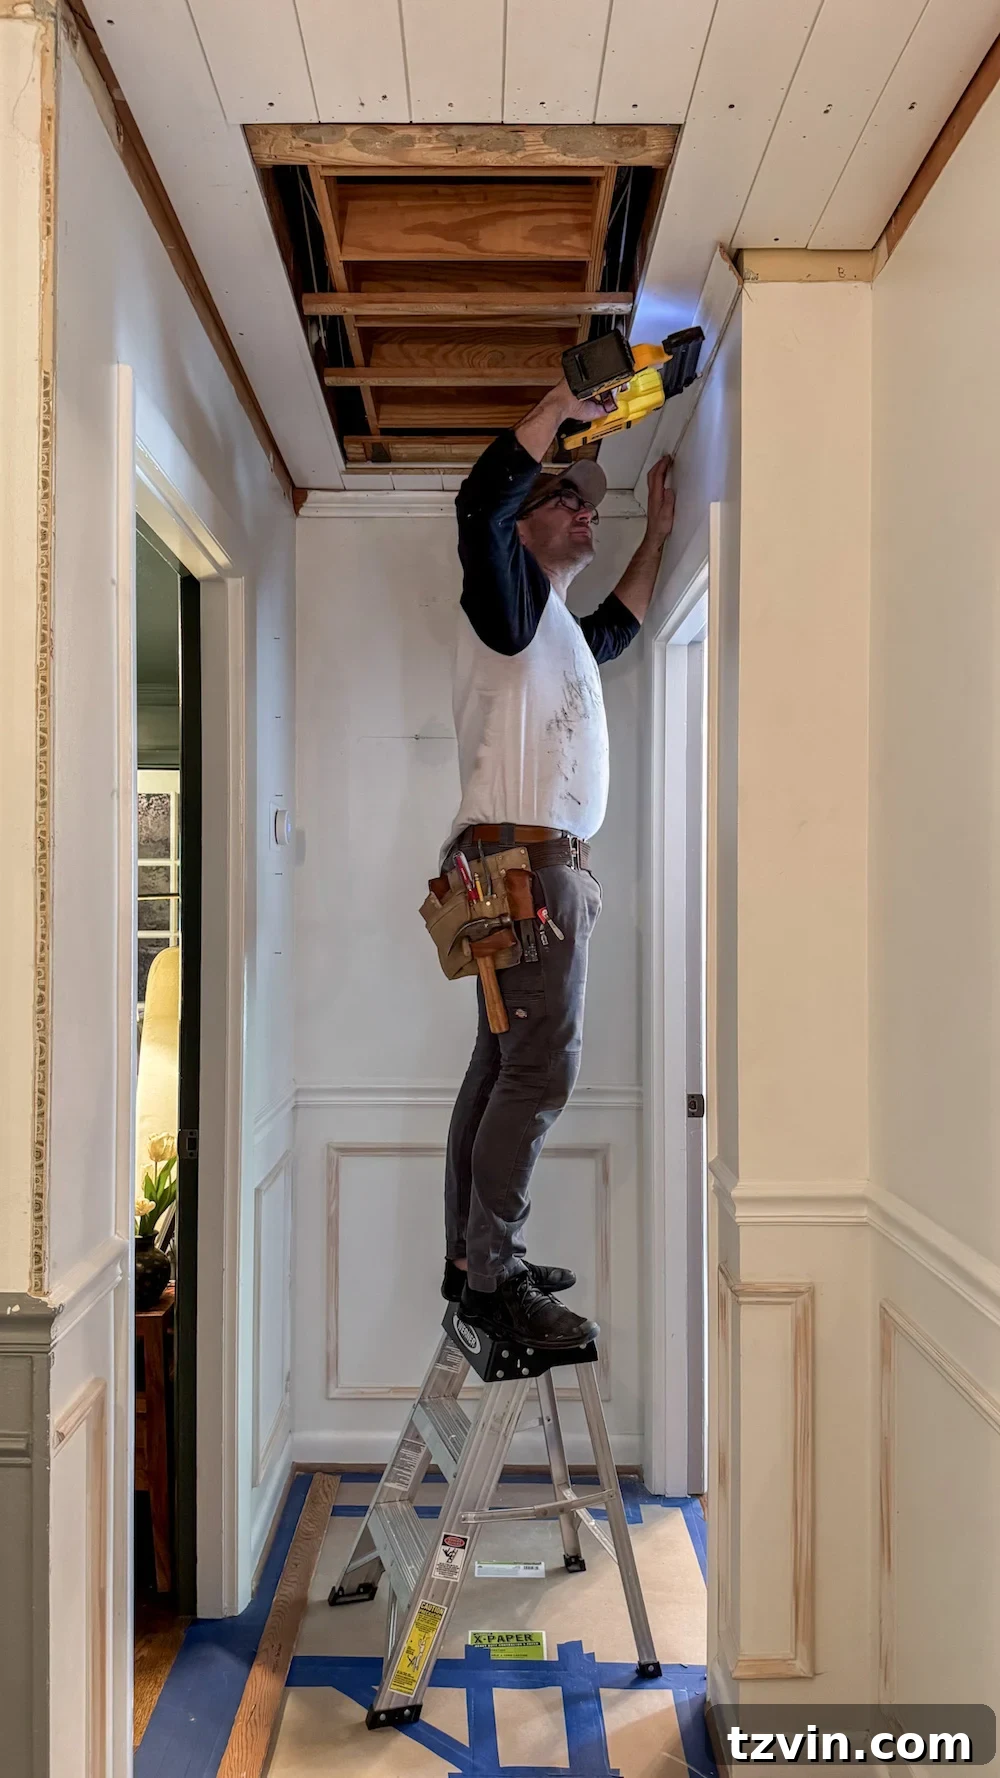
Step 8: Custom-Fitting Planks for the Attic Door Panel
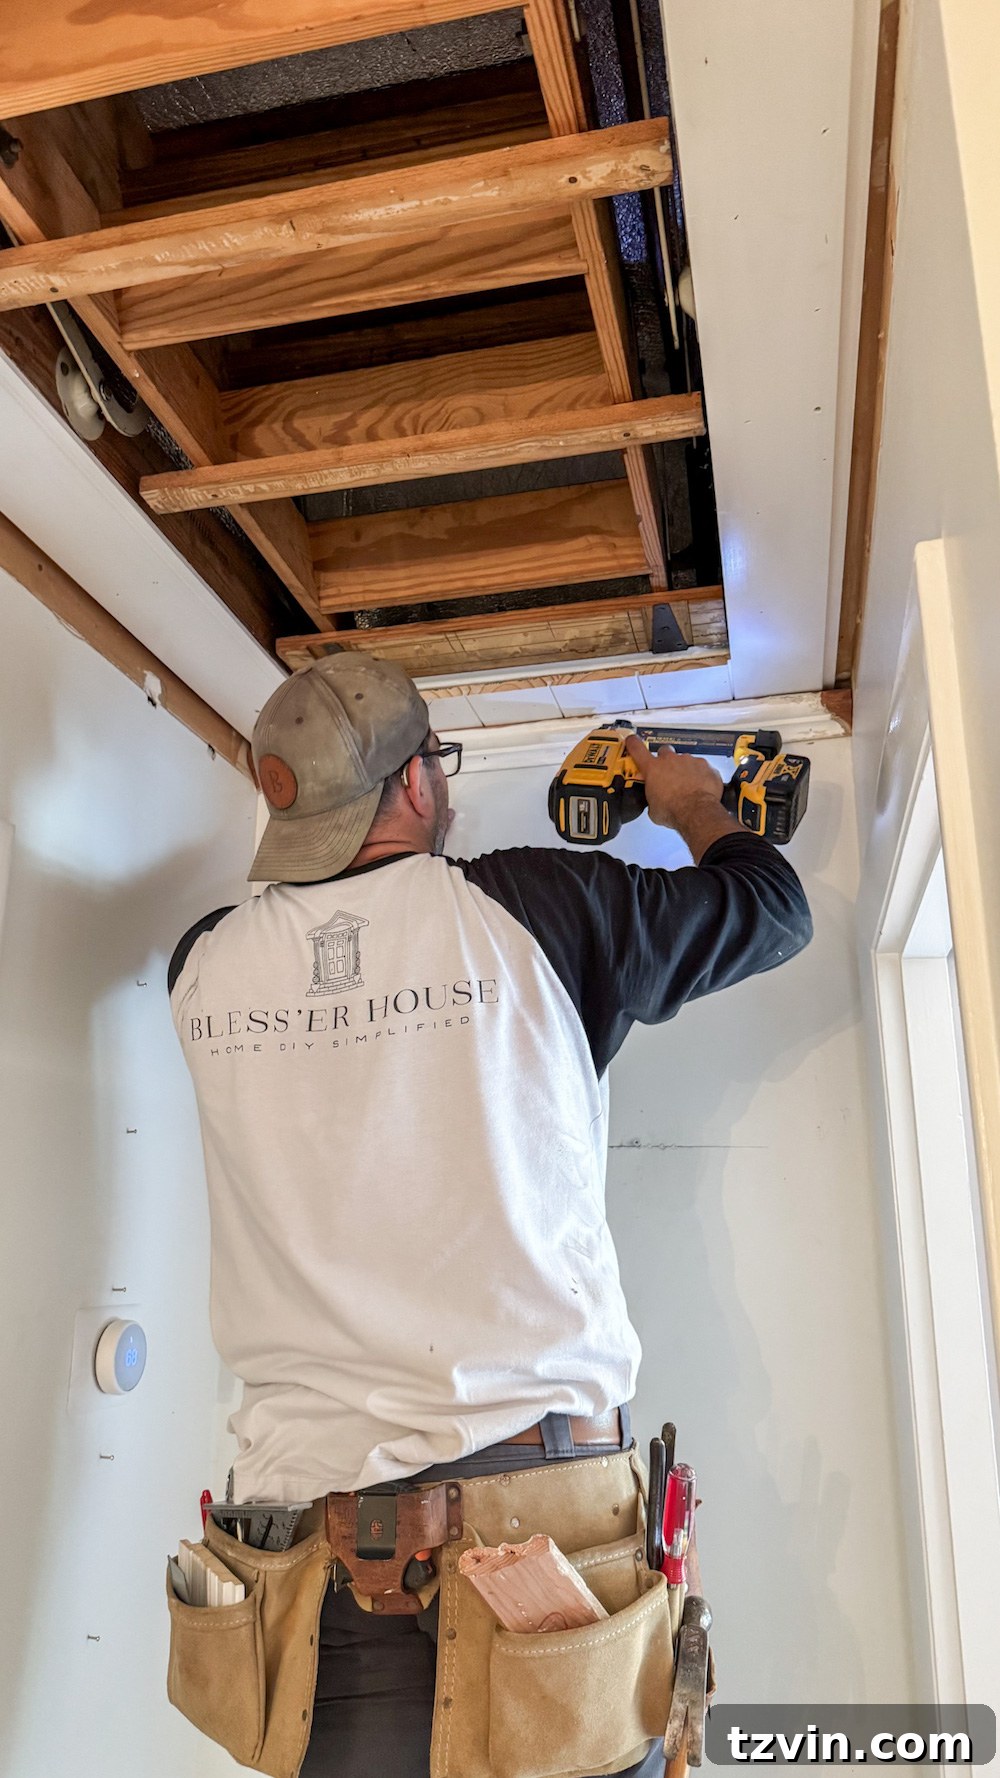
Now, shift your focus to the attic door itself. Carefully measure the precise dimensions of your attic door panel. Once you have these measurements, cut tongue and groove planks to size, ensuring they fit perfectly onto the door’s surface. Crucially, just as with the ceiling planks, apply the same 45° angle to the ends of these door planks that will meet the ceiling. This meticulous attention to detail is what allows the door to perfectly align with the surrounding ceiling pattern, making it visually disappear into the overall design when closed. This precise cutting is the secret to achieving that coveted, seamless integration.
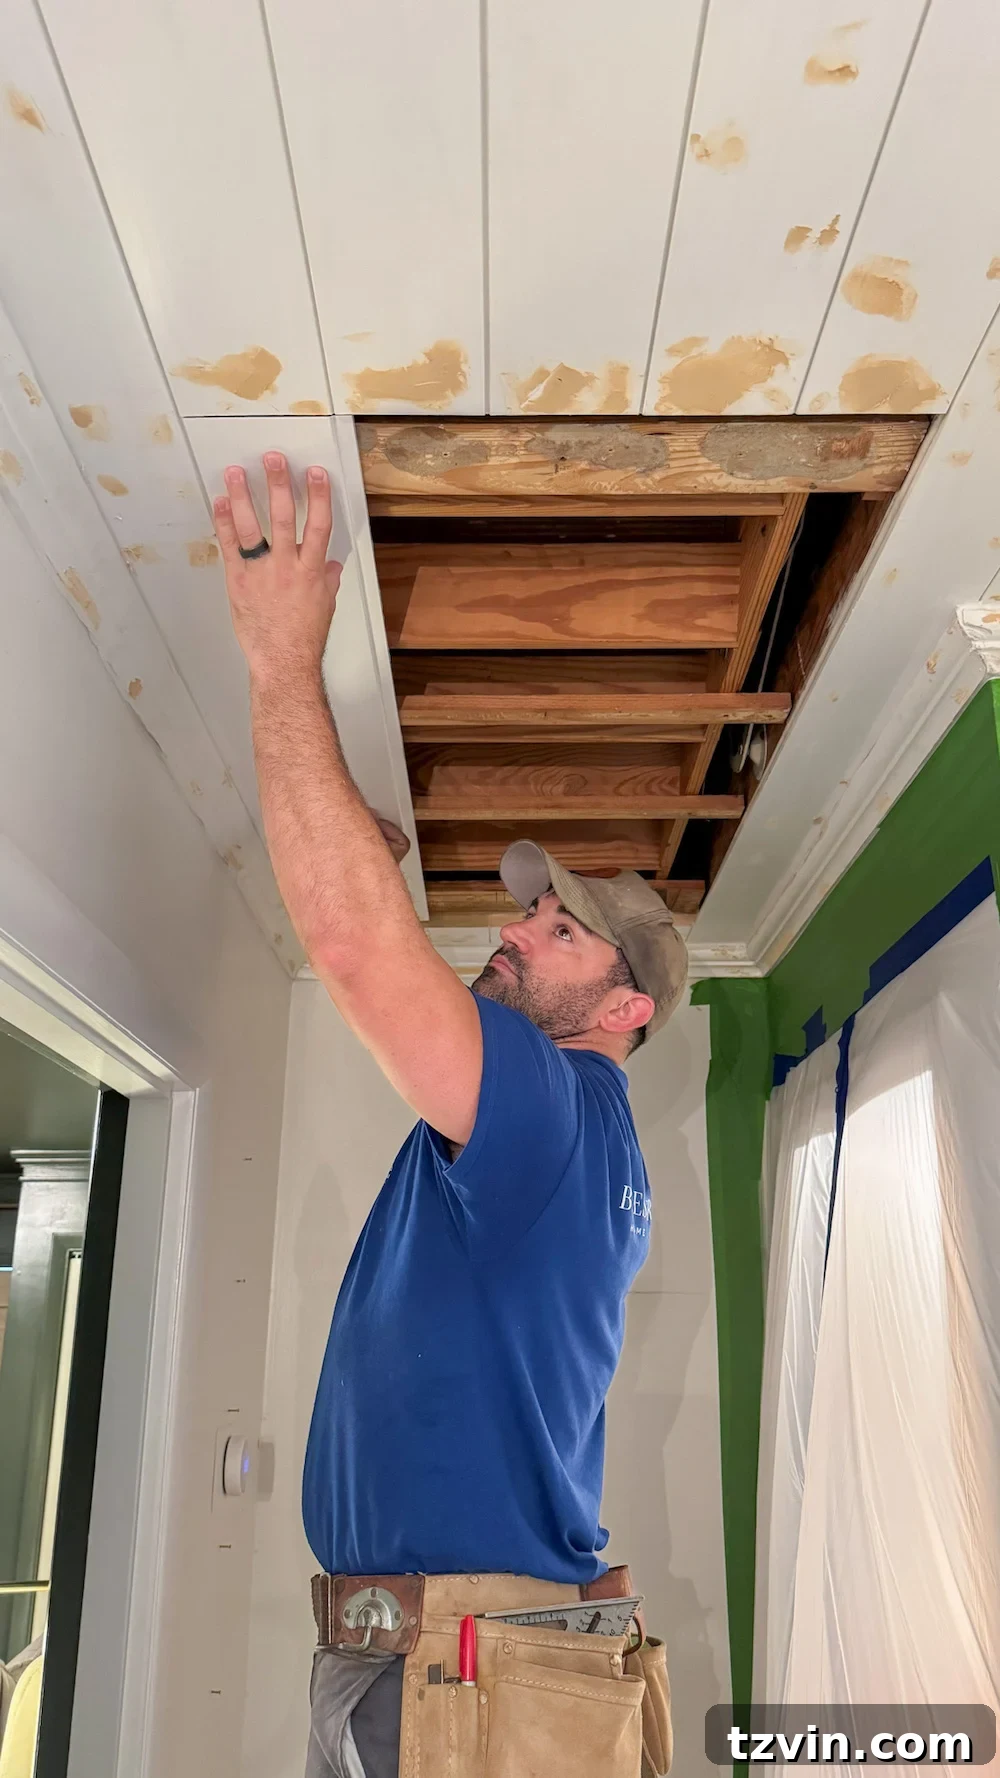
Step 9: Securely Attach Planks to the Attic Door Panel
With your custom-cut planks ready, it’s time to attach them to the attic door panel. Apply a generous amount of construction adhesive to the back of each plank, then firmly press them onto the door. Follow up by using finish nails to provide extra security and ensure a lasting bond. An important consideration here: adding these planks will undoubtedly increase the weight of your attic door. Before proceeding, assess the strength of your existing hinges. If your attic door feels heavy or the hinges seem inadequate, reinforce them to safely support the added weight. This small preventative step can save you from potential issues down the line.
Step 10-11: Perfecting the Surface – Fill Nail Holes and Caulk Edges
Once all your planks are securely in place, it’s time for the crucial finishing work that transforms good craftsmanship into excellent. Use high-quality wood filler to meticulously fill every nail hole and any minor seams between the planks. This creates an incredibly smooth surface, preparing it perfectly for paint. Additionally, apply caulk around the perimeter where the crown molding meets the ceiling and walls, sealing any gaps and creating crisp, clean lines. Allow both the wood filler and caulk ample time to dry thoroughly, following the manufacturer’s instructions. Patience in this step is essential for a flawless final result.
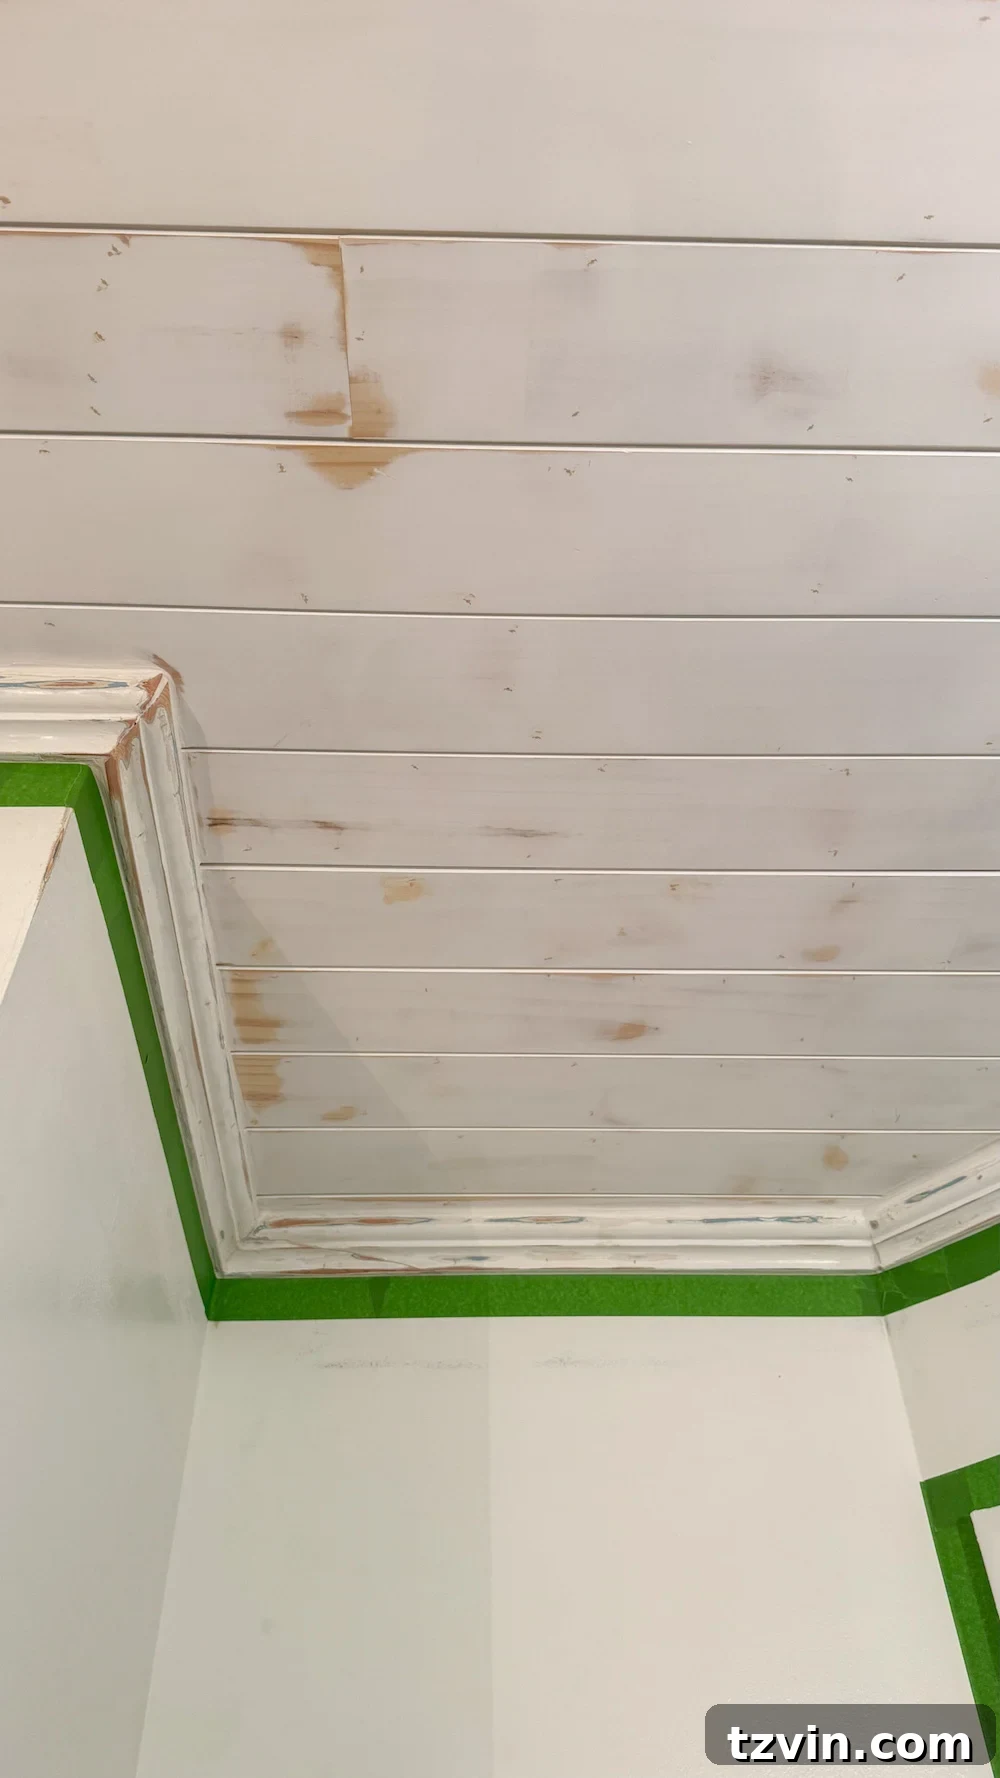
Step 12: The Grand Finale – Sand, Prime, and Paint
With the wood filler and caulk completely dry, the moment for painting draws near. First, gently sand all areas where wood filler was applied until the surface is perfectly smooth and seamless to the touch. Next, apply a high-quality primer across the entire new ceiling and the planked attic door. Primer is essential for ensuring even paint absorption, enhancing durability, and providing a uniform base for your chosen color. Finally, apply your desired paint. We opted for a crisp, clean white to achieve a classic, airy look that instantly brightens the hallway. However, don’t shy away from bolder choices – who knows, a moody ceiling color might be on the horizon for us in the future!
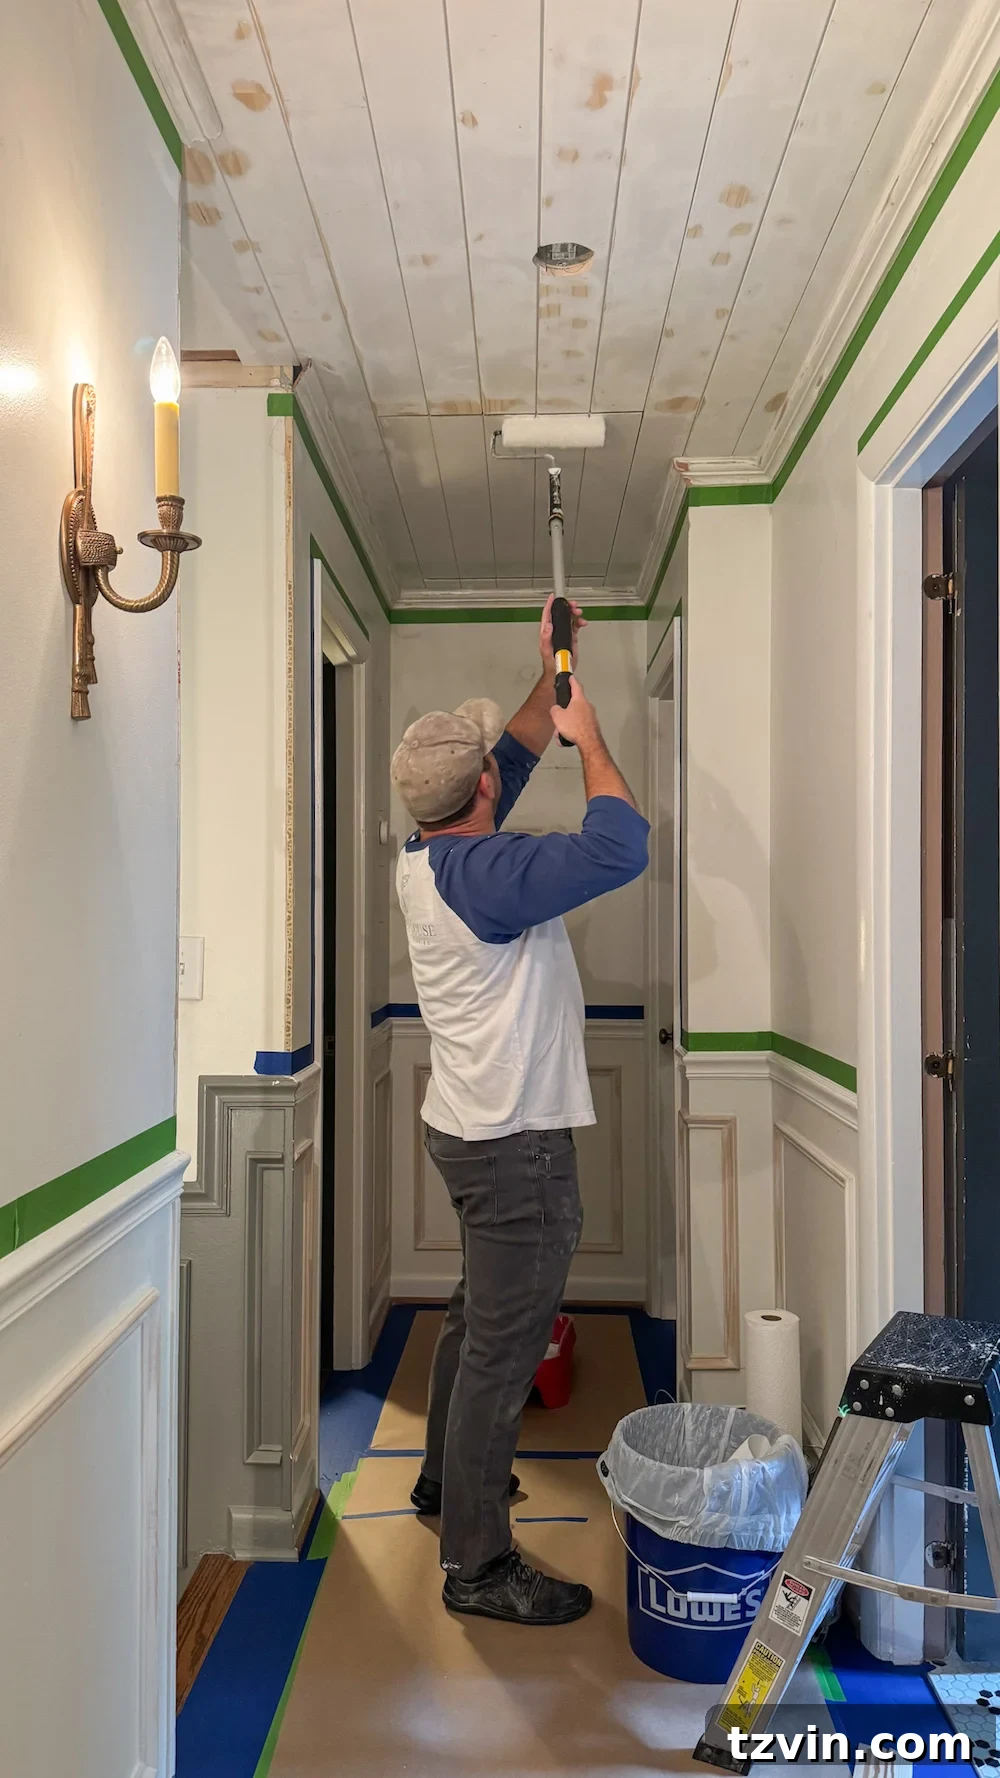
Step 13: Replace the String with a Modern Hook & Pull Kit
Say goodbye to that unsightly, dangling string! This often-overlooked detail makes a significant difference in the overall aesthetic. Years ago, we proactively upgraded to an attic hook and pull kit to minimize the attic door’s visual impact. Now, with the beautifully integrated tongue and groove planks in place, the discreet pull system blends in perfectly, becoming virtually undetectable. This simple yet effective change ensures the attic door opens and closes with ease and convenience, without being an eyesore or disrupting the newly refined ceiling design.
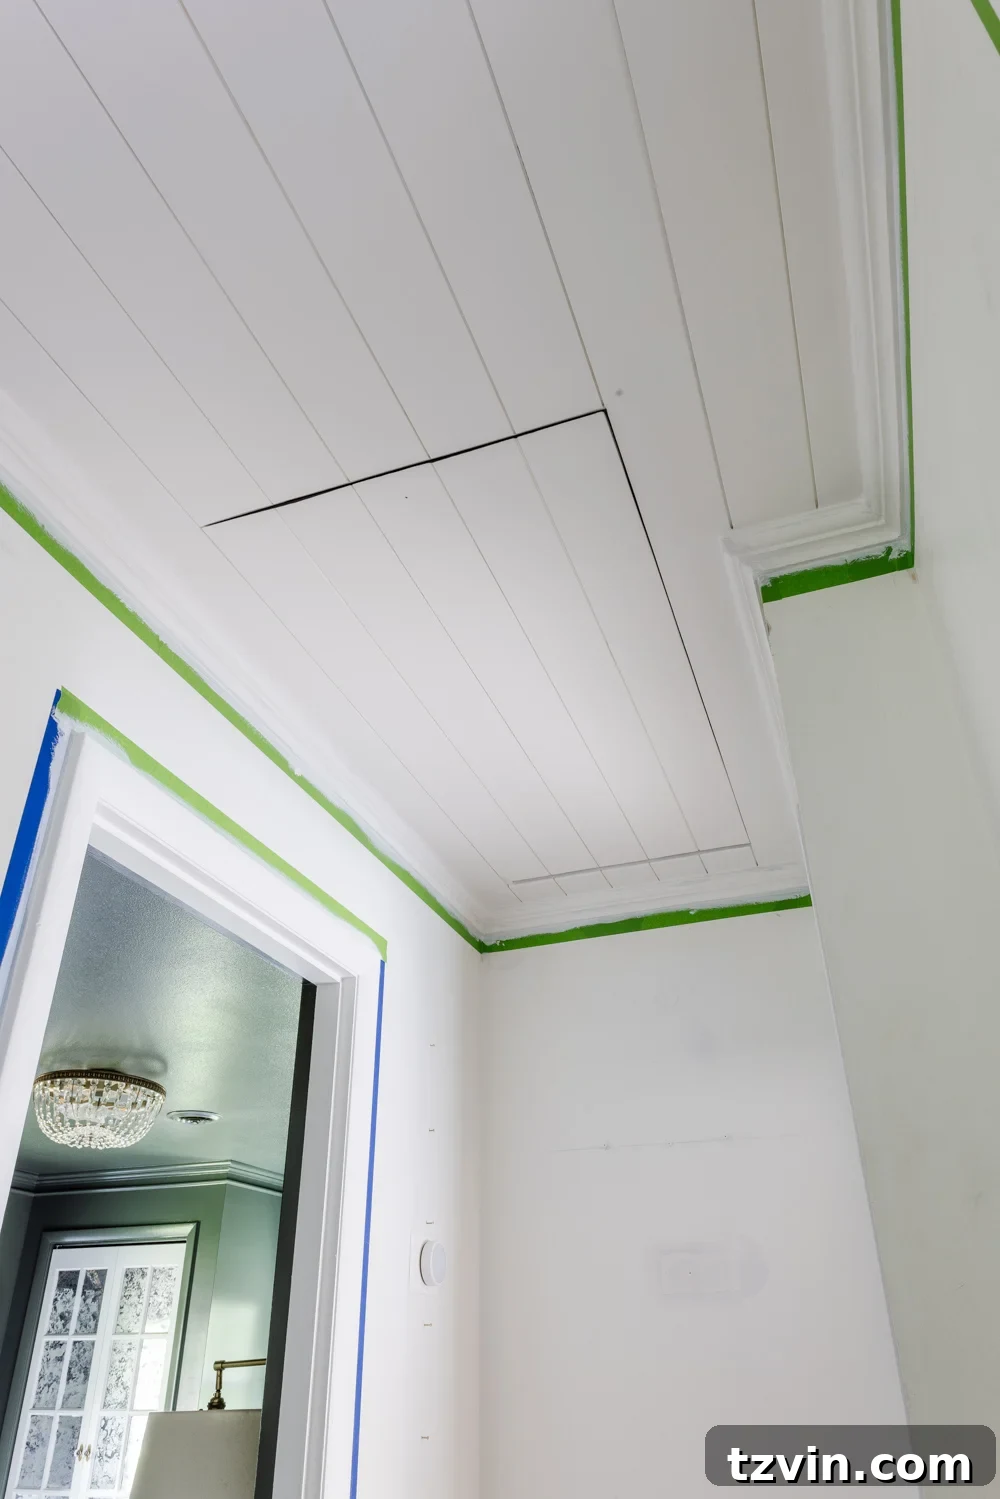
Attic Door Before & After: A Stunning Hallway Transformation
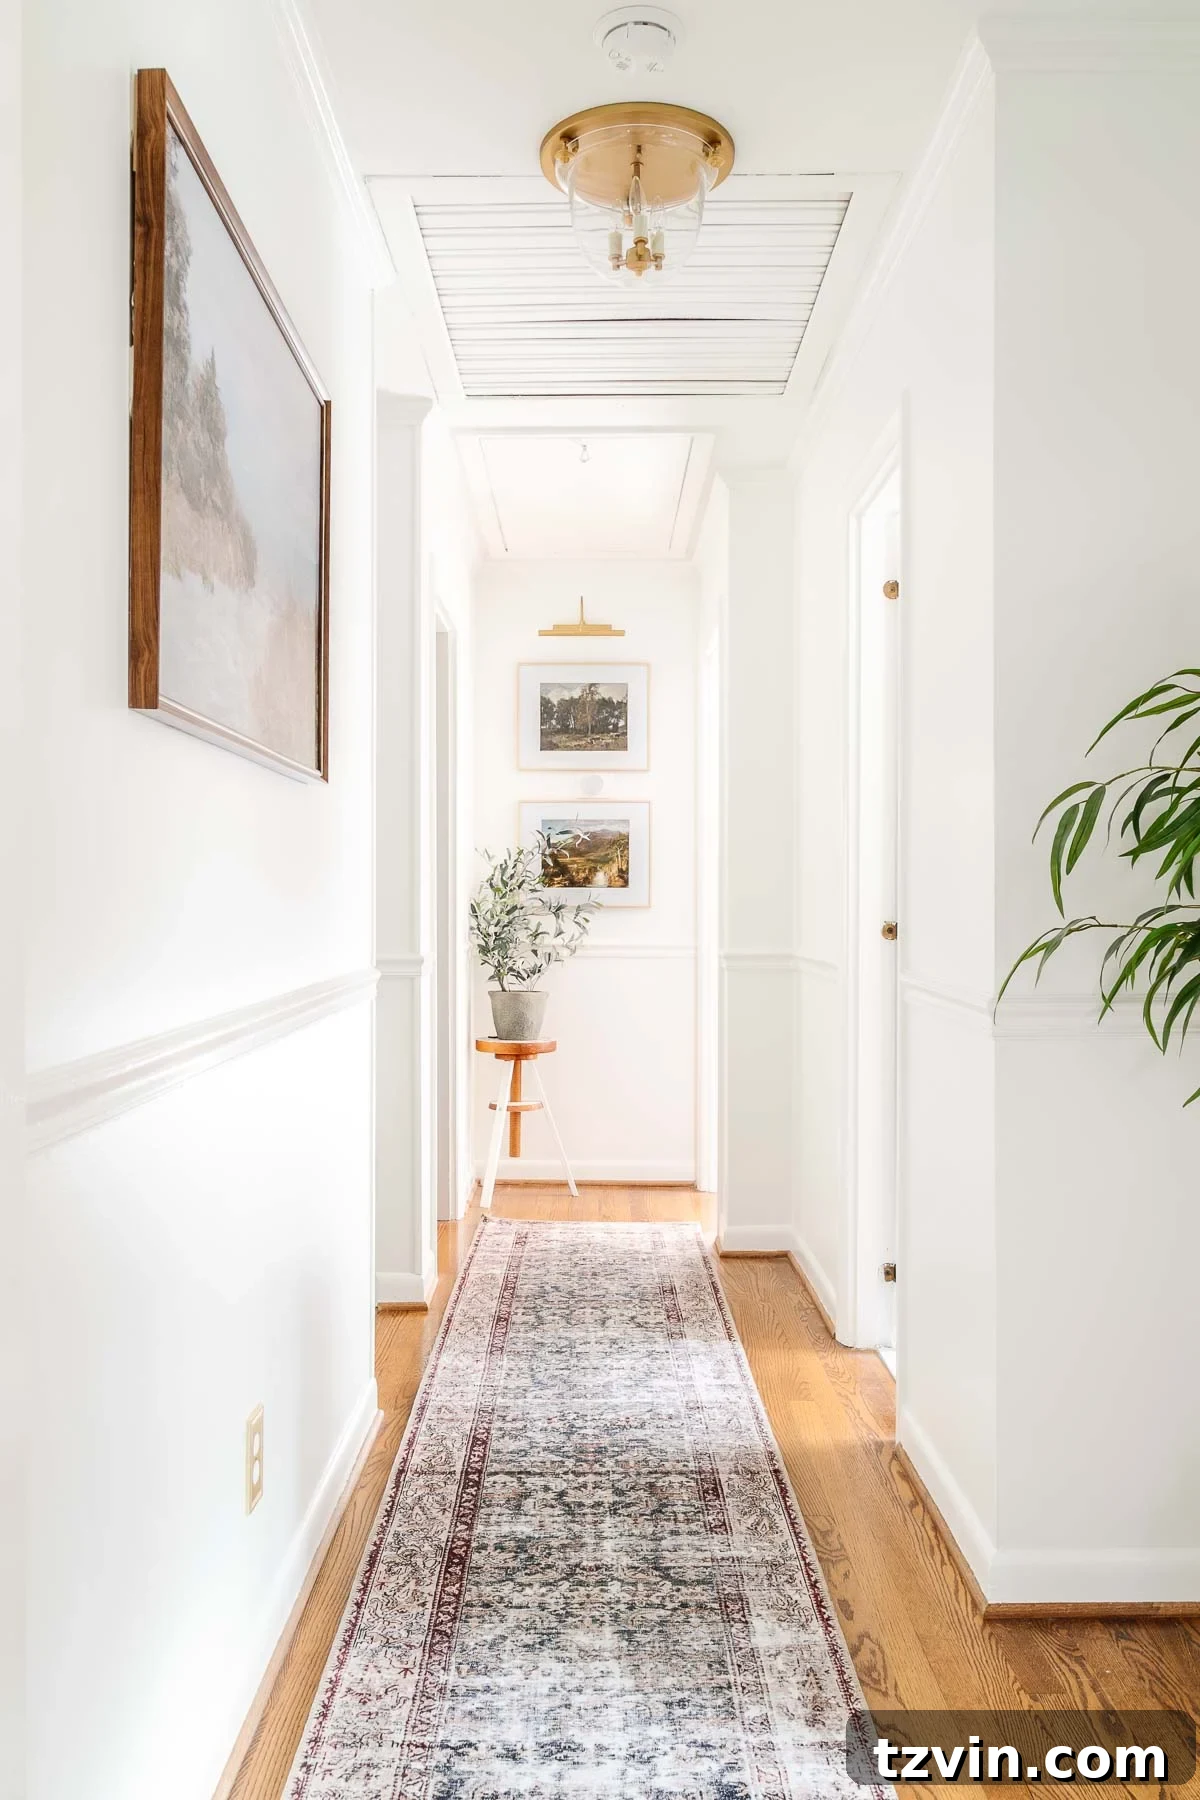
The transformation is truly remarkable. With our elegant tongue and groove ceiling now seamlessly installed and the attic door expertly hidden from plain sight, our upstairs hallway feels entirely revitalized. What was once a cramped, cluttered space now boasts a greater sense of height, an undeniable cleanliness, and a far more intentional design aesthetic. The visual noise has been eliminated, replaced by a calm, harmonious flow.
Now, with this major project complete, we can finally reintroduce our beloved antique mirror, roll out a soft runner rug to add warmth and texture to the floor, and curate a charming gallery wall. These final touches will bring the entire space together, reinforcing the character and charm we always envisioned for our home. It’s honestly hard to believe we procrastinated on this project for so long. Hiding that attic door was undoubtedly the missing puzzle piece, unlocking the true potential and infusing our upstairs hallway with the character and sophistication it so desperately begged for.
Here’s a little sneak peek as the contrasting trim gets its fresh coat of paint – the final elements coming together beautifully!
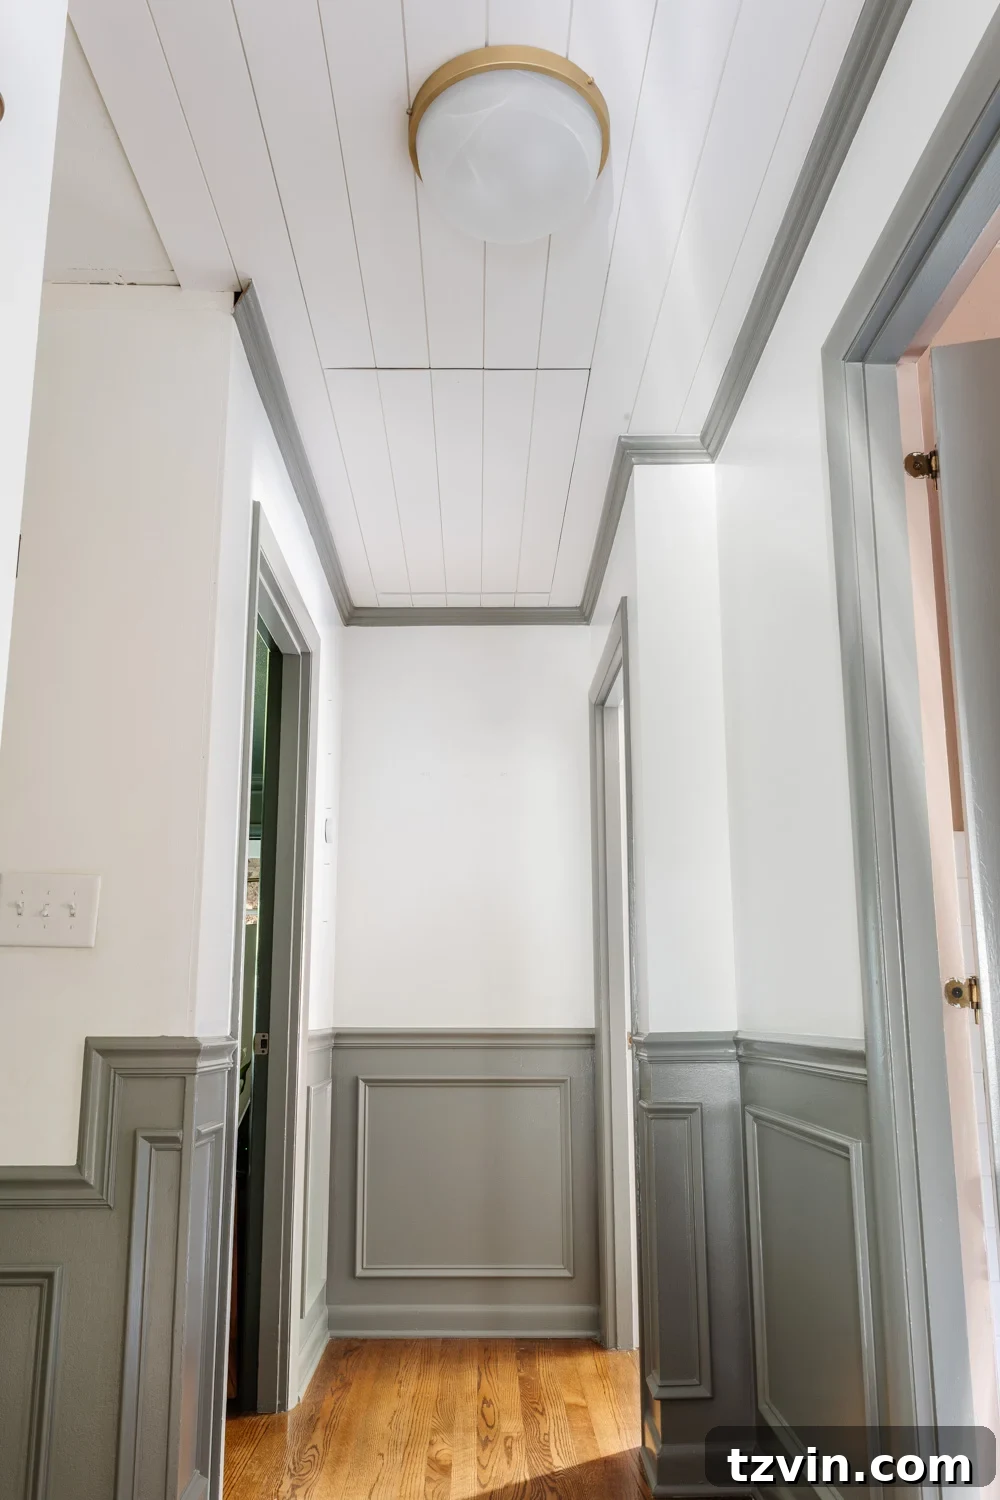
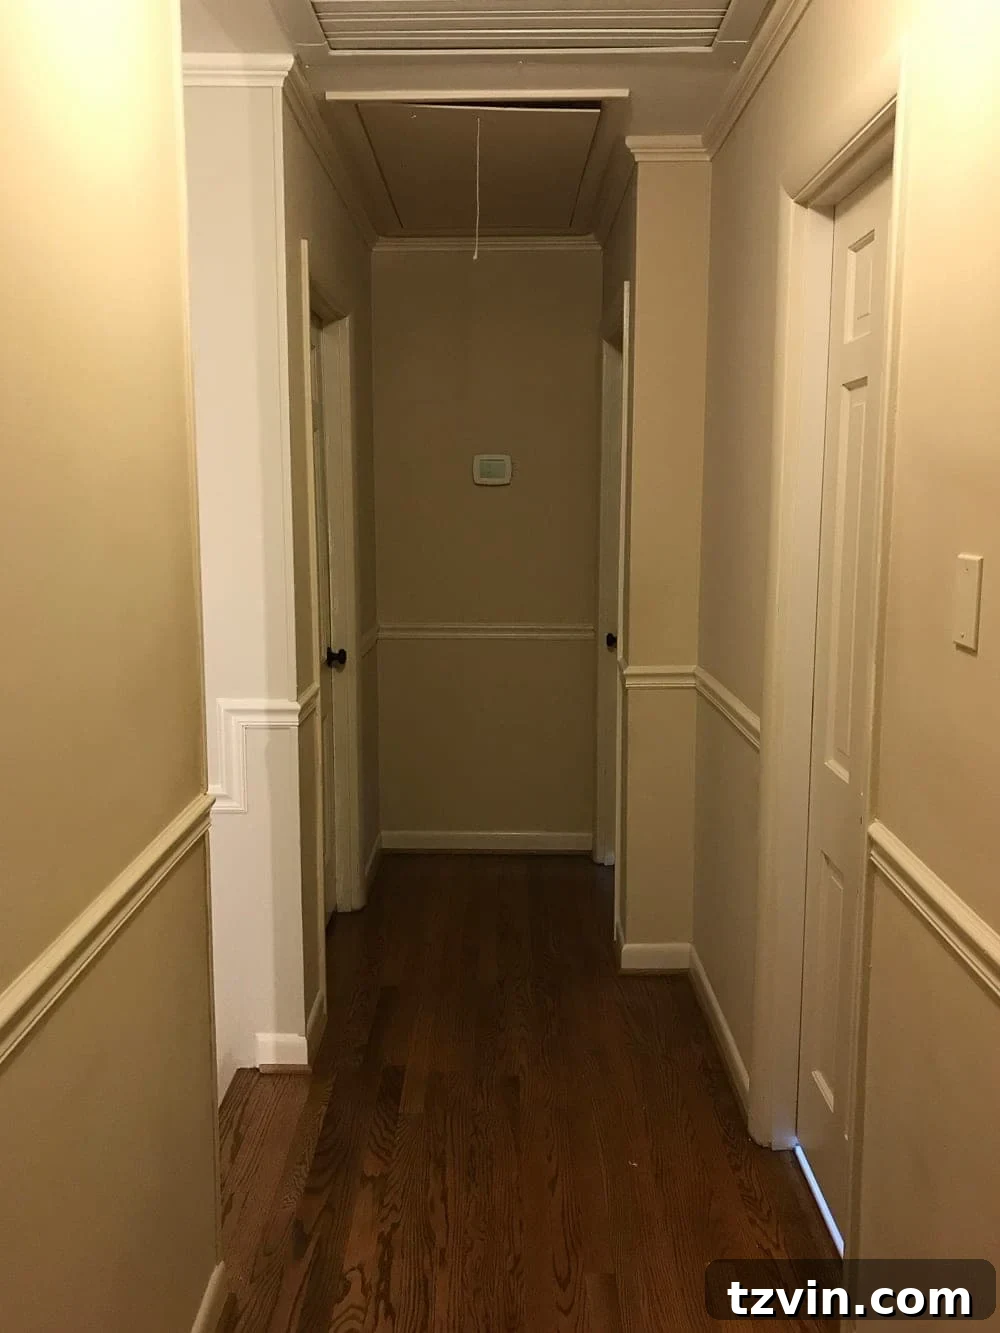
Are you living with a ceiling eyesore that you’ve been meticulously avoiding? Let our journey be your ultimate sign to finally tackle it. Embrace the transformative power of some good old-fashioned tongue and groove magic. You’ll be amazed at the difference it makes!
If you decide to give this project a try, or if you’ve already completed a similar DIY marvel, please let me know! Tag me on Instagram @blesserhouse so I can celebrate your hard work and cheer you on!
More DIY Millwork Ideas to Elevate Your Home
- DIY Picture Frame Molding: Add Elegant Detail to Any Room
- How to Quickly Beef Up Crown Molding and Baseboards for a High-End Look
- How to Install Stair Wainscoting the Easy Way: A Step-by-Step Guide
- 8 DIY-Able Wall Molding Ideas to Add Character to Your Home Instantly