
Mastering Your Home Makeover: A Step-by-Step Guide to Creating an Effective Mood Board
Embarking on a home makeover journey can be both exciting and daunting. The biggest hurdle for many, myself included, is often the sheer volume of decisions involved. From paint colors and furniture styles to textures and lighting, the choices can quickly lead to what’s known as “decision paralysis” or the dreaded fear of missing out (FOMO) on a better option.
Fortunately, there’s a powerful and visually engaging tool that can transform this overwhelming process into a clear, confident, and enjoyable experience: the mood board. Learning how to create a mood board has been a cornerstone of our successful home transformations over the years, providing invaluable clarity and preventing costly mistakes.
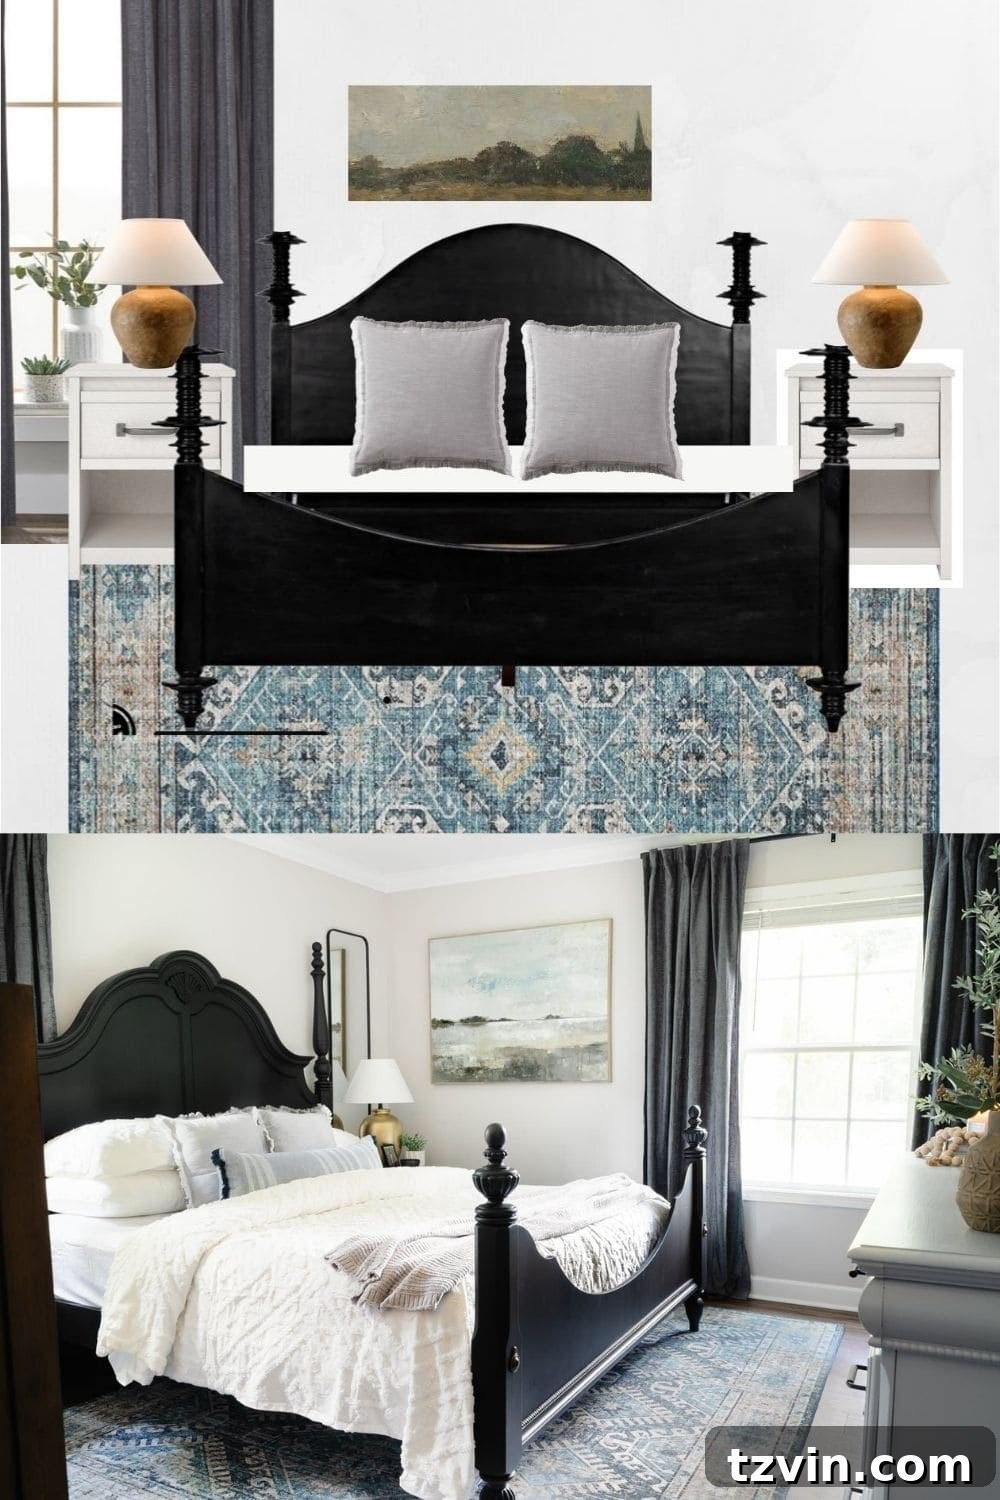
Rug | Curtains | Duvet Set | Gray Pillows | Blue Pillow | Mirror | Lamp (painted Rustoleum Metallic Gold) | Throw
(See this bedroom makeover here.)
What Exactly is a Mood Board for Interior Design?
At its core, a mood board is a curated collection of images, textures, colors, and other design elements assembled to convey the overall feel or aesthetic of a project. For interior design, it serves as a visual blueprint, allowing you to “try on” different room plans before committing to any purchases. Think of it as a creative collage that brings your vision to life in a tangible, easy-to-understand format.
It typically includes photos of furniture, lighting fixtures, flooring, wallpaper, textiles, artwork, and even small decor items. The goal is to see how these diverse components interact and harmonize, ensuring they tell a cohesive design story.
Why Creating a Mood Board is Essential Before Any Room Makeover
Before you lift a paintbrush or click ‘add to cart’ on that expensive sofa, a well-crafted mood board can save you significant time, money, and stress. Here’s why this vital planning tool should be your first step:
1. Achieve Design Clarity and Cohesion
The beauty of a mood board lies in its ability to consolidate abstract ideas into a concrete visual representation. It helps you define a clear style, color palette, and overall ambiance for your space. Instead of vaguely imagining a “cozy farmhouse” or “modern minimalist” room, you’ll have a visual reference that guides every subsequent decision, ensuring a cohesive and harmonious final look.
2. Prevent Costly Design Mistakes and Buyer’s Remorse
No one wants to invest hundreds or thousands of dollars in furniture or decor only to realize it doesn’t quite fit the aesthetic or clash with other elements. A mood board allows you to experiment with different combinations virtually. You can swap out a rug, change a paint color, or test various lighting fixtures until you achieve the perfect balance, all without spending a dime. This foresight eliminates buyer’s remorse and protects your budget from expensive do-overs.
3. Streamline Decision-Making and Overcome Paralysis
For those prone to decision paralysis, a mood board is a powerful antidote. By having all your potential choices laid out visually, you can more easily compare options, identify patterns, and trust your gut feeling. It removes the guesswork and empowers you to make confident design decisions, moving your project forward efficiently.
4. Facilitate Effective Communication with Partners and Professionals
If you’re tackling a room remodel with a spouse, partner, or even an interior designer, a mood board acts as an invaluable communication tool. It ensures everyone is on the same page, sharing a unified vision. You can discuss and refine the design together, addressing any disagreements visually before they become actual construction or purchasing conflicts. This pre-visualization prevents misunderstandings and fosters a collaborative approach.
My husband, Robert, and I always set aside time to pull together a mood board before any room makeover. It allows us to clearly see the direction we’re heading in, ensuring we’re both excited and confident about the plan.
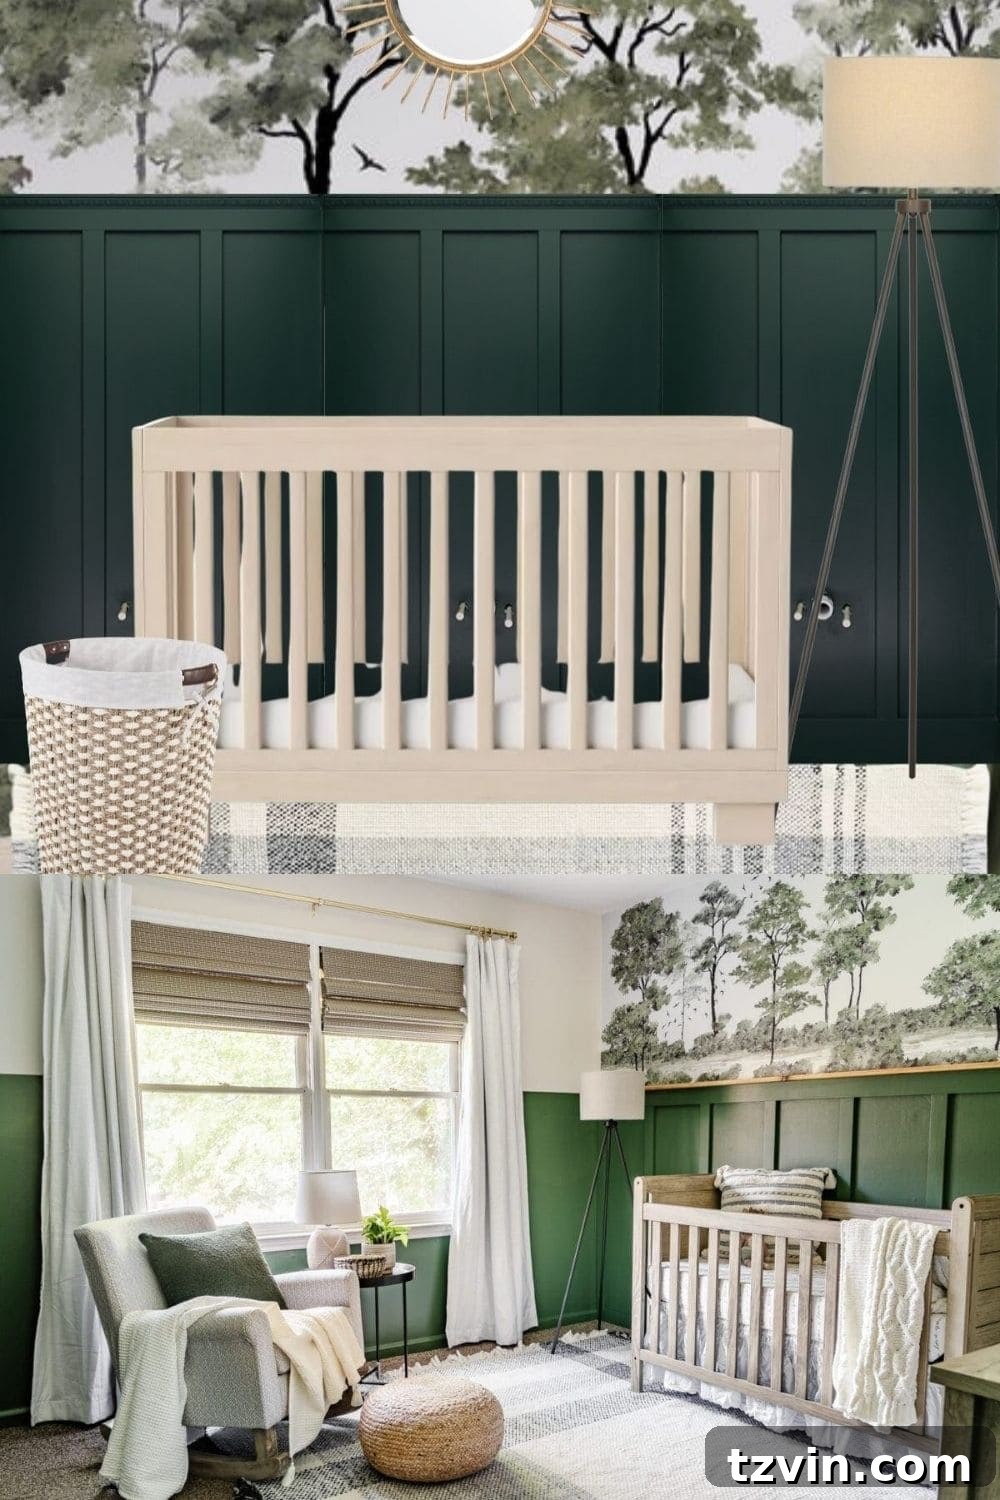
Rocking Chair | Rug | Pouf | Green Pillow | Cream Pillow | Throw | Table | Floor Lamp | Table Lamp | Mural
(See this nursery makeover here.)
Pre-Mood Board Prep: Gathering Your Design Inspiration
Before you dive into creating your digital mood board, it’s crucial to gather a wealth of inspiration. This initial phase sets the foundation for your entire design concept:
- Explore Diverse Sources: Browse platforms like Pinterest, Instagram, Google Images, design blogs, and home decor magazines. Look for rooms, furniture pieces, color palettes, and stylistic elements that resonate with you. Don’t limit yourself – explore various styles even if you think you know what you want.
- Identify Key Elements: Pay attention to what catches your eye. Is it a particular color combination, a unique texture, a type of furniture, or an overall feeling?
- Save Your Favorites Systematically: As you find inspiring images or specific items you’re considering for purchase (like a rug, a lamp, or a piece of art), save them! Screenshot them, download them, or use Pinterest boards. I recommend creating a dedicated folder in Google Drive or a similar cloud service to keep everything organized.
- Choose Your Tool: For digital mood board creation, Canva is an excellent choice. It offers both a free version and a more feature-rich paid Pro version. If you need advanced features like the background remover for a short period, consider utilizing Canva’s 30-day free trial and canceling once your mood board is complete. This tutorial will guide you through using both free and paid options.
How to Create a Professional Mood Board Design on Canva
UPDATE: You can see a video tutorial for how to create a mood board design on Canva here.
Follow these steps to transform your collection of inspiration into a cohesive design masterpiece using Canva:
1. Start a New Design on Canva:
Go to Canva.com and click the “Create a Design” button located in the top right corner of the screen. This will open a menu of design options.
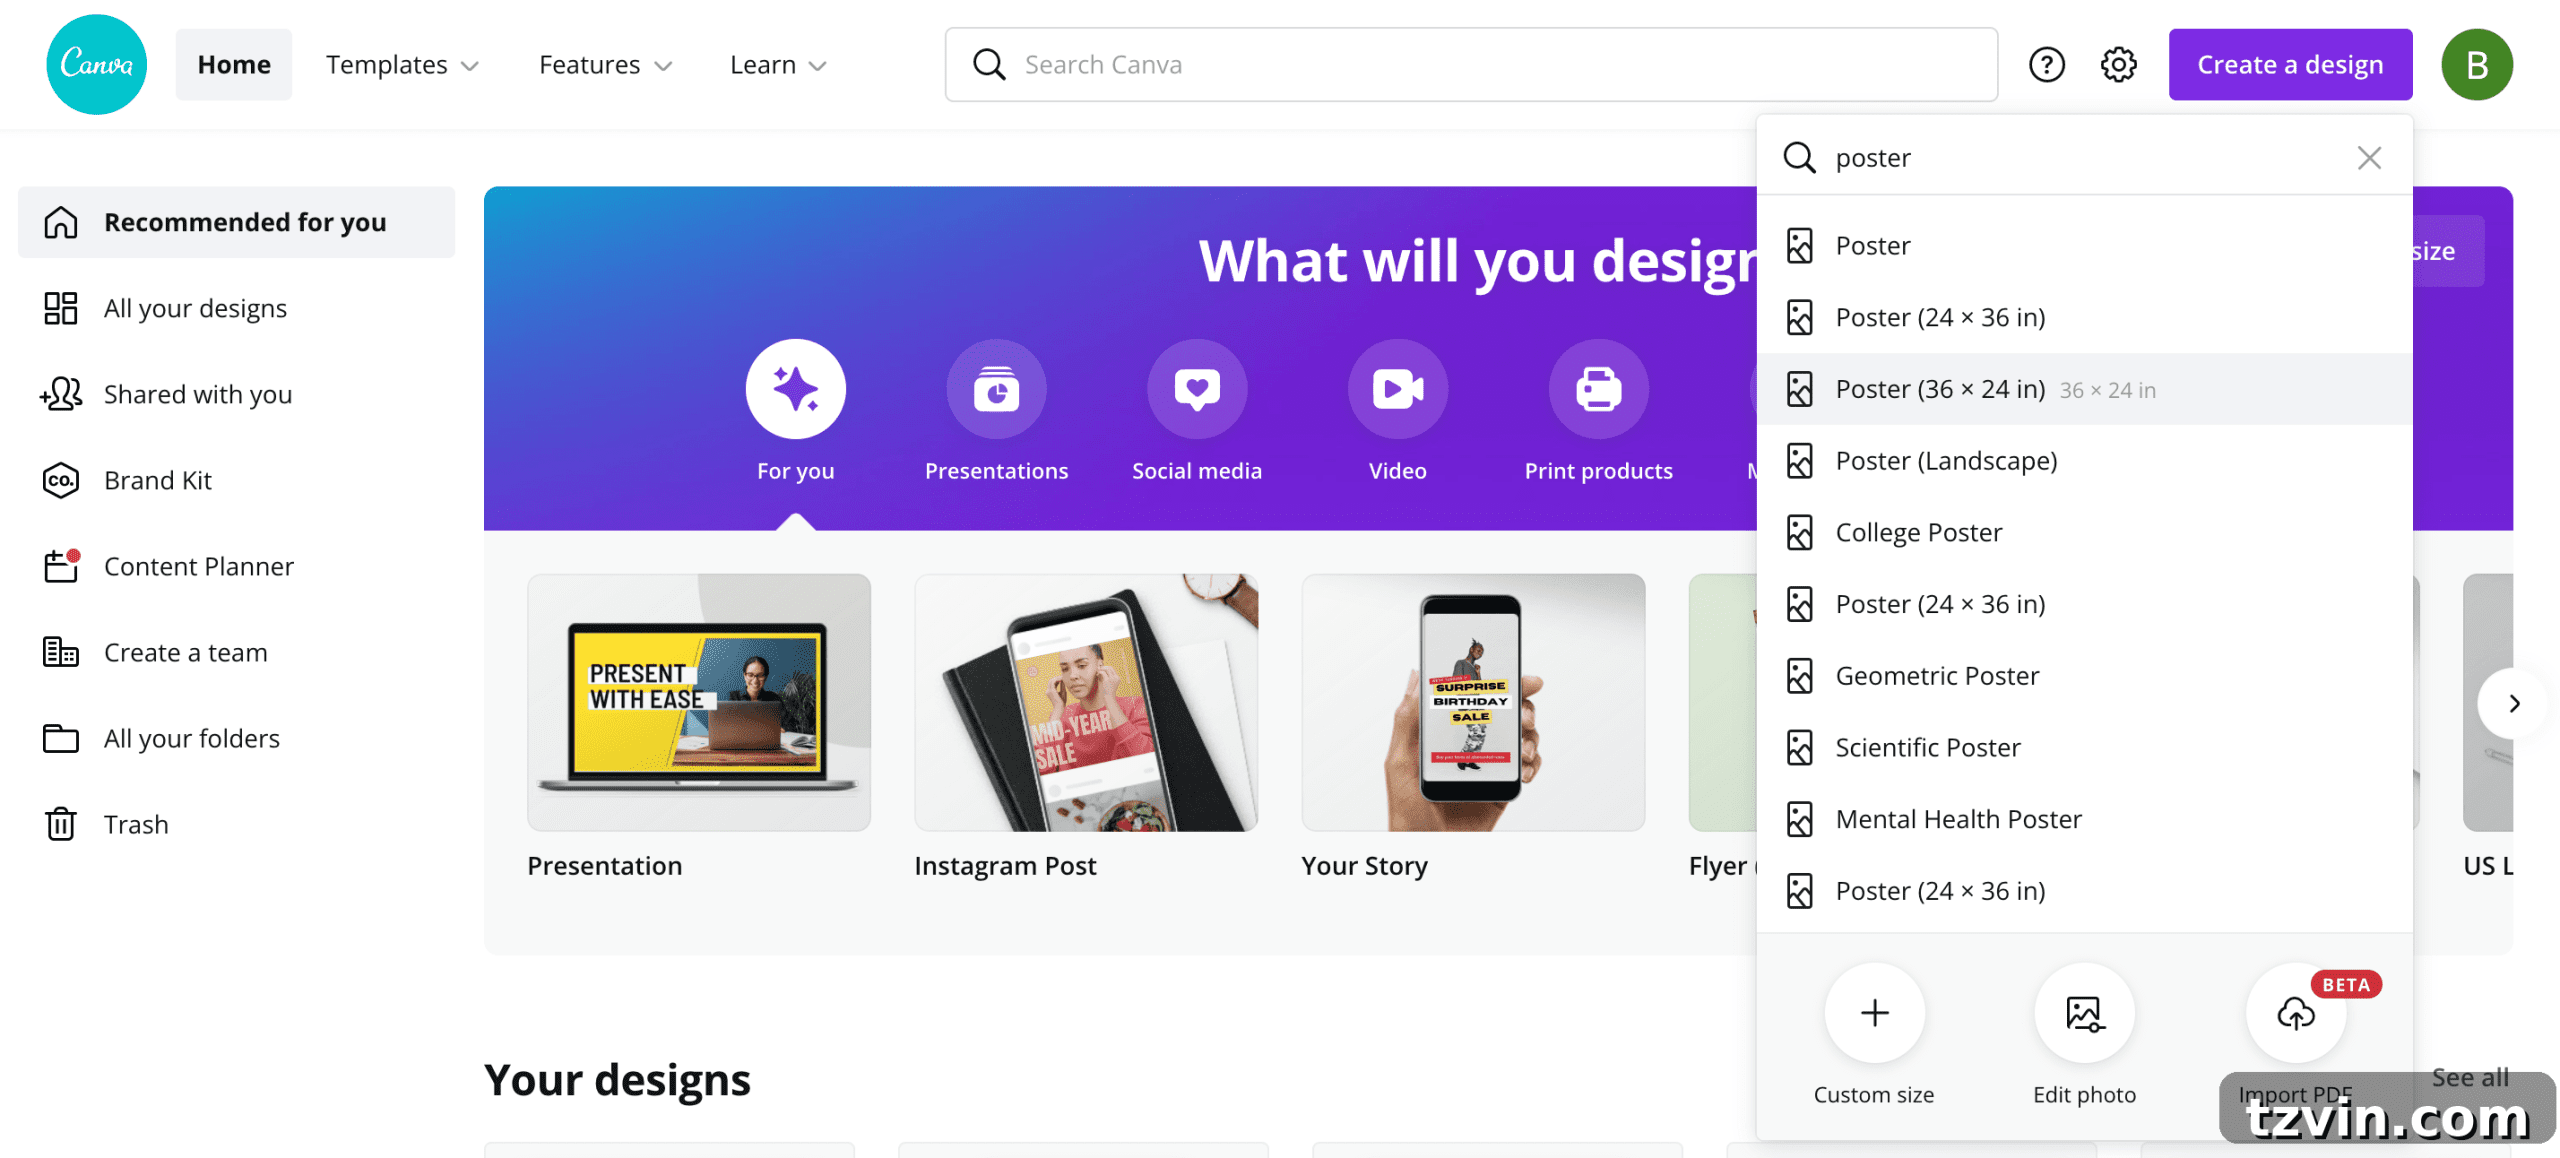
2. Select Your Canvas Size:
In the prompt that appears, search for “poster” and select the orientation (portrait or landscape) that best suits your vision for the mood board. A larger canvas gives you more space to arrange elements freely.
3. Upload Your Inspiration Images:
On the left-side toolbar, click the “Uploads” icon. Here, you can upload all the inspiration images and item photos you previously saved to your Google Drive folder or desktop. Having all your assets in one place simplifies the process.
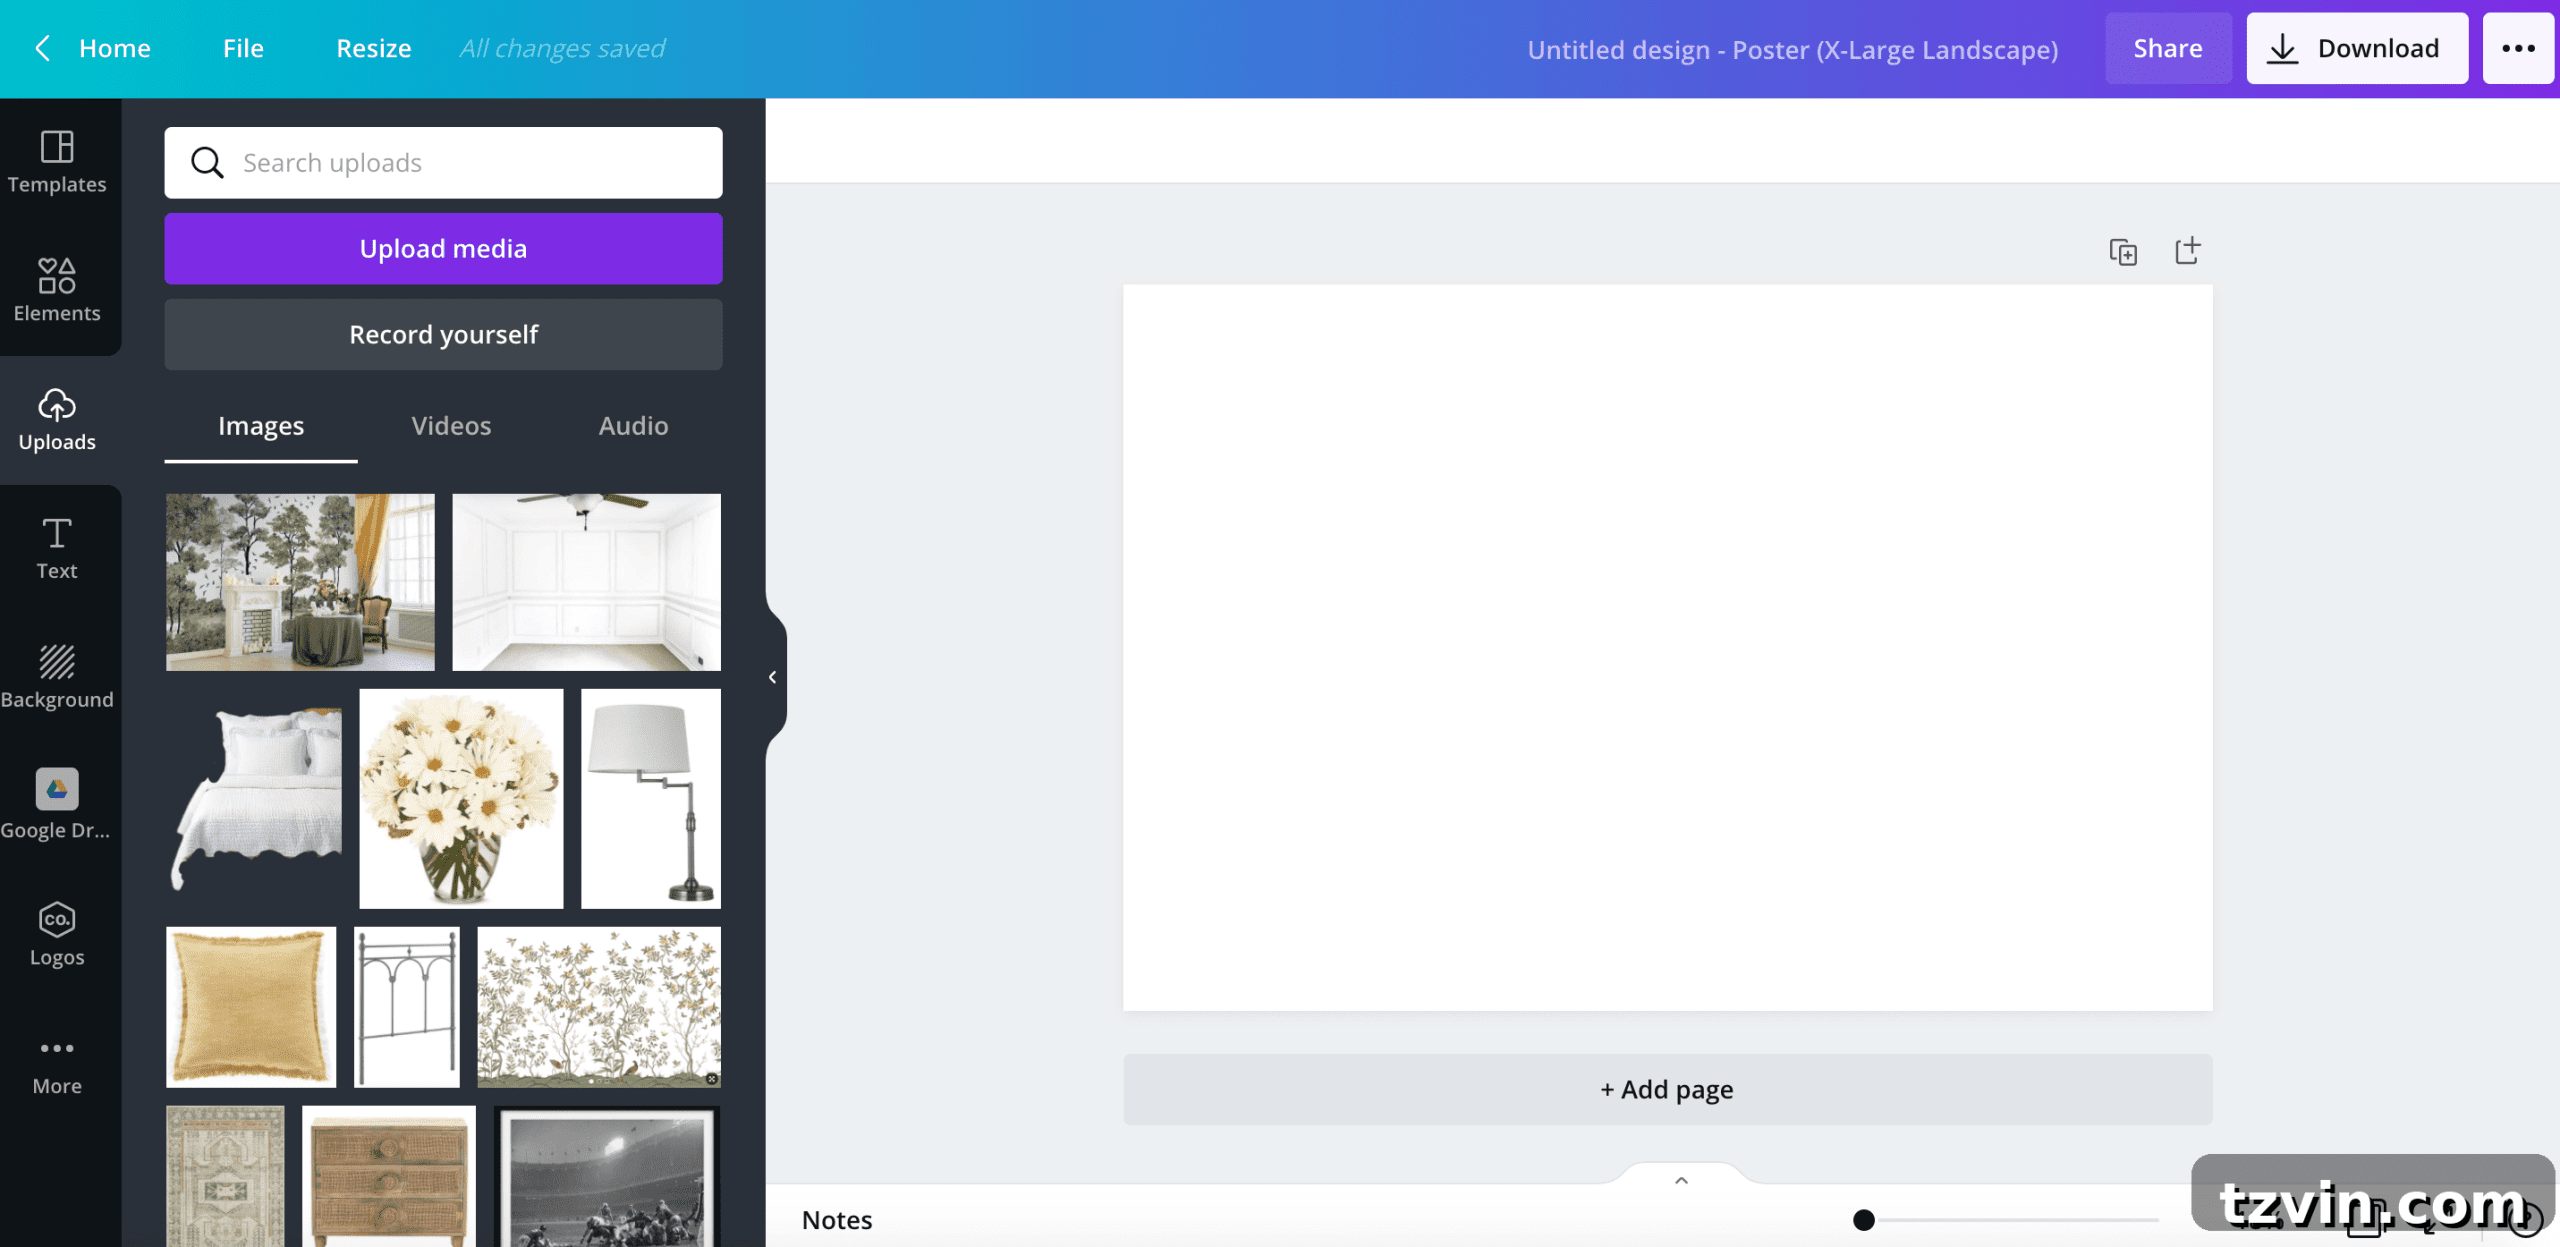
4. Begin Placing Your Core Elements:
Click on the first item you wish to place on your mood board. I often start with foundational elements like wallpaper, a rug, or flooring. These larger pieces establish the color scheme and overall base upon which other items will be layered.
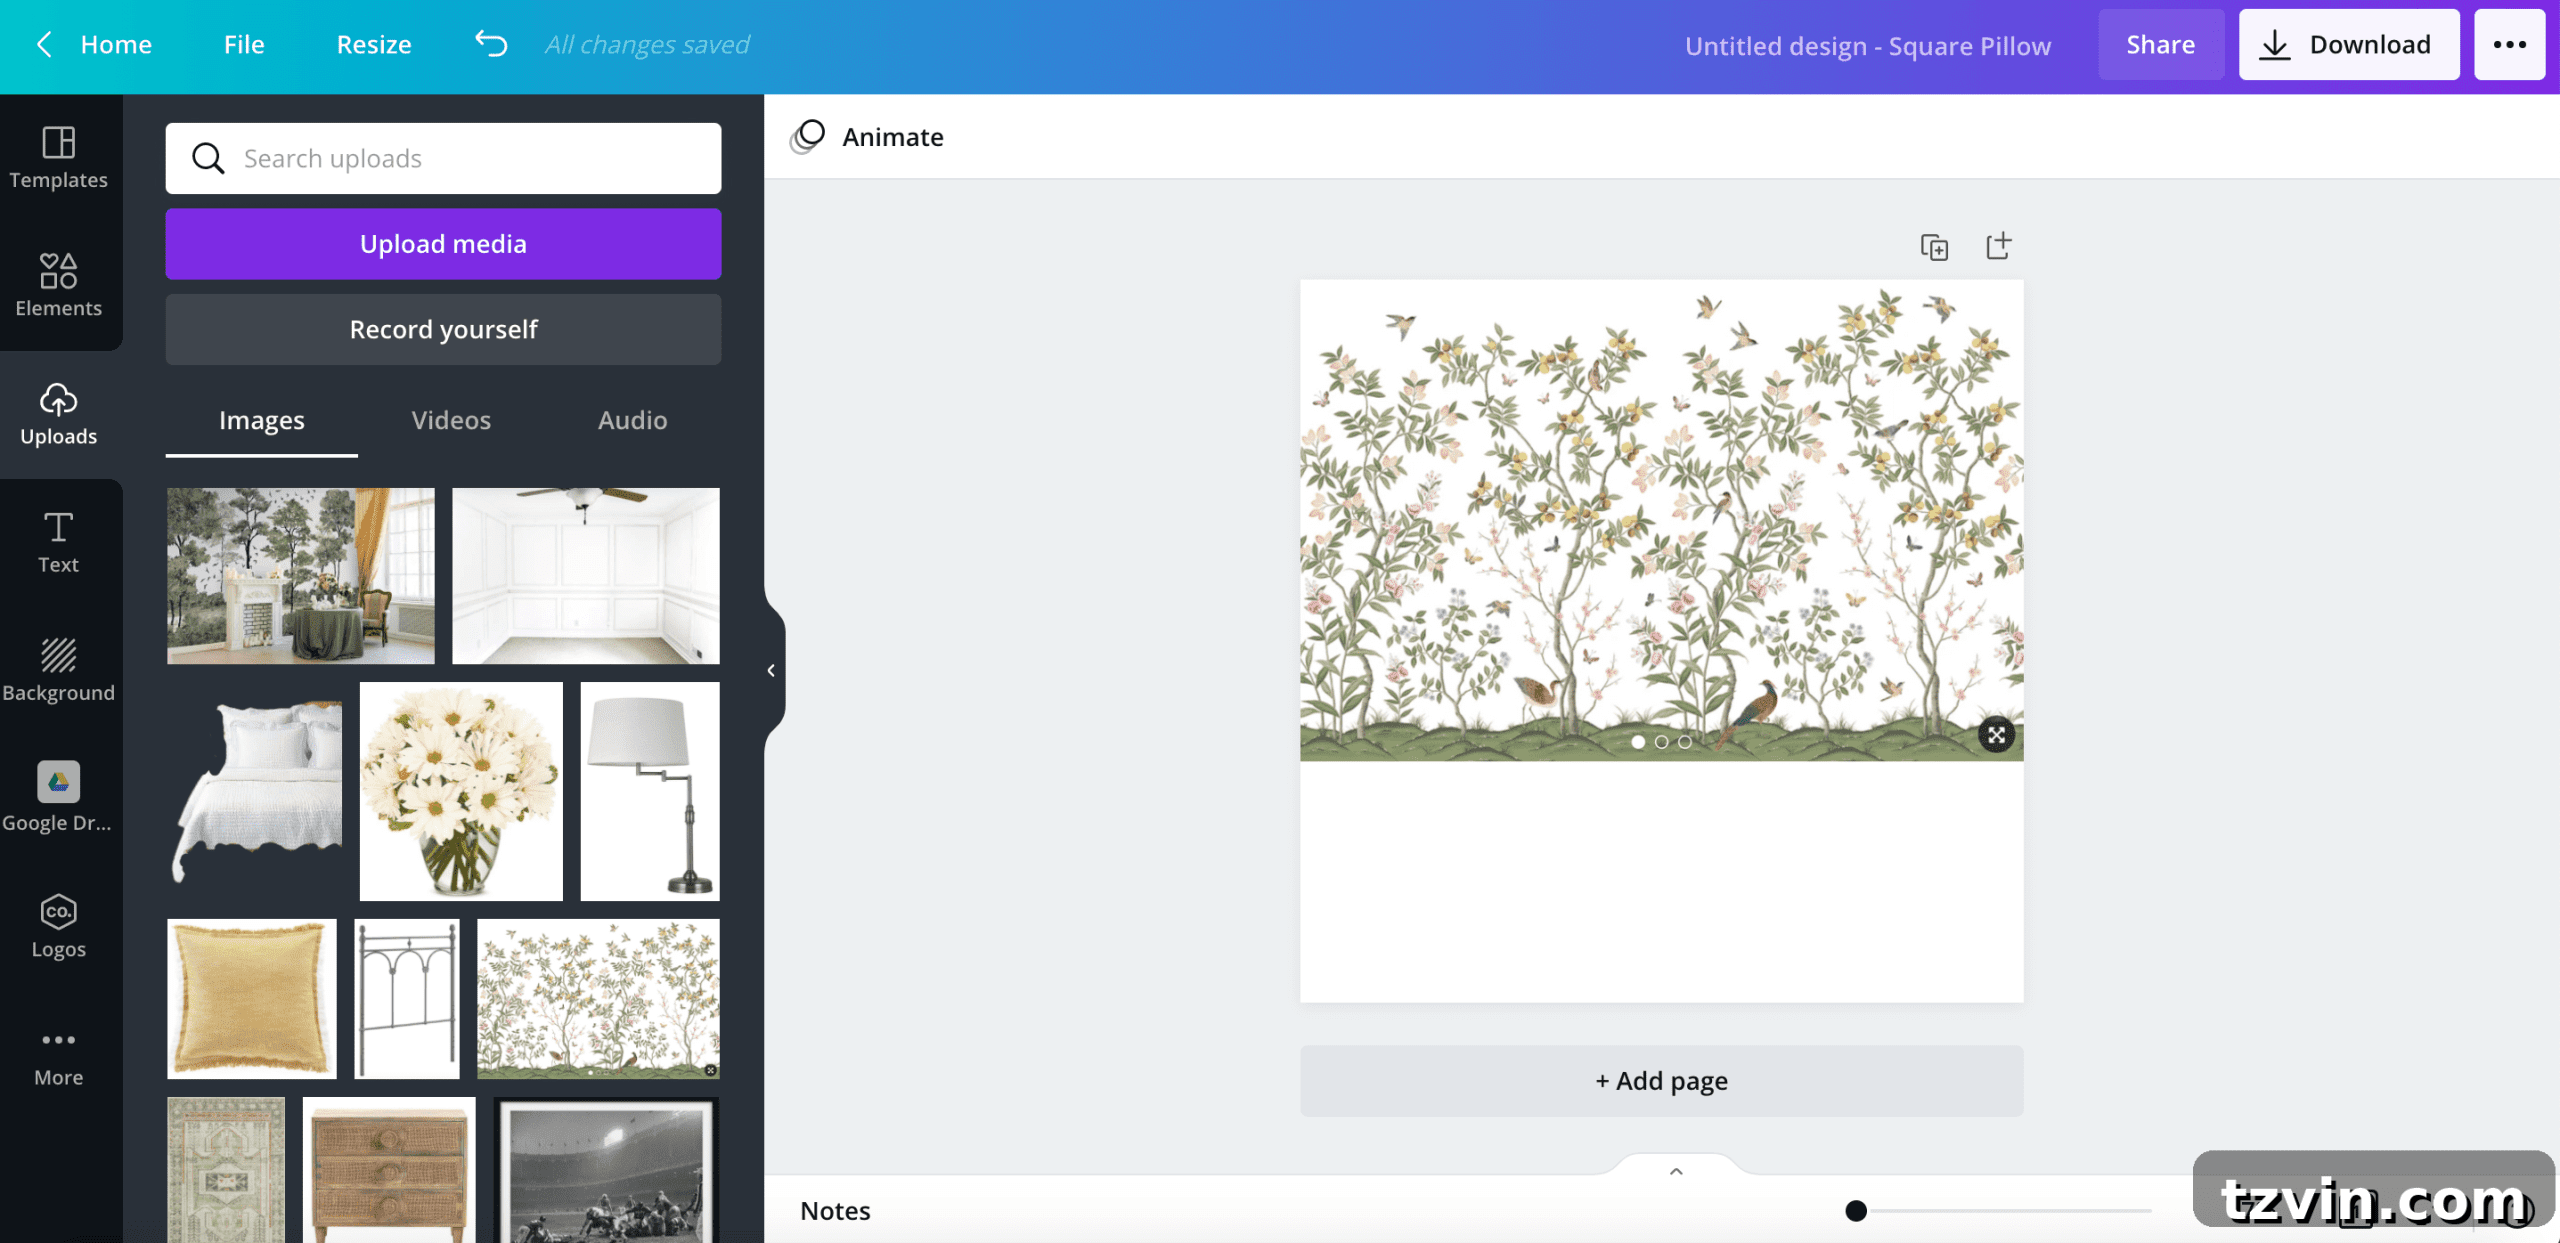
5. Adjust Image Size and Position:
To resize an uploaded image, click on it and then drag one of the circles in the corners to scale it to your desired size. To reposition the image, click and drag it from the middle to place it anywhere on your mood board canvas.
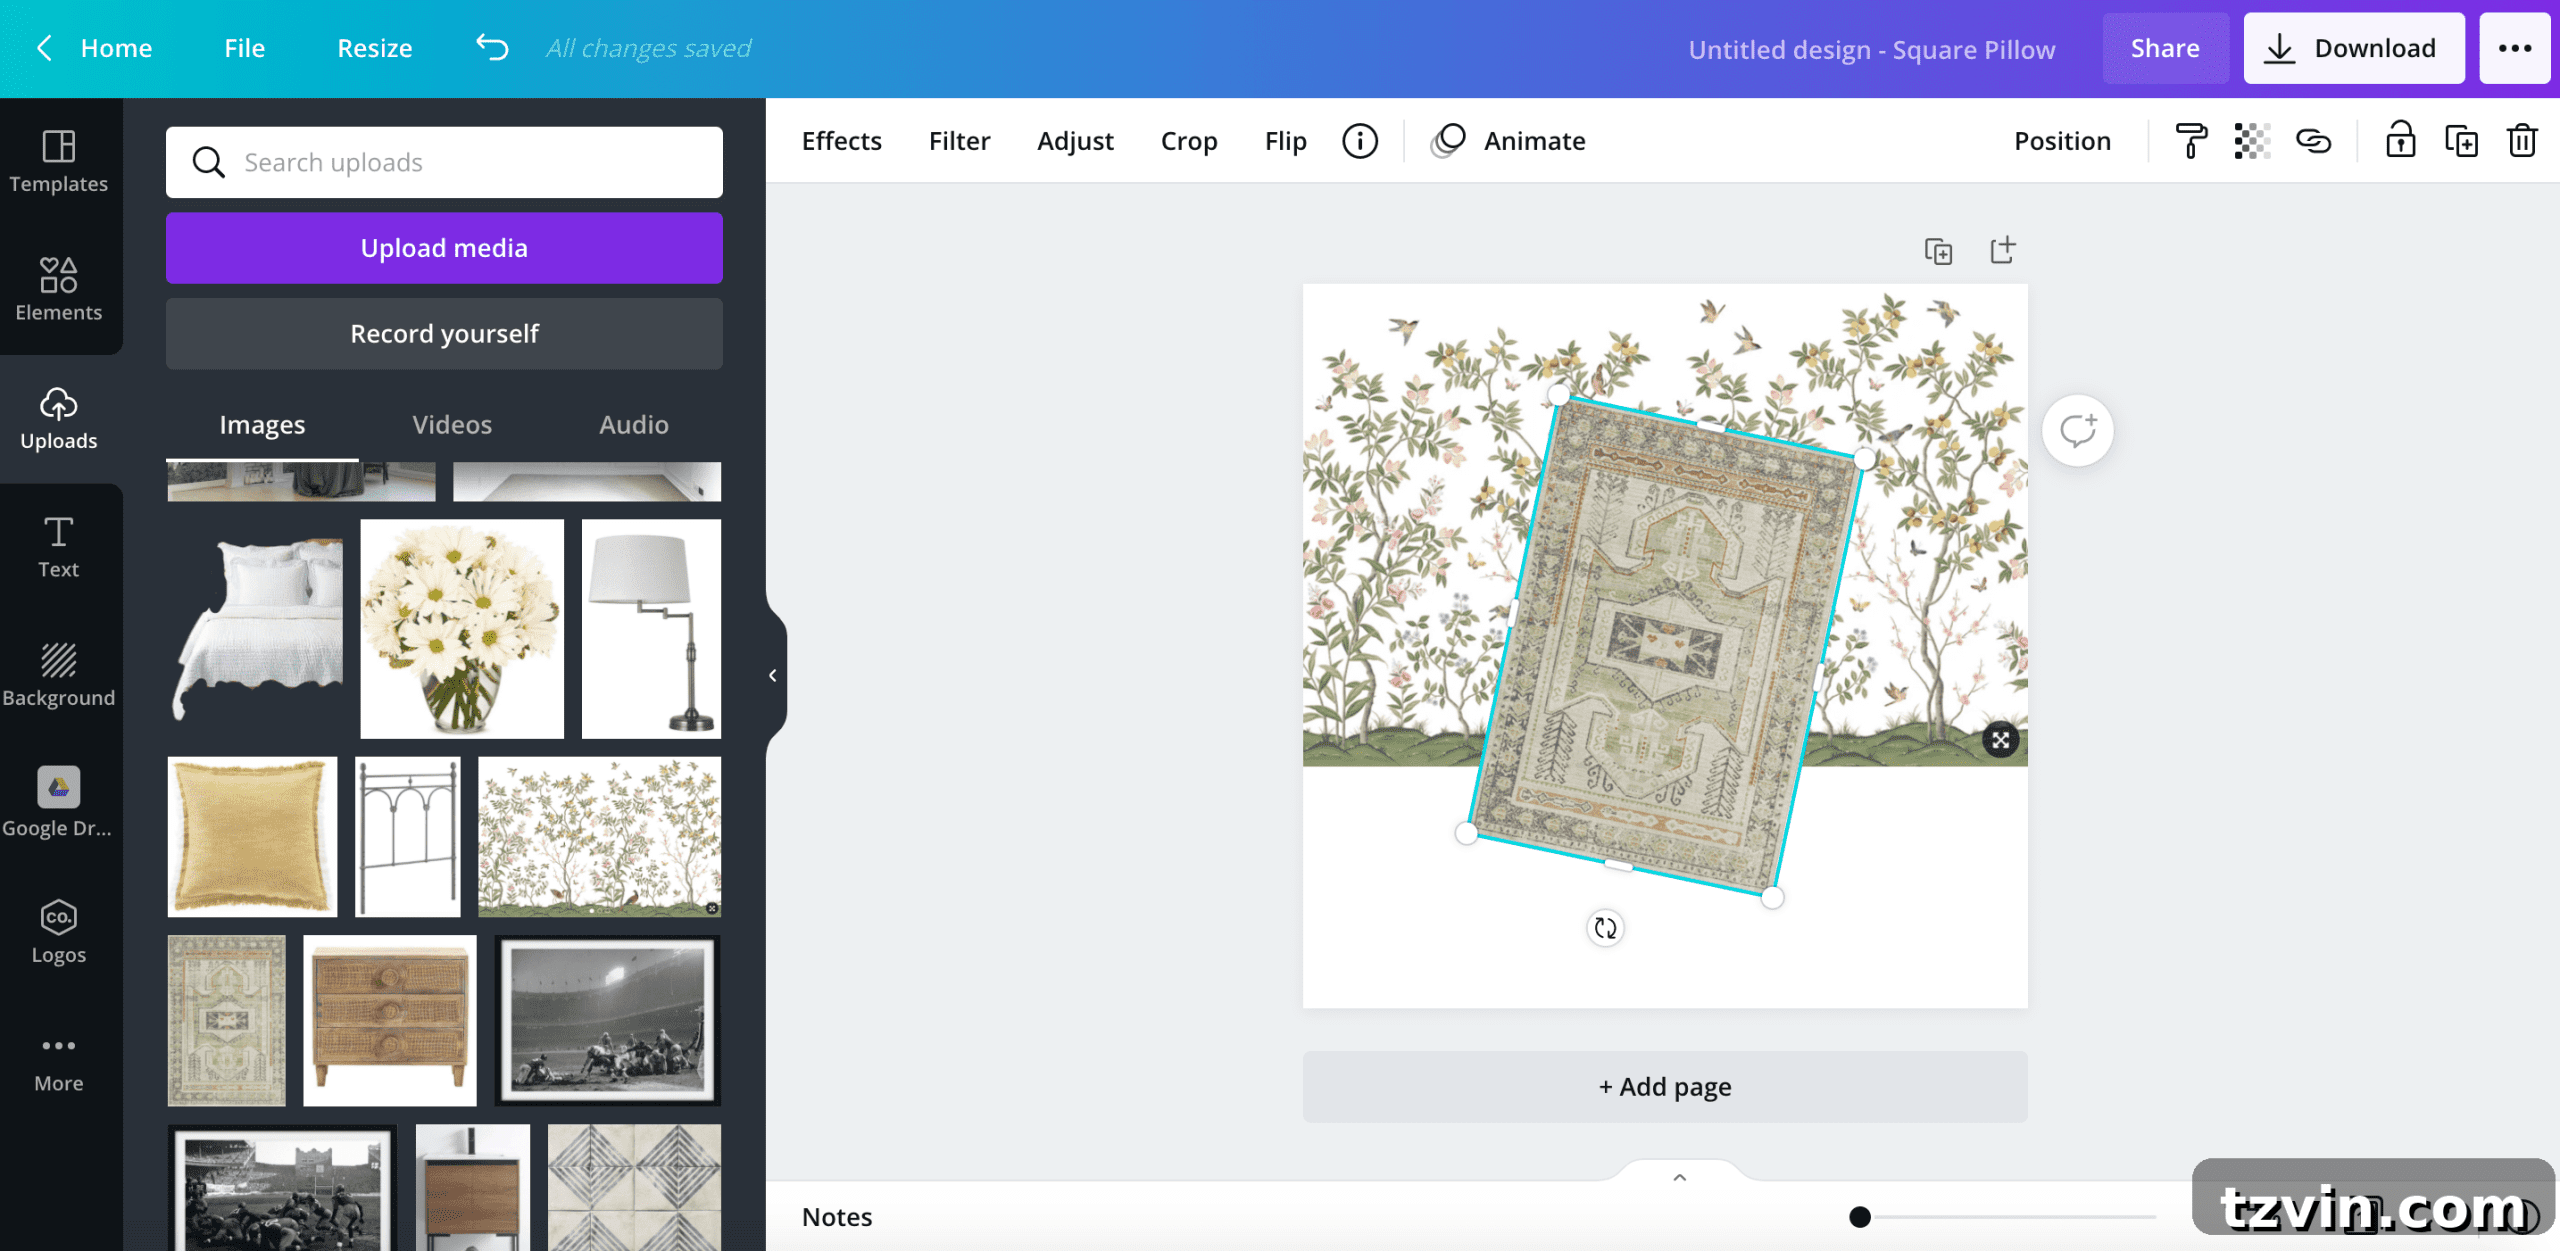
6. Rotate Images for Dynamic Layouts:
To rotate an image, click on it to highlight. A circular arrow icon will appear. Click and drag this arrow to rotate the image clockwise or counter-clockwise, allowing you to create more dynamic and realistic arrangements.
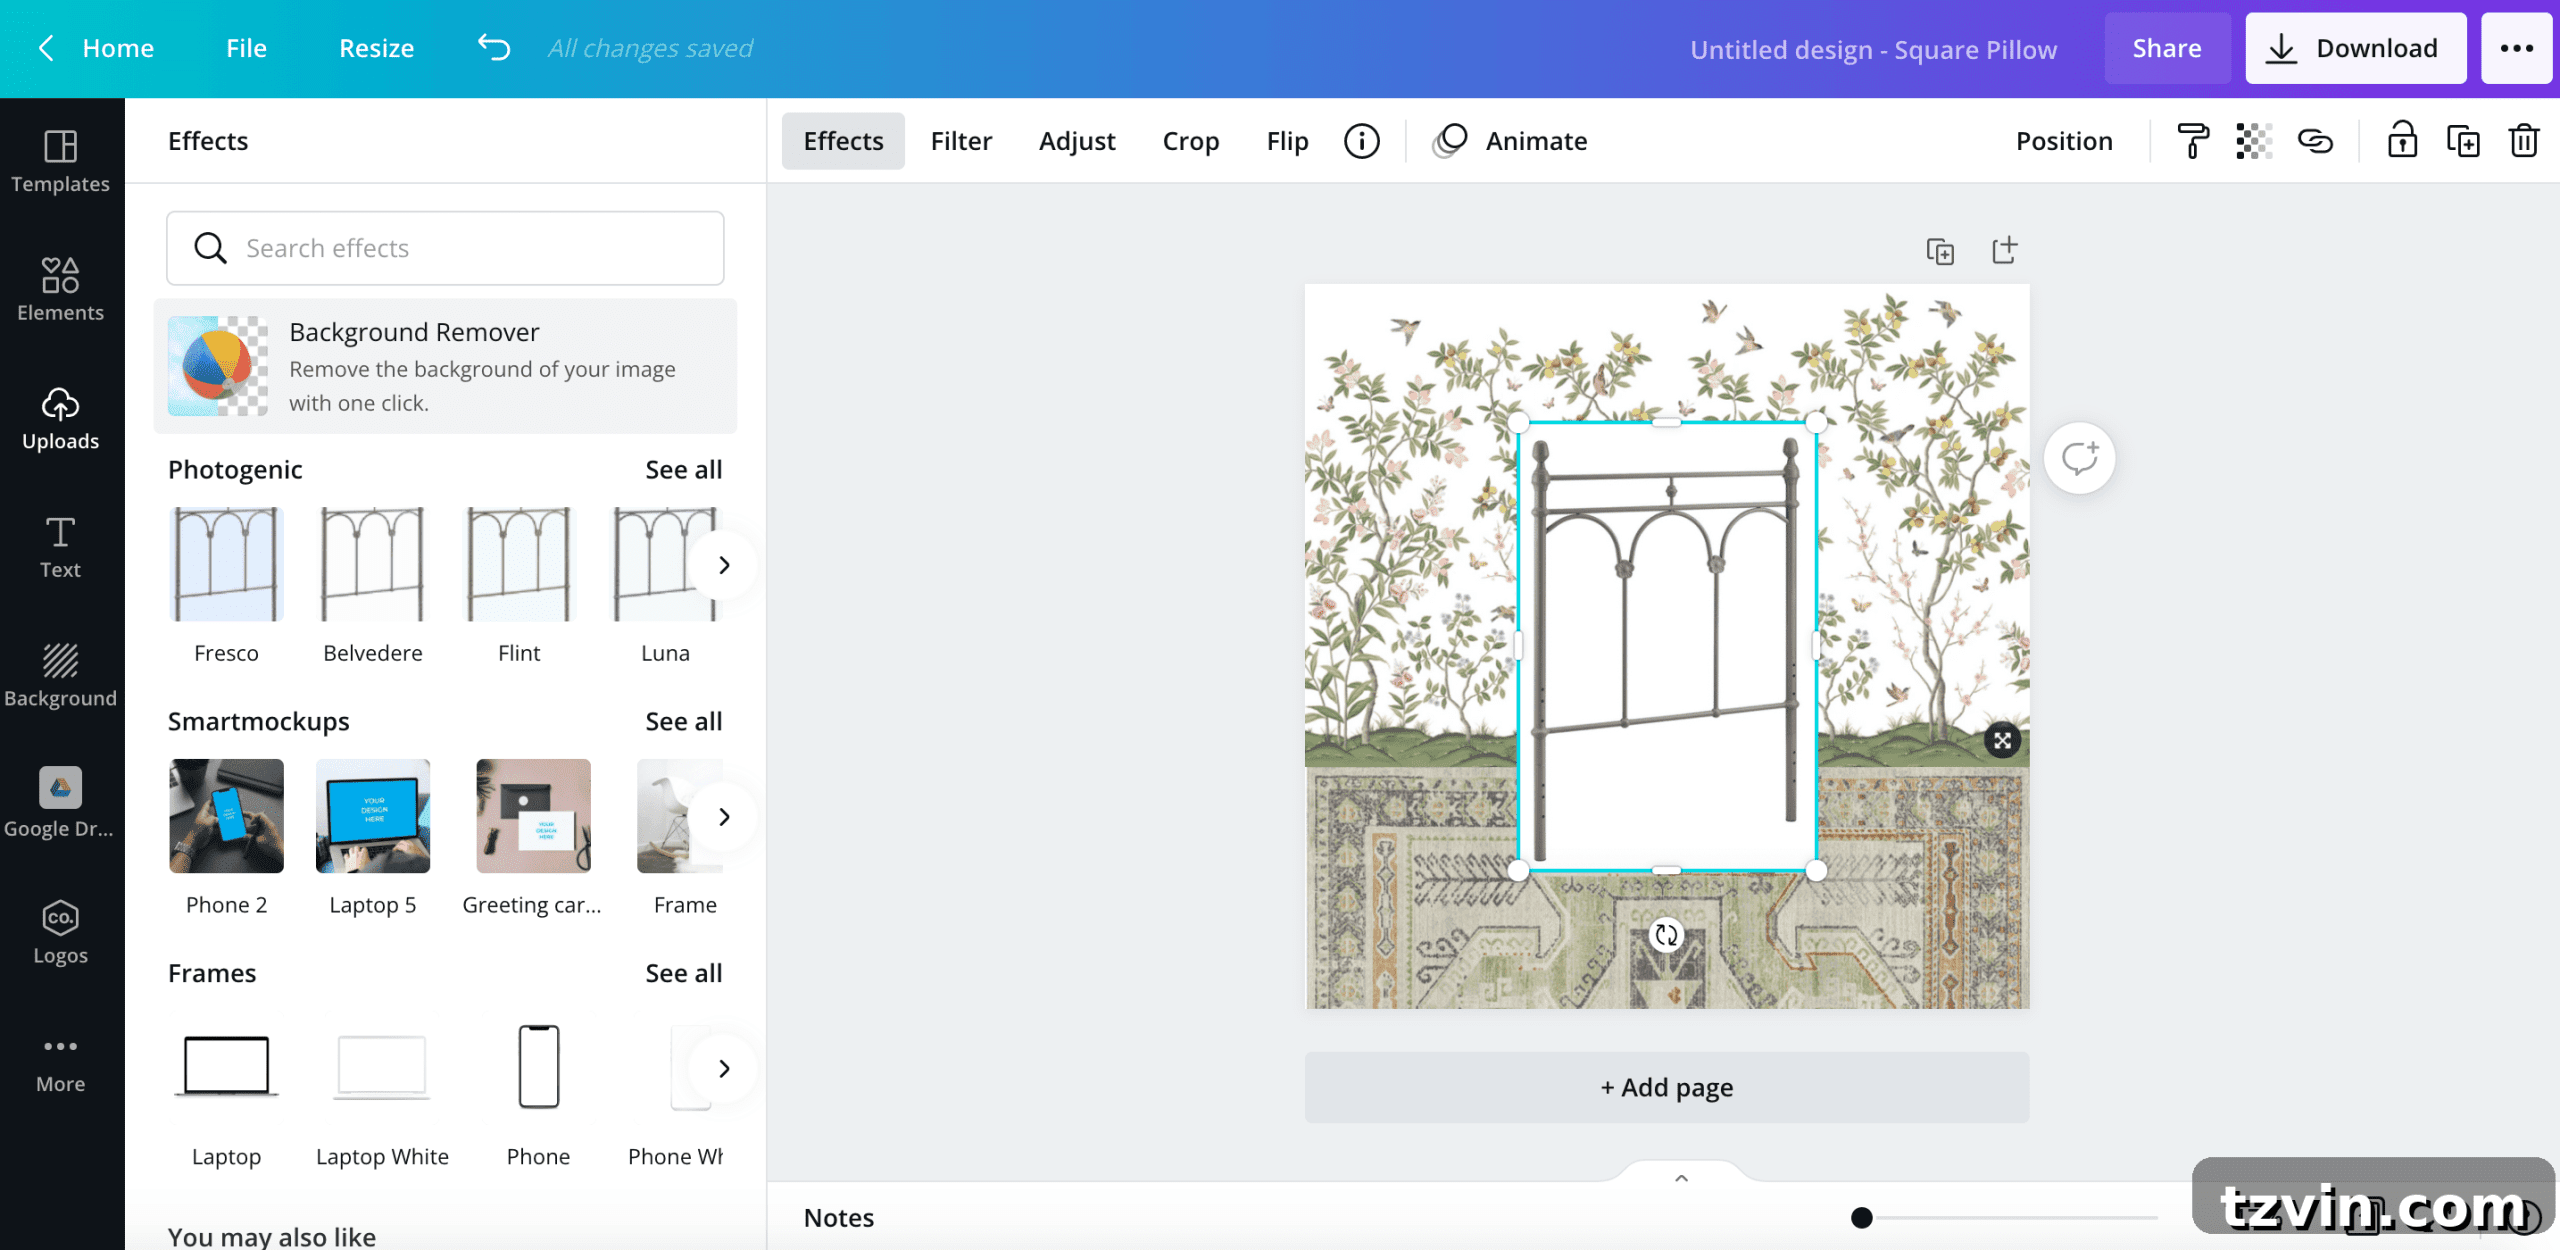
7. Remove Image Backgrounds (Canva Pro Feature):
For a clean, professional look, you often need to remove the background from furniture or decor items. If you have Canva Pro, click on the image, then select “Effects” in the top toolbar. Choose “Background Remover” from the options in the top left of the screen. Canva’s AI will automatically detect and remove the background.
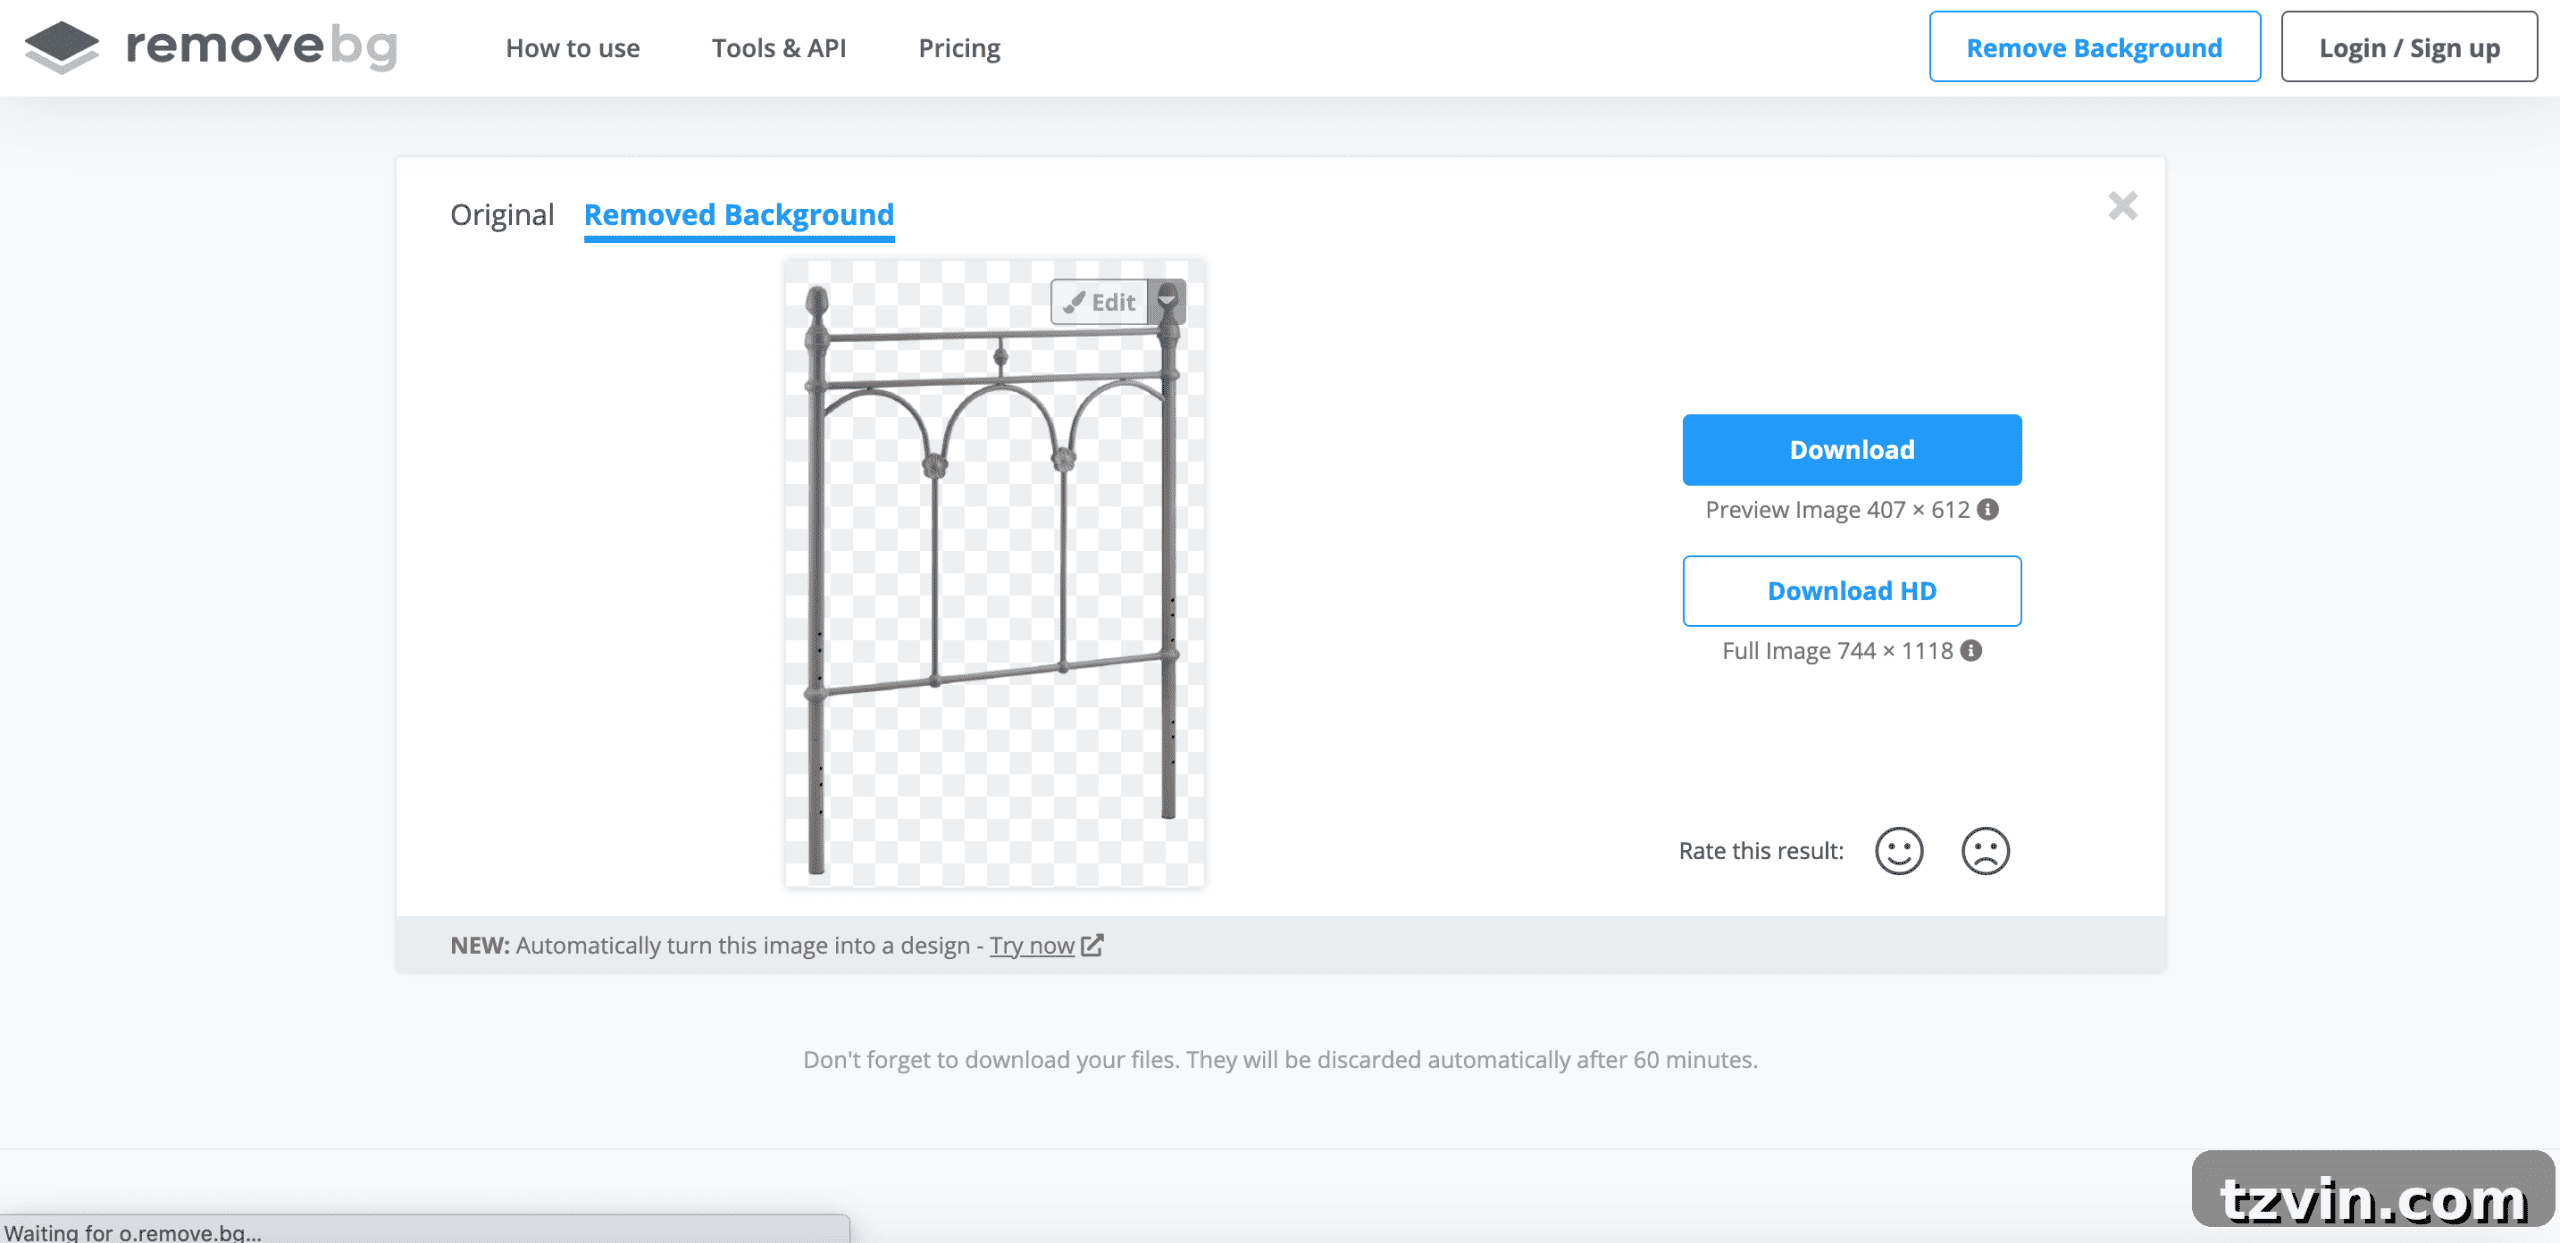
8. Remove Image Backgrounds (Free Alternative):
If you’re using the free version of Canva, don’t worry! Open a new browser tab and go to Remove.bg. Upload your image, and the website will automatically remove its background. Save the newly adjusted image and then upload it to Canva to add to your mood board. This extra step ensures a polished look without a Pro subscription.
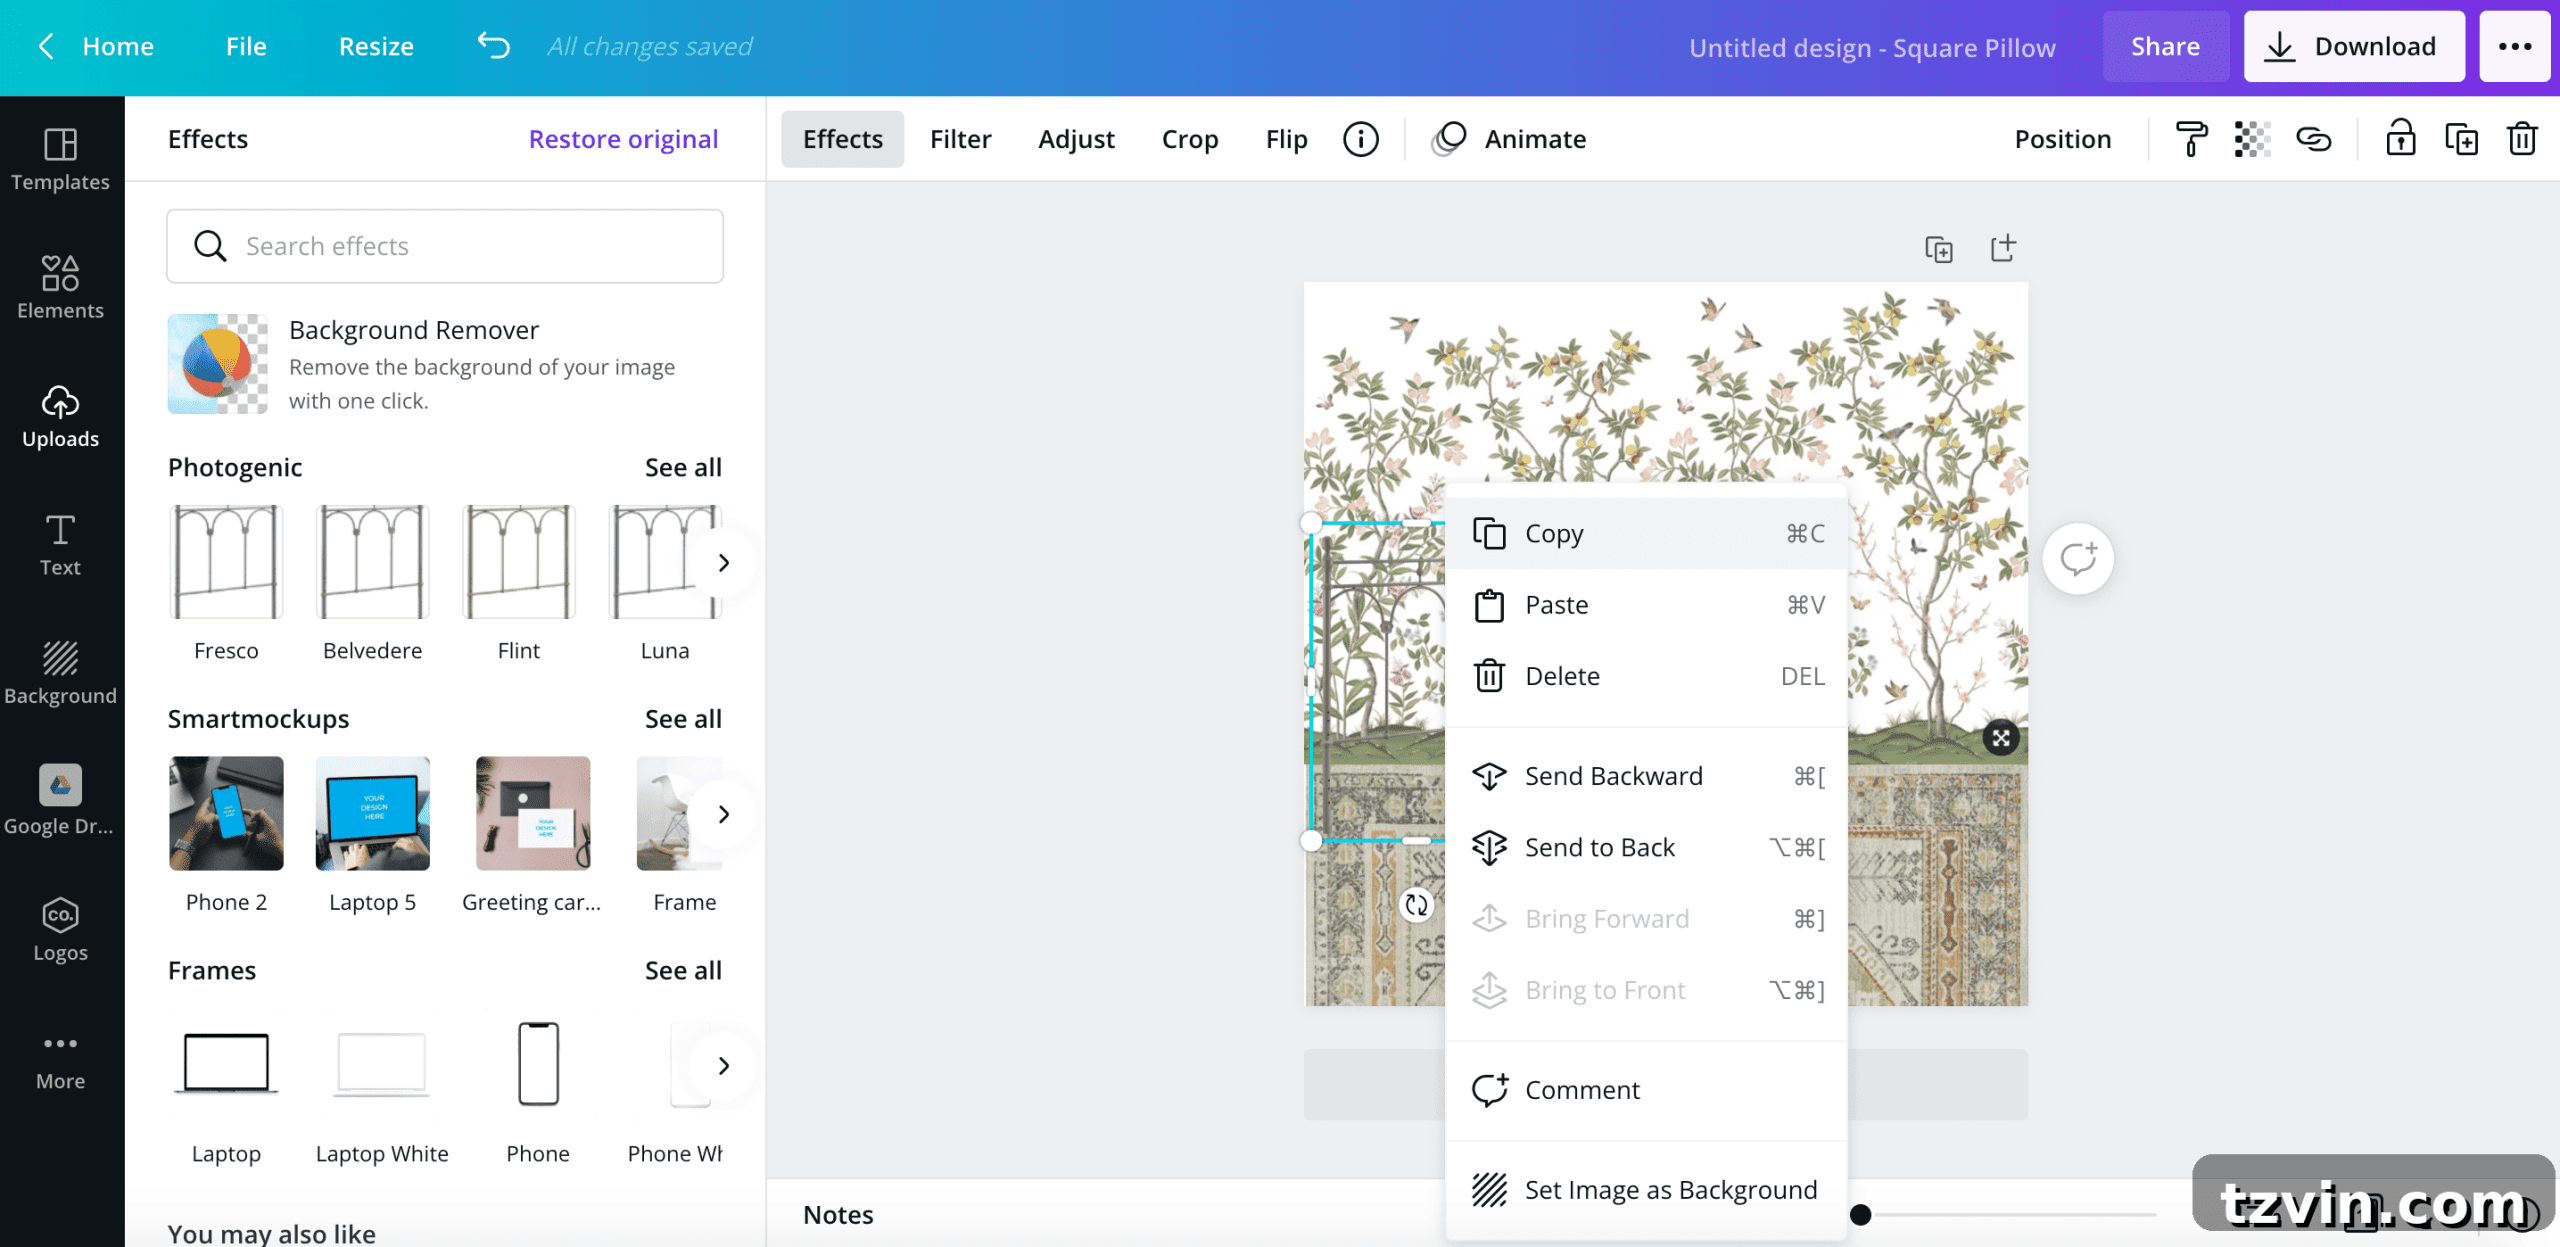
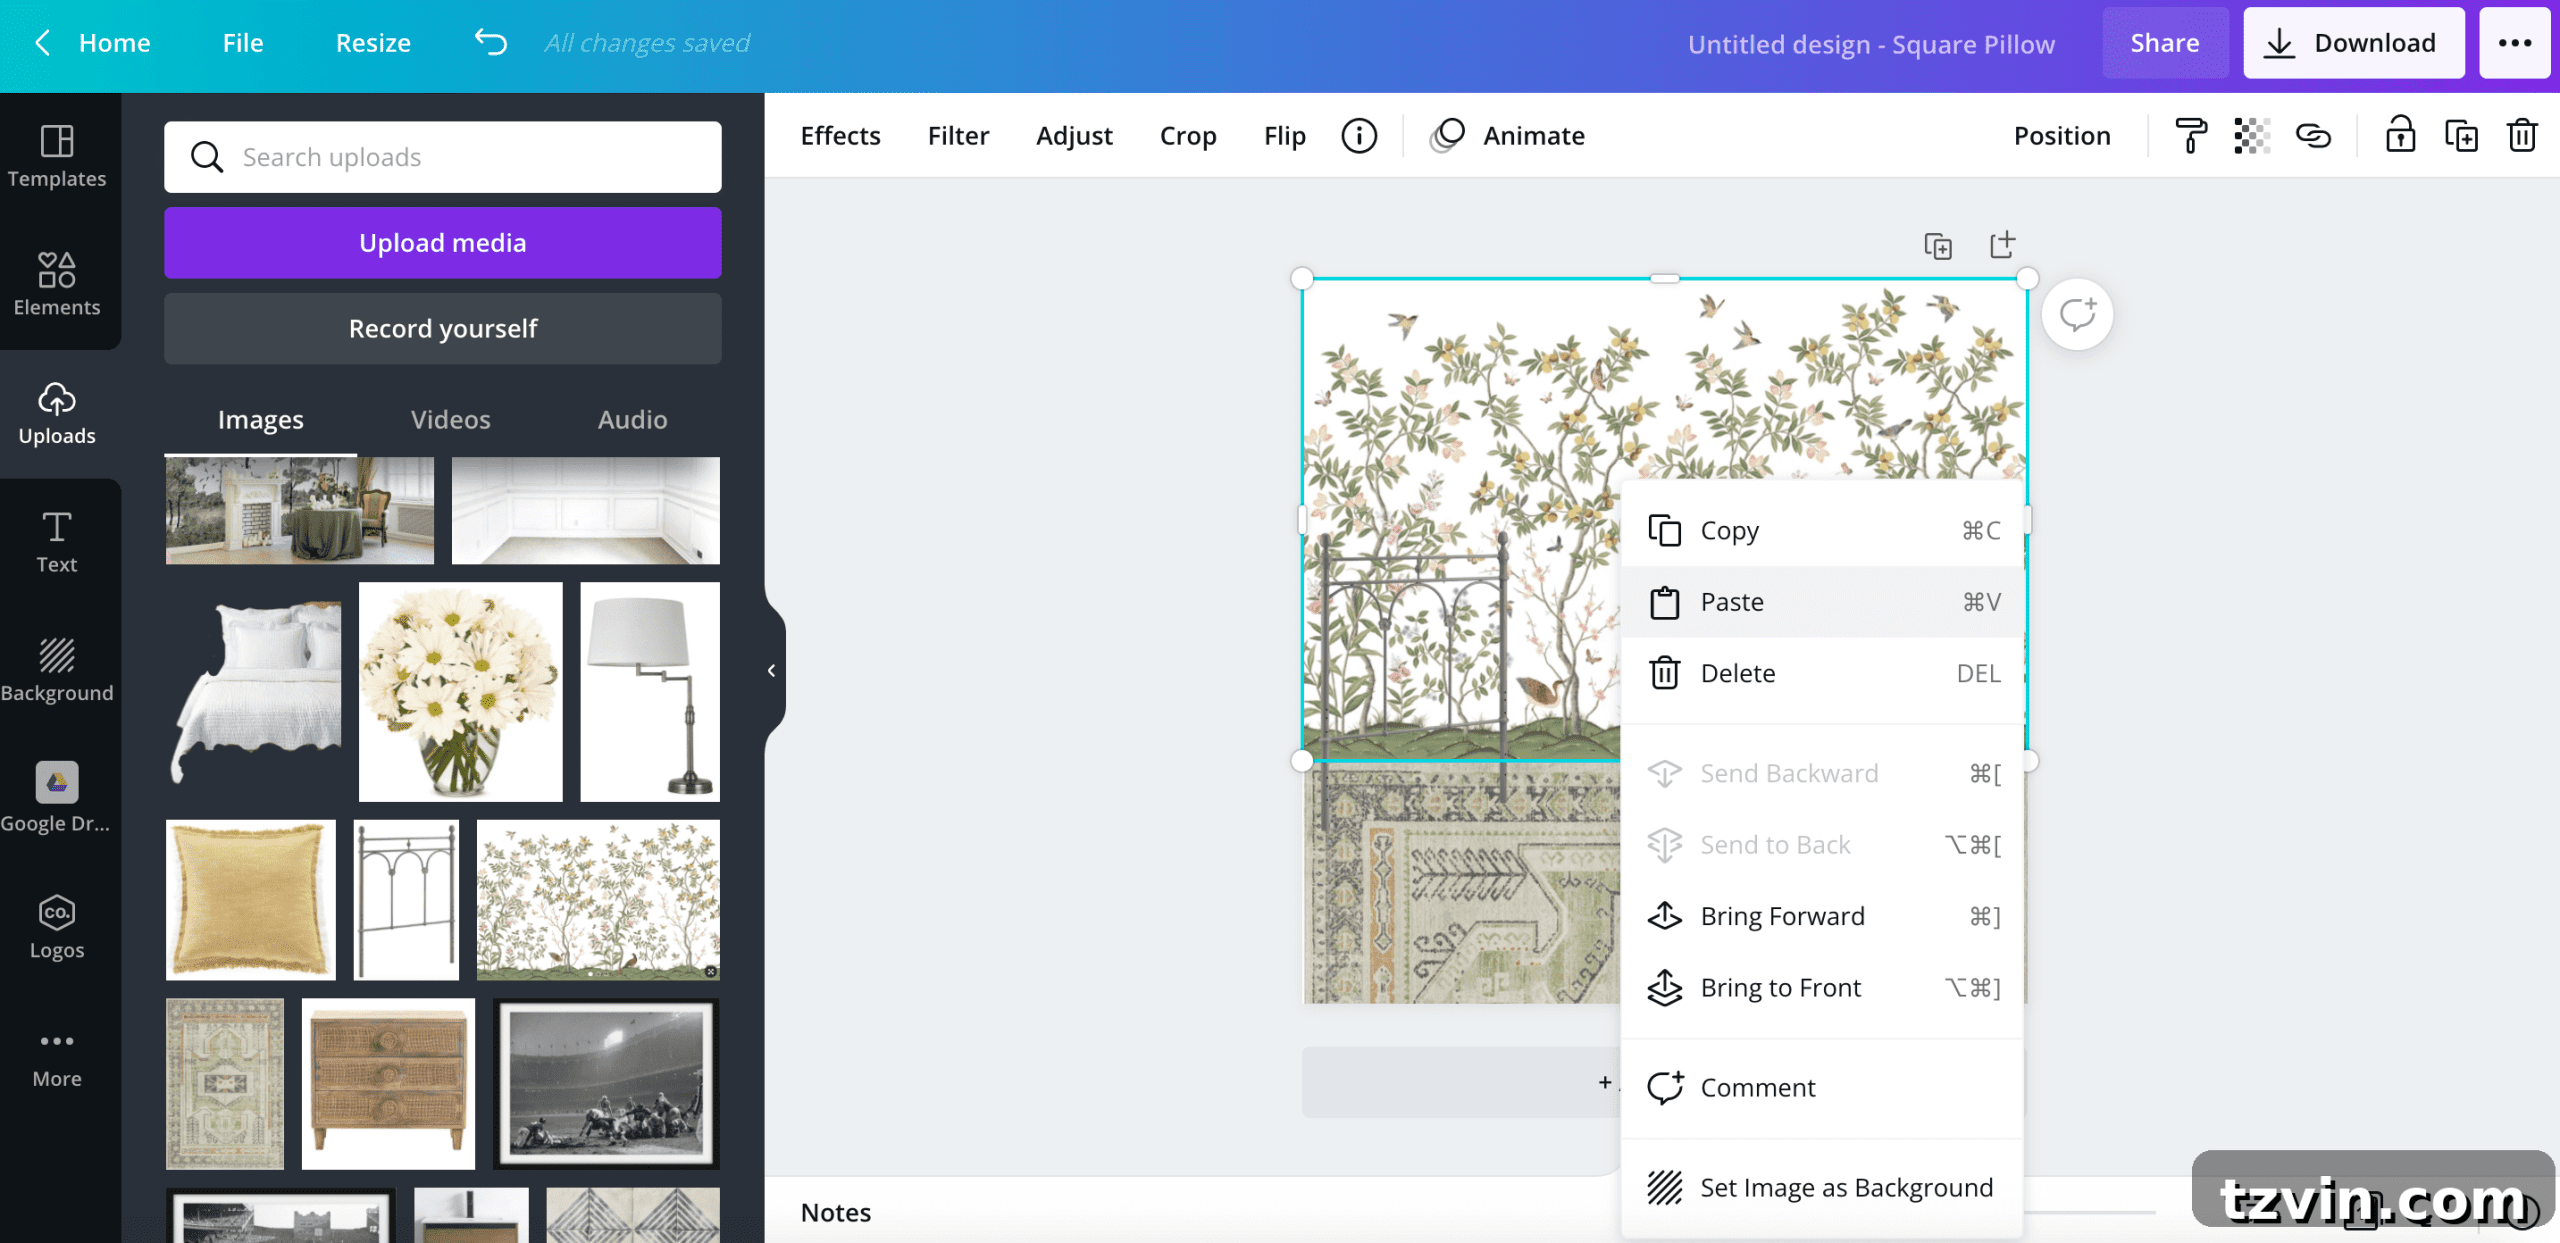
9. Duplicate Images for Repetitive Elements:
To quickly create copies of an item (e.g., multiple pillows, matching lamps), select the image and then right-click (PC) or double-click (Mac) and choose “Copy.” Then right-click/double-click again and select “Paste.” A duplicate image will appear, which you can then move and resize as needed.
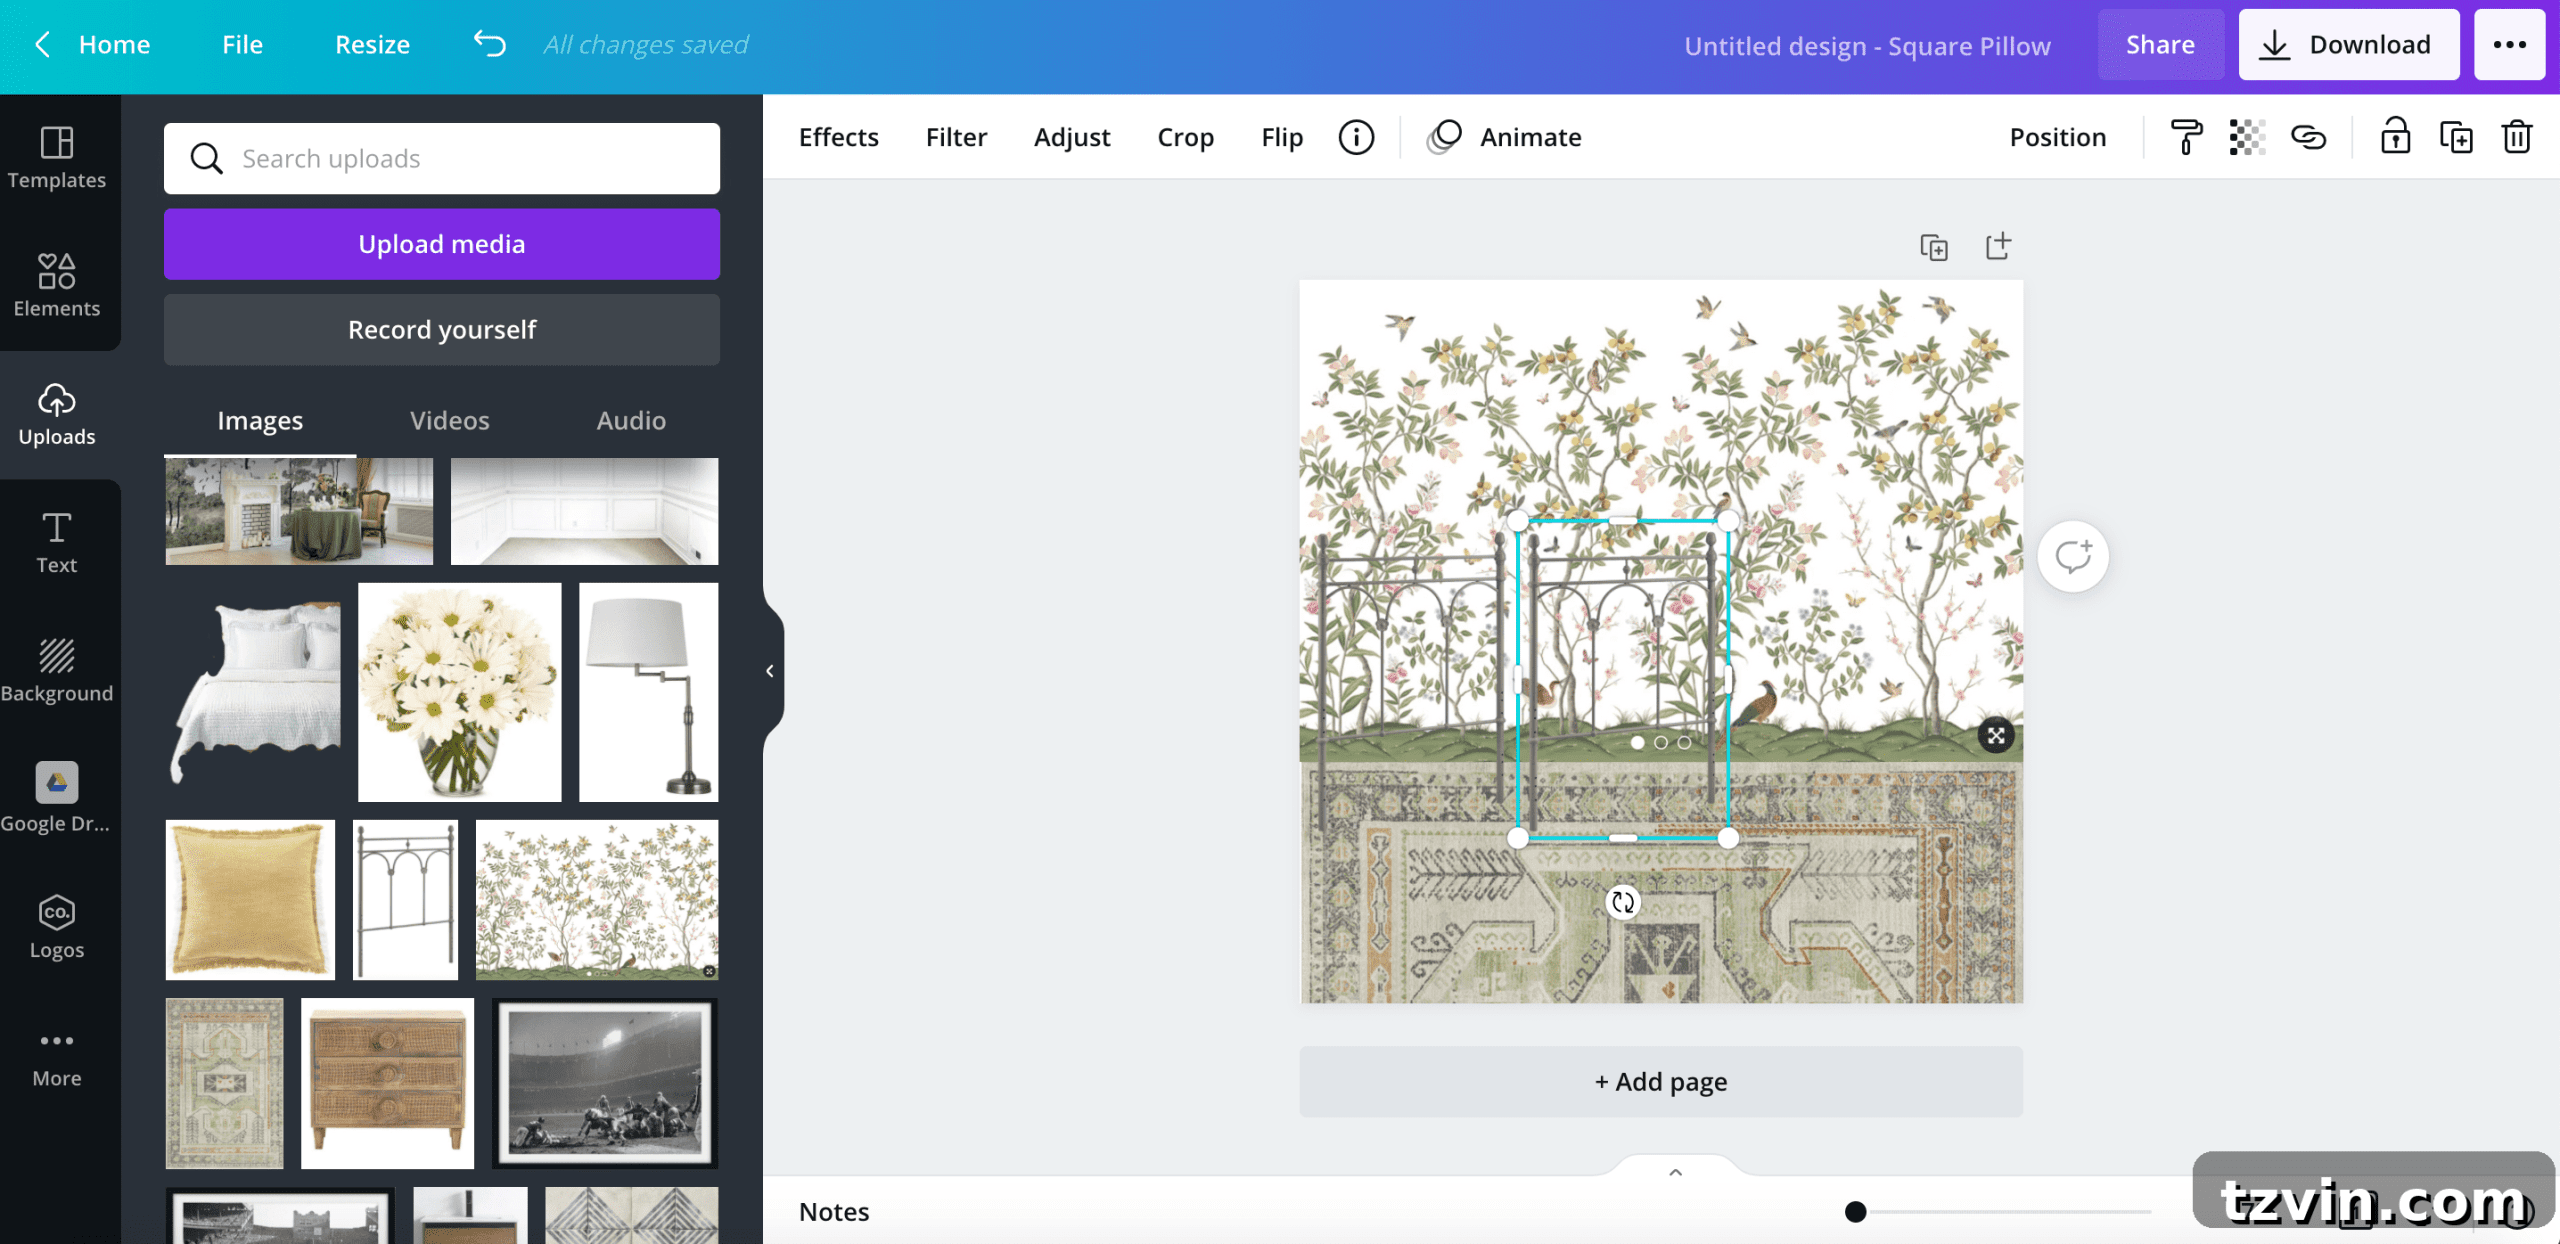
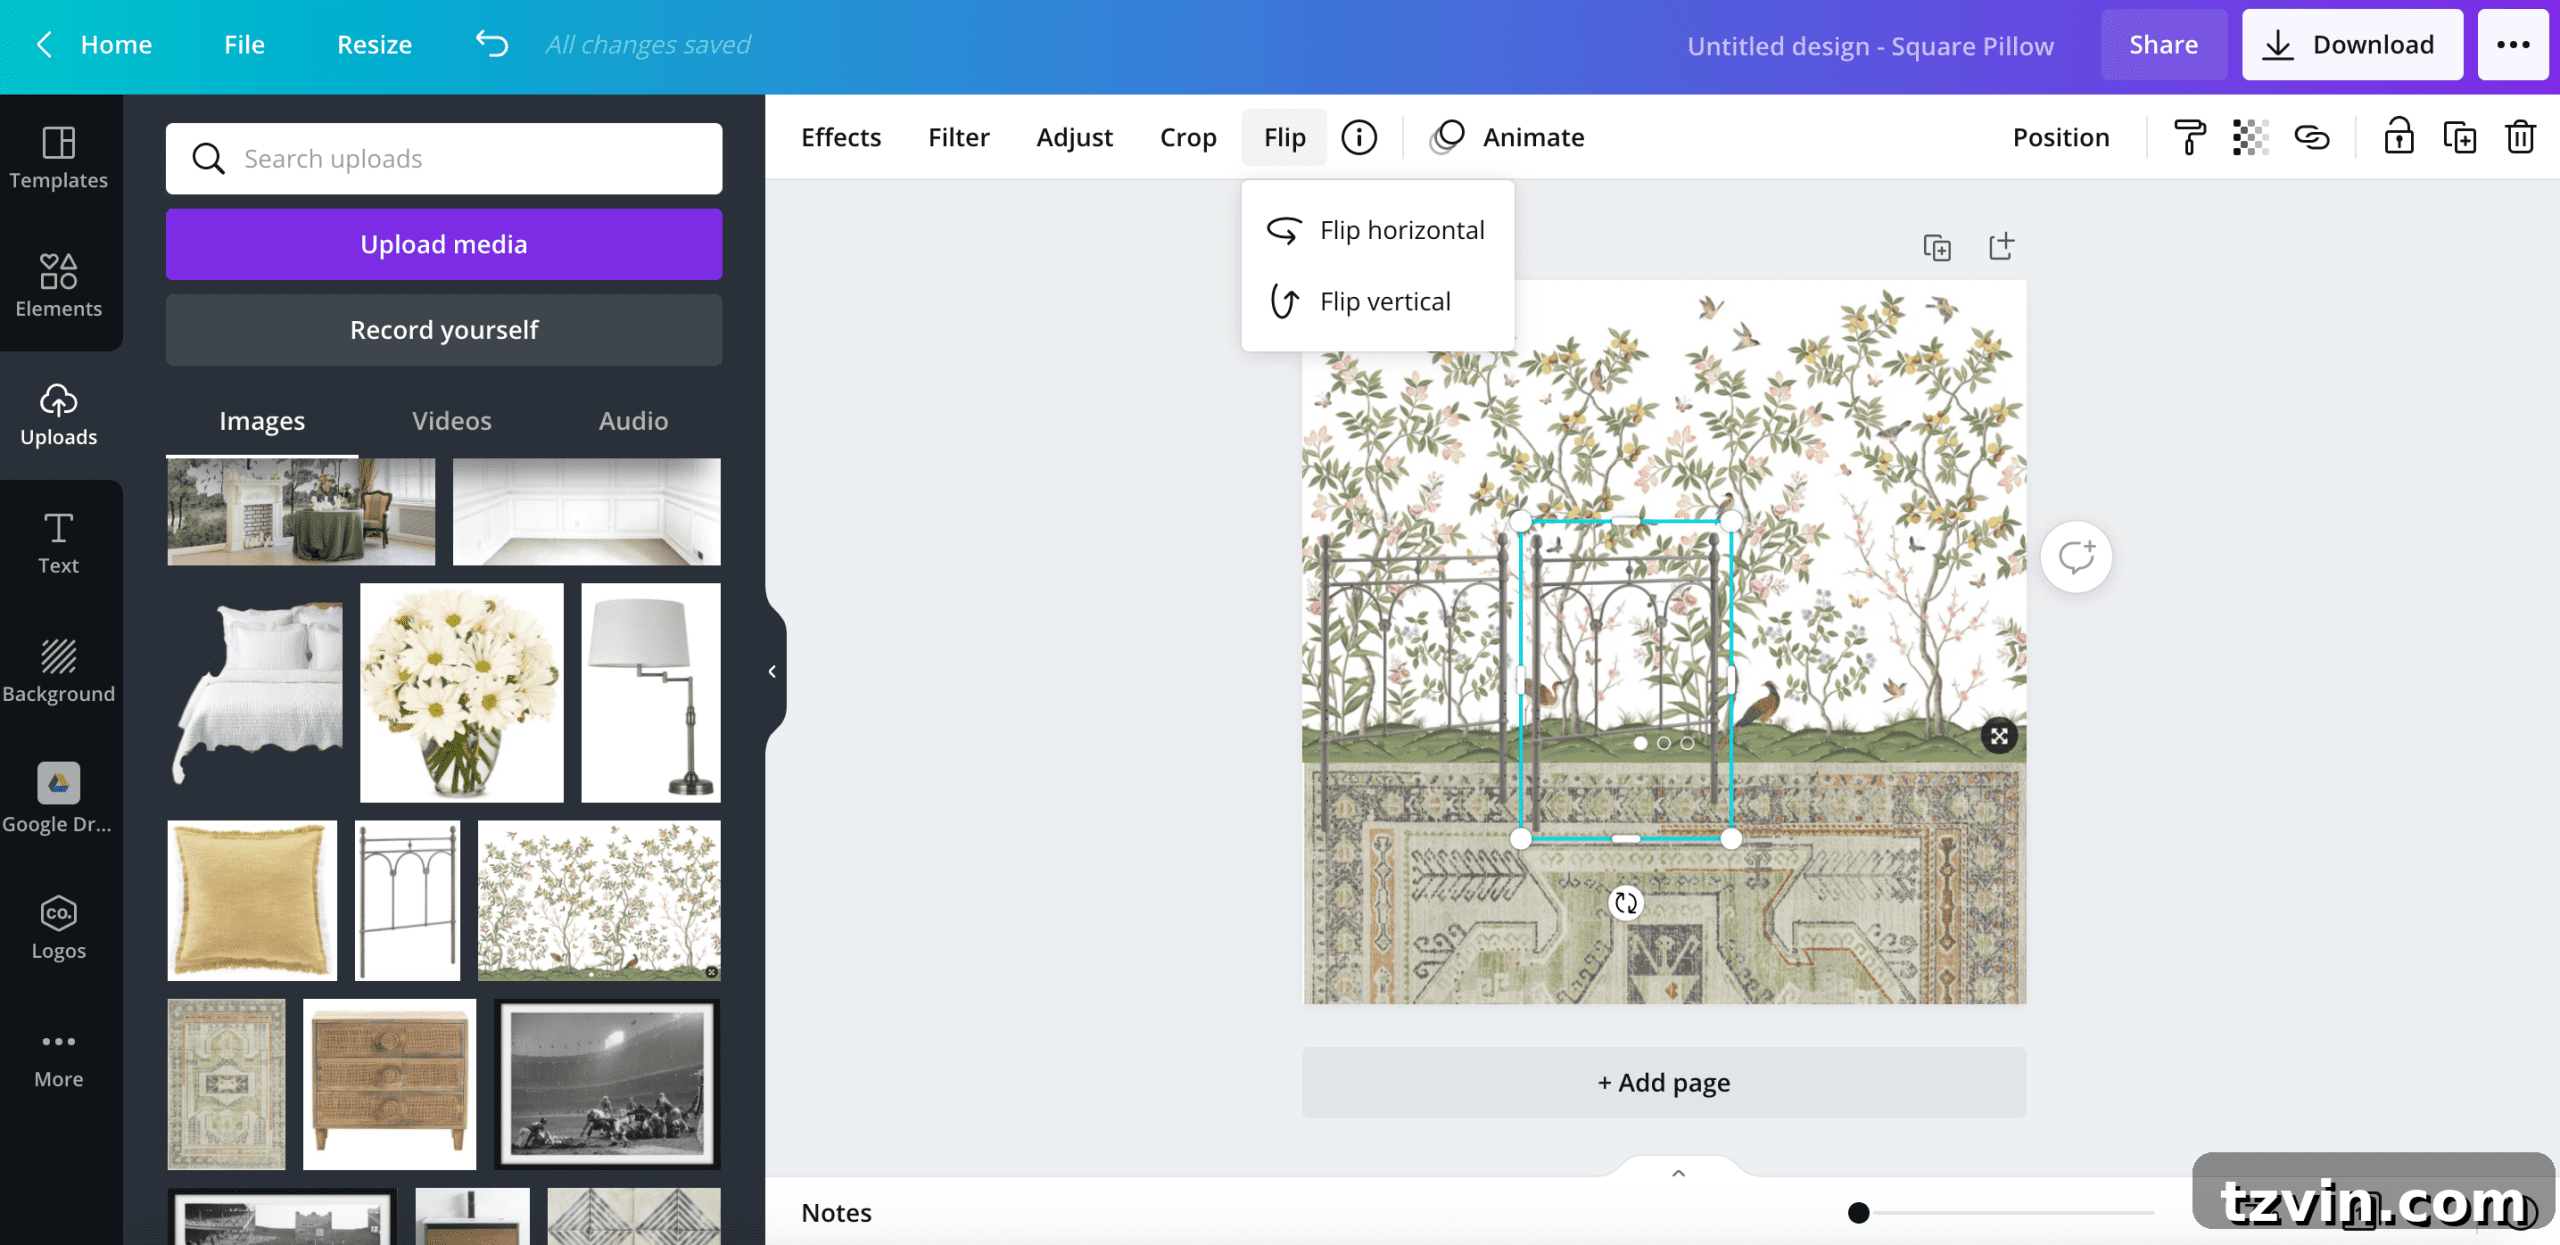
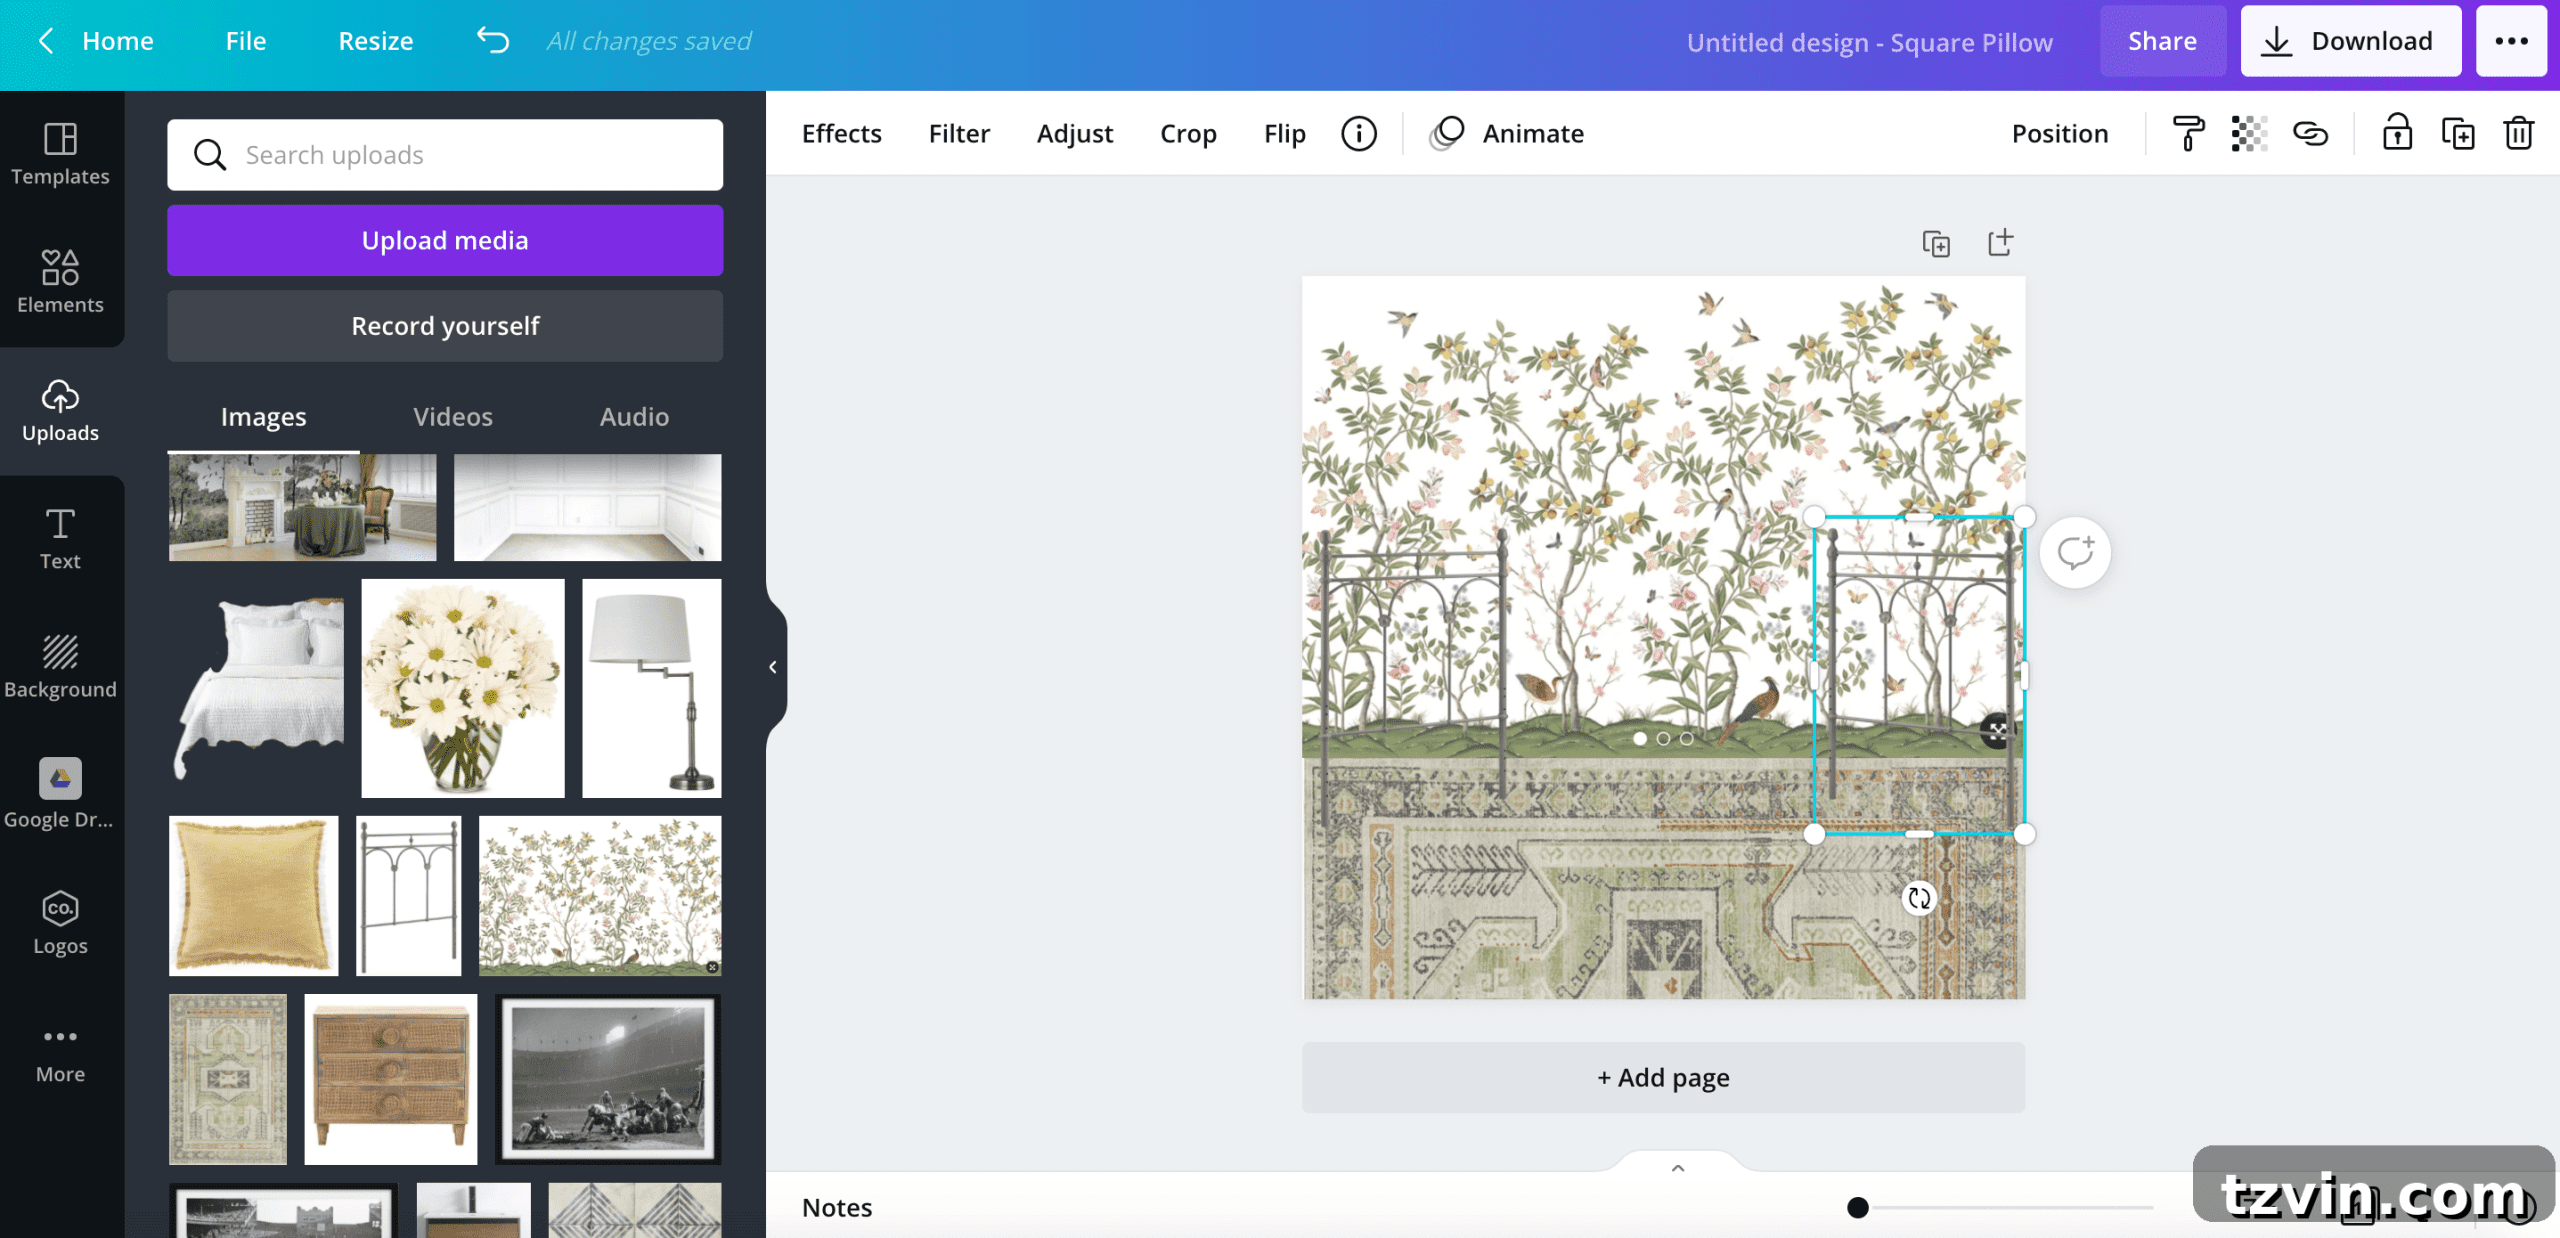
10. Flip Images for Different Perspectives:
To achieve symmetry or simply change the orientation of an item, click on the image and then select “Flip” from the top toolbar. You can choose “Flip Horizontal” or “Flip Vertical” to adjust the image as needed.
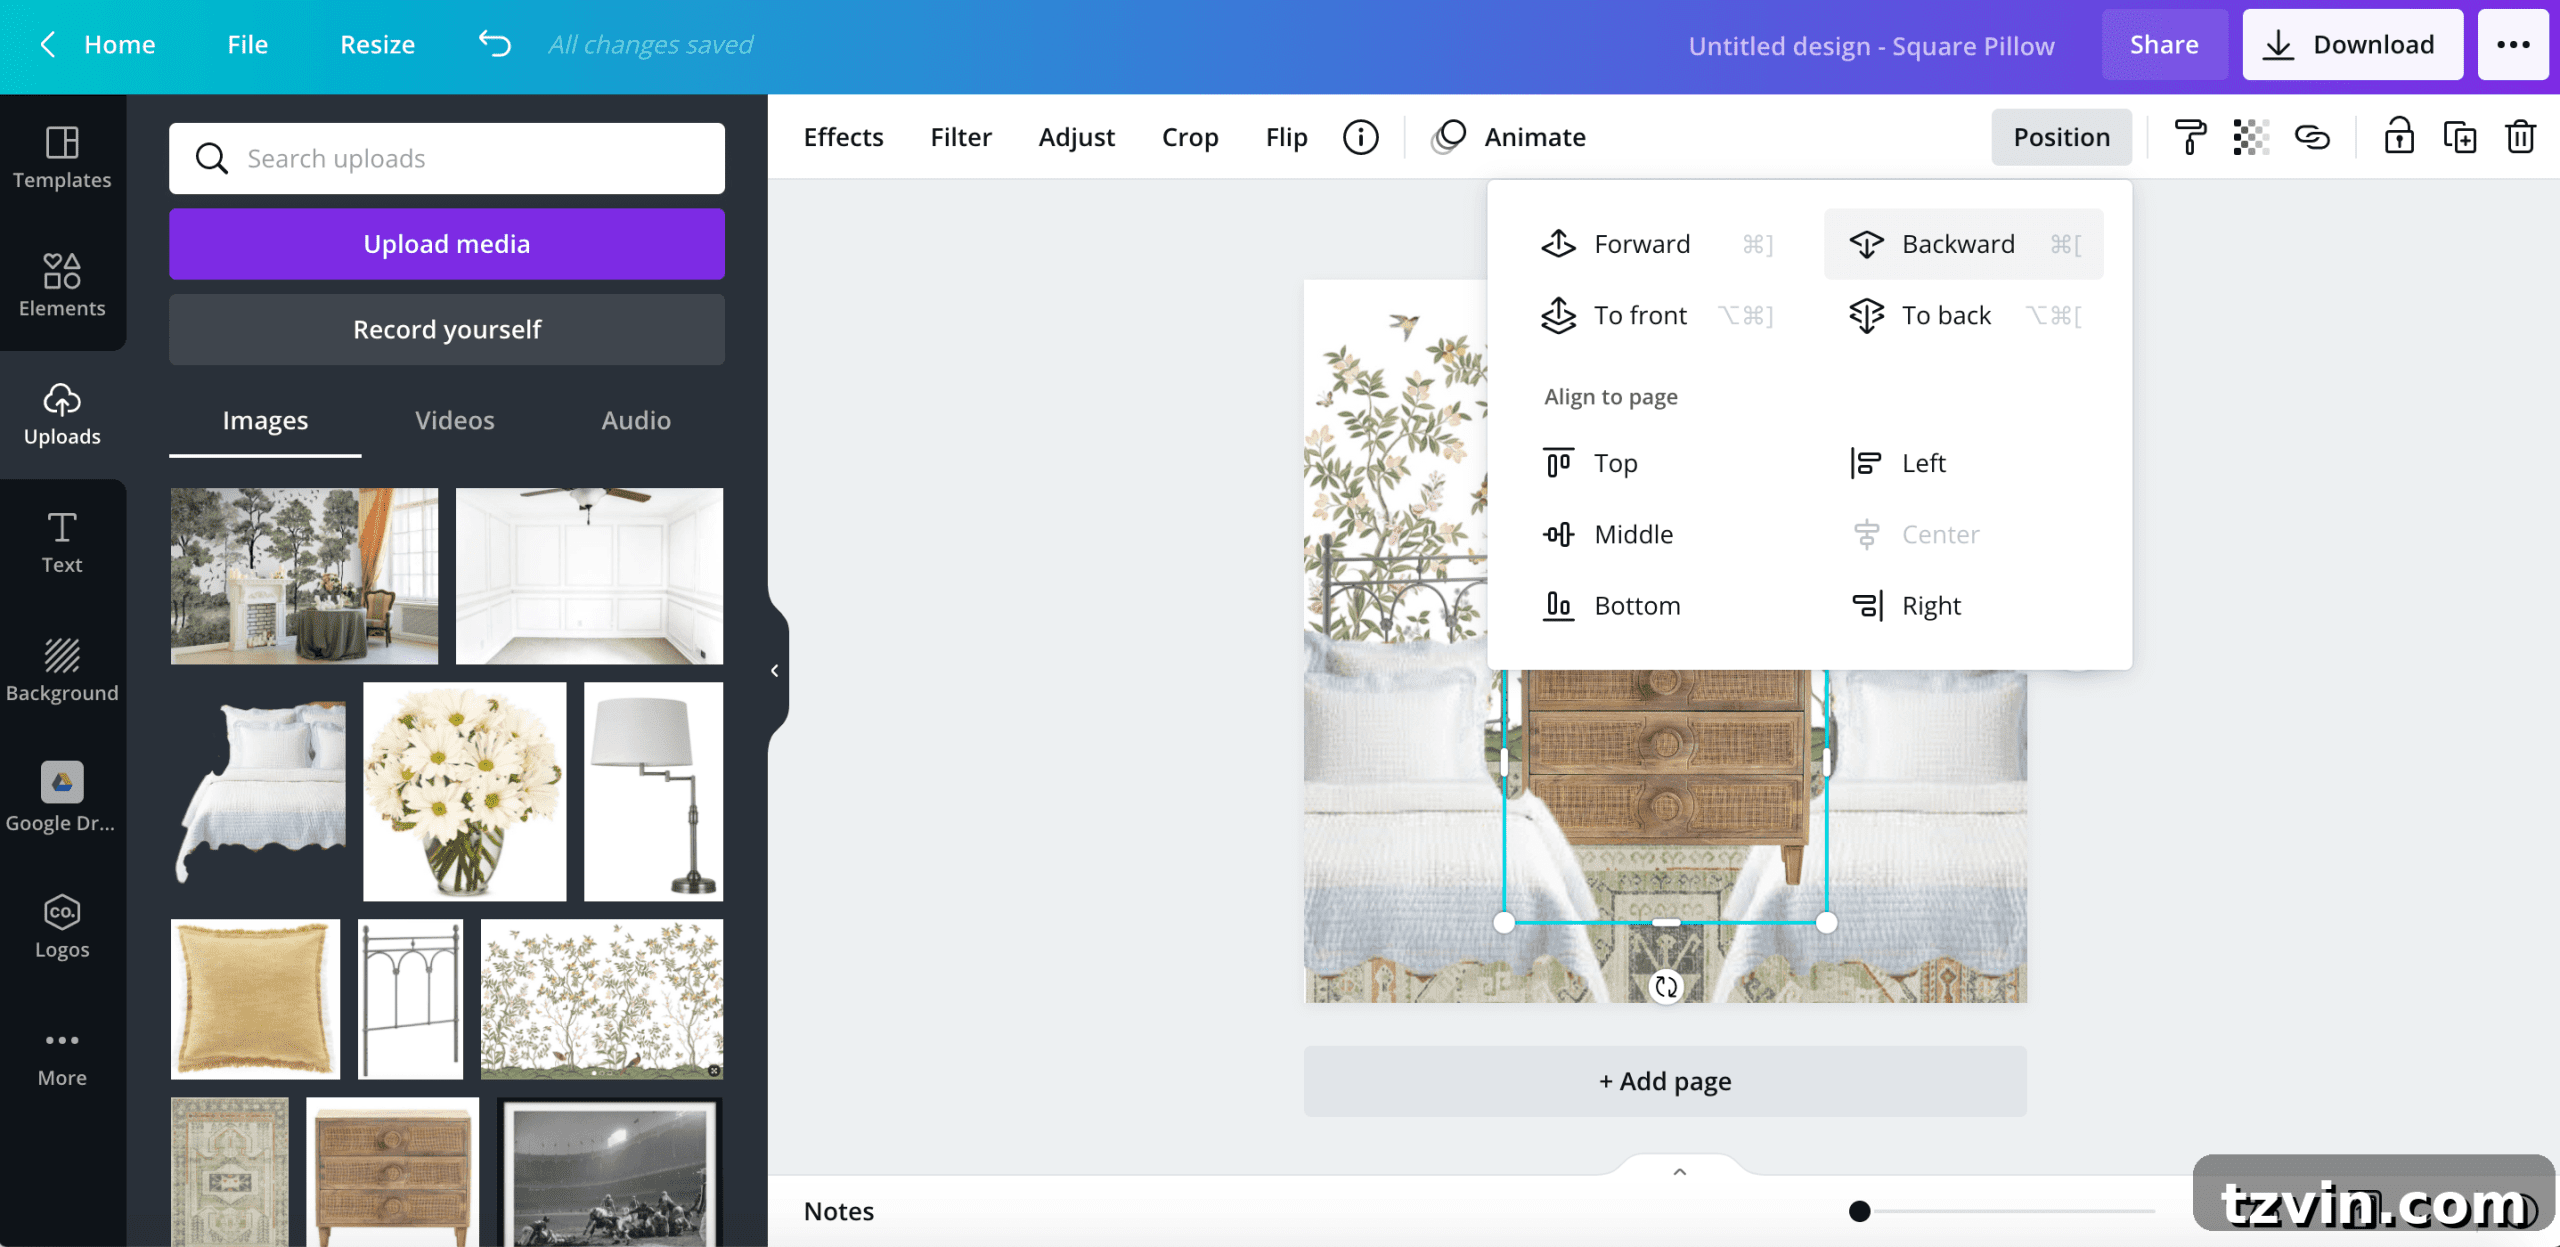
11. Layer Images for Depth and Realism:
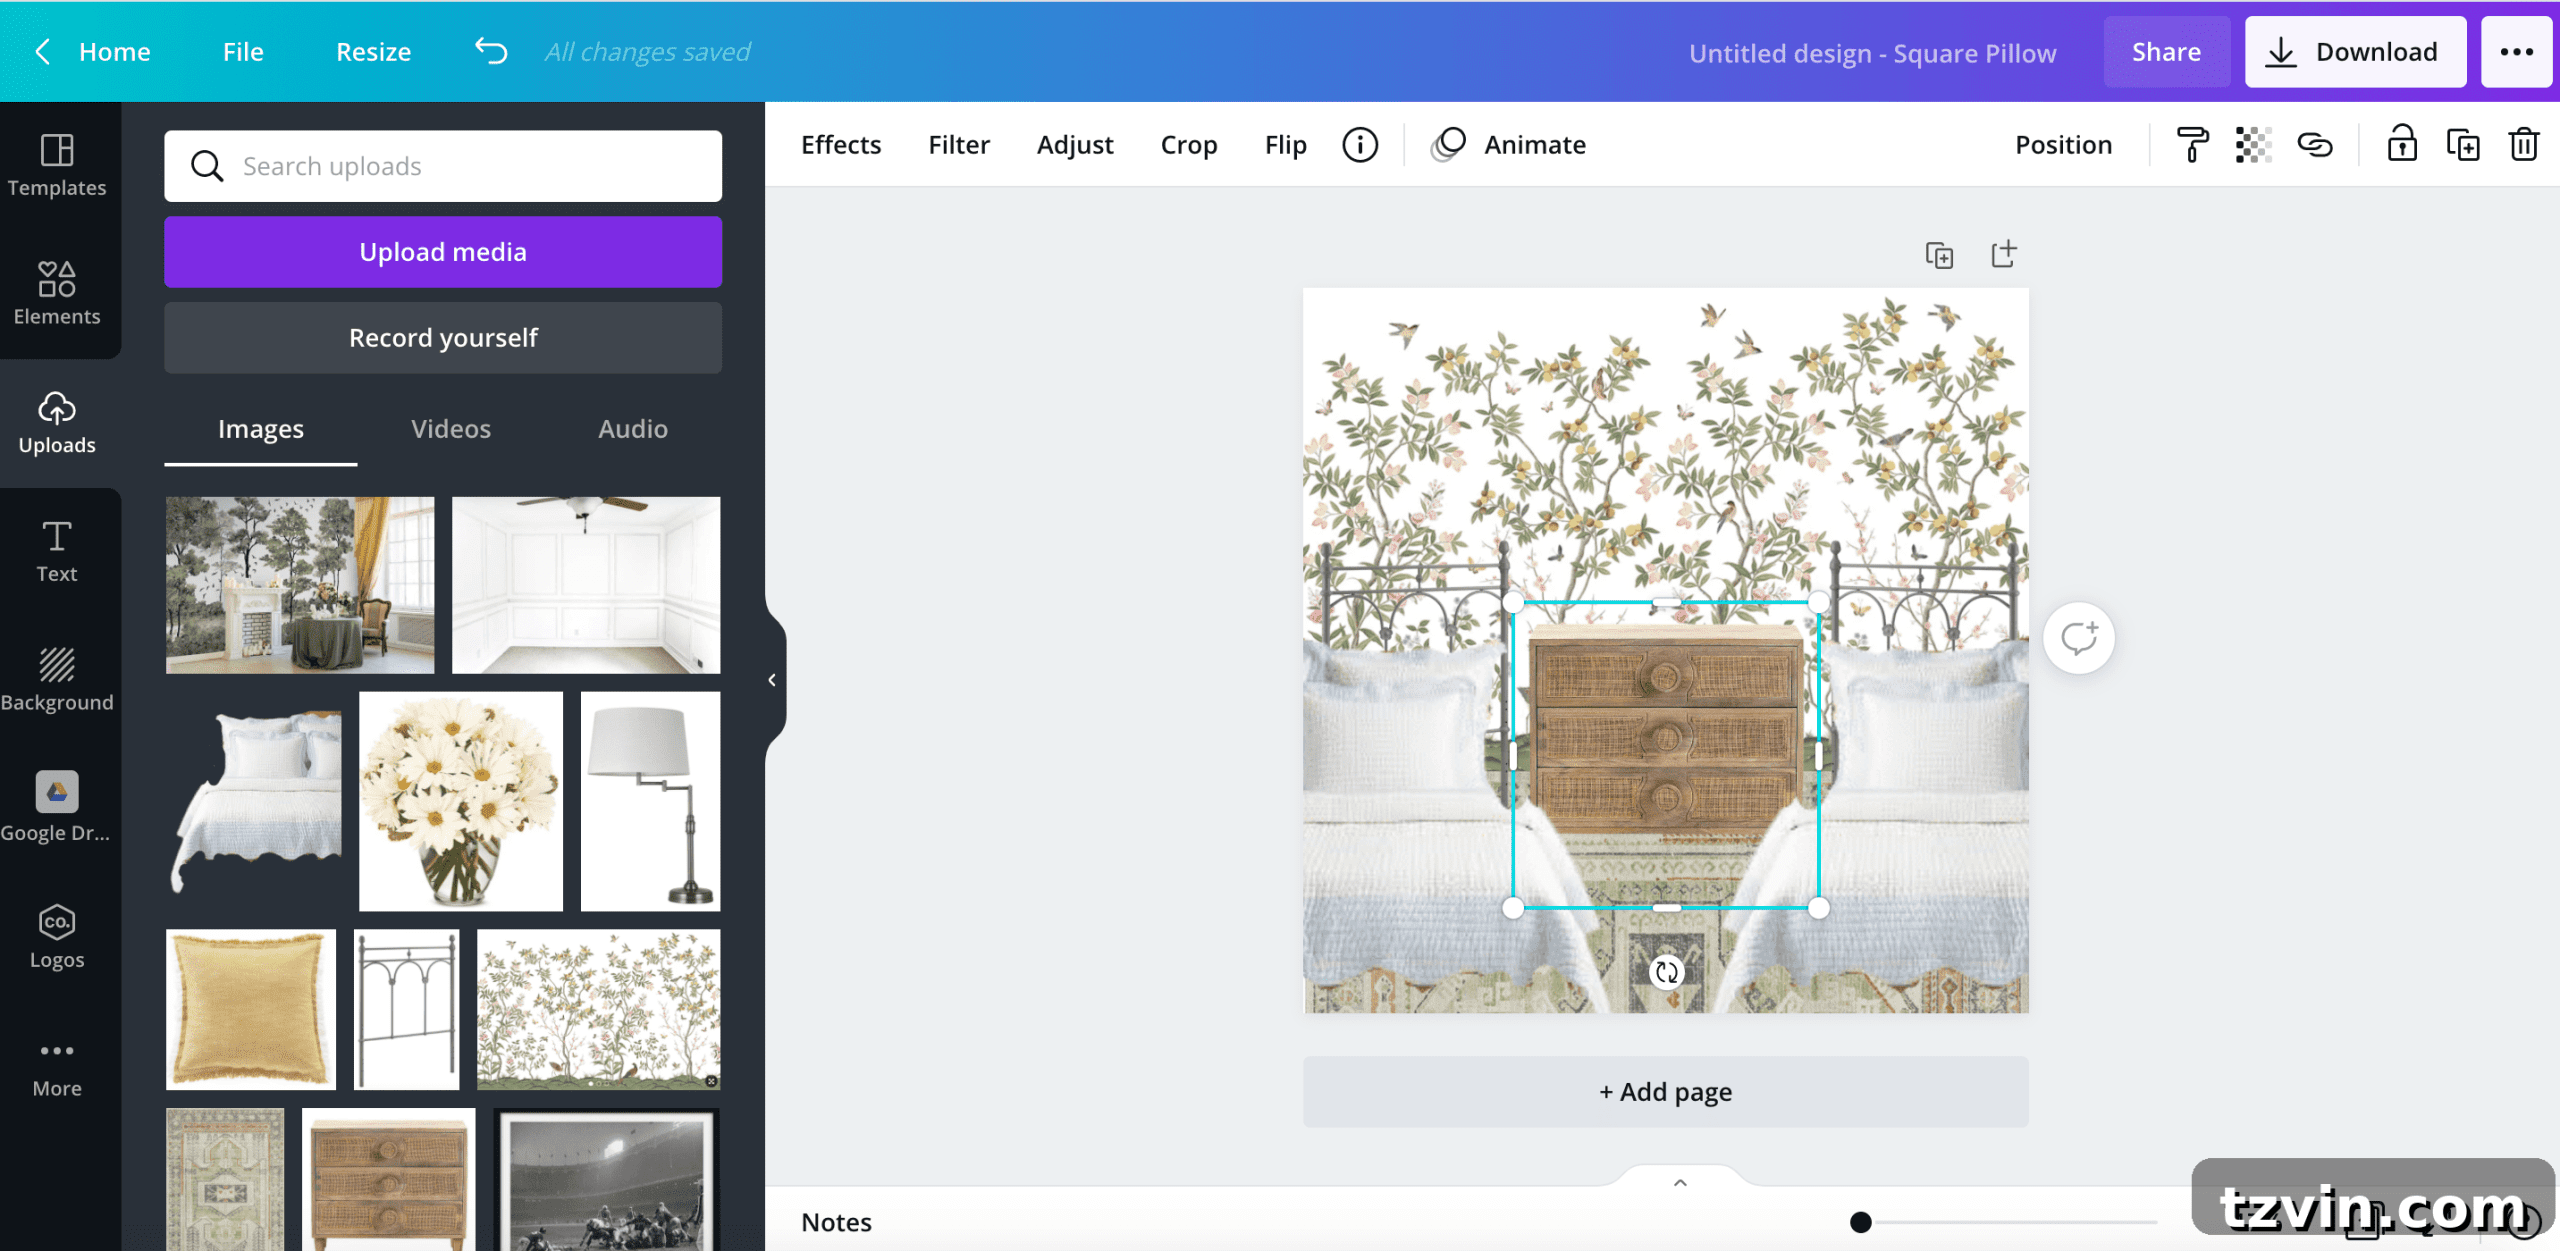
To create a sense of depth and make elements appear to overlap realistically, use the layering feature. Select an image, then click “Position” in the top right toolbar. Here you can choose “Move Forward,” “Move to Front,” “Move Backward,” or “Move to Back” to adjust its position in the layer stack.
12. Visualize Your Design in Your Actual Room:
For an incredibly helpful perspective, upload a photo of the room you’re making over. Once uploaded, click on the image, then go to “Position” and select “Send to Back.” This allows you to virtually place your design elements within the context of your actual space, giving you an immediate sense of how everything will look and fit.
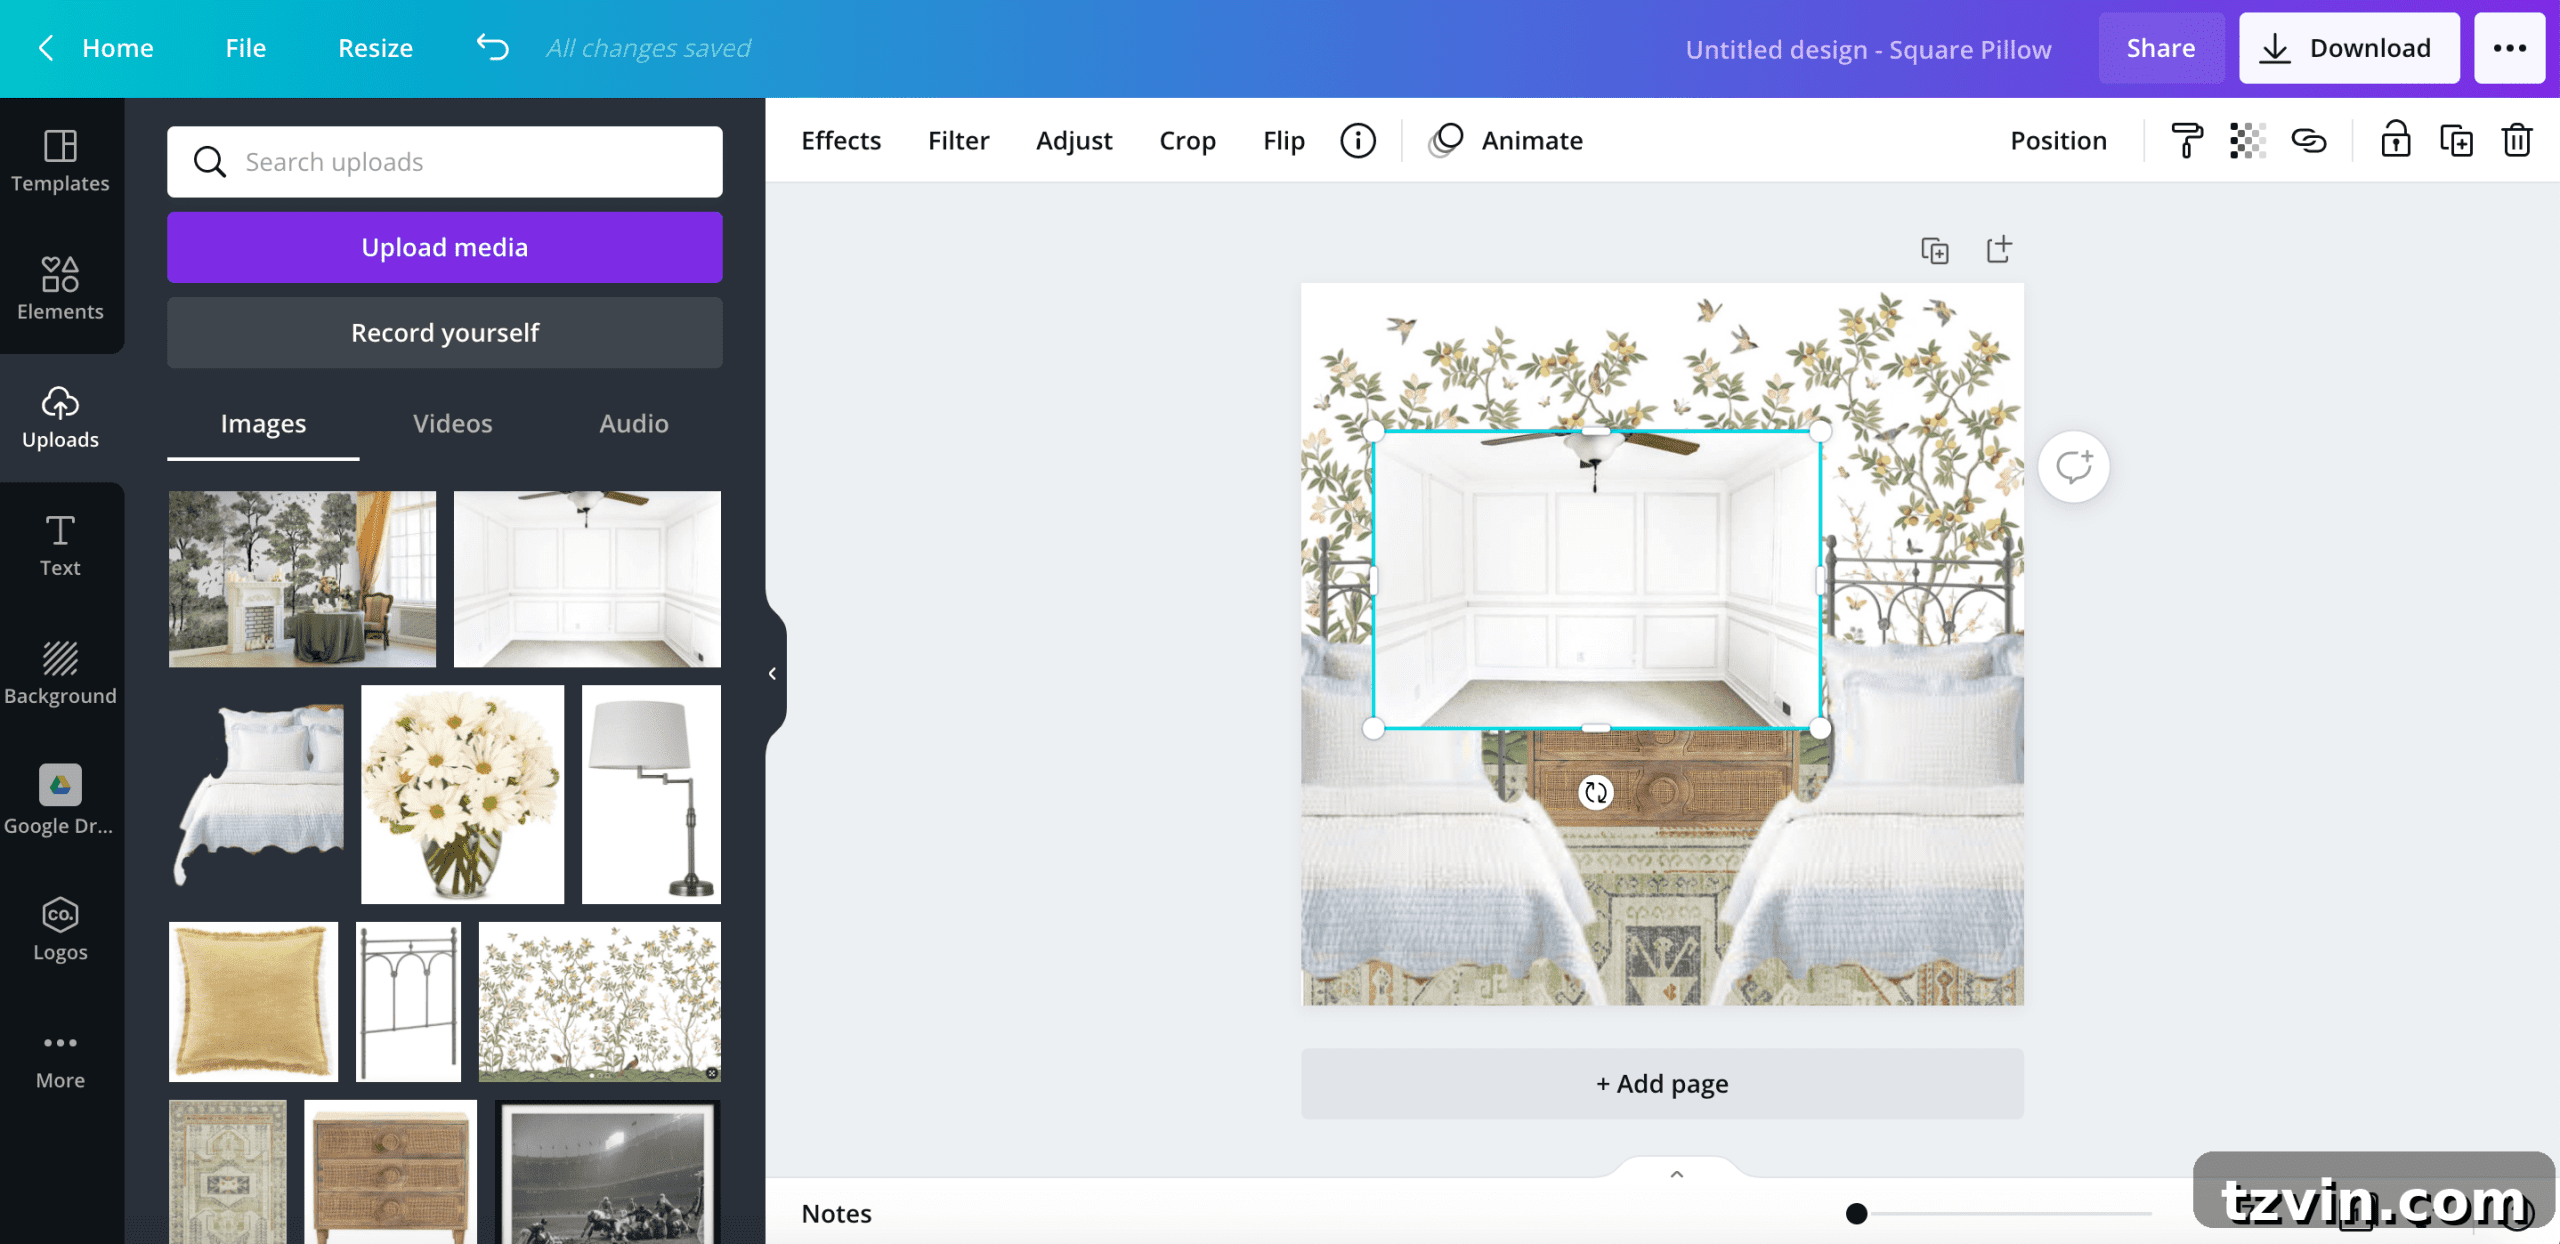
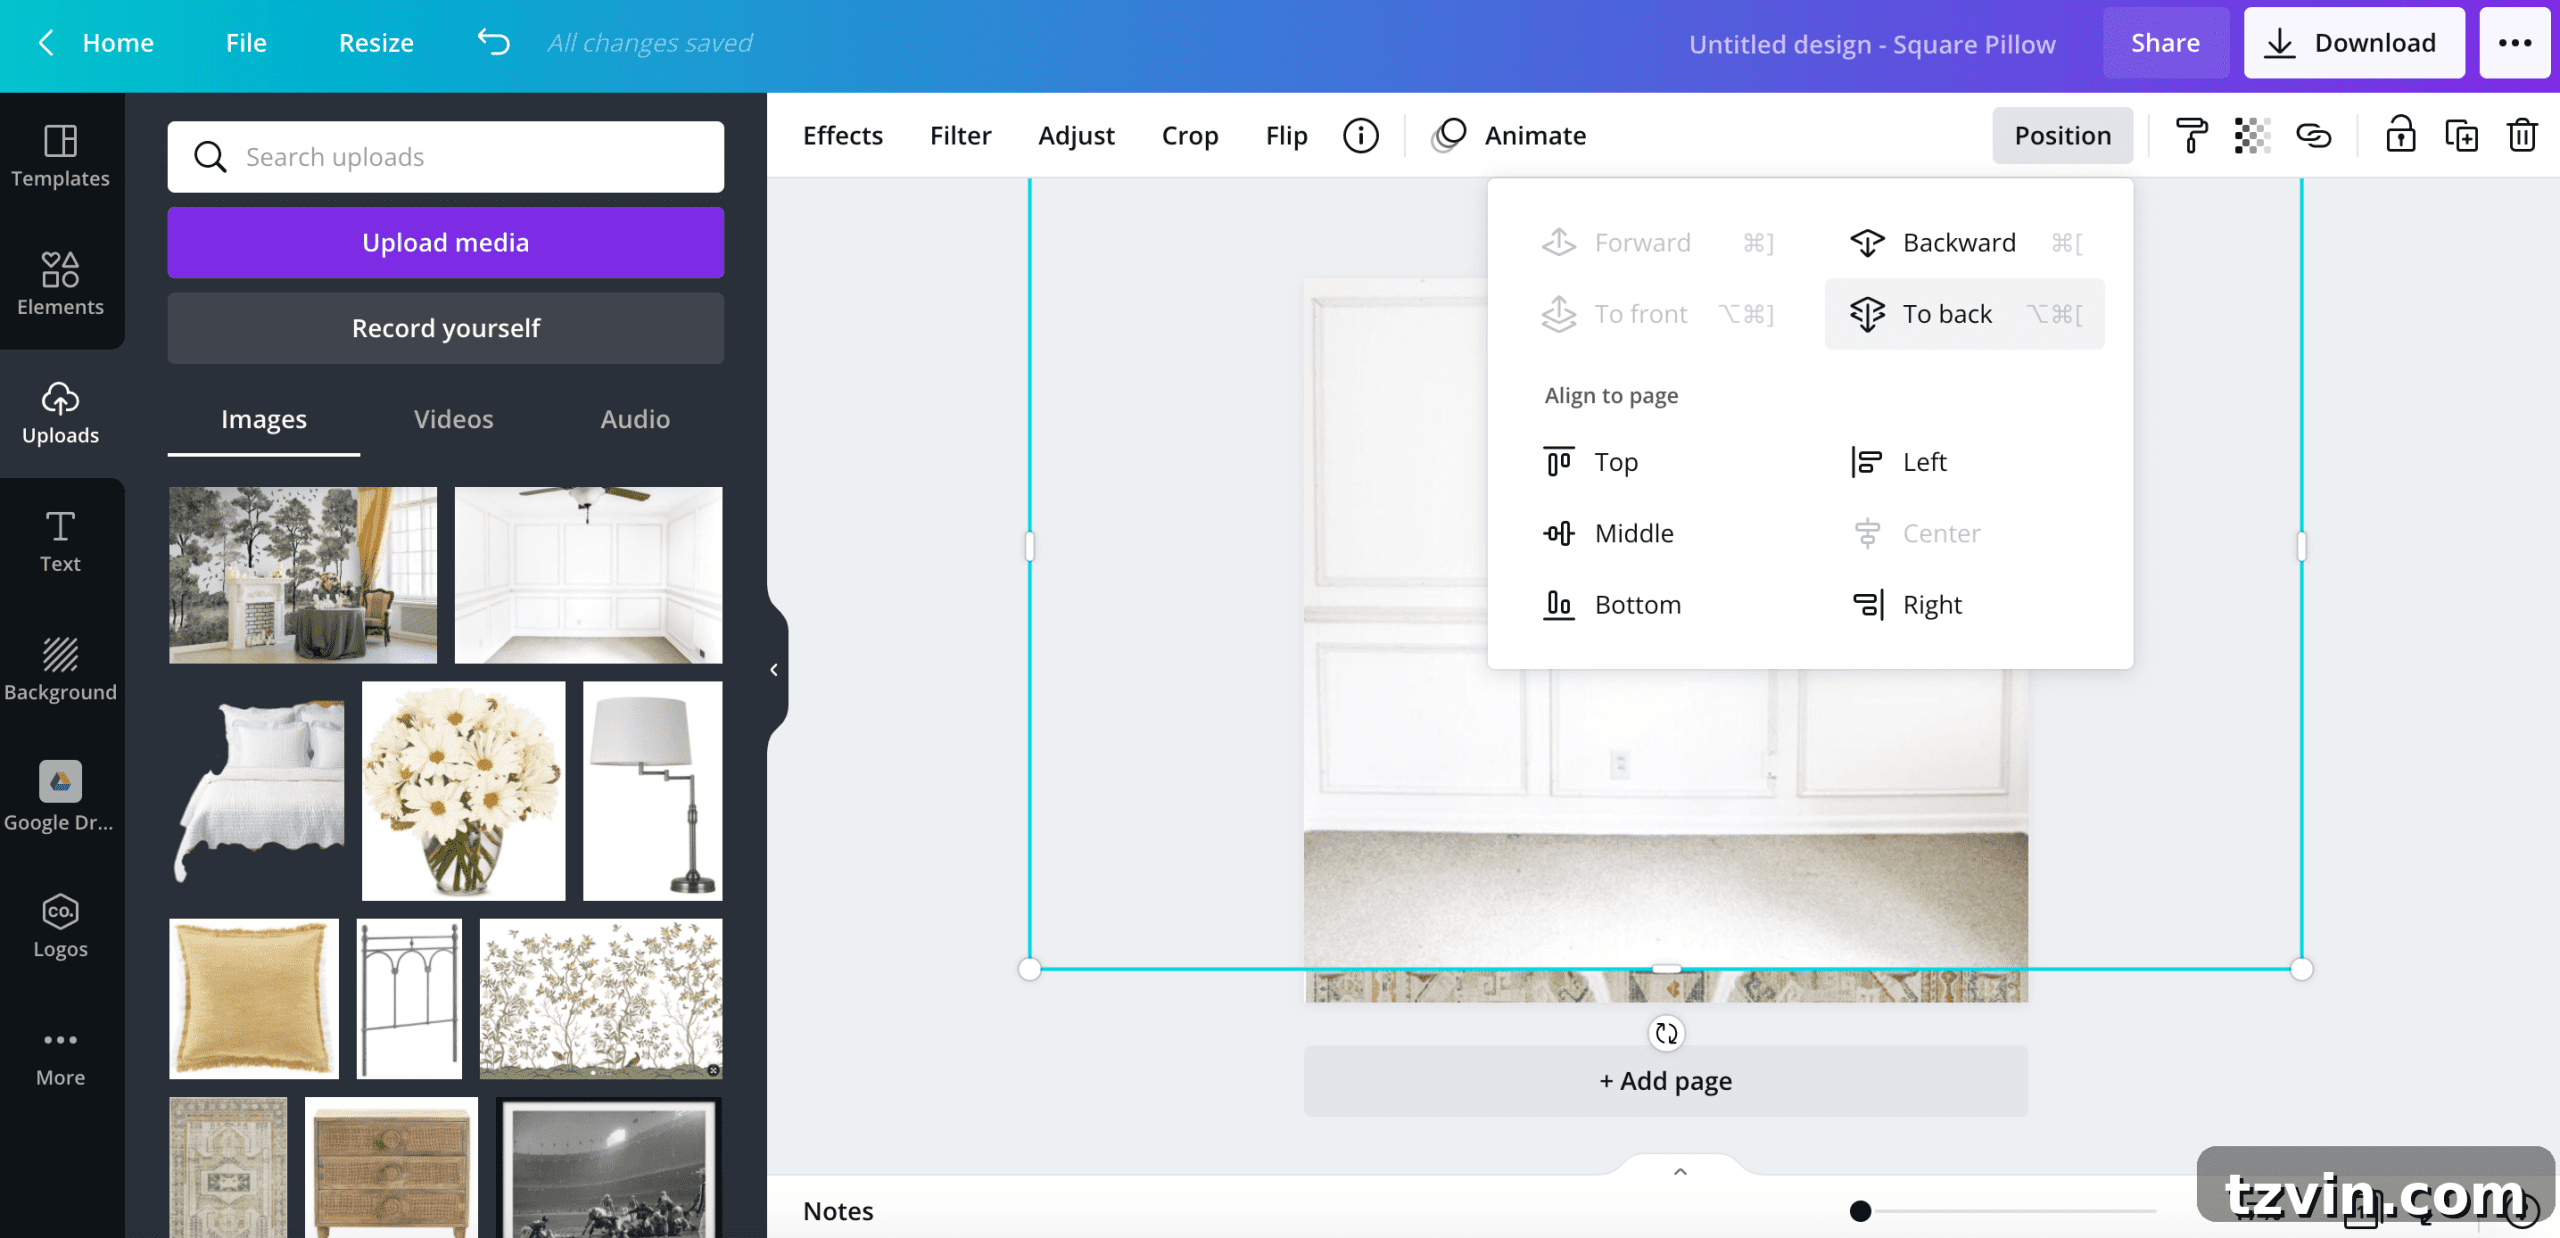
13. Finalize and Refine Your Design:
That’s it! Continue “trying on” different decor pieces, experimenting with arrangements, and adjusting elements until you’ve curated the perfect room design for your taste and needs. Don’t hesitate to step away and come back with fresh eyes, or get a second opinion from your partner or a trusted friend.
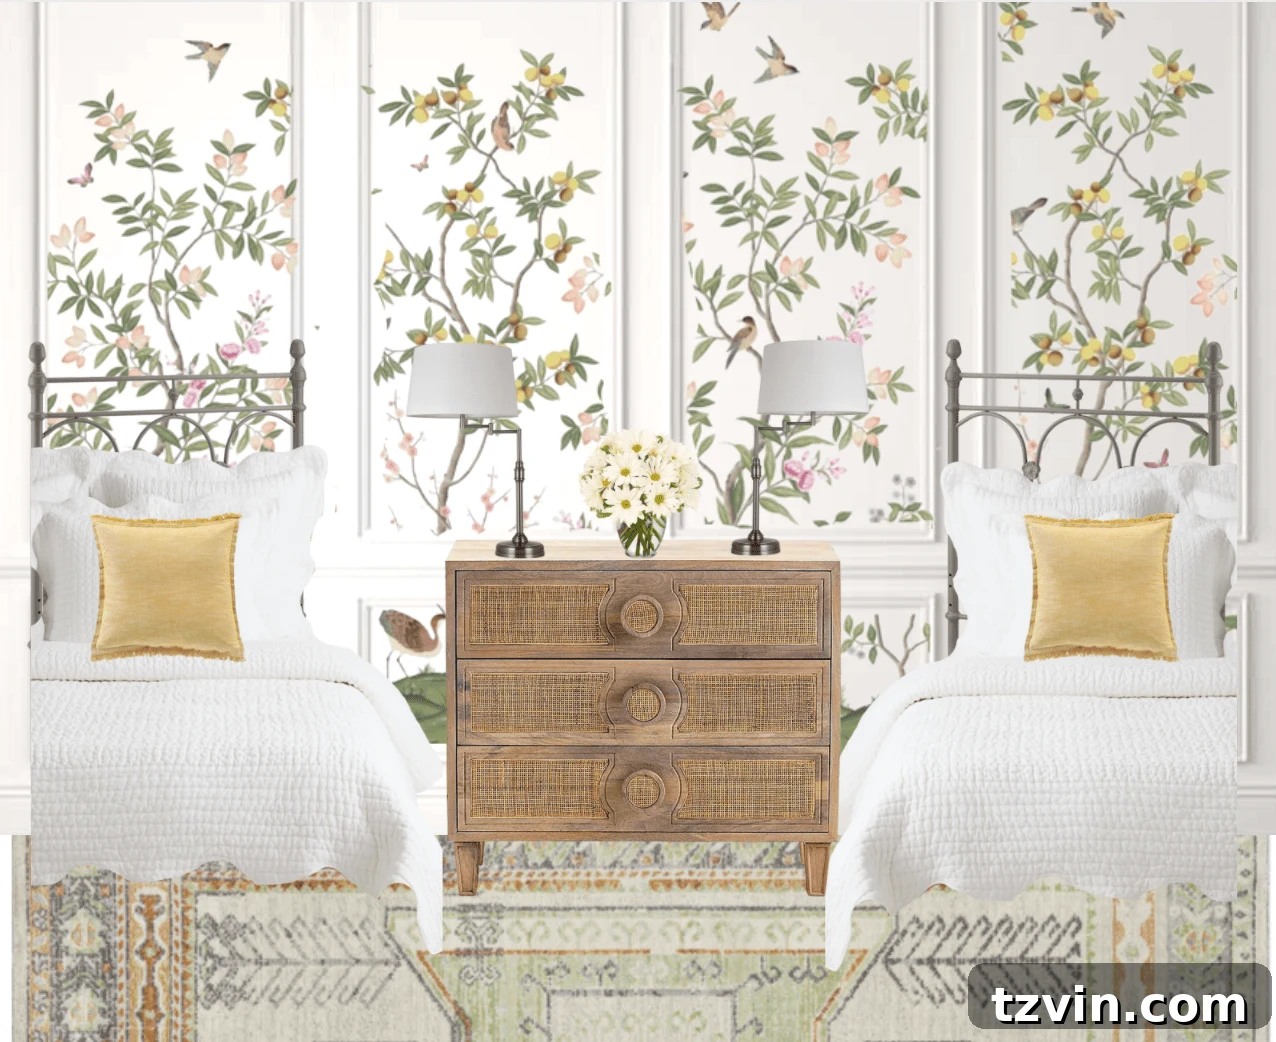
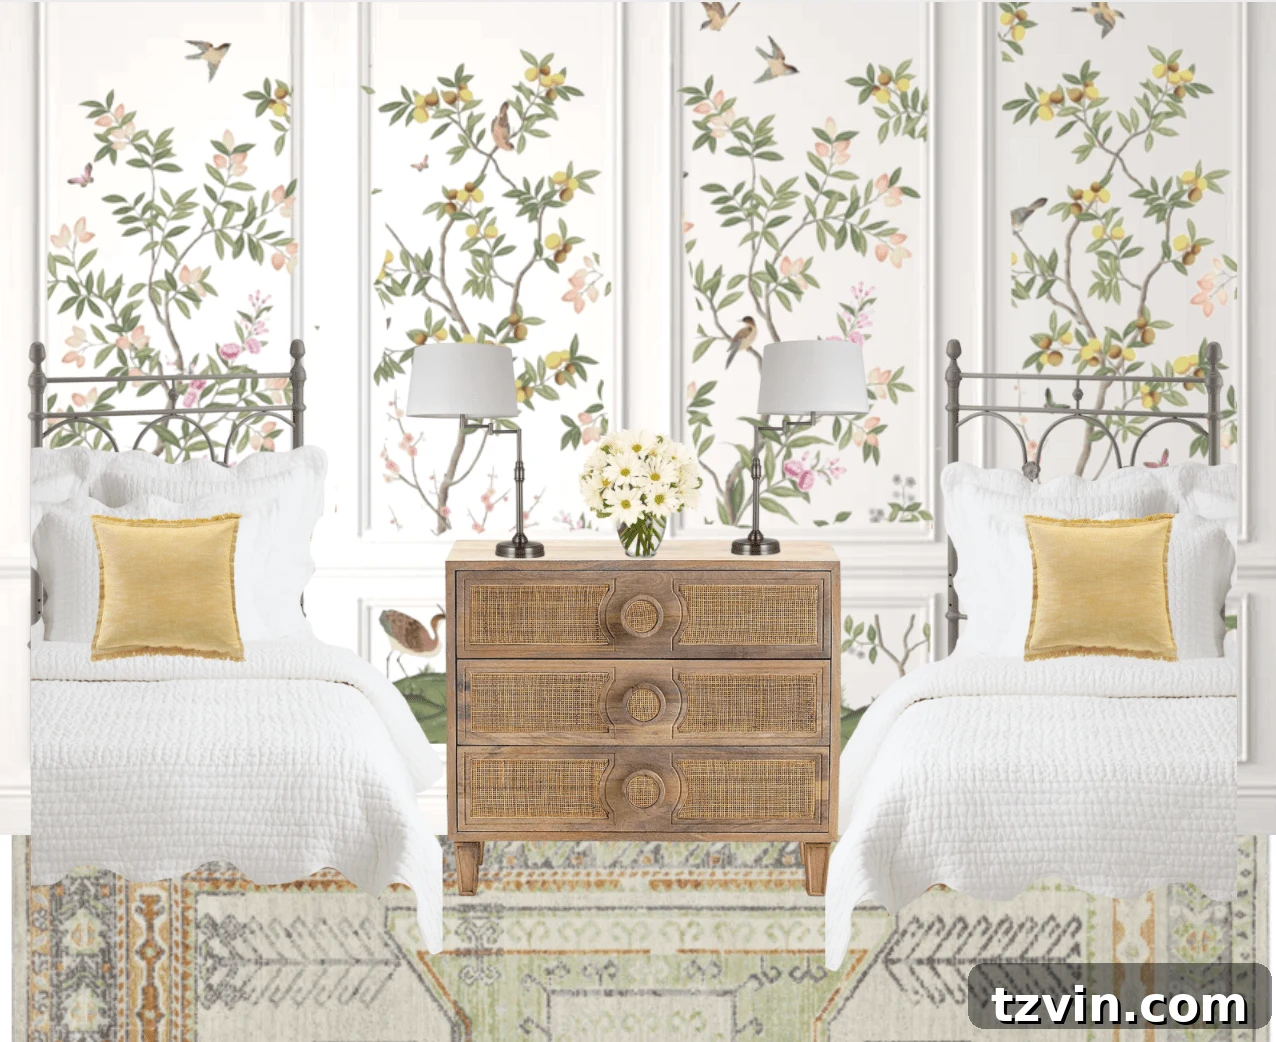
Wallpaper | Rug | Dresser | Headboards | Quilts | Lamps | Pillows
Bringing Your Mood Board to Life: From Digital Vision to Dream Room
Once your digital mood board is complete and you’re confident in your design, the real fun begins: bringing it into your home. Your mood board isn’t just a pretty picture; it’s a strategic guide for your purchasing and implementation phases.
Use it as your shopping list and visual reference. When browsing stores or online, refer back to your mood board to ensure every item you consider aligns with your established aesthetic. This prevents impulse buys that could derail your cohesive vision. Stick as closely as possible to the chosen elements, but allow for minor flexibility if you discover a truly perfect alternative that enhances the overall feel. Remember, the mood board is a guide, not a rigid prison for your creativity.
Currently, we’re planning Regan’s little girl’s bedroom makeover, transitioning her from her nursery. It’s a bittersweet moment to say goodbye to the crib, but seeing the charming wallpaper and sweet twin beds for future sleepovers, I know it’s the right, exciting step forward. More on that transformation soon!
This process of creating a mood board has been instrumental in every successful decor project we’ve undertaken. It demystifies interior design and puts the power of visualization directly into your hands. Are there any other specific decorating details or planning tips you’d love to learn about? Share your questions – I aim to cover more of these often-overlooked but crucial aspects of home styling.
If you found this tutorial helpful, save it for later! You can pin it here:
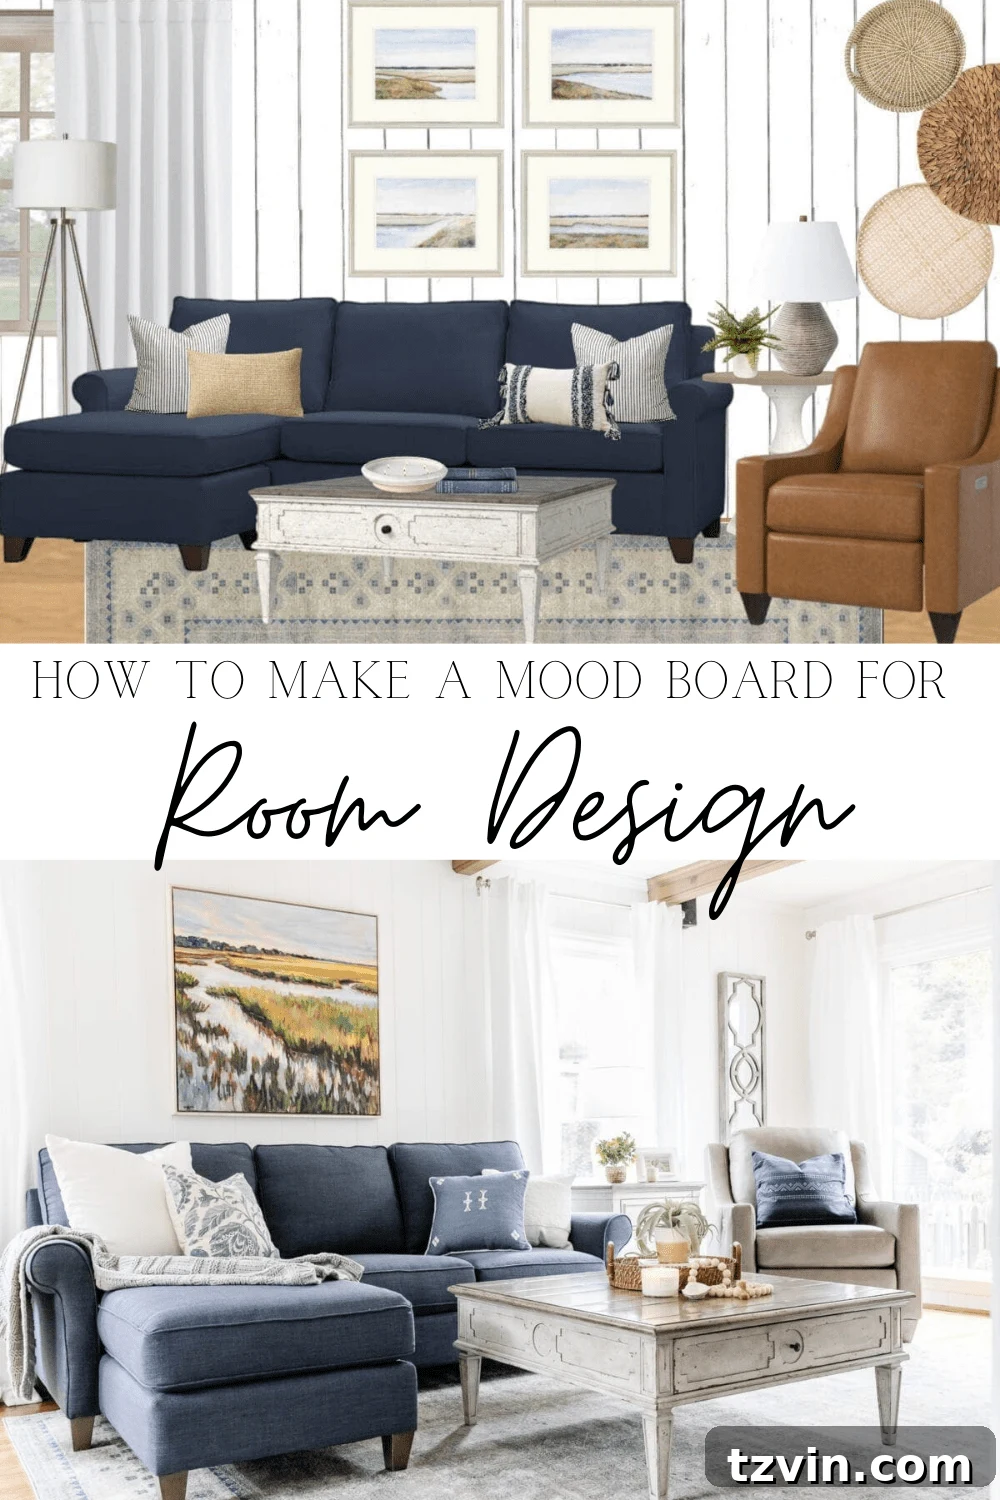
(See this living room makeover here.)

Related Interior Design and Home Decor Resources
- How to Transition Away from Farmhouse Style
- 15 Ways to Transform Your Entire House with Just Paint
- 40 Ways to Improve Your Home for Under $100
- How to Choose the Perfect Paint Color for Your Home Every Time
- How to Find Your Decorating Style