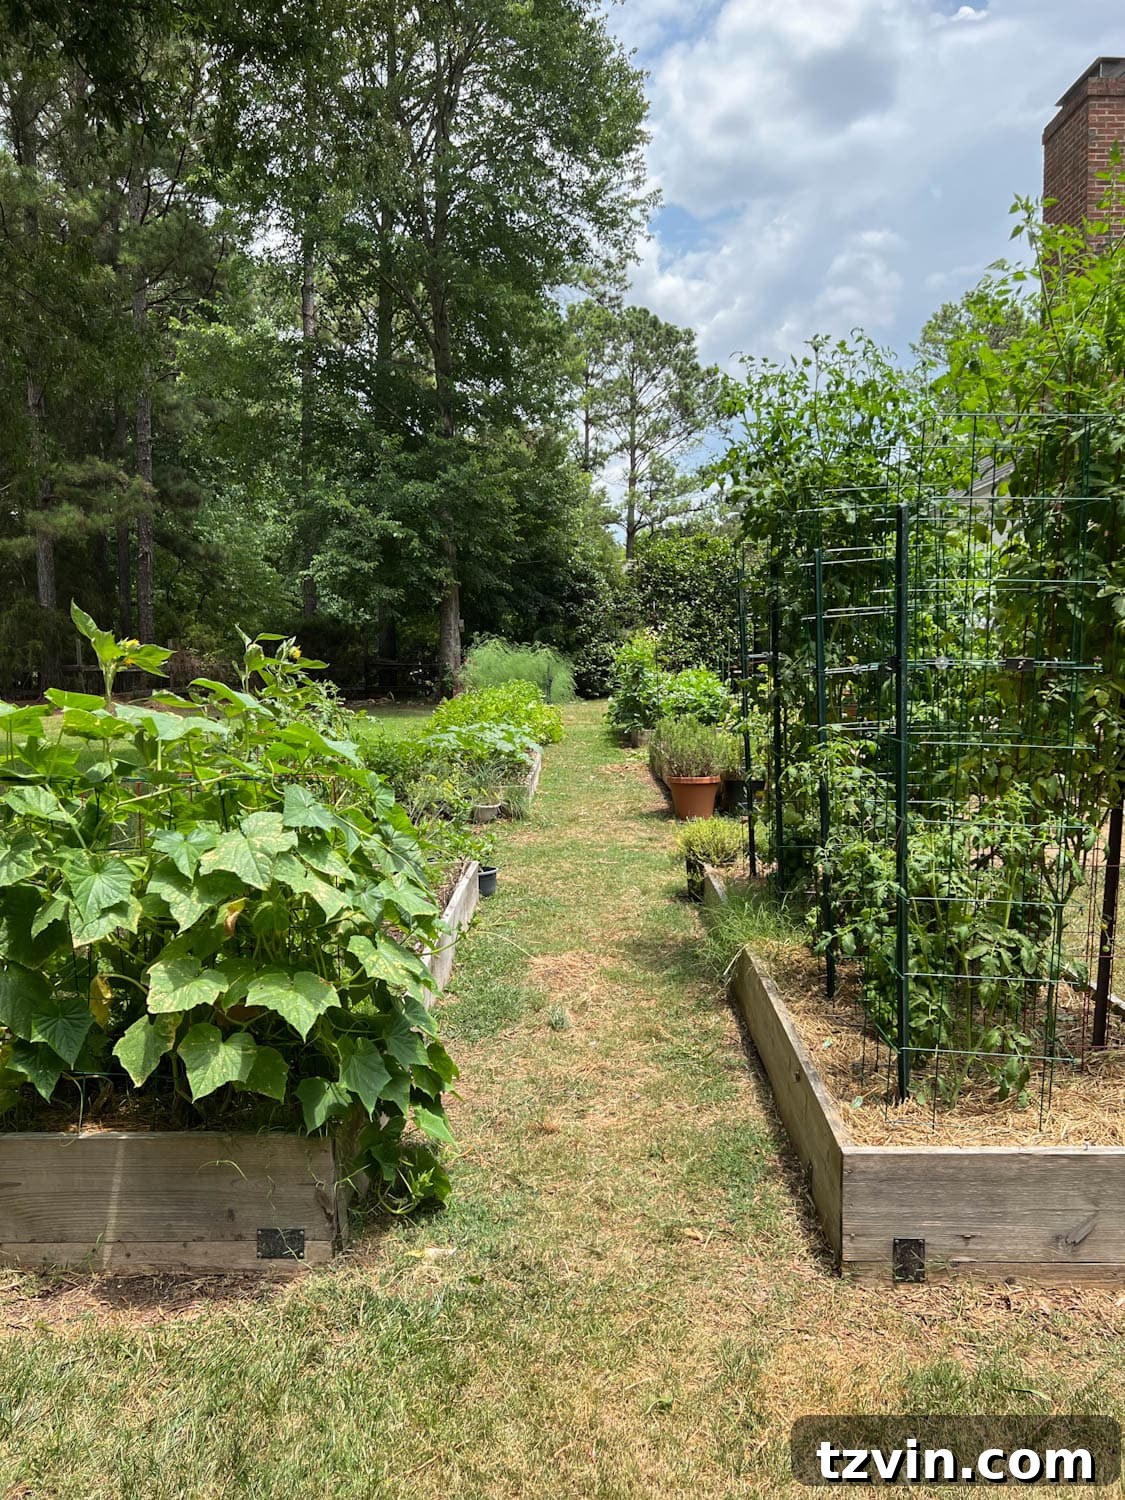
Unlock the Secrets to a High-Yield Raised Bed Vegetable Garden: Master Gardener Tips for Abundant Harvests
Gardening can sometimes feel like a mystical art, especially for those of us who possess what’s affectionately known as a “black thumb.” But imagine transforming your backyard into a thriving oasis, bursting with fresh, organic vegetables. What if achieving a bountiful harvest was simpler than you ever imagined? This guide, built on years of expertise from a seasoned master gardener (my dad, Hank!), reveals the straightforward techniques to cultivate an incredibly productive raised bed vegetable garden.
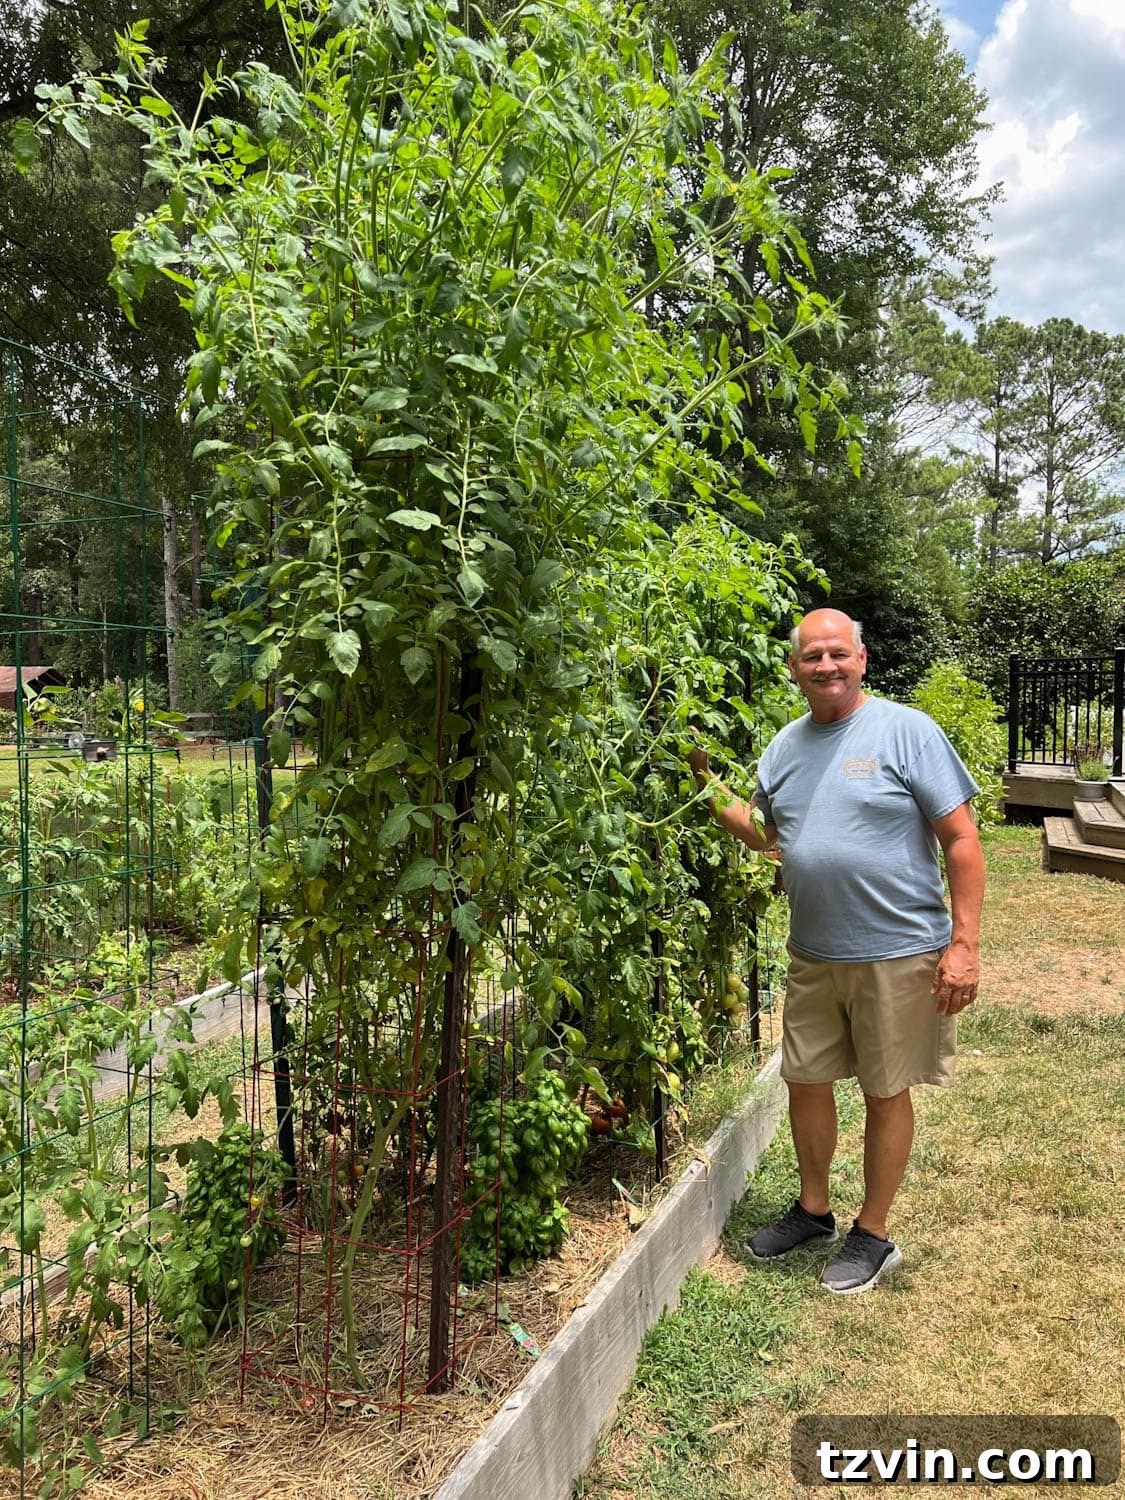
For years, my own attempts at gardening felt like a futile battle against nature. Yet, my dad consistently produces an enviable bounty of fresh produce. Six years ago, I shared a glimpse into his world, highlighting our budget-friendly DIY raised garden beds. The success was undeniable, and his methods have only proven more valuable with time. Now, it’s time to bring his invaluable insights back into the spotlight, ensuring even the most hesitant gardeners can achieve remarkable results.
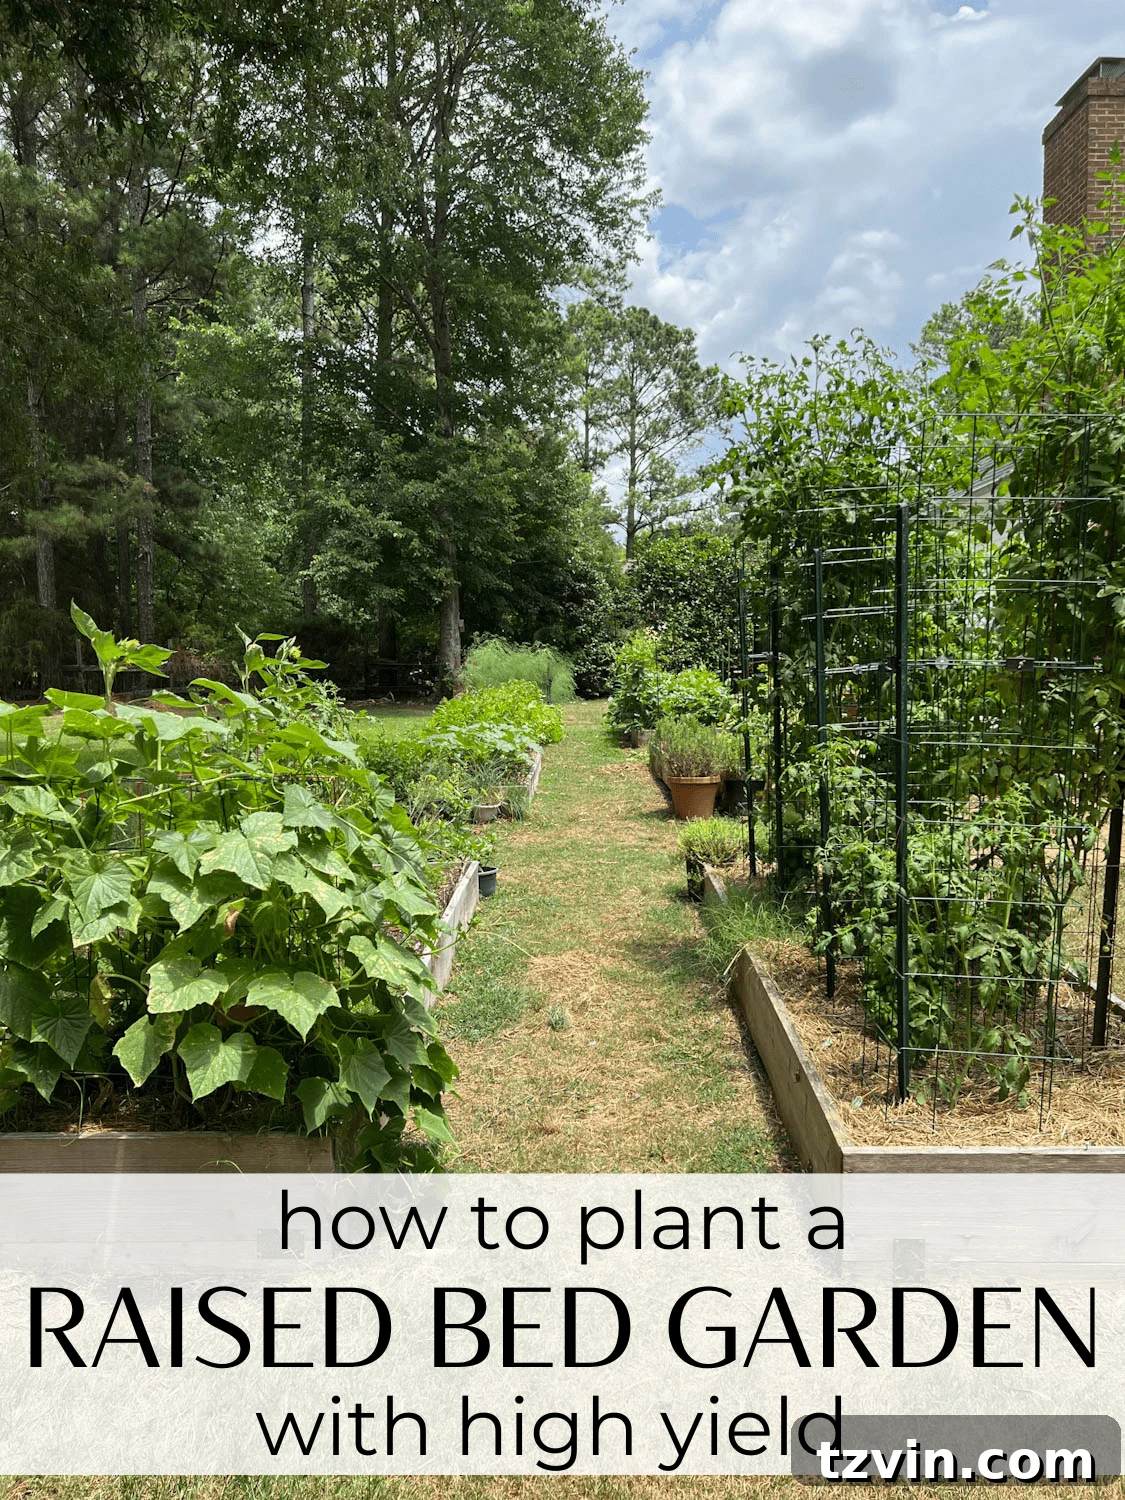
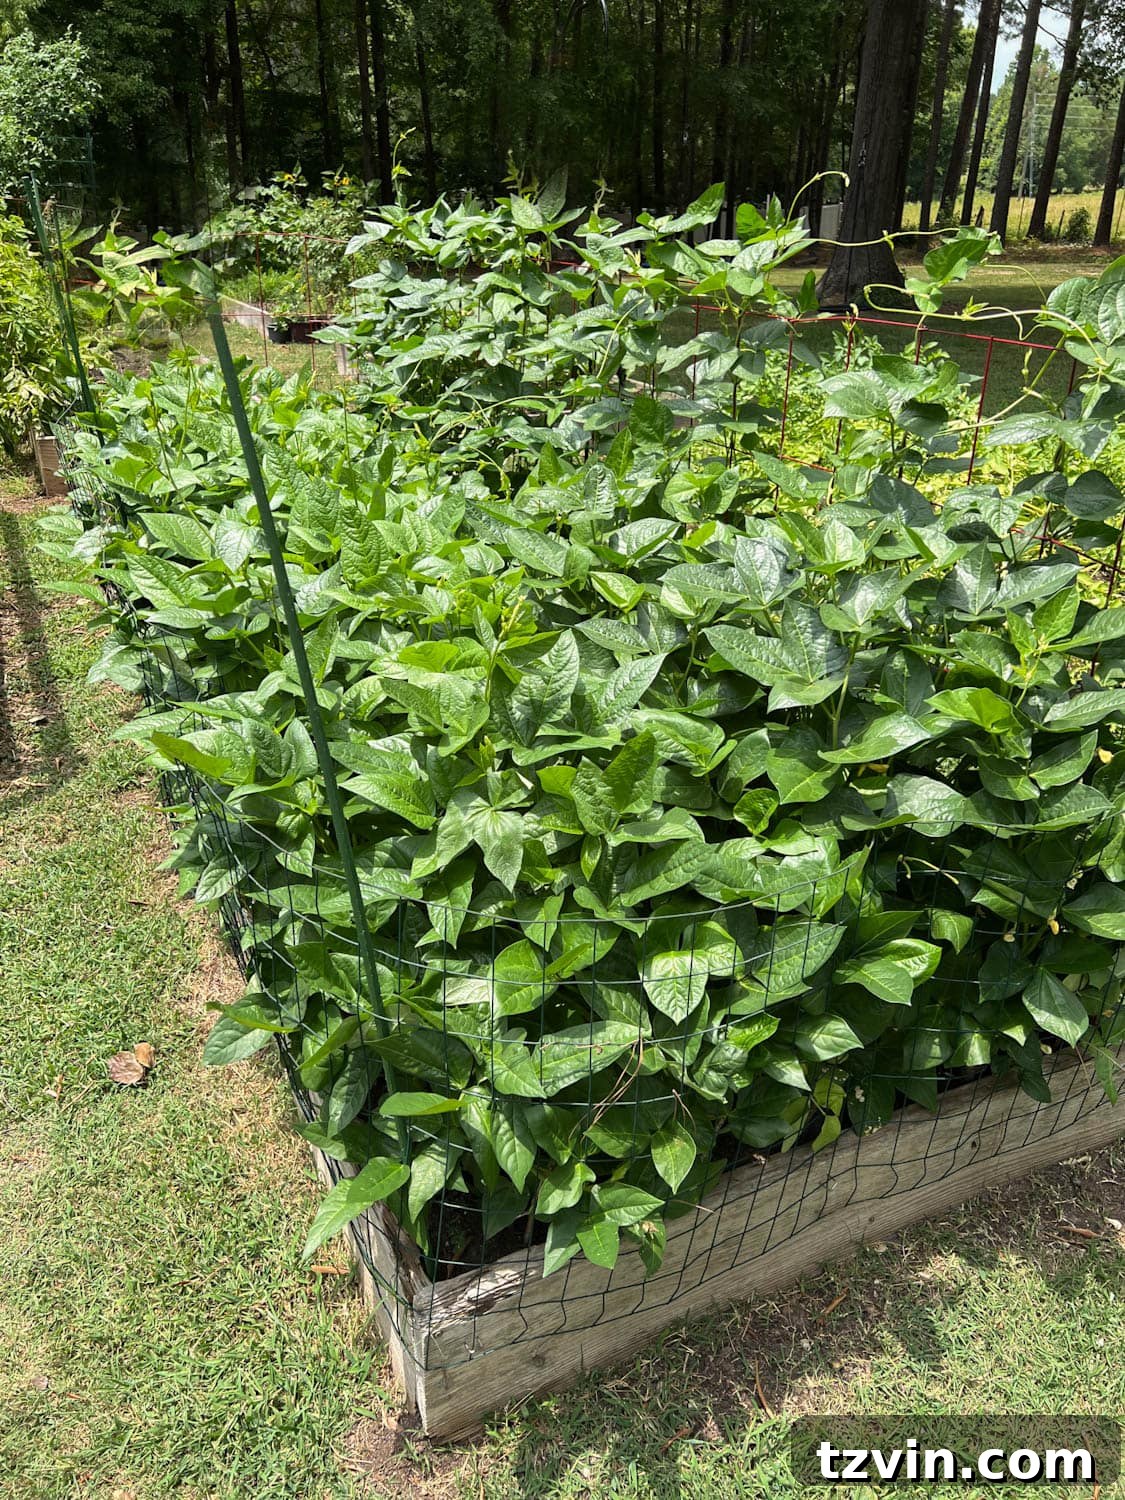
Observing my parents’ flourishing garden this past summer reminded me just how impactful Hank’s tutorial is. It’s designed for anyone dreaming of growing their own food, from absolute beginners to those looking to optimize their current setup. His practical advice empowers even those with the “blackest of thumbs” to cultivate a gorgeous, productive vegetable garden.
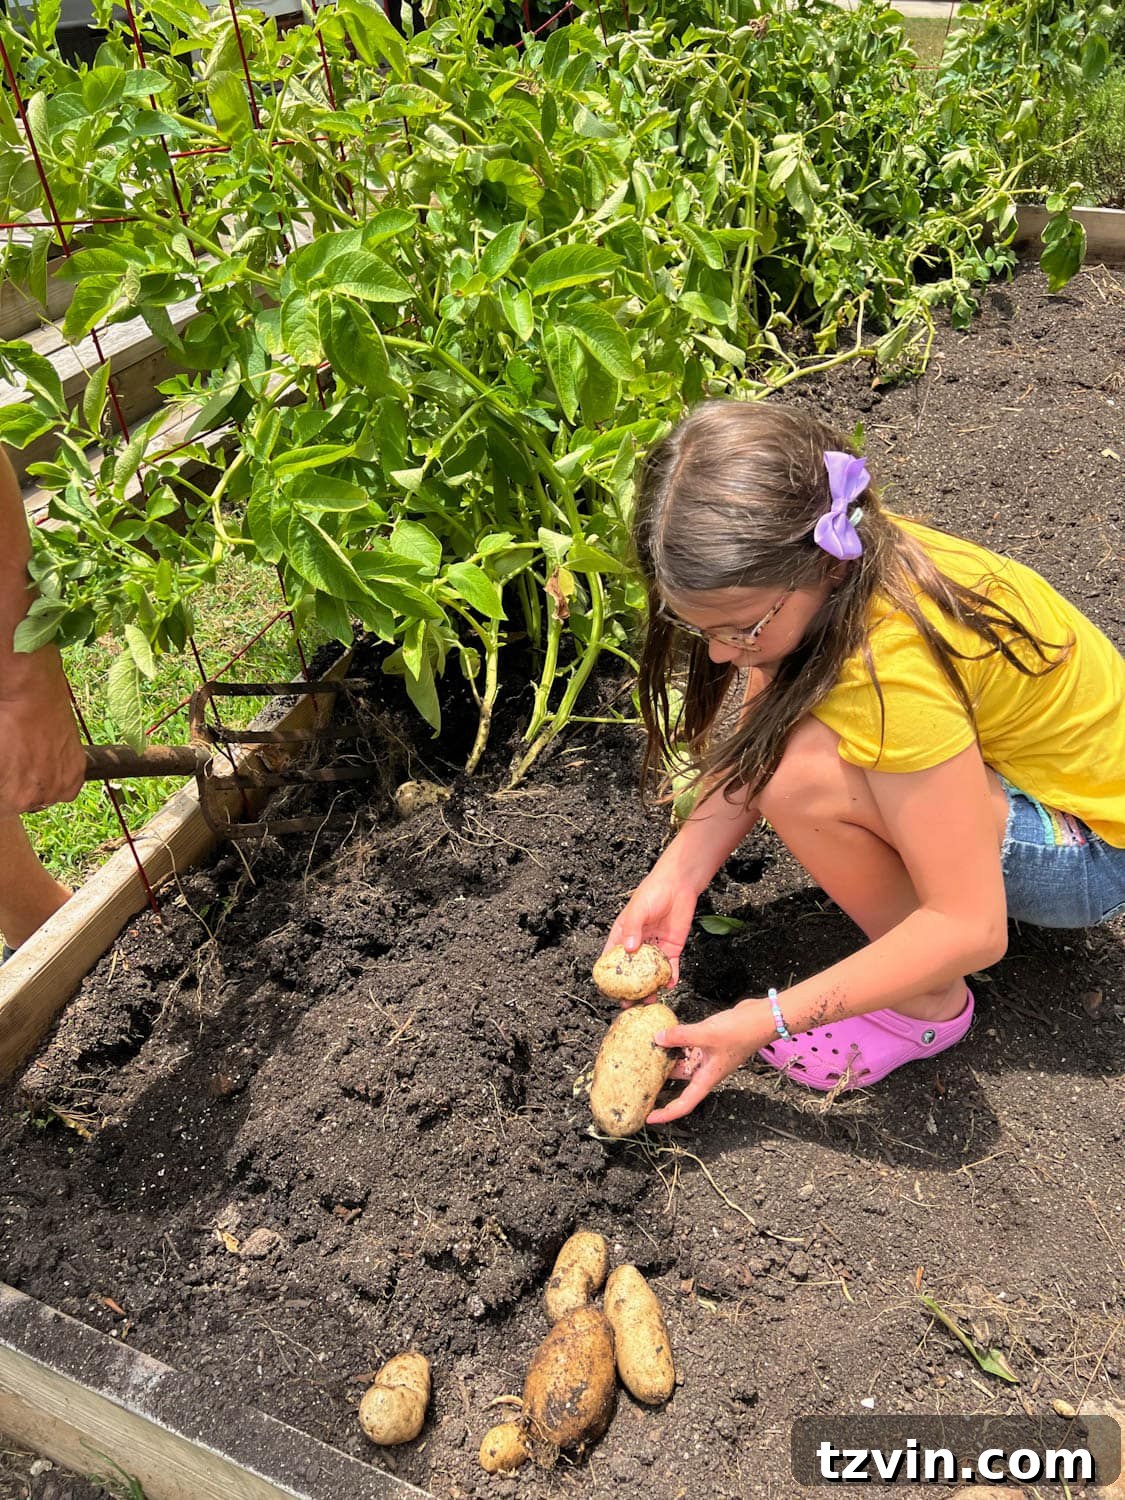
This comprehensive guide, which my dad helped me craft back in 2016, continues to deliver fantastic results. All these years later, our children, Olivia and Regan, still cherish the moments spent harvesting fresh vegetables at “Grandmama and Grandaddy’s” house. It’s truly incredible to see my now nine-year-old Olivia, who once planted basil as a toddler, now expertly harvesting potatoes alongside her grandfather.
Why Choose Raised Bed Vegetable Gardening?
Raised bed gardening offers a multitude of advantages over traditional in-ground planting, making it an ideal choice for both novice and experienced gardeners aiming for a high-yield organic vegetable garden.
- Superior Soil Control: Unlike native garden soil, which can be heavy, rocky, or nutrient-deficient, raised beds allow you to create the perfect growing medium. You can fill them with a custom blend of nutrient-rich soil, compost, and amendments, ensuring optimal conditions for plant growth from day one.
- Enhanced Drainage: Raised beds naturally drain better than ground-level gardens. This prevents waterlogging, which can suffocate roots and lead to plant diseases. Good drainage is crucial for healthy root development and overall plant vigor.
- Fewer Weeds: By creating a dedicated growing space with fresh, weed-free soil, you significantly reduce the amount of weeding required. The elevated nature also makes any necessary weeding much easier on your back and knees.
- Pest Reduction: While not entirely pest-proof, raised beds can offer a slight barrier against ground-dwelling pests like slugs and snails. Integrating companion plants, as discussed later, further enhances natural pest deterrence.
- Extended Growing Season: The soil in raised beds tends to warm up faster in spring, allowing for earlier planting. It also stays warmer longer into fall, extending your harvest period.
- Accessibility and Aesthetics: Raised beds are easier to work with, reducing bending and kneeling. They also create a neat, organized, and visually appealing garden space, transforming your backyard into a beautiful and productive landscape feature.
Raised beds can be constructed in various sizes and shapes to perfectly fit your outdoor space and can be made from diverse materials like concrete, rock, or wood, offering great design flexibility.
How to Build and Plant a High-Yield Organic Raised Bed Garden
The organic method we’re about to outline has been rigorously tested and proven over many years in our old house, consistently yielding the healthiest, most abundant vegetables. The best time to embark on this project is in early spring, setting your garden up for success through summer and well into the fall harvest.
Choosing the Perfect Garden Site: Location and Size
Careful site selection is the cornerstone of a successful vegetable garden. Spend time observing your backyard throughout the day to understand its sunlight patterns. Your raised bed must receive at least 6-8 hours of direct sunlight daily for most vegetables to thrive. A south-facing location is often ideal.
Strive to place your bed on a level surface, or be prepared to grade the area to achieve a uniform foundation. Avoid planting too close to large trees, as their extensive root systems will compete aggressively with your vegetables for water and nutrients, significantly impacting your yield. Consider proximity to a water source for easy irrigation, and if possible, choose a spot that offers some protection from strong winds.
Essential Supplies for Your High-Yield Raised Bed Garden
Gathering your materials beforehand will ensure a smooth and efficient build. Here’s what you’ll need for a standard 4×8 foot raised bed:
- 2- 2x12x12 Untreated Pine Boards (or cedar for longer life)
- Circular saw or table saw (optional, many hardware stores offer cutting services)
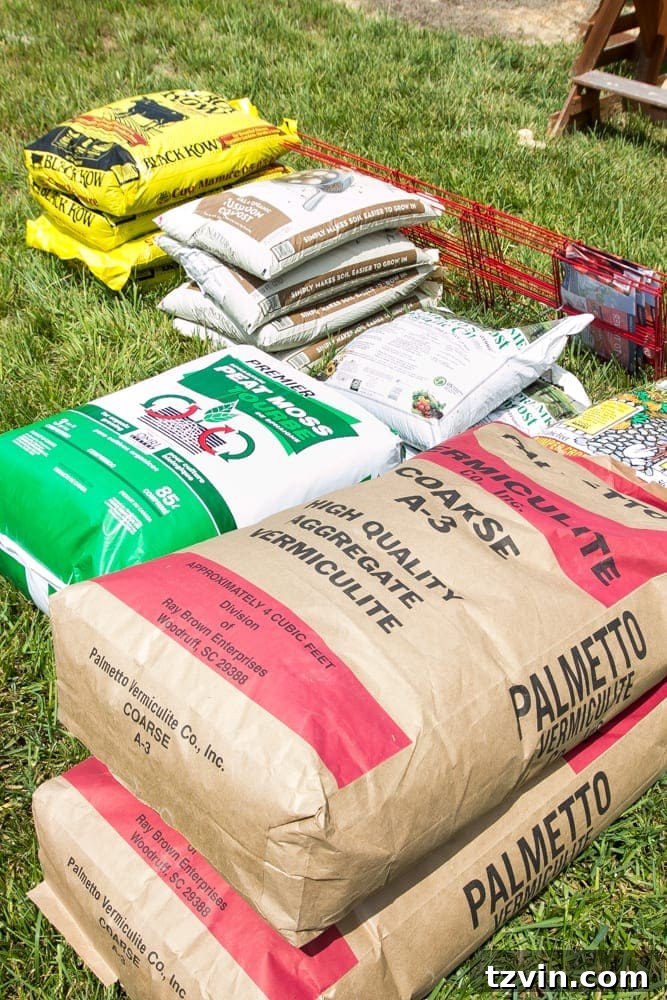
- 1 bag of Peat Moss (improves water retention and aeration, or sustainable coco coir)
- 2 bags of Vermiculite (enhances moisture retention, aeration, and nutrient exchange)
- 4 bags of Black Kow Compost (premium aged cow manure, rich in nutrients and beneficial microbes)
- 4 bags of Mushroom Compost (excellent source of organic matter, slow-release nutrients)
- Lime powder (adjusts soil pH, provides calcium vital for preventing blossom end rot)
- Tomato Cages (essential for supporting vining plants like tomatoes and some peppers)
- Cardboard (an eco-friendly, free weed barrier)
- Tiller (for thorough soil mixing, a sturdy shovel can also work for smaller beds)
- Power Drill
- Decking Screws (rust-resistant for outdoor use)
- Spade
- Trowel
- Plastic Tarp (for mixing soil ingredients)
- Vegetable plants or seeds of your choice
Top Vegetable Plants for Your Raised Bed
Choosing the right plants for your skill level can greatly impact your gardening success and enjoyment.
Beginner-Friendly Vegetables & Herbs
These plants are generally forgiving, have shorter growing seasons, and are less prone to common pests and diseases:
- Lettuce (leafy greens are fast-growing and can be succession planted)
- Kale (hardy and nutritious, tolerates various conditions)
- Swiss Chard (colorful and productive, similar to spinach)
- Cucumbers (easy to grow, especially bush varieties in raised beds)
- Radishes (quickest harvest, great for impatient gardeners!)
- Green Beans (bush beans are excellent, require minimal support)
- Pumpkins (ensure space for vining or choose a compact variety)
- Broccoli (can be rewarding with proper care)
- Green Onion (easy to grow from sets or seeds)
- And versatile herbs like basil, mint, oregano, thyme, rosemary, chives, cilantro.
Intermediate Gardener Choices
These plants may require a bit more attention, space, or a longer growing season:
- Tomatoes (rewarding but need staking and consistent watering)
- Carrots (require loose, rock-free soil, which raised beds provide perfectly)
- Squash (can be vigorous growers, choose bush varieties or provide ample space)
- Zucchini (highly productive, often producing more than you can eat!)
- Brussels Sprouts (long growing season, worth the wait)
- Asparagus (perennial, takes a few years to establish but then yields for decades)
Companion Planting Wisdom
A smart gardening trick is to integrate companion plants. Planting marigolds around your garden can naturally deter deer, rabbits, and many common plant-destroying insects. Similarly, basil planted near tomatoes not only repels pests but can also enhance the flavor of the tomatoes, making them ideal partners.
Step-by-Step Raised Bed Construction & Planting
Follow these detailed steps to build and plant your thriving organic raised bed garden.
Step 1: Design Your Bed and Prepare Boards
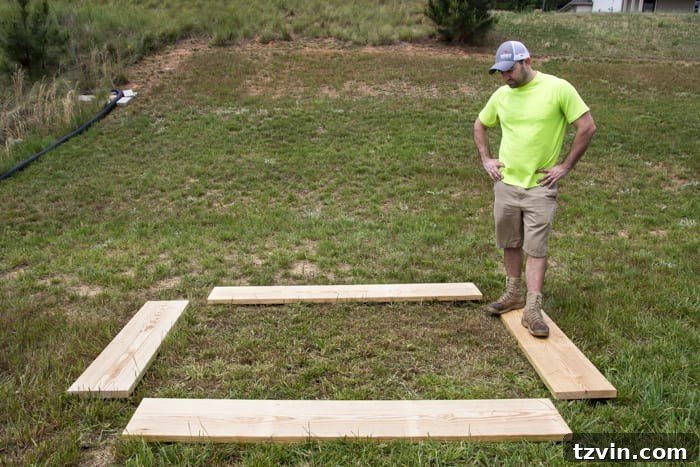
Before any cutting, finalize your raised bed’s dimensions. A common and practical size is 4 feet wide by 8 feet long, which allows easy access to plants from both sides without stepping into the bed. You’ll use two 2x12x12 pine boards. If you’re not comfortable with power tools, most hardware stores like Lowe’s will cut the wood for you. Cut two of your boards to 4-foot lengths and the remaining two to 8-foot lengths. Lay these boards on your chosen, leveled garden spot to visualize the frame.
Step 2: Install the Cardboard Weed Barrier and Assemble Frame
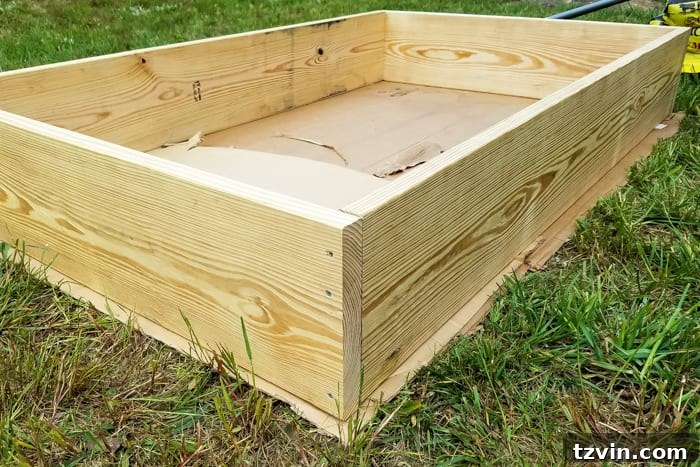
This is a brilliant, inexpensive, and eco-friendly trick for weed suppression! Before assembling the wooden frame, lay several layers of old cardboard sheets directly on the ground where your raised bed will sit. Overlap them to ensure no gaps. Cardboard acts as an excellent biodegradable weed barrier, suffocating existing weeds and grass without the need for synthetic landscaping fabric. As it breaks down, it also adds valuable organic matter to your soil.
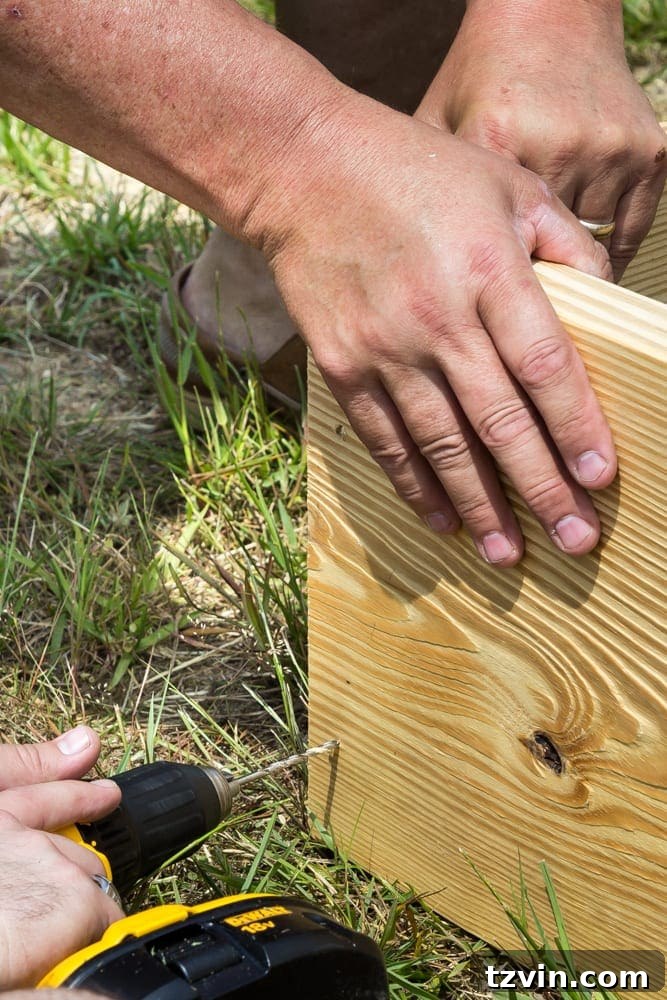
Once the cardboard is in place, position your pre-cut wooden boards on top, forming a rectangle. Using your power drill and durable decking screws, secure the boards together at each corner. Ensure the frame is square and stable. Your completed box, resting on its cardboard base, is now ready for the next steps. The cardboard will naturally decompose over time, providing a long-term, chemical-free solution to keeping weeds at bay.
Step 3: Craft the Ultimate Organic Soil Mix
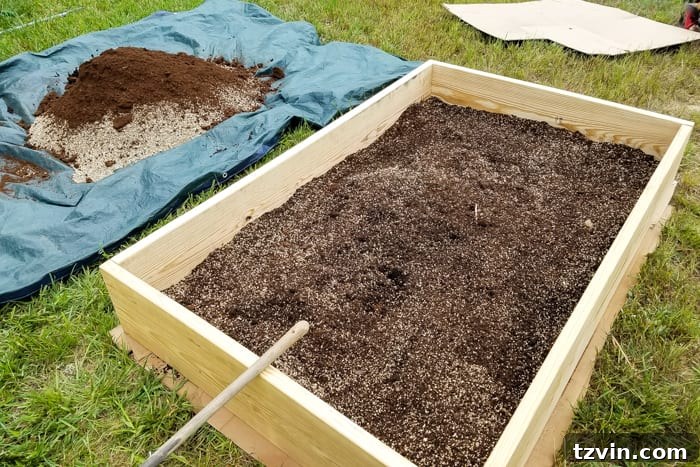
The secret to a high-yield raised bed lies in its soil. This carefully curated blend provides optimum nutrition, drainage, and aeration for vigorous plant growth. Lay out a large plastic tarp and pour all your bags of compost, vermiculite, and peat moss onto it. The exact ratio can be adjusted, but a good starting point is roughly 1/3 compost, 1/3 vermiculite, and 1/3 peat moss. Consider the following for each component:
- Black Kow Compost & Mushroom Compost: These are your nutrient powerhouses. They provide essential macro and micronutrients, introduce beneficial microorganisms, and improve soil structure. The aged manure (Black Kow) is especially rich in nitrogen, while mushroom compost adds a wealth of organic matter.
- Vermiculite: This lightweight mineral excels at moisture retention while simultaneously improving aeration. Its unique structure allows it to hold water and nutrients and then release them slowly to plant roots, preventing both drought and waterlogged conditions.
- Peat Moss: Known for its exceptional ability to hold water and nutrients, peat moss also contributes to an acidic soil pH, which can be balanced later. (Sustainable alternatives like coco coir are also excellent choices for water retention and aeration).
Thoroughly mix these components using your tarp as a giant mixing bowl. Fold the corners in and out, rolling and tumbling the ingredients until they are uniformly combined. Work in batches if necessary, then transfer the rich mixture into your raised bed frame.
Step 4: Incorporate and Aerate Your Soil Mixture
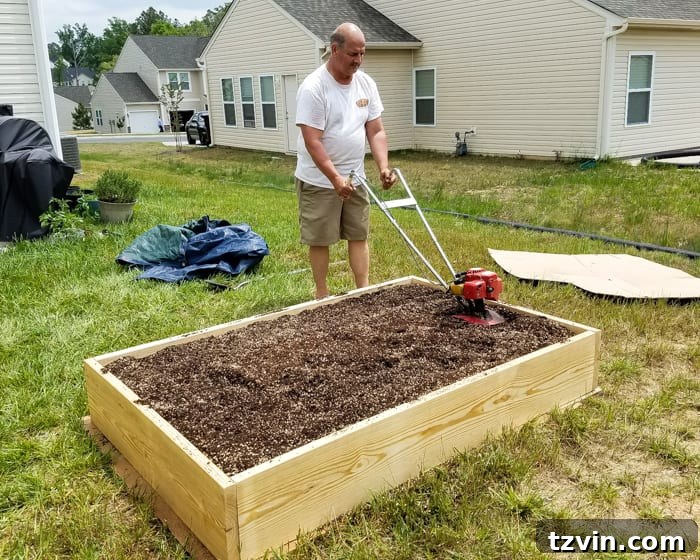
Once all the mixed soil is in the raised bed, use a tiller to thoroughly incorporate and aerate it. This final tilling ensures an even distribution of all components, eliminates any compaction from filling, and creates a perfectly light, fluffy, and nutrient-rich environment for your plants to establish deep, healthy root systems. For smaller beds, a spade or garden fork can achieve similar results with a bit more effort.
Step 5: Strategize Your Plant Layout
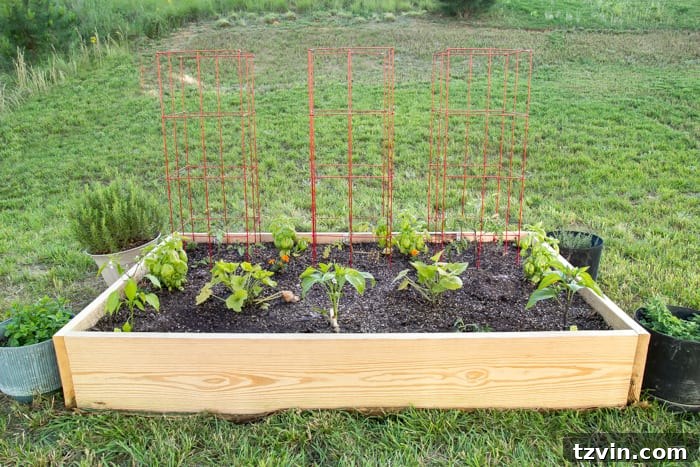
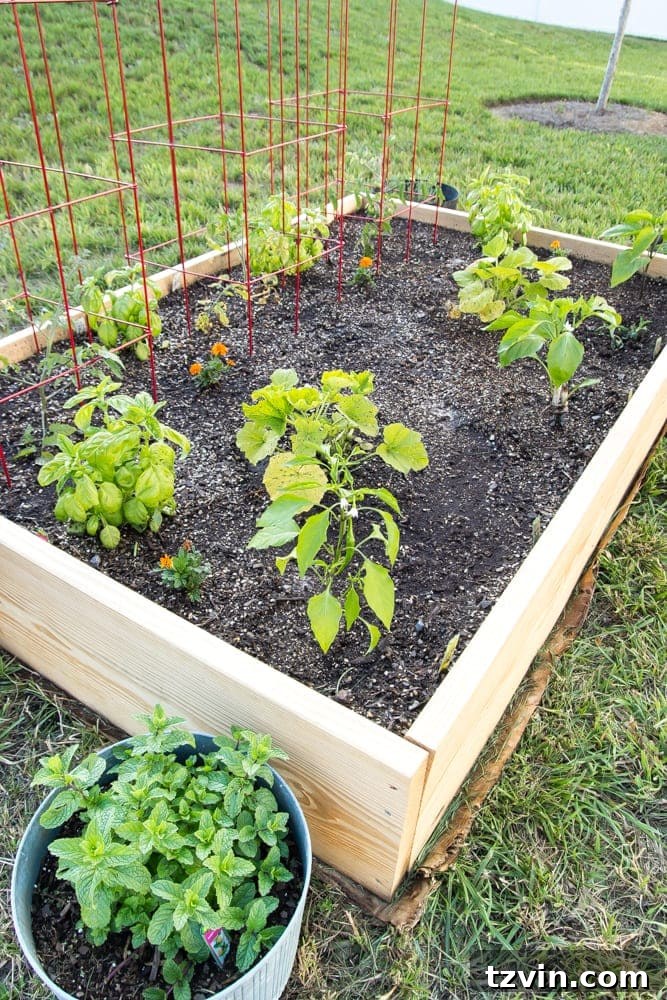
Before putting anything in the ground, plan the placement of your plants. Consider their mature size, sunlight requirements, and whether they need support like cages or trellises. Group plants with similar needs together. We opted for a vibrant mix including Early Girl, Celebrity, and Grape Cherry tomatoes, alongside basil, zucchini, summer squash, Hot Golden Cayenne peppers, Sweet Banana peppers, and Mammoth jalapenos. Planning ensures adequate spacing, promotes good air circulation, and maximizes your yield.
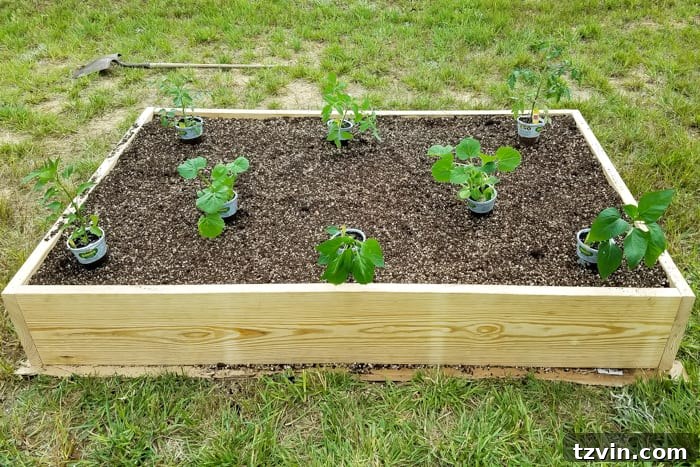
Step 6: Prepare Planting Holes with Soil Amendments
Once your layout is determined, dig the individual holes for each plant. For heavy feeders like tomatoes, peppers, and squash, this is where lime powder comes in handy. Sprinkle a small amount of lime powder into each planting hole. Lime helps adjust the soil pH to an optimal level for these plants and, more importantly, provides essential calcium, which is crucial for preventing common issues like blossom end rot in tomatoes and peppers.
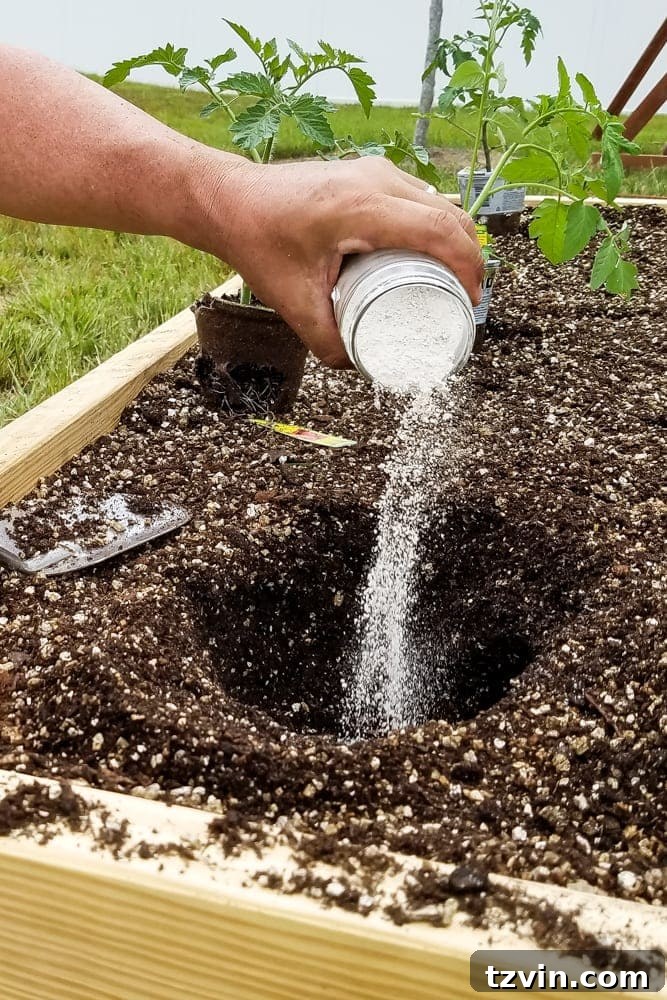
Step 7: Gentle Planting for Success
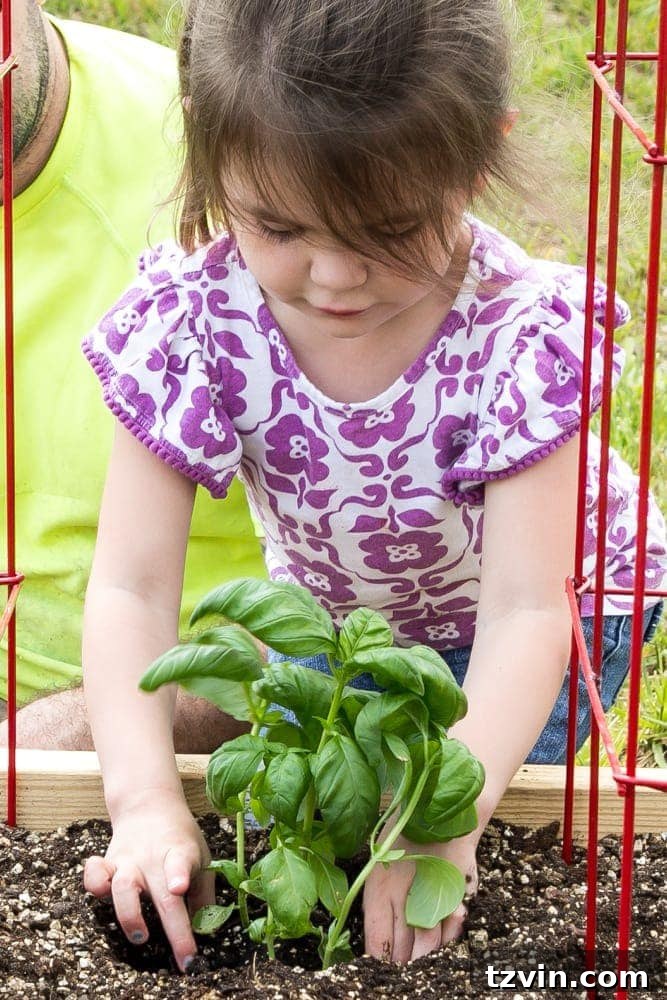
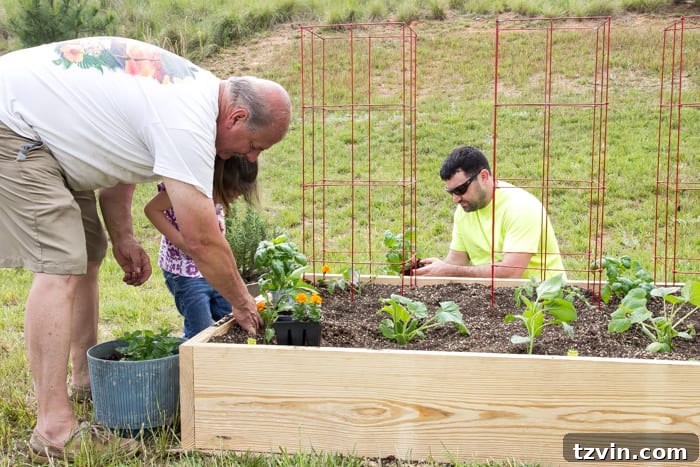
Now for the exciting part – planting your vegetables! Carefully remove each plant from its nursery pot. If the roots are tightly bound, gently loosen them with your fingers. Place the root ball of the plant into the prepared hole, ensuring it sits at the same depth as it was in its original container. Backfill the hole with your custom soil mix, gently firming it around the base of the plant to remove any air pockets. Involving little helpers, like Olivia, makes this step even more enjoyable, fostering a love for gardening from a young age!
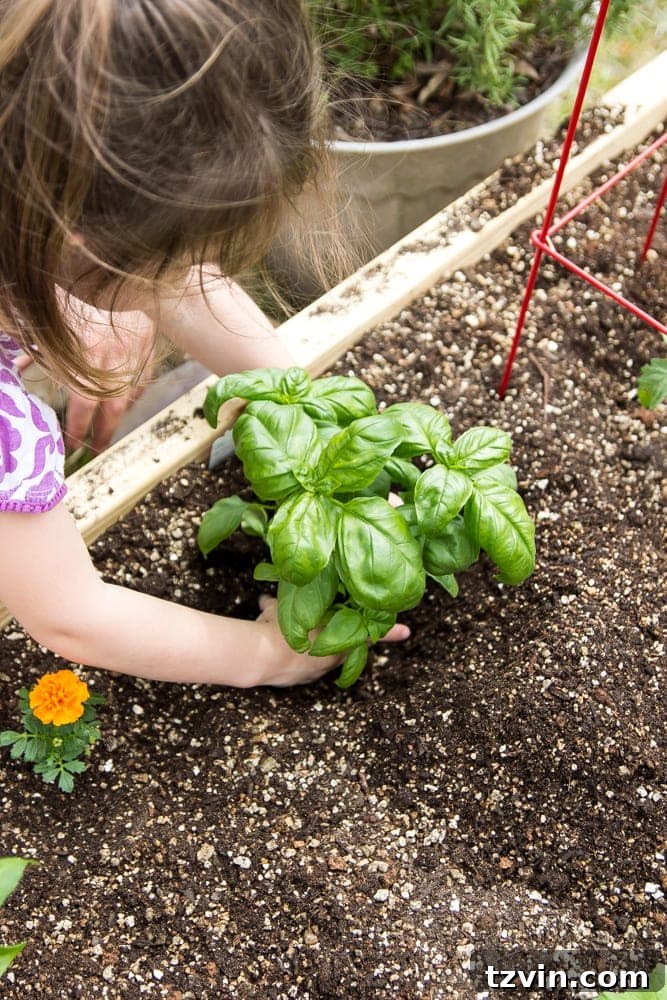
It’s a joy to watch children connect with nature, even if it means getting their hands gloriously dirty. Olivia, guided by her enthusiastic grandaddy, was right in her element, learning the ropes from the best.
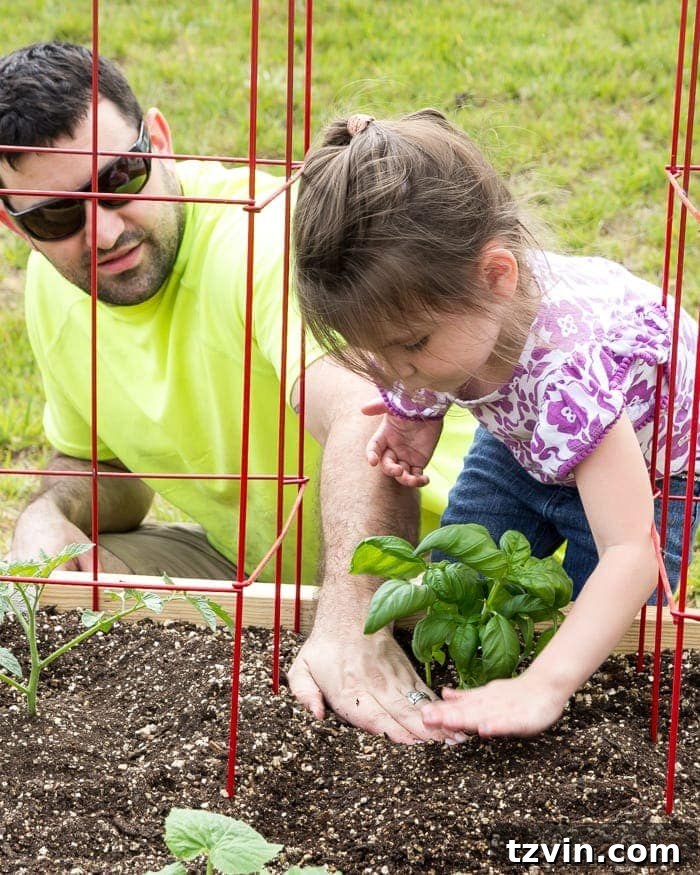
Step 8: Implement Natural Pest Deterrents and Support Structures
To help protect your precious plants from unwanted visitors, strategically plant marigolds between your vegetables. Their strong scent naturally repels aphids and other common garden parasites. Similarly, basil, when planted near tomatoes, acts as an excellent companion, deterring bugs and potentially enhancing tomato flavor. For vining plants like tomatoes, certain peppers, and some squash varieties, now is the time to install support structures. Place sturdy tomato cages (readily available at most hardware stores) around young plants to provide essential support as they grow, preventing sprawling and fruit damage.
Step 9: Establish a Consistent Watering Routine
Immediately after planting everything, give your entire raised bed a thorough and deep watering. This helps settle the soil around the roots and eliminates any remaining air pockets. Going forward, consistency is key. It’s best to water your raised bed vegetable garden in the mornings, typically 3-4 times per week, aiming for about an inch of water total per week (accounting for rainfall). Deep, infrequent watering encourages roots to grow deeper, making plants more resilient. Check the soil moisture by sticking your finger about an inch or two deep – if it feels dry, it’s time to water. Consider a drip irrigation system or soaker hoses for efficient and targeted watering.
Ongoing Care and Maximizing Your Harvest
Building the raised bed and planting is just the beginning. Consistent care will ensure a continuous, abundant harvest.
- Regular Fertilization: While your initial soil mix is rich, heavy feeders will eventually deplete nutrients. Supplement with organic liquid fertilizers (like fish emulsion or seaweed extract) every few weeks, or top-dress with a layer of fresh compost mid-season.
- Pest and Disease Monitoring: Regularly inspect your plants for any signs of pests or diseases. Early detection is key. Use organic pest control methods like hand-picking, insecticidal soap, or neem oil as needed. Good air circulation from proper spacing also helps prevent fungal diseases.
- Weeding: Even with a cardboard barrier, some persistent weeds may emerge. Remove them promptly to prevent competition for nutrients and water. Mulching with straw or wood chips can further suppress weeds and retain soil moisture.
- Staking and Pruning: Continue to guide vining plants onto their supports. For indeterminate tomatoes, pruning suckers (small shoots that grow in the crotch of a leaf stem and the main stalk) can direct energy into fruit production.
- Succession Planting: For fast-growing crops like lettuce, radishes, and bush beans, consider planting small batches every few weeks to ensure a continuous supply throughout the season.
- Harvesting: Harvest vegetables at their peak ripeness. Regular harvesting encourages plants to produce more, extending your yield. For leafy greens, harvest outer leaves; for beans and squash, pick frequently when young and tender.
Embrace the Journey: From Black Thumb to Green Thumb
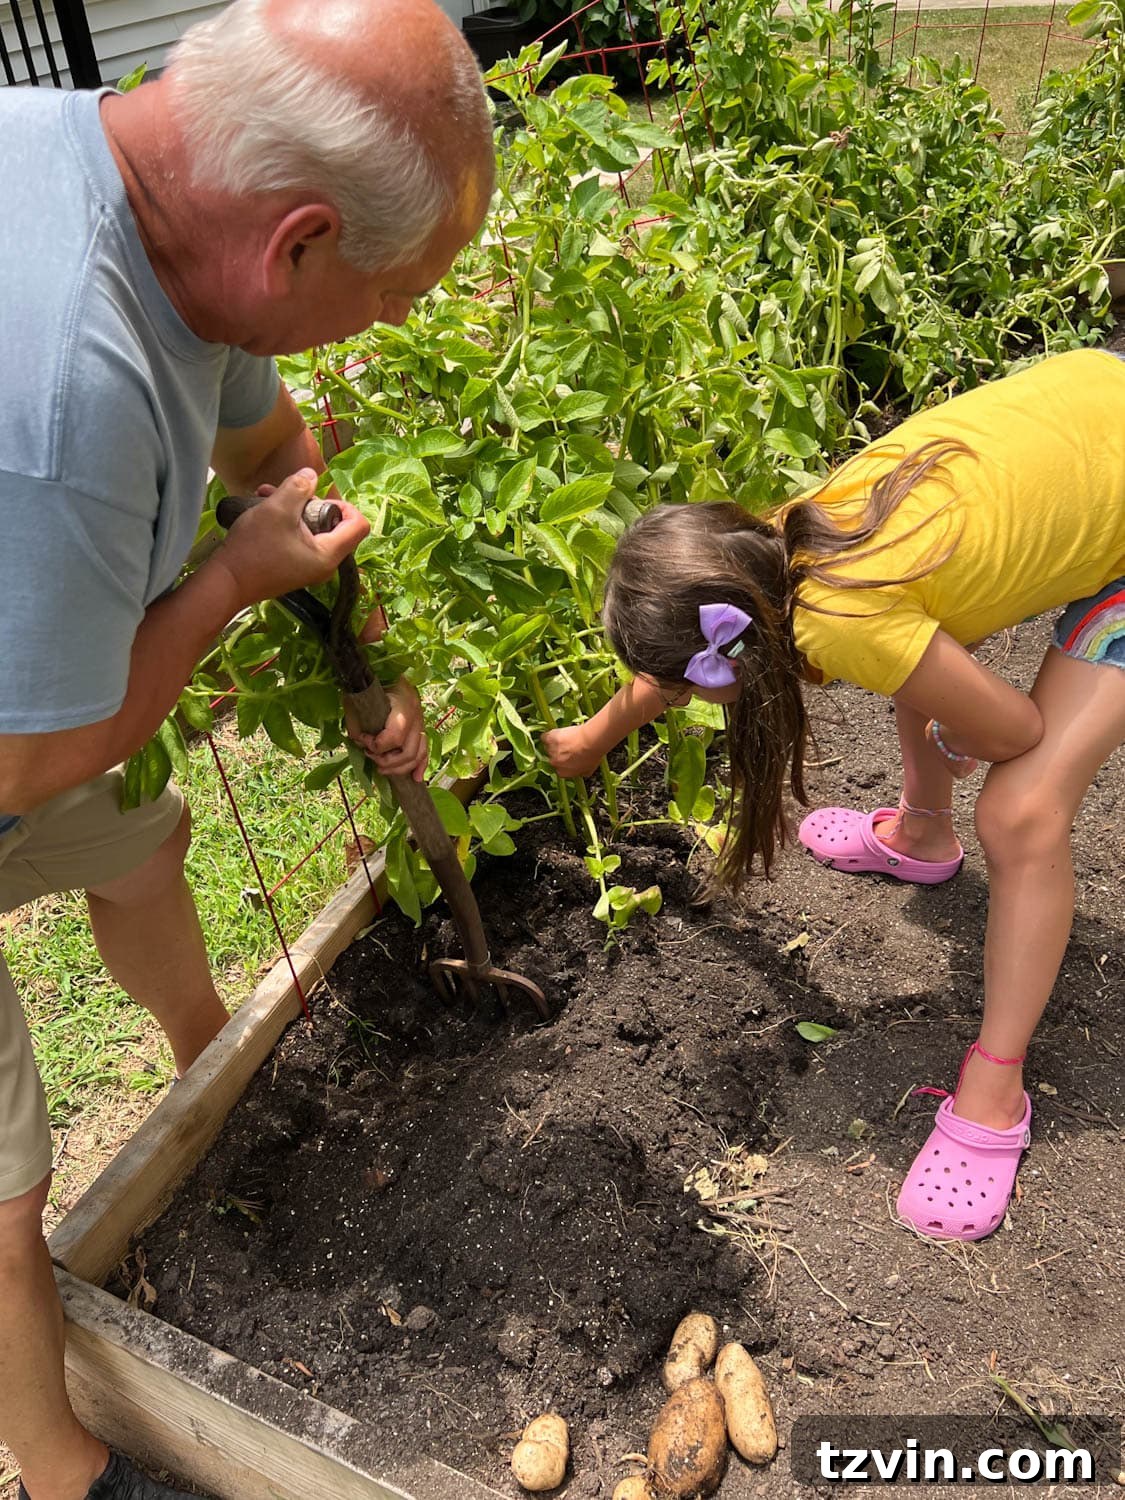
Watching a garden flourish is incredibly rewarding. While I might still be navigating the delicate balance of keeping my own children fed and thriving, my dad has truly mastered the art of organic farming. His dedication yields an abundance of fresh produce, which my mom, channeling her inner culinary goddess, transforms into delicious meals. The sheer volume and quality of what his hard work produces are genuinely awe-inspiring.
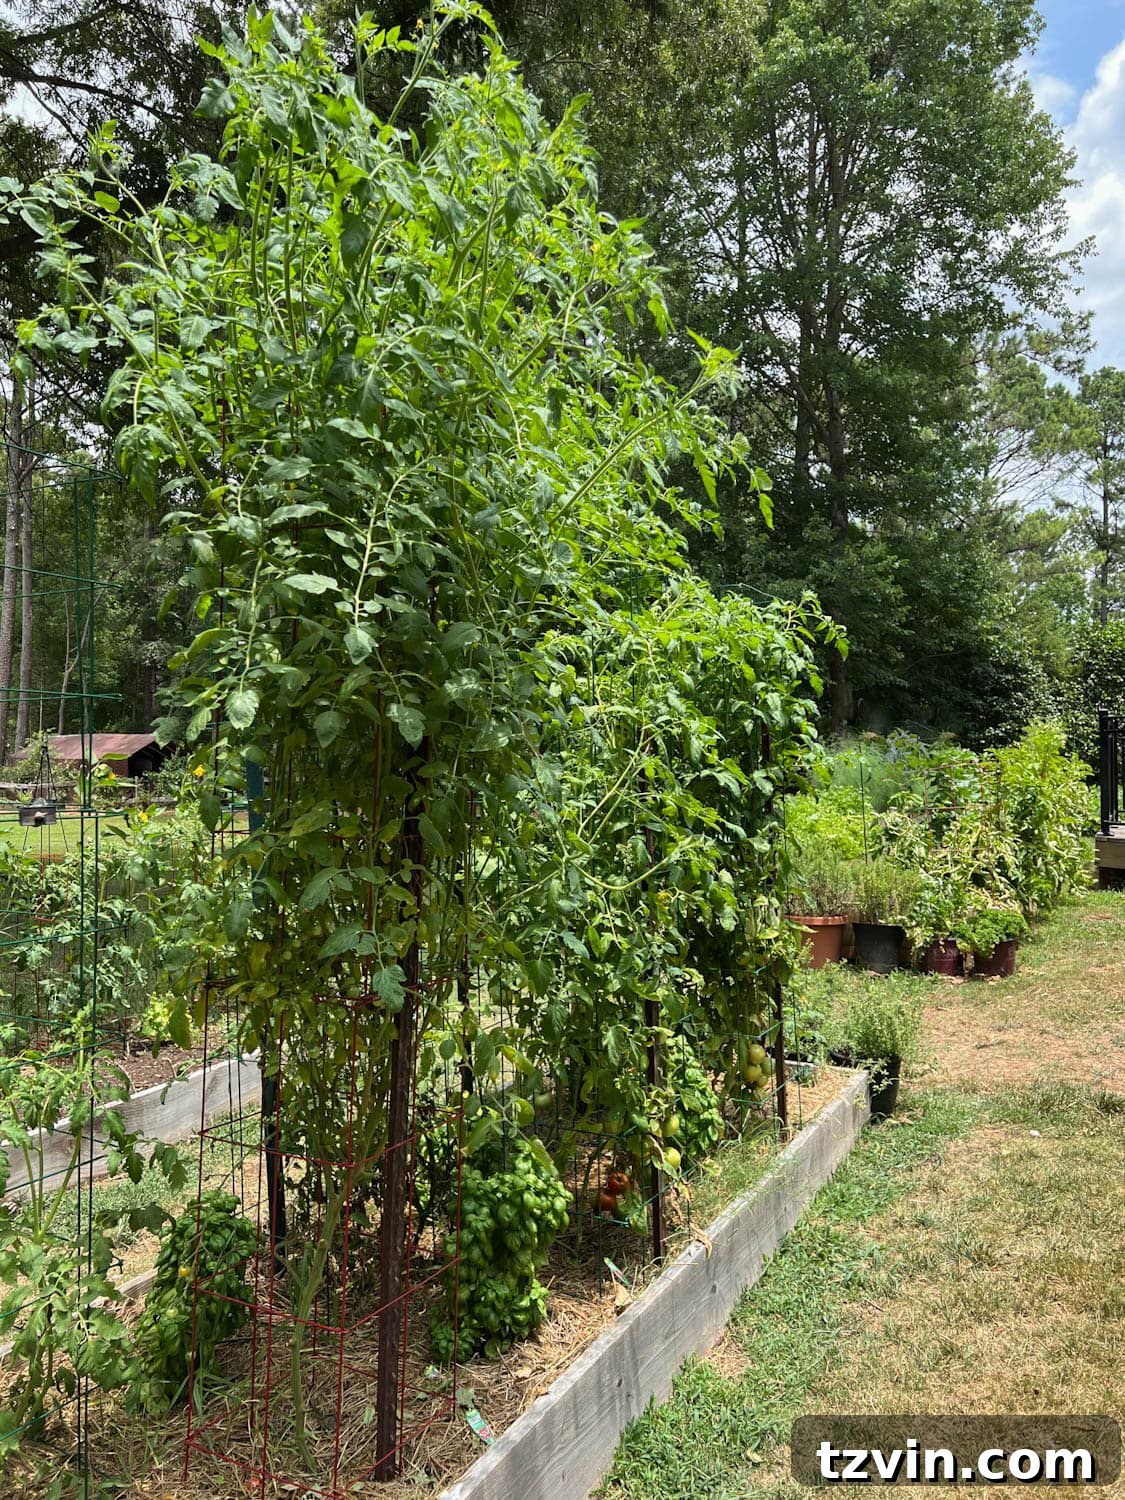
Have you embarked on the journey of planting a raised bed or vegetable garden? Or do you, like my past self, consider yourself more of a “plant murderer”? In either case, I sincerely hope these tried-and-true tips empower you to cultivate your own thriving oasis.
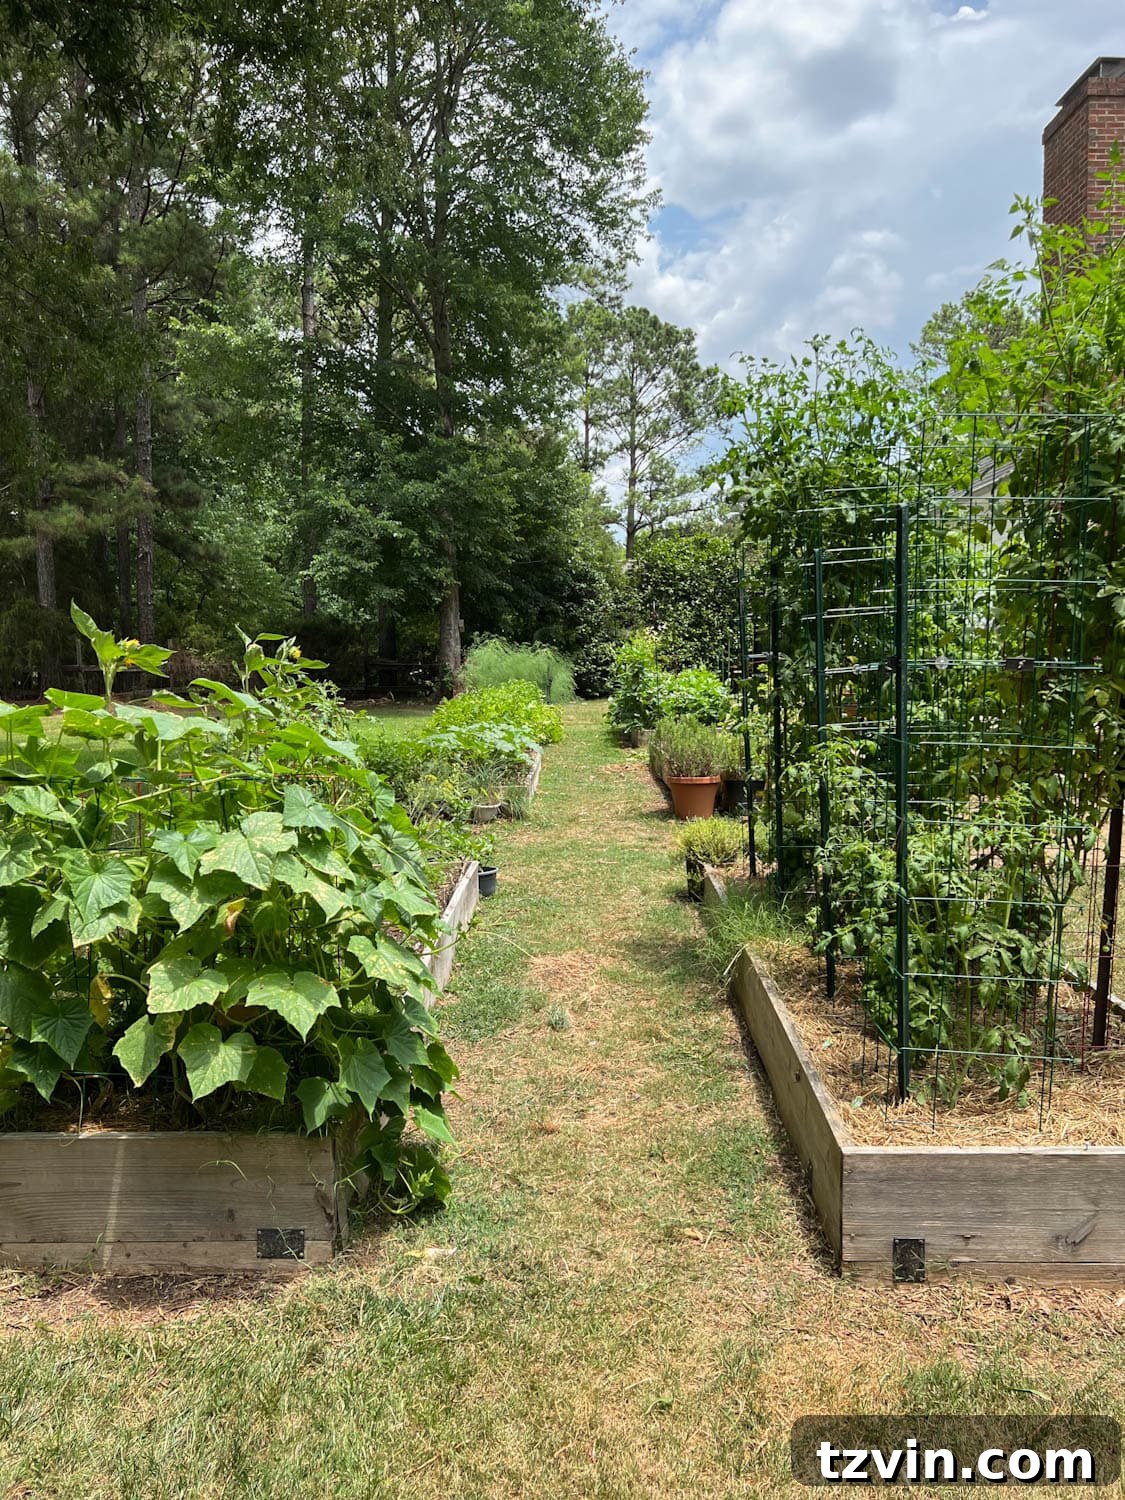
Meanwhile, I might still be found discreetly plucking ripe summer tomatoes from my parents’ garden, perhaps playfully blaming the deer. Kidding, of course! But the joy of fresh, homegrown produce is truly unmatched.
What about you? Have you recently planted anything in an above-ground garden that you’re excited about, or are you in the process of building a new raised bed? We’re always eager to learn and share. Do you have any gardening tips or secrets you’d be willing to share with our community? Please leave your insights in the comments below!
More Backyard & Gardening Inspiration
If you’re looking for more ways to enhance your outdoor living space or further expand your gardening knowledge, check out these related articles:
- DIY Wooden Spoon Garden Markers
- DIY Vertical Garden Planter from Wood Scraps
- Backyard Lighting Ideas You Can Install Yourself on a Budget
- The Best Yard Games for Backyard Barbecues
- DIY Backyard Beer Garden Transformation