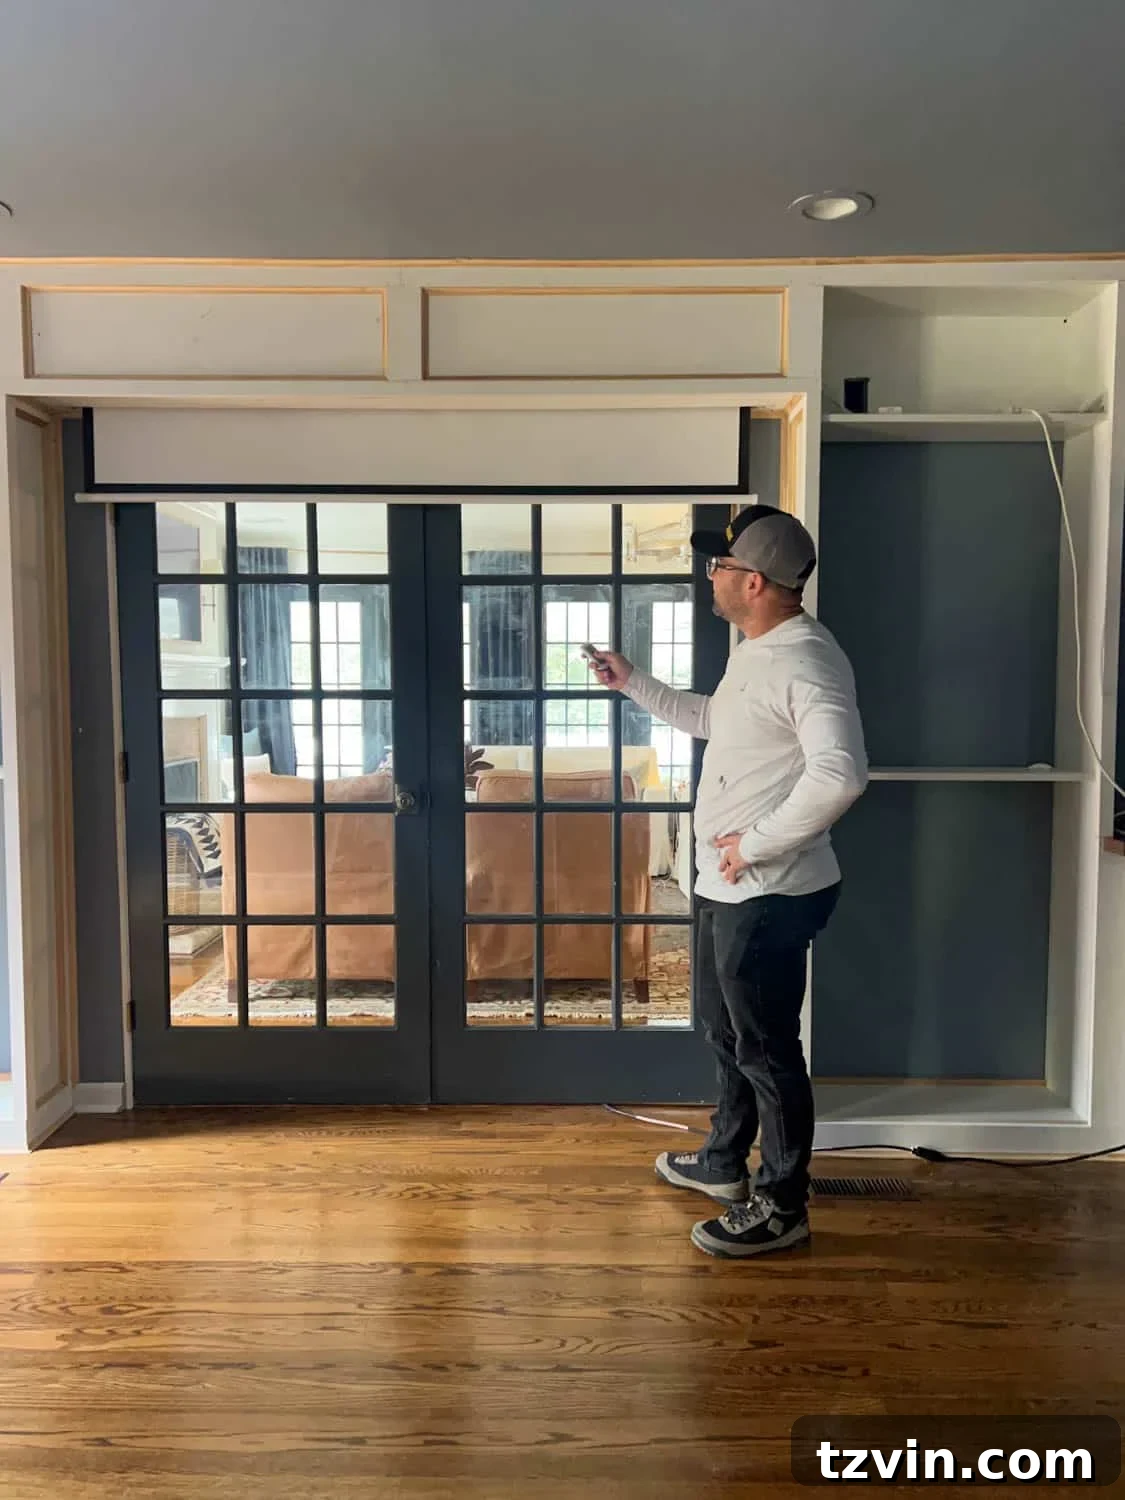
The Ultimate DIY Home Media Room: How to Integrate a Hidden Projector Screen with IKEA Built-Ins
Imagine a home media room where entertainment appears at the touch of a button and disappears just as magically, leaving behind a beautifully organized space. This isn’t a dream; it’s a DIY reality waiting to transform your living area. Discover how to build a custom box to seamlessly hide an electric projector screen between built-in IKEA shelves, creating the ultimate home theater experience without sacrificing style or functionality.
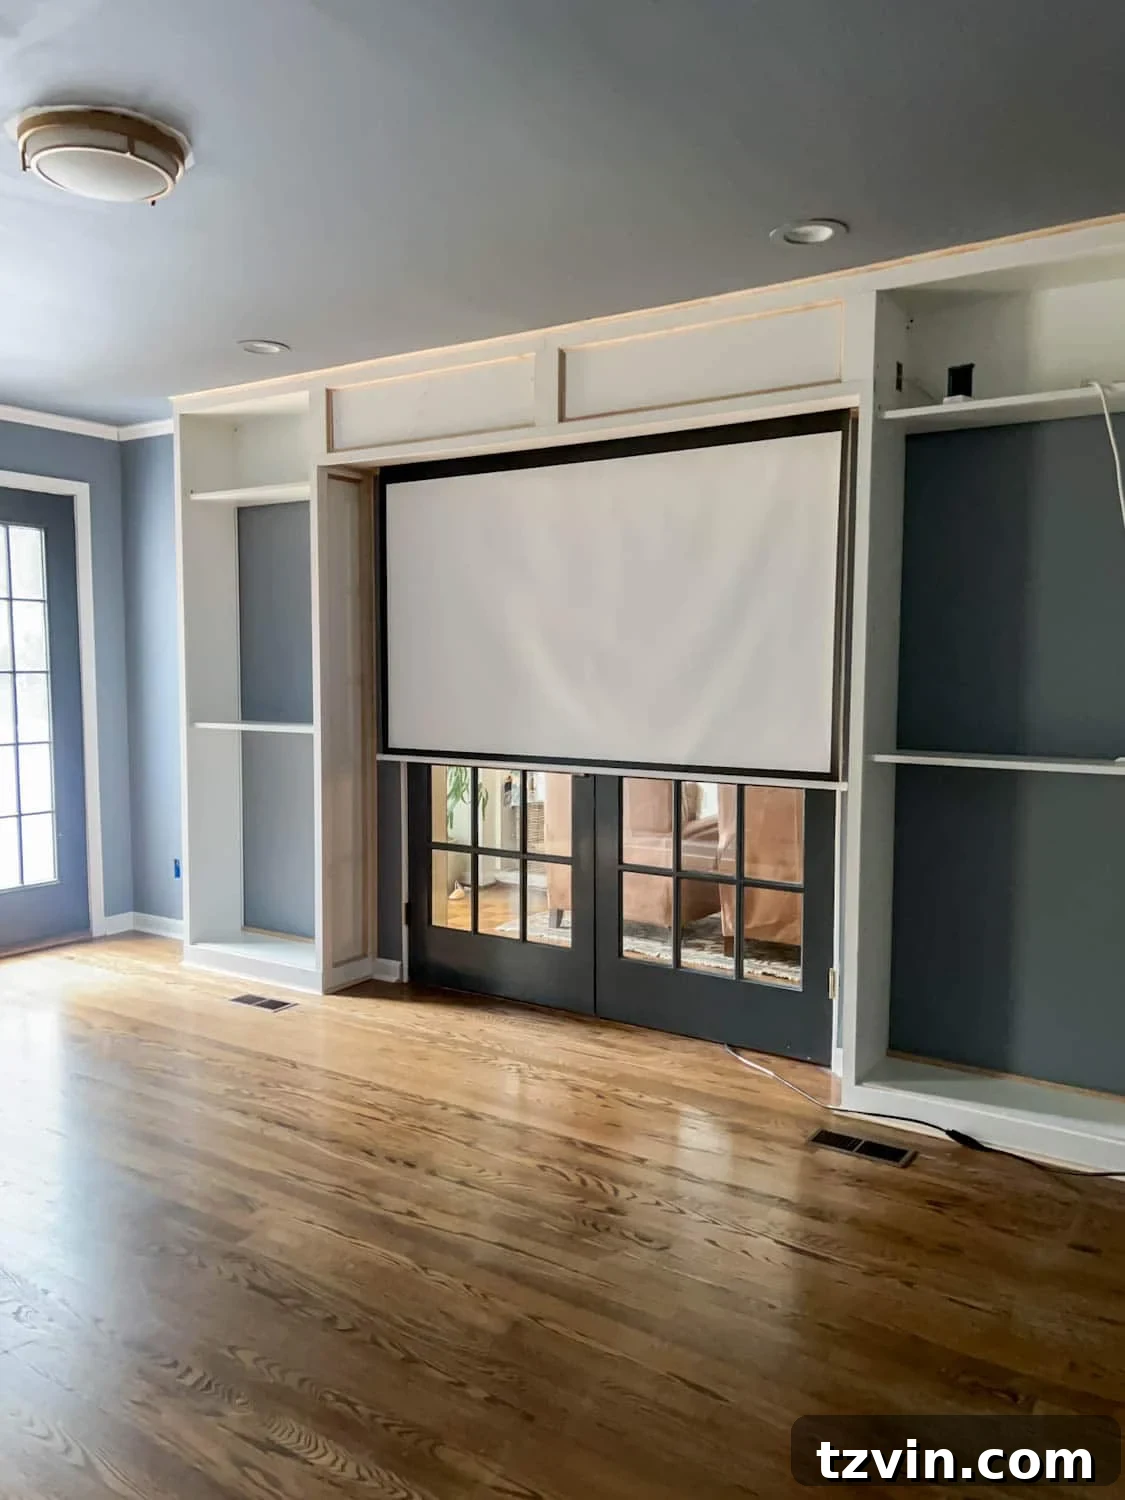
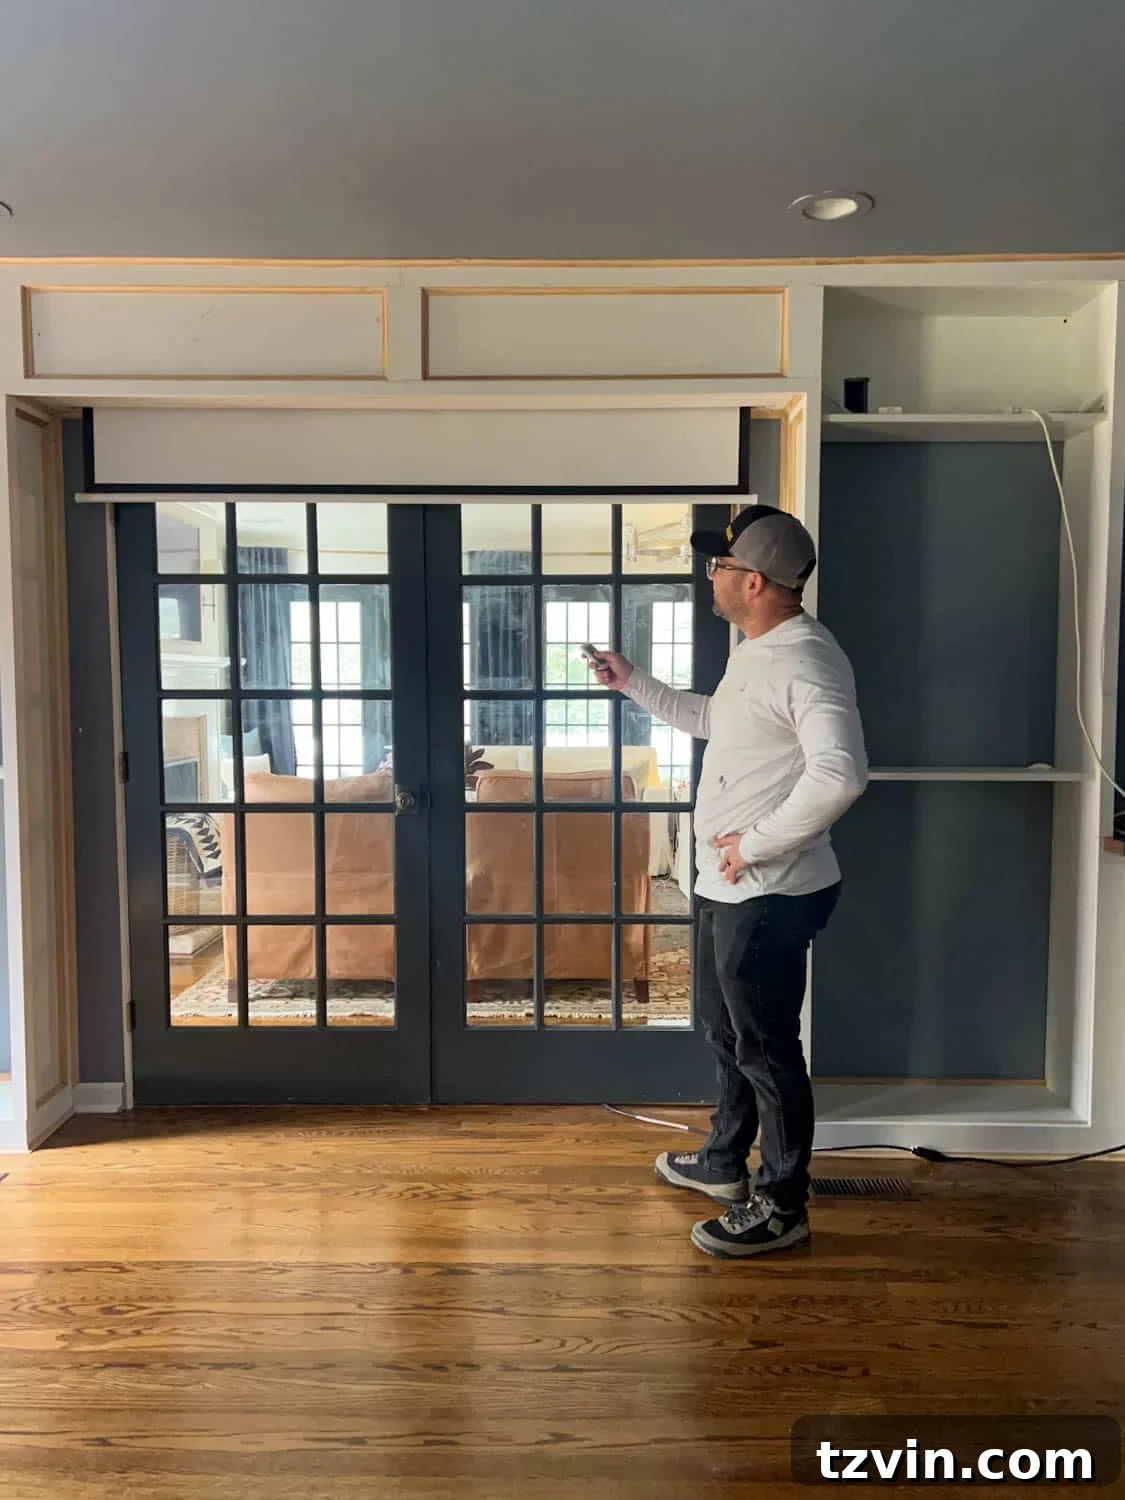
This project stands out as one of the most innovative and satisfying DIY ventures we’ve undertaken. Its appeal lies in its clever illusion: a state-of-the-art projector screen that materializes for movie nights and tucks away discreetly when not in use. It’s an elegant solution for anyone looking to maximize space and maintain a clean aesthetic in their home media room.
Our journey began with a vision for a comprehensive media room makeover. A key component was integrating an electric projector screen without it dominating the room. The solution? Our tried-and-true IKEA built-in bookcase hack, modified to conceal this “magic trick” screen.
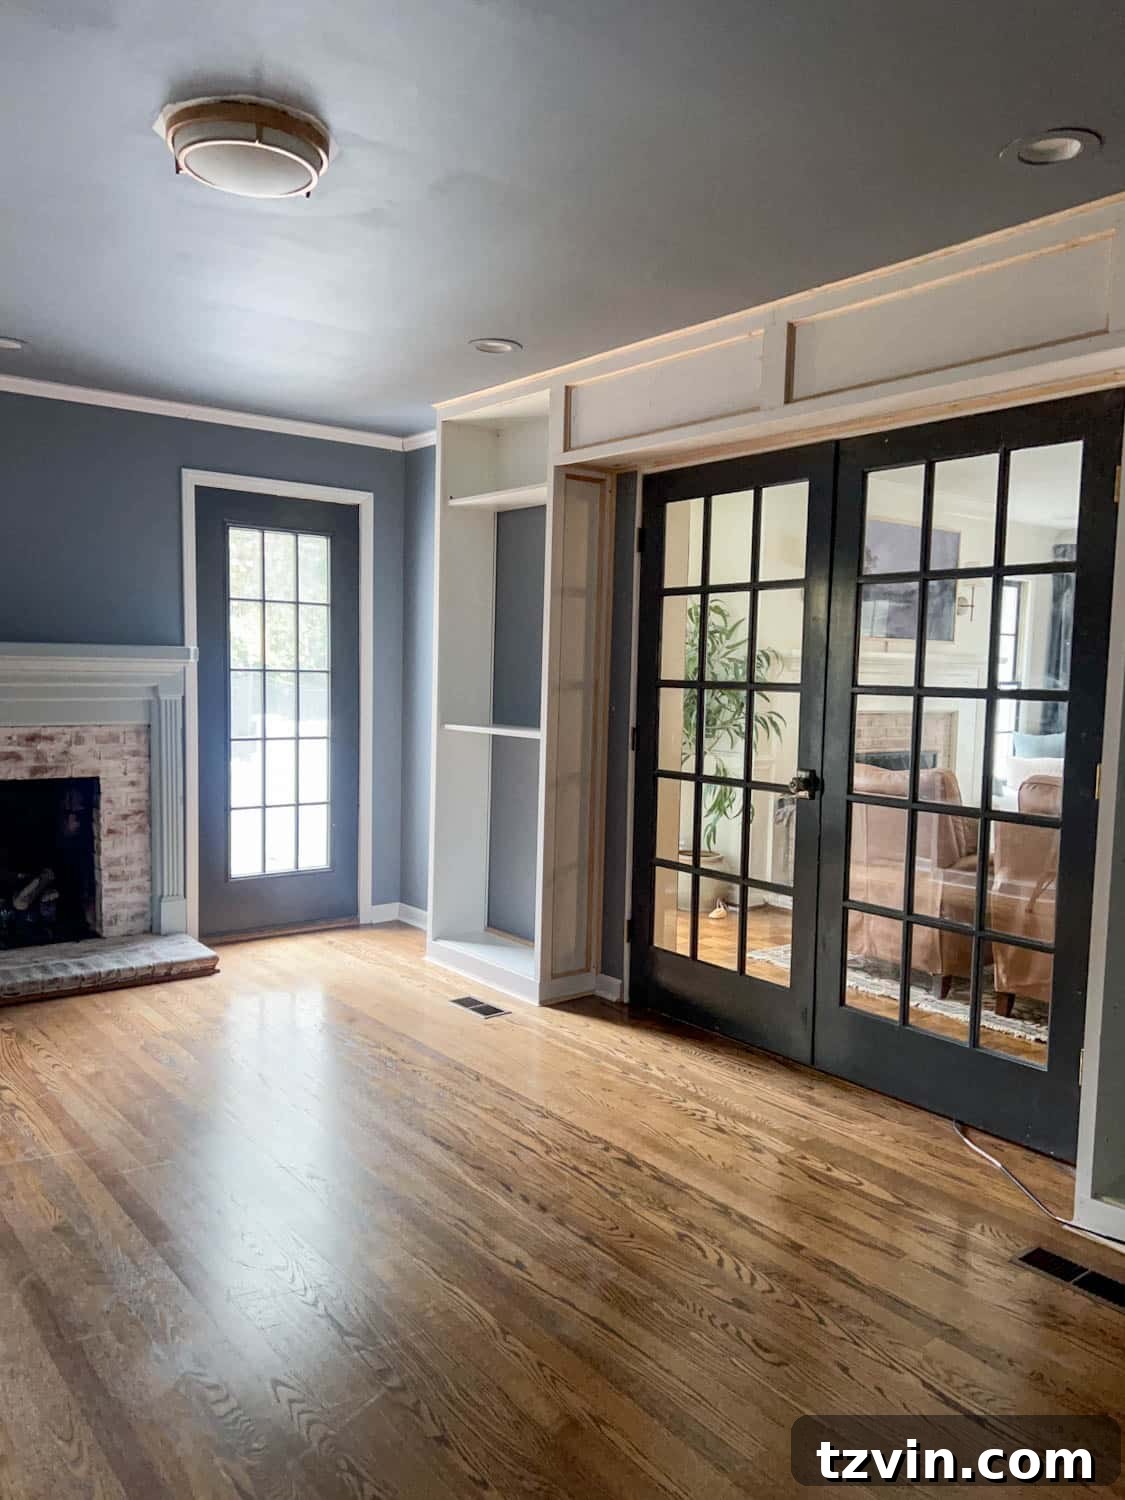
(For those curious about room access, rest assured! We maintain another entry point to the media room. This ensures smooth flow even when the projector screen is lowered for those epic family movie marathons.)
As an Amazon Associate, I earn from qualifying purchases. Please read our disclosure policy.
The Art of Disappearing Entertainment: How to Build Your Hidden Projector Screen Box
Building a custom box to hide your projector screen offers unparalleled aesthetic and functional benefits. This DIY hidden projector screen box design is specifically tailored to fit snugly between bookcases, such as the setup we created above our elegant French doors. It transforms a standard screen into an integrated feature, enhancing the room’s design rather than detracting from it.
The heart of this system is an 84″ motorized electric projector screen, operated effortlessly by a remote control. This allows you to deploy or retract the screen from any corner of the room, adding a layer of convenience and modern luxury. When planning your build, consider the power source: ensure easy access to an electrical outlet. While manual operation is an option, the remote-controlled motorized feature is undeniably cooler and more user-friendly.
Our project was designed for a room with 8-foot ceilings. If your space boasts taller ceilings, don’t worry—the design is adaptable. You’ll simply need to incorporate additional height extenders for your IKEA Billy bookcases to ensure the built-in structure reaches your ceiling line, maintaining that seamless, custom look. This flexibility makes the hack suitable for a variety of home layouts.
Essential Supplies for Your Projector Screen Concealment
Gathering the right materials is the first step to a successful DIY project. Here’s what you’ll need to create your hidden projector screen box:
- 2 IKEA Billy bookcases with height extenders: These form the foundational structure for your built-ins and provide the framework for the hidden screen.
- Motorized electric projector screen (ours is 84″): The star of the show! A motorized screen offers convenience and a sleek, retractable design. Ensure it fits your chosen opening size.
- 2 2x4x8 studs: Crucial for sturdy framing, especially for mounting the screen and bracing the box.
- 2 1x12x8 boards: These will form the top and bottom panels of your projector screen enclosure, creating the clean box shape.
- 1 1x4x8 board: Used for specific trim elements, particularly on the sides of the box, to add depth and a finished look.
- 14 1x2x8 boards: Versatile for internal framing, additional trim details, and concealing mounting points, contributing to a polished finish.
- 20 8′ cove molding pieces: For elegant, traditional detailing around the edges of your trim, giving the built-ins a high-end, custom feel.
- 18 gauge finishing nails: Ideal for attaching trim and molding subtly, leaving minimal holes for easy concealment.
- 2 1/2″ wood screws: Essential for strong, secure connections when anchoring structural pieces like the bookcases and 2x4s to the wall and to each other.
- Wood filler: For seamlessly patching nail and screw holes, creating a smooth surface ready for paint.
- Sandpaper: To achieve a perfectly smooth finish after applying wood filler and before painting.
- Caulk: For sealing gaps and cracks, ensuring a professional, gap-free appearance between different wood pieces and against walls.
Tools You’ll Need for a Seamless Build
Having the correct tools makes all the difference in achieving professional results with ease:
- Nail gun (e.g., Porter Cable Cordless Nailer): Speeds up the trim attachment process and ensures nails are flush with the surface. A cordless option offers great mobility.
- Power driver with bits: For quickly and efficiently driving wood screws, essential for anchoring and assembly.
- Jig saw: Perfect for making precise, curved, or irregular cuts, such as the opening for the screen or outlet access in the bookcase.
- Miter saw: Crucial for accurate straight and angled cuts, especially for trim and molding. A compound miter saw offers even more versatility. If you don’t have one, a miter box with a hand saw and a circular saw can serve as alternatives.
- Coping saw: Specialized for making intricate cuts for coping joints, particularly useful for fitting cove molding perfectly in corners.
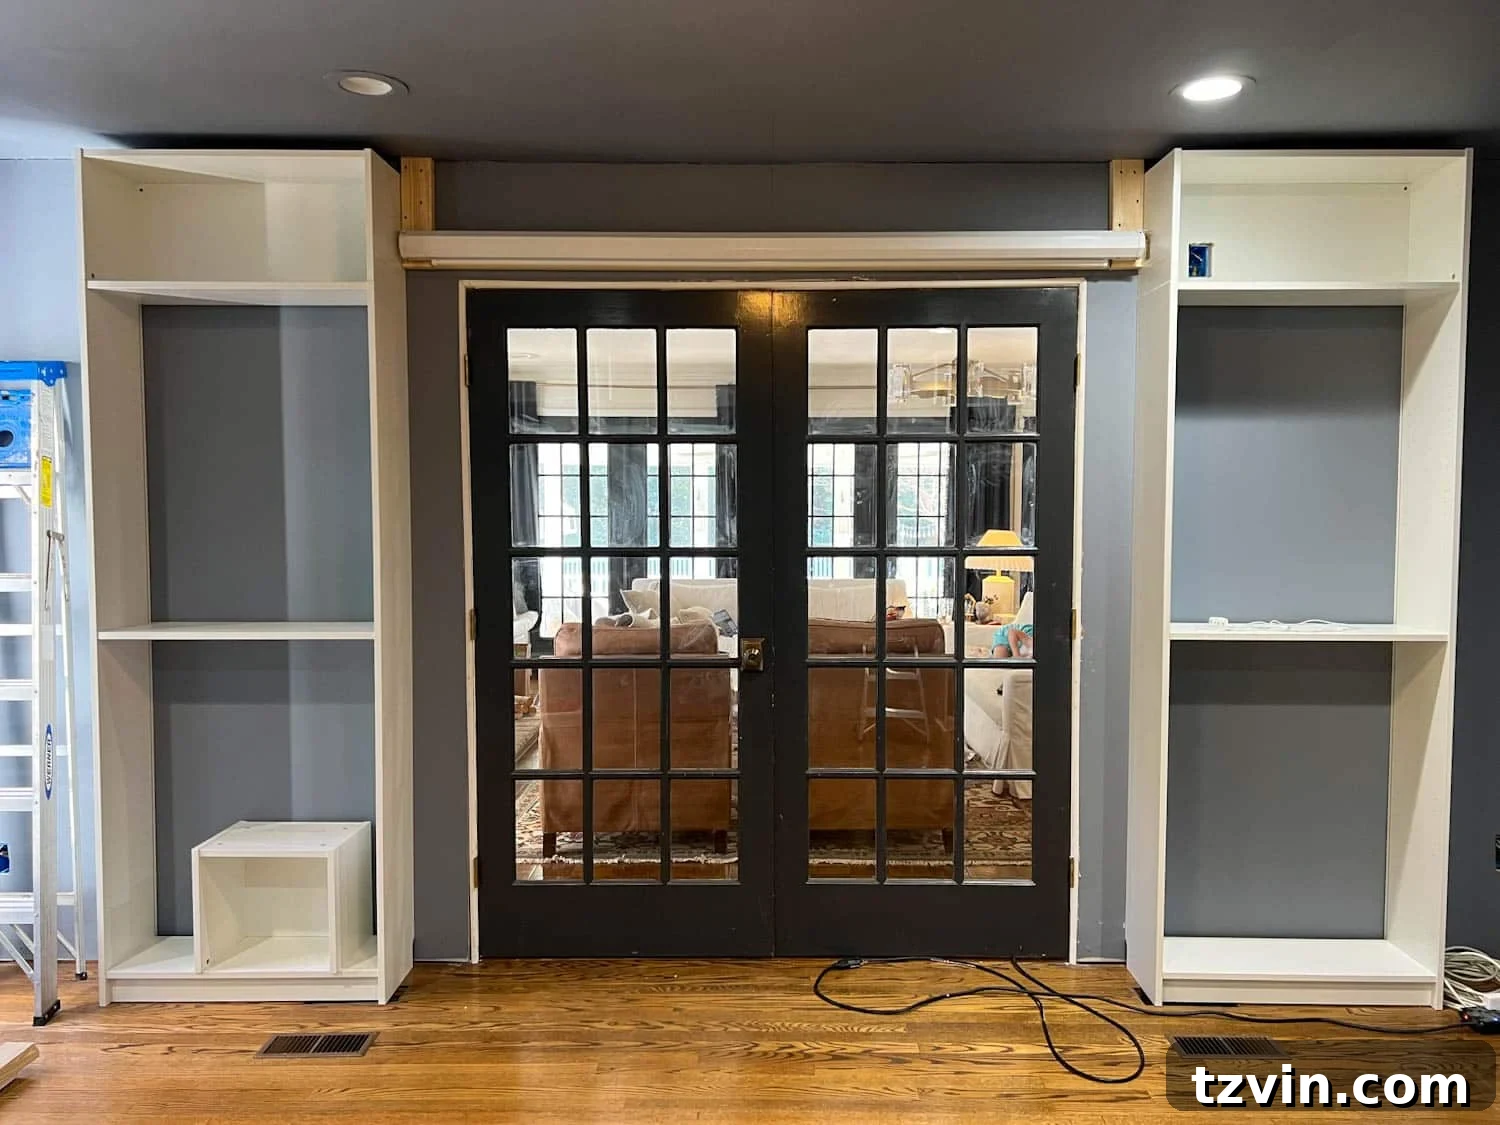
Step-by-Step Guide to Crafting Your Hidden Projector Screen Box
Step 1 – Laying the Foundation: Bookcase Assembly & Outlet Prep
Begin by assembling your IKEA Billy bookcases according to the manufacturer’s instructions, ensuring the height extenders are properly installed to reach your ceiling. Position them precisely where you envision your built-in unit. This initial placement is critical for the overall symmetry and functionality.
If your design incorporates an electric screen requiring power, identify the nearest outlet. With careful measurement, use your jigsaw to cut an appropriate opening in the back and potentially the side of one of the bookcases. This ensures seamless access for the power cord without visible wires. Remember to always prioritize safety when using power tools and ensure your cuts are clean and accurate. Once positioned, securely anchor the bookcases to the wall by driving wood screws into wall studs. This provides crucial stability and prevents tipping.
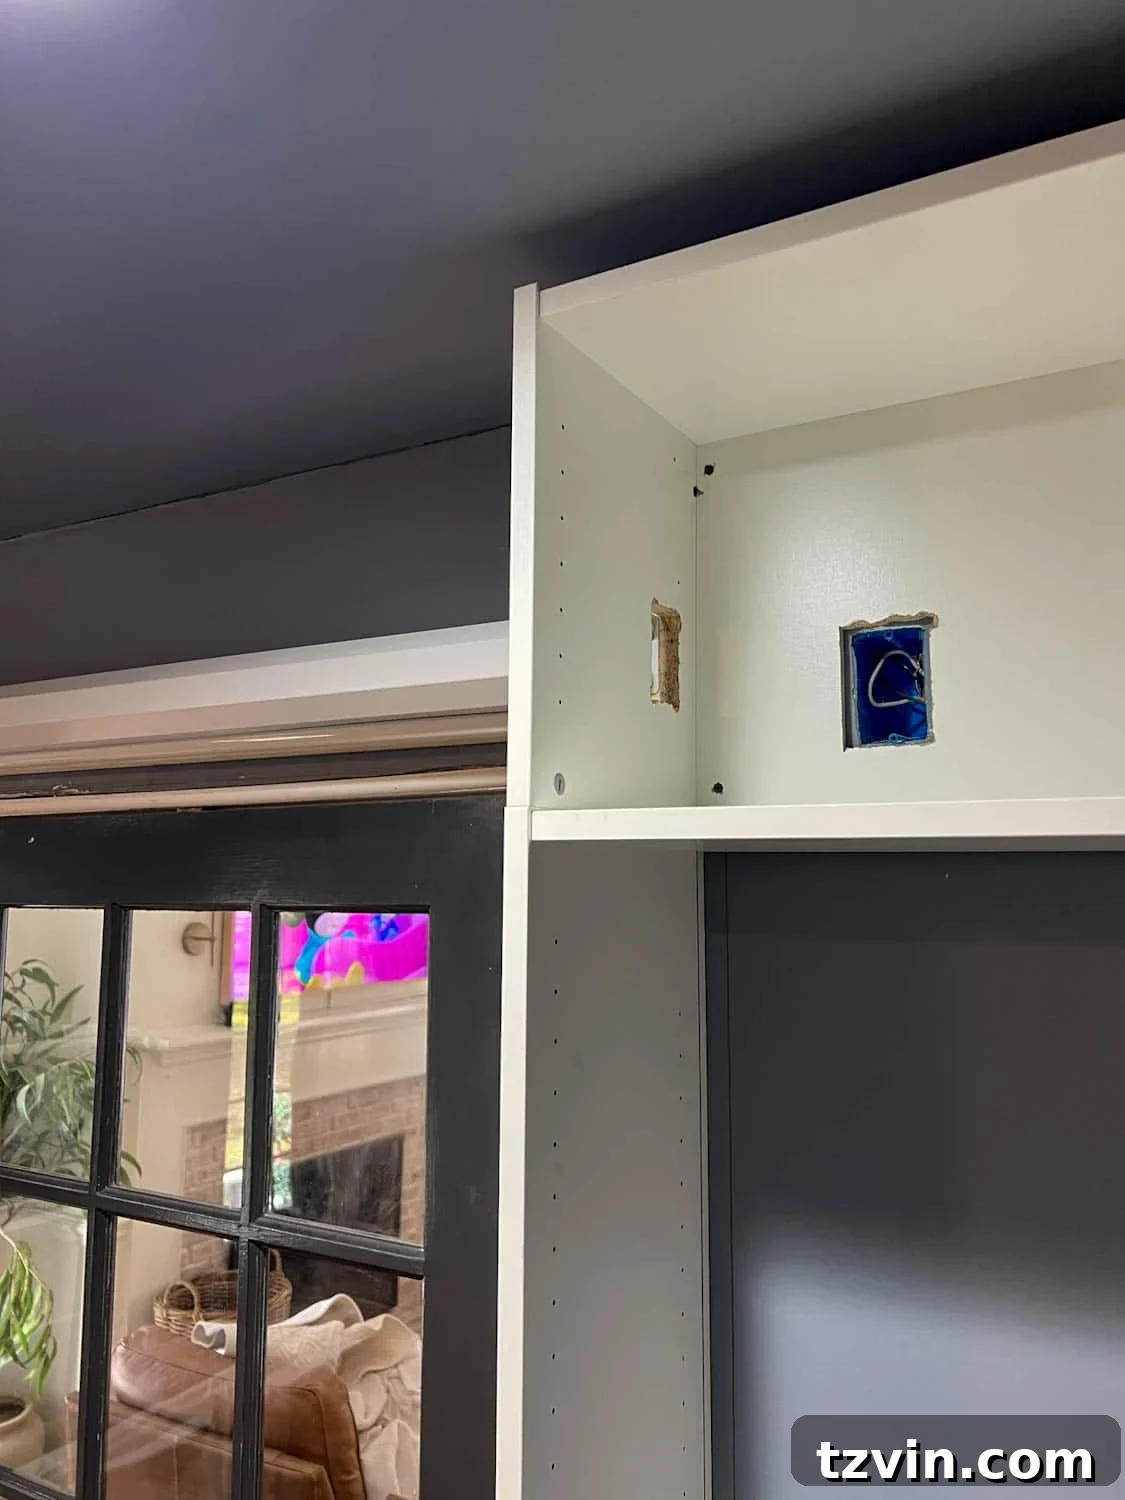
Step 2 – Mounting the Magic: Securely Installing Your Projector Screen
Next, prepare the mounting system for your projector screen. Cut two 12-inch lengths and one 74-inch length from your 2×4 studs. These pieces will form a sturdy frame for your screen. Using wood screws, securely anchor these 2x4s to the wall between your assembled bookcases. The 74-inch piece will likely span horizontally, with the 12-inch pieces providing vertical support or additional spacing.
Once the 2×4 frame is firmly in place, mount your projector screen directly onto these wooden supports. This strategic placement ensures that the screen protrudes slightly from the wall, typically by a couple of inches. This slight offset is essential, allowing the screen to lower and retract smoothly without catching or rubbing against the wall or the back of the built-in structure. It’s a small detail that makes a big difference in the screen’s operation and longevity.
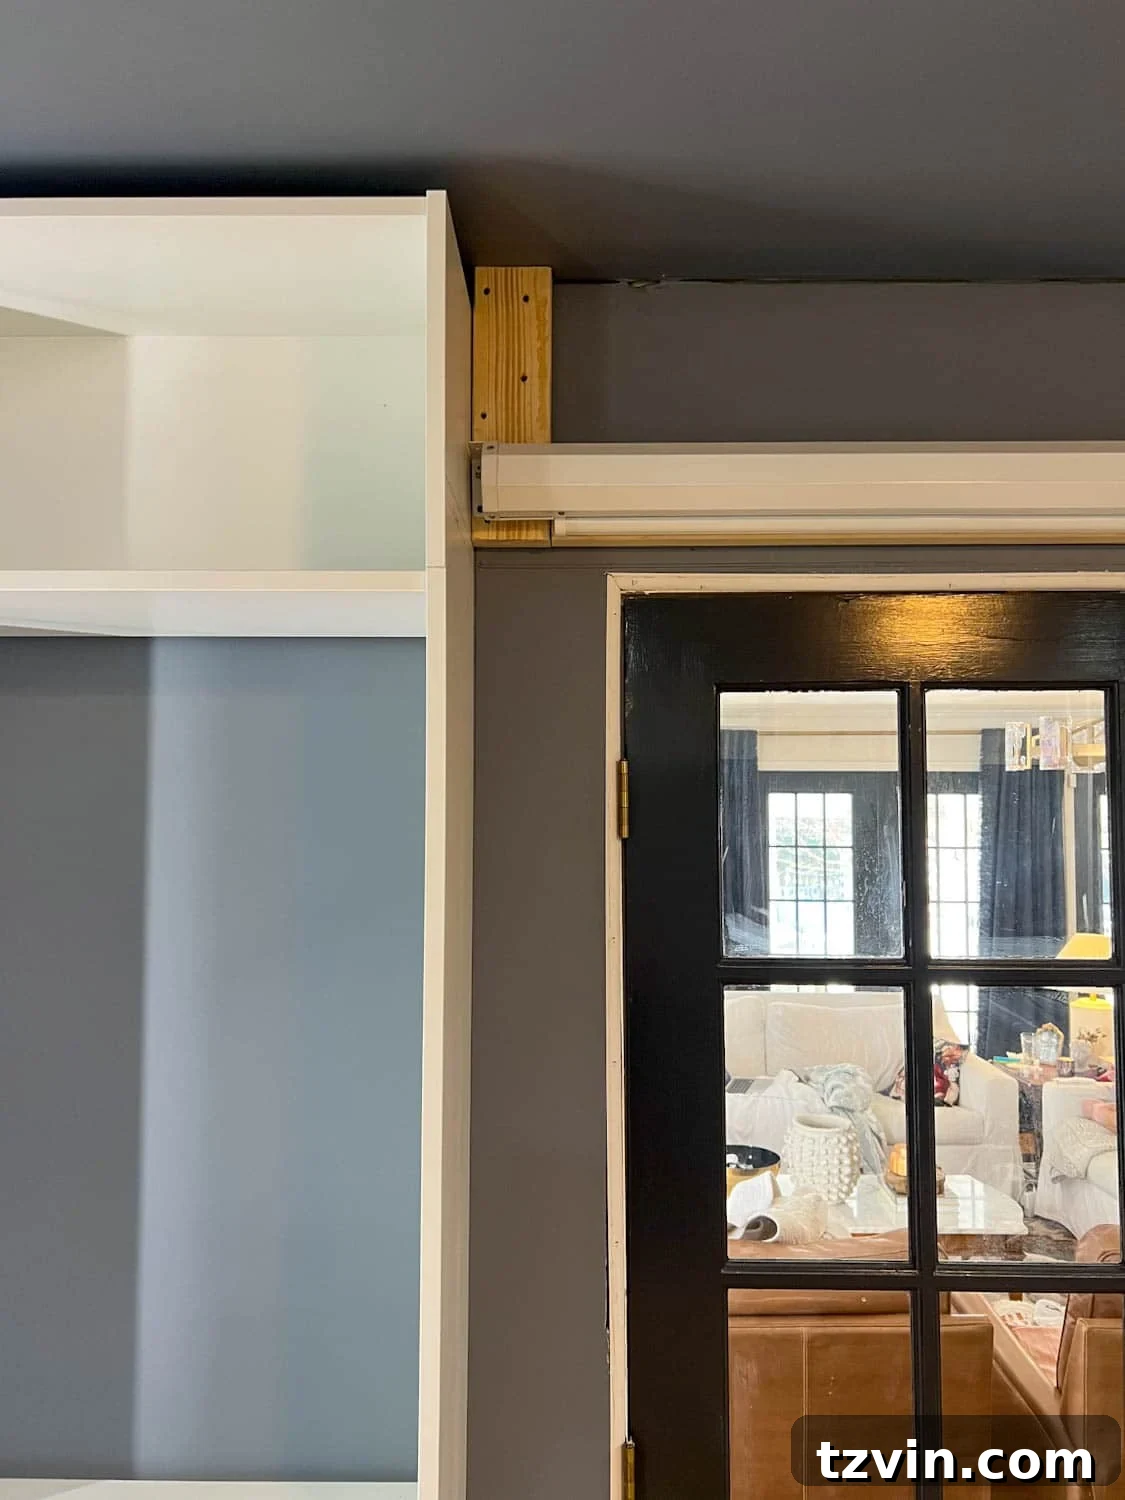
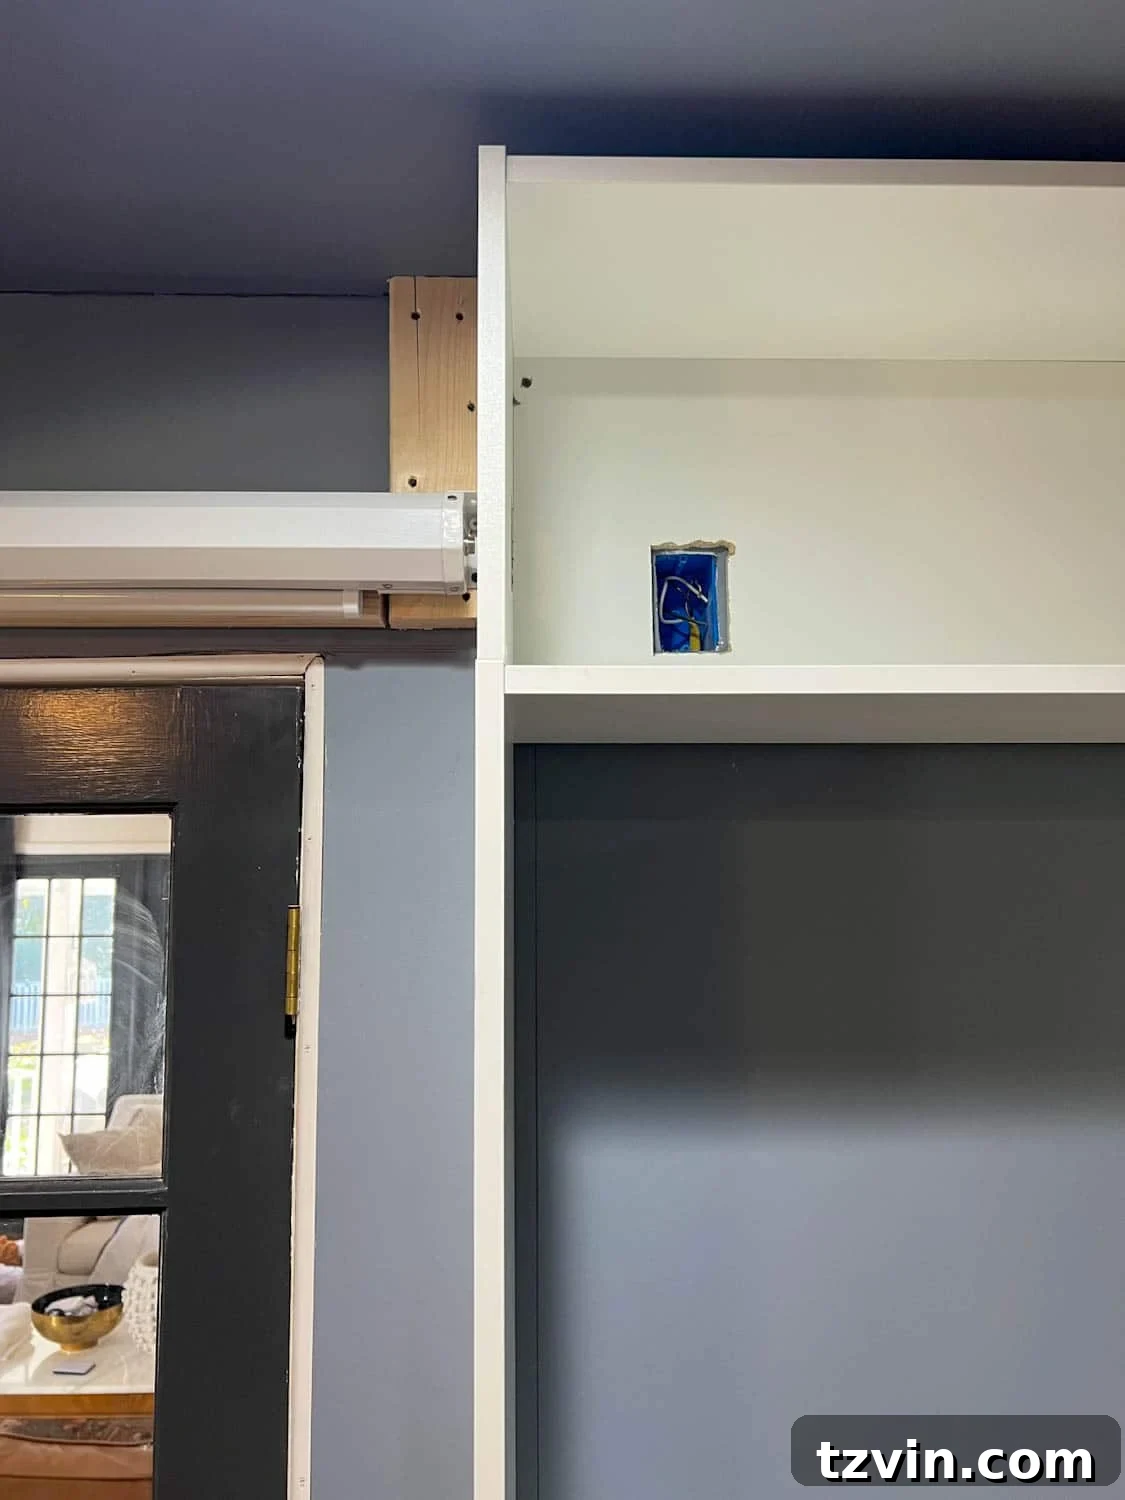
Step 3 – Building the Box Frame: Establishing the Front Brace
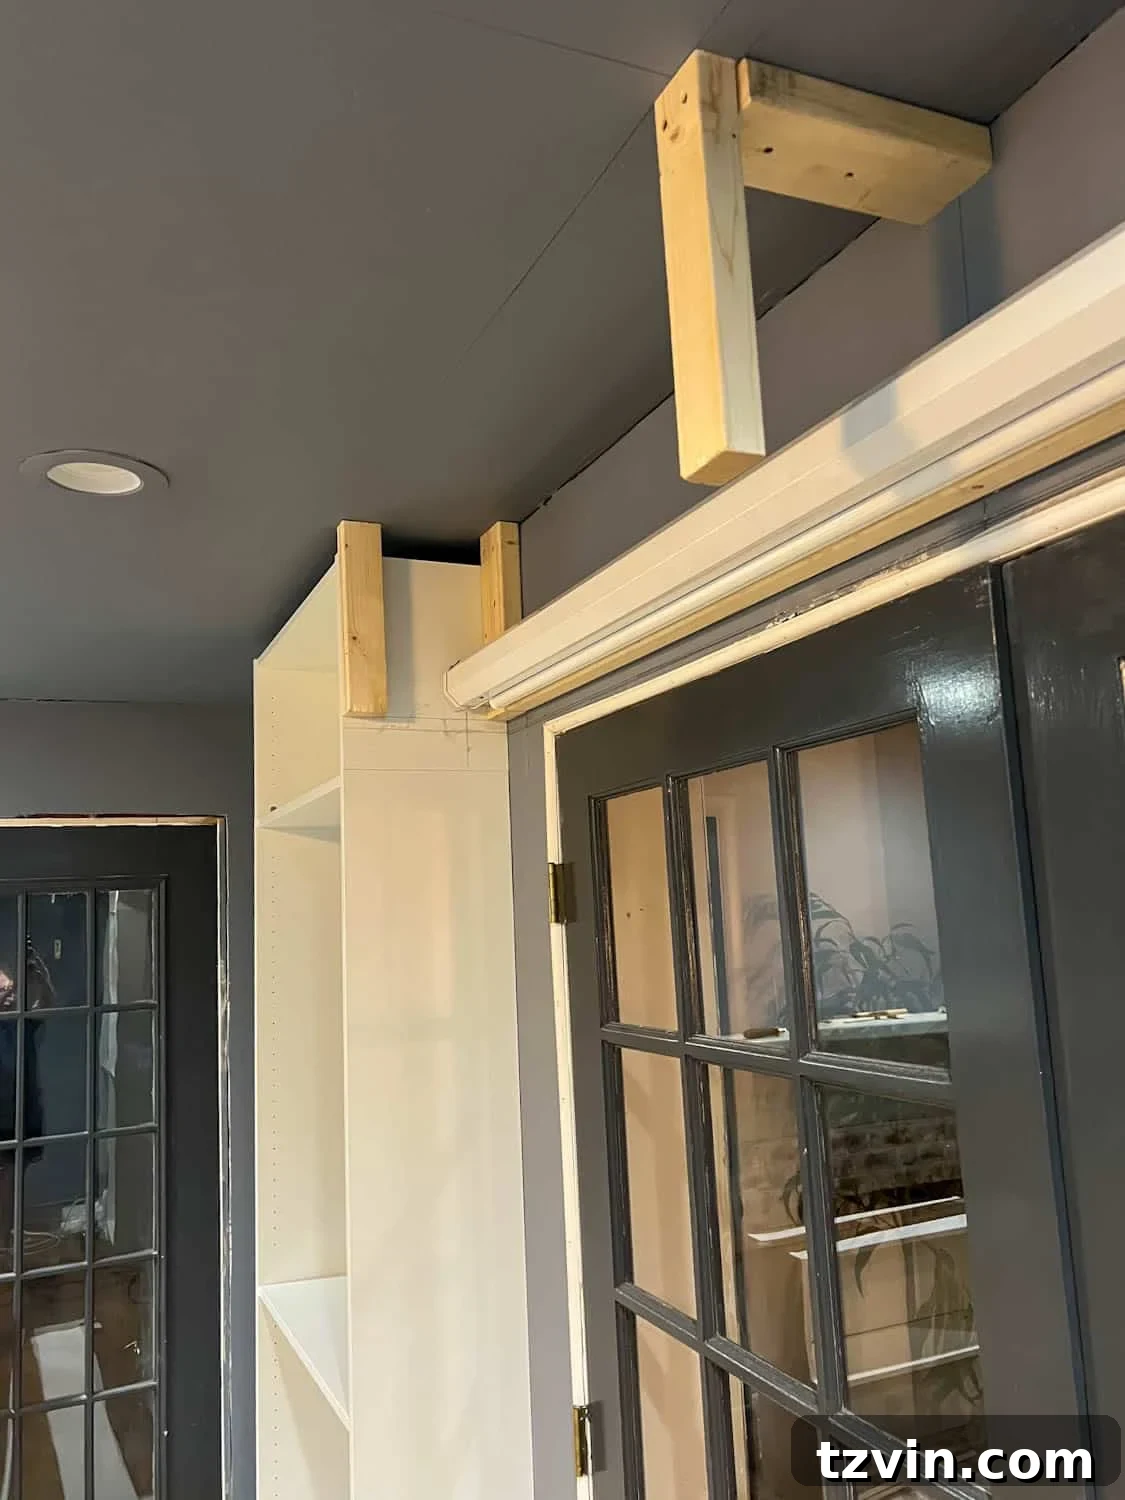
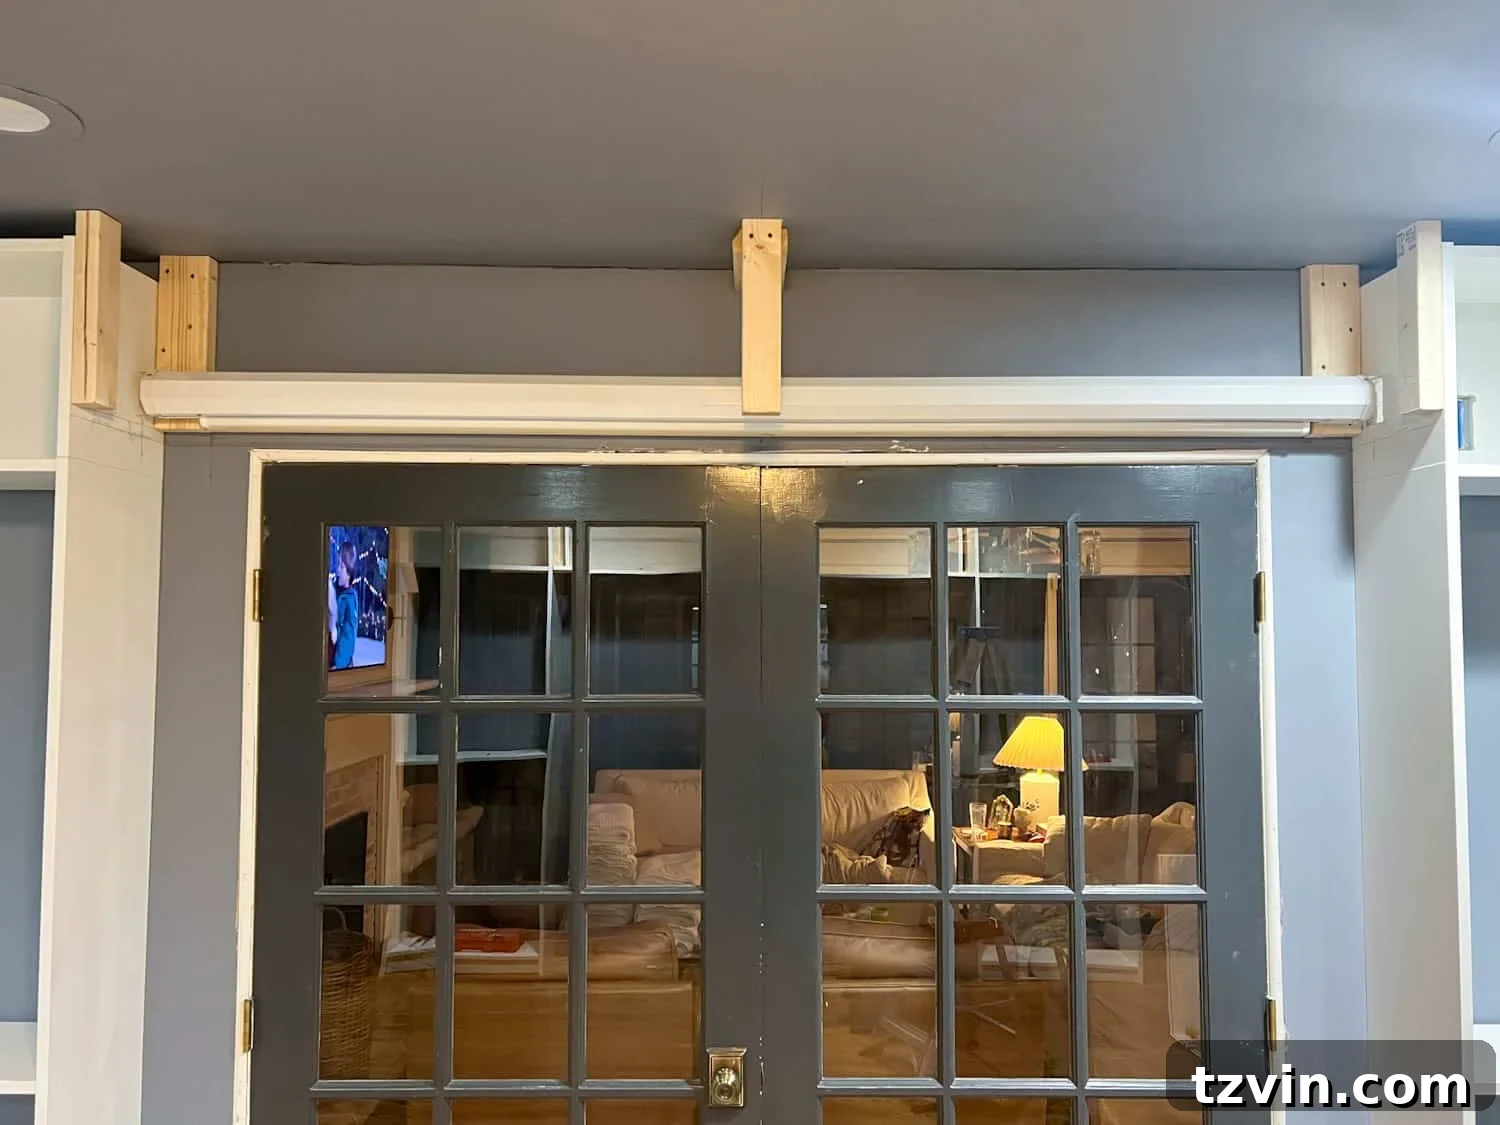
To create the robust skeletal structure of your hidden projector screen box, cut four 12-inch lengths from your remaining 2×4 studs. These pieces will act as crucial bracing elements. Utilizing wood screws, firmly attach these 2×4 pieces in strategic locations: one to the ceiling in the middle section above the French doors, one on either side directly adjacent to the top of your bookcases, and finally, one across the front of this middle section, as illustrated in the accompanying image.
These braces form the foundational frame for the front and top of your enclosure. They provide the necessary support for the decorative panels and trim that will ultimately conceal the projector screen, ensuring the entire structure is stable, rigid, and perfectly aligned with your built-in bookcases. Take care to ensure they are level and plumb for a professional finish.
Step 4 – Crafting the Screen Opening: Bottom Panel Construction
With the main bracing in place, it’s time to define the opening for your projector screen. Take one of your 1×12 boards. Using your jigsaw, carefully cut an opening into this board that precisely accommodates the width of your projector screen housing. This cut needs to be neat and accurate, as it will be the visible slot from which your screen deploys.
Once the opening is cut, attach this modified 1×12 board underneath the 2×4 braces you installed in Step 3, using additional wood screws for a firm connection. This forms the bottom panel of your box. To enhance the clean, finished look and completely hide the projector screen’s mounting hardware, place a 1×2 board directly underneath the rear 2×4 brace, flush against the wall. This small detail ensures that when the screen is retracted, all unsightly components are perfectly concealed, contributing to the seamless illusion.
Step 5 – Completing the Enclosure: Front Panel Installation
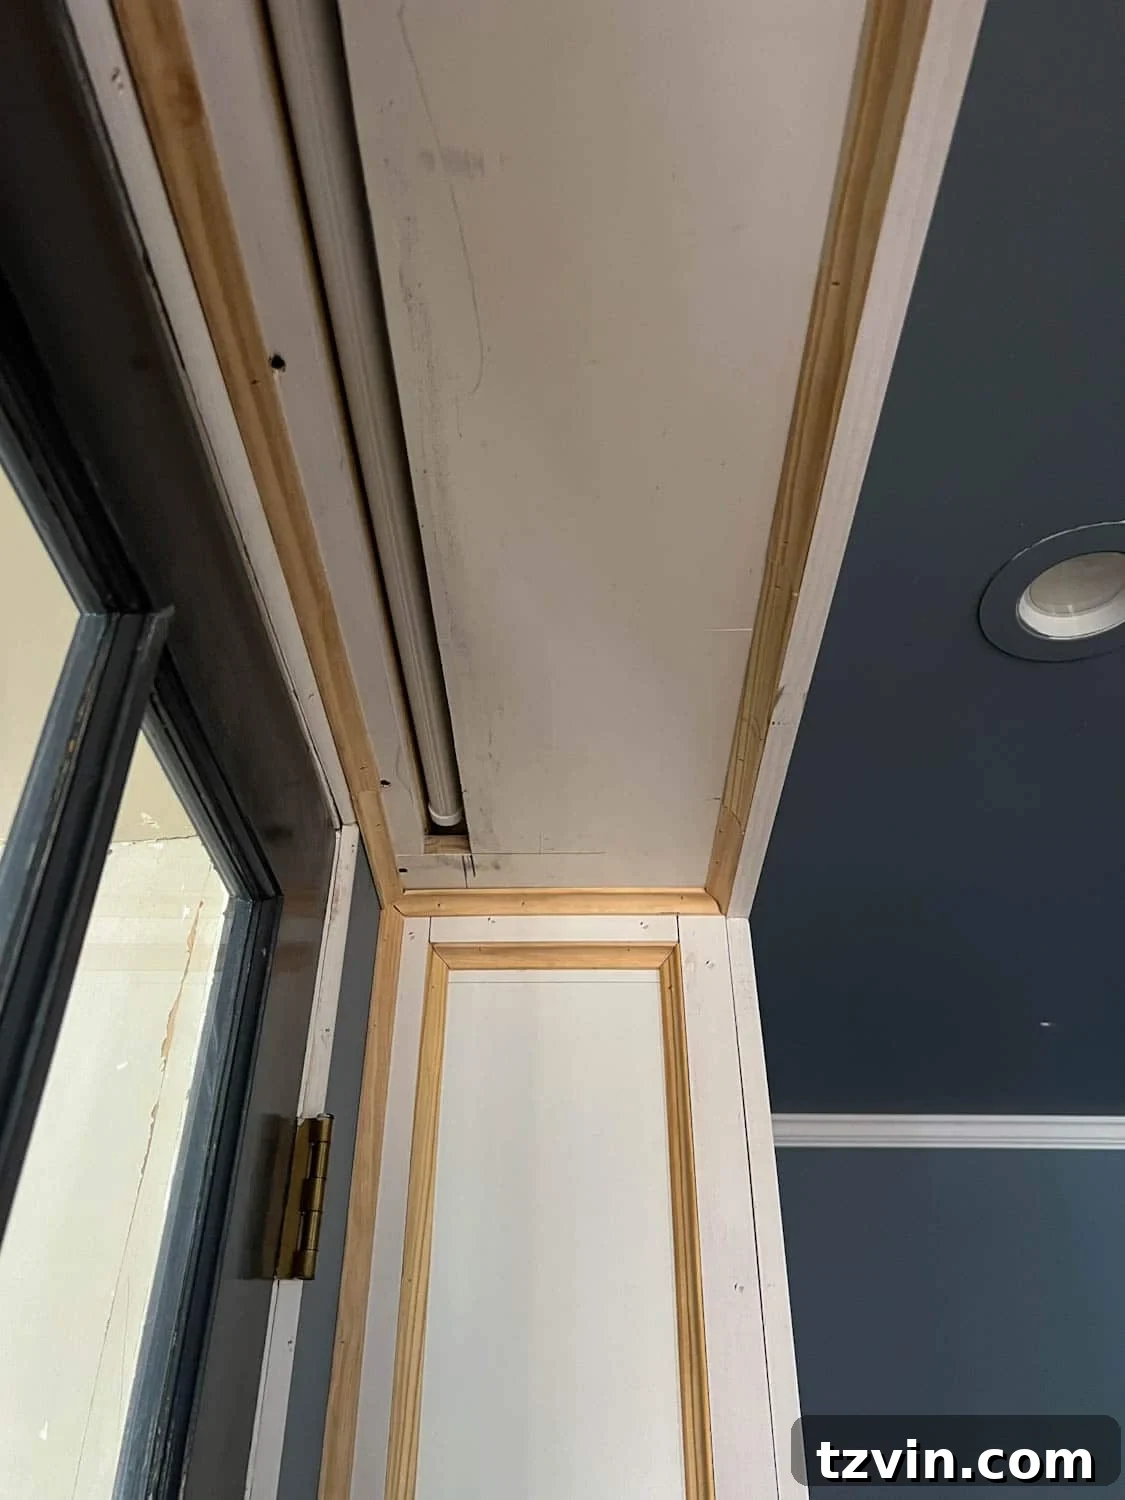
Now that the bottom panel and internal structure are complete, it’s time to fully enclose the projector screen housing. Take your second 1×12 board and attach it to the front of the 2×4 braces and the side frames, effectively completing the box shape. This panel serves as the primary face of your hidden enclosure, ensuring the projector screen remains out of sight when not in use.
Secure this 1×12 board firmly with wood screws, making sure it aligns perfectly with the adjacent bookcases and the bottom panel. A flush and even installation at this stage is crucial for a professional, built-in appearance. This step transforms the open framework into a cohesive, finished box, ready for the final decorative touches that will integrate it seamlessly into your media room’s design.
Step 6 – Elevating Aesthetics: The Art of Trim and Molding
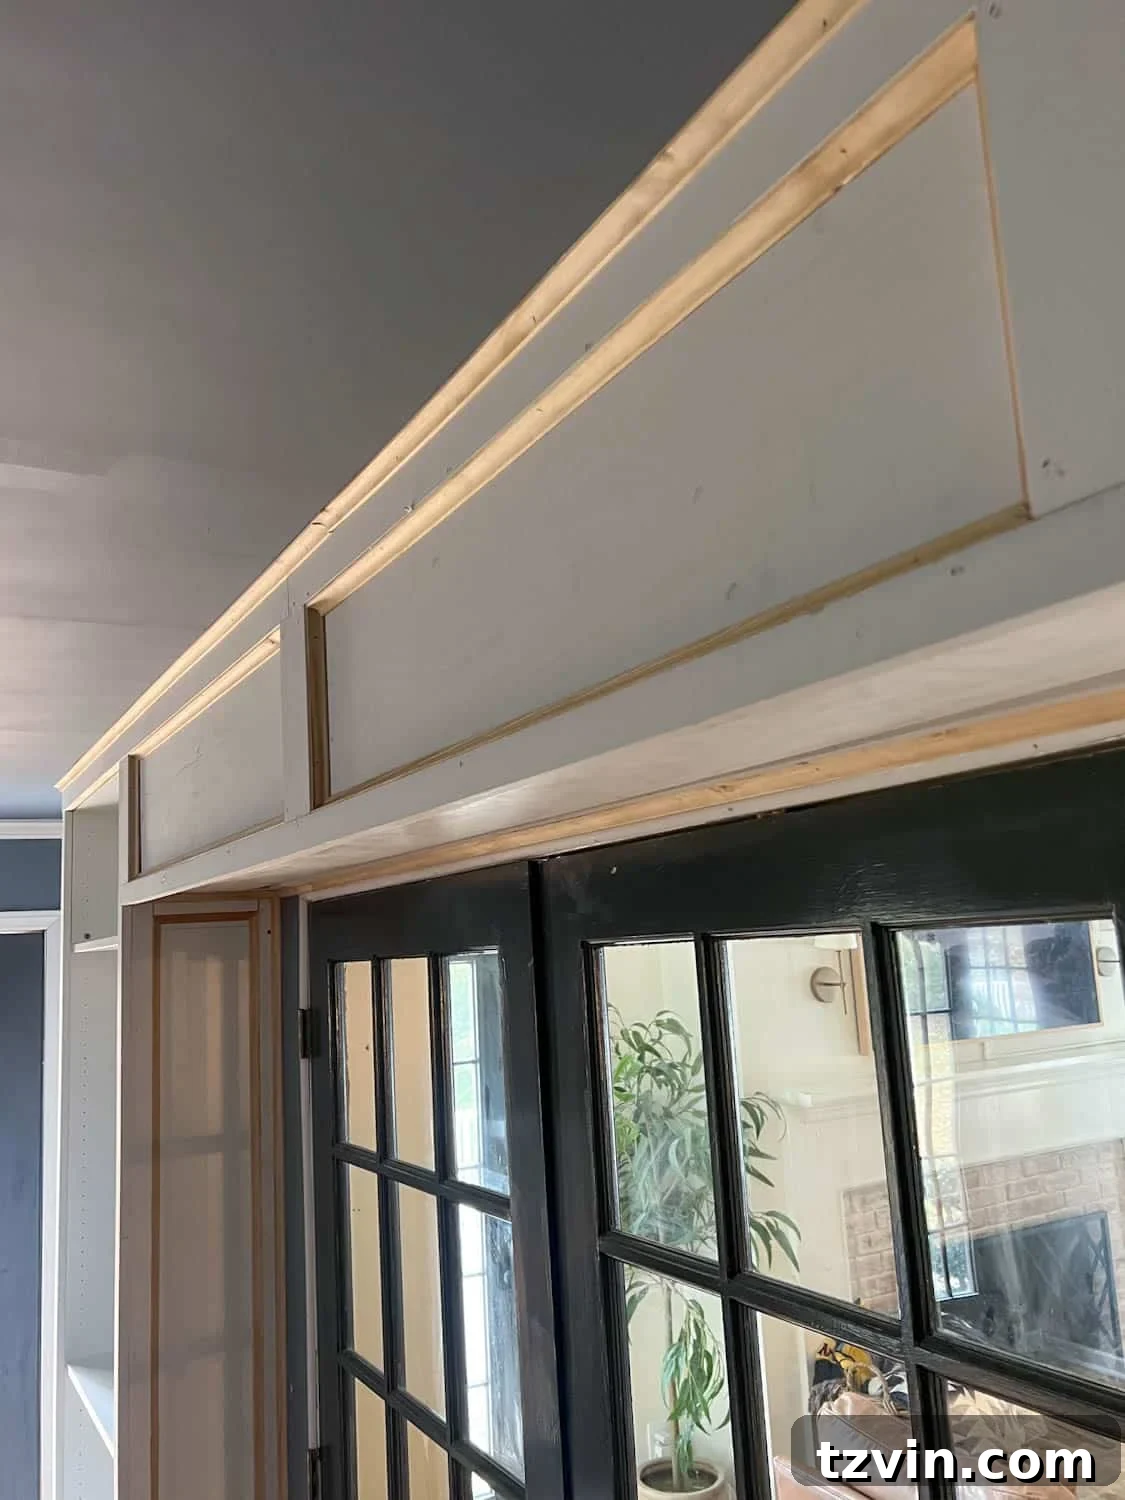
This step is where your built-in unit truly begins to shine, transforming from functional structure to refined furniture. Using your brad nailer, attach 1×2 boards to both the top and bottom edges of the newly constructed box. These pieces add depth and a layered detail, enhancing the custom look. Next, apply 1×4 boards to the sides of the box, seamlessly connecting it to the adjacent bookcases.
To further integrate the design and create a truly cohesive aesthetic, also add 1×2 boards to the front edges of your IKEA bookcases. This creates a uniform facade across the entire built-in unit. For an even more ornate and traditional style, elevate the look by adding cove molding. Using finishing nails, carefully attach the cove molding along the edges of all the 1×2 and 1×4 boards you just installed. For perfect, tight corners, utilize a coping saw to meticulously miter the ends of the cove molding, ensuring a flawless, professional finish that screams custom craftsmanship.
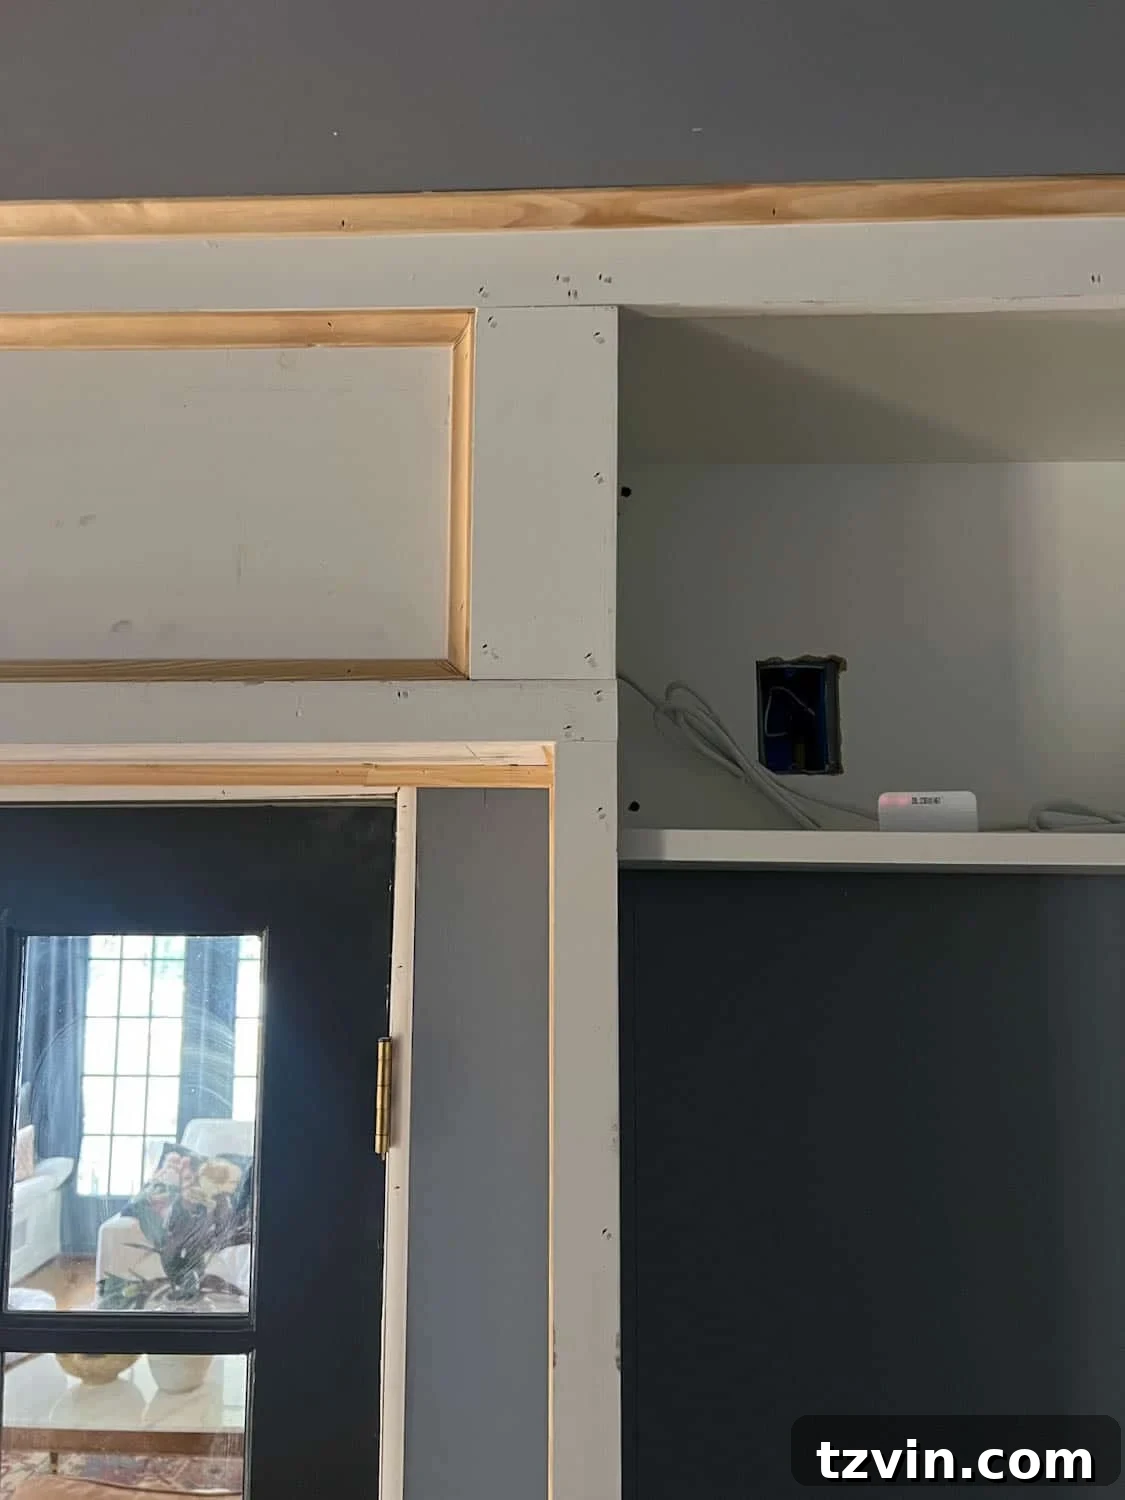
Step 7 – The Grand Finale: Finishing Touches for a Flawless Look
With all the structural and decorative elements in place, it’s time for the final, crucial steps that will make your hidden projector screen built-in look truly professional and integrated. Start by meticulously covering all visible nail and screw holes with wood filler. Apply generously, ensuring the holes are completely filled. Once the wood filler is thoroughly dry, use sandpaper to smooth the surfaces until they are perfectly even with the surrounding wood. This creates a seamless, blemish-free foundation.
Next, apply caulk to any cracks or gaps that remain after sanding, particularly where different wood pieces meet or where the built-in structure meets the wall or ceiling. Caulk fills these imperfections, providing a smooth transition and preventing paint from seeping into unwanted crevices. Finally, the moment of transformation: prime all new wood surfaces, then apply your chosen paint color. A good quality primer ensures even paint adhesion and a durable finish. Paint with care, covering all surfaces for a uniform, polished look that brings your ultimate home media room vision to life.
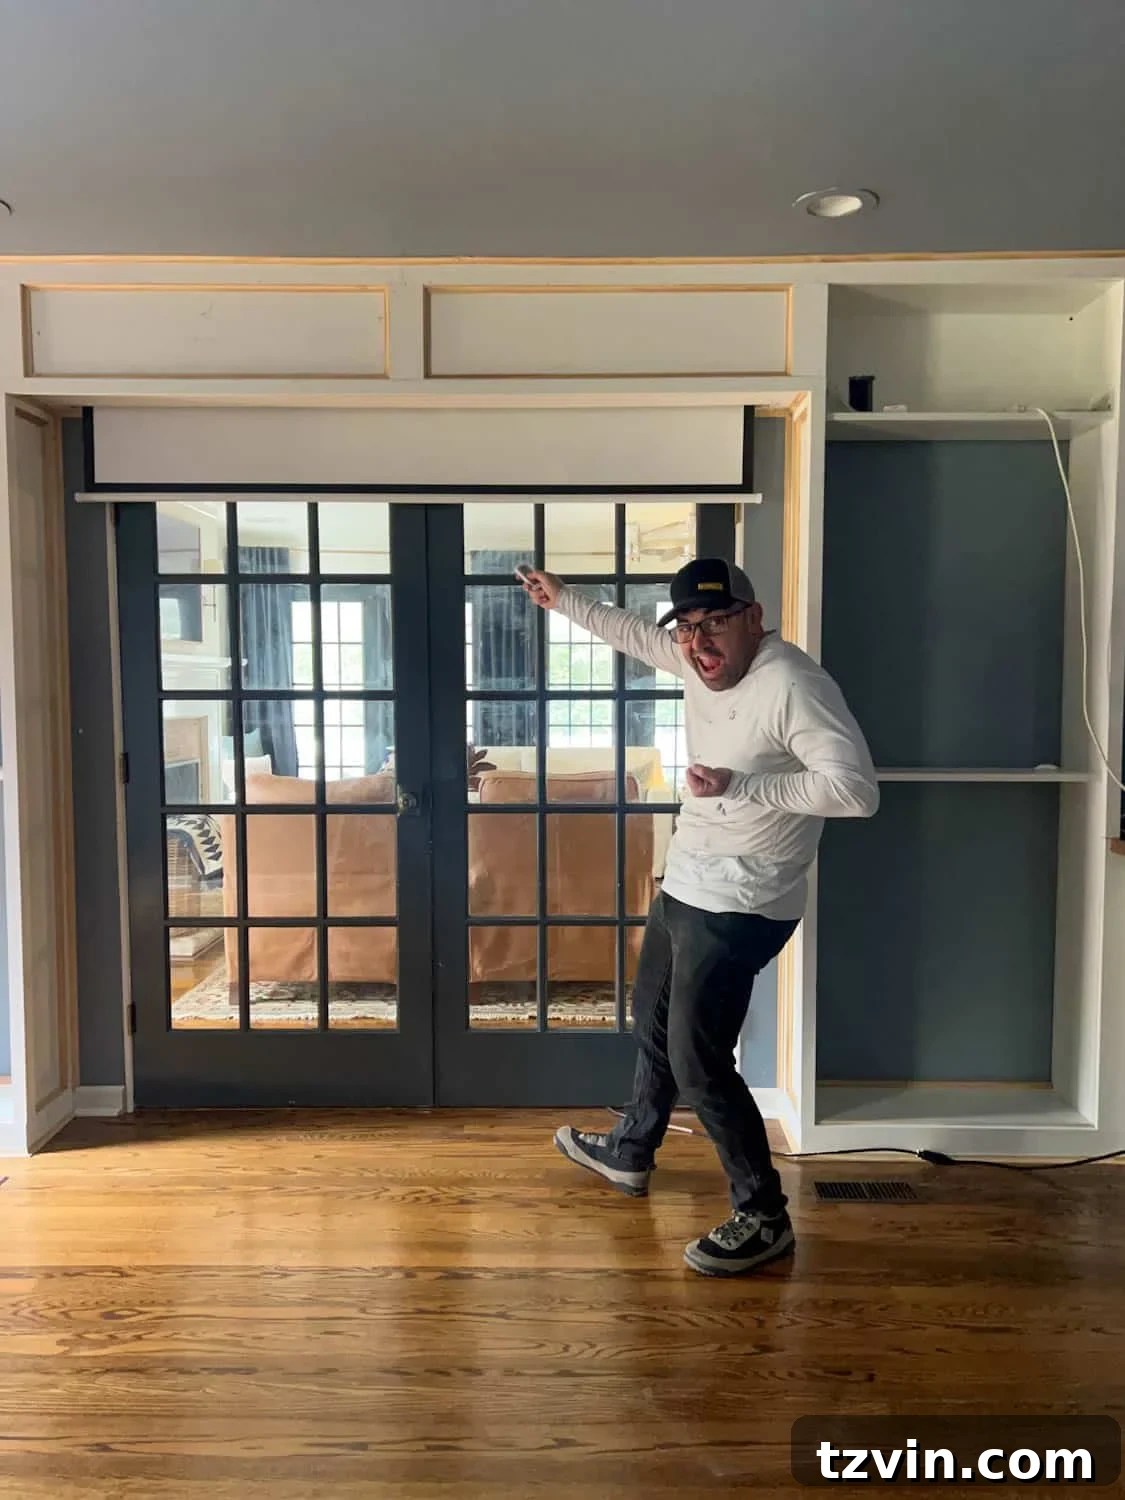
This hidden projector screen truly elevates our home media room, and the satisfaction of seeing it come together is immense. My partner, Robert, is particularly excited about the potential for his future gaming setup—and who can blame him? This space is designed for both immersive entertainment and everyday functionality.
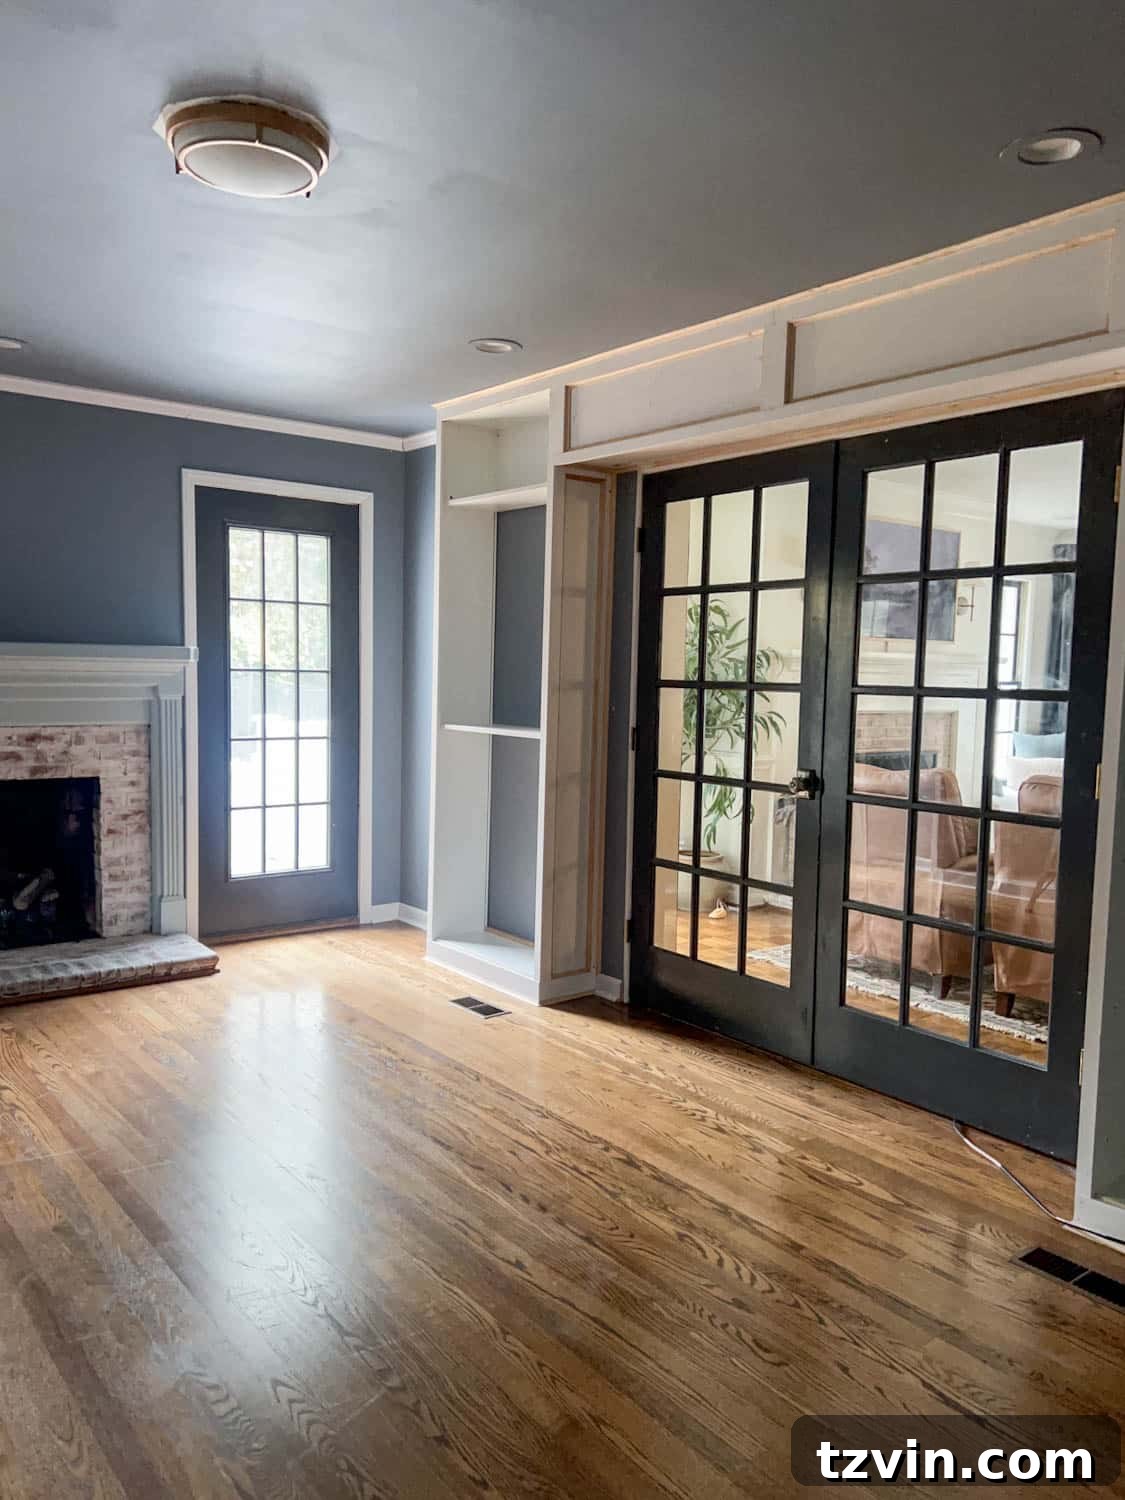
While the core structure is complete, we still have exciting plans ahead! A fresh coat of paint will unify the built-ins with the room’s overall aesthetic, and we envision adding elegant glass front doors to the bookcases, adding both style and a touch of sophistication. The progress so far is incredible, and we can already see the amazing final result taking shape.
The beauty of this design is its versatility. For epic family movie nights or intense gaming sessions, the recessed screen effortlessly descends into view. But for everyday living, or when we want to fully utilize the double doors for an open and airy feel, it retracts seamlessly, making the screen practically invisible. It’s the perfect blend of high-tech entertainment and thoughtful, integrated design.
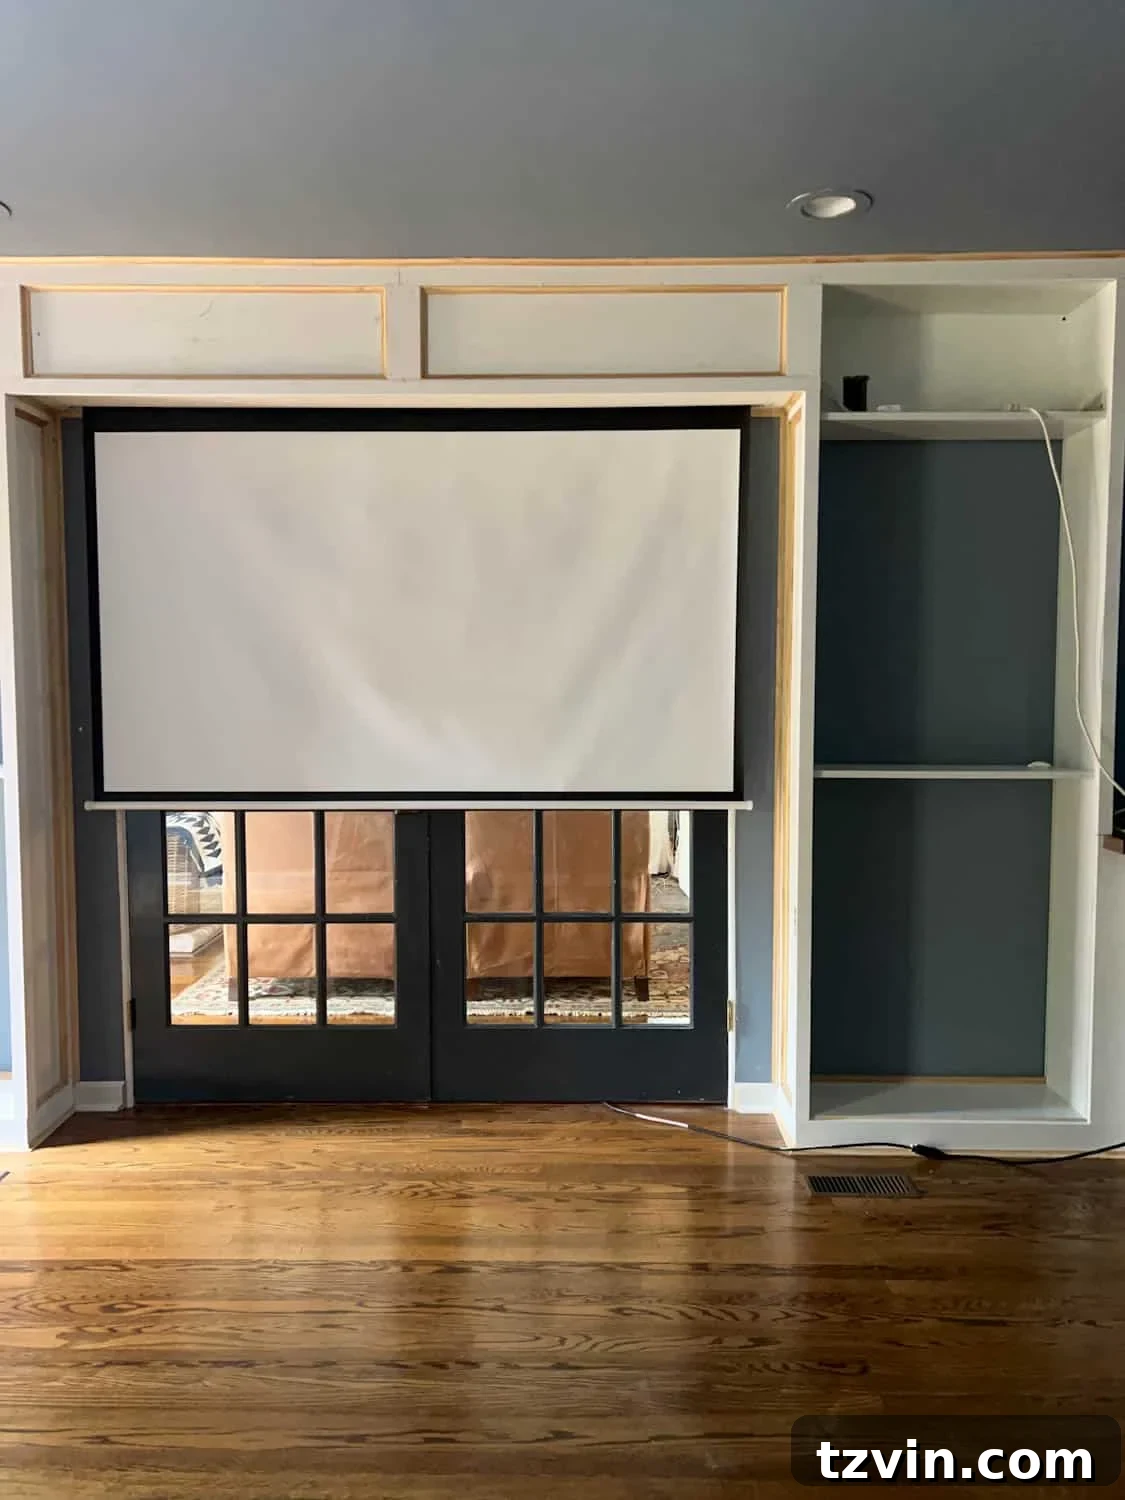
The entire media room is destined for a transformation with a deep, rich blue/green color scheme. The hunt for that perfect, captivating shade is still ongoing, but the vision is clear: a vibrant, inviting space. We’re also planning to install a really fun, statement wallpaper on the ceiling, adding an unexpected playful touch – after all, this room is meant to be a place of joy and relaxation, not taking itself too seriously!
Beyond this incredible projector screen hack, Robert has also been diligently working on additional built-ins for the other two walls of the room. We absolutely cannot wait to reveal how all these elements come together to create a truly spectacular and functional media room. For a sneak peek into the broader design scheme, be sure to check out our complete media room plans.
You can stay updated on all our progress and behind-the-scenes moments by following along on the Bless’er House Instagram Stories. We love sharing our DIY adventures with you!
Unleash Your Creativity: More DIY IKEA Hack Ideas
Inspired by this hidden projector screen? Dive deeper into the world of IKEA hacks and discover more creative ways to customize IKEA storage pieces for your home:
- DIY Built-In Bookshelves Using the IKEA Billy Bookcase Hack
- 5 DIY IKEA Storage Hacks We’ve Used and Recommend
- DIY IKEA Closets Using Billy Bookcases
- 20 Inspiring IKEA Pax Closet Makeovers
- DIY IKEA Bookcase Built-In Shelves
- DIY IKEA Pantry Cabinet Using Hemnes
Frequently Asked Questions About Hidden Projector Screens
While a dedicated projector screen offers the best image quality, you have several budget-friendly DIY alternatives. You can explore options like a shower curtain liner (see our guide on how to use a shower curtain liner as a DIY movie screen), a clean white bed sheet, a smooth white wall, a white plastic tarp, or even a canvas drop cloth. For an unconventional approach, some people even project onto a smooth white ceiling for a unique viewing experience.
For a truly hidden and seamless setup, a motorized electric screen is highly recommended. It allows for effortless deployment and retraction with a remote control, making the screen appear and disappear like magic. A manual screen, while more affordable, requires physical interaction to pull down and roll up, which can interrupt the sleek illusion of a hidden system and be less convenient in a built-in enclosure.
While the IKEA Billy bookcase with height extenders is ideal due to its modularity and common dimensions, this hack can be adapted for other IKEA shelving units or even custom built-ins. The key is to ensure the chosen shelves provide sufficient structural support and allow enough space between them to accommodate your projector screen and the custom enclosure. You may need to adjust the dimensions of the 2x4s and other wood pieces accordingly.
Effective cable management is crucial for a clean, hidden look. Plan your electrical access point carefully, as demonstrated in Step 1, to allow the screen’s power cord to be plugged in discreetly behind the bookcase. For projector cables (HDMI, audio, etc.), consider running them through conduit hidden within the wall or behind the built-ins to your projector. Wireless HDMI kits can also reduce cable clutter. The goal is to keep all wiring out of sight for a professional finish.