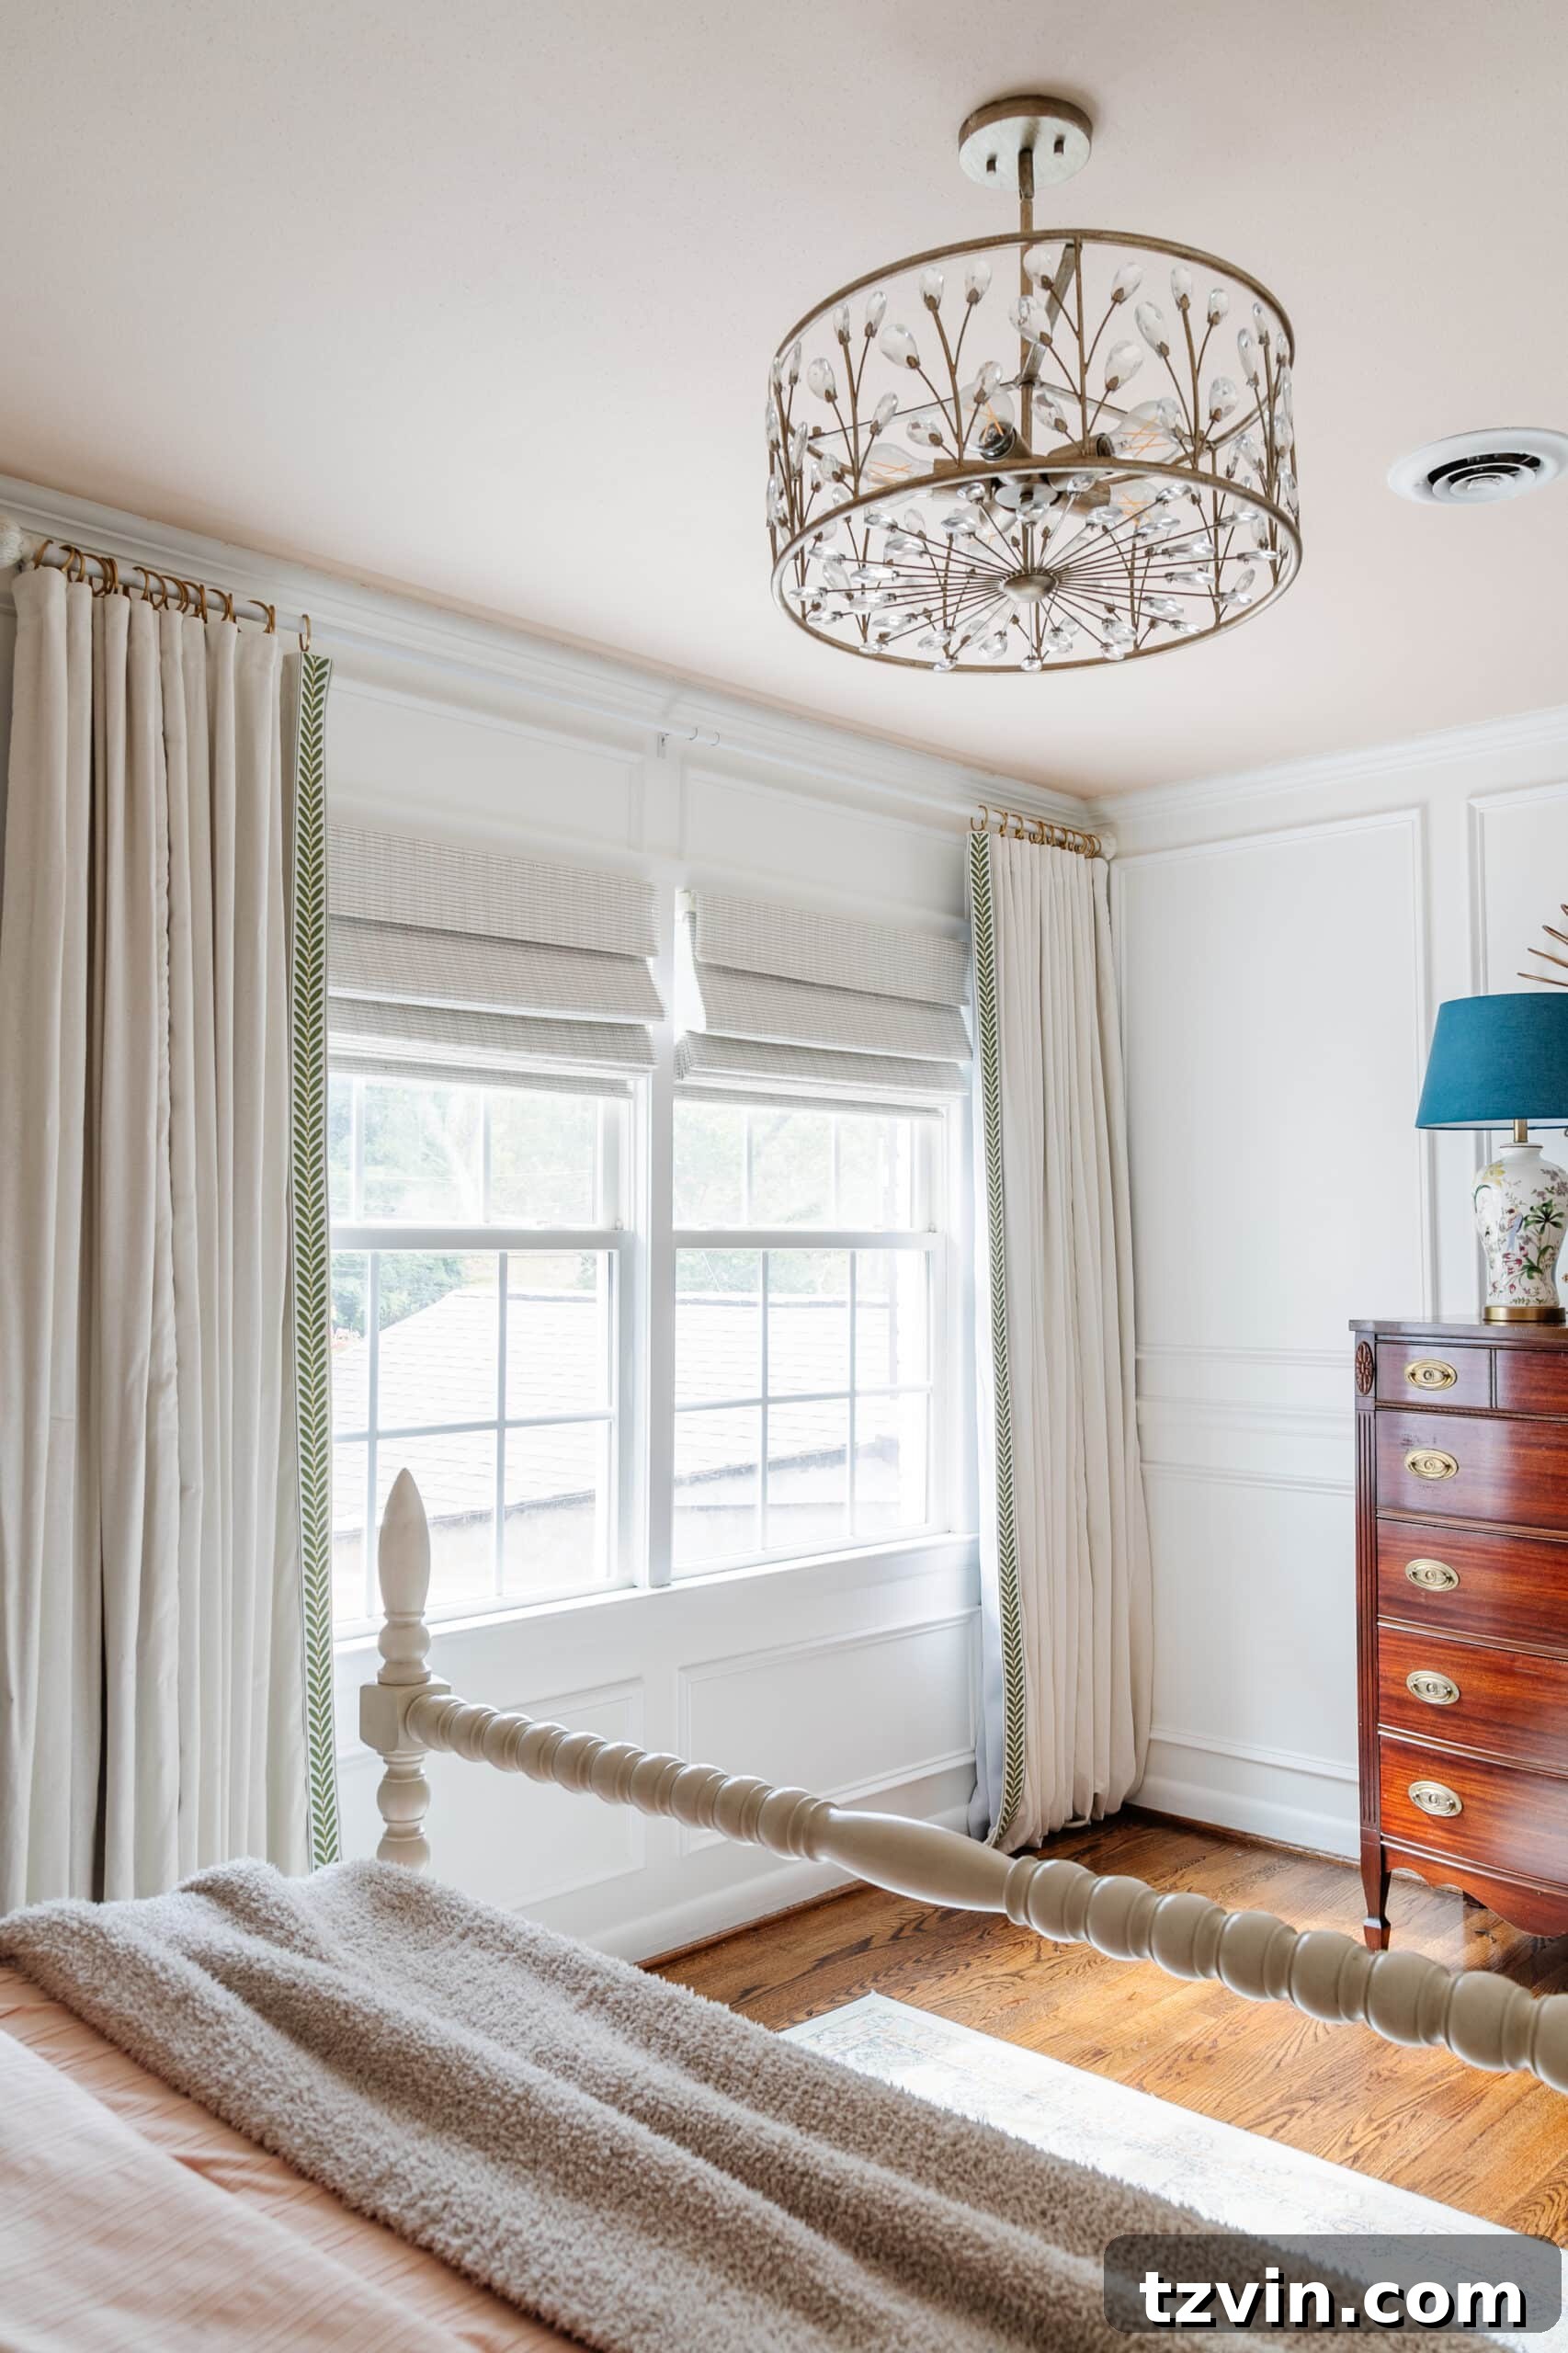
Transform Your Windows: DIY No-Sew Curtains with Passementerie Trim for Grandmillennial Style on a Budget
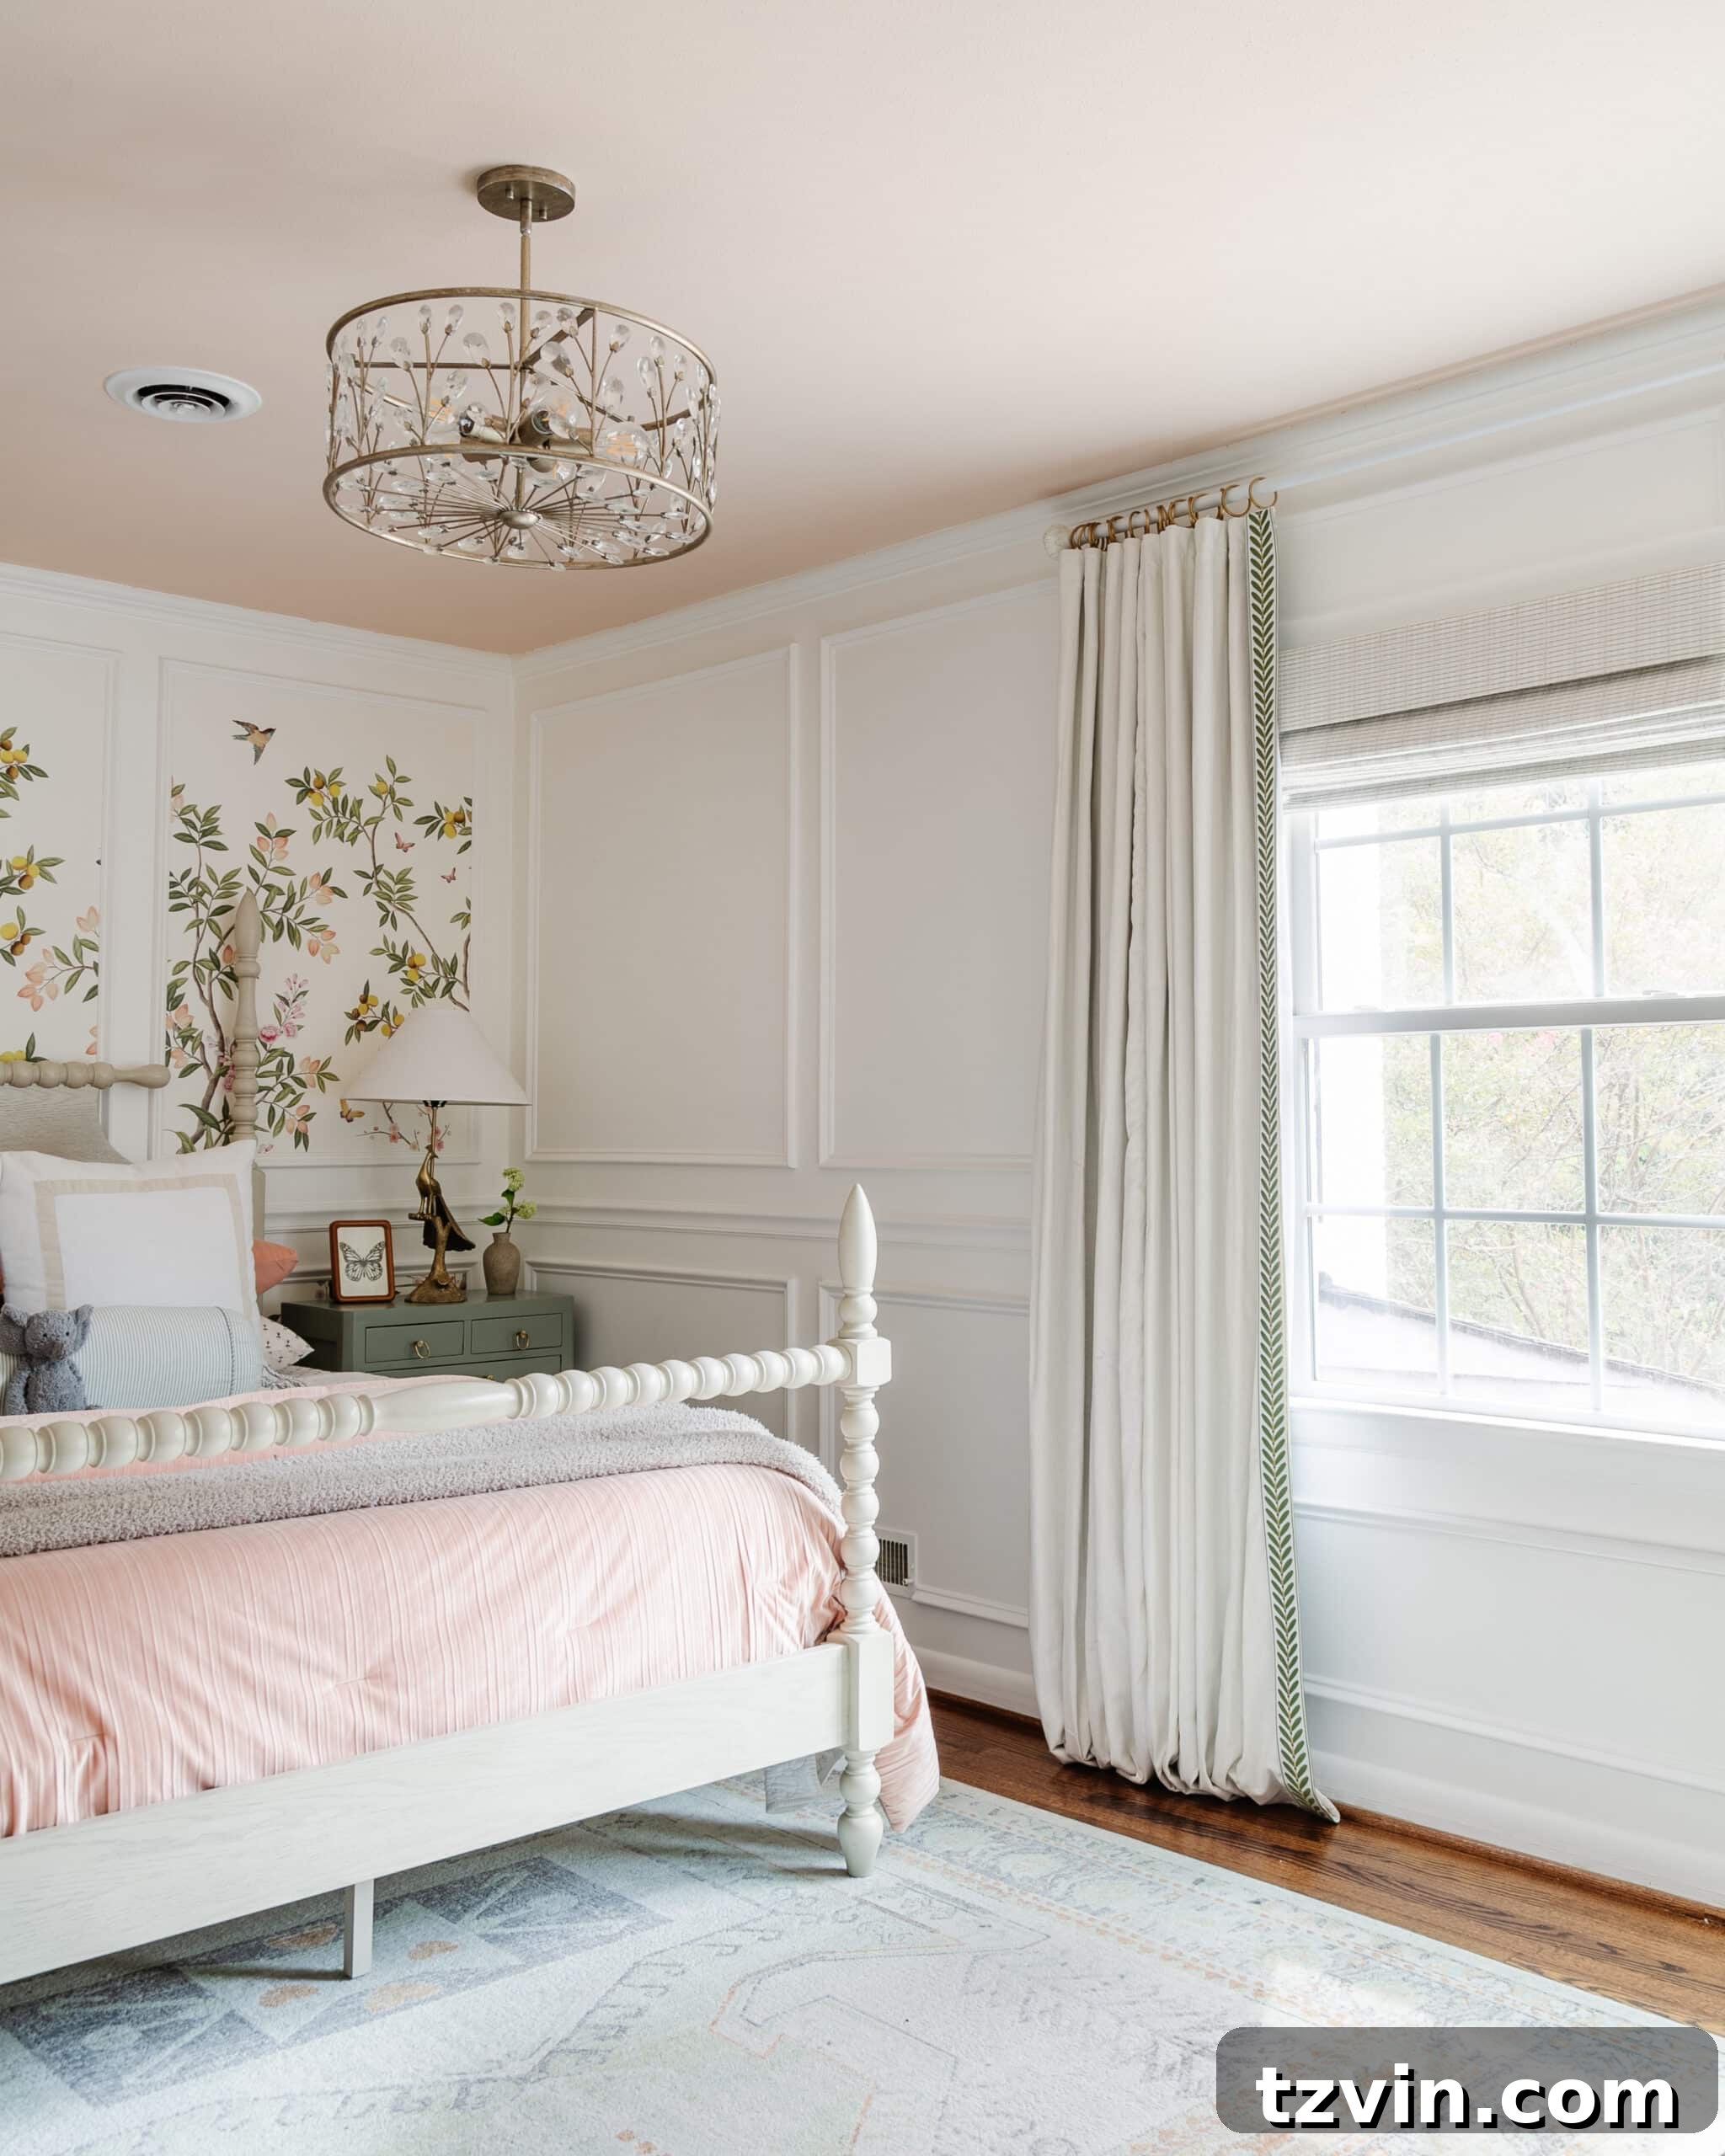
For quite some time, I’ve envisioned the perfect pair of grandmillennial cottage-style curtains for my younger daughter’s bedroom. The moment I hung the enchanting chinoiserie wallpaper in her space, I knew exactly the sophisticated, yet charming, window treatment it needed. Imagine luxurious drapes adorned with exquisite passementerie trim, flowing elegantly to complete the whimsical, classic look. This dream, however, came with a couple of significant hurdles.
Overcoming the Hurdles to Dream Curtains: Cost and Skill
My vision of beautiful, designer-inspired curtains was clear, but two major obstacles stood in my way:
1. **Exorbitant Cost:** Curtains featuring delicate passementerie details are notoriously expensive. I absolutely adored these trimmed curtains from Frontgate, but the price tag—over $1,000 for just one panel—was simply not within my budget. Achieving that grandmillennial elegance shouldn’t break the bank.
2. **Lack of Sewing Skills:** Despite numerous attempts and a strong desire, I am completely inept with a sewing machine. The thought of intricate stitching filled me with dread, making traditional curtain making an impossible task.
Unlock Elegant Window Treatments: The No-Sew Curtain Revolution
You absolutely do not need to be a skilled seamstress to create stunning, custom curtains or to add beautiful embellishments. My secret weapon for this DIY no-sew curtain project was hemming tape – a permanent fabric adhesive that makes “sewing” completely unnecessary. This simple, yet incredibly effective, hack allowed me to achieve the luxurious look I craved without touching a needle and thread.
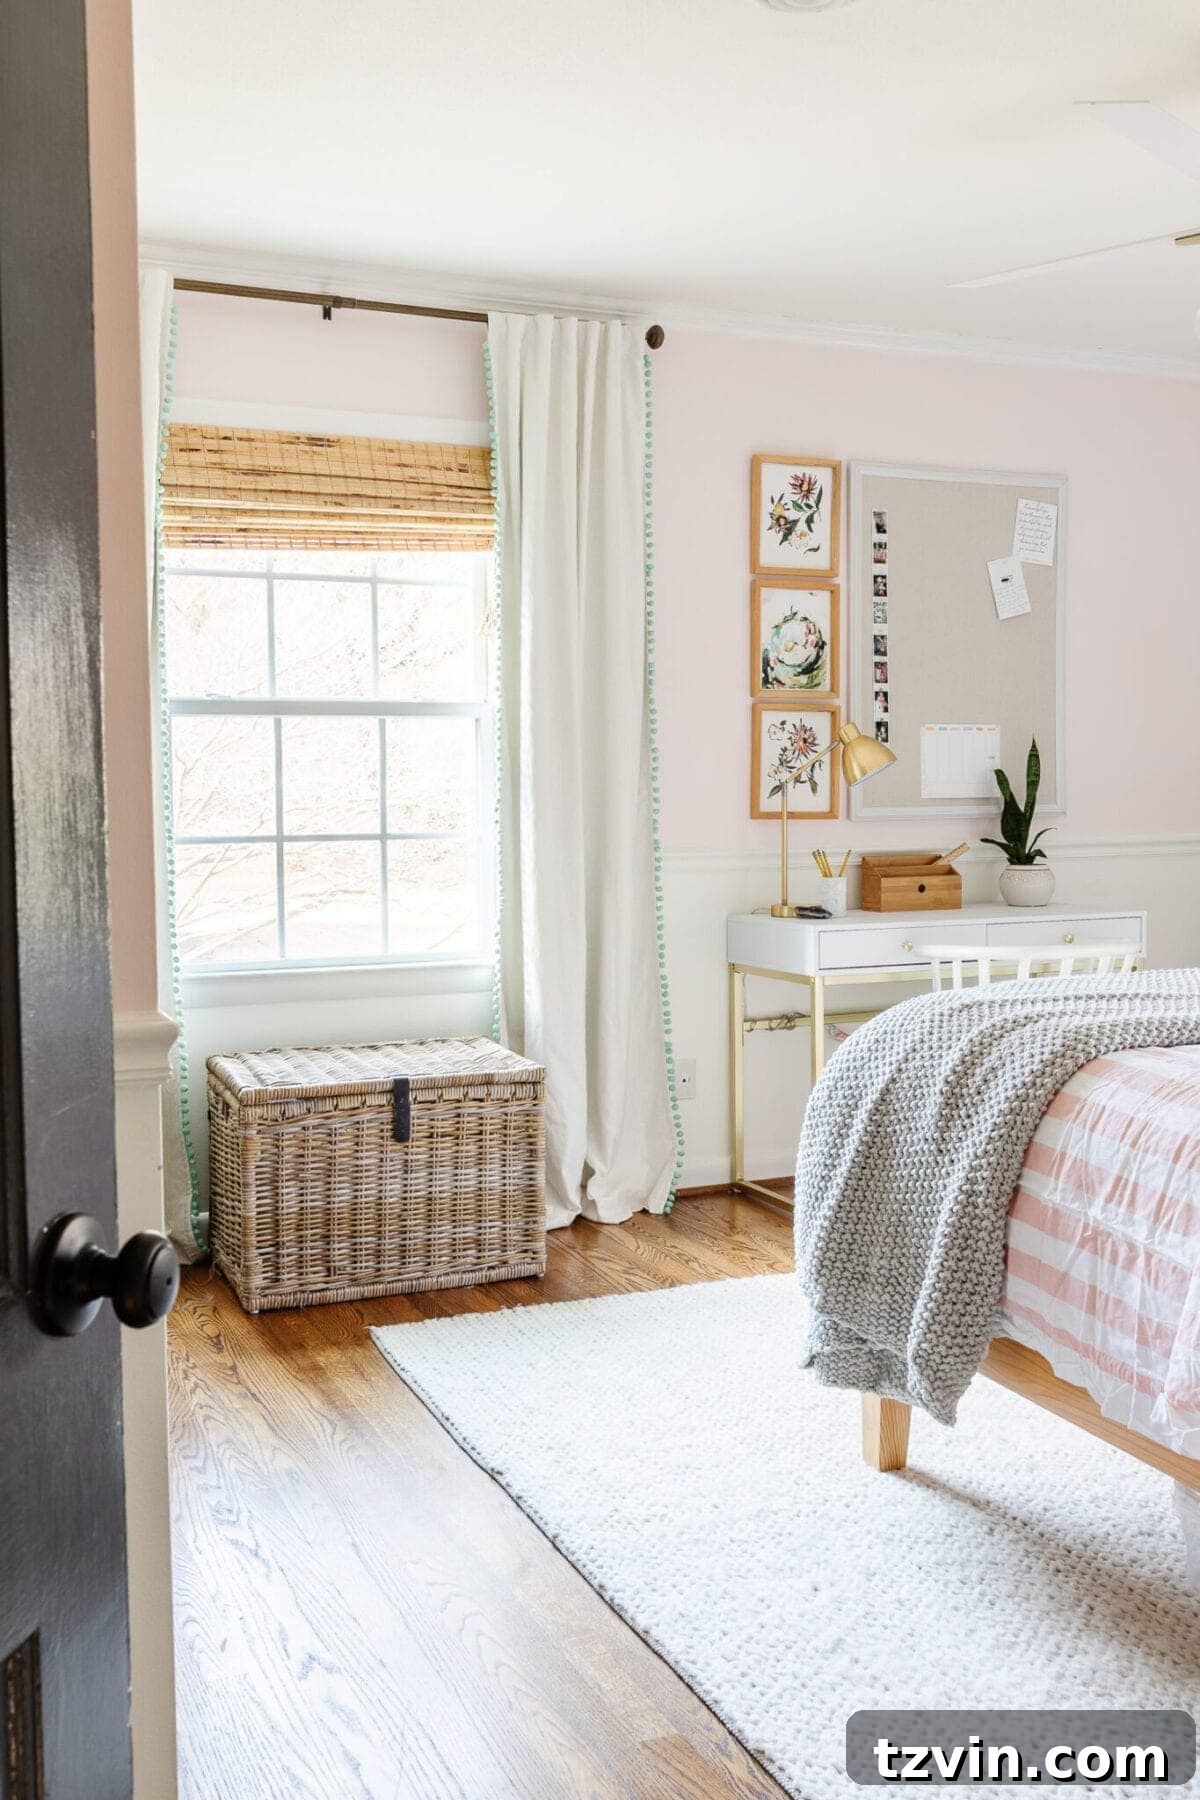
The results were beyond my expectations! The curtains turned out gorgeously, and the entire project cost around $50 for both panels, primarily by upcycling existing curtains. I repurposed the pom-pom trim curtains from our older daughter’s room, which had been set aside after her Swedish cottage style bedroom makeover. This not only saved money but also gave beloved items a fresh, new life.
Passementerie, with its rich textures and intricate designs, is a prominent feature in the current resurgence of grandmillennial style. While designer versions command premium prices, creating your own embellished curtains is surprisingly straightforward and budget-friendly. If your windows are currently dressed in plain, uninspiring drapes, this no-sew tutorial offers an excellent opportunity to elevate them. This versatile method can also be used to craft entirely new curtains from scratch, giving you full creative control over your fabric choices and design.
Revamp Your Curtains: Transforming Headings with No-Sew Solutions
While I highly recommend Heat n Bond hemming tape for its superior durability and lasting hold, you can adapt these steps using hot glue or a micro stitch kit for temporary or less frequently handled projects. However, for a truly permanent and resilient finish, Heat n Bond is the gold standard. Before adding the decorative trim, I decided to first update the curtain heading to achieve a more custom and tailored appearance, perfect for the grandmillennial aesthetic. This technique works equally well for curtains you’re making from scratch.
Essential Supplies for Your No-Sew Curtain Project
- Heat n Bond hemming tape in Super Weight: Crucial for a strong, permanent bond.
- Iron & ironing board: For activating the hemming tape adhesive.
- Sharp fabric scissors and/or seam ripper: For precision cutting and removing old elements.
- Lighter or clear nail polish: To prevent fraying on cut fabric edges and trim.
- Tailor’s tape: For accurate measurements.
- Trim tape: Choose a passementerie design that complements your style.
- (Optional) Curtain heading tape: For creating a structured, professional top edge.
- (Optional) Curtain rings with eyelets: For easy hanging and a polished look.
Having the right tools will make this DIY project smooth and enjoyable, ensuring your finished curtains look professionally made.
Crafting Custom Curtains: How to Make DIY No-Sew Curtains from Scratch
If you’re starting with raw fabric, the process of creating beautiful no-sew curtains is incredibly simple and offers endless design possibilities. Here’s how to begin:
- **Measure and Cut Your Fabric:** Start by accurately measuring your window to determine the desired width and length of your curtains. Remember to account for hem allowances on all sides (typically 1-2 inches for side hems and 3-6 inches for bottom hems, depending on your preferred drape). Cut your chosen fabric to these precise dimensions.
- **Create Finished Edges:** For a polished look, fold approximately 1 inch of fabric over along one edge. Place a strip of Heat n Bond hemming tape underneath this fold.
- **Iron to Secure:** Press firmly with a hot iron to activate the adhesive, creating a clean, crisp “seam” without any stitching. Repeat this process for all four sides of your curtain panel, ensuring every edge is perfectly finished.
Detailed step-by-step instructions below will guide you through adding custom headers and elegant trim, whether you’re starting from scratch or refreshing existing panels.
Step 1 – Prepare Your Panels: Remove Embellishments and Trim to Length
Begin by meticulously preparing your curtain panels. If your existing curtains have any embellishments you wish to remove, such as the pom-poms on my old panels, use sharp fabric scissors or a seam ripper to carefully snip them away. For this project, I simply removed the pom-poms, leaving the fabric clean and ready for its new trim.
Next, accurately measure the desired length for your curtains on the window where they will hang. Remember to consider whether you want them to just “kiss” the floor, break slightly, or puddle dramatically. Once measured, carefully cut off any excess fabric from the bottom of the panels. Always allow for an additional 3-4 inches of fabric that you will turn under to create a neat, finished hem later. It’s always better to cut a little less than you think, as you can always trim more if needed.
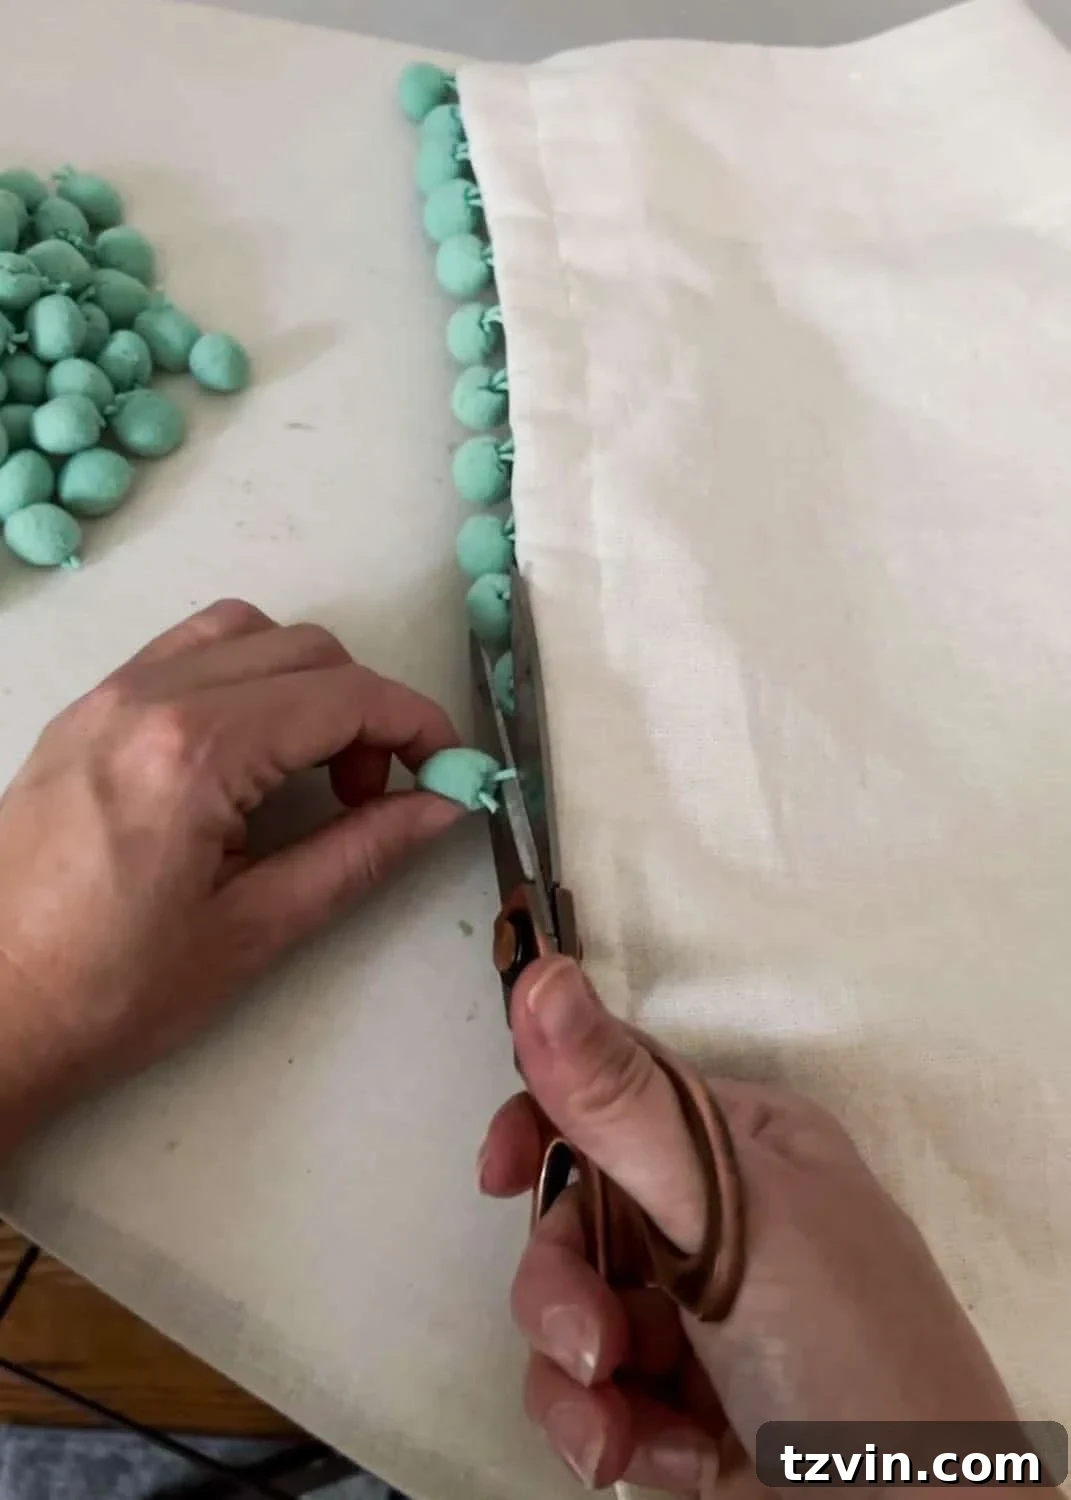
Step 2 – Customize the Header: Remove Old Tabs (If Desired)
To achieve the clean, tailored look I envisioned, suitable for hanging from curtain rings with a structured header, I opted to remove the existing back tabs from my curtains. These tabs are typically used for a rod pocket style, but I wanted the more formal appearance of header tape and pleating hooks. Using my fabric scissors, I carefully cut off each back tab, ensuring a smooth, even edge across the top of the curtain panel. This step is optional and depends on your desired hanging method and aesthetic.
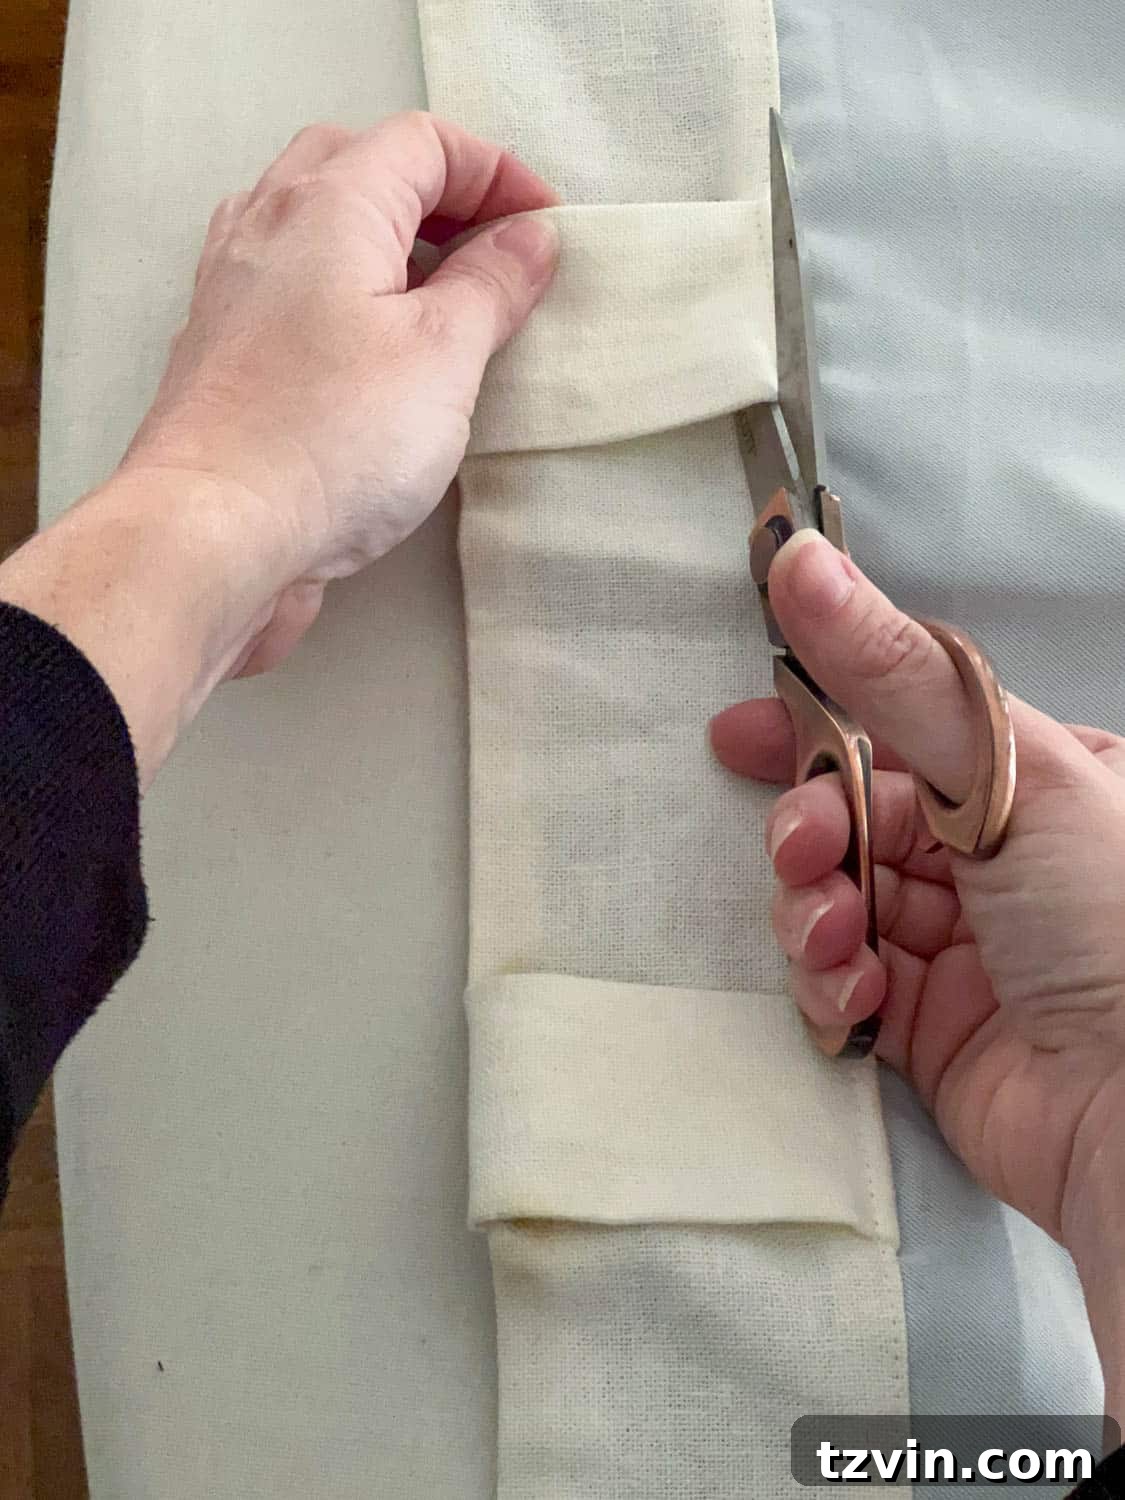
Step 3 – Prepare the Header Tape: Measure, Cut, and Seal
For a structured and refined curtain top, I utilized curtain header tape. First, measure the header tape precisely to the length of your curtain panel’s top edge. Accuracy here is key for a crisp finish.
Once cut, it’s vital to prevent fraying, which can compromise the longevity and appearance of your curtains. Gently run a lighter flame along the freshly cut edges of the header tape, being careful not to burn the material, just to melt the fibers slightly. Alternatively, a thin coat of clear nail polish applied along the cut edge will also effectively seal the fibers and prevent any unraveling. After sealing, set the header tape aside, ready for the next step.
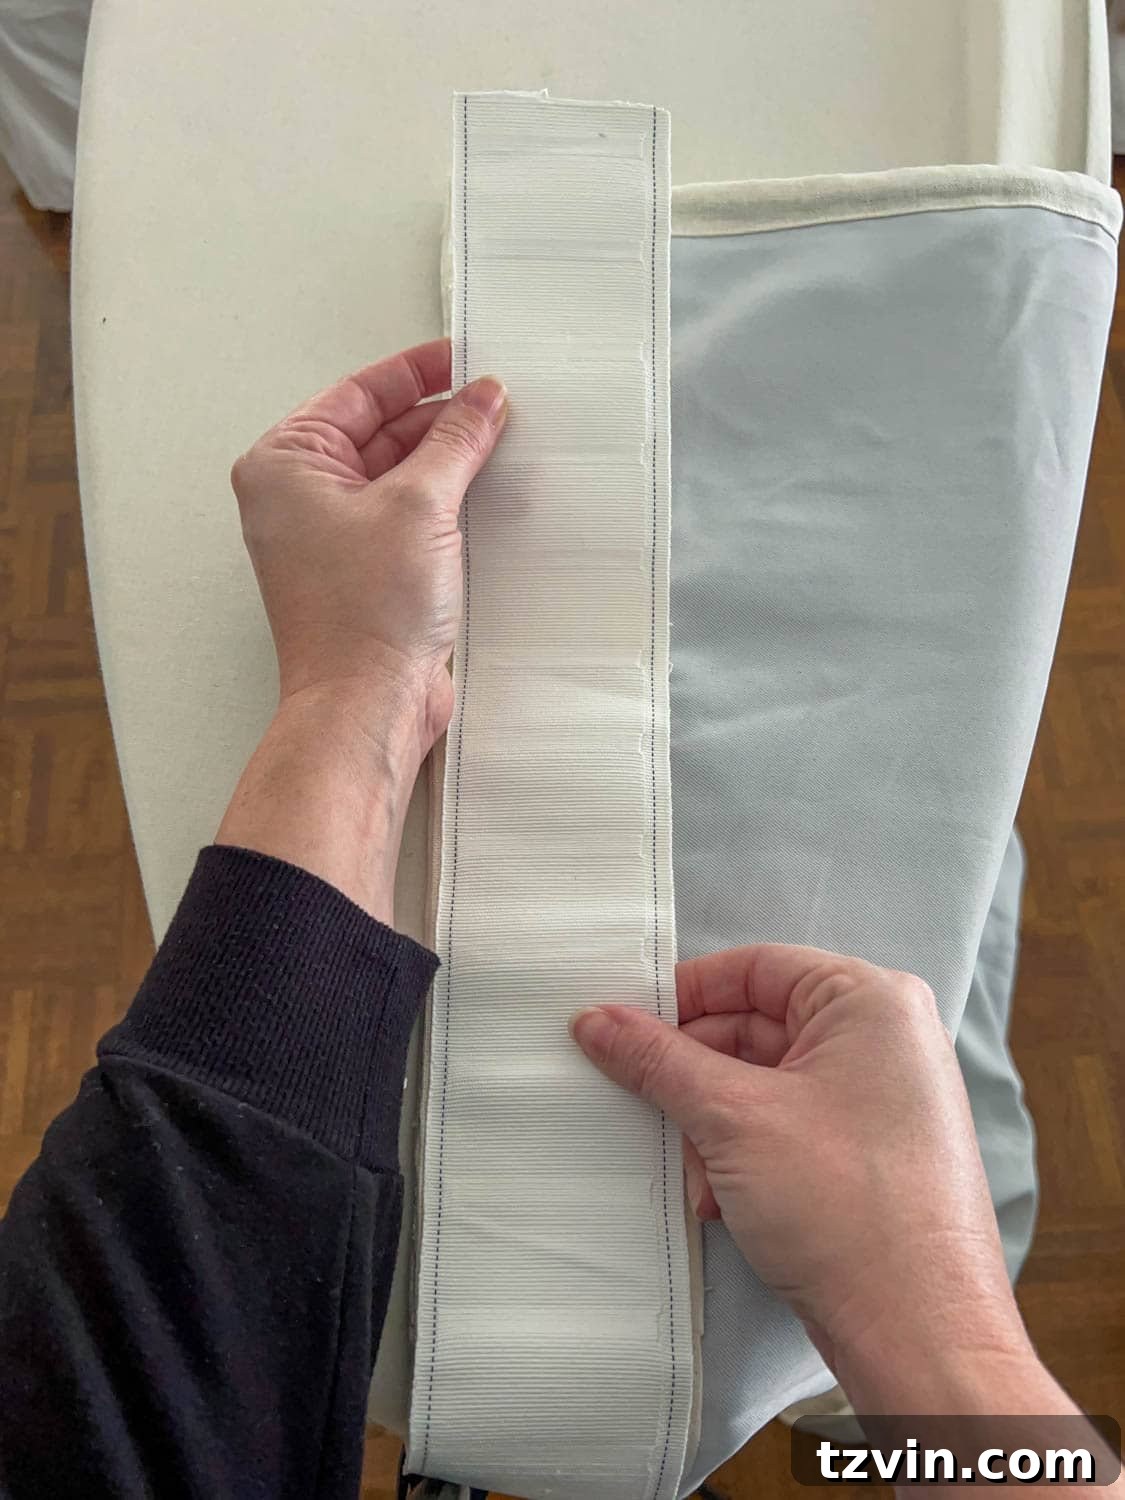
Step 4 – Secure the Adhesive: Iron on Hemming Tape to the Curtain Panel
To prepare for attaching the header tape, measure and cut two lengths of Heat n Bond tape. These will run along the backside of the curtain panel’s header. Based on my experience, I highly recommend using a heavy-weight Heat n Bond for this step to ensure a robust and lasting bond, as a lighter strength tape might struggle with the weight and tension of a curtain header.
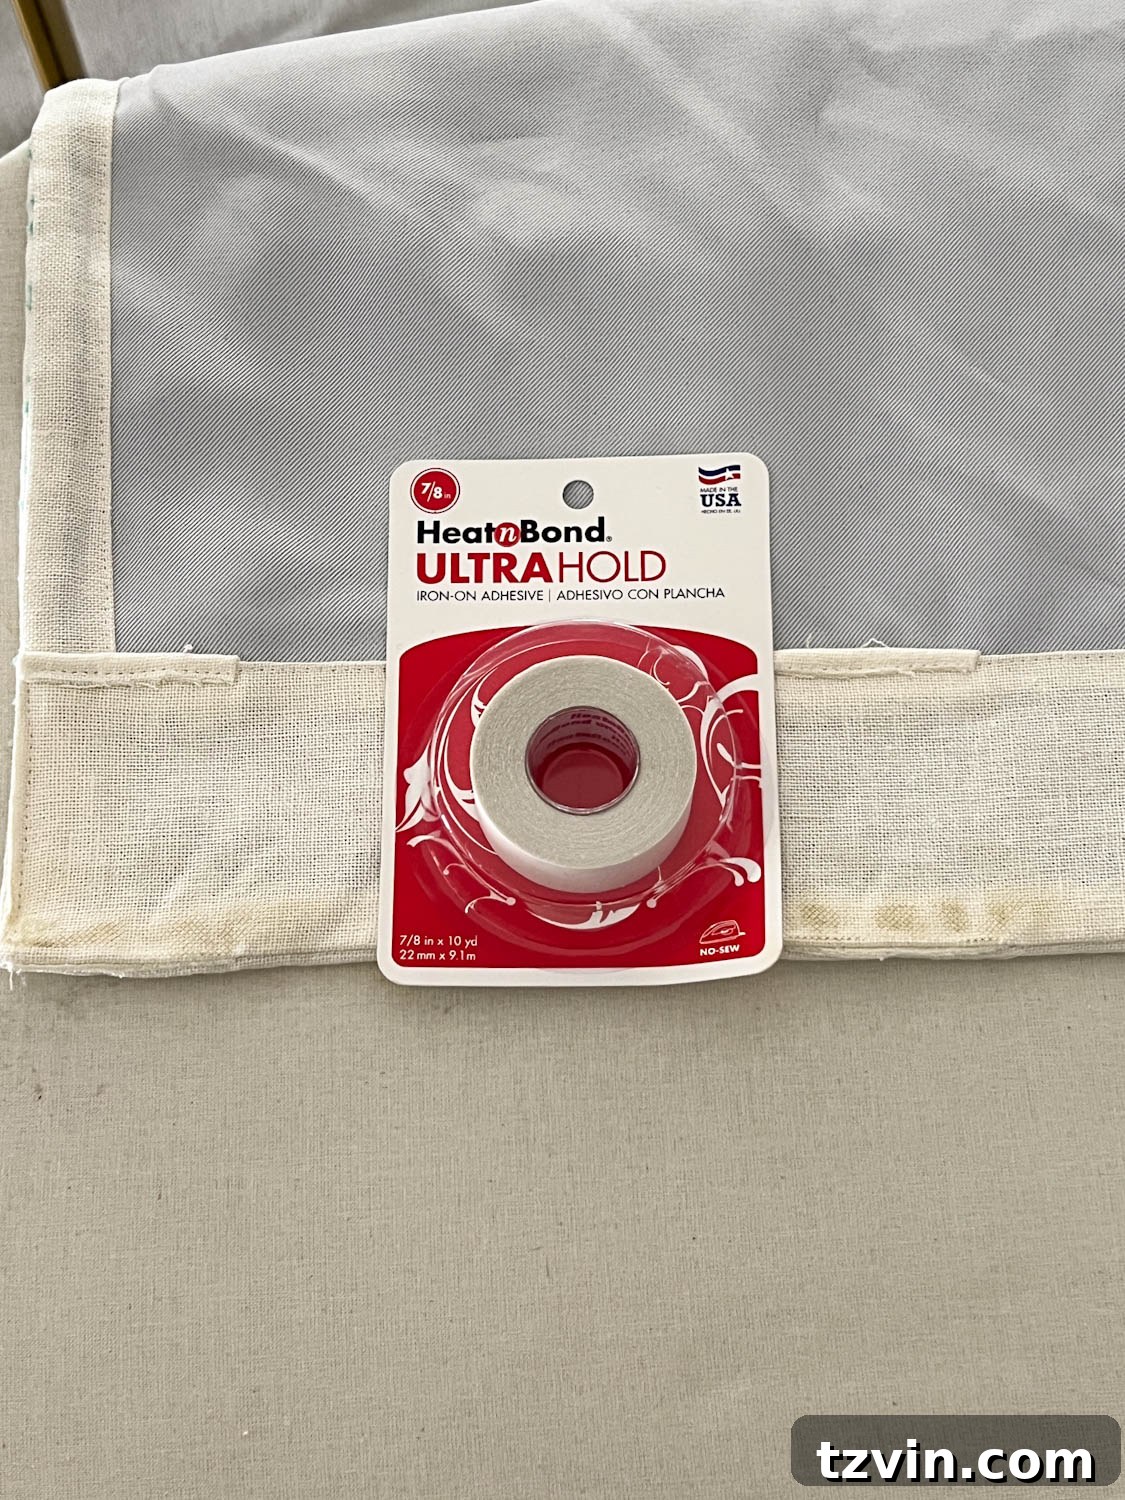
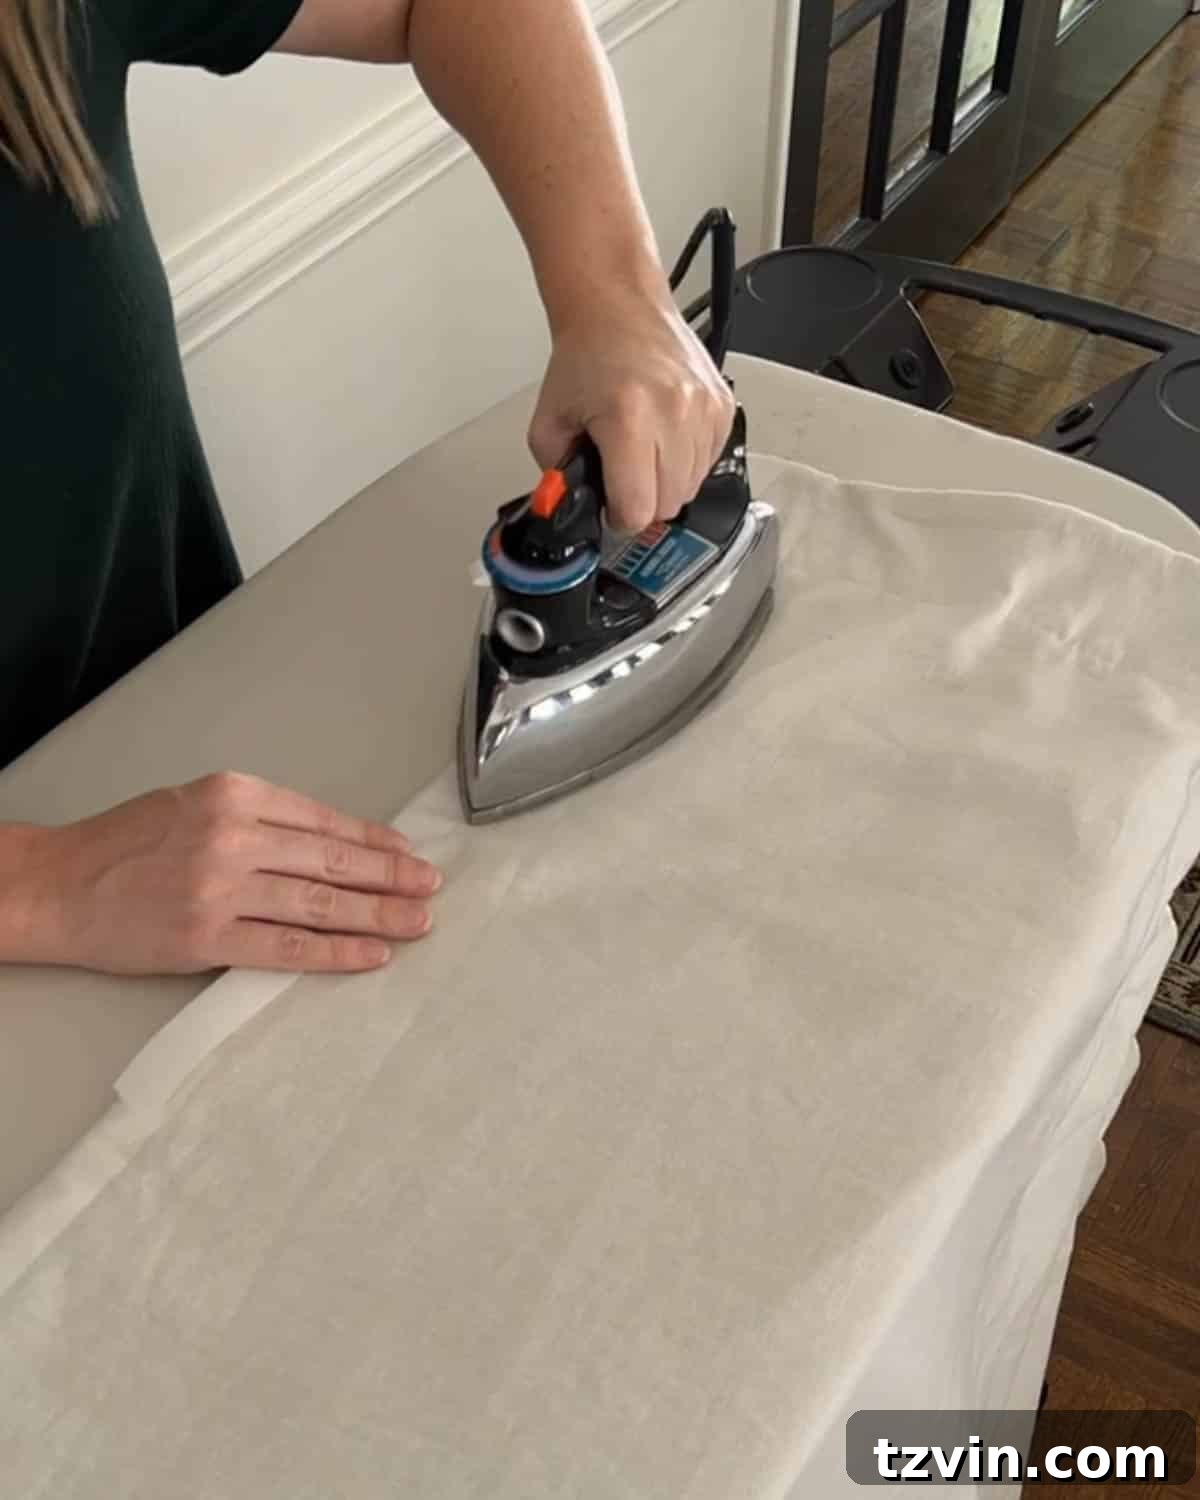
Carefully peel away the paper backing from one side of the hemming tape. Position the exposed adhesive side of the tape onto the backside of your curtain panel, along the top edge where the header will be. While pinning the tape in place can offer extra security, I found it manageable to proceed without pins.
Set your iron to a medium heat setting. Press and hold the iron firmly against the hemming tape for a few seconds in sections, allowing the heat to activate the adhesive and secure the tape to the curtain fabric. Work your way across the entire length of the header, ensuring a strong, consistent bond.
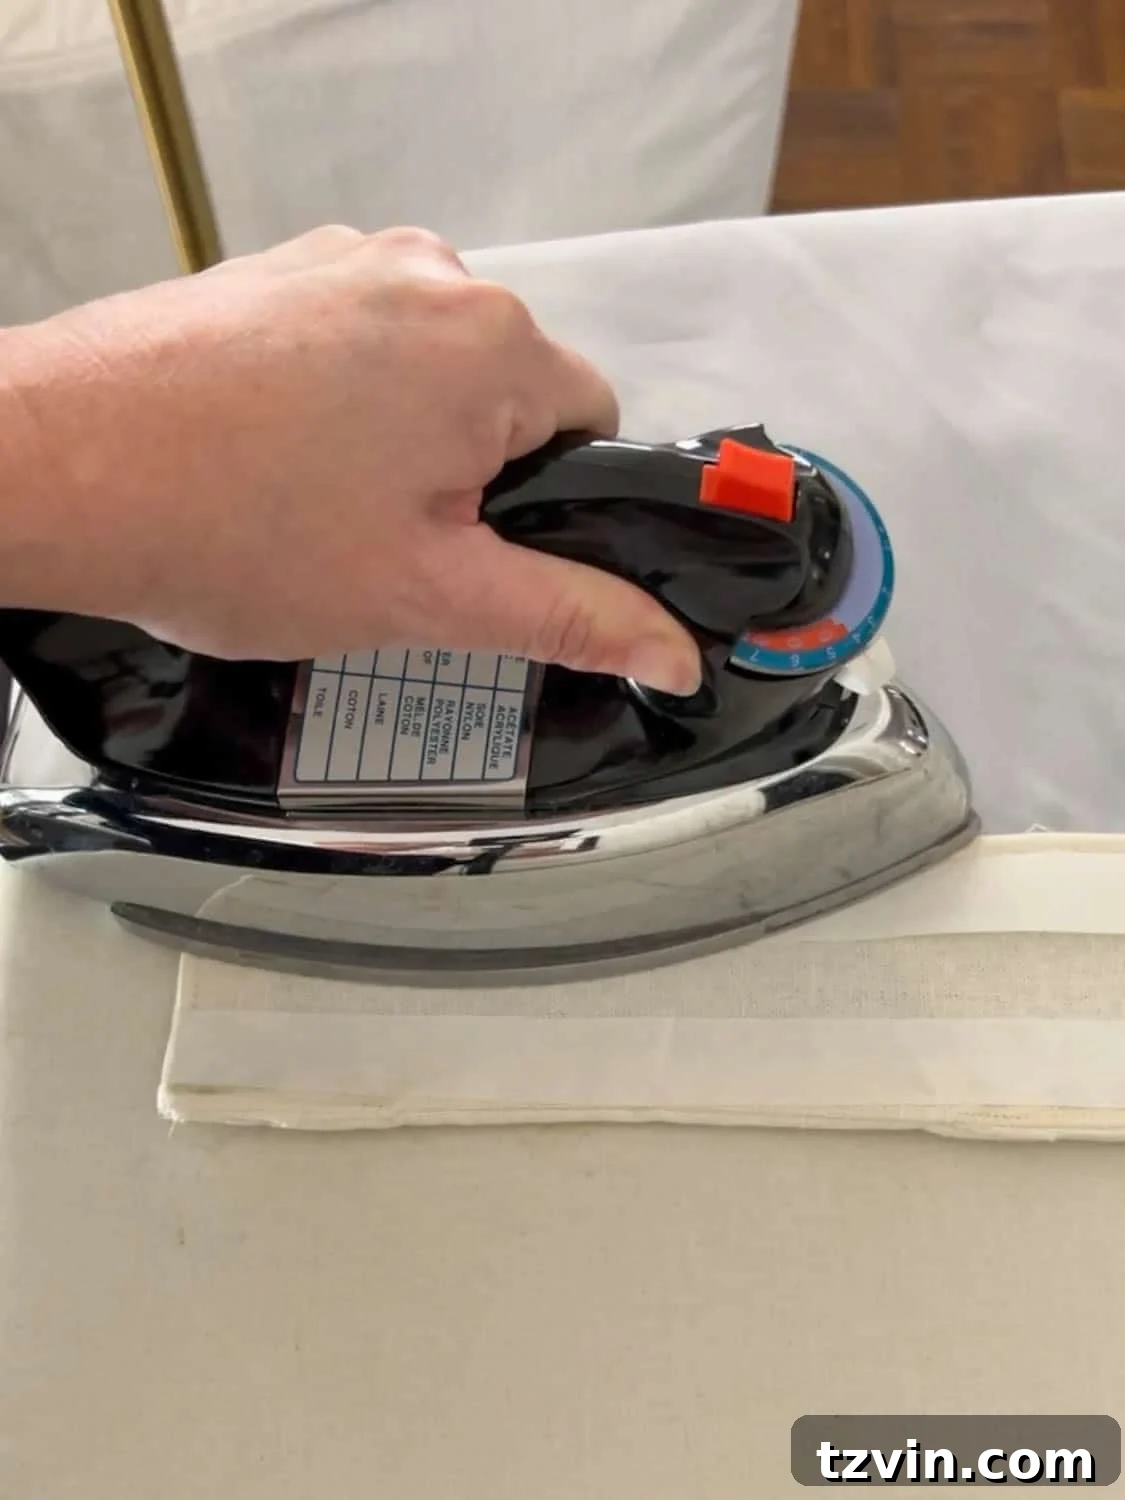
Step 5 – Finalizing the Header: Attaching the Curtain Header Tape
Once the initial layer of hemming tape is securely ironed onto your curtain panel, it’s time to attach the header tape. Carefully peel away the remaining paper backing from the hemming tape that is now facing upwards.
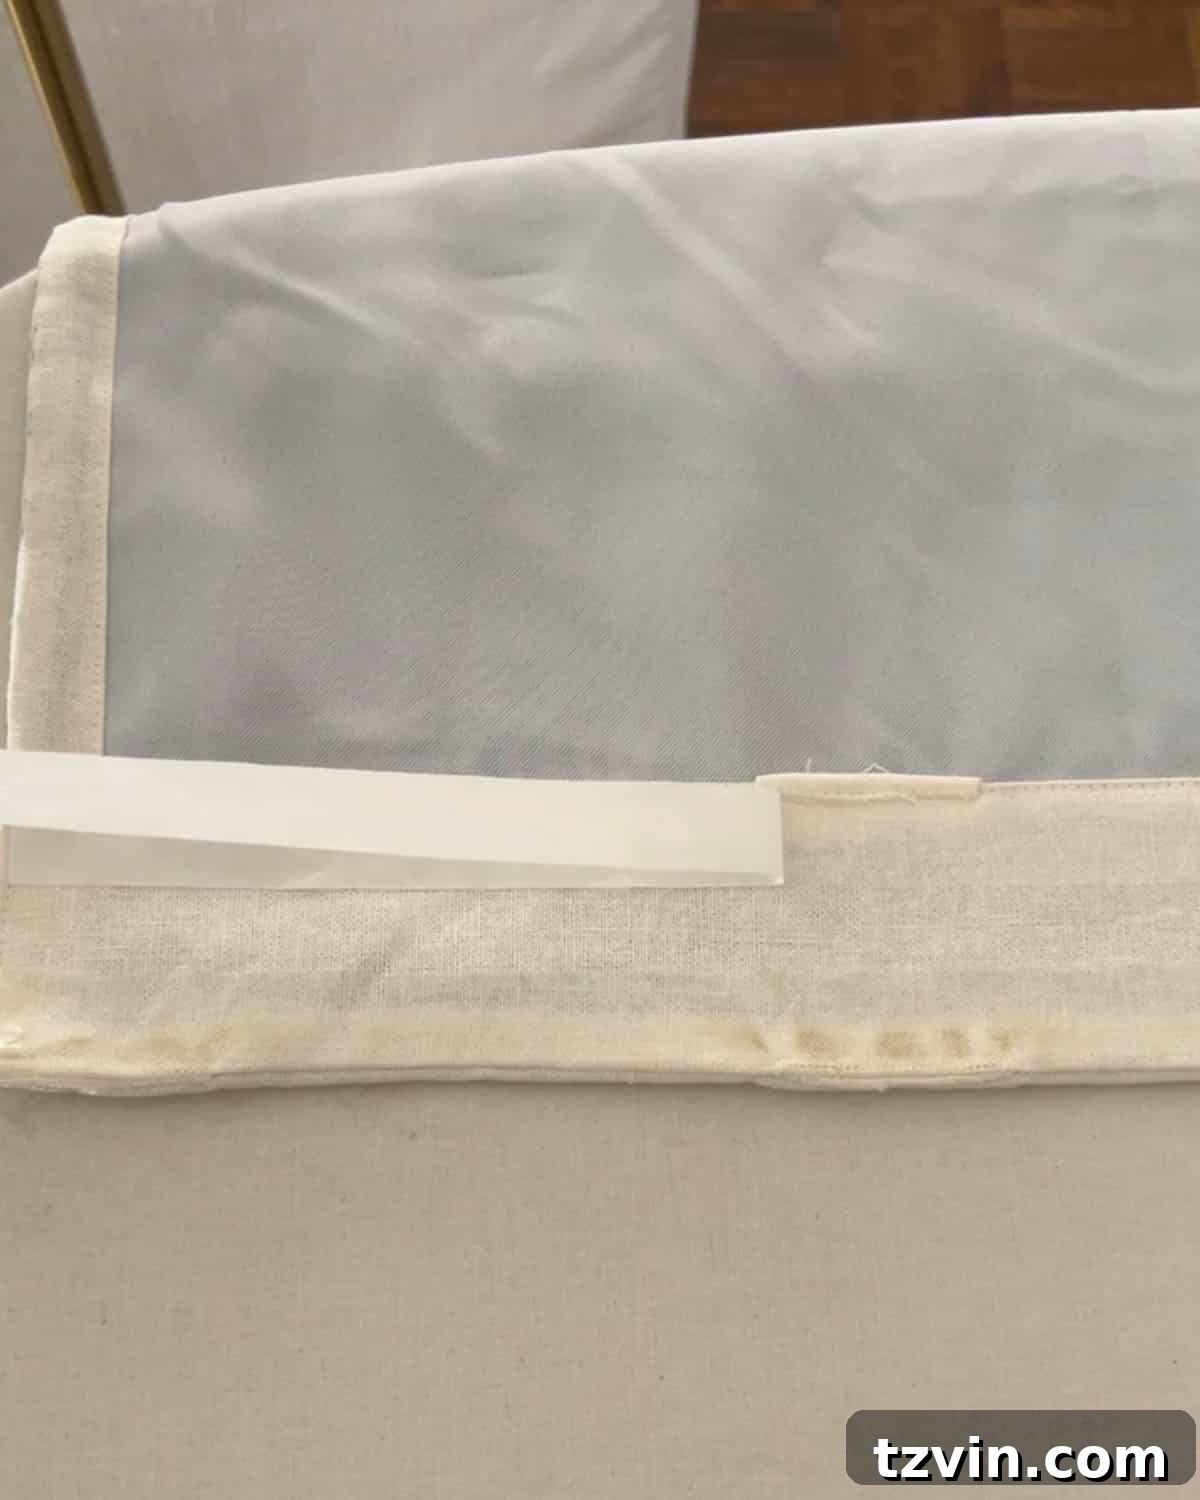
Precisely align the curtain header tape on top of the exposed hemming tape. Take your time to ensure it’s straight and evenly positioned. With your iron still set to medium heat, press and hold it onto the header tape for several seconds in small sections. The heat will reactivate the adhesive, creating a strong, permanent bond between the header tape and the curtain panel. Once complete, your curtain will have a beautifully structured header, ready for hanging with pleating hooks.
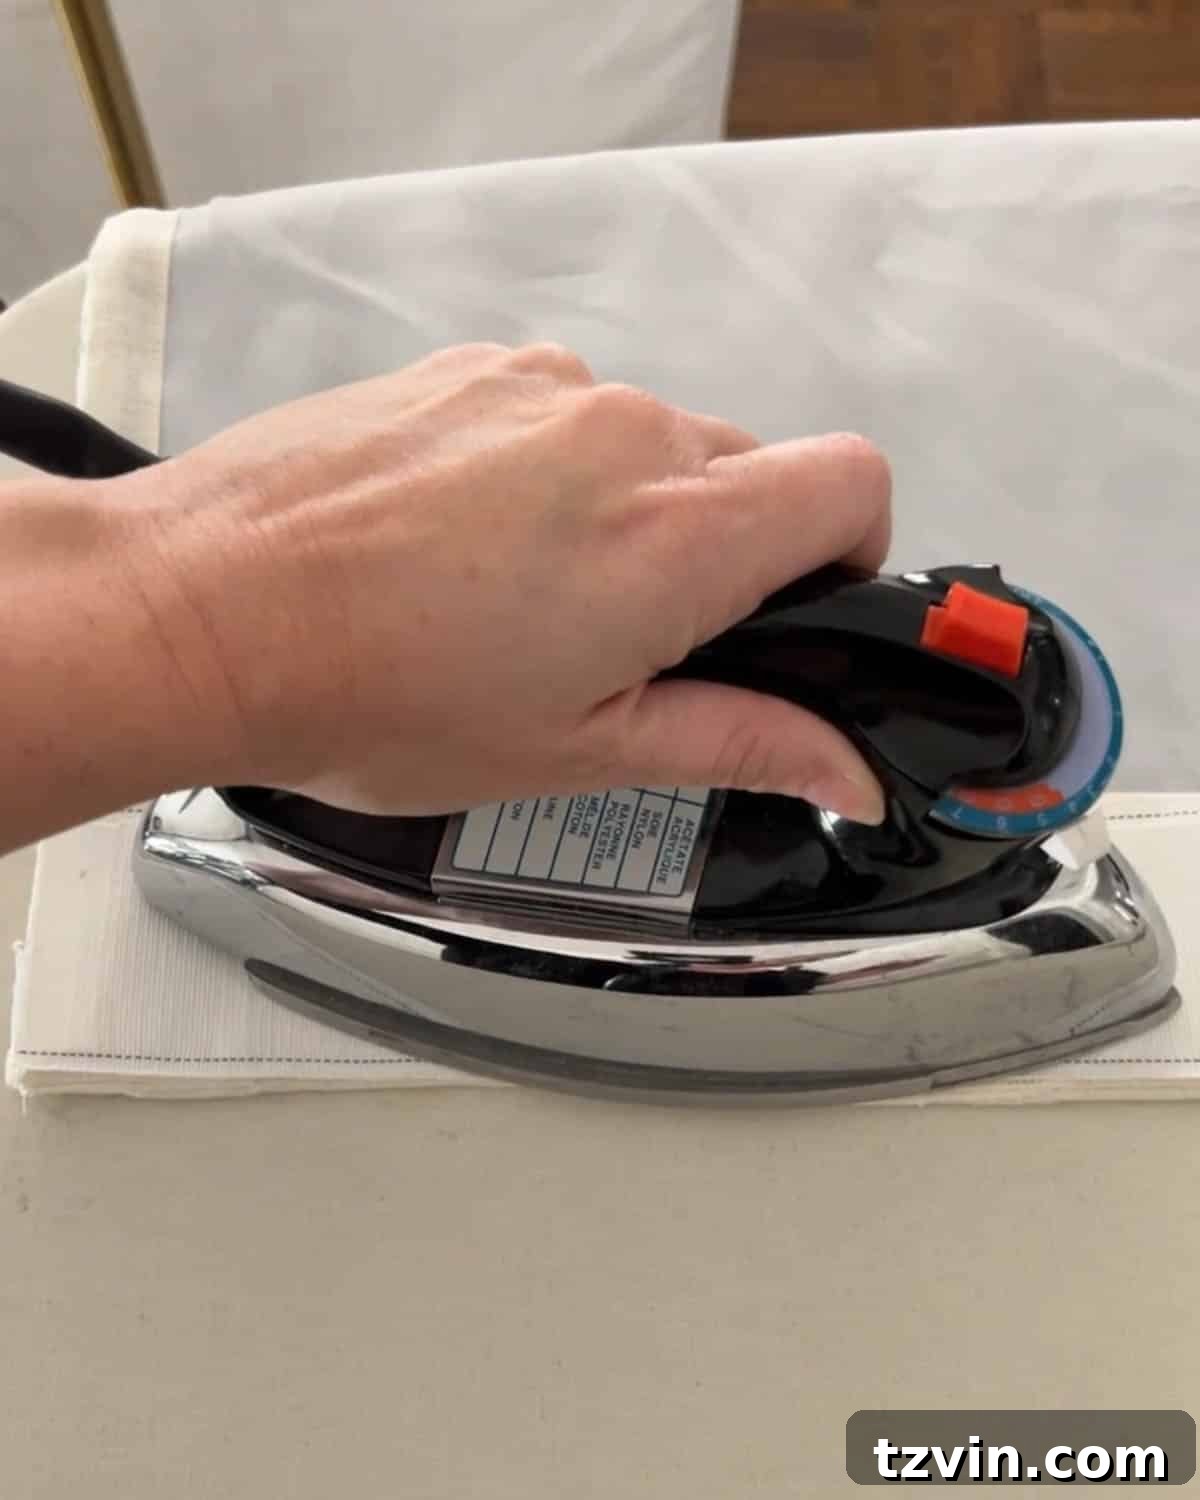
Elevate Your Drapes: How to Add a Curtain Border Without Sewing
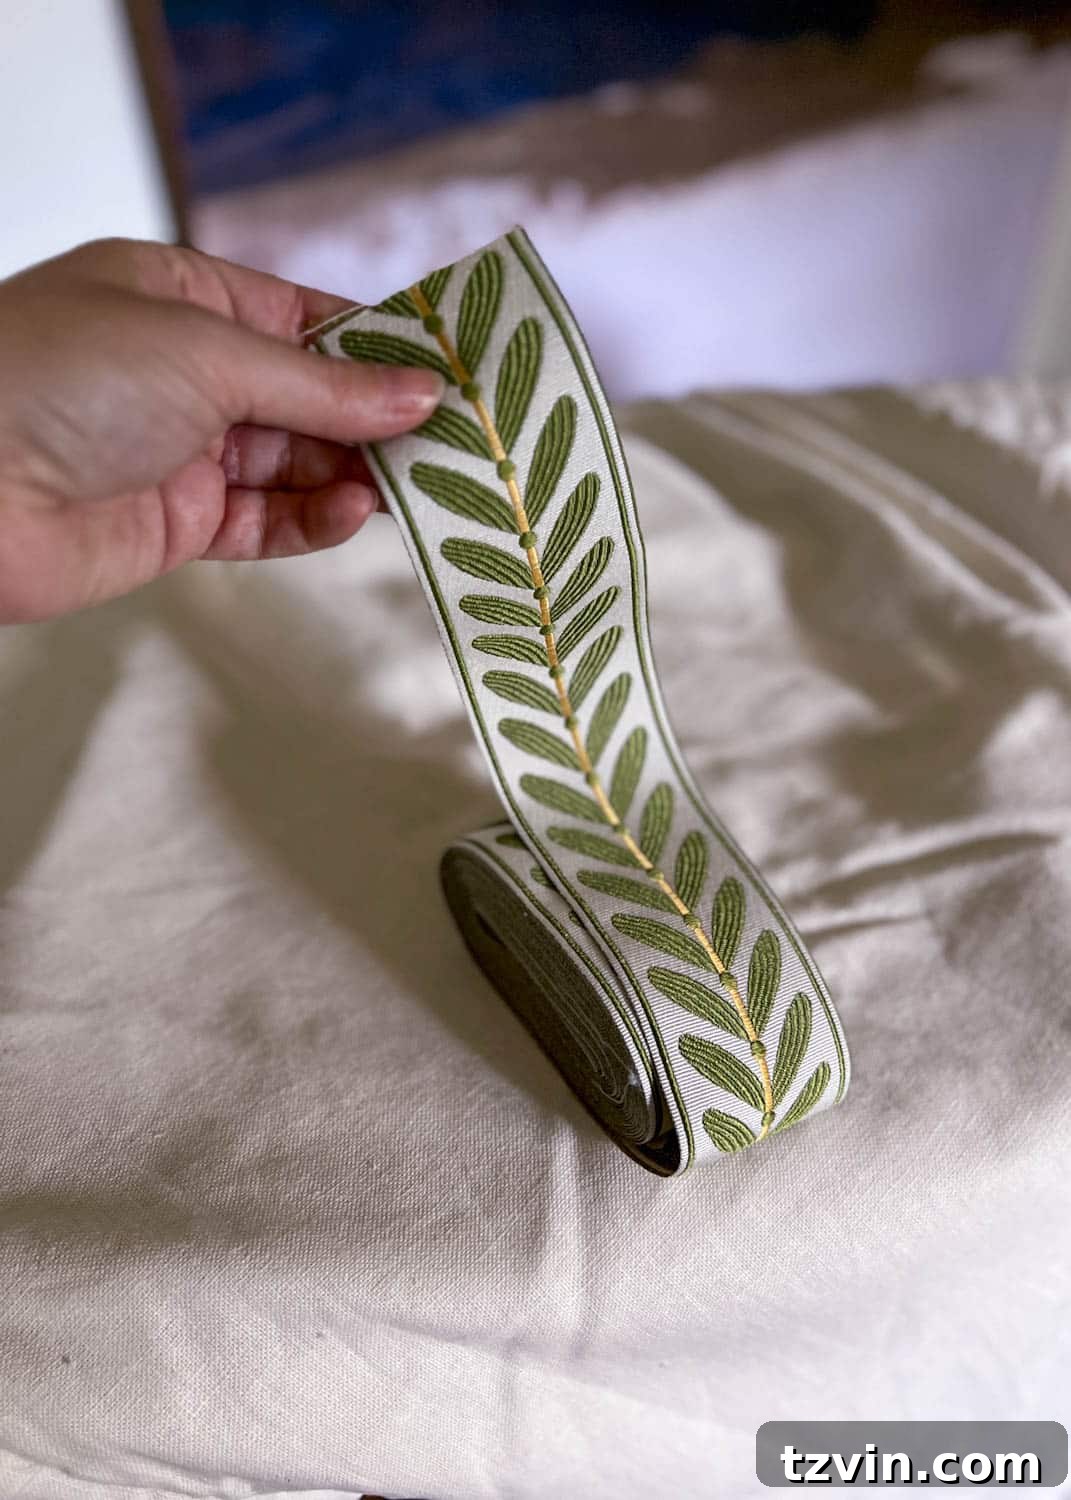
The addition of a decorative border is what truly transforms ordinary curtains into a statement piece, embodying the elegance of grandmillennial style. I was thrilled to discover this stunning leaf-patterned curtain trim tape for an incredible $3 per yard! Its sophisticated design closely mirrors the high-end trimmed curtains from Frontgate that initially captivated my imagination, proving that luxury can be achieved on a budget.
Step 1 – Precision Prep: Measure and Cut Trim and Hemming Tape
Accuracy is paramount when adding decorative trim. Begin by measuring the exact length of your curtain panel where the trim will be applied. Then, cut both your chosen Heat n Bond tape and the decorative trim to this precise length, ensuring they are identical. To maintain a clean and professional appearance, prevent fraying on the cut edges of your trim. A quick pass with a lighter flame (carefully and briskly!) will seal synthetic fibers, or a dab of clear nail polish can effectively prevent natural fibers from unraveling. This small step makes a big difference in the finished look.
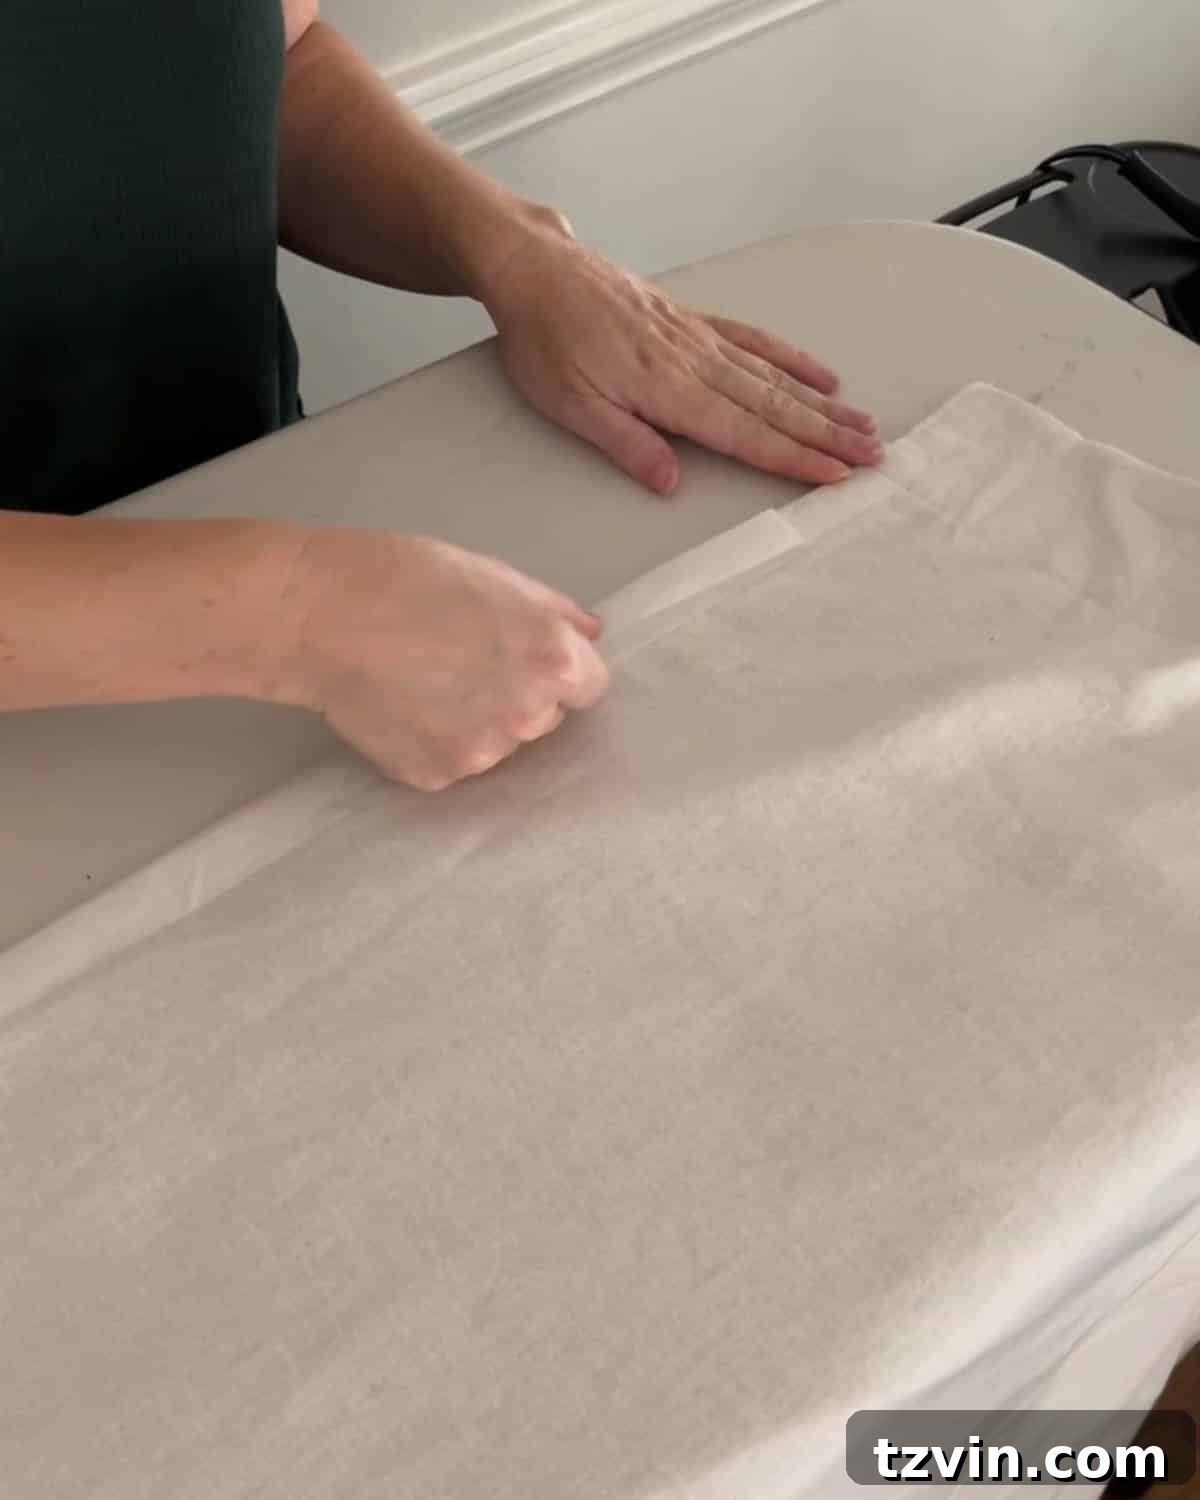
Step 2 – Lay the Foundation: Attach Hemming Tape to the Curtain Edge
Following the same reliable procedure as Step 4 (ironing on the first side of the hemming tape), apply the hemming tape precisely along the edge of your curtain panel where you intend to place the trim. Remember to consult the instructions on your Heat n Bond packaging for optimal results, as temperatures and press times can vary slightly. A critical detail here is to consider the placement for each panel: for the left curtain panel, the trim will be applied to the right side, while for the right panel, it will go on the left side. This ensures a symmetrical and visually appealing border when your curtains are hung.
Step 3 – The Grand Embellishment: Attaching the Decorative Trim Tape
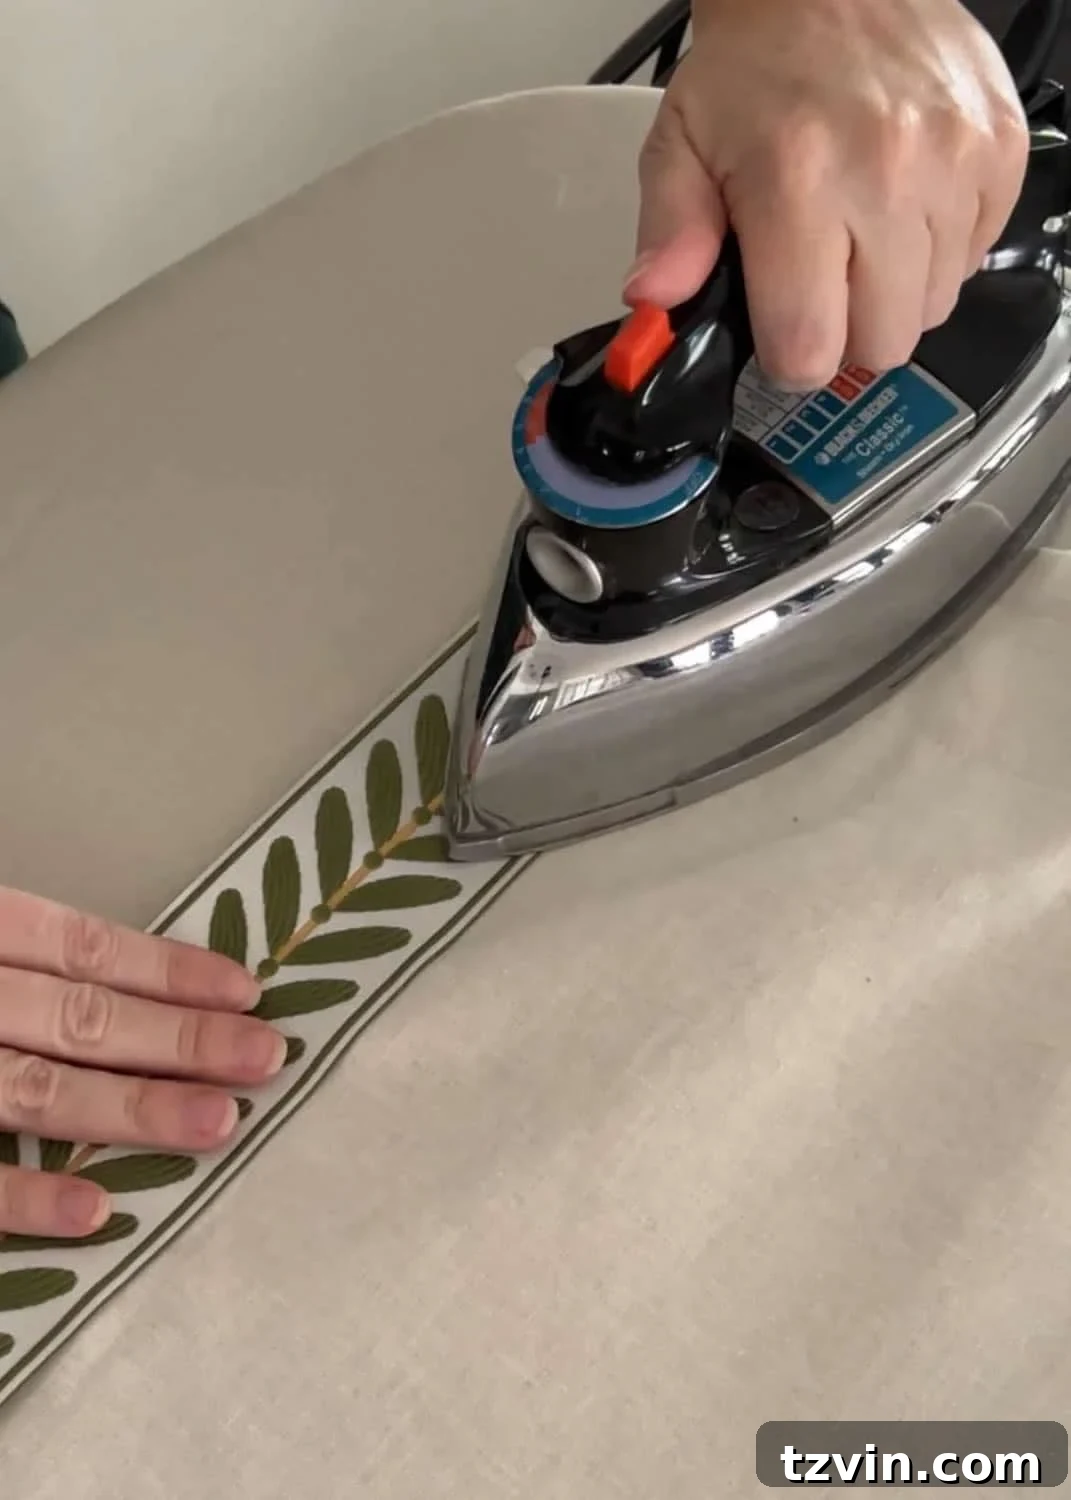
With the hemming tape securely in place, it’s time for the most exciting part: attaching your beautiful passementerie trim! Before positioning, carefully check the direction of your trim tape to ensure the design faces the way you desire. For my leaf-patterned trim, I wanted the “leaves” to point upwards, creating a cohesive and intentional look.
Next, gently peel away the paper backing from the hemming tape, revealing the adhesive. Carefully place your decorative trim tape directly on top of the exposed adhesive, aligning it perfectly along the edge of your curtain panel. Take your time with this step to ensure precise placement.
Once positioned, press and hold your hot iron onto the trim tape for several seconds in small, overlapping sections. The heat will activate the adhesive, bonding the trim permanently to your curtain fabric. Work steadily across the entire length of the trim, ensuring every inch is firmly secured. Step back and admire your newly adorned, no-sew masterpiece!
The Art of Hanging Curtains: Maximizing Style and Space
With your custom no-sew curtains complete, the way you hang them can dramatically impact the feel and perceived size of your room. Using header tape provides fantastic versatility for creating various pleating styles, allowing you to achieve a truly bespoke look. You can easily follow a hook method for elegant DIY pinch pleat curtains, or explore other configurations.
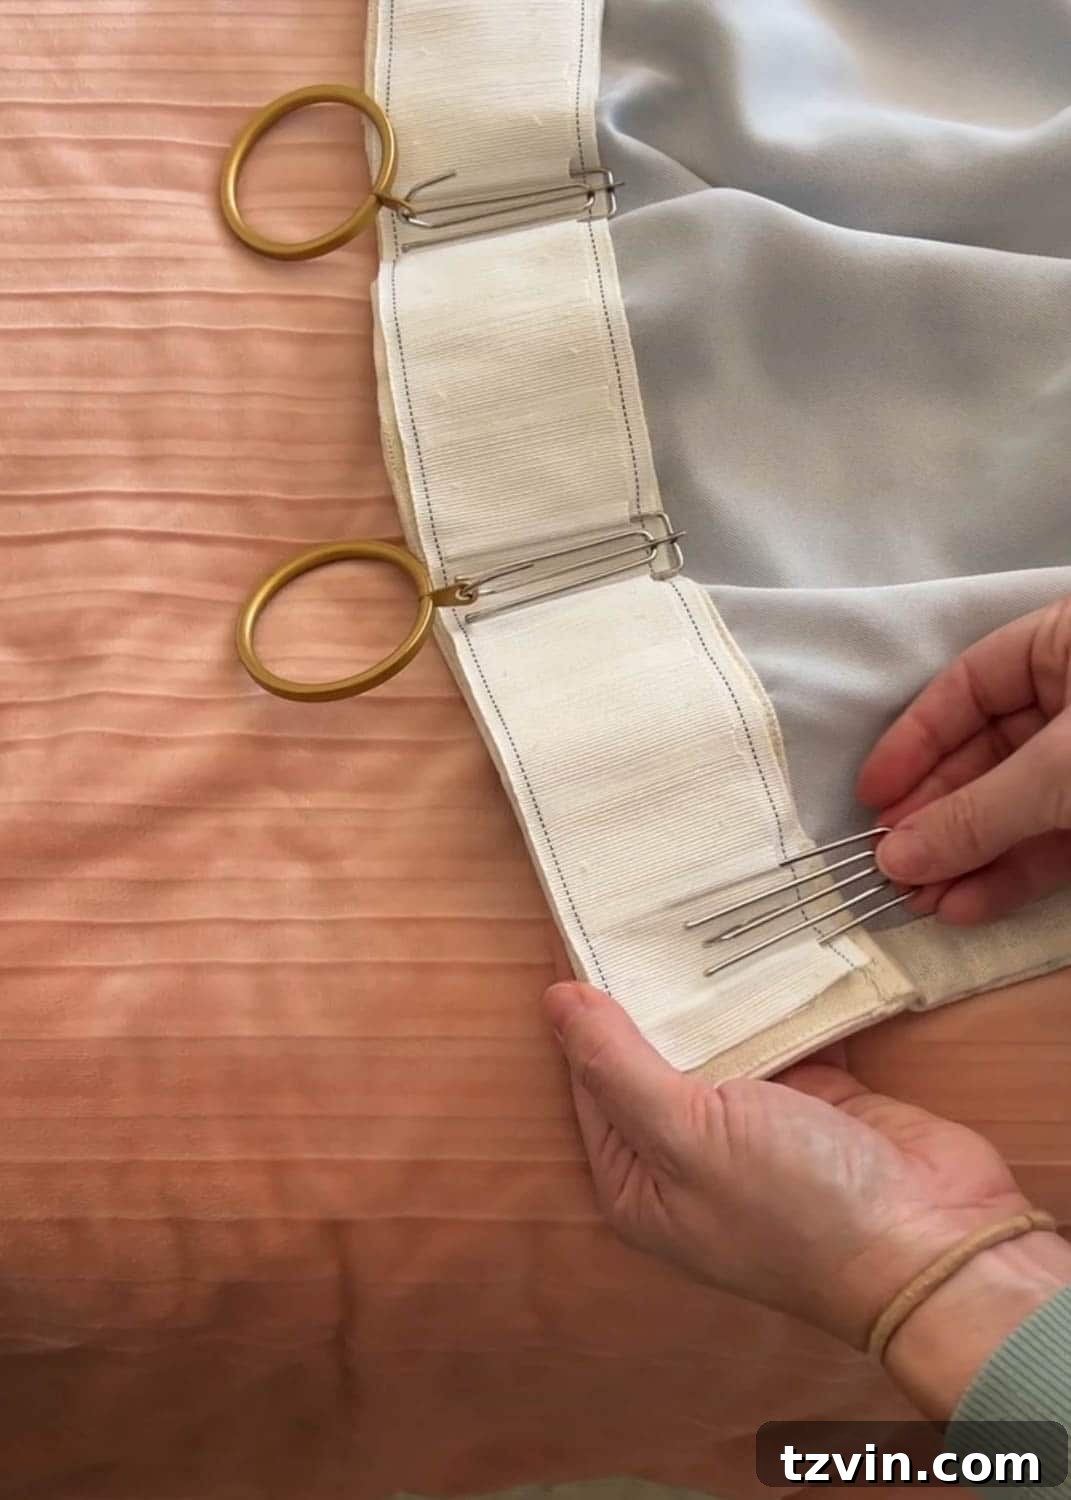
For my curtains, I opted for staggered pleating hooks, which create a soft, undulating ripple effect. Simply push the sharp prongs of the pleating hooks into the woven spaces of the header tape, arranging them to achieve your desired fullness and pleat style. To complete the look and add a touch of glamour, I finished the curtains with these exquisite gold curtain rings, which beautifully complement the grandmillennial aesthetic.
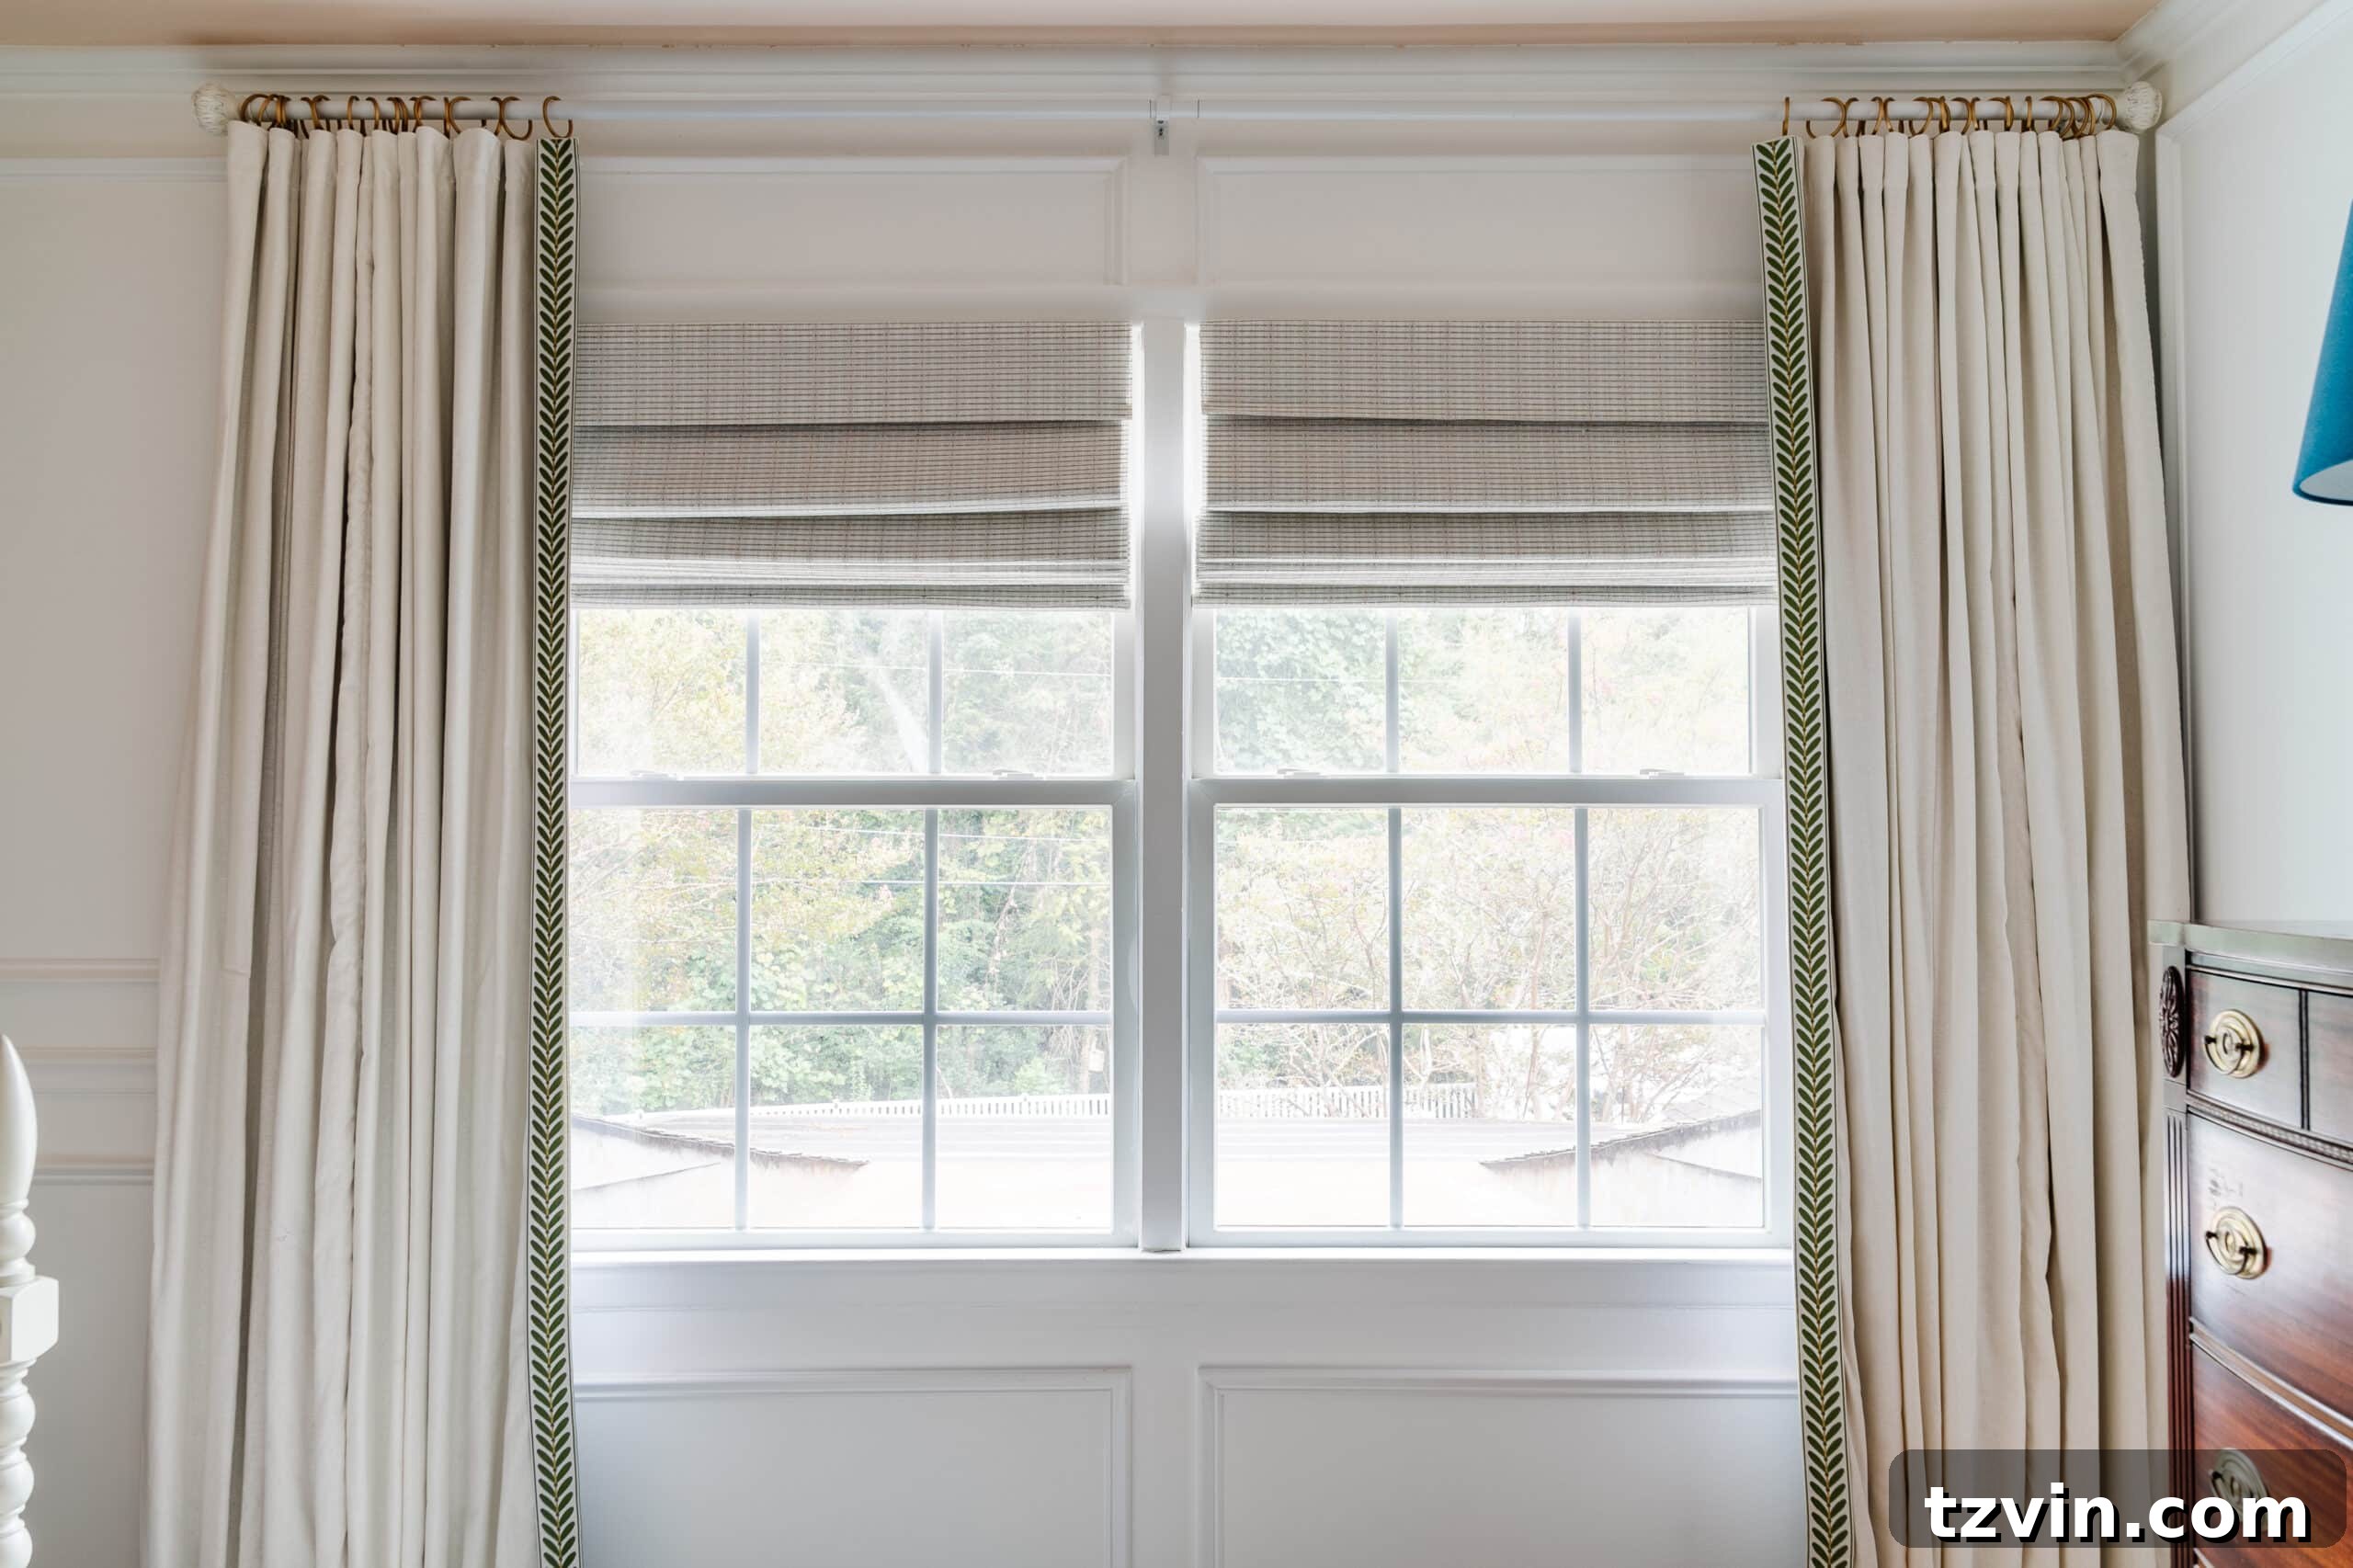
A key principle in curtain hanging is to mount your curtain rod “high and wide.” This means installing the rod about 2-6 inches below your crown molding, or as high as possible if you don’t have molding. Extending the rod 12-18 inches beyond either side of your window frame allows the curtain panels to completely clear the window when open, maximizing natural light and making the window appear larger. This simple trick makes your room feel taller and more expansive, adding to the overall elegance.
Related: Essential Tips: How to Hang Curtains Like a Pro
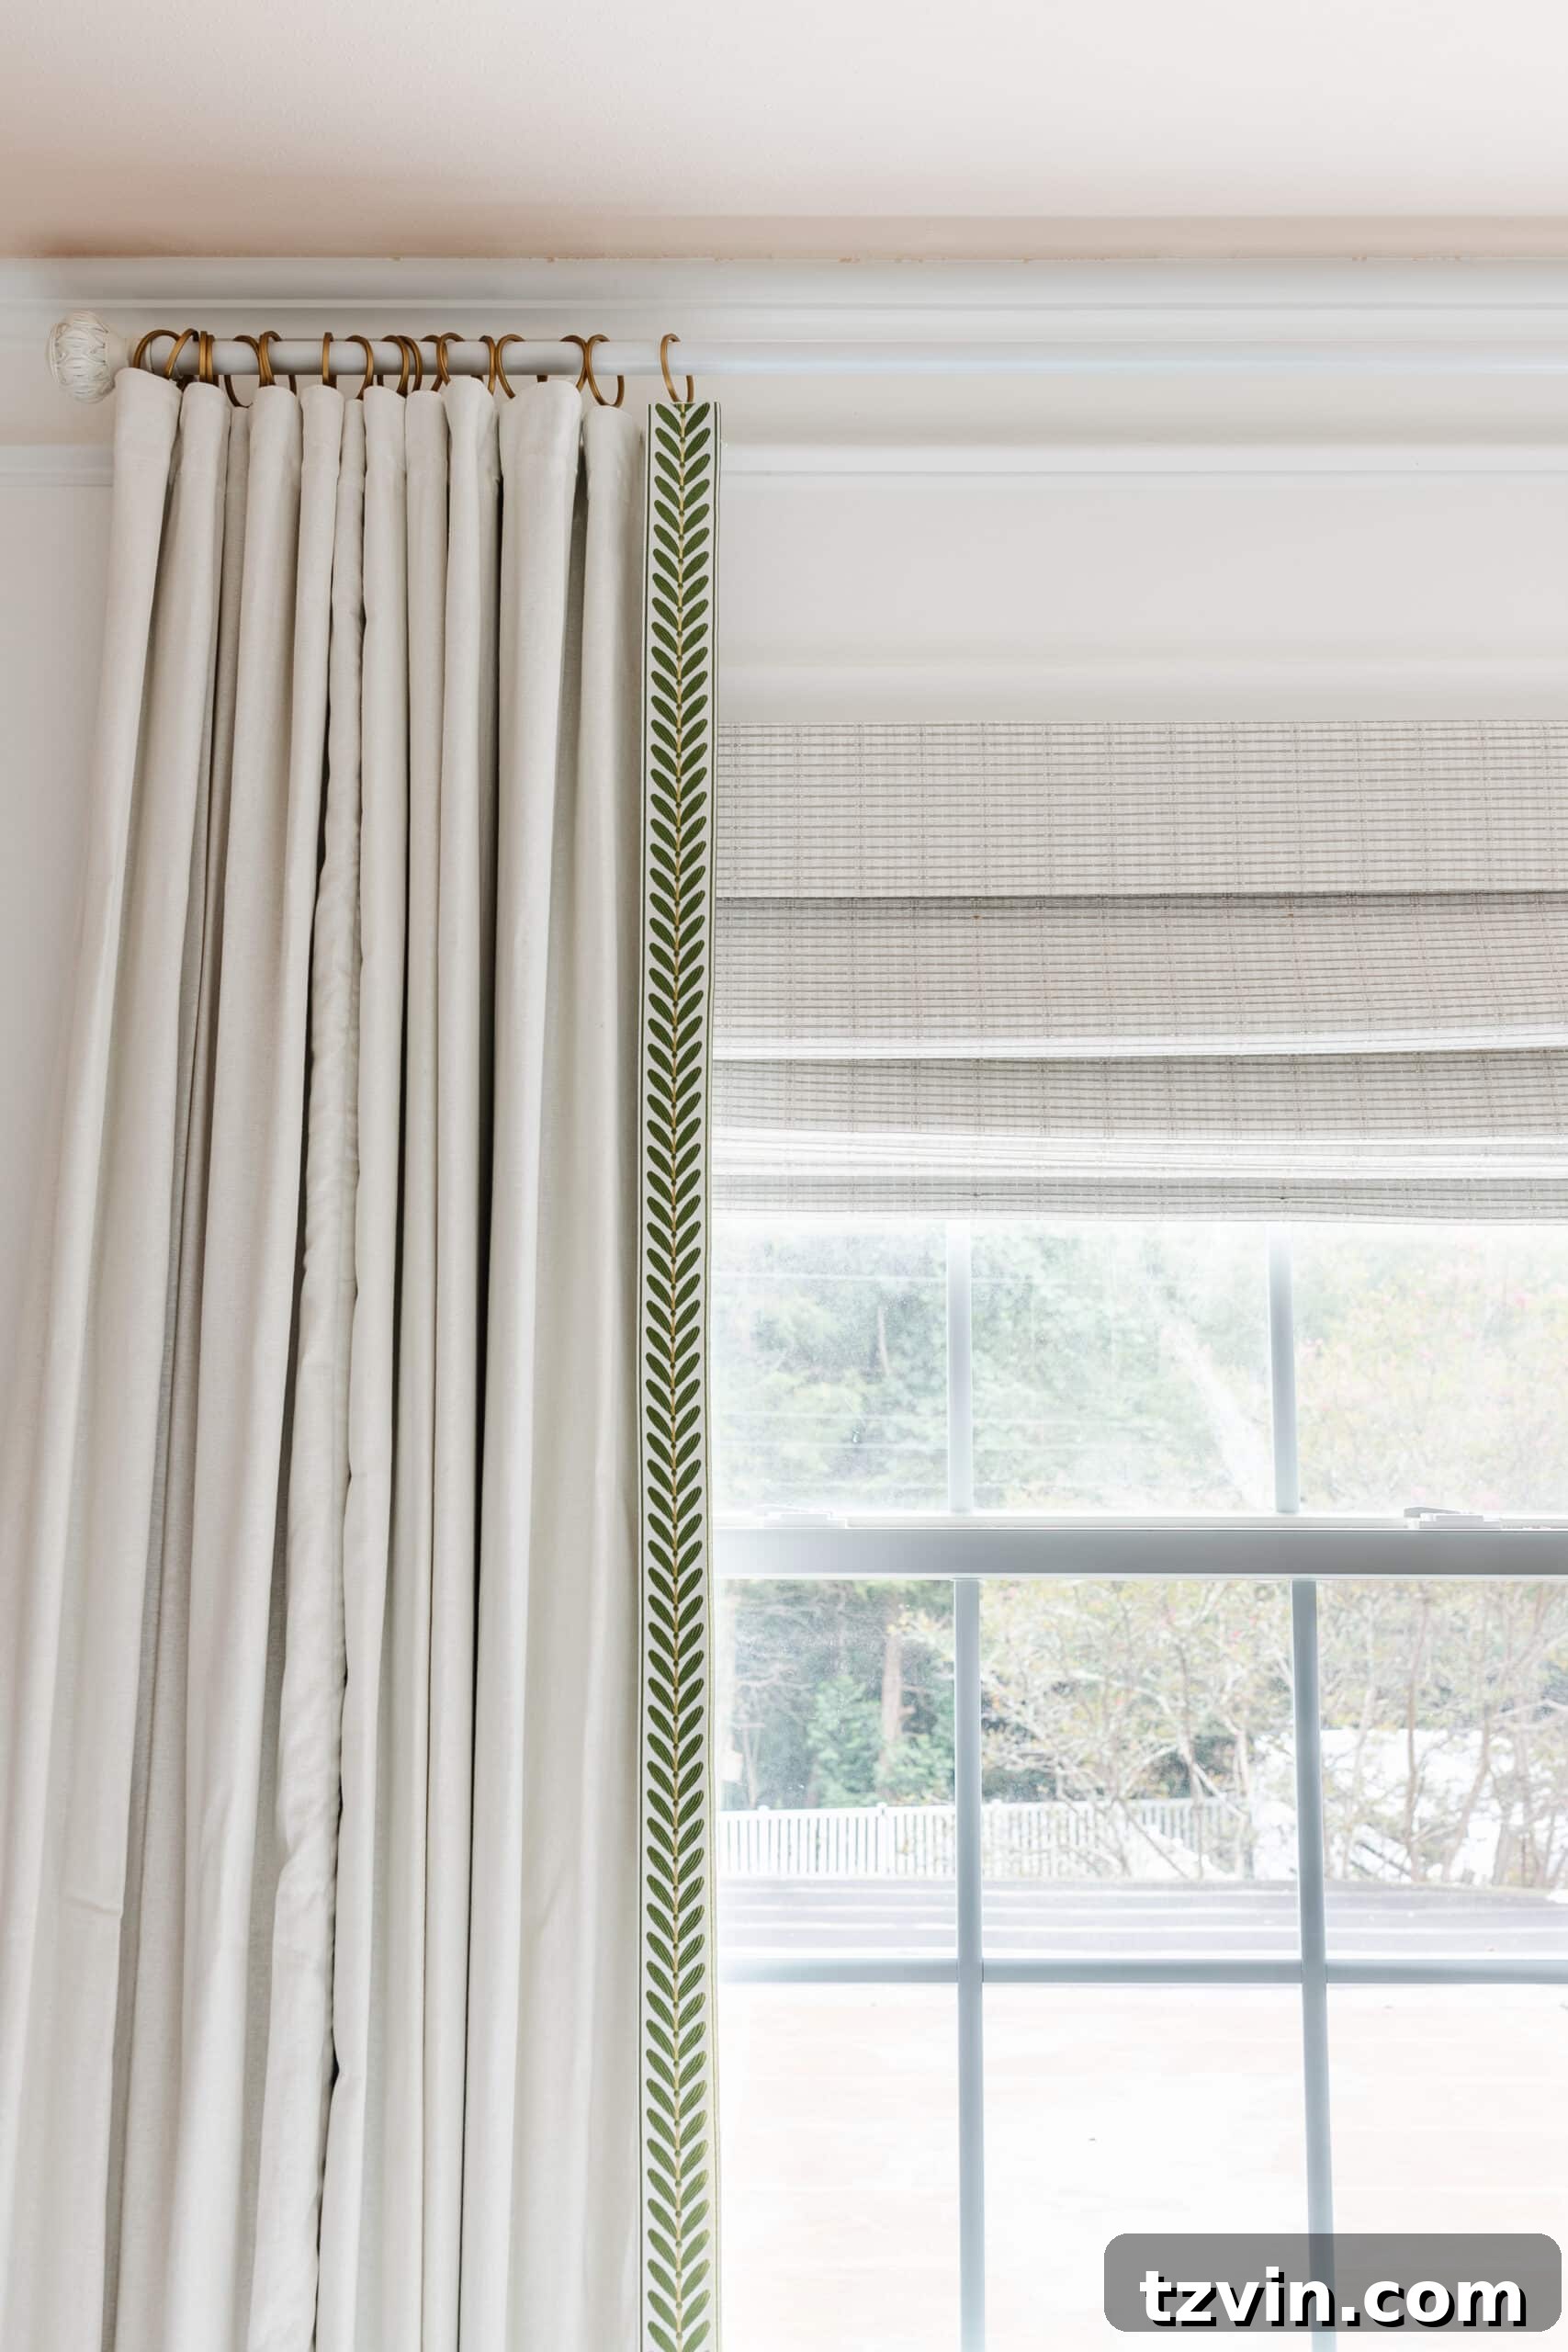
To ensure a flawless finish, I used my reliable upholstery steamer to gently release any wrinkles or creases from the newly hung curtains. This steamer has been a staple in my home for years and consistently delivers professional-quality results, leaving fabrics smooth and pristine. In hindsight, I might have hemmed these curtains just an inch shorter to achieve a perfect “kiss” with the floor. However, I was initially concerned they might appear too short after incorporating the hooks. This is a minor adjustment I may tackle in the future.
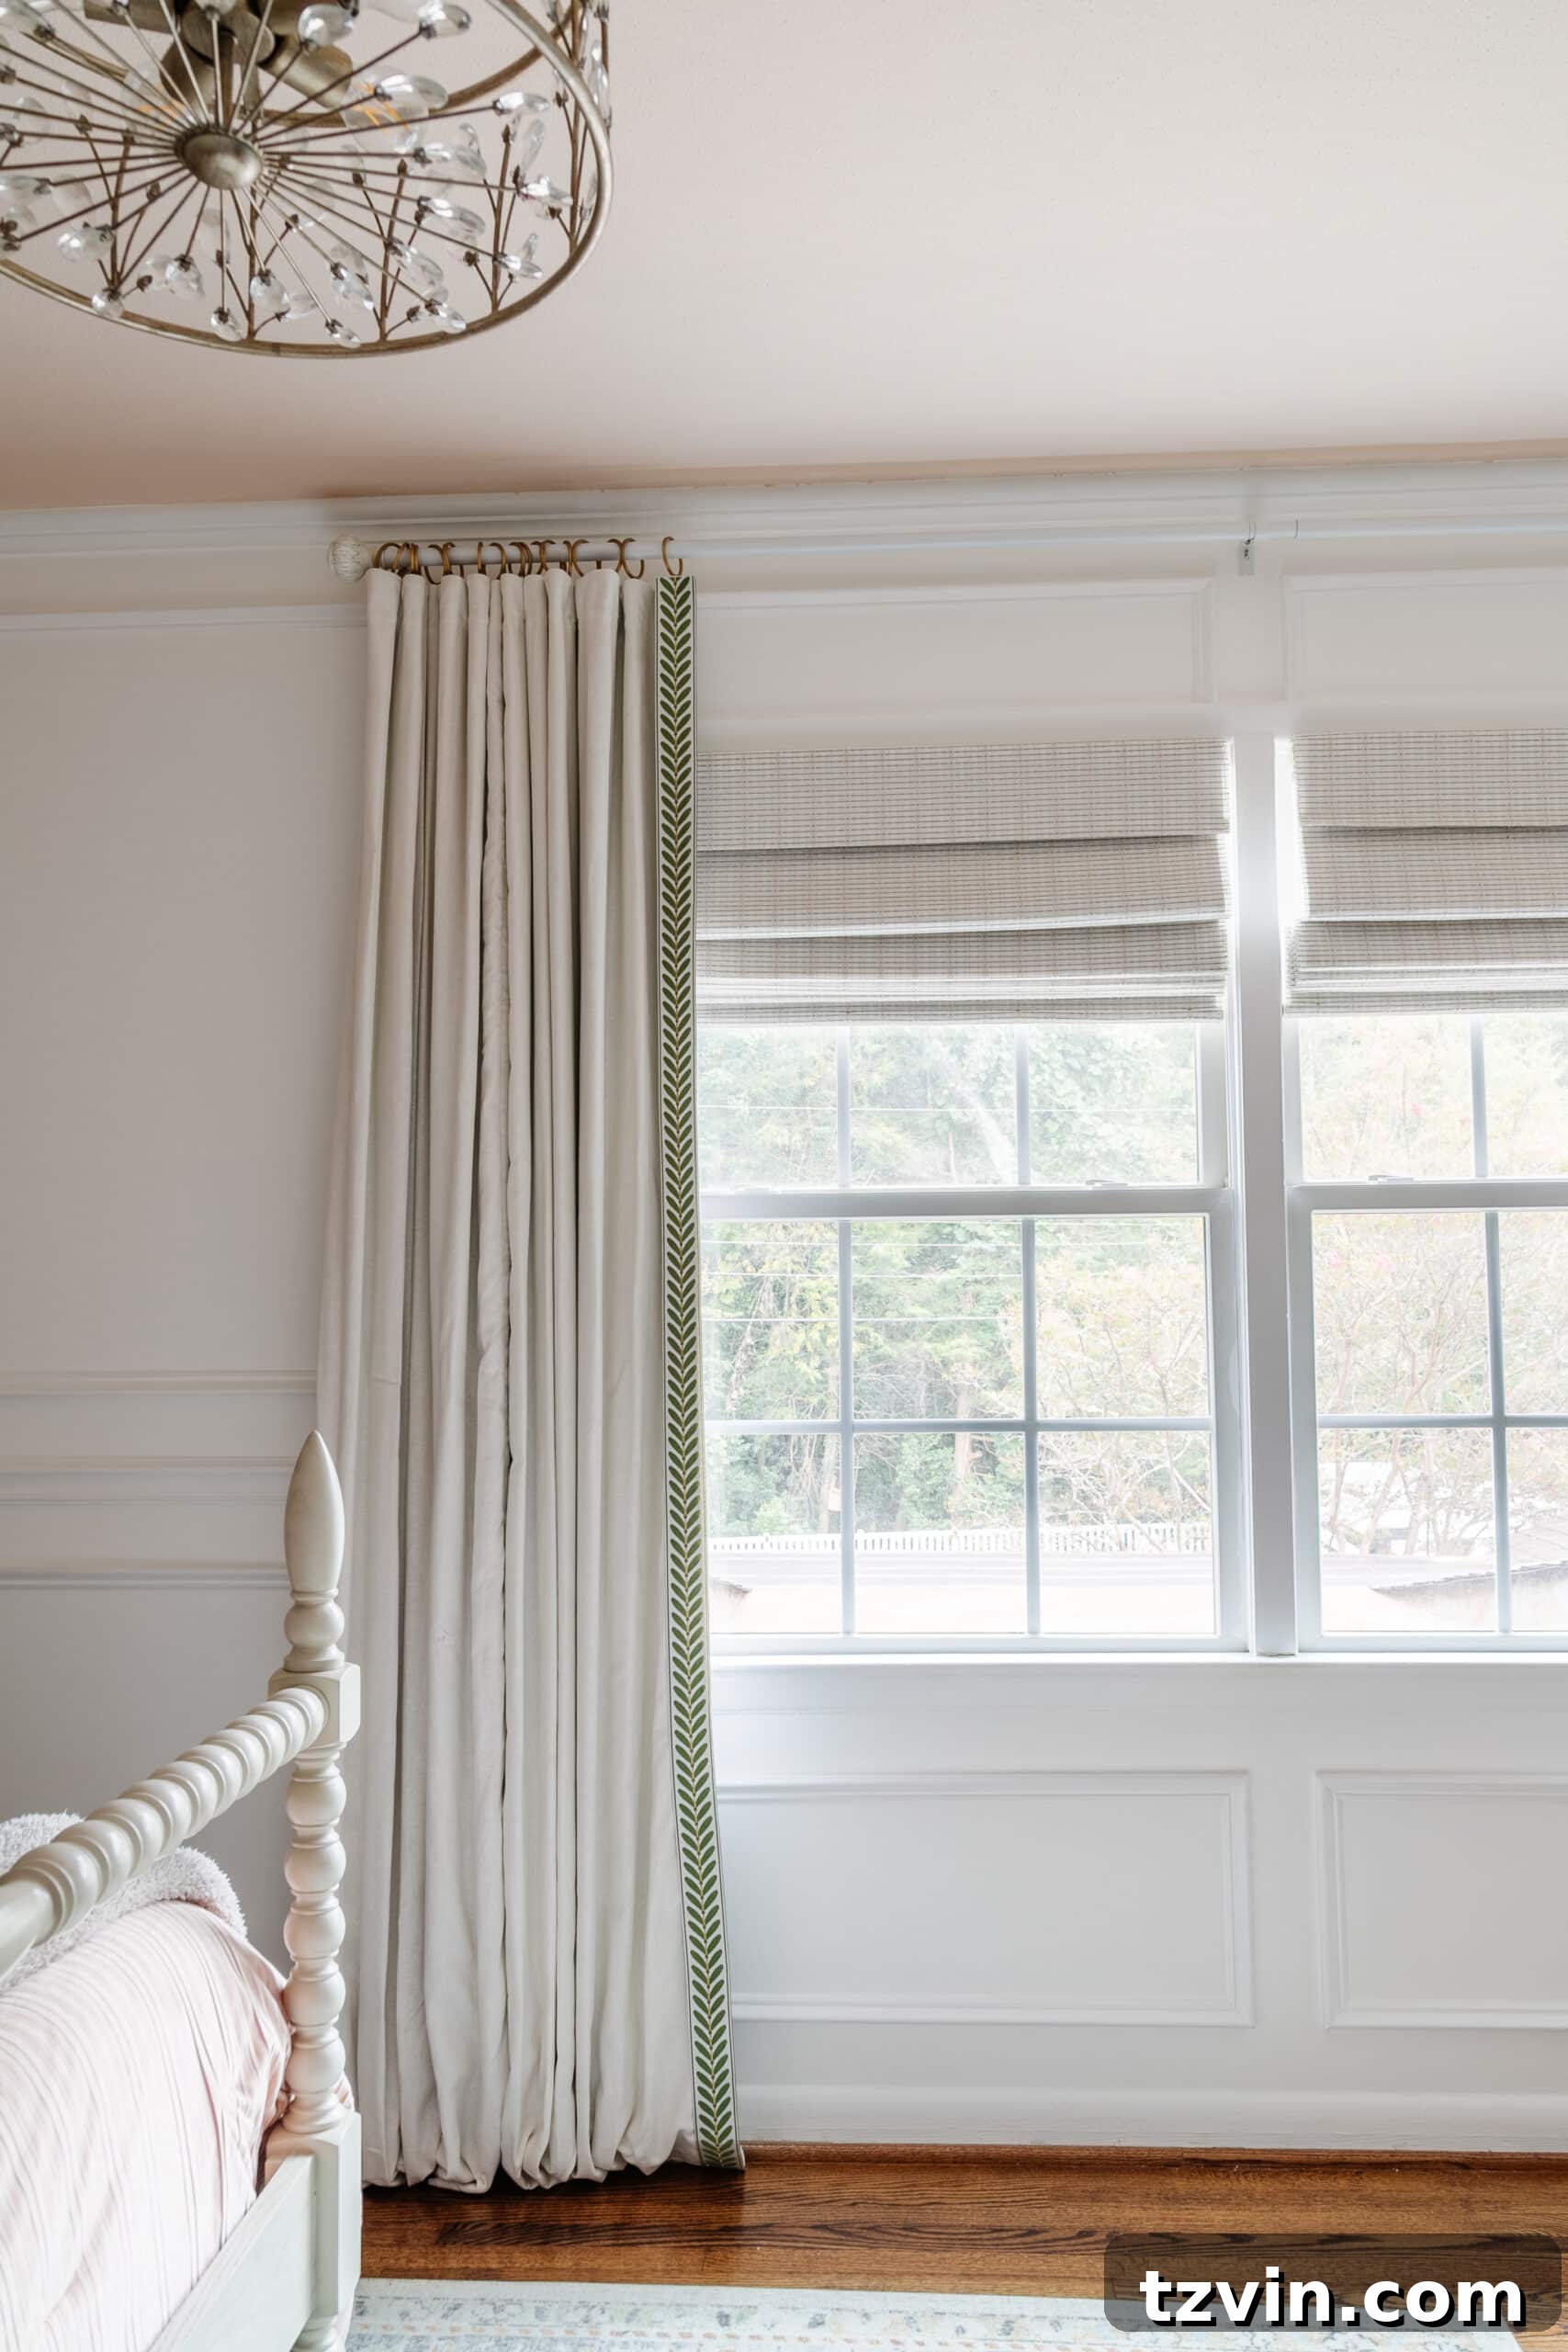
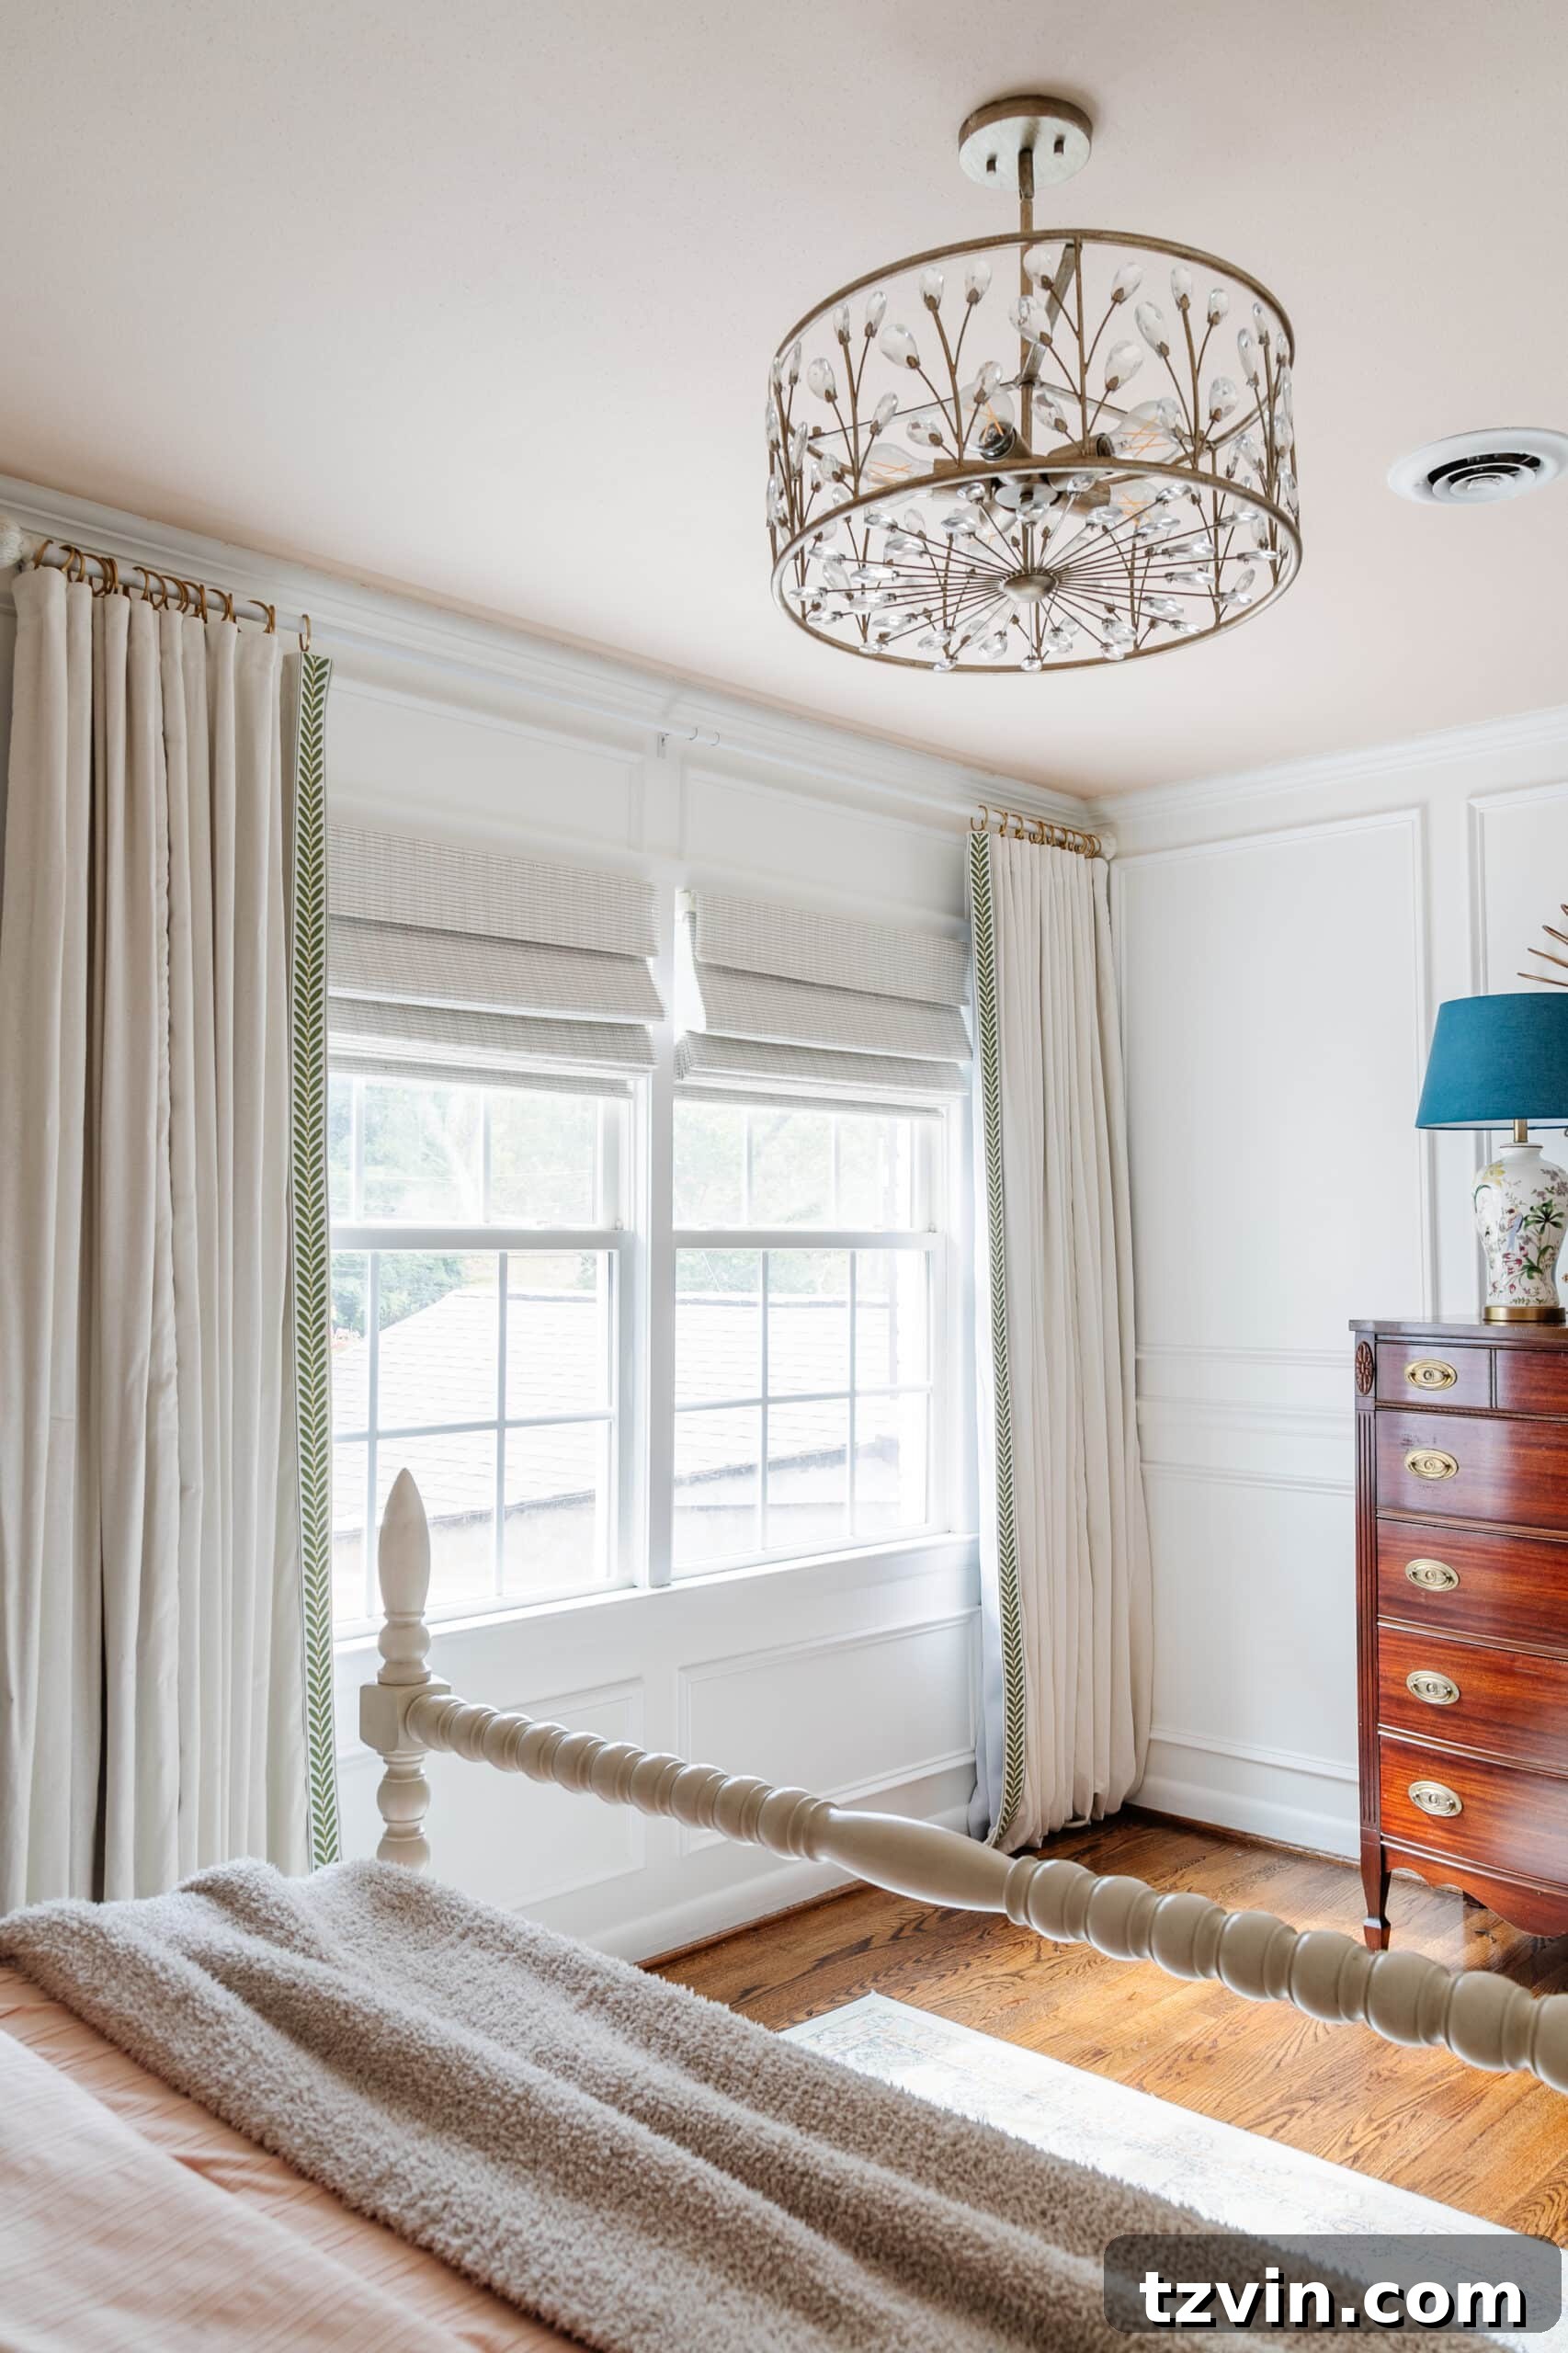
Despite a minor imperfection or two, the transformation was undeniably beautiful! Considering these custom-look curtains cost me only $50, compared to the over $2,000 price tag of the designer curtains that inspired them, this project represents a monumental victory in budget-friendly decor. These elegant passementerie curtains would be equally stunning in a sophisticated living room or a formal dining area, adding a touch of tailored luxury to any space.
Decoding Passementerie: An Art of Decorative Trimmings
Passementerie is a centuries-old decorative art form originating from France, dedicated to creating elaborate trimmings and ornamental accessories. The term itself derives from “passements,” meaning trimmings. This intricate craft involves designing and producing decorative elements—such as tassels, fringes, braids, cords, rosettes, and gimps—using a variety of luxurious materials. Silk, metallic threads, beads, and ribbons are commonly employed to add rich embellishment and a sense of opulence to clothing, textiles, and home furnishings. Passementerie is much more than simple trim; it’s a detailed artistry that elevates ordinary items into extraordinary pieces of design, perfectly aligning with the layered, curated aesthetic of grandmillennial style.
Unleash Creativity: Inspiring Curtain Trim Ideas
If you’re captivated by the sophisticated charm of passementerie curtains, there’s a vast world of curtain trim ideas waiting to transform your plain drapery panels into focal points. Beyond the leaf-patterned tape I used, consider adding:
- **Fringe:** From delicate brush fringe to elaborate bullion fringe, it adds movement and texture.
- **Tassels:** Single tassels or a continuous line of mini tassels can bring a playful yet elegant touch.
- **Braids & Cording:** Classic and refined, perfect for accentuating edges or creating patterns.
- **Pom-Poms:** For a whimsical, cottage-core twist that still fits the grandmillennial vibe.
- **Scalloped Borders:** A softer, more feminine alternative to straight trims.
- **Contrasting Fabric Bands:** A wider band of complementary fabric at the leading edge or bottom can create a bold statement, which can also be attached with hemming tape.
Experiment with different textures, colors, and widths to find the perfect trim that reflects your personal style and enhances your home’s decor.
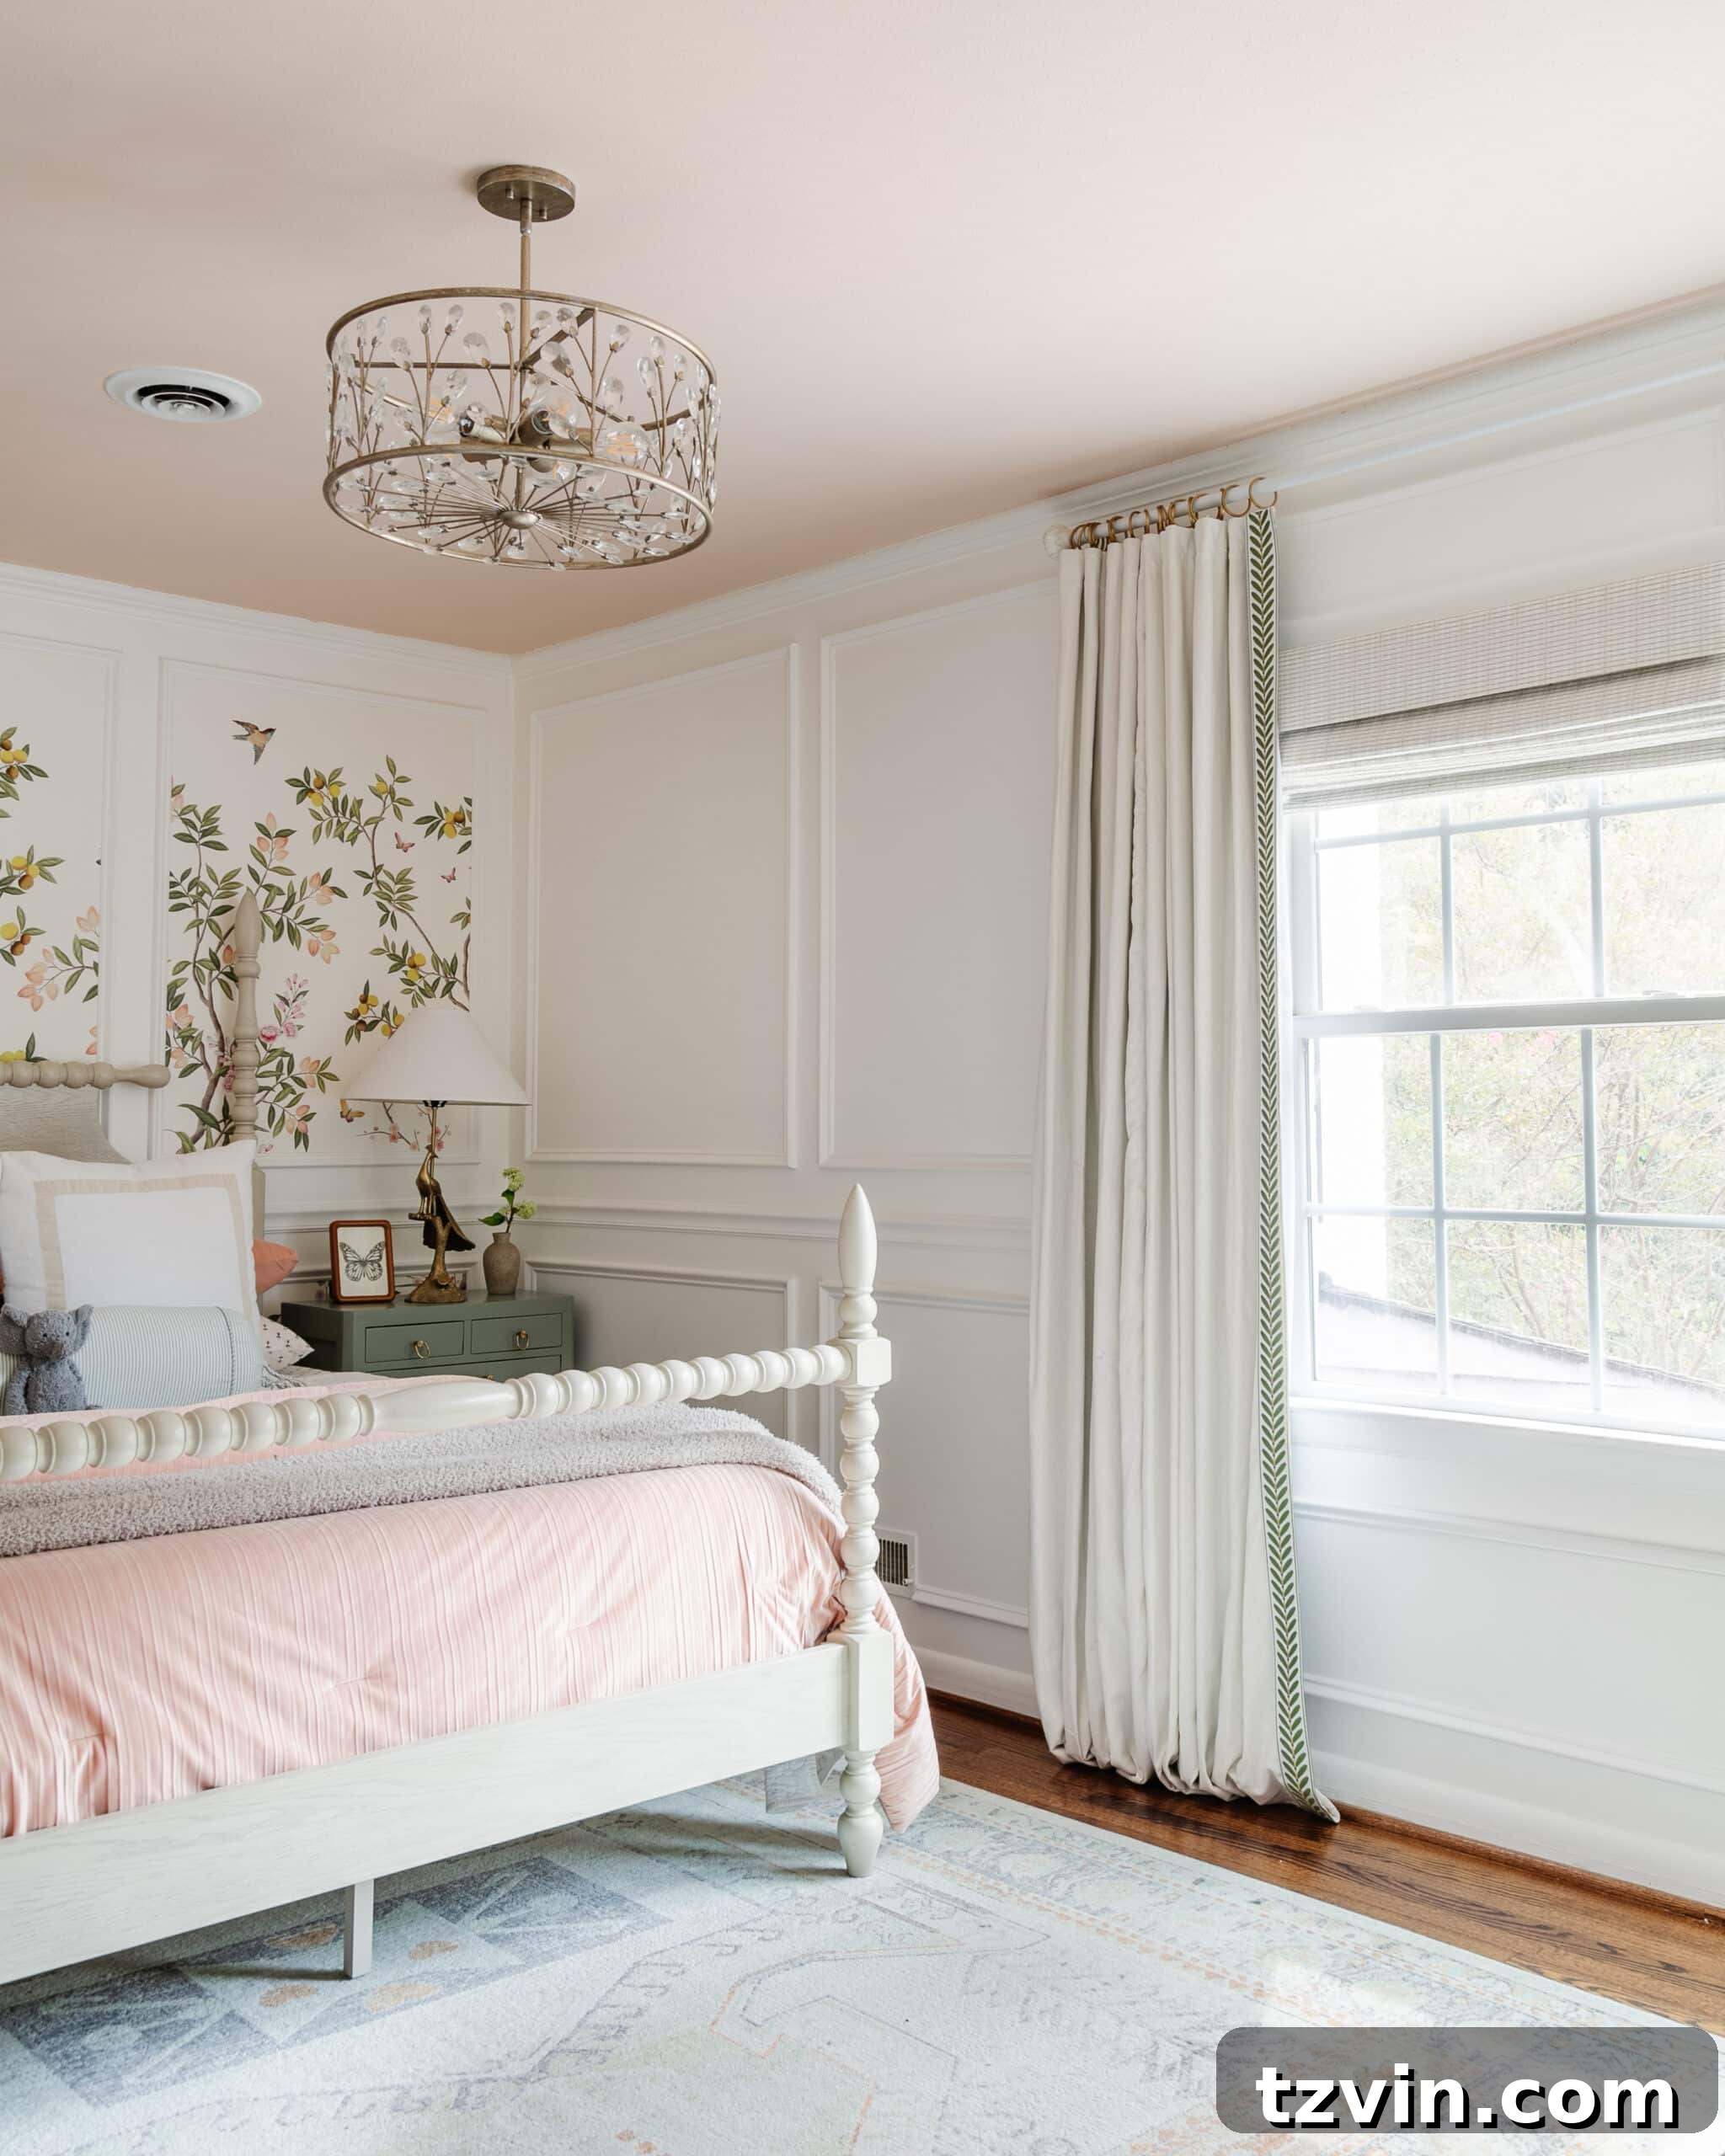
This exquisite curtain trim pairs so adorably with Regan’s stunning chinoiserie wallpaper! Perhaps she’ll consider a room swap with me someday. 😉
Have you ever ventured into making your own DIY curtains or experimented with a no-sew method? It’s incredibly rewarding to achieve such a polished look without the need for a sewing machine. One of these days, I truly vow to learn how to use a sewing machine, but for today, the no-sew path continues to be my go-to for beautiful, custom window treatments!
Explore More Window Treatment Ideas and Inspiration
- The Best Luxury for Less: Amazon Curtains, Rods, and Shades
- Our Favorite Window Treatments & How to Hang Curtains Flawlessly
- Budget-Friendly DIY Outdoor Curtains and Screened Porch for Under $100
- Innovative Window Film Ideas to Create Decorative Glass Around Your Home for Less
- DIY Window Trim – The Easy Way Without Miter Cuts
Frequently Asked Questions About No-Sew Curtains and Decor
For quick and affordable window coverings, consider using readily available household textiles. Tablecloths, plain drop cloths (often found at hardware stores), and flat bed sheets all make excellent makeshift curtains. Simply attach them to a curtain rod using clip rings for an instant update. For smaller windows, like in a kitchen or bathroom, even kitchen towels can be transformed into charming no-sew cafe curtains with clip rings.
Generally, making your own curtains, especially using no-sew methods, tends to be significantly cheaper than purchasing ready-made or custom options. You save on labor costs and can often find fabric and trims at a lower price point. However, this cost saving often comes at the expense of your time. If you have the available time and enjoy DIY projects, creating your own curtains is a fantastic way to achieve a custom look without the designer price tag. Consider your personal balance of time, budget, and desired outcome.
No-sew curtains, particularly those made with high-quality fusible hemming tape like Heat n Bond Super Weight, can be surprisingly durable. When applied correctly with adequate heat and pressure, the adhesive creates a strong, permanent bond that can withstand regular use and gentle washing. For best longevity, always follow the specific instructions on your hemming tape product and consider using a heavy-duty option for curtain headers and load-bearing seams.
Yes, most no-sew curtains made with fusible hemming tape can be washed. However, it’s crucial to check the care instructions for both your chosen fabric and the specific hemming tape you used. Generally, a gentle cycle with cold water and air drying or very low heat tumble drying is recommended to preserve the adhesive’s integrity. Avoid harsh detergents or high heat, which can weaken the bond over time.