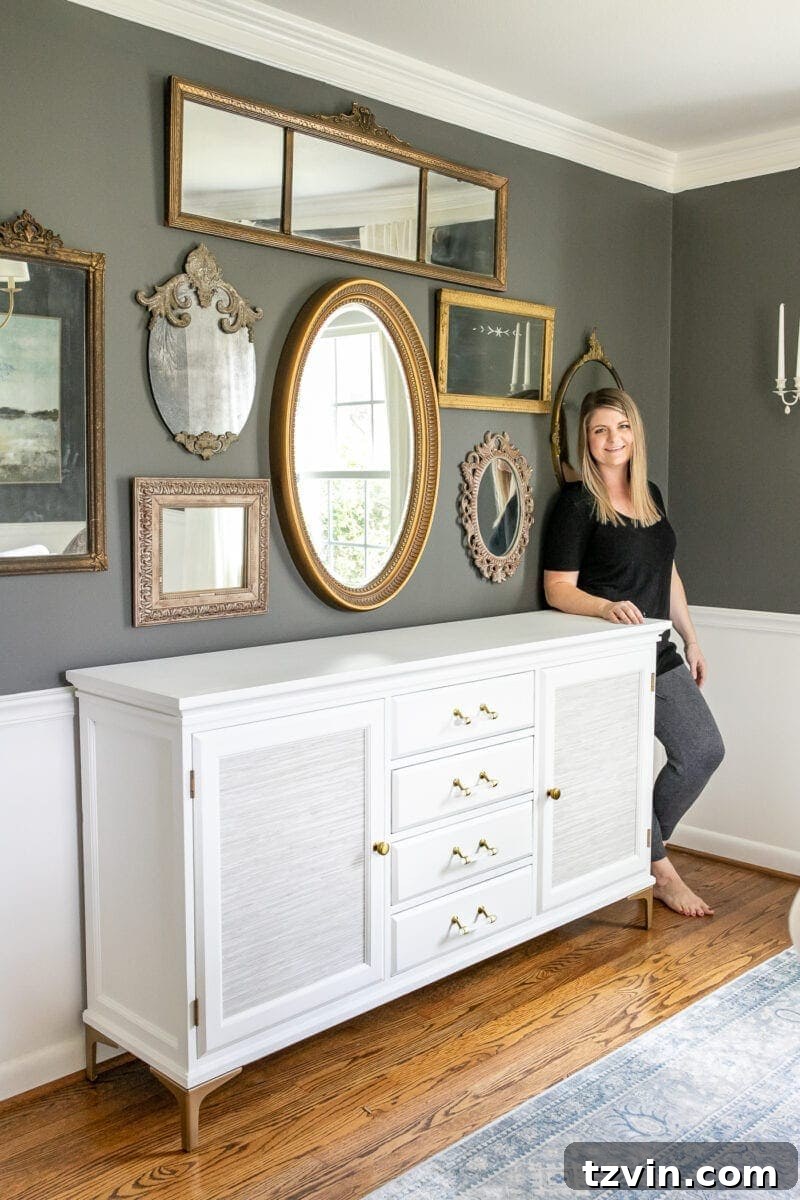
From Drab to Fab: Your Ultimate Guide to a Modern Glam Buffet Makeover with Grasscloth & Brass
Every home decor enthusiast knows the thrill of a good underdog story, especially when it involves a forgotten piece of furniture destined for greatness. The classic thrift store furniture makeover — a journey from overlooked to utterly captivating — holds a special place in the hearts of those who appreciate a dramatic transformation. There’s something profoundly satisfying about rescuing a bulky, dated item and breathing new life into it, turning it into a bespoke treasure.
This particular adventure began, as many do, with a scroll through Facebook Marketplace. What caught my eye wasn’t a pristine, ready-to-style masterpiece, but rather a robust, albeit uninspired, buffet. It was far from being a showstopper in its original form; its bulky silhouette and dated aesthetic weren’t aligned with the modern glam vision I had in mind. However, beneath its unassuming exterior lay the most crucial ingredients for a successful makeover: solid construction and excellent “bones.” These fundamental qualities assured me that, with a bit of creativity, elbow grease, and the right tools, this piece was ripe for a stunning Cinderella story.
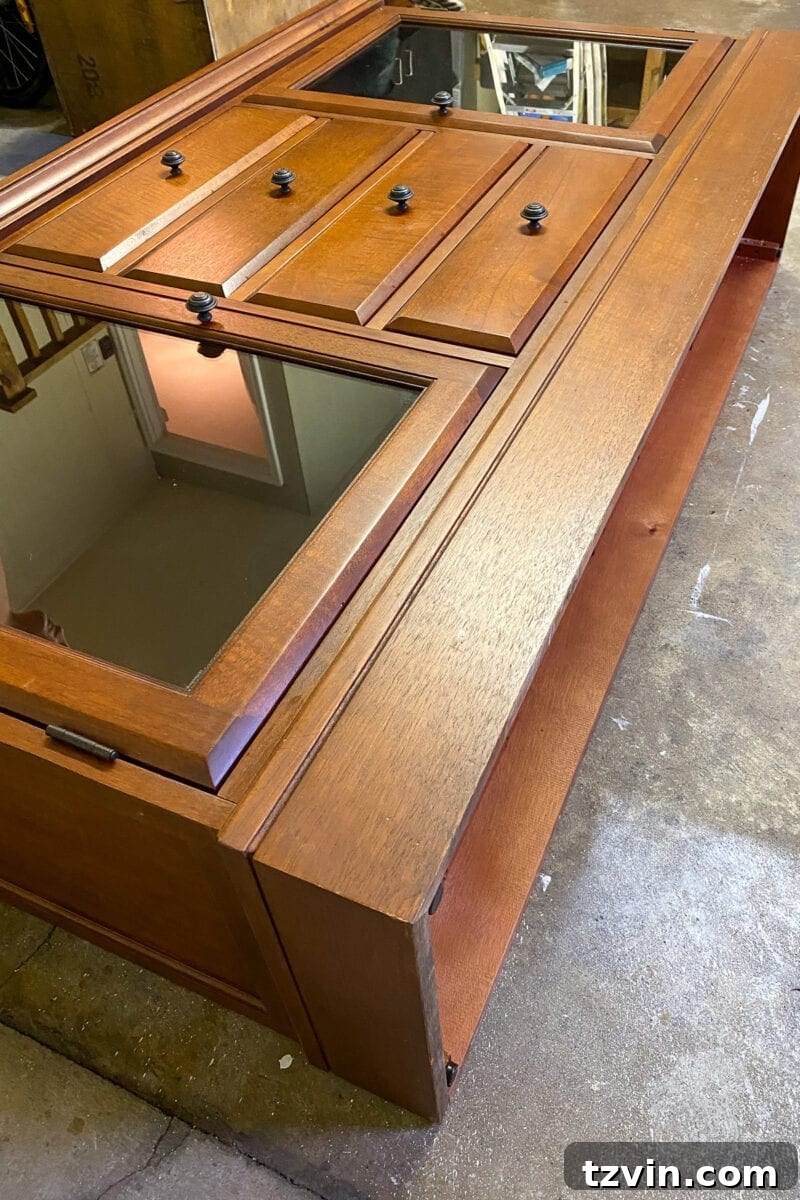
Our mission was clear: to take this sturdy, but stylistically challenged, buffet and infuse it with a modern glam sensibility. This involved a strategic structural modification, a fresh coat of paint, and carefully chosen accents of brass and luxurious grasscloth. The goal was to create a high-end, designer look without the exorbitant price tag, proving that a budget-friendly approach can yield truly spectacular results.
Essential Supplies for Your Glam Buffet Transformation:
(Please note: Some affiliate links are included below for your convenience. Full disclosure on affiliate partnerships can be found here.)
- Circular Saw: Essential for making precise cuts to alter the furniture’s structure, like removing a bulky base.
- Power Drill: Indispensable for removing old hardware, attaching new feet, and securing other components.
- Power Sander & Medium Grit Sanding Pads: For smoothing surfaces, preparing for paint, and achieving a professional finish. Medium grit (around 120-150) is often ideal for initial prep.
- Tack Cloth and/or Shop Vac: Crucial for thoroughly removing sanding dust, ensuring a clean surface for paint adhesion. A shop vac is particularly effective for larger projects.
- Wood Filler: Perfect for patching old knob holes or any imperfections in the wood, creating a smooth canvas for new hardware.
- Spray Primer: A must-have for blocking stains and ensuring superior adhesion, especially when painting light colors over dark wood.
- Fusion Mineral Paint in Picket Fence: Chosen for its self-leveling properties, built-in topcoat, and durable, low-sheen finish, offering a crisp, clean white.
- 2″ Angled Sash Brush: Designed for precision, this brush excels at getting into corners, intricate details, and tight cabinet spaces.
- Brass & Frosted Glass Pulls: Elegant new hardware to elevate the aesthetic and provide a functional, stylish upgrade.
- Brass Knobs: Complementary hardware to complete the cohesive modern glam look.
- Decorative Furniture Feet: These transform the buffet’s silhouette, giving it a lighter, more elevated appearance. Versatile enough for chairs and sofas too!
- Rustoleum Metallic Gold Spray Paint: My personal favorite for achieving a convincing, sophisticated modern brass finish.
- Removable Grasscloth Wallpaper: Adds incredible texture and allows for concealed storage behind glass doors, with the flexibility to change later.
The Step-by-Step Transformation: Unleashing Glamour
1. Redefining the Silhouette: Removing the Bulky Base
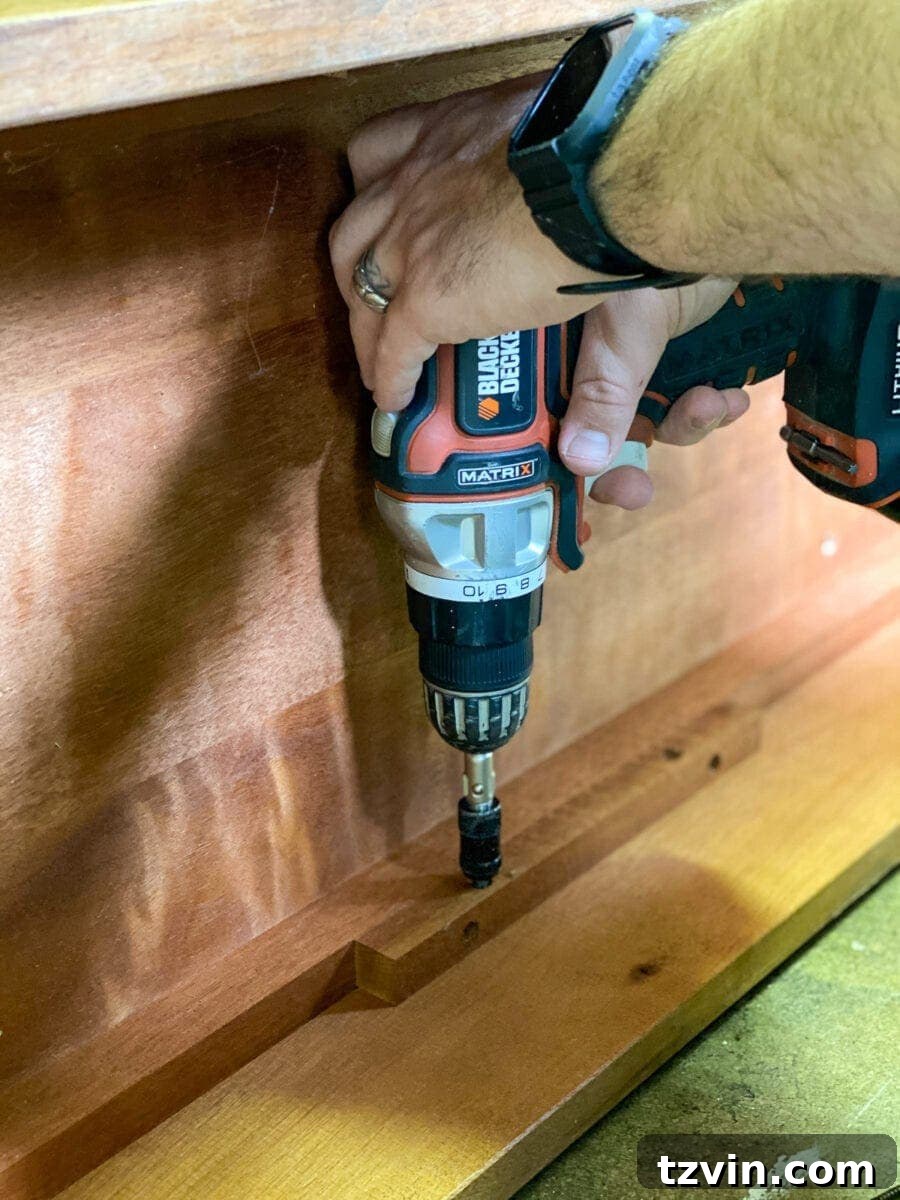
Our initial objective was to modernize the buffet’s inherently bulky appearance. While we wanted to maintain its original height for functional purposes, its heavy base contributed to a dated aesthetic. The solution? A strategic amputation! We began by meticulously identifying and removing all screws securing the bottom boards. This step is crucial for a clean, damage-free removal of the base structure. Taking the time to locate every fastener ensures that the next step can be executed smoothly and safely, preparing the piece for its new, elevated stance.
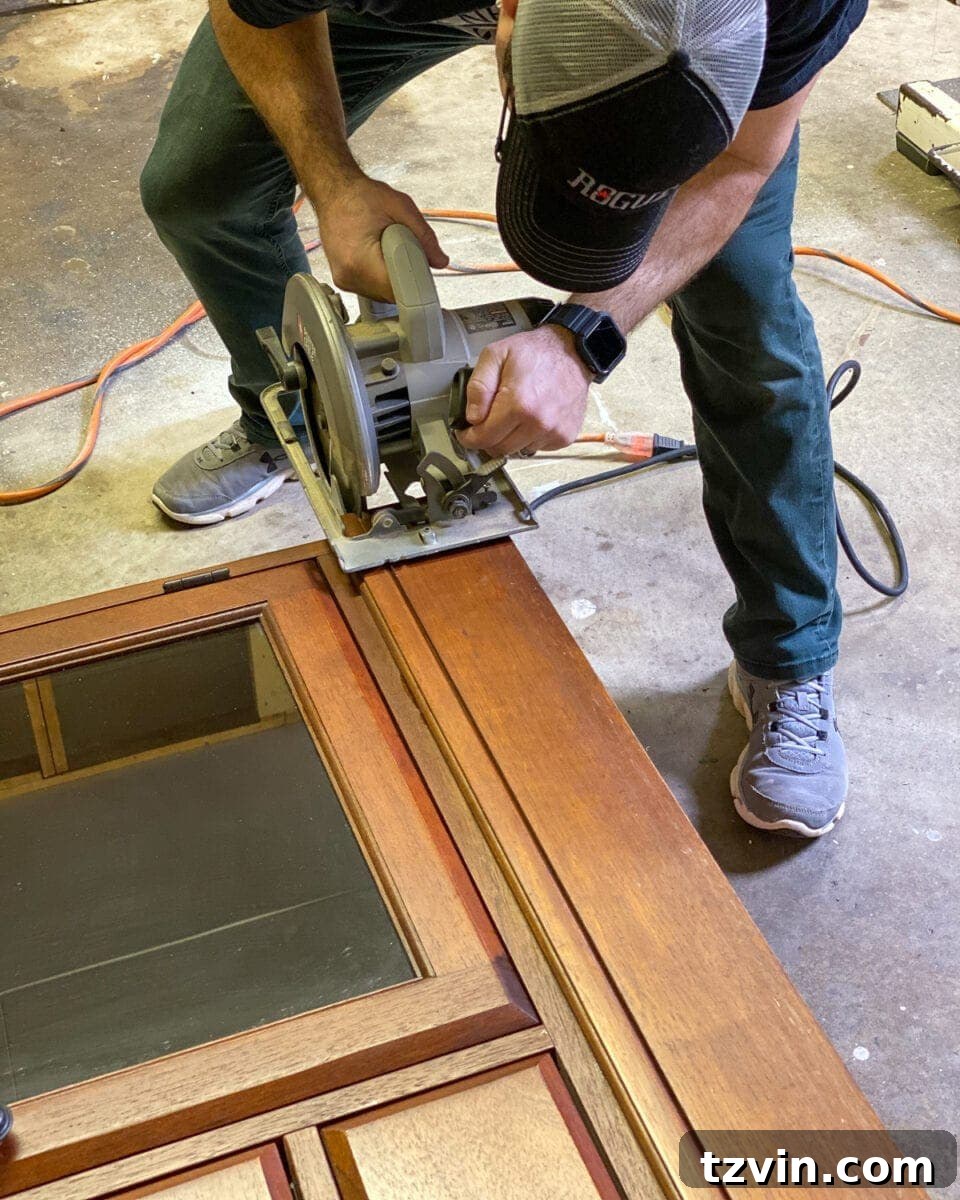
2. Precision Cutting: Elevating the Design
With the screws removed, Robert, with careful precision, used a circular saw to cut along the existing seam where the buffet’s base met the main body. This technique ensures a straight, clean line, critical for the buffet’s new, sleek foundation. A circular saw offers the power and accuracy needed for such structural modifications, effectively transforming the bulky base into a clean edge, ready to accommodate new, stylish feet. Safety is paramount here; always ensure proper eye and hand protection when operating power tools.
3. Drawer Preparation: A Fresh Canvas for New Hardware
The original hardware left unsightly holes that wouldn’t align with our new, elegant brass pulls and knobs. To achieve a flawless finish, I applied wood filler to all existing knob holes on the drawers. Once the wood filler was completely dry (usually a few hours, depending on the product), I meticulously sanded it down until the surface was perfectly smooth and flush with the drawer fronts. This step is vital for creating a seamless “fresh start” for the new hardware, ensuring a high-end, bespoke look.
4. Pristine Cleanliness: Essential Prep for Painting
After all the cutting and sanding, a significant amount of dust inevitably accumulates. Proper dust removal is non-negotiable for a professional paint finish. We employed both a tack cloth, which effectively picks up fine particles, and a shop vac for larger debris. This thorough cleaning prevents dust from getting trapped in the paint, which can lead to a gritty texture. Once clean, the buffet was ready to be moved outdoors for priming, ensuring good ventilation and a suitable environment for spray application.
5. The Power of Primer: Blocking Stains and Ensuring Adhesion
While not every furniture piece requires primer, it is an absolute game-changer when painting a dark wood piece with a light color, especially white. Dark tannins in wood, when painted over directly with white paint, can “bleed through,” causing an unsightly pinkish or yellowish discoloration over time. To prevent this frustrating issue, I applied a high-quality spray primer. Primer acts as a stain blocker, sealing the wood and creating an ideal, uniform surface for the subsequent paint layers to adhere flawlessly. This step truly saves time and heartache in the long run.
6. The Midas Touch: Elevating the Furniture Legs
While the buffet itself was priming, I turned my attention to the new furniture legs. The existing finish on them had a rather generic, shiny yellow-gold hue that didn’t quite capture the sophisticated brass aesthetic we were aiming for. Using my favorite Rustoleum metallic gold spray paint (which delivers an incredibly convincing modern brass finish), I carefully applied several light, even coats. This transformed the legs into elegant, antique brass accents that perfectly complemented our modern glam vision, adding a touch of understated luxury.
7. Structural Enhancement: Attaching the New Feet
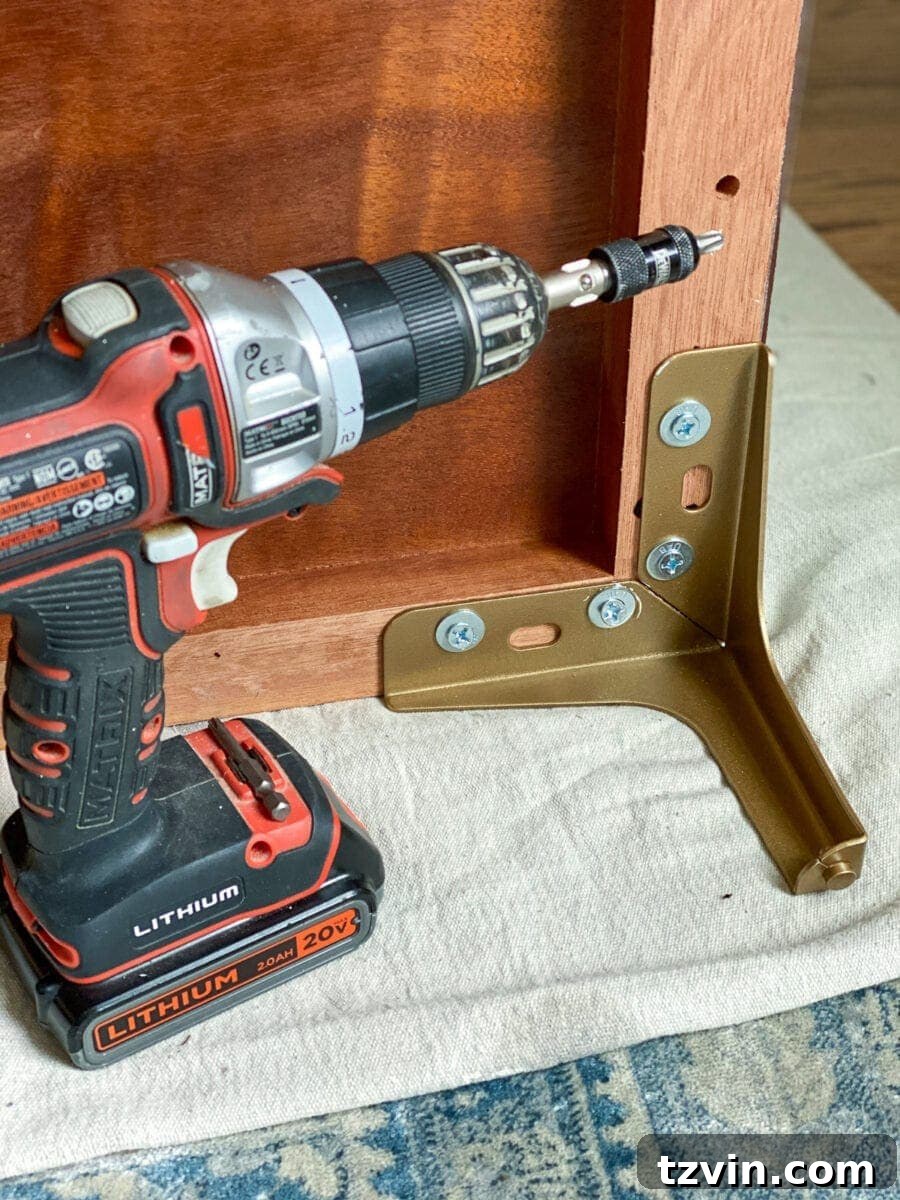
Once both the buffet and the freshly sprayed legs were completely dry, it was time to marry them. We carefully flipped the buffet onto its back, providing stable access to its underside. Using a power drill, we securely attached the new decorative feet to each corner of the buffet’s base. Proper alignment and secure fastening are key here to ensure stability and a balanced appearance. This seemingly simple step dramatically altered the buffet’s presence, lifting it off the ground and contributing significantly to its lighter, more contemporary profile.
8. The Perfect Hue: Painting with Fusion Mineral Paint
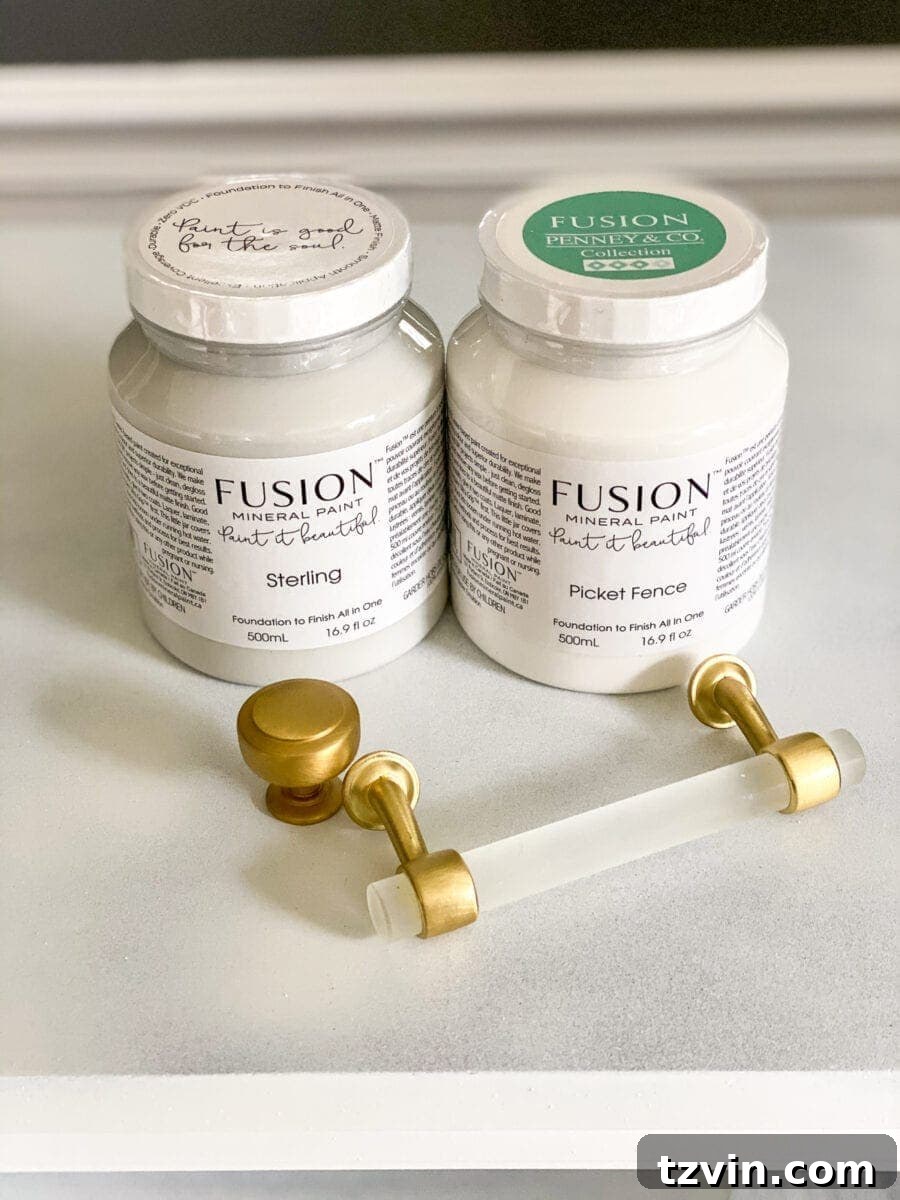
With the primer dry and the new feet in place, the buffet was ready for its transformation in color. I applied two smooth coats of Fusion Mineral Paint in “Picket Fence.” This particular paint is a favorite for furniture makeovers due to its exceptional self-leveling capabilities, which minimize brush strokes, and its built-in topcoat, eliminating the need for an extra sealing step. Using a 2-inch angled sash brush allowed me to navigate corners and edges with precision, ensuring even coverage and a crisp, clean white finish that brightens the entire piece and forms the perfect backdrop for our glam accents. Allowing adequate drying time between coats is essential for durability and a professional outcome.
9. Adding Texture and Concealment: The Grasscloth Detail
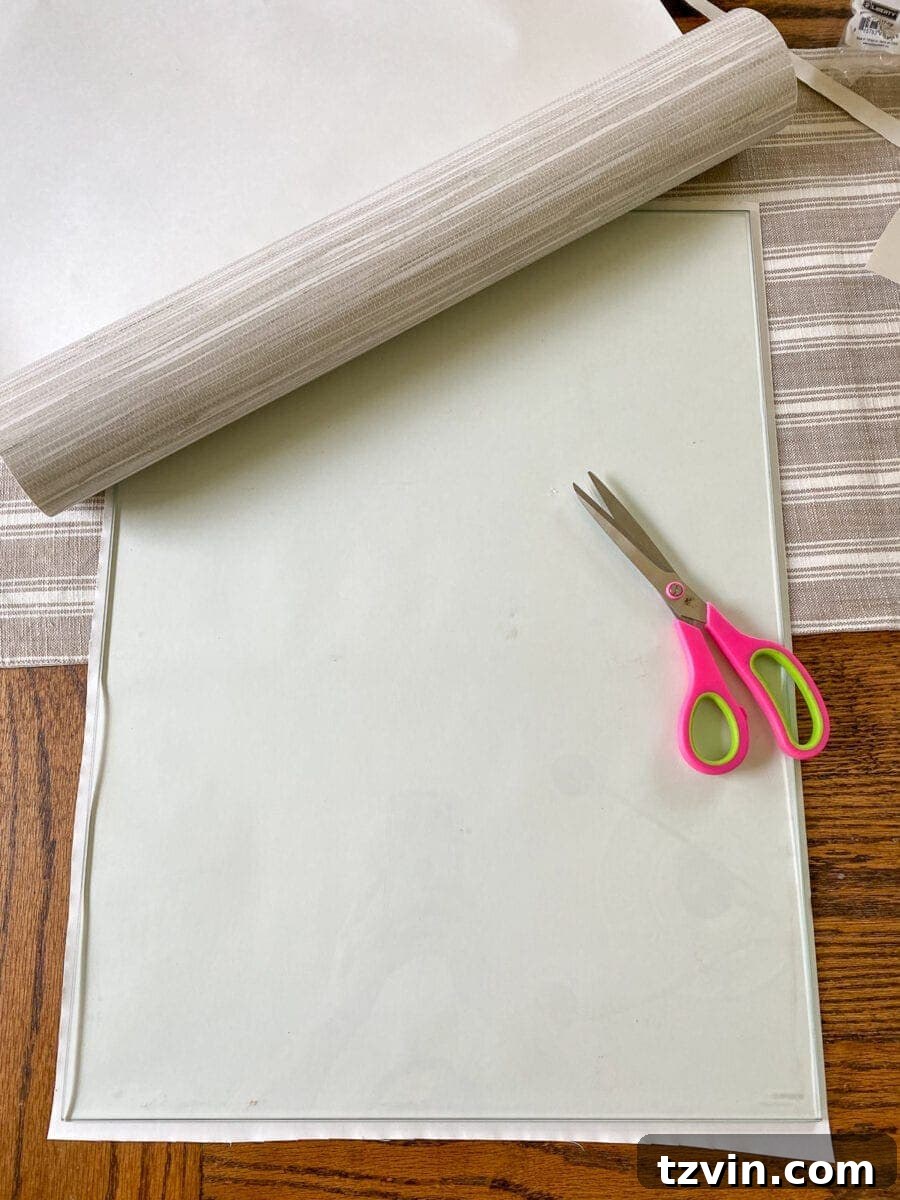
A key element of this modern glam buffet makeover was the introduction of texture and a clever solution for concealed storage. For the glass fronts of the doors, I carefully applied removable grasscloth wallpaper. This material offers a sophisticated, natural texture that instantly elevates the piece, while also providing a beautiful way to hide contents within the cabinets. I worked slowly and deliberately, starting from one side and smoothly pressing out any air bubbles with a wallpaper smoother as I went. The removable aspect is fantastic, offering flexibility if future styling preferences change. This step truly brings the “glam” factor to life, adding depth and visual interest.
10. The Grand Finale: Hardware and Assembly
With the paint cured and the grasscloth meticulously applied, the final touches brought the vision to fruition. I reinstalled the glass panels into the doors, followed by attaching the doors and drawers back to the buffet. The moment of truth arrived with the installation of the new brass and frosted glass pulls and matching brass knobs. These pieces of hardware are more than just functional; they act as jewelry for the furniture, catching the light and completing the modern glam aesthetic. And just like that, what was once a bulky, overlooked thrift store find was transformed into a sophisticated, high-impact buffet – a true statement piece!
The Transformed Reveal: Luxury for Less
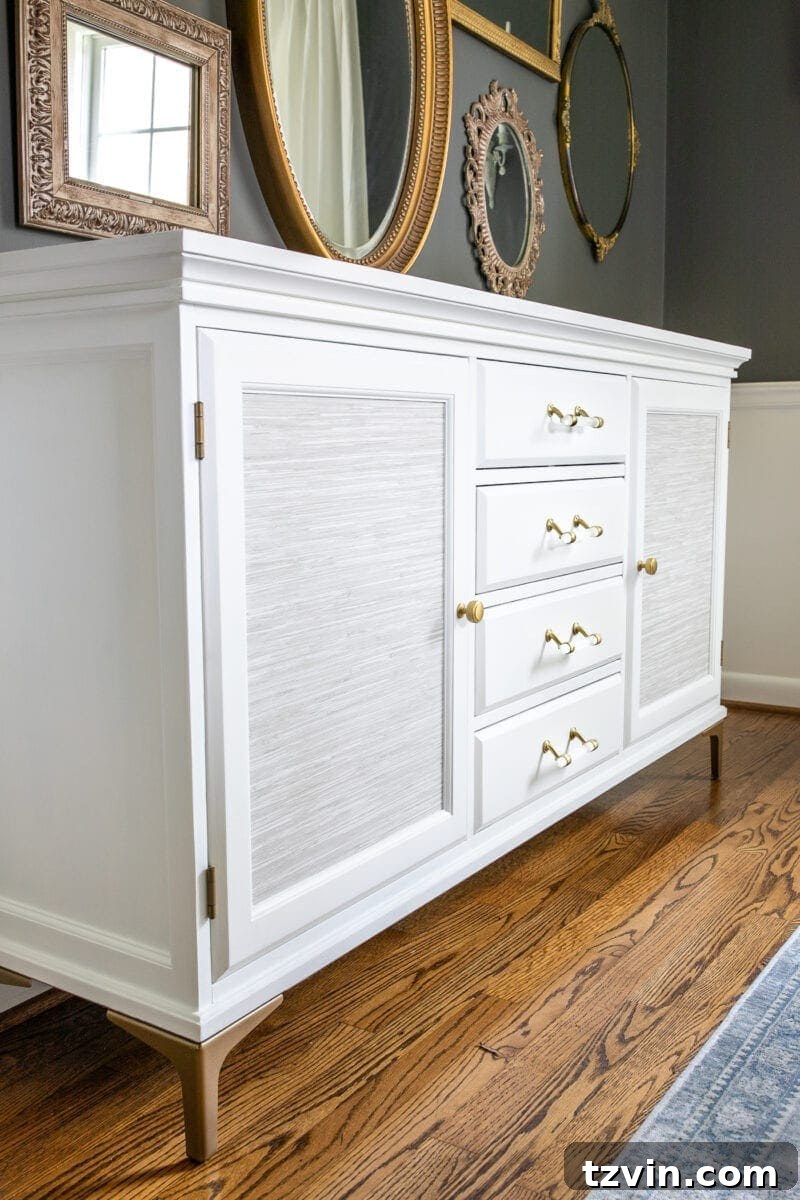
The final result is nothing short of stunning. This revamped buffet now boasts the elegant, streamlined look of a high-end designer piece, remarkably similar to some of the luxurious inspirations I had saved for this project. The transformation from a drab, bulky item to a chic, modern glam focal point is truly rewarding. And the best part? The total cost for the buffet itself, along with all the paint, new pulls, knobs, and decorative feet, came in at approximately $350. This is a testament to the power of DIY – achieving a luxury aesthetic without the designer price tag, making sophisticated home decor accessible and budget-friendly.
One of the fantastic features of this makeover is the use of removable grasscloth wallpaper. Should our design preferences evolve in the future, the grasscloth can be easily removed, allowing us to revert to classic glass doors or even try a different texture. For now, I absolutely adore the subtle yet rich texture it introduces, adding depth and warmth to the piece. Beyond aesthetics, it’s incredibly practical, providing discreet storage for items we prefer to keep out of sight, maintaining a tidy and elegant living space.
With the main transformation complete, the next delightful challenge is styling the top of this beautiful buffet. The possibilities are endless, and I’m still pondering the perfect arrangement. Would a pair of elegant buffet lamps create the ideal ambiance? Or perhaps a minimalist approach, leaving it relatively unadorned? A stylish bowl or a decorative tray could also serve as a striking accent, adding a touch of curated charm. Each option offers a different feel, and I’m enjoying the process of envisioning the perfect finishing touch. What would your styling choice be?
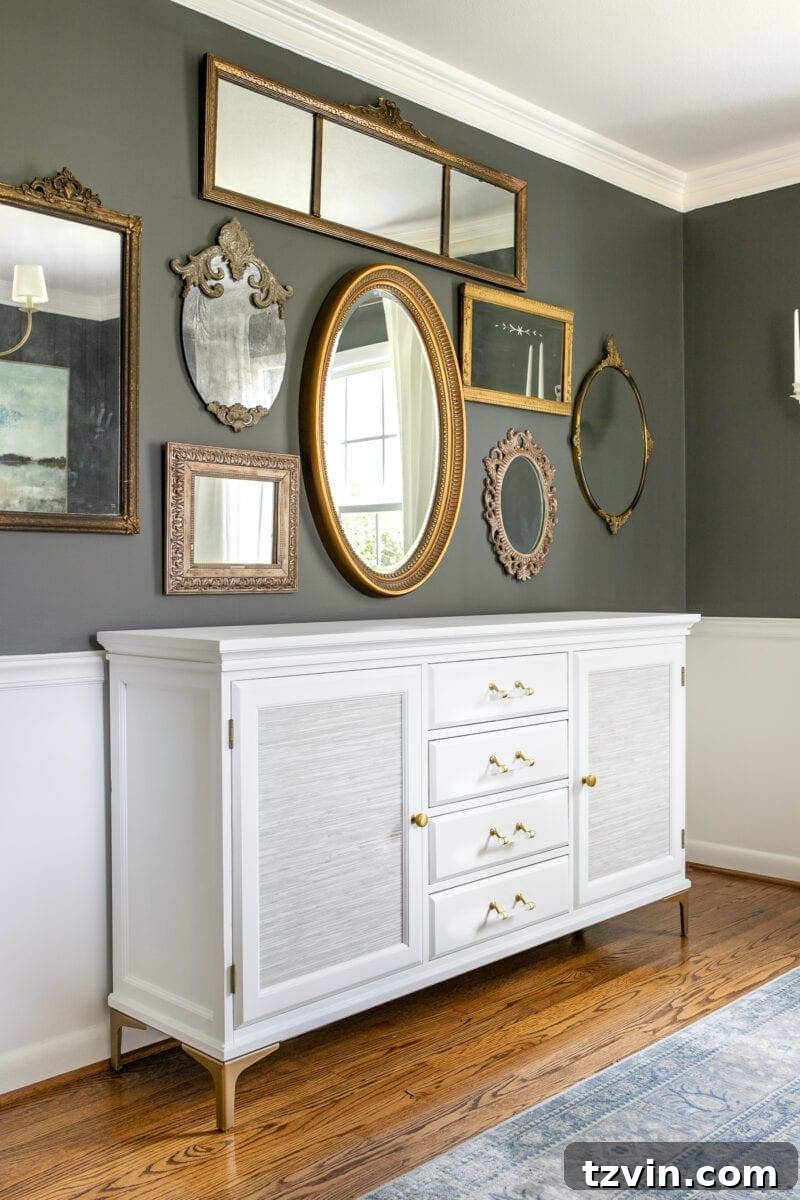
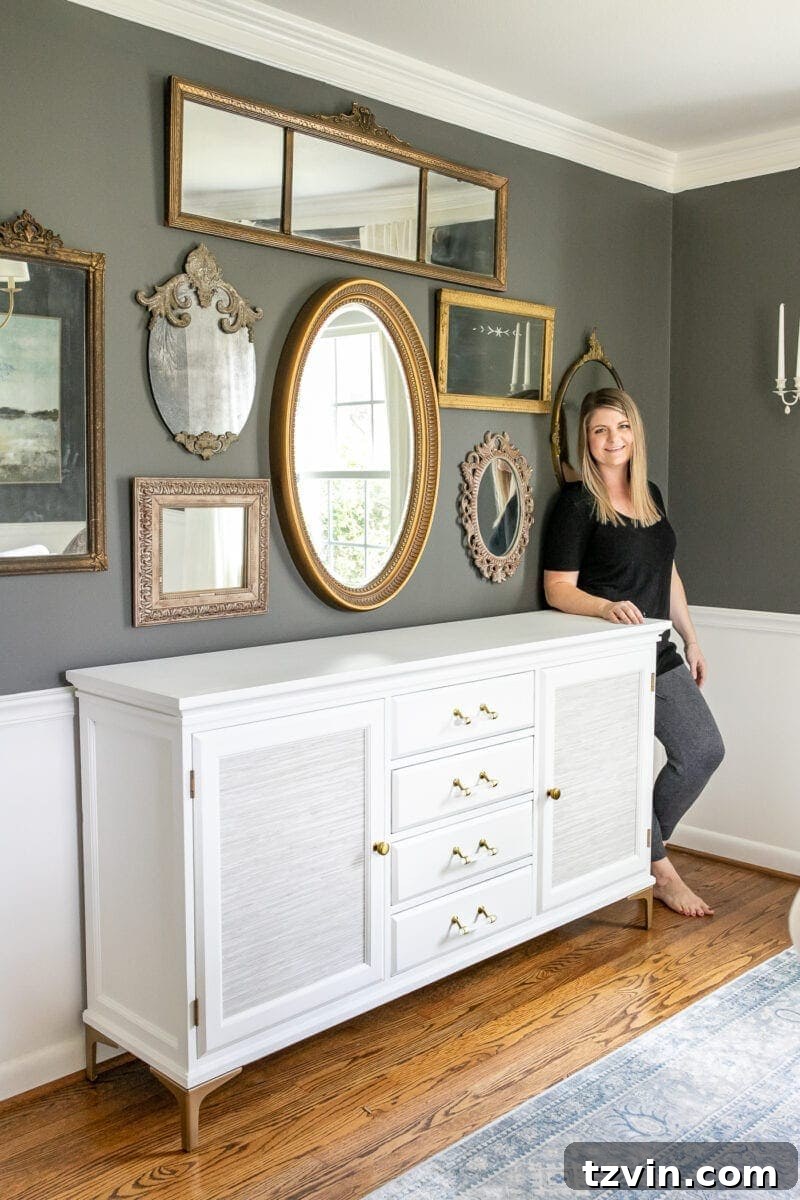
Our dining room, where Betty White (yes, that’s her name now, thanks to an Instagram follower!) proudly resides, has its own evolving aesthetic. Some days, I revel in the dynamic visual interest of our mirror gallery wall. On others, I find myself craving a simpler, more serene backdrop. For now, the gallery wall remains, and it feels incredibly cohesive and grounded with this exquisite buffet underneath. Her new name, “Betty White,” feels wonderfully fitting – spunky, sassy, yet undeniably a class act, just like the legendary star herself. This piece doesn’t just hold belongings; it holds character and a story of transformation.
Are you feeling inspired to embark on your own furniture makeover journey? If you’re eager for more budget-friendly design ideas and stunning transformations, you can explore a wide array of our thrifty furniture makeover projects here. Each one is a testament to the potential hidden within forgotten pieces.
And if the idea of painting furniture still feels a little daunting, don’t let intimidation hold you back! We’ve got you covered with our comprehensive Beginner’s Guide to Painting Furniture. It breaks down all the essentials, offering practical tips and confidence-boosting advice to get you started. Fair warning: once you experience the satisfaction of transforming a piece with your own hands, it’s entirely addictive. Just add your favorite coffee, a great playlist, and you’ll find that furniture painting becomes an instant, incredibly rewarding form of therapy. Happy DIYing!