
Transform Your Home: The Ultimate Guide to Crafting a Stunning Staircase Gallery Wall
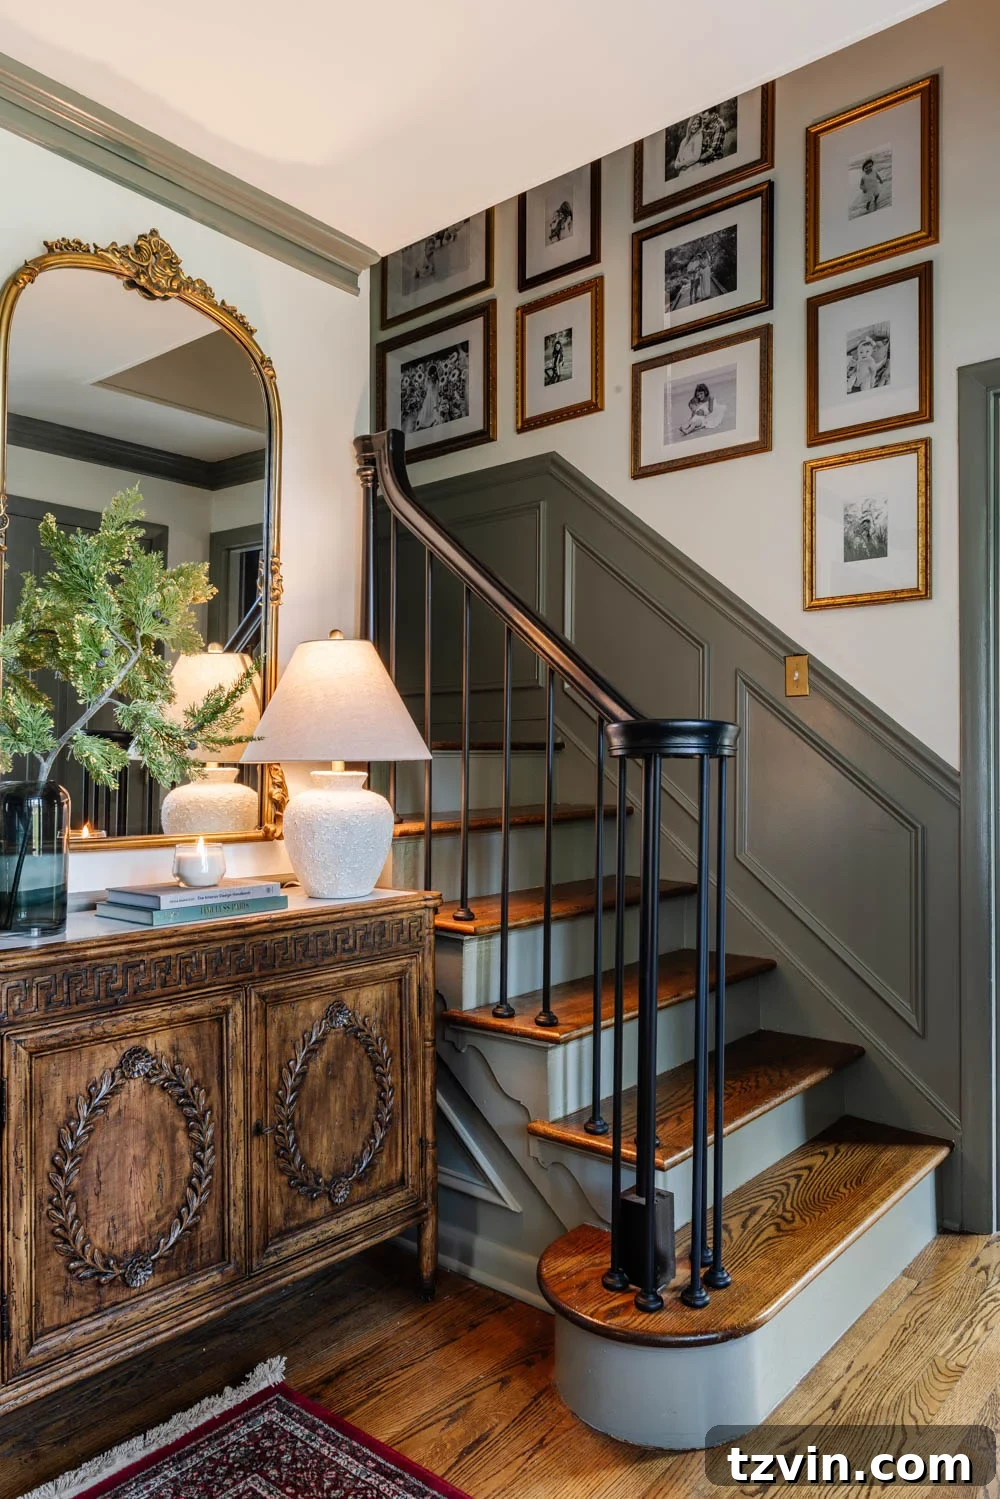
At the very heart of our home, one cherished feature stands out: our captivating staircase gallery wall. More than just a collection of pictures, it serves as a visual narrative, chronicling the precious milestones and evolving stages of our family life. Each framed memory resonates deeply, embodying moments that truly capture our hearts and make our house feel like a vibrant, living home.
Positioned centrally, this gallery wall offers an inviting focal point, drawing the eye upwards and inviting contemplation of the beautiful journey our family has shared. It’s not merely decor; it’s a testament to love, growth, and the enduring power of family bonds. For anyone looking to infuse their living space with personal charm and heartfelt stories, a staircase gallery wall offers an unparalleled opportunity.
Foyer Details: Trim: Sherwin Williams Willowleaf | Wall: Benjamin Moore Chantilly Lace | Wooden Cabinet | Rug | Vase | Evergreen Branch | Lamp | Mirror | Christmas Tree | 11×14 Frame | 11×14 Frame | 11×14 Frame | 12×16 Frame | 12×16 Frame
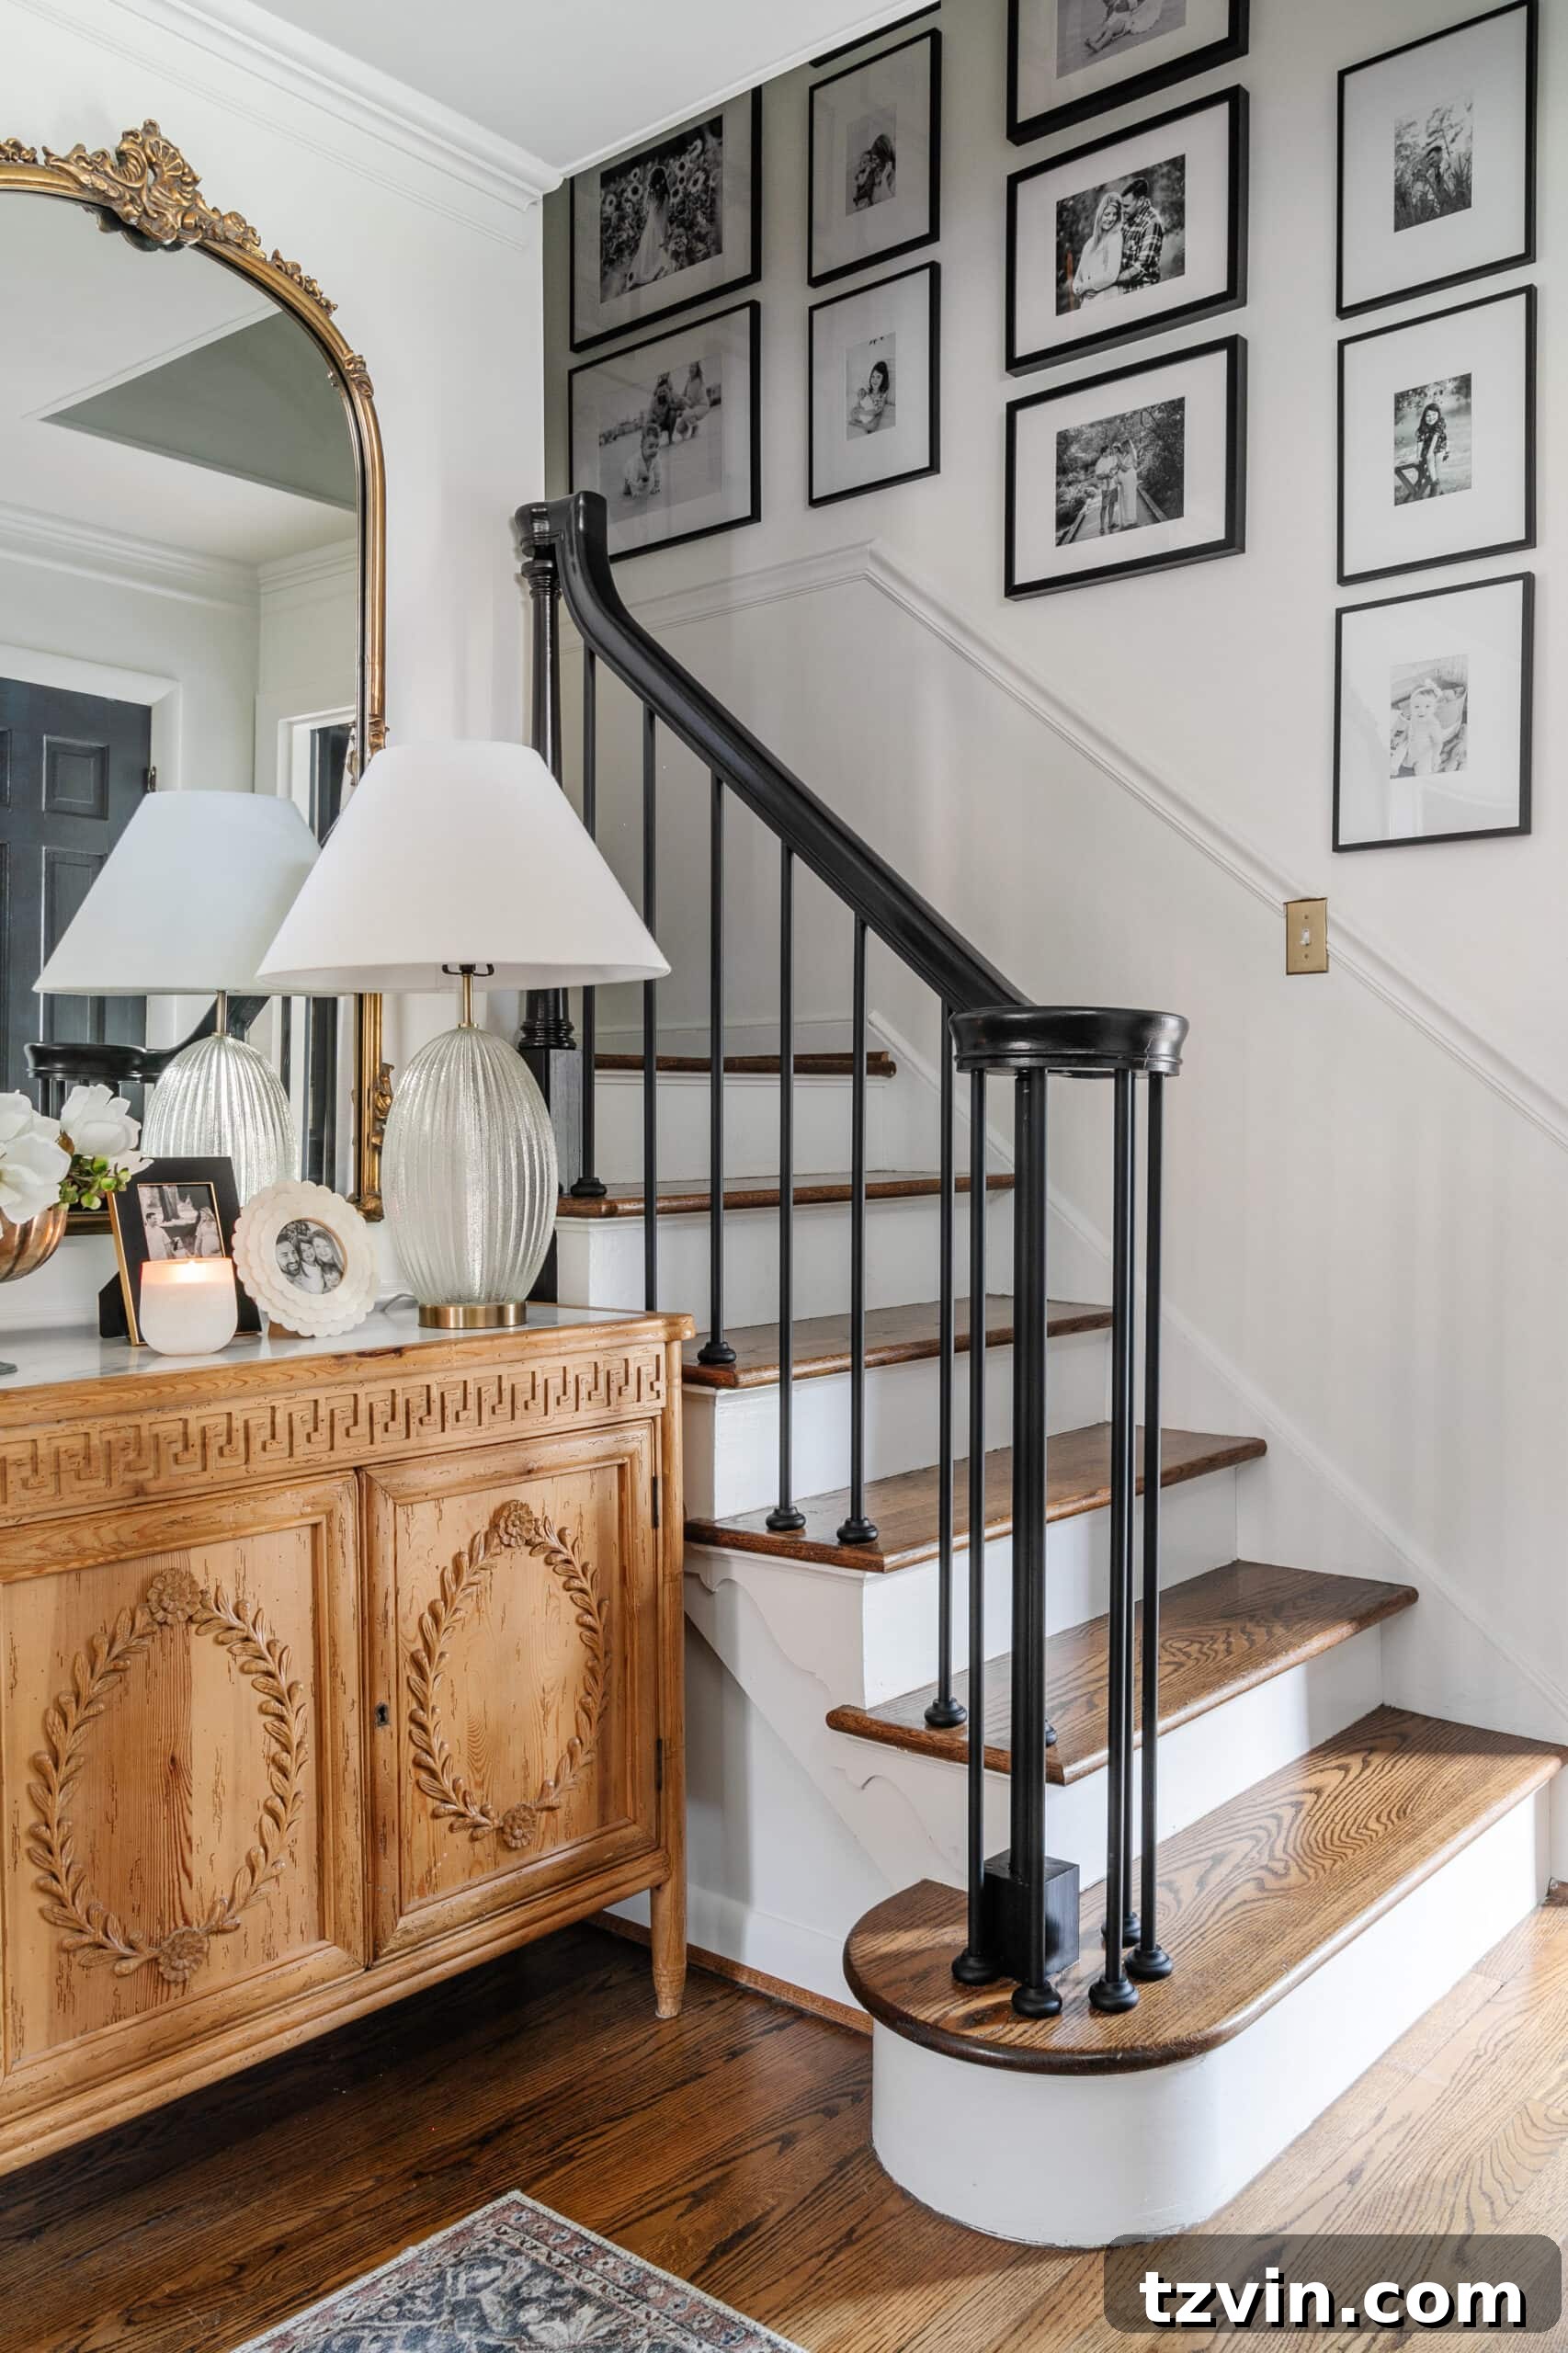
We initially created our stairway gallery wall several years ago, and like all good design, it has evolved with our changing tastes. As our home decor style transitioned towards a more refined traditional aesthetic in the foyer, we decided it was time for an update. With much encouragement and a resounding vote from our community on Instagram, we made a significant swap: replacing our modern black frames with elegant, antique-style brass picture frames. The result feels incredibly cohesive, as if this classic arrangement was always destined to be here, effortlessly enhancing the character of our entryway.
This subtle yet impactful change highlights how the choice of picture frame style can dramatically alter the entire ambiance of your wall decor. While both the modern and traditional approaches have their unique charms, the brass frames now perfectly complement the warmth and timelessness we sought to achieve in this central area of our home. It’s a beautiful example of how small adjustments can lead to a completely refreshed look.
To illustrate this transformation, here is a glimpse of our staircase gallery wall before, featuring the modern black frames. Both styles are undeniably appealing, serving as clear evidence that the frames you select play a pivotal role in shaping the overall visual impact of your display.
The Secret to Arranging a Staircase Gallery Wall Perfectly Every Time
(As an Amazon Associate, I earn from qualifying purchases. Full disclosure here.)
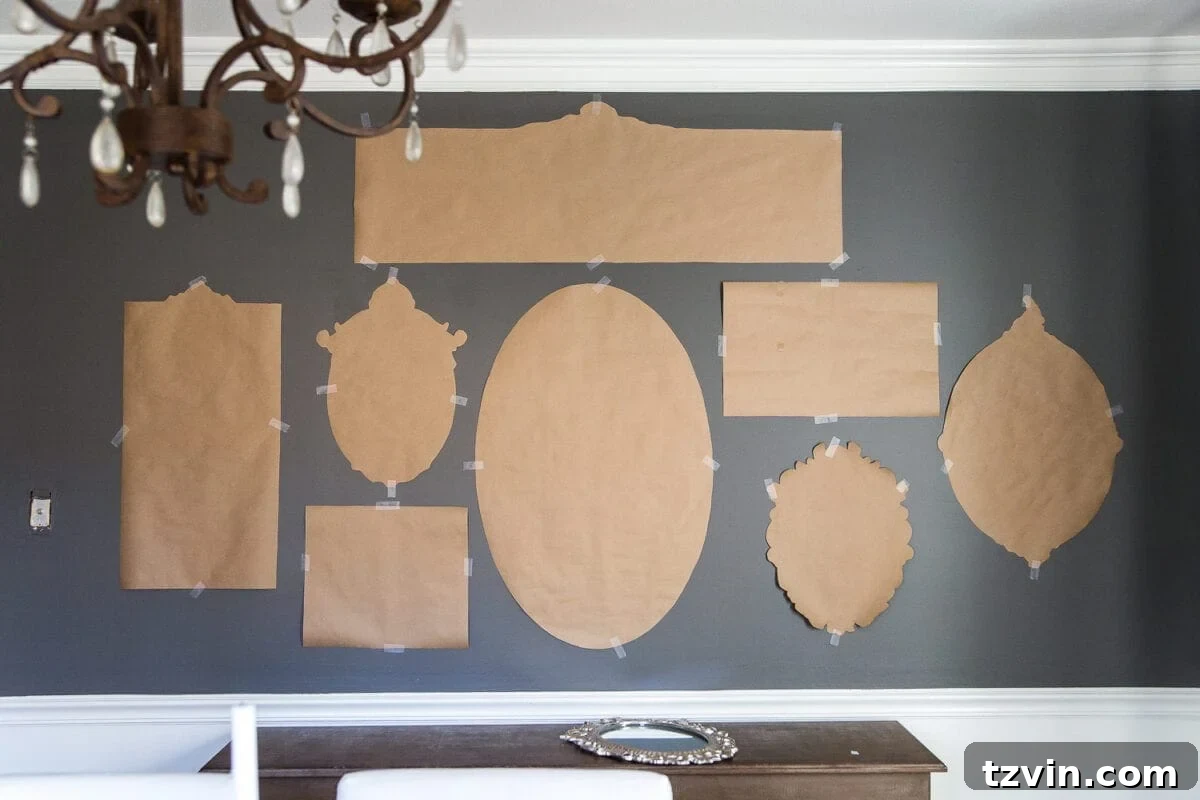
Creating a gallery wall, especially one that gracefully ascends a staircase, can seem like a daunting task. The fear of misplaced nails, crooked frames, and an unbalanced layout often deters even the most enthusiastic DIY decorators. However, there’s a foolproof method that ensures a perfect arrangement every single time, without the hassle of accidental nail holes or endless repositioning. If you’ve ever yearned for an efficient and painless way to design a gallery wall – whether on your stairway or any other wall – I wholeheartedly recommend the wrapping paper or shipping paper trick. This ingenious technique simplifies the entire process, allowing you to visualize and perfect your layout before a single nail goes into the wall.
This method is a game-changer for achieving a professional, aesthetically pleasing result with minimal stress. It eliminates guesswork and allows for creative experimentation, ensuring that your gallery wall flows harmoniously with the architecture of your home. We’ve utilized this very technique successfully in various areas of our home, proving its versatility and effectiveness for any wall decor project. It’s the ultimate hack for both seasoned decorators and first-time gallery wall creators.
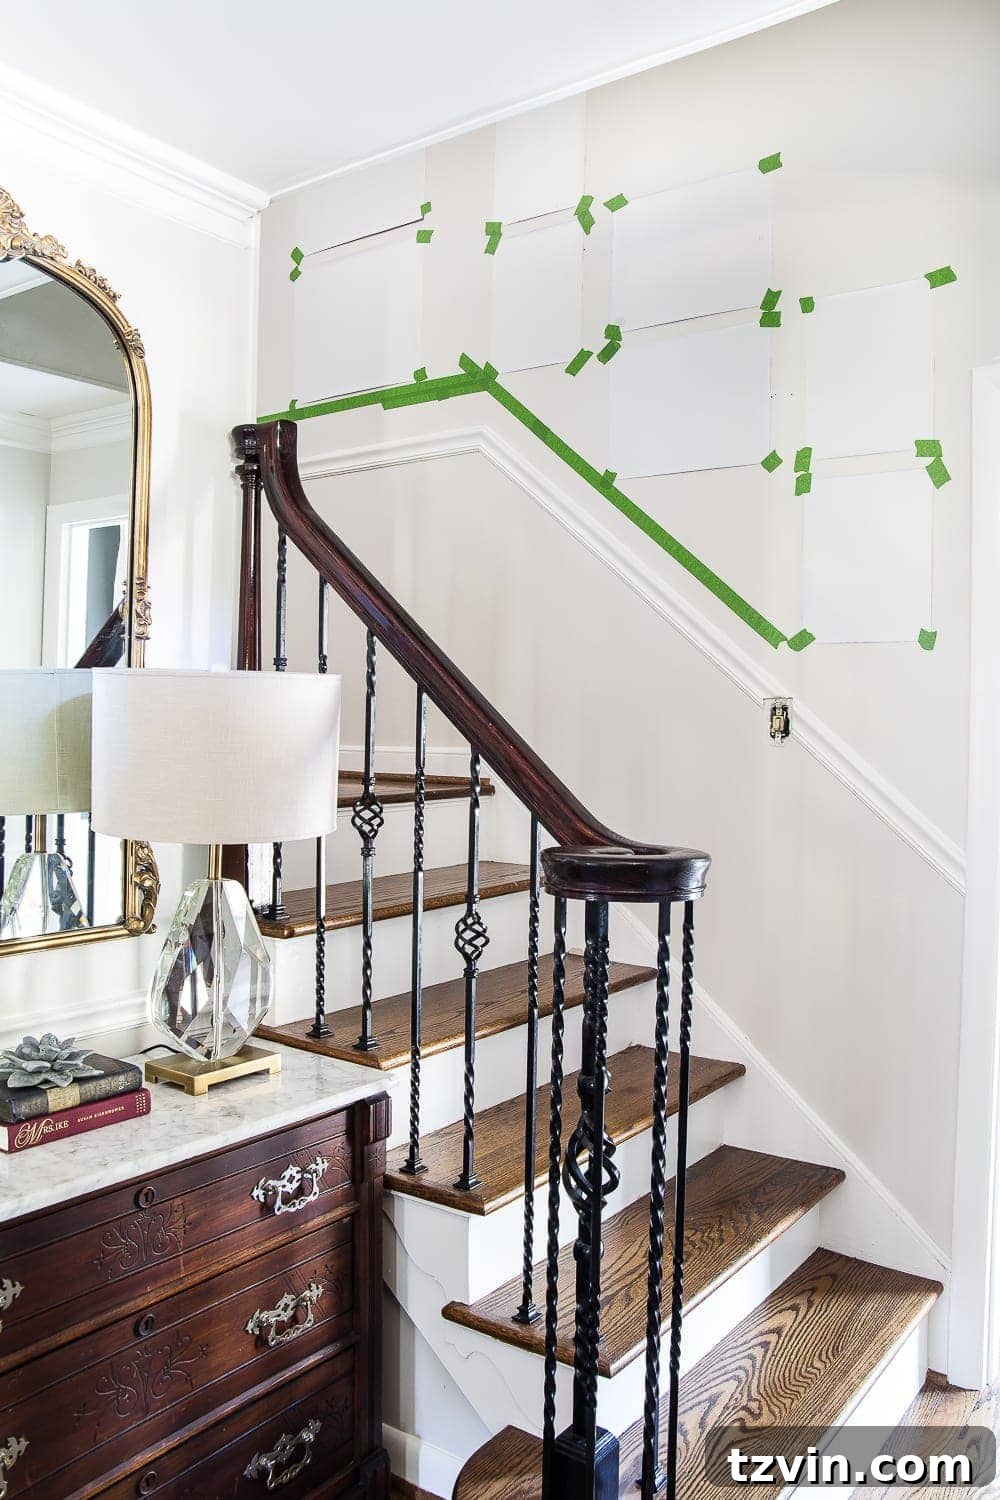
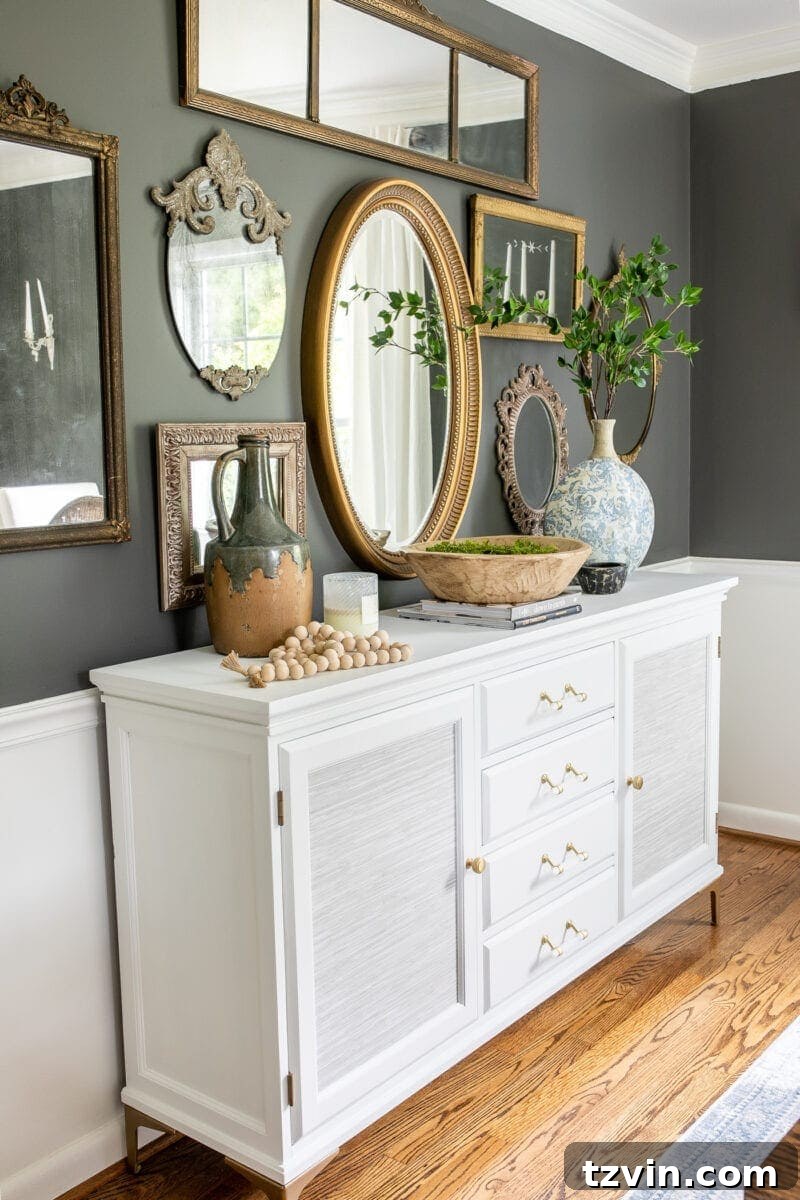
This same tried-and-true method proved invaluable when we designed our dining room gallery wall many years ago. It’s a versatile technique that works wonders for any space.
Gallery Wall Layout Planning Step-By-Step
Follow these simple steps to meticulously plan your gallery wall with the paper template trick:
- Prepare Your Templates: Lay out a sheet of shipping paper, butcher paper, or even wrapping paper on a flat surface like your floor. Arrange your picture frames on top of the paper, tracing around each one to create an accurate outline. Carefully cut out these outlines to use as hanging templates for your frames.
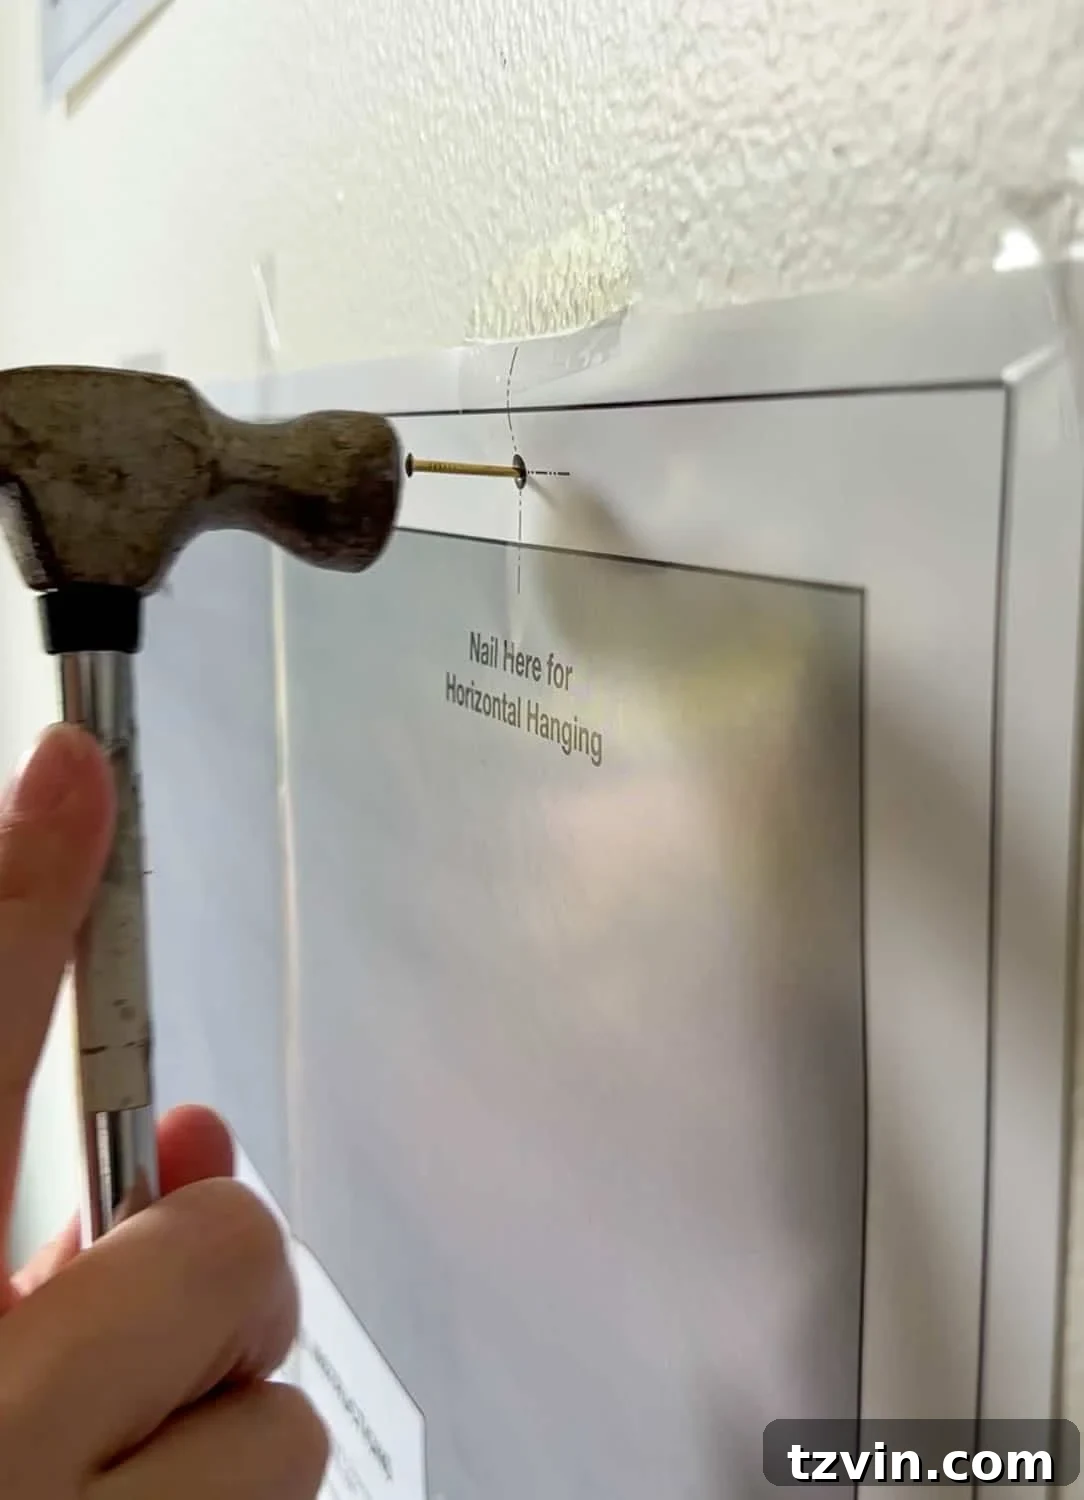
- Mark Nail Hole Positions: For each paper template, identify where the hanging hardware is located on the back of its corresponding frame. Mark the exact spot where the nail or screw needs to go directly onto the paper template. This precision is key to avoiding mistakes.
- Test Your Layout on the Wall: Securely attach the paper templates to your wall using Scotch tape. Clear tape is ideal as it’s less distracting, allowing you to visualize the arrangement more clearly. This step is crucial for experimenting with different layouts, spacing, and flow, especially when dealing with a sloped staircase wall. Adjust and rearrange until you are completely satisfied with the aesthetic balance and overall composition.
- Install and Hang: Once your desired layout is finalized, simply hammer your nails directly through the marked spots on the paper templates. This ensures perfect placement. After the nails are in, carefully rip off the paper templates from the wall, leaving only the nails exposed. Now, you can confidently hang your frames onto the pre-positioned nails. Voila! Your perfectly arranged gallery wall is complete, free from any unsightly, accidental nail holes.
While many newer picture frames now conveniently come with pre-made hanging templates, making the process even simpler, the shipping paper trick remains an invaluable technique. It’s particularly fantastic for older, thrifted, or custom-sized frames that lack pre-packaged templates, offering an efficient and budget-friendly solution for a flawless display.
PRO TIP: When beginning your layout, start by placing the largest templates on the wall first. These larger pieces will serve as your anchors and help define the overall structure and flow of your gallery. Once your main anchor frames are positioned, you can then strategically fill in the surrounding spaces with the smaller templates, ensuring a balanced and harmonious composition.
Selecting the Right Frame Sizes for Your Staircase Gallery Wall
When curating a gallery wall, especially one adorning a prominent space like a staircase, it’s always advisable to lean towards oversized picture frames rather than small ones. The visual impact of larger frames is significant; they command attention and contribute to a more sophisticated and less cluttered aesthetic. If you opt to fill an entire wall with an abundance of small frames, such as 8x10s or smaller, the result can often feel busy, chaotic, and visually overwhelming. This effect is particularly pronounced if you choose to display vibrant color photos or bold artwork, as the accumulation of small, intense images can create a jumbled appearance.
For a staircase gallery, I highly recommend focusing on a range of substantial frame sizes, typically between 11×14 and 20×24 inches. These dimensions provide a strong foundation and a sense of grandeur to your display. Think of these larger frames as your “anchor” pieces – they establish the main structure and visual weight of the gallery. While you can certainly incorporate smaller picture frames like 8x10s or 5x7s to fill in gaps or add intricate details, they should complement, not dominate, the larger frames. This strategic mix ensures a balanced and dynamic composition that guides the eye smoothly up the stairway.
To help you replicate the elegant look of our own staircase gallery wall, I’ve meticulously detailed the specific frame sizes we utilized in the images below. This serves as a practical guide for your own project, allowing you to confidently choose dimensions that create a cohesive and visually pleasing display. We meticulously arranged our various frame sizes into distinct columns, ensuring they maintained a sense of order and structure despite the organic flow of the staircase. This columnar arrangement helps to ground the design and prevent it from appearing haphazard, offering a refined touch to the overall presentation.
(Click each image below to effortlessly shop the frames if you’re looking to purchase them to craft your very own stunning gallery wall.)
Shop Our Gallery Wall Frames
Shop Our Gallery Wall Frames
Shop Our Gallery Wall Frames
Where to Find Perfect Picture Frames for Your Gallery Walls
Embarking on the quest for the ideal picture frames to complete your gallery wall can be an exciting journey, especially when you know where to look for hidden gems. One of my absolute favorite sections in any thrift store is undeniably the picture frame and art aisle. It’s a treasure trove where potential awaits, often at incredibly budget-friendly prices. Don’t underestimate the transformative power of a simple can of black or gold spray paint. With a little creativity and effort, you can turn a dated or plain frame into a stunning piece that perfectly complements your home’s aesthetic. To add an extra touch of antique elegance and depth, consider experimenting with different shades of Rub n Buff, which can create a beautiful, aged patina.
For this specific gallery wall, I incorporated only a handful of thrifted picture frames. While I adore the hunt, I sometimes lack the patience to wait for the exact sizes I need to appear in thrift stores. Therefore, I supplemented my collection by ordering the remaining frames from Amazon, a reliable source for a wide variety of styles and dimensions. Beyond these options, there are numerous other fantastic places to discover unique frames. I’ve compiled a list of more of my favorite places to find vintage style picture frames, catering to various tastes and budgets.
However, if you’re operating on a super tight budget, consistently checking the frame section in your local thrift store is highly recommended. The key is to look beyond the art that might not align with your personal style and instead focus solely on the potential of the frame itself. Imagine it stripped down, repainted, or even gilded – the possibilities are endless for transforming a humble find into a standout piece.
EXPERT TIP: A mat can instantly elevate the perceived value and sophistication of an inexpensive frame. If you already possess a decent frame that feels a bit underwhelming, try adding a custom-cut mat inside. This simple addition instantly imparts a high-end, polished look, making it appear as though it came straight from a boutique like Pottery Barn. For the ultimate budget-friendly approach, you can even craft a mat yourself using poster board and a precise X-Acto knife, allowing for complete customization and significant savings.
Essential Gallery Wall Spacing Rules to Consider
Achieving a cohesive and visually pleasing gallery wall isn’t just about selecting the right frames and photos; it’s equally about mastering the art of spacing. When arranging frames in a grouping, a crucial rule of thumb is to maintain a consistent distance of approximately 2 to 6 inches between each picture frame. This seemingly small detail makes a significant difference in the overall harmony and balance of your display. The goal is to create a sense of unity and connection among the frames, allowing them to read as a single, curated collection rather than disparate, floating elements.
If you hang your frames too far apart, they risk appearing disconnected and isolated in space, losing the “gallery” effect. Conversely, placing them too close together can make the wall feel cramped and cluttered, diminishing the impact of individual pieces. The 2-6 inch range provides enough breathing room for each frame to be appreciated while still contributing to a larger, unified composition. This spacing also helps to guide the eye smoothly across the arrangement, creating a natural flow, especially important on an ascending staircase wall where visual progression is key. Consider how the negative space around each frame contributes to the overall aesthetic – it’s just as important as the frames themselves.
For even more insights into optimizing your wall decor and avoiding common missteps, delve into additional tips here on mistakes most people make when hanging picture frames. Understanding these principles will empower you to create a sophisticated and well-executed gallery wall that enhances the beauty of your home.
Beyond the technicalities of hanging and spacing, the most challenging yet rewarding part of planning a gallery wall is undoubtedly deciding which photos to print. As a parent, my heart instinctively screams, “I WANT THEM ALL!” Each picture holds a unique story, a cherished memory, making the selection process a delightful, albeit difficult, task. It’s about curating a collection that truly reflects the essence and journey of your family, celebrating the moments that matter most.
Every day, as we navigate these stairs – often multiple times a day, a familiar #parentingproblems scenario – we are met with a cascade of smiling faces and heartwarming memories. This gallery wall ensures that joy is an integral part of our daily routine, offering constant reminders of the love and happiness that fills our home. It’s a daily dose of gratitude and a visual celebration of our growing family.
Foyer Sources and Decor Details
For those looking to recreate or draw inspiration from our welcoming foyer, here’s a comprehensive list of the specific sources and decor elements that bring this space to life:
- Trim color: Sherwin Williams Willowleaf
- Wall color: Benjamin Moore Chantilly Lace
- Gel stained cabinet (in Minwax Coffee)
- Wainscoting Picture Frame Molding
- Rug
- 11×14 picture frame
- 11×14 picture frame
- 11×14 picture frame
- 12×16 picture frame
- 12×16 picture frame
- 12×16 picture frame
- 16×20 picture frame
- 16×20 picture frame
- 16×20 picture frame
- 20×20 picture frame
- 20×20 picture frame
- Mirror
- Smoked glass vase
- Table lamp
- Evergreen branch
- Christmas tree
Our family, our hearts, and this beautiful wall continue to grow and evolve, and there’s truly nothing that could bring me greater joy. It’s a constant reminder that a house truly transforms into a home through the love and memories of the people who inhabit it. These personal touches are what imbue a space with warmth, personality, and an enduring sense of belonging.
I’m also curious to hear from you: do you have a unique or special way that you choose to display your family photos? Share your creative ideas in the comments! Truthfully though, no matter how you choose to present them, ANY way you display these precious memories is a special way, honoring the moments and people that fill your life with meaning.
Explore More Wall Decor Tips and Ideas
Ready to further enhance your home with stunning wall decor? Dive into these additional resources for expert advice, creative inspiration, and practical guides to elevate every wall in your living space:
- How to Hang a Gallery Wall Perfectly Every Time: Your Comprehensive Guide
- Discover Where to Buy Vintage Art Online and Master How to Print Digital Art for Your Home
- Avoid Common Pitfalls: Mistakes Most People Make When Hanging Picture Frames
- Unlock Creativity: 28 Creative DIY Wall Decor Ideas to Transform Your Blank Walls