
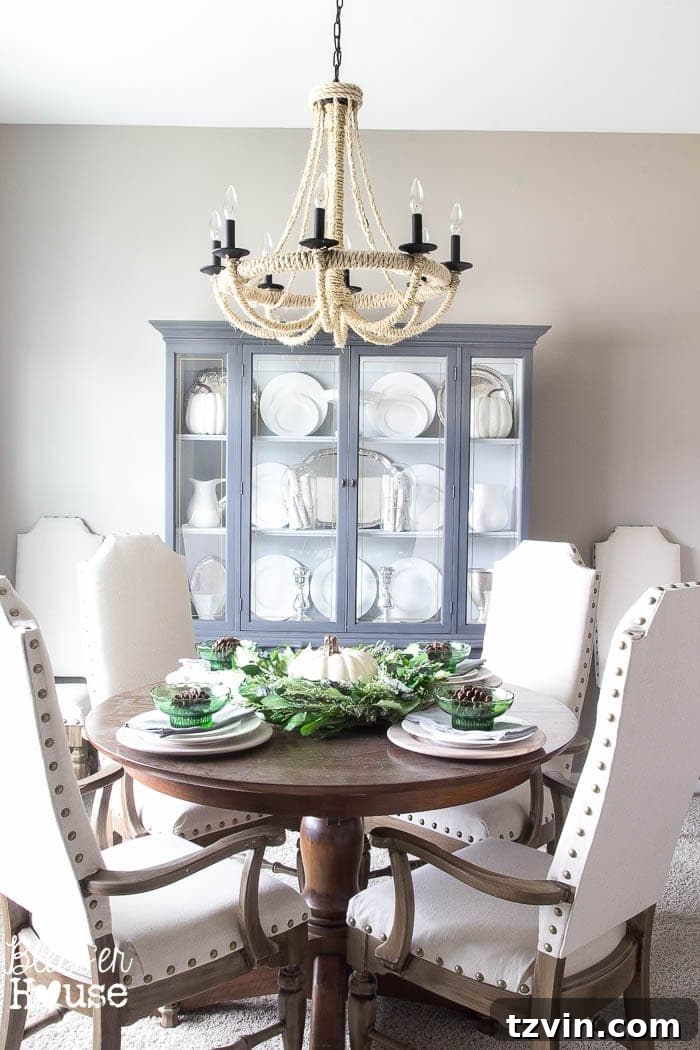
From Drab to Dreamy: Reviving a French Provincial China Cabinet with Ease
Life often throws us curveballs, and sometimes, those curveballs come in the form of relentless rain. Here in our neck of the woods, we’ve been submerged in what feels like an endless monsoon, clocking in twenty rainy days this past month. While I usually find myself making grand plans, filling Google calendars with ambitious goals, and adding countless items to online shopping carts during such weather, these plans often amount to very little when the sun finally decides to peek through.
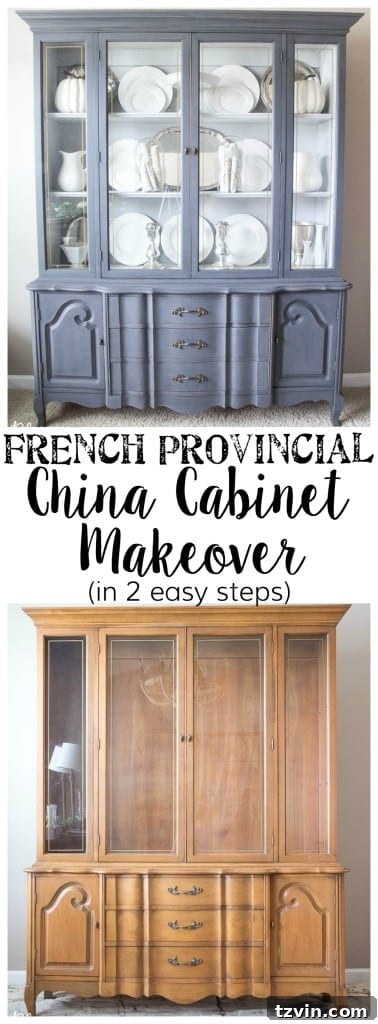
My laundry basket, for instance, has become a testament to this lack of outdoor productivity, overflowing with nothing but pajamas and yoga pants. A clear #productivityfail, if there ever was one! However, even amidst the gray skies and the urge to simply hibernate, a beacon of sunshine emerged this week, breathing new life into our home and sparking a truly rewarding DIY project: a stunning French Provincial china cabinet makeover.
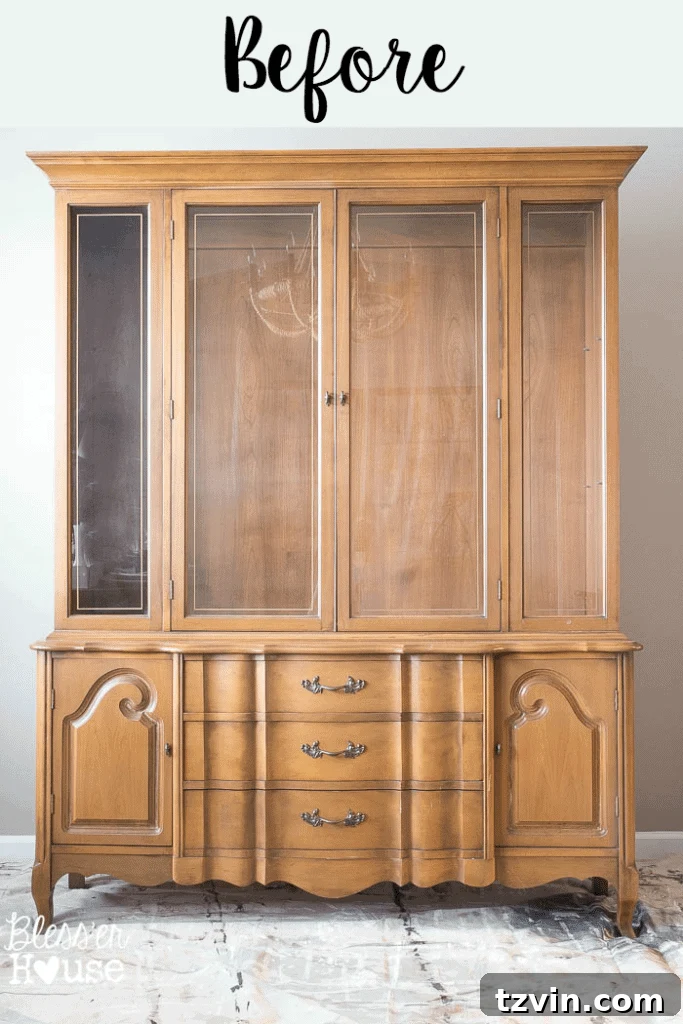
A Timely Transformation for Trash to Treasure Tuesday
As fate would have it, this particular project aligned perfectly with our much-loved “Trash to Treasure Tuesday” series, proving that even on the gloomiest days, there’s always an opportunity to transform something old into something spectacular. If you caught a glimpse of our rather chaotic home tour last week, you might have already spotted this magnificent piece waiting for its moment in the spotlight. Its arrival marked a significant turning point in our dining room’s ongoing evolution and presented a fantastic challenge for a vintage furniture restoration project.

The Great Dining Room Dilemma: Finding the Perfect Fit
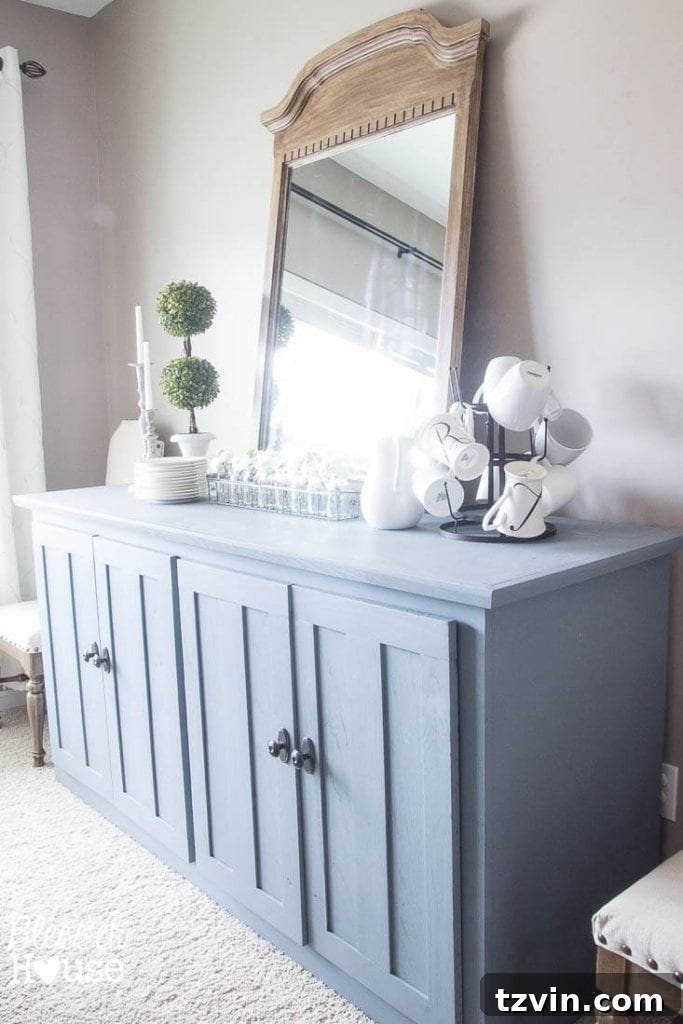
For several months, my husband Robert and I had been grappling with a common interior design challenge: disproportionate furniture. After painstakingly hauling our previous buffet into the dining room, it became glaringly obvious that its measurements were simply not compatible with the space. Sometimes, and I’ll admit, a lot of times, I learn lessons the hard way. While I genuinely adored the buffet’s style, its depth, exceeding two feet, made our dining room feel incredibly cramped and unwelcoming. It hindered movement and created a perpetual sense of clutter, which is the last thing you want in a space dedicated to gathering and sharing meals. The room felt less like an inviting space and more like a crowded thoroughfare.
With Thanksgiving rapidly approaching and a guest list of over twenty people expected for dinner in just a few weeks, the urgency to optimize our dining area became paramount. We needed a solution, and we needed it fast. The decision was made to sell the beloved but oversized buffet and embark on a quest to find a more appropriately scaled replacement. This wasn’t just about aesthetics; it was about creating a functional, comfortable, and inviting space for our family and friends during the holidays and beyond. We envisioned a dining room refresh that maximized both style and practicality, making the most of every square foot.
A Flea Market Find: Destiny in the Details of a China Cabinet
Just when we thought the perfect piece might be elusive, I stumbled upon this exquisite French Provincial china cabinet at a local flea market last weekend. It was love at first sight, not only for its charming aesthetic but, more importantly, for its impeccable dimensions. It was the ideal depth for our dining room, offering ample storage without overwhelming the space. And to top it all off, I managed to purchase it for the exact same price at which I had sold our previous buffet – $250. Talk about destiny! It felt like the universe was aligning to grant our dining room wish, proving that incredible flea market finds can truly transform a home on a budget-friendly decor budget.
Initially, I considered a different approach for this beautiful piece. My first thought was to preserve its natural wood beauty, strip away the somewhat orange-y stain, and apply a weathered wood finish. However, as many of you know from my previous confessions, I have a significant aversion to wood stripping. It’s a notoriously messy, time-consuming, and labor-intensive process, involving harsh chemicals and often requiring good ventilation – which, with our “month-long monsoon,” meant outdoor work was impossible. Time was a major constraint, and I wanted a transformation that could be completed efficiently and indoors. Given these factors, painting emerged as the clear, most sensible, and ultimately, the most satisfying path for this DIY china cabinet project.
This post contains some affiliate links for your convenience. For more info, please see my full disclosure here.
The Cabinet’s Grand Transformation: A Step-by-Step Guide
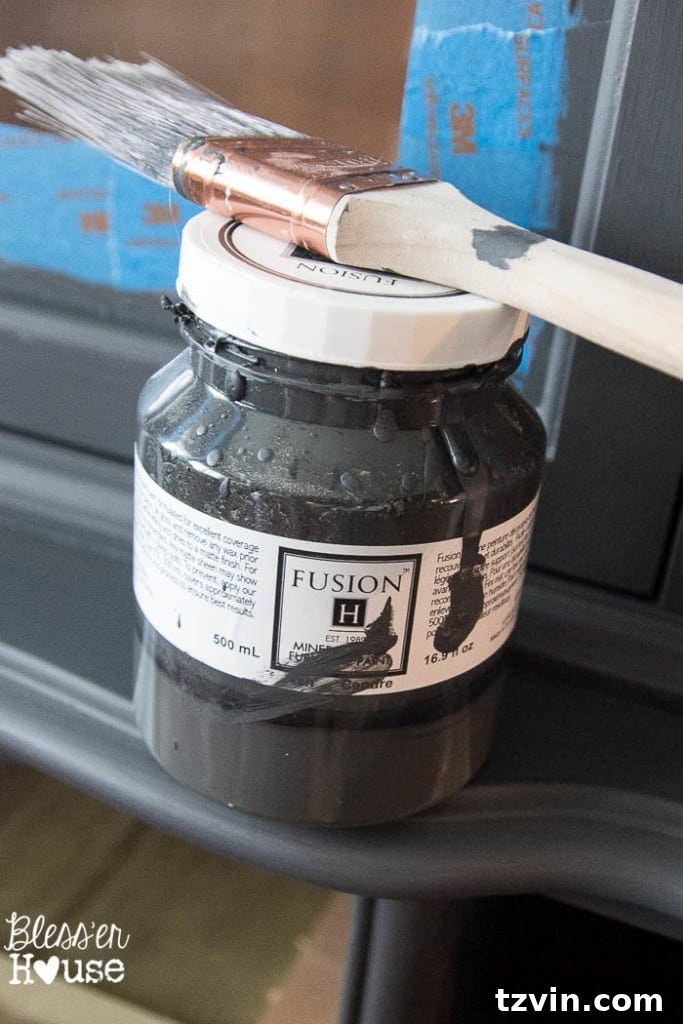
Choosing the right paint was paramount for a durable and beautiful finish. Luckily, I still had plenty of Fusion Mineral Paint in the shade ‘Ash’ leftover from our recent foyer table makeover. This discovery felt like another stroke of good fortune, allowing me to dive straight into the project without delay. Fusion Mineral Paint has truly become my go-to choice for furniture makeovers, and for very good reasons, which I’ll delve into shortly.
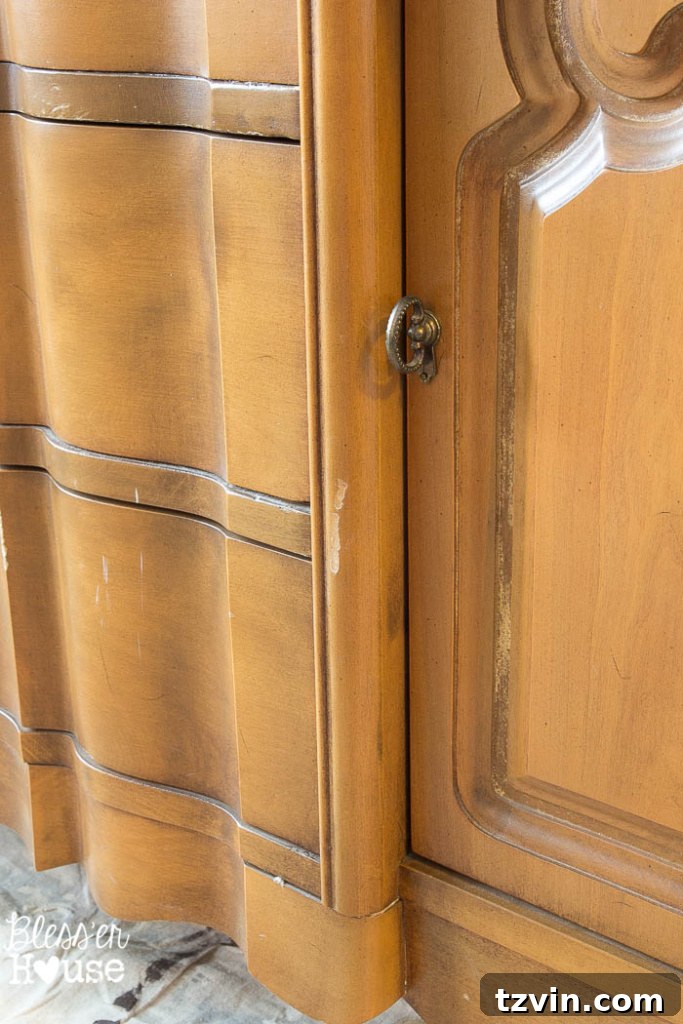
Preparation is Key: The Power of Deglosser for Painting Furniture
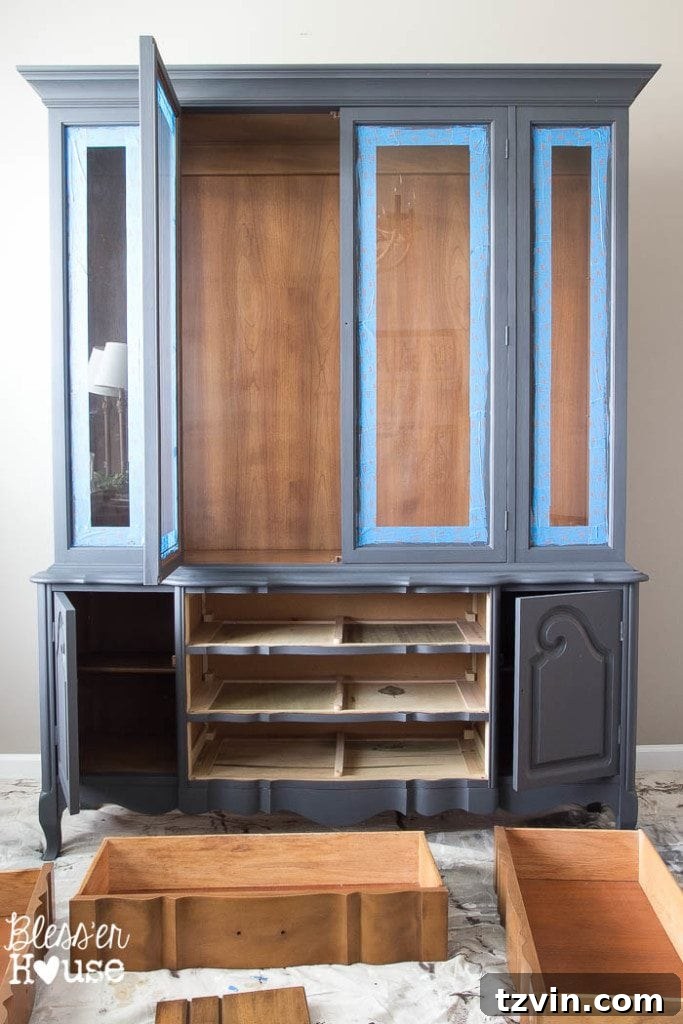
Even with paints marketed as “no-prep,” a little groundwork goes a long way in ensuring a lasting and professional-looking finish. My first step was to thoroughly clean the entire cabinet with a deglosser. This crucial product removes any lingering dust, grime, and especially old wood oils that can prevent paint from adhering properly. It lightly etches the existing finish, creating an ideal surface for the new paint. For me, deglosser is absolutely key, even when using what might be considered a chalk paint alternative, despite its “no-prep” reputation. Skipping this step often leads to adhesion issues down the line, such as chipping or peeling prematurely, and nobody wants their beautiful makeover to fail. Think of it as creating a clean slate, a smooth canvas for your artistic vision.
Painting with Precision: Why Fusion Mineral Paint Shines for DIYers
With the surface prepped, it was time for the magic to happen. I applied the Fusion Mineral Paint in ‘Ash’. One of the reasons I’ve grown to love Fusion Mineral Paint so much is its incredible user-friendliness and superior finish. Unlike traditional chalk paints, Fusion Mineral Paint doesn’t require a topcoat or wax sealant after painting. It’s a true “one-and-done” solution, saving both time and additional material costs. This is a significant advantage, as waxing can be an extra, sometimes messy, step that adds to the overall project duration and demands extra curing time.
For this china cabinet, a single coat was all it needed to achieve full, opaque coverage – a testament to its excellent pigmentation. What’s more, it dried completely within an hour, allowing for rapid progress. Its self-leveling properties are another huge bonus for DIY enthusiasts; even my less-than-perfect brush strokes seamlessly disappeared, leaving behind a smooth, factory-like finish without any visible brush marks. Beyond its performance, Fusion Mineral Paint is often more affordable than many chalk paint brands, making it a budget-friendly choice that doesn’t compromise on quality. (If you’re curious to try it out, they often offer free tester pots, so keep an eye out for promotions!) The Ash color provided a sophisticated, neutral base that beautifully modernized the vintage piece, offering a contemporary twist to the classic French Provincial style.
Adding Character: The Art of Distressing Furniture
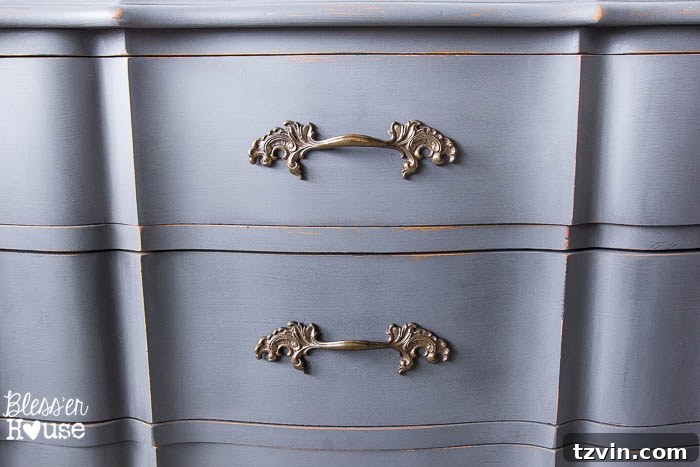
To enhance the French Provincial charm and give the cabinet a gently aged, farmhouse-inspired look, I decided to lightly distress the entire piece. Using a medium grit sanding block, I carefully sanded the edges, raised details, and areas that would naturally show wear, allowing subtle hints of the original wood underneath to peek through. This technique adds depth and character, softening the new paint finish and making the piece feel as if it has a rich history, rather than being freshly painted. It’s always amazing how a simple sanding step can dramatically alter the perception of the paint, creating a beautifully nuanced effect and an authentic vintage furniture restoration feel.
For the hardware, I opted to leave it in its original state. The existing finish already complemented the newly painted cabinet perfectly and, serendipitously, also harmonized beautifully with the nailhead trim on our dining chairs. Sometimes, the best choice is to simply let the original elements shine, reducing extra work and maintaining a cohesive aesthetic without incurring additional costs or effort. Once the paint was dry and distressed to perfection, the hardware was meticulously reattached, completing the exterior transformation and adding the final sparkle.
A Subtle Contrast: Painting the Interior of the Hutch
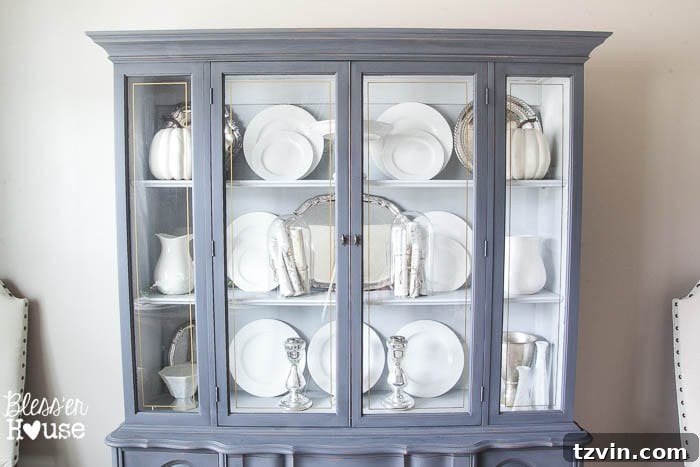
To add an extra layer of refinement and visual interest, I chose a different, complementary shade for the interior of the hutch. Fusion Mineral Paint in the color ‘Sterling’ was the perfect choice. Sterling offers a beautiful, subtly cool gray tint that provides a soft contrast to the ‘Ash’ exterior. This slight variation in color creates a more dynamic look and ensures that the items displayed inside truly stand out without competing with the cabinet itself. The cool undertones of Sterling also lend a contemporary touch to the classic French Provincial style, making the hutch feel light and airy, an ideal backdrop for delicate china and silver.
Styling with Sentiment: Honoring Family and Tradition in Home Decor
Once the paint was fully cured and the cabinet was ready, the most rewarding part began: filling it with cherished items. I proudly loaded it with my grandmother’s treasured silver, pieces that had been tucked away and locked up for decades, awaiting their moment to shine. Thanksgiving always evokes precious memories of her, and being able to retrieve these family heirlooms, polish them up, and display them beautifully just in time for the holiday felt incredibly special. I know she would have been absolutely delighted, or “tickled,” as she would say, to see them elegantly showcased. These pieces aren’t just decorative; they are a tangible link to our family history and traditions, infusing our home decor transformation with personal meaning.
On a practical note, for any of you embarking on wedding registry planning, here’s a tip I received from my wise mother five years ago, and one I wholeheartedly endorse: opt for a plain white china set. While my inner teenager might cringe at admitting my mom was right, it’s truly timeless! I use mine constantly; its versatility allows it to seamlessly transition from casual family dinners to formal holiday feasts, making it an invaluable investment for any home. It pairs perfectly with virtually any décor, offering endless possibilities for table settings and china cabinet displays, ensuring your collection remains stylish for decades to come.
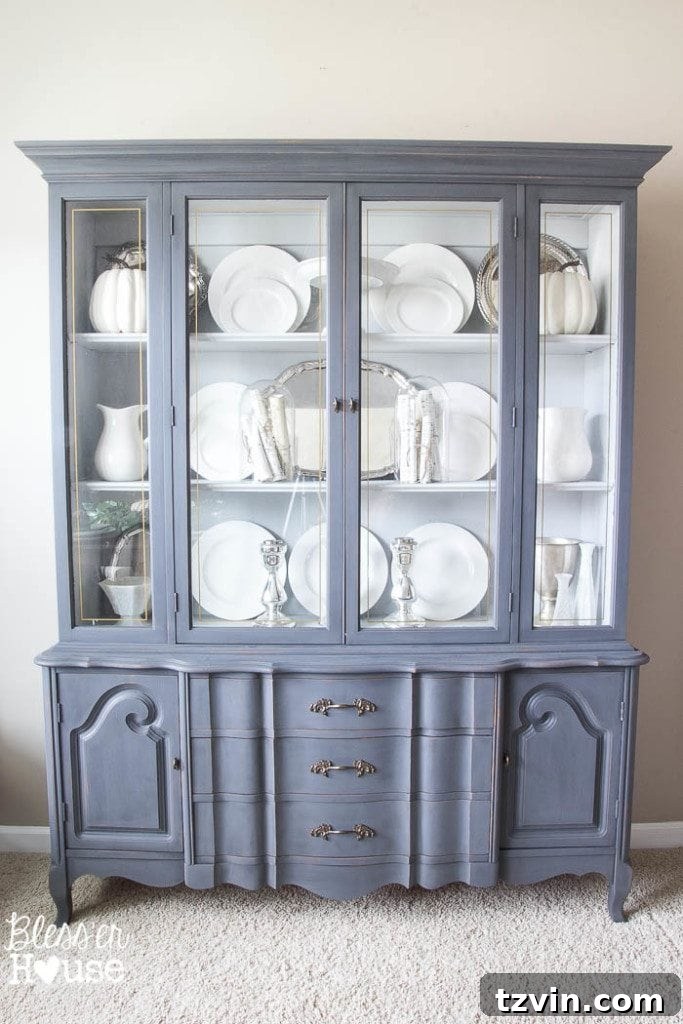
The Dining Room Reimagined: Space and Style Unified
Isn’t it just darling now?! While I typically gravitate towards furniture with clean lines and minimalist aesthetics, the graceful curves and ornate details of this French Provincial cabinet completely won me over. Its character adds a touch of classic elegance that perfectly balances the more contemporary elements in our dining room, creating a harmonious blend of old and new. The transformation isn’t just visual; it’s profoundly functional. This new cabinet is half the depth of our old buffet, which means we now have significantly more room to move, breathe, and entertain comfortably in this space. The dining room no longer feels like a cramped passageway but an open, inviting area ready for gatherings, making our dining room refresh a resounding success.
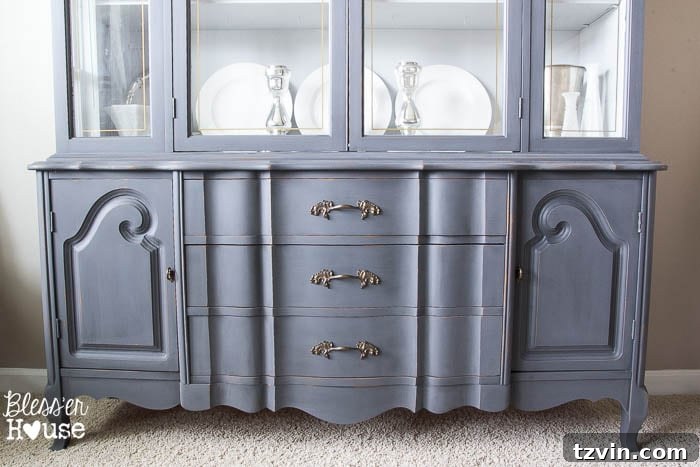
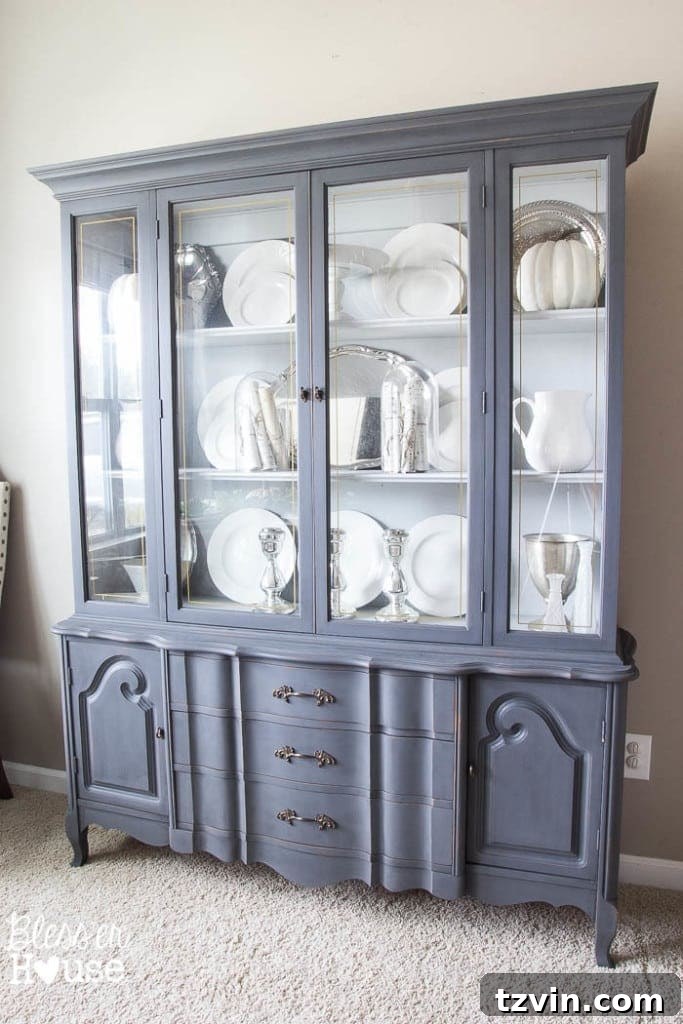
Ongoing Transformations: Our Home Improvement Journey Continues
As you can see in the photos, our home improvement journey is an ongoing adventure. Notice the window on the left? Robert and I recently framed it ourselves! I’ll be sharing a more in-depth tutorial and reveal about this project soon on Remodelaholic. Essentially, we applied the same easy DIY window trim treatment that we successfully implemented in Olivia’s bedroom. It’s a simple yet impactful way to elevate the architectural details of a room, adding character and a finished look that truly makes a difference.
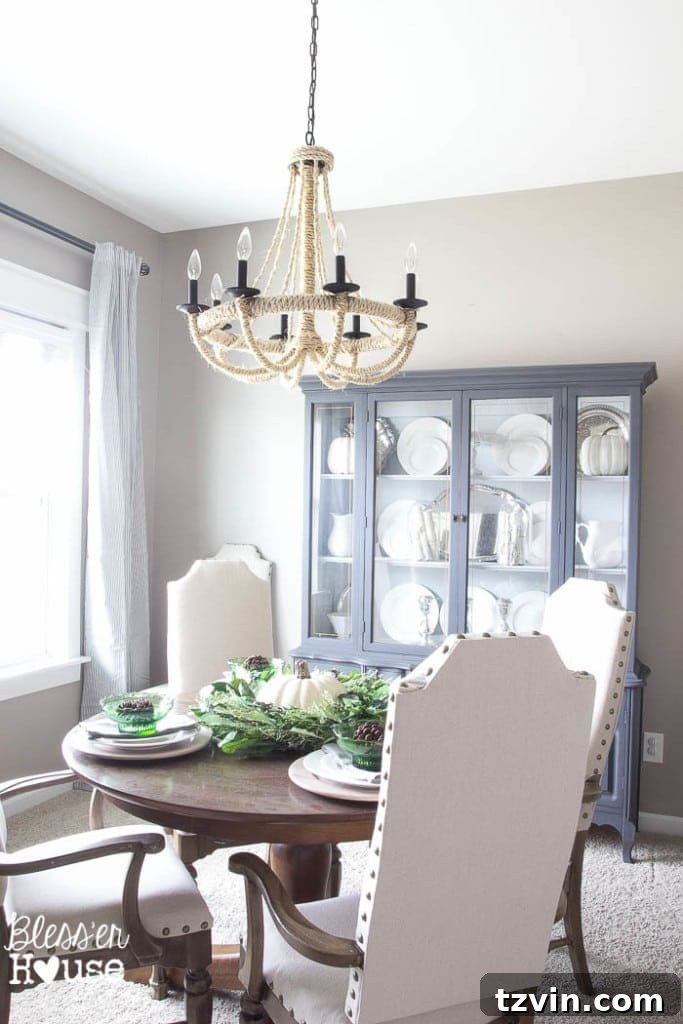
And of course, the dining room still has a few more items on its “to-do” list. I’m hoping to add a beautiful area rug under our table (because honestly, whose brilliant idea was carpet in a dining room?!), explore a different finish for the round table itself to give it a fresh look, and perhaps even introduce board and batten or a shiplap accent wall to add texture and character. These projects will undoubtedly come to fruition one day, gradually shaping our vision for this central gathering space and continuing our journey of home decor transformation through DIY projects.
To truly appreciate the transformation, let’s take a quick look back at what we were working with when we first moved into this house in December 2013:
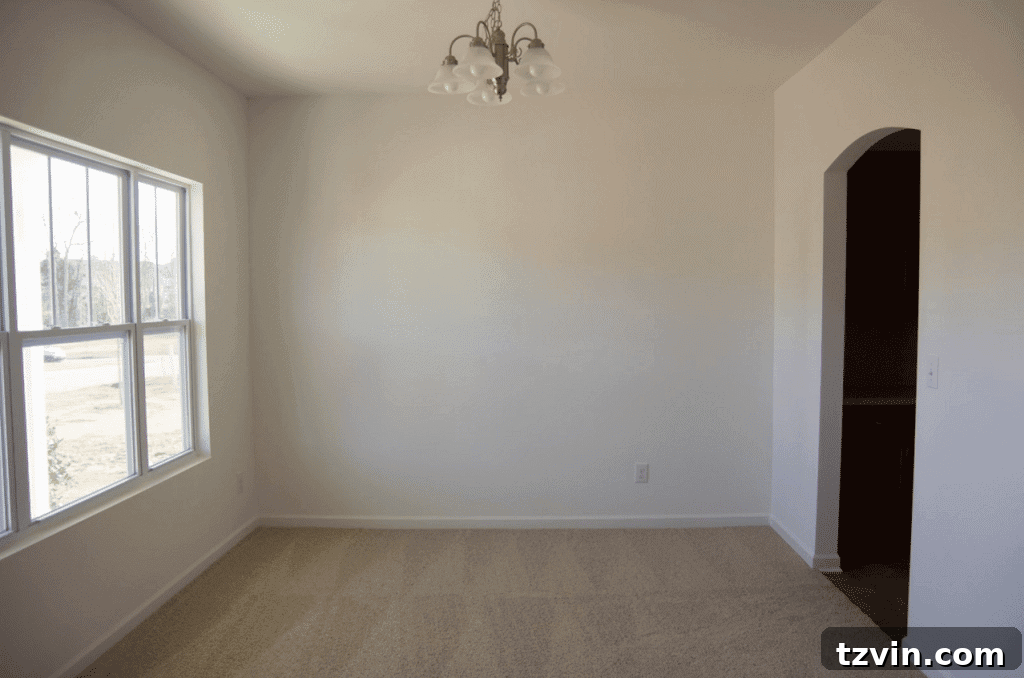
This room has certainly embarked on an incredible journey since then. It stands as a testament to the power of thrifty finds, a little imagination, and the willingness to roll up your sleeves and get creative. It proves that you don’t need a huge budget to create a stylish and functional home; often, it just takes a keen eye for potential and a dedicated DIY spirit to achieve remarkable home transformations.
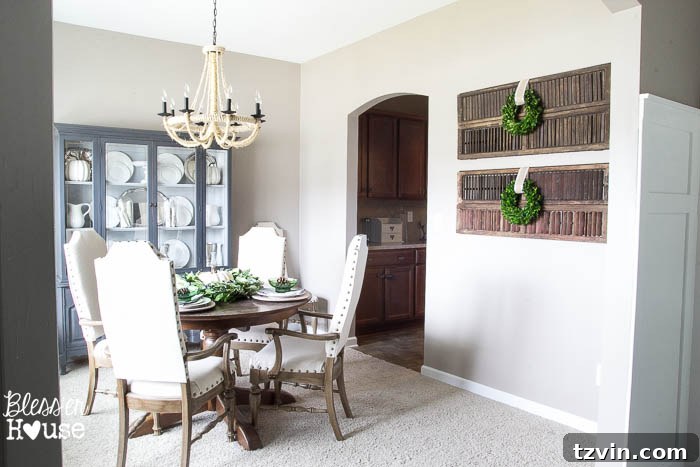
It’s worth noting that taking these “after” photos of our dining room was quite the adventure itself. Despite the sunshine I mentioned, it was actually pouring buckets outside at the time, which made capturing clear, well-lit images a bit of a challenge. Let’s just say a lot of sweet-talking to my camera and some strategic lighting adjustments were involved! But the results were worth every effort, perfectly capturing the essence of this furniture makeover.
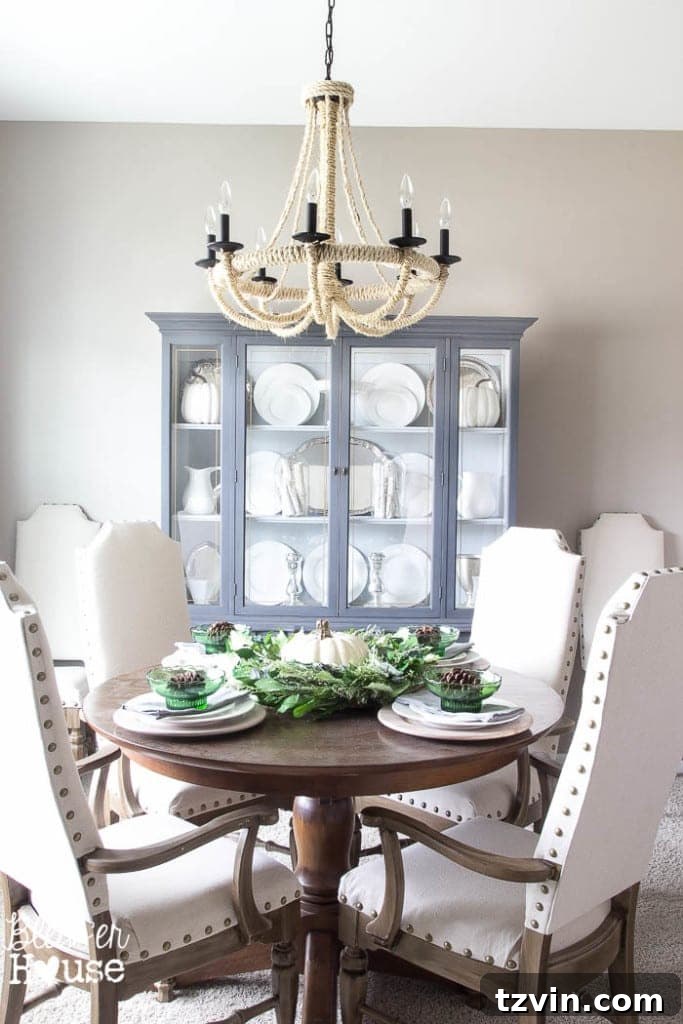
But hark, y’all! The forecast finally promises sunshine for tomorrow! And with the warmth and light, that page-long to-do list I’ve been compiling will finally get the attention it deserves. Until then, I’ll be basking in the glow of this beautiful china cabinet and the joy it brings to our refreshed dining room, a true testament to the power of a good DIY project.
More Trash to Treasure Transformations!
Don’t miss out on more inspiring transformations and clever DIY furniture makeovers from my amazing bloggy friends for this month’s Trash to Treasure Tuesday! Click through to see what incredible treasures they’ve unearthed and reinvented. You’ll find a wealth of painting furniture tips and creative ideas to inspire your next project:
 Confessions of a Serial Do-It-Yourselfer | Prodigal Pieces | Artsy Chicks Rule | Girl in the Garage

Follow us for more DIY inspiration and home transformations:
Facebook | Pinterest | Instagram | Twitter | Google+ | Bloglovin’