
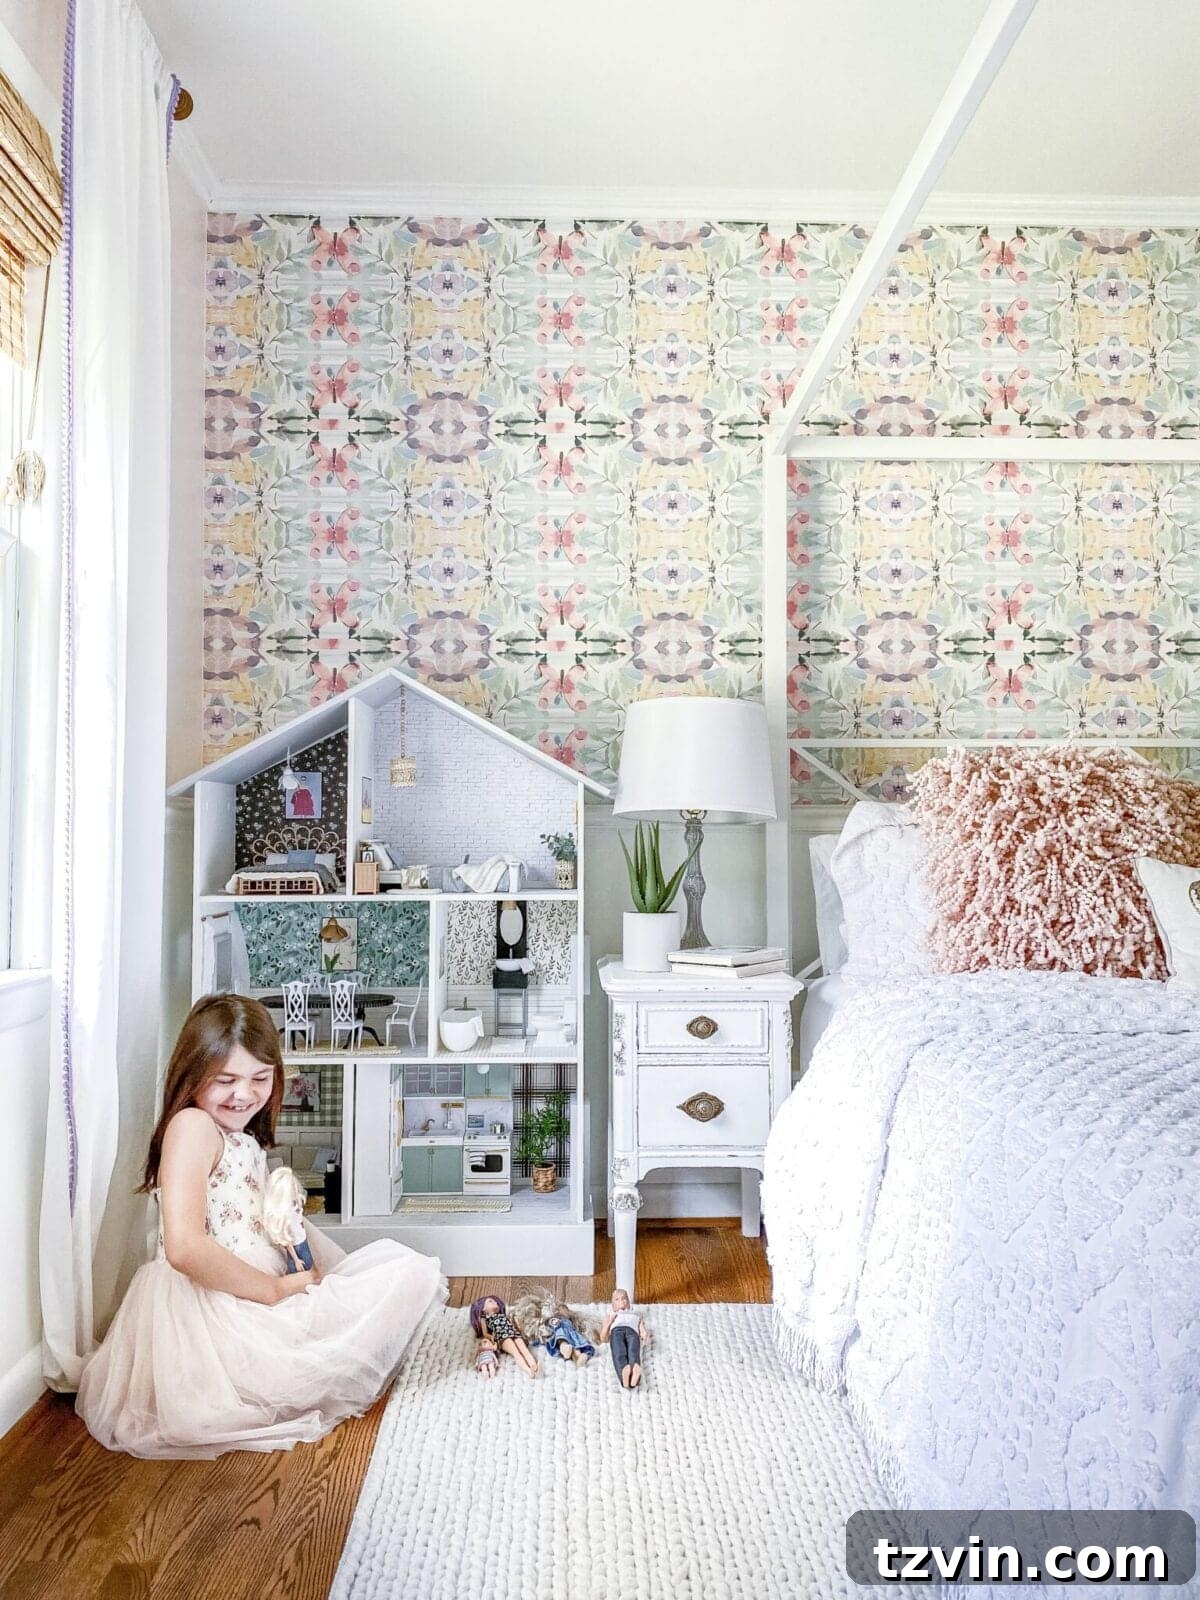
Transforming a simple bookcase into a captivating, realistic DIY dollhouse might sound like a daunting task, but it’s an incredibly rewarding journey that taps into your creative spirit and repurposes everyday items. What began as a casual idea for a quick paint job quickly blossomed into a passionate project, revealing the unexpected joy of miniature crafting. This comprehensive guide will walk you through creating a beautiful, detailed dollhouse using thrift store finds, existing household items, and a touch of imagination, proving that stunning results don’t require a hefty budget or specialized skills. Get ready to dive into the charming world of DIY dollhouse makeovers!
My own adventure into dollhouse design started quite unexpectedly. I stumbled upon a simple dollhouse bookcase at a consignment sale for just $60, a steal I couldn’t pass up. It sat in our garage for months, its potential simmering. My initial thought was to give it a quick refresh—a splash of paint, perhaps some pretty scrapbook paper for the back panels, and call it done. Little did I know, this seemingly minor project would pull me into the enchanting realm of miniature interiors, a hobby I never imagined I’d adore. Apparently, all those diorama projects from middle school were actually preparing me for this delightful undertaking! Before I knew it, I was completely immersed, dedicating weeks to perfecting every tiny detail.
The Starting Point: Before the Magic Began
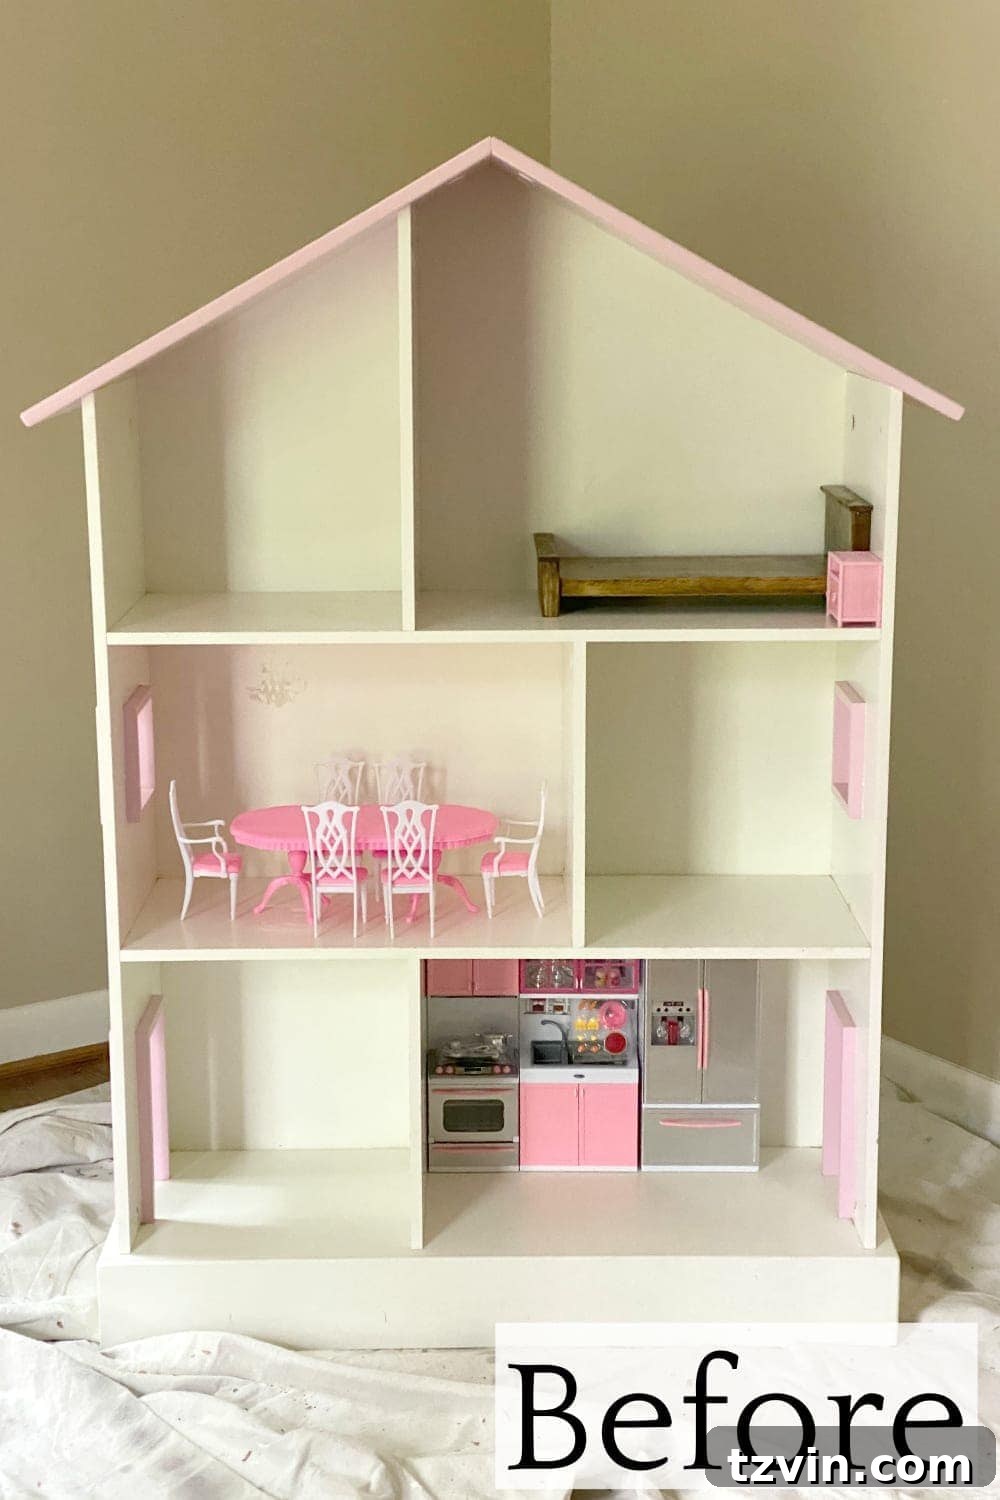
The humble beginnings of a dream dollhouse.
While my husband, Robert, embarked on a significant office makeover, I found my own creative outlet in this charming DIY dollhouse. For the past two weeks, it became my primary focus, transforming from a neglected bookcase into a vibrant, miniature home. This project wasn’t just about crafting; it was a special reward for my daughter, Olivia, who has been an incredible helper and big sister throughout these unusual times at home. This entire process truly felt like a labor of love, never like work—despite a few minor hot glue burns to my fingertips! The joy of seeing it come to life, piece by tiny piece, was immeasurable.
The Grand Reveal: After the Transformation
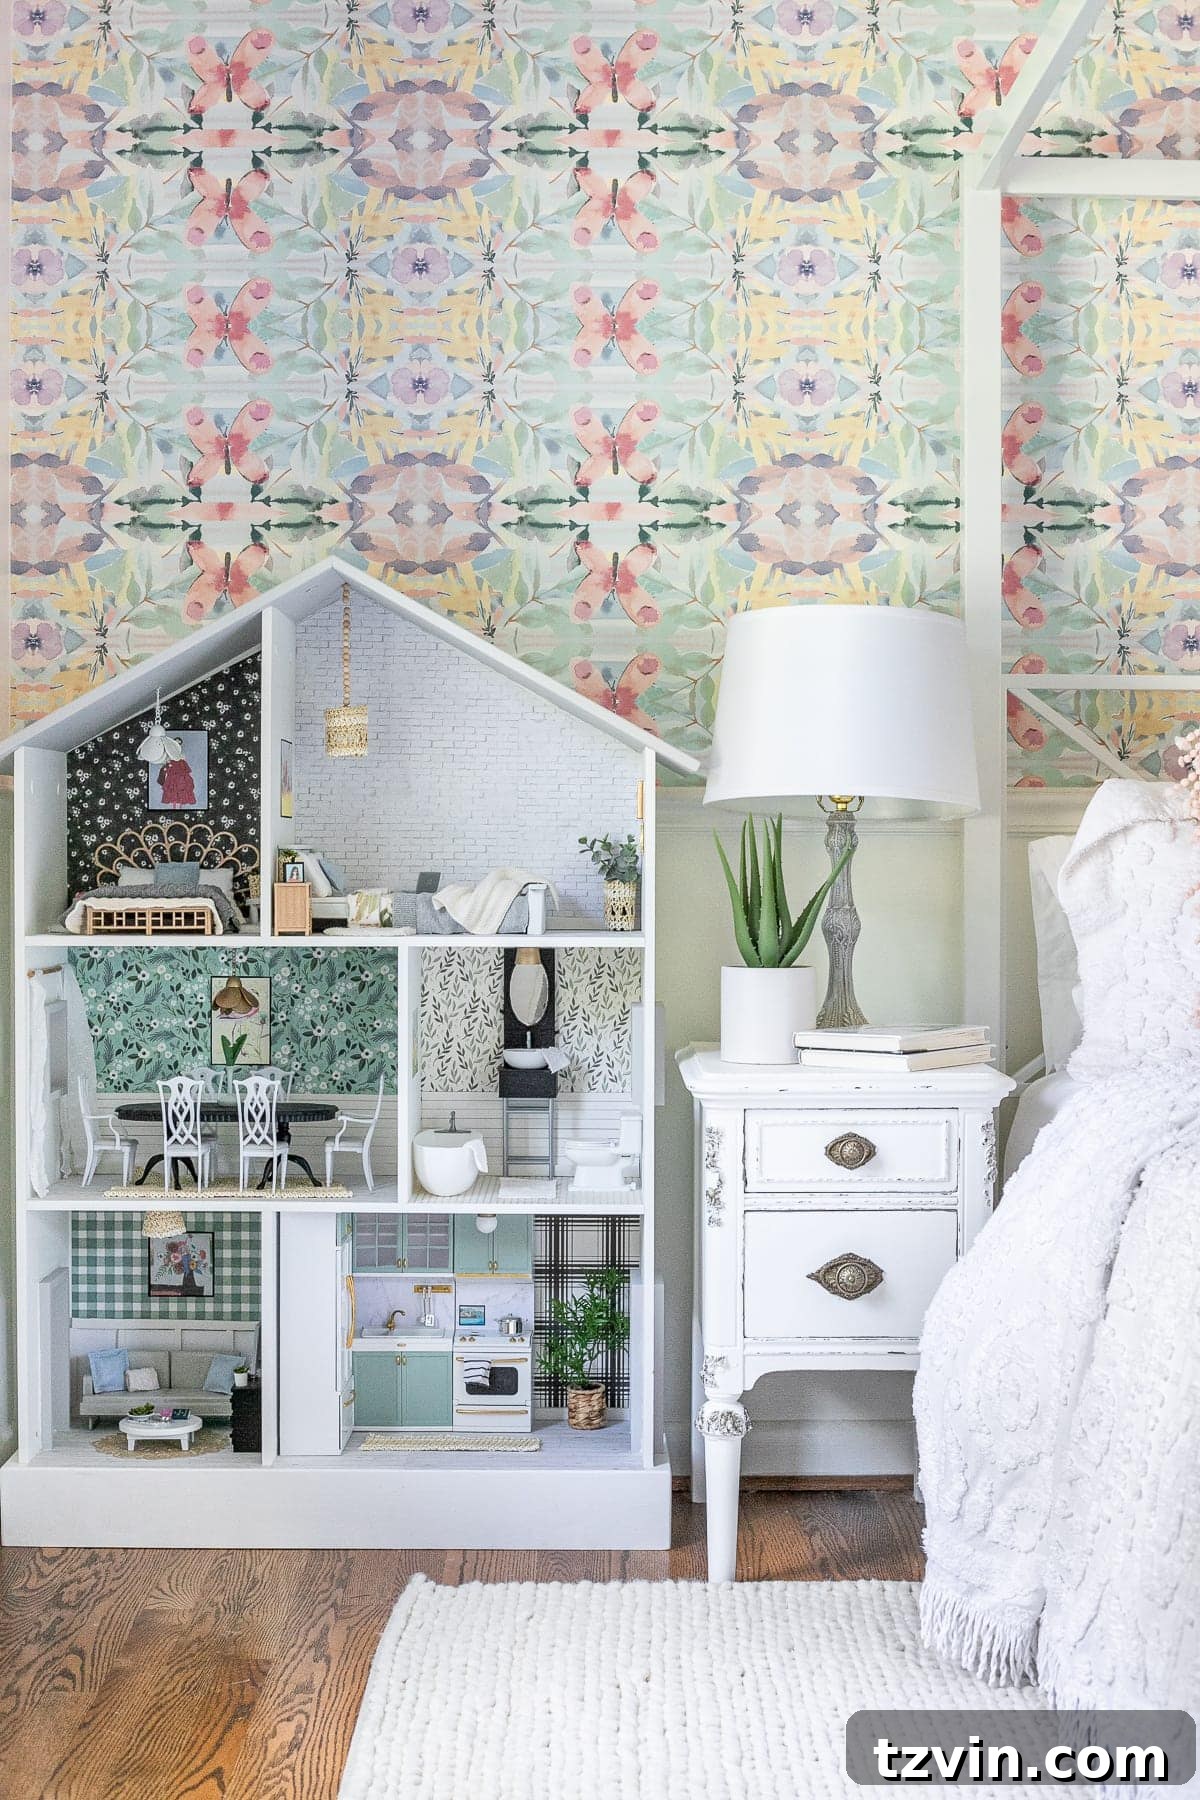
Creating a Realistic DIY Dollhouse: A Step-by-Step Guide
Embarking on a dollhouse makeover is a fantastic way to unleash creativity and achieve stunning results without breaking the bank. The key lies in strategic repurposing and thoughtful detailing. Below, you’ll find a breakdown of the supplies I used and how each room came to life, packed with tips for making your own miniature dream home.
(Some affiliate links are provided below. Full disclosure here.)
Essential Supplies for Your Dollhouse Makeover
One of the most exciting aspects of this project is the ability to use items you already have around the house, making it incredibly budget-friendly and sustainable. Here’s a detailed list of materials that proved invaluable:
- Scrapbook Paper: This is your secret weapon for transforming plain walls and floors. I used high-quality sheets from this diverse pack for various wallpaper patterns and even faux shiplap. For a realistic “wood” floor effect, this specific paper worked wonders, and this white brick pattern added texture to a feature wall. Look for patterns like marble, tile, wood grain, or intricate florals to add character to each room.
- Doll Furniture (Old & New): A blend of vintage and modern pieces creates a charming, eclectic look. I incorporated some of my own childhood Barbie furniture, supplemented by unique Etsy Barbie furniture finds, consignment shop treasures, and even some gems from Ebay Barbie furniture. A couple of new, affordable sets, like this doll kitchen and this living room set, provided a solid foundation to customize.
- Spray Paint: Essential for quickly changing the color of furniture or plastic accessories. I maximized my resources by only using leftover spray paint cans I already had on hand, demonstrating how to achieve a fresh look economically.
- Acrylic Paint & Brushes: Perfect for adding intricate details, painting small knobs, handles, or creating custom artwork for the miniature walls. A small set of craft brushes will be your best friend for these delicate touches.
- Repurposed Clothing: Don’t throw away outgrown clothes! Items from the donation pile are goldmines for fabric. Cut them up to create bedding, plush rugs, tiny pillows, soft towels, stylish curtains, and more. Think about textures and patterns that would work in miniature scale.
- Small Knick-Knacks & Household Repurposables: This is where creativity truly shines. Toothpaste lids and hairspray caps are fantastic for crafting miniature light fixtures, plant pots, ottomans, baskets, or stools. Buttons can become knobs, beads can be embellishments, and small plastic containers can be storage. Look at everyday objects with a new perspective!
- Rubber Cement: I highly recommend rubber cement for adhering paper to surfaces. It provides quick, strong adhesion without causing the paper to wrinkle or warp, which is crucial for smooth finishes on walls and floors.
- Hot Glue and Glue Gun: Indispensable for creating no-sew items like tiny Barbie pillows, securing light fixtures, attaching small embellishments, and quick assembly. Just be mindful of those hot glue burns—they’re a badge of honor for crafters!
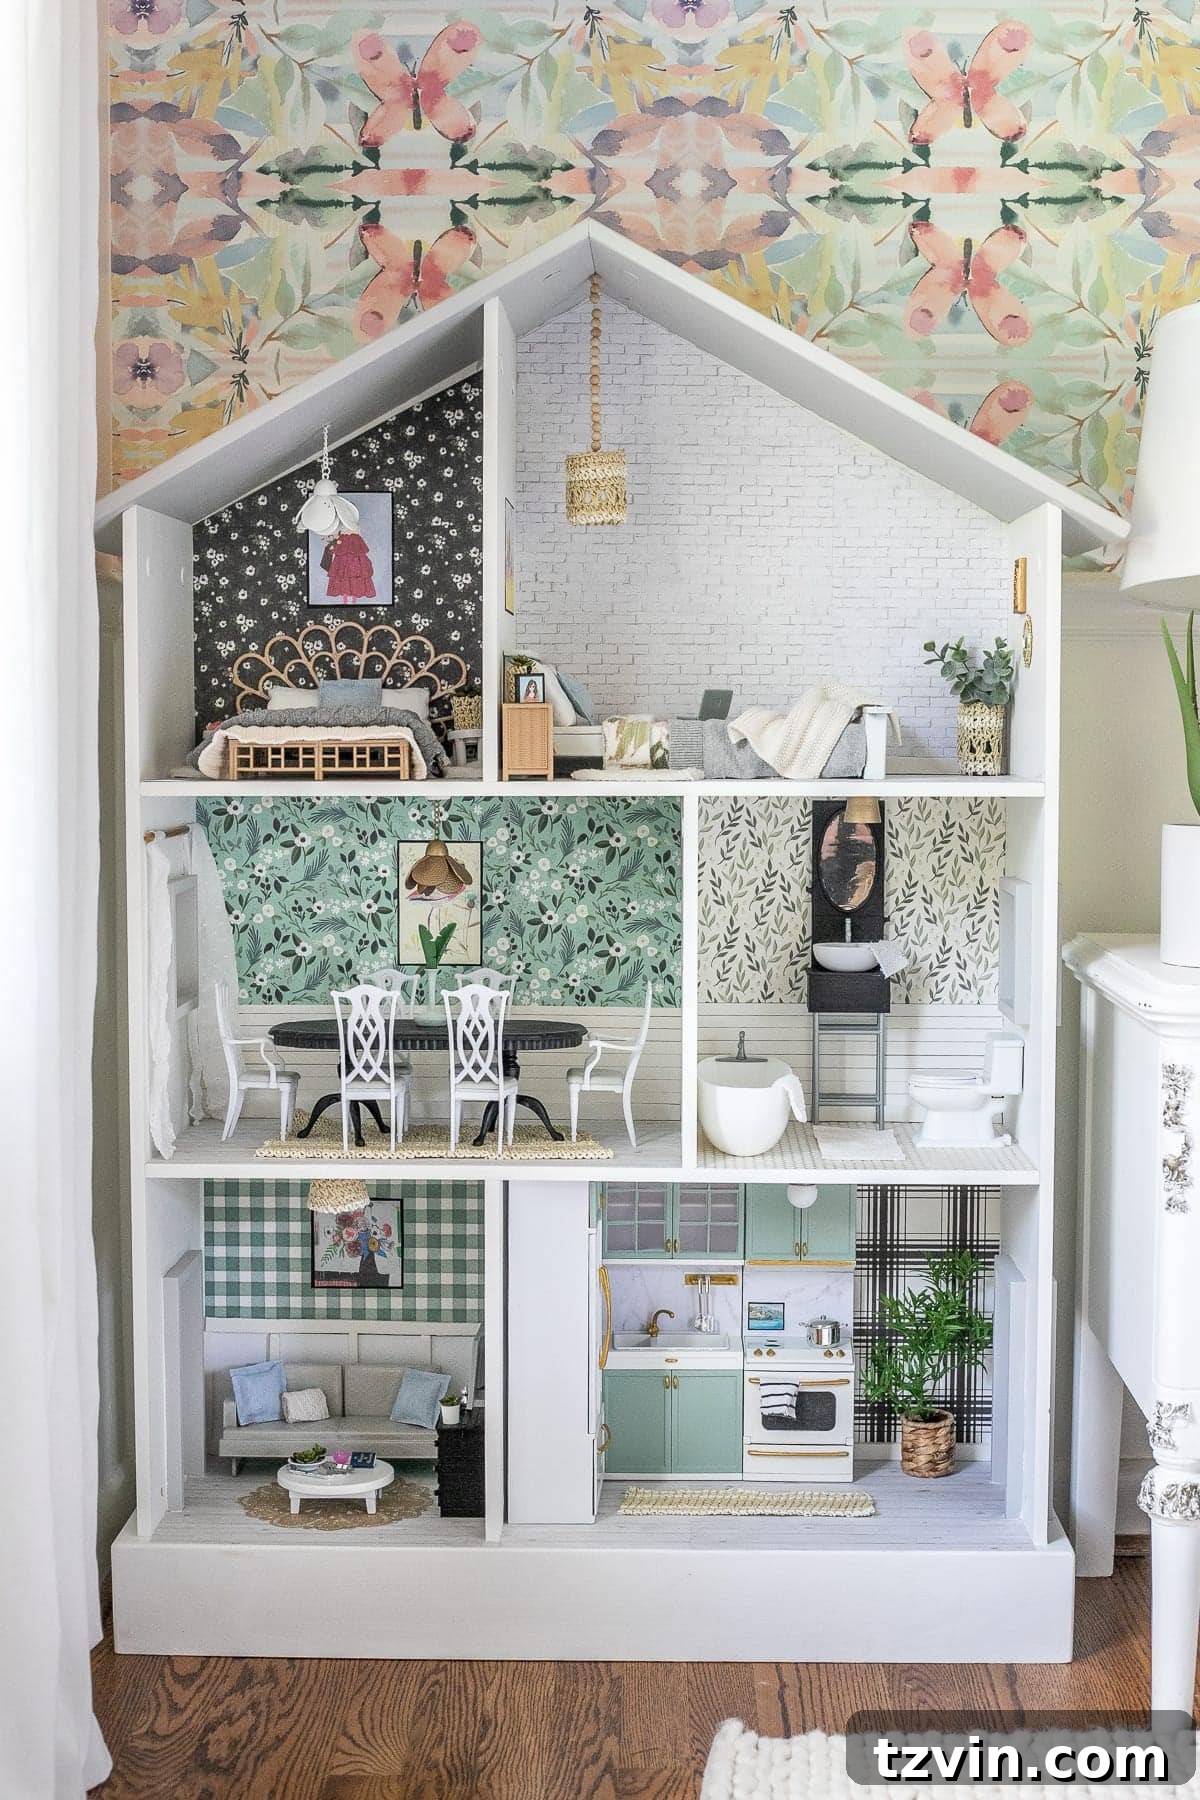
Olivia played a crucial role in the design process, meticulously selecting the wallpaper patterns for her DIY dollhouse. After her initial choices, she entrusted me with the remaining design elements, asking for a delightful surprise. This gave me the freedom to work on each room little by little, carefully curating details daily to make the dollhouse feel as realistic and inviting as possible. Every corner was thoughtfully considered, from the smallest rug to the tiniest piece of art, ensuring a cohesive and charming miniature home.
The Heart of the Home: Kitchen
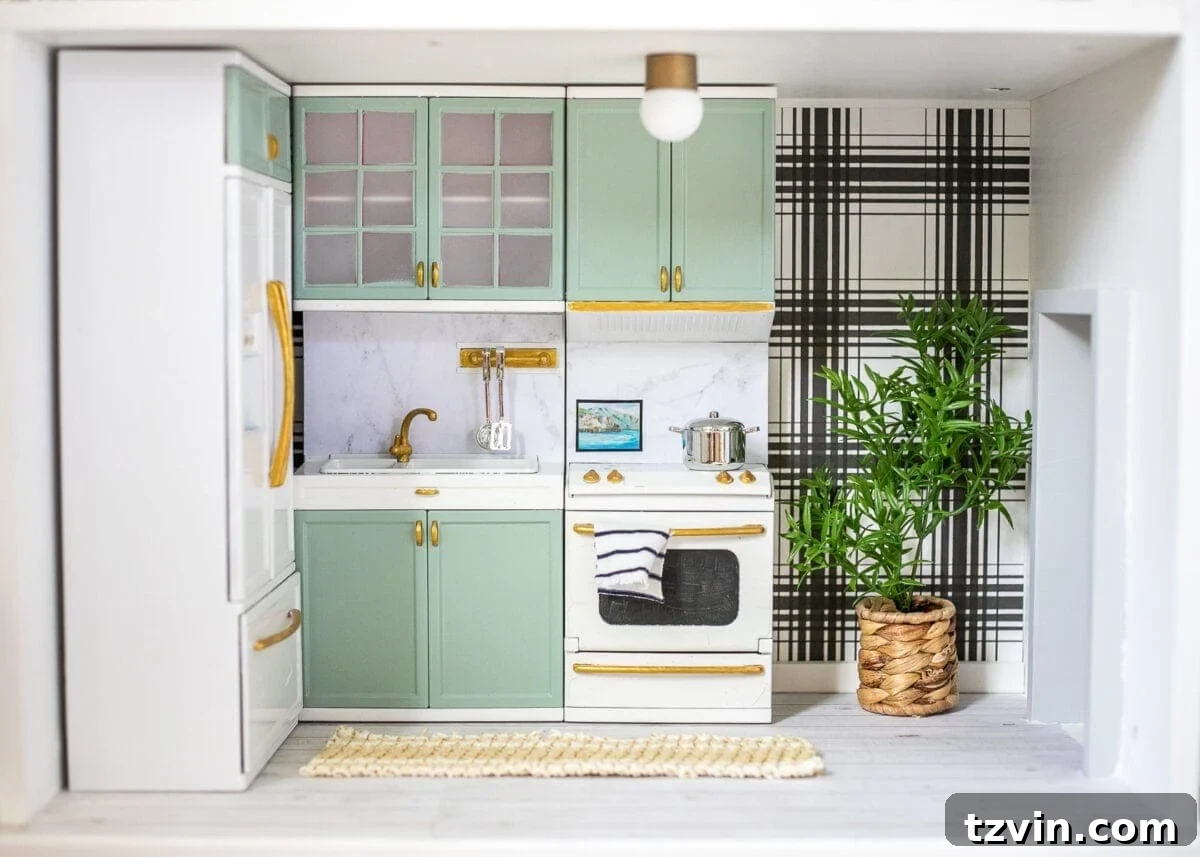
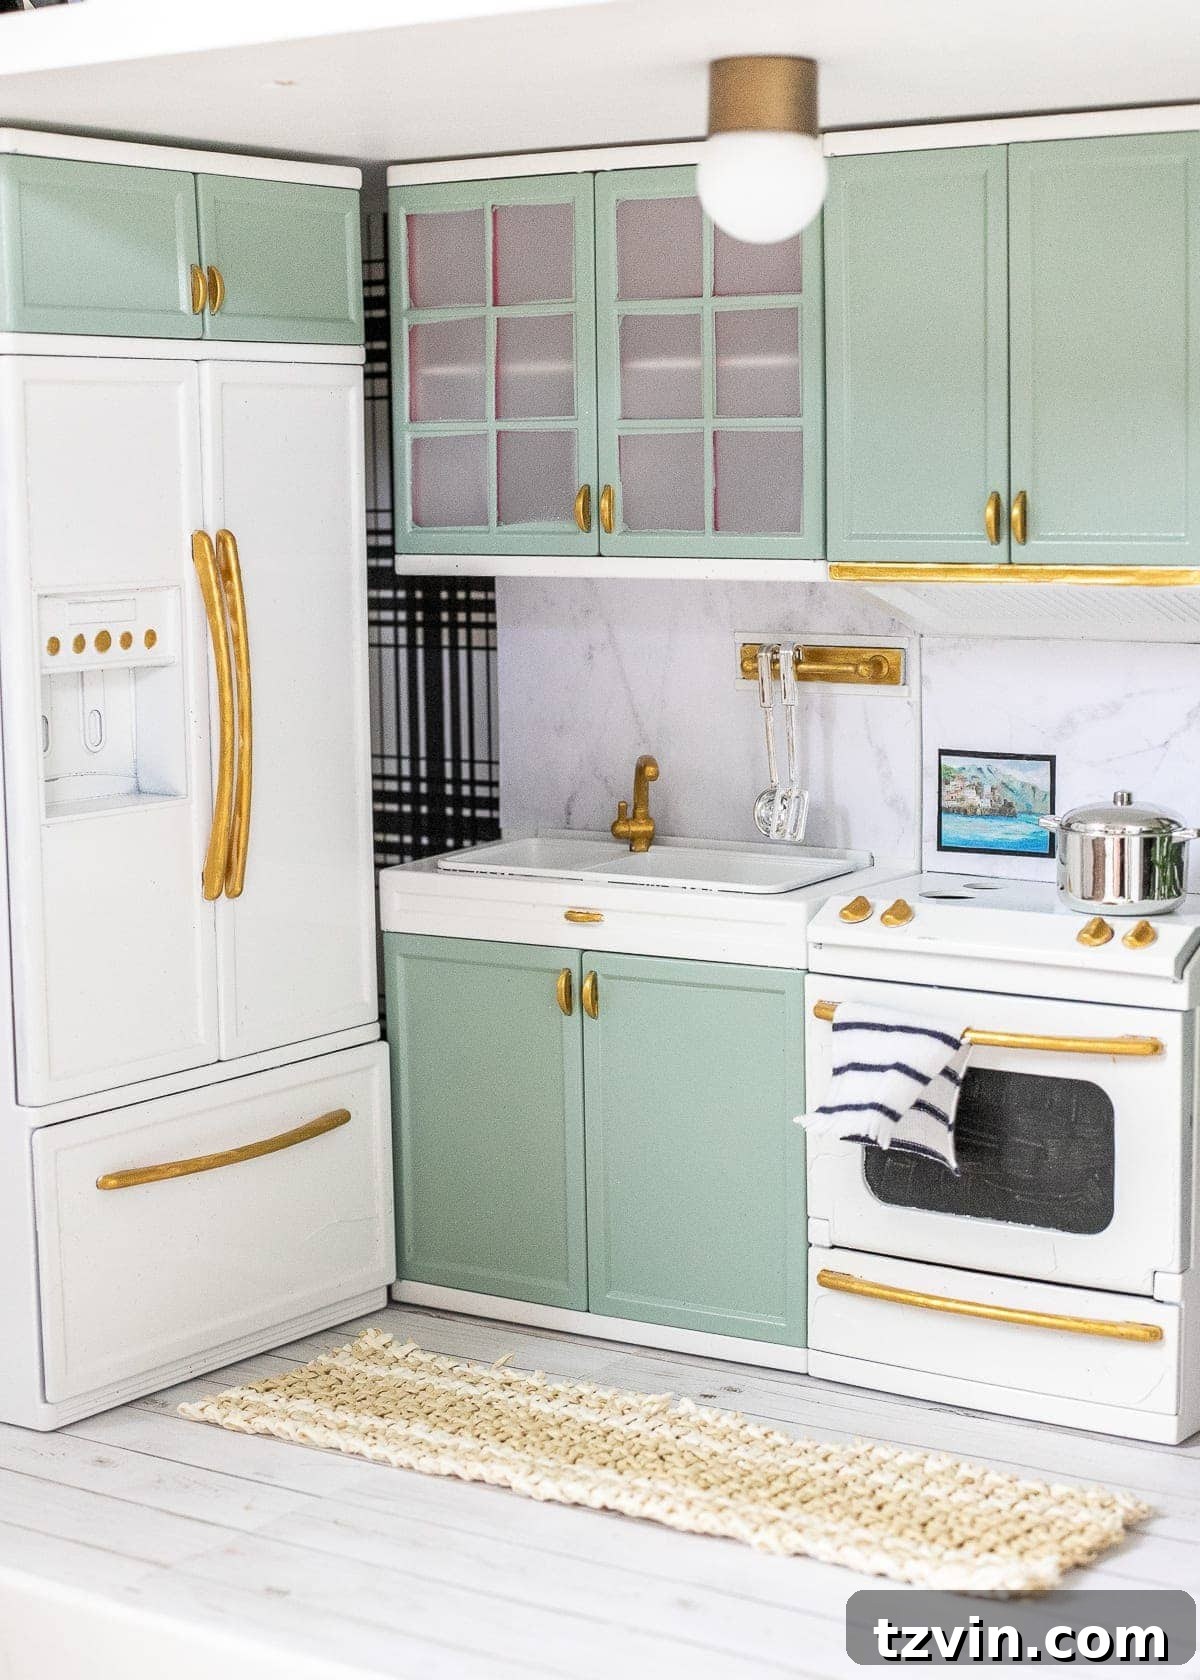
Creating a modern and stylish kitchen involved a mix of clever transformations and thoughtful details. Here’s how this miniature culinary space came to life:
- Kitchen Set: Since Olivia didn’t have a Barbie kitchen already, I purchased this basic set online. To elevate its look, I carefully removed the doors and spray painted them a beautiful Krylon Catalina Mist for a soft, inviting hue. The main body of the set received a crisp coat of white spray paint. To add a touch of elegance, I hand-painted the handles and knobs with shimmering gold acrylic paint, giving the cabinets a custom, high-end feel.
- Backsplash: To mimic the sophisticated look of marble, I applied this gorgeous marble scrapbook paper to the backsplash area. If you happen to have marble contact paper on hand, that would also be an excellent and easy-to-apply alternative for a similar effect.
- Miniature Tree: A simple woven napkin ring was cleverly repurposed to serve as a stylish “basket” for a miniature tree. I placed a faux stem inside, securing it with aluminum foil, and then painted the top of the foil black to resemble rich potting soil.
- Rug: This charming mini rug was simply a small, carefully cut piece from an old straw hat, adding a natural, textural element to the floor.
- Light Fixture: For a unique overhead light, I transformed a face wash bottle lid by spray painting it with a brass-colored paint I already owned. A mini ping pong ball was then hot glued inside, creating a realistic, globe-like fixture.
- Artwork: To personalize the kitchen, I printed this serene landscape art from Artfully Walls onto cardstock. It was then carefully glued onto the backsplash, making it appear as if it were a tiny framed piece of art hanging in the space.
Cozy Gatherings: Living Room
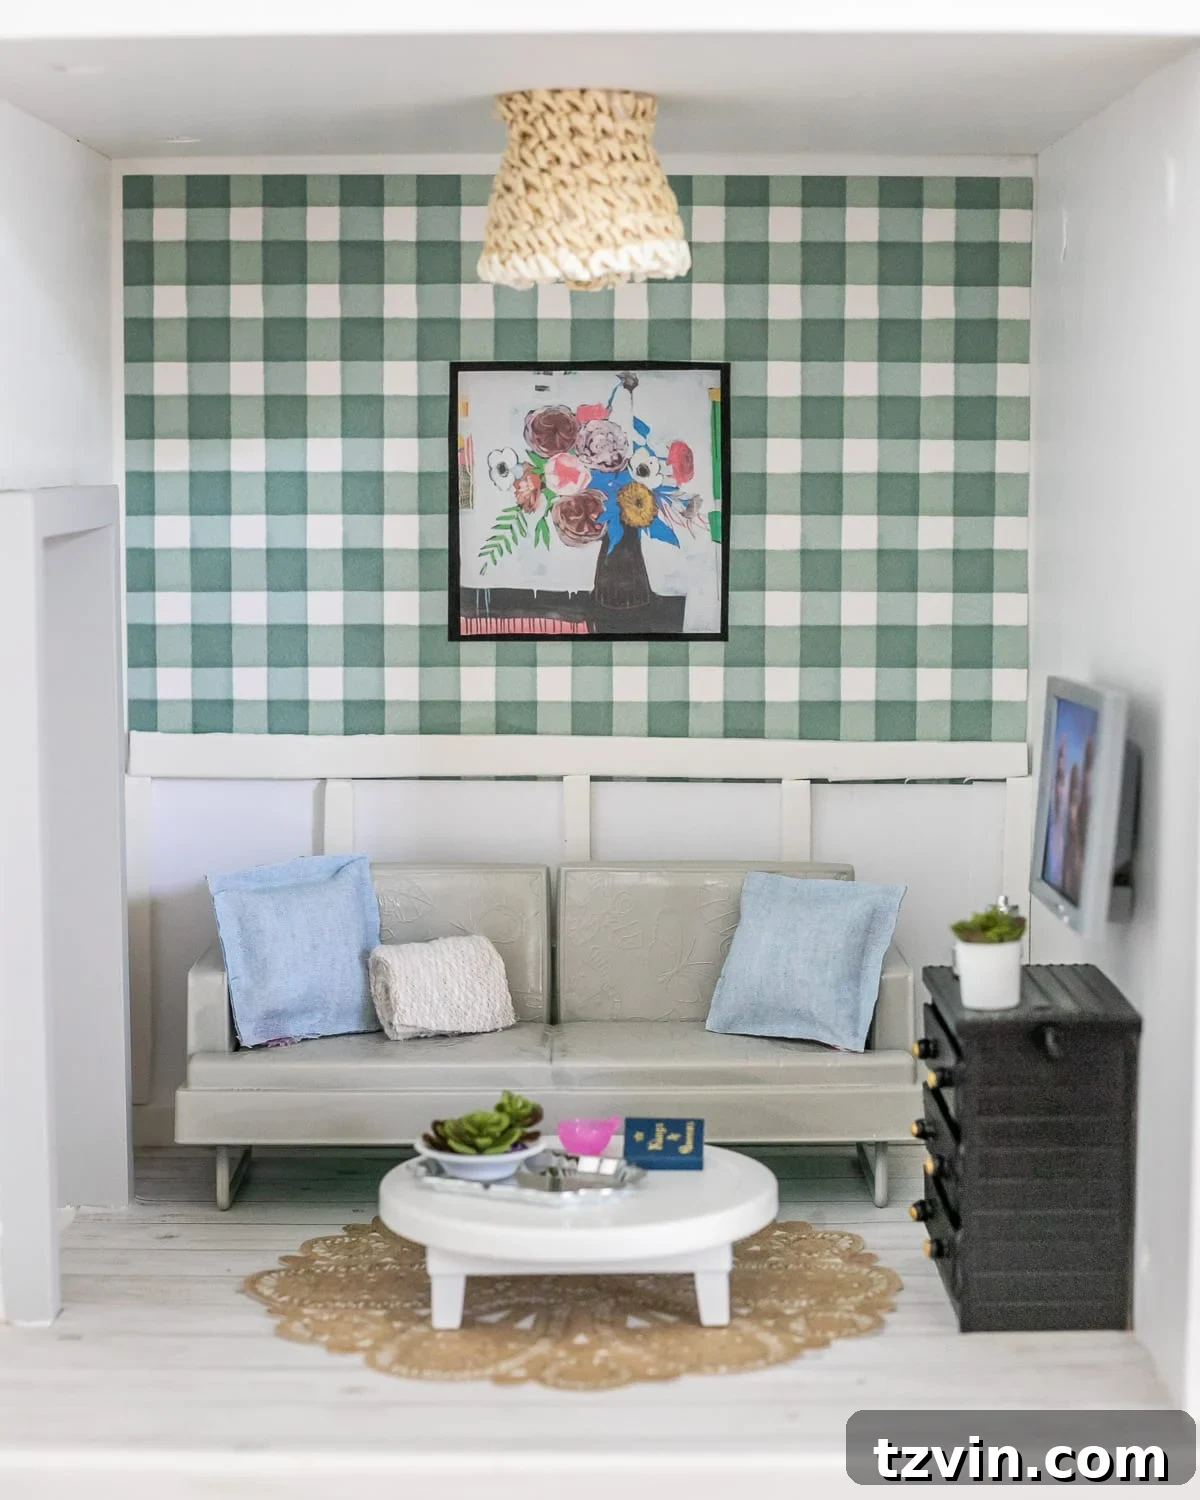
The living room was designed to be a comfortable and stylish space, blending handmade elements with thrifted finds. It’s a testament to how simple materials can create intricate details:
- Board and Batten Wall: To add architectural interest, I quickly created a board and batten effect using a simple foam sheet and white cardstock. These pieces were precisely cut and glued to the back wall, mimicking the classic paneling style with minimal effort.
- Jute Rug: For a touch of rustic charm, I found an image of a jute rug online, screenshot it, printed it onto cardstock, and then glued it to the floor. This method is fantastic for realistic rug patterns without needing actual miniature fabric.
- Sofa: The sofa from this living room set received a fresh coat of spray paint, instantly updating its look and integrating it into the room’s color scheme.
- Coffee Table: This piece was a nostalgic find, an old coffee table from my own Barbie playing days. A quick spray paint job gave it a modern refresh, proving that vintage toys can easily be revitalized.
- TV Stand: To create a custom TV stand, I repurposed a piece Olivia already owned. After spray painting it, I hot glued popsicle sticks to the front to mimic the appearance of drawers and added tiny beads as realistic knobs, completing the illusion of built-in storage.
- Throw Pillows: These cozy miniature pillows were fashioned from small pieces of cut-up old clothes. The edges were simply hot glued together, eliminating the need for any sewing and making them incredibly easy to create.
- Television: The miniature TV was part of the original set. To make it more engaging, I printed a screencap of “Frozen 2” (Olivia’s favorite movie) and glued it to the screen, adding a personal touch.
- Planter Pot: A tiny faux succulent was hot glued inside a repurposed toothpaste cap, creating a charming and easy-to-make miniature plant.
- Light Fixture: An inventive light fixture was crafted from half of a plastic Easter egg, with a remnant from a straw hat glued on top for a unique texture.
- Wall Art: This delicate floral still life artwork was printed on cardstock, adding a touch of elegance and color to the living room wall.
Elegant Gatherings: Dining Room
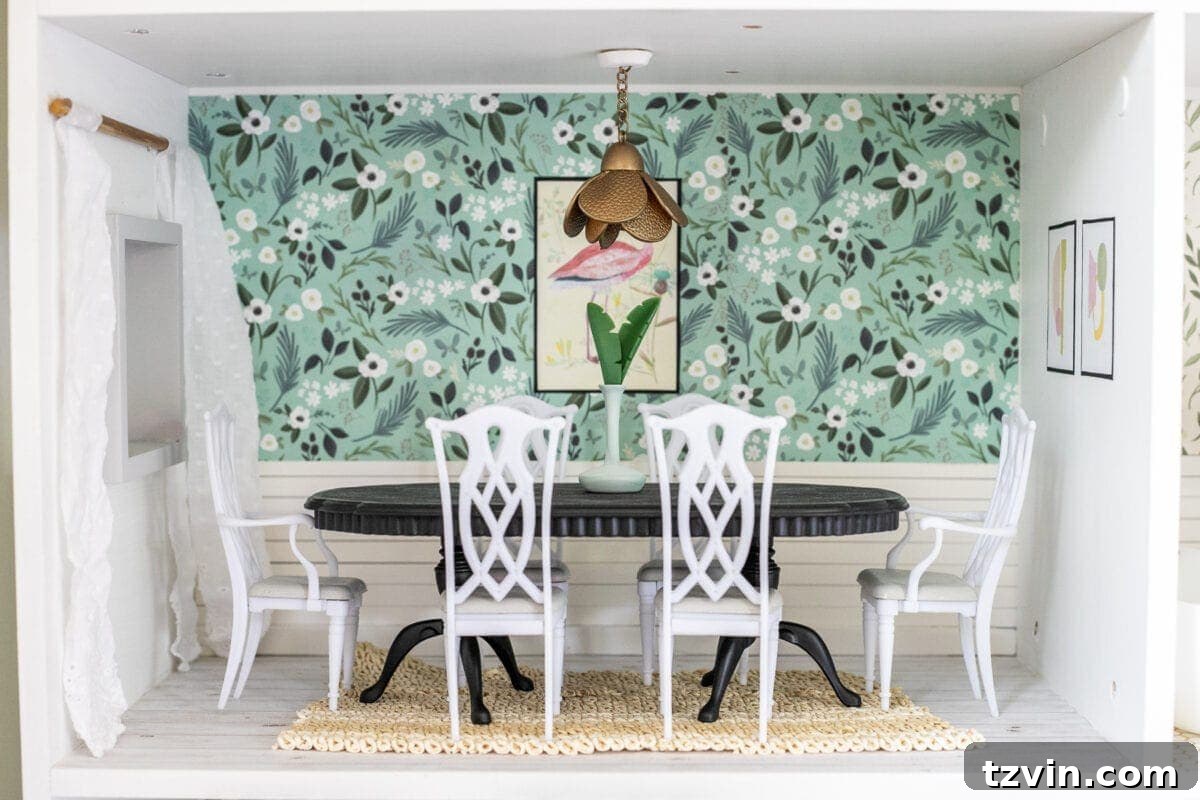
The dining room was designed to be a sophisticated yet playful space, perfect for miniature meals and gatherings. Here’s a detailed look at its elements:
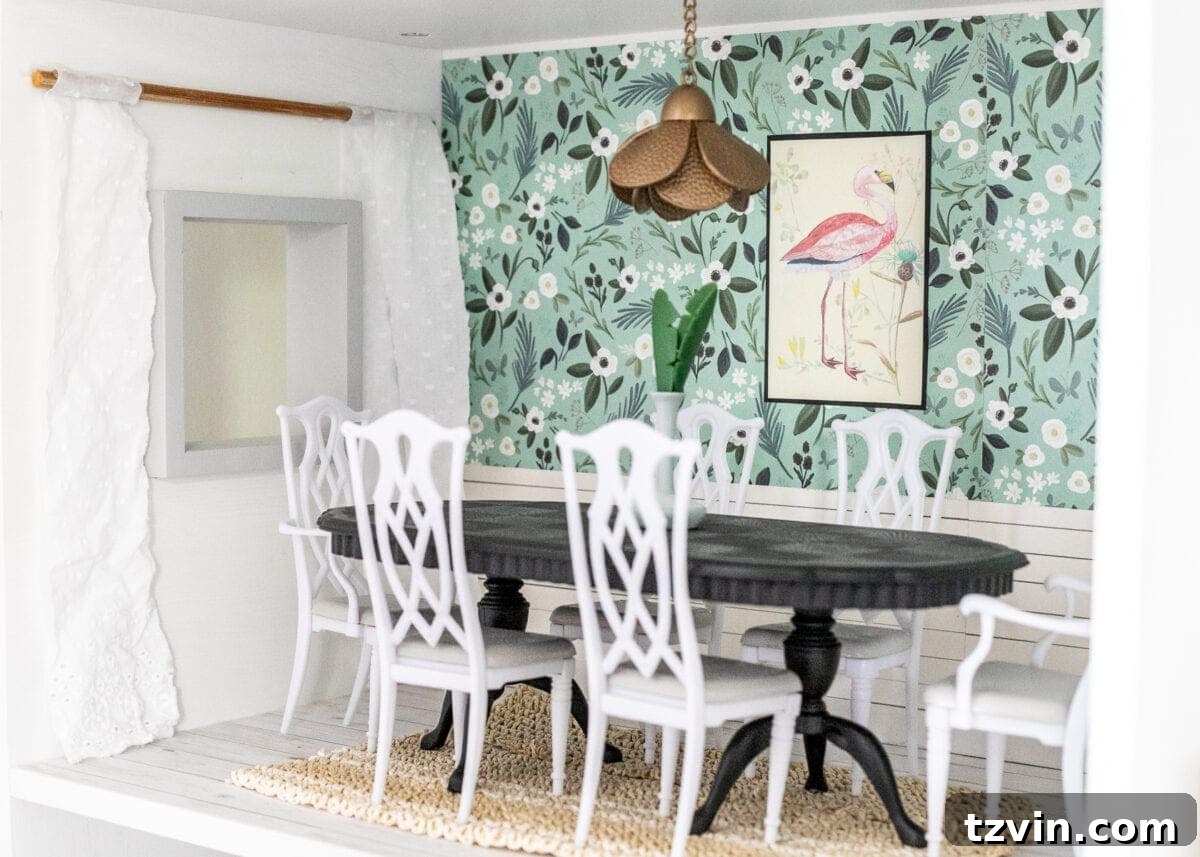
- Dining Set: To achieve a chic, modern look, I spray painted this dining set using black and gray colors I already had in my supply stash. This simple step completely transformed the generic plastic pieces into stylish miniature furniture.
- Rug: A remnant from a straw hat was ingeniously cut and shaped to create a rustic, textural rug, grounding the dining area with a touch of natural charm.
- Curtains: Remnants from an old shirt were carefully cut to size, fashioned into elegant miniature curtains that add softness and a sense of completeness to the window.
- Curtain Rod: A simple chopstick served as the perfect, understated curtain rod, holding the fabric drapes in place.
- Chandelier: A spray-painted keychain was cleverly repurposed into a dazzling miniature chandelier, adding a touch of glamour and a focal point above the dining table.
- Wall Art: Olivia’s passion for flamingos inspired the choice of this vibrant flamingo art, making the space uniquely hers. Complementing it, this geometric art and this other geometric piece were added, creating a dynamic and visually interesting gallery wall.
Spa Retreat: Bathroom
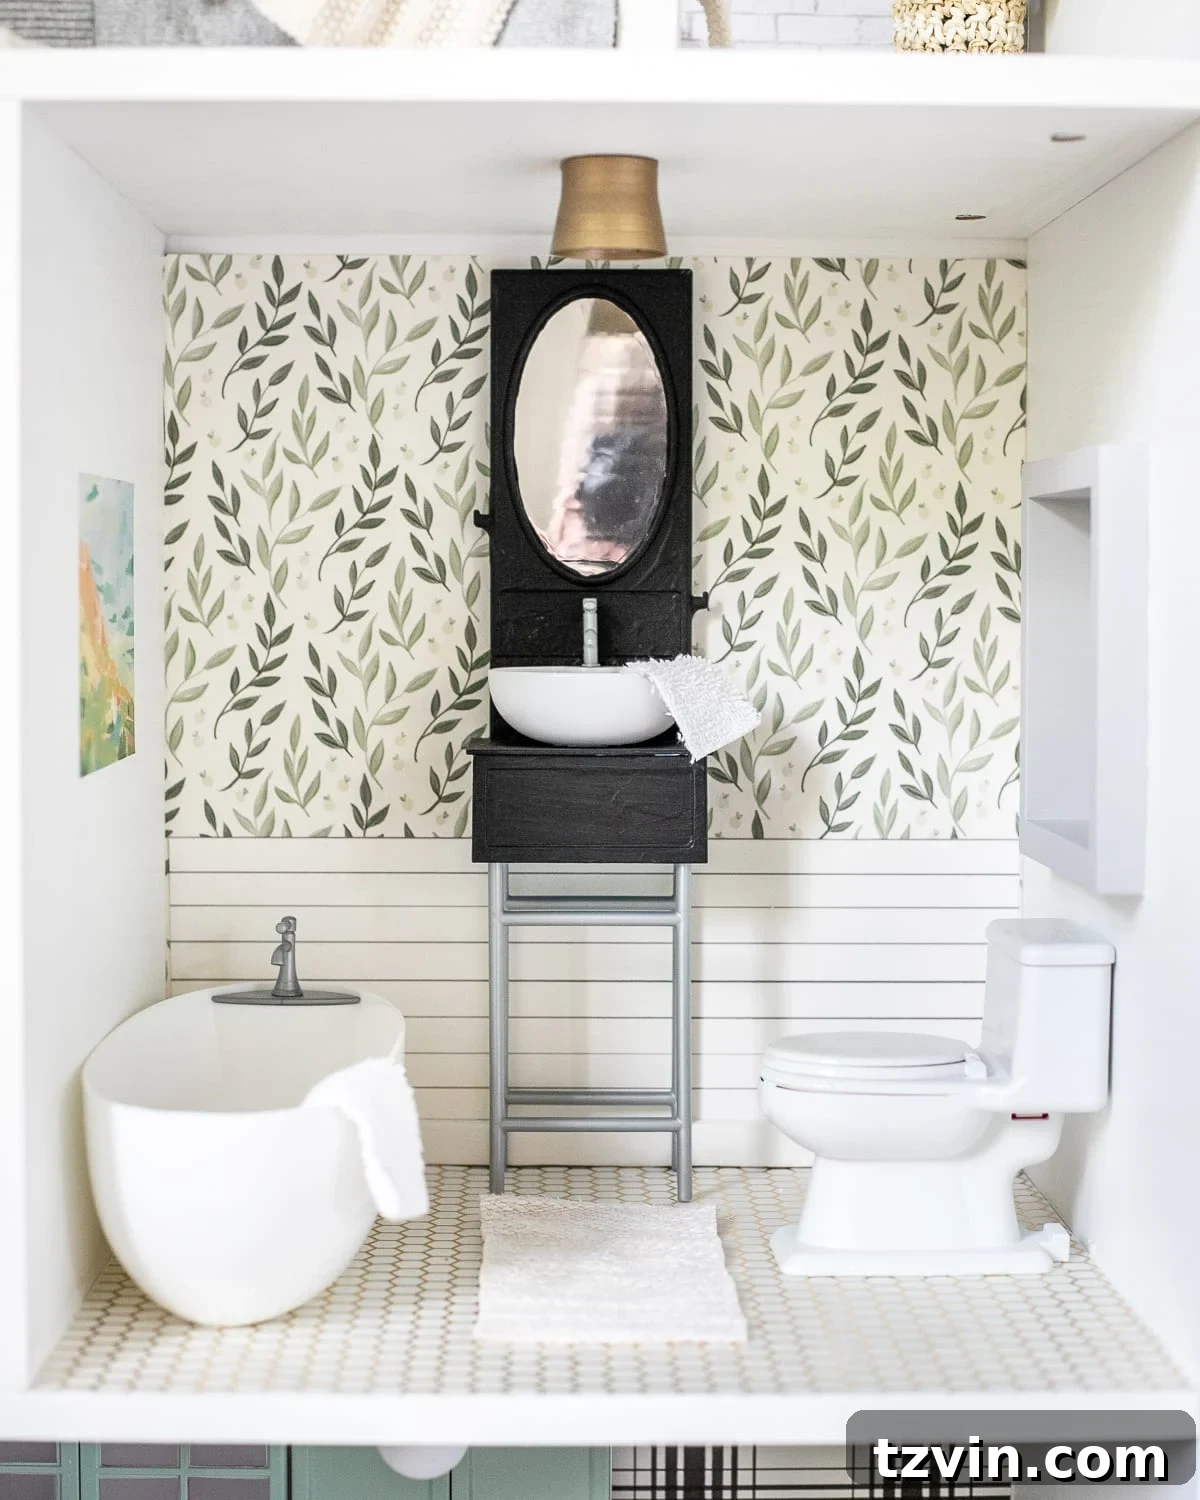
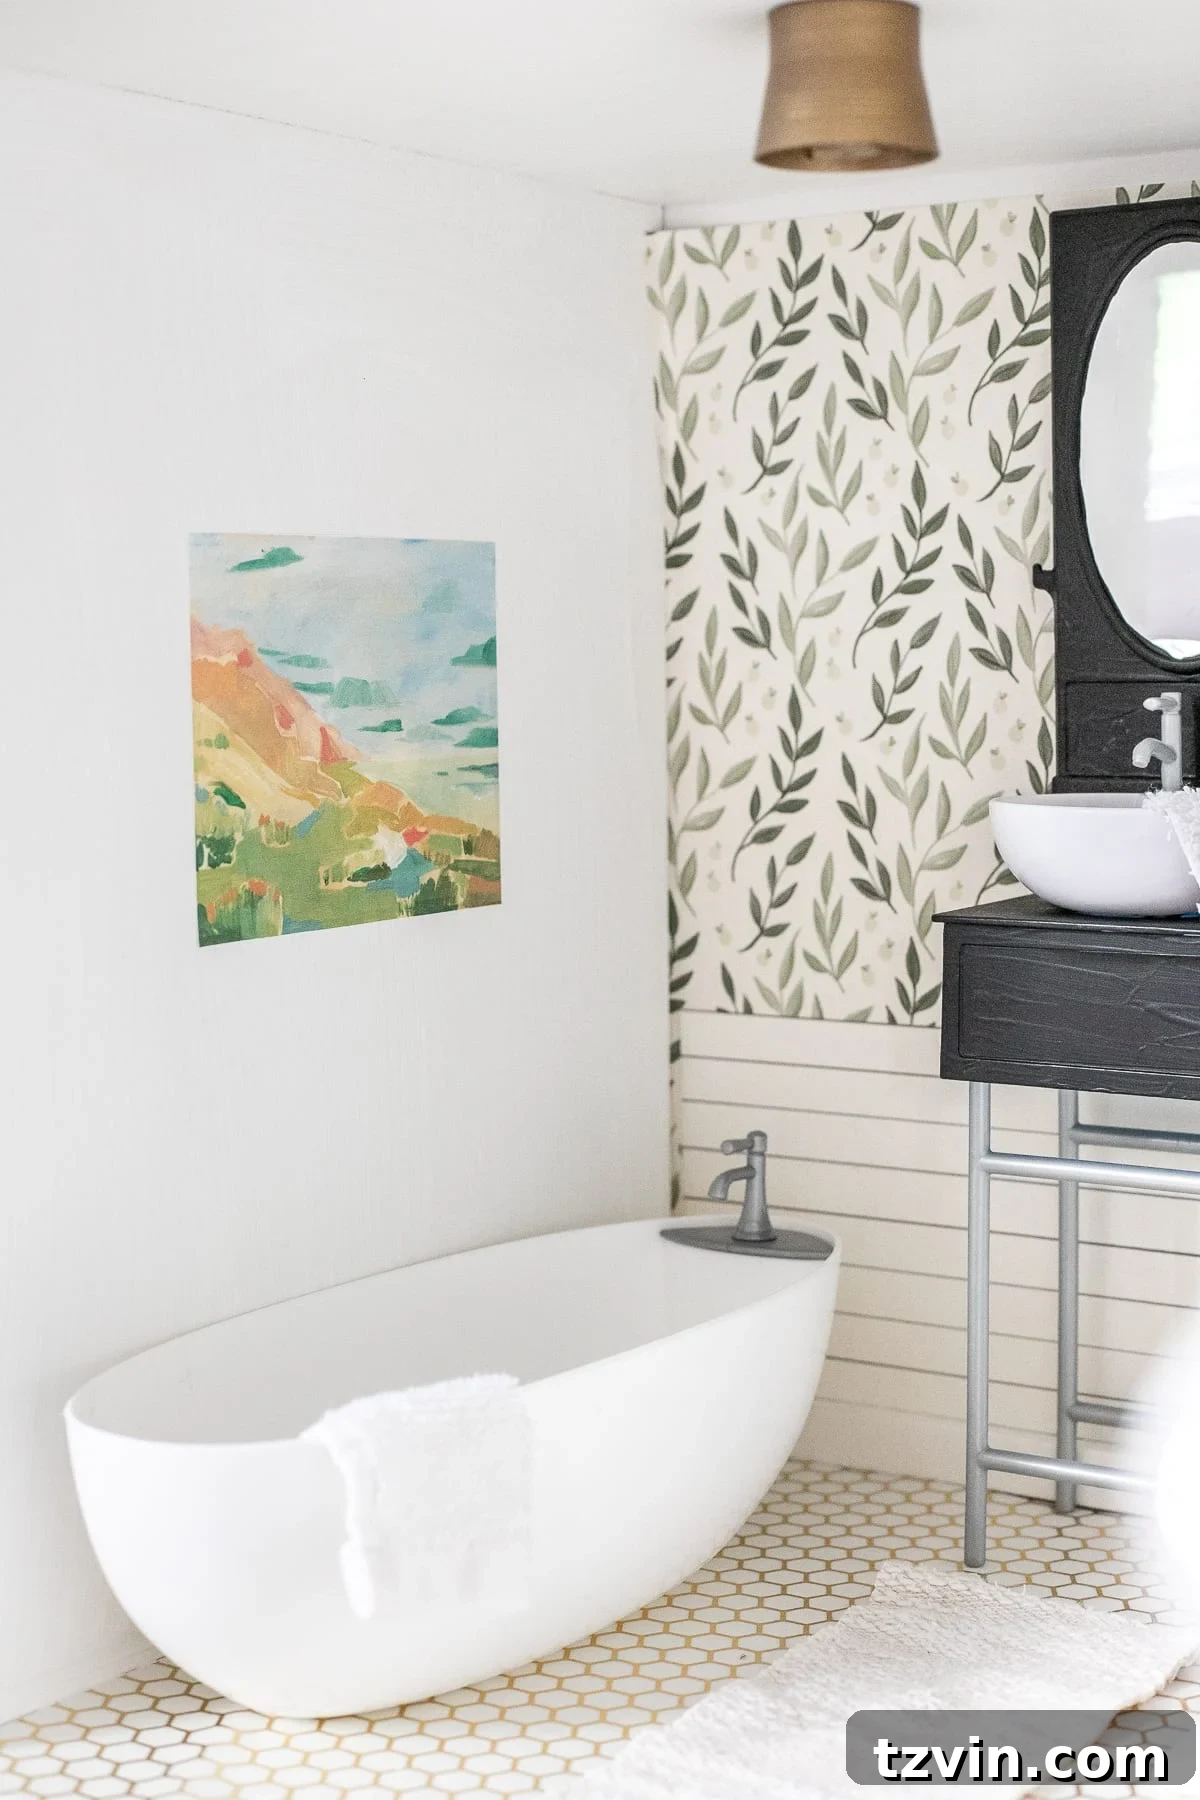
Even a dollhouse bathroom deserves a touch of elegance and functionality. This space was designed for miniature relaxation, combining vintage pieces with clever upcycles:
- Bathroom Furniture: The furniture in this miniature bathroom is a charming mix of pieces from my own childhood doll collection and items Olivia already owned. This blend creates a sense of history and continuity within the dollhouse.
- Rug: A soft remnant from an old sweater was cut to size, creating a cozy and plush rug underfoot, adding warmth to the tiled floor.
- Towels: Tiny towels were fashioned from remnants of an old washcloth, neatly folded and placed to complete the miniature bathing area.
- Wall Art: This serene abstract landscape, printed on cardstock, was chosen to add a calming and sophisticated element to the bathroom wall, enhancing the spa-like atmosphere.
- Light Fixture: A toothpaste cap was given a new life as a chic light fixture by being spray painted a luxurious brass color, adding a touch of metallic shine.
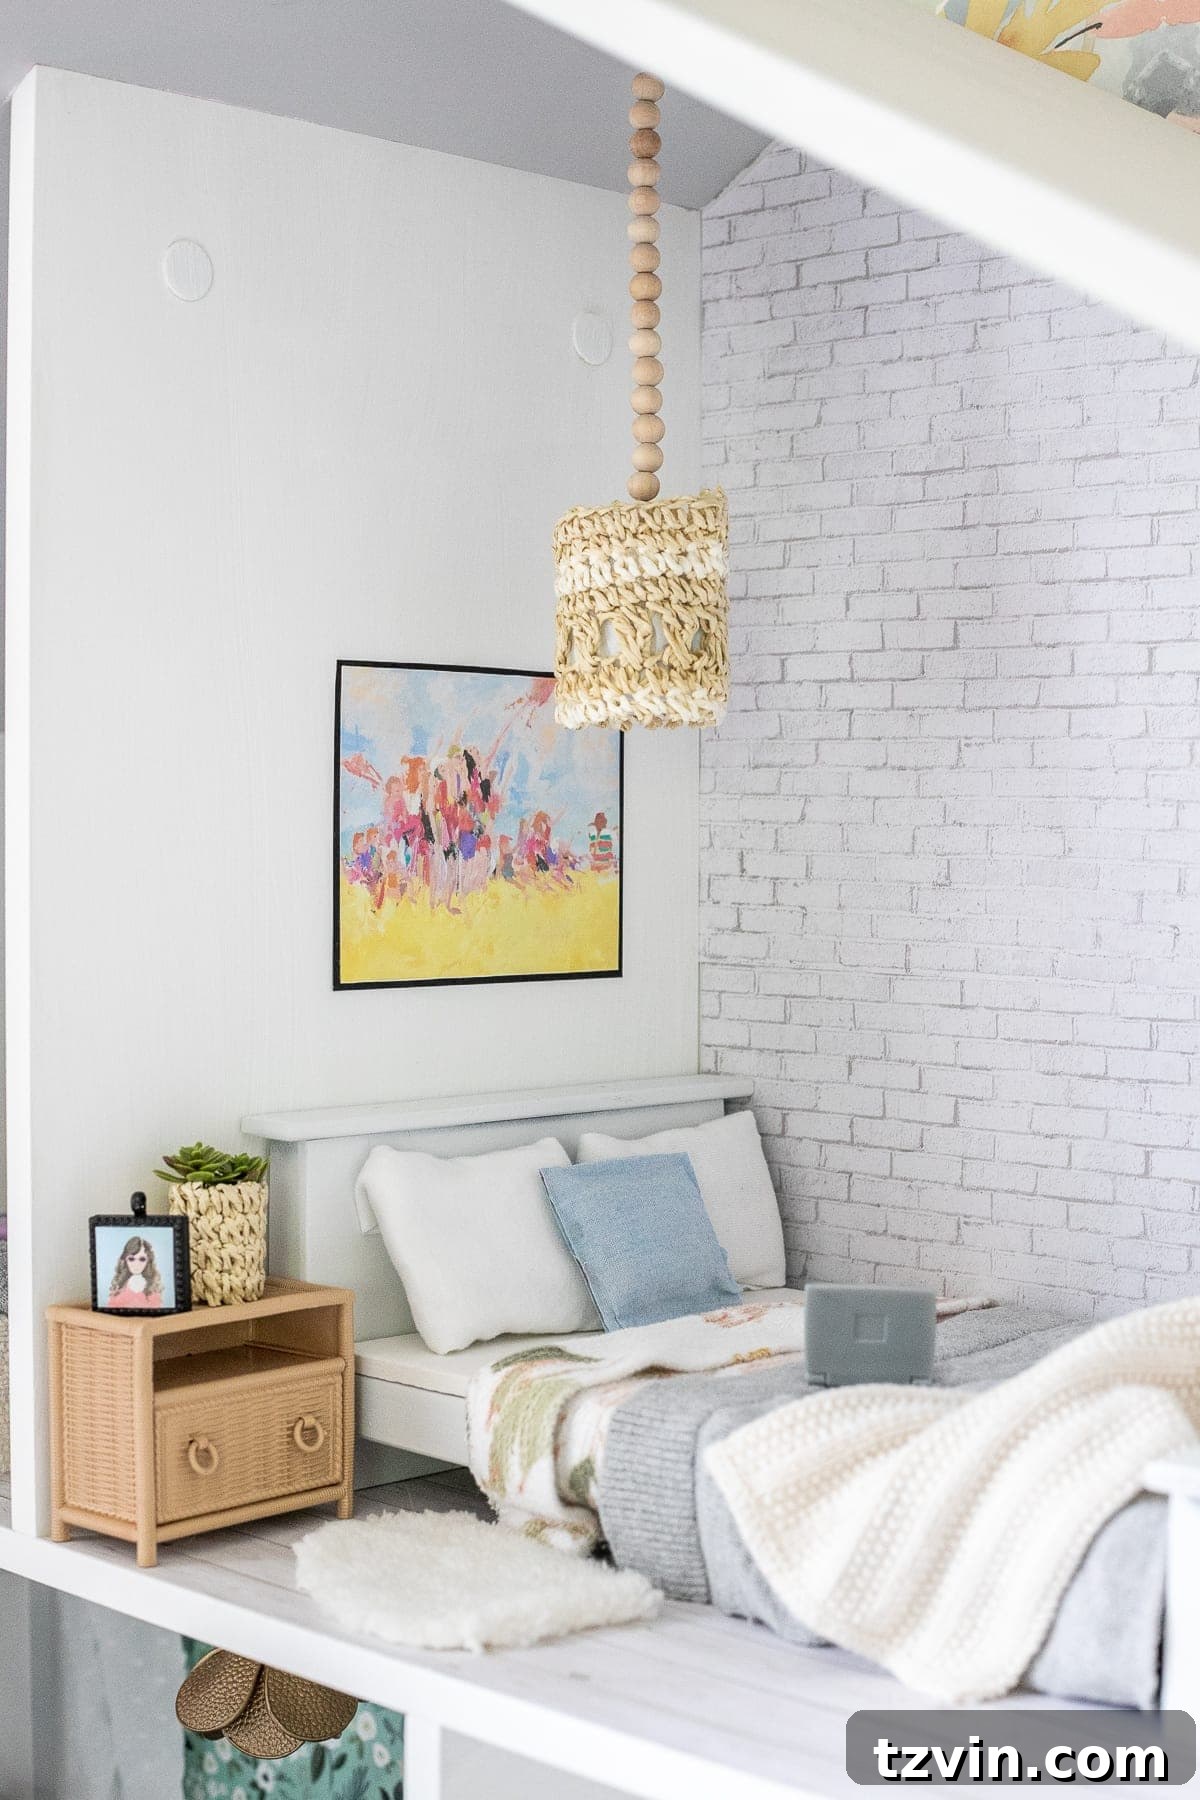
Dreamy Slumber: Bedroom 1
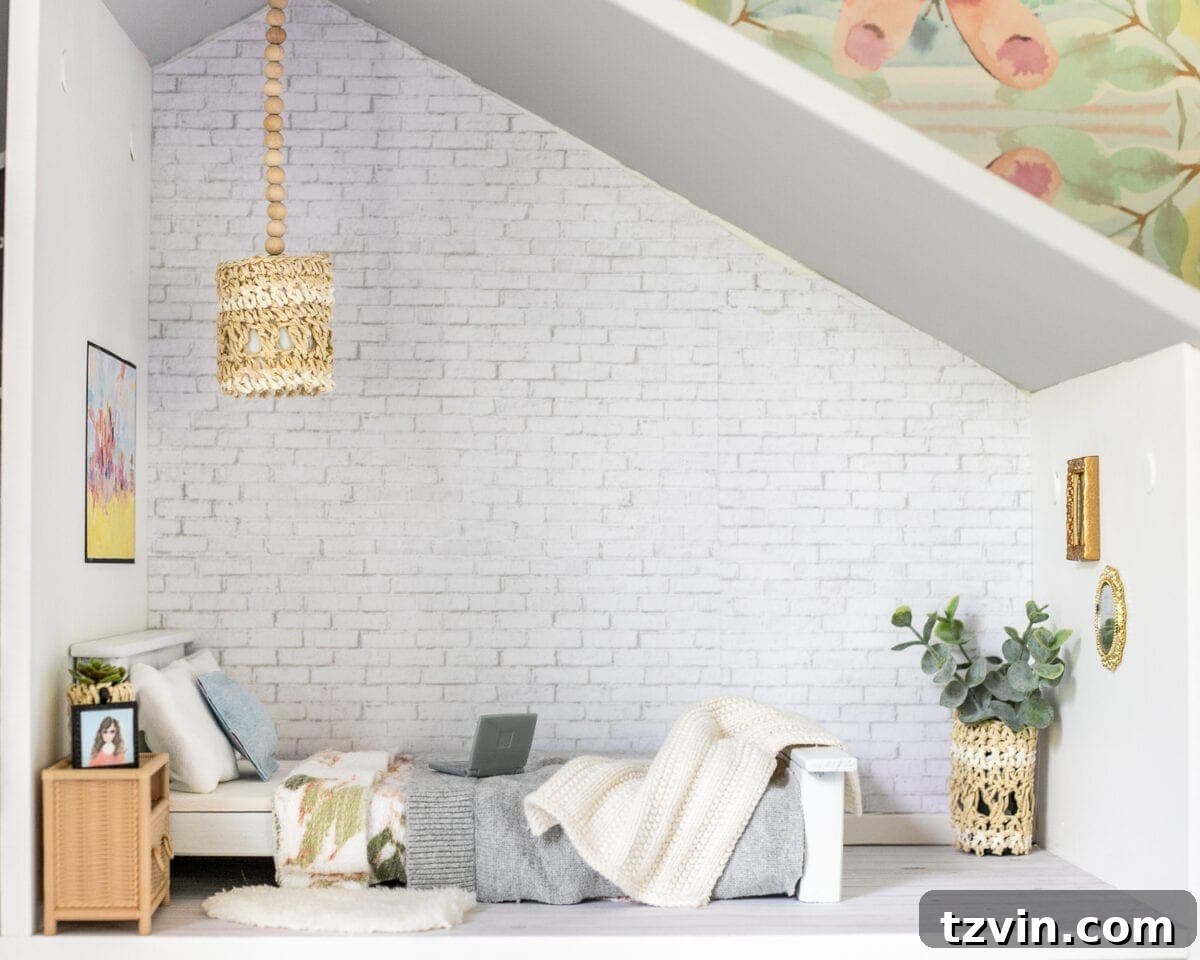
This bedroom embodies a tranquil and inviting atmosphere, created through a combination of unique finds and imaginative repurposing. Each detail contributes to a serene miniature retreat:
- Bed: The focal point of the room, this charming bed was a delightful Etsy find, offering a distinct character that sets the tone for the space.
- Nightstand: A small nightstand, discovered as an Ebay find, was perfectly sized to complement the bed and provide miniature bedside storage.
- Large Plant: A hairspray cap was creatively transformed into a planter, wrapped with a remnant of a straw hat for texture. Faux stems were hot glued inside, secured with aluminum foil, to create a lush, freestanding plant.
- Mirrors: To add depth and reflection, miniature mirrors were sourced from fairy garden accessories, proving that unexpected sources can yield perfect dollhouse elements.
- Bedding: The soft and inviting bedding was crafted from carefully cut-up pieces of old clothes, providing realistic textures and patterns.
- Sheepskin Rug: A small, fluffy sheepskin rug was ingeniously fashioned from a cut-up fleece mitten, adding warmth and luxury to the floor.
- Picture Frame: A tiny photo frame charm was repurposed into a miniature picture frame, ready for a personalized piece of art.
- Pendant Light: A hairspray cap, adorned with a straw hat remnant hot glued on top, was suspended with a beaded strand to create a stylish pendant light, illuminating the space with miniature charm.
- Wall Art: This whimsical kite flying art, printed on cardstock, adds a playful and colorful touch to the wall, enhancing the room’s dreamy ambiance.
Chic Sanctuary: Bedroom 2
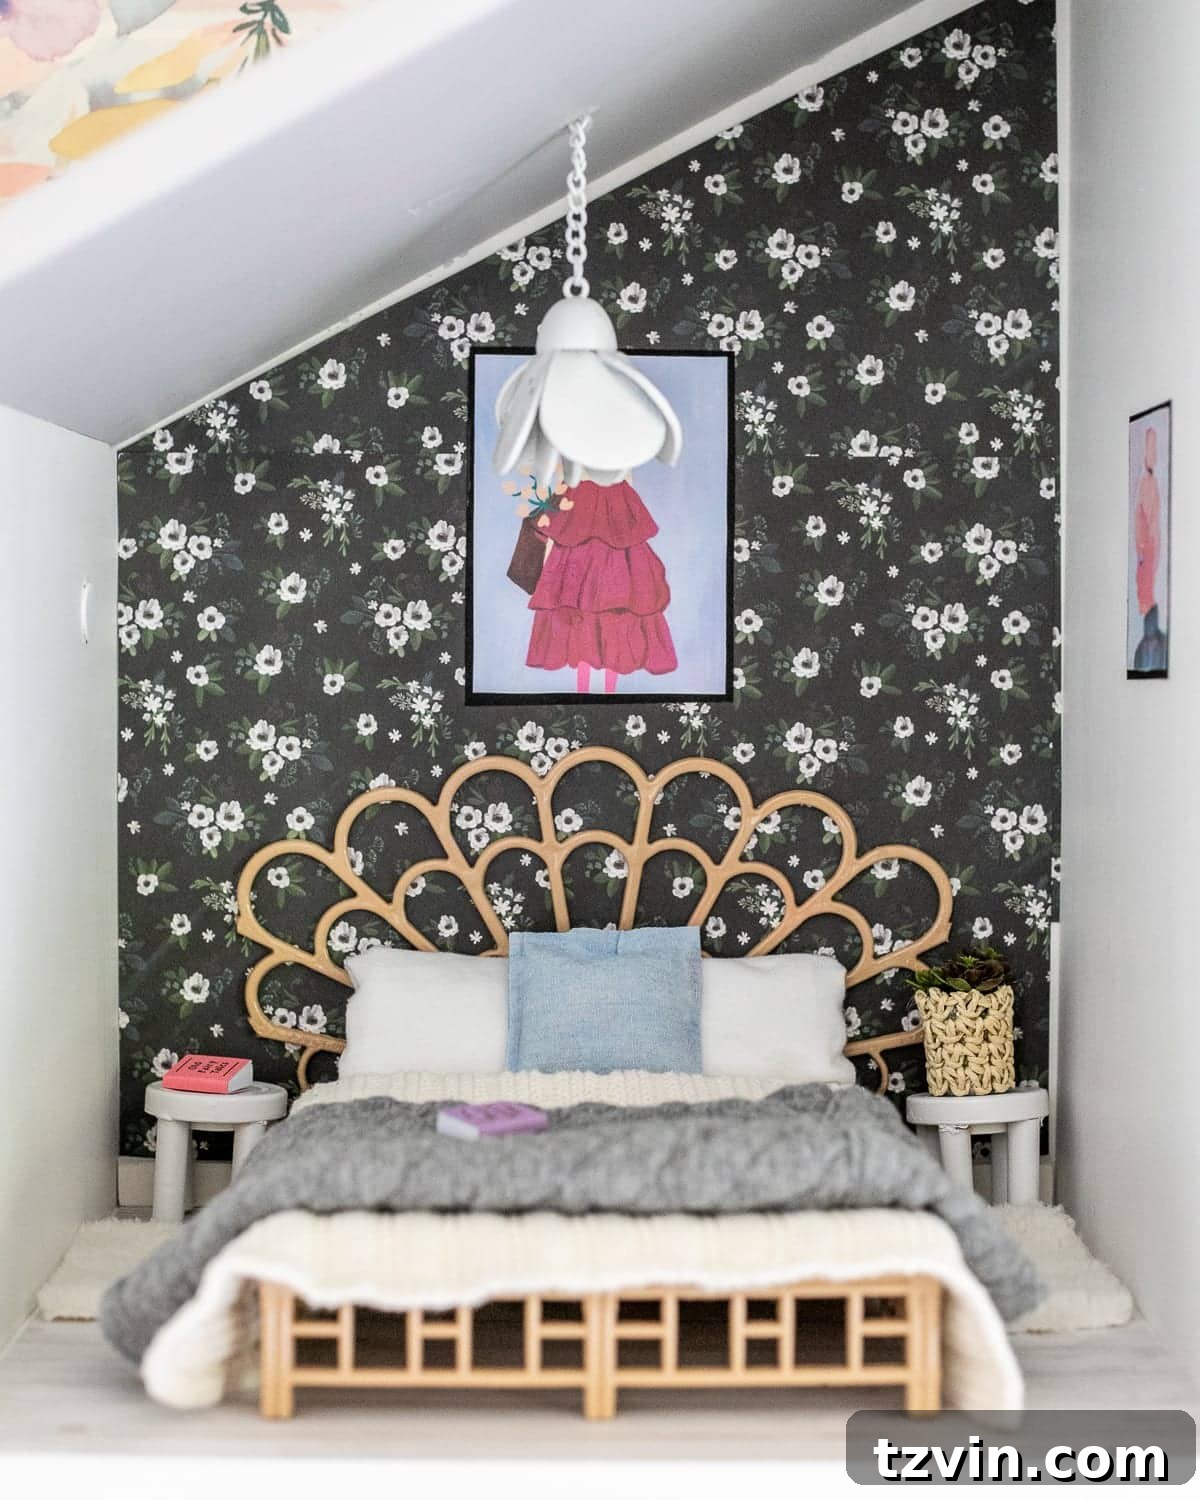
This second bedroom offers a distinct aesthetic, characterized by a fusion of vintage charm and contemporary artistic flair. It’s a testament to how mixing styles can create a rich, inviting miniature space:
- Bed: A captivating vintage Ebay find forms the centerpiece of this bedroom, lending a sense of history and unique style.
- Nightstands: These bespoke nightstands were ingeniously crafted by hot gluing pieces from my own collection of old toys, demonstrating how cherished items can be given new life and purpose.
- Miniature Book: A tiny book, sourced from fairy garden accessories, adds a whimsical and intellectual touch to the bedside table.
- Bedding: Just like in the first bedroom, the soft bedding was lovingly created from carefully cut-up old clothes, ensuring a cozy and lived-in feel.
- Planter Pot: A hairspray cap was transformed into a charming planter, adorned with straw hat remnants glued on. Tiny faux mini succulents were then hot glued inside, creating a vibrant miniature plant.
- Wall Art: To introduce a modern artistic element, this abstract portrait and this other abstract portrait were printed on cardstock and thoughtfully arranged on the wall, adding depth and visual interest.
- Chandelier: A spray-painted keychain was ingeniously repurposed into a sparkling miniature chandelier, providing a touch of glamour and sophisticated lighting.
- Sheepskin Rugs: Plush sheepskin rugs were created from cut-up fleece mittens, adding luxurious texture and warmth to the floor beside the bed.
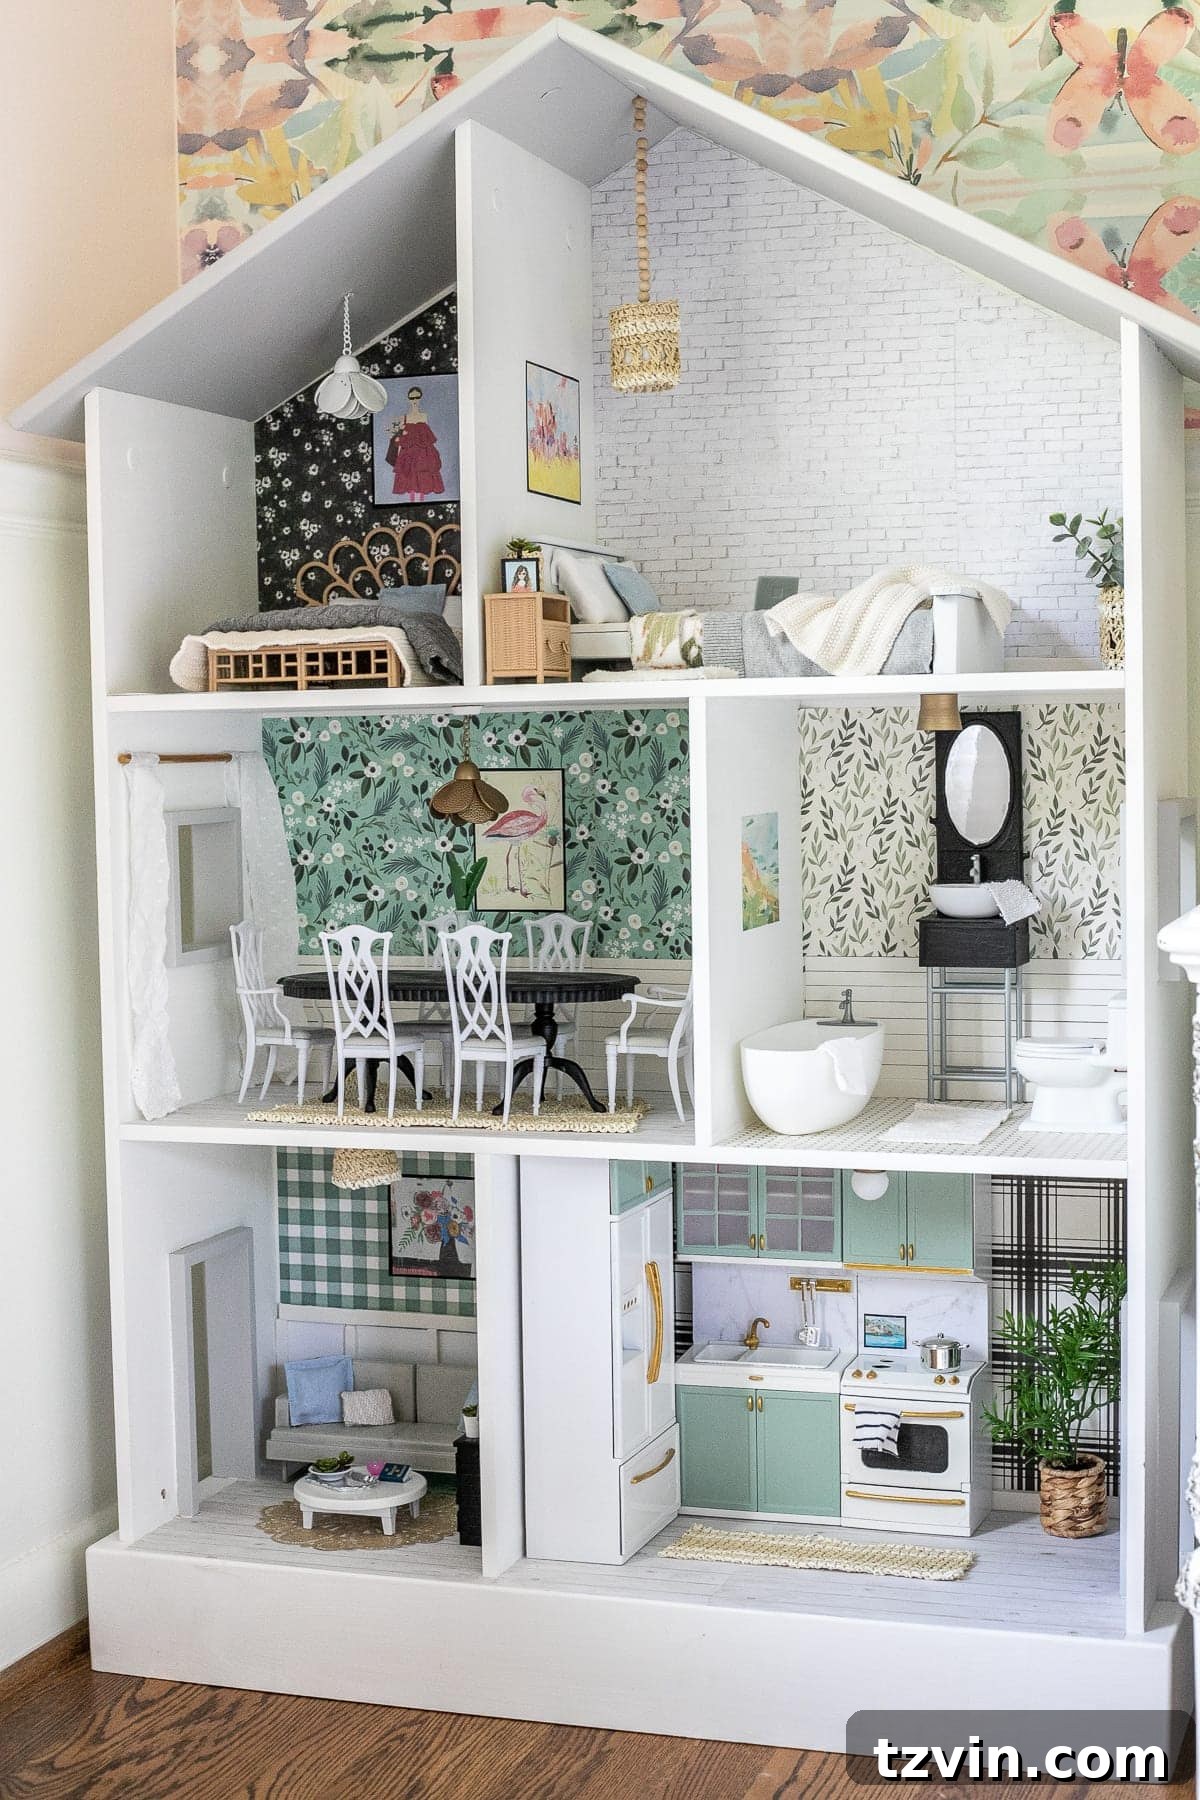
Every room carefully designed, creating a cohesive and inviting miniature home.
The Unexpected Joy of Miniature Crafting
I must admit, I always found those tiny toy videos on YouTube a bit peculiar. However, after dedicating myself to this dollhouse makeover, I completely understand the immense appeal of miniature crafting. It is incredibly fun and deeply satisfying! Be warned, though: once you start delving into the charming world of tiny details and repurposing everyday items, it’s remarkably hard to stop. Each small success fuels the desire to create more, to perfect every minuscule element, turning what began as a simple project into a truly passionate pursuit.
General Tips for Your DIY Dollhouse Project
To ensure your dollhouse makeover is as smooth and successful as possible, consider these additional tips:
- Plan Your Layout: Before you start gluing, sketch out your ideas for each room. Consider color schemes, furniture placement, and where you want accent walls or special features.
- Measure Twice, Cut Once: This age-old advice is especially true for miniatures. Precision makes a huge difference in the final look of your wallpaper, flooring, and fabric elements.
- Layer Textures: Combine different materials like scrapbook paper, fabric scraps, and natural elements (like straw or tiny twigs) to add depth and visual interest to your rooms.
- Paint Smart: When spray painting plastic furniture, use light, even coats to avoid drips and ensure a smooth finish. For small details, use fine-tipped brushes and acrylic paints.
- Involve Your Kids: Make it a collaborative project! Let them choose colors, wallpaper, or even help with simple tasks like cutting fabric. This fosters their creativity and makes the dollhouse even more special to them.
- Think Outside the Box: Challenge yourself to see potential in everyday objects. A bottle cap can be a stool, a bead can be a doorknob, and a piece of sponge can be miniature food.
- Safety First: When using a hot glue gun, always exercise caution to avoid burns. Supervise children closely if they are helping.
Where to Find More Dollhouse Inspiration
The miniature world is vast and full of incredible talent. If you’re looking for even more dollhouse ideas and creative inspiration, these excellent resources are fantastic places to start:
- The Hartley Home
- Tiny House Calls
- Sweet Tiny Houses
- Amy Pigliacampo
- Mini Adventures Co.
- Remington Avenue
- Life in a Dollhouse
- Lavender Belle Miniatures
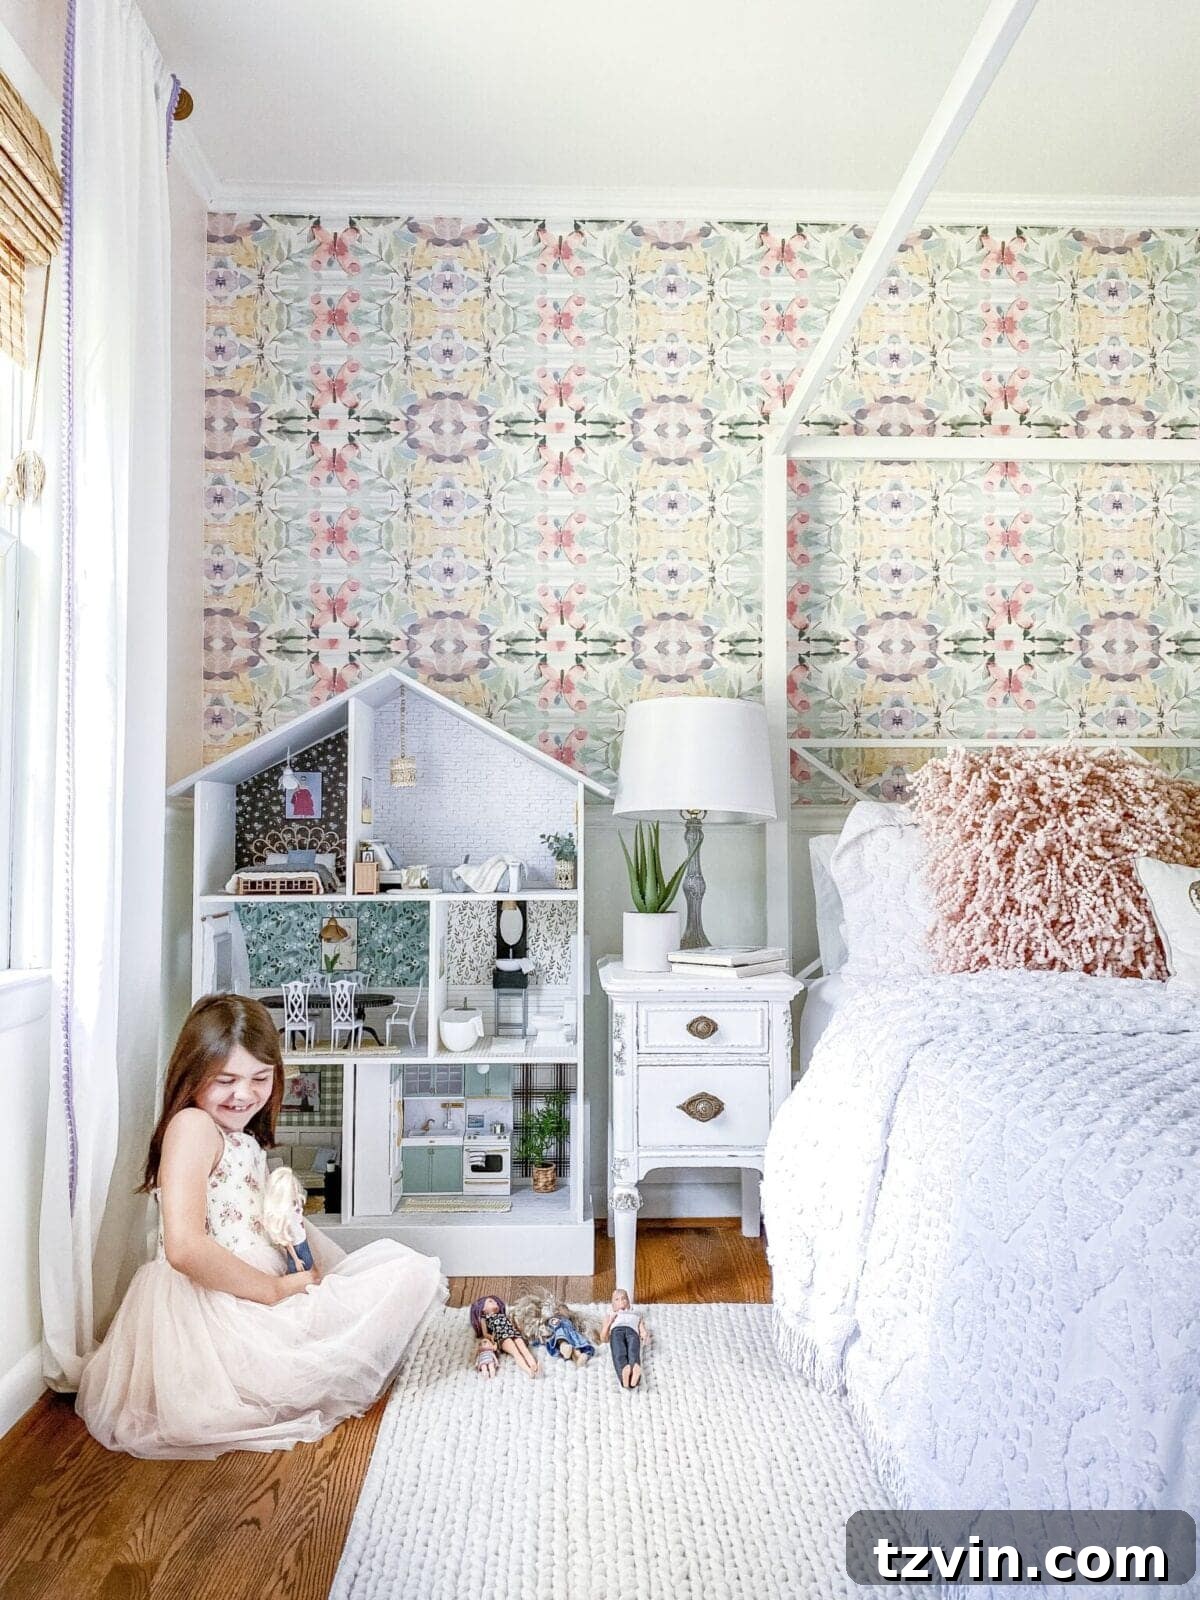
The finished dollhouse, ready for endless imaginative play.
Do you have any other favorite dollhouse accounts or bloggers you follow for inspiration? Or perhaps you’ve embarked on your own dollhouse makeover journey? Share your experiences and tips in the comments below!
Projects like this make me incredibly thankful for my girls. While it might be a little tough to see Olivia (and eventually Regan, when she’s older) play with and inevitably “destroy” this dollhouse through countless adventures and imaginative scenarios, every single hot glue burn and every late night spent crafting will be completely worth it. The joy and creativity it inspires are priceless. Thank heaven for little girls and their boundless imaginations!
P.S. Discover more creative ideas for kids’ decor here, from fun room transformations to engaging DIY projects.
P.P.S. If you want to save this post for future reference or inspiration, feel free to pin it here:
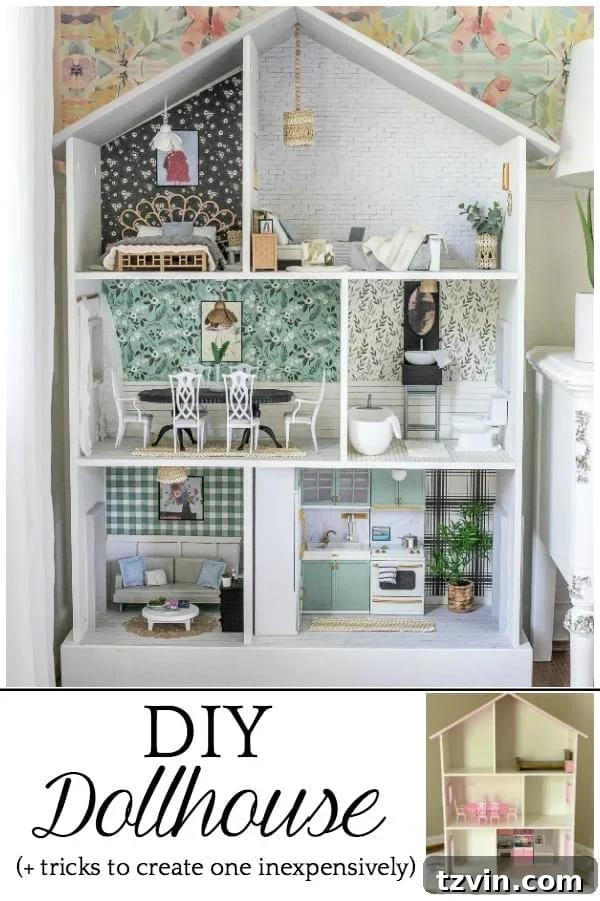
Pin this project to remember all the creative dollhouse makeover ideas!

Happy Crafting!
Frequently Asked Questions About Dollhouses
What is the most popular dollhouse scale?
What dollhouse scale do I need for Barbie?
Explore More DIY & Kids’ Decor Ideas
- DIY Narnia Wardrobe Reading Nook
- 30 Home Decor Items You Should Always Buy While Thrift Shopping
- DIY Ballet Barre and How to Hang Wall Decor on a Chair Rail
- 100 Best Cheap Gift Ideas for Babies, Kids, Tweens, and Teens
- 60+ Gift Ideas for Kids That Aren’t Toys