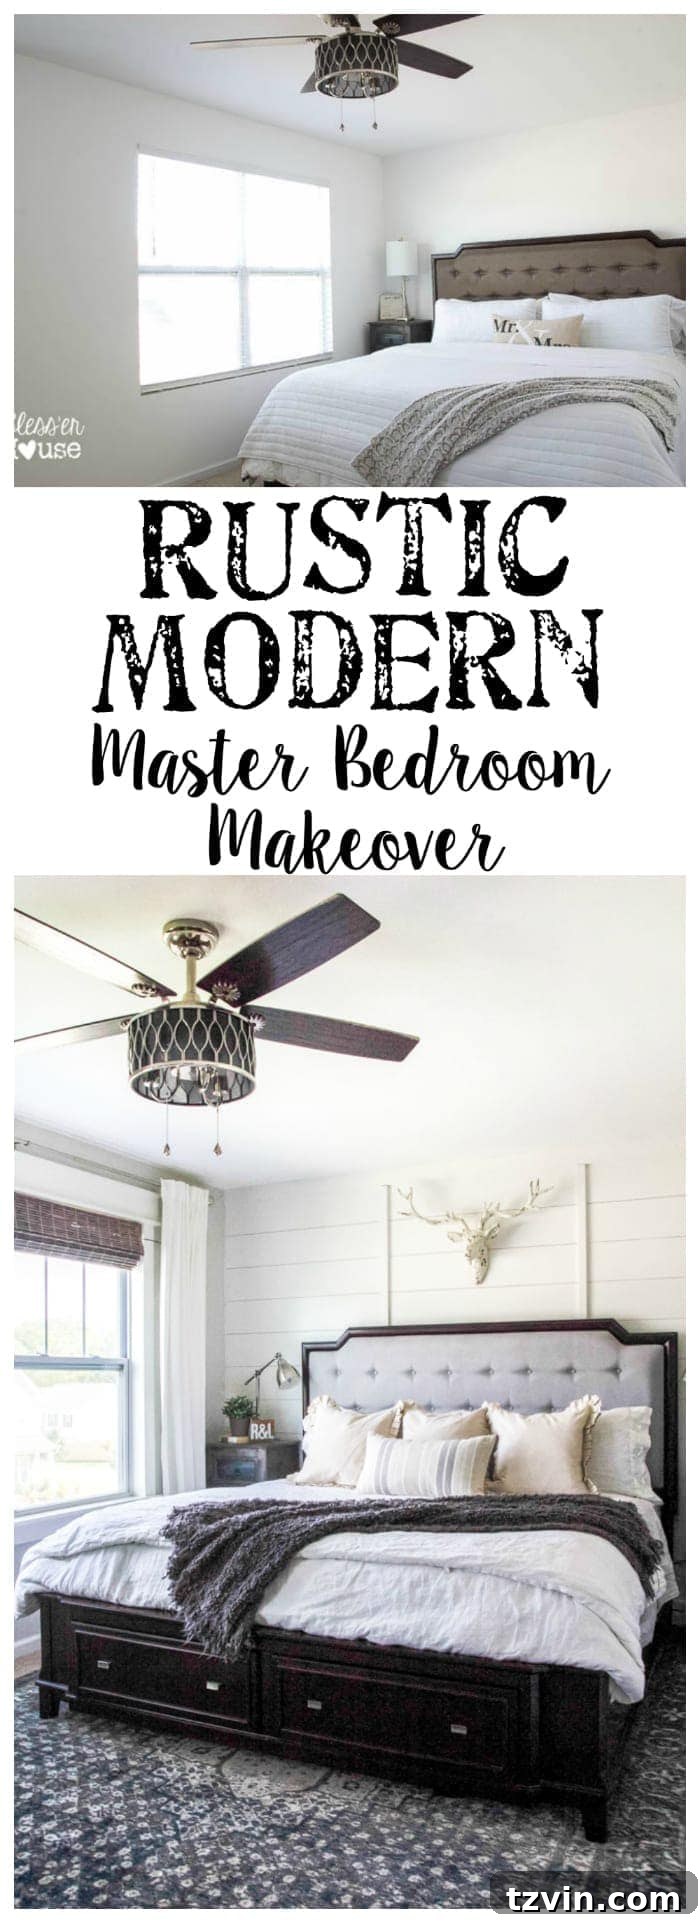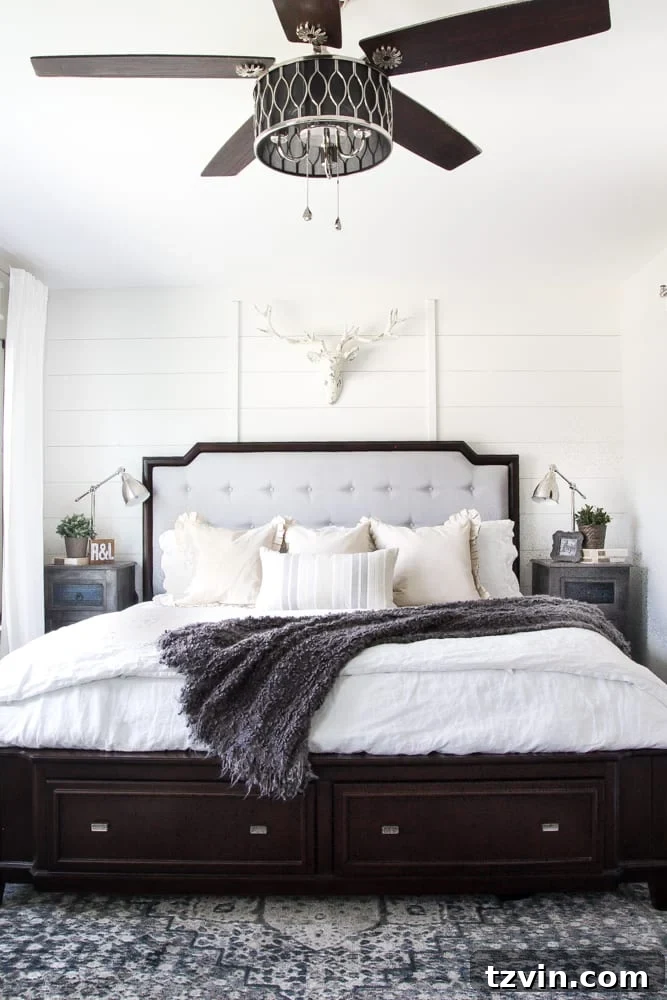
After months of dedicated effort, creative problem-solving, and a dash of DIY magic, we are thrilled to officially announce that our master bedroom makeover is COMPLETE! It feels incredibly satisfying to finally share the culmination of this journey, transforming a bland builder-grade space into a serene, stylish rustic modern sanctuary. Get ready for a full tour and all the details on how we achieved this dramatic transformation on a budget.
Rustic Modern Master Bedroom Reveal: Our Ultimate DIY Sanctuary
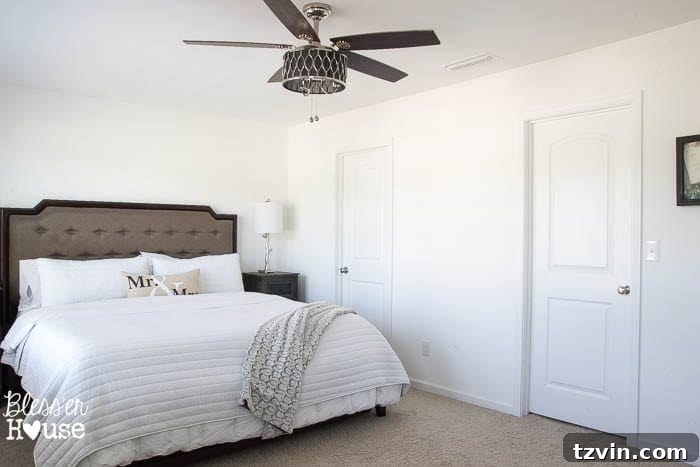
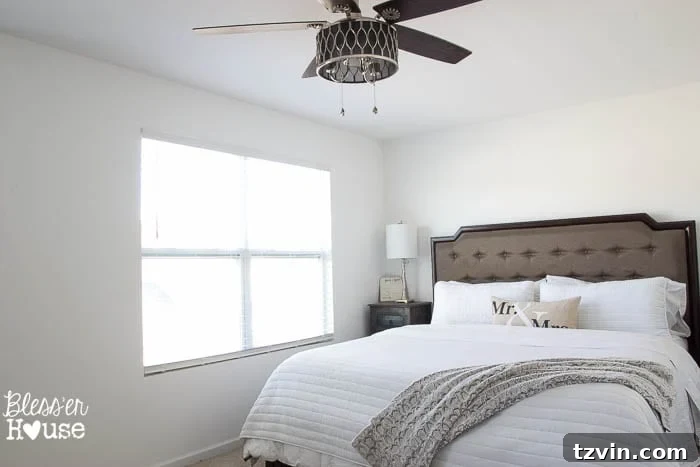
Just a year ago, this room was nothing more than a blank canvas – a stark white box devoid of personality, as you can see in the ‘before’ snapshot below. It was functional, yes, but far from inspiring. We knew it had immense potential, just waiting for the right touches to bring it to life and truly reflect our style.
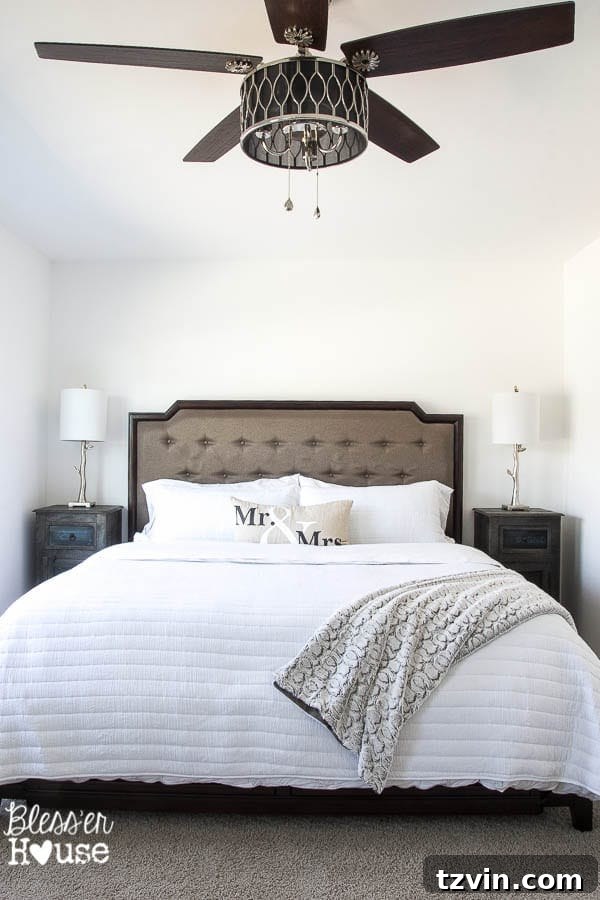
Every home has those ‘meh’ spaces that simply beg for an “oomph factor,” and our master bedroom was certainly one of them. We envisioned a retreat that blended the warmth of rustic elements with the clean lines of modern design, creating a space where both comfort and aesthetics coexist beautifully. The goal was to infuse character and coziness without breaking the bank, leveraging DIY techniques and smart sourcing. And now, the transformation is complete, boasting a look that truly speaks to our vision.
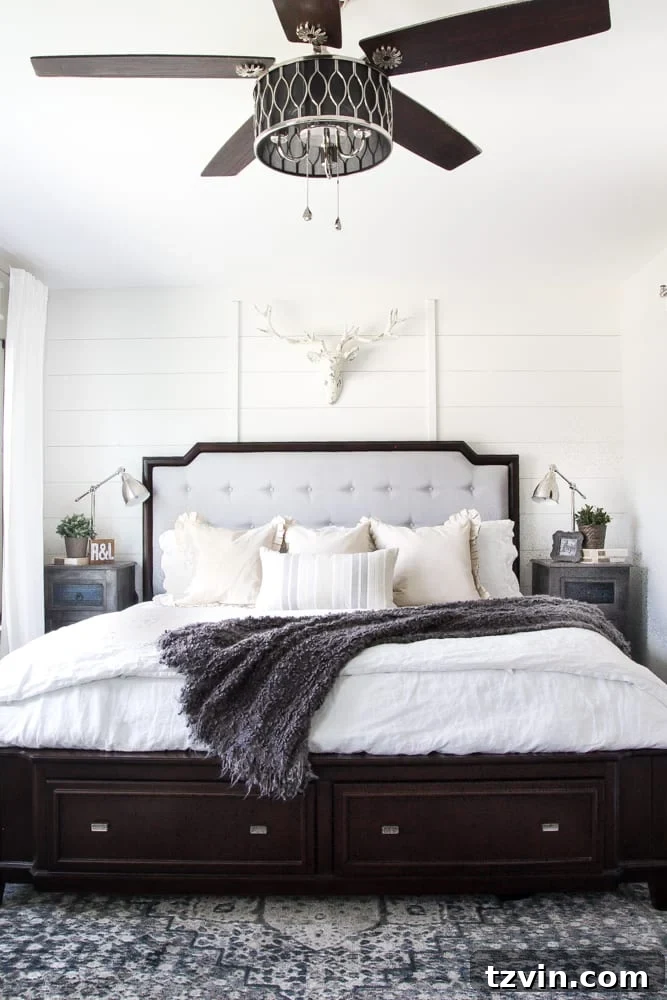
Crafting Our Rustic Modern Aesthetic
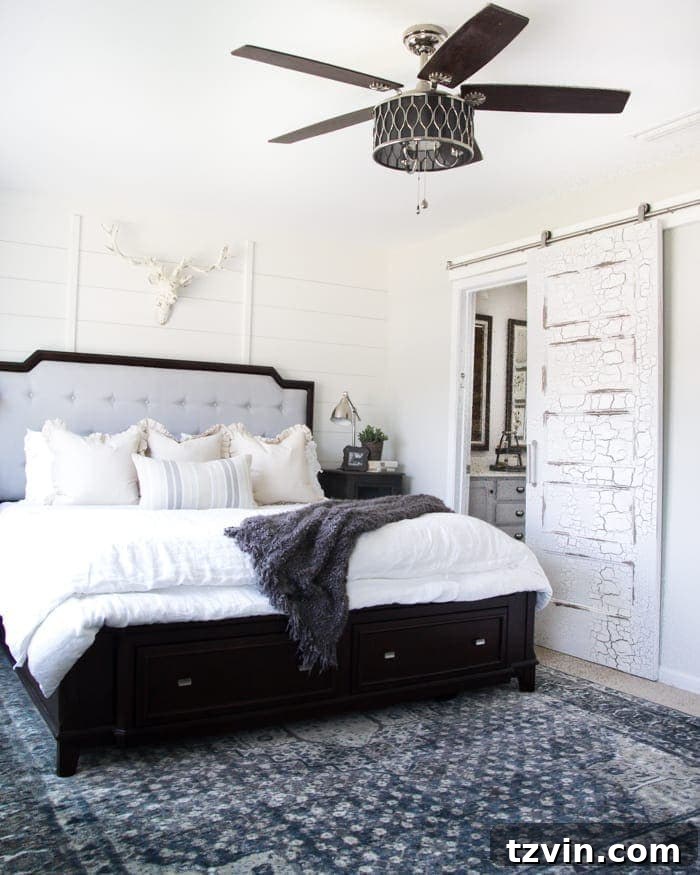
The final result leans slightly more modern than our initial concept, but it’s a balance we absolutely adore. It’s a testament to how design evolves organically, often guided by the pieces you find and the practical needs of your space. This bedroom now serves as our tranquil haven – a place where Robert and I can unwind, recharge, and even, on occasion, endure an early morning wake-up call from our energetic daughter, Olivia.
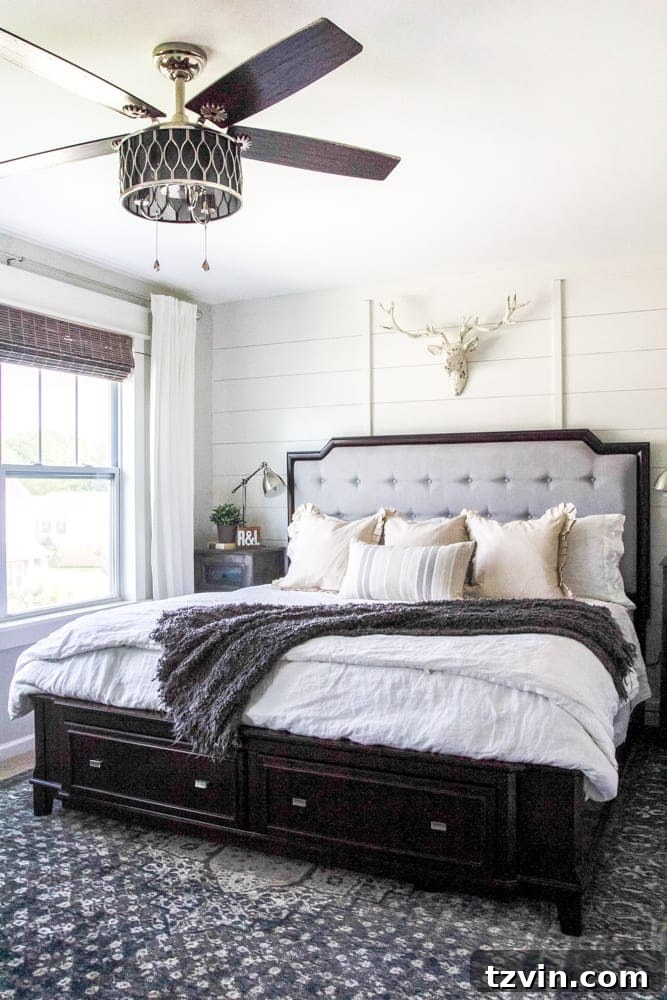
One of the core principles for this makeover was to maximize the potential of items we already owned. This not only kept costs down but also ensured a sense of continuity and personal history within the space. For instance, the ceiling fan, a frequent topic of reader inquiries, was an early purchase from Lowe’s. While that specific model has since been discontinued, its contemporary design still fits seamlessly with the updated aesthetic. For those seeking unique lighting solutions, we’ve explored many stylish, non-boring ceiling fan options here.
The Heart of the Room: Our Repurposed Bed
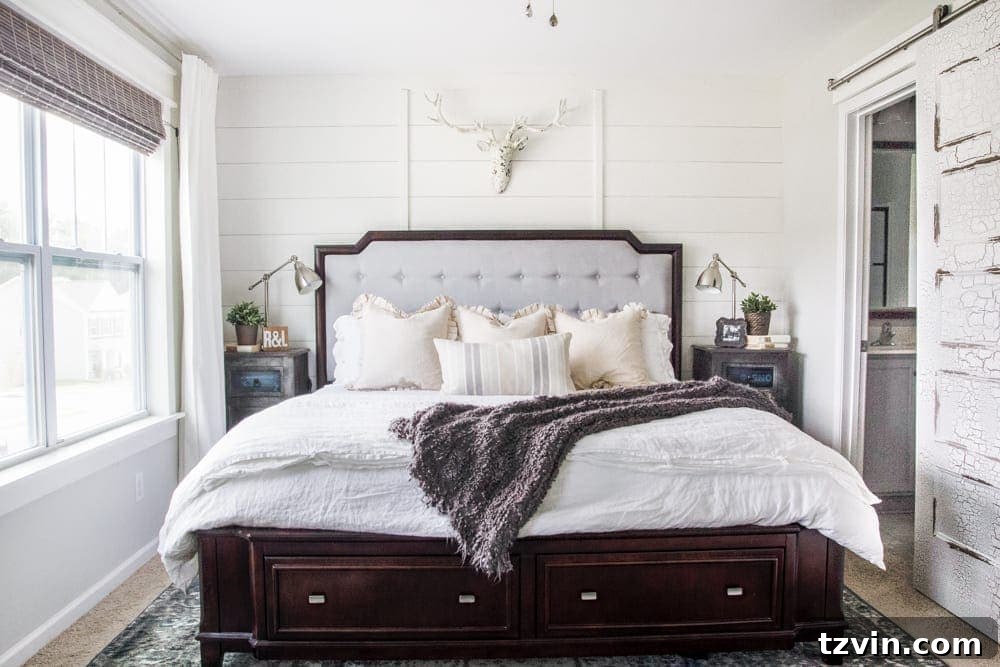
Our generously sized bed, originally from Ashley Furniture, was a key piece we wanted to retain. Rather than replacing it, we embarked on a budget-friendly DIY project: painting the upholstery a sophisticated gray. This quick fix proved incredibly effective, offering a fresh look without the expense of a new bed. Six months on, the fabric continues to hold up beautifully, a testament to the durability of upholstery paint and a fantastic way to refresh existing furniture.
Finding Form and Function: Nightstands that Inspire
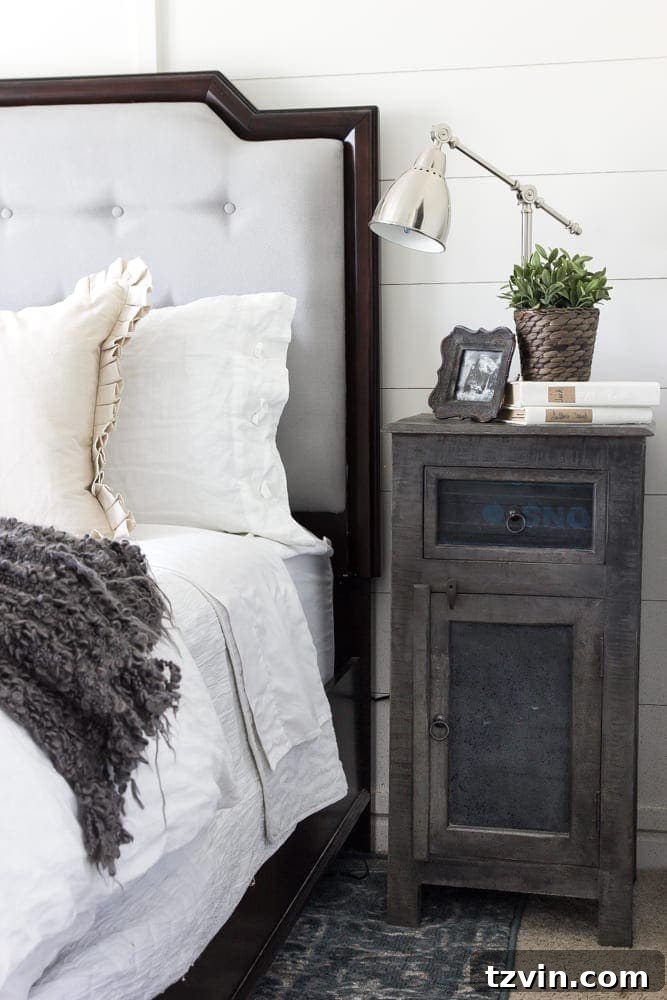
The search for the perfect nightstands presented a unique challenge. Our bed is quite tall, and the wall space next to it is relatively narrow. We needed pieces that offered both storage and style without overwhelming the area. We eventually discovered these distinctive nightstands from Nadeau, and they were love at first sight. Their “funky” character perfectly complemented our emerging vision, becoming an unexpected source of inspiration for the rest of the room’s design elements.
The Game-Changer: Sliding Barn Doors
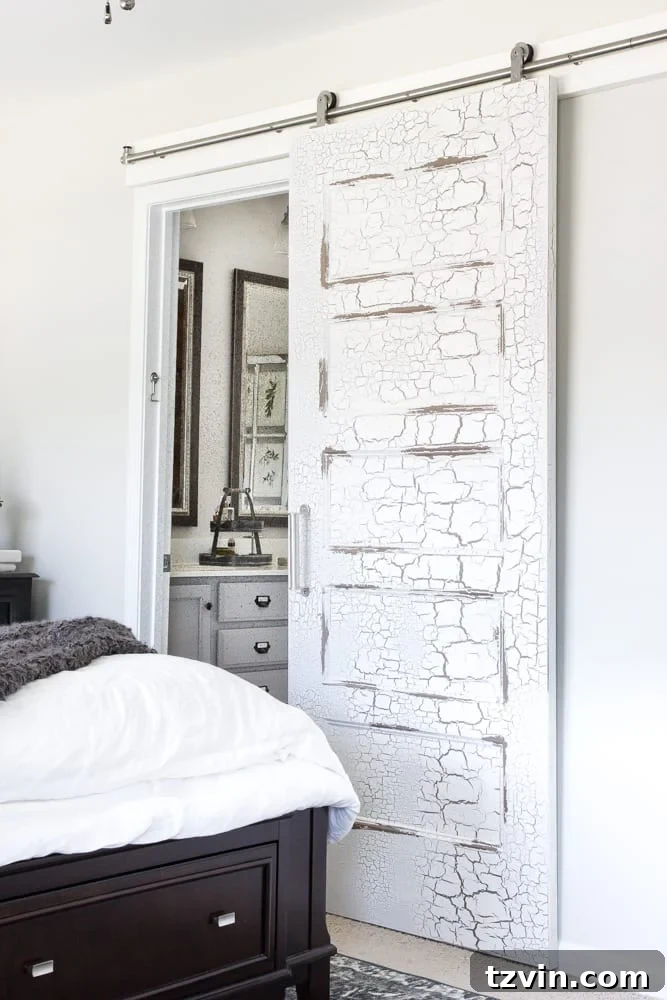
Perhaps the most impactful DIY project in this makeover, and certainly one of our favorites, is the installation of our sliding barn doors. The original hinged doors felt like an afterthought, creating awkward traffic patterns and limiting valuable space. Before, the bathroom door constantly clashed with the shower door, a daily nuisance that screamed for a functional upgrade.
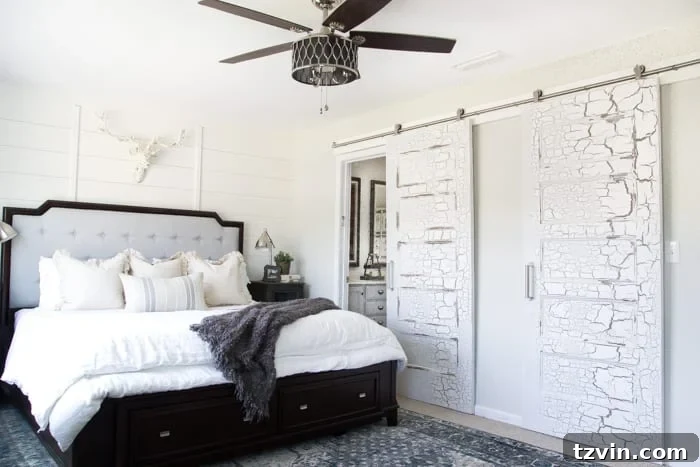
The shift to sliding barn doors solved this functional dilemma beautifully, eliminating swinging doors and instantly expanding our usable space, particularly in the closet area. Beyond the practical benefits, they introduce a significant architectural element, adding rustic charm and visual interest that the room desperately needed.
The Art of Distressing: Adding Texture and Character
The distressing process for these hollow core doors involved a lot of experimentation, but the final outcome was well worth the effort. We wanted to infuse the wall with texture and a sense of history, and the distressed finish achieved just that, transforming a flat surface into a focal point. This DIY technique is fantastic for adding character and depth to otherwise plain doors or furniture, playing perfectly into the rustic modern vibe.
Details that Define: Bedding, Decor, and Paint
When it came to bedding and towels, our preference for crisp whites remains unwavering. White linens offer a timeless elegance and the practical benefit of easy bleaching, ensuring a consistently clean and fresh feel. This choice also provides a beautiful contrast against our dark furniture, maintaining a light and airy atmosphere throughout the room.
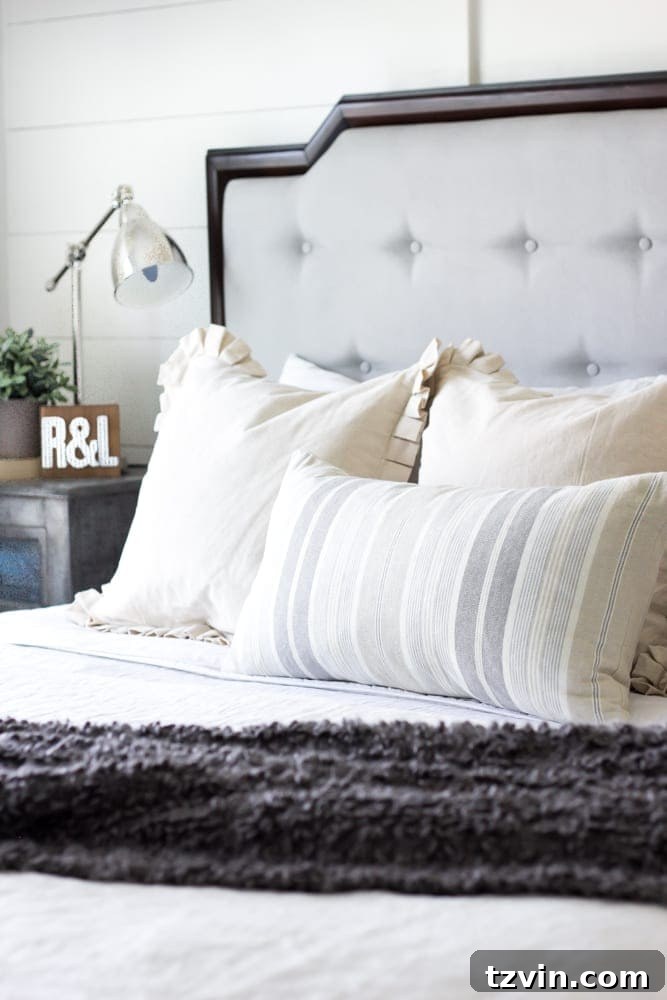
To complement the bedding, we selected simple linen and cotton pillows. Their understated texture and neutral tones ensure they don’t compete with the intricate pattern of our area rug, allowing each element to shine without overwhelming the senses.
Personal Touches: Decorating with Meaning
One of the most talked-about pieces in our bedroom is the faux taxidermy deer head, affectionately named “Pat the Deer.” While faux taxidermy isn’t for everyone, and we’ve certainly received comments about it, it holds significant sentimental value for us. It’s a cherished reminder of our honeymoon in Asheville, NC, where we stayed at The Grand Bohemian Hotel. The hotel’s unique modern glam hunting lodge decor, complete with antler chandeliers in our suite, left a lasting impression. I made a promise to myself then that I would incorporate antlers into our future home decor, and Pat is the beautiful fulfillment of that promise.
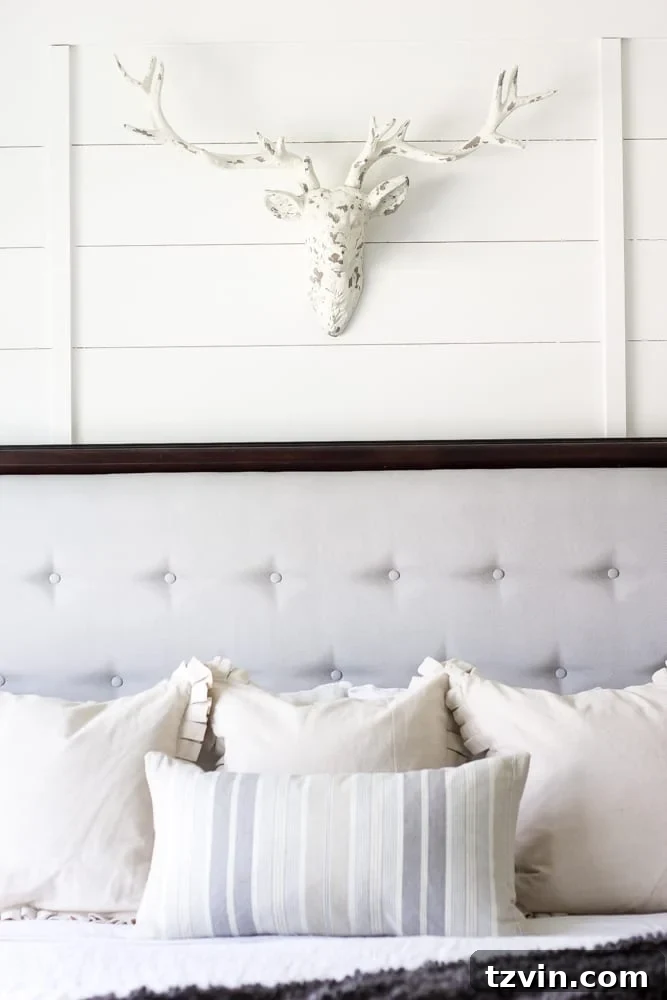
This brings us to an important decorating philosophy: your home should be a reflection of *you*. Decorate with pieces you love, that tell your story, and that bring you joy. Don’t let external opinions dictate your personal style. It’s your sanctuary, and it should feel authentic to you.
Elevating Windows with DIY Charm
Our windows, originally quite plain, were given a significant upgrade to enhance their character and create the illusion of greater size. We implemented our favorite three-part combo: DIY Craftsman trim, natural woven shades, and elegant long white curtains. This layered approach adds depth, texture, and a custom, high-end feel, proving that even builder-grade windows can be transformed into beautiful architectural features.
The Striking Planked Board and Batten Wall
Another DIY project that continues to delight us is the DIY planked board and batten accent wall. This feature instantly added architectural interest, texture, and a custom feel that perfectly anchors the room’s design. It’s a relatively simple project with a massive visual impact, proving that thoughtful DIY elements can truly transform a space from ordinary to extraordinary.
A Craigslist Find Transformed: The Dresser
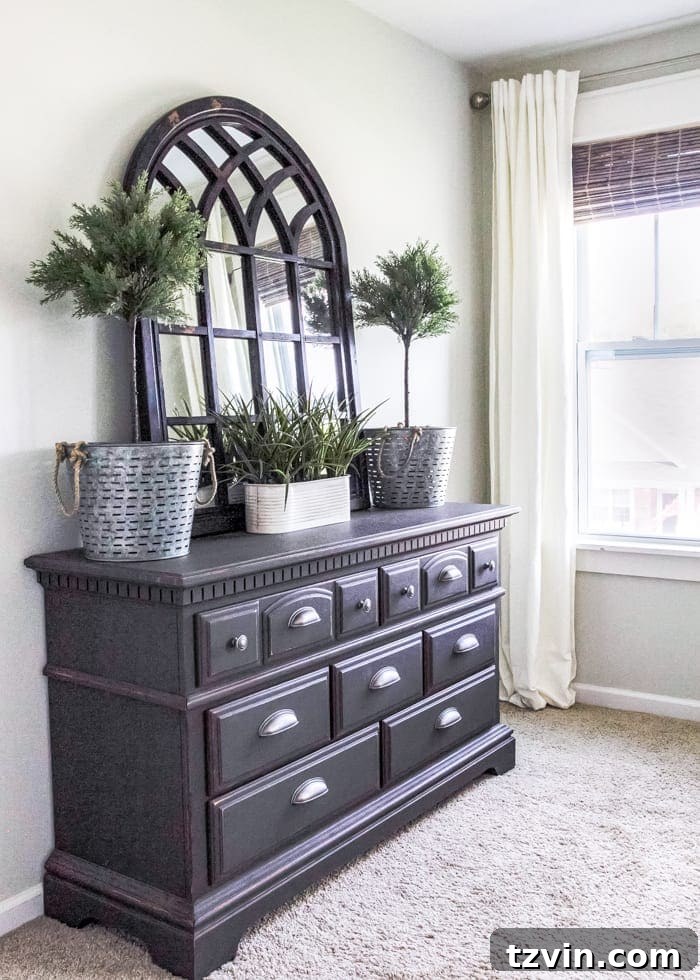
The wall opposite our bed once featured a rather uninspired dresser, a quick Craigslist acquisition made out of necessity when we first moved in. While it served its purpose of storing clothes, it lacked aesthetic appeal.
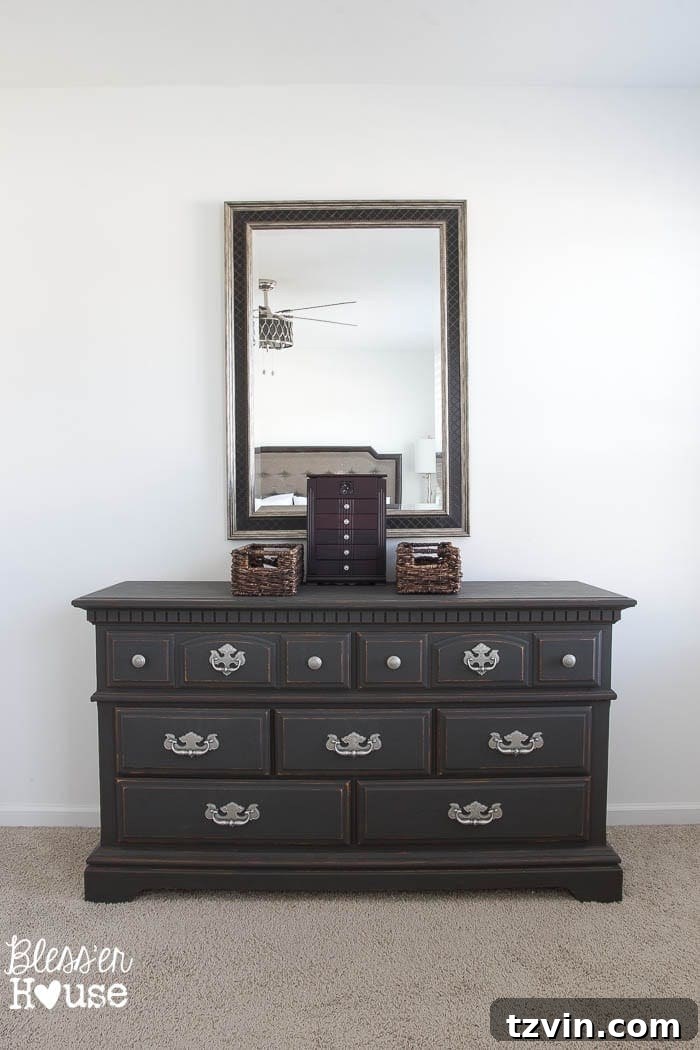
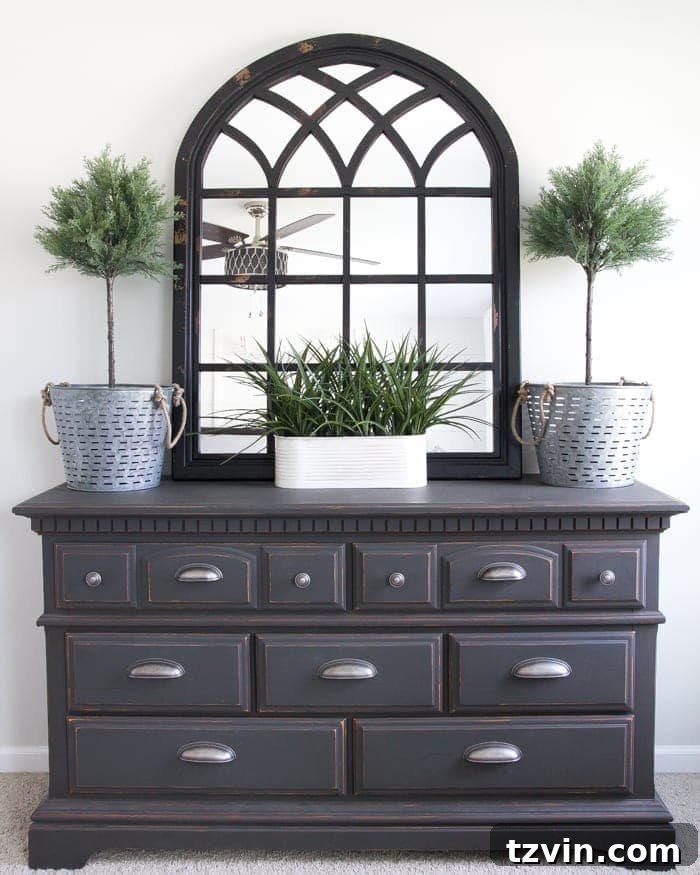
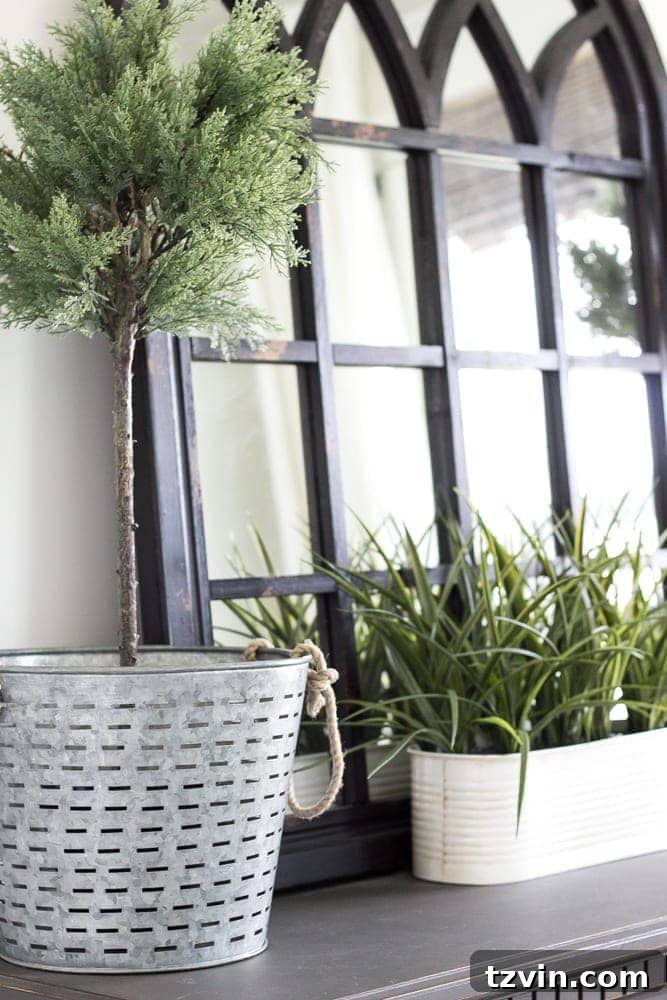
A simple yet powerful upgrade was swapping out the old hardware for new knobs and pulls. This small change made a significant difference, instantly elevating its look and better integrating it into the room’s rustic modern theme. The addition of a stylish mirror and elegant topiaries further enhanced the vignette, creating a more refined and purposeful feel.
The Perfect Hue: Benjamin Moore Moonshine
For the wall color, we chose Benjamin Moore Moonshine. This beautiful, very neutral, and light gray proved to be the ideal backdrop for our rustic modern vision. It strikes the perfect balance, offering a sense of calm and sophistication without feeling cold. Moonshine has quickly become one of our go-to paint colors for its incredible versatility and ability to brighten any space.
Budget & DIY Insight: A Worthwhile Investment
This master bedroom makeover set a new record for us in terms of both time and money. While we usually aim to complete room transformations within a couple of months, this project stretched over a year. The staggered approach, however, allowed us to slowly acquire pieces, tackle DIY projects one by one, and truly refine our vision. The result, though a longer process, was undoubtedly worth the wait.
We were genuinely surprised by the grand total of our expenses, exceeding $2,000 for this room. This is a rare occurrence for us, with the exception of our kitchen remodel, which was a project of a different scale entirely. However, when you consider that items were slowly added over a year, with numerous trips to stores like IKEA and HomeGoods, it’s easy to see how the costs accumulated. This process taught us the value of meticulous tracking, even for smaller purchases, as they certainly add up over time.
Budget Breakdown: Sources for Your Own Makeover
Here’s a detailed breakdown of the costs for our rustic modern master bedroom makeover. Please note that some affiliate links are provided below for your convenience, which means we may earn a small commission if you make a purchase through them (for more information, see our full disclosure here).
- Wall paint (Benjamin Moore Moonshine in Glidden matte paint) – $60
- DIY planked board and batten wall – $106
- Planked wall paint (Sherwin Williams Alabaster in Glidden semi-gloss paint) – $30
- DIY window trim – $70
- Curtains – $50
- Driftwood Roman shades – $83
- Nightstands (similar ones linked) – $400
- DIY distressed hollow core doors – $108.52
- 2 sliding barn door hardware kits – $399.98
- Lamps – $69.98
- Faux stag head – $56 (on sale + a coupon)
- Blue medallion rug – $306.48
- Window mirror – $135.99
- Topiaries (bought on clearance at IKEA, now discontinued – similar linked) – $19.98
- Galvanized olive buckets – $39.98
- Artificial grass planter (similar linked) – $19.99
- Artificial sage plants – $11.98
- Linen duvet set – $89.99
- Stripe lumbar pillow – $19.99
- Linen ruffle pillows – $59.97
- Gray throw blanket – $29.99
- Dresser knobs and pulls – $57.19
TOTAL: $2,225.01
(Note: Our existing furniture, such as the bed and dresser, was not included in this budget, as it was acquired prior to the makeover, and costs were no longer readily available.)
Catch Up on Our Bedroom Makeover Journey
If you’ve been following along or just discovered our master bedroom’s transformation, here are all the posts detailing our progress from the very beginning, offering step-by-step guides and insights into each DIY project:
- Modern Rustic Master Bedroom Design Plan
- Finding the Perfect Nightstands
- The Trick to Get Designer Paint Colors on the Cheap
- DIY Planked Board and Batten Focal Wall Installation
- DIY Planked Board and Batten Focal Wall Reveal
- 3 Must-Do Tricks to Upgrade Plain Windows
- New Rug in the Master Bedroom
- How to Distress Hollow Core Doors
- Beginner’s Guide to Painting Upholstery
- How to Distress Hollow Core Doors
- How to Install Sliding Barn Doors
- Adding Pulls to the Barn Doors
What’s Next? The Playroom Transformation!
With the master bedroom officially checked off our list, our attention now turns to an even more ambitious project: the playroom! This space is set to undergo a massive transformation, and we are incredibly excited to share our plans and progress with you. We’re currently developing the design, largely guided by our previous playroom design concepts, while incorporating some fresh adjustments to make it truly spectacular.
Do you have any significant room makeover plans on your horizon? Have you recently completed a decorating project that fills you with pride? We’d love to hear all about it! Share your stories, tips, and triumphs in the comments below!
If you found inspiration in our rustic modern master bedroom reveal, don’t forget to save this post for future reference!