Transform Your Closet: The Ultimate IKEA Billy Bookcase Built-In Hack
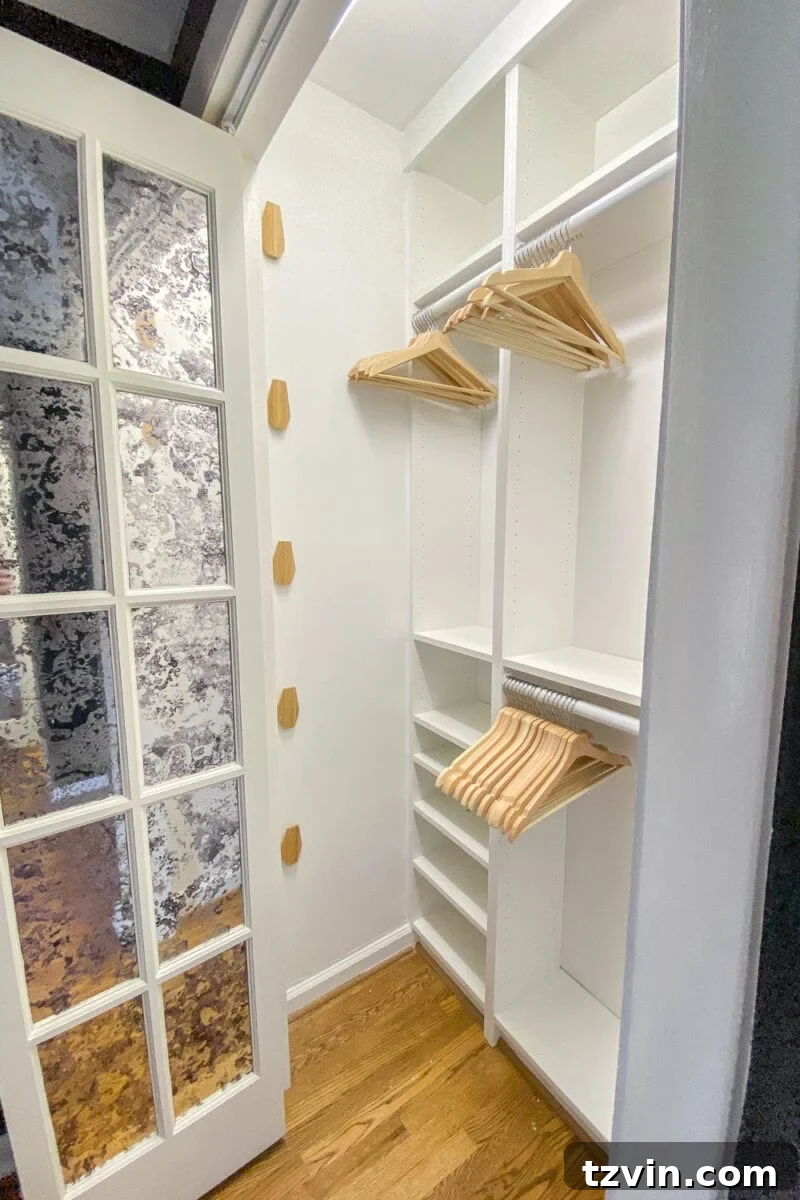
Unlock the potential of your bedroom closets with this comprehensive, step-by-step tutorial on creating custom built-ins using affordable IKEA Billy bookcases. Discover how to achieve a high-end, organized look on a budget, complete with a detailed budget breakdown and a 4-year review of its durability.
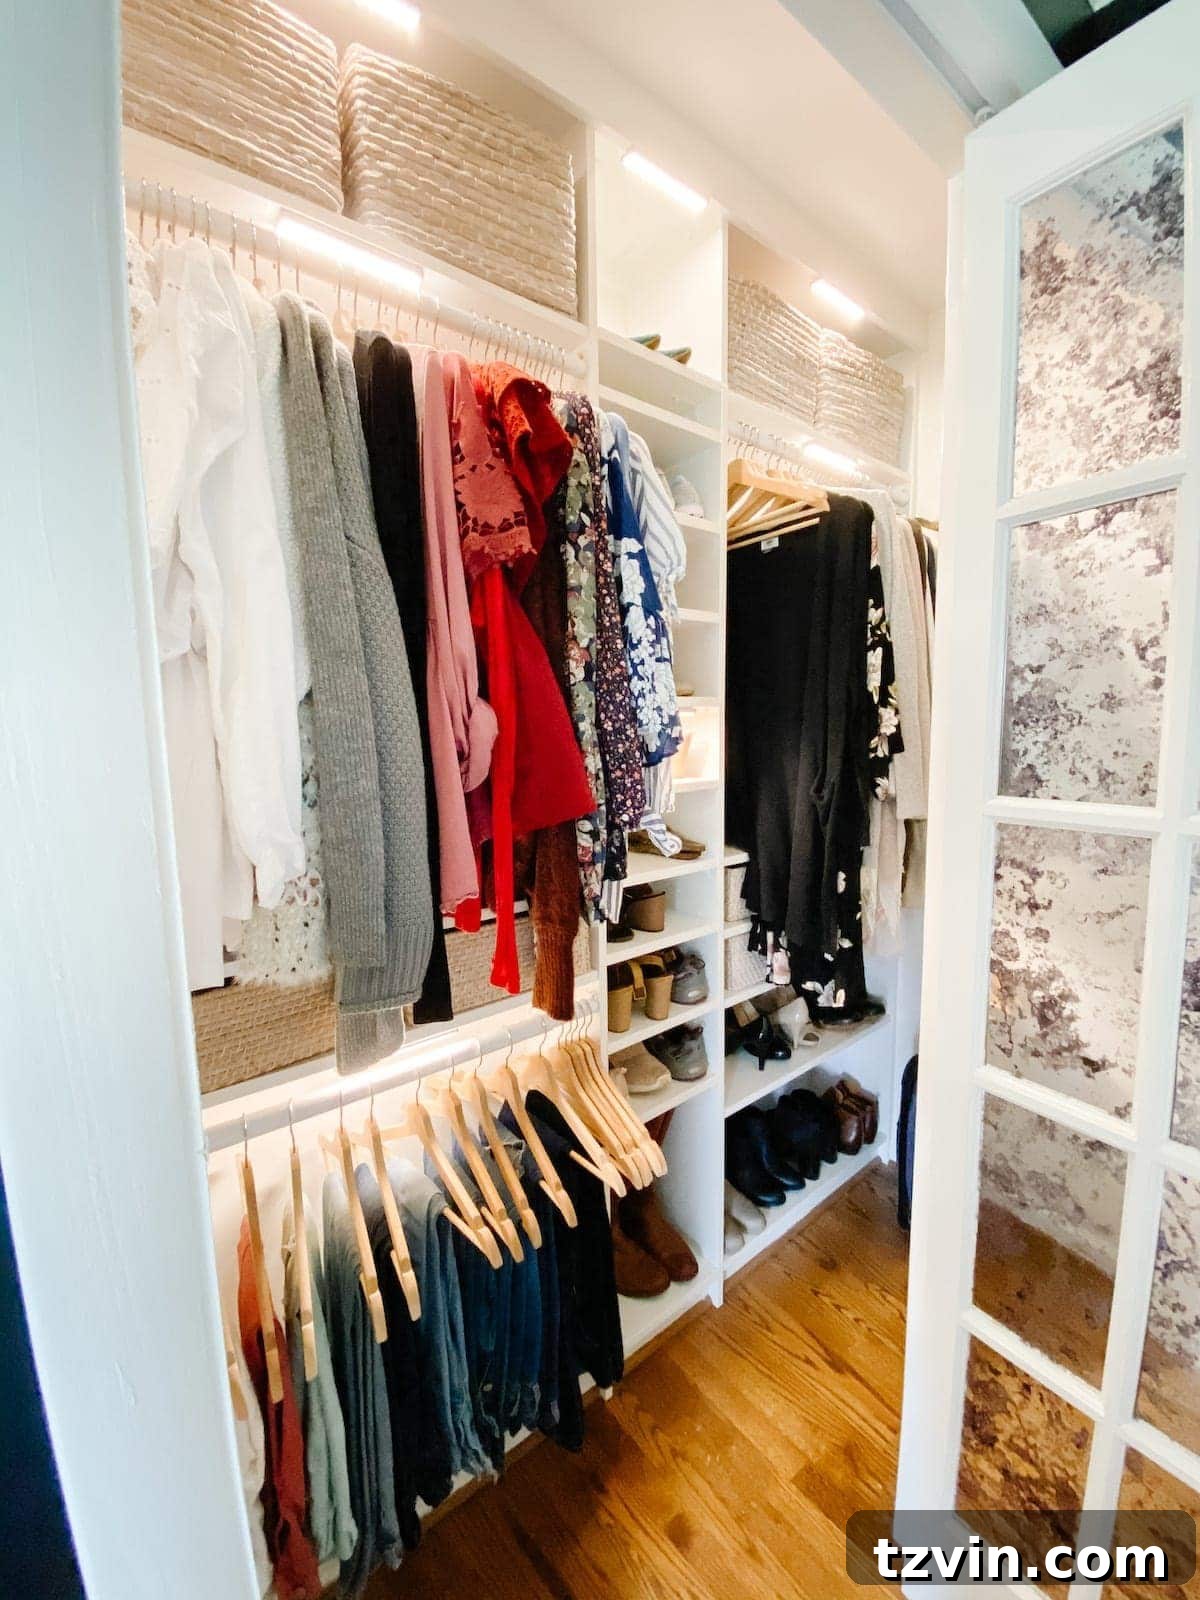
IKEA continues to be a treasure trove for brilliant, budget-friendly storage solutions, and this time, it’s transforming bedroom closets. Over the years, we’ve leveraged IKEA furniture for various DIY projects, from built-in bookcases and custom cabinets to home office storage and pantry organization. However, our DIY IKEA closet hacks using Billy bookcases stand out as some of our most impactful and satisfying transformations.
While many inspiring IKEA PAX closet system ideas exist, the PAX system’s dimensions often prove challenging for smaller or unusually shaped spaces. Our tiny bedroom closets, for instance, were simply incompatible with the standard PAX units. This led us to discover the IKEA Billy bookcase hack as the perfect, flexible, and cost-effective alternative to create the custom closet systems we’d always envisioned.
Four Years Later: Unwavering Durability! We originally undertook these closet built-in projects four years ago, and we are thrilled to report that they are holding up perfectly. The structure remains solid, the paint fresh, and the functionality just as excellent as the day they were installed. This long-term performance truly speaks to the durability and value of this IKEA hack, making it a reliable solution for anyone seeking a lasting custom closet.
Why IKEA Billy Bookcases are the Ideal PAX Alternative for Small Closets
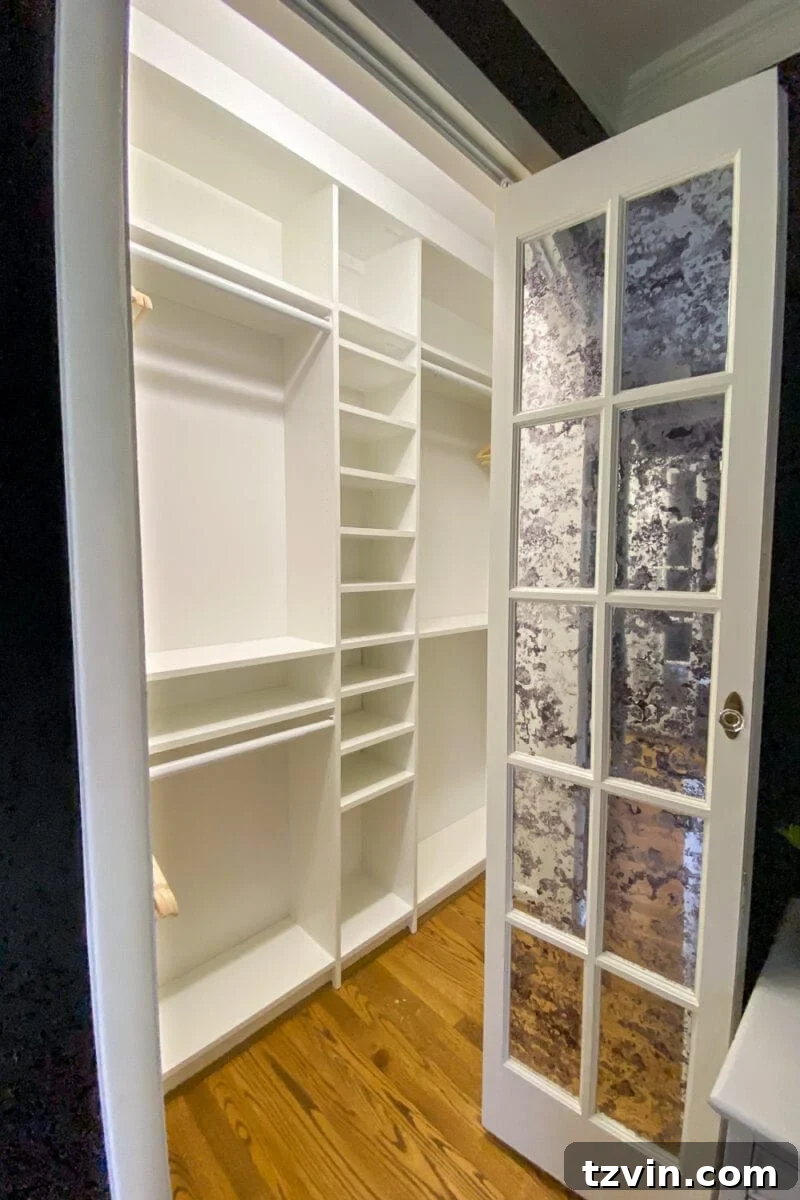
Many dream of the highly customizable IKEA PAX wardrobe system, but it’s not a one-size-fits-all solution. In fact, for many homeowners with older homes or unique closet dimensions, the PAX system can be more of a hindrance than a help. We learned this firsthand when attempting to fit PAX units into our compact closets. After carefully measuring and re-measuring, we realized that forcing the PAX system into our space would result in significant wasted areas and a less-than-optimal layout. This discovery led us back to IKEA to exchange our PAX boxes for the more adaptable Billy bookcases.
If you find yourself with a small closet where standard IKEA PAX wardrobes just won’t fit, don’t despair! This custom closet alternative using Billy bookcases offers an ingenious way to create efficient, built-in storage solutions that maximize every inch of available space. Before this transformation, we struggled with flimsy, often broken wire shelves that offered minimal functionality. Smaller items had no designated home, and shoes inevitably ended up in a chaotic pile on the floor.
This DIY tutorial provides the perfect blueprint for achieving a sophisticated, custom built-in look and superior organization in your entire closet, often at a lower cost than a full PAX system. It’s about working with your space, not against it, to create a truly personalized storage haven.
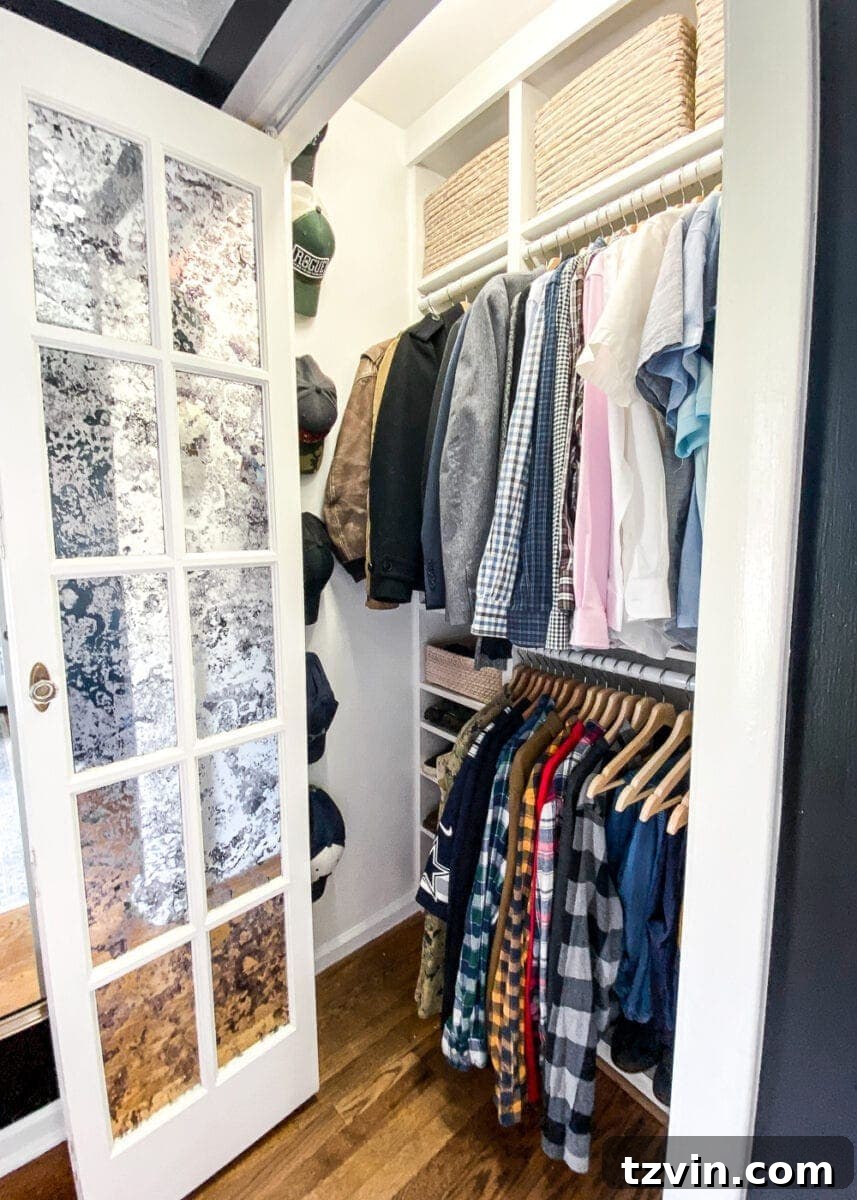
How to Create Your Custom IKEA Closet with Billy Bookcases
This guide offers detailed instructions for two common closet types: a reach-in closet and a small walk-in closet, demonstrating the versatility of the Billy bookcase system.
Essential Supplies for a Reach-In Closet Makeover
Before you begin, gather these materials to ensure a smooth and efficient project:
- 1 – 31 1/2″ x 79 1/2″ Billy Bookcase (Standard width)
- 1 – 15 3/4″ x 79 1/2″ Billy Bookcase (Narrow width)
- 1 – 31 1/2″ Billy Height Extension Unit
- 1 – 15 3/4″ Billy Height Extension Unit
- 8 – Skuggis Hooks (for additional hanging storage)
- 2 – Pull-out Tie Organizer Racks
- 5 packs of Bumerang Hangers (Matching hangers elevate the look)
- 3 Adjustable Closet Rods
- 1 – 1×4 MDF Strip (for trim work)
- Finishing Nailer
- Table Saw (or any saw capable of straight cuts)
- Caulk
- Paint color matched to IKEA white in a satin finish
Estimated Total Cost: $324 (excluding power tools already owned)
Here’s a glimpse of the “before” situation in Robert’s closet—a common scenario of underutilized space and disorganization:
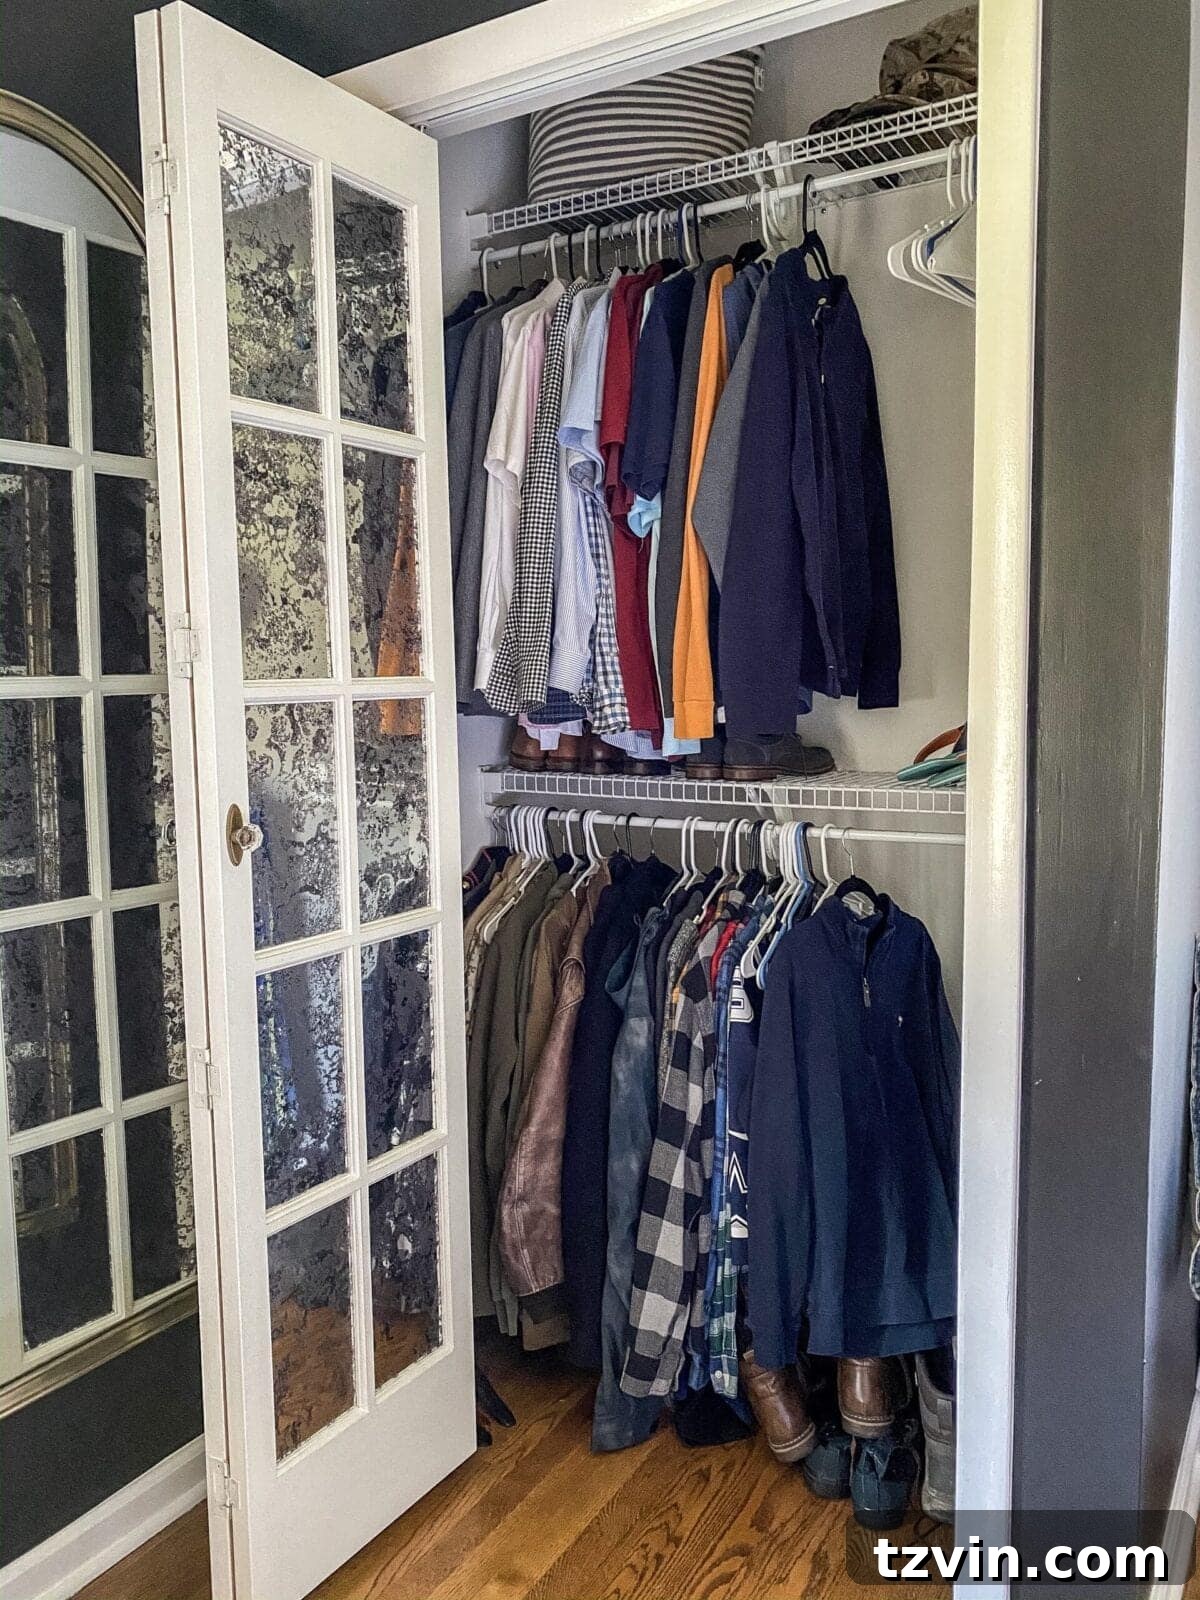
Step-by-Step Guide for a Reach-In Closet Transformation
Step 1: Clear the Space and Prepare Walls
Begin by completely emptying your closet. Remove all existing shelving, especially any old, inefficient wire racks. Carefully patch any nail holes or imperfections in the walls with spackle, ensuring a smooth surface. While not strictly mandatory, applying a fresh coat of paint will dramatically enhance the overall aesthetic and make your new built-ins truly shine. Opting for a light, neutral color can also make the closet feel larger and brighter, and it helps eliminate any lingering musty odors. A clean slate is essential for a professional finish.
Step 2: Assemble and Position Your Billy Bookcases
Following the clear instructions provided by IKEA, assemble your two Billy bookcases. Once assembled, carefully position them side by side within your closet space. In our case, the fit was incredibly snug, leaving mere millimeters between the units and the closet walls. This tight fit is ideal as it minimizes wasted space and contributes to the custom, built-in appearance. Precise measurements beforehand are key to achieving such an optimal fit.
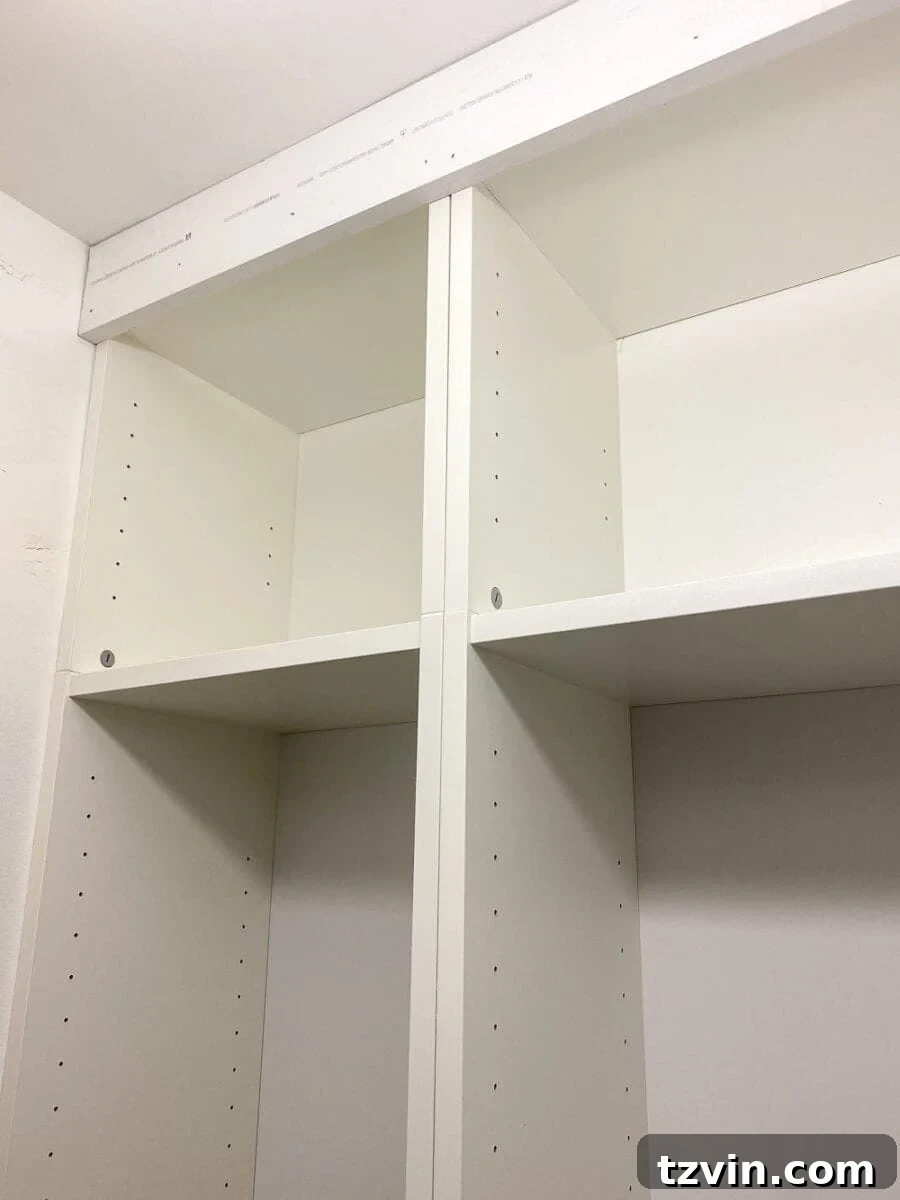
Step 3: Integrate Height Extenders and Secure Units
To fully maximize the vertical storage potential of your closet, add the Billy height extension units on top of the assembled bookcases. These extenders allow you to utilize space right up to the ceiling, providing extra shelving for seasonal items or less frequently used belongings. Once the extenders are in place, securely anchor both bookcases to the wall using the provided hardware or sturdy wall anchors. This crucial step ensures stability and safety, especially when the shelves are loaded with clothes and accessories.
Step 4: Install Custom Trim for a Seamless Look
To bridge any small gaps (typically around 1 inch) between the top of the bookcases and the ceiling, and to give your DIY built-ins a truly professional, high-end finish, install MDF trim strips. We used a 1×4 MDF strip, cutting it to size with a circular saw (or miter saw for more precise angles) and attaching it horizontally like crown molding using a brad nailer gun. This trim piece instantly elevates the aesthetic, making the bookcases appear as if they were custom-built into the closet architecture.
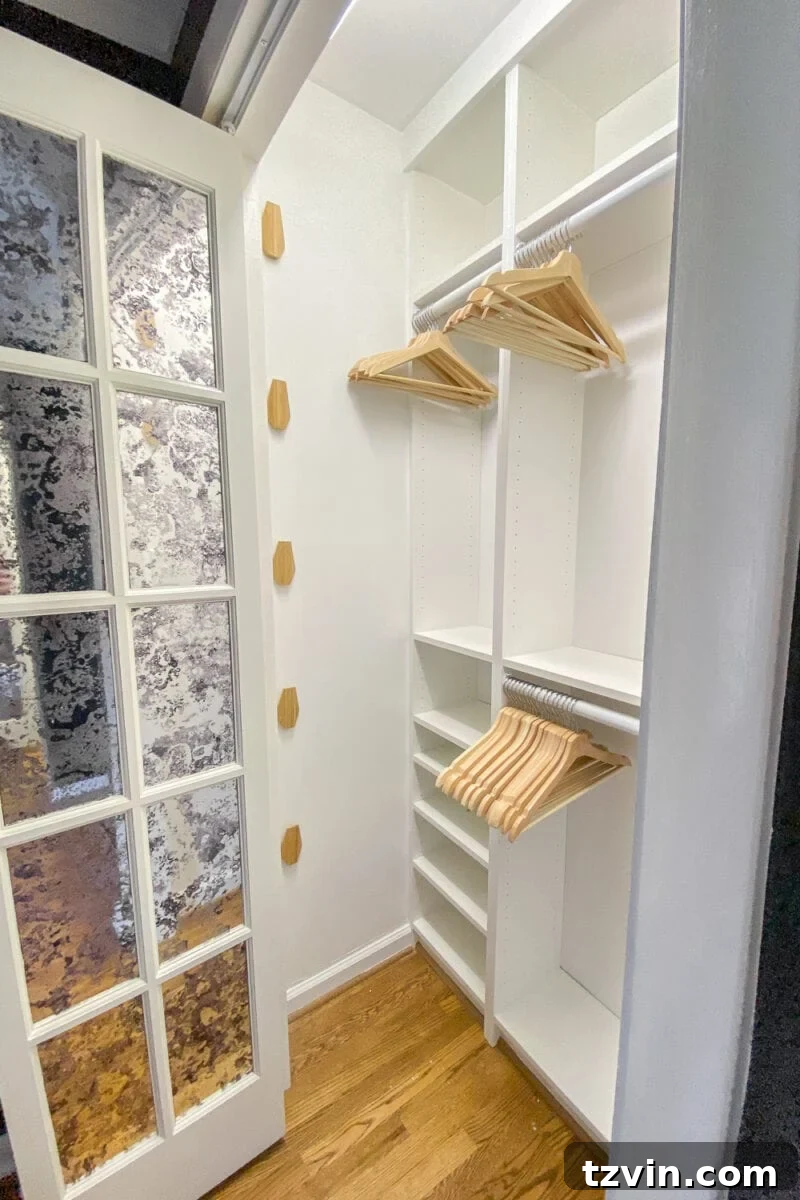
Step 5: Caulk, Fill, and Paint for a Professional Finish
This step is where your IKEA hack truly transforms into a custom built-in. Apply caulk to all cracks and seams where the bookcases meet the walls and the newly installed trim. This fills any imperfections and creates smooth, continuous lines. Next, apply wood filler to all nail holes from the trim, letting it dry completely before sanding smooth. Finally, once the caulk is dry, paint over the caulked areas and wood-filled spots with paint color-matched to the IKEA white (Sherwin Williams’ white base paint is an excellent match). Feathering the paint carefully allows you to blend these areas seamlessly with the existing IKEA finish, making the entire unit appear as one cohesive piece of millwork.
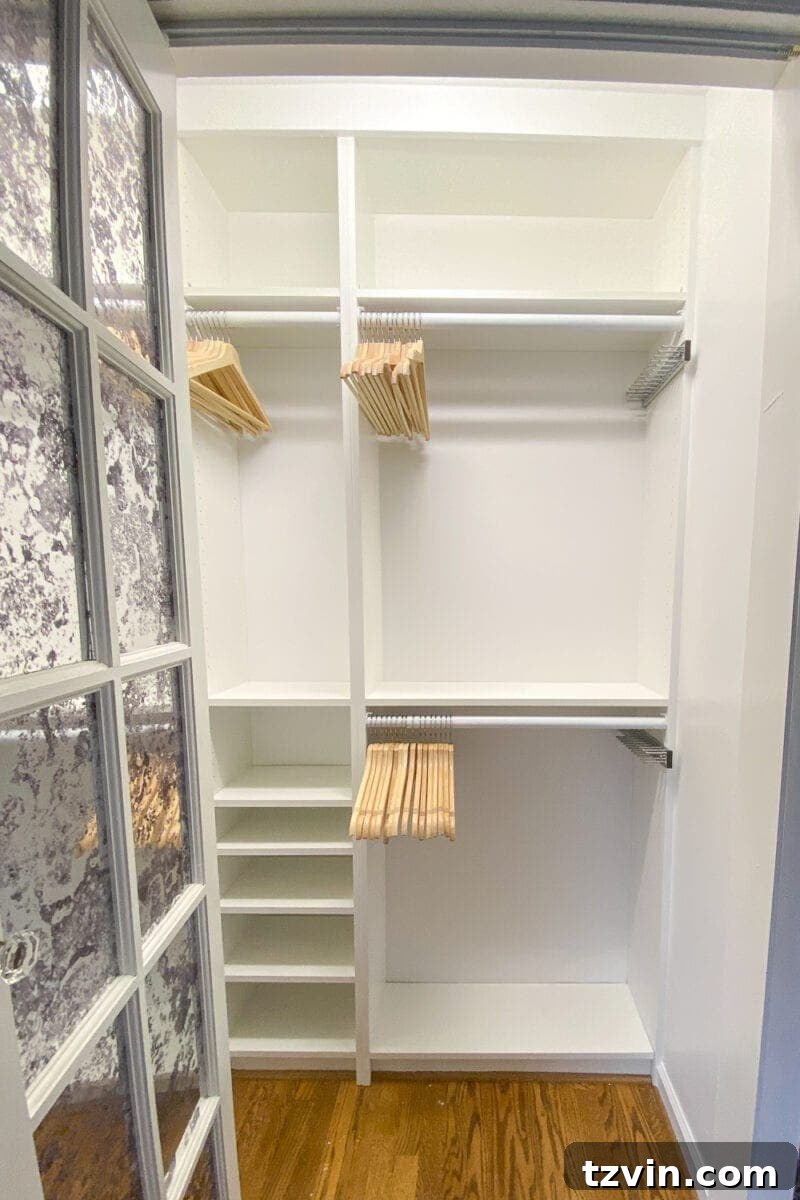
Step 6: Customize with Shelves and Storage Accessories
The final step involves tailoring your new custom closet to your specific storage needs. Insert the adjustable Billy shelves into the bookcases, utilizing the plastic brackets to set them at ideal heights for shoes, folded clothes, or storage bins. Then, install your chosen accessories: screw in the adjustable closet rods for hanging garments, attach IKEA Skuggis wall hooks for bags or robes, and mount the pull-out tie organizer racks. Depending on your personal wardrobe and available space, consider adding other practical IKEA products like jewelry racks, small accessory dividers, or even a dedicated pull-out denim bar. Don’t forget to incorporate laundry baskets on the floor if space permits. The thoughtful addition of various baskets (like those from the Container Store we added later) on upper shelves and in cubbies can further maximize storage for out-of-season clothing or rarely used items. The result is a highly functional and beautifully organized closet!
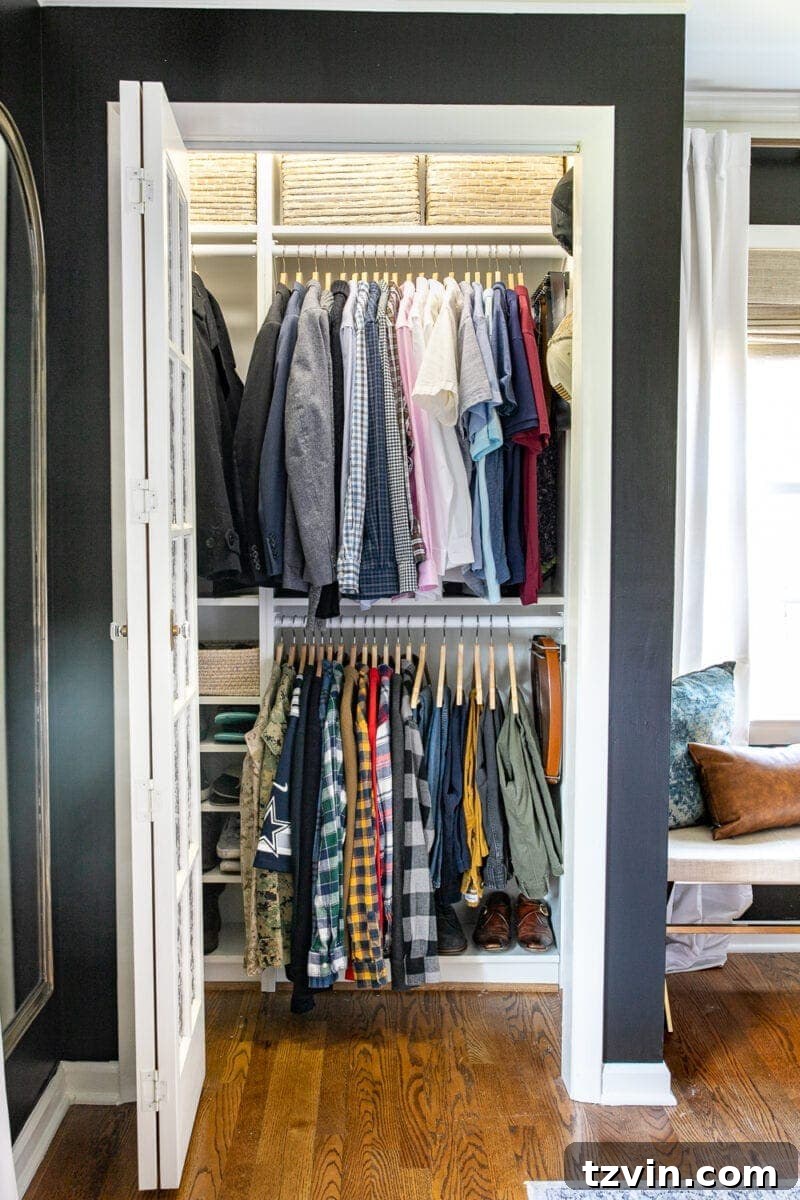
Essential Supplies for a Small Walk-In Closet Makeover
For a small walk-in closet, the approach is similar but with a few modifications to accommodate its unique layout and maximize space.
- 2 – 31 1/2″ x 79 1/2″ Billy Bookcases
- 2 – 31 1/2″ Billy Height Extension Units
- 1 – 19 5/8″ x 22 7/8″ x 92 7/8″ PAX Wardrobe Frame (if space allows for one narrow unit)
- 2 – 19 5/8″ Komplement Drawers (for the PAX frame)
- 2 – 19 5/8″ Komplement Shelves (for the PAX frame)
- 1 – Komplement Pull-Out Multi-Use Hanger
- 4 – Skuggis Hooks
- 4 – 1×4 MDF Strips
- 4 Adjustable Closet Rods
- 5 packs of Bumerang Hangers
- 3-inch L Brackets (for custom shelving)
- Finishing Nailer
- Table Saw (or similar saw for straight cuts)
- Caulk
- Paint color matched to IKEA white in a satin finish
Estimated Total Cost: $464.50
Here’s the before picture of my (very) small walk-in closet. It was barely functional as a walk-in, highlighting the need for smart storage solutions.
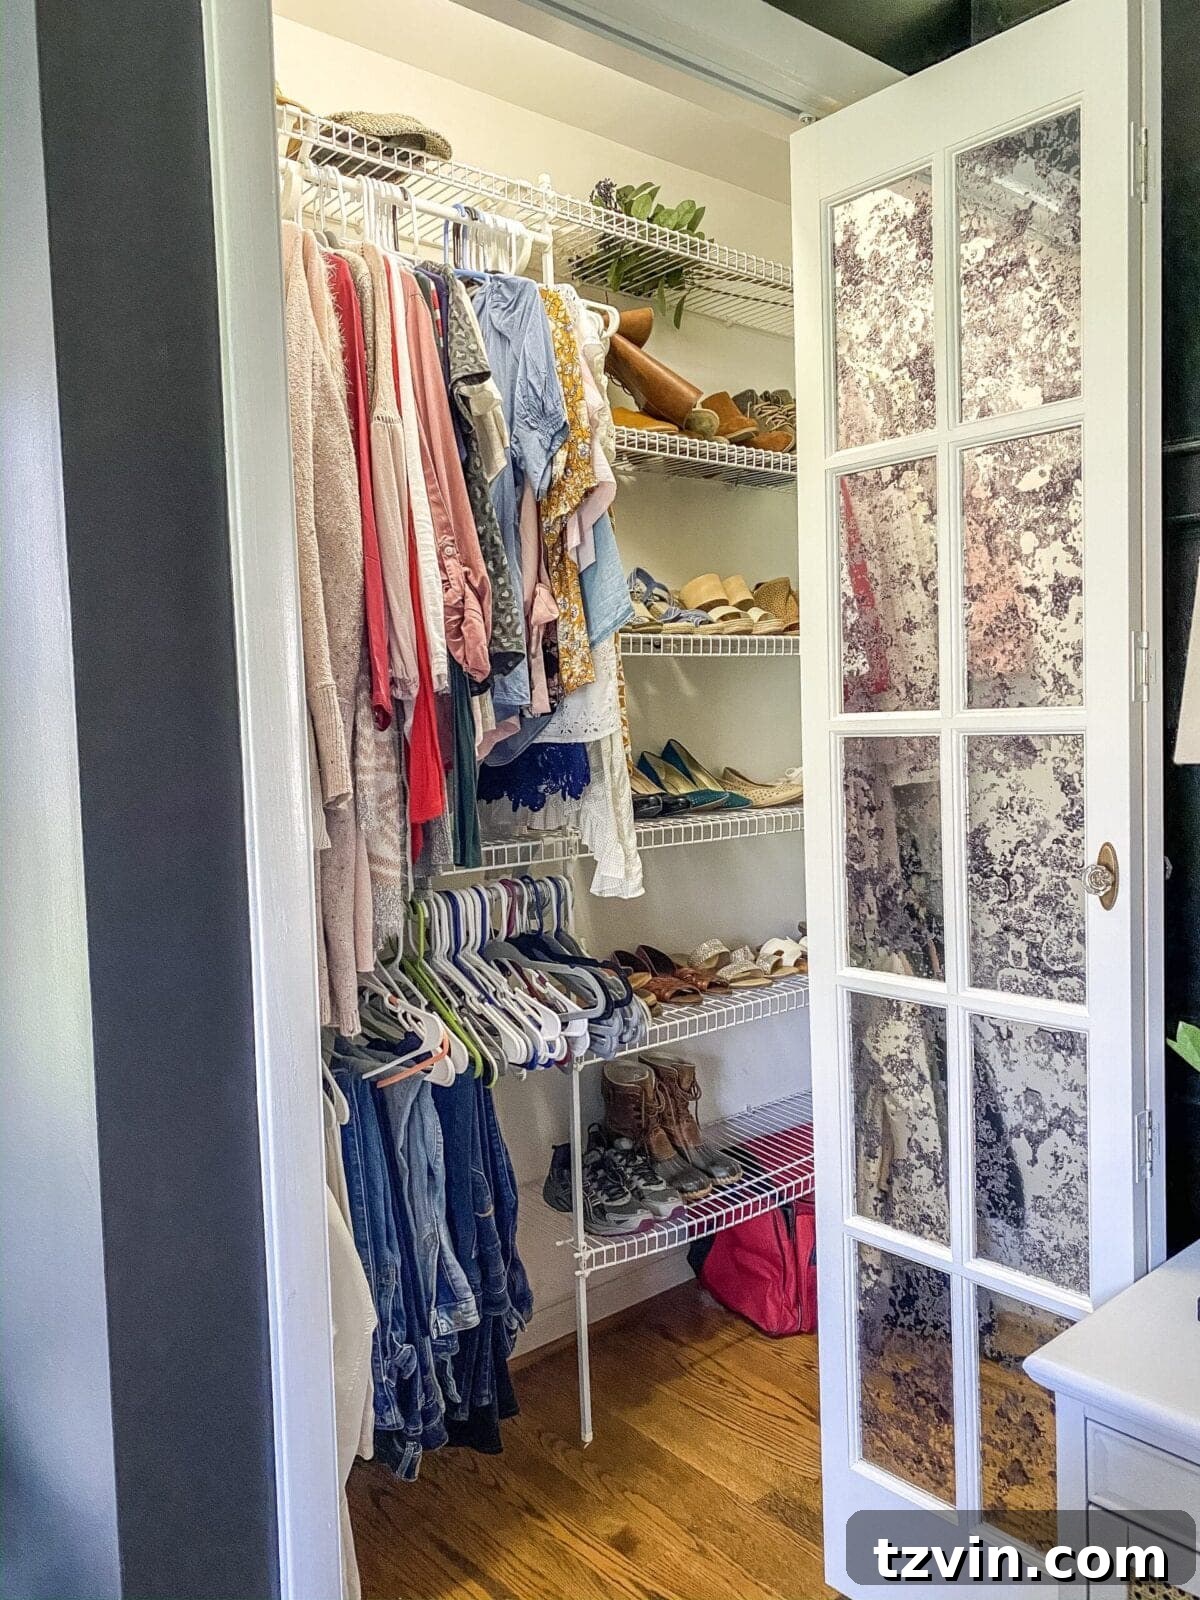
(Yes, I had a bouquet of flowers on the top shelf. I can’t explain it either!)
Step-by-Step Guide for a Small Walk-In Closet Transformation
Step 1: Prep and Integrate the PAX Frame (If Applicable)
Just like with the reach-in closet, begin by removing all old shelving, spackling any holes, and painting the walls for a fresh start. For my L-shaped, extremely tight walk-in closet, we found a perfect niche for one narrow IKEA PAX unit. This allowed us to integrate some dedicated hanging space for long dresses. After preparing the walls, assemble the PAX unit (if using) and carefully position it in its designated spot, typically the deepest recess of the closet.
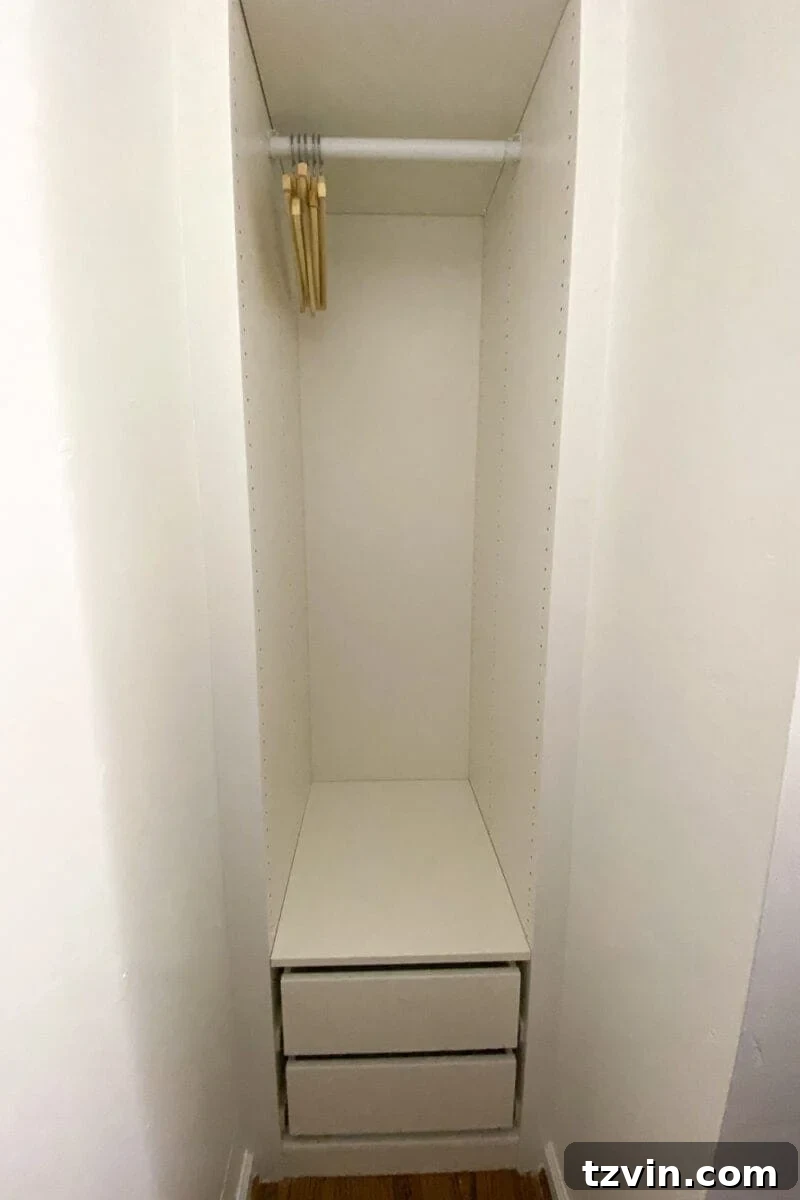
Step 2: Assemble and Strategically Place Billy Bookcases
Assemble your two Billy bookcases. For this walk-in layout, we strategically placed them side-by-side, leaving a purposeful 12-inch gap in between. This gap will be transformed into clever custom shelving later, demonstrating the flexibility of this hack to adapt to unique space requirements.
Step 3: Add Extenders and Secure All Units
To maximize vertical storage, add the Billy extenders on top of both bookcases, extending them flush with the ceiling. Next, ensure all units—both the Billy bookcases and the PAX frame (if used)—are securely anchored to the walls. Locate wall studs and use appropriate nails or screws to firmly attach the back of the units, preventing any wobbling and ensuring long-term stability.
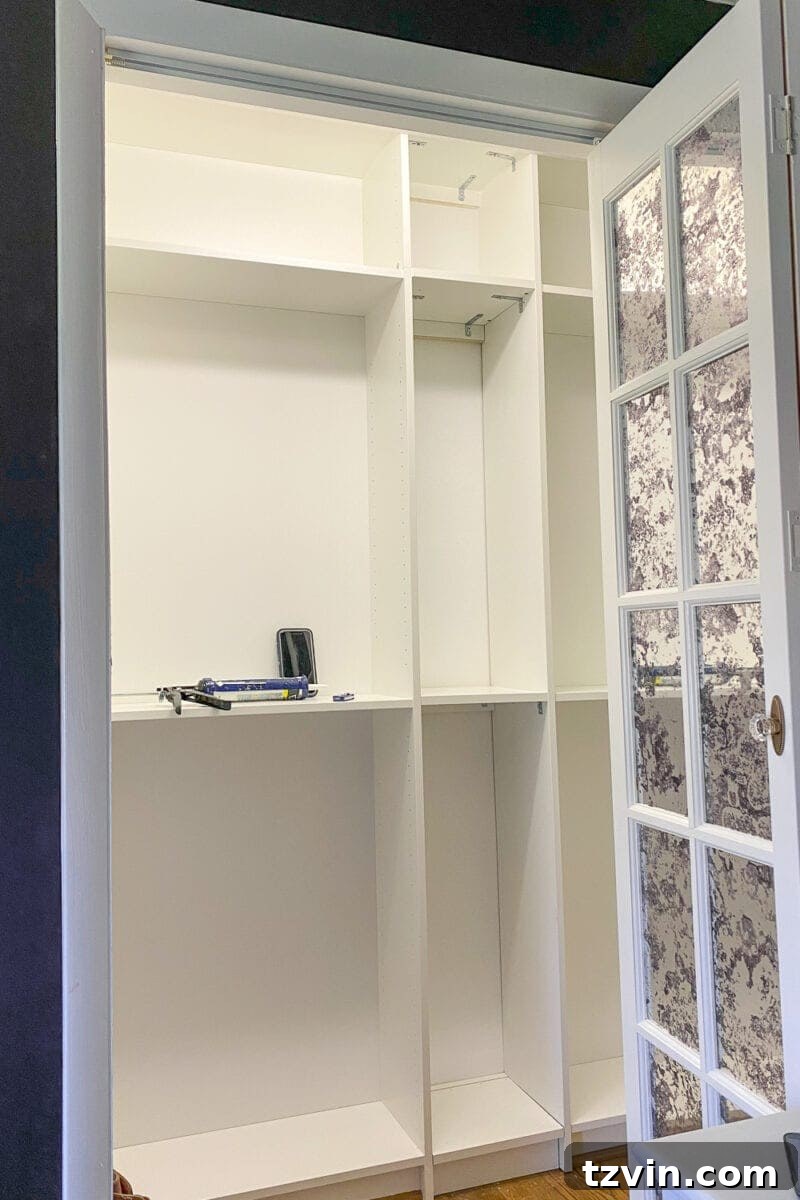
Step 4: Craft Custom Shoe Shelves from the Gap
The 12-inch gap between the two Billy bookcases provides an excellent opportunity for custom storage. We ingeniously transformed this space into a skinny shoe shelf unit. Using some of the spare Billy shelves, we carefully cut them down to size with a table saw (a circular saw or miter saw also works well for straight cuts). These cut shelves were then framed out to create their own mini-bookcase structure within the gap, secured with 2-inch L brackets. This clever use of space is perfect for organizing shoes, handbags, or other small accessories.
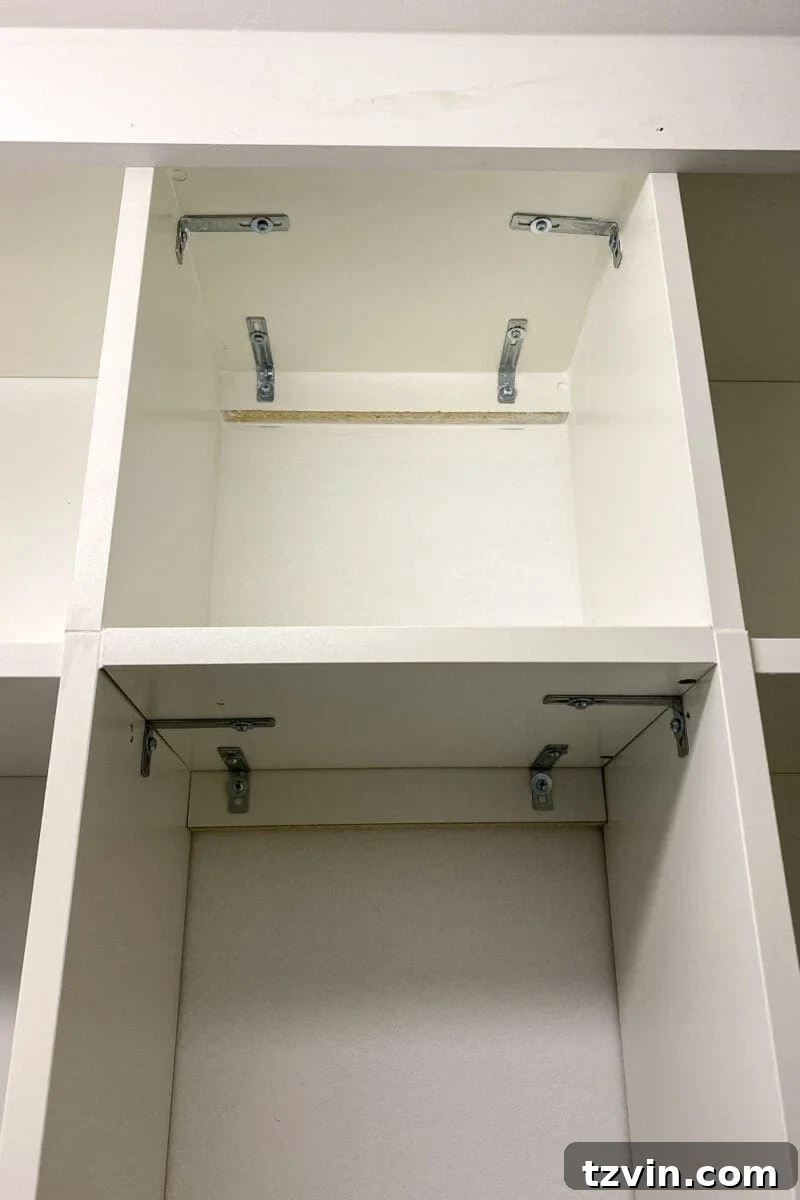
Step 5: Install the Custom Shoe Shelves
Once your cut Billy shelves are ready, install them within the newly created skinny bookcase in the 12-inch gap. Attach these shelves securely to the adjacent Billy bookcases using a nail gun, ensuring they are level and sturdy. This step completes the structural customization of your walk-in closet.
Step 6: Trim and Finish All Gaps
Similar to the reach-in closet, trim out any small gaps between the top of the bookcases and the ceiling using 1×4 MDF strips. Apply this same trimming technique to the top and sides of the PAX frame (if applicable) to make it flush and seamlessly integrated with the surrounding walls and Billy units. This meticulous trim work is essential for achieving a truly built-in, polished aesthetic.
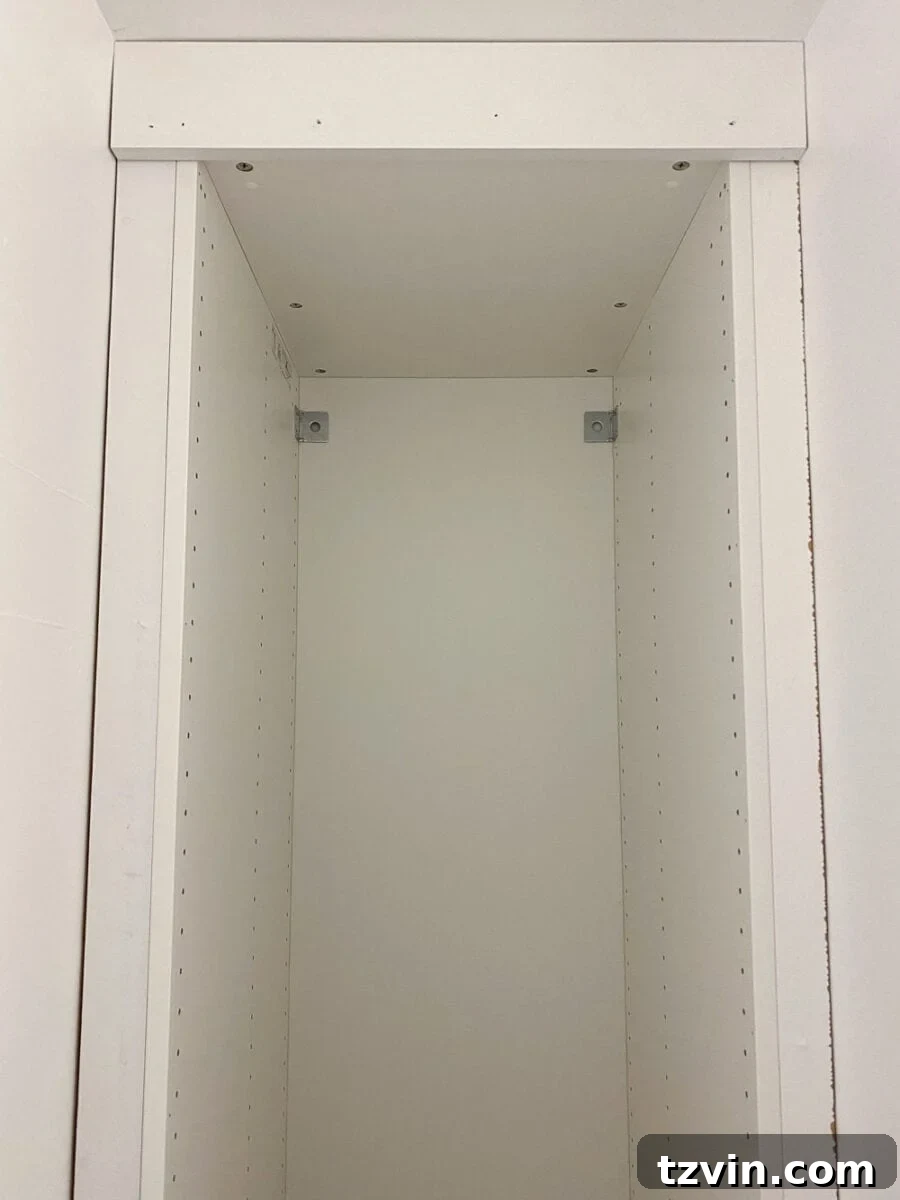
Step 7: Caulk, Wood Fill, and Paint for a Pristine Appearance
This critical finishing step brings everything together. Caulk all seams and cracks where the units meet the walls and where trim pieces are installed. Fill any visible nail holes with wood filler, letting it dry completely before sanding smooth. Then, apply paint color-matched to the IKEA white over all caulked and filled areas. This careful attention to detail eliminates visual breaks and creates the illusion of a custom-built, factory-finished closet system, truly elevating the overall look.
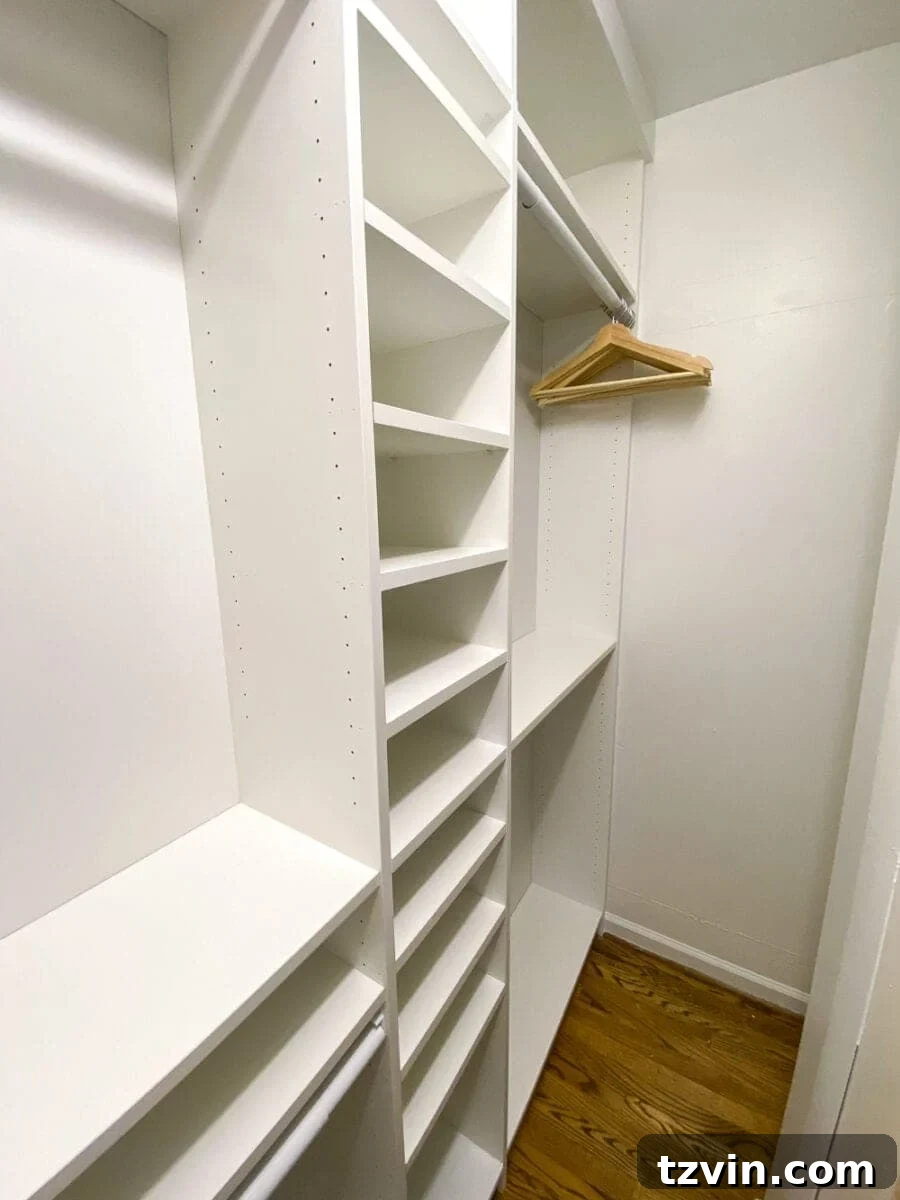
Step 8: Personalize with Storage Accessories
Complete your custom closet by installing all the functional accessories. This includes screwing in the adjustable closet rods for hanging clothes, adding Komplement drawers and shelves within the PAX frame, attaching Skuggis wall hooks for versatile hanging options, and organizing your wardrobe with matching Bumerang hangers. These final touches not only enhance functionality but also contribute to a cohesive and aesthetically pleasing storage system.
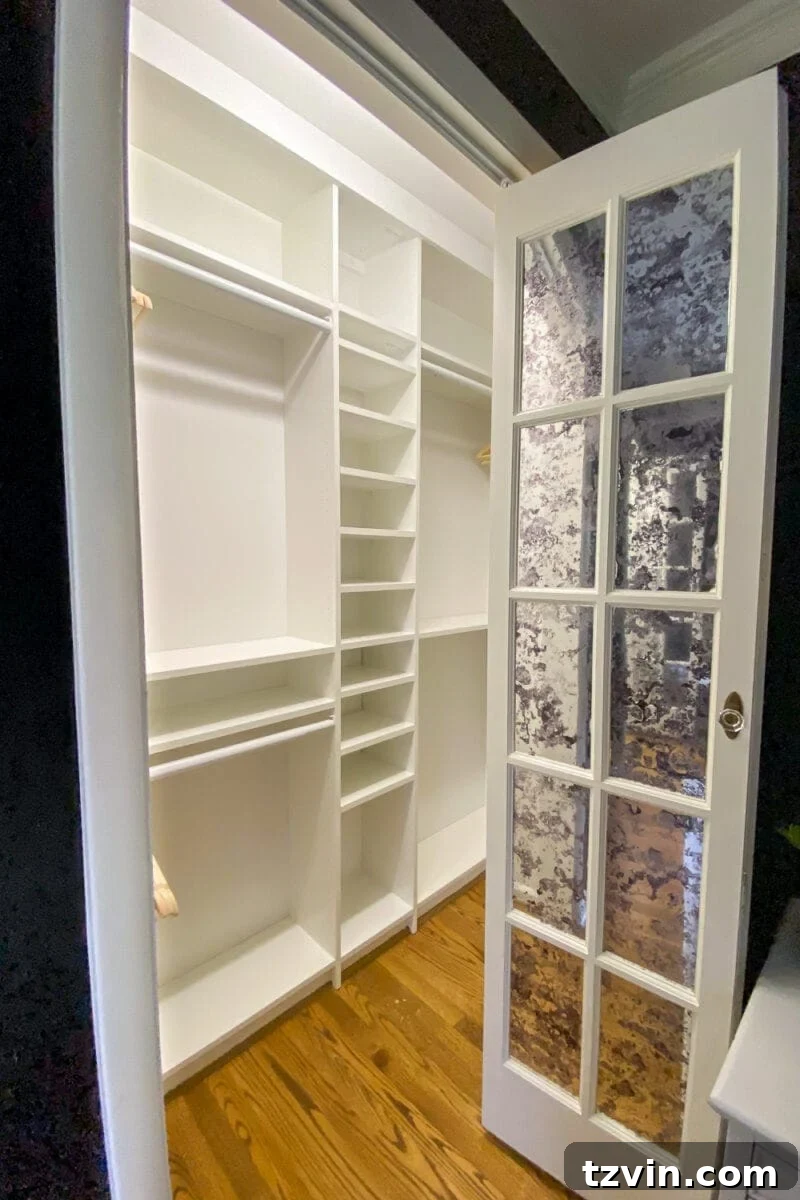
We later incorporated various types of baskets as a smart solution for storing out-of-season clothing, accessories, and other items, compensating for the lack of traditional drawers (beyond the couple I have in the single PAX frame). Frankly, we don’t miss having more drawers at all, proving that well-chosen baskets can be just as effective and sometimes even more flexible for closet organization.
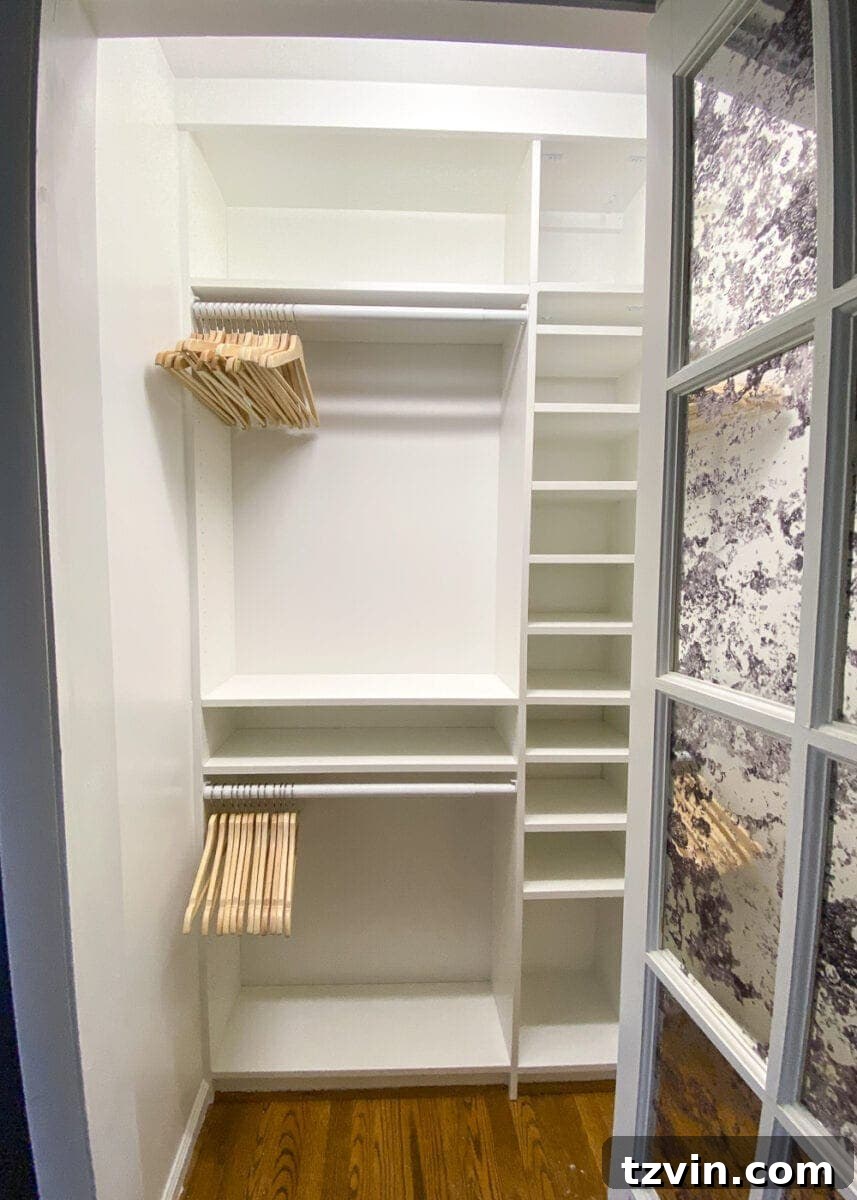
The Stunning Transformation: Finished IKEA Billy Bookcase Closets
The transformation of our closets using the IKEA Billy bookcase hack has been nothing short of spectacular. Our “Plan B” decision to opt for Billy bookcases over the PAX system proved to be a stroke of genius, allowing us to maximize every available inch of space more effectively than we had initially planned. These custom built-ins not only look phenomenal but also provide unparalleled organization compared to the flimsy wire shelves we endured for years.
This DIY project was surprisingly straightforward. While the physical installation involved some measuring and cutting, the most challenging (and rewarding) part was undoubtedly sorting through and thoughtfully arranging our extensive wardrobes into their new, perfectly designed homes. The end result is a highly functional, visually appealing, and incredibly efficient storage system that feels truly bespoke.
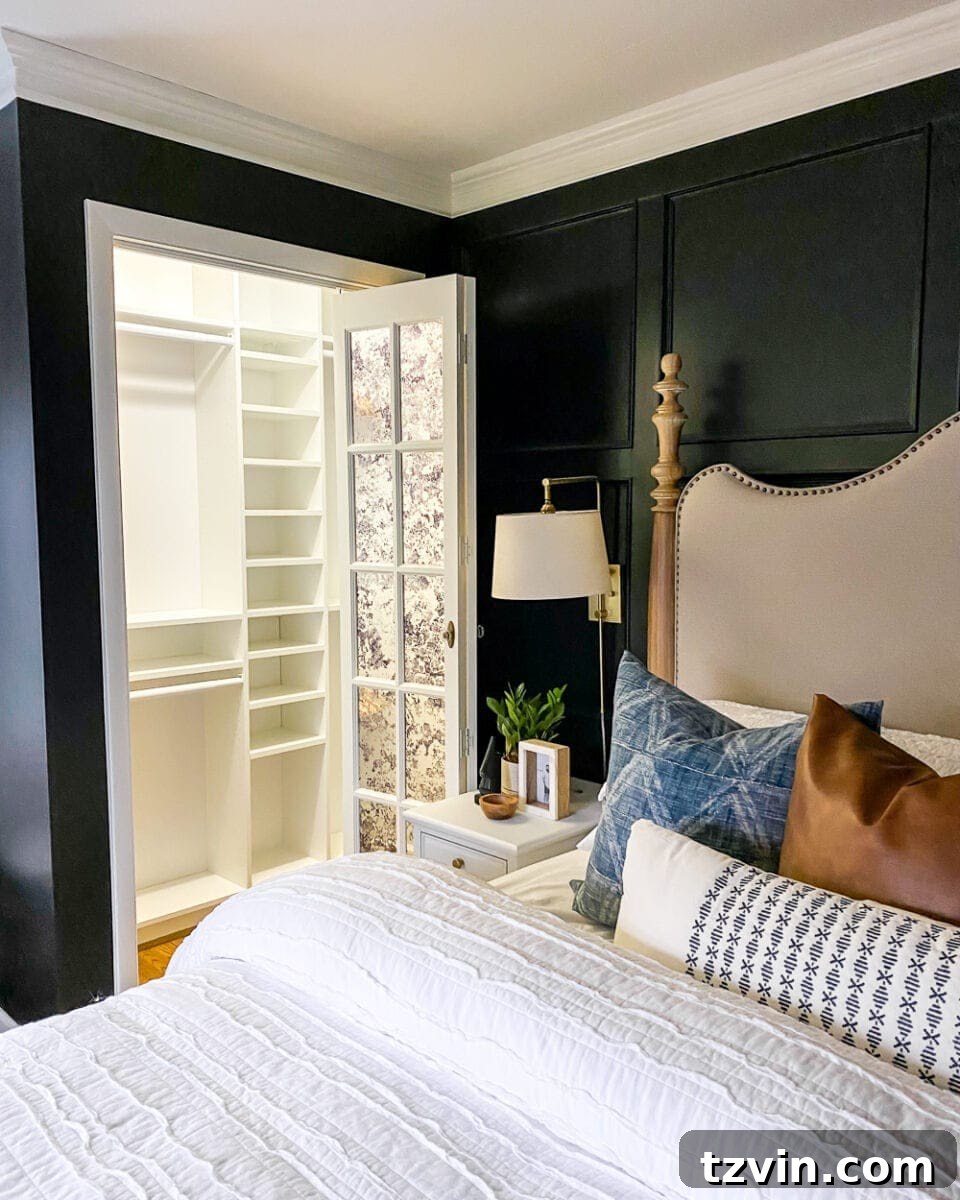
A Little Extra Flair: Don’t forget to check out our DIY mirrored French bifold closet doors that we customized – they add another layer of elegance to our master bedroom suite!
Advanced Bedroom Closet Organizing Tips for Optimal Efficiency
Once your beautiful new custom closet is complete, it’s time to optimize its functionality with smart organizing strategies. These tips will help you maintain a clutter-free and highly efficient wardrobe:
- Color-Code Your Clothing: Arrange your garments by color, sorting pieces in rainbow order. This creates a visually appealing display and makes it incredibly easy to find specific items and plan outfits.
- Group by Type and Season: Categorize your clothing by type (e.g., shirts, pants, dresses) and then further by season. Store out-of-season items in designated bins on higher shelves to free up prime real estate for what you’re currently wearing.
- The Hanger Test: A classic method for decluttering. Turn all your hangers backward when you fill the closet. Once you wear an item, turn its hanger the correct way. At the end of a year, donate anything still hanging backward—it’s a clear sign you don’t wear it!
- Eye-Level for Frequently Used Items: Position your most frequently worn clothes and accessories at eye level. This ergonomic approach saves time and effort during daily routines.
- Invest in Matching Hangers: Using consistent hangers (like the IKEA Bumerang) creates a uniform, upscale look and can actually save space compared to a mix-and-match collection.
- Utilize Shelf Dividers: These simple tools are fantastic for keeping piles of sweaters, t-shirts, or linens neat and prevents them from toppling over, maximizing vertical space on shelves.
- Multi-Hangers for Vertical Space: Employ cascading or multi-item hangers for scarves, belts, or multiple pants. This clever trick leverages vertical space, especially useful in narrower sections of the closet.
- Add Strategic Lighting: Good lighting is crucial in any closet. We highly recommend wireless motion sensor LED lights. They automatically illuminate your wardrobe, making it easier to see items and adding a touch of luxury without the need for complex wiring.
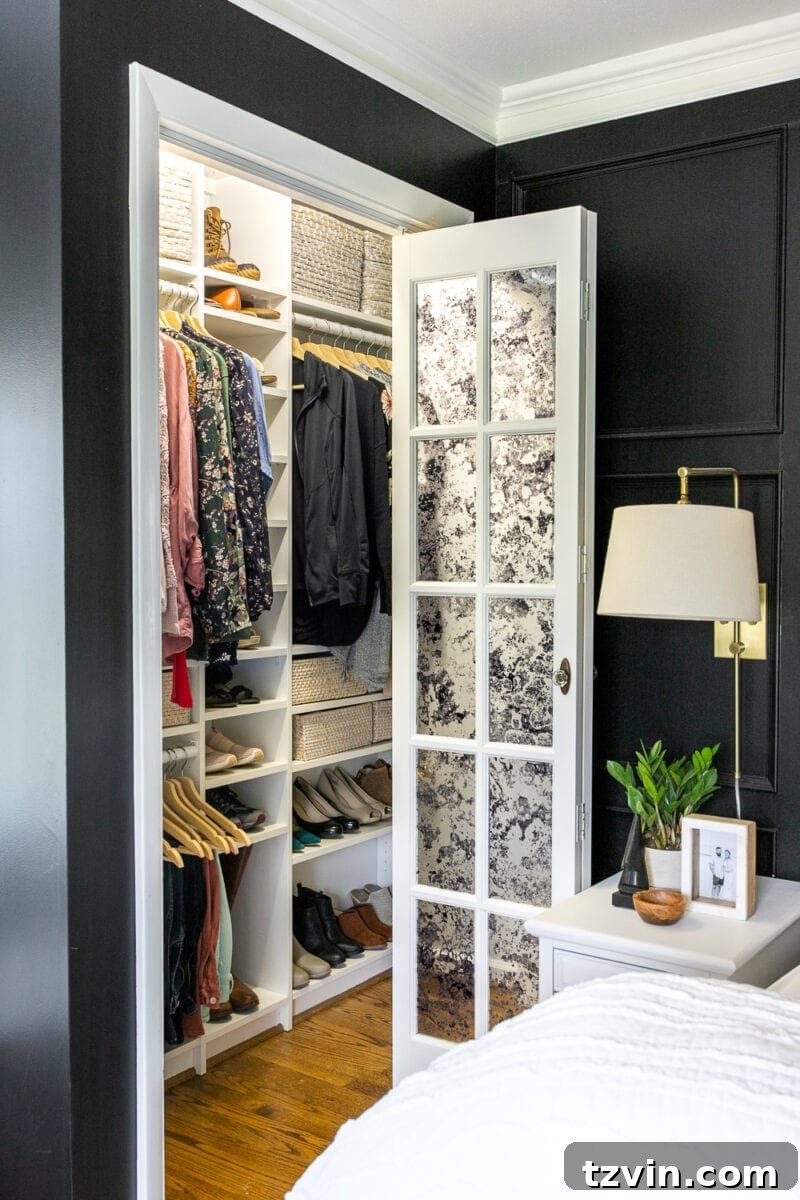
For a complete tour of our fully organized IKEA closet system and more in-depth wardrobe organizing strategies, check out our final walk-through and organizing tips.
Explore More Creative DIY IKEA Hack Ideas
If you’re inspired by the versatility of IKEA furniture for innovative storage solutions, here are more brilliant ideas to spark your next home improvement project:
30 Genius DIY IKEA Closet Ideas
DIY Burl Wood IKEA Dresser Hack Using Contact Paper
DIY Built-In Bookshelves Using the IKEA Billy Bookcase Hack
Follow this step-by-step guide to build a stunning and functional DIY IKEA closet system using Billy bookcases.
-
Clear and Prep Your Closet Space
Remove all old shelving, patch any holes with spackle, and paint the walls. A fresh coat of paint brightens the space and eliminates odors, providing a clean foundation for your new built-ins.
-
Assemble and Position Billy Bookcases
Assemble your Billy bookcases according to IKEA instructions. Carefully place them side-by-side in your closet, aiming for a snug fit to maximize space and create a seamless look.
-
Add Height Extenders and Secure to Wall
Install Billy height extension units on top of the bookcases to utilize vertical space up to the ceiling. Securely anchor all bookcases to the wall studs for stability and safety.
-
Attach Decorative Trim Pieces
Close any small gaps between the top of the bookcases and the ceiling with 1×4 MDF strips. Cut these trim boards with a saw and attach them like crown molding using a brad nailer gun for a professional, built-in appearance.
-
Caulk, Wood Fill, and Paint for a Flawless Finish
Apply caulk to all cracks and seams, then use wood filler for nail holes (sanding smooth when dry). Paint over these areas with a color matched to IKEA white to make the entire unit look like one cohesive, custom-built closet.
-
Install Shelves and Organize with Accessories
Place adjustable shelves at desired heights for shoes and folded items. Install closet rods, wall hooks, tie organizers, and other accessories like drawers or dividers to customize the storage to your specific wardrobe needs.