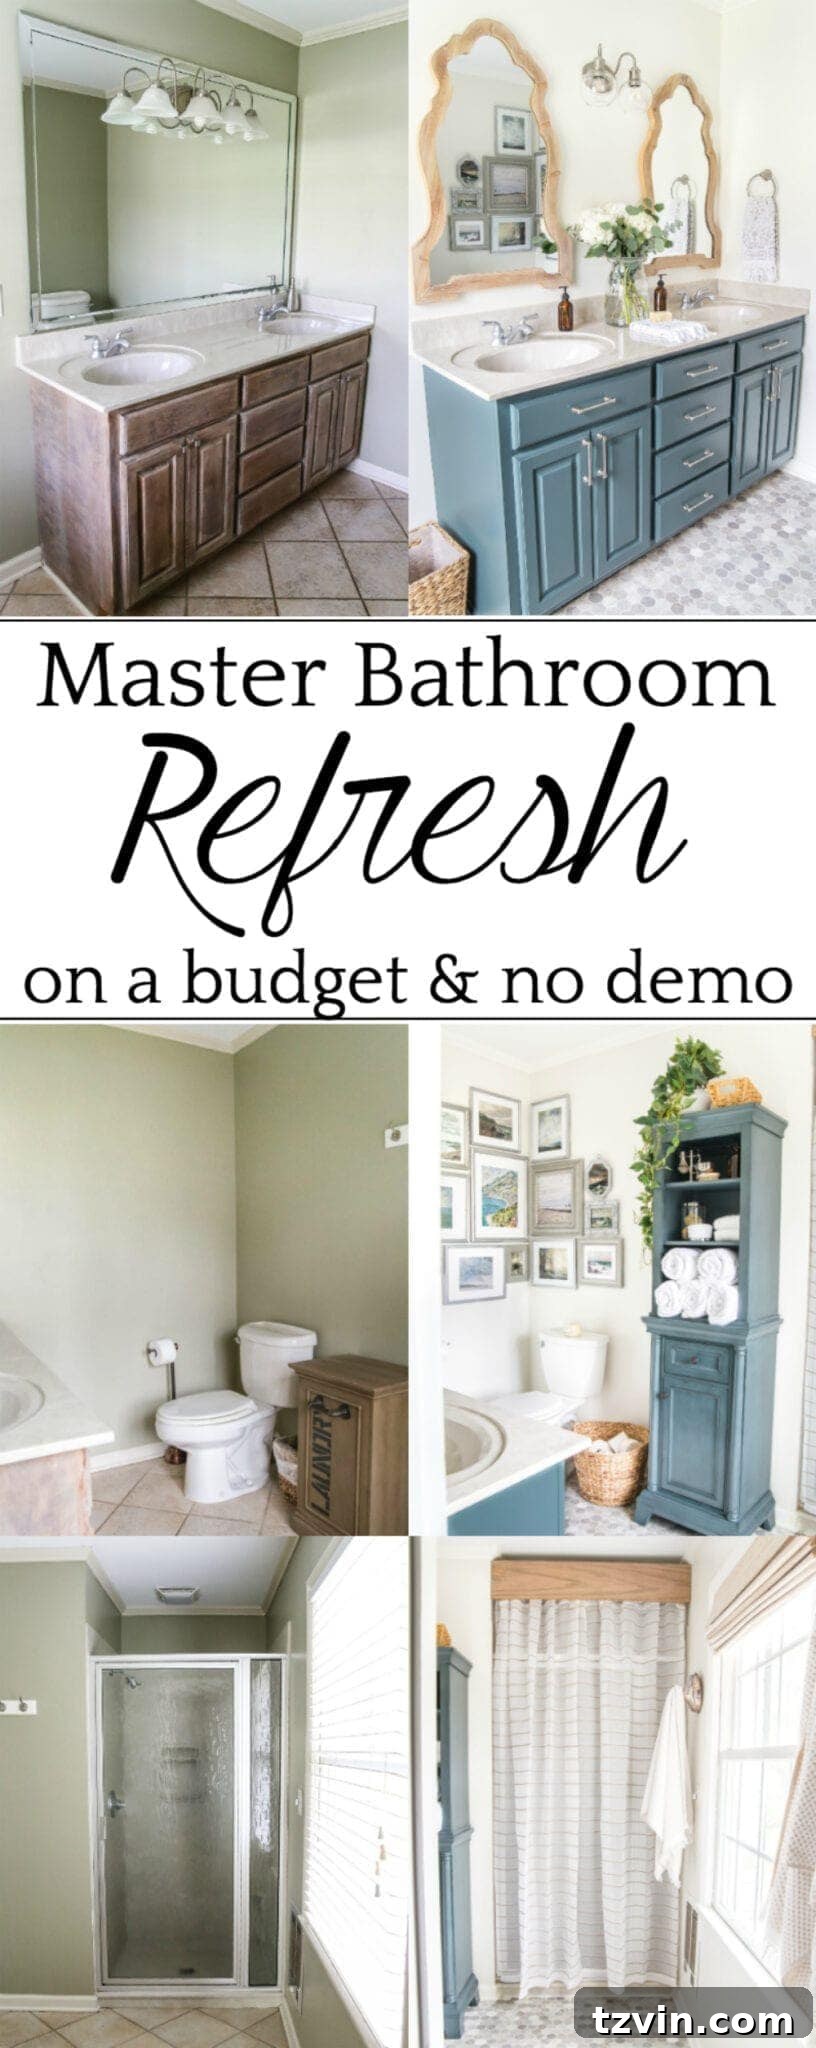
Affordable Master Bathroom Transformation: A DIY Guide to a Budget-Friendly Refresh
For nearly two years, we started every single morning in a master bathroom that felt stuck in a time warp. It’s almost unbelievable how long we tolerated its outdated appearance and lack of functionality. We harbored grand visions of a complete master bathroom overhaul, picturing a stunning, fully gutted renovation that would likely set us back around $10,000. However, with such a significant project still far on the horizon, my husband Robert and I collectively decided we simply couldn’t endure the bathroom in its current state for another day. It was time for a change, and we were determined to make it happen without breaking the bank.
This situation perfectly embodied our philosophy of “work with what you have,” a skill we’ve honed over time in our home. Thankfully, a few strategic DIY solutions, paired with the transformative power of paint, can accomplish wonders for very little investment. After channeling all our creative energy and applying numerous clever DIY tricks, our master bathroom has been dramatically refreshed. We’re thrilled with the results, and you’re about to see just how impactful a budget-friendly makeover can be!
The transformation is truly remarkable, proving that you don’t always need a massive budget or extensive demolition to create a space you love. Our goal was to inject modern style and improved functionality into this essential room, and we achieved it through thoughtful design choices and hands-on effort. Welcome to our newly refreshed master bathroom!
(Some affiliate links are provided below for your convenience. Full disclosure here.)
Revamping the Vanity: A Fresh Coat and New Hardware
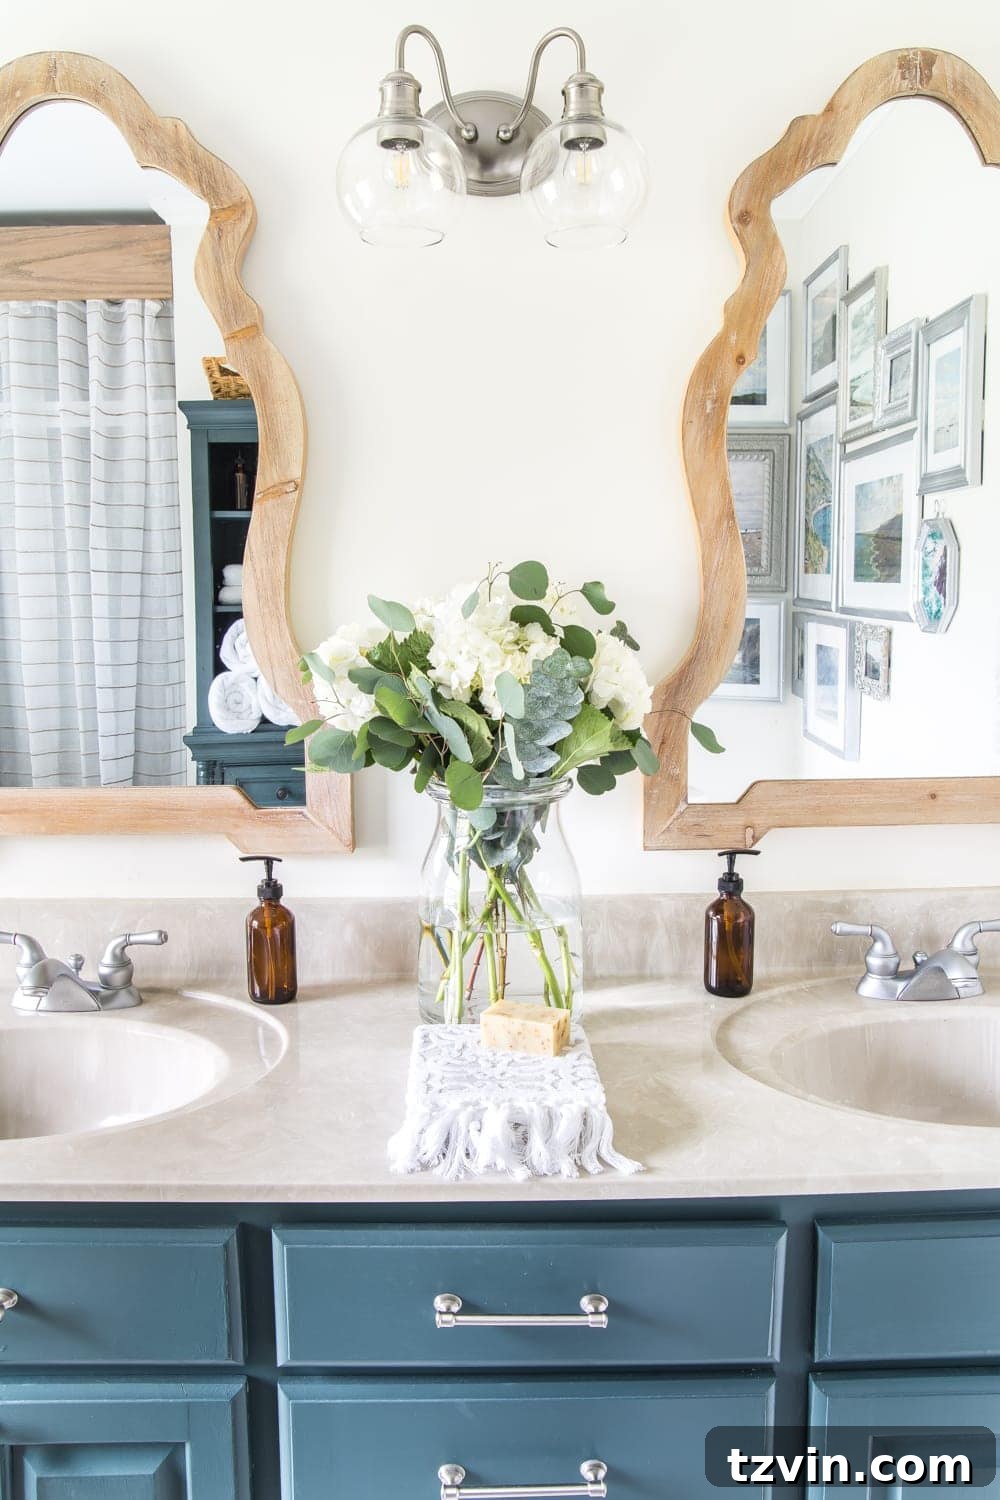
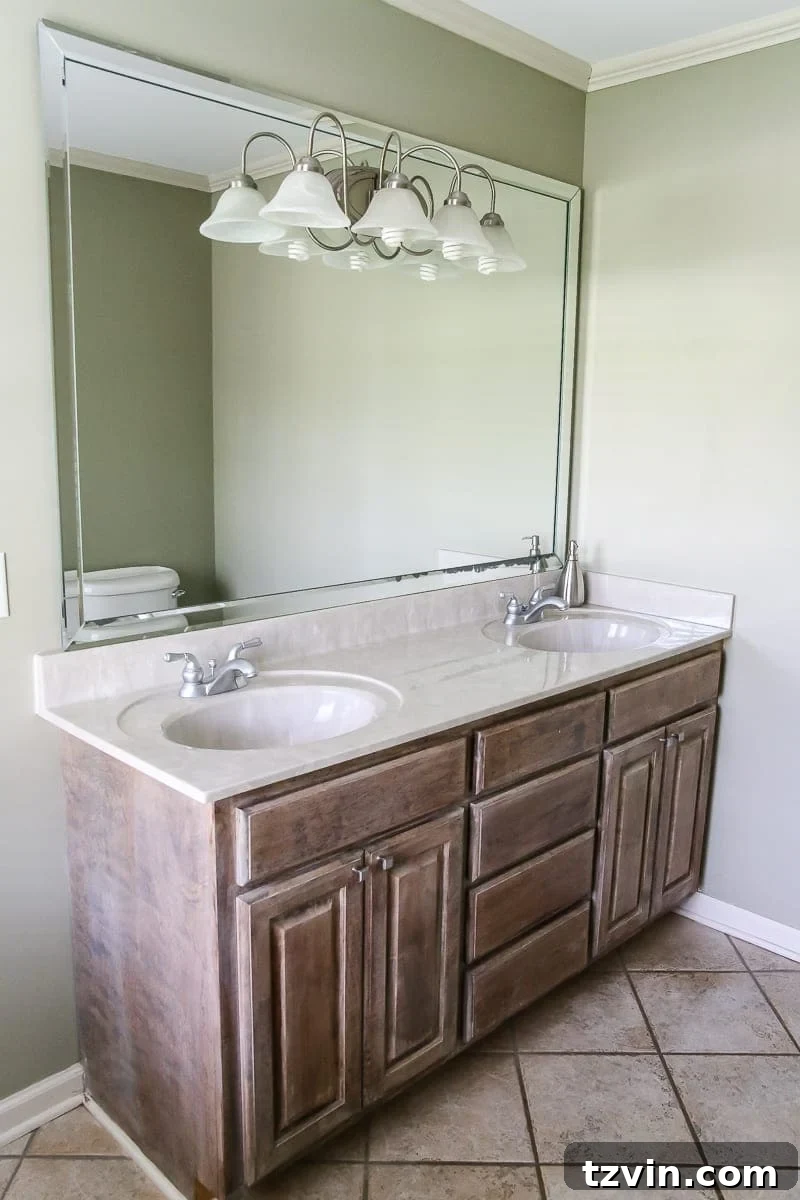
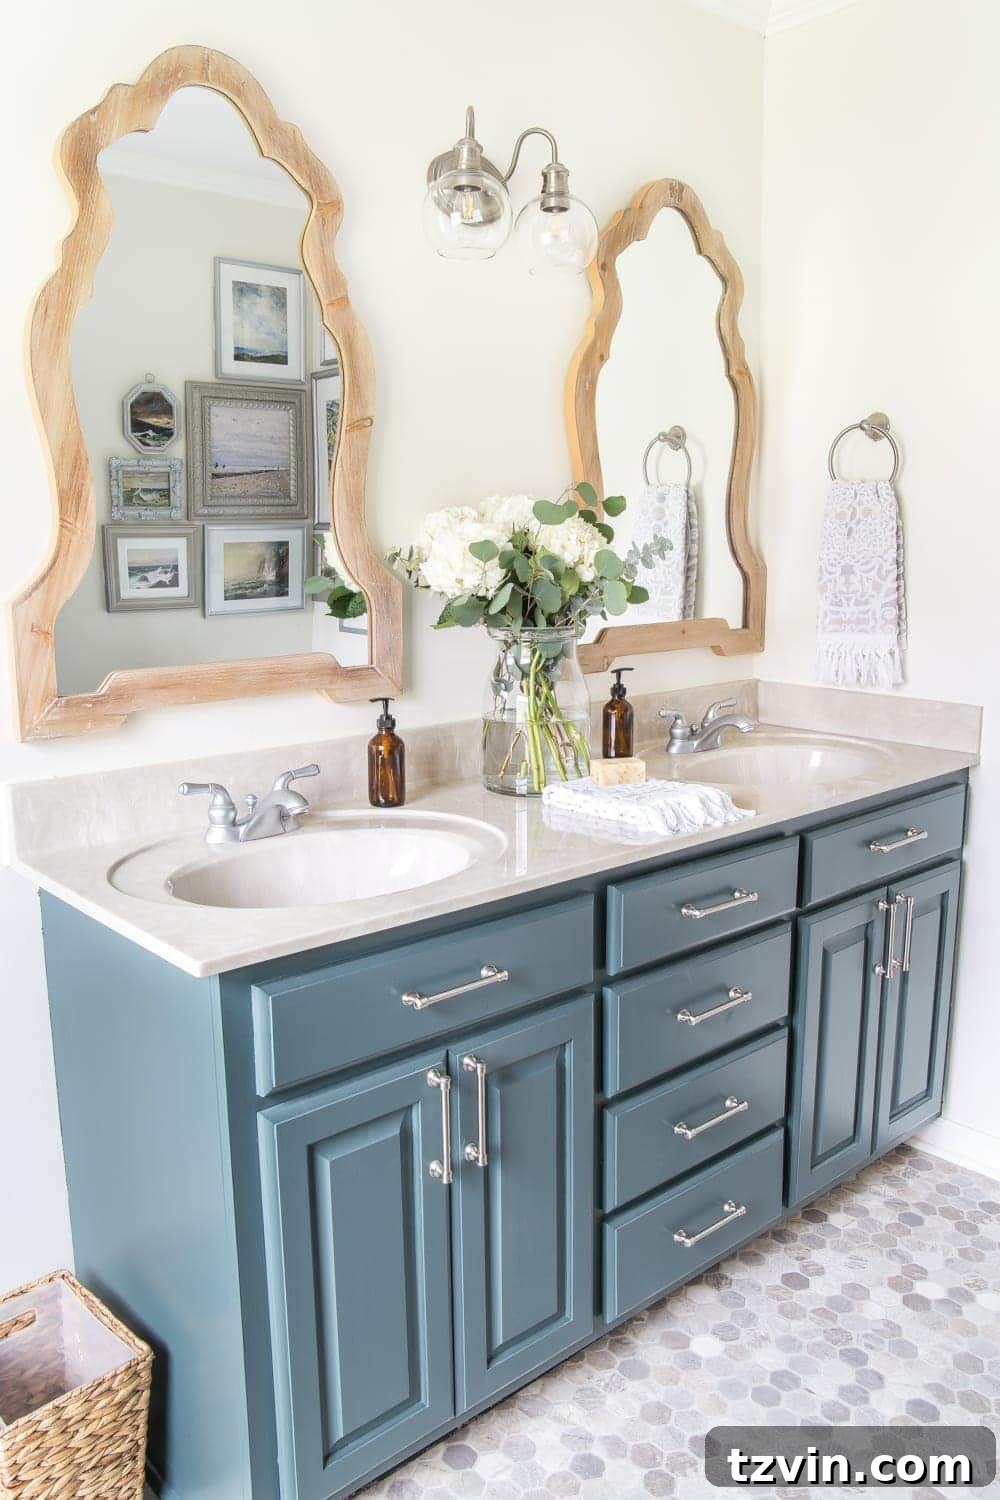
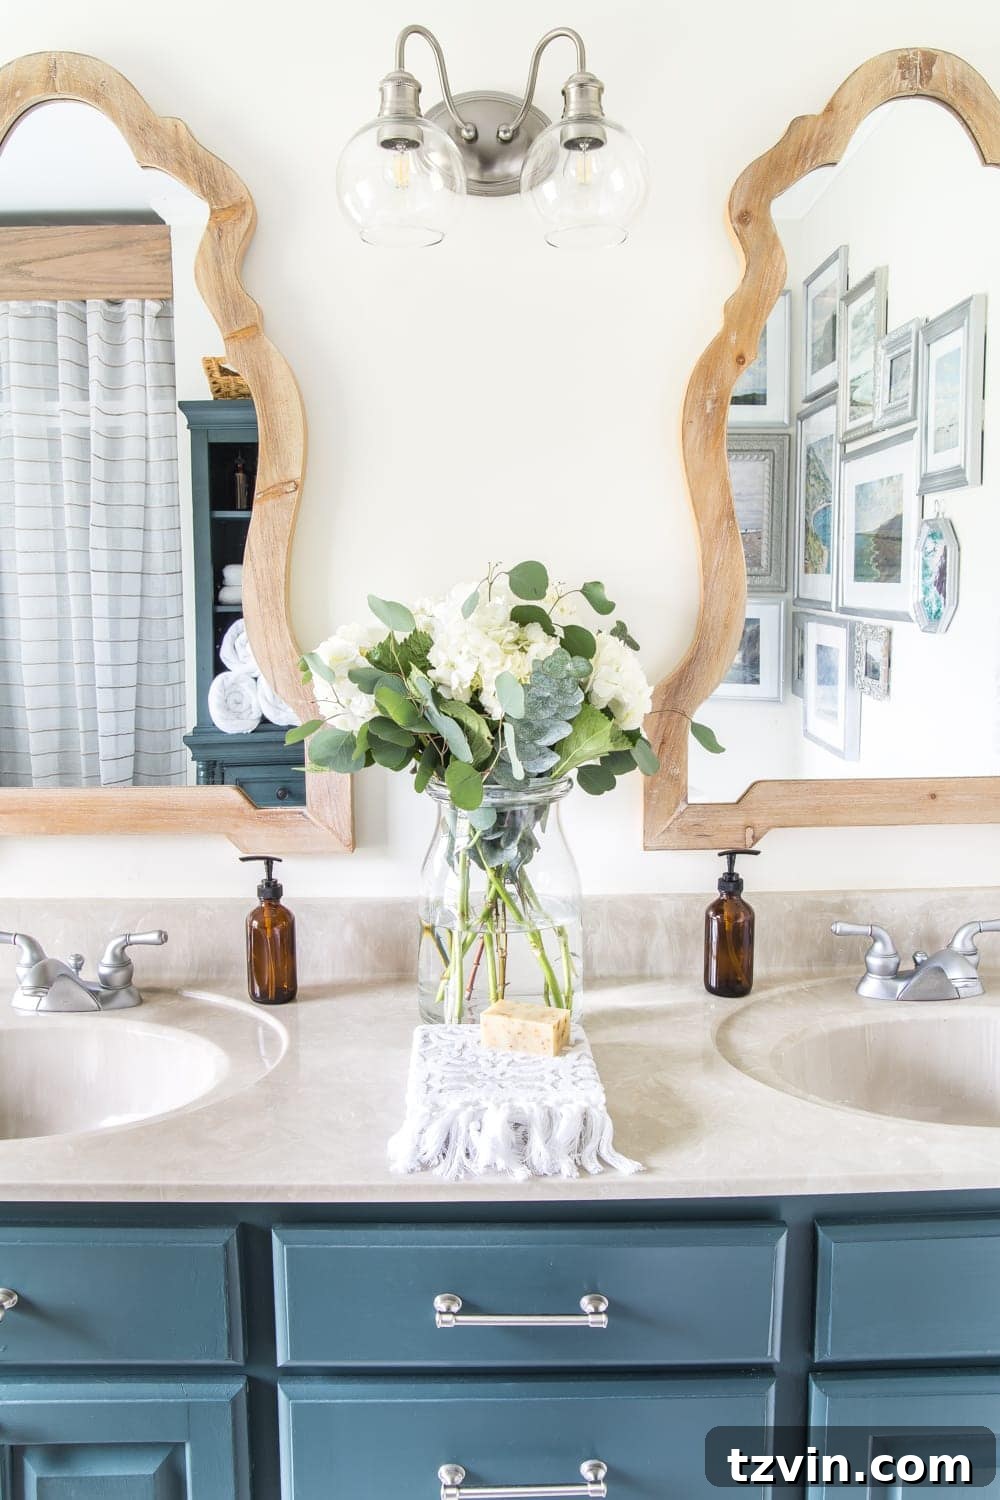
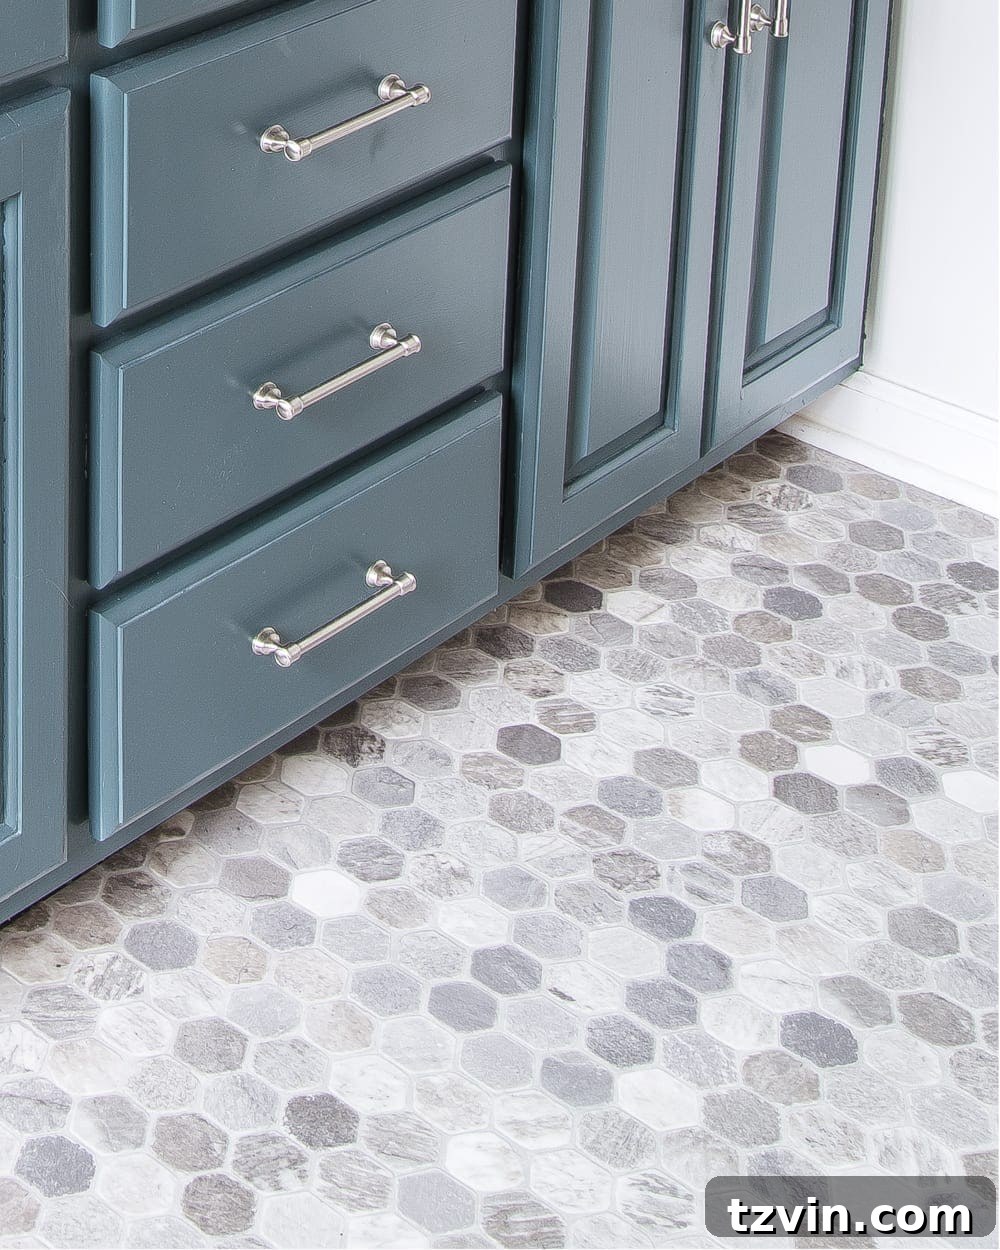
The vanity was a major focal point that needed immediate attention. Its rough wood finish contributed significantly to the dated feel of the bathroom. Our primary goal was to remedy this with a fresh, modern look. We turned to our trusted DIY go-to method for painting cabinets, which has proven successful in numerous projects, including our kitchen. This comprehensive technique ensures a durable and professional-looking finish. We selected a custom paint color, expertly matched to our existing linen cabinet, creating a cohesive and harmonious palette throughout the room.
Beyond aesthetics, the vanity’s functionality was also lacking. The drawers, notoriously difficult to open without any hardware, were a daily frustration. To resolve this, we installed elegant brushed nickel pulls. This choice wasn’t arbitrary; the brushed nickel finish perfectly complements our existing faucets, tying together the metallic elements in the space. The new hardware not only enhances the visual appeal of the vanity but also dramatically improves usability, making those morning routines a little smoother.
Selecting the Perfect Paint Color: Warmth and Cohesion
A significant challenge in our budget refresh was working around the existing beige countertop, which we couldn’t replace at this stage. With our baby Regan in the house, we conscientiously avoided projects that would expose her little lungs to harsh fumes, ruling out a painted countertop project similar to one we tackled in our last bathroom makeover. Instead, we strategized to make the beige countertop feel intentional and integrated into the design.
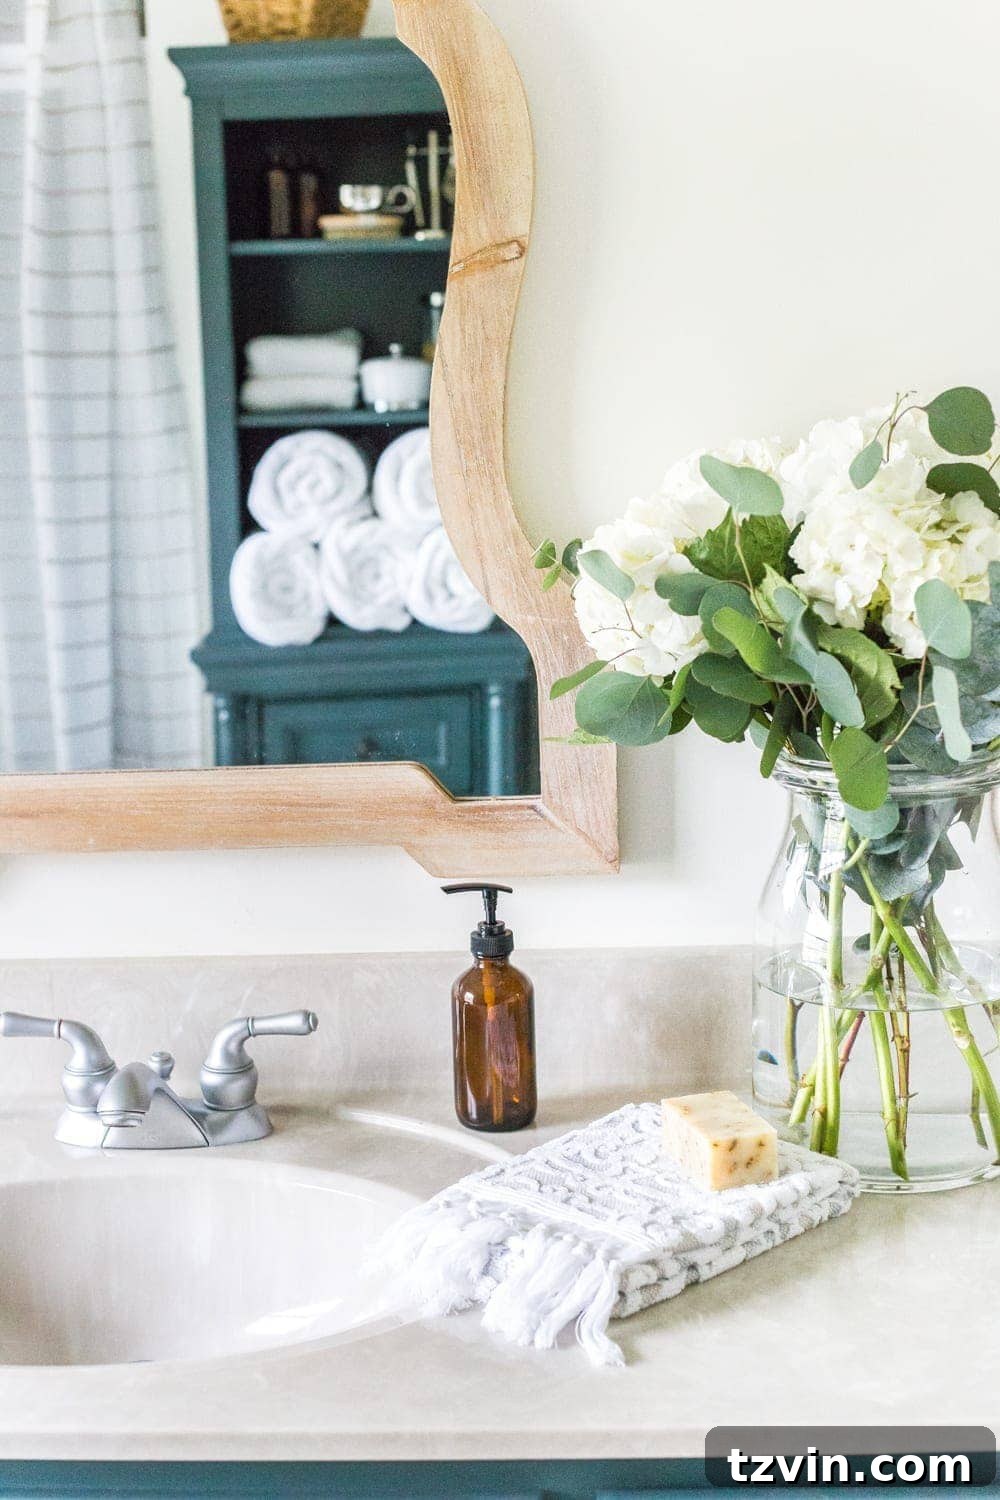
Our solution was to paint the walls with Benjamin Moore White Dove. This classic, soft off-white shade is renowned for its ability to add a subtle warmth and sophistication to any space. It beautifully complements the beige countertop, transforming it from an outdated feature into a natural, harmonious element within the room. White Dove brightens the bathroom without feeling stark, creating a serene and inviting atmosphere that makes perfect sense with the existing tones.
Elevating Style with Arched Mirrors
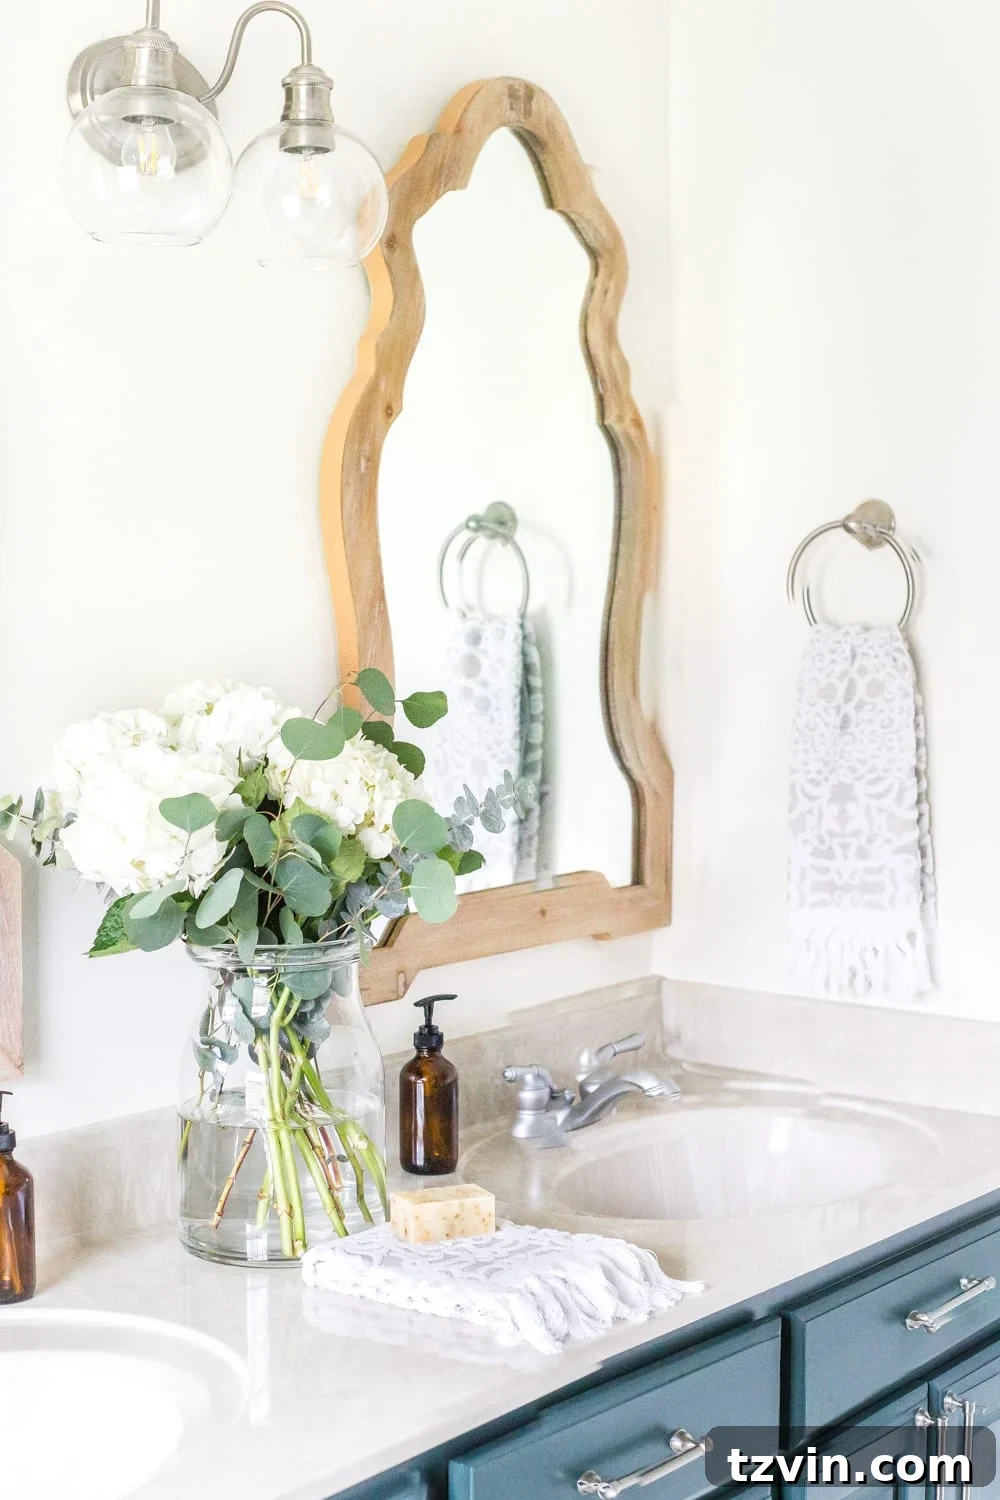
The original mirror in our master bathroom was not only dated but also showed signs of wear and tear. Robert, with the help of a friend, bravely wrestled the old, damaged mirror off the wall, paving the way for one of the most impactful visual upgrades in the room. We replaced it with a pair of stunning arched wooden mirrors. It never ceases to amaze me what a profound difference simply swapping out mirrors can make in a bathroom’s overall aesthetic.
The arched shape introduces a softness and elegance that contrasts beautifully with the straight lines of the vanity and walls, adding architectural interest and a touch of modern sophistication. The wooden frames bring warmth and texture, perfectly aligning with our natural coastal-inspired theme. If you’re considering removing your own bathroom mirror, there are helpful resources available. You might try this tutorial for mirrors hung with clips or this tutorial for mirrors installed with adhesive.
Modernizing with a New Light Fixture
The old vanity light fixture was not only aesthetically unappealing but also partially broken, making its replacement a priority. We opted for a sleek, smaller two-light sconce. This choice was deliberate: the compact design offers a more contemporary silhouette, instantly modernizing the space. Furthermore, its brushed nickel finish seamlessly matches our existing faucets and the newly installed vanity pulls, ensuring a cohesive and polished look across all metallic elements.
The right lighting can dramatically alter the perception of a room, and this new fixture not only provides essential illumination but also acts as a stylish design element, contributing to the refreshed and sophisticated atmosphere we aimed to create. It’s a subtle change with significant impact, proving that even small updates can make a big difference.
Transformative Organization: From Clutter to Calm
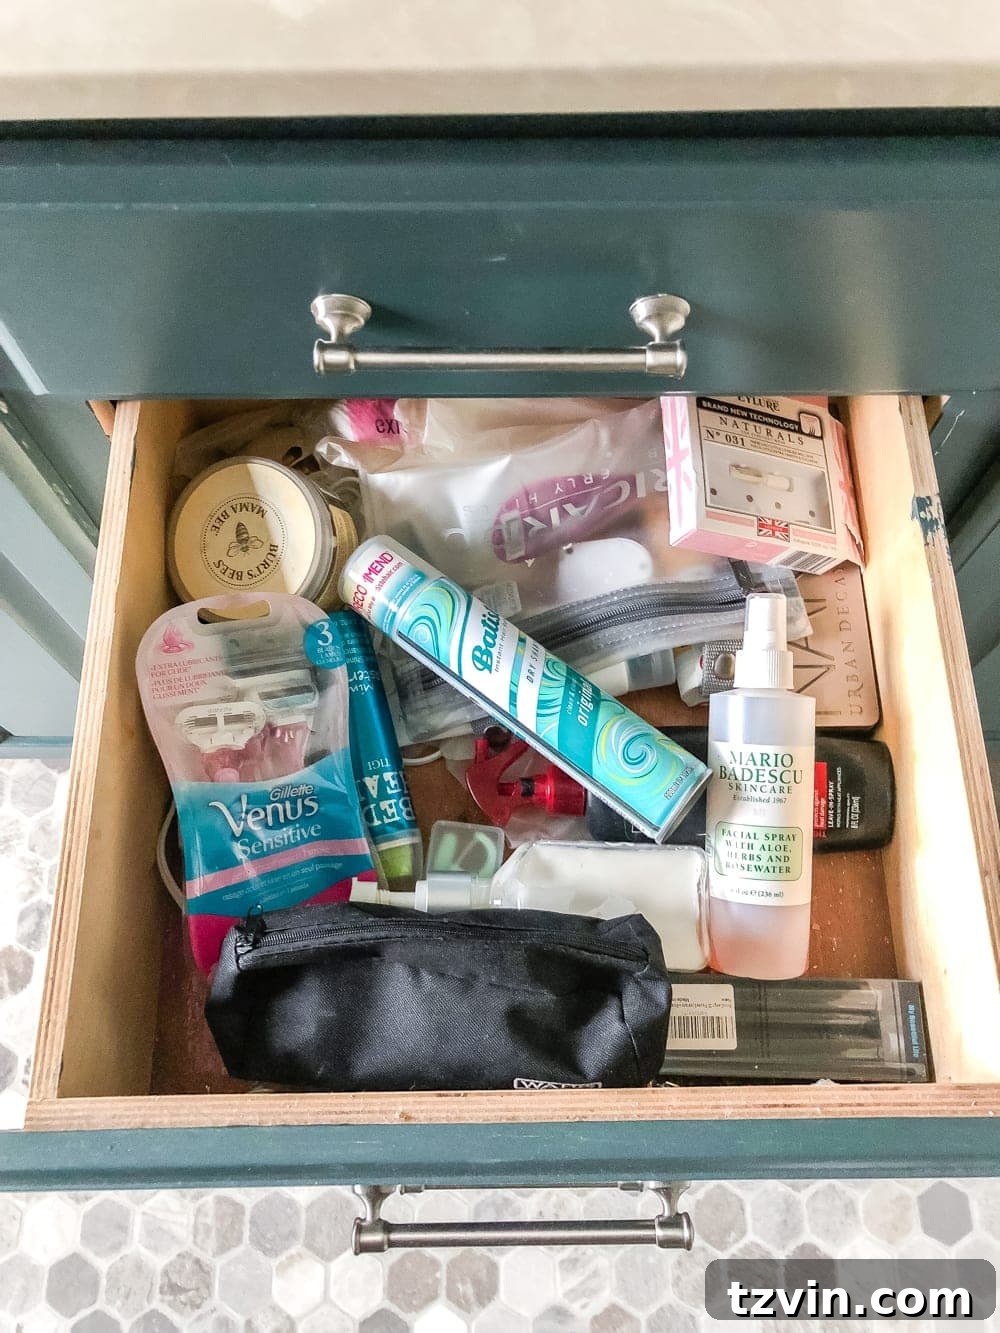
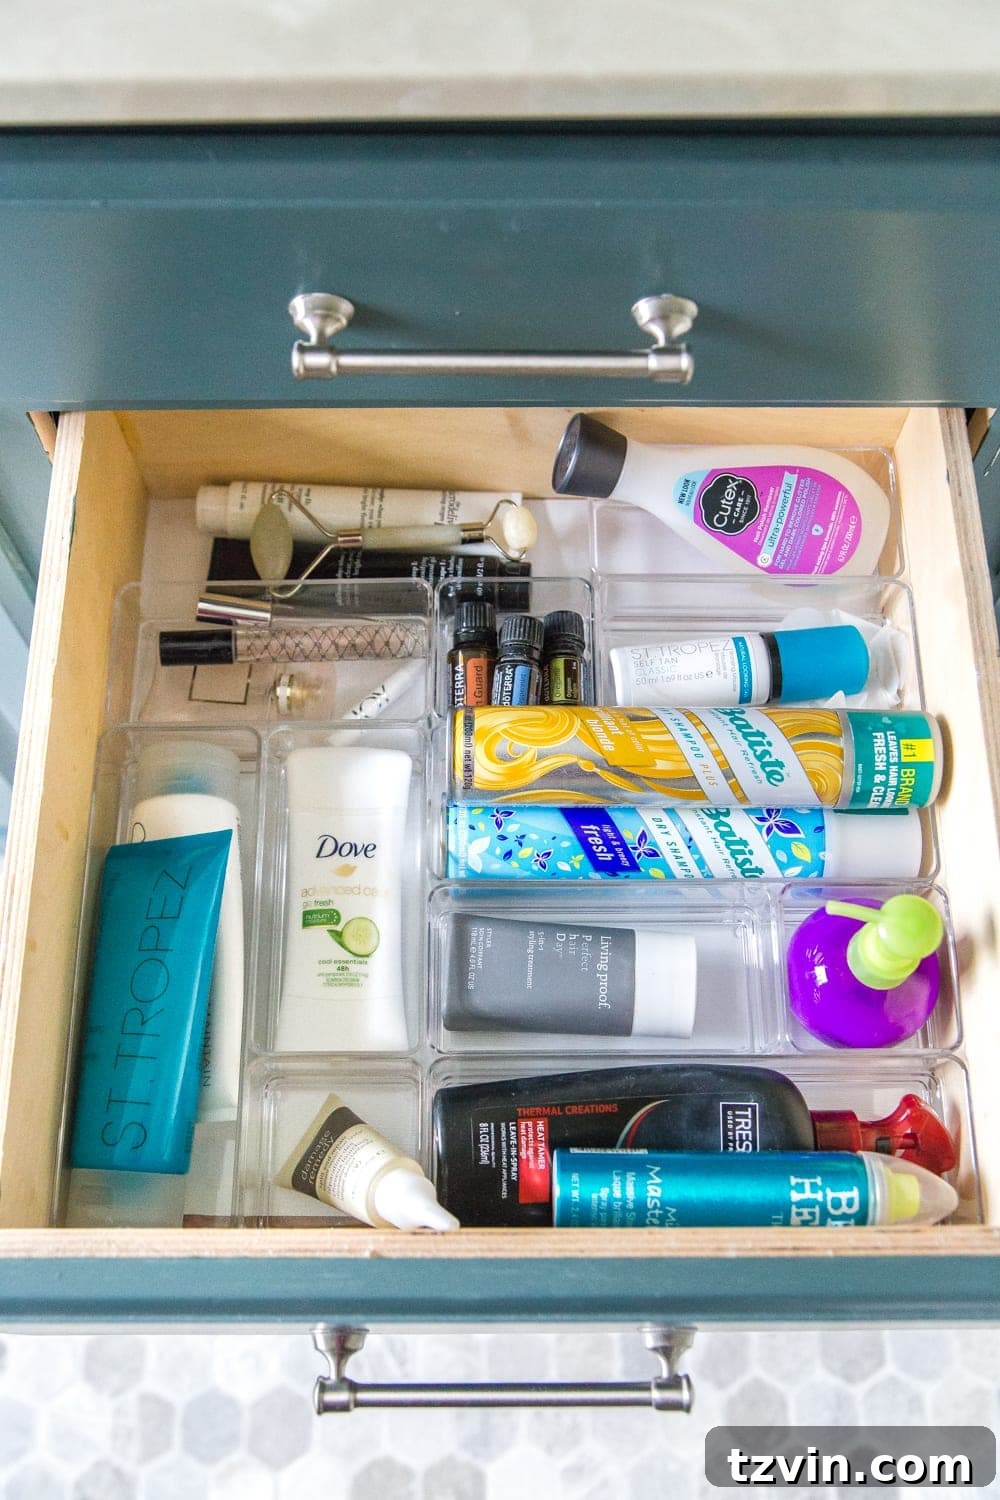
Beyond the visible surfaces, the inside of our vanity cabinets and drawers was a realm of disarray, reflecting the overall stress the bathroom inflicted. Tackling this hidden chaos was crucial for truly transforming the space into an oasis. I embarked on a major decluttering mission, taking out every single item, meticulously purging most of what we no longer needed or used, and then thoughtfully organizing the remaining essentials. For the drawers, I utilized clear plastic drawer organizers. These transparent dividers are invaluable for keeping smaller items like toiletries, makeup, and hair accessories neatly separated and easily visible, preventing them from becoming a tangled mess.
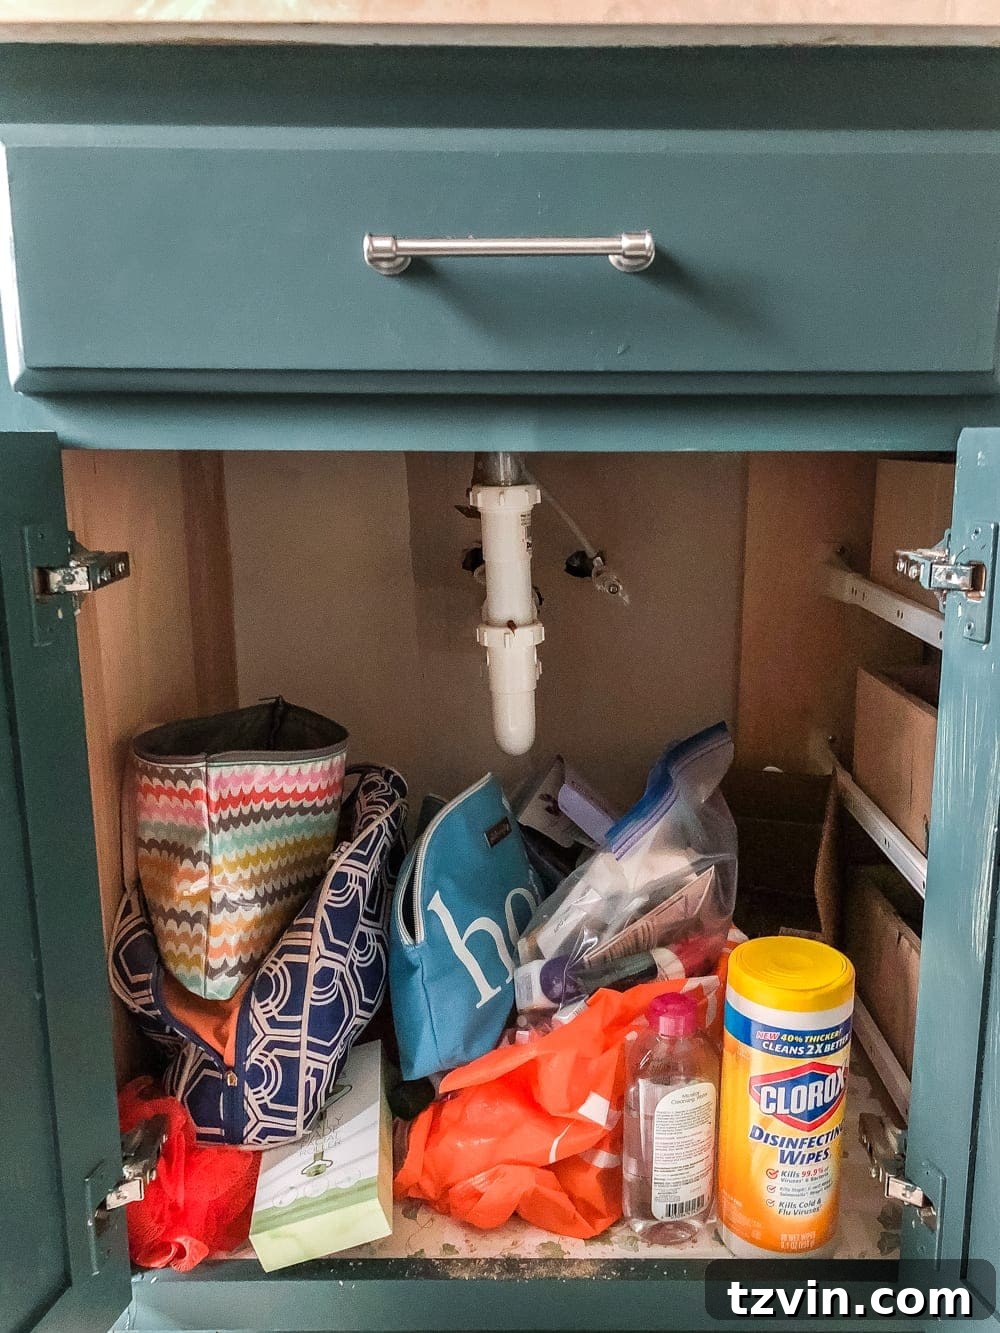
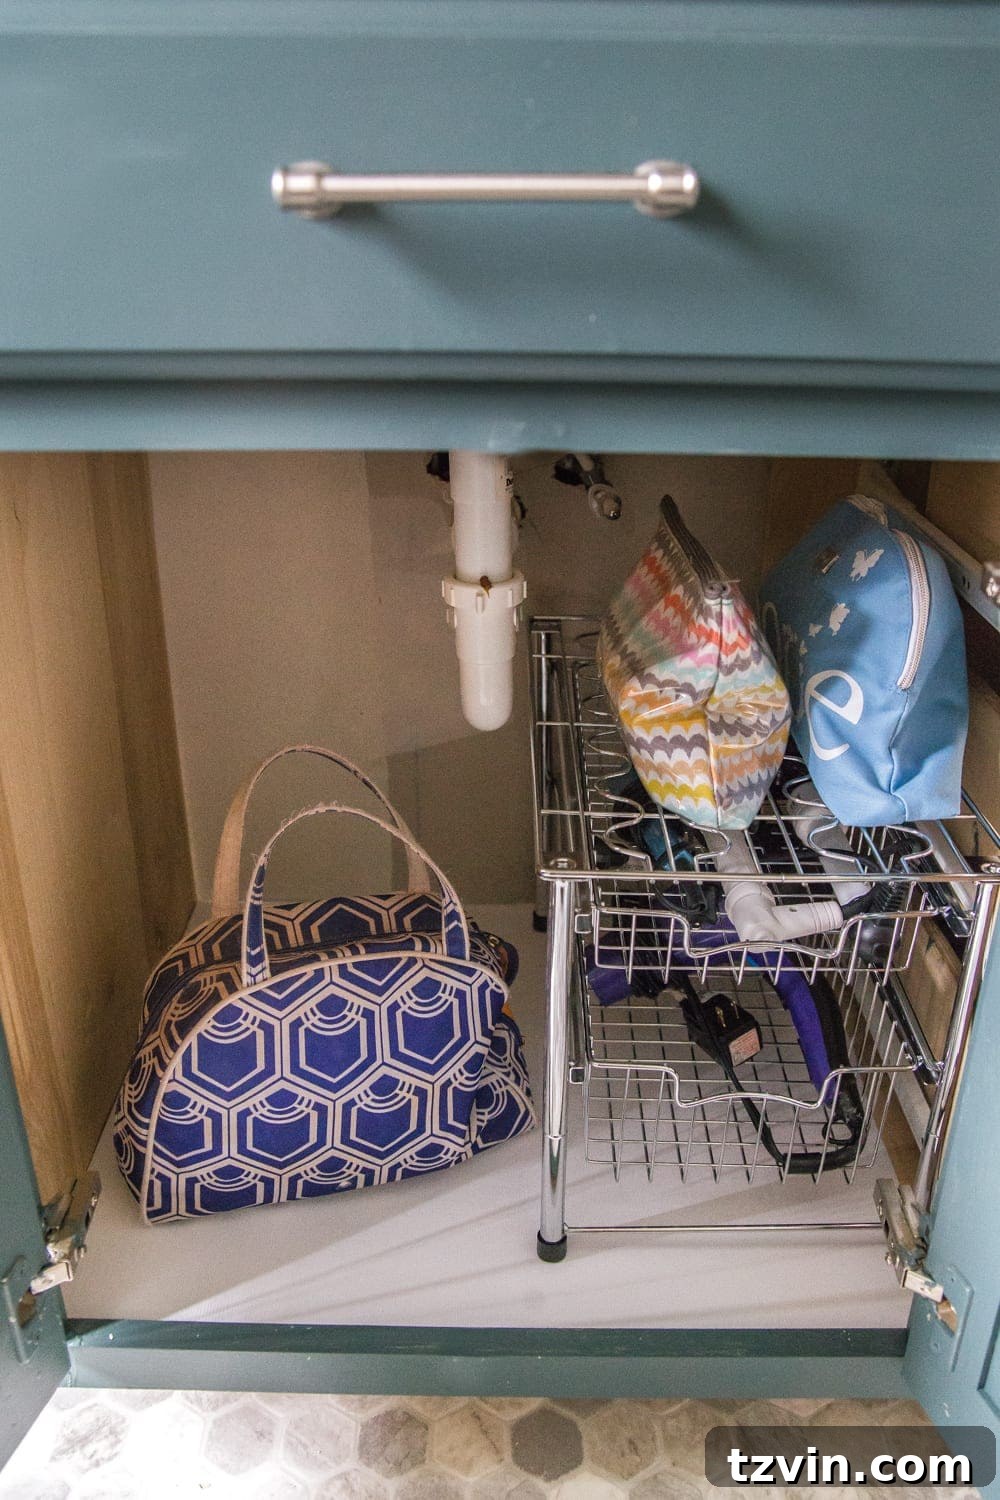
The area under the sinks also received a major overhaul. This often-neglected space quickly becomes a dumping ground for cleaning supplies and bulky items. To maximize vertical storage and maintain order, I installed stackable basket drawers. These are fantastic for utilizing the full height of the cabinet, making everything accessible without having to rummage through piles. To further elevate the cleanliness and aesthetic of these hidden spaces, I lined the shelves with white contact paper. This simple addition not only makes cleaning easier but also provides a fresh, uniform look that contributes to the overall sense of calm and order. Effective organization is not just about tidiness; it’s about creating a functional system that reduces stress and improves daily routines.
Clever Shower Door Concealment: Function Meets Style
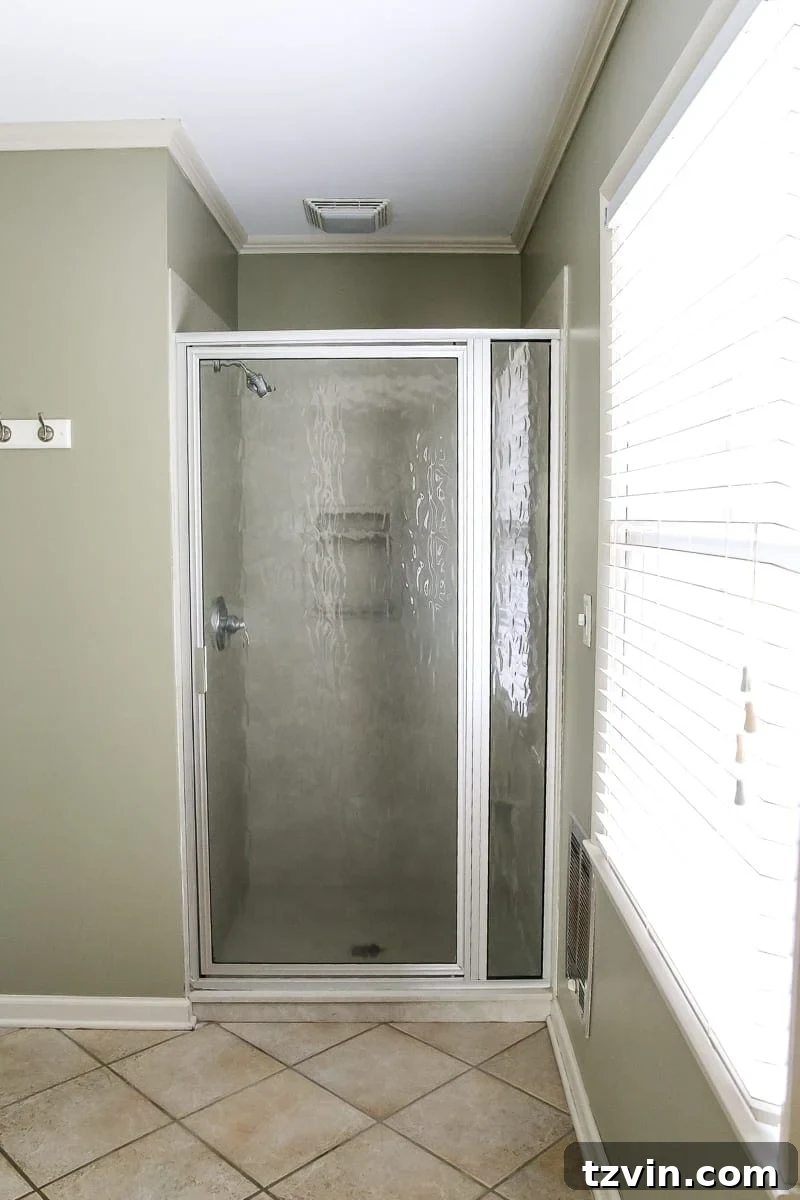
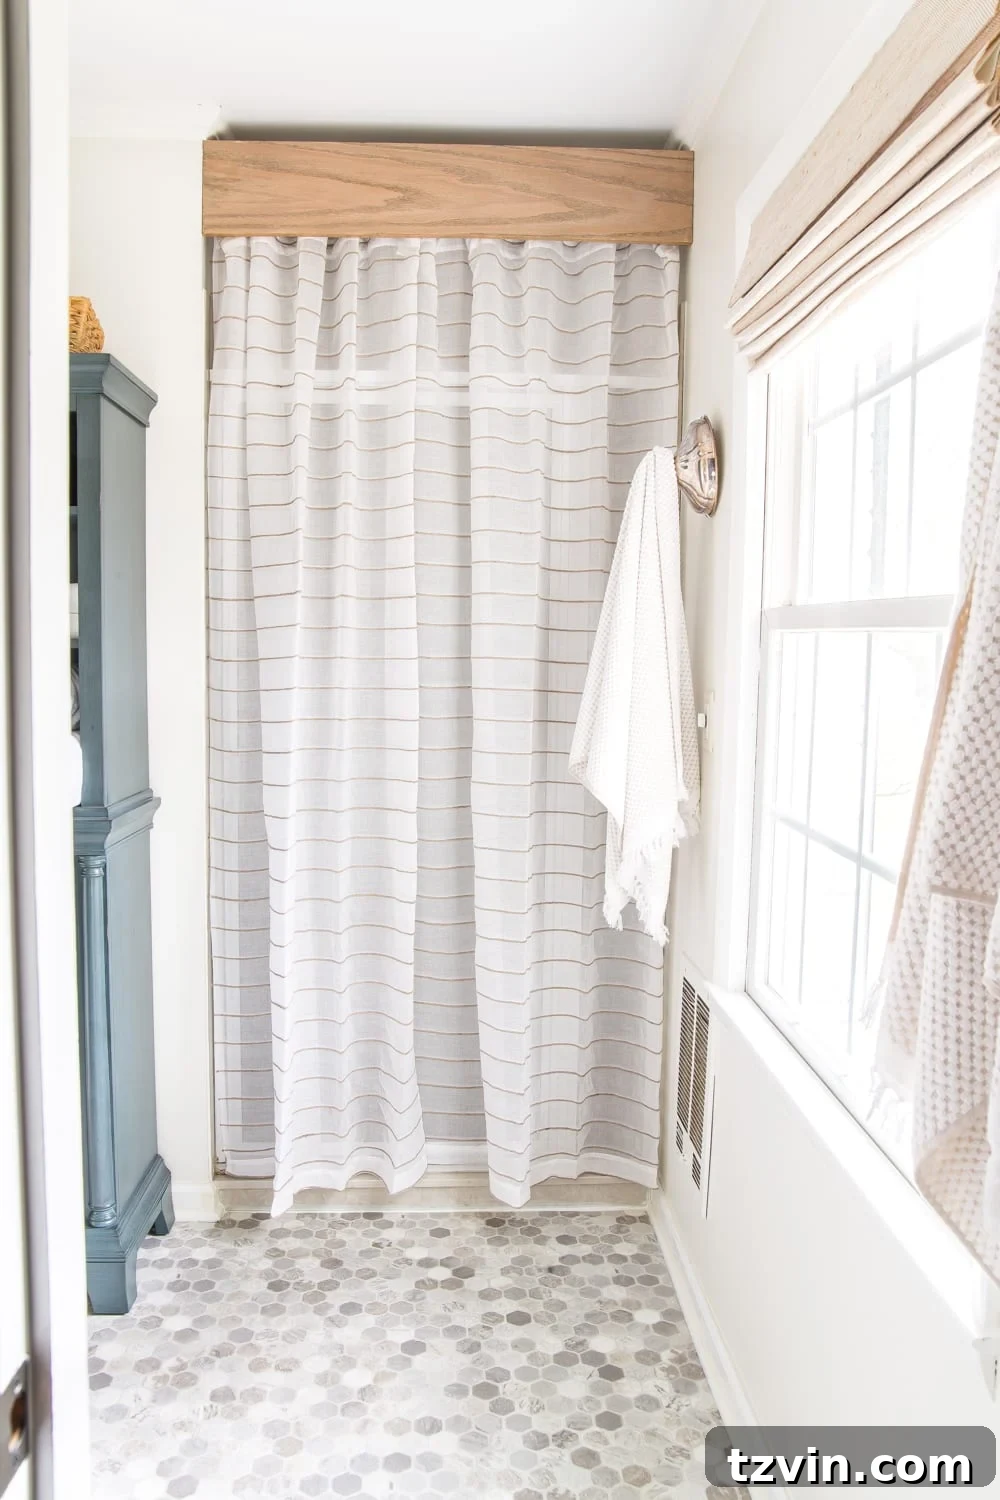
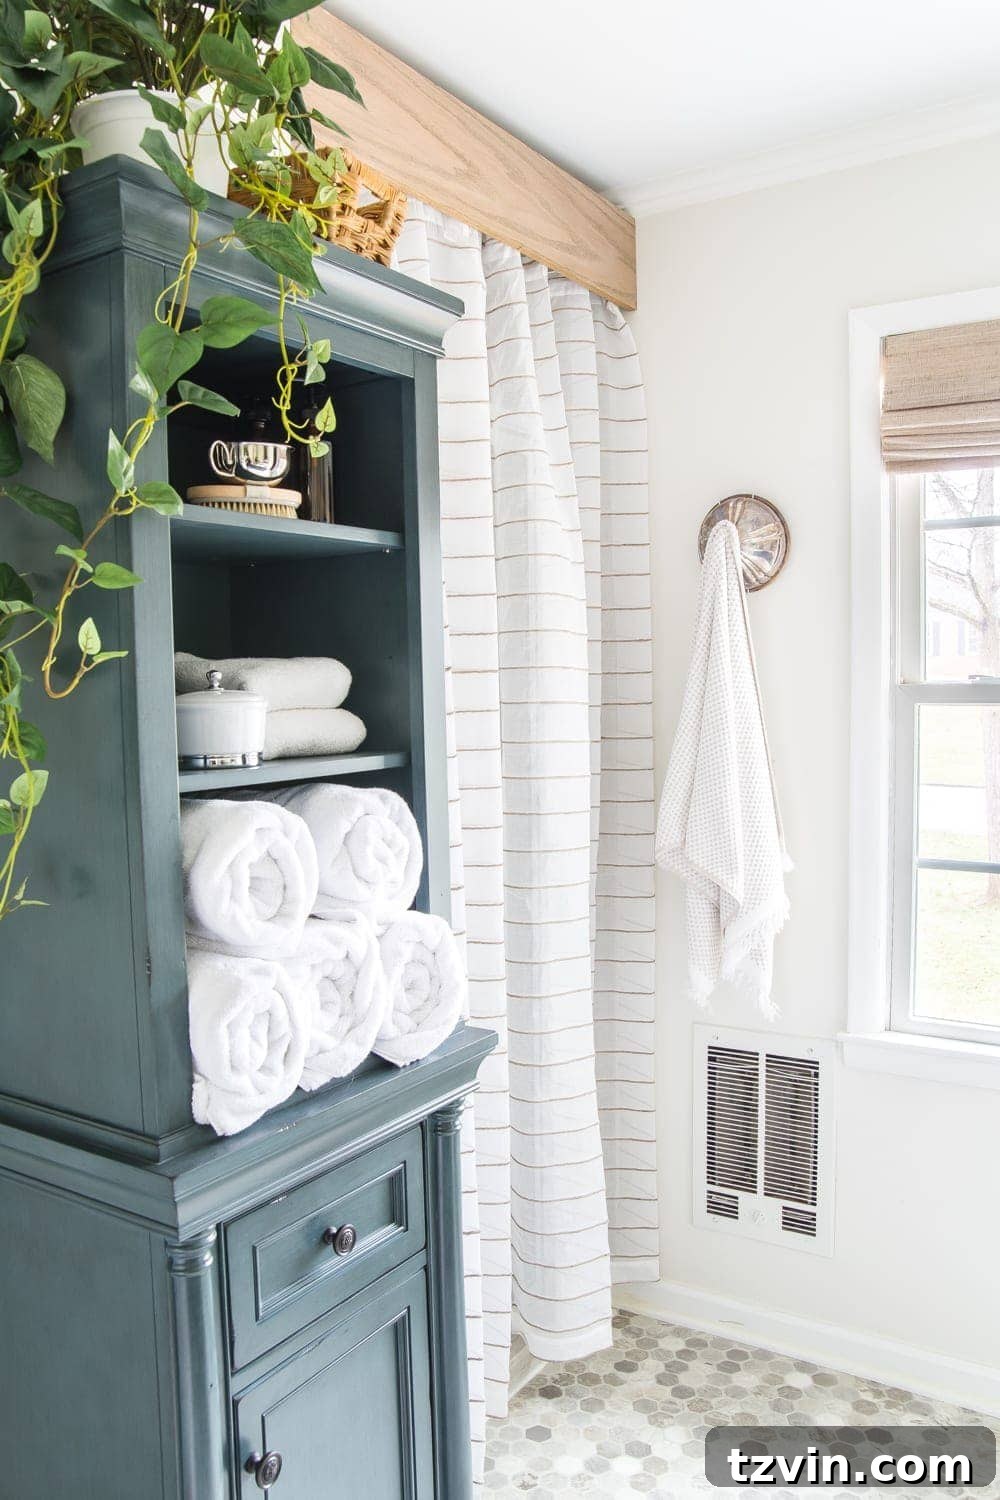
The existing shower door was another element contributing to the bathroom’s outdated aesthetic. Rather than undertaking a costly and time-consuming replacement, many of you suggested a creative workaround: covering it up! We decided to take the plunge and embrace this innovative solution. We hung a beautiful semi-sheer curtain, which expertly conceals the old door while still allowing natural light to filter into the shower area, maintaining a bright and airy feel. The soft fabric adds a touch of elegance and texture, instantly softening the harsh lines of the old shower enclosure.
To give this clever solution a polished, built-in look, we crafted a custom cornice from a simple wooden board. This cornice serves a dual purpose: it elegantly hides the tension rod from which the curtain hangs, and it adds architectural detail to the space. We stained the wood to match the natural tones elsewhere in the bathroom and sealed it with polyurethane to protect it from humidity, ensuring its longevity in the bathroom environment. This DIY shower door cover-up is a testament to how creative thinking can transform a major eyesore into an attractive design feature, all while adhering to a strict budget.
Adding Personality with a Budget-Friendly Gallery Wall
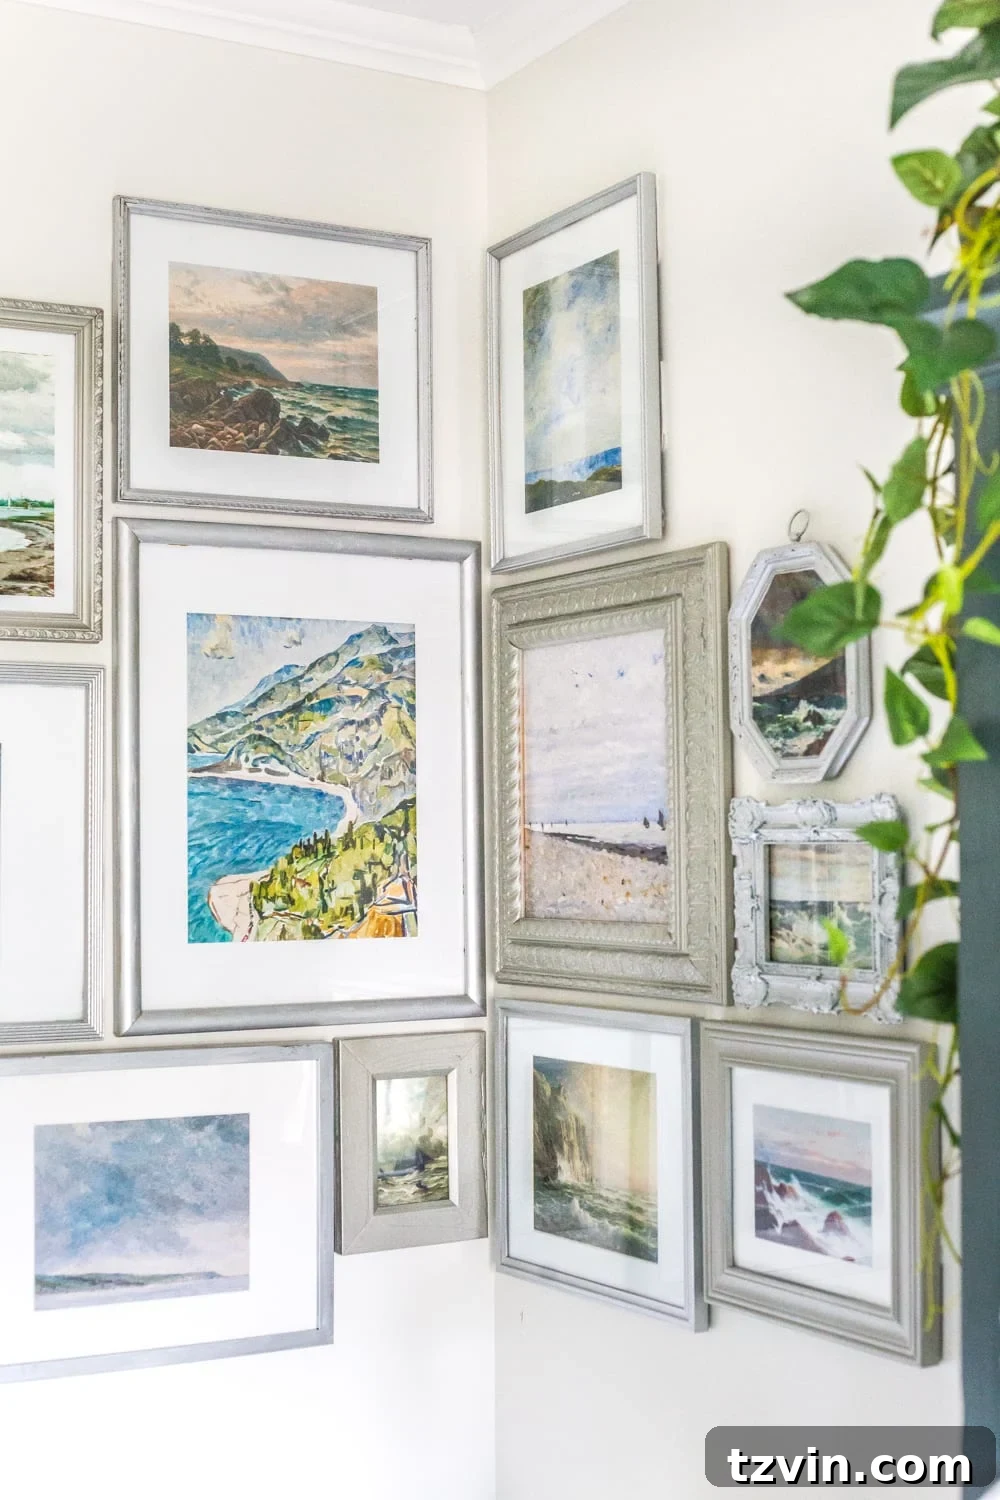
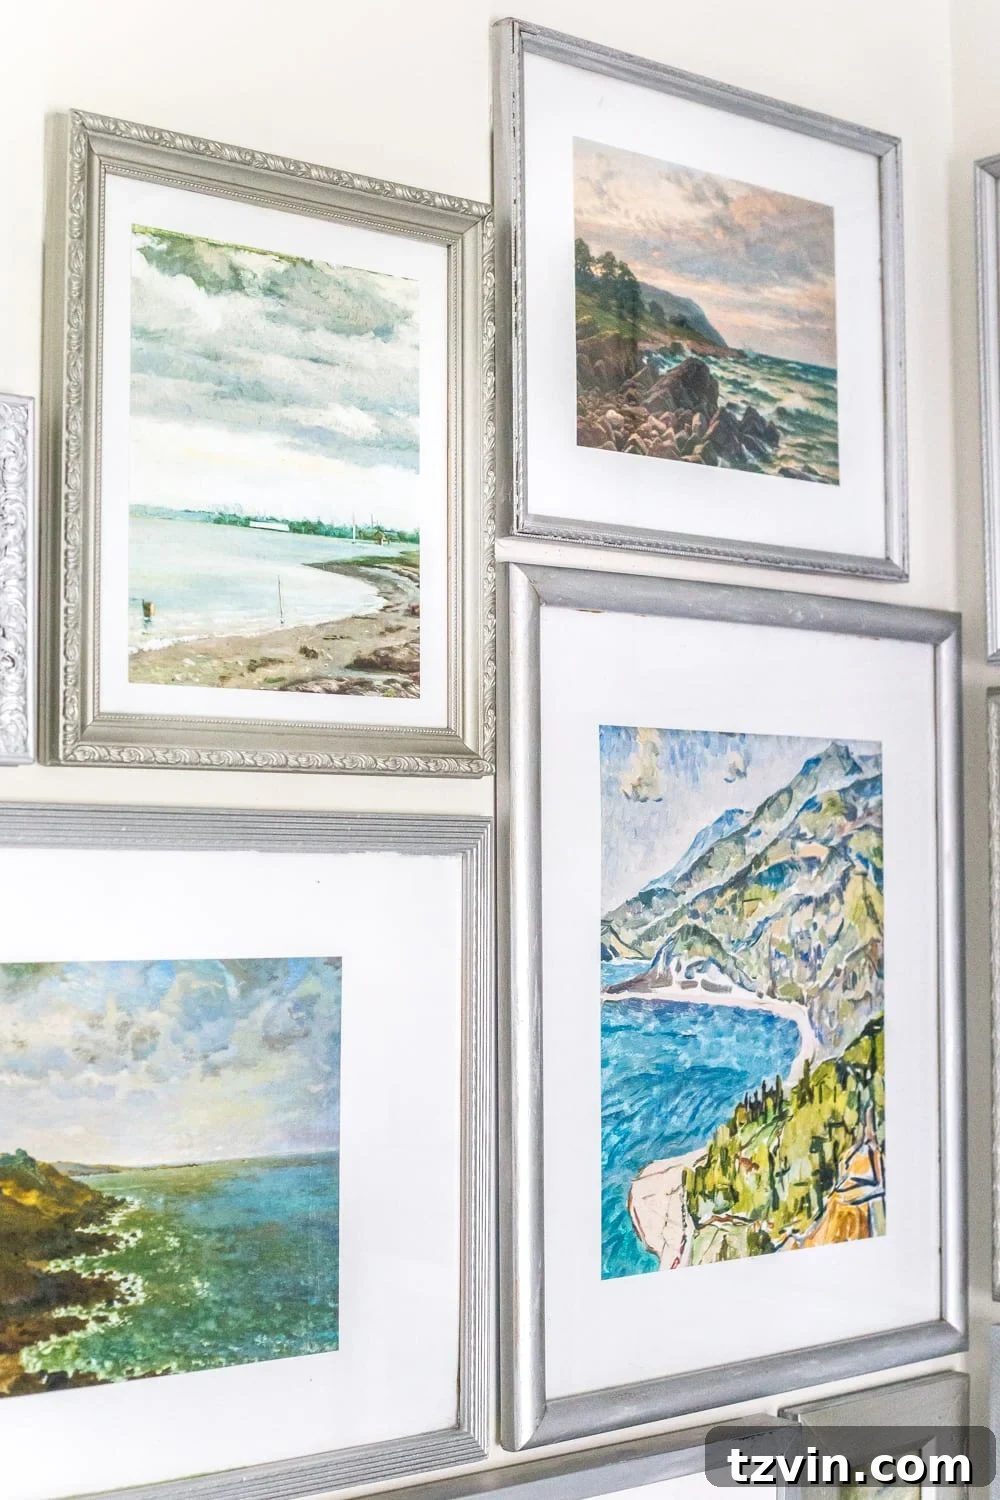
One particular big, blank corner in the bathroom initially left me completely stumped. It felt cavernous and impersonal, begging for a touch of personality but without an exorbitant price tag. My solution was to create a charming and cost-effective gallery wall. I started by gathering a collection of affordable thrifted frames, finding unique shapes and sizes that added character. For the mats, instead of expensive custom options, I ingeniously made them from cheap poster board, a trick that saves a significant amount of money while still providing a polished look.
The art itself came from a fantastic resource: free public domain coastal art printables. This allowed us to introduce soothing blue and green tones into the space, tying in beautifully with the custom cabinet color and the overall serene aesthetic. The entire gallery wall project cost us around $50, demonstrating how strategic sourcing and DIY ingenuity can transform a neglected corner into a focal point. It adds immense personality and artistic flair, perfectly complementing the room’s refreshed style.
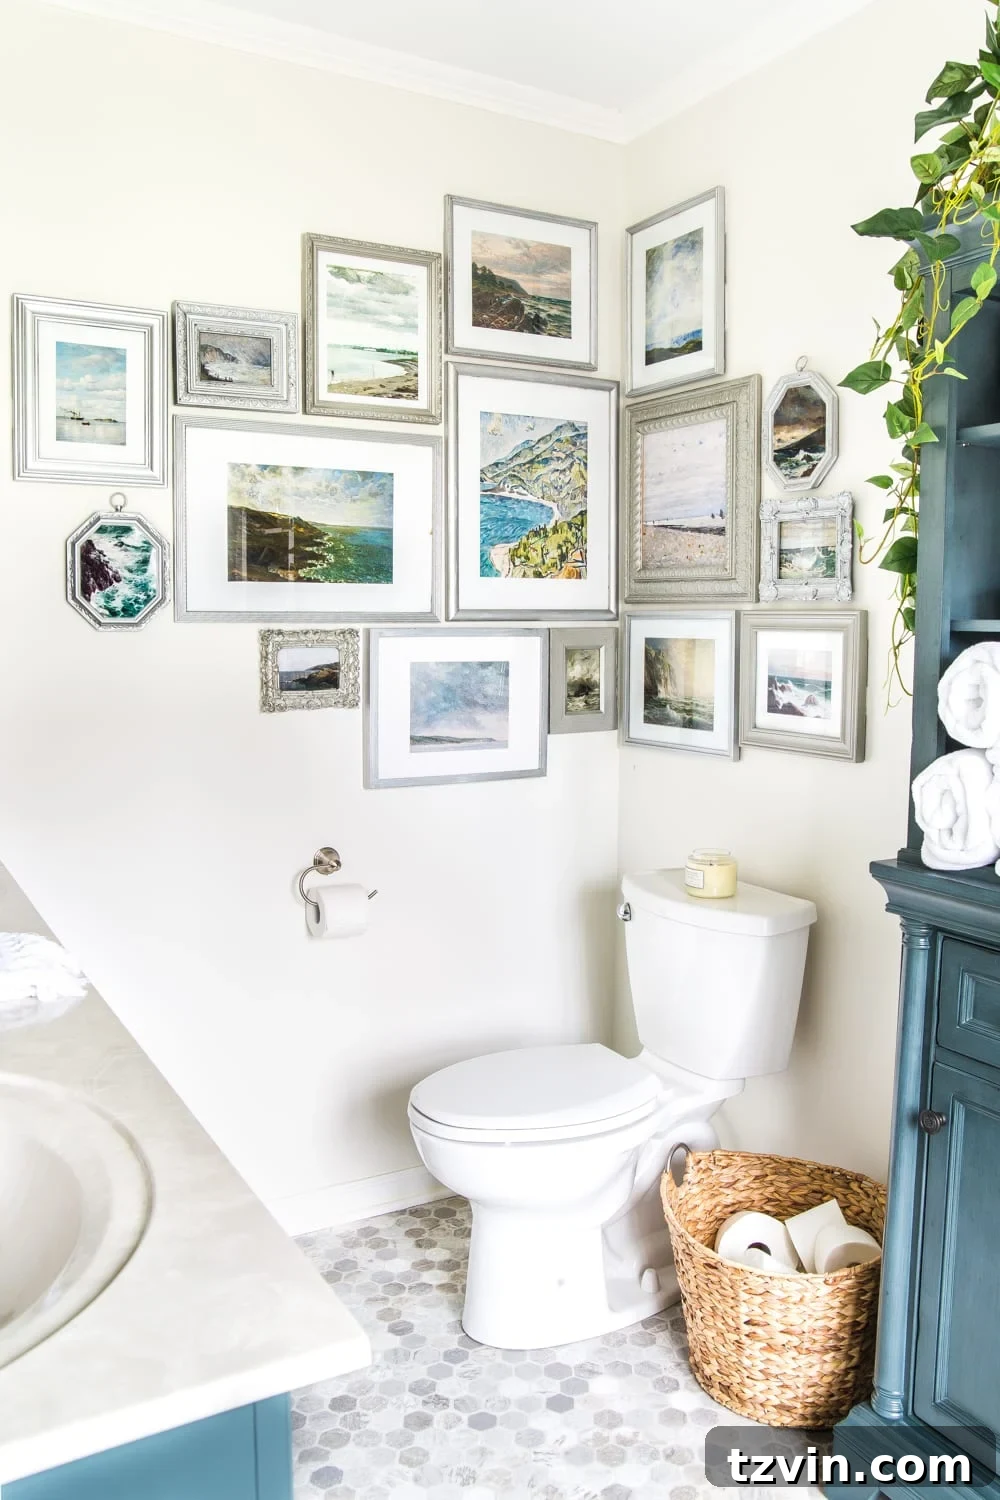
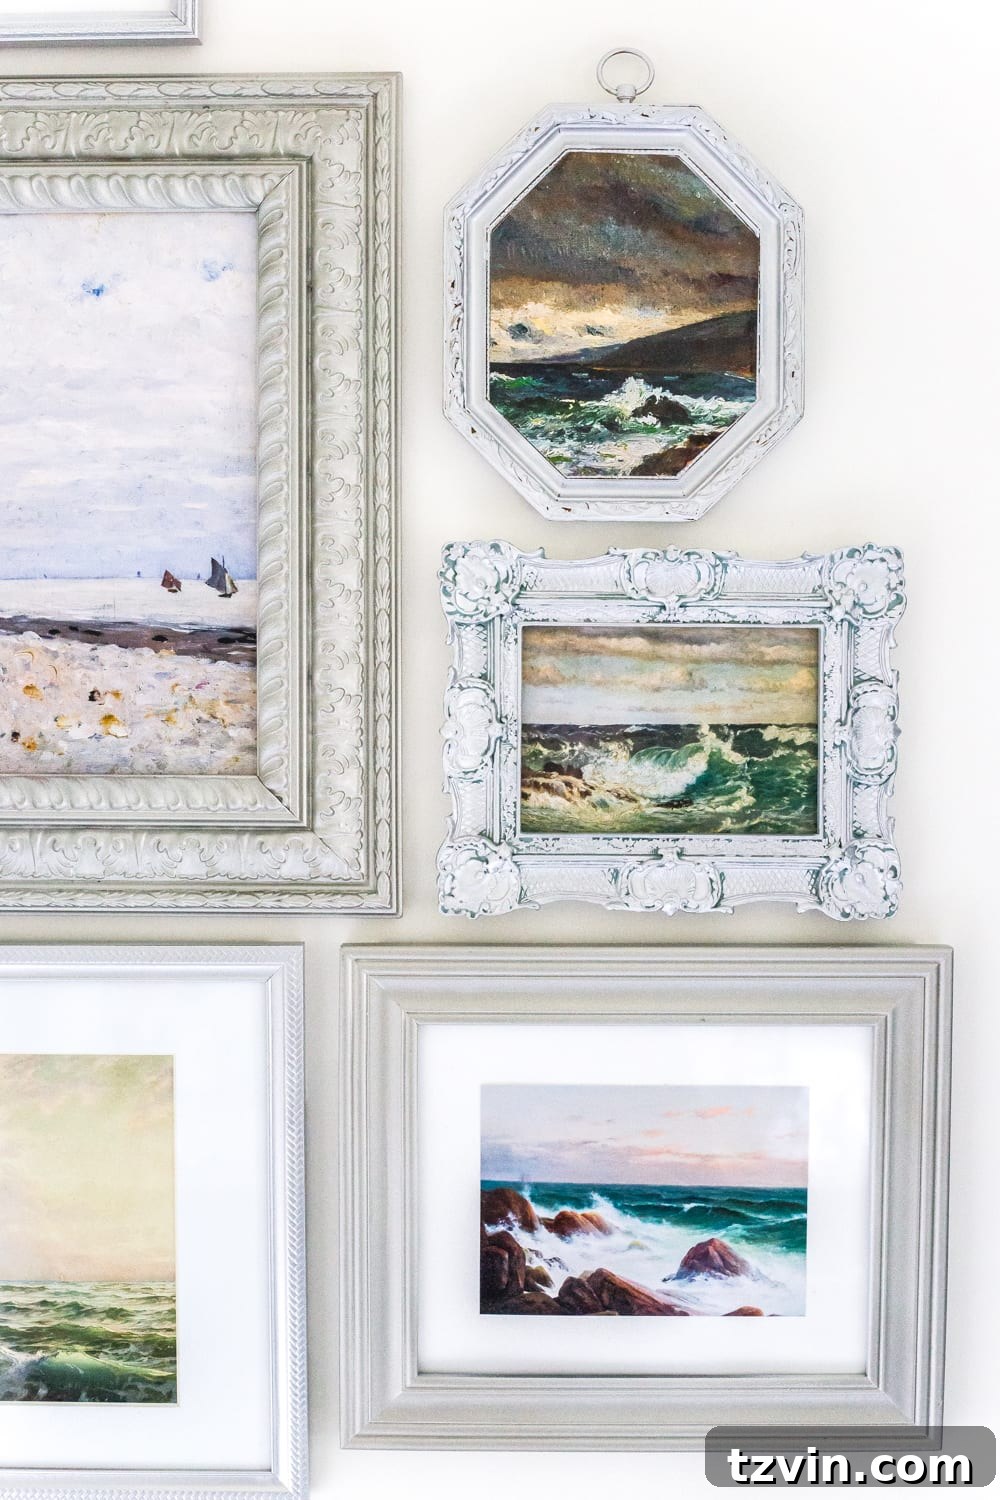
This curated collection not only fills the previously blank wall but also infuses the space with so much character and visual interest. The coastal theme feels incredibly calming, and the subtle blues and greens harmoniously blend with the customized vanity color, creating a truly cohesive and inviting atmosphere. It’s proof that impactful decor doesn’t have to come with a hefty price tag.
Essential Vertical Storage: The Linen Cabinet
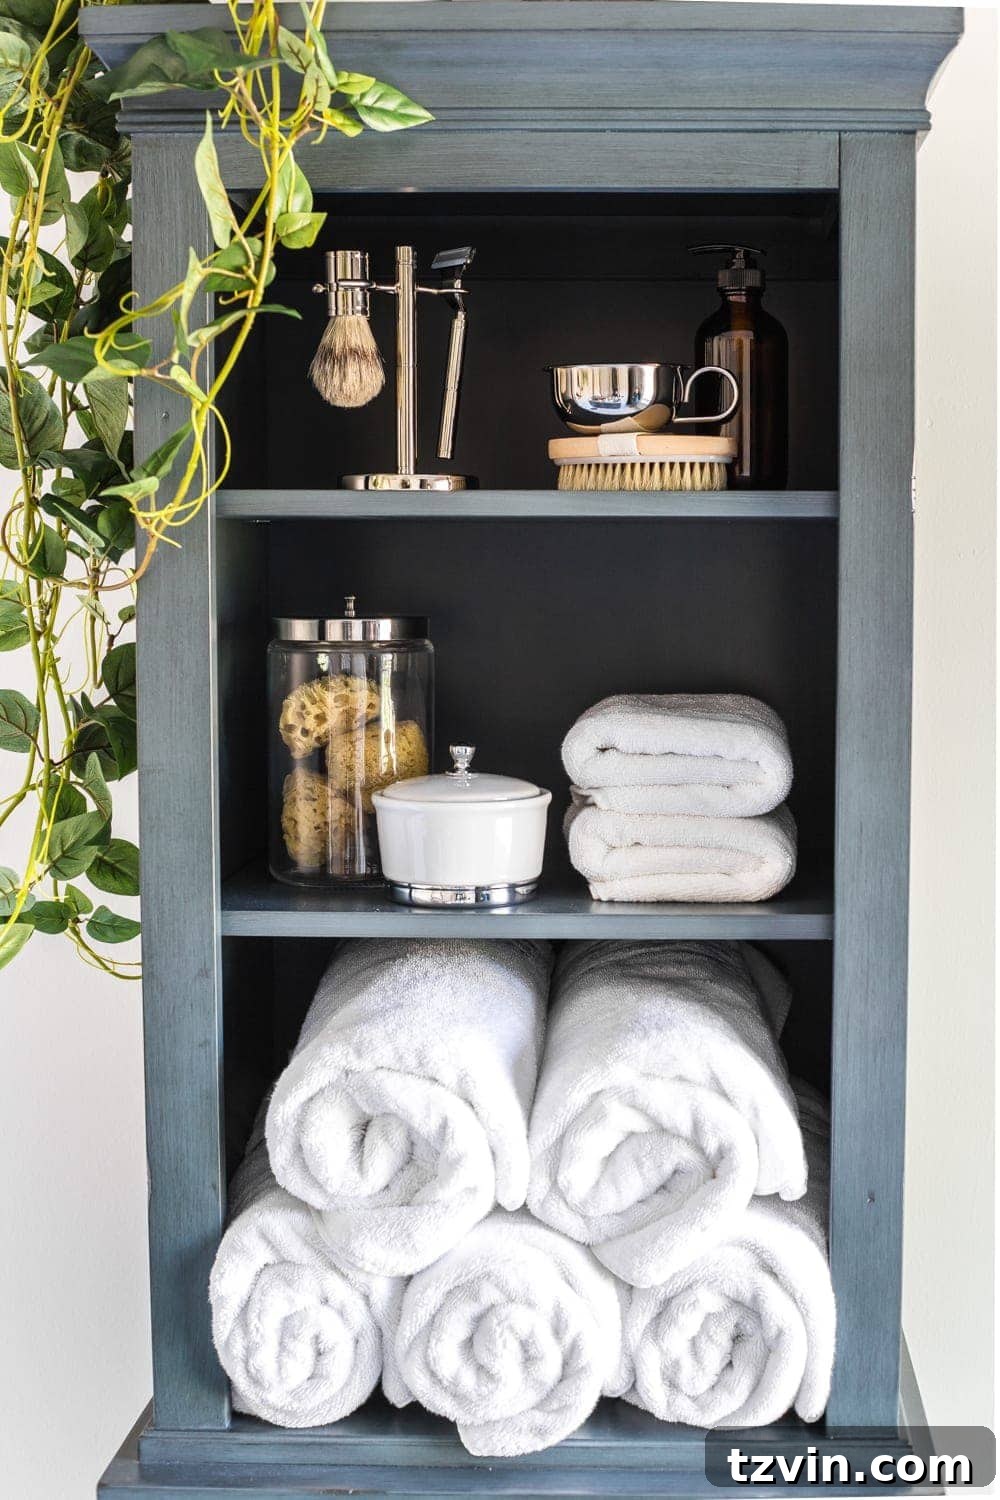
One of our most pressing needs in the master bathroom was for additional vertical storage. The existing layout offered limited space, and we desperately required a solution to keep essentials tidy and accessible. We found the perfect answer in this elegant linen cabinet, which we purchased on sale. This cabinet not only provided the much-needed storage but also served as the primary inspiration for the custom paint color used on our vanity, creating a beautiful thread of color consistency throughout the entire room.
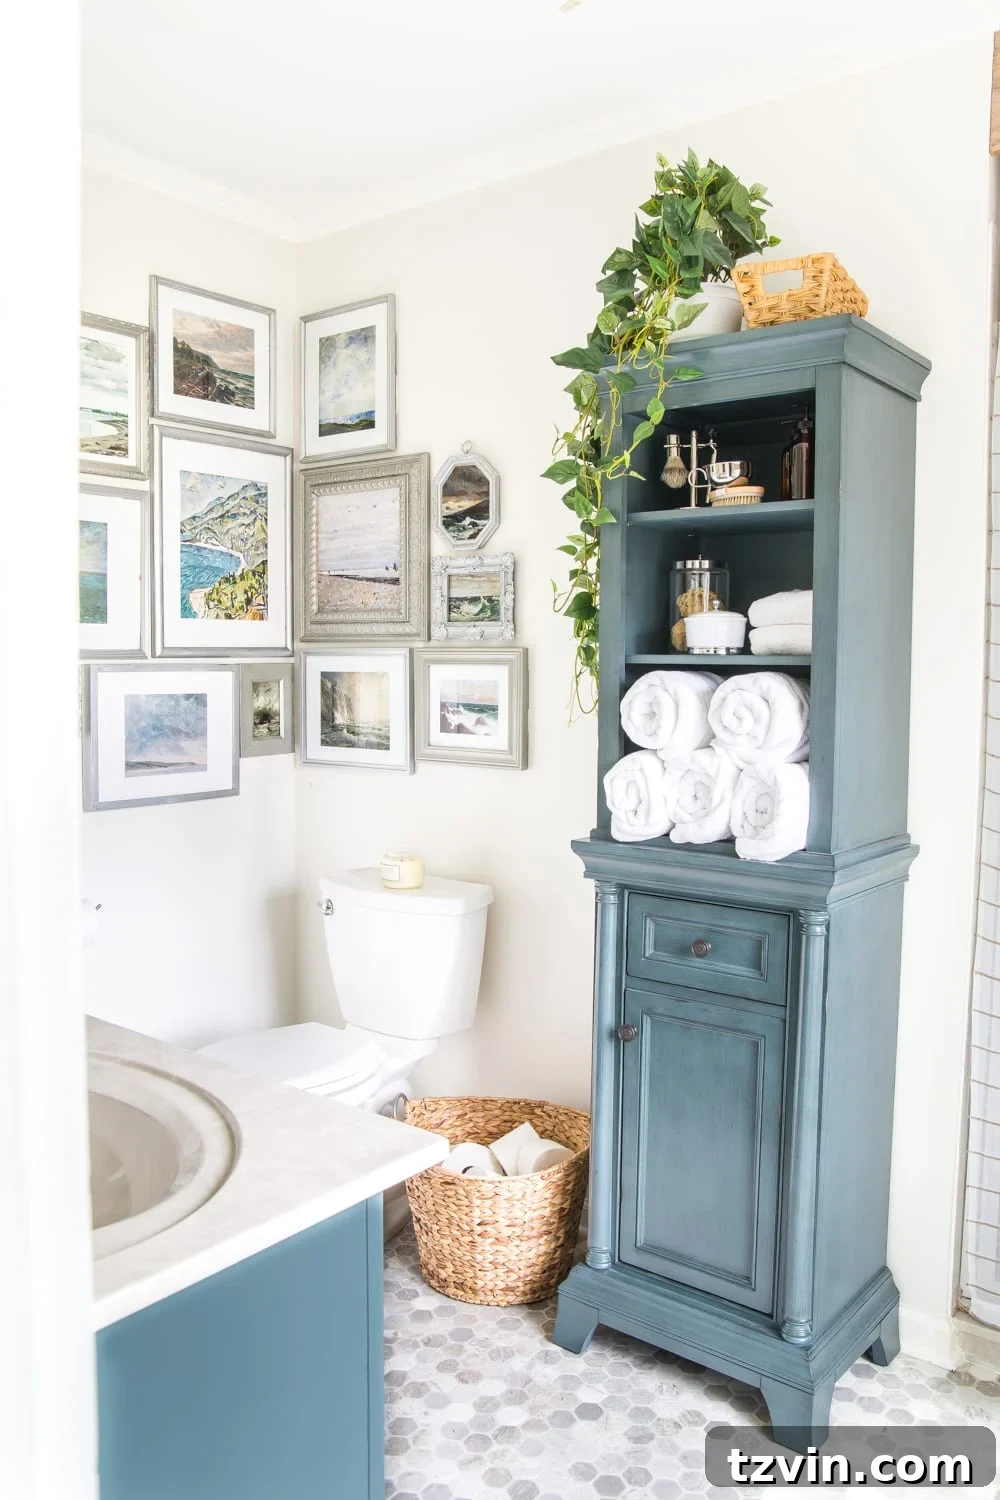
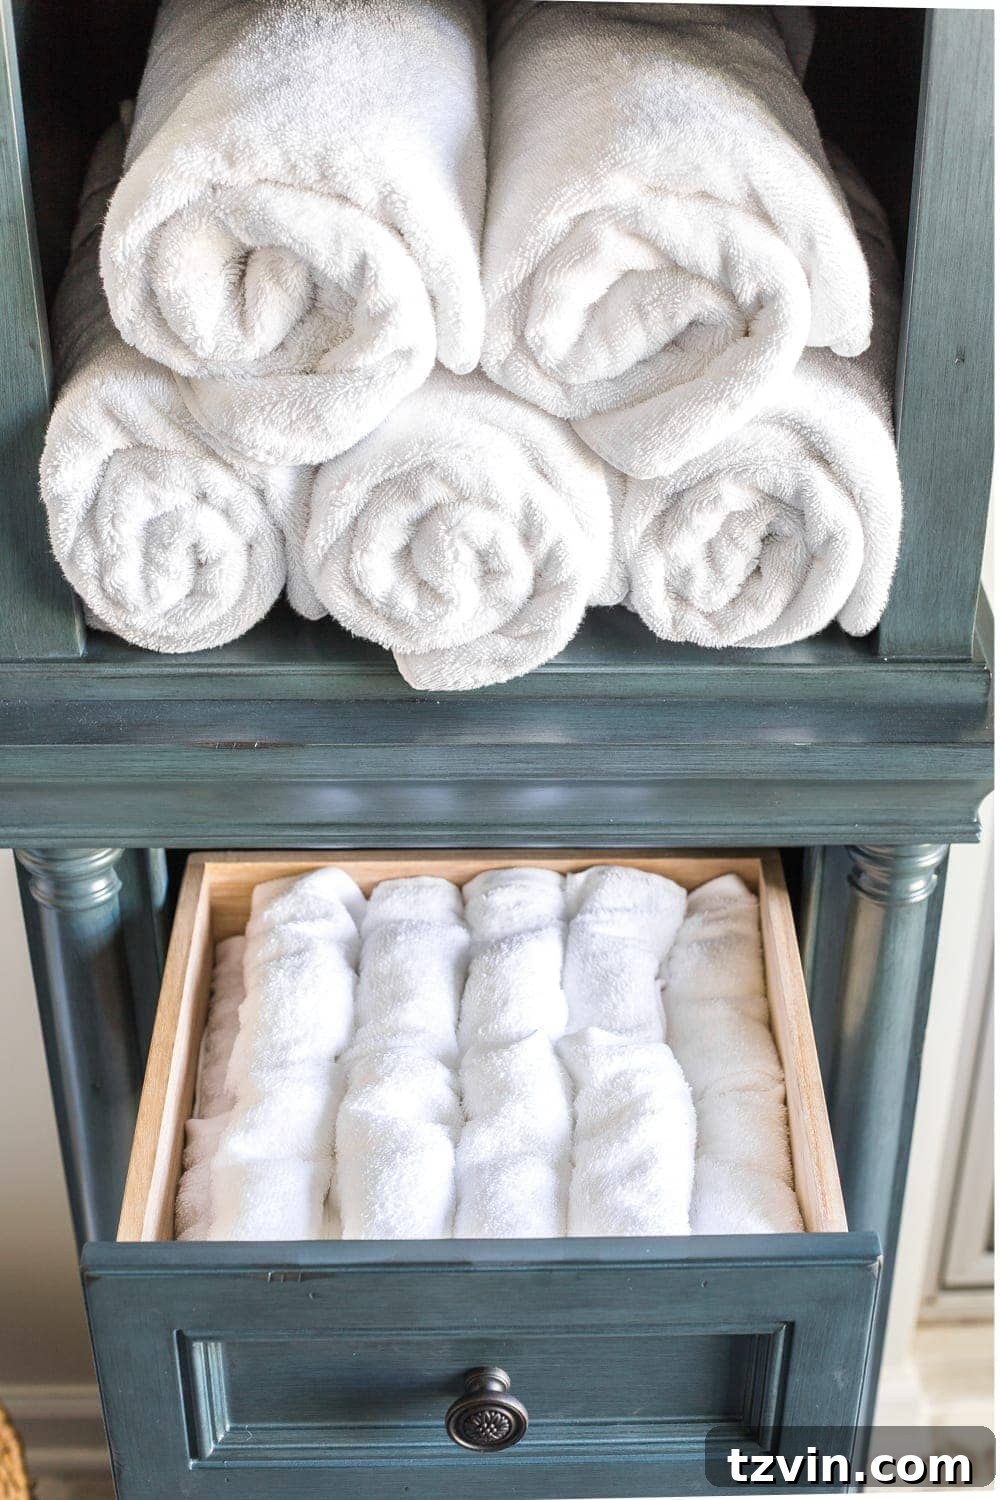
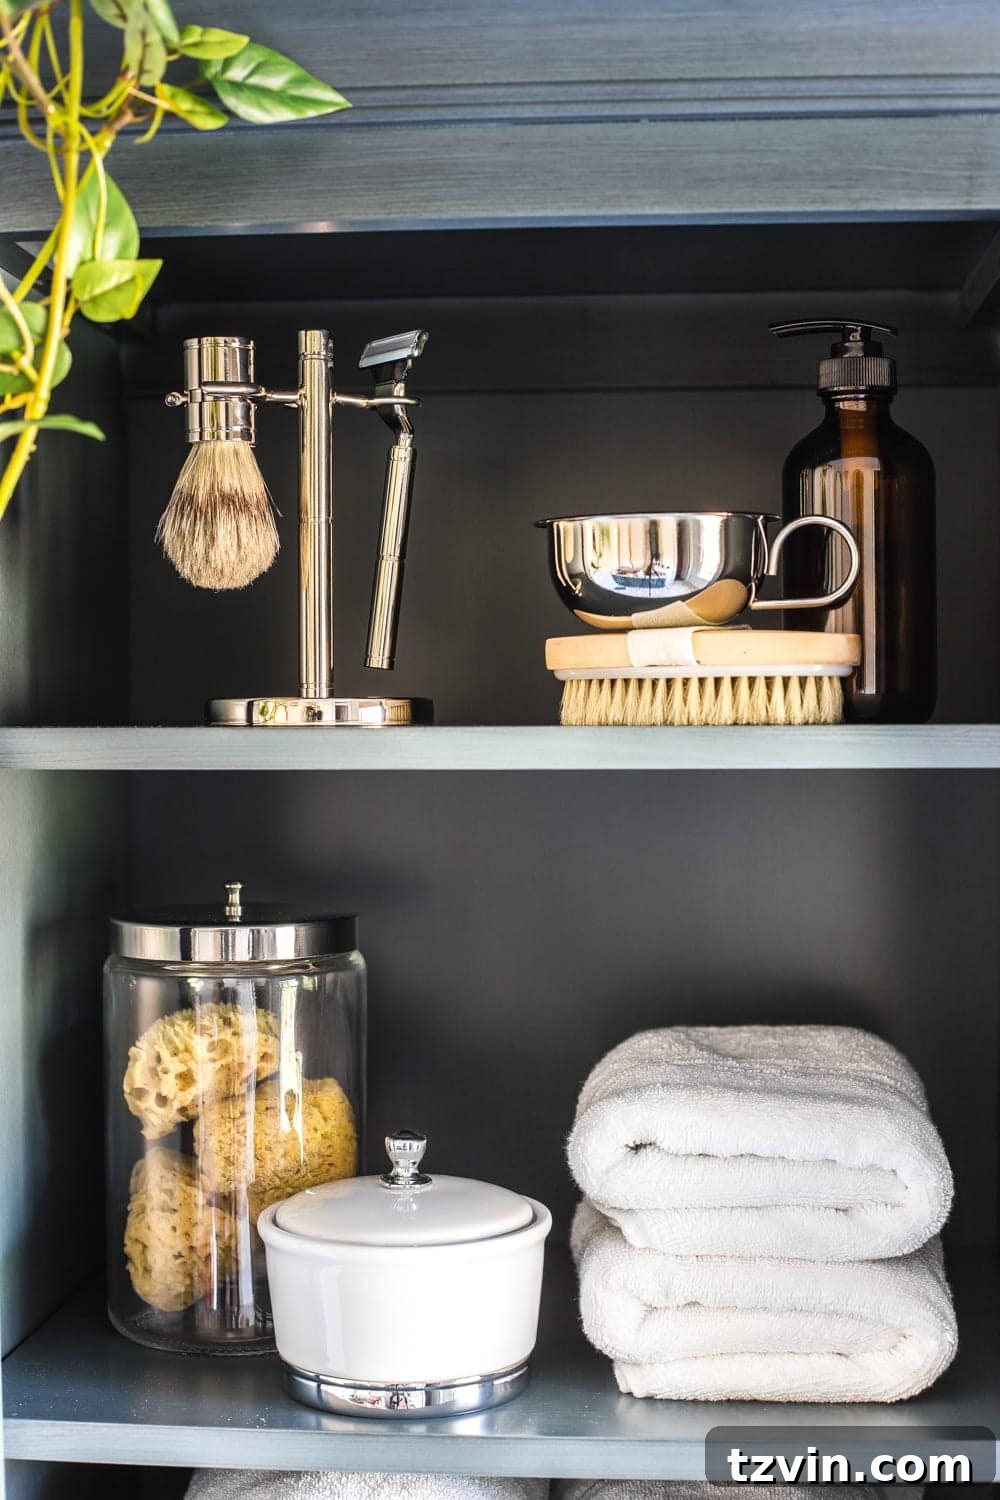
The cabinet now serves as a central hub for bathroom necessities. Its shelves neatly hold a few carefully rolled towels, lending a luxurious, spa-like feel to the space. Additionally, everyday items like Q-tips, exfoliating sponges, and Robert’s shaving kit are stored within easy reach, keeping countertops clear and clutter-free. The strategically placed drawers are ideal for organizing smaller linens, specifically designated for washcloths.
We were able to utilize the drawer to hold wash cloths too.
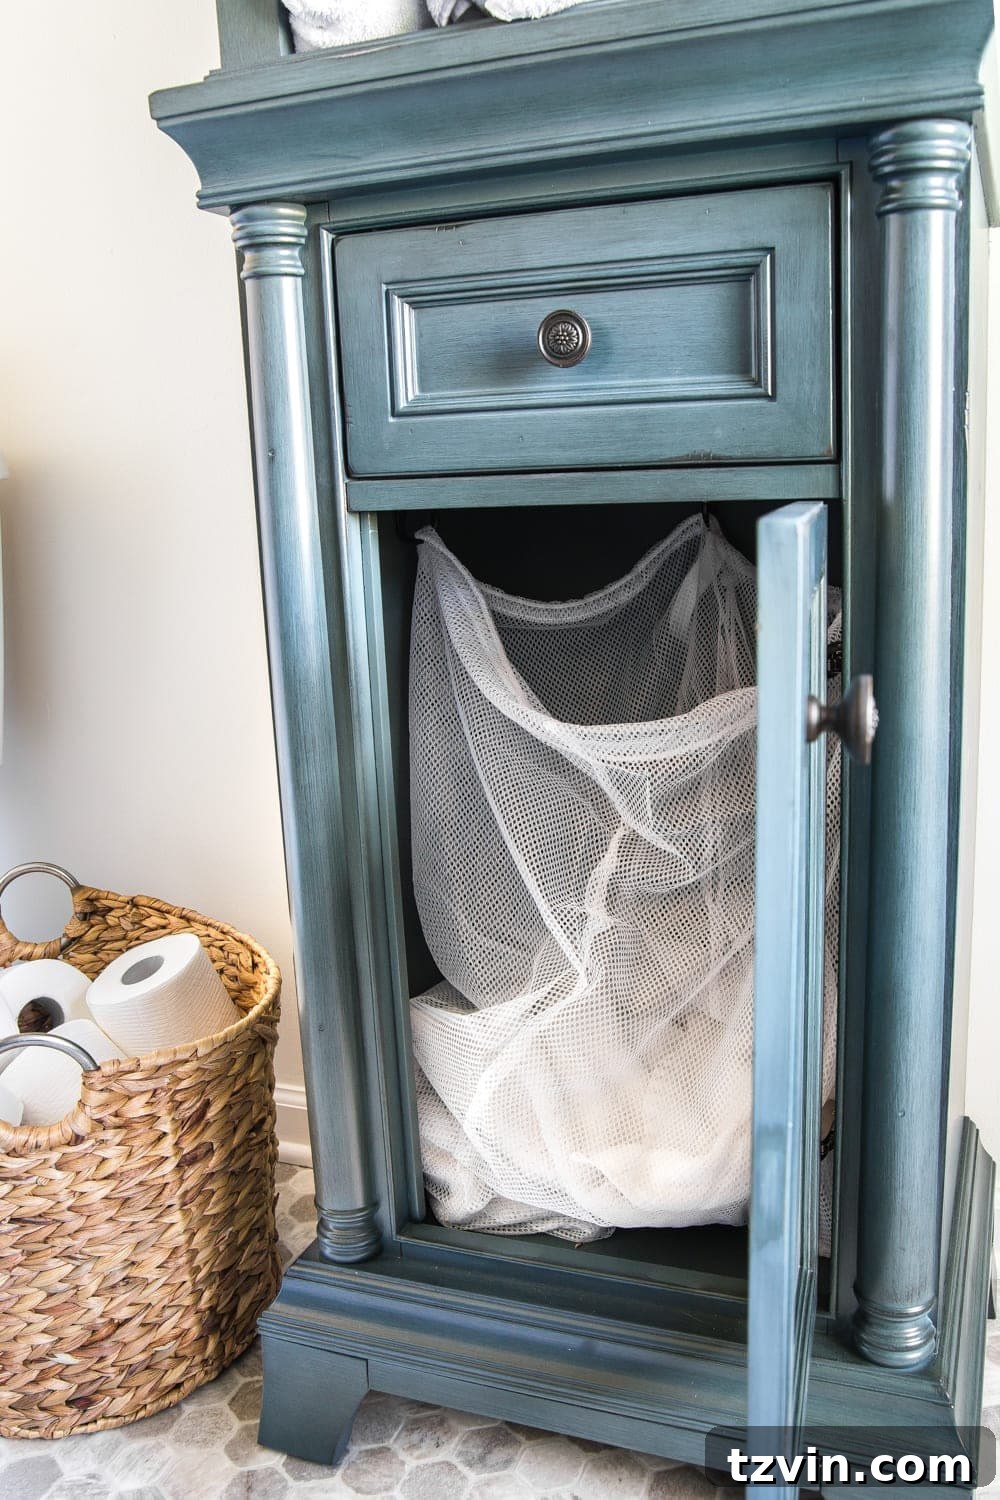
And in a particularly clever DIY move, I rigged up a discreet hamper within one of the cabinet sections using a laundry bag. This ingenious solution keeps dirty laundry out of sight, maintaining the serene aesthetic of the bathroom, yet is incredibly practical for daily use. This linen cabinet truly transforms the organization and functionality of our master bathroom, proving that thoughtful storage can dramatically enhance a space.
Prioritizing Privacy with a Woven Wood Window Shade
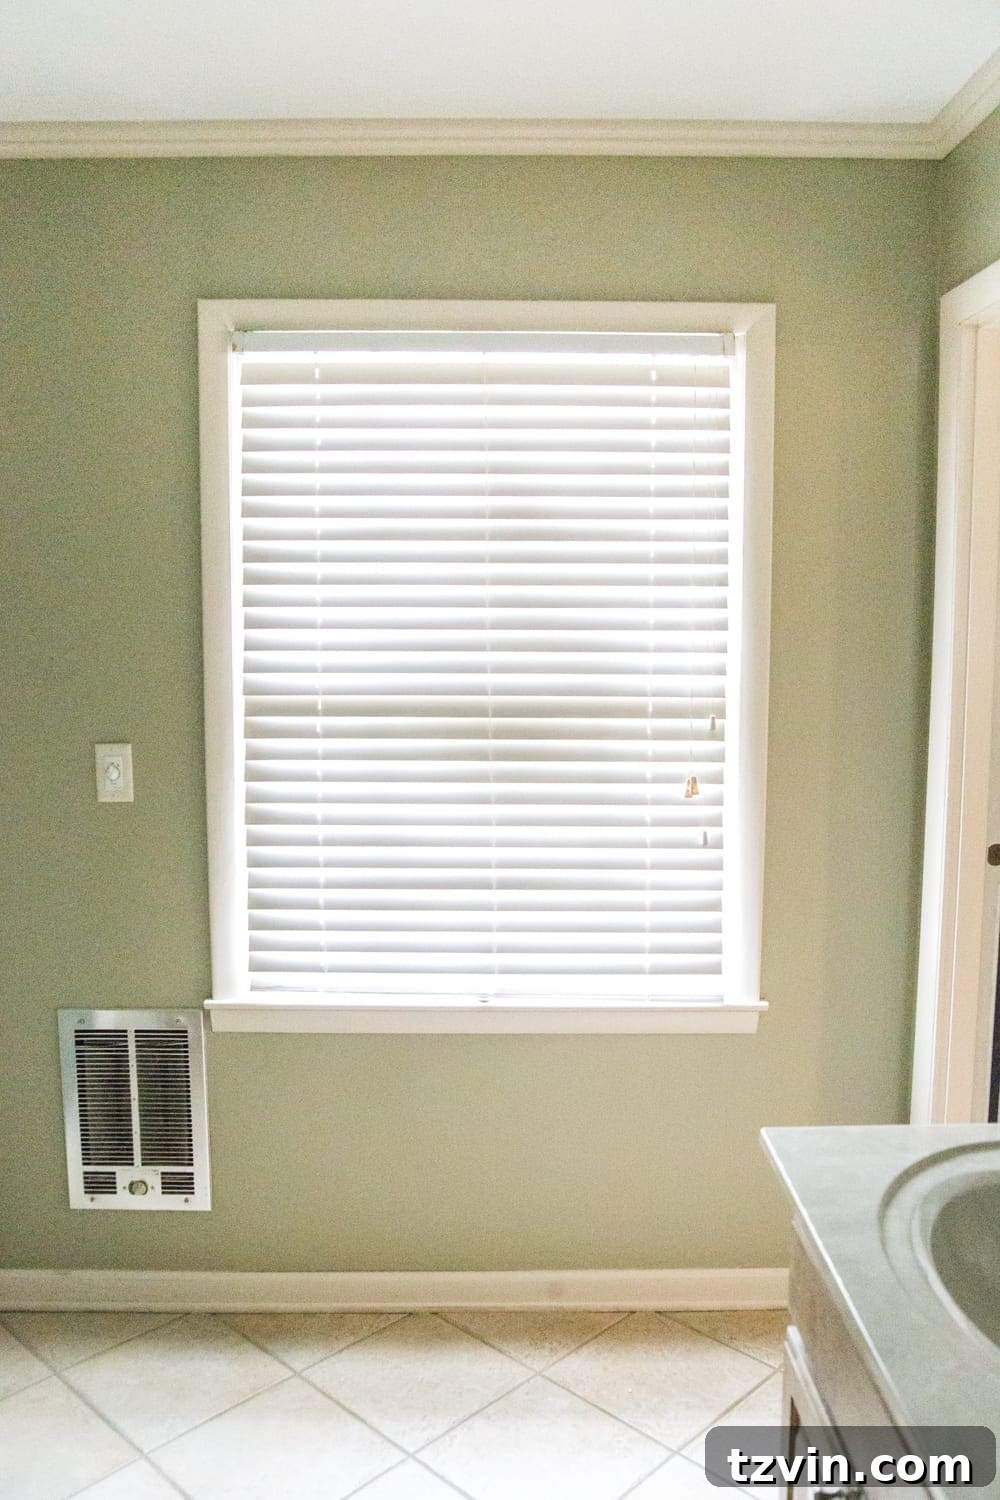
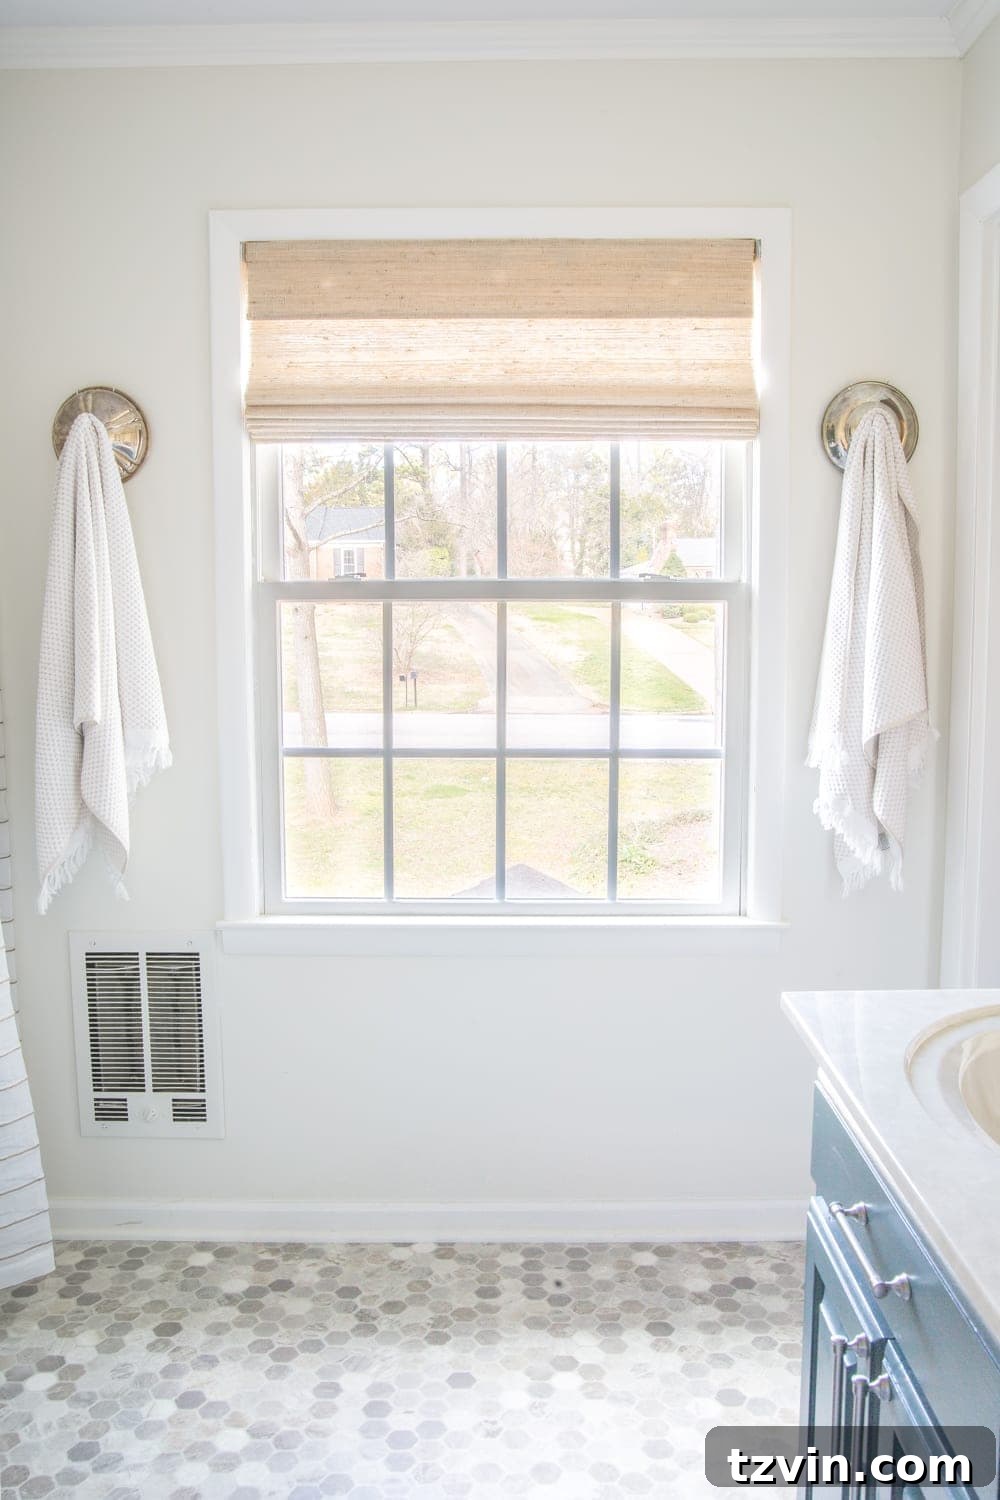
When it came to the window treatment, we knew we had to invest a little more than usual. This particular window is situated at the very front of our house, making privacy an absolute non-negotiable. While our budget-friendly ethos guided most decisions, compromising on privacy in the master bathroom was not an option. We chose a beautiful woven wood shade, specifically in Bonaire Flaxen, because it came with a highly effective privacy liner. This robust lining ensures complete discretion, saving us from the rather embarrassing prospect of the entire neighborhood getting to know us a little too intimately!
Beyond its crucial privacy function, the woven wood shade adds wonderful texture and a natural, organic element to the bathroom. Its earthy tones beautifully complement the coastal aesthetic and the warm White Dove walls. It’s a perfect blend of practicality and style, providing light control, enhancing privacy, and contributing significantly to the serene and inviting atmosphere of our refreshed master bathroom.
Unique Wall Hooks: Repurposing with Charm
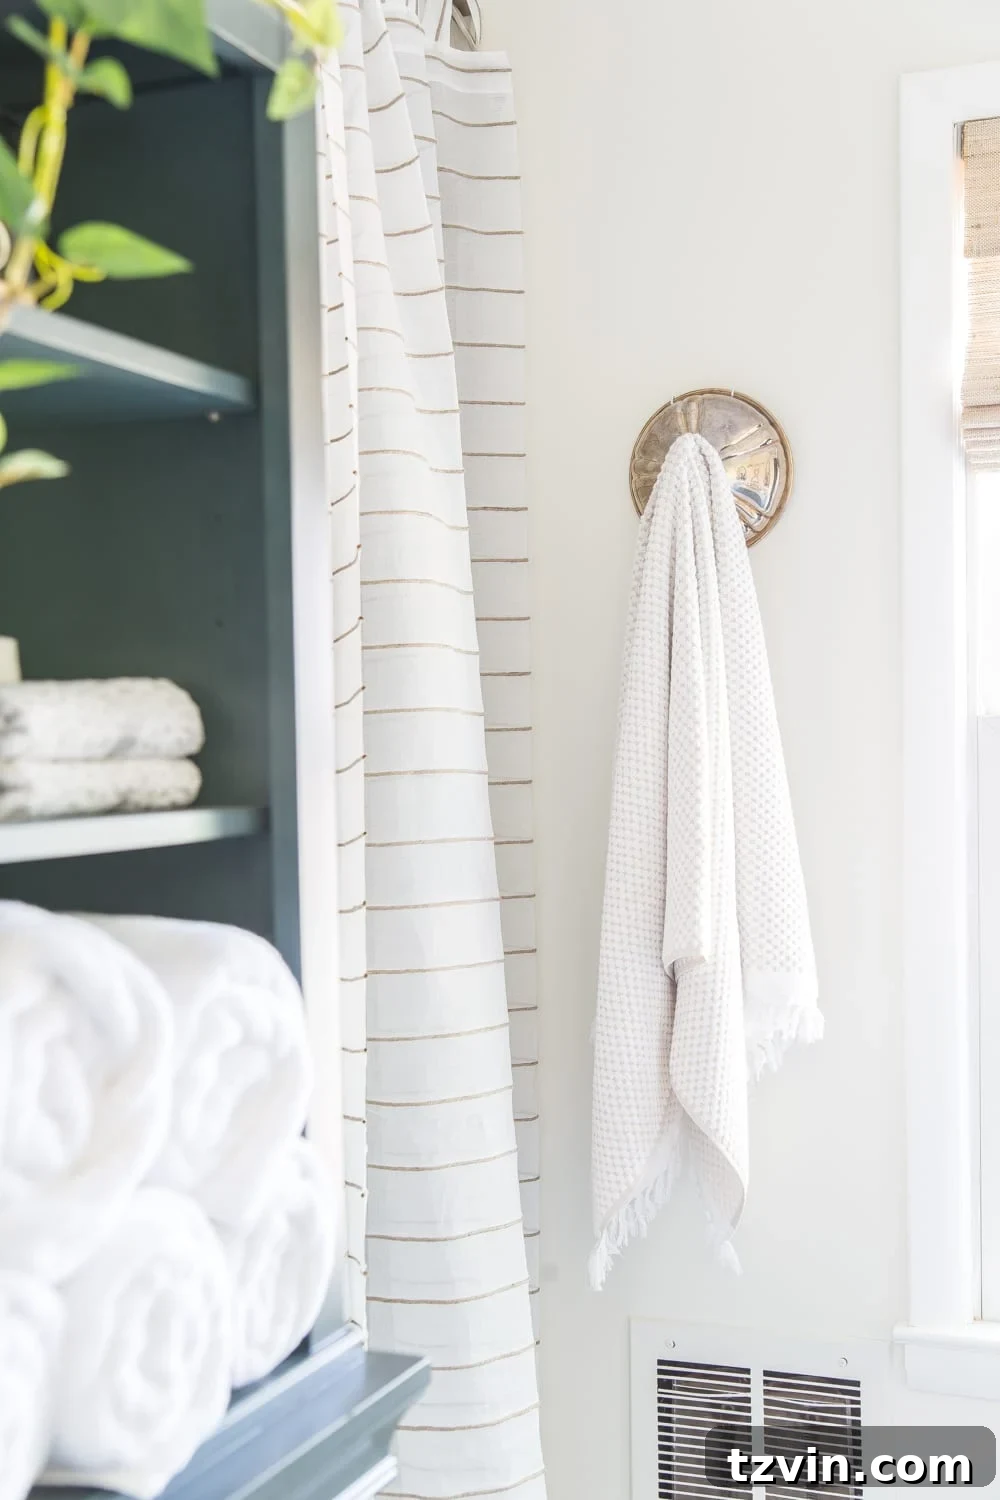
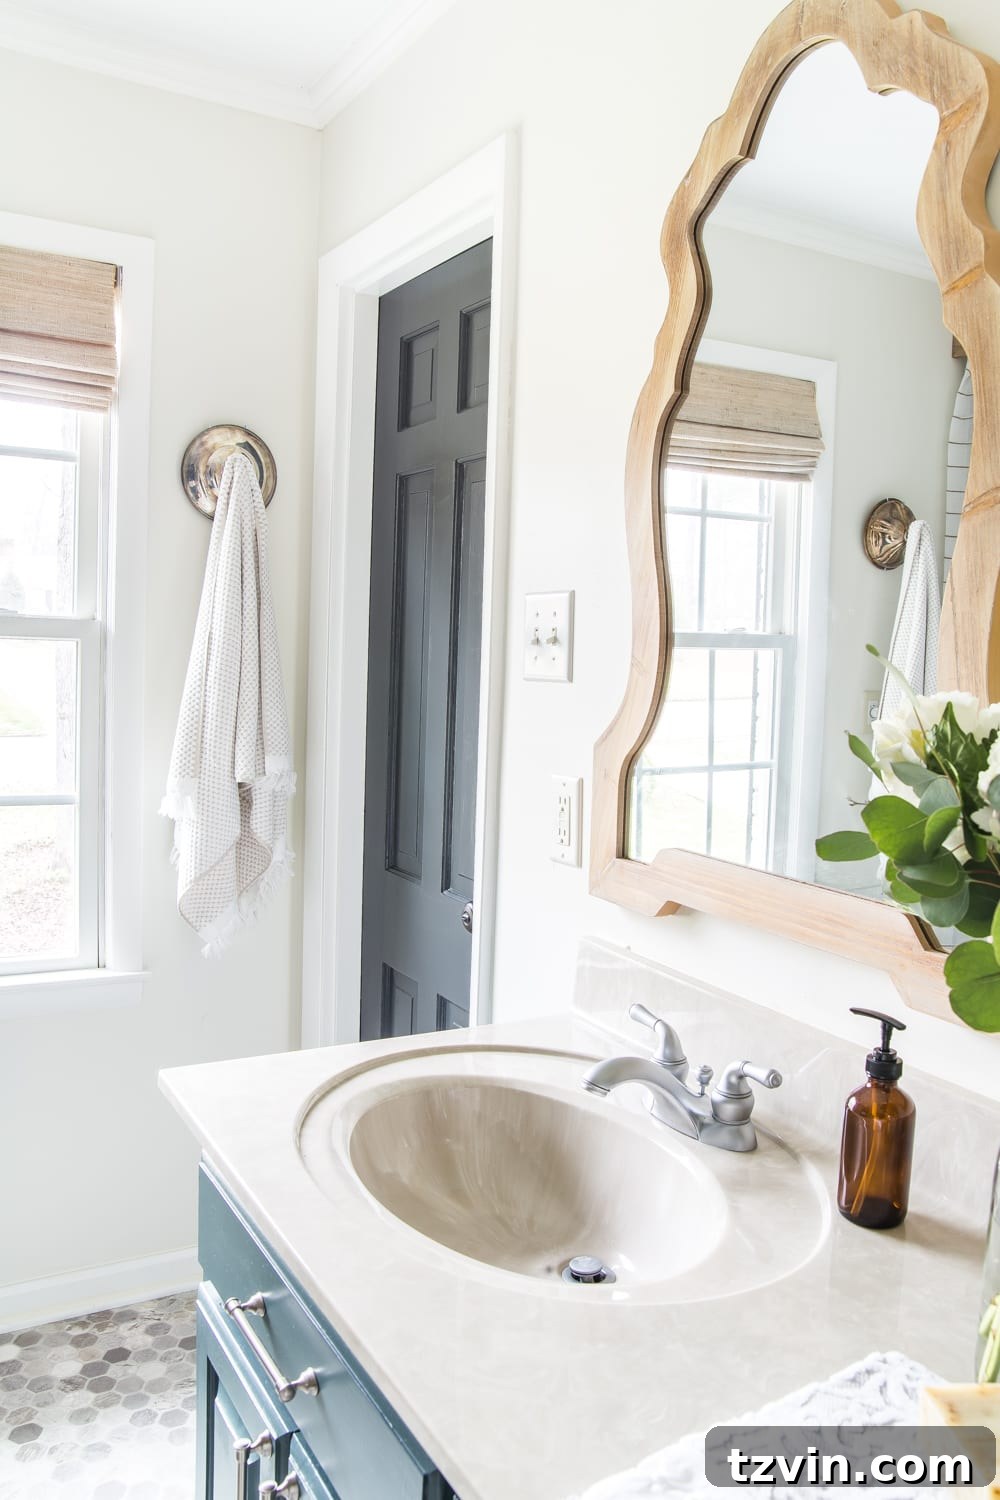
In our quest to infuse personality and unique touches into the bathroom, we stumbled upon a truly fun repurposing idea for our wall hooks. I discovered some old chafing dish lids – yes, the kind typically used for keeping food warm! – and immediately envisioned them as charming towel hooks. This unexpected use of an everyday item adds a whimsical and distinctive element to the space, truly showcasing our commitment to creative DIY solutions. Aren’t they simply adorable?
This small detail is a wonderful conversation starter and demonstrates how everyday objects can be given a new life and purpose, adding character without additional cost. They’re not only visually appealing but also perfectly functional, providing convenient spots to hang towels, robes, or other bathroom necessities. It’s these kinds of personal touches that truly make a house feel like a home, reflecting the unique style and resourcefulness of its inhabitants.
A Flooring Revelation: Modern Vinyl Over Old Tile
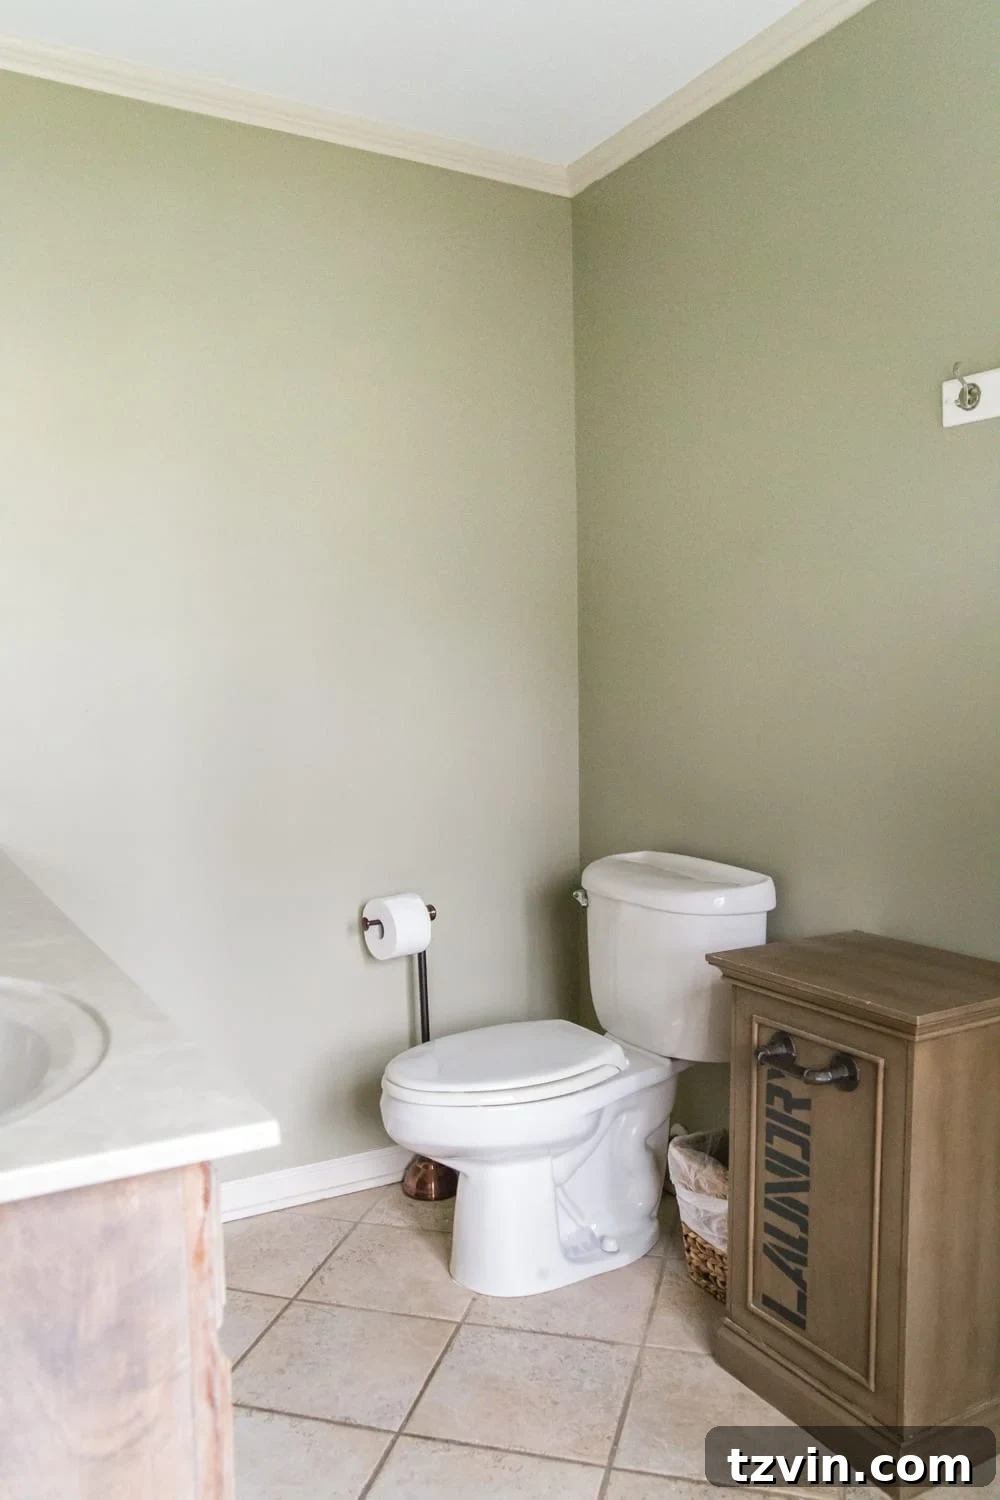
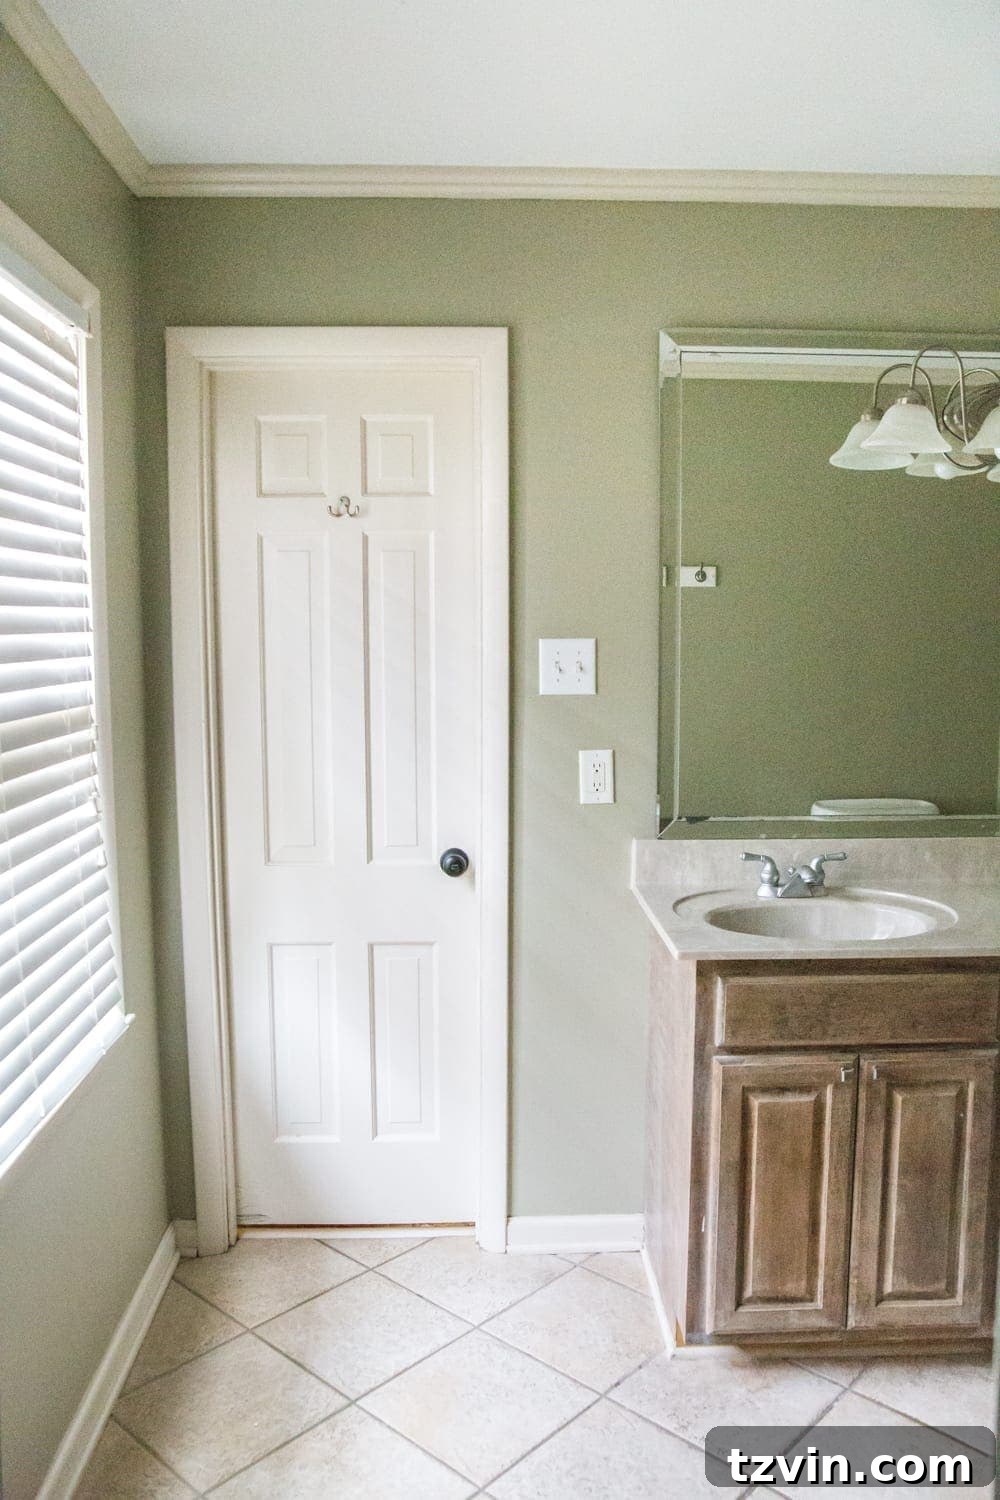
Undoubtedly, one of the biggest aesthetic hurdles in our master bathroom was the severely outdated floor. The old beige ceramic tiles were beyond redemption; even our trusty grout pens, which had worked wonders in other areas, couldn’t salvage their appearance this time. With our budget-friendly refresh serving as a temporary solution until a full tile replacement becomes feasible, we needed an innovative yet affordable fix.
Our breakthrough came with the discovery of sheet vinyl flooring designed to mimic the look of hexagon tiles. We carefully installed this vinyl directly on top of the old beige ceramic tiles, creating an entirely new foundation for the room. I still can’t quite believe it’s vinyl! The realism of the pattern and texture is astounding; it genuinely looks and feels like authentic hexagon tile. This solution was not only incredibly cost-effective but also remarkably mess-free, making it the perfect temporary upgrade to dramatically transform the floor without the dust and disruption of a full demolition. It’s a testament to how far modern vinyl flooring has come and its potential to deliver stunning results on a budget.
The Finishing Touch: A Bold Door Color
The final element to receive a refreshing update was the bathroom door itself. Consistent with the aesthetic throughout our home, all our interior doors are painted in the sophisticated shade of Benjamin Moore Wrought Iron. This particular door, therefore, finally caught up with the rest of the house, joining the unified color scheme. Choosing a dark, rich color like Wrought Iron for interior doors serves a powerful design purpose: it consistently adds that vital “punch of contrast” that every room needs.
This deep, almost charcoal gray shade creates a striking visual anchor against the lighter walls, defining the entry to the room and adding a touch of modern drama. It elevates the overall design, providing a sense of depth and elegance that ties the entire space together. It’s a simple yet highly effective way to add architectural interest and a cohesive design statement, even in a budget-friendly refresh.
Embracing Our Revitalized Oasis
That’s the complete tour of our master bathroom’s budget-friendly refresh! I am genuinely amazed at the transformation of this space, though I confess I feel that way every time we complete a room makeover. Where once there was a dated, stressful mess, this room now truly feels like a serene oasis as we get ready each morning. The subtle changes, from a fresh coat of paint on the vanity and walls to clever storage solutions and thoughtful decor, have collectively created a harmonious and inviting atmosphere that we absolutely adore.
We no longer feel that anxious anticipation for a major demolition and renovation. This refresh has given us a beautiful, functional bathroom that we can enjoy thoroughly in the interim, proving that significant style and comfort don’t always require a hefty investment. The moral of our story is clear: you don’t have to live with a room that causes you stress while you wait for years on end to fully renovate it. A little paint, a dash of imagination, and some good old-fashioned sweat equity can do wonders with what you already have. Embrace creativity, and watch your space transform!
We’re currently pouring our energy into something truly monumental in another part of our house, and I cannot wait to share all the exciting details with you. But more on that later… stay tuned!
If you want to know about any of the sources we used, here they are:
- Vanity / linen cabinet color (custom – click here in this post for the color formula)
- Wall color – Benjamin Moore White Dove
- Trim color – Benjamin Moore Simply White
- Door color – Benjamin Moore Wrought Iron
- Mirrors
- Light fixture
- Linen cabinet
- Vinyl floor
- Drawer pulls
- Wall art (free printables in this post w/ tutorial)
- Semi-sheer curtain
- Window shade in Bonaire Flaxen
- Drawer organizers
- Stackable basket drawers
- Towels
- Hand towels
- White towels
- Artificial plant
- Large basket
- Small basket
- Vintage style shaving kit
- Soap dispensers
- Large glass jar
- Small white jar
Moral of the story: Don’t live with a room that causes you stress as you wait for years on end to fully renovate it. Paint and imagination and a little bit of sweat equity can do SO much using what you already have. We’re working on something HUGE on another part of our house right now too, and I can’t wait to share it with y’all. But more on that later… 😉
If you want to save this post for later, you can pin it here: