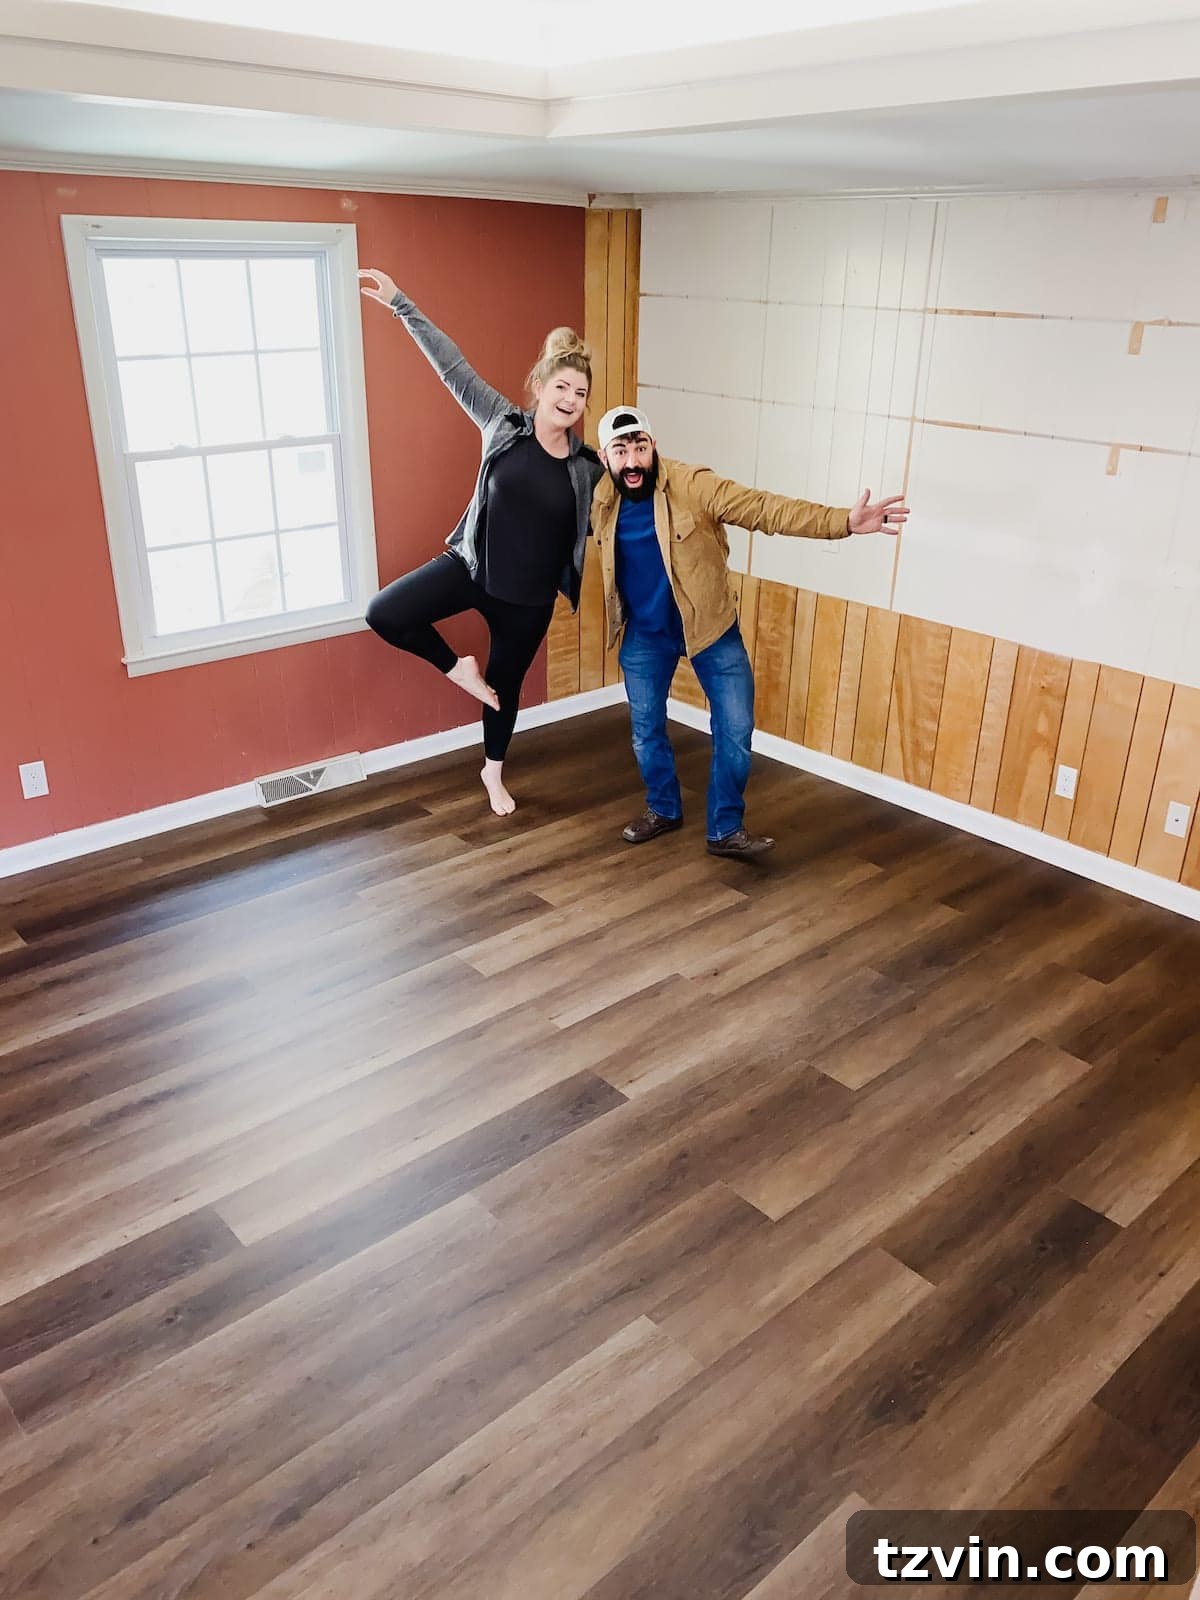
Unlock the secret to beautiful, resilient floors! This comprehensive, step-by-step guide will show you how to quickly and easily install luxury vinyl plank (LVP) flooring, revealing why it’s the ultimate choice for busy families with kids and pets.
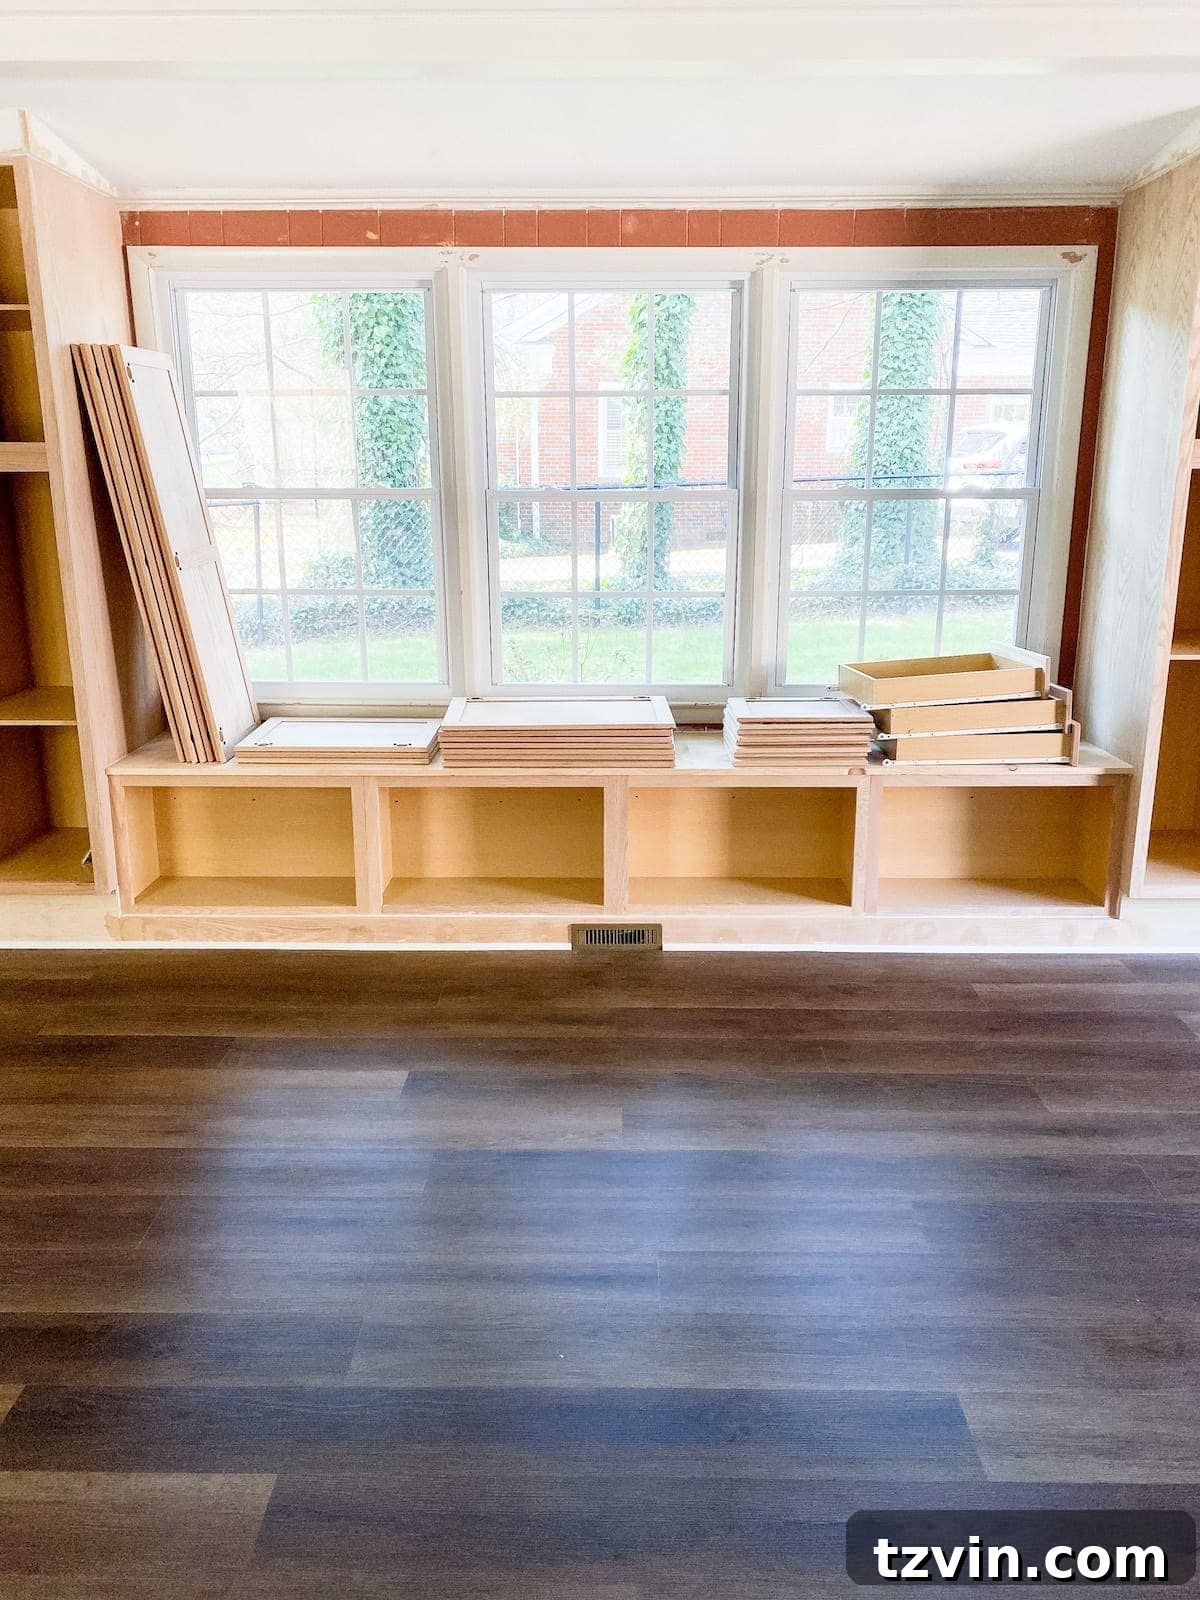
After weeks of demolition and construction – from dismantling old shelves and stripping away worn carpet to constructing a magnificent wall of built-in cabinets – we are thrilled to finally be moving into the aesthetically pleasing phase of the Carney family’s home transformation: the floors! The right flooring choice can dramatically alter a space, and we were eager to find a solution that was both stunning and supremely practical.
Why Luxury Vinyl Plank (LVP) Flooring is the Smart Choice for Active Homes
With nine energetic children, the Carney household demands flooring that can withstand constant activity and maintain its pristine appearance. Our selection criteria for this project were clear and uncompromising: the new floors had to be exceptionally durable, completely waterproof, highly scratch-resistant, impressively stain-resistant, straightforward enough for a DIY installation, budget-friendly, and, above all, visually appealing. After extensive research, ProCore Floors luxury vinyl plank flooring emerged as the undisputed champion, effortlessly ticking every single box on our list. This remarkable material offered the perfect blend of robustness and elegance that we sought for such a dynamic living space.
ProCore Floors generously partnered with us, providing all the flooring necessary for this ambitious project. Their products are exclusively available at Lowe’s stores nationwide, making them easily accessible for homeowners across the country. Initially, I admit to feeling a sense of apprehension about installing LVP flooring, as it was a completely new experience for us. The thought of tackling a large-scale flooring installation was a bit intimidating, given our lack of prior experience with this specific material. However, I’m happy to report a spoiler alert: the installation process proved to be surprisingly easy and straightforward, quickly dispelling all my initial fears and doubts. It truly was an approachable DIY project.
Cast your mind back to the “before” state of this room, with its old, stained carpet that had seen better days. It was a space crying out for a refresh, a robust foundation that could handle the daily life of a large family. The transformation we envisioned hinged on finding a flooring solution that could not only replace the worn-out carpet but also elevate the entire room’s functionality and aesthetic. Once we removed the old carpet, we discovered an uneven subfloor, which required the installation of a new plywood subfloor to create a perfectly level foundation. This crucial step was the extent of our major prep work.
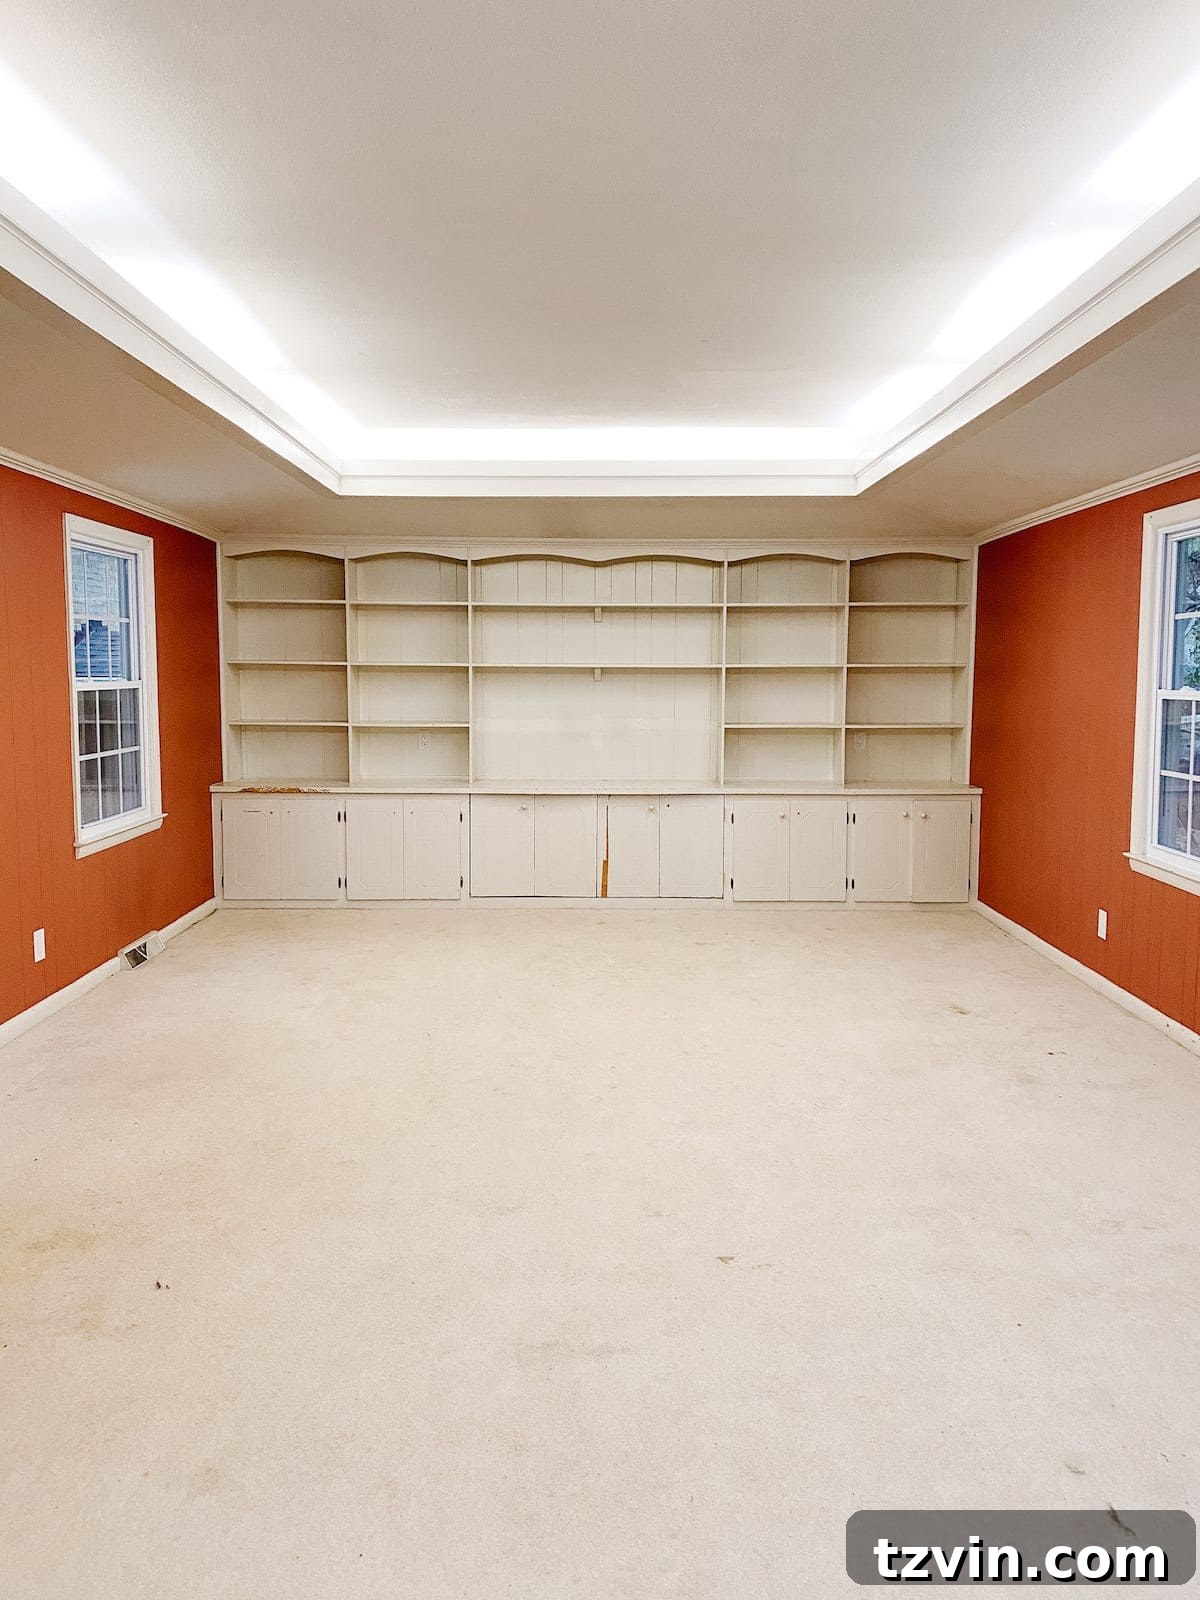
One of the significant advantages of ProCore LVP flooring is its innovative floating installation system. This means the planks don’t need to be glued or nailed down; instead, they simply click together and rest on top of most existing level flooring surfaces. This feature dramatically streamlined our installation process, making it much quicker and far less messy than traditional flooring methods. It’s truly a game-changer for DIY enthusiasts, allowing for efficient and professional-looking results without the need for extensive subfloor preparation beyond ensuring a smooth, level base.
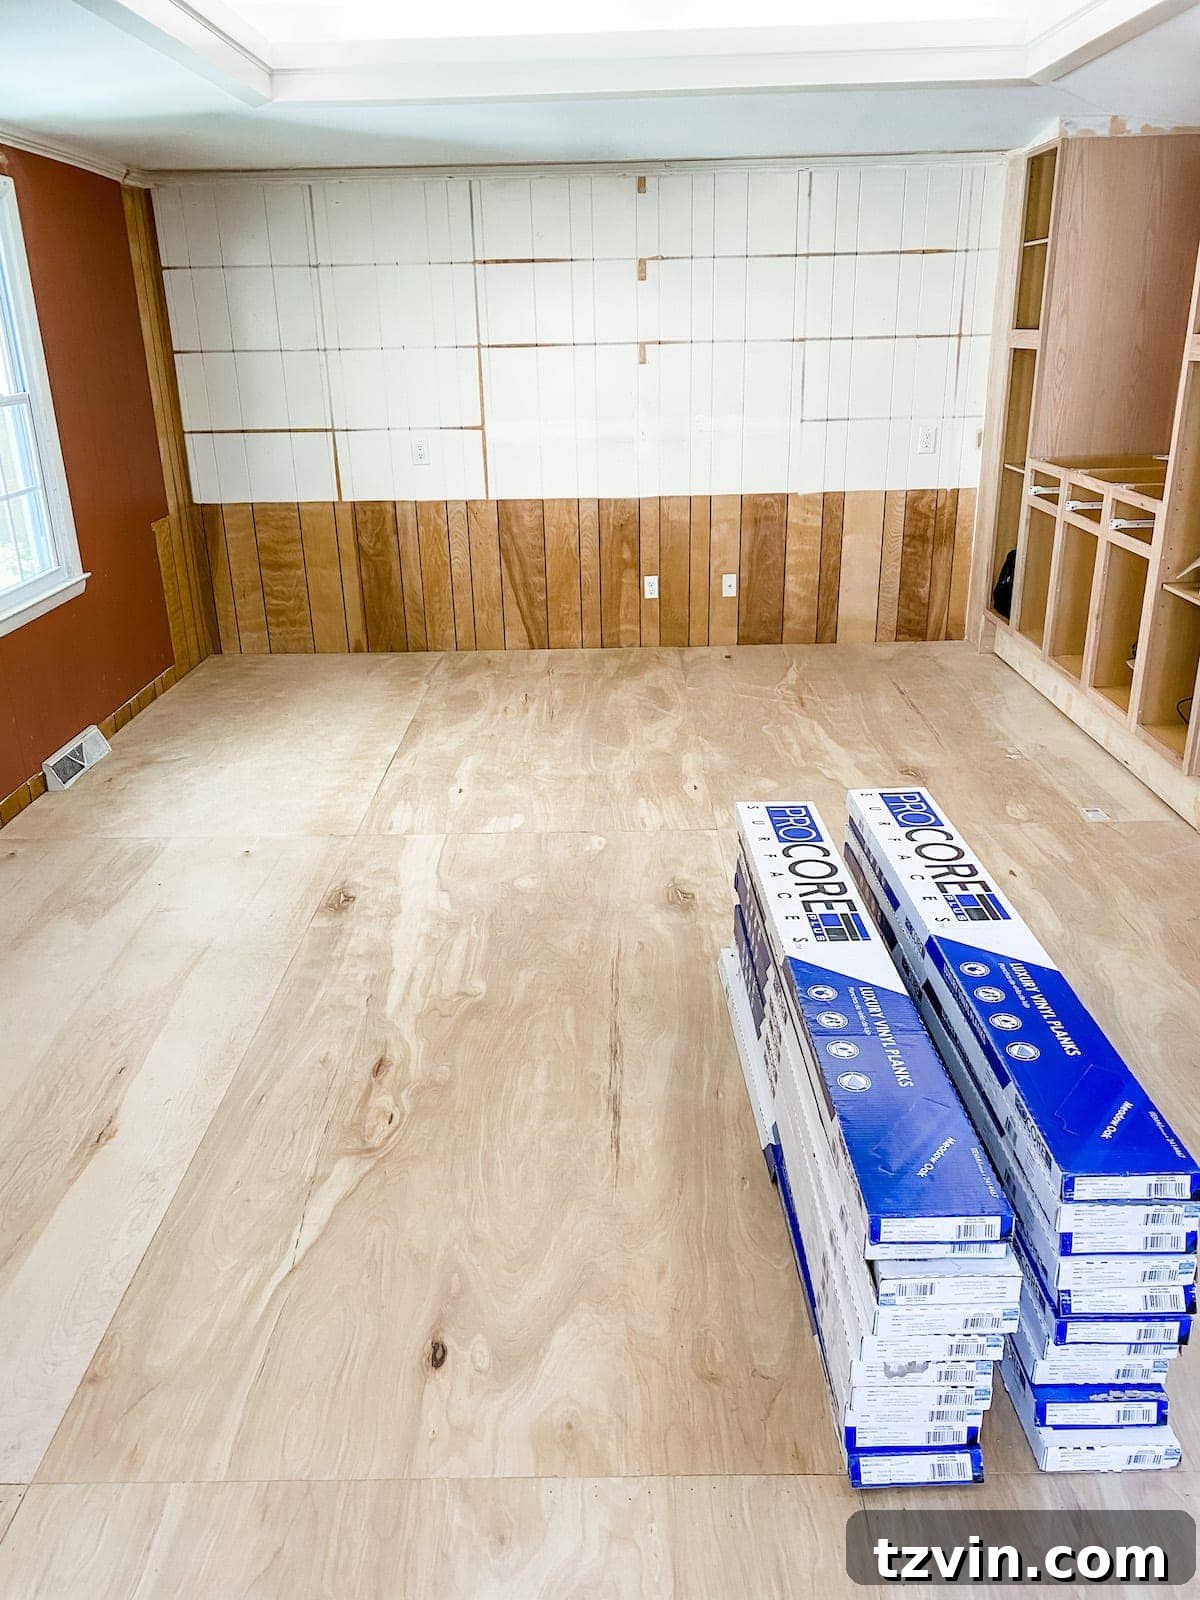
To ensure optimal performance and prevent potential issues with expansion or contraction after installation, we carefully followed the manufacturer’s recommendation to let the LVP planks acclimate. This involved laying the sealed boxes of flooring in the room where they would be installed for a full 48 hours. This period allows the planks to adjust to the room’s ambient temperature and humidity levels, minimizing the risk of gaps forming or planks buckling once they are laid down. This simple but crucial step is often overlooked but is vital for a long-lasting and flawless finish.
Choosing the Perfect LVP Color for Your Home’s Aesthetic
Selecting the right flooring color is a pivotal decision that impacts the entire room’s ambiance. I always advise against making color choices solely based on online images, as screen representations can vary significantly from real-life appearances. Fortunately, ProCore Floors makes this process easy and reliable. You can visit your local Lowe’s store to pick up free samples of their LVP options, allowing you to compare them directly within your home’s lighting conditions and alongside existing decor. Alternatively, for convenience, you can also order samples online to be delivered right to your door.
Before committing to a specific flooring, we meticulously deliberated over five distinct color samples from ProCore’s impressive range of 20 options. Our contenders included Tudor Oak, Warm Honey Oak, English Grove Oak, Meadow Oak, and Crescent Oak. Each sample brought its unique character, and evaluating them in the actual space was invaluable for visualizing the final outcome.
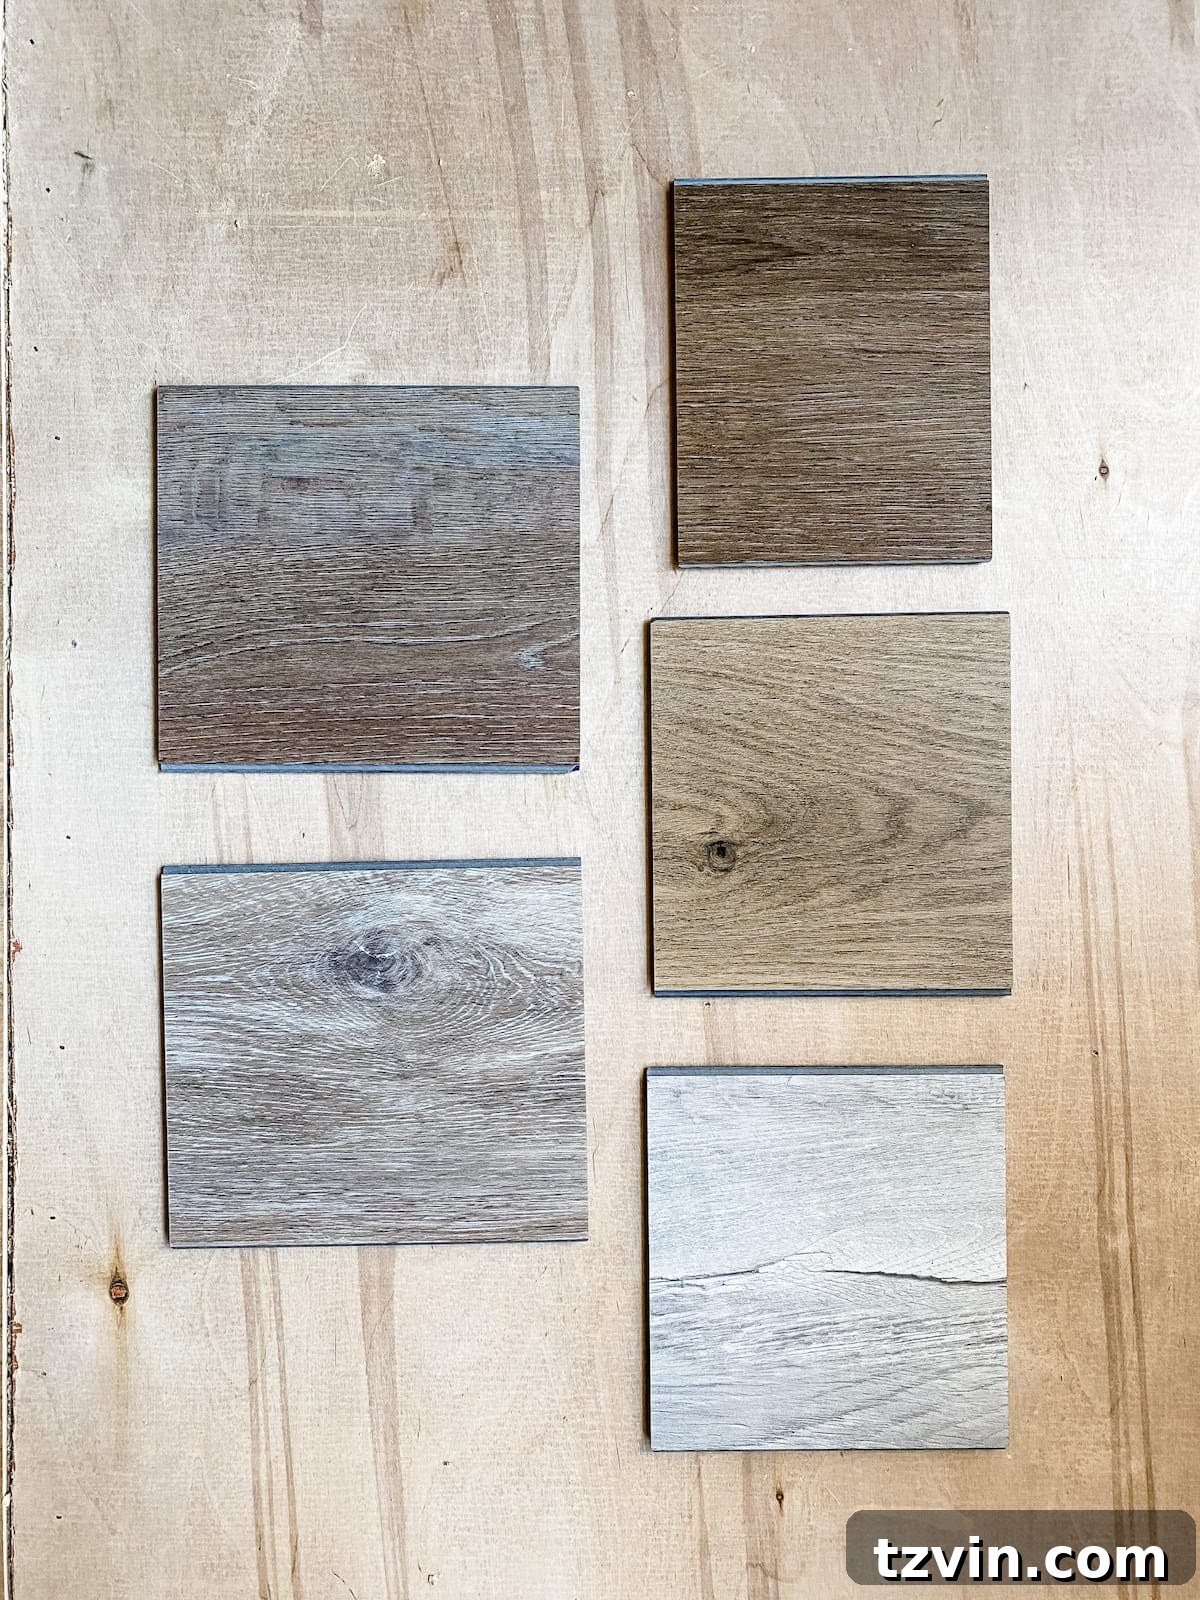
Ultimately, the Meadow Oak color emerged as the clear winner for the Carney project. Its rich, classic medium-dark brown tone provided the perfect balance we were seeking. It offered a timeless appeal that complemented the other existing flooring throughout the Carney home, creating a harmonious and cohesive flow. We specifically aimed to avoid a look that was too rustic or overtly farmhouse, which led us to rule out the gray-toned flooring options that, while beautiful, didn’t align with our overall vision for this particular space. The hand-scraped texture of the Meadow Oak planks is truly remarkable, replicating the authentic look and tactile feel of real wood, adding depth and character without the maintenance demands of natural timber. This choice ensures the room will feel warm and inviting, ready for countless family memories to be made.
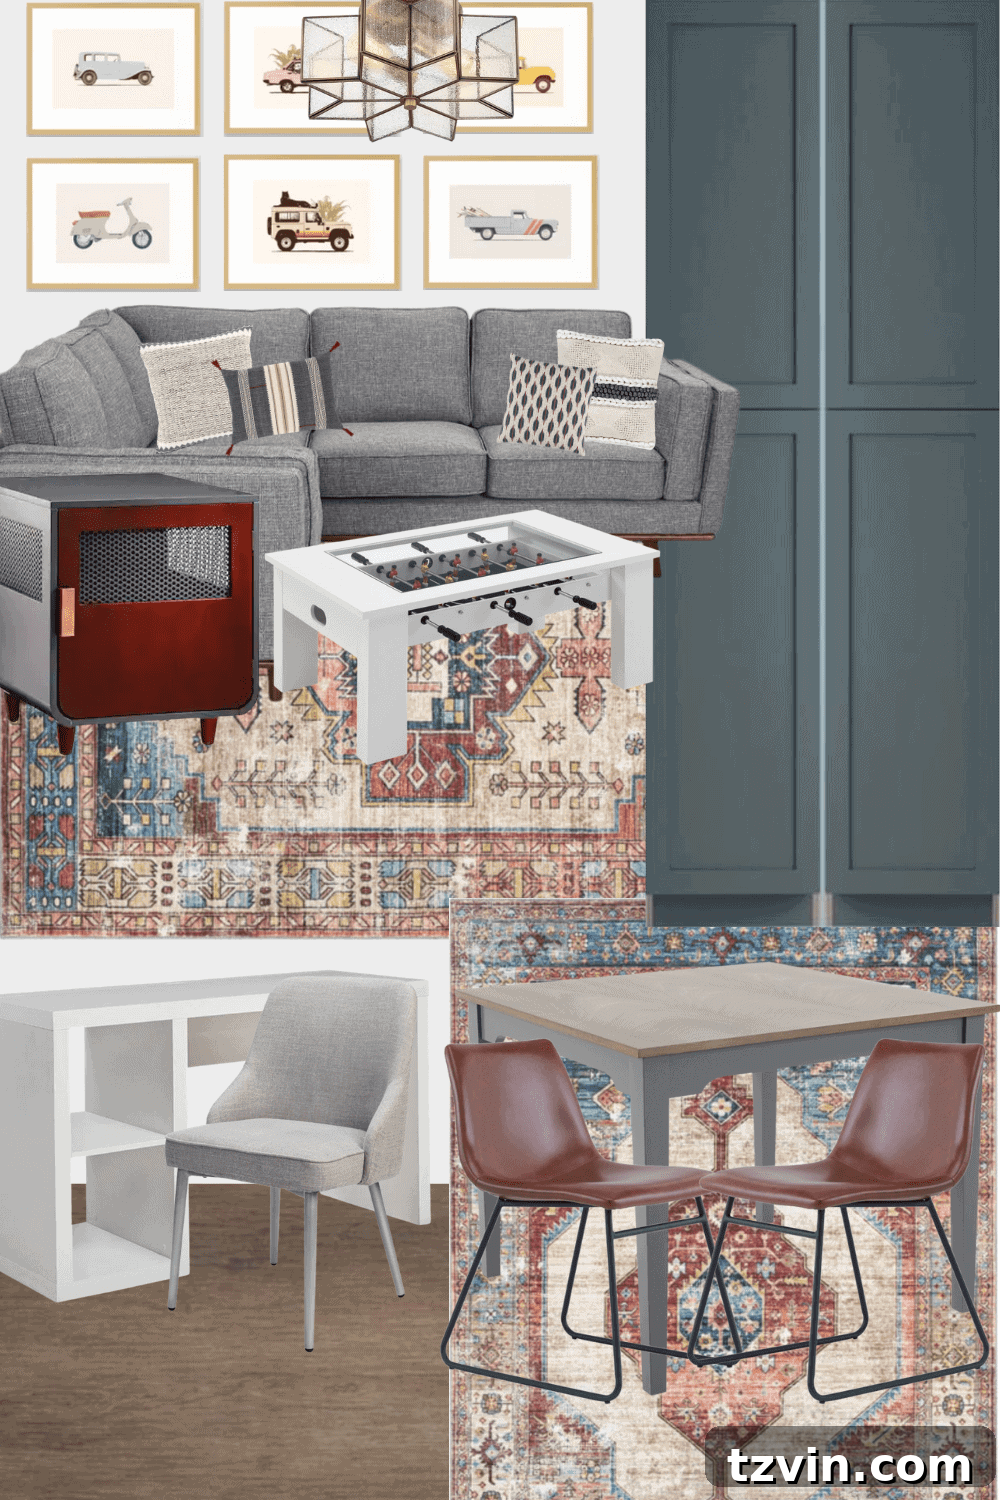
Here’s a glimpse of how the Meadow Oak LVP flooring will integrate with the broader design vision for the room, offering a sneak peek into the cohesive and stylish space once all elements come together.
Essential Tools for a Successful LVP Installation
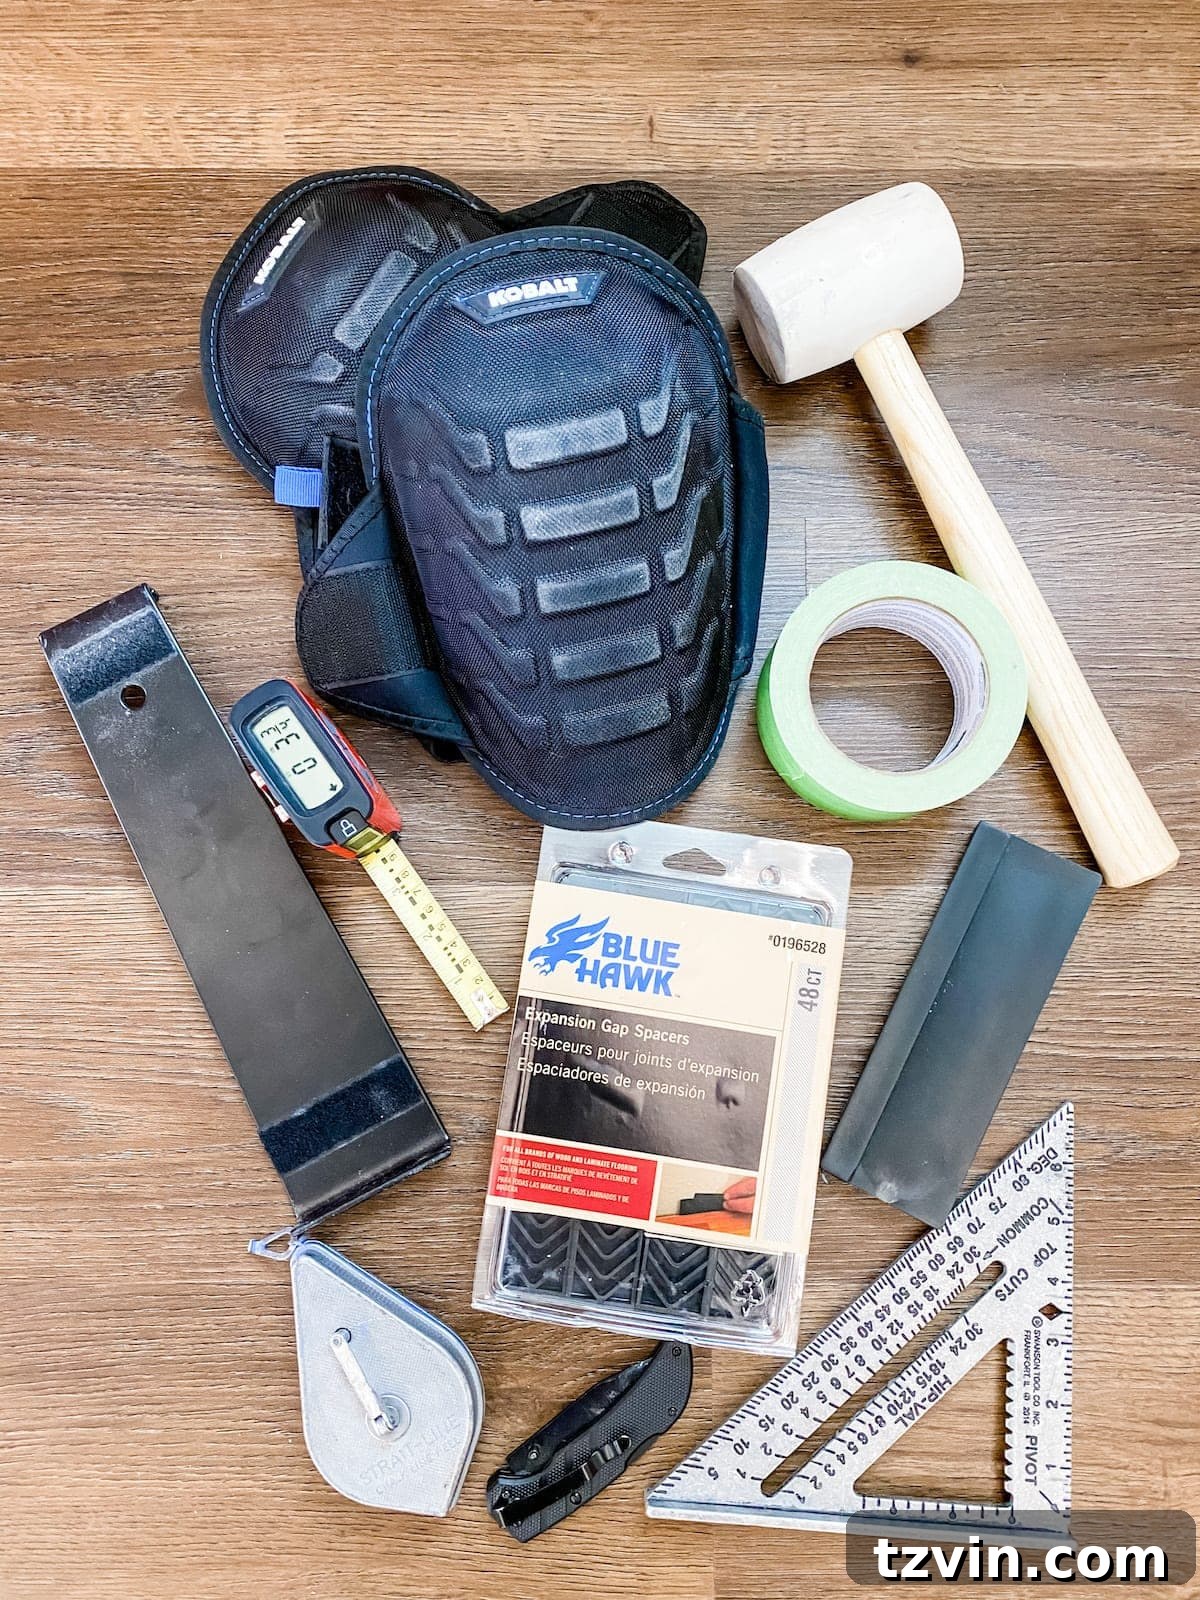
Having the right tools is paramount for any DIY project, and LVP flooring installation is no exception. While many items are common household tools, a few specialized pieces will make the job much smoother and more professional. Here’s what we used:
- All-in-1 Flooring Kit: This typically includes a tapping block, pull bar, and spacers – essential for achieving tight seams and maintaining expansion gaps.
- Rubber Mallet: Used to gently tap planks into place and ensure secure interlocking without damaging the edges.
- Knee Pads: Your knees will thank you! Essential for comfort during hours of work on the floor.
- Utility Knife: Perfect for scoring LVP planks for clean, straight cuts, especially on thinner sections.
- Speed Square: Helps ensure accurate 90-degree cuts and measurements.
- Extra Spacers: Crucial for maintaining consistent expansion gaps around the perimeter of the room.
- Chalk Line: Used to snap straight lines on the subfloor, guiding your initial plank alignment.
- Jigsaw (optional, but highly recommended): Ideal for cutting intricate shapes or curves around obstacles like pipes or door frames.
- Tape Measure: For all your measuring needs, ensuring precision in plank length and room dimensions.
- Contour Gauge (optional, but a lifesaver): Makes replicating irregular shapes (like door jambs or oddly shaped walls) onto planks incredibly easy.
- Oscillating Multi-Tool: Invaluable for undercutting door jambs, allowing planks to slide neatly underneath for a seamless finish.
- Painter’s Tape: Useful for temporarily securing spacers and marking cuts.
Detailed Preparation for Flawless LVP Installation
Thorough preparation is the bedrock of any successful flooring project, ensuring not only a beautiful finish but also the longevity of your new LVP floors. Taking the time to properly prep your space will save you significant headaches down the line.
1. **Remove Existing Elements:** Begin by carefully removing your baseboards and any old flooring material. If you wish to reuse your existing baseboards, score the caulk lines with a utility knife before gently prying them away from the wall using a pry bar. This minimizes damage and makes reinstallation easier. Alternatively, if your baseboards are staying put, you can simply remove the shoe molding (quarter round) instead, which typically covers the expansion gap.
2. **Strategic Layout Planning:** Before laying a single plank, visualize your floor’s layout. A key best practice is to position your LVP planks so they run parallel to the longest wall in the room. This often creates a more expansive and visually appealing effect. Furthermore, it’s wise to start your first row along a wall that contains a doorway. This strategic starting point allows you to easily slide the LVP planks underneath the door jambs, resulting in a cleaner, more professional transition.
3. **Accurate Room Measurement:** Precision is key. Use your tape measure to accurately record the dimensions of your entire room. Double-check all measurements to avoid costly mistakes and ensure you order the correct amount of flooring material, plus a little extra for cuts and waste.
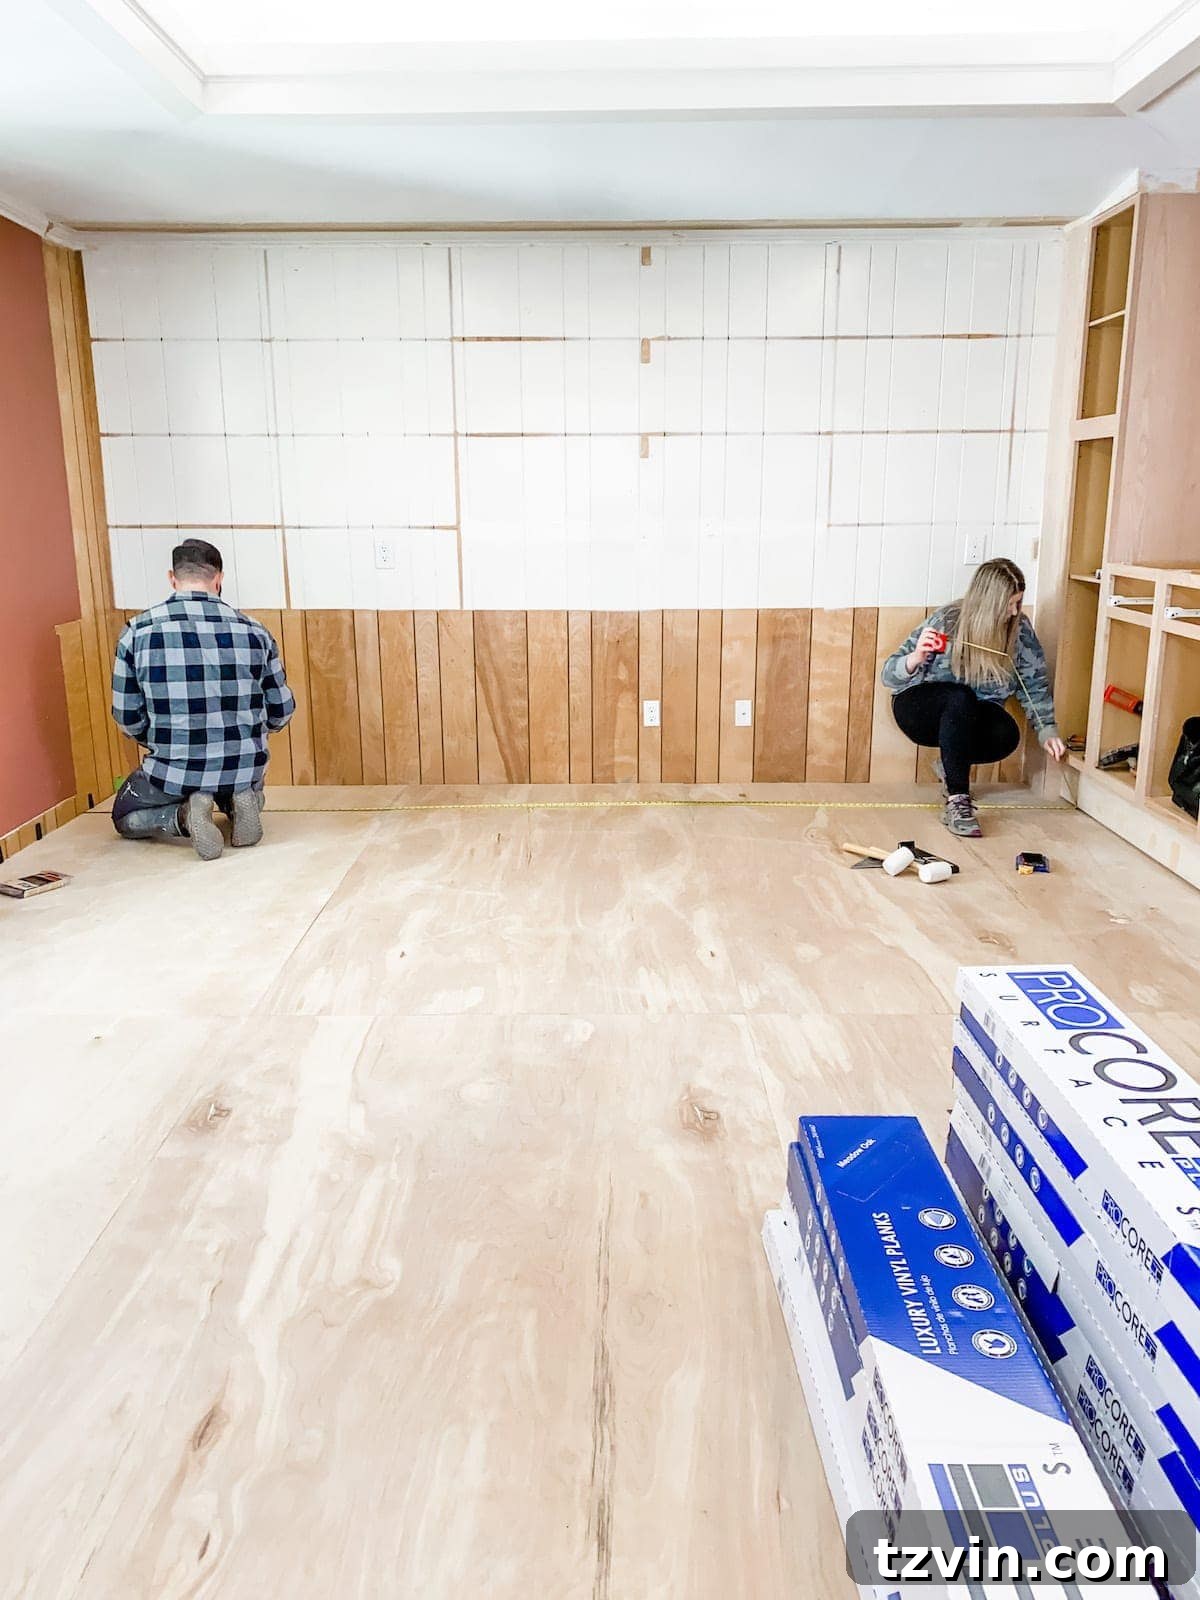
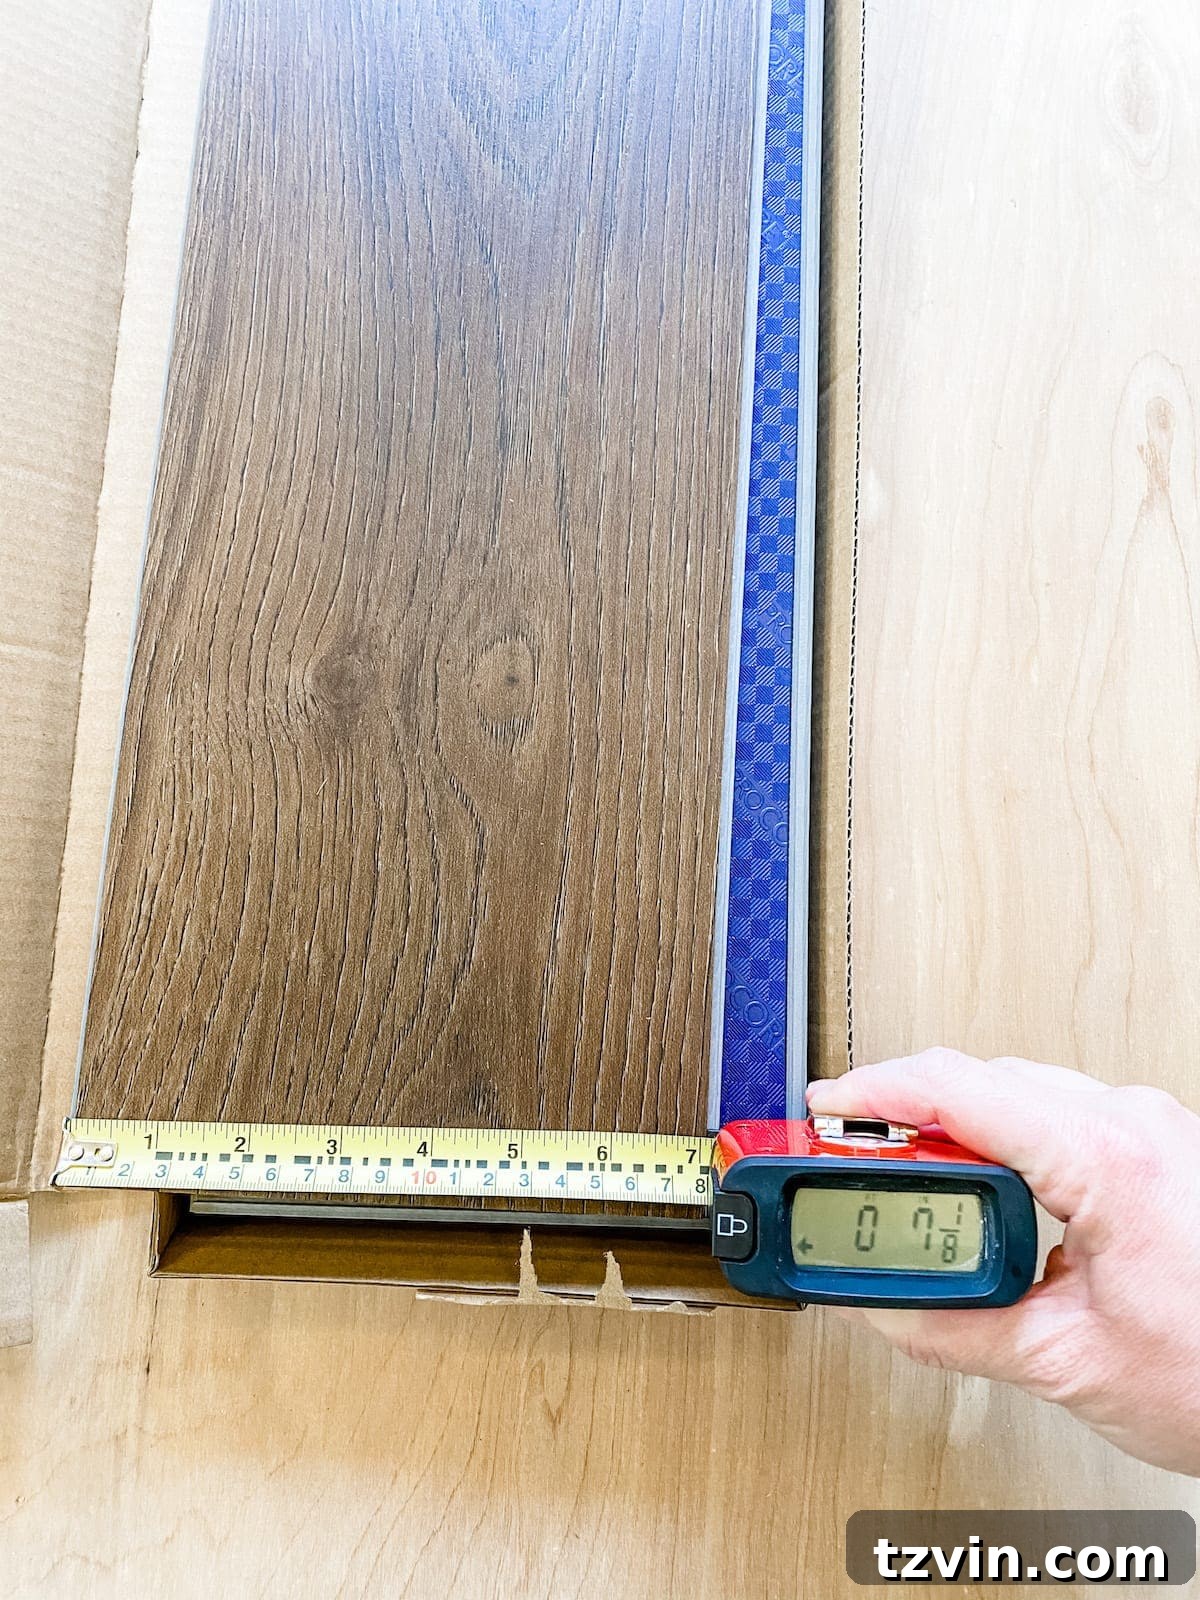
4. **Calculate Plank Rows and Adjust Starting Width:** Next, measure the usable width of your LVP planks (excluding the locking edge). Divide your room’s width by the plank width to estimate how many full rows you’ll have. This calculation is crucial for planning ahead to avoid ending up with a very narrow, awkward cut on the very last row of your flooring, which can be unstable and look unprofessional. In our case, this calculation revealed that starting with a full-width plank would result in a difficult 1-inch cut on the final row. To achieve a more manageable 3-inch cut on the last row, we preemptively trimmed 2 inches off the width of our starting row of planks. This foresight ensures a better aesthetic and a more stable installation across the room.
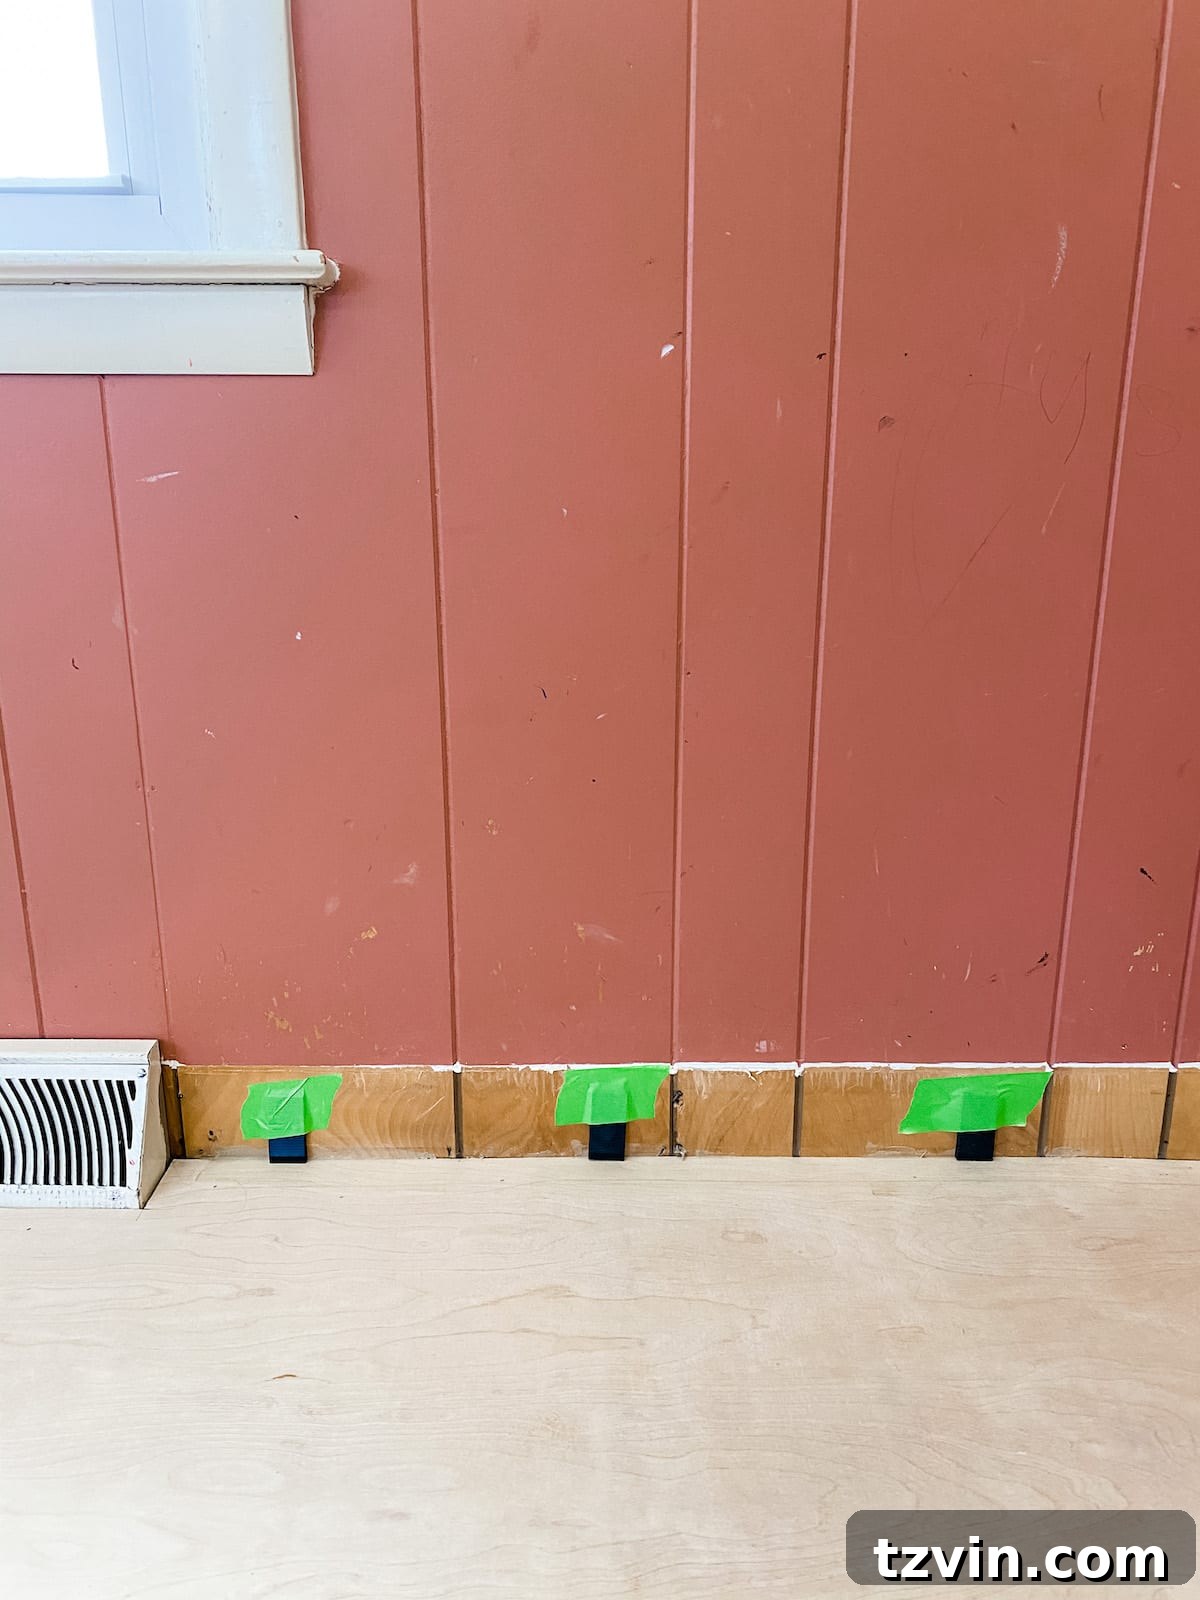
5. **Establish Expansion Gaps with Spacers:** It’s vital to allow for expansion and contraction of your flooring due to temperature and humidity fluctuations. Place flooring spacers around the entire perimeter of the room, snug against the walls, and secure them with painter’s tape to prevent movement. These spacers create the necessary expansion gap, which will later be hidden by your baseboards or shoe molding.
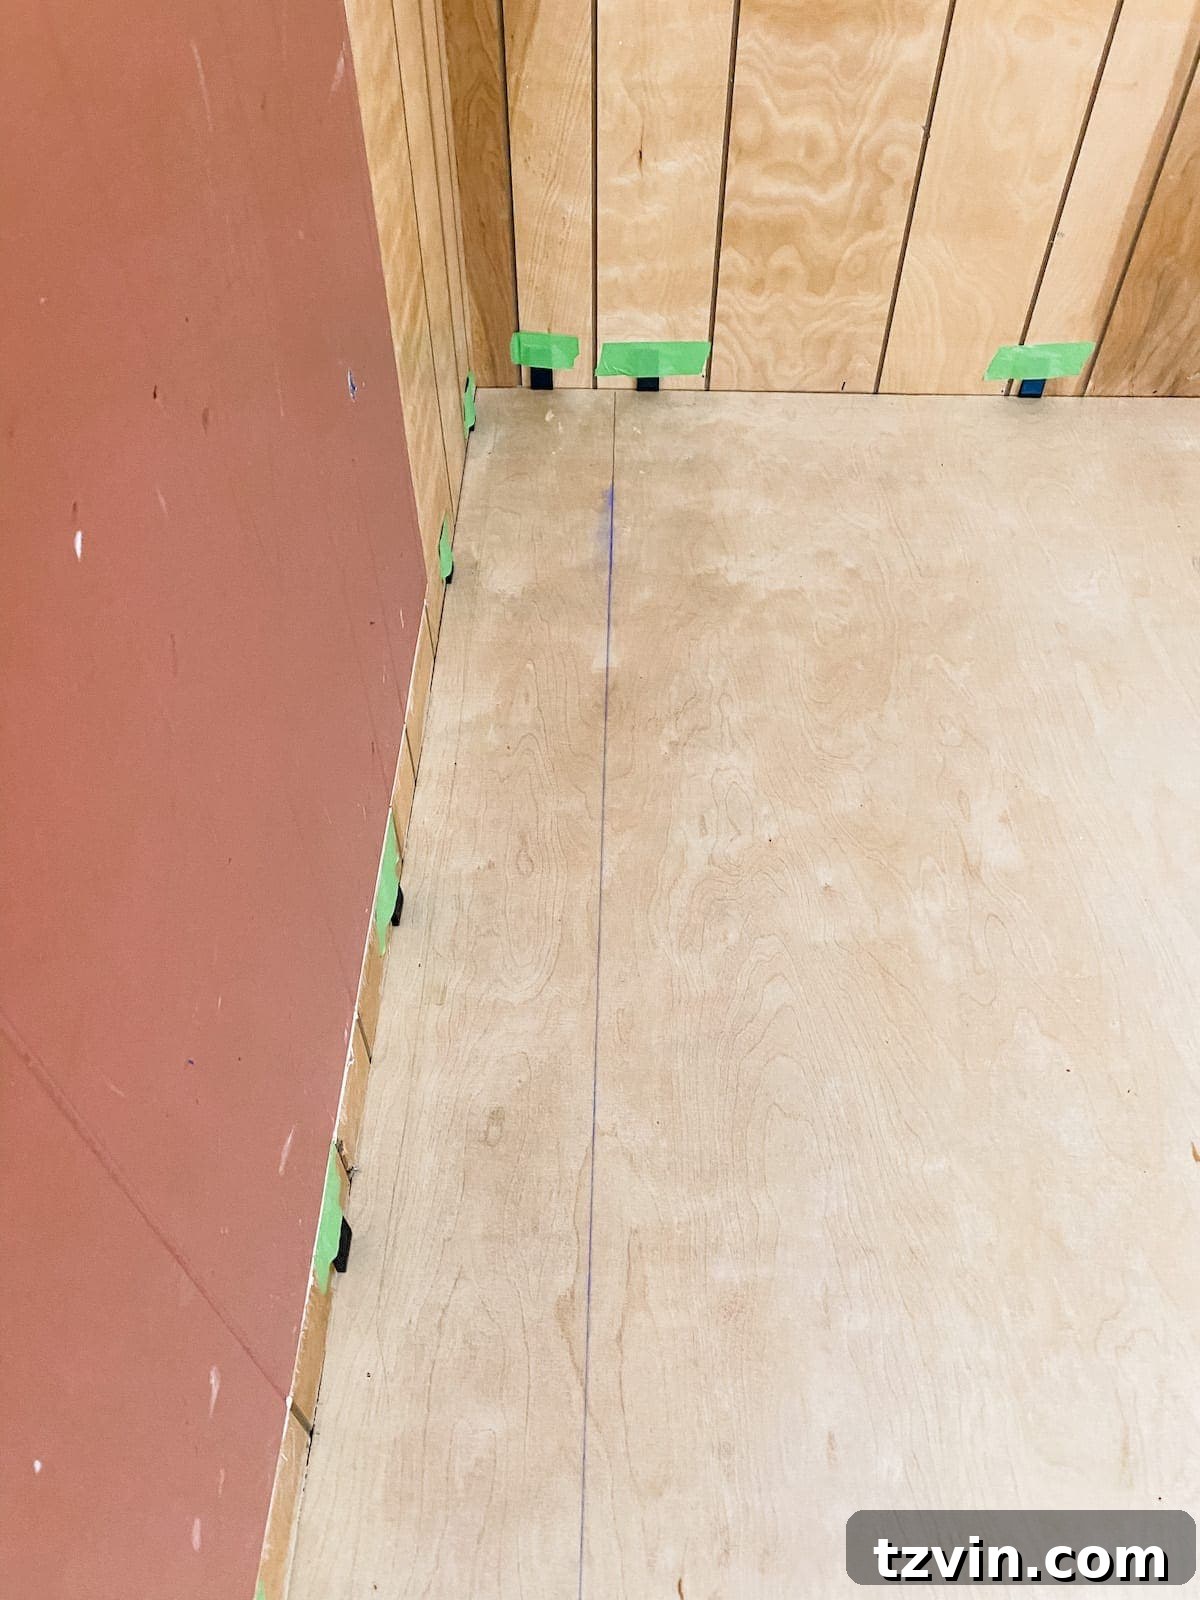
6. **Mark a Straight Starting Line with a Chalkline:** Real-world walls are rarely perfectly straight. To ensure your first row of LVP is absolutely linear, use a chalk line to mark your starting row directly on the subfloor. This provides an accurate, unwavering guide for your initial planks, which will dictate the straightness of your entire floor.
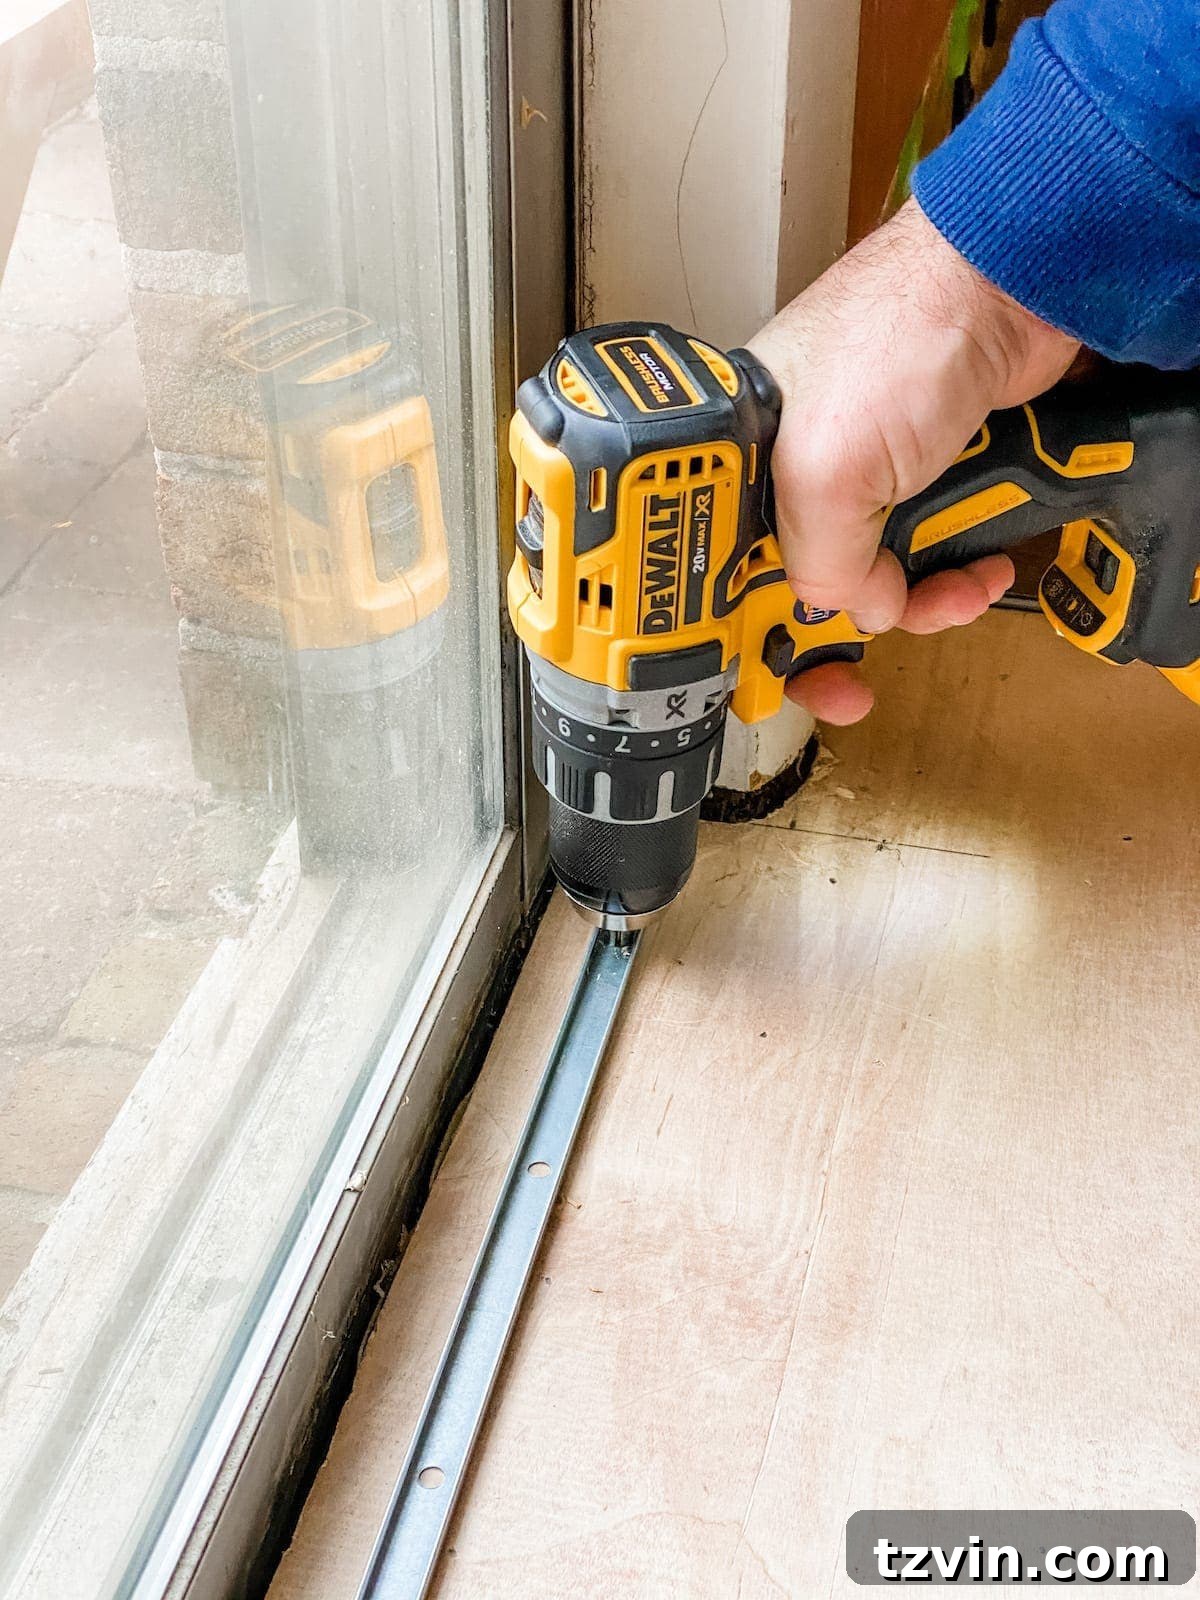
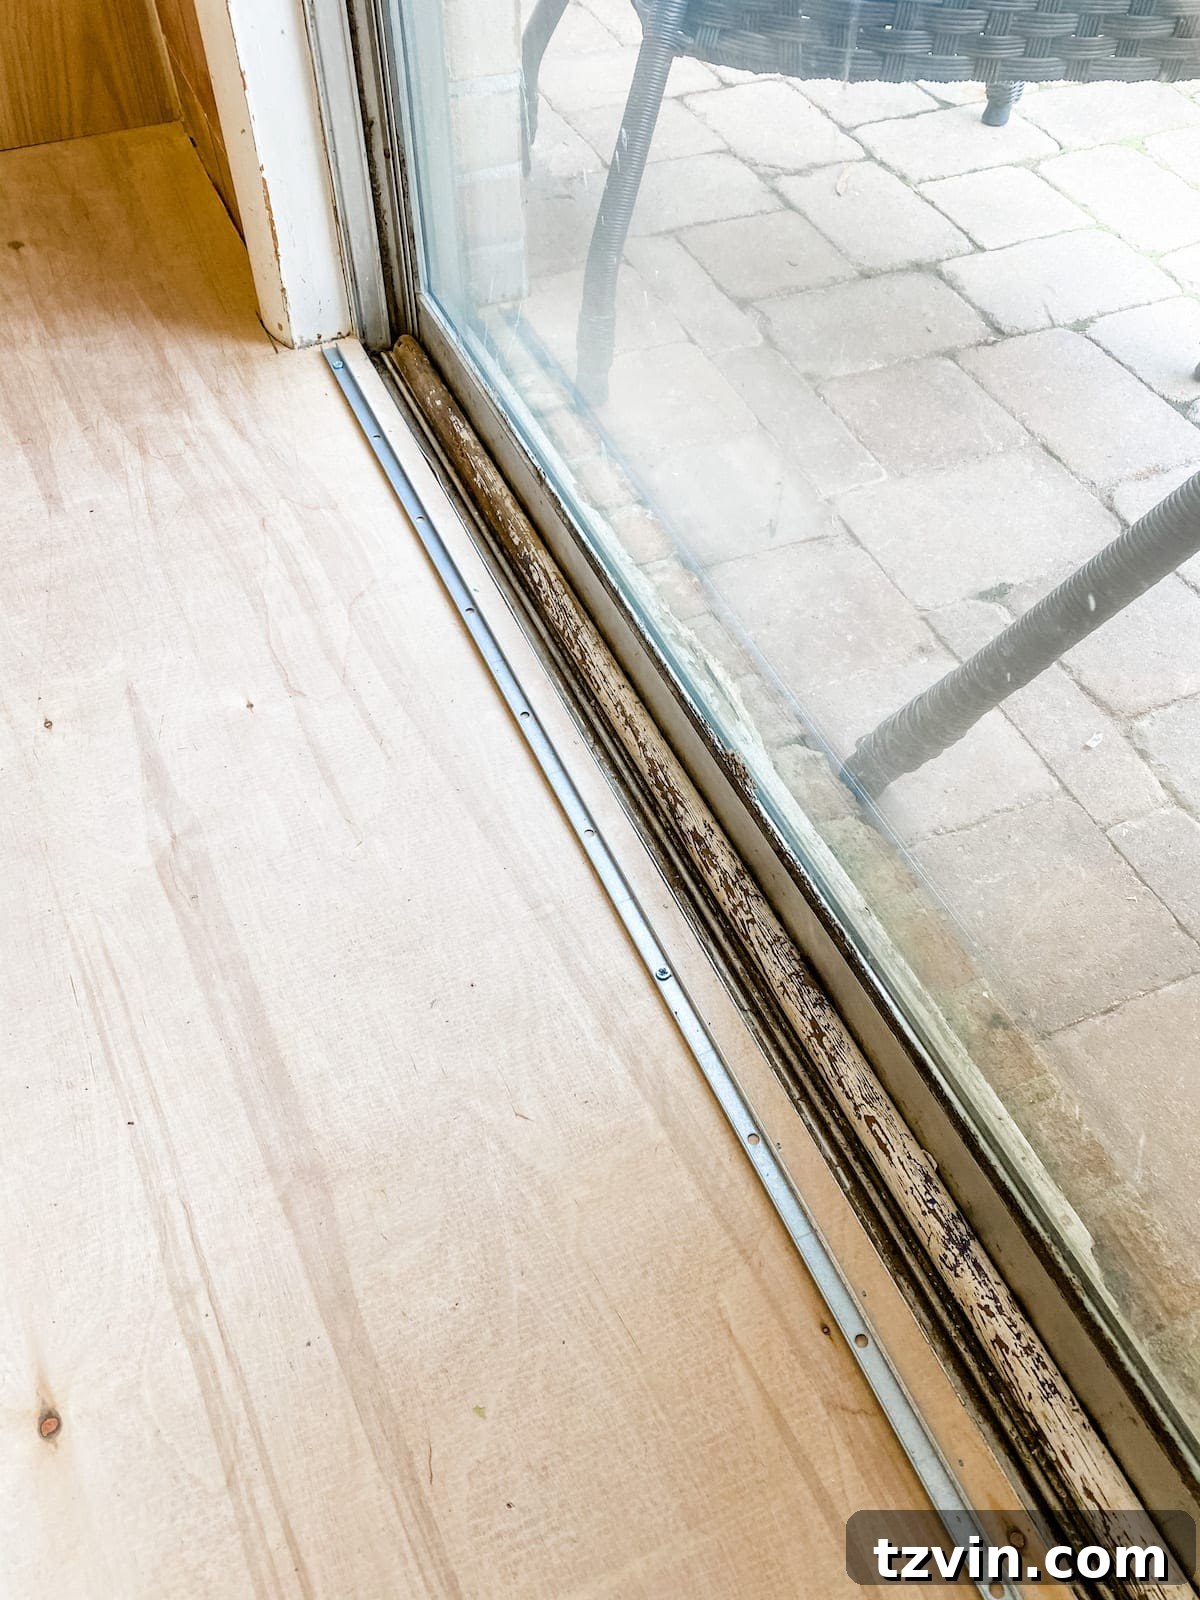
7. **Install Transition Strip Metal Piece:** At any doorways where your new LVP floor will meet another type of flooring, install the metal track piece for your transition strip. This piece will be screwed to the subfloor. The decorative vinyl strip will then snap into this track later, after your planks are fully installed, creating a clean and safe transition between rooms.
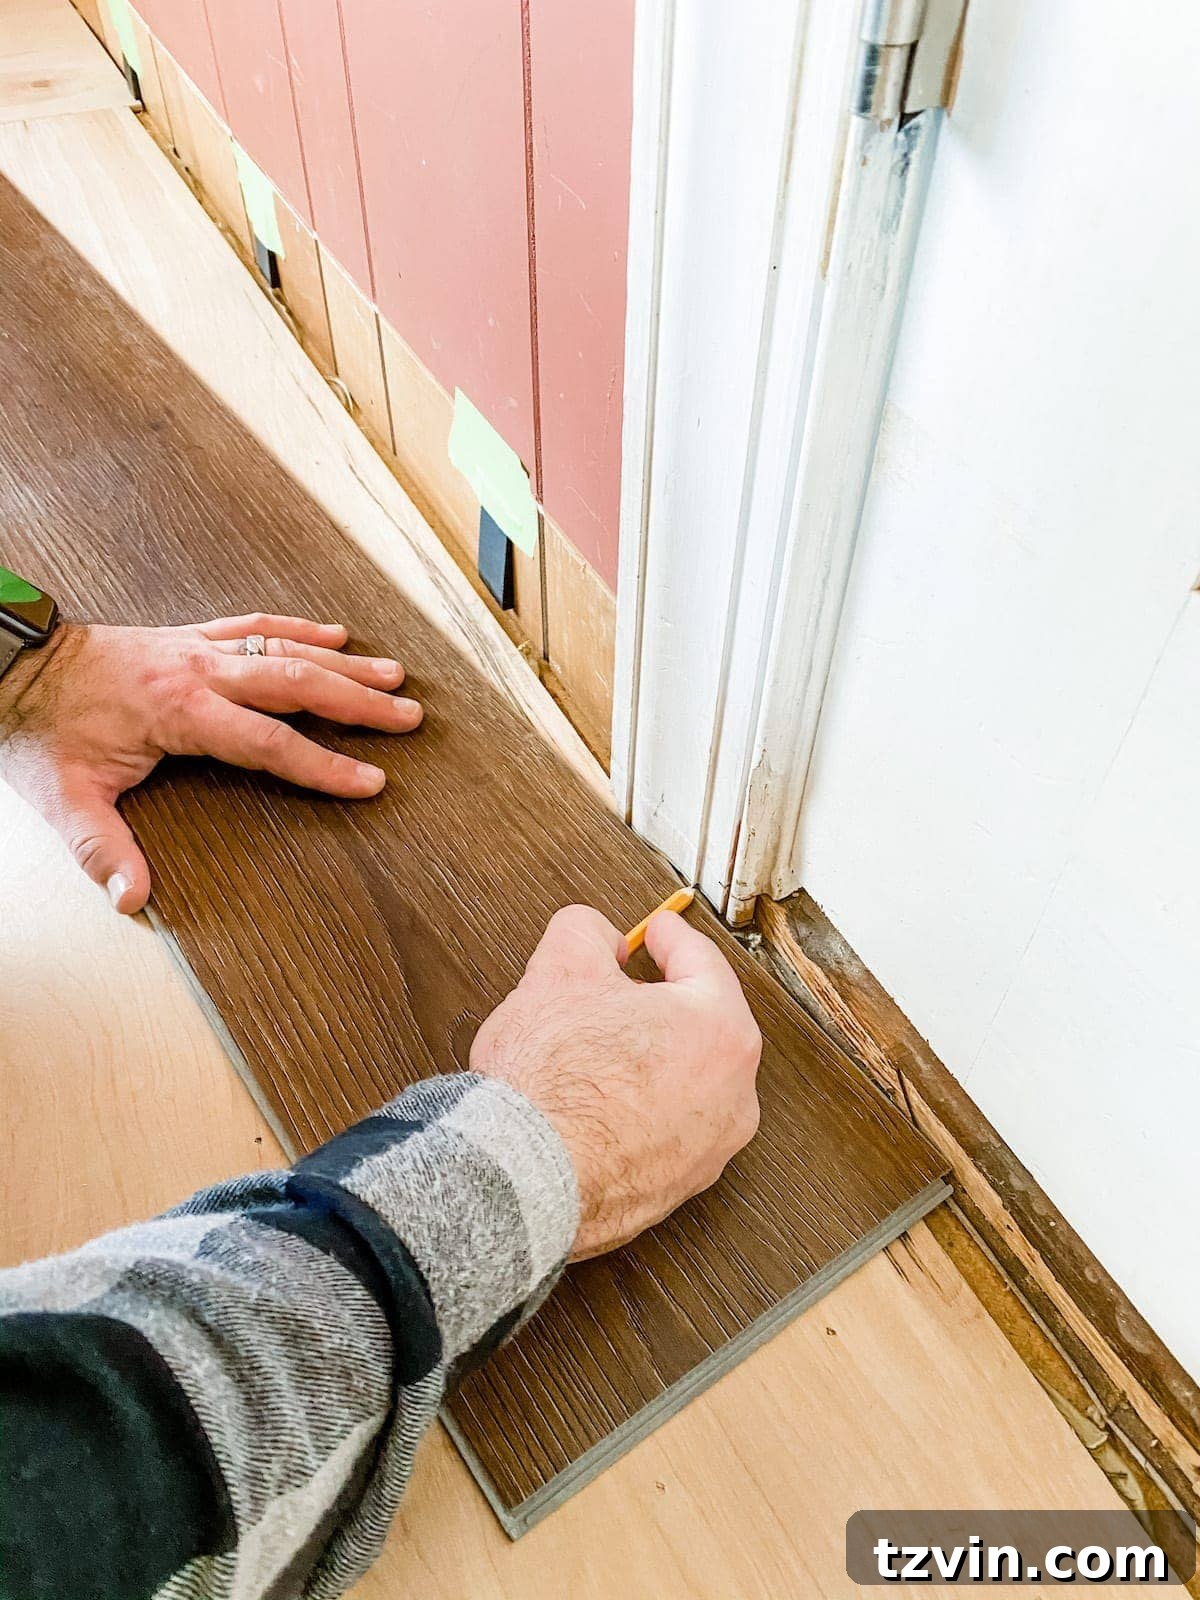
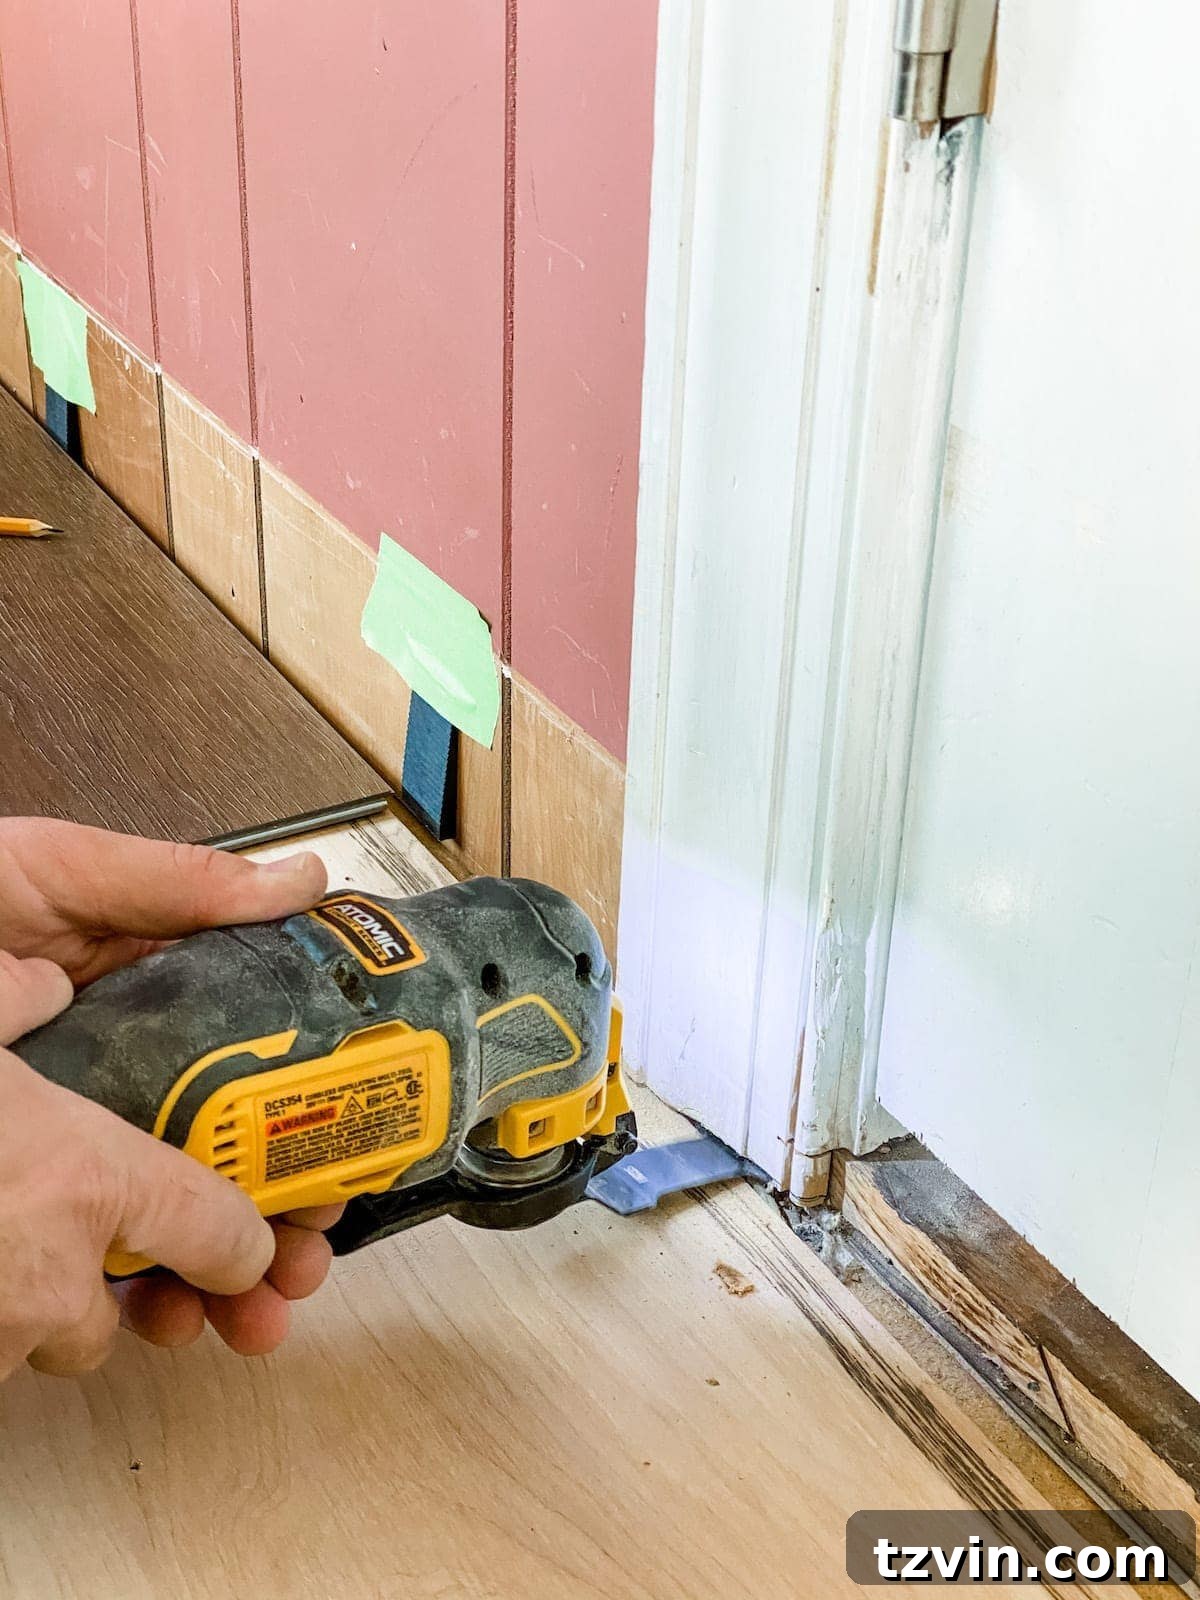
8. **Undercut Door Jambs:** For a truly professional and seamless look, you’ll need to undercut your door jambs. Use an oscillating multi-tool with a wood-cutting blade to carefully trim the bottom of the door frame, creating a space for the LVP planks to slide neatly underneath. This eliminates the need for awkward cuts around the door trim. After cutting, use a utility knife or a putty knife to remove any wood debris or sawdust from underneath the jamb, ensuring a clean cavity for the planks.
Mastering Click-Lock Luxury Vinyl Plank Floor Installation
With the preparation complete, it’s time to bring your new LVP floor to life! This section details the “click vinyl floor installation” process, focusing on the simple, yet effective, interlocking mechanism that makes LVP a popular DIY choice. As mentioned in our prep phase, we precisely trimmed the width of the planks for our initial row, guided by the chalk line, making slight adjustments for the wall’s imperfections to ensure a perfectly straight start.
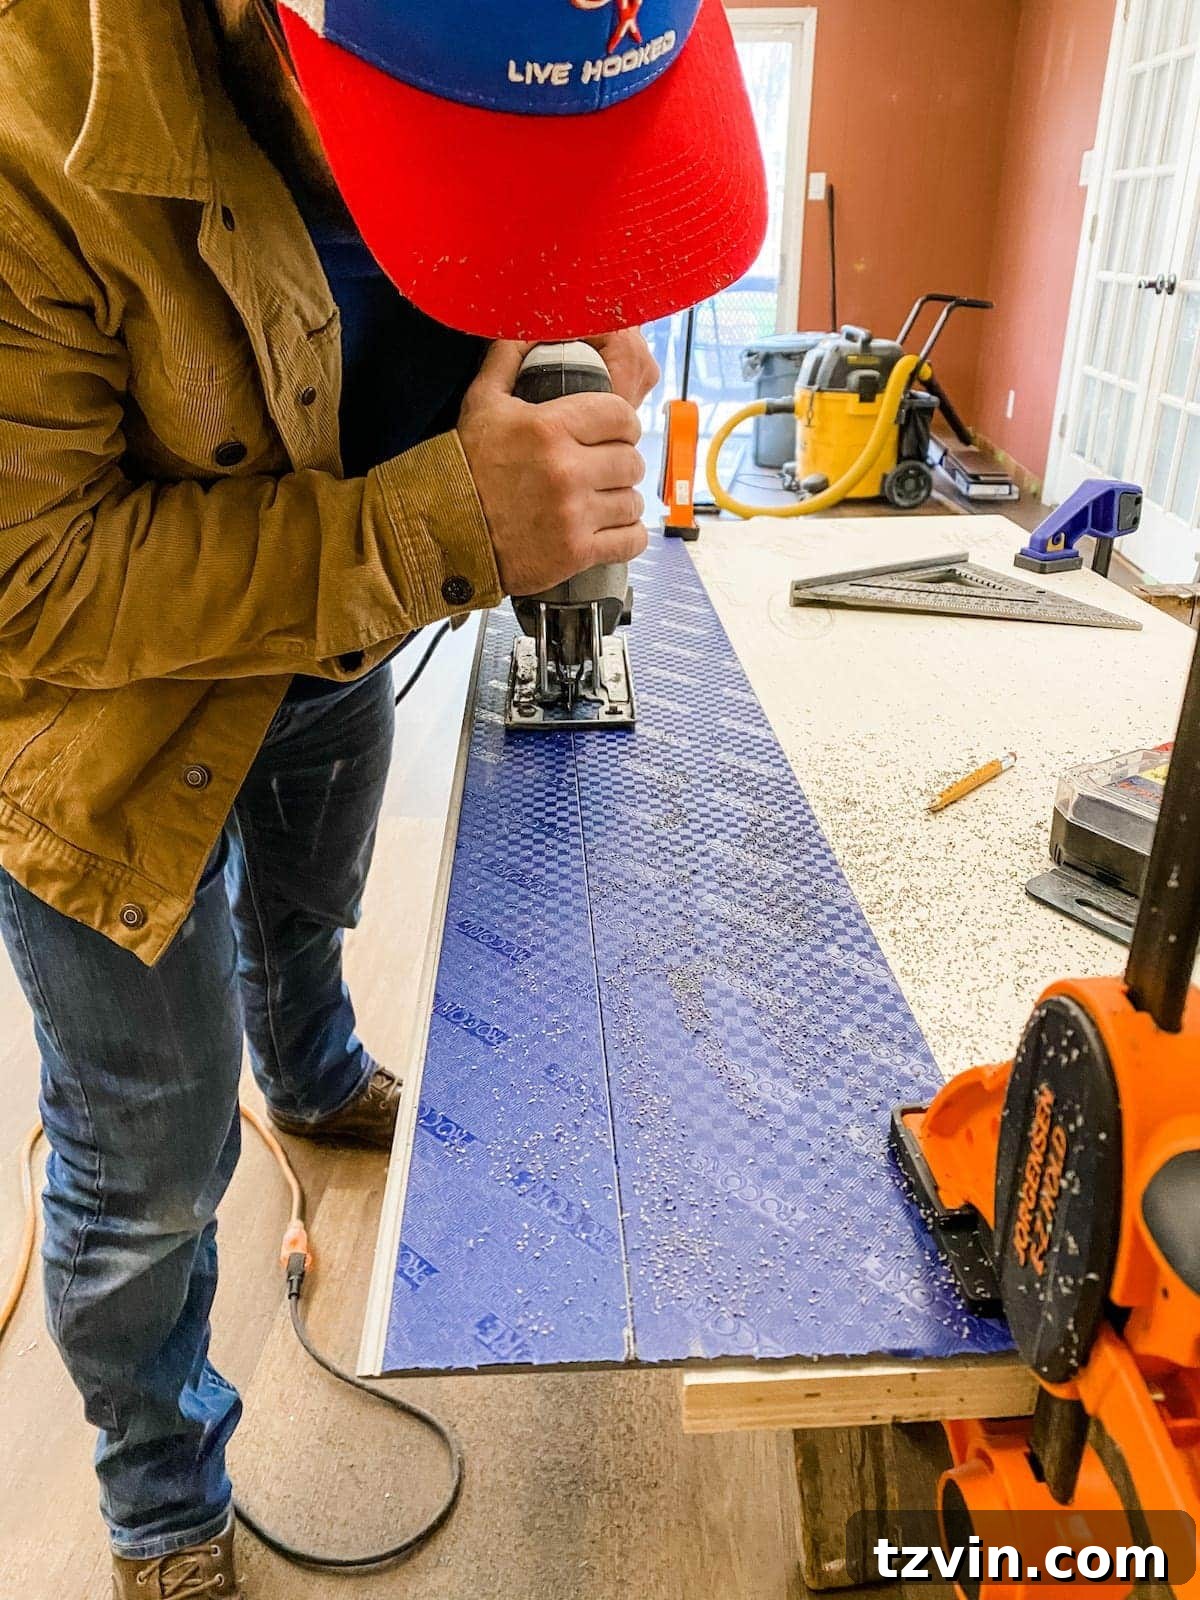
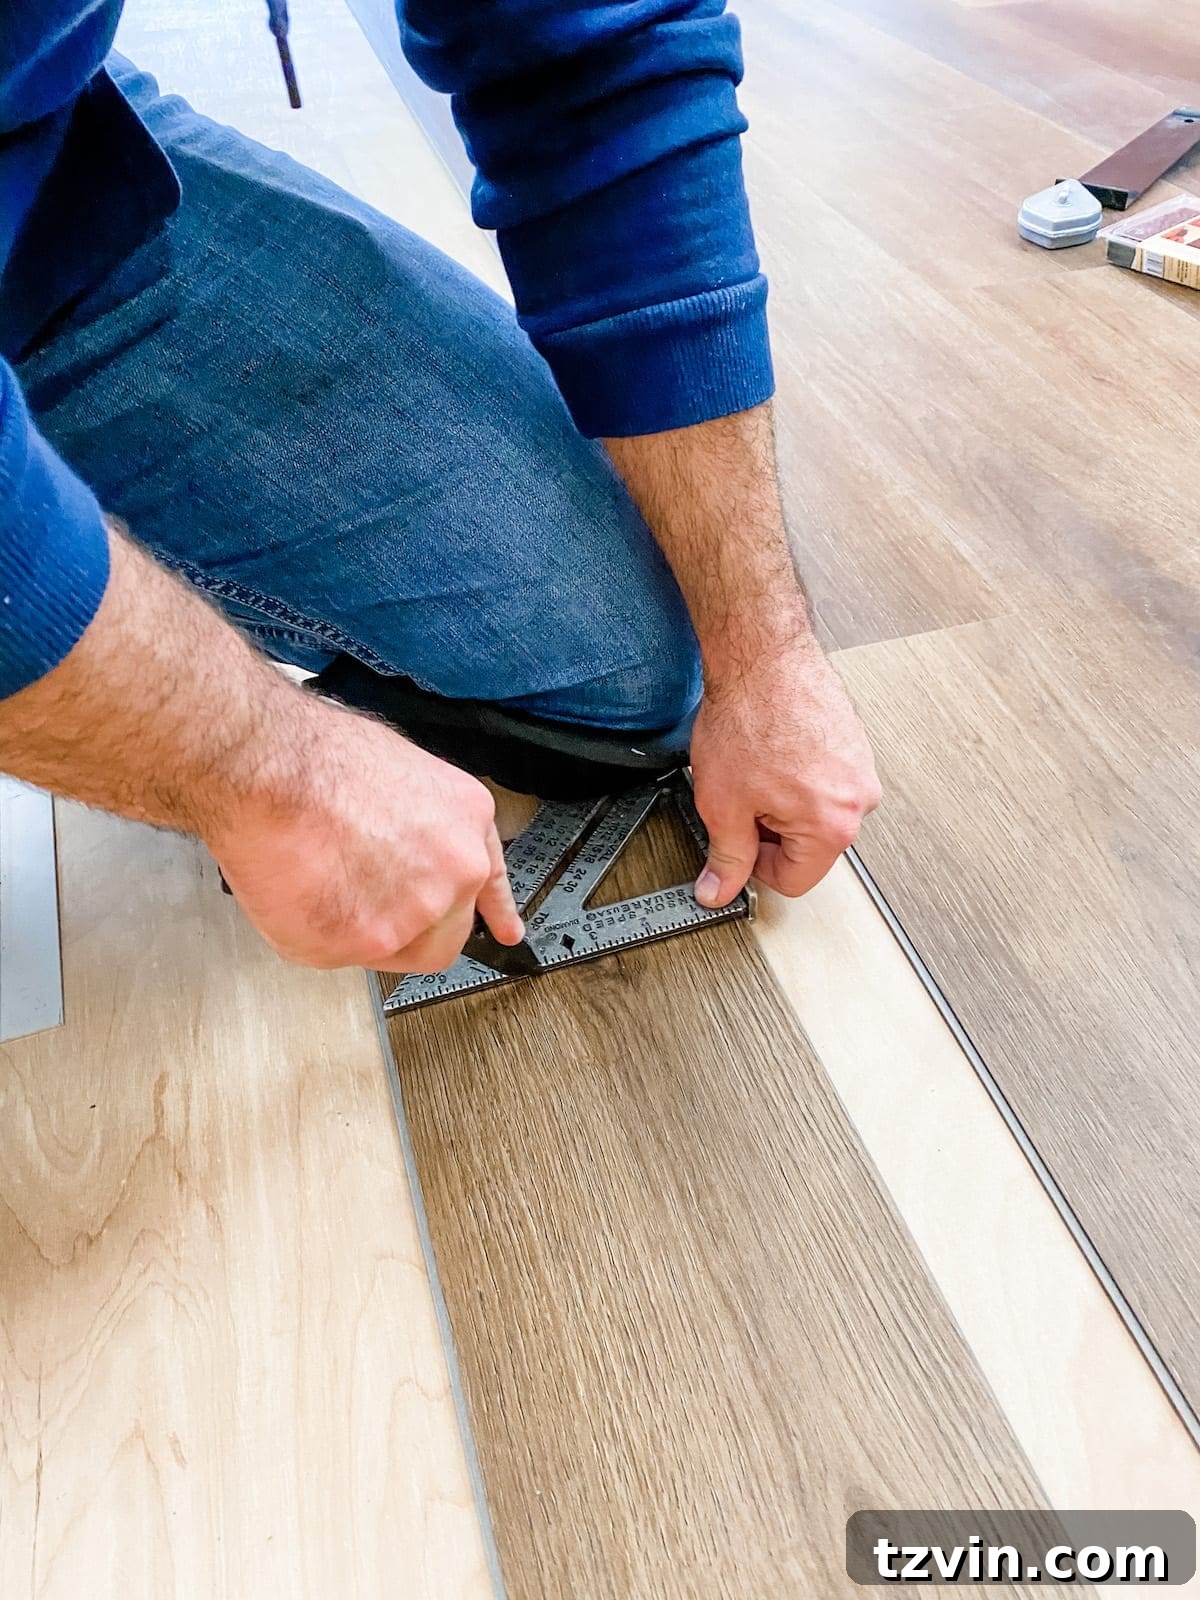
9. **Cutting LVP Planks:** For straight cuts, lay a plank on a flat, stable surface. Use a utility knife and a speed square or straight edge to score along your cut line multiple times. Apply firm, consistent pressure. Once deeply scored, simply bend the plank downwards until it snaps cleanly along the score line. For more complex or curved cuts, such as those around pipes or irregular obstacles, a jigsaw equipped with a carbide blade is your best friend. Always mark your cut lines clearly with a straight edge and pencil before cutting.
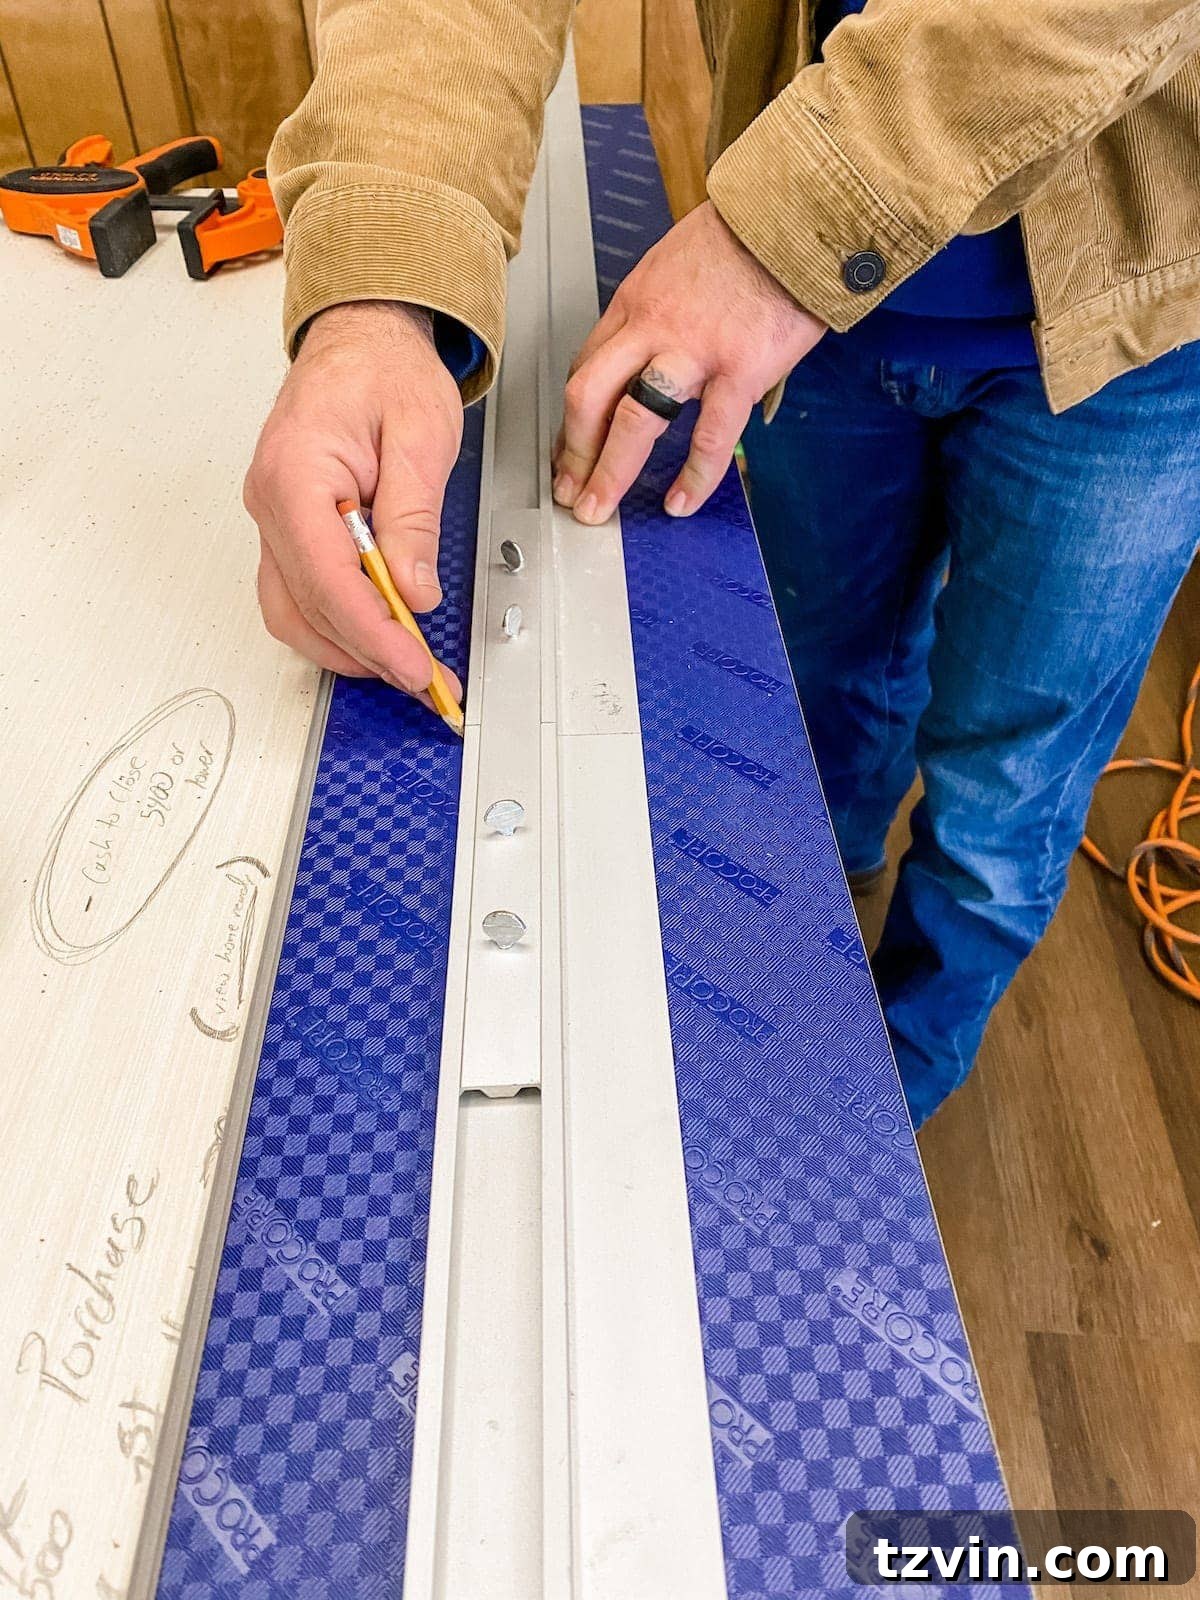
For trickier cuts, you can cut them with a jigsaw using a carbide blade. Mark your cut beforehand using a straight edge and a pencil.
10. **Starting Point and First Plank:** Begin your installation in the left corner of the room, working your way across. This orientation is essential because it ensures that the locking mechanism on the right side and the front end of your first plank is exposed, allowing subsequent planks to easily click into place as you build out the row and move into the next.
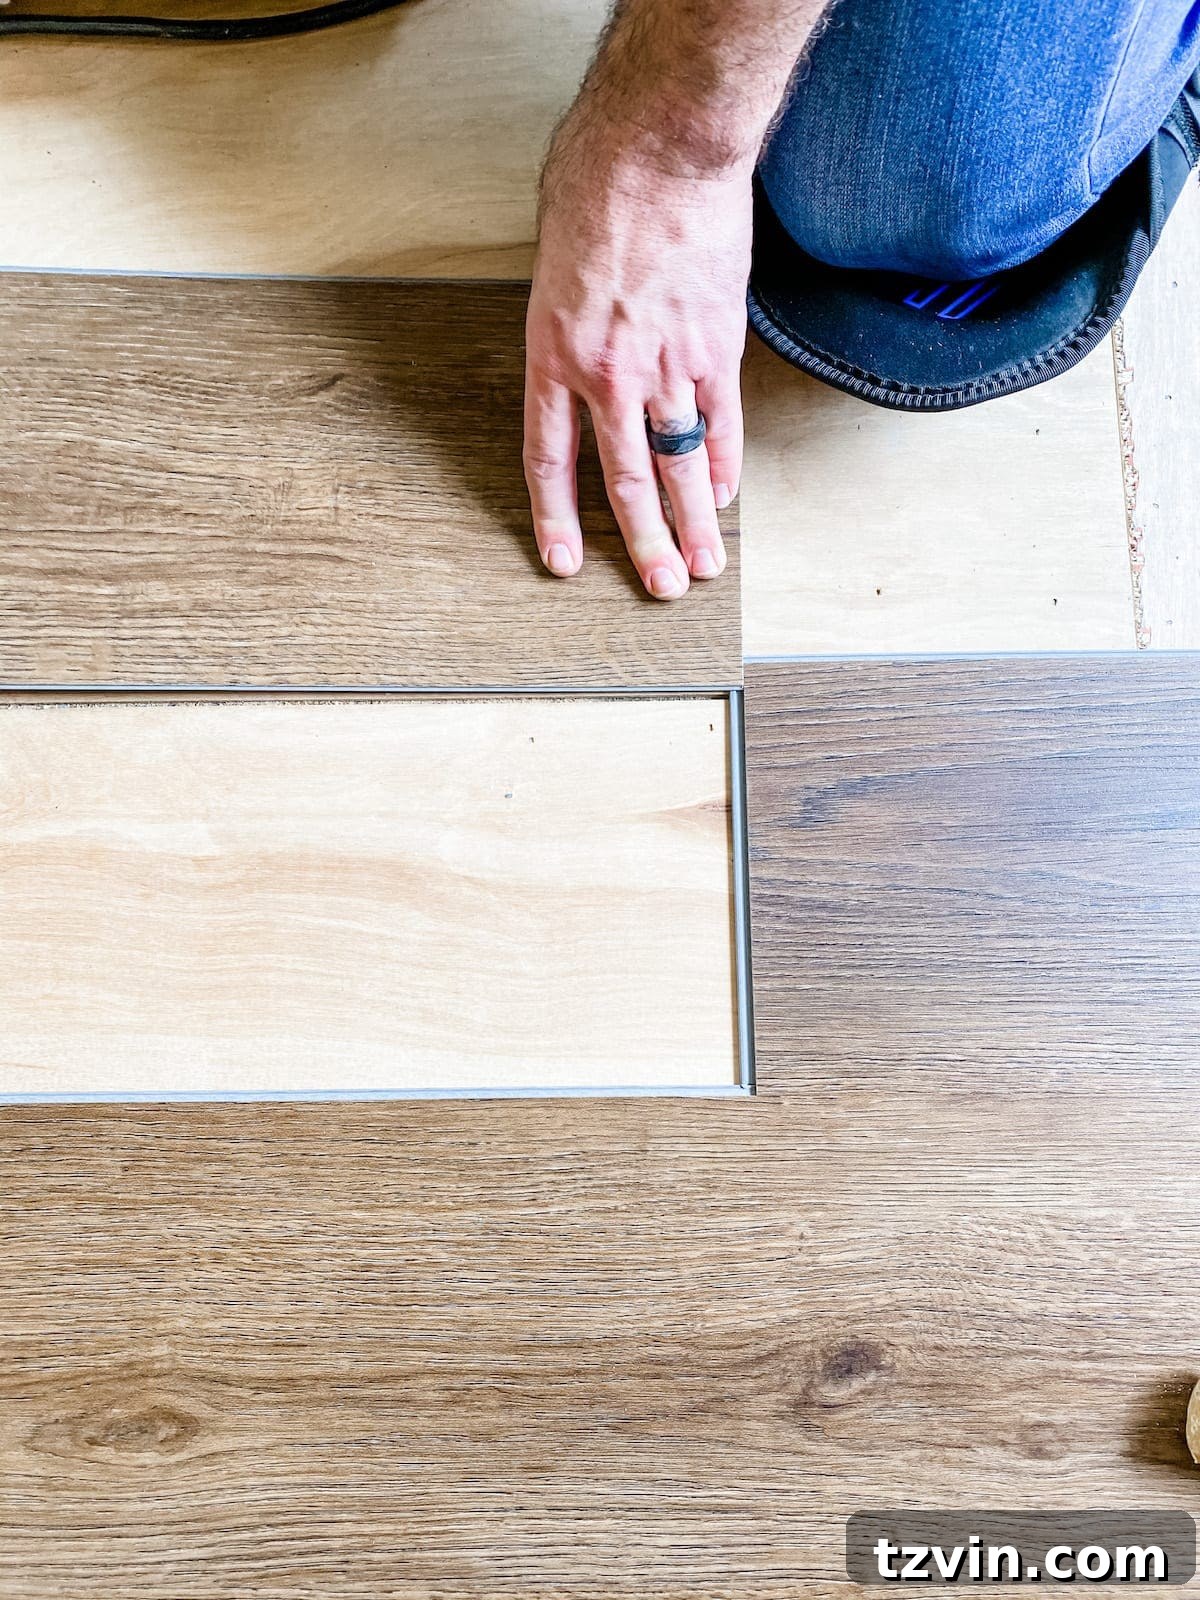
11. **Connecting End Joints:** As you progress with the first row, take the end of the next plank and angle it slightly into the end joint of the previous plank. Gently push down and forward until you hear and feel a secure click, indicating that the locking mechanism has fully engaged. This creates a strong, seamless bond between the planks.
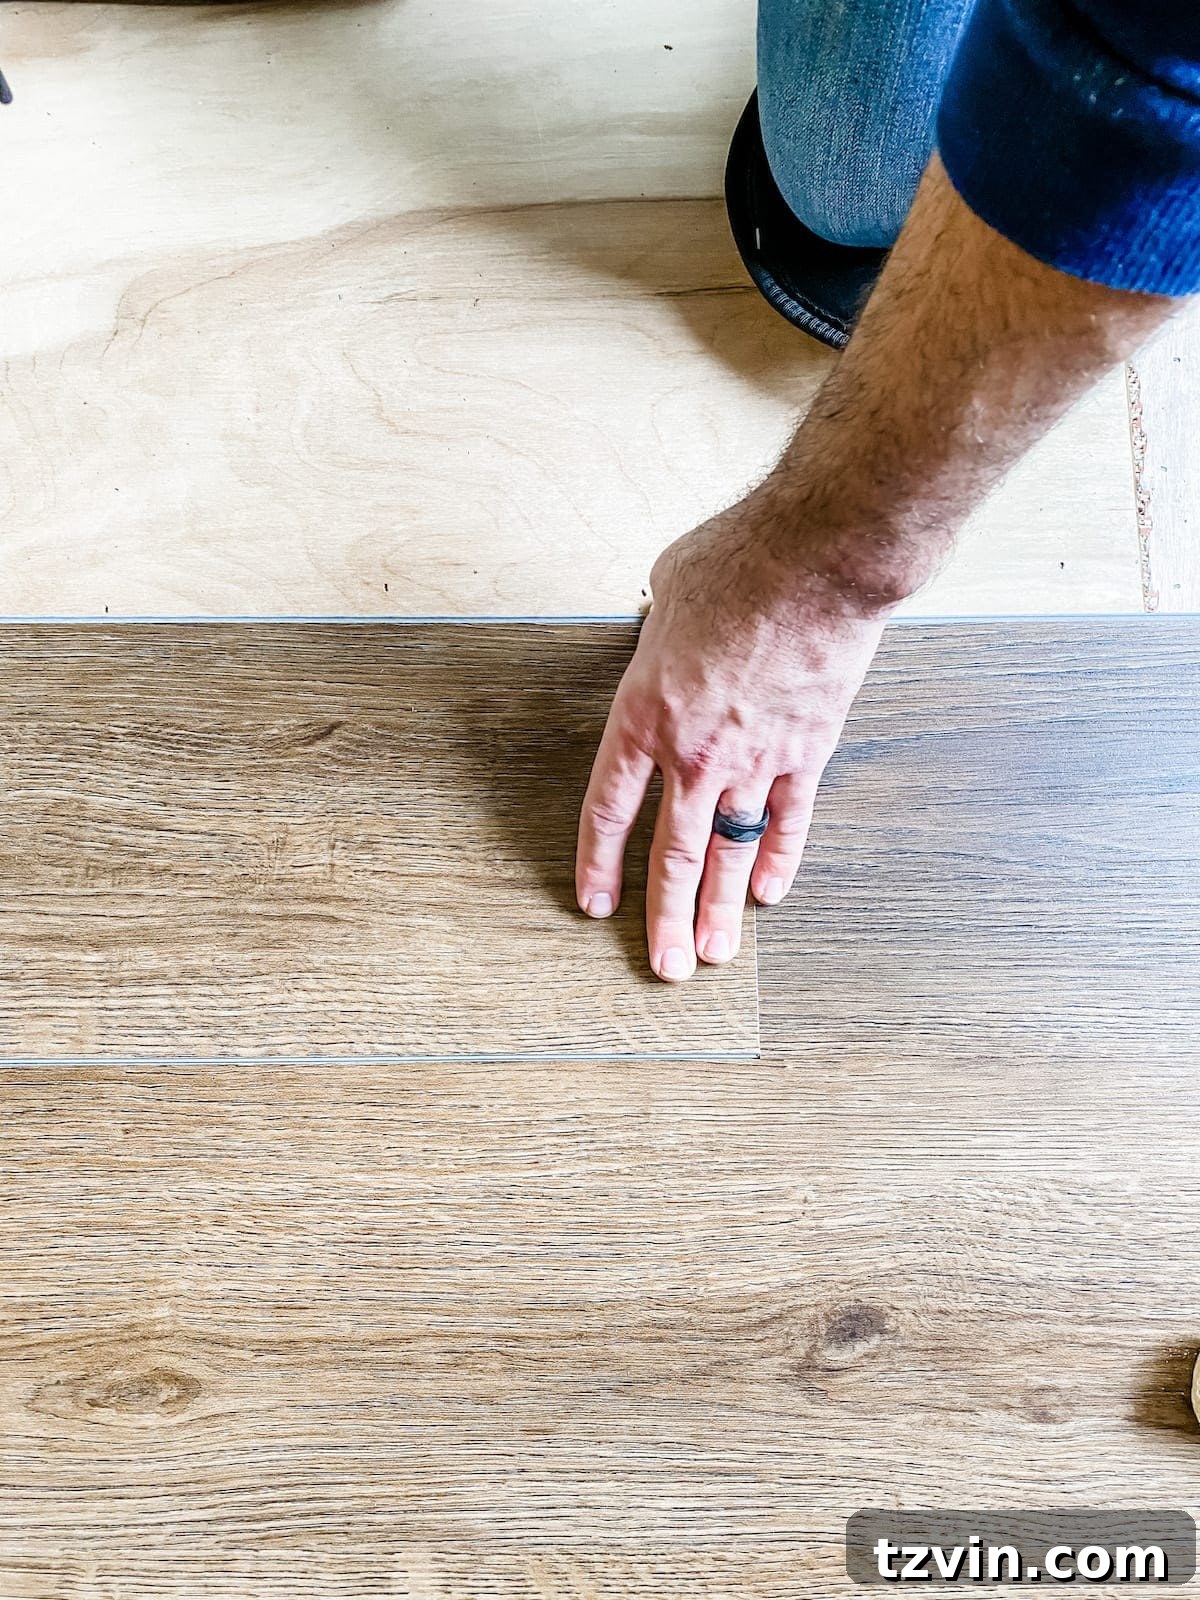
12. **Locking Long Edges:** Once you’ve completed a row of end-to-end connected planks, you’ll begin attaching subsequent rows. Take a new plank, angle its long edge slightly (typically around 20-30 degrees) into the long edge of the parallel plank in the previous row. Apply gentle downward pressure while wiggling or tapping until the locking mechanism fully engages along the entire length. You’ll feel it click firmly into place, creating a tight and secure seam.
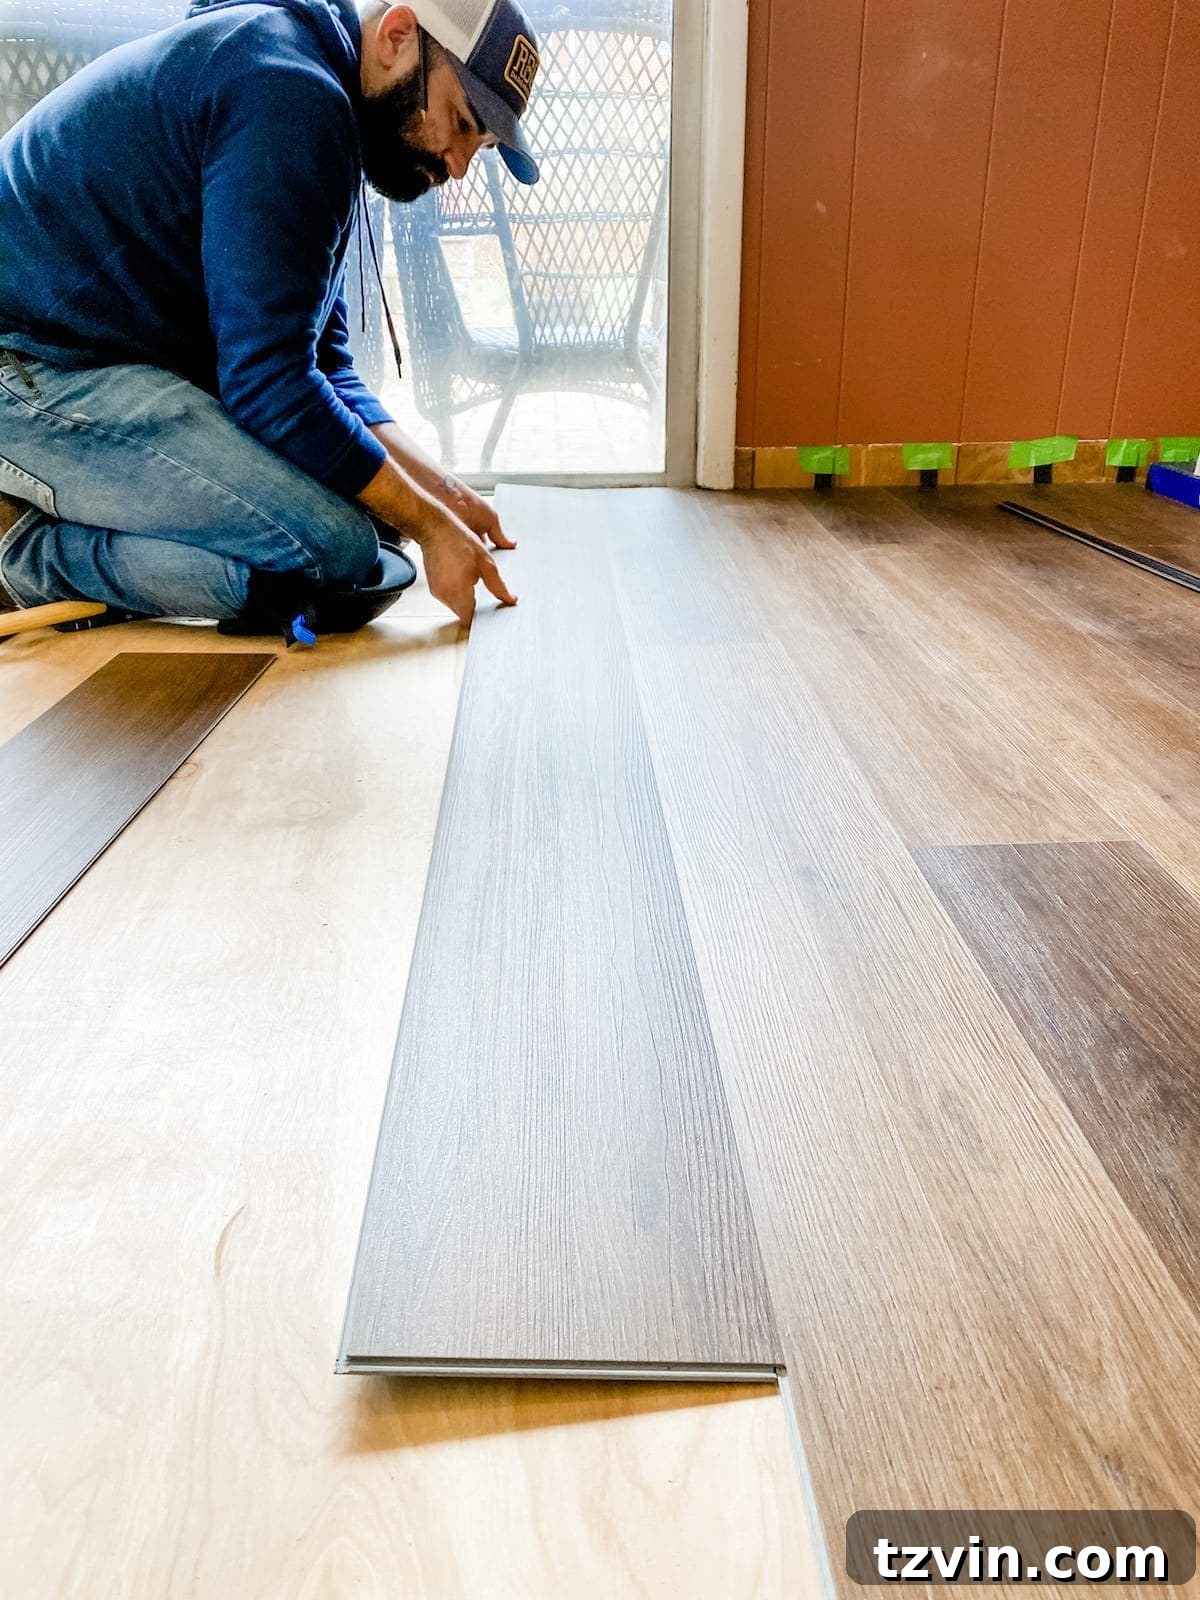
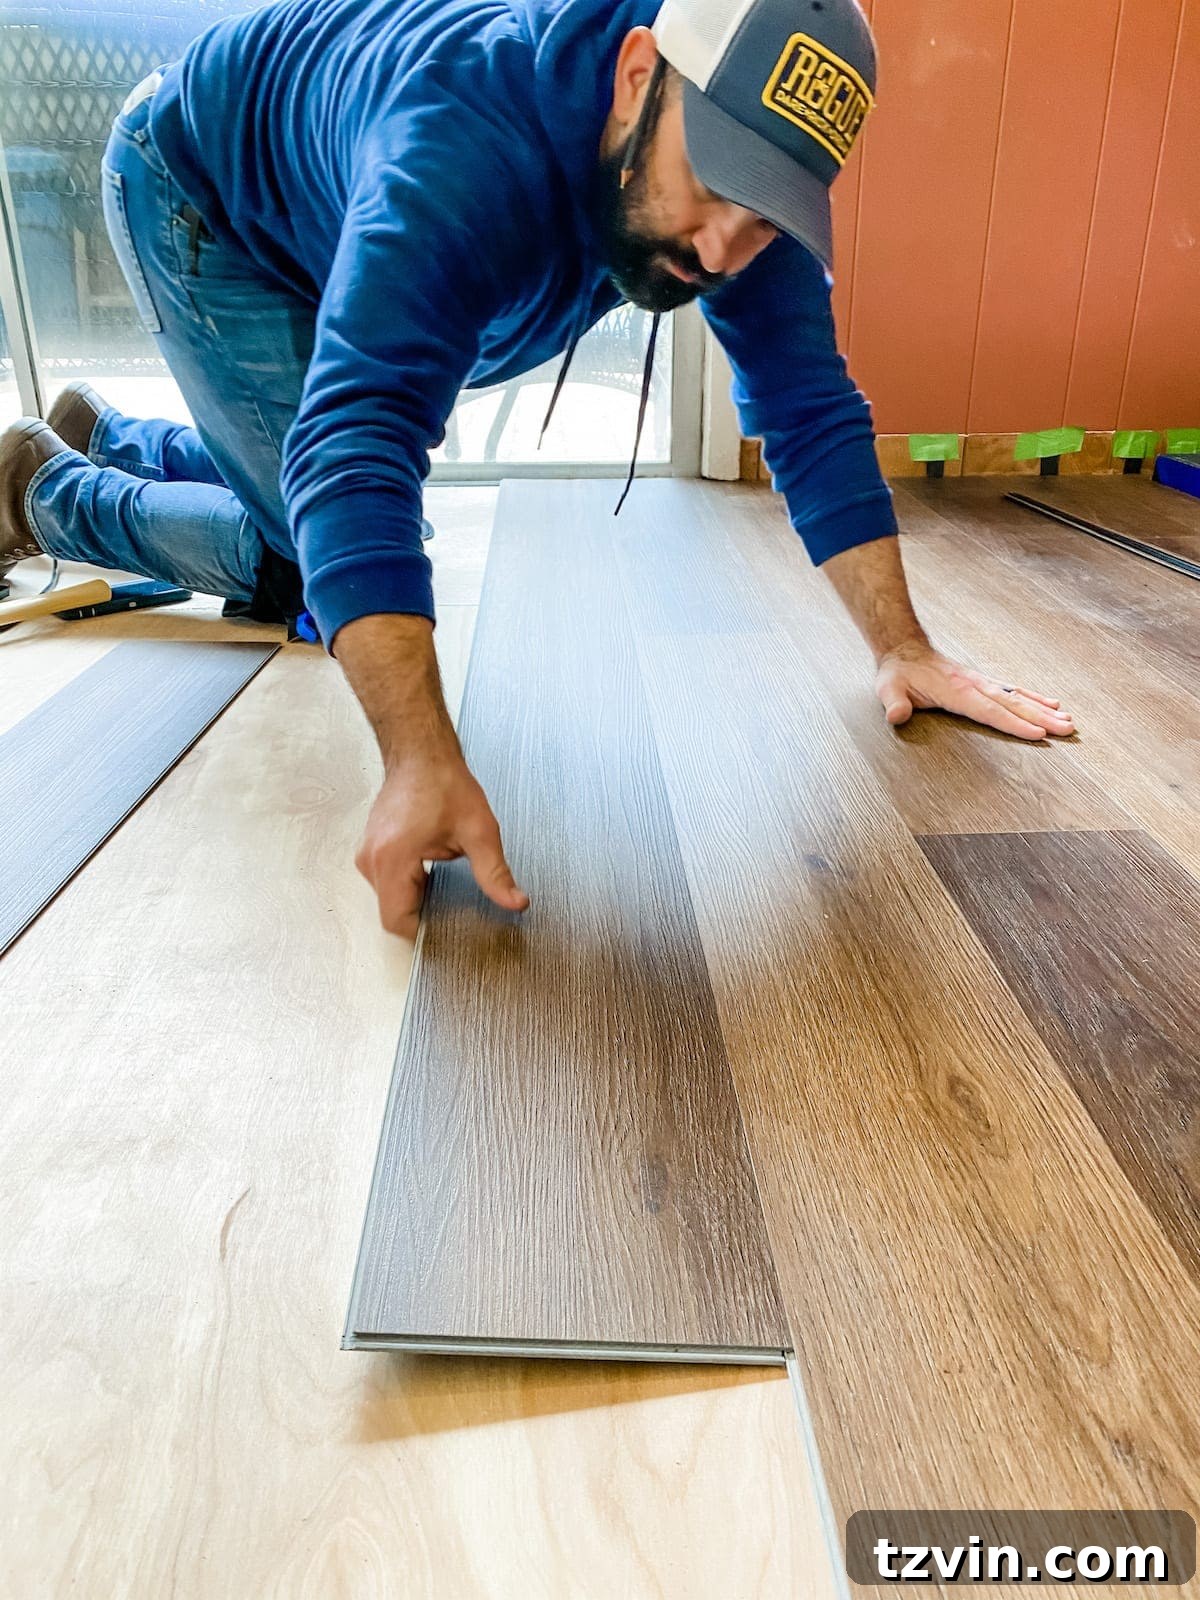
13. **Securing with Tapping Block and Mallet:** For any planks that don’t fully seat with hand pressure, use a tapping block against the edge of the plank (never directly on the locking tongue) and gently tap it with a rubber mallet. This helps to fully engage the locking mechanism and close any visible gaps, ensuring a tight, seamless fit across the entire floor.
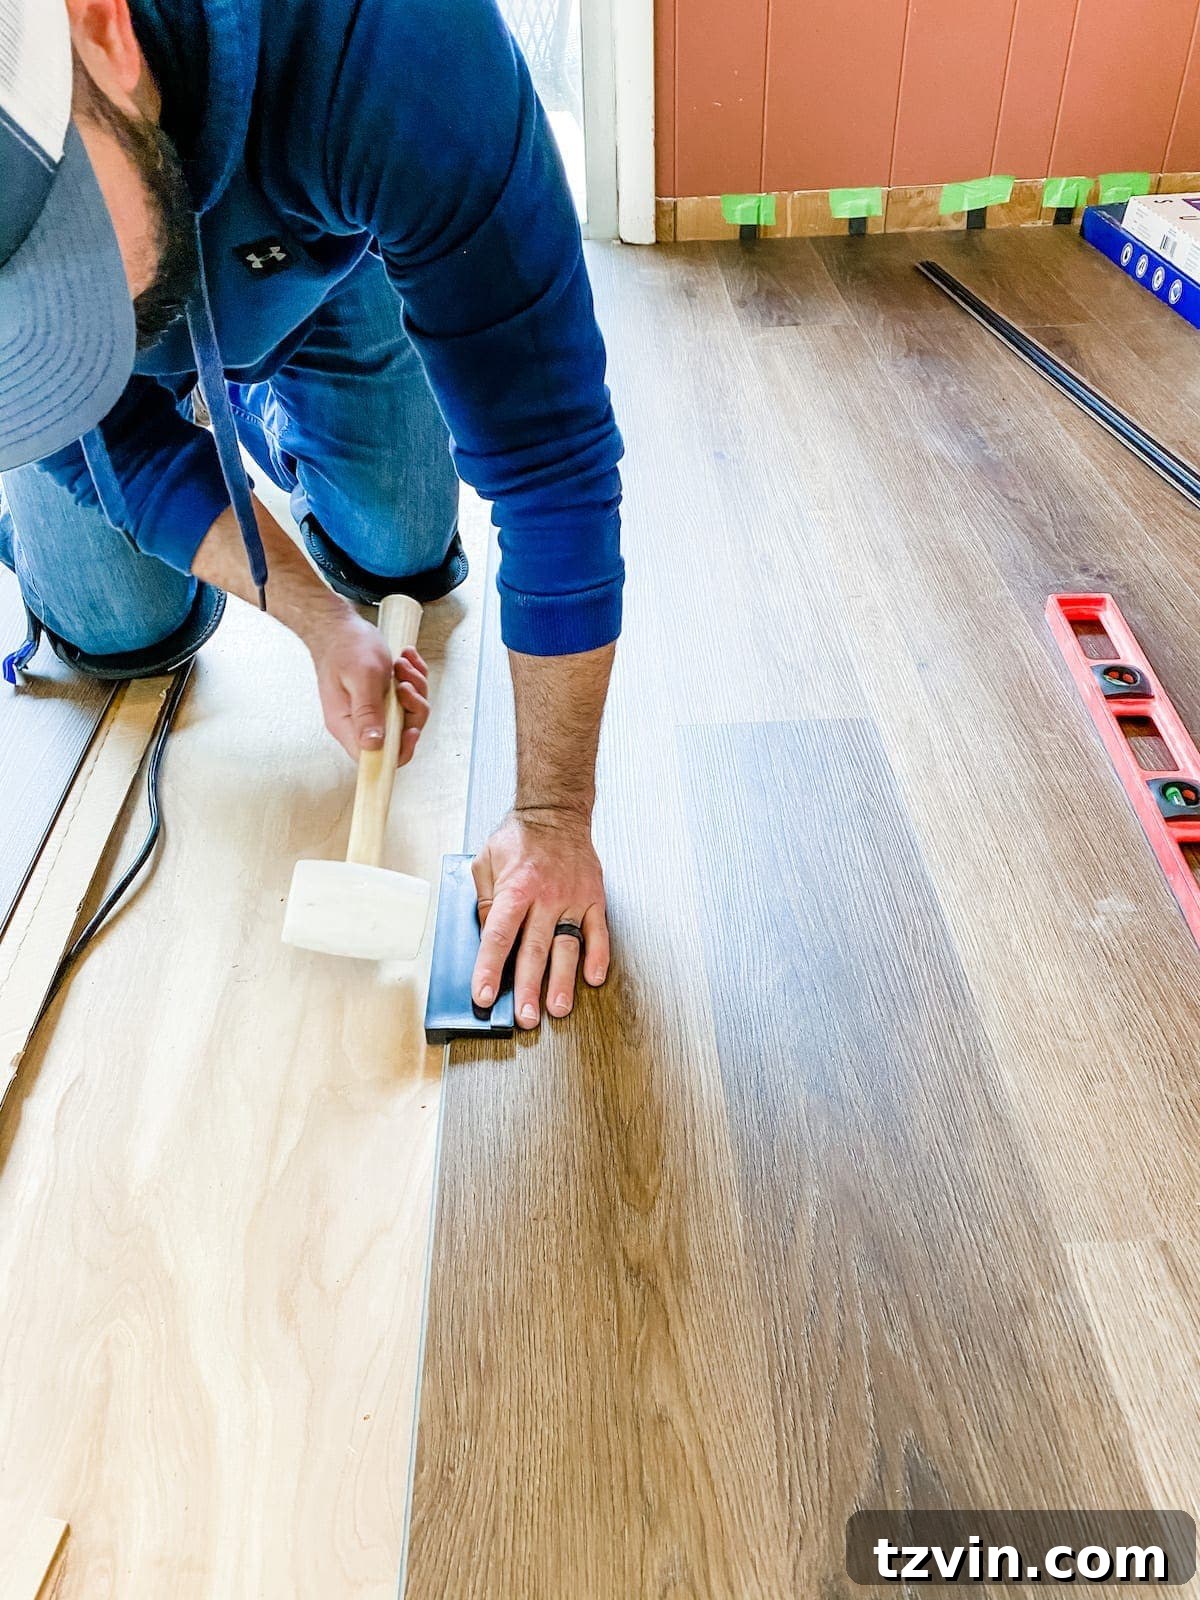
14. **Final Taps for Seams:** After a plank is locked into place, it’s good practice to lightly tap along all the seams (both the long and short edges) with your rubber mallet. This ensures all connections are fully seated and firmly locked, preventing any subtle lifting or gapping over time. A solid connection provides maximum durability and a professional finish.
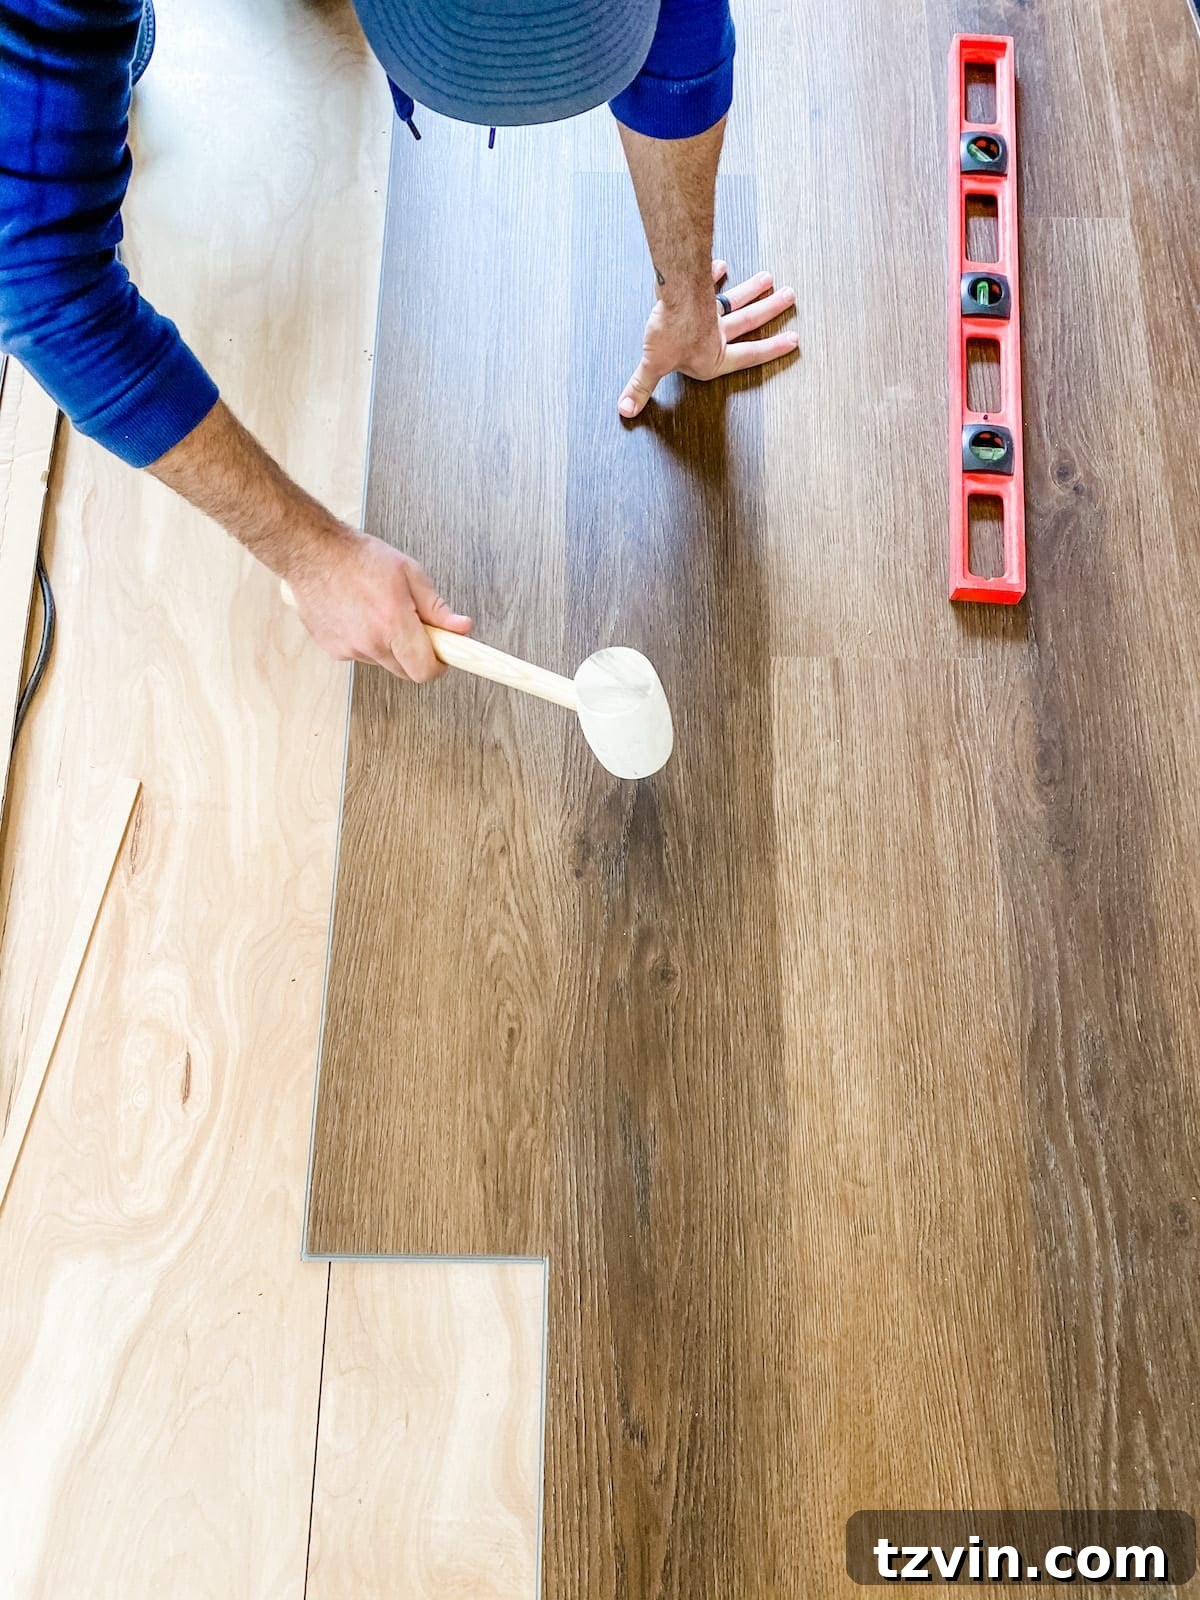
Achieving a Natural Look with Random Plank Layouts
The key to a professional-looking LVP floor is to mimic the natural randomness of real wood. As you install, consciously pay attention to your plank layout to avoid creating any repetitive patterns or “H-joints” (where end joints align perfectly in adjacent rows). Aim for a truly random, staggered effect. A good rule of thumb is to ensure that the end joints of adjacent planks are at least 8 inches apart. Also, avoid “stepping” or “stair-stepping” rows, where end joints fall in a consistent diagonal line.
To achieve the most natural variation, it’s highly recommended to open 4-5 boxes of LVP at a time and pull planks from different boxes as you go. This mixes up the subtle variations in color, grain, and texture that occur naturally in manufacturing, preventing an artificial or patterned appearance. Before clicking planks into place, it’s often helpful to dry-lay a section of a row to check your pattern and ensure you don’t end up with two overly similar planks or noticeable patterns right beside each other. The more random and varied your layout appears, the more authentic and beautiful your finished LVP floor will look.
15. **Navigating Irregular Obstacles with a Contour Gauge:** When you encounter oddly shaped obstacles such as door frames, pipes, or curved walls, a contour gauge becomes an indispensable tool. Simply press the gauge firmly against the obstacle, and its flexible pins will perfectly conform to the shape, creating an accurate mold of the irregular outline.
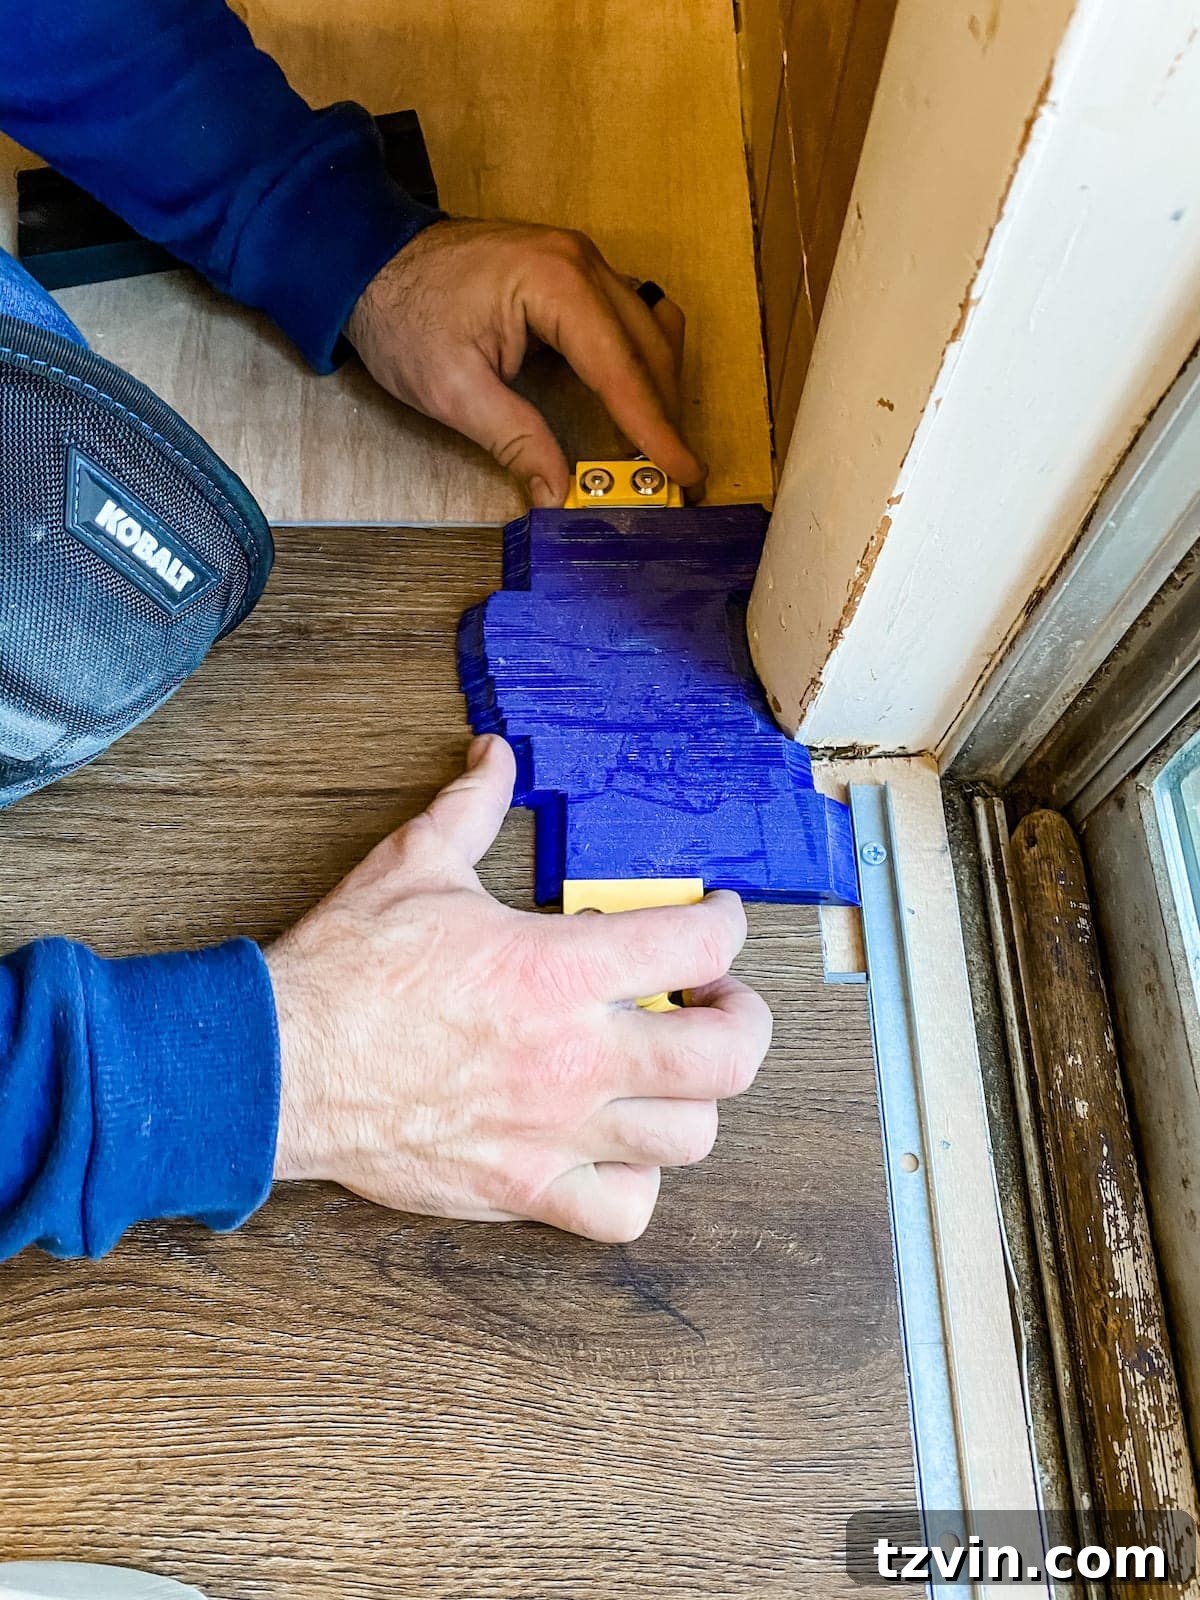
16. **Transferring the Shape:** Carefully transfer the acquired shape from the contour gauge onto your LVP plank. Use a pencil to trace along the outline created by the pins, ensuring an exact replication of the obstacle’s profile.
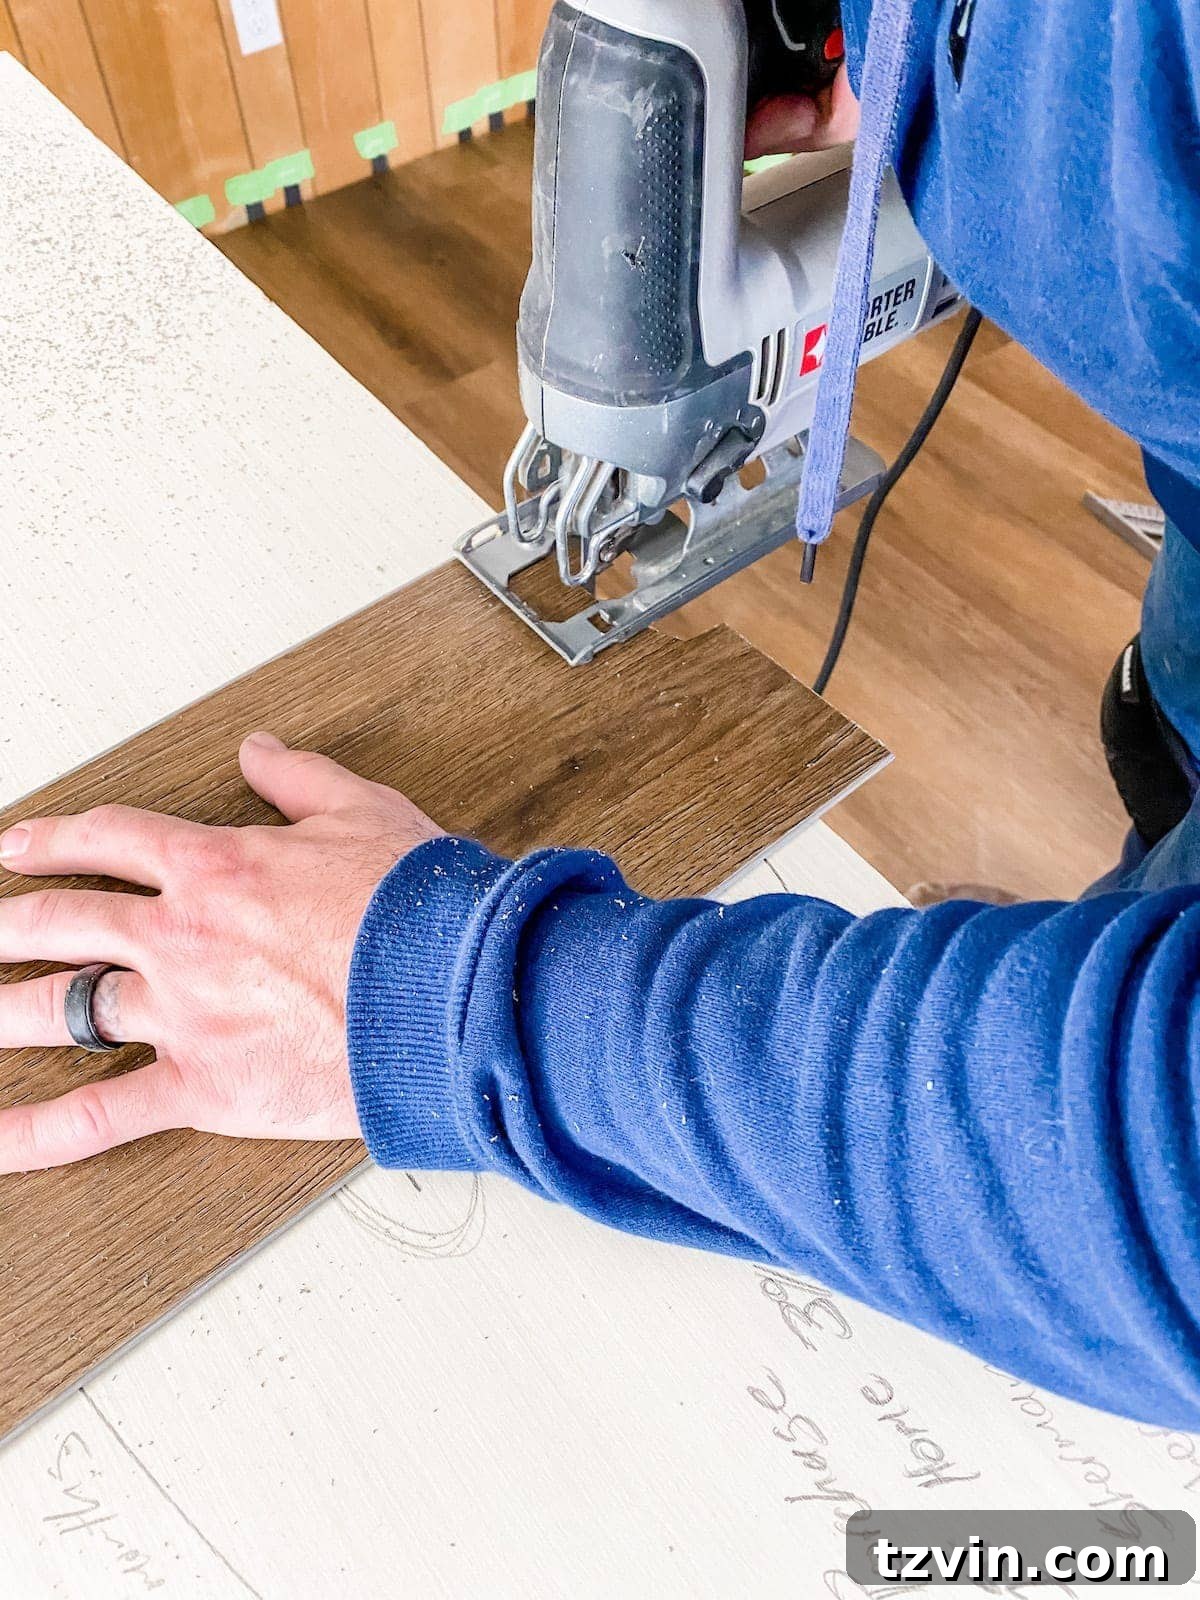
17. **Precision Cutting with a Jigsaw:** With the shape accurately traced, use a jigsaw to carefully cut along your pencil line. Remember to account for the necessary expansion gap around the obstacle; don’t cut the plank to fit perfectly flush. Leaving a small gap ensures the floor can expand and contract without buckling. The jigsaw allows for the precision needed for these custom cuts, resulting in a clean, professional finish around challenging features.
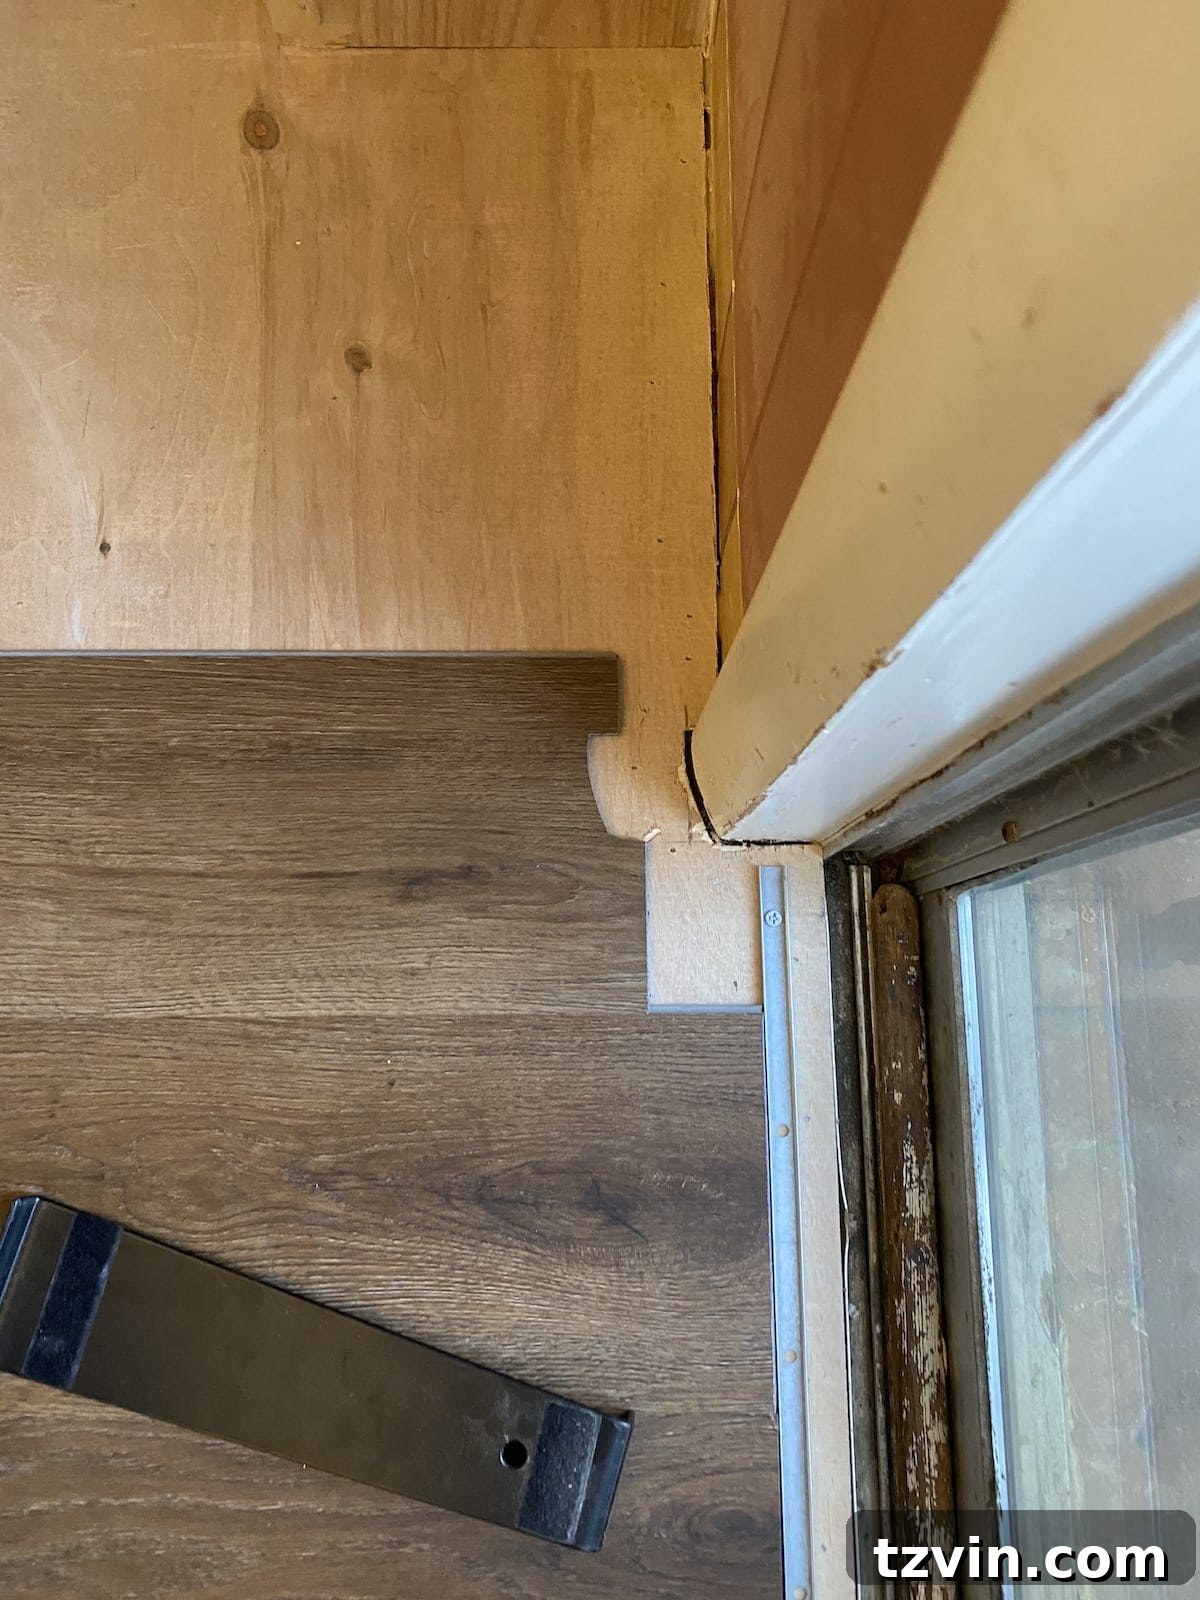
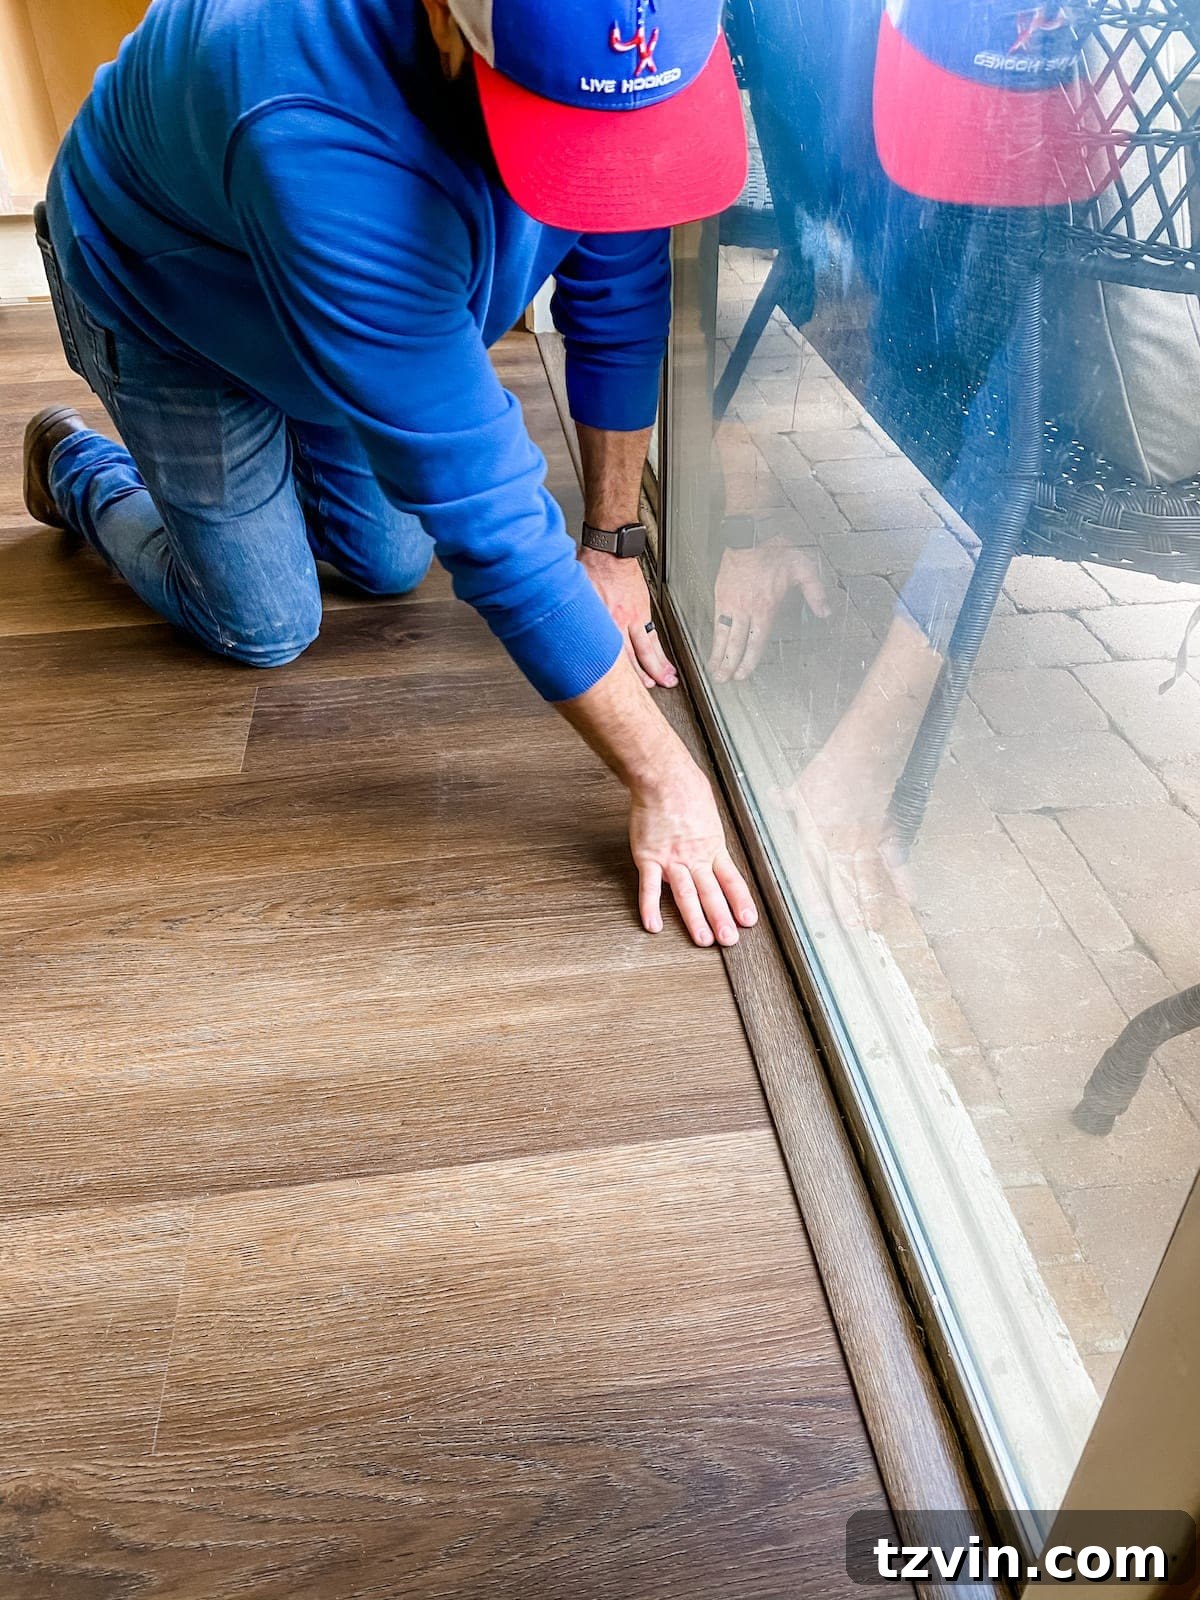
18. **Installing the Transition Strip:** Once your LVP floor is completely installed and extends into the doorway, it’s time for the final touch. Take the decorative vinyl transition strip and align its grooves with the metal track piece you installed earlier. Apply firm, even pressure along its length until it securely snaps into place. This transition strip creates a smooth, finished edge and safely bridges the gap between your new LVP and adjacent flooring.
Protect Your Investment: Essential Floor Care Tips
While luxury vinyl plank flooring is renowned for its exceptional durability and resistance, taking a few simple precautions will help preserve its beauty and extend its lifespan significantly. To be safe, always avoid dragging heavy furniture directly across your new floors. Instead, use surface sliders underneath furniture legs when moving items to prevent scratches and gouges. Similarly, be mindful of sharp objects that could potentially scrape or dent the surface. For all furniture, especially tables and chairs that are frequently moved, consider applying felt pads to the bottom of the legs. These small, inexpensive additions act as a protective buffer, minimizing friction and ensuring your LVP floors remain pristine for years to come.
Finishing Touches: Installing Baseboards and Shoe Molding
With the LVP flooring securely in place, the final step in your transformation is to install or reinstall the baseboards. If you removed your original baseboards earlier, carefully place them back on the walls, aligning them properly. For those who chose to leave their baseboards installed, now is the time to add shoe molding (also known as quarter round) along the perimeter of the room. This molding serves a crucial aesthetic and functional purpose: it elegantly covers the expansion gap that you meticulously created around the edges of the room, providing a clean, finished look while allowing your floor the necessary room to expand and contract. Use a miter saw for precise angled cuts at corners and along straight runs. For inside corners, a coping saw can be used to create seamless, interlocking joints. Once all the baseboards or shoe molding are installed, use caulk to fill any small gaps between the molding and the wall or floor, and fill any finishing nail holes with wood filler for a truly polished result. Paint as needed to match your trim color, and step back to admire your handiwork.
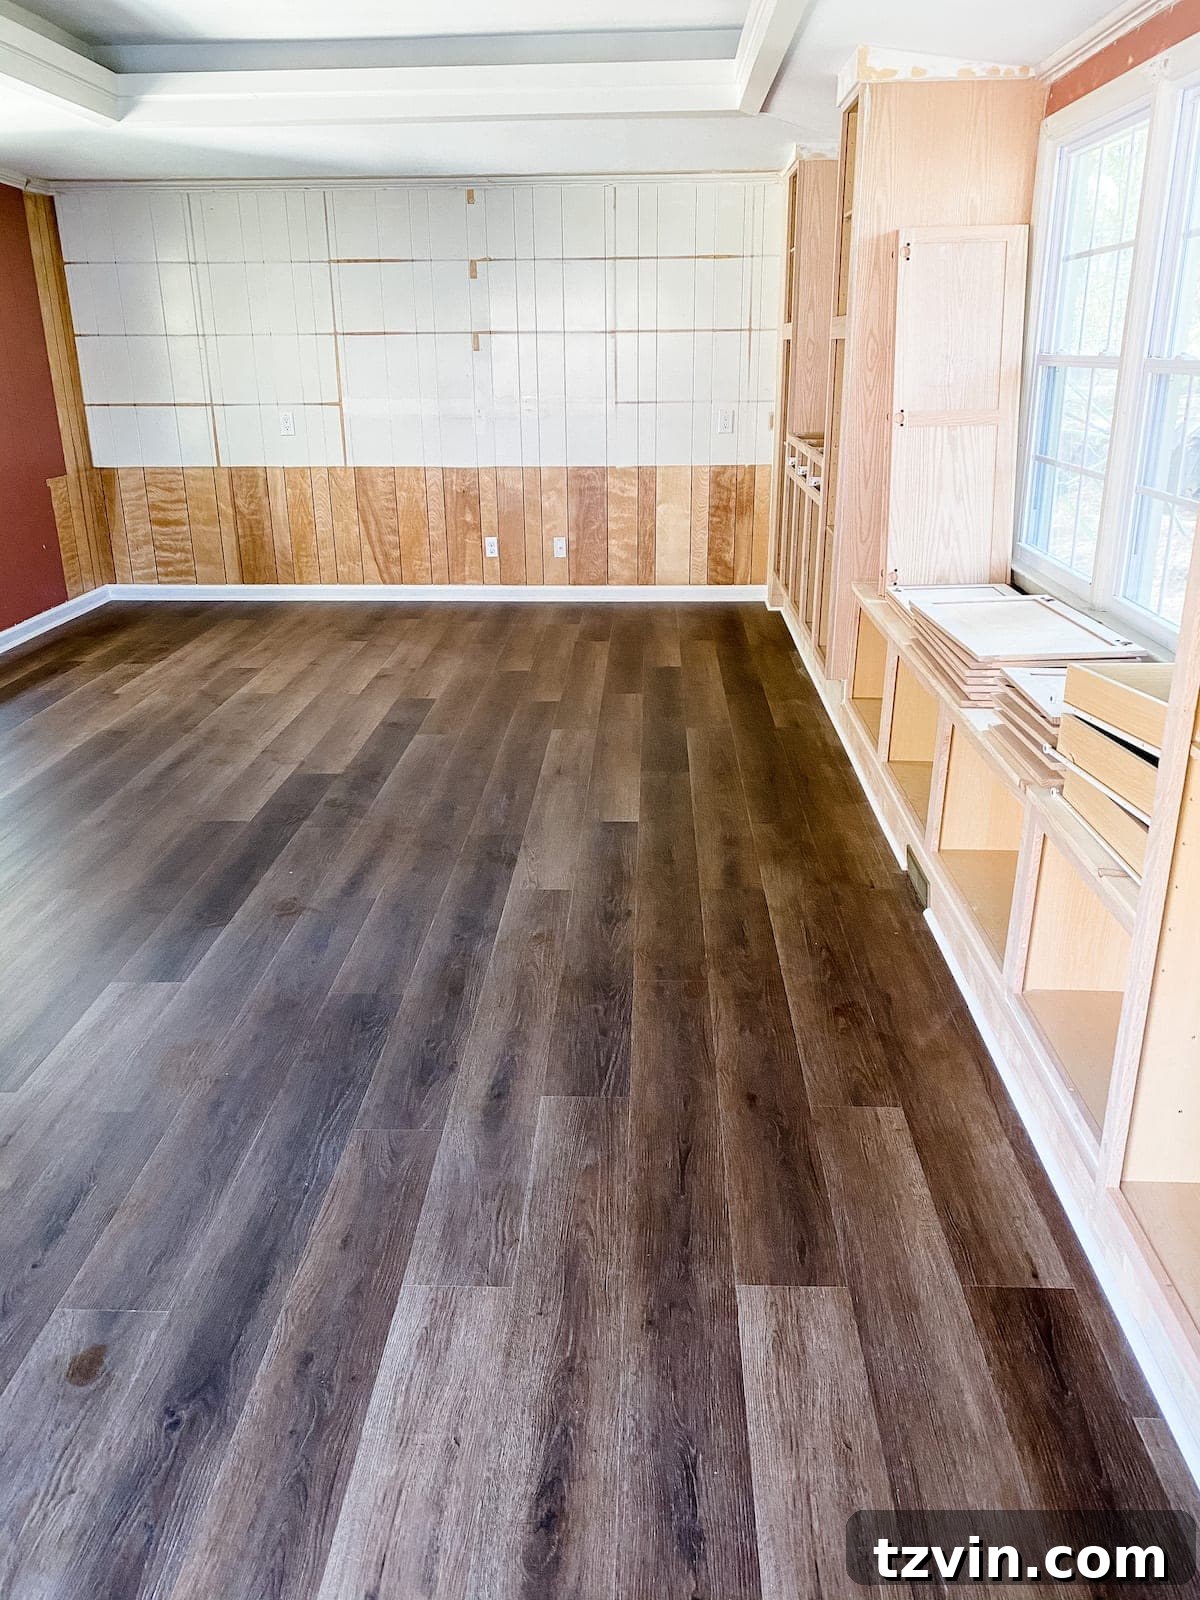
And just like that, another major milestone in the Carney project is complete! Built-ins: CHECK! Floors: CHECK! The transformation is truly beginning to take shape, laying the foundation for an incredible new space.
Next up on our to-do list is painting, and then this room will undergo an even more dramatic reveal. We can’t wait to share the next phase of this exciting renovation journey with you!
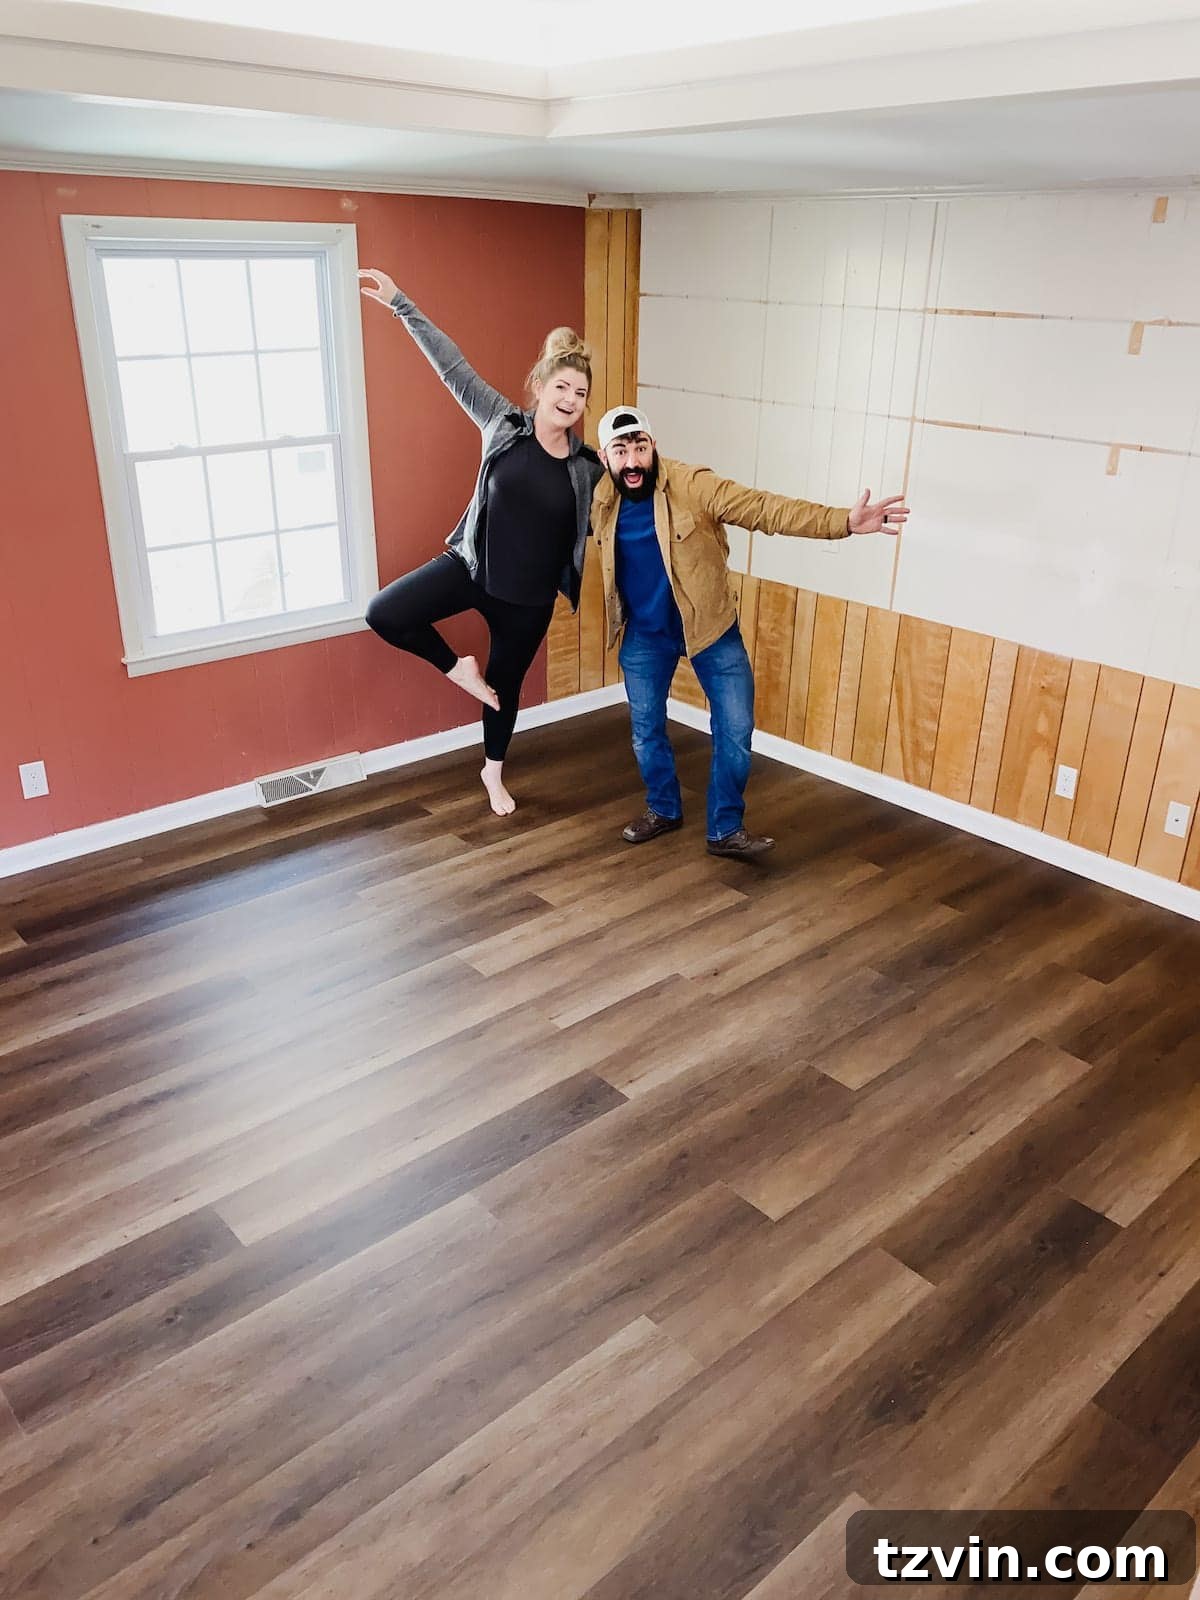
Of course, no significant project milestone is truly complete without a celebratory moment! Robert and I marked the completion of the flooring installation with a few enthusiastic dance moves. It’s safe to say our individual dance styles are… distinctly different, but the joy of progress was undeniably shared! 😉
Just imagine: crisp, light, and bright walls providing a stunning contrast to deep, moody built-ins, all complemented by vibrant, joyful kids’ art! The vision is coming together, and the excitement is palpable. It’s going to be absolutely spectacular!