Transform Your Staircase: A Comprehensive DIY Guide to Replacing Iron Balusters and Newel Posts on a Budget with Tool Rentals
Embarking on a home renovation project often brings about moments of profound satisfaction, and updating a staircase is undoubtedly one of them. For many homeowners, the staircase serves as a central design element, often being the first thing guests see upon entering. This DIY staircase makeover, involving the replacement of outdated iron balusters and a newel post, falls squarely into the category of projects that leave you wondering, “Why didn’t we do this sooner?!”
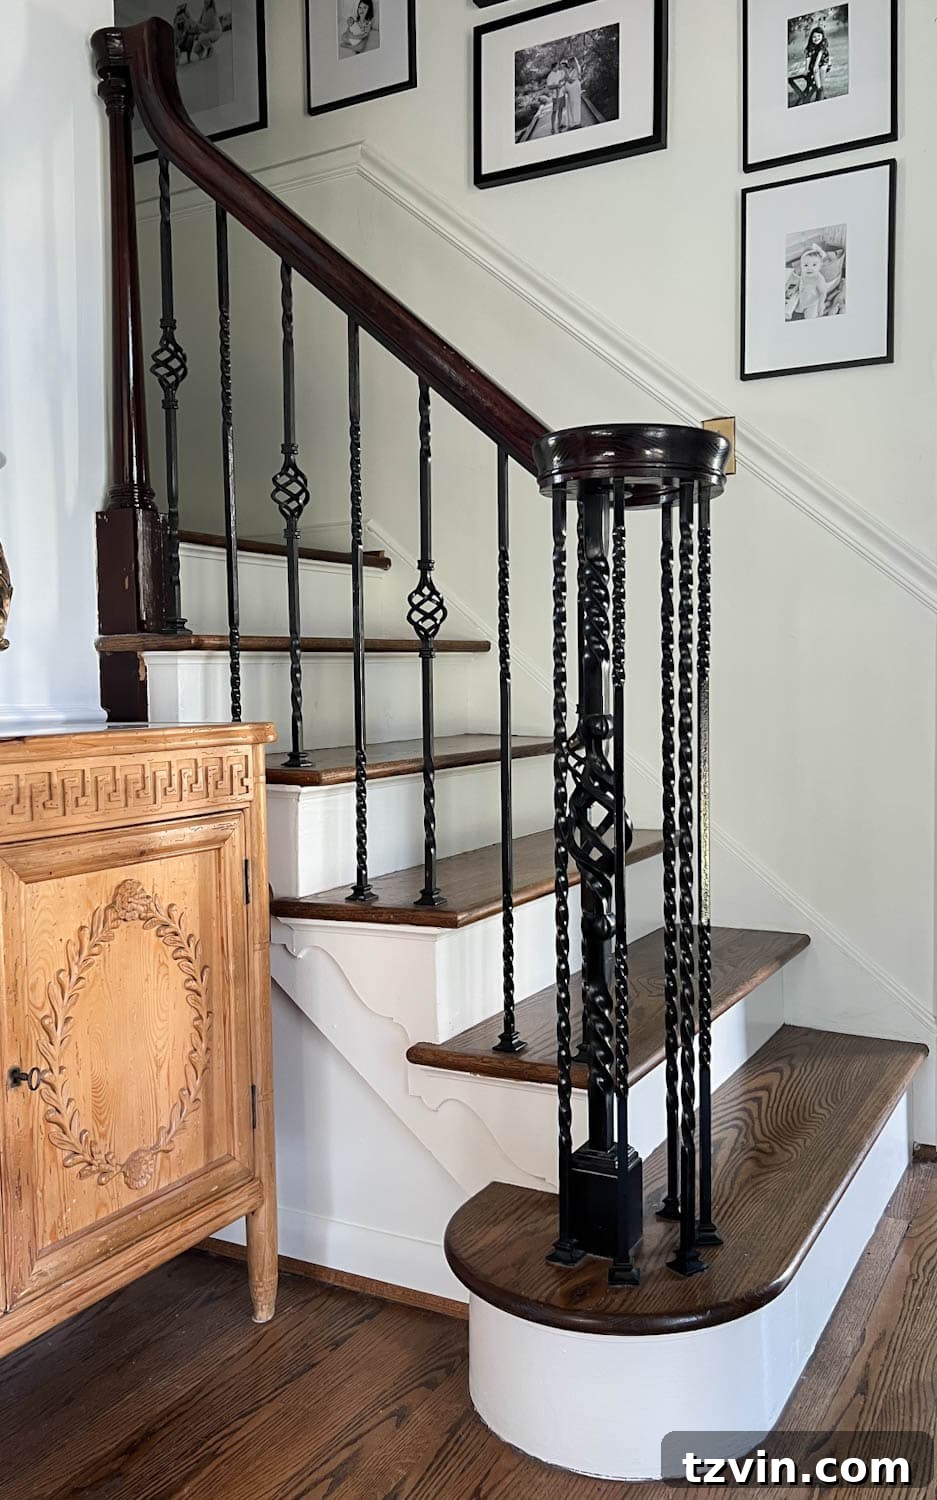
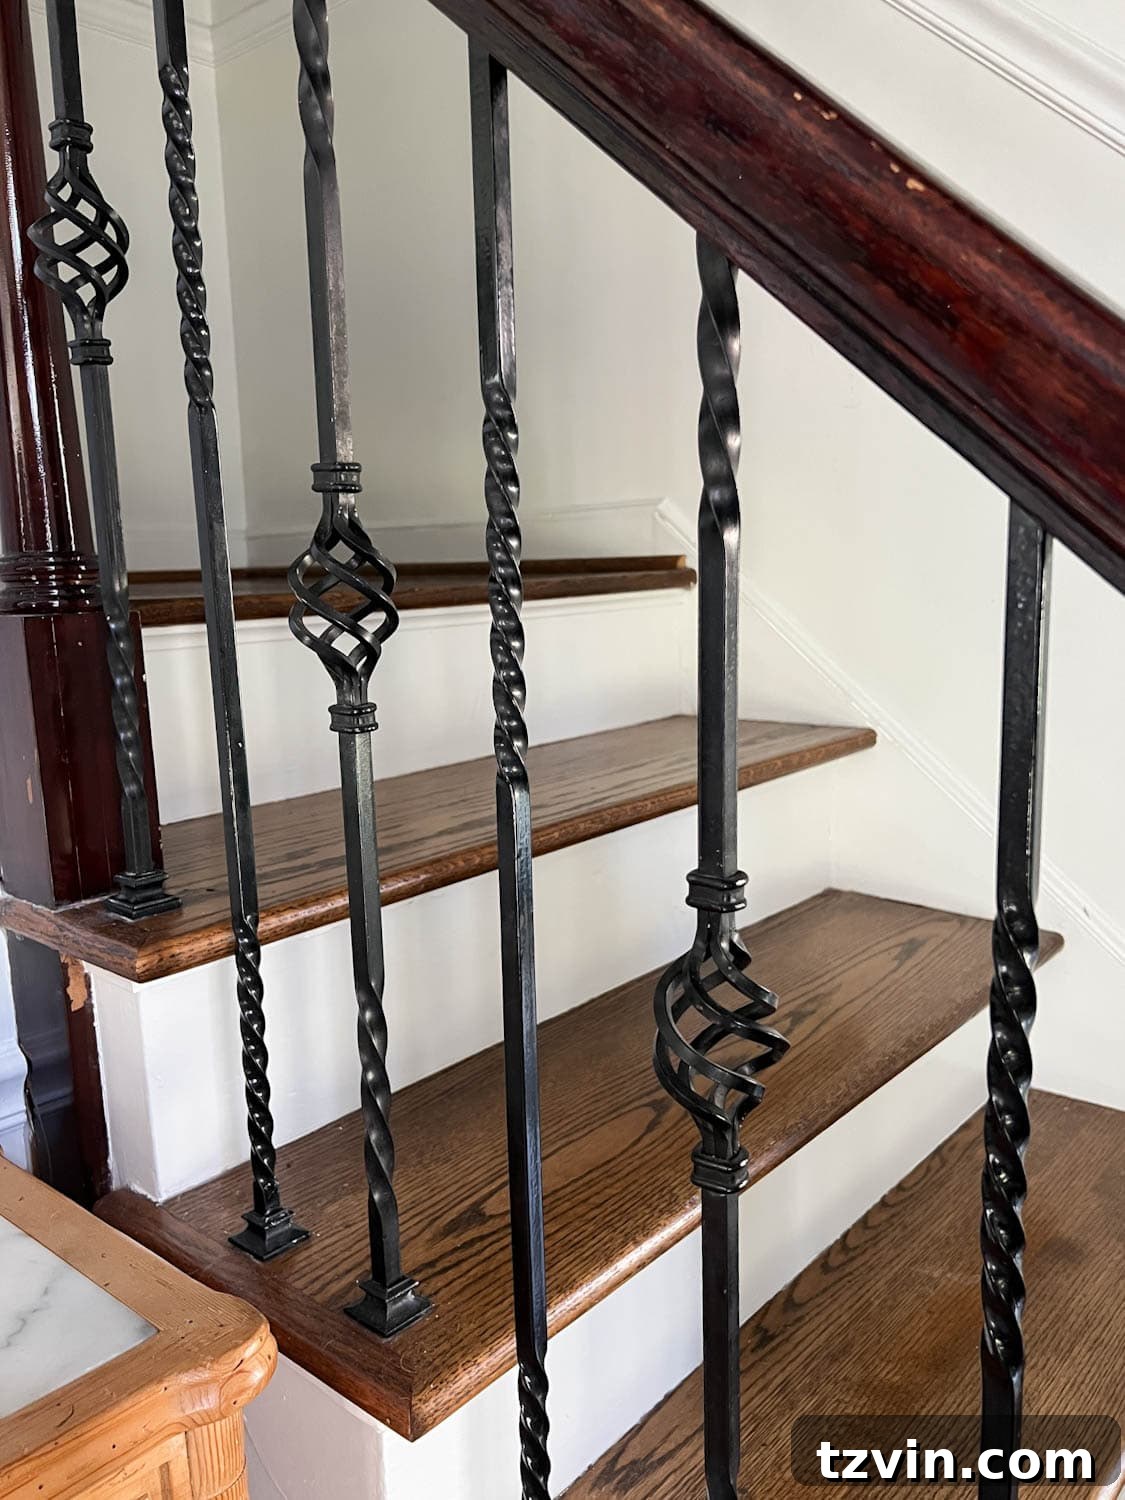
While our old stair railing was perfectly functional, its aesthetic simply no longer aligned with our evolving home style. It likely brought joy to a previous occupant, but its intricate wrought iron design felt out of place with our desired updated look. This project wasn’t born out of necessity, but rather a strong desire to personalize our living space and create a more cohesive design flow.
Is It Easy to Replace Staircase Spindles? An Intermediate DIY Project Guide
The excellent news for aspiring DIYers is that you don’t necessarily need to replace your entire banister to achieve a dramatic new look. Focusing solely on replacing the staircase spindles (or balusters, to use the technical term) is a highly effective and budget-friendly way to update your staircase. Most existing staircase systems can be adapted to accommodate new balusters, making this an achievable intermediate DIY project for those with some basic carpentry skills and a willingness to learn.
Initially, I harbored a slight guilt about wanting to change our foyer’s stair balusters, as many people appreciate the twisty, basket-style wrought iron. However, its intricate nature was simply not to my taste. Furthermore, the existing handrail, with its chipping, reddish gel stain, was an immediate candidate for a neutral color update to better complement our beautiful mid-tone hardwood floors. When I finally broached the subject with my partner, Robert, his enthusiastic agreement (“I’m so glad you want to change that! I don’t like it either, but I didn’t want to say anything in case you liked it.”) instantly solidified the project’s launch. This shared vision made the transformation even more exciting.
Essential Tools for Removing Iron Balusters and Maximizing Savings Through Tool Rentals
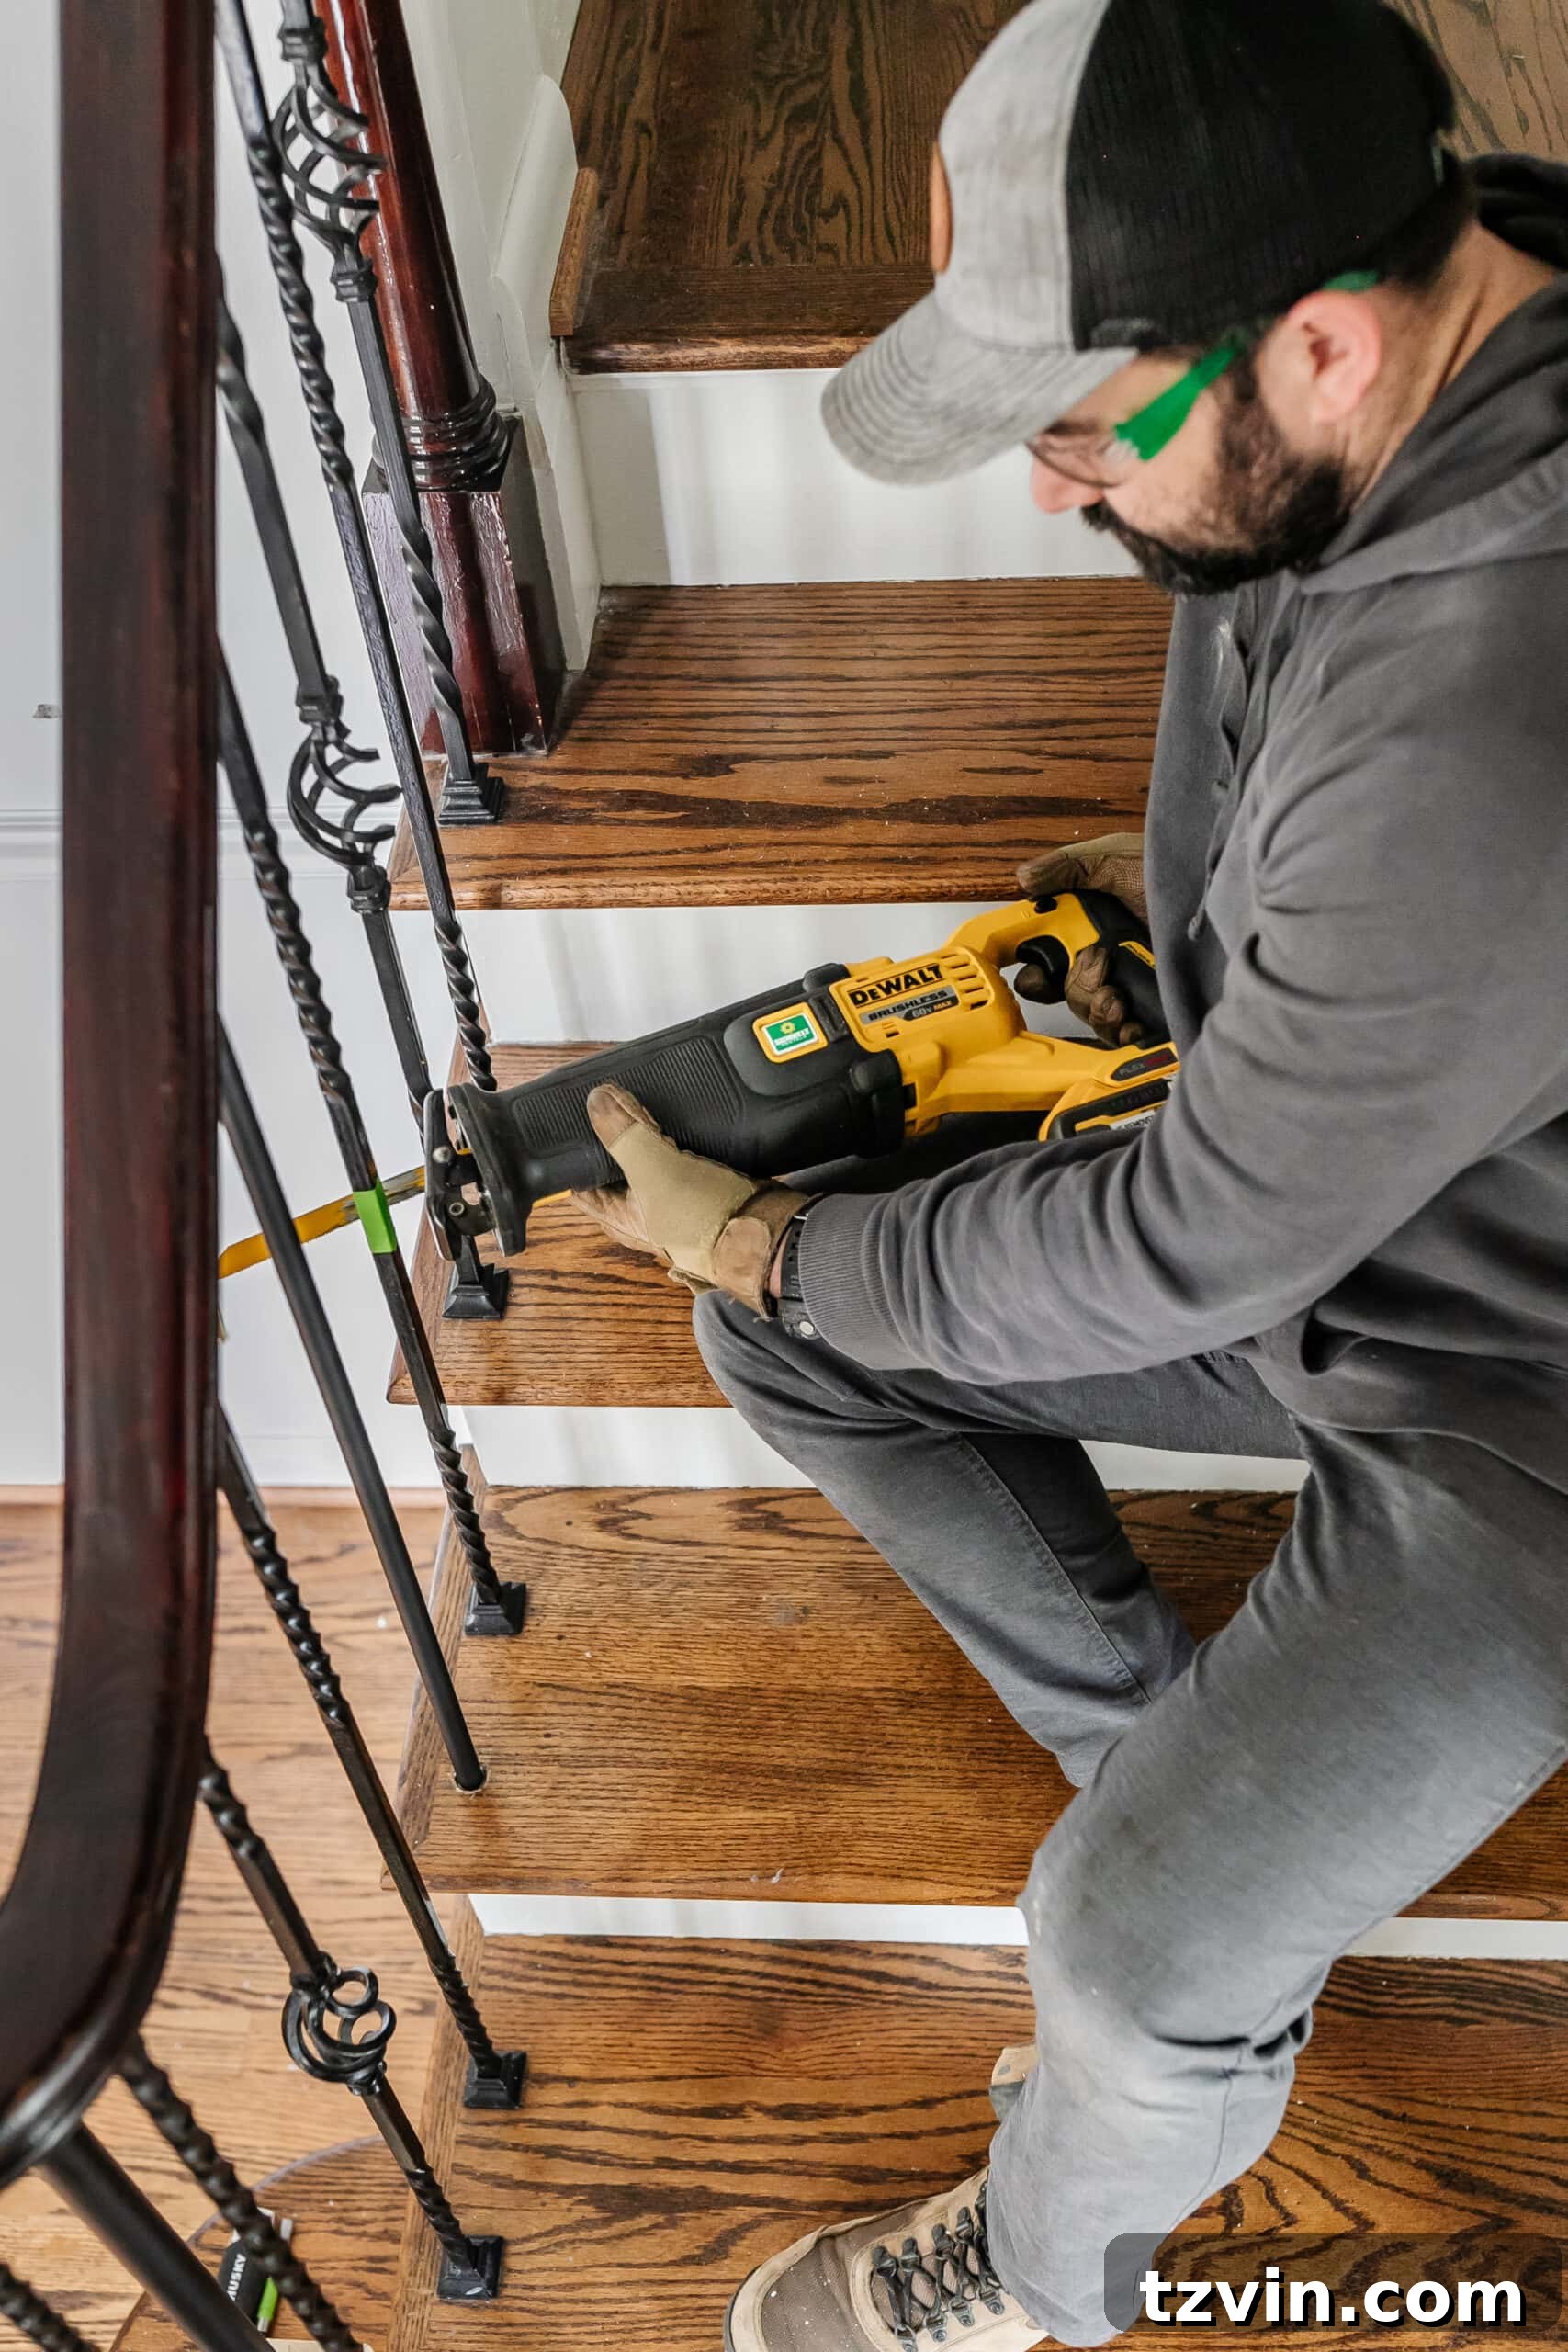
Successfully tackling the removal of old wrought iron balusters requires specific tools that might not be standard in every home workshop. For this significant task, we needed a powerful reciprocating saw capable of cleanly slicing through metal. Instead of purchasing an expensive tool we’d likely only use once or twice, we opted for a smart, cost-effective solution: tool rental. This approach allowed us to access professional-grade equipment without the significant upfront investment, drastically reducing our overall project expenses.
With the right tools, replacing stair spindles becomes an incredibly rewarding DIY project, potentially saving you thousands of dollars compared to hiring a professional contractor. While removing iron balusters does demand more power and patience than working with wood, the process is straightforward with the correct equipment. For a project you’ll likely complete only once, renting specialized tools is undeniably the most economically sound choice. We found that online resources for replacing iron balusters were scarce, often focusing only on wood. Fortunately, the knowledgeable equipment specialists at the rental store provided invaluable guidance on the most effective methods for our specific job, proving that expert advice is often just a conversation away.
Choosing Your Style: Metal Balusters vs. Wood Balusters for Your Staircase Remodel
When undertaking a stair railing makeover, one of the first design decisions you’ll face is the material for your new balusters. We opted to replace our existing iron stair balusters with a different, more modern style of iron balusters. However, the methods described in this guide are equally applicable if you prefer to swap any existing balusters (metal or wood) with elegant wood balusters for a more traditional or classic aesthetic. The beauty of staircase design lies in its versatility; you can mix and match various components like handrails, newel posts, and balusters to craft a truly customized look that perfectly reflects your personal style and complements your home’s architecture.
It’s worth noting that if your current balusters are wood, or if you plan to replace metal balusters with wood, you’ll find the process considerably easier. Wood is generally more forgiving to work with than metal. It’s simpler to cut, allowing for cleaner, more precise adjustments, and in the event of a minor mishap, wood is much easier to repair or conceal imperfections. This makes wood a popular choice for many DIY enthusiasts, particularly those who might be newer to intricate home improvement projects. Consider your desired aesthetic, your comfort level with different materials, and the overall look you aim to achieve when making this important decision.
Your Step-by-Step Guide to Replacing Balusters for a Stunning DIY Stair Makeover
This comprehensive guide will walk you through every step of transforming your staircase by replacing balusters and, optionally, your newel post. With careful planning and the right tools, you can achieve professional results on a DIY budget.
Tools You’ll Need
Having the correct tools for this project is paramount for both efficiency and safety. Don’t hesitate to utilize tool rental services for specialized equipment to keep costs down.
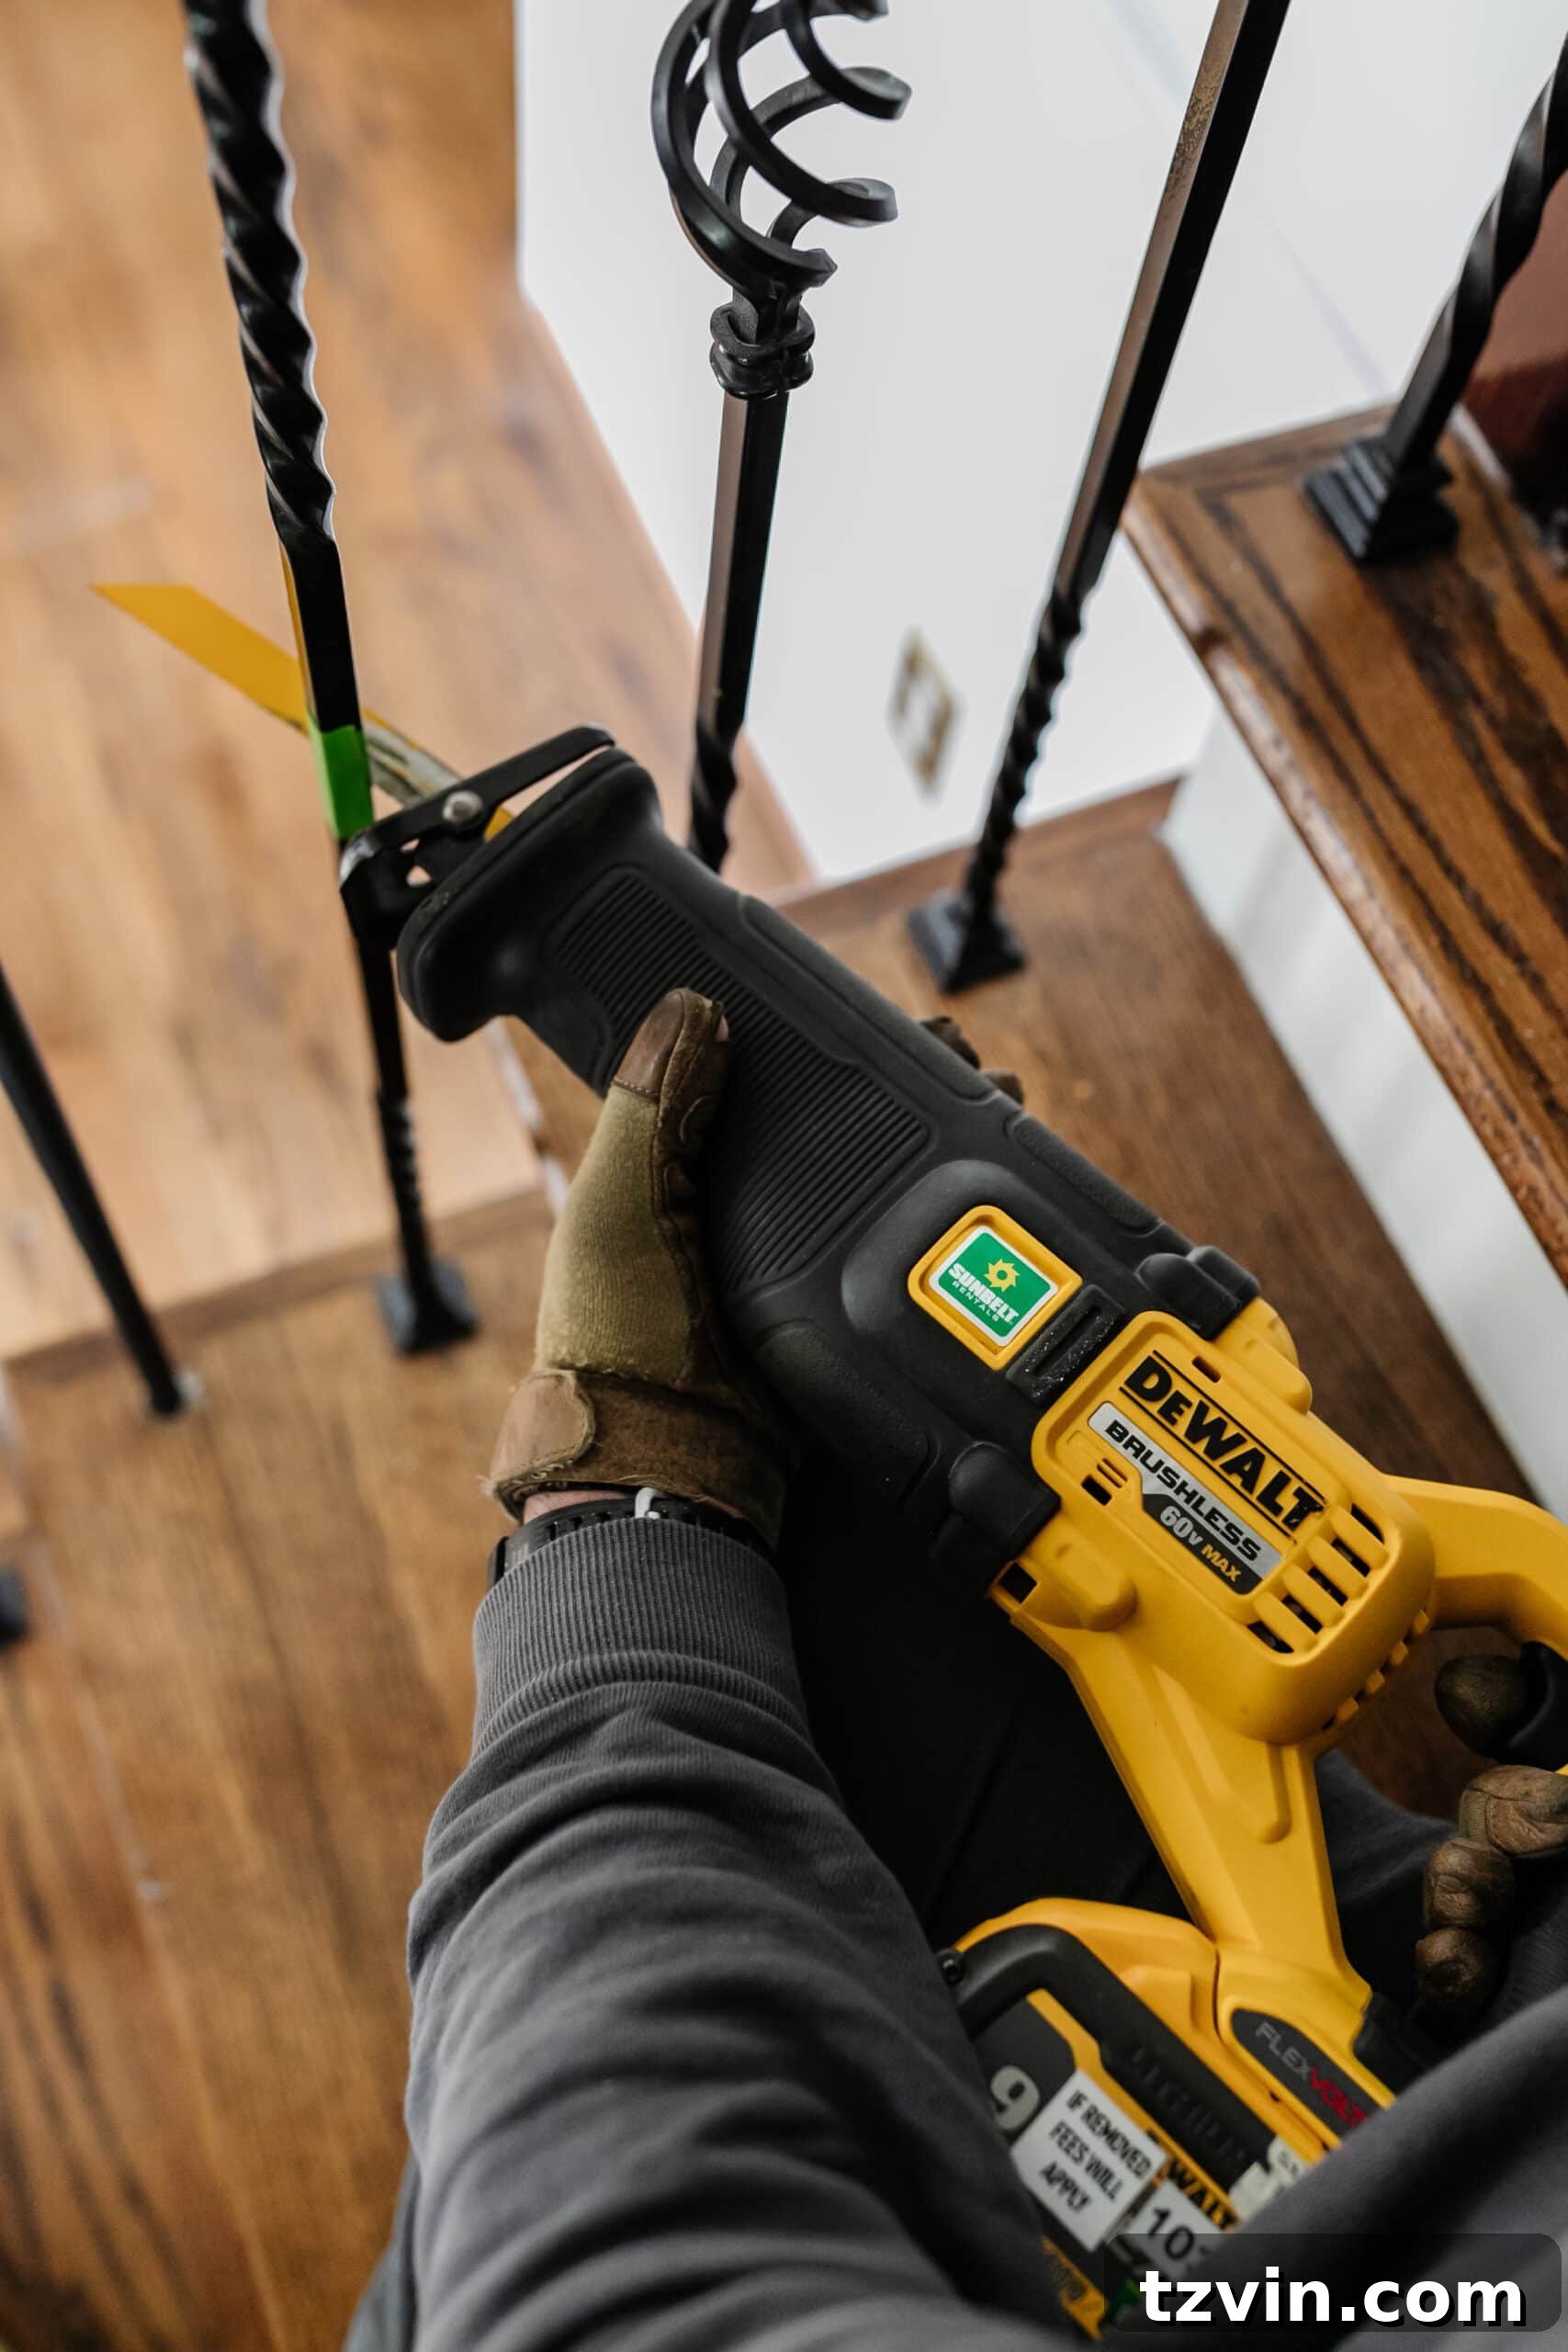
- Reciprocating Saw: Essential for cutting through existing balusters. A high-powered, cordless 60 Volt model is ideal for iron balusters, providing the necessary strength and maneuverability.
- Multiple Reciprocating Saw Blades: Blades dull quickly, especially when cutting metal. Keep several on hand and change them after every 3-4 balusters. Ensure you have dedicated metal-cutting blades for iron and wood-cutting blades for wooden balusters. Fresh blades make cleaner, safer cuts.
- Shop Vacuum: Crucial for immediate cleanup of metal shards, wood dust, and debris, keeping your workspace safe and tidy.
- Drill: A versatile tool for removing screws, drilling new holes, and preparing surfaces.
- Drill Paddle Bit: Needed if you’re replacing your newel post. The size will depend on the diameter of your new newel post.
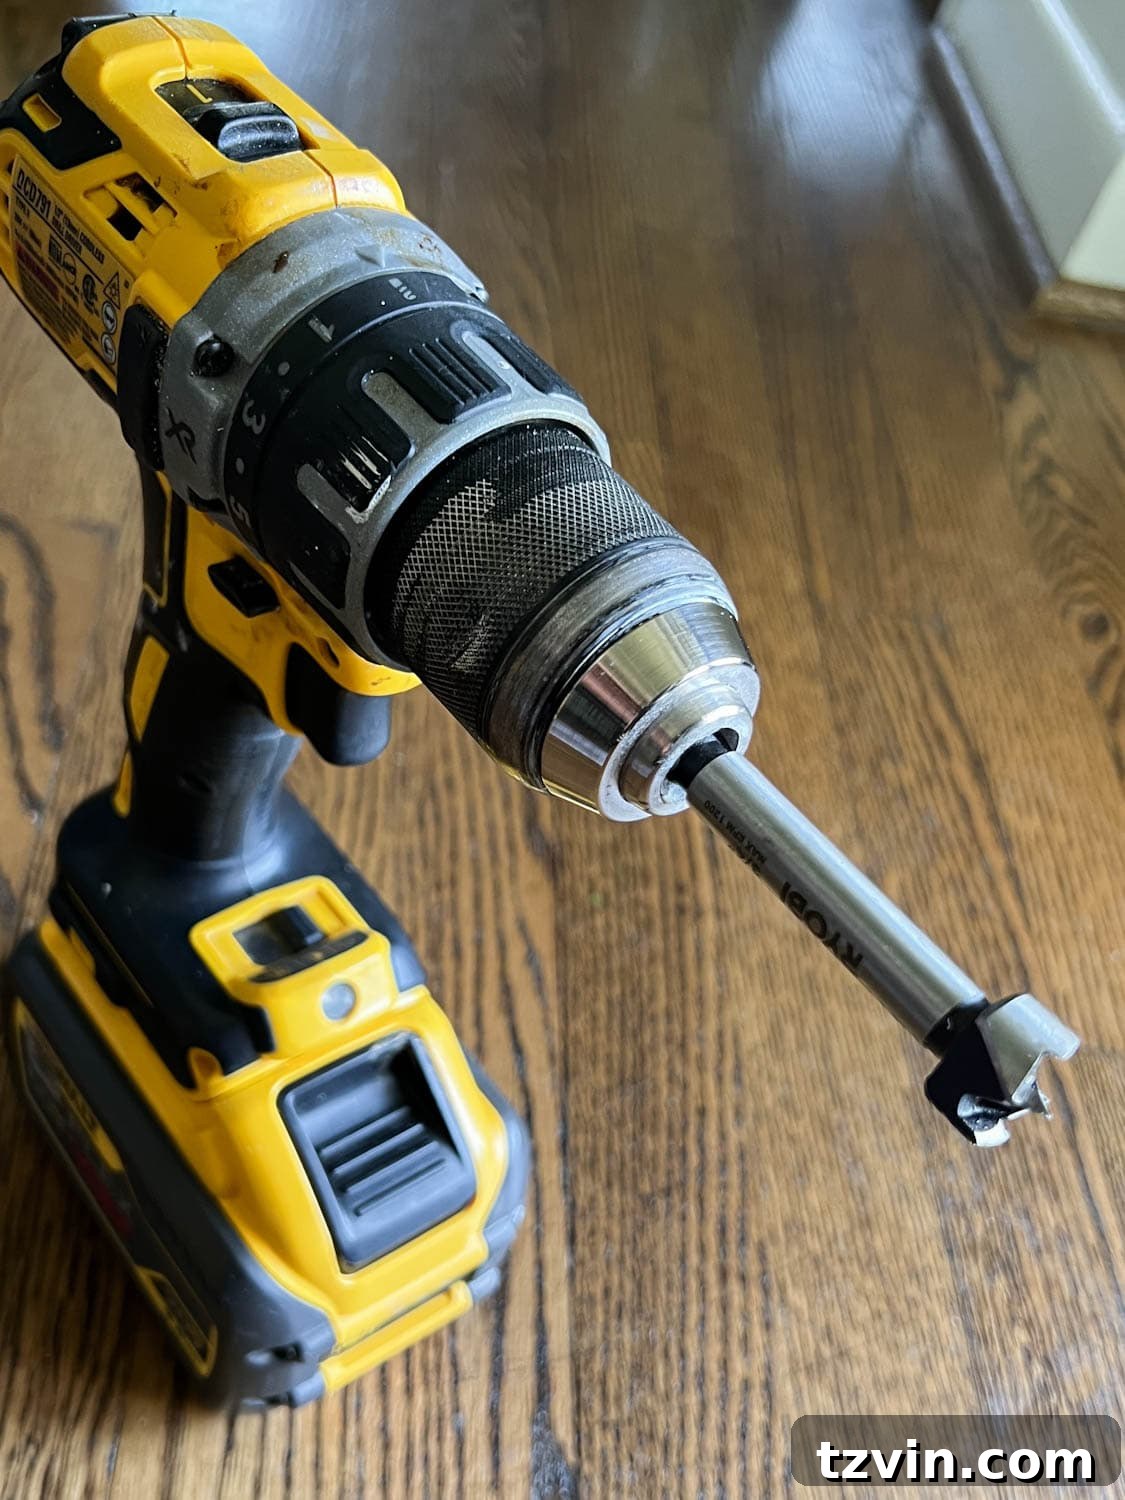
- Forstner Bit: Excellent for cleaning out old baluster holes and creating smooth, precise new holes without splintering the wood. Match the size to your new baluster diameter.
- Phillips Bit: For driving and removing Phillips head screws.
- Pliers: Useful for gripping stubborn baluster ends, breaking away old adhesive, or general maneuvering.
- Hack Saw or Miter Saw: For precise cutting of new balusters. A miter saw offers greater accuracy for consistent lengths.
Essential Supplies
Gathering all your supplies before you begin will ensure a smooth and continuous workflow.
- Stair Balusters: We opted for 5/8-inch plain round powder-coated metal balusters for a sleek, modern look. Choose a style and material that complements your desired aesthetic.
- Stair Shoes: These decorative pieces conceal the points where balusters meet the handrail and treads. Select shoes that match your balusters’ diameter and style. Determine if you need angled shoes (for balusters attaching to an angled stringer) or flat shoes (for balusters attaching perpendicularly to a step/tread).
- Newel Post (Optional): If your existing newel post is stylistically linked to your old balusters (as ours was), you might choose to replace it. We used a plain round iron newel post.
- 4×4 Wood Block (Optional): Used as a base for a new newel post, providing a secure mounting point.
- Speed Square: For accurately marking and finding the center of wood blocks.
- 4 x 2-inch Self-Drilling Wood Screws: For securing a newel post base.
- 3/4-inch Self-Drilling Wood Screws: For reinforcing new balusters in the treads.
- Wood Filler: To fill screw holes and minor imperfections in wood surfaces.
- Proper Safety Gear: Always wear work gloves, safety glasses, and closed-toe shoes to protect yourself from flying debris and sharp edges.
- Heavy-Duty Construction Adhesive: For permanently securing balusters and newel posts. Look for an adhesive suitable for both wood and metal.
- Painter’s Tape and Pencil: For marking cuts, numbering balusters, and protecting surfaces.
- Bonding Primer: Essential for preparing old, stained, or previously finished wood handrails for a durable new paint finish.
- Waterborne Alkyd Paint in Satin Sheen: This type of paint cures to a hard, resilient finish, ideal for high-traffic areas like handrails. Satin sheen offers a subtle, elegant look.
- Pro Quality 2-inch Angled Paint Brush: For smooth, streak-free application of primer and paint, especially in curves and tight spaces.
- Fine-Grit Sandpaper: For smoothing primed surfaces and eliminating brush strokes for a flawless finish.
- Tack Cloth: To thoroughly remove sanding dust before painting.
*Remember, this project is significantly easier and safer with the assistance of a partner. Teamwork will be your greatest asset!
Step 1 – Safely Remove Old Balusters
The initial step of removing old balusters can feel daunting, but like many DIY tasks, success often comes from simply facing your fears and taking the first cut. Before you begin, thoroughly inspect how your existing balusters are attached. They are typically secured to the handrail and either the stair treads or a stringer (the angled board running alongside the steps) using a combination of adhesive, epoxy, or screws. Remove any visible screws or nails using your drill or pliers first. In our case, the balusters were solely glued in place.
To prepare for removal and aid in measuring new balusters, apply a piece of painter’s tape around each baluster, near its center. Number each baluster sequentially. This provides a surface for your saw blade to grip initially and creates a precise reference for cutting your new balusters later. With your reciprocating saw fitted with the appropriate metal-cutting blade (or wood-cutting blade for wood balusters), carefully make a cut through the baluster in the middle of the taped section. Start slowly to establish the cut, then increase speed.
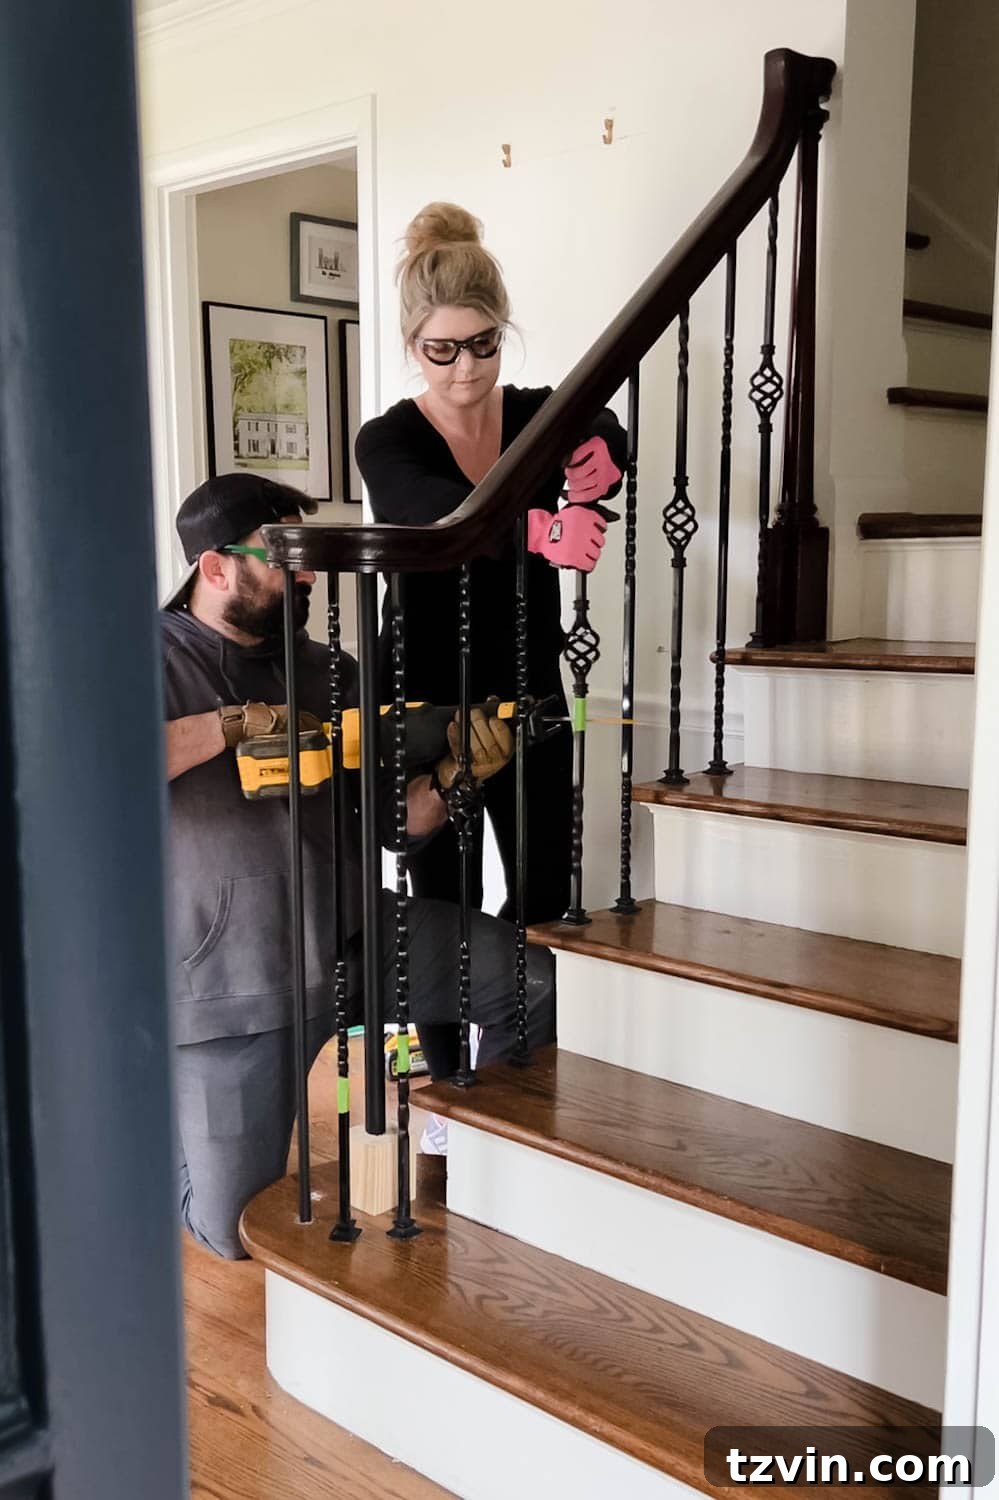
This is where your partner is invaluable: have them firmly hold the top section of the baluster while you cut. This reduces pressure on the handrail, preventing potential cracking or damage to the wood. **IMPORTANT SAFETY WARNING: Always ensure you are cutting away from your partner, and that your partner stands well behind the saw, maintaining a safe distance from the blade at all times.**
Once cut, the two ends of our balusters generally came out of the handrail and treads with a gentle wiggling motion. For any particularly stubborn pieces, use pliers to get a firm grip and break away any old adhesive or epoxy. Be prepared to change your saw blade frequently; dull blades create more friction, increase the risk of kickback, put undue stress on the handrail, and significantly increase the chance of damage. Plan to replace your blade after every 2-3 balusters when cutting iron.
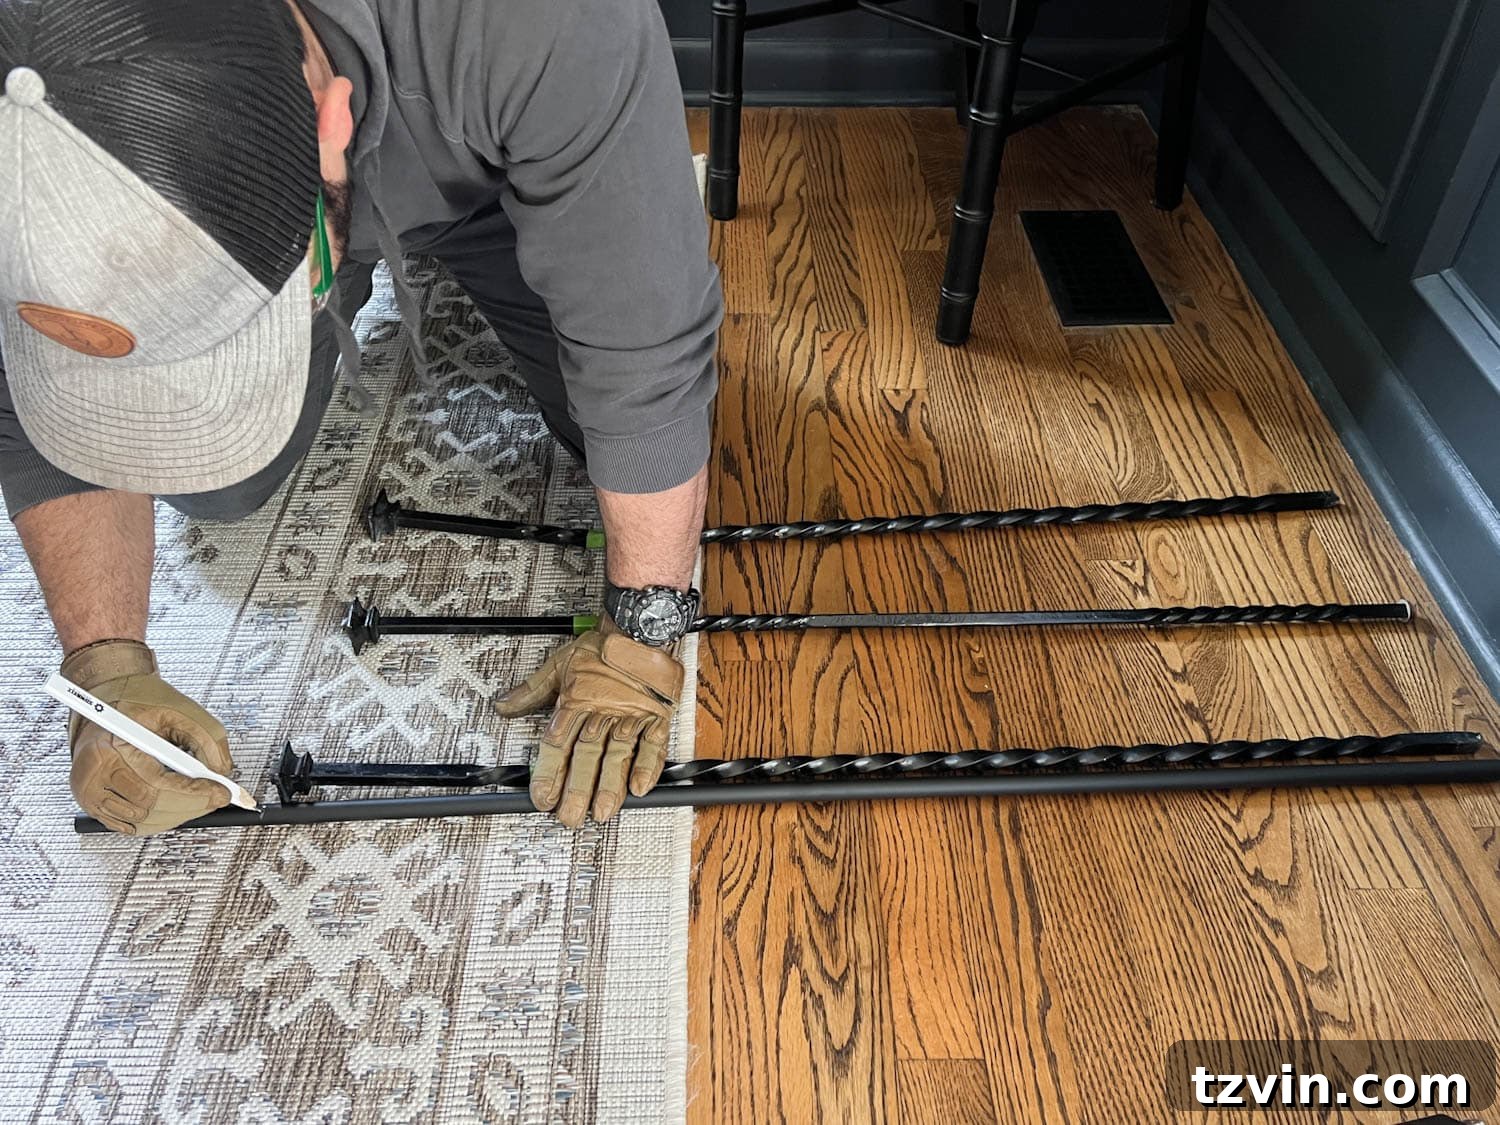
Regularly use your shop vacuum to clean up any tiny metal shards or wood dust. This not only keeps your workspace clean but also prevents accidental injuries. After all balusters are cut and removed, line them up in their original numbered order. These old balusters will serve as your crucial reference for accurately cutting the new ones.
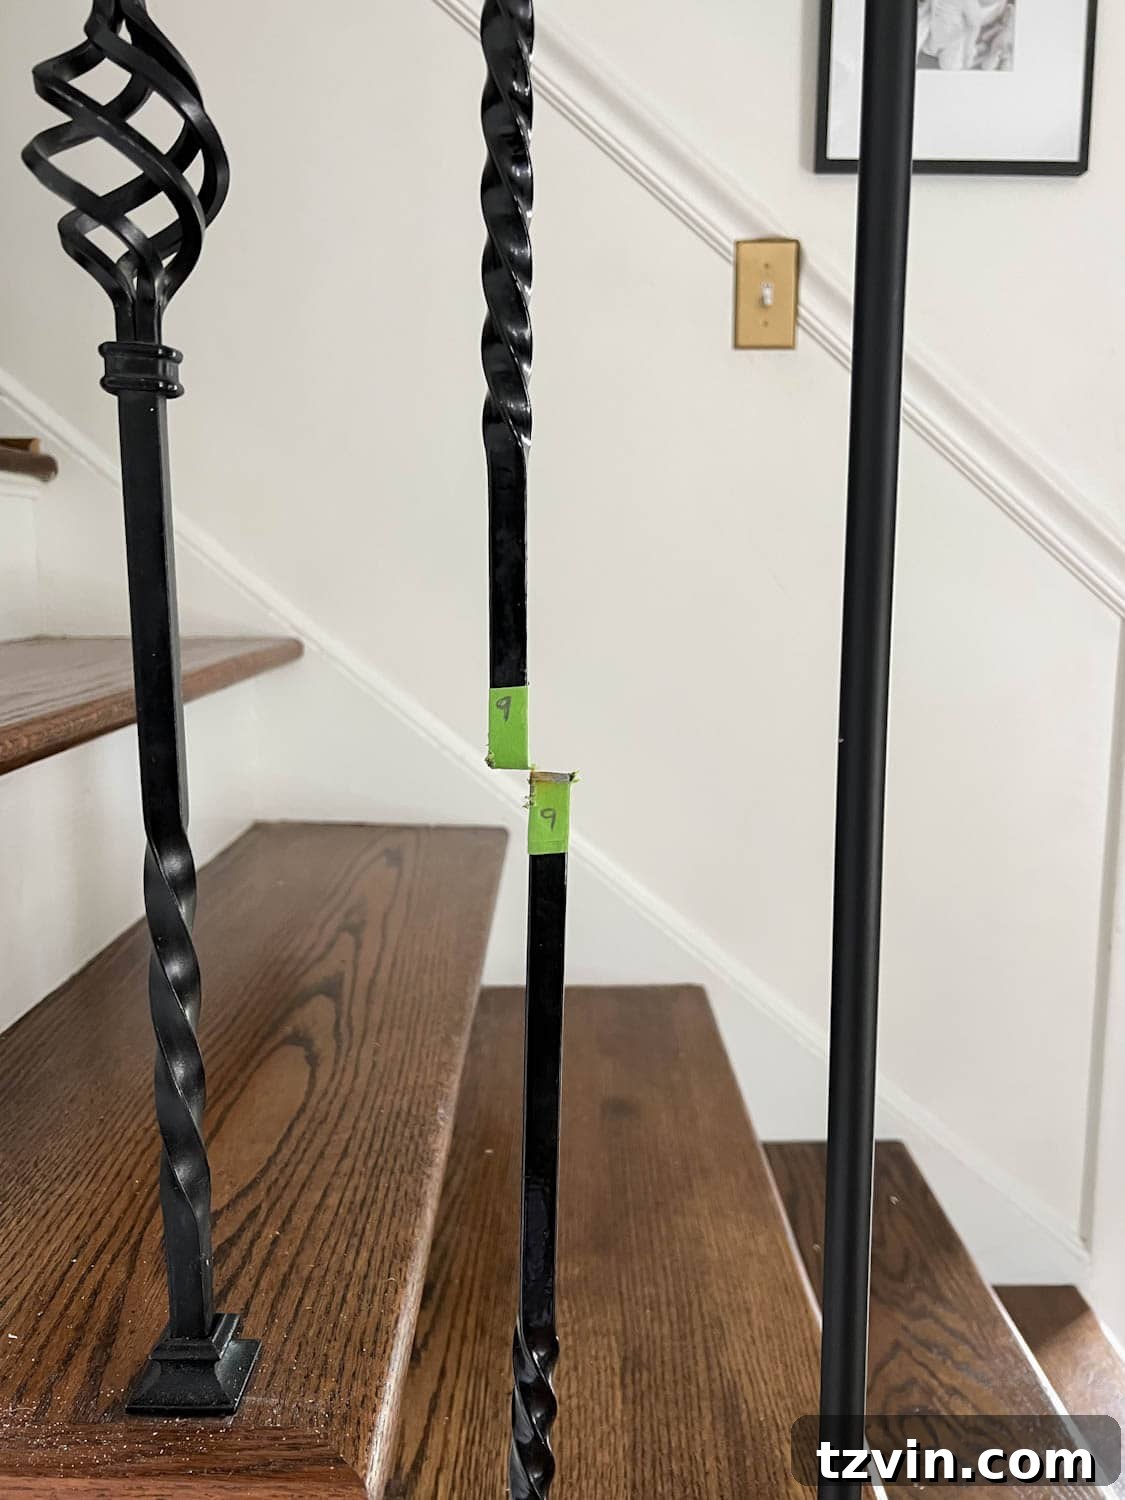
Pro Tip: If your project includes replacing the newel post, do NOT remove all the balusters at once. Leave most of them intact to maintain structural support for the handrail. Remove only one or two balusters near the newel post, proceed to Step 4, and then return to remove the rest after the newel post is secured.
Step 2 – Prepare and Resize Baluster Holes
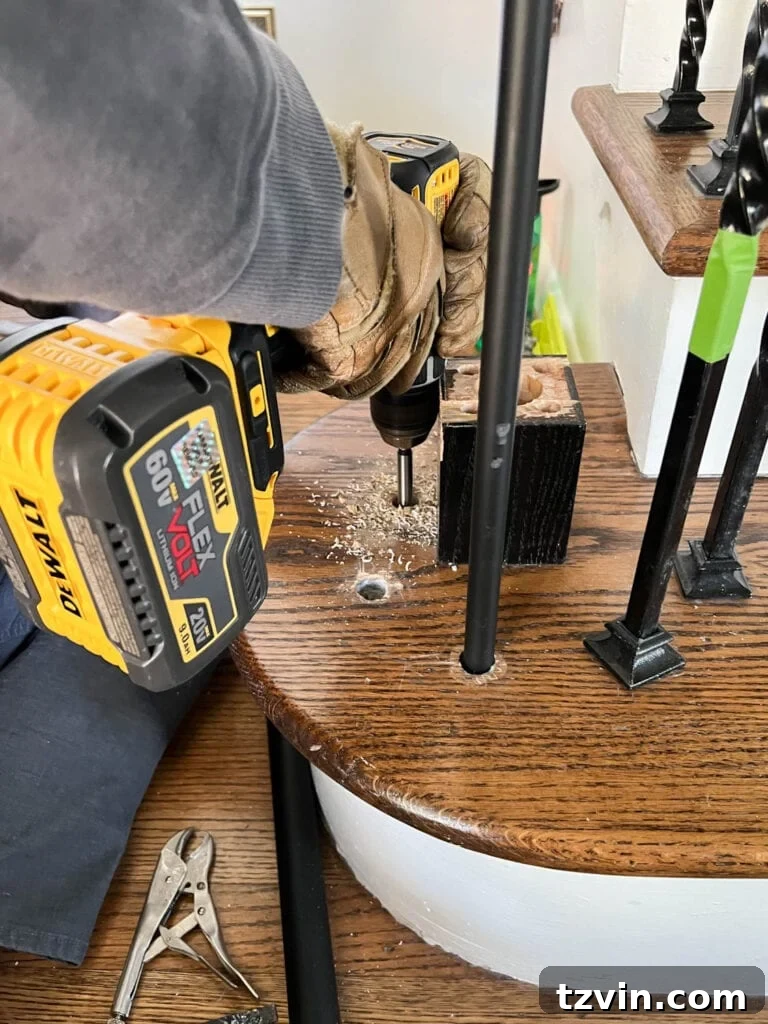
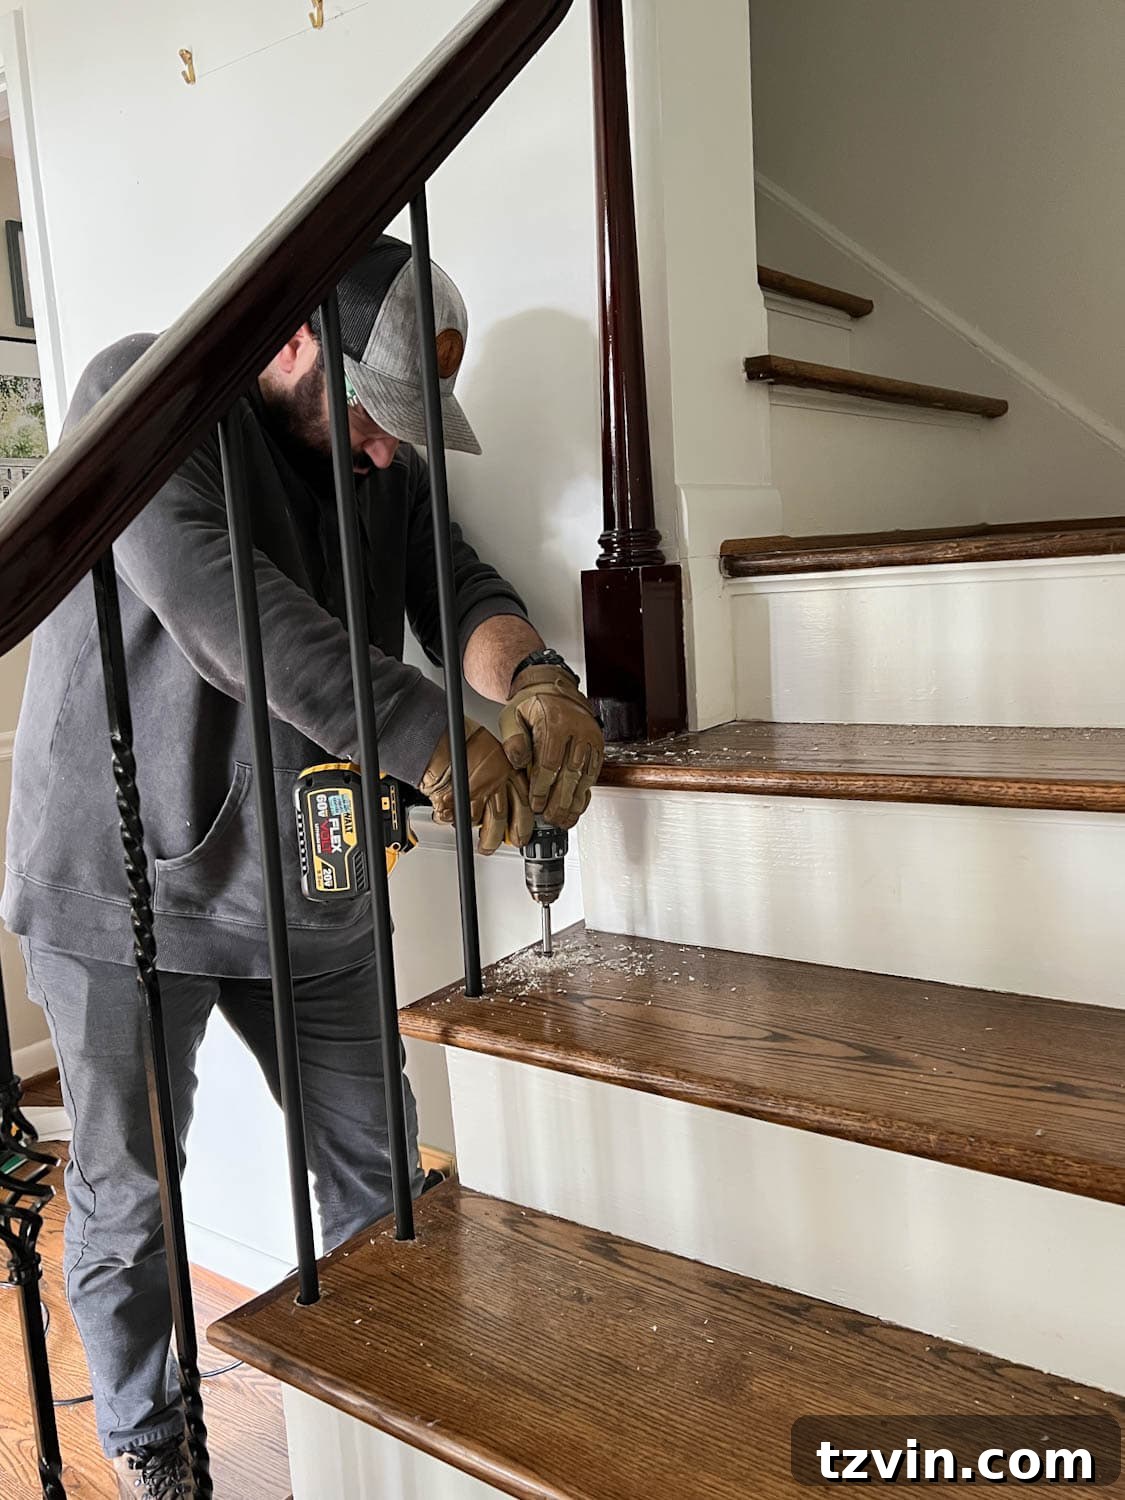
To simplify the installation of your new balusters, it’s generally best to reuse the existing holes in the handrail and treads. This saves time and ensures consistent spacing. Begin by thoroughly cleaning any residual old adhesive, epoxy, or debris from these holes. A Forstner drill bit is your best friend for this task. Select a Forstner bit that matches the approximate size of your existing holes. Its unique design allows it to cut clean, flat-bottomed holes without splintering the surrounding wood, which is crucial for maintaining the integrity of your hardwood treads and handrail. It provides a much cleaner result than a standard paddle bit for this specific job.
Once cleaned, check to ensure the holes are large enough to comfortably accommodate the ends of your new balusters. If necessary, use the Forstner bit to slightly enlarge the holes. Don’t worry if the holes end up being slightly larger than your new balusters; the decorative stair shoes will effectively conceal these gaps later, providing a neat and finished appearance.
Step 3 – Precisely Cut New Balusters
Accuracy in this step is crucial for a professional-looking installation. Retrieve the old balusters you numbered and set aside in Step 1. These will be your primary reference for marking the precise cut lengths on your new balusters using a pencil. If your old balusters are not usable for some reason, measure the vertical distance between the top of the stair tread and the bottom surface of the handrail, then add approximately one inch to this measurement. This extra length accounts for the depth the baluster will sit within the drilled holes in both the tread and the handrail.
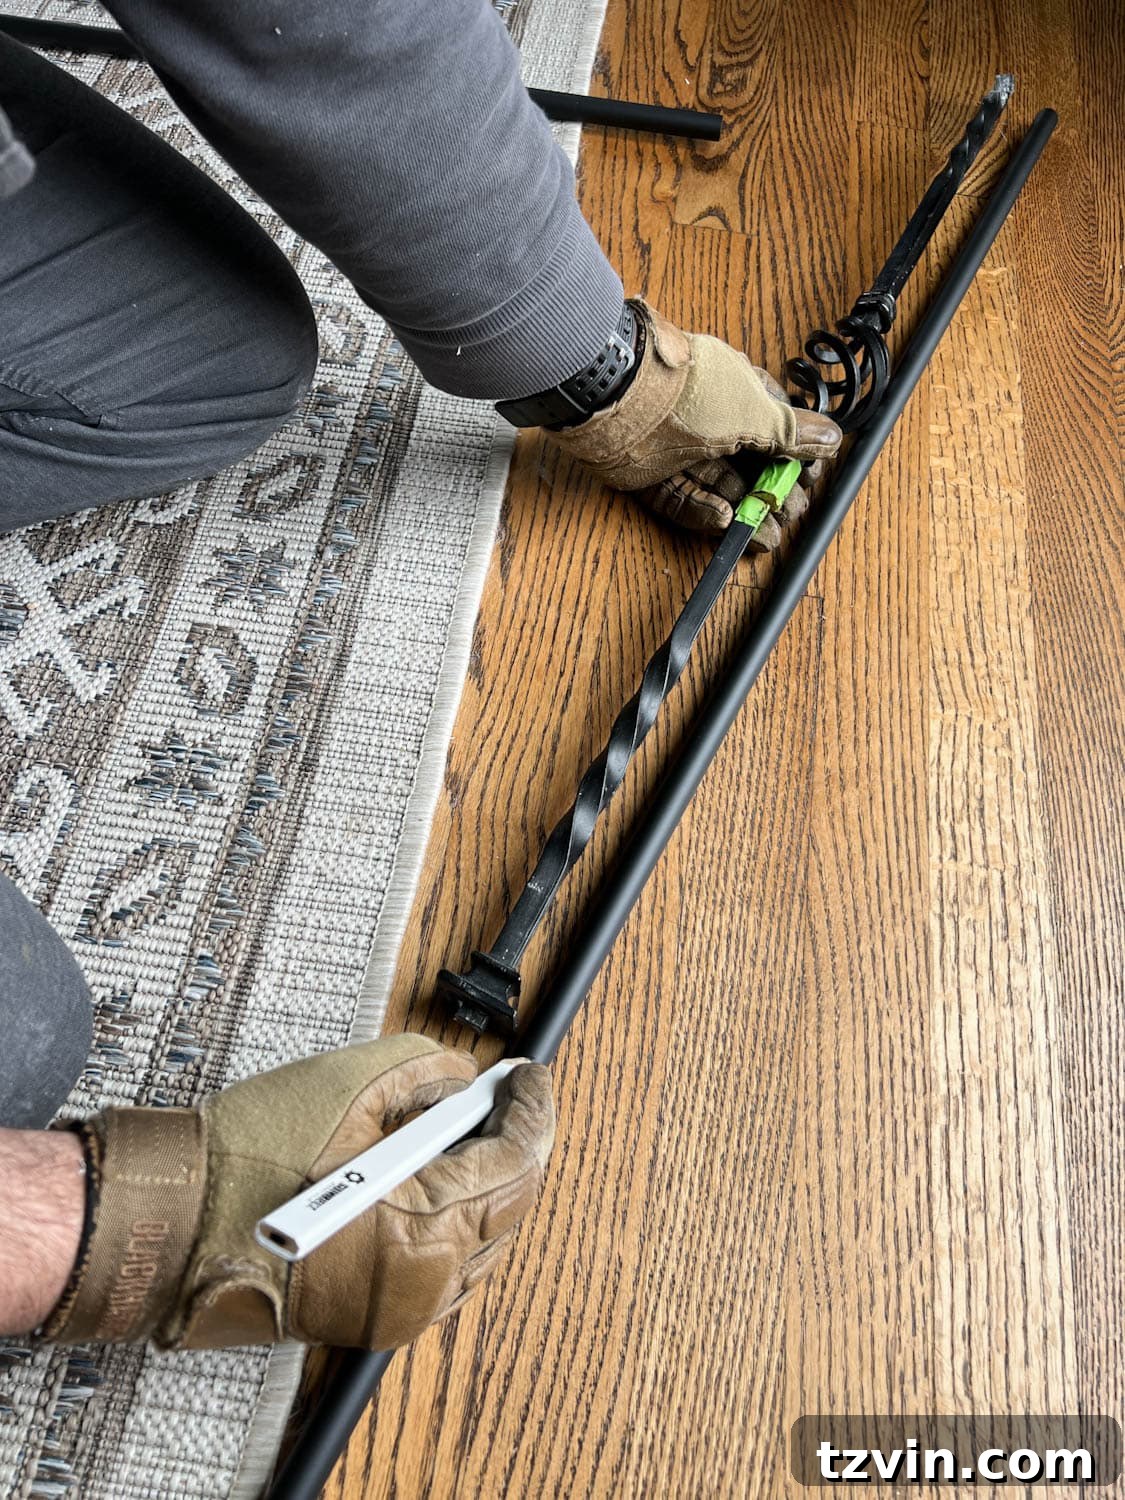
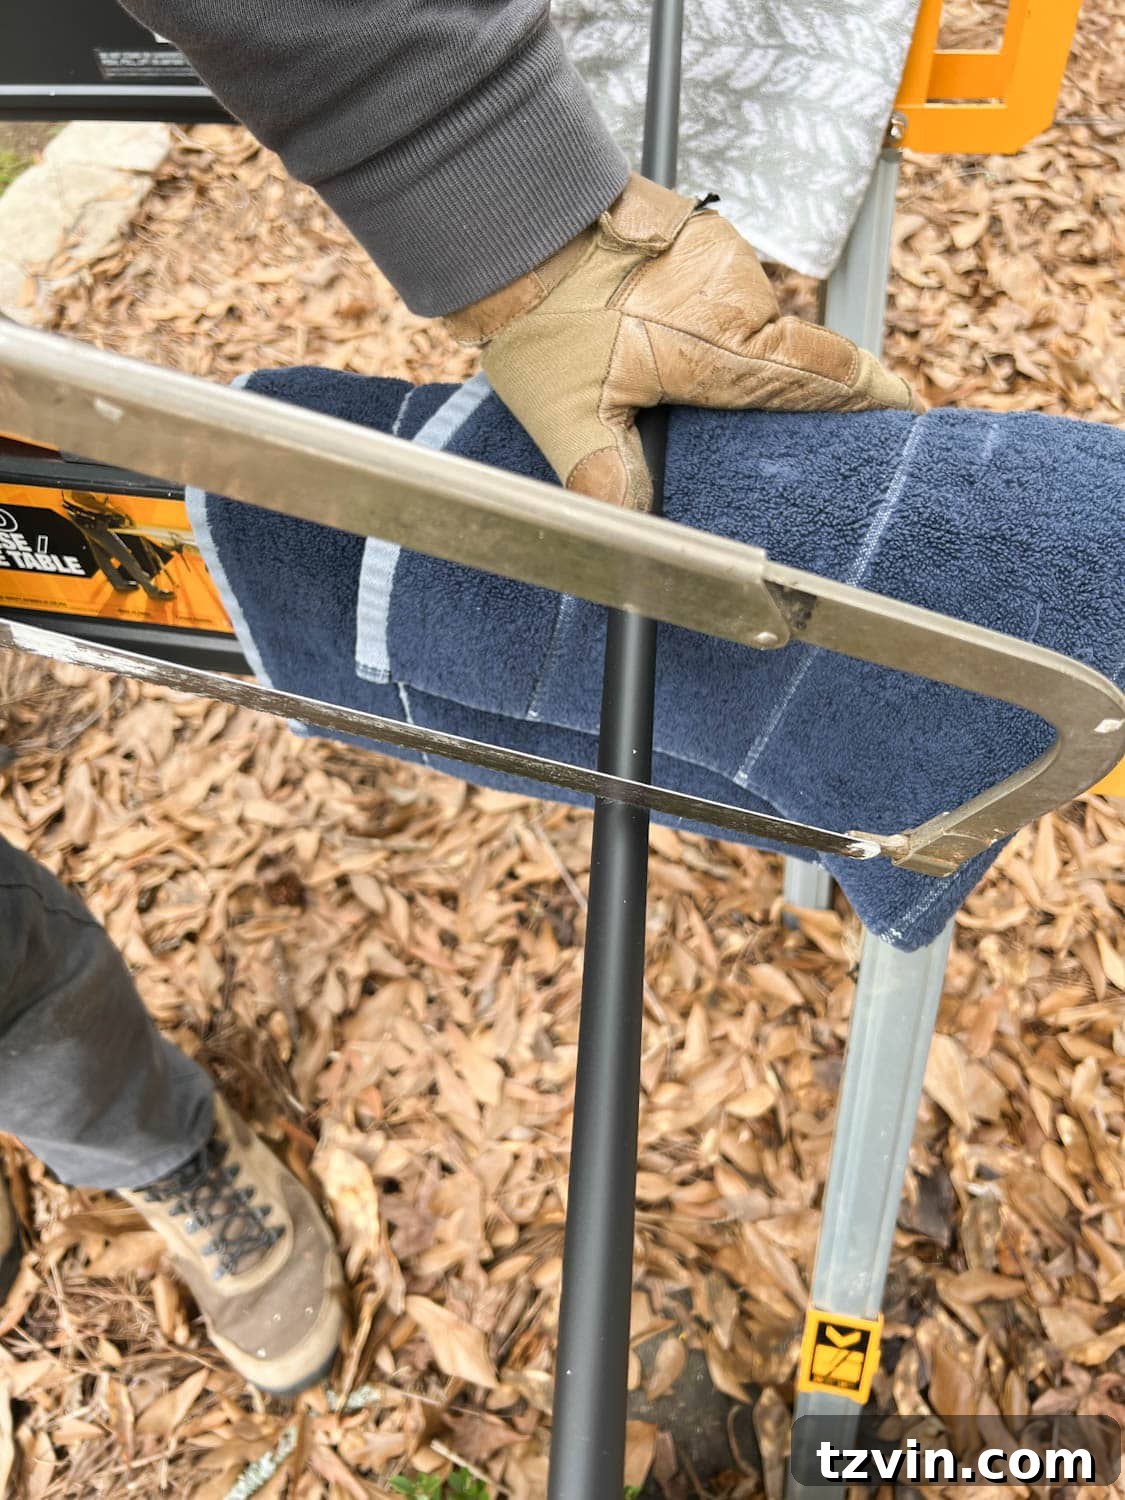
To cut through the new iron spindles, a miter saw equipped with a metal-cutting blade will provide the cleanest and most consistent cuts. If a miter saw isn’t available, a simple hack saw can also be used, though it will require more effort and careful technique to achieve straight cuts. For wooden spindles, a regular hand saw or miter saw with a wood blade will suffice. To prevent scratching the pristine finish of your new iron spindles, place a couple of towels or soft cloths underneath them on your sawhorse during cutting.
Once cut, dry fit a few of your new spindles to ensure they fit properly into the prepared holes and that their lengths are correct on the stair railing. This test fit allows you to make any necessary minor adjustments before permanent installation. After confirming the fit, remove the new balusters and set them aside. It’s significantly easier to prime and paint the handrail in the next step without any balusters obstructing your work area, ensuring a smoother and more professional paint finish.
Step 4 – Installing a New Newel Post (Optional)
This step is optional and will only apply if your existing newel post’s style is incongruent with your new balusters, as was the case with our ornate iron basket design. As mentioned in Step 1, it’s critical to maintain the structural integrity of your handrail during this process. We only removed two balusters closest to the newel post to provide adequate access for removal and installation, leaving the majority of the balusters in place to support the handrail.
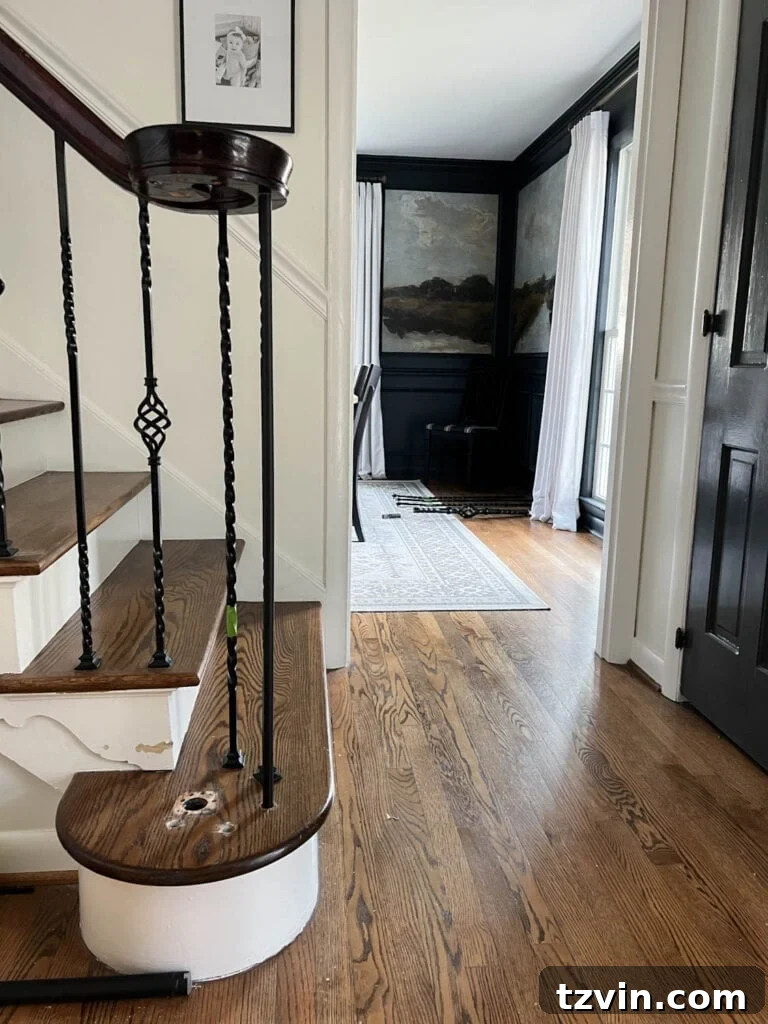
Remove the old newel post using the same cutting method as the balusters. Our previous post was mounted on a wooden block screwed into the tread. After severing the iron post, we carefully cut away the wooden cap and removed the screws from the block to expose the original post hole.
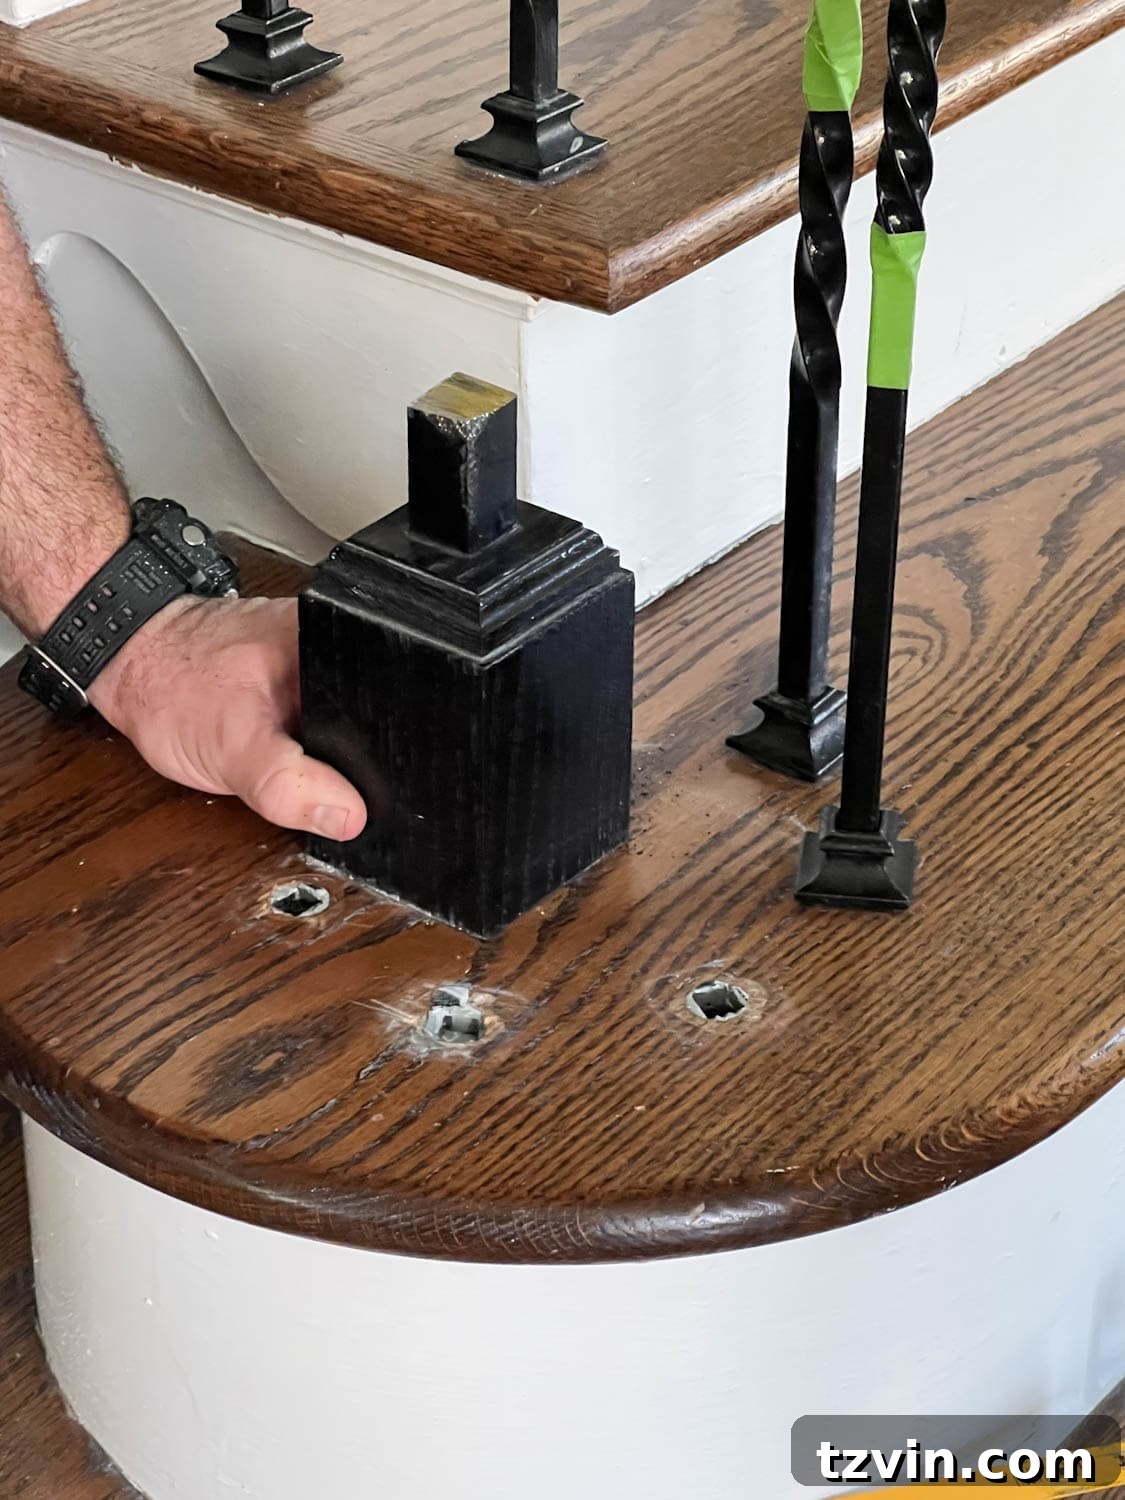
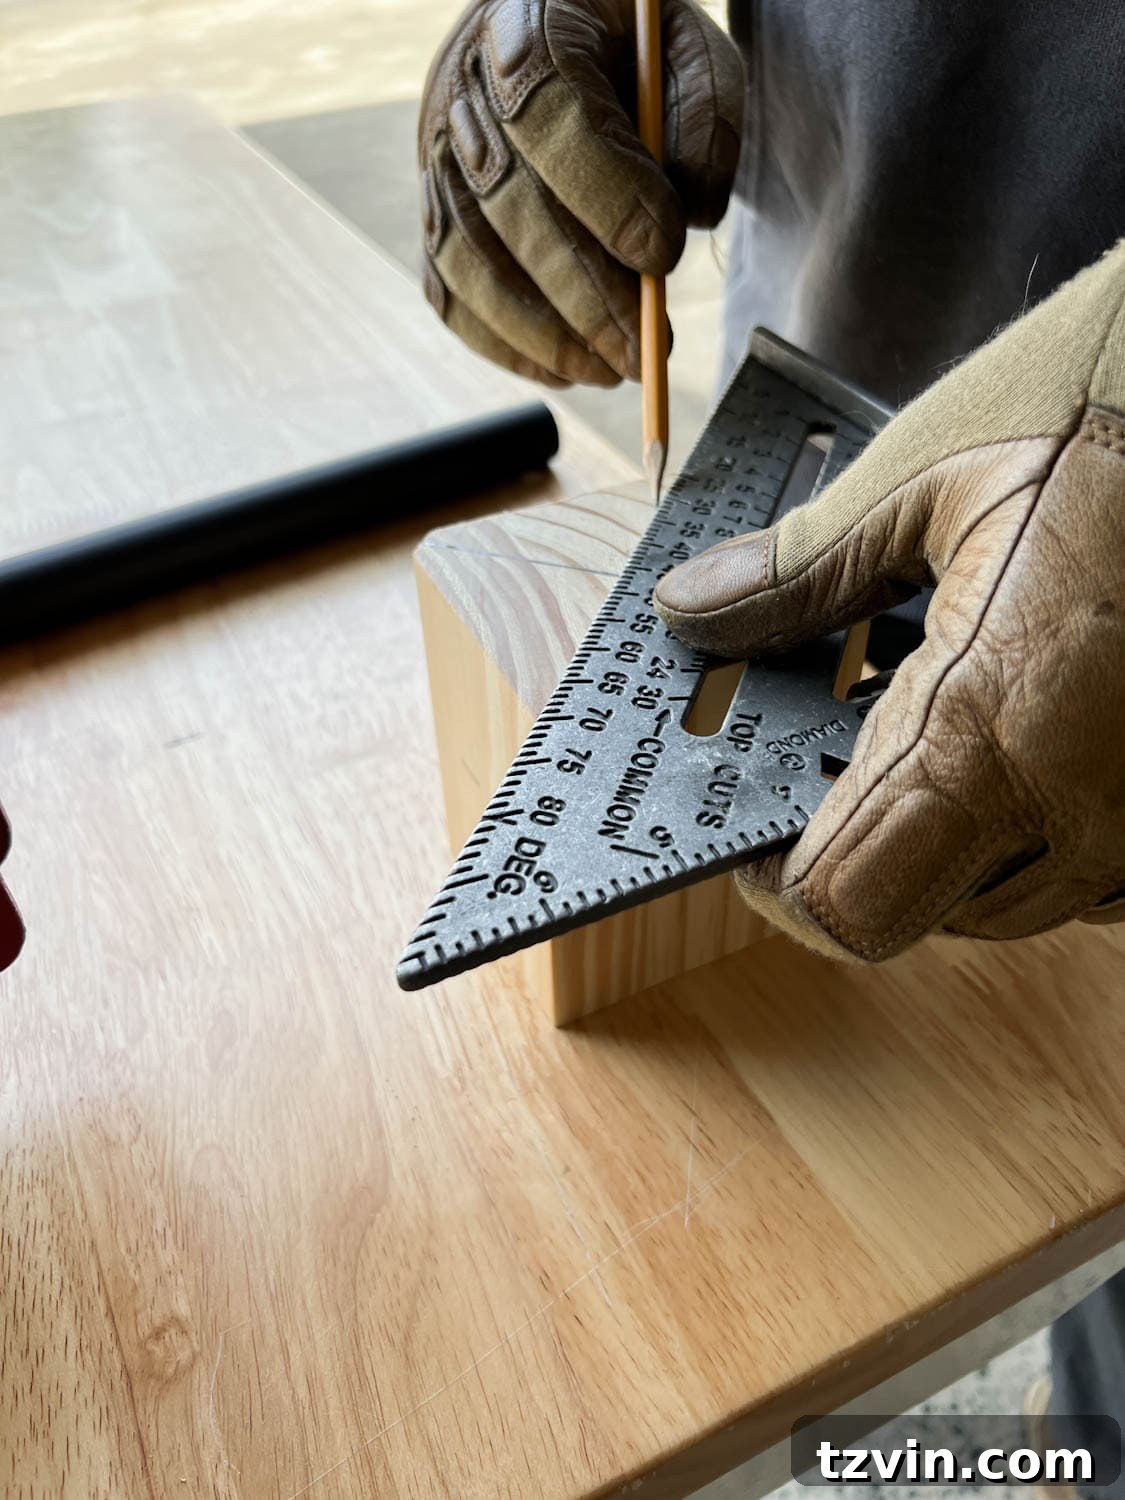
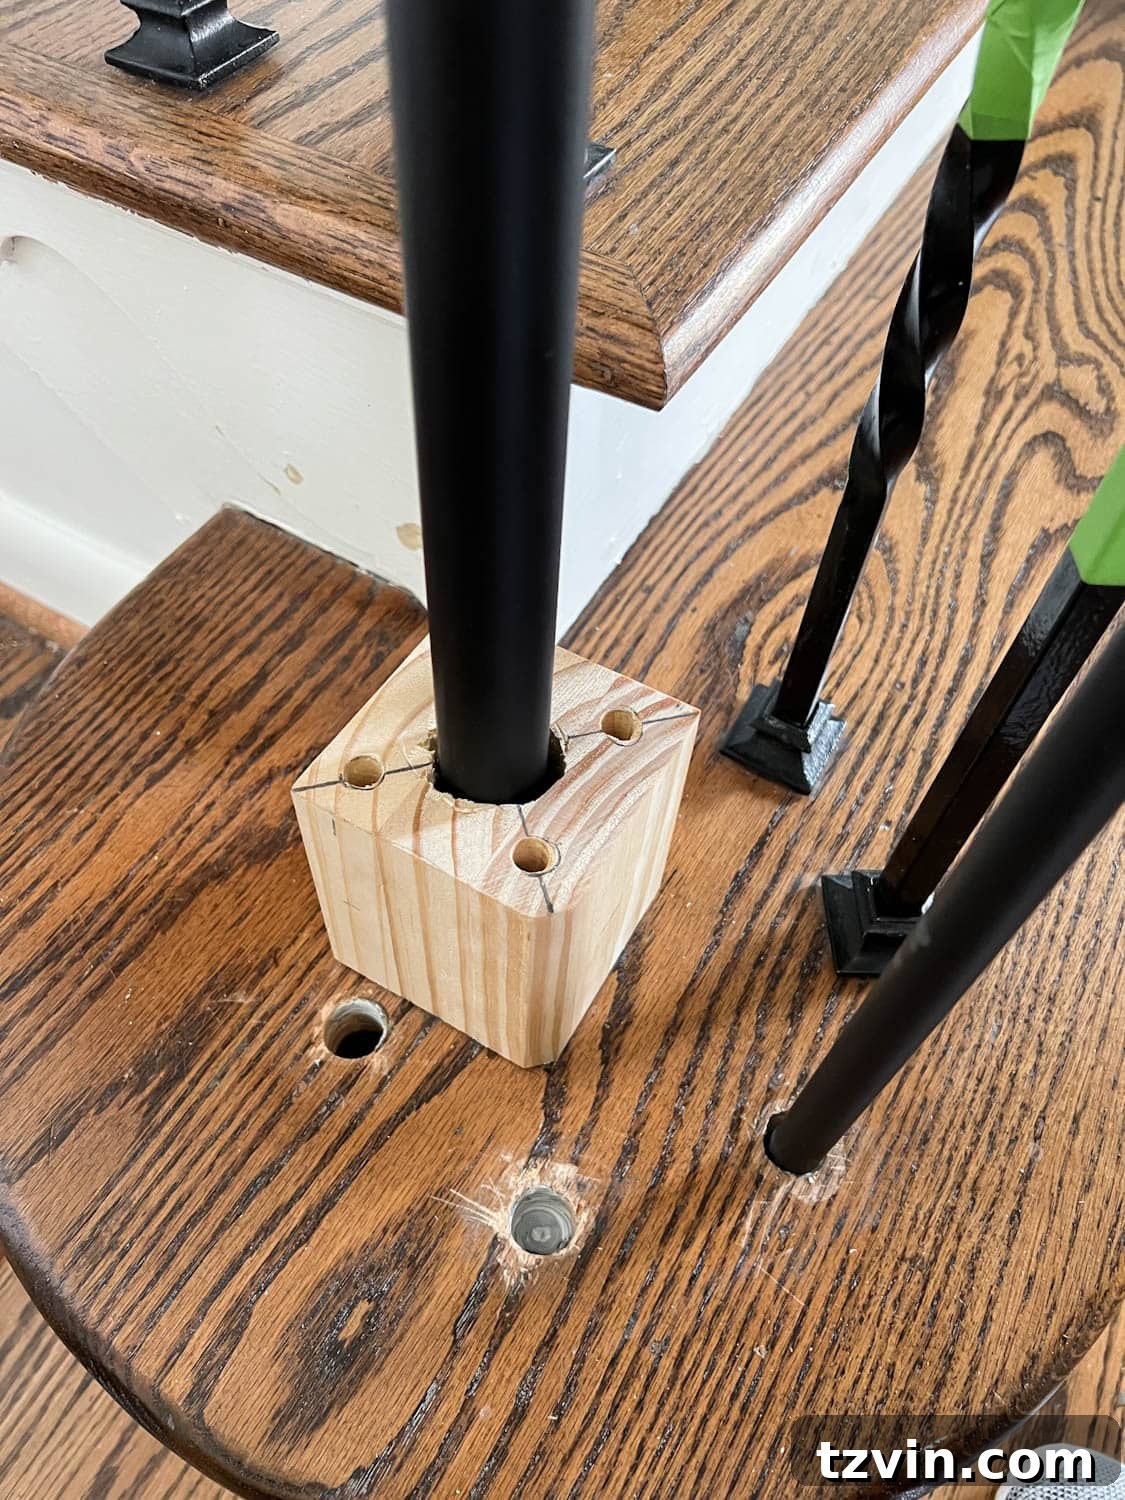
To prepare the new mounting block, take a fresh 4×4 wooden block. Use a speed square to draw diagonal lines from corner to corner, marking a precise ‘X’ to find the exact center of the block. Position your new newel post’s base at the center of this ‘X’ and trace its outline onto the wood. This outline will serve as your guide for drilling the newel post hole.
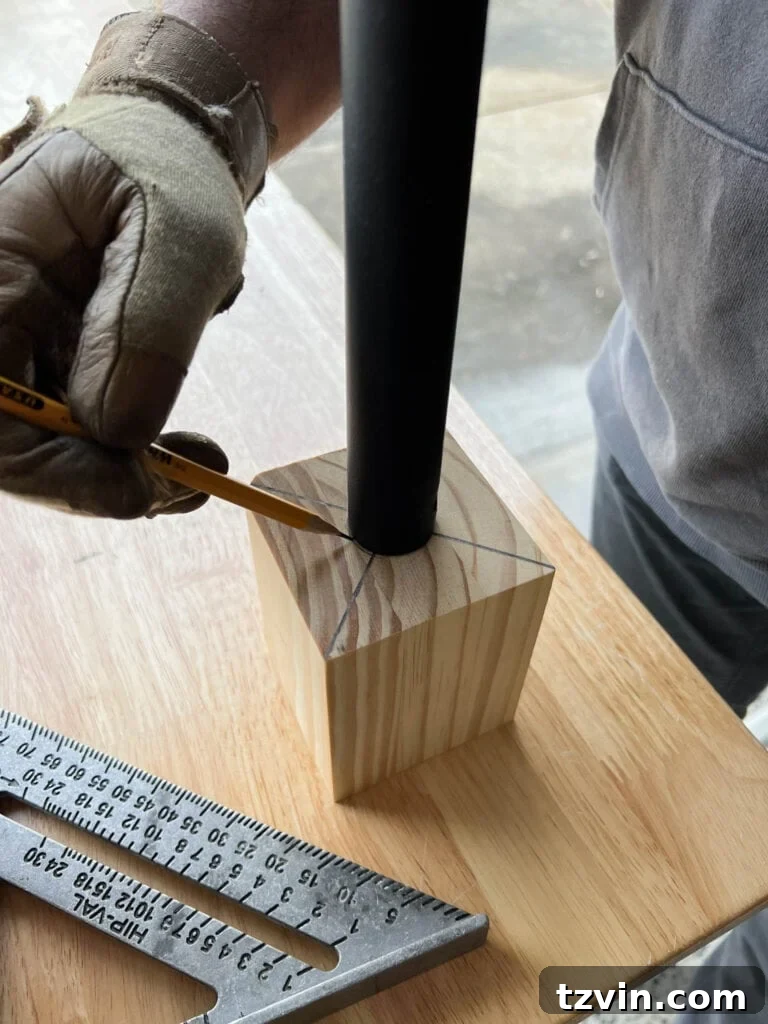
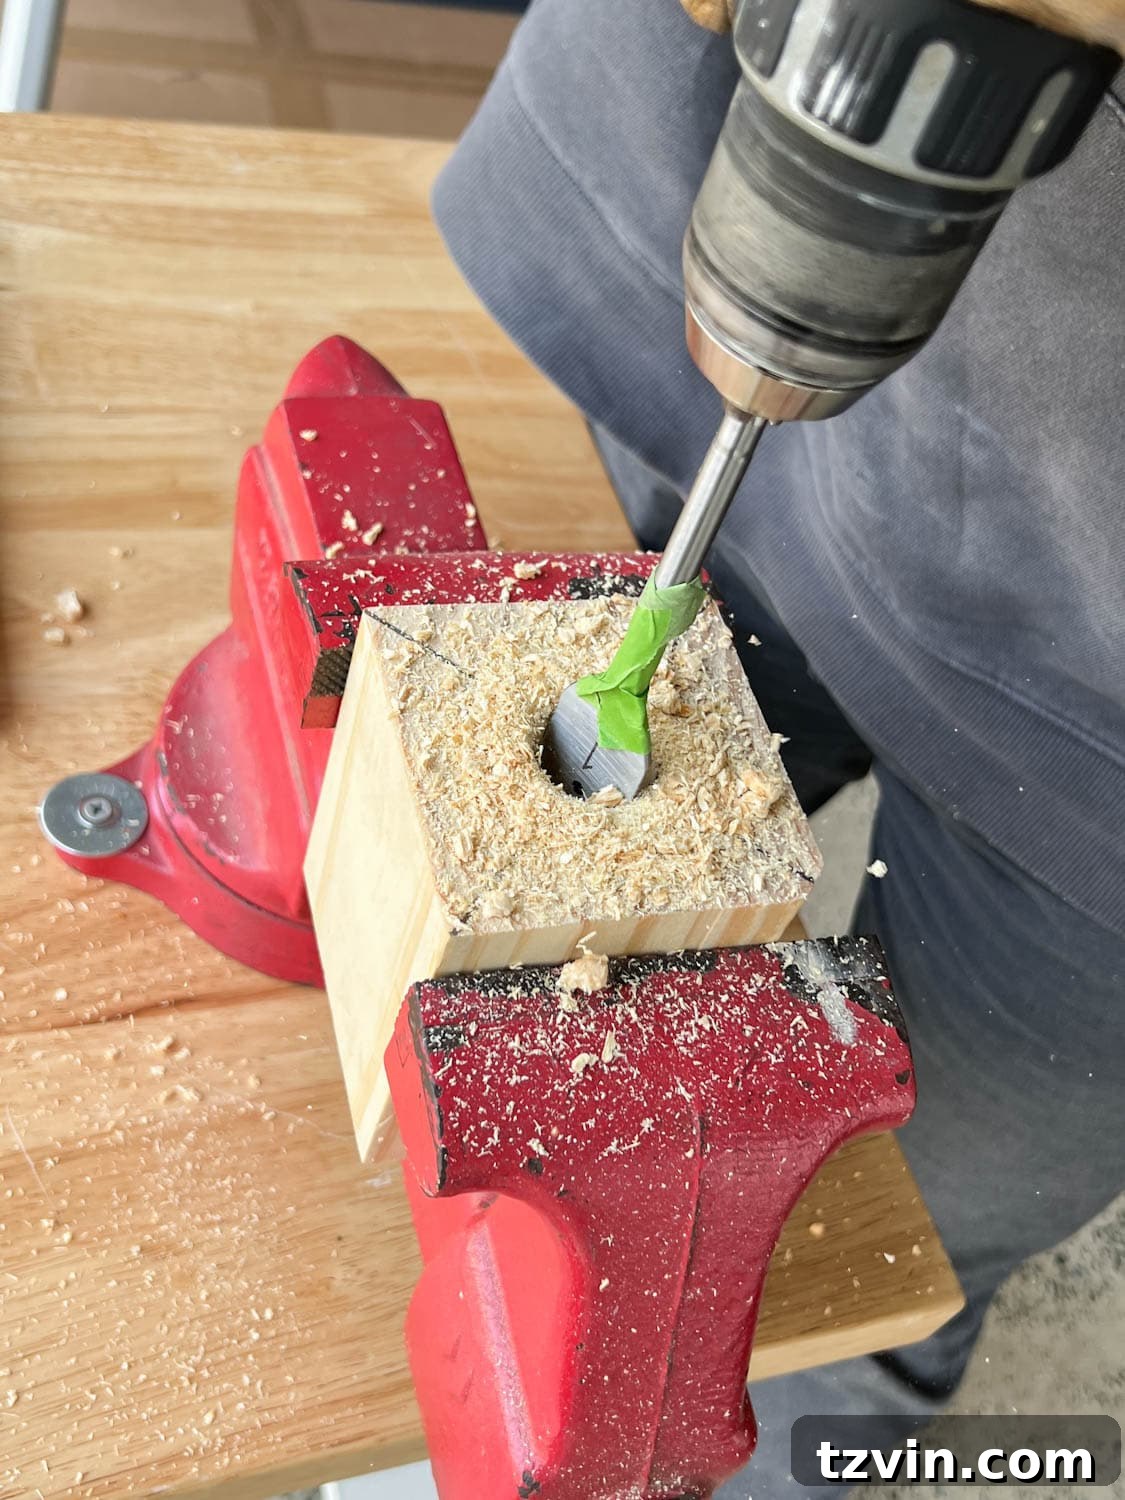
Using a paddle bit of the appropriate diameter, carefully drill the hole for the newel post into the center of the wooden block. Next, switch to a regular drill bit and drill four pilot holes approximately halfway through the block, positioned evenly around the central newel post hole. These pilot holes will prevent the wood from splitting when you secure the block to the tread.
Once the block is prepared, carefully set the new newel post into the drilled hole in the block, ensuring it’s plumb and aligns with the handrail above. Drive four 2-inch self-drilling wood screws through the pilot holes in the wooden block and into the stair tread, securely anchoring the base. Afterward, fill the screw holes with wood filler for a smooth finish. Finally, apply a generous amount of heavy-duty construction adhesive into both the newel post hole in the block and the corresponding hole in the handrail to permanently secure the post.
(We strategically waited to attach the final two balusters around the newel post. This allowed us to fully sand, prime, and paint the newel post and its block without any obstructions, ensuring a pristine finish before the balusters were permanently installed.)
Step 5 – Prime and Paint the Handrail for a Flawless Finish
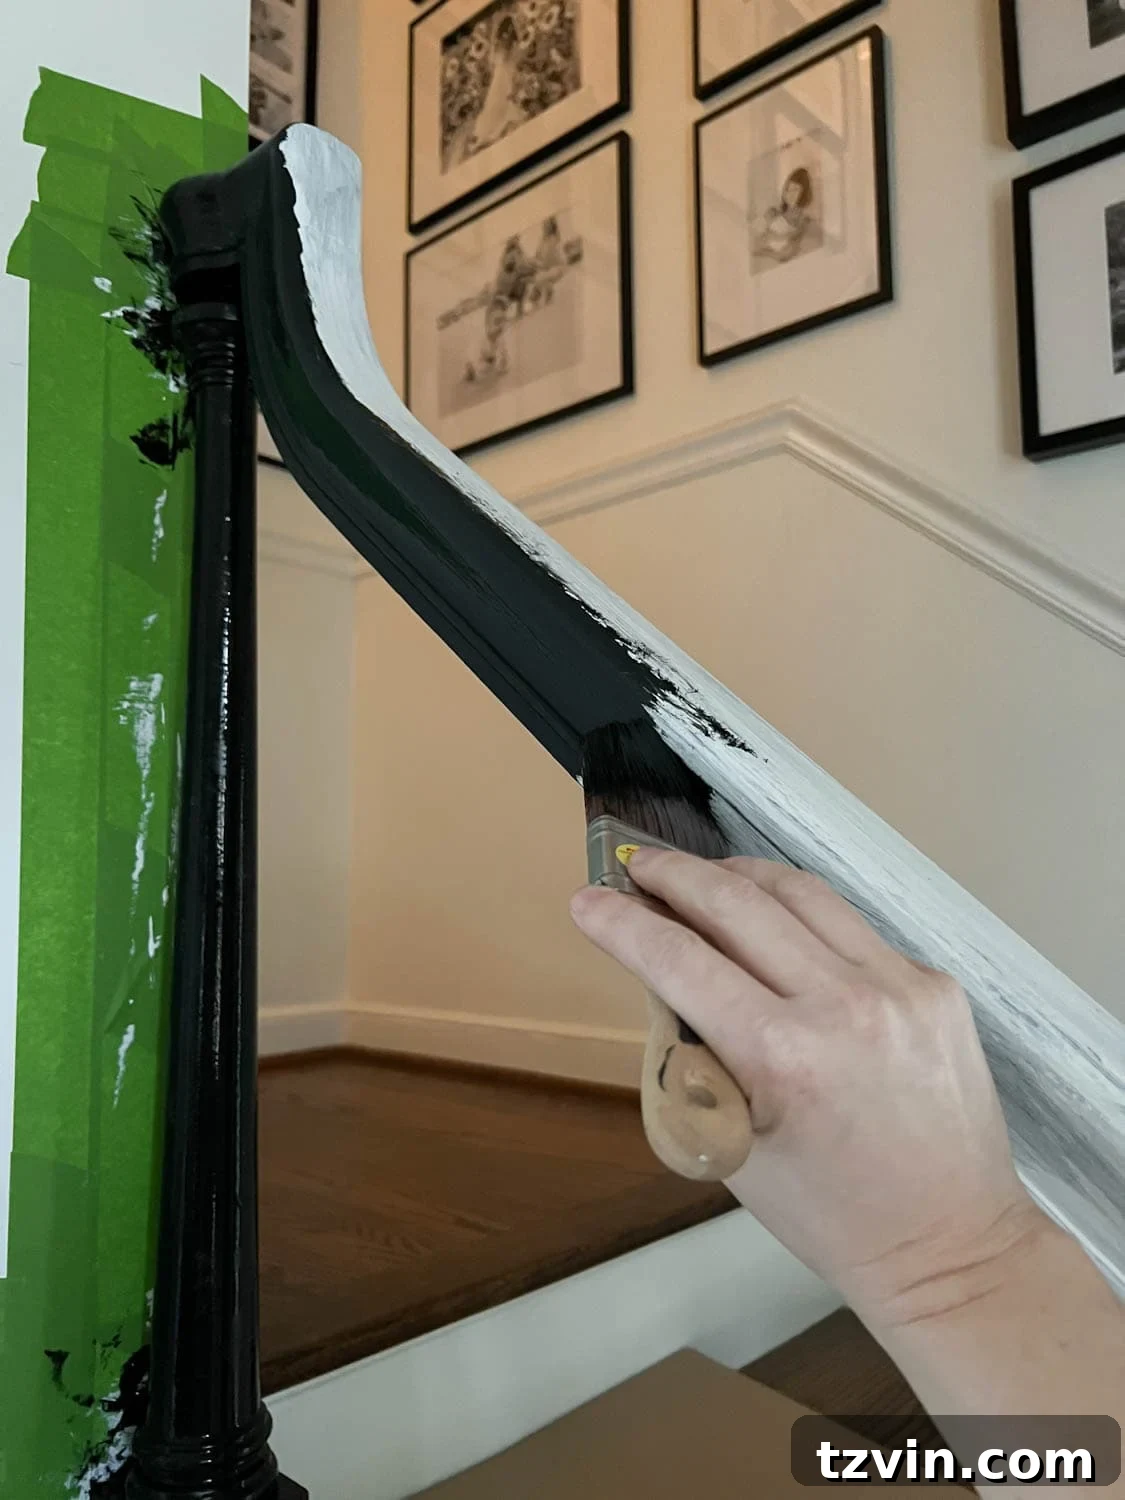
Painting the handrail before installing the new balusters is a critical step that saves considerable time and effort, yielding a much cleaner, more professional result. Begin by lightly sanding the entire surface of the handrail with fine-grit sandpaper. This creates a “tooth” for the primer to adhere to, ensuring excellent adhesion. After sanding, meticulously wipe away all dust and debris using a tack cloth to prepare the surface for priming.
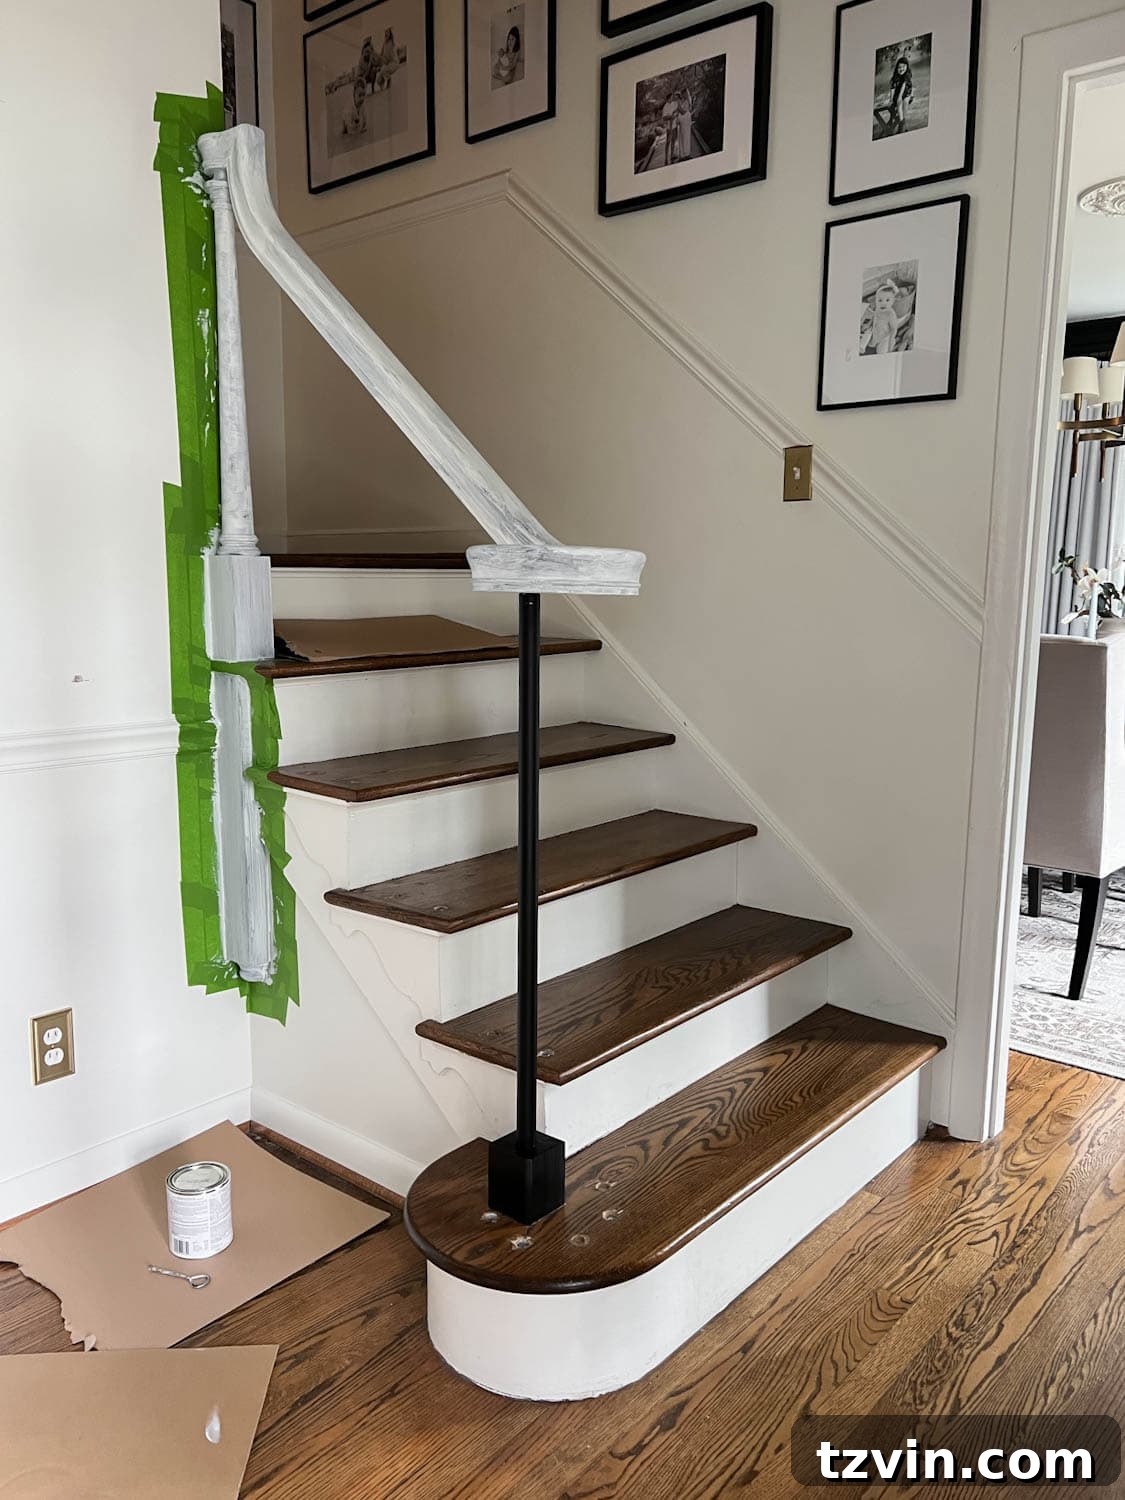
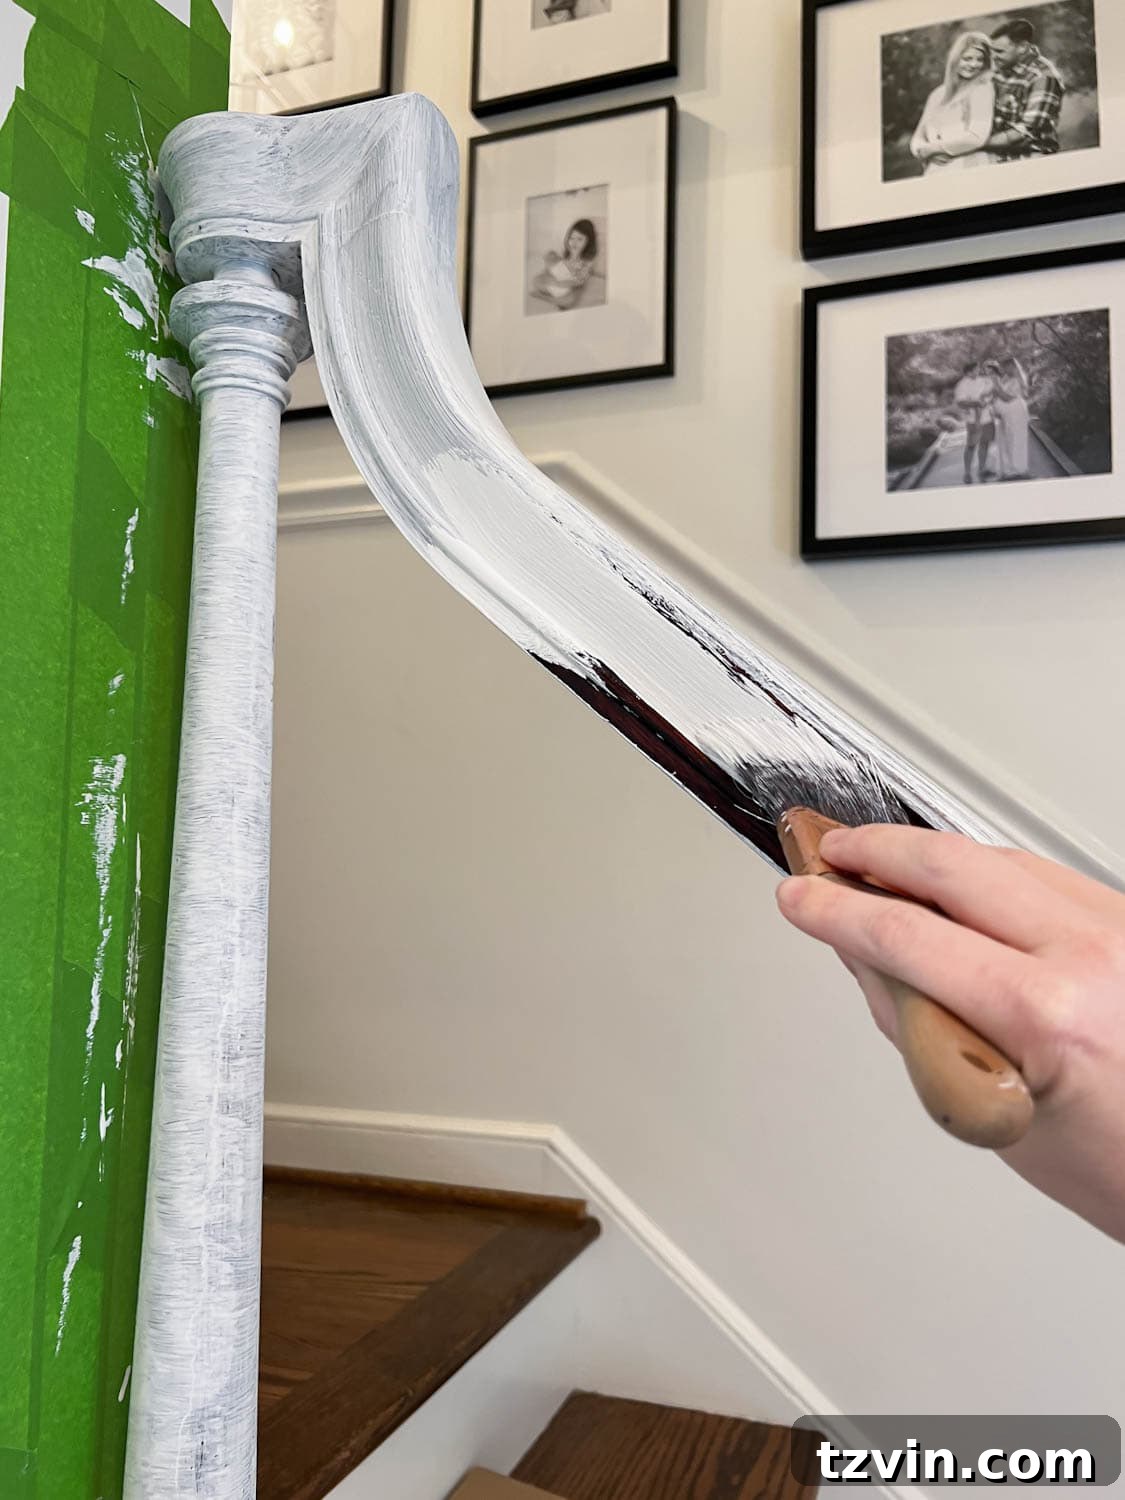
Using a high-quality 2-inch angled paint brush, apply an even coat of waterborne bonding primer. Bonding primer is specifically formulated to adhere to difficult surfaces like previously stained or varnished wood, providing a strong foundation for your topcoat. Its superior adhesion properties ensure that your paint will not chip or peel prematurely.
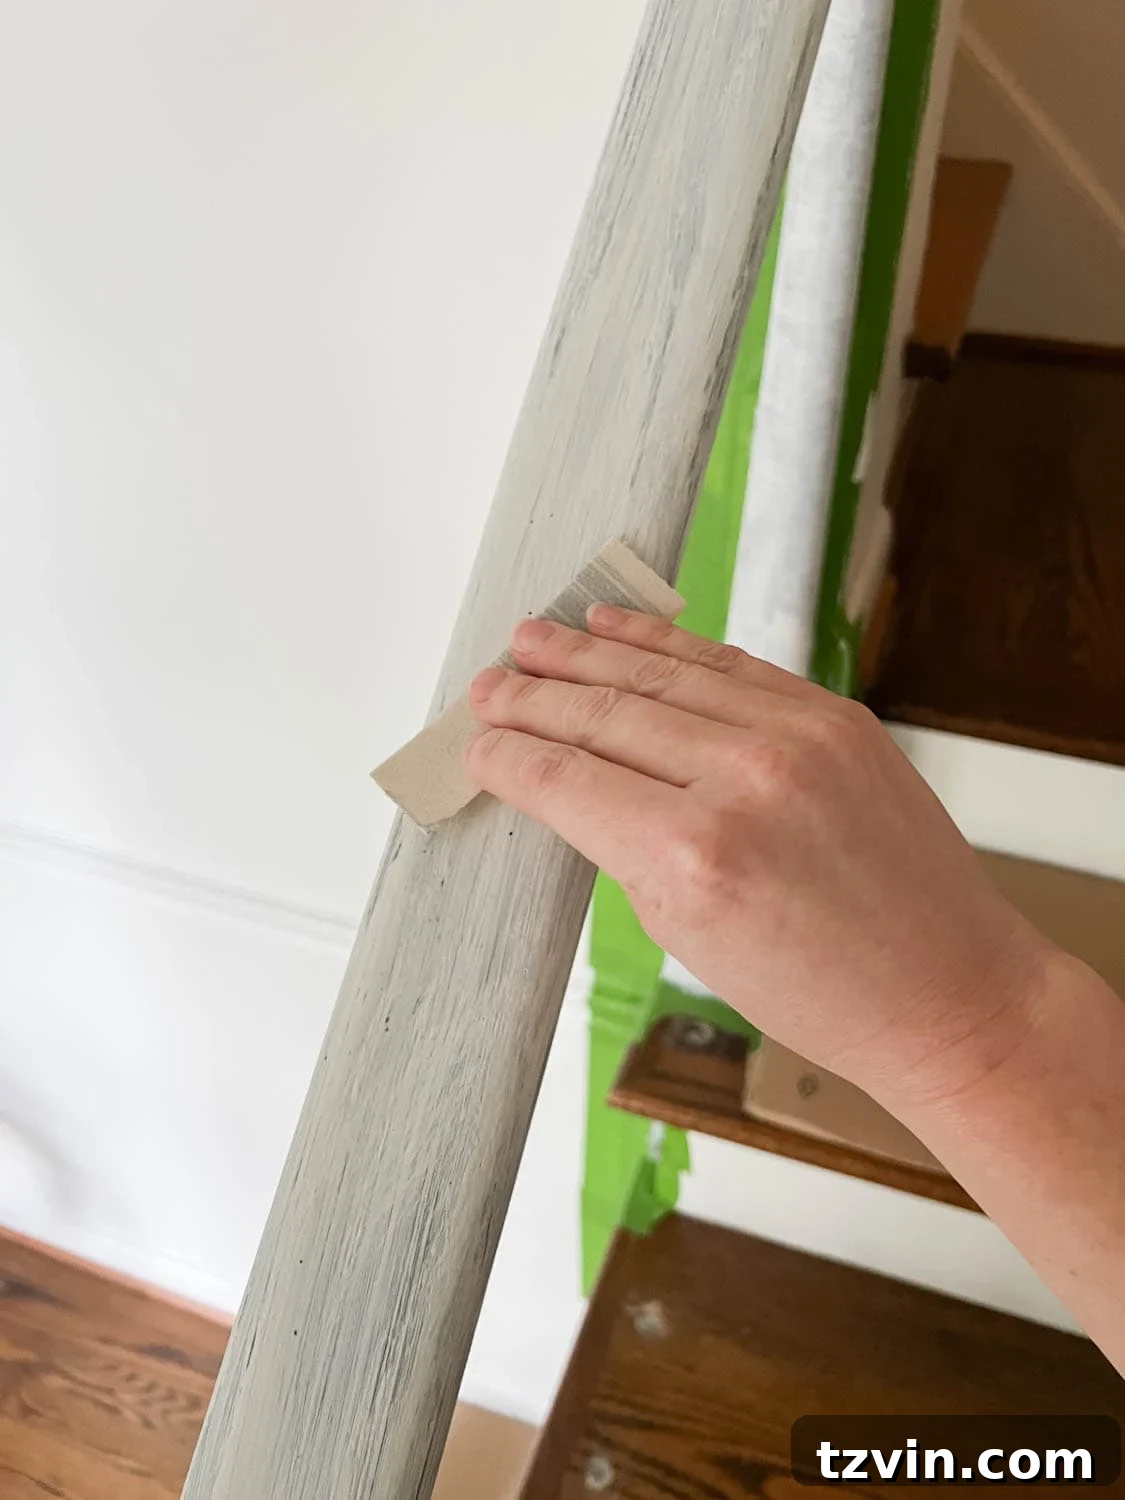
Allow the primer to dry completely according to the manufacturer’s instructions. Once dry, lightly sand the primed surface again with fine-grit sandpaper. This step is crucial for achieving a glass-smooth final finish, as it helps to eliminate any visible brush strokes or minor imperfections from the primer coat. For best results, use simple sandpaper (rather than a rigid sanding block) which allows you to easily contour to the curves and grooves of the handrail. After sanding, use a tack cloth once more to remove all sanding dust, leaving a pristine surface.
Finally, apply two coats of a high-quality waterborne alkyd paint. We initially considered semi-gloss but ultimately chose a satin sheen, as it beautifully complemented the finish of our new balusters. Waterborne alkyd paints are highly recommended for stair railings because they cure to an incredibly durable, hard surface that can withstand the constant traffic and wear common in a staircase. Additionally, these paints are self-leveling, meaning that brushstrokes tend to disappear as the paint dries, resulting in an exceptionally smooth, factory-like finish. Allow adequate drying time between coats and before proceeding to the next step, ideally overnight for maximum curing.
Step 6 – Securely Attach New Balusters
Once the paint on your handrail is completely dry (allowing at least 24 hours for proper curing is ideal), you can begin the exciting process of installing your new balusters. For each baluster, first slide a stair shoe onto the baluster. Next, apply a small amount of heavy-duty construction adhesive into both the handrail hole and the corresponding tread hole. This adhesive will provide a strong, permanent bond.
Carefully insert the top end of the baluster into the handrail hole. The pre-drilled holes should offer just enough extra room to allow you to push the baluster slightly upward. This upward flexibility is crucial, as it enables the bottom end of the baluster to then slide precisely into place in the tread hole. Once both ends are seated, gently release the upward pressure, ensuring the baluster is securely positioned.
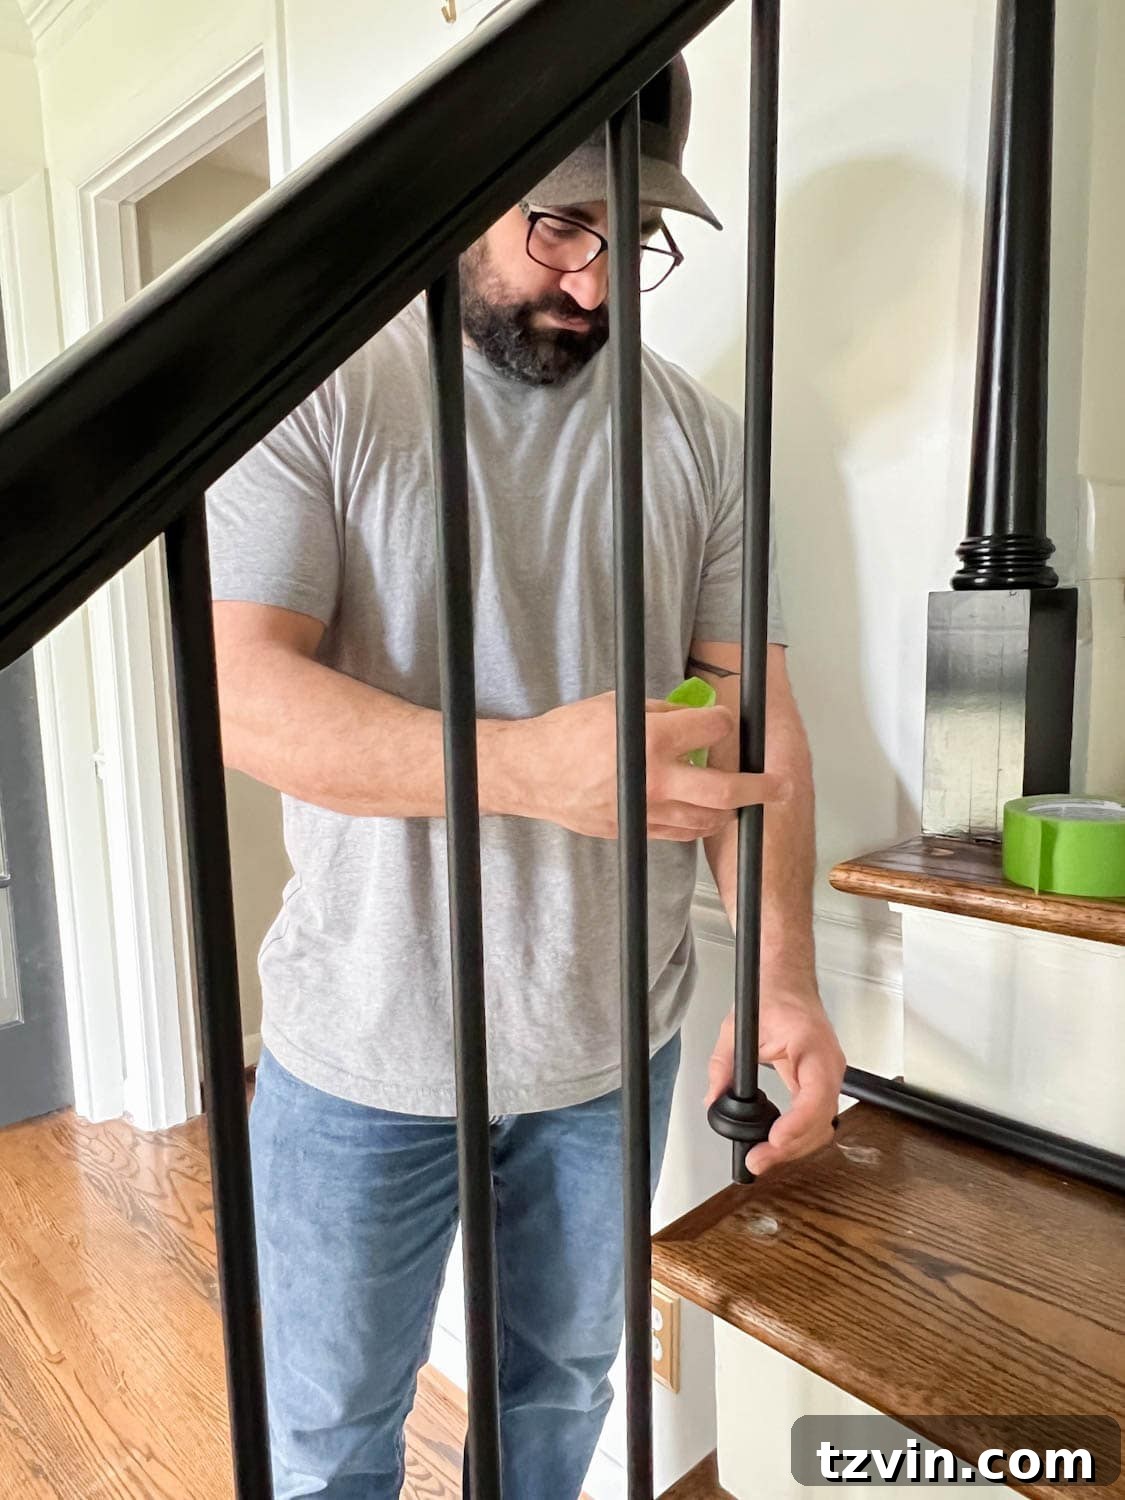
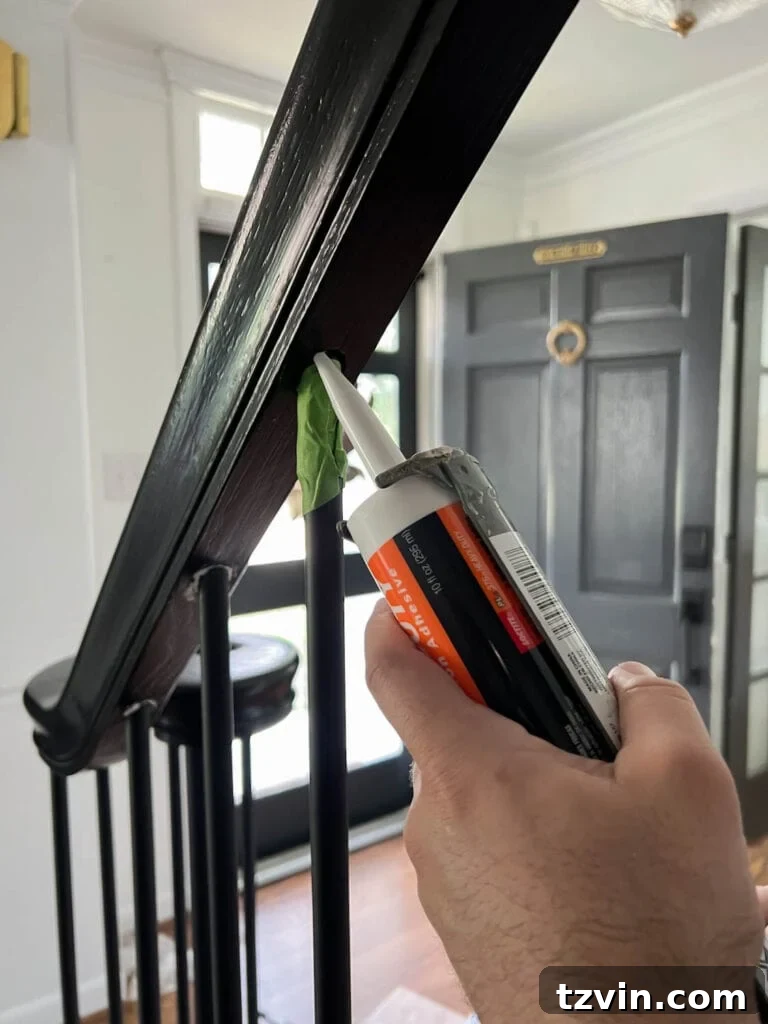
For added security and stability, apply a little more construction adhesive into the handrail hole around the baluster base. We found it helpful to use painter’s tape to protect the black metal spindles from any adhesive drips or messes; remove the tape immediately after applying the adhesive. To further anchor the balusters to the treads, carefully drive 3/4-inch self-drilling wood screws beside the iron spindles, ensuring they fit snugly into the holes. This provides extra rigidity and prevents any movement.
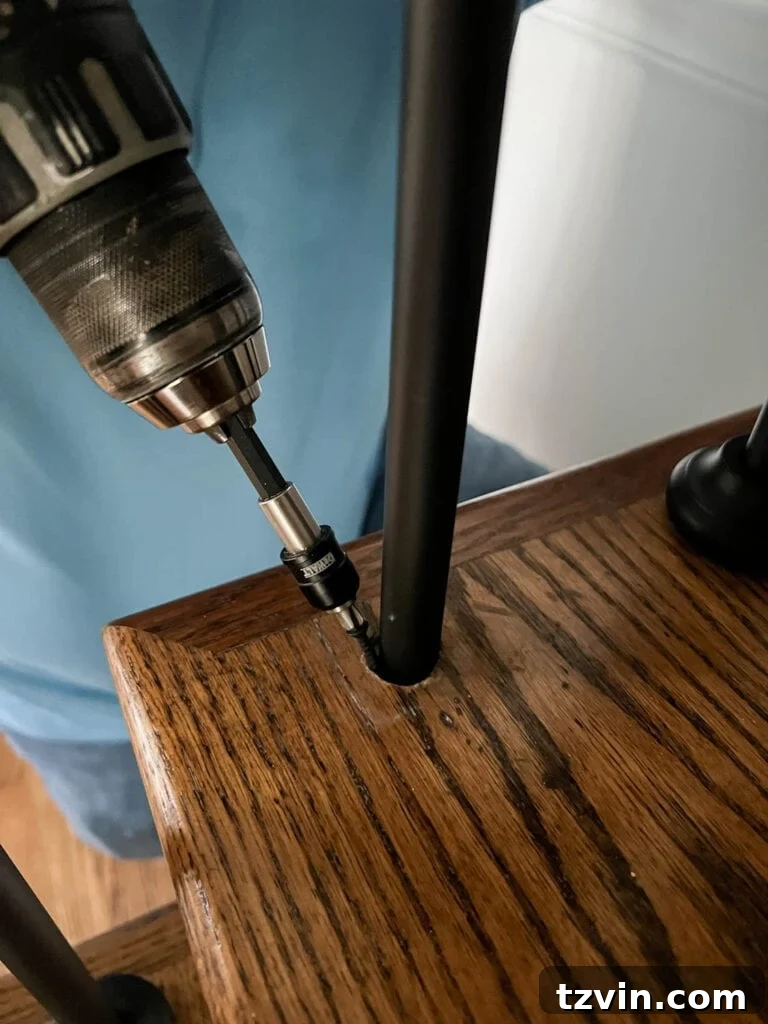
Once the balusters are firmly in place, slide the stair shoes down over the tread holes until they sit flush, creating a clean, polished look. It’s imperative to allow the construction adhesive to cure completely for at least 24 hours (or longer, as per manufacturer instructions) before placing any weight or pressure on the balusters or performing any final paint touch-ups. This ensures maximum bond strength and durability for your newly transformed staircase.
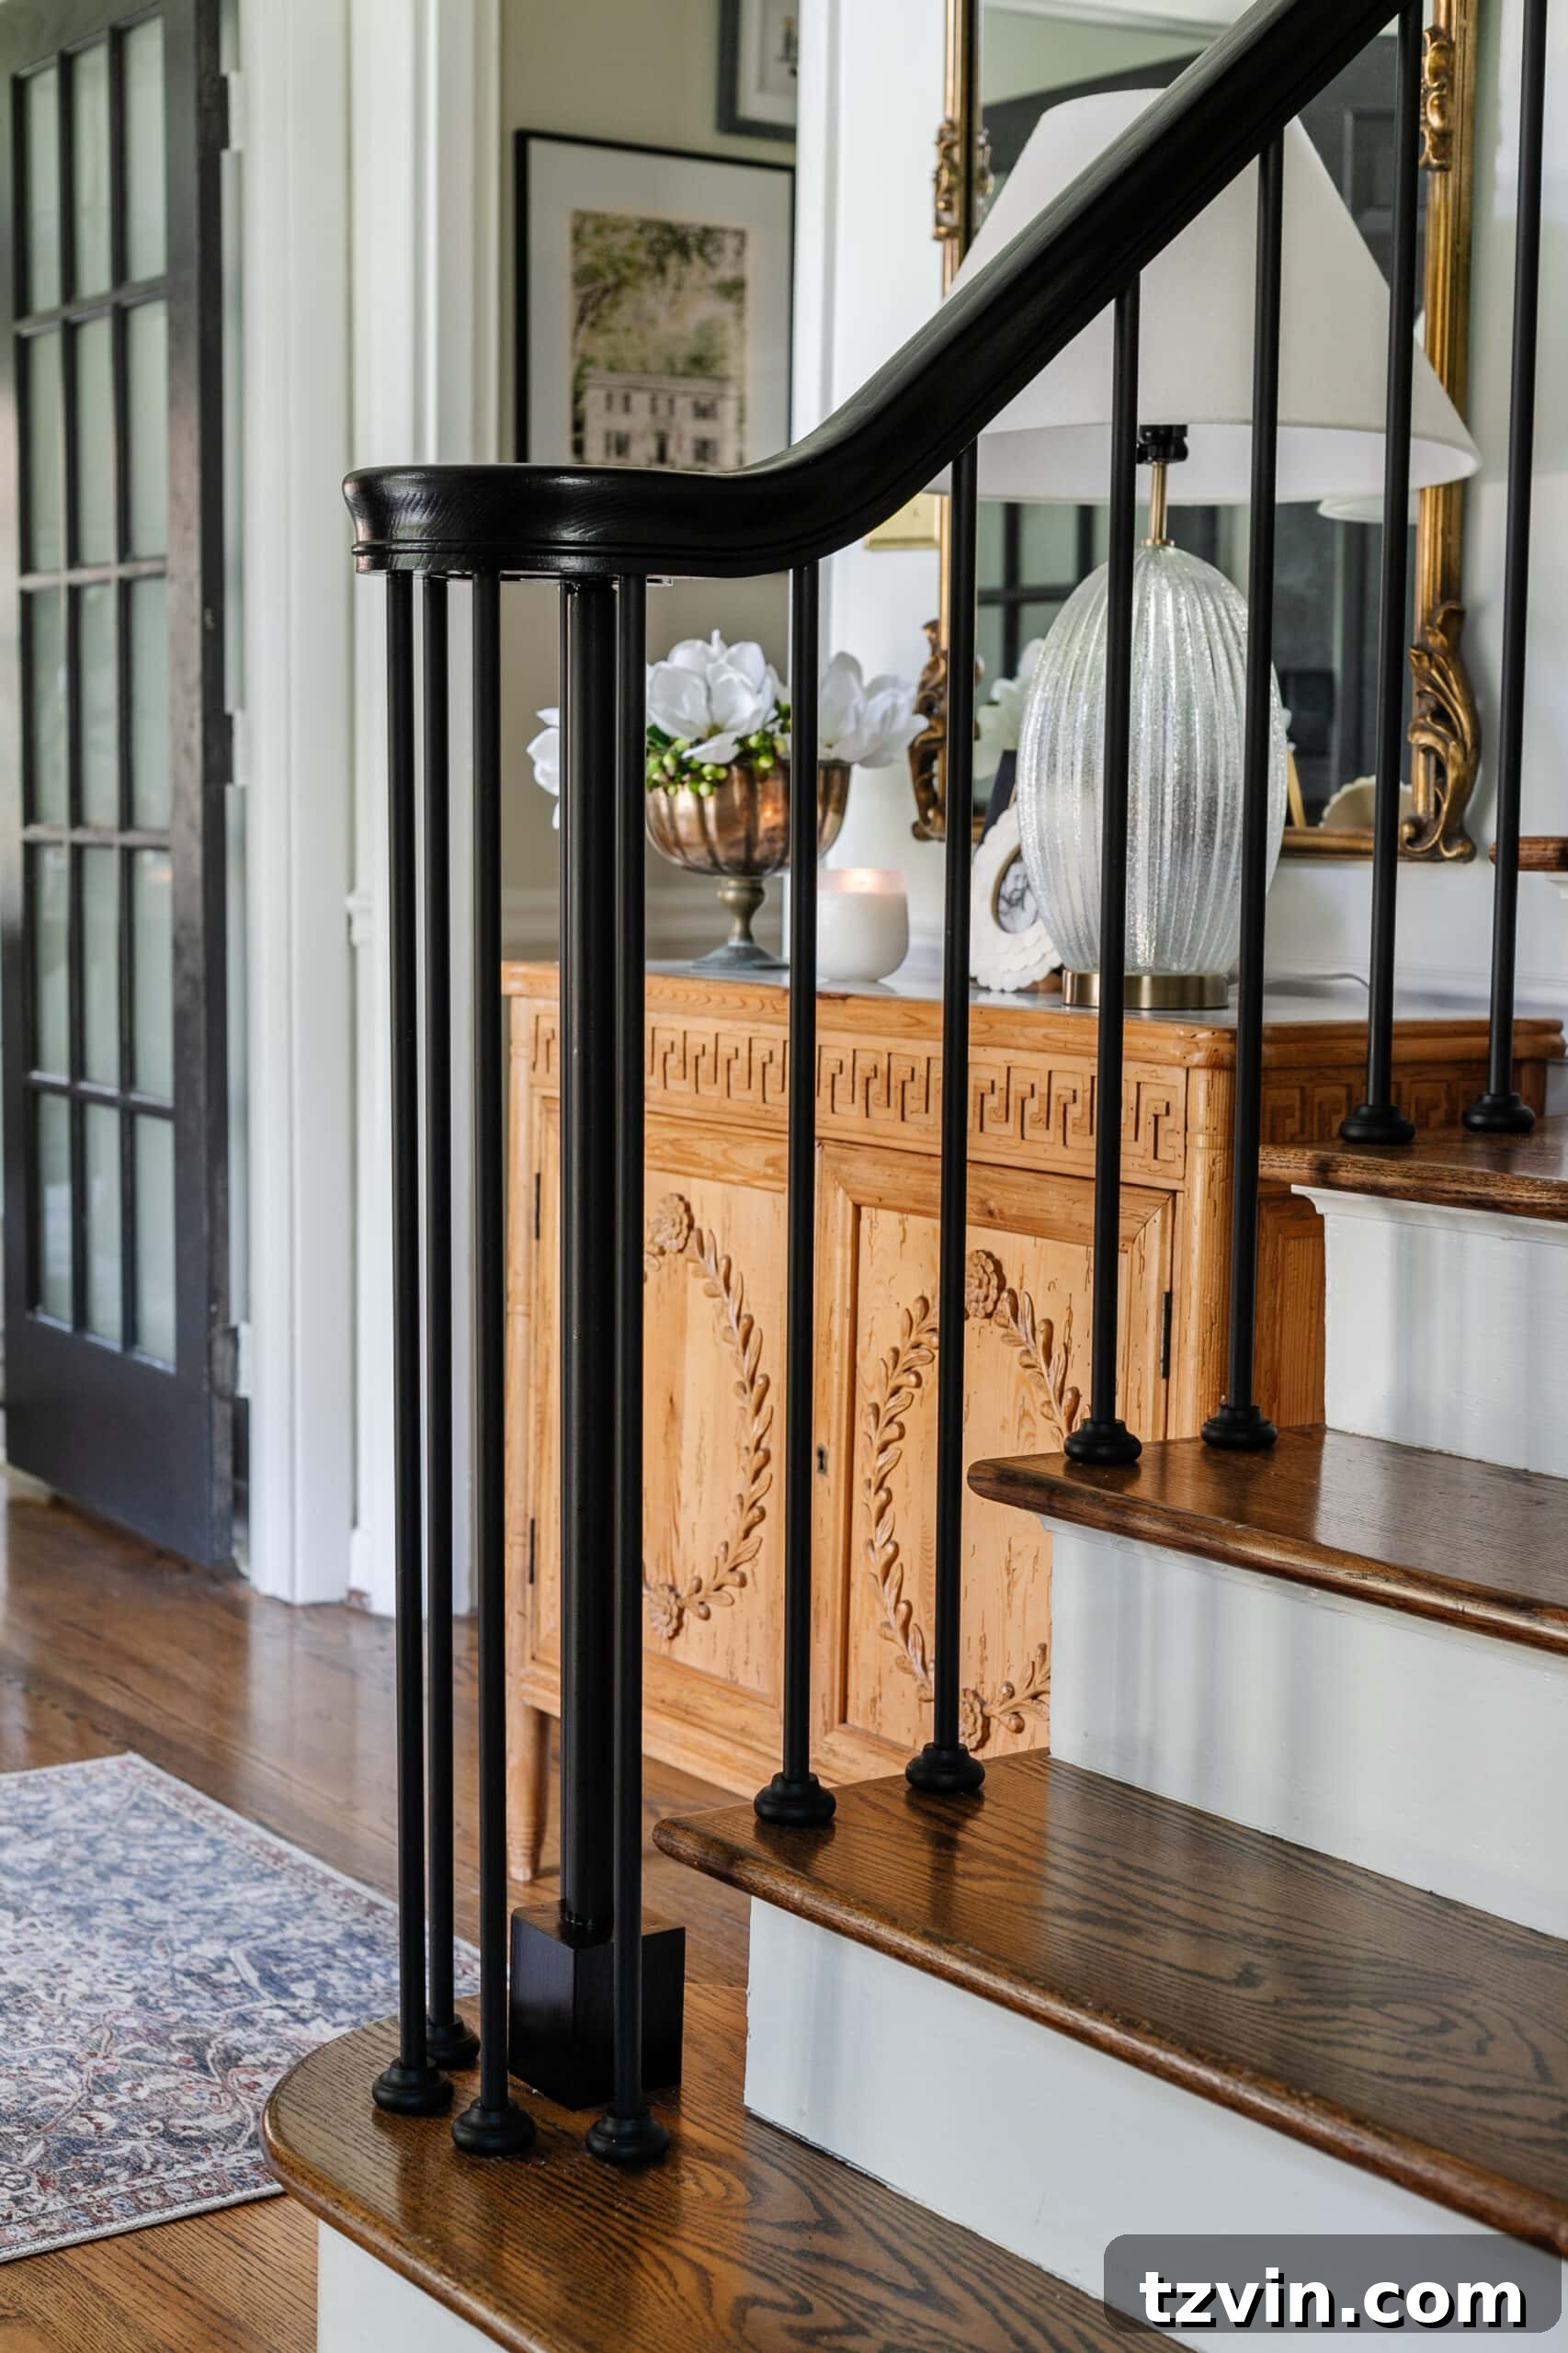
The Stunning DIY Stair Makeover: Before & After Transformation
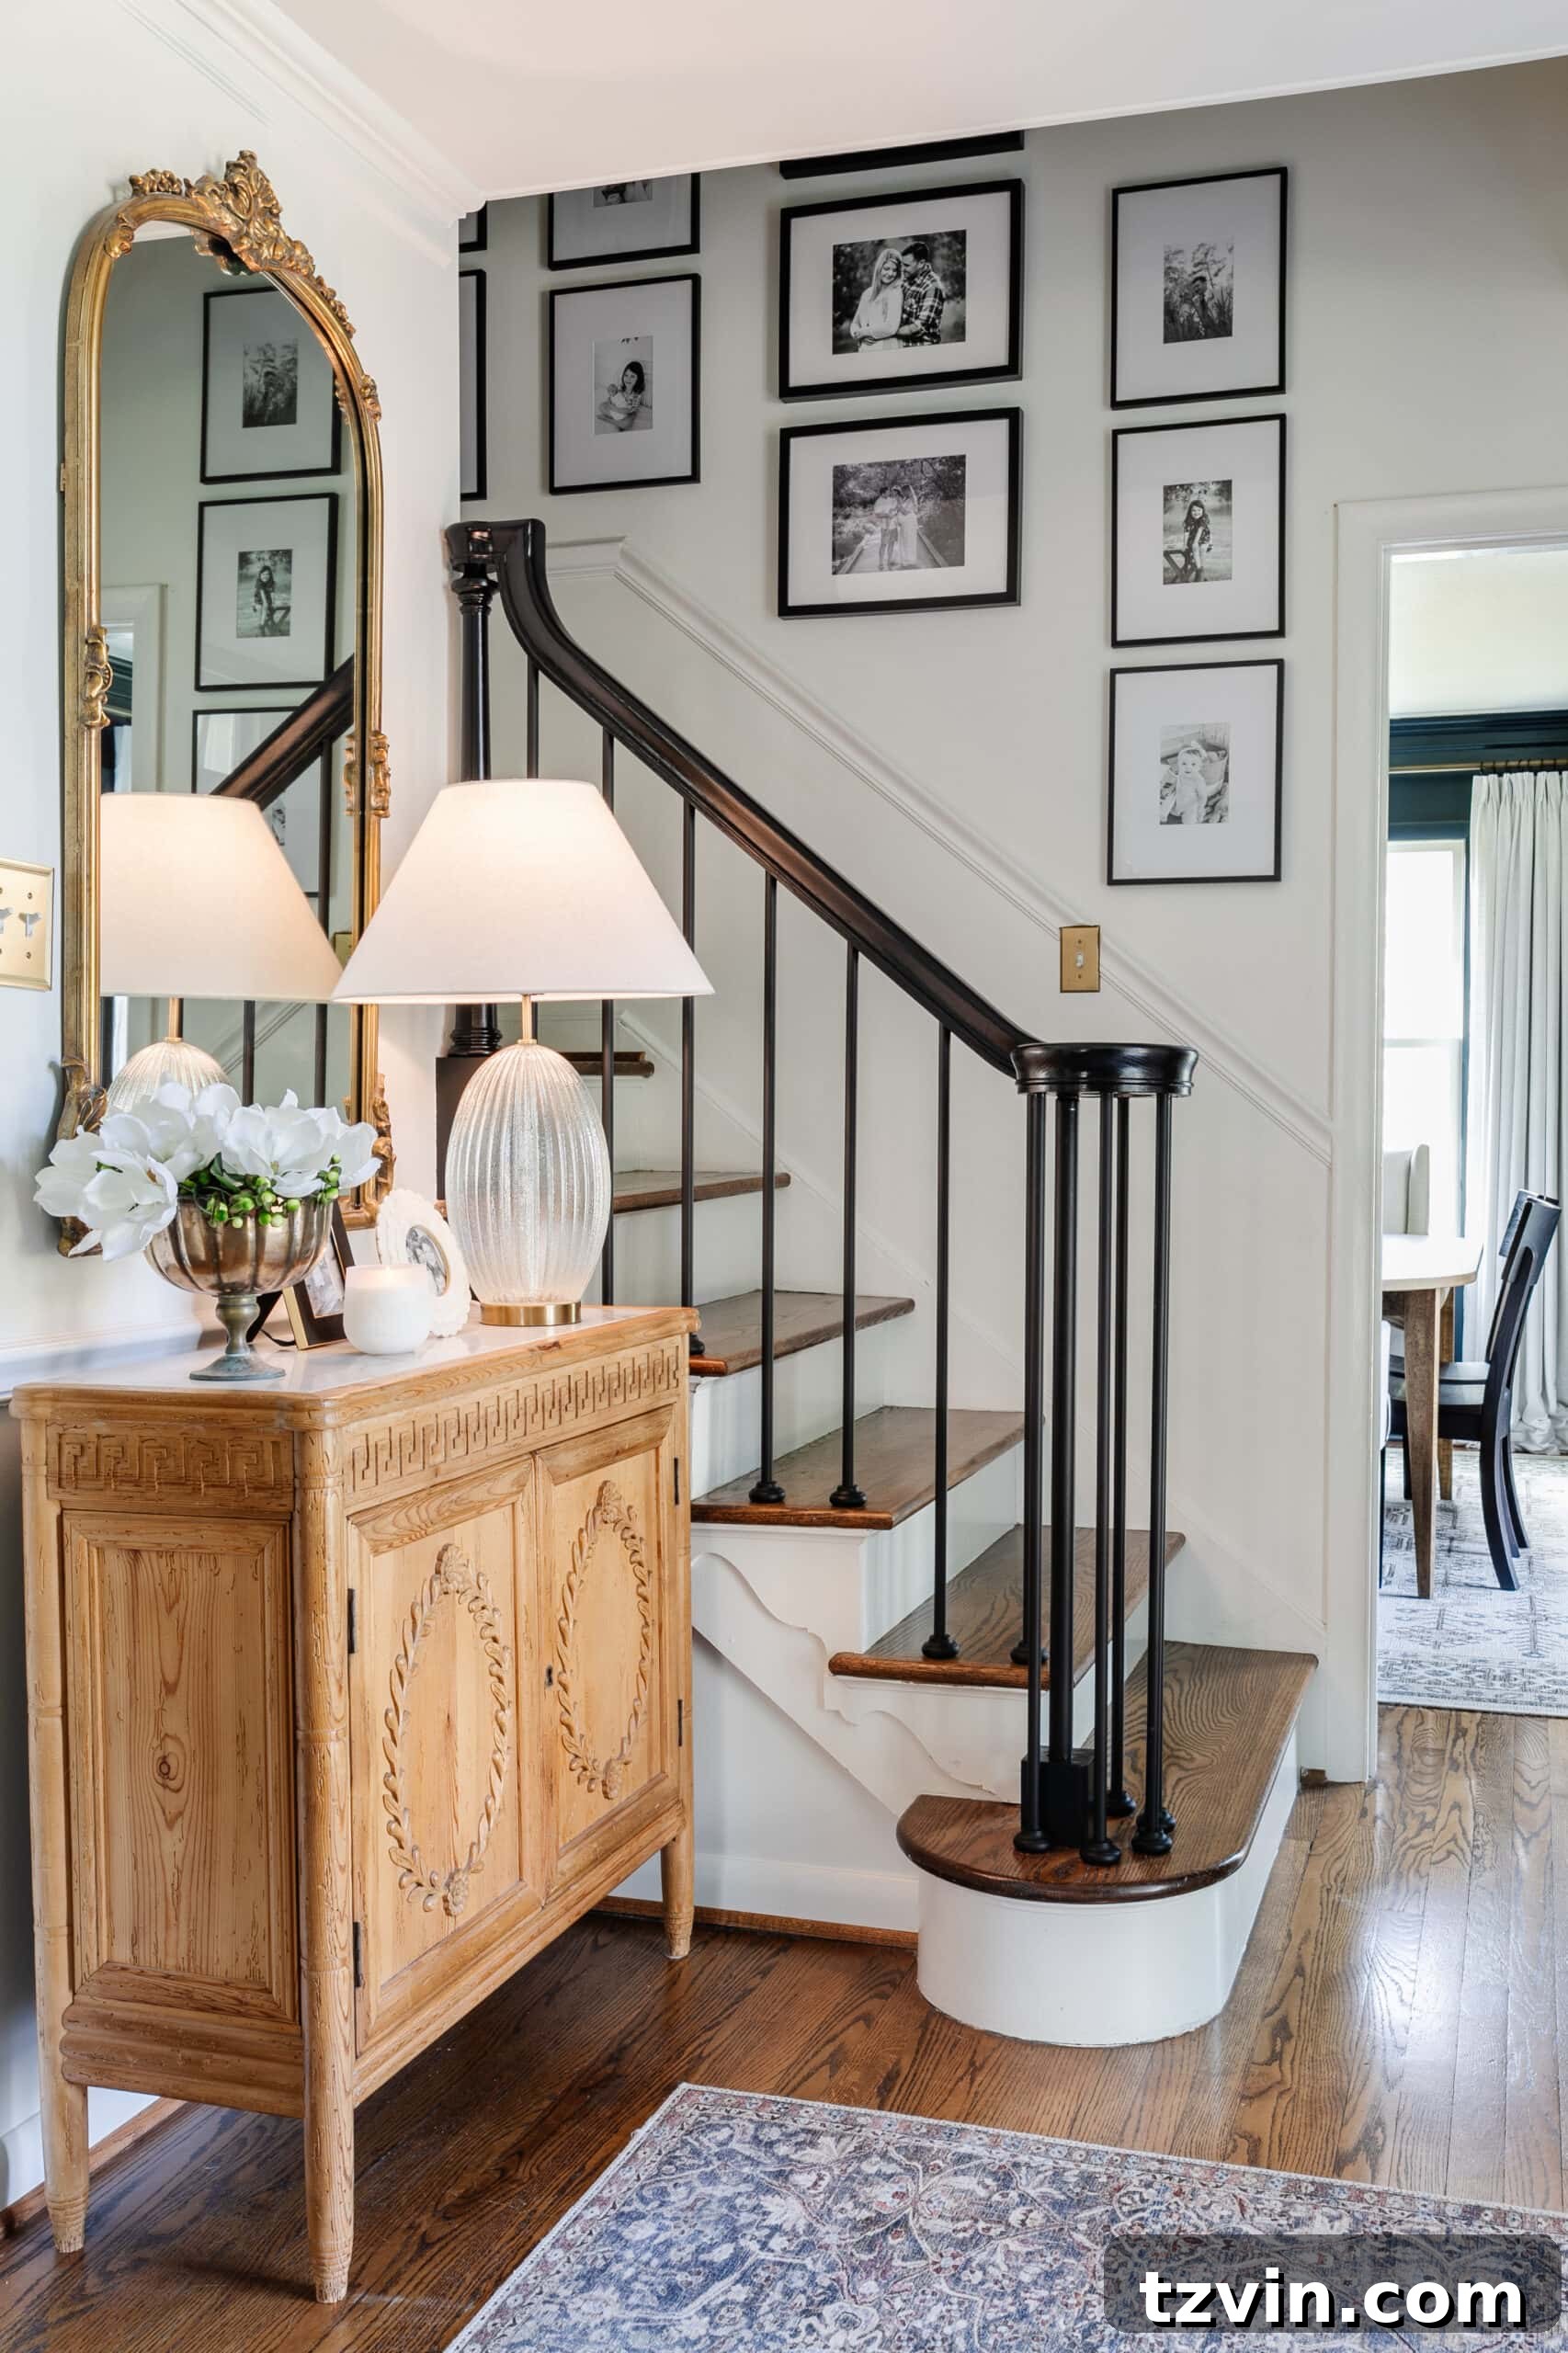
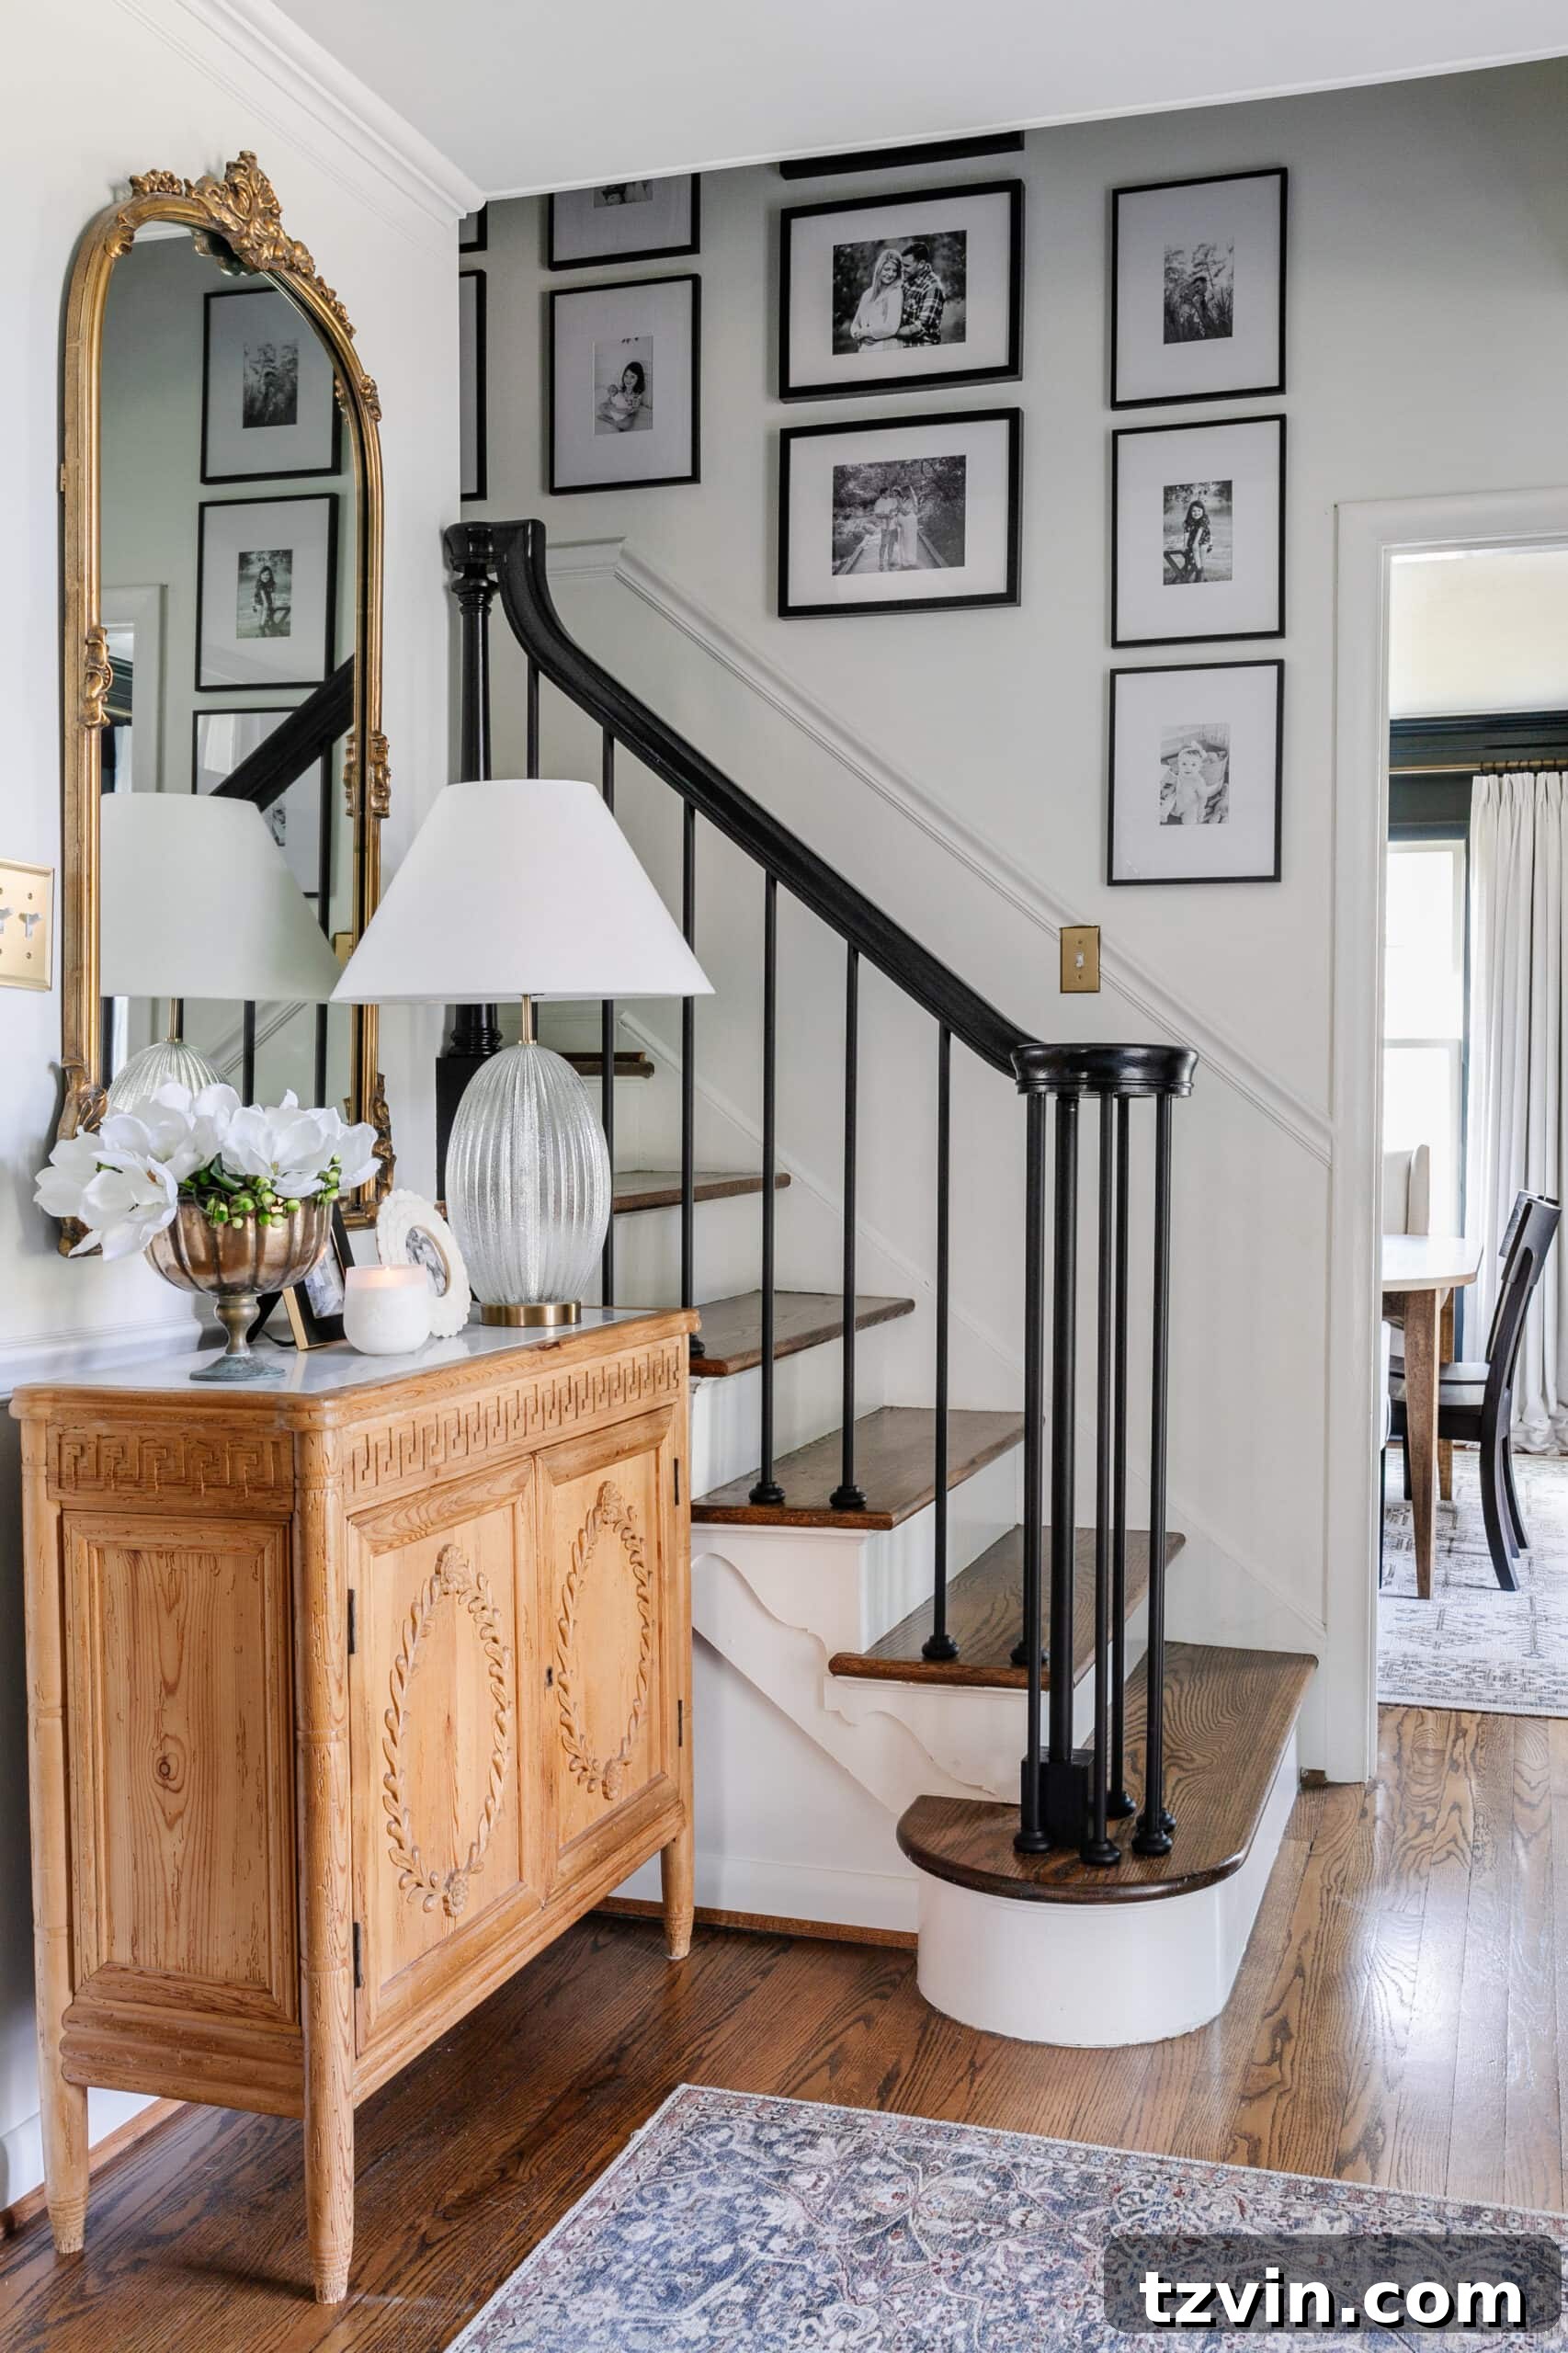
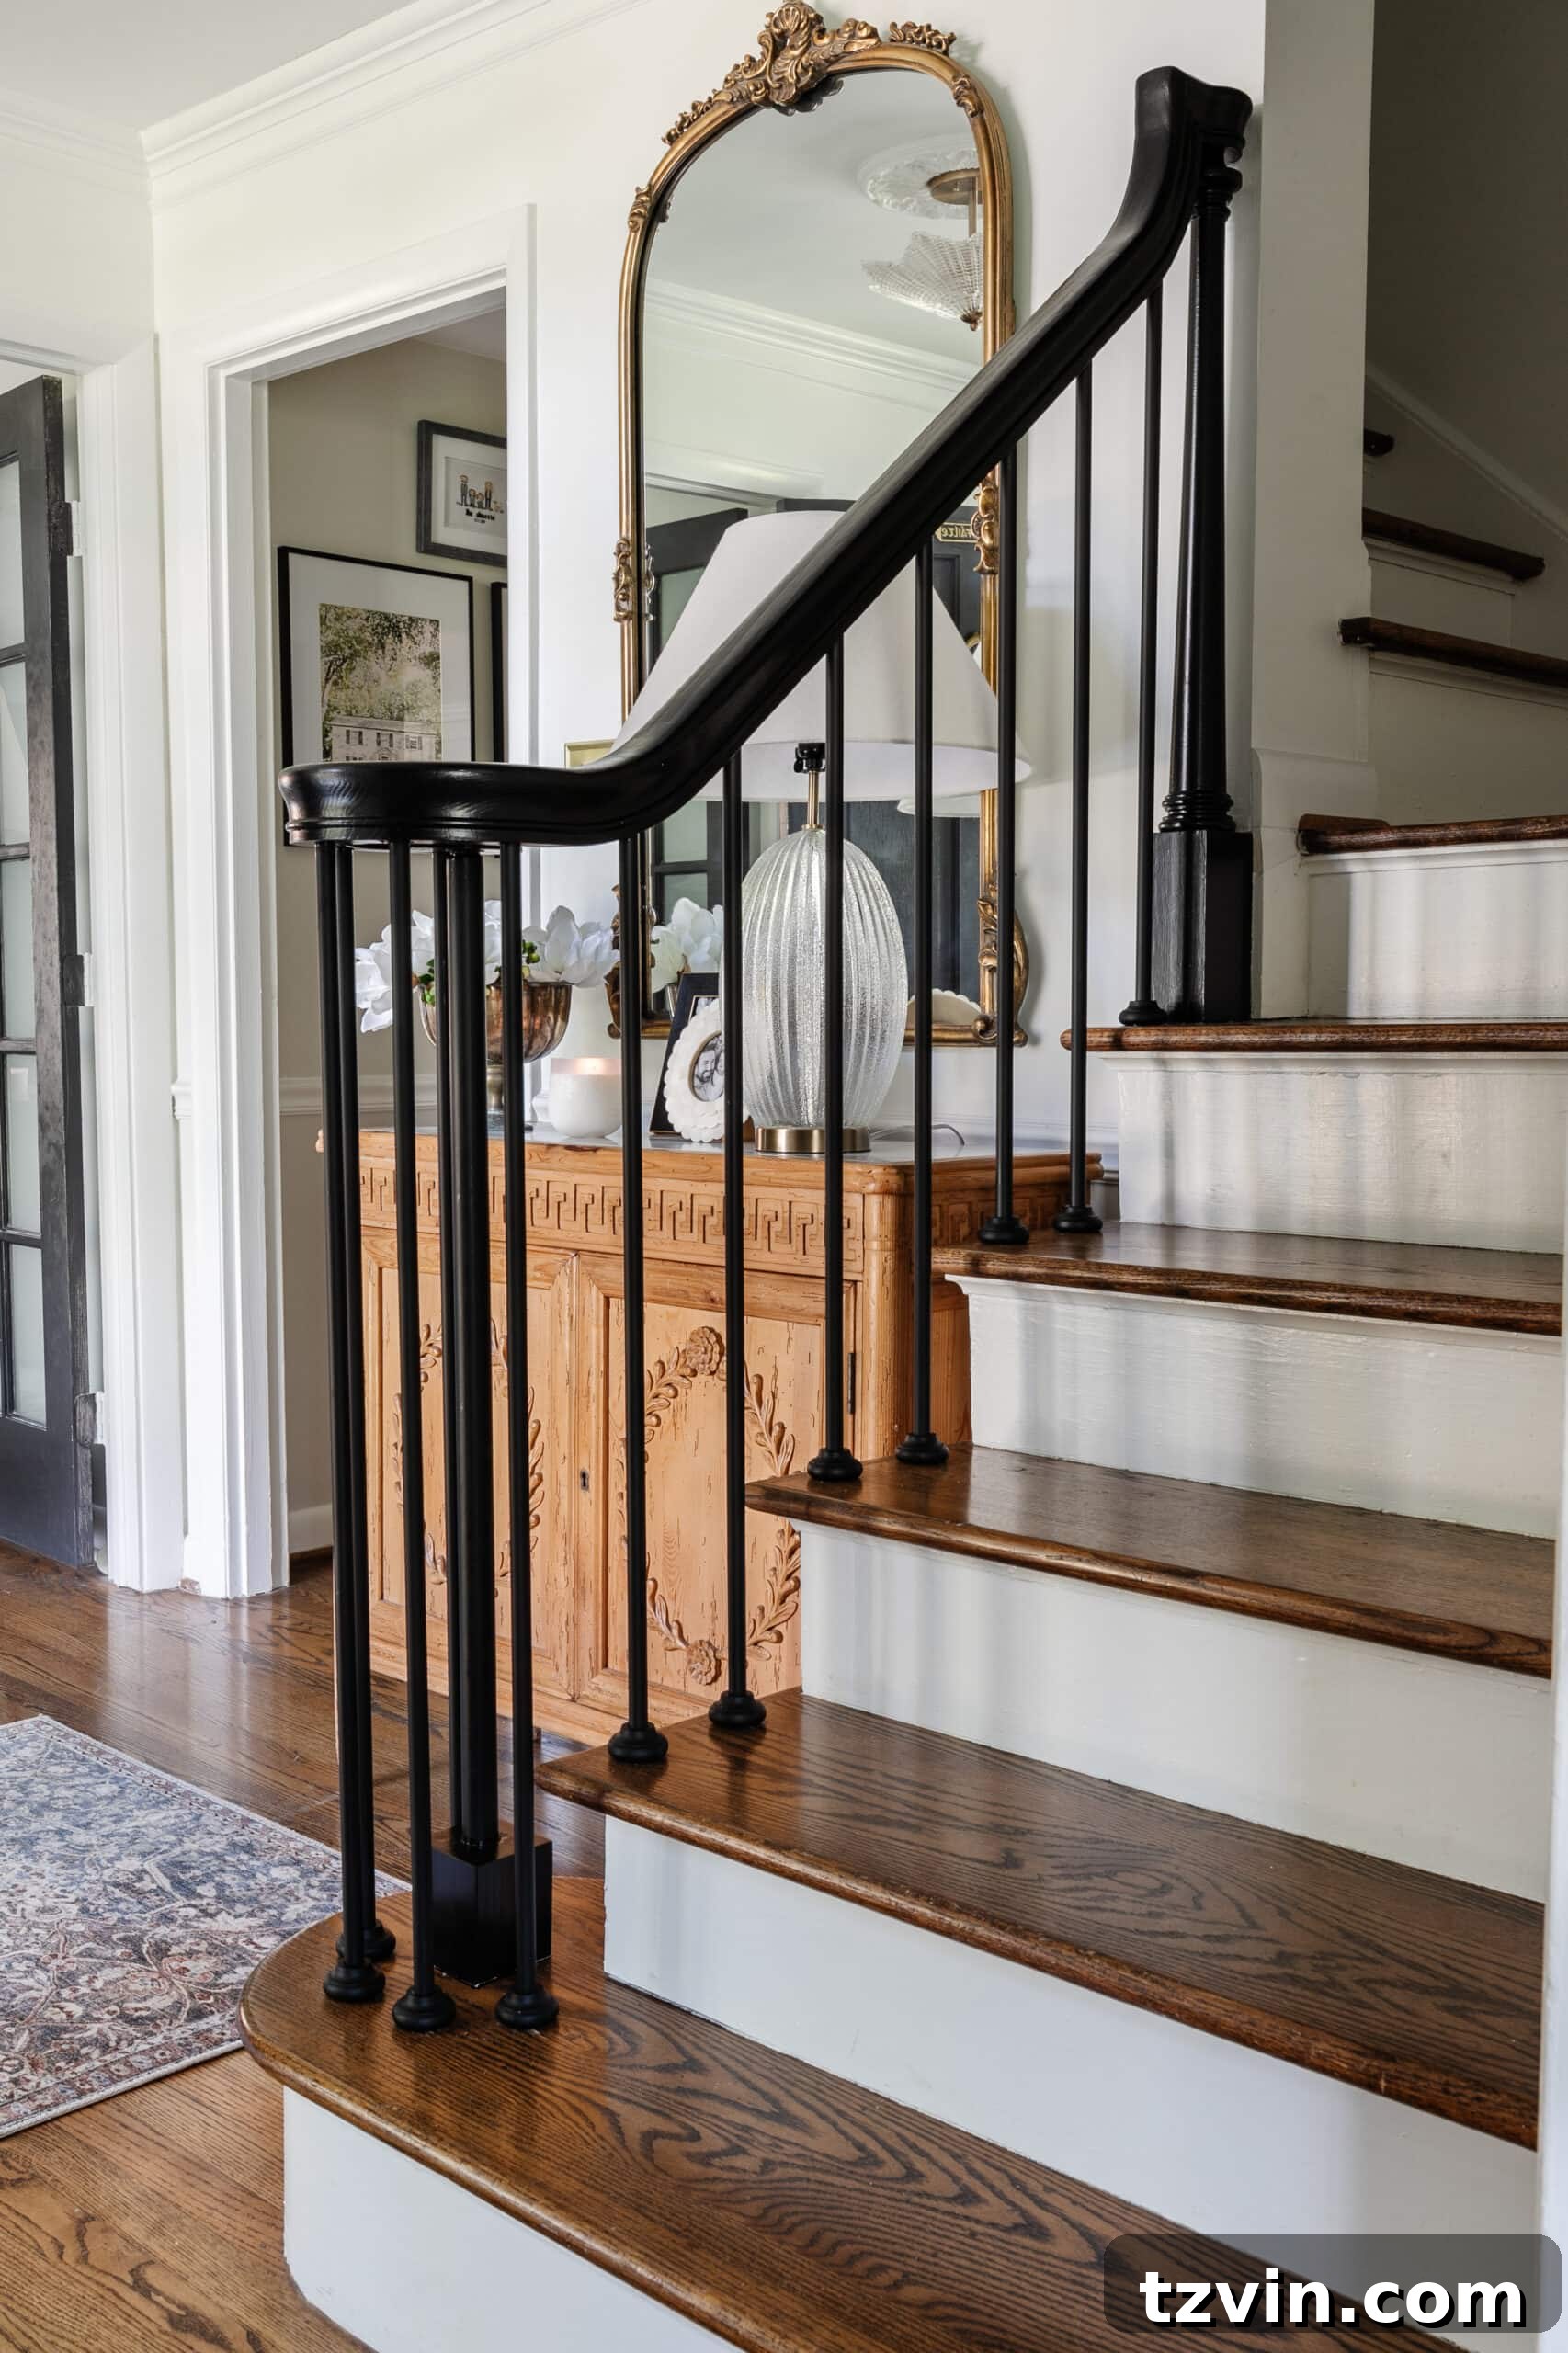
The transformation is truly remarkable! Our staircase now proudly showcases a sleek, updated black stair railing – a perfect fusion of old and new. This project seamlessly blends modern sensibilities with traditional charm, achieving a balanced aesthetic that aligns perfectly with our home’s overall style, as those familiar with our previous projects know. The visual impact of this half-new railing is undeniable, creating a focal point that is both elegant and inviting.
Looking ahead, I envision further enhancements. A stair runner would be a beautiful and practical addition, providing both a soft texture underfoot and a reduction in noise on the bare wooden treads. Moreover, it would introduce another layer of visual interest to the staircase. I’ve also been contemplating painting the stair risers a contrasting shade, adding depth and character. What are your thoughts on these potential next steps?
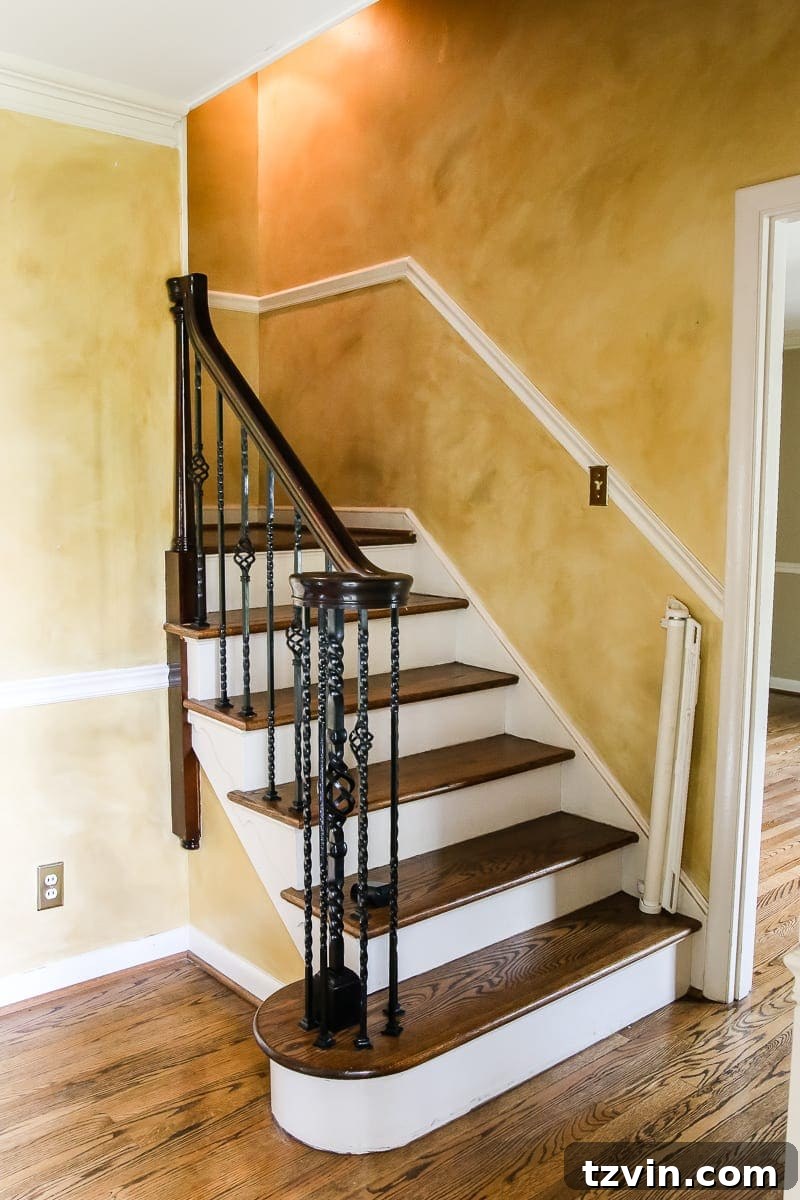
Regardless of future additions, I am continuously amazed by the dramatic difference six years of thoughtful design and dedicated DIY efforts have made in our foyer and staircase. This transformation is a powerful testament to the impact of focused vision and hard work. Never underestimate the transformative power of a fresh coat of paint and unwavering willpower. Beyond the structural changes, the addition of a cherished Facebook Marketplace console and our personalized family gallery wall have woven a layer of warmth and character, completing the inviting ambiance of our entryway.
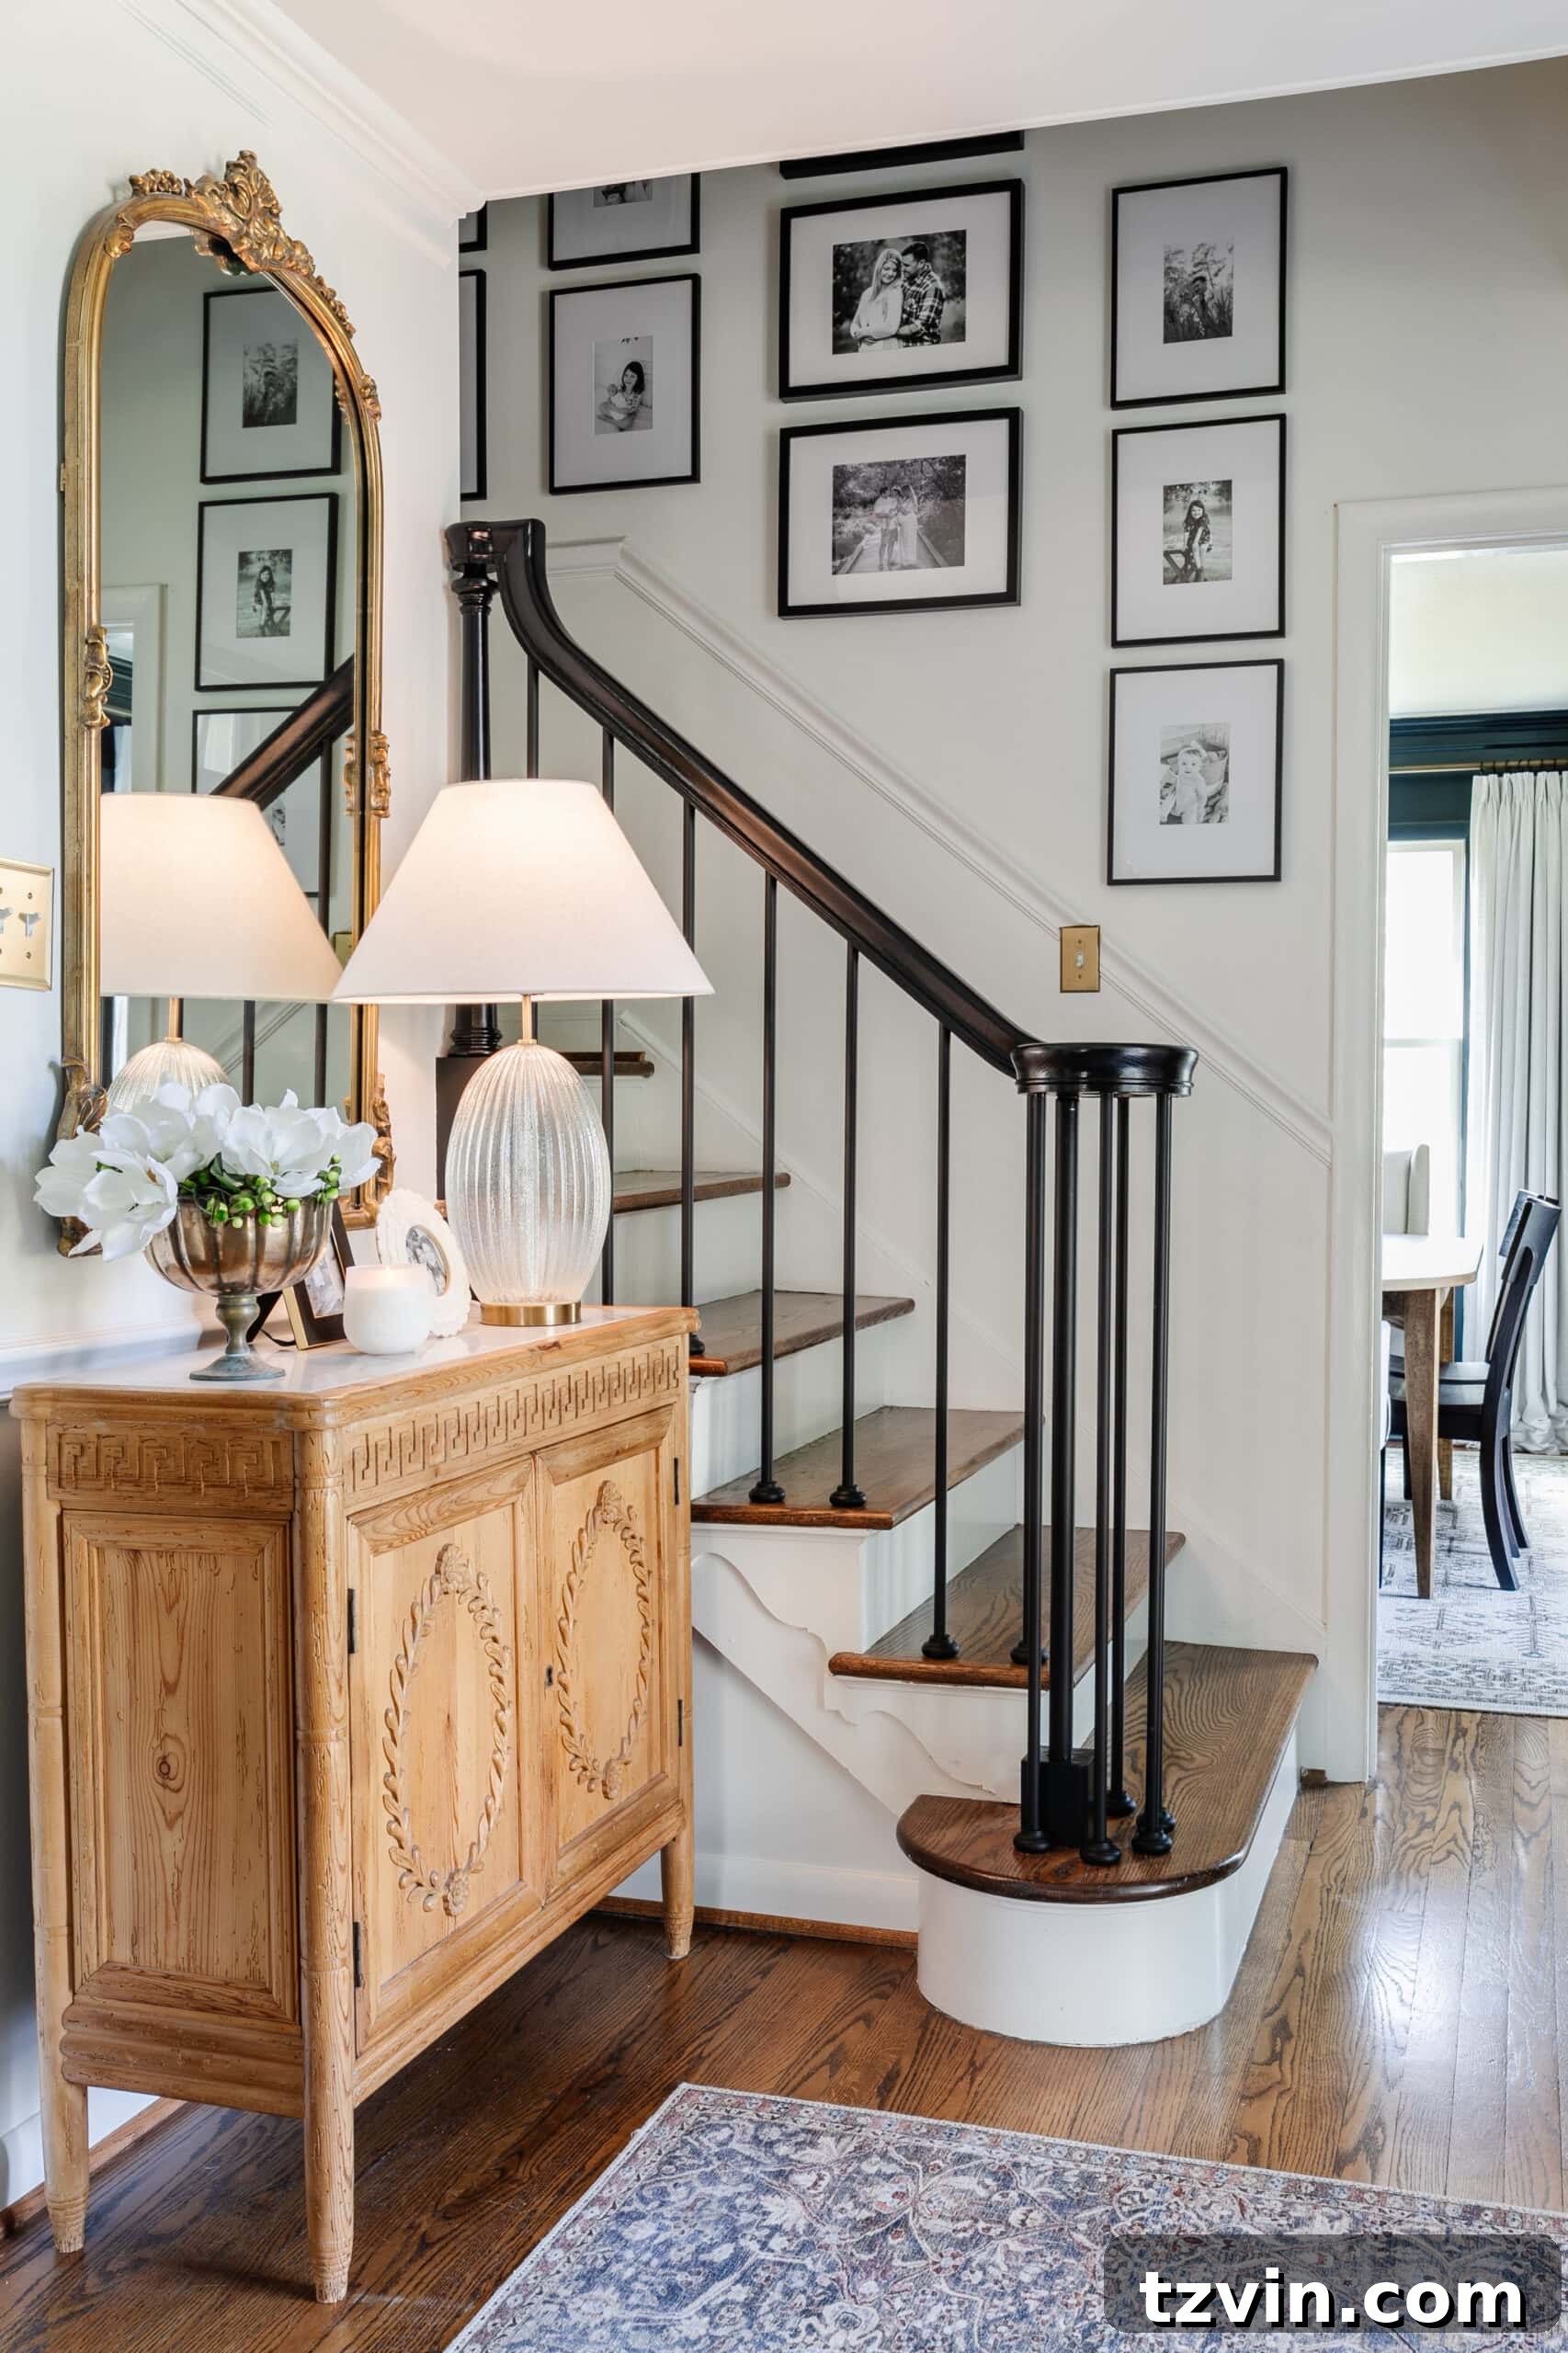
Budget-Friendly Staircase Renovation: How Much Does It Cost to Replace Stair Spindles?
One of the most appealing aspects of this DIY project is its incredible cost-effectiveness. Replacing stair spindles yourself is significantly more budget-friendly than engaging a professional contractor, making this an absolutely achievable DIY endeavor for many homeowners. We were able to further optimize our budget by strategically utilizing tool rental services. By renting the high-powered reciprocating saw needed for the wrought iron removal, we avoided the expense of purchasing a specialty tool that would see limited use beyond this project.
The total cost for our staircase makeover, encompassing tool rental fees, necessary saw blades, high-quality primer, durable paint, construction adhesives, the new balusters, a newel post, and various disposable materials, amounted to approximately $383. This demonstrates a substantial saving compared to professional installation, which could easily range from $2,000 to $5,000 or more, depending on the complexity and materials.
Of course, the final cost will vary based on several factors. The length and complexity of your stair railing will directly impact the number of balusters required, thus affecting material costs. Additionally, if your project involves replacing the entire handrail in addition to the balusters and newel post, the overall expense would naturally increase. However, by focusing on key components and leveraging smart strategies like tool rental, a stunning staircase transformation remains well within reach for the budget-conscious DIYer.
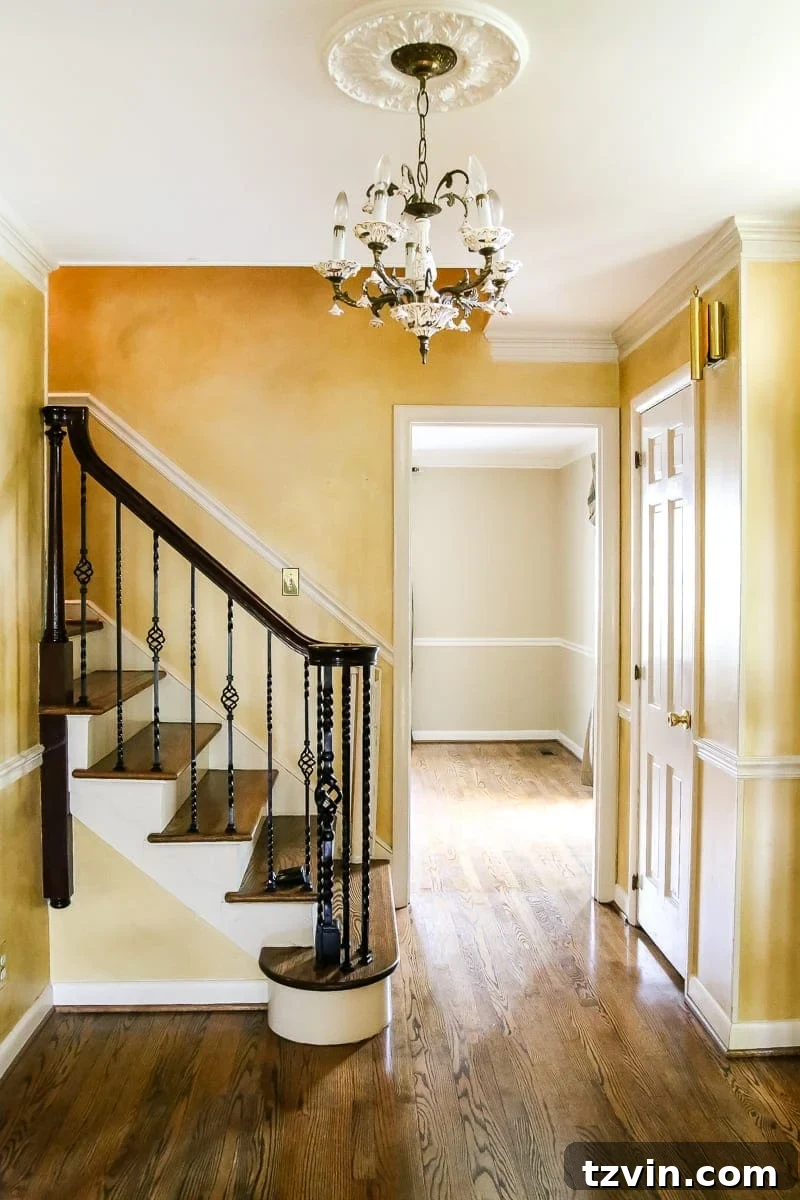
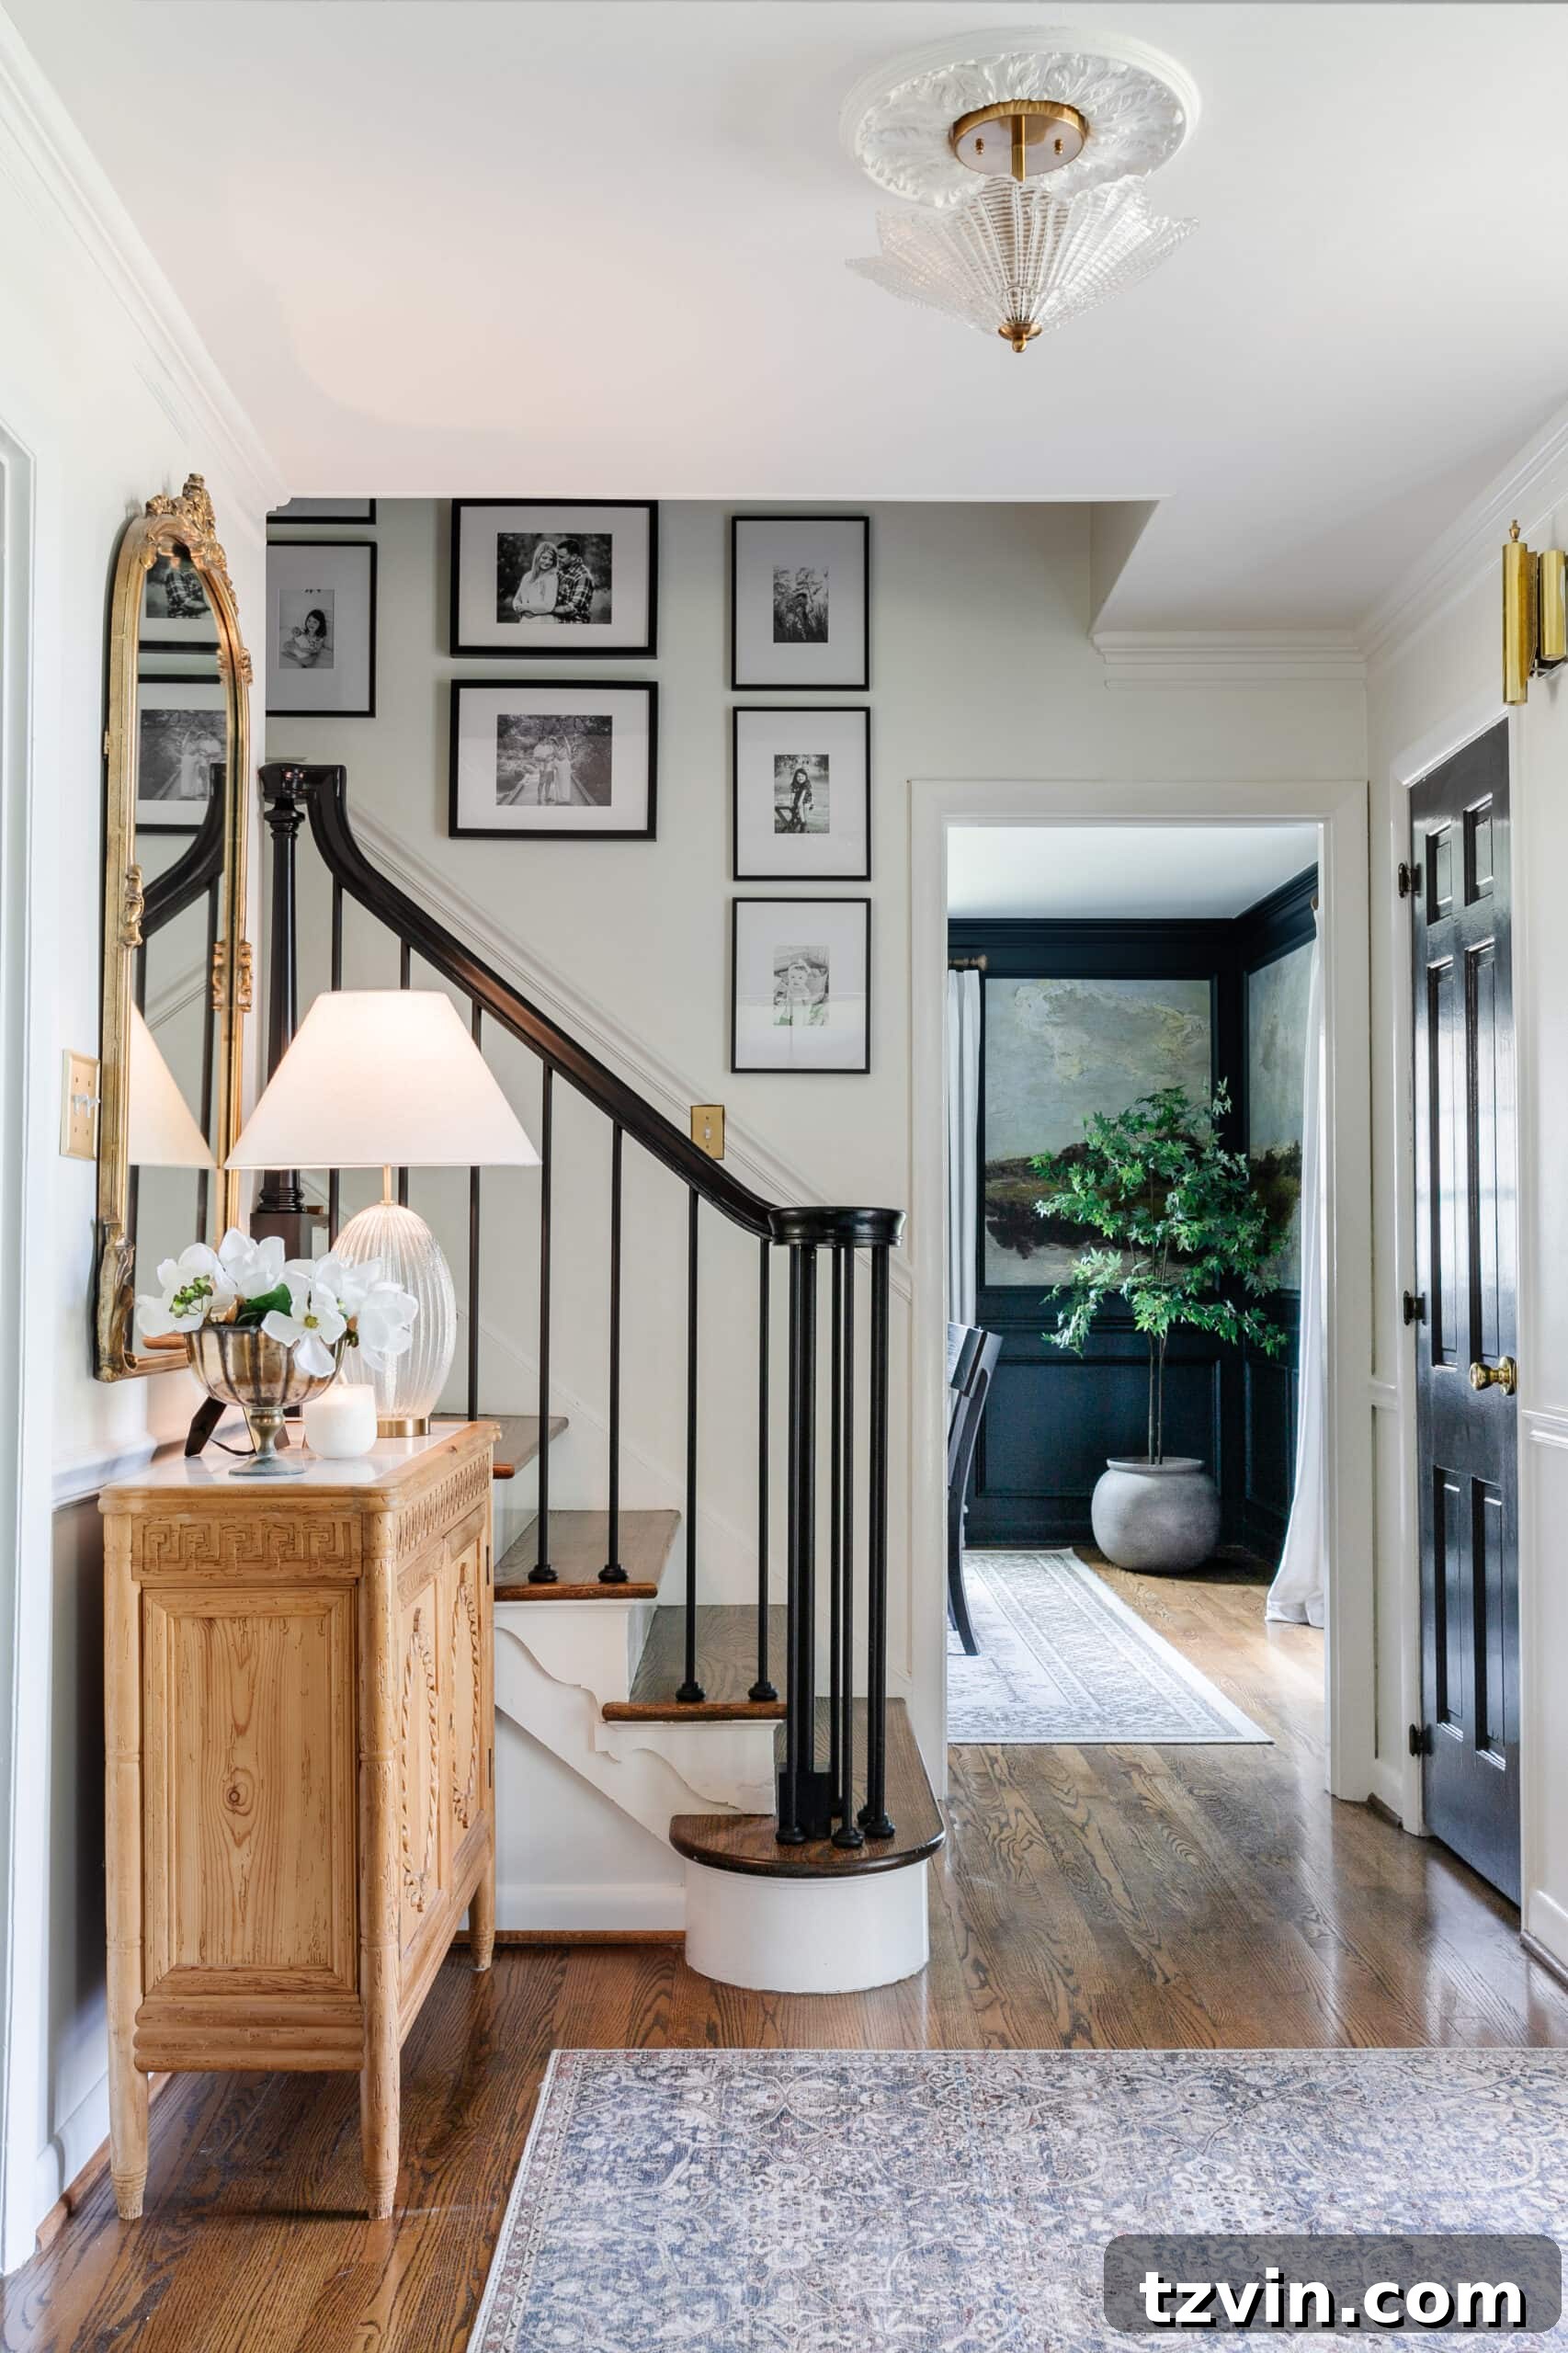
So there you have it – the almost-official before and after of our staircase. While the journey of home improvement is continuous (perhaps a stair runner, a ceiling treatment, or a vintage wool rug are still on the horizon!), the core stair components are beautifully complete. Ultimately, there’s never a truly “final after” in a beloved home, because the process of creation and evolution is often the most rewarding part. But this stair railing? It’s genuinely the “after” I’ve envisioned and dreamed of for six wonderful years.
Explore More DIY Home Improvement Ideas
- How to Install a Herringbone LVP Floating Floor
- DIY Limewashed Brick Fireplace
- DIY Built-Ins and Window Seat Using Stock Kitchen Cabinets
Frequently Asked Questions About Stair Balusters
Balusters and spindles are terms often used interchangeably, and in modern usage, they essentially refer to the same vertical supports that fill the space between the handrail and the treads or floor. Historically, a baluster was typically thicker and more ornate, resting on a footing like a step or a floor. A spindle, on the other hand, was generally thinner and more often supported by a horizontal rail underneath.
Building codes often dictate the maximum distance between stair balusters for safety. The general rule of thumb, and a common code requirement, is that a 4-inch sphere (or smaller) should not be able to pass through the gap between two balusters. This usually translates to spacing balusters approximately every 4 inches, or roughly three balusters per linear foot of railing.
Standard sizes for stair balusters can vary by material and style. For square wood balusters, common dimensions typically include 1 1/4 inches, 1 3/4 inches, and 1 5/8 inches. Metal balusters often come in sizes like 1/2 inch, 5/8 inch, or 3/4 inch square or round. Always check with your local building codes and the manufacturer’s specifications when selecting baluster sizes.