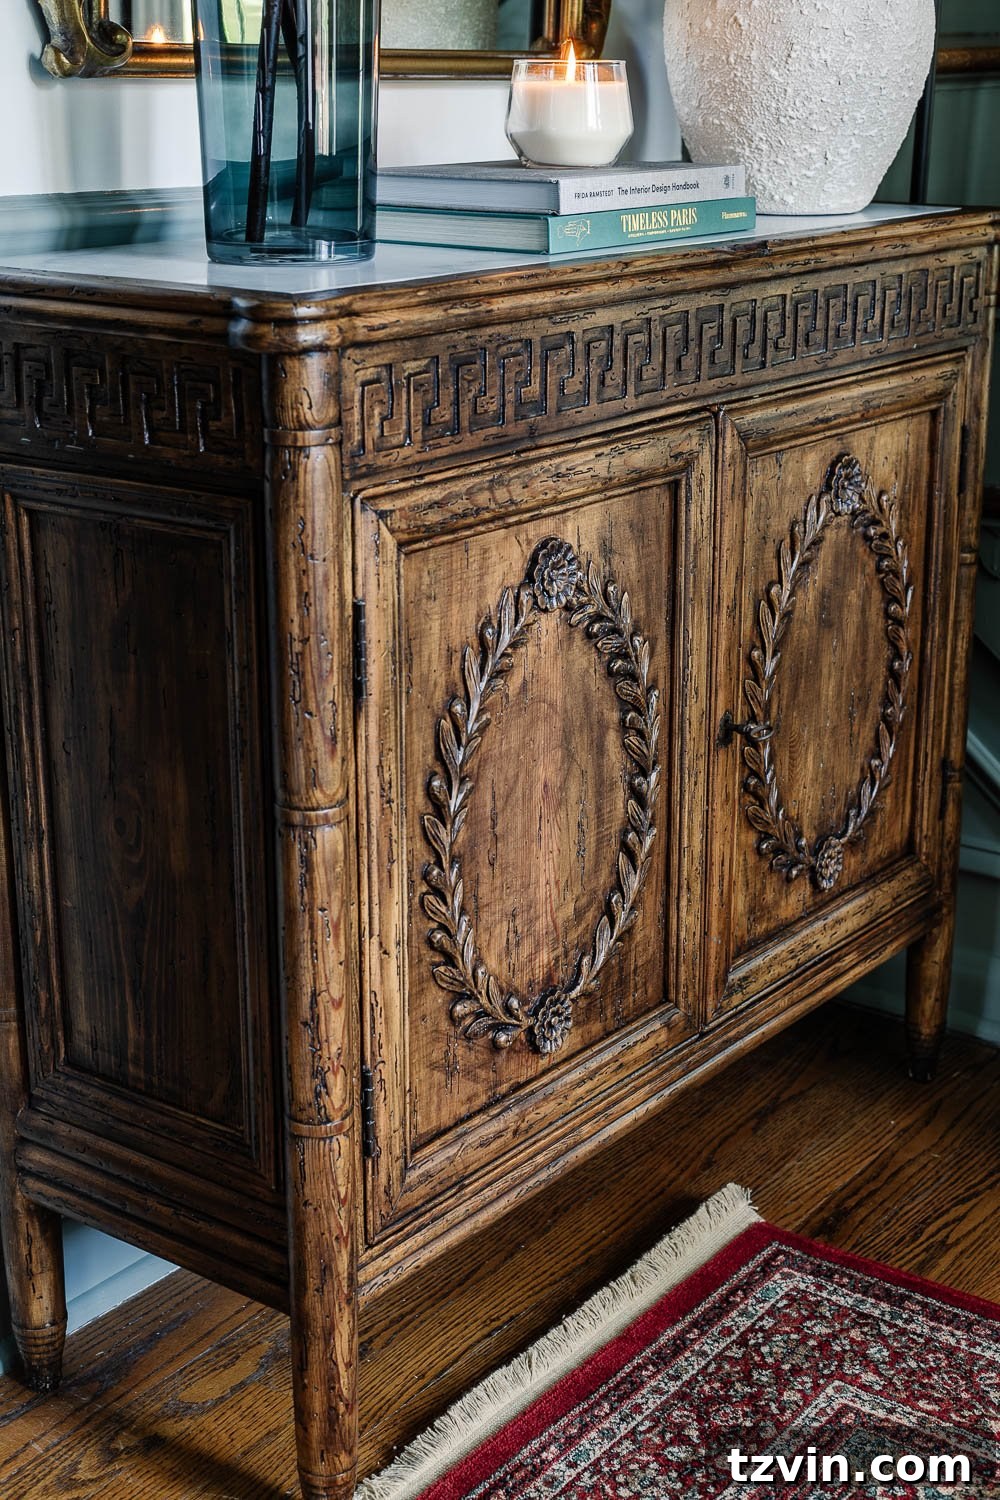
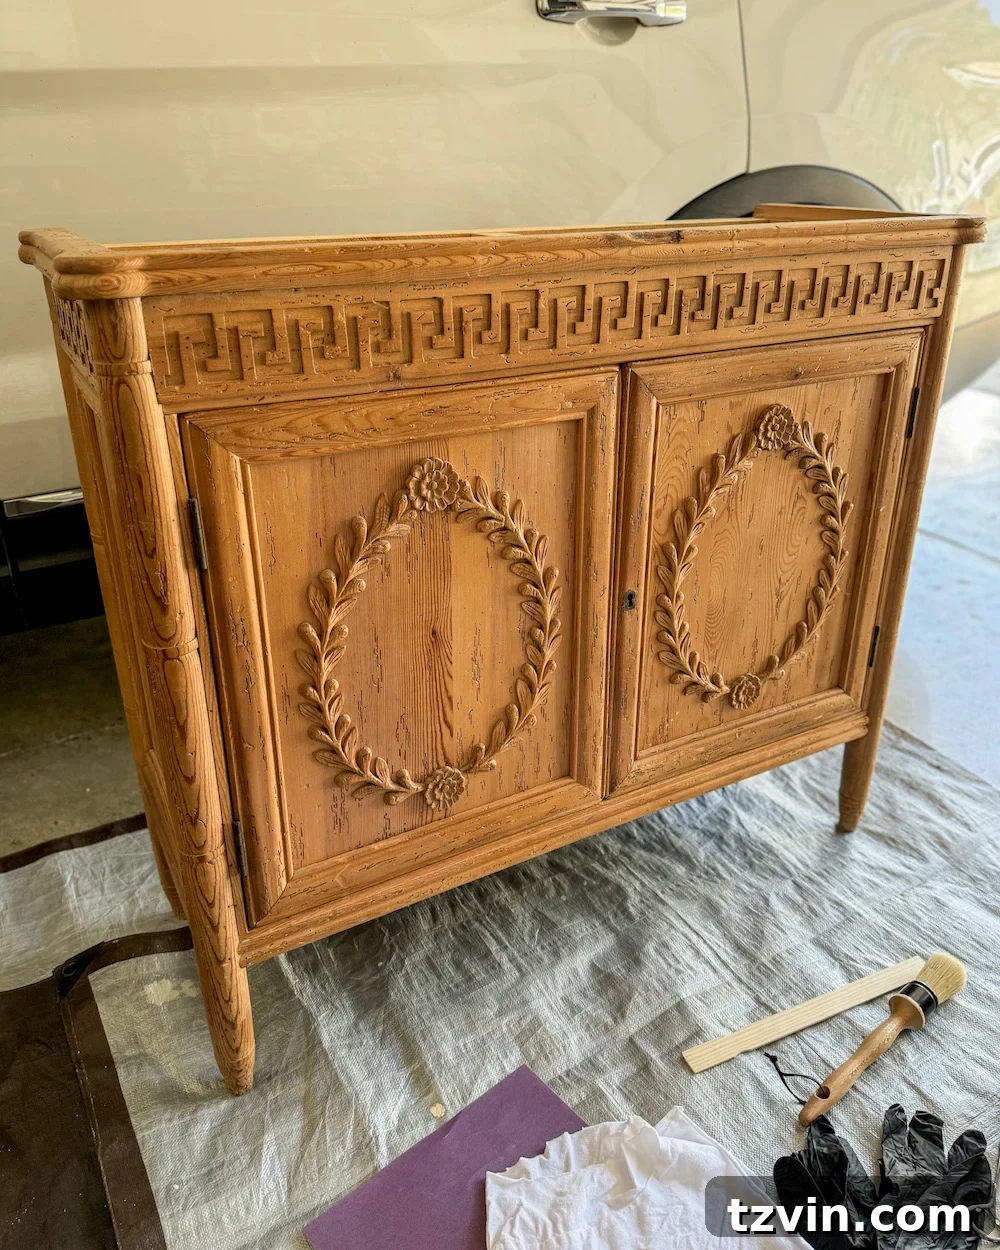
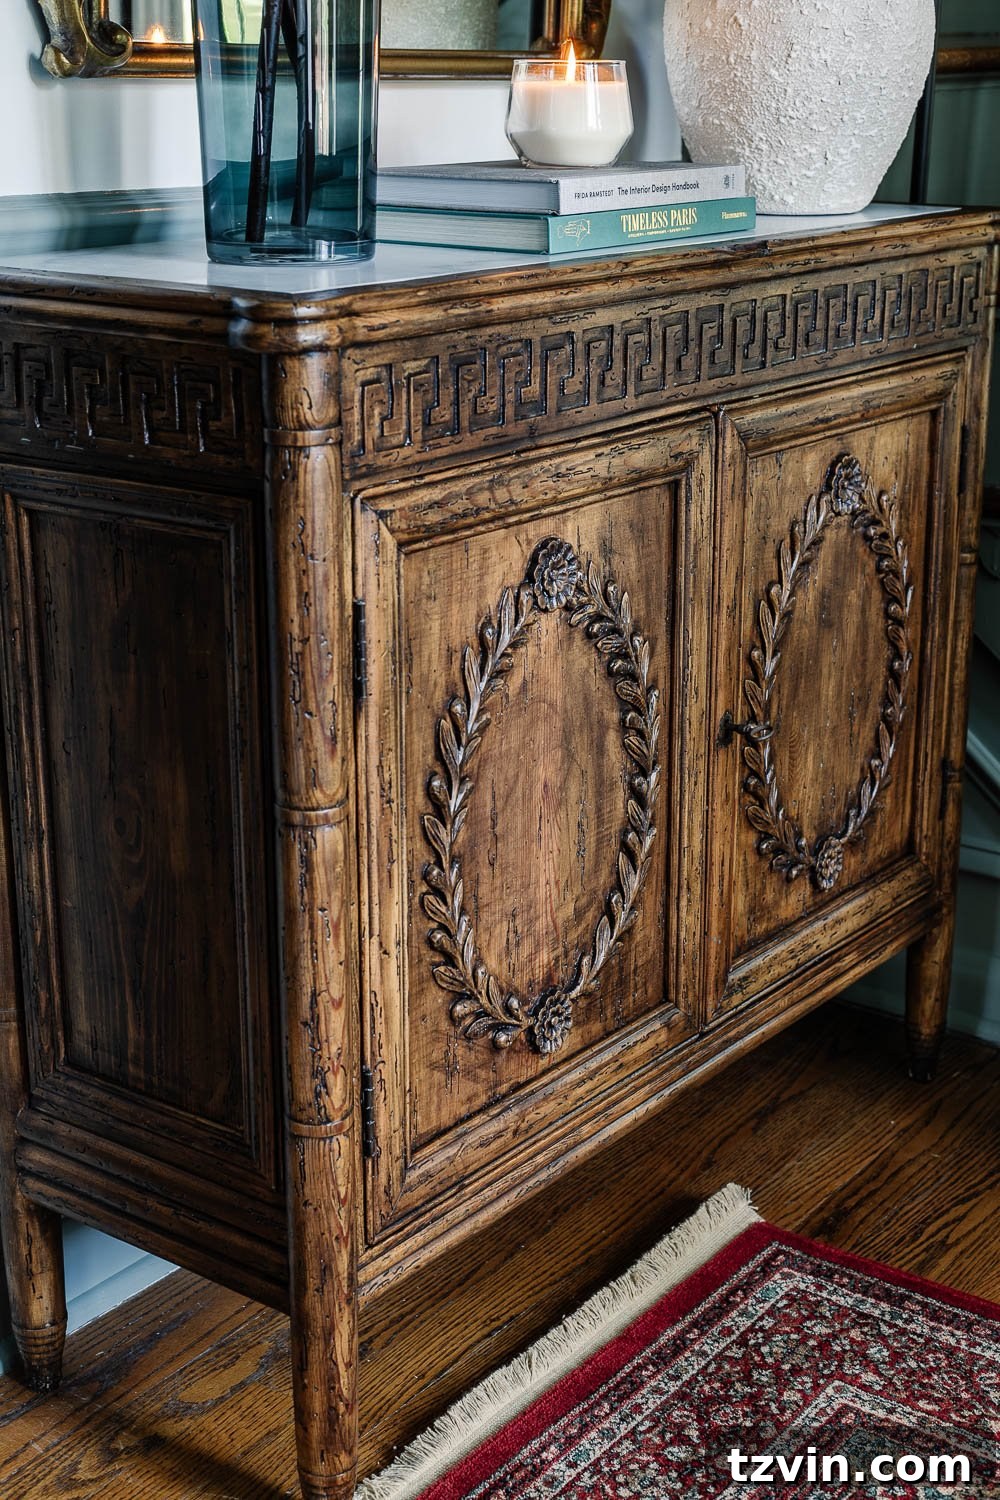
I finally did it. For years, I had stared at our foyer cabinet, knowing it needed a transformation, yet I hesitated. I don’t know why it took me so long to consider this simple furniture makeover, but now that I’ve applied a fresh coat of gel stain, it’s abundantly clear this was its destiny all along. The original, almost offensively orange-y stain color truly had no business gracing such a beautiful piece of furniture. It screamed “outdated,” and frankly, it never quite fit the aesthetic I envisioned for our entryway.
The difference is astounding. What was once a vibrant, somewhat jarring orange hue has now been transformed into a sophisticated, rich tone that perfectly complements our home. This simple change has elevated the entire space, making the cabinet feel like a bespoke piece rather than just a functional item. This isn’t just about changing a color; it’s about unlocking the true potential of a beloved piece and making it shine. If you’ve been contemplating a similar project for your own furniture, let this serve as your sign!
Related: How to Find the Best Furniture Deals on Facebook Marketplace
I initially discovered this gorgeous cabinet a few years back, scoring it for an absolute steal on Facebook Marketplace. It was originally a high-end piece, retailing for over $1,000 from Horchow, which made my find even sweeter. Despite its incredible quality, the existing orange stain always held me back from loving it fully. I was genuinely terrified to change the stain, fearing I might ruin such a valuable piece.
My past experiences with furniture refinishing were, to put it mildly, nightmarish. I’ve spent countless hours meticulously stripping off old stain and varnish, a process that was not only incredibly lengthy but also notoriously messy, leaving my workspace covered in chemicals and sticky residue. To sidestep the harshness of wood stripper, I even resorted to sanding off old finishes for hours on end, generating clouds of dust and demanding immense physical effort. All that time, mess, and sheer energy, just to achieve a new stain color!
However, discovering gel stain has been a complete revelation and an absolute game-changer for my DIY furniture projects. It is, without a doubt, your best friend when it comes to transforming wood pieces. This incredible product makes you wonder why you ever even considered a can of paint stripper or spent endless hours sanding in the past. Gel stain offers a simple, effective, and far less strenuous alternative, delivering professional-looking results with significantly less effort and mess.
Now, seeing this wood cabinet in its new, rich, deep coffee tone, it truly feels as if this was the color it was always meant to be. The transformation is so complete and natural, I’m utterly in love with the result! It blends seamlessly into our decor, providing a sophisticated anchor for our foyer. This project has not only revitalized a beautiful piece of furniture but also rekindled my passion for DIY, proving that a stunning makeover doesn’t have to be a daunting task.
Related: How to Remove Scratches from Wood Furniture in Minutes
Effortless Furniture Revitalization: How to Apply Gel Stain Over Old Stain on Furniture or Cabinets
If you’ve ever dreamt of updating the wood tone of your cherished furniture pieces or even your kitchen cabinets without the arduous process of stripping and heavy sanding, gel stain is the answer. This method stands out as by far the easiest and most efficient way to achieve a fresh new look by staining directly over an existing finish. Its versatility even extends to applying stain over painted surfaces, offering remarkable flexibility for your home decor projects. Before we dive into the step-by-step guide, let’s ensure you’re equipped with essential knowledge to guarantee a successful and stunning transformation.
Essential Insights: What to Know Before You Begin Your Furniture Staining Project
Embarking on a furniture staining project with gel stain can be incredibly rewarding, but understanding a few fundamental principles beforehand will ensure your success and satisfaction. Gel stain behaves differently than traditional liquid stains or paints, and respecting these nuances will yield the best results.
- **Dark Over Light Only: The Golden Rule of Gel Stain.** Gel stain is designed to add color and depth, not to lighten an existing finish. Think of it as applying a sheer colored filter. You can successfully apply a darker gel stain over a lighter existing stain, effectively deepening the tone or completely changing the color to a richer hue. However, attempting to apply a lighter gel stain over a darker existing finish will not work; the darker undertone will show through, and the lighter stain will not be visible. If your goal is to achieve a lighter wood tone, the unfortunate reality is that you will have to resort to stripping and completely sanding the furniture down to its bare wood.
- **The Importance of Good Surface Condition.** For gel stain to adhere properly and create a beautiful, uniform finish, the underlying furniture surface must be in good condition. This means avoiding pieces with significant water damage, peeling varnish, or cracking on the surface. Gel stain works by gripping onto the existing finish, and if that finish is compromised, the gel stain will not adhere evenly, leading to an inconsistent and potentially flaky result. Minor imperfections are often disguised well by gel stain, but major structural or finish damage needs to be addressed prior to application.
- **Oil and Water Don’t Mix: Understanding Stain Bases.** This is a critical distinction that can make or break your project. If the existing stain on your furniture is oil-based, you absolutely must apply an oil-based gel stain on top. Similarly, if the existing stain is water-based, you need to use a water-based gel stain. Applying an oil-based stain over a water-based one, or vice-versa, will lead to adhesion problems, an uneven finish, and potentially a sticky, uncured mess. The chemical compositions are incompatible, preventing proper bonding and drying.
How to easily test for oil or water-based stain:
To determine the base of your existing finish, grab a cotton ball and a small amount of rubbing alcohol. Moisten the cotton ball with the alcohol and gently wipe it over an inconspicuous area of the woodwork. Allow the alcohol to evaporate fully. If, after evaporation, you notice that the wood stain appears slightly lighter or some color has transferred to the cotton ball, it indicates that the existing stain is water-based. Oil-based stains, on the other hand, will show no reaction or change in color when exposed to alcohol, confirming their oil-based nature. This quick test saves you from potential compatibility issues down the line.
Pro Tip: Always test your chosen gel stain color in an inconspicuous area, such as the back of a leg or an inside cabinet door, before committing to the entire piece. This allows you to confirm the color and adhesion without risking your main project.
Essential Supplies for Your Gel Stain Furniture Makeover
Gathering the right tools and materials before you begin will make your gel staining process smooth and efficient. Here’s what you’ll need for a successful furniture transformation:
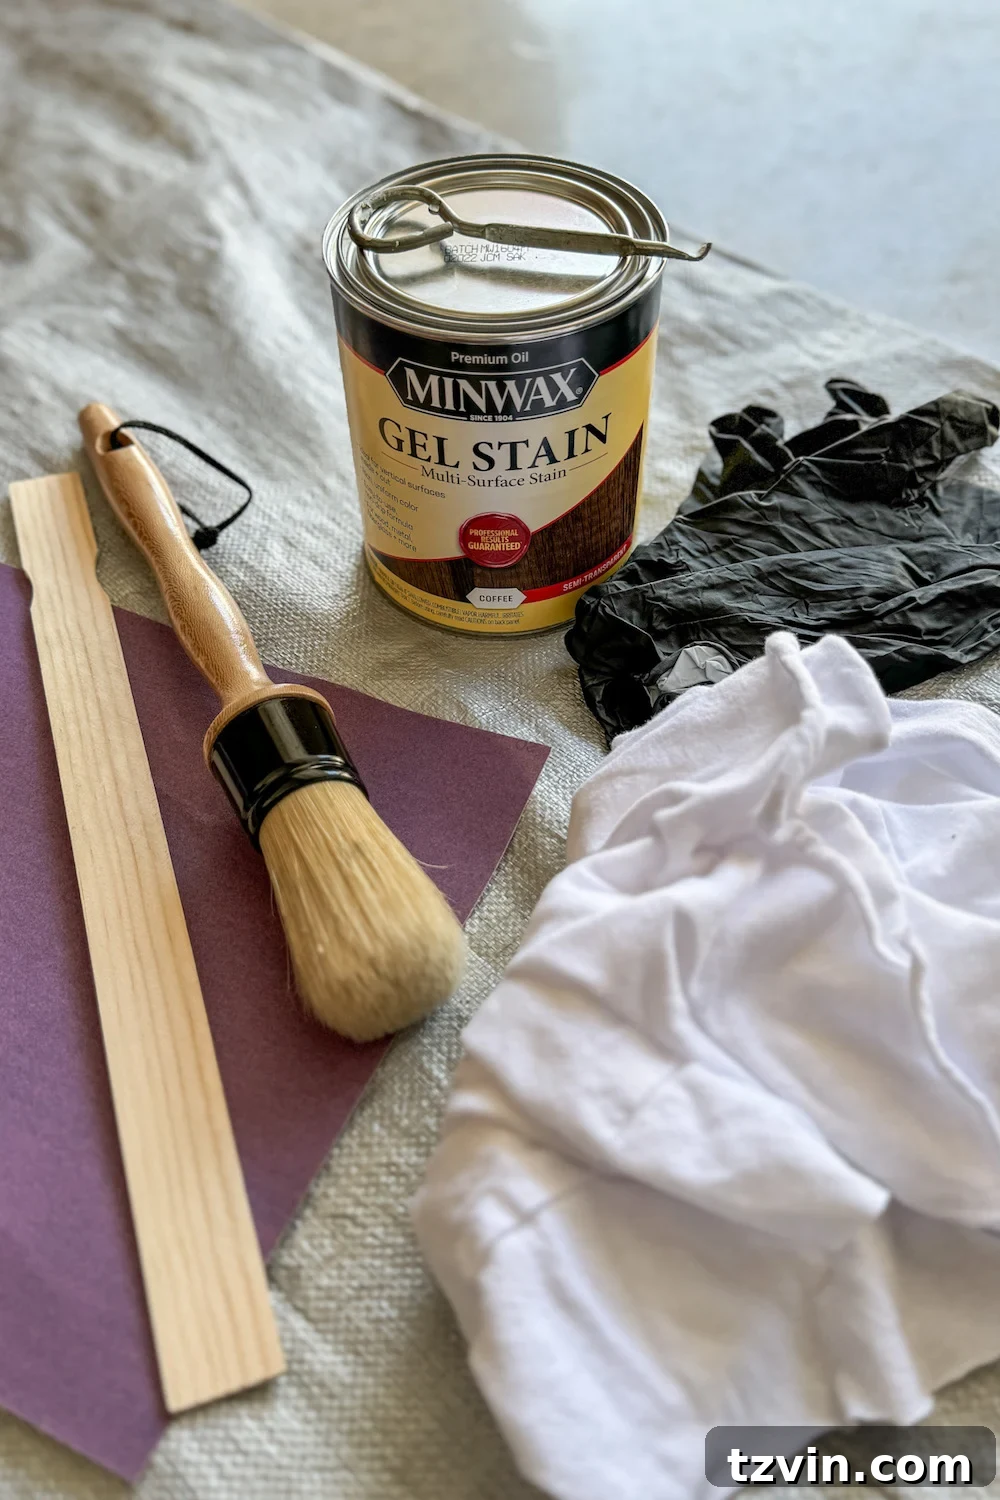
- **Minwax Gel Stain** (I personally achieved this rich, deep look using the color Coffee, which offers incredible depth and warmth.)
- **Simple Green** or **Krud Kutter cleaner** (or any robust all-purpose degreaser) – essential for thoroughly cleaning the surface and removing any grease or grime.
- **Fine-grit sandpaper** (optional but highly recommended, 220-grit or higher) – While this tutorial emphasizes “without sanding” in the traditional sense of removing all old stain, a quick, light scuffing provides crucial “tooth” for the gel stain to adhere optimally, leading to a more durable finish.
- **Clean, lint-free rags** (old cotton t-shirts work wonderfully) – vital for applying and wiping off excess stain, ensuring a smooth, streak-free finish.
- **Good quality staining brush, foam brushes, or staining pad** – Choose what feels most comfortable for application; a good brush provides better control and a smoother initial coat.
- **Chemical-resistant gloves** – always protect your hands from stains and cleaners.
- **Minwax Clear Matte Polycrylic** (or your preferred clear coat) – essential for sealing and protecting your newly stained finish, ensuring longevity.
Related: How to Clean Wood Furniture to Make It Look New
Step 1 – Thoroughly Clean the Furniture Surface
The success of your gel stain project heavily relies on a perfectly clean surface. If your furniture piece has accumulated grease, oil, grime, or even old furniture polish, these contaminants can prevent the gel stain from adhering properly, leading to splotchy or peeling results. Start by spraying the entire surface with a powerful degreaser cleaner like Simple Green, Krud Kutter, or any other robust all-purpose degreaser. Allow it to sit for a minute or two to penetrate the grime, then vigorously wipe the surface clean with a damp cloth. You might be surprised at how much dirt comes off! Repeat this process if necessary until the cloth comes away clean, ensuring every inch of the furniture is free from residue. This crucial step prepares the surface for optimal stain adhesion.
Step 2 – Lightly Scuff Sand for Adhesion
This is where the “without sanding” part of the tutorial needs a slight clarification. While you don’t need to engage in the laborious task of sanding off the entire existing stain down to bare wood (which is common with traditional staining), a light scuff sanding is highly recommended for superior gel stain adhesion. Using fine-grit sandpaper (220-grit or higher), gently and evenly scuff the entire surface of the furniture. The goal isn’t to remove the finish but to create a microscopic texture, or “tooth,” for the gel stain to grip onto. This subtle roughness dramatically improves the bond between the existing finish and the new gel stain, ensuring a more durable and long-lasting result. Pay extra attention to high-traffic areas or spots where the original finish might be slicker.
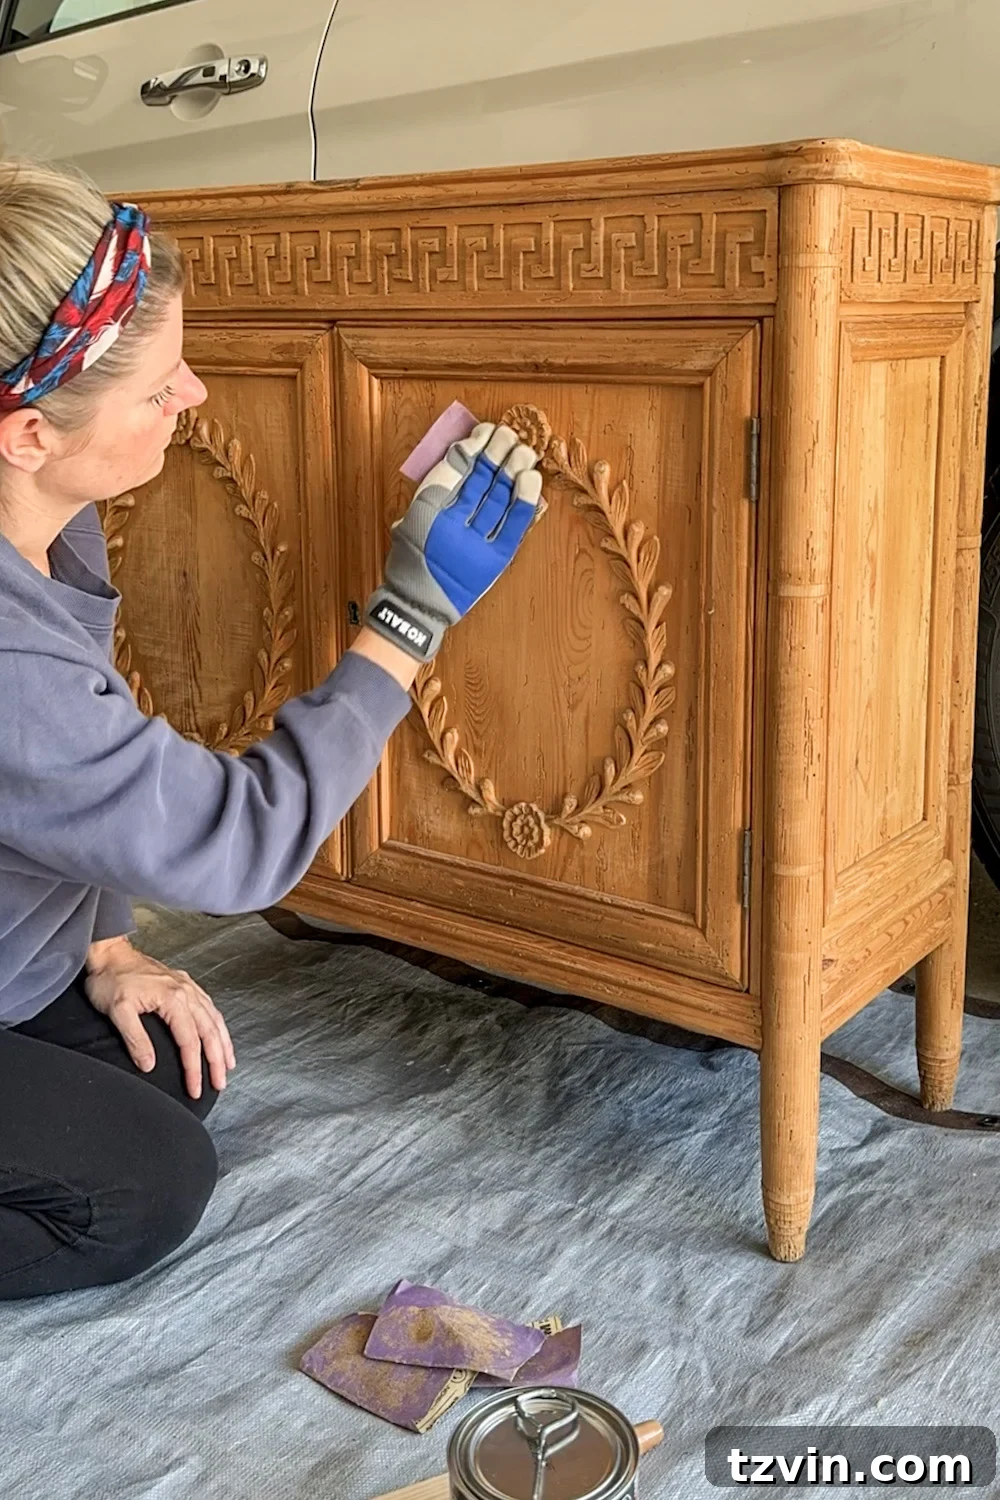
Step 3 – Thoroughly Wipe Away Sanding Dust
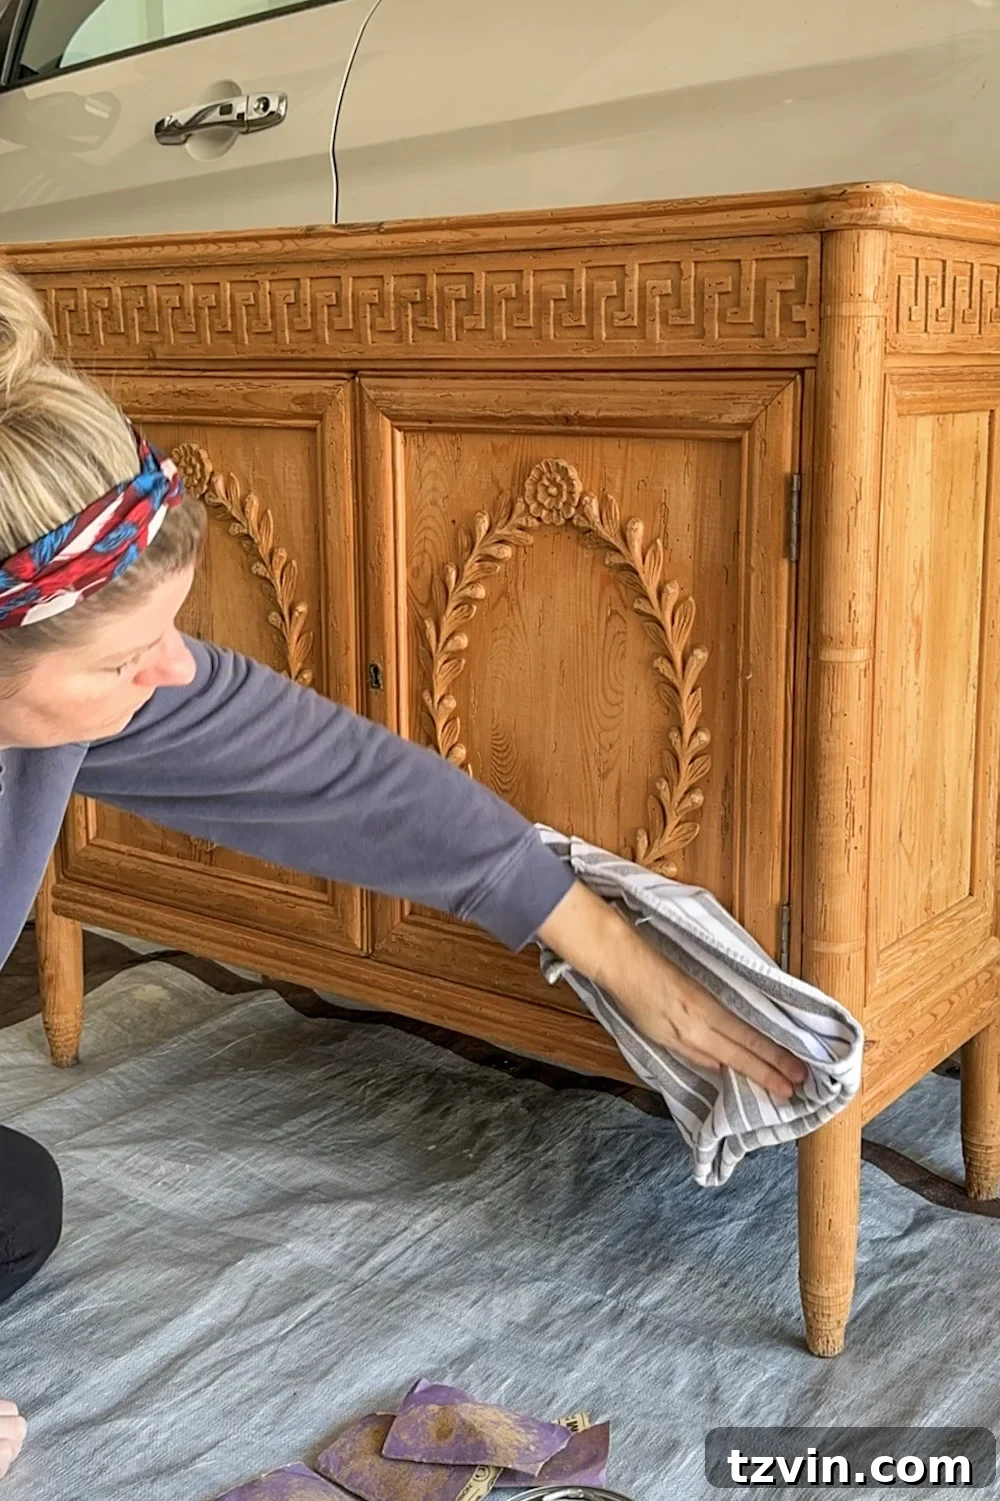
After lightly scuff sanding, your furniture surface will have a fine layer of dust. It’s imperative to remove every trace of this dust before applying the gel stain. Any residual dust will become embedded in the stain, resulting in a gritty, uneven, and less professional-looking finish. Use a clean, dry, lint-free rag or a tack cloth to meticulously wipe away all sanding dust. For intricate areas or carvings, a small brush or a blast of compressed air can be helpful. Ensure the surface is impeccably clean and smooth before moving on, as this step is crucial for achieving a flawless gel stain application.
Related: Best Deck Stain Color for a Neutral Driftwood Look
Step 4 – Apply the First Coat of Gel Stain
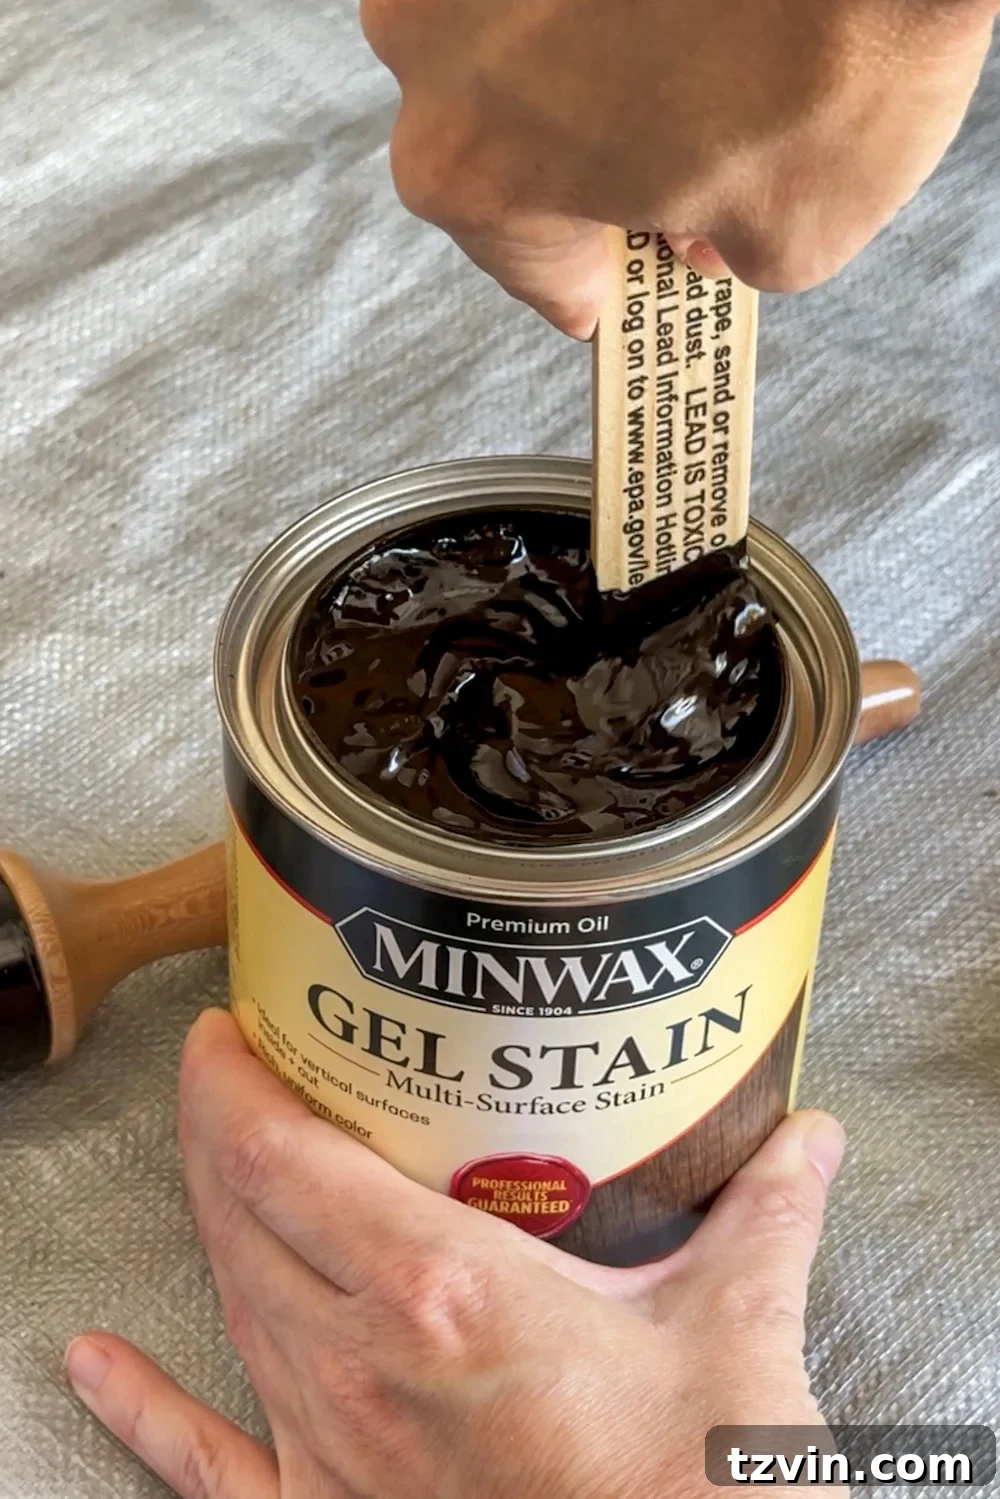
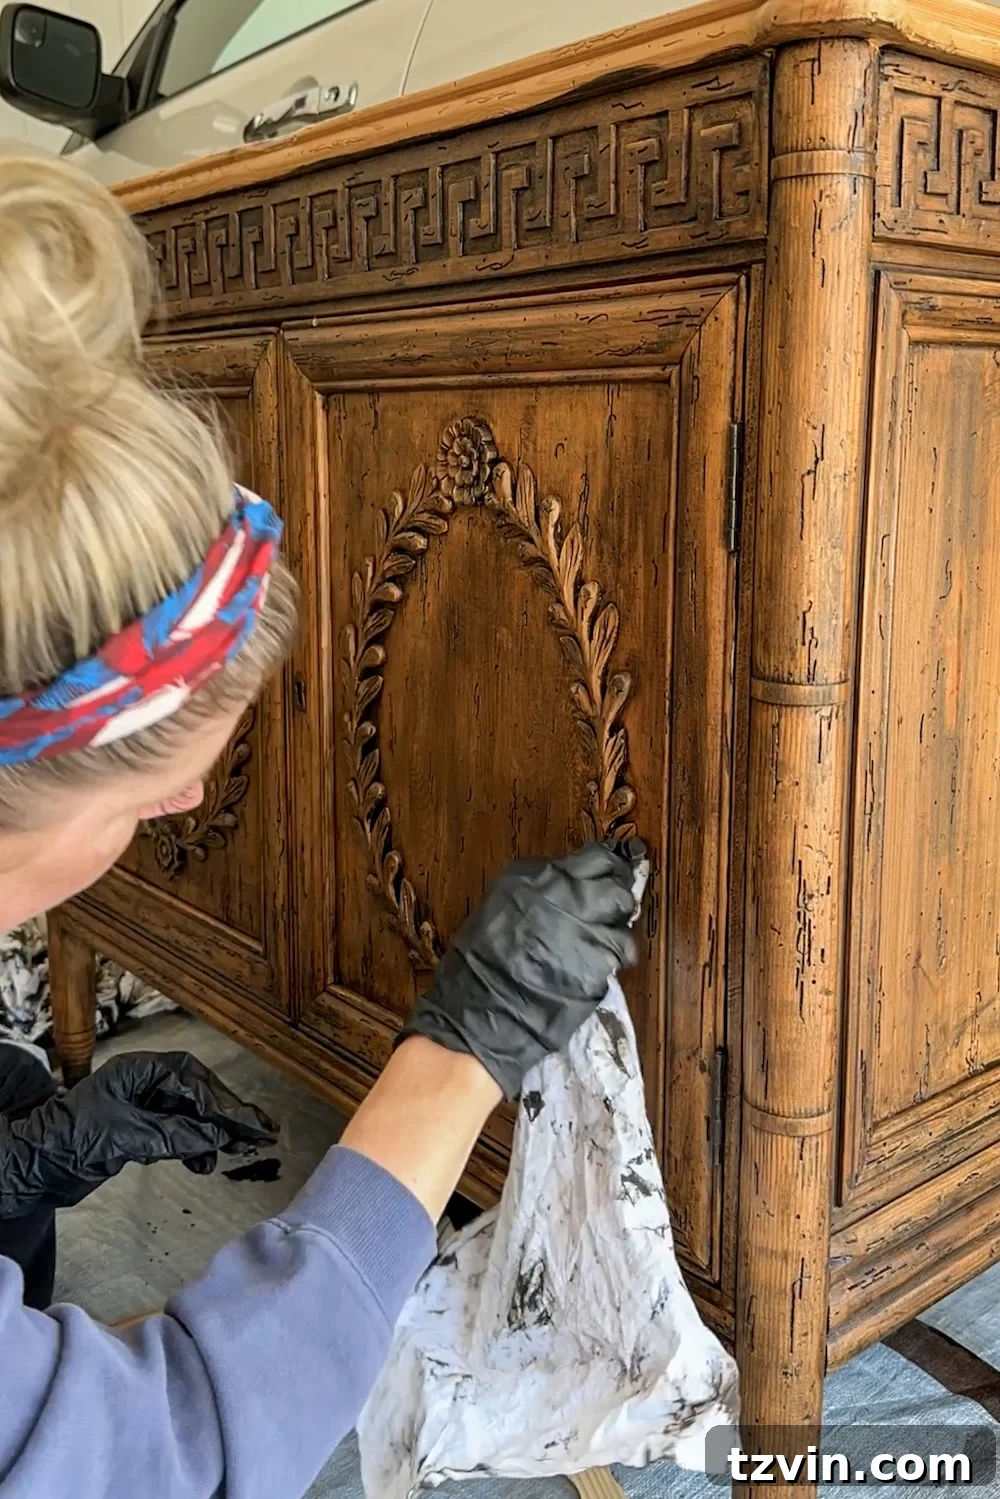
Now comes the exciting part: applying the gel stain! Gel stain has a unique, pudding-like consistency, which is distinct from traditional liquid stains. This thickness is what allows it to sit on top of the existing finish rather than soaking in. Begin by giving the can of gel stain a thorough stir, ensuring any settled pigments are fully incorporated. Once mixed, apply a generous, even coat of the stain to a manageable section of the furniture using your chosen staining brush, foam brush, or staining pad. Work with the grain of the wood for the most natural look. It’s essential to work in sections because gel stain begins to set relatively quickly, and you don’t want it to dry before you have a chance to wipe off the excess. Typically, after waiting 2-3 minutes to allow the stain to penetrate and set slightly, use a clean, lint-free rag to wipe away the excess stain. Use gentle, even pressure and wipe with the grain, ensuring you remove any streaks or uneven build-up. Continue this process, section by section, until the entire piece has received its first coat.
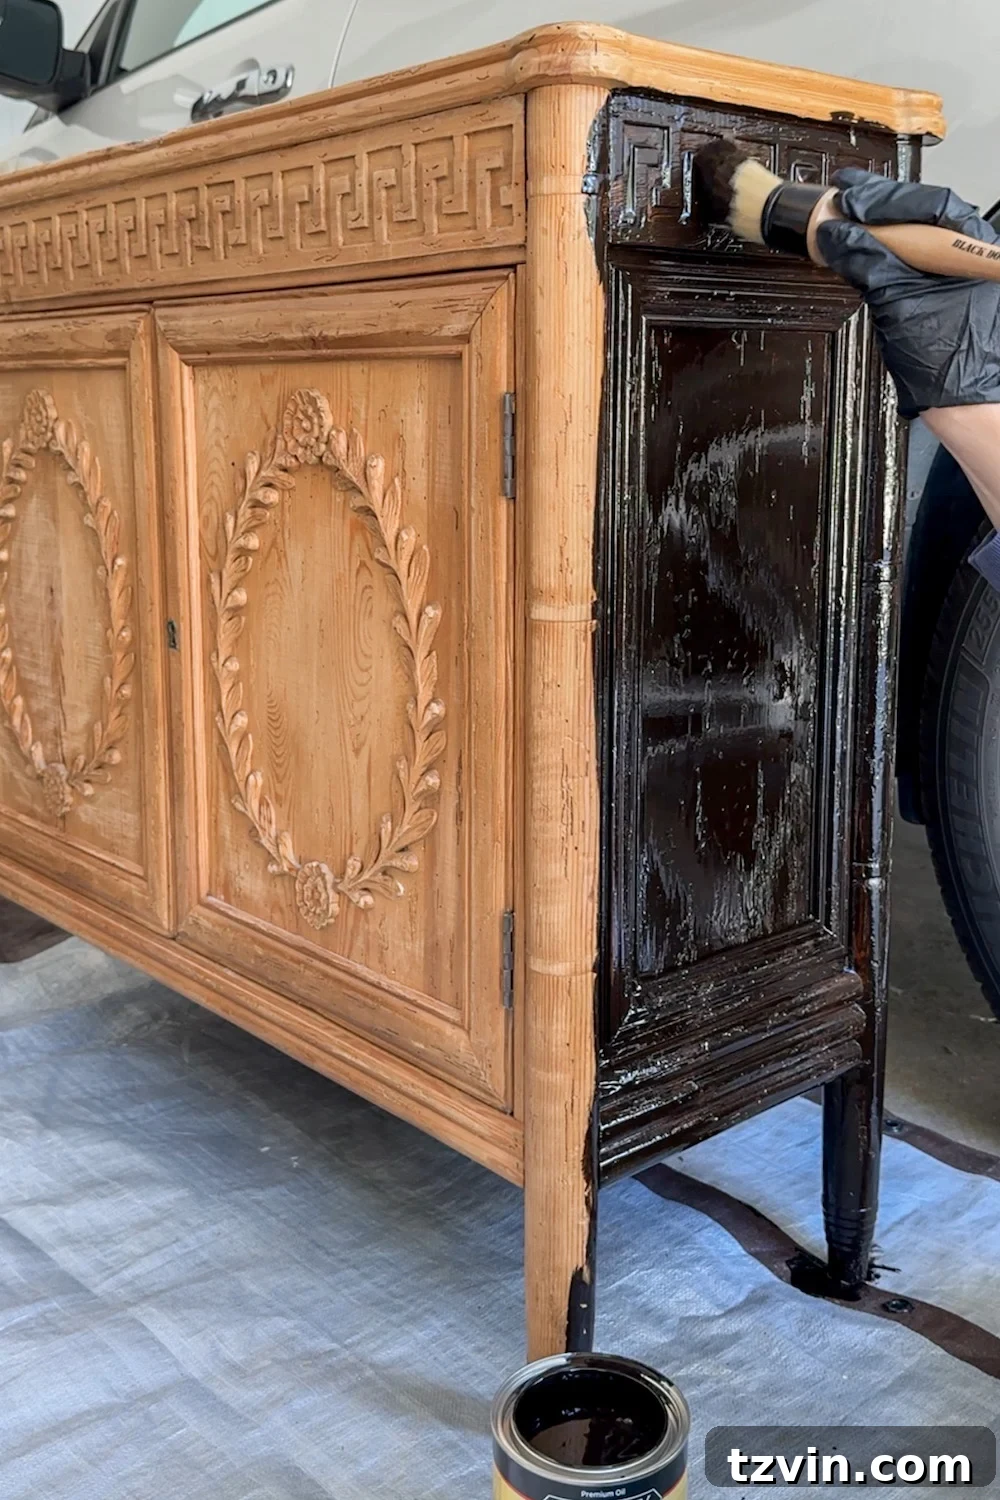
Step 5 – Apply the Second Coat of Gel Stain for Deeper Color
If you’re aiming for a significantly deeper, richer color – as I was with my foyer cabinet – a second coat of gel stain will achieve that desired depth. After the first coat has had ample time to dry, typically 8-10 hours, you can proceed with the second application. Ensure the surface is dry to the touch and there are no tacky spots. Repeat the exact same process from the first coat: apply a generous amount of gel stain to a section, allow it to set for 2-3 minutes, and then wipe away the excess with a clean, lint-free rag, always moving with the grain. This second layer will build upon the first, enhancing the color intensity and evening out any subtle imperfections. You’ll notice the color transform into a truly luxurious tone with this additional application. If you desire even more depth, you can apply a third coat, allowing adequate drying time between each, though two coats are often sufficient for a dramatic change.
Step 6 – Seal the Finish for Durability and Protection
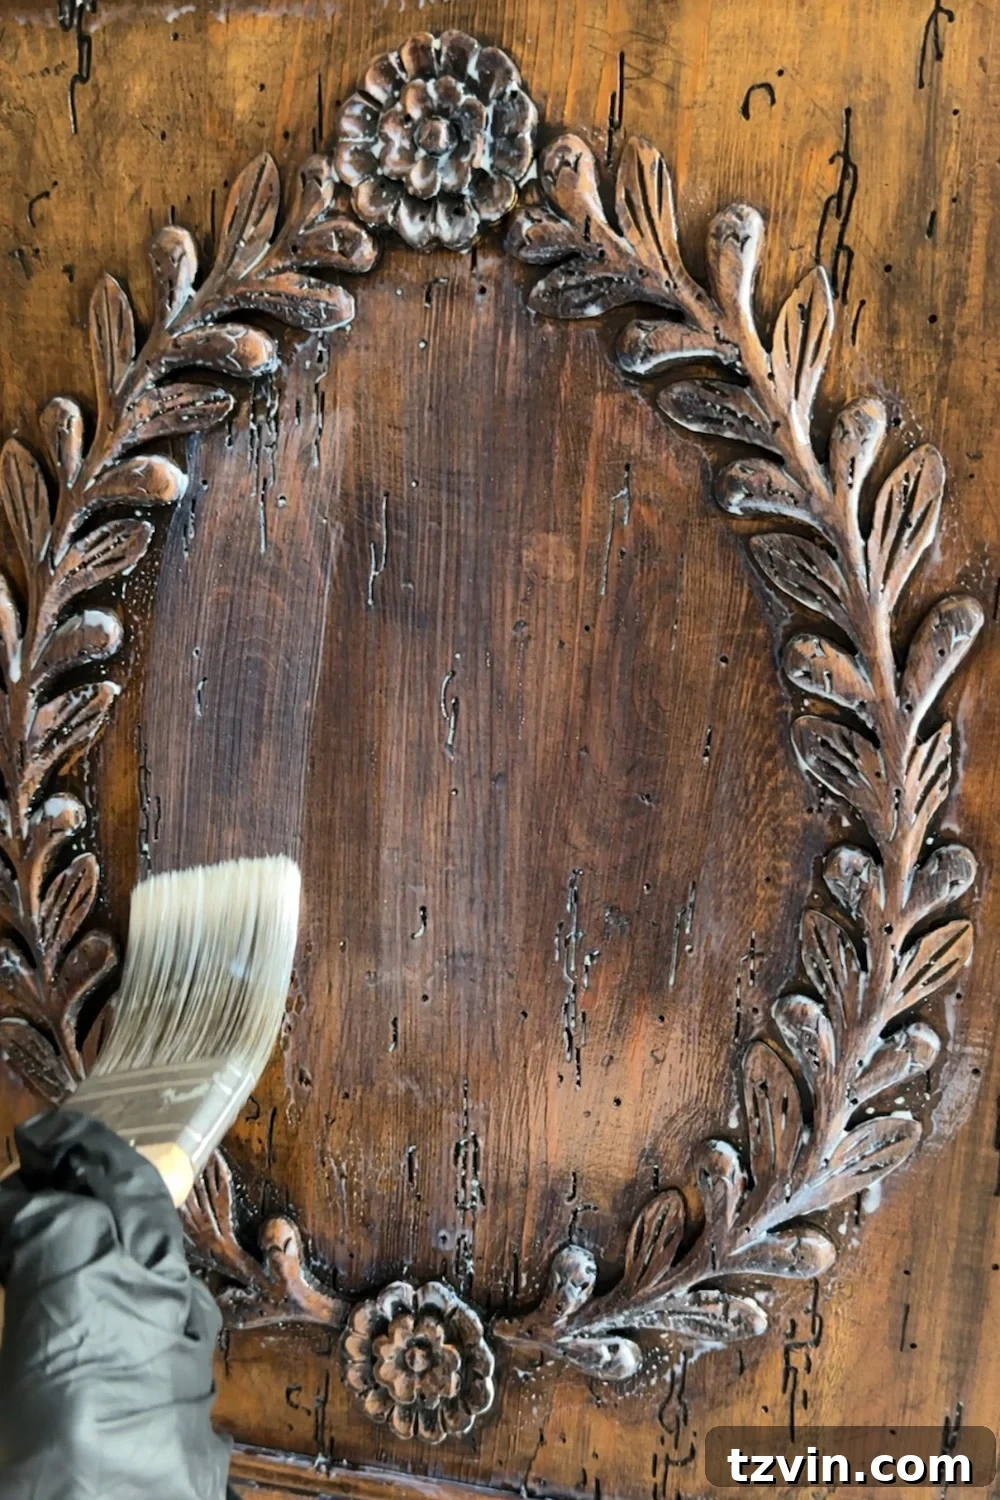
Once you are completely satisfied with the color and finish achieved by your gel stain coats, the final and critical step is to seal and protect your hard work. Wait a full 24 hours after applying your final gel stain coat to ensure it is thoroughly cured. Then, using a good quality paint brush (a synthetic bristle brush works well with water-based polycrylic), apply an even top coating of polycrylic. Polycrylic is an excellent choice as a topcoat for gel stain because it is water-based, clear (it won’t yellow over time like some oil-based polys), and dries quickly. Apply thin, even coats, avoiding drips and puddles. Allow at least two hours for the first coat to dry before lightly scuffing with 400-grit sandpaper and applying a second coat. For high-traffic pieces or surfaces that will see a lot of use, a third coat is highly recommended for maximum durability. This protective layer will shield your beautiful new stain from scratches, moisture, and daily wear and tear, ensuring your furniture makeover lasts for years to come.
Related: Burl Wood Furniture for All Budgets + Refinished Burl Dresser
And just like that, it’s done! The most challenging aspect of this entire furniture makeover was simply exercising patience and allowing sufficient drying time between each coat. But believe me, the wait is absolutely worth it. This Minwax Gel Stain in Coffee shade is nothing short of gorgeous. What I truly adore is how it flawlessly transformed the color while still allowing the exquisite, natural wood grain to show through. It’s not a paint; it’s a stain that enhances, not hides, the wood’s inherent beauty.
I honestly can’t get over how luxurious and sophisticated this carved wood cabinet looks now. It went from being an overlooked, outdated piece to a striking focal point in our foyer. The depth of color and the subtle sheen from the polycrylic give it a high-end, custom furniture feel without the exorbitant price tag.
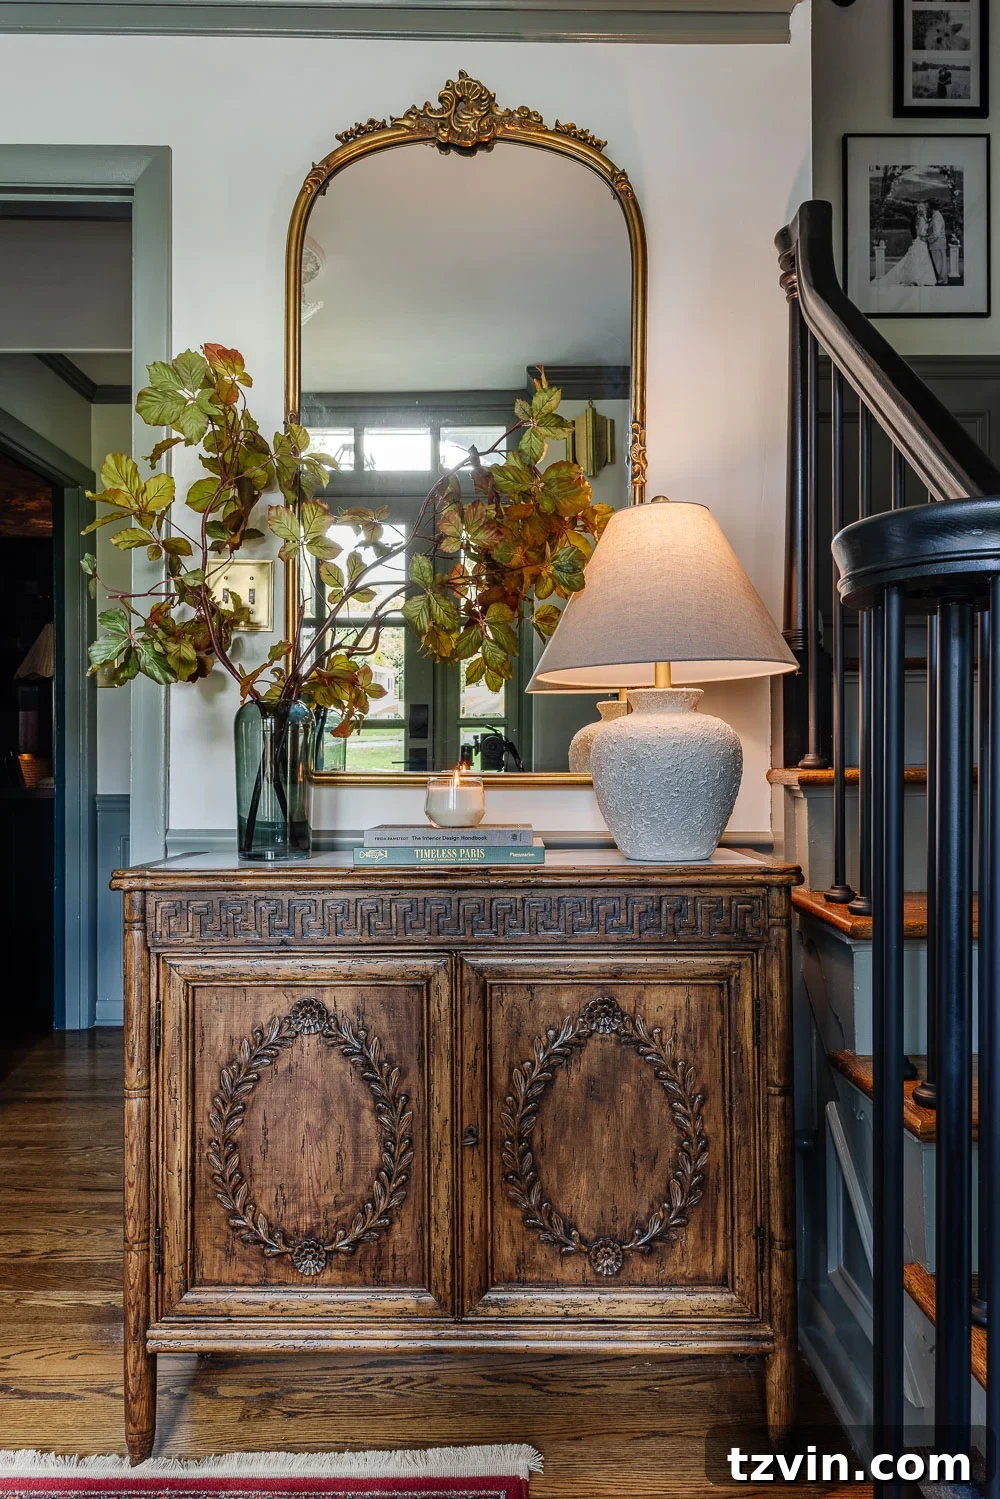
I’m so excited to share more details about how we’re styling and decorating this newly refreshed foyer space very soon! You’ll see how this cabinet truly anchors the entire entryway.
What are your thoughts on this transformation? Do you prefer the rich, dark wood stain or the lighter, original orange tone from before? Either way, for me, there’s no turning back now – I’m completely smitten with its new look! This project proves that with the right technique and product, any piece of furniture can find its true calling.
Discover More Inspiring Wood Furniture Makeover Ideas
How to Clean Wood Furniture to Make It Look New Again
Creative DIY Burl Wood IKEA Dresser Hack Using Contact Paper