
Transform Your Space: How to Create a Stunning DIY Wall Christmas Tree with Command Hooks, Garland, and Lights
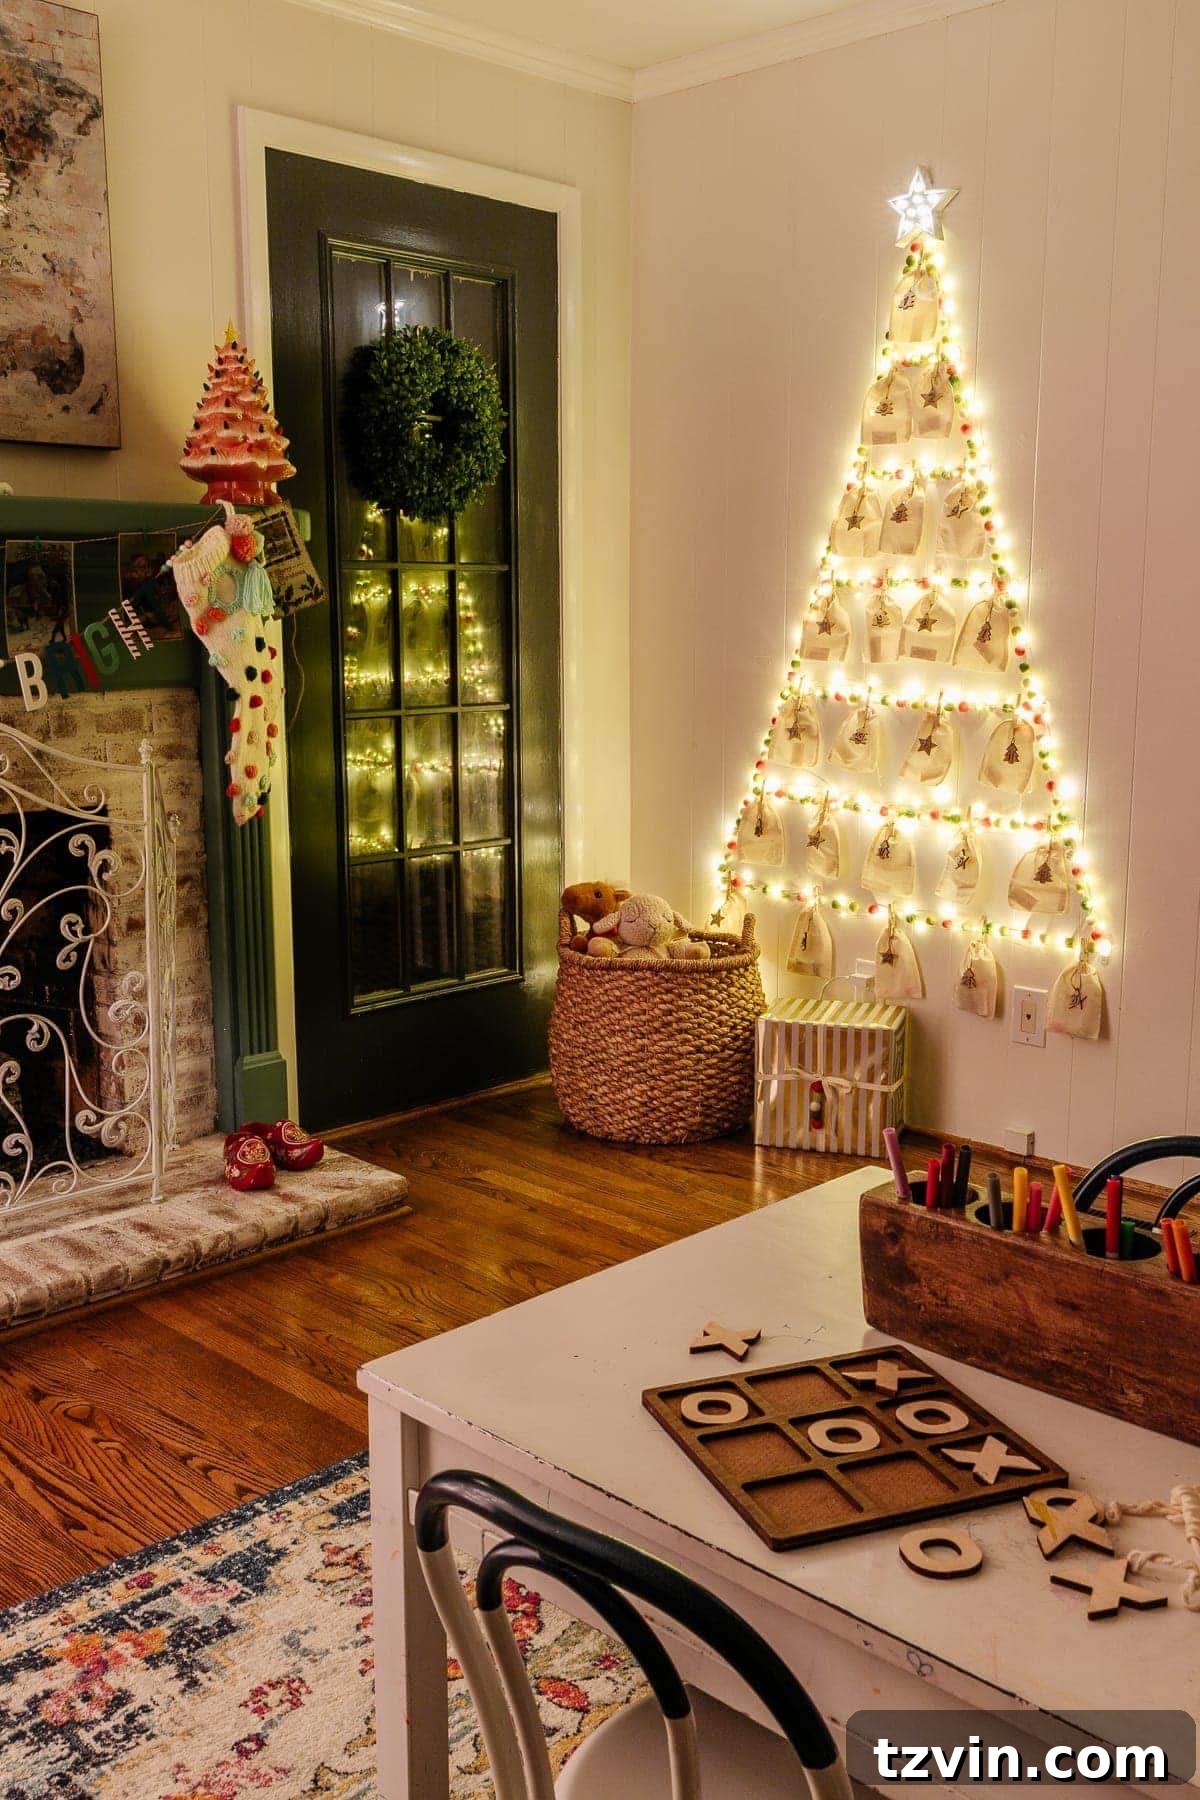
The holiday season is a magical time, filled with warmth, joy, and festive decorations. However, for many, the idea of setting up a traditional Christmas tree can come with challenges: limited space, budget constraints, or the sheer effort of assembly and storage. What if there was a charming, convenient, and budget-friendly alternative that brings all the festive cheer without the hassle? Introducing the DIY wall-mounted Christmas tree – a brilliant solution that leverages the simplicity of Command hooks, the sparkle of garland, and the warmth of string lights to create a captivating focal point in any room.
This ingenious project isn’t just a space-saver; it’s a versatile piece of Christmas wall decor that can double as an interactive Advent calendar or simply serve as a beautiful, cheap Christmas decoration. Our family has embraced this delightful tradition for years in our playroom, and it’s become a cherished part of our holiday setup. It’s incredibly quick to assemble, requires practically zero storage space post-holidays, and offers endless possibilities for personalization.
While we often opt for whimsical, colorful tinsel garland to make it extra playful for the kids, you can easily adapt this concept with more traditional green pine garland for an elegant touch. This DIY wall Christmas tree is the perfect solution for anyone looking to add holiday spirit to an apartment, a small living room, a dorm room, a waiting area, a classroom, or any space where a conventional tree might not fit or is impractical. It’s a testament to creativity and practicality, proving that festive decor doesn’t have to be complicated or expensive.
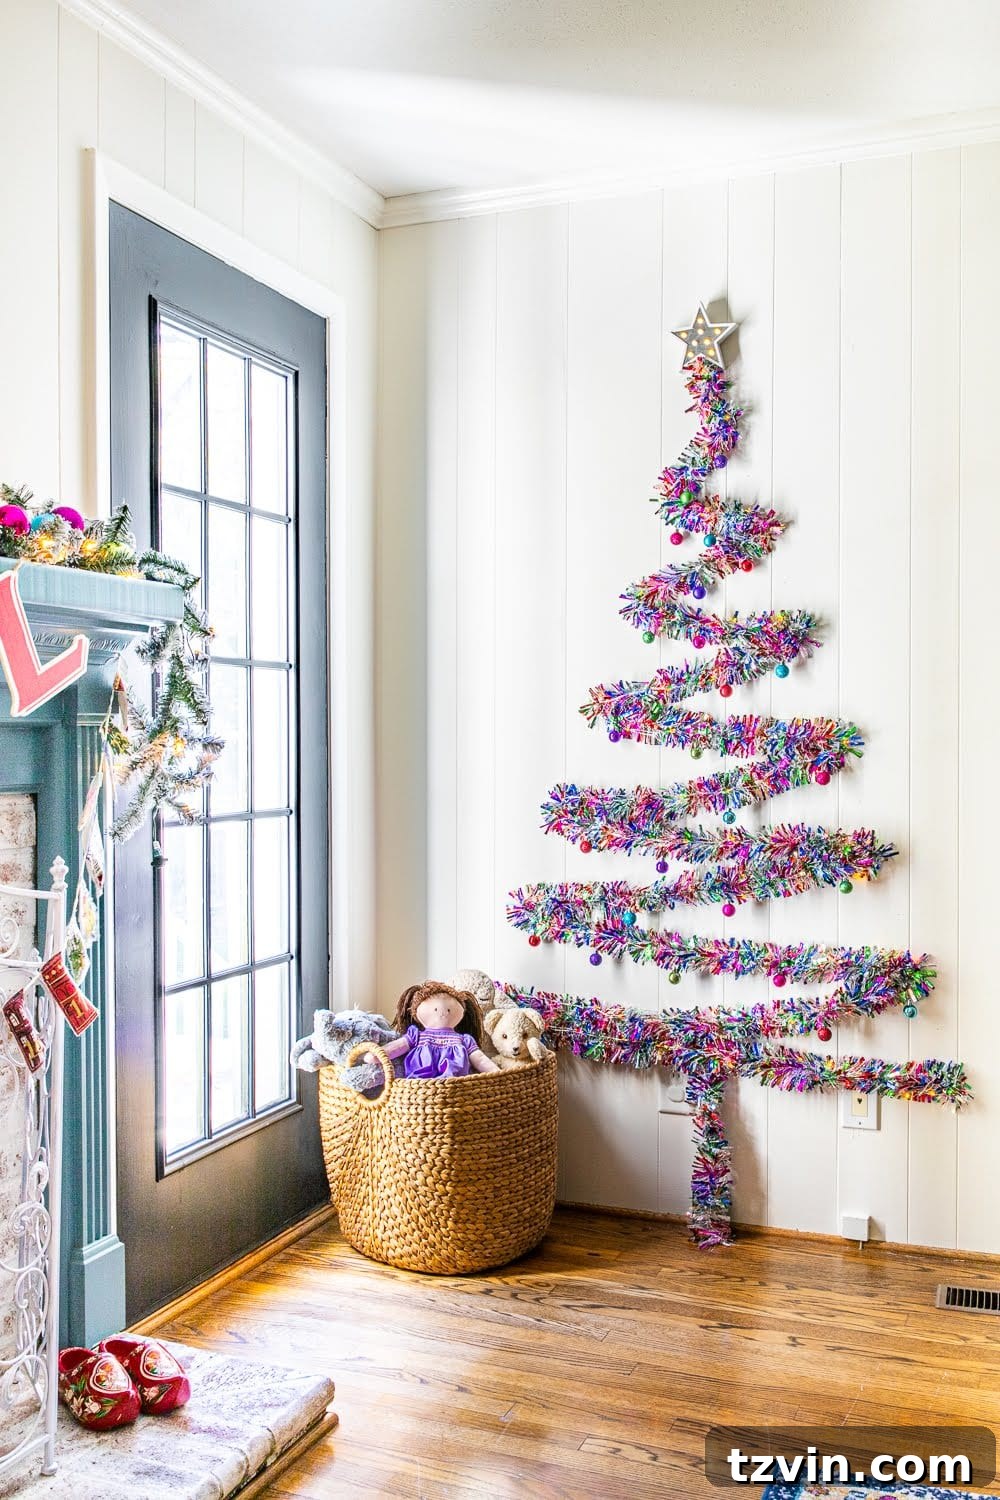
How to Make a Wall-Mounted Christmas Tree With Lights
Creating your own wall-mounted Christmas tree is surprisingly simple and requires no specialized tools or extensive crafting skills. This guide will walk you through each step, ensuring you achieve a beautiful and festive result that can be customized to your heart’s content. From gathering your supplies to adding the final sparkling touches, you’ll find that transforming a blank wall into a holiday masterpiece is an enjoyable and rewarding process.
Supplies You’ll Need
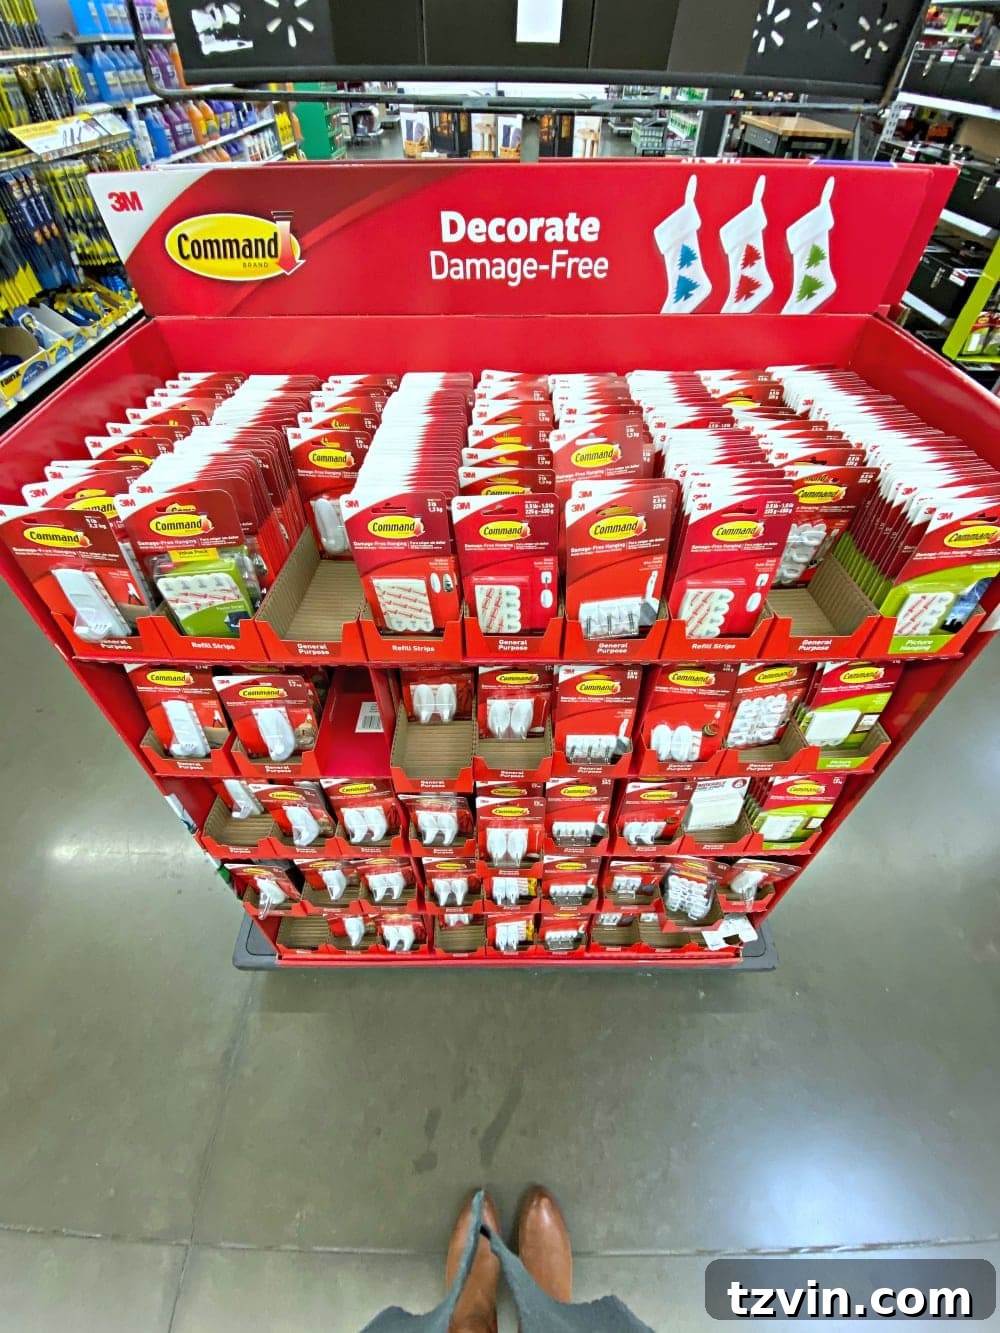
One of the best aspects of this DIY project is the accessibility of the materials. Most items can be found at your local craft store, dollar store, or online, making it an incredibly budget-friendly option. Choose your garland and lights to match your desired aesthetic – whether that’s classic elegance or whimsical charm. Remember, Command products are key here for damage-free installation and removal!
- Wire Command Hooks: These are essential for securely holding your garland and lights without damaging your walls. Look for hooks designed for lights or general indoor/outdoor use.
- Thin Christmas Garland: Select the color and style that best suits your holiday theme. Tinsel garland is fantastic for a whimsical, sparkly look, while faux pine garland offers a more traditional feel. You might need several strands depending on the desired size and fullness of your tree.
- Battery-Powered Christmas Lights or Fairy Lights: These offer flexibility in placement, as you won’t need to be near an outlet. If you have an outlet nearby, traditional plug-in string lights work just as well.
- Marquee Star Light or Tree Topper: A star is the quintessential tree topper. A marquee star adds a lovely glow, but you could also get creative and make one out of cardboard, then paint or glitter it.
- Command Picture Hanging Strips: Ideal for attaching your star or other heavier decorations securely to the wall without causing damage.
- Small Shatterproof Ornaments with Hooks: Opt for shatterproof ornaments, especially if the tree is in a high-traffic area or a child’s room. Dollar stores are excellent places to find a variety of affordable options.
- Optional: Clothespins and Numbered Small Bags: These are perfect for turning your wall tree into a delightful Advent calendar, adding an interactive element for counting down to Christmas.
Step-by-Step Instructions for Your DIY Wall Christmas Tree
Follow these straightforward steps to construct your beautiful and unique Christmas wall decor. The process is designed to be user-friendly, allowing for creativity and customization at every turn.
Step 1 – Plan Your Tree and Mark Spots for Hooks
Begin by envisioning your wall Christmas tree. Use a pencil to lightly mark the intended top point of your tree on the wall. From this central point, consider how wide or skinny you’d like your tree to be. A wider base will create a fuller, more traditional tree shape, while a narrower base offers a sleeker, modern look. Once you have a general idea of your desired triangular outline, mark the points where each Command hook will be placed along the perimeter of this shape. Don’t worry about being perfectly precise; a slightly organic shape can add to the charm.

Step 2 – Place Command Hooks for Your Wall Tree
Carefully apply your Command indoor/outdoor light hooks directly onto the wall, following the pencil marks you made in Step 1. Ensure you read and follow the instructions on the Command hook packaging for optimal adhesion. Typically, this involves cleaning the wall surface with rubbing alcohol, pressing the adhesive strip firmly, and then attaching the hook. Arrange the hooks in the shape of a triangle, creating the framework for your tree. The number of hooks will depend on the size of your tree and the length of your garland, but generally, spacing them about 12-18 inches apart along the perimeter works well.
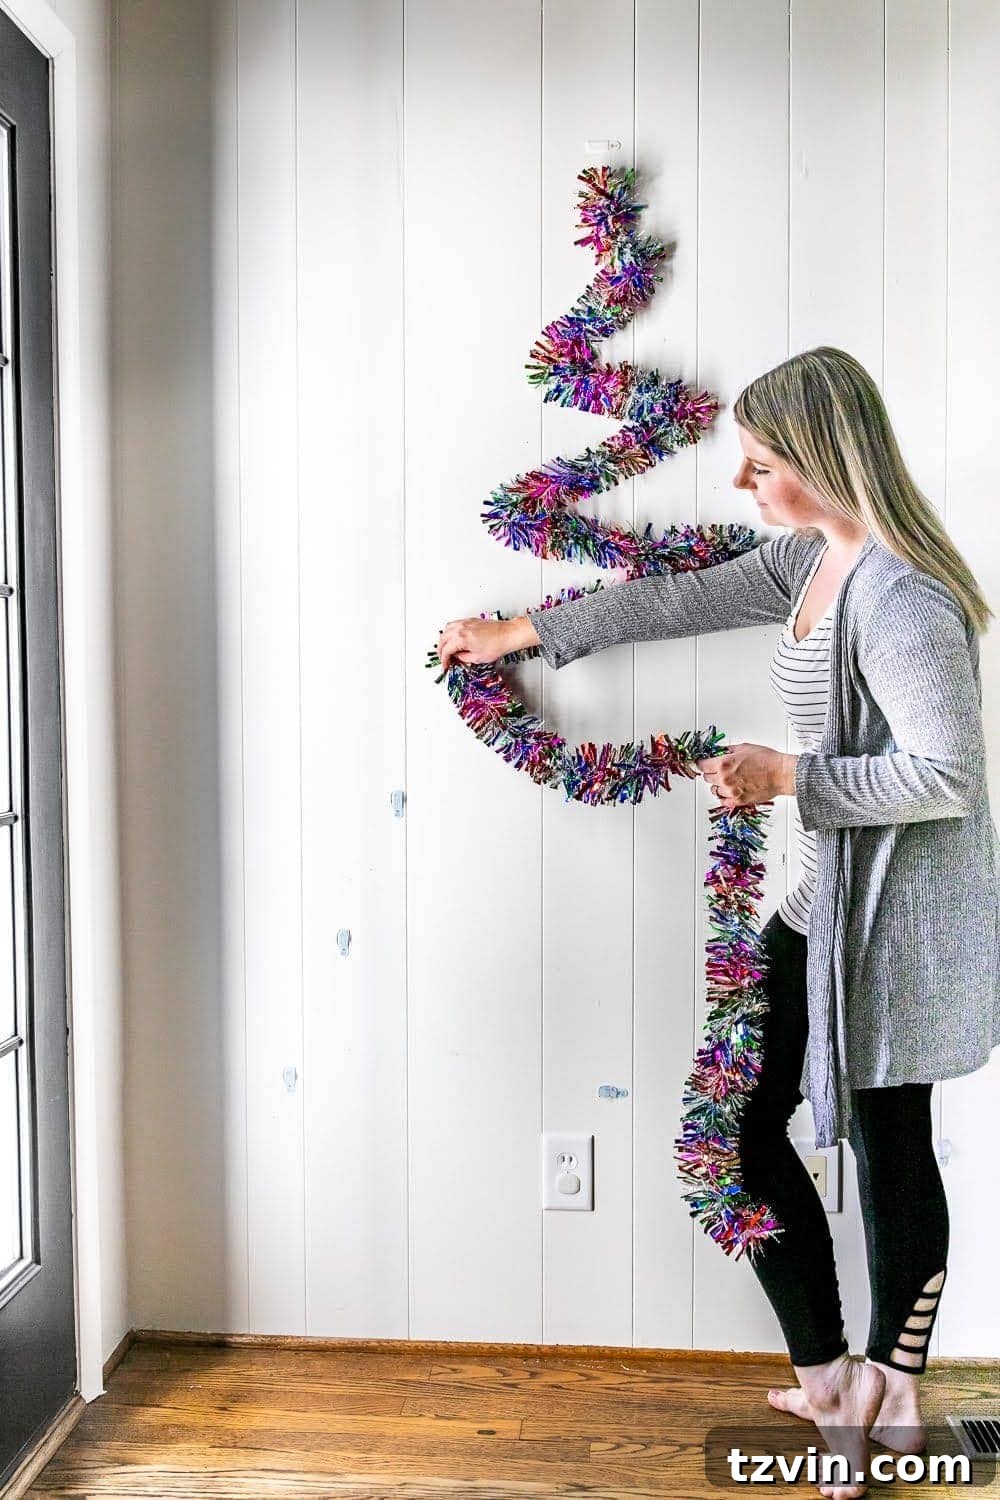
Step 3 – Weave Garland Through Hooks
Now, it’s time to bring your tree to life with garland! Start at the very top hook of your triangular shape. Securely attach the end of your chosen garland into this first hook. Then, gently begin weaving your garland downwards, looping it through each subsequent hook. You can create gentle swoops or tighter zig-zags, depending on the look you prefer. For a fuller tree, you might choose to use multiple strands of garland, layering them for extra depth and dimension. Ensure the garland is taut enough to hold its shape but not so tight that it pulls the hooks off the wall.

Step 4 – Place Your Christmas Lights
Once your garland is in place, it’s time to add the magical glow of Christmas lights. Repeat the same weaving process you used for the garland, carefully draping your battery-operated fairy lights or plug-in string lights through the Command hooks. Distribute the lights evenly to ensure a consistent sparkle across your tree. If using battery-powered lights, make sure the battery pack is positioned discreetly at the bottom of the tree, perhaps tucked behind the garland, where the “trunk” of a traditional tree would be. If using plug-in lights, ensure the plug conveniently reaches an outlet and that any cords are safely secured and out of the way.

Step 5 – Attach Your Tree Topper Star
No Christmas tree is complete without a star! If you plan to add a star, select your chosen design (whether it’s a glowing marquee star or a handmade cardboard creation). Attach it securely to the very top point of your wall tree using a Command large picture hanging strip. These strips provide a strong hold without damaging your wall, making them perfect for heavier decorations. Ensure it’s centered and level to complete the classic Christmas tree silhouette. My star was a lucky dollar section find, proving you don’t need to spend a fortune for a fantastic result!
Step 6 – Hang Ornaments and Embellishments
To truly make your wall Christmas tree sparkle, add small shatterproof ornaments. These are ideal for this type of setup, especially in areas with children or pets, as they won’t break if they happen to fall. Simply hang the ornaments from the wire hooks or directly onto the garland itself. You can choose a cohesive color scheme or go for a playful mix of bright colors, depending on your overall decor theme. This step allows for a lot of personal expression, bringing the tree to life with texture and charm.

Step 7 – Transform into an Advent Calendar (Optional)
For an extra layer of holiday fun and an interactive element, turn your wall Christmas tree into a delightful Advent calendar. Attach numbered bags filled with small treats, mini toys, or thoughtful messages to the garland using clothespins. Alternatively, use numbered tags with daily activities or inspiring quotes. This not only makes the countdown to Christmas more exciting for children but also adds another layer of personalized decoration. You could also use clothespins to display cherished Christmas cards received from friends and family, making your wall tree a dynamic festive display.
And there you have it – a wonderfully charming and functional wall-mounted Christmas tree! It’s such an adorable addition to any room, bringing immense joy and holiday spirit. The best part? No tools are needed, the setup is super quick, everything stays securely in place throughout the season, and it all comes down without any damage to your walls once Christmas is over. This seriously easy DIY Christmas tree takes about an hour at most to create and offers unique results every time. While lights and ornaments are optional, they certainly amplify the festive fun and personalize your creation.

We absolutely love Command hooks and hanging strips in our home; we use them year-round for various decorations and organizational needs. While I probably don’t want to know our total expenditure on them over the years, their convenience and damage-free hanging capabilities are truly invaluable. This wall Christmas tree concept perfectly exemplifies their utility for creative and temporary holiday displays.
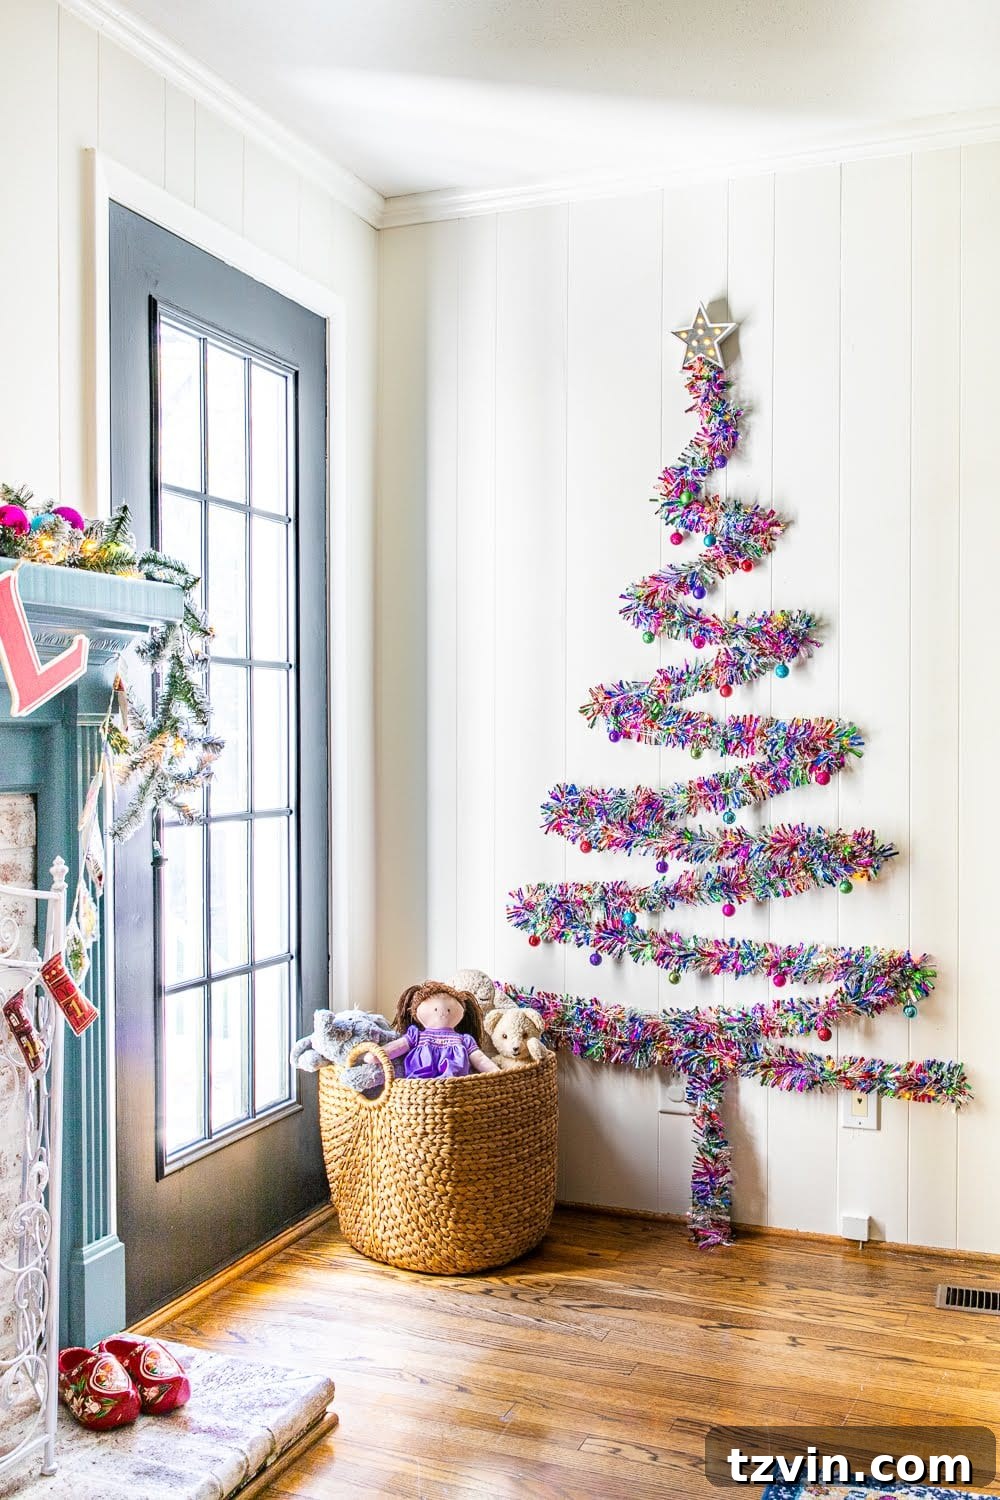
While our playroom, where this wall tree often resides, might not adhere to minimalist aesthetics, where’s the fun in that during the holidays? Christmas is a time for abundance, joy, and a bit of festive maximalism. Since having our sweet babies, Christmas has become even more magical. It only feels right to infuse their spaces with extra enchantment, creating memories and wonder for them to cherish.
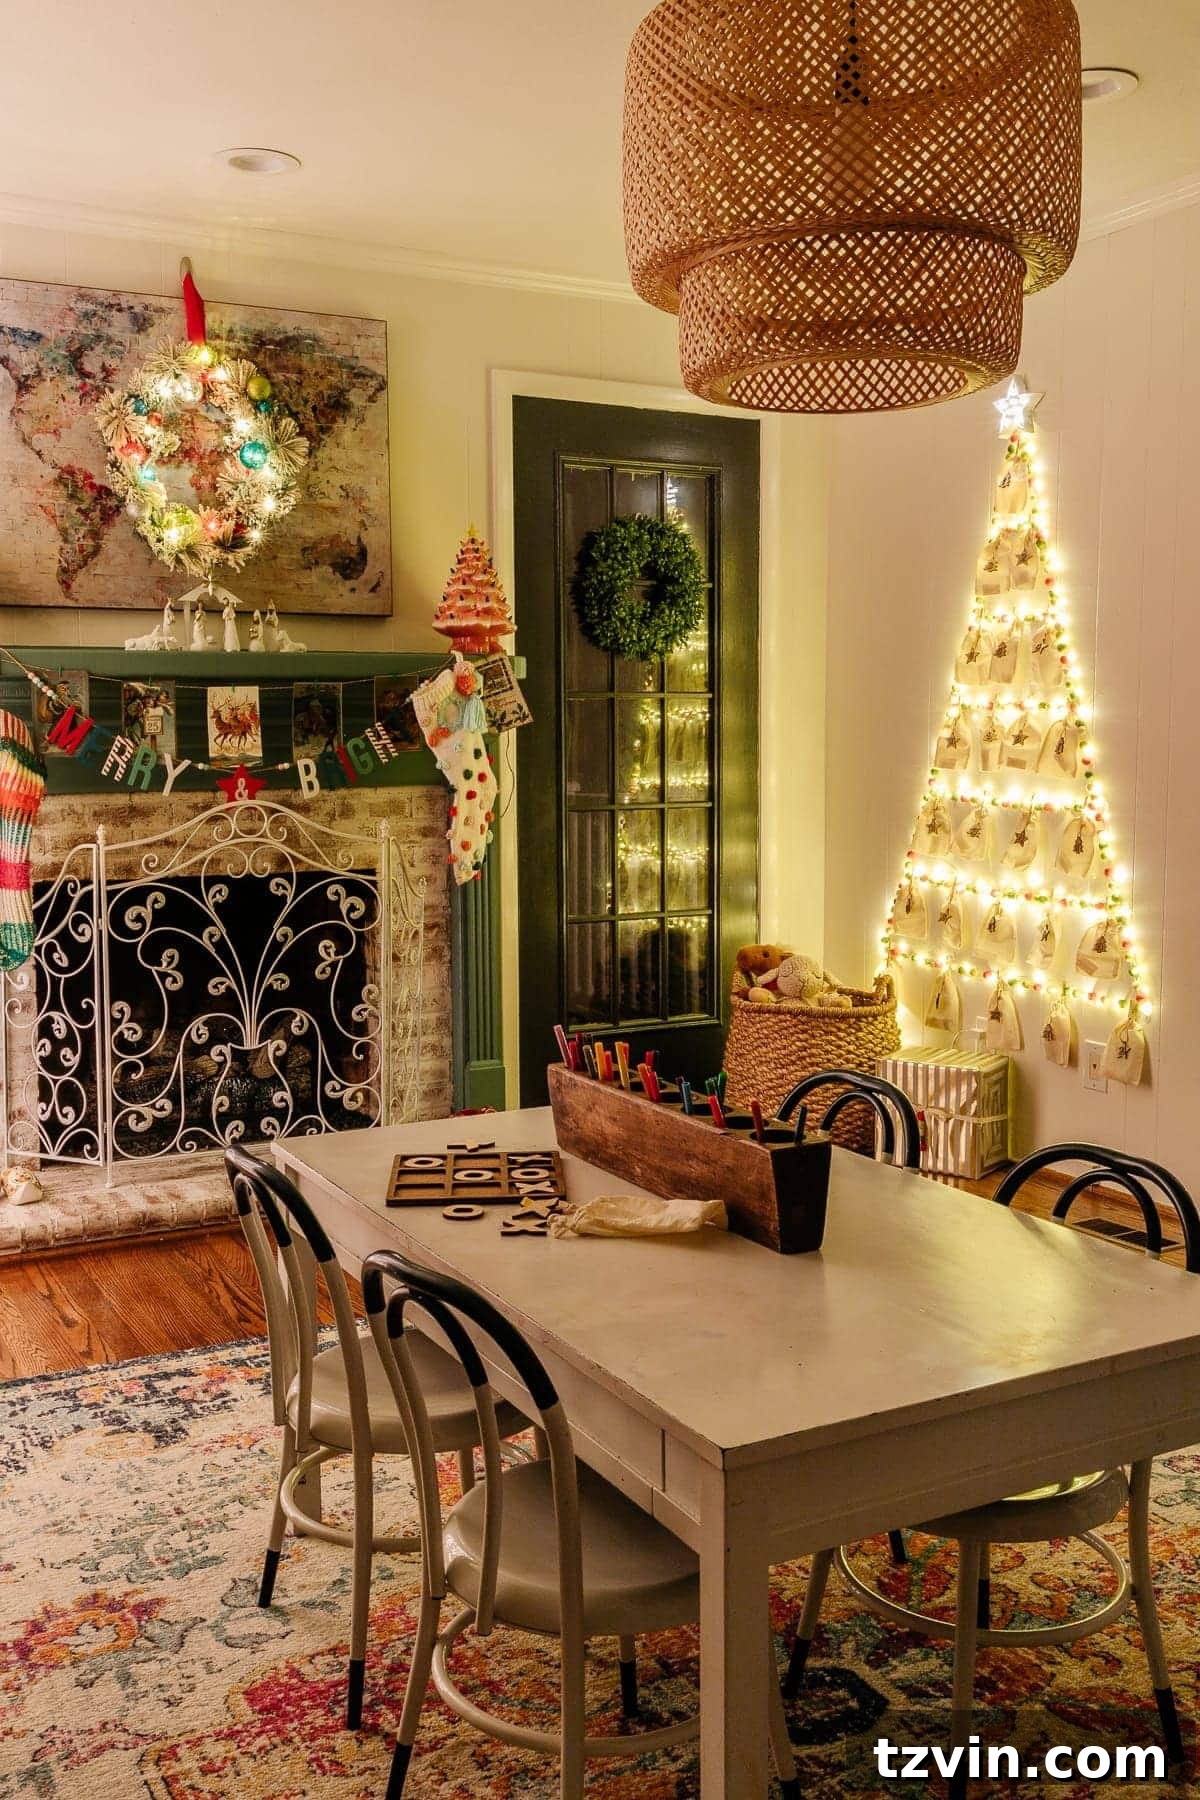
Do you enjoy decorating your children’s bedrooms or playrooms for the holidays? Adding a touch of festive magic to their personal spaces can make the season feel even more special and exciting for them. This wall Christmas tree is just one of many ways to bring that extra sparkle into their world without taking up precious floor space.
More DIY Christmas Wall Decor Ideas
If you’re inspired to explore more creative ways to deck your walls for the holidays, here are some additional DIY Christmas wall decor ideas to spark your imagination:
- 18 Christmas Wall Decor Ideas and Holiday Art Printables
- 5 Minute Christmas Bow Ribbon Art
- Vintage Christmas Tree Gallery Wall Printable Set
- Snow Cabin Art Printable
- Winter Painting Free Art Printable to Frame Anywhere
- DIY Large Wall Art and Winter Landscape Printable
- Winter Botanical Gallery Wall Printables