Unlock Your Creativity: The Ultimate Guide to DIY Texture Paint with Baking Soda for Stunning Home Decor
Imagine transforming ordinary, overlooked items into extraordinary pieces of home decor that radiate sophistication and charm. This isn’t a dream reserved for professional artists or high-end boutiques; it’s an accessible reality with a simple, ingenious DIY hack: homemade texture paint. Using just leftover paint and a common kitchen staple – baking soda – you can revitalize everything from glass vases and ceramic pots to wooden figurines, giving them a luxurious, sculpted stone or aged pottery aesthetic. Prepare to see your thrift store finds, dollar store treasures, and hand-me-down items in a whole new light!
For far too long, achieving a high-end textured finish seemed like a complex task, often associated with expensive specialty paints or intricate artistic techniques. However, the secret to creating a designer look – be it a realistic faux stone, rustic terracotta, or a contemporary matte ceramic finish – is surprisingly simple. This comprehensive guide will reveal how to master this transformative process, empowering you to create bespoke decor pieces that beautifully reflect your personal style, all while adhering to a budget. It’s an absolute game-changer for anyone passionate about unique home accents and sustainable crafting, offering a fantastic way to rescue and repurpose items that might otherwise be discarded.
Whether your goal is to refresh a collection of outdated vases, elevate plain ceramic pottery, or breathe new life into an interesting thrift store sculpture, this versatile texture paint is poised to become your go-to solution. Beyond its remarkable aesthetic potential, this method offers an excellent opportunity to utilize those half-empty cans of latex or acrylic paint accumulated from previous projects. This makes your crafting endeavors not only creative but also eco-friendly and incredibly economical. Get ready to embark on a journey where every glass jar, ceramic planter, and wooden trinket becomes a potential canvas for your next stunning creation, adding character and warmth to every corner of your home.
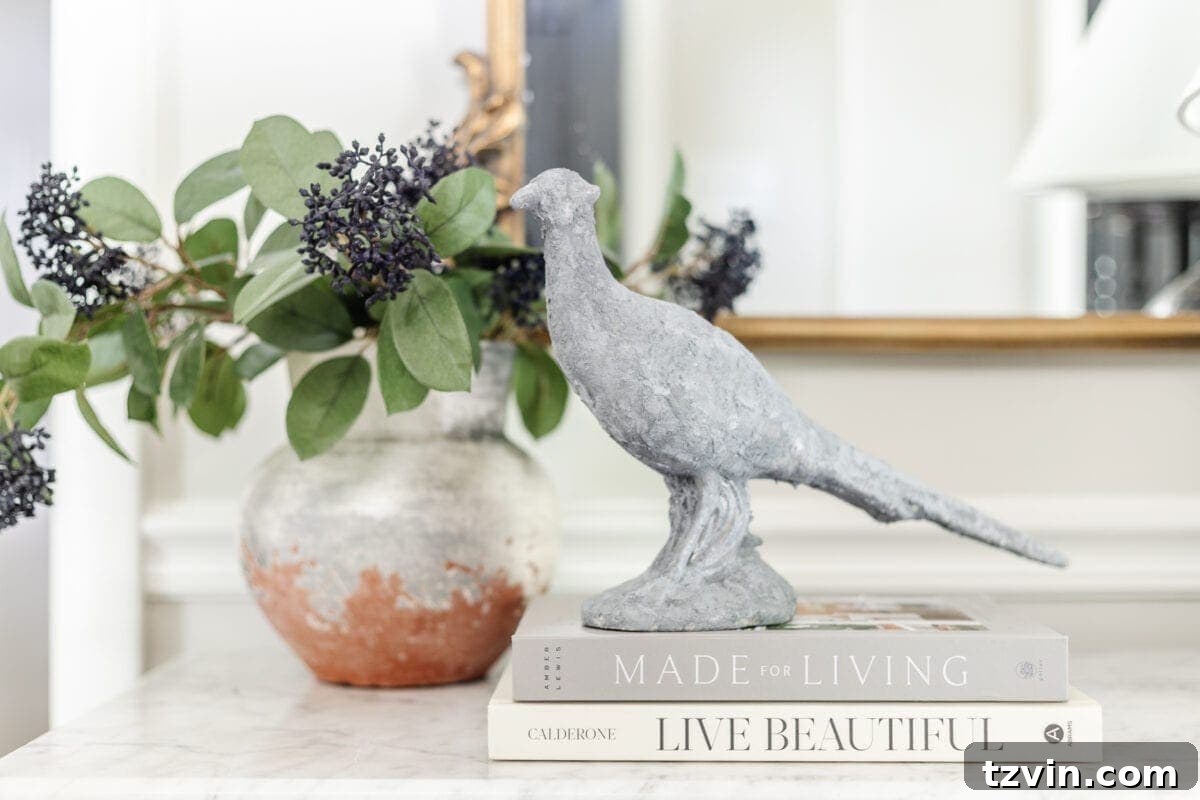
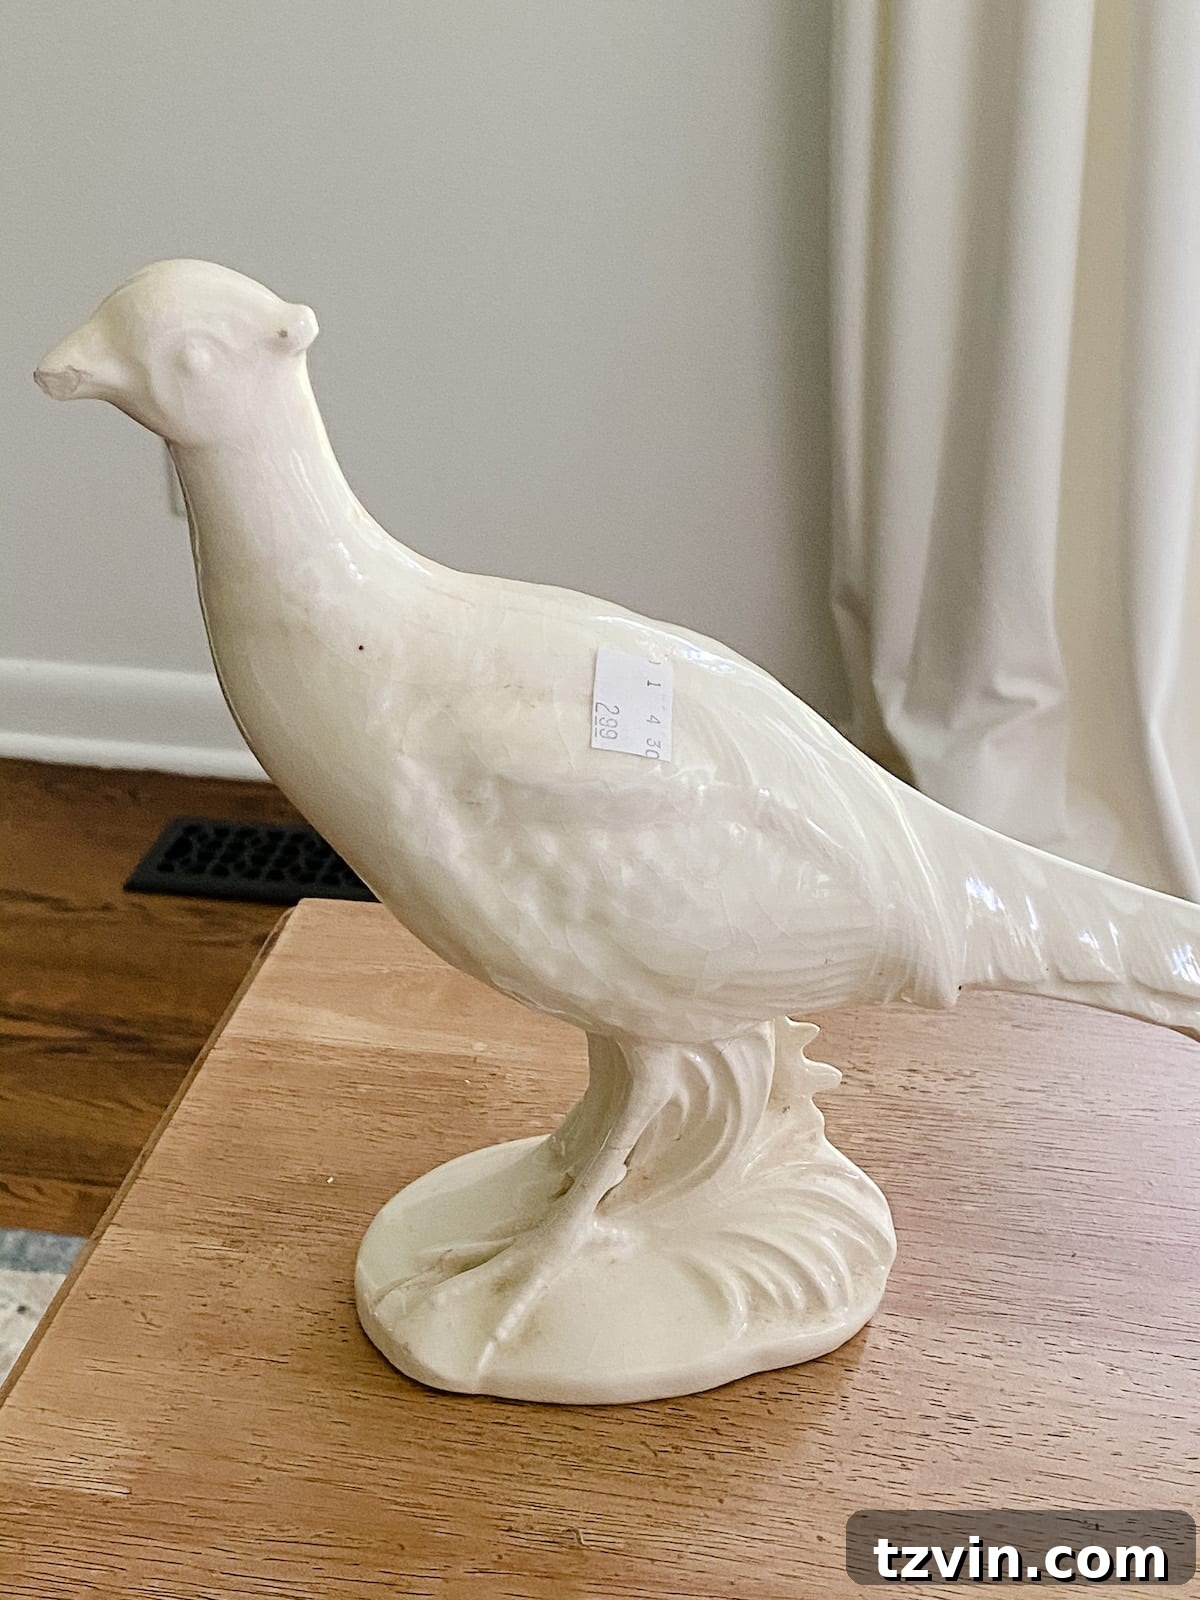
Our own adventure into the world of DIY texture paint began with an unassuming candidate: a slightly broken $3 pheasant figurine discovered during a thrift store hunt. This modest find presented the perfect challenge – could it be transformed into an elegant, faux sculpted stone piece? The results, as you’ll soon witness, were truly astonishing, demonstrating that even items with minor imperfections or a forgotten past possess immense potential when approached with creativity and the right technique. This transformation exemplifies how simple ingredients can yield surprisingly sophisticated outcomes.
One of the most appealing aspects of this project is its incredible accessibility. The vast majority, if not all, of the necessary supplies are likely already residing within your pantry or tucked away in your garage. This eliminates the need for any special purchases, allowing you to dive into your DIY adventure without incurring additional costs. It’s a truly “free” project, liberating your creative spirit from financial constraints and proving that some of the most impactful home decor transformations can be achieved with the simplest of means. Prepare to be amazed at how effortlessly you can achieve professional-looking results with minimal effort and maximum decorative impact.
Creating Custom Decor: Your Guide to Homemade Texture Paint
Crafting your own texture paint is an astonishingly straightforward process that requires minimal supplies and no advanced artistic skills. The true magic unfolds when you combine everyday household items, yielding a versatile paint that can convincingly mimic various natural textures such as rugged stone, industrial concrete, or beautifully aged clay. This section will meticulously guide you through gathering your essential materials and then walk you step-by-step through the simple process of concocting this transformative mixture, setting the stage for your next incredible home decor project.
Essential Supplies for Your DIY Texture Paint Project
The inherent beauty of this DIY lies in its absolute simplicity. Forget about extensive shopping lists or specialized artisan tools. Here’s a concise breakdown of the few items you’ll need to gather before you begin your creative endeavor:
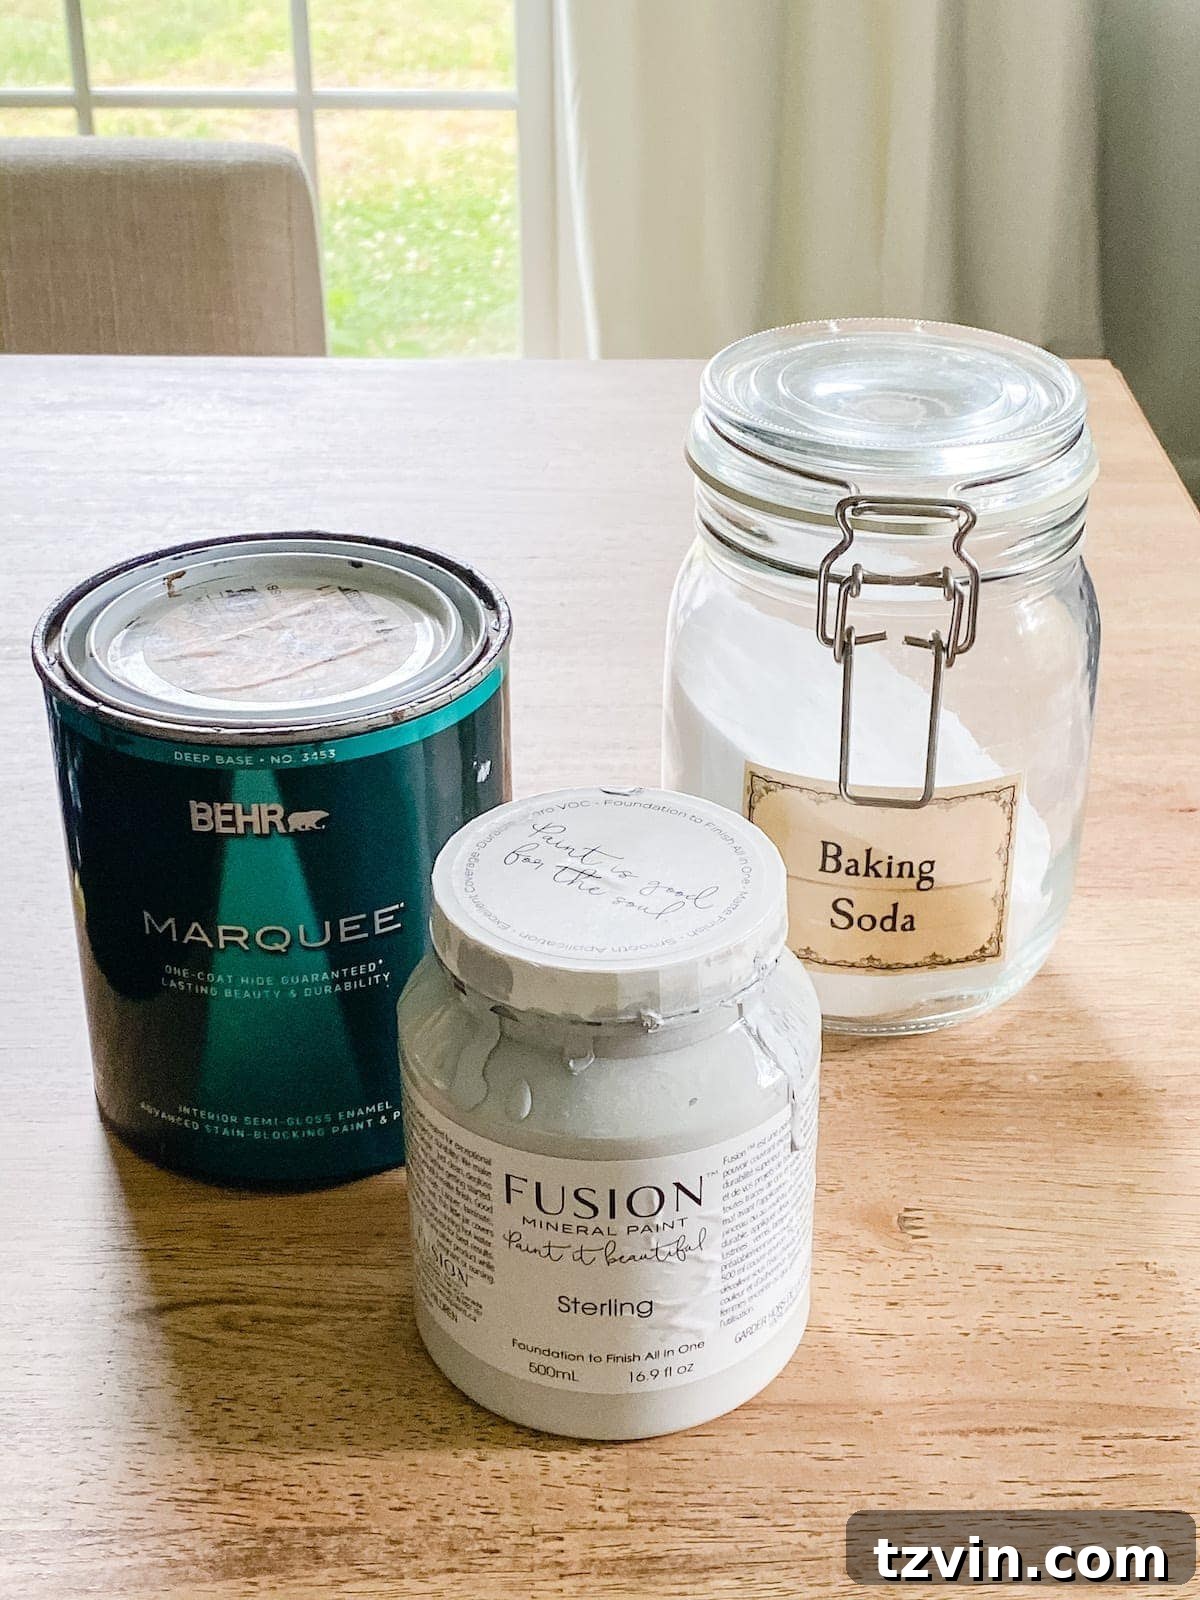
- Latex or Acrylic Paint of Your Choice: This forms the foundational element of your texture paint. Virtually any water-based paint will work effectively, whether it’s a remnant from a larger wall painting project (latex paint) or a collection of smaller craft acrylics. When selecting your paint, give some thought to its original finish (e.g., matte, eggshell, satin), as this can subtly influence the final look, although the robust texture will largely dominate any underlying sheen. For achieving a truly authentic faux stone or ceramic aesthetic, matte or eggshell finishes tend to blend most seamlessly. Feel free to experiment with a spectrum of colors – classic grays, soft whites, warm creams, and deep earthy tones are superb for mimicking natural stone, but don’t shy away from vibrant hues to create eye-catching contemporary pieces.
- Baking Soda (Sodium Bicarbonate): This unassuming kitchen staple is undeniably the star of the show. It’s the ingredient solely responsible for imparting that desirable gritty, tactile texture to your paint. Its finely powdered consistency blends flawlessly with paint, creating those wonderful, irregular bumps and subtle ridges that instantly lend a new dimension and perceived age to your items. For best results, ensure your baking soda is relatively fresh, as older, clumpy baking soda might not mix as smoothly.
- A Disposable Bowl and Spoon or Stirring Stick: For the mixing process, practicality is key. Opt for something that can be easily cleaned or, even more conveniently, discarded after use. Excellent choices include old plastic food containers, sturdy disposable paper cups, or even durable paper plates. For stirring, a simple plastic spoon, a craft stick, or a robust popsicle stick will perfectly suffice. These items allow for easy mixing without the worry of permanent paint residue.
- Craft Brush or Paintbrush: The type of brush you choose can significantly impact the application and final texture. A brush with stiffer bristles is generally recommended and often proves ideal for the dabbing, stippling, and pouncing techniques that are critical for effectively building up pronounced texture. While a flat brush can also be used, try to avoid overly soft or flimsy brushes, as they may struggle to hold the thicker, textured paint or distribute it adequately to create the desired effect.
Seriously, that’s the complete extent of your supply list! With these readily available items, you are fully equipped to unlock a vast realm of decorative possibilities and embark on a journey to transform your living space with truly unique, handmade decor pieces that reflect your personal style and creativity.
Step-by-Step Guide to Mixing Your Perfect Texture Paint
The beauty of this DIY project extends to its preparation: there’s no need for rigid, precise measurements or complicated ratios. This process is inherently forgiving and actively encourages experimentation, allowing you to fine-tune the texture to perfectly match your specific aesthetic vision. Here’s a detailed guide on how to effortlessly whip up your ideal batch of textured paint:
1. Prepare Your Paint Base and Custom Colors:
Begin by pouring your selected paint into your disposable mixing bowl. If your artistic vision calls for a custom shade or a sophisticated multi-toned effect, this is the opportune moment to meticulously blend different paint colors. This phase offers an exciting avenue to create truly unique hues that will harmoniously complement your existing home decor or express your distinct personal aesthetic. Ensure you mix the paints thoroughly until you achieve a consistent and uniform color throughout. Here’s a critical piece of advice: always endeavor to mix a sufficient quantity of paint for your entire project in a single batch. Replicating an exact custom shade in a subsequent batch can prove incredibly challenging, often leading to noticeable inconsistencies in your finished piece, which can detract from its overall appeal. For our pheasant project, a refined blend of leftover Fusion Mineral Paint Stirling light gray and Benjamin Moore Wrought Iron charcoal created a deep, rich base reminiscent of natural, weathered stone, perfectly suited for achieving that elegant, aged appearance.
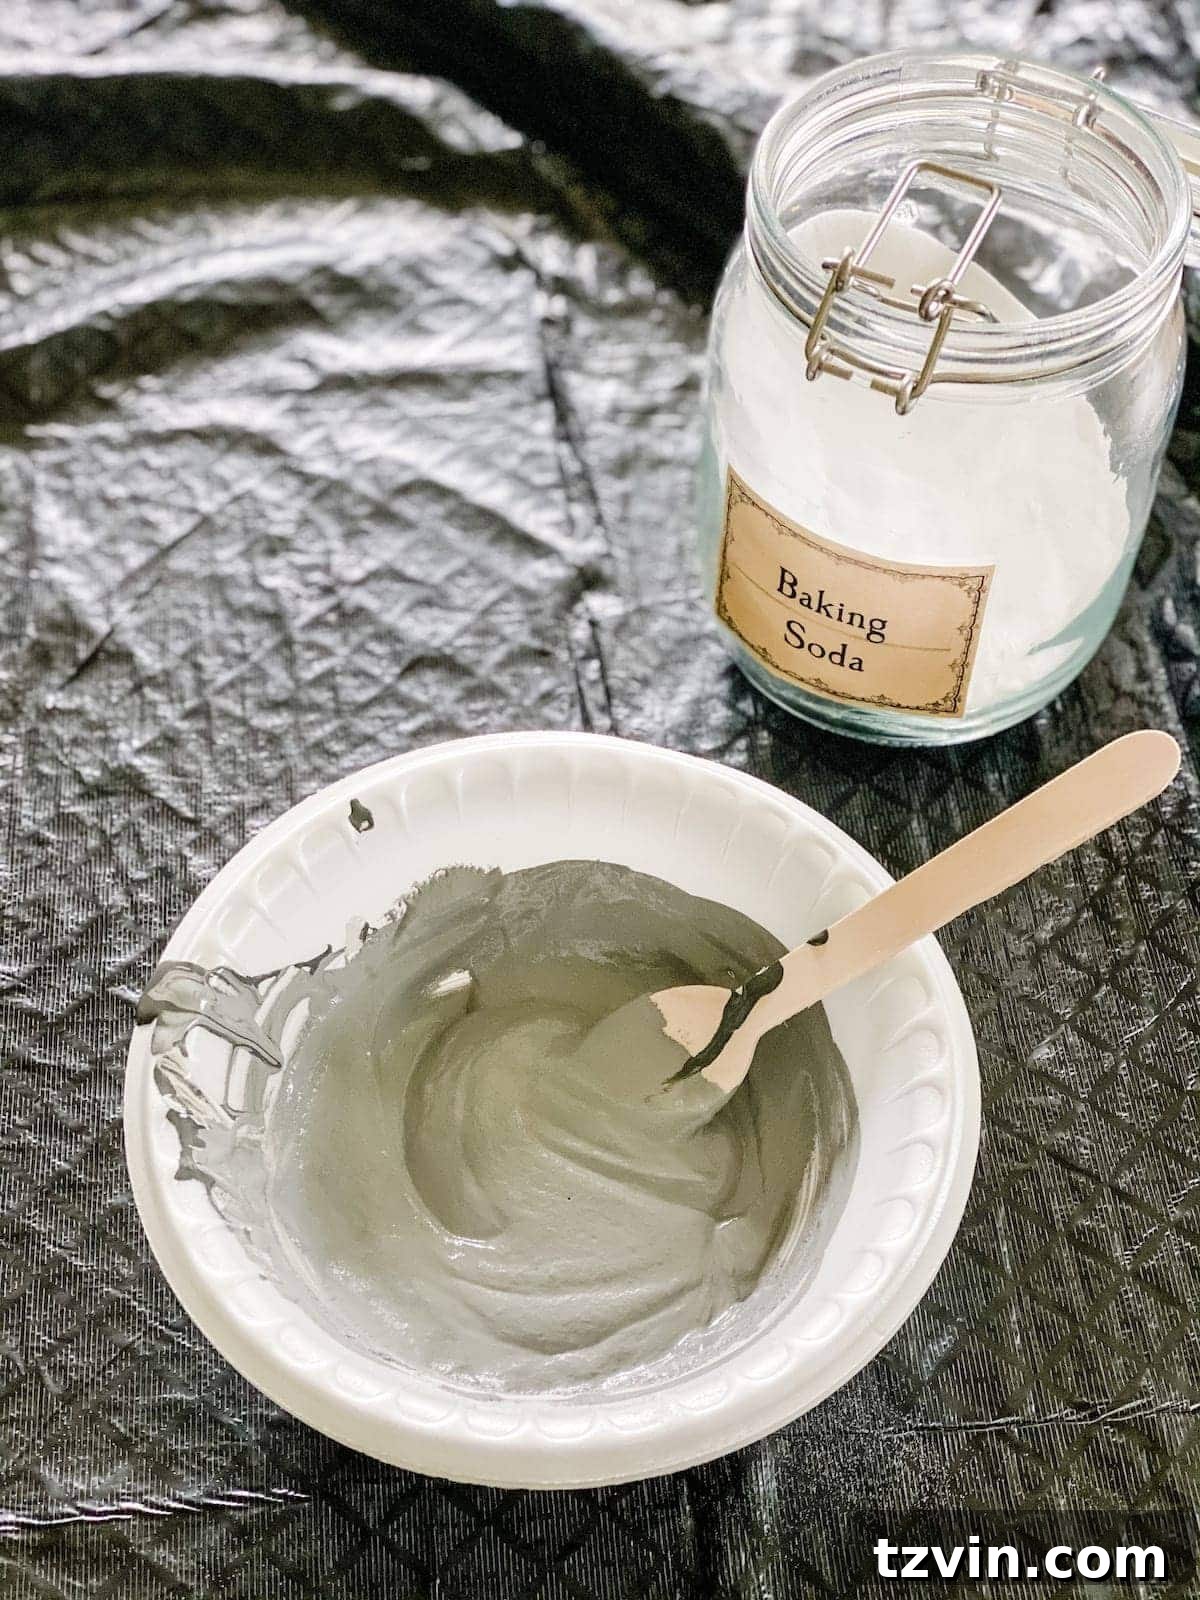
2. Incorporate Baking Soda for Desired Texture:
Once you are completely satisfied with your custom paint color and its consistency, it’s time to introduce the magic ingredient: baking soda. Begin by adding the baking soda gradually to your paint mixture. A practical starting ratio is approximately one tablespoon of baking soda for every cup of paint. Stir the mixture diligently and thoroughly until the baking soda is fully integrated and the mixture achieves a smooth, uniform consistency. This initial ratio will typically yield a paint with a subtle, fine grit texture, ideal for a refined finish. From this point onward, you have the flexibility to progressively add more baking soda, stirring robustly after each addition, until you achieve your desired level of thickness and pronounced texture. The more baking soda you incorporate, the chunkier and more visually impactful the texture will become. Envision the consistency of a rich cake frosting – thick, easily spreadable, and capable of holding distinct peaks. This particular consistency is often perfect for creating dramatic, sculpted effects that authentically mimic the rugged appearance of stone or the tactile feel of rough ceramic. Always ensure you mix until you have a consistently uniform texture to guarantee an even and professional application on your chosen project piece.
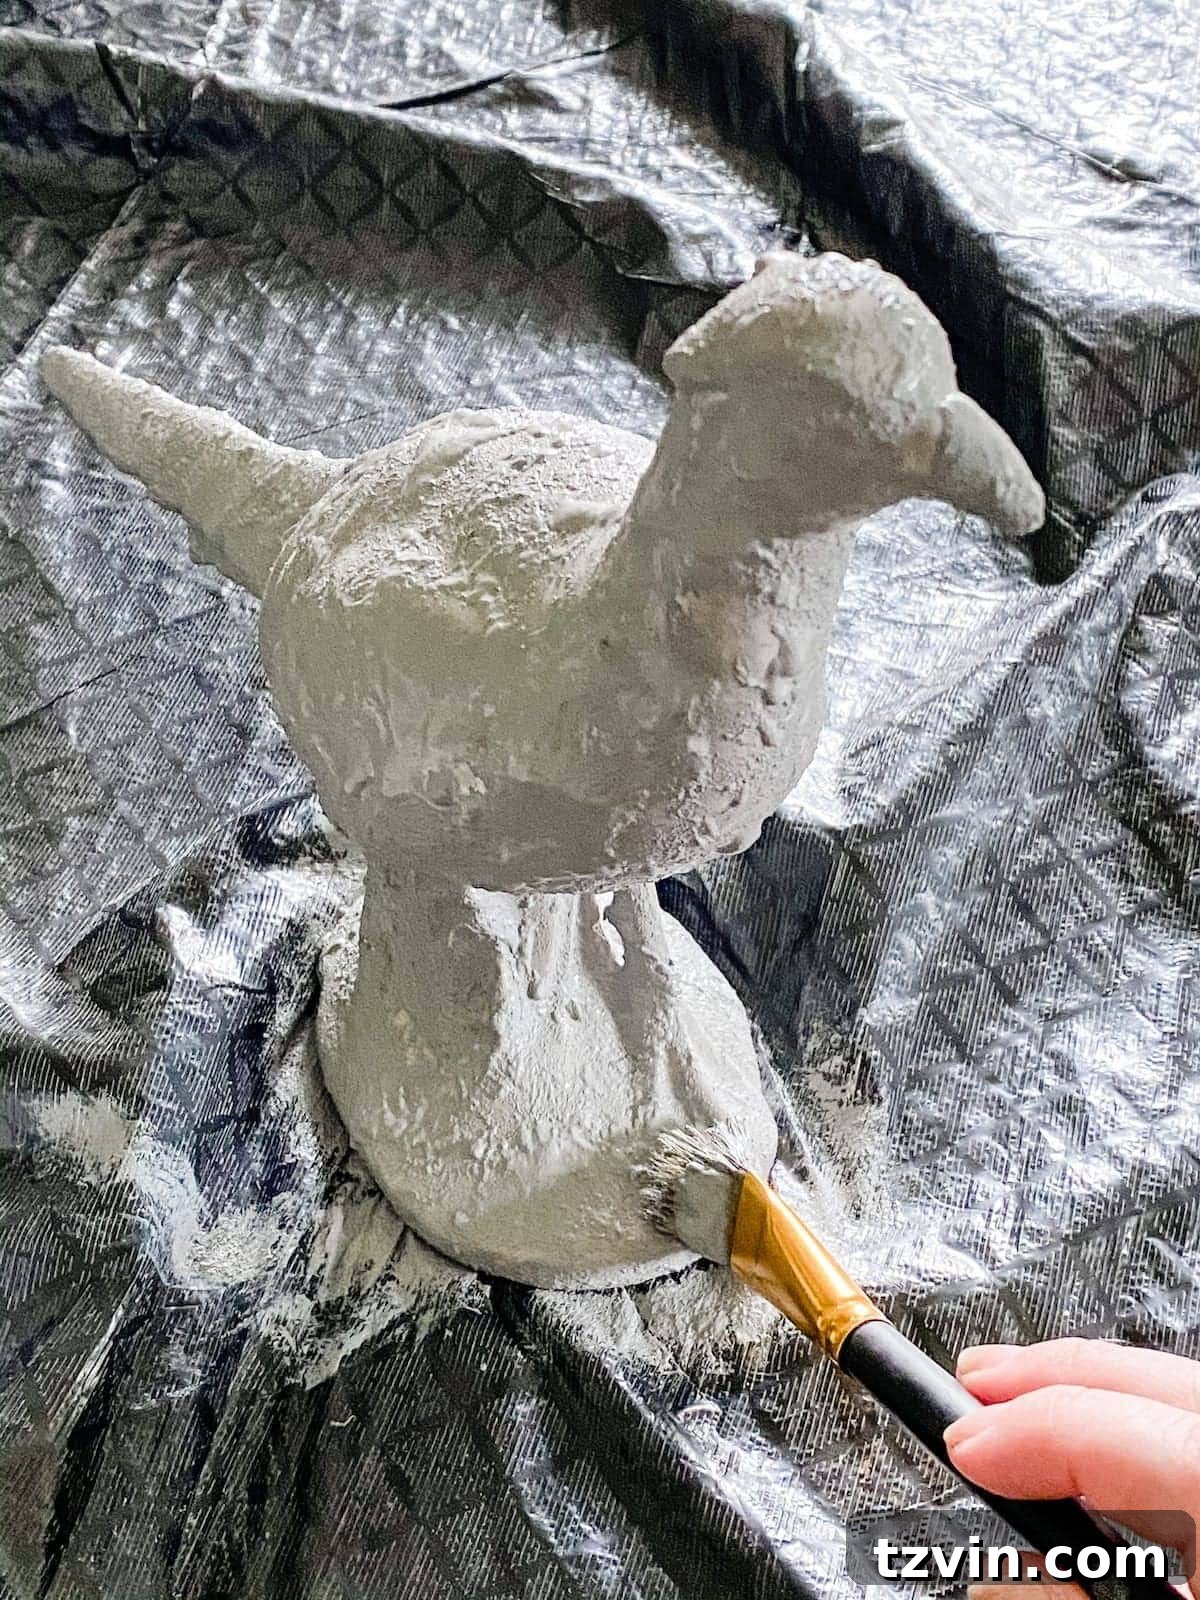
Application Techniques for an Authentic Faux Stone Finish
The method you employ to apply your freshly mixed texture paint is just as vital as the mixing process itself in achieving your desired aesthetic. To cultivate that coveted authentic, high-end stone or beautifully aged ceramic appearance, you must consciously abandon your typical smooth brushing techniques. Instead, embrace application methods that actively build dimension and expertly mimic the natural, pleasing irregularities found in genuine stone.
3. Dab, Don’t Brush: Building Dimension and Depth:
Rather than using fluid, even brushstrokes that would unfortunately flatten and diminish the texture, your approach should be to dab, stipple, or pounce the paint onto your item. This specific technique encourages the texture to gradually build up, creating those incredibly desirable peaks and subtle valleys that give a piece character. Load your craft brush generously with the thick, textured paint and then gently press it onto the surface, ensuring you lift it straight up rather than dragging it across. If, after your initial few dabs, the paint doesn’t exhibit a “chunky” enough quality for your preference, simply incorporate a bit more baking soda into your existing mixture and stir again until you achieve your ideal, desired consistency. Remember, you hold complete creative control over the final aesthetic outcome.
For an even more profoundly realistic stone finish, strategically layering colors can yield a significant and impressive difference. Begin by dabbing on a foundational base coat of your chosen medium gray texture paint, ensuring thorough and even coverage. While this initial layer is still perceptibly wet (or at least slightly tacky to the touch), introduce a small quantity of a lighter paint color into your remaining textured mixture. Then, using either a separate clean brush or employing a very light, delicate touch with the same brush, gently dapple or dry-brush this lighter textured paint onto the still-wet medium gray surface. This meticulous technique flawlessly creates subtle yet impactful variations in tone and depth, beautifully replicating the inherent natural imperfections and nuanced complexities found in authentic stone. This layering approach adds an incredible sense of dimension and undeniable realism, elevating your project from a simple painted item to a truly sculpted masterpiece.
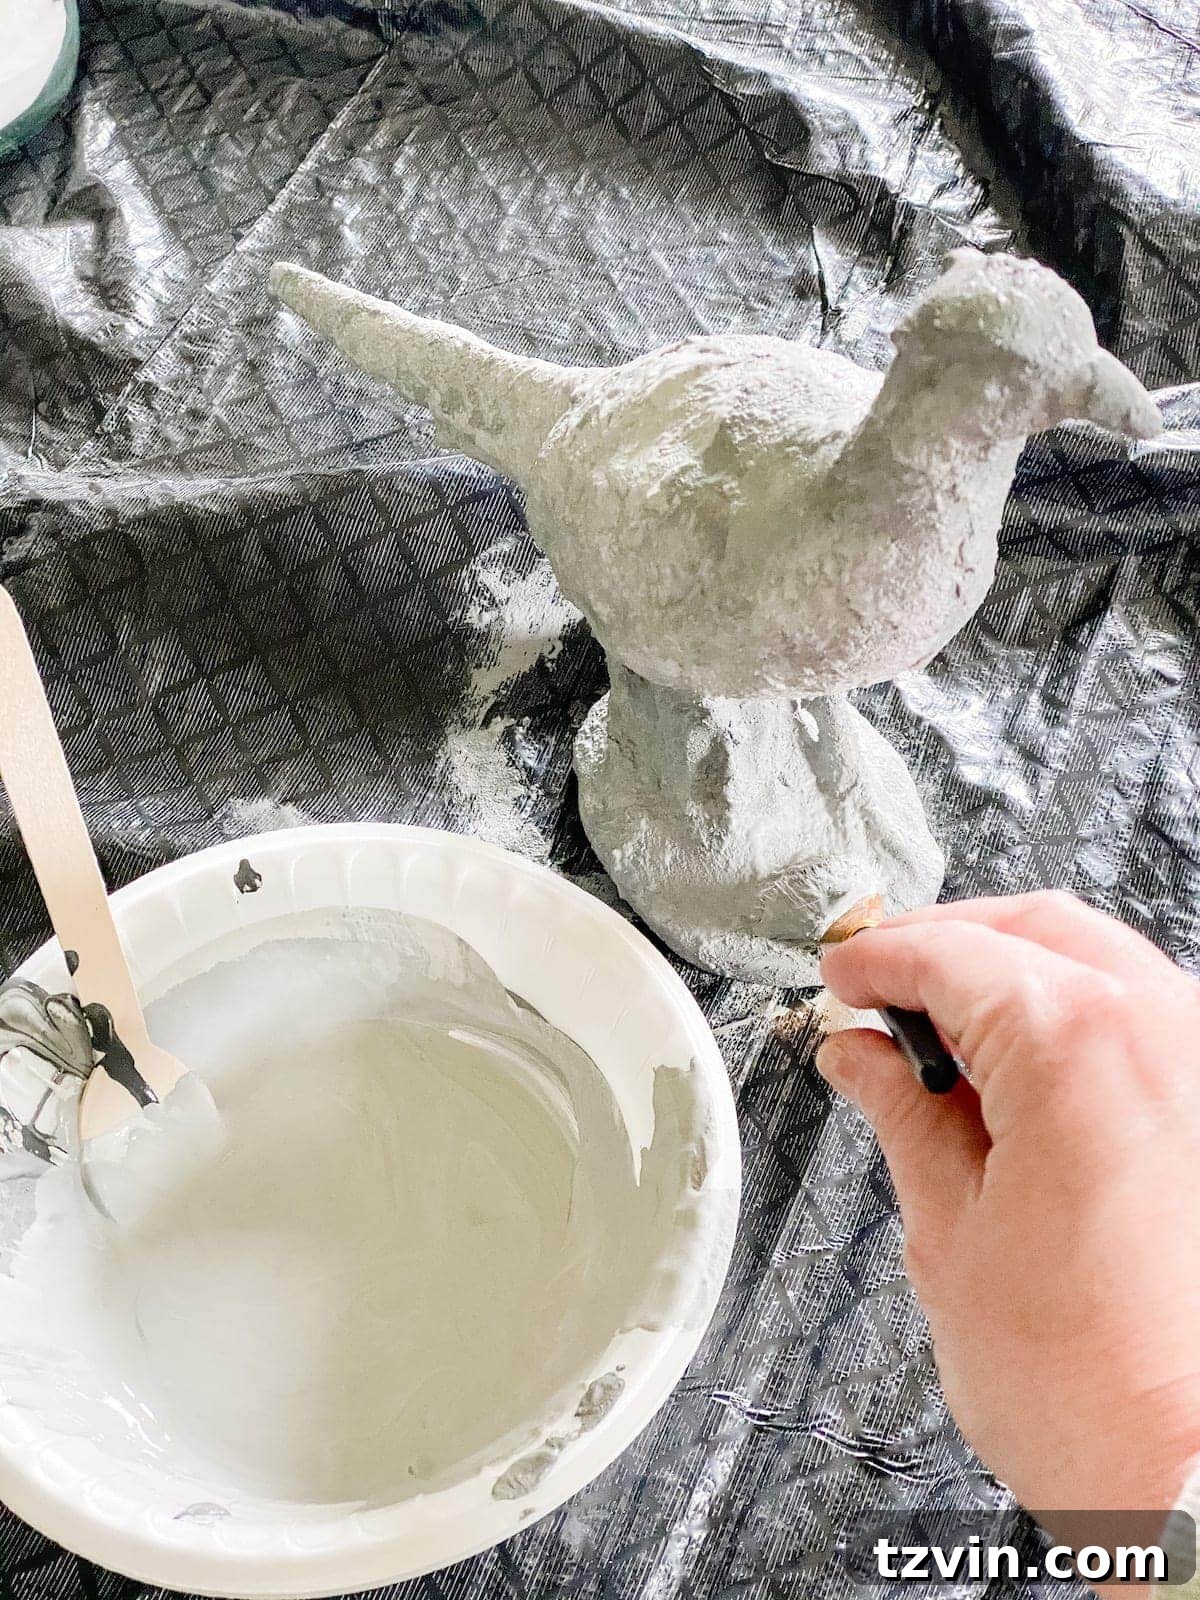
Grant your newly textured piece ample and undisturbed time to dry completely. Depending on the specific thickness of your applied paint layers and the ambient humidity levels, this curing process could span several hours, or potentially even extend overnight. Once fully dry, you will be utterly captivated by the profound transformation. The item, once perhaps mundane or damaged, will now proudly showcase a robust, wonderfully tactile finish, creating the illusion that it has been meticulously carved from ancient, enduring stone, a true testament to its renewed artistry.
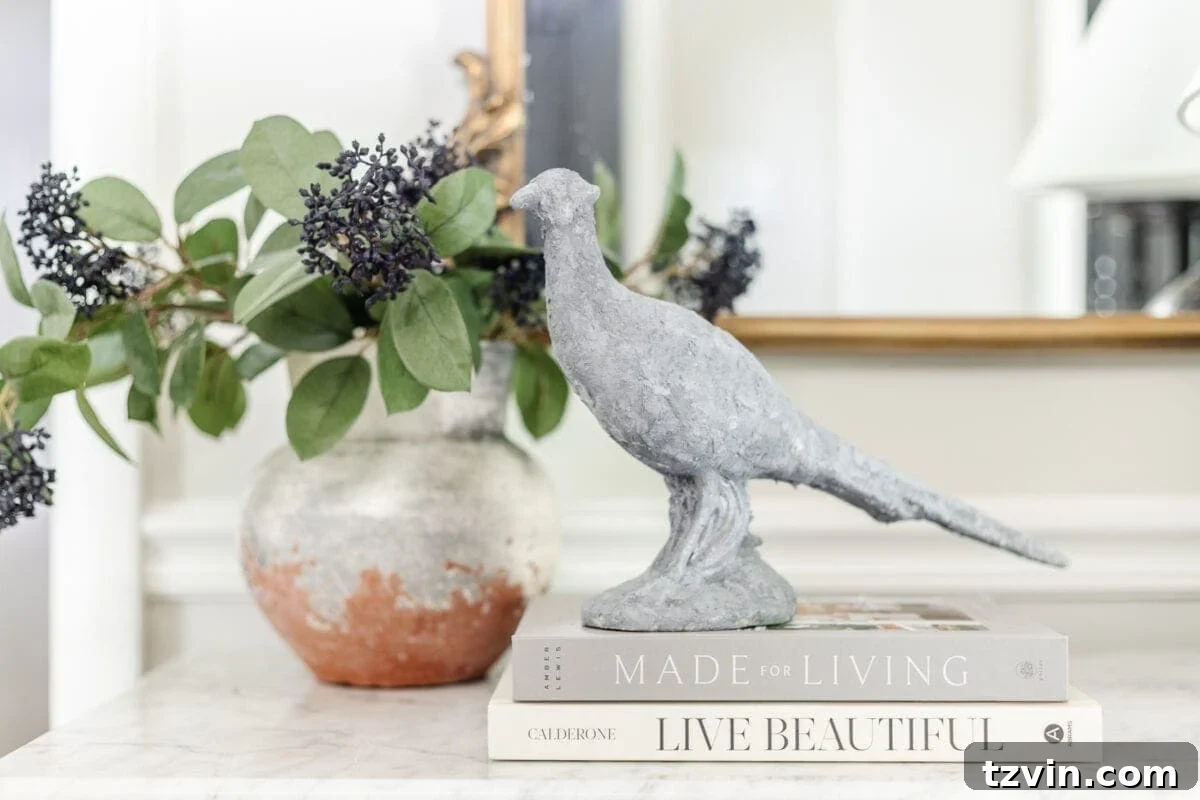
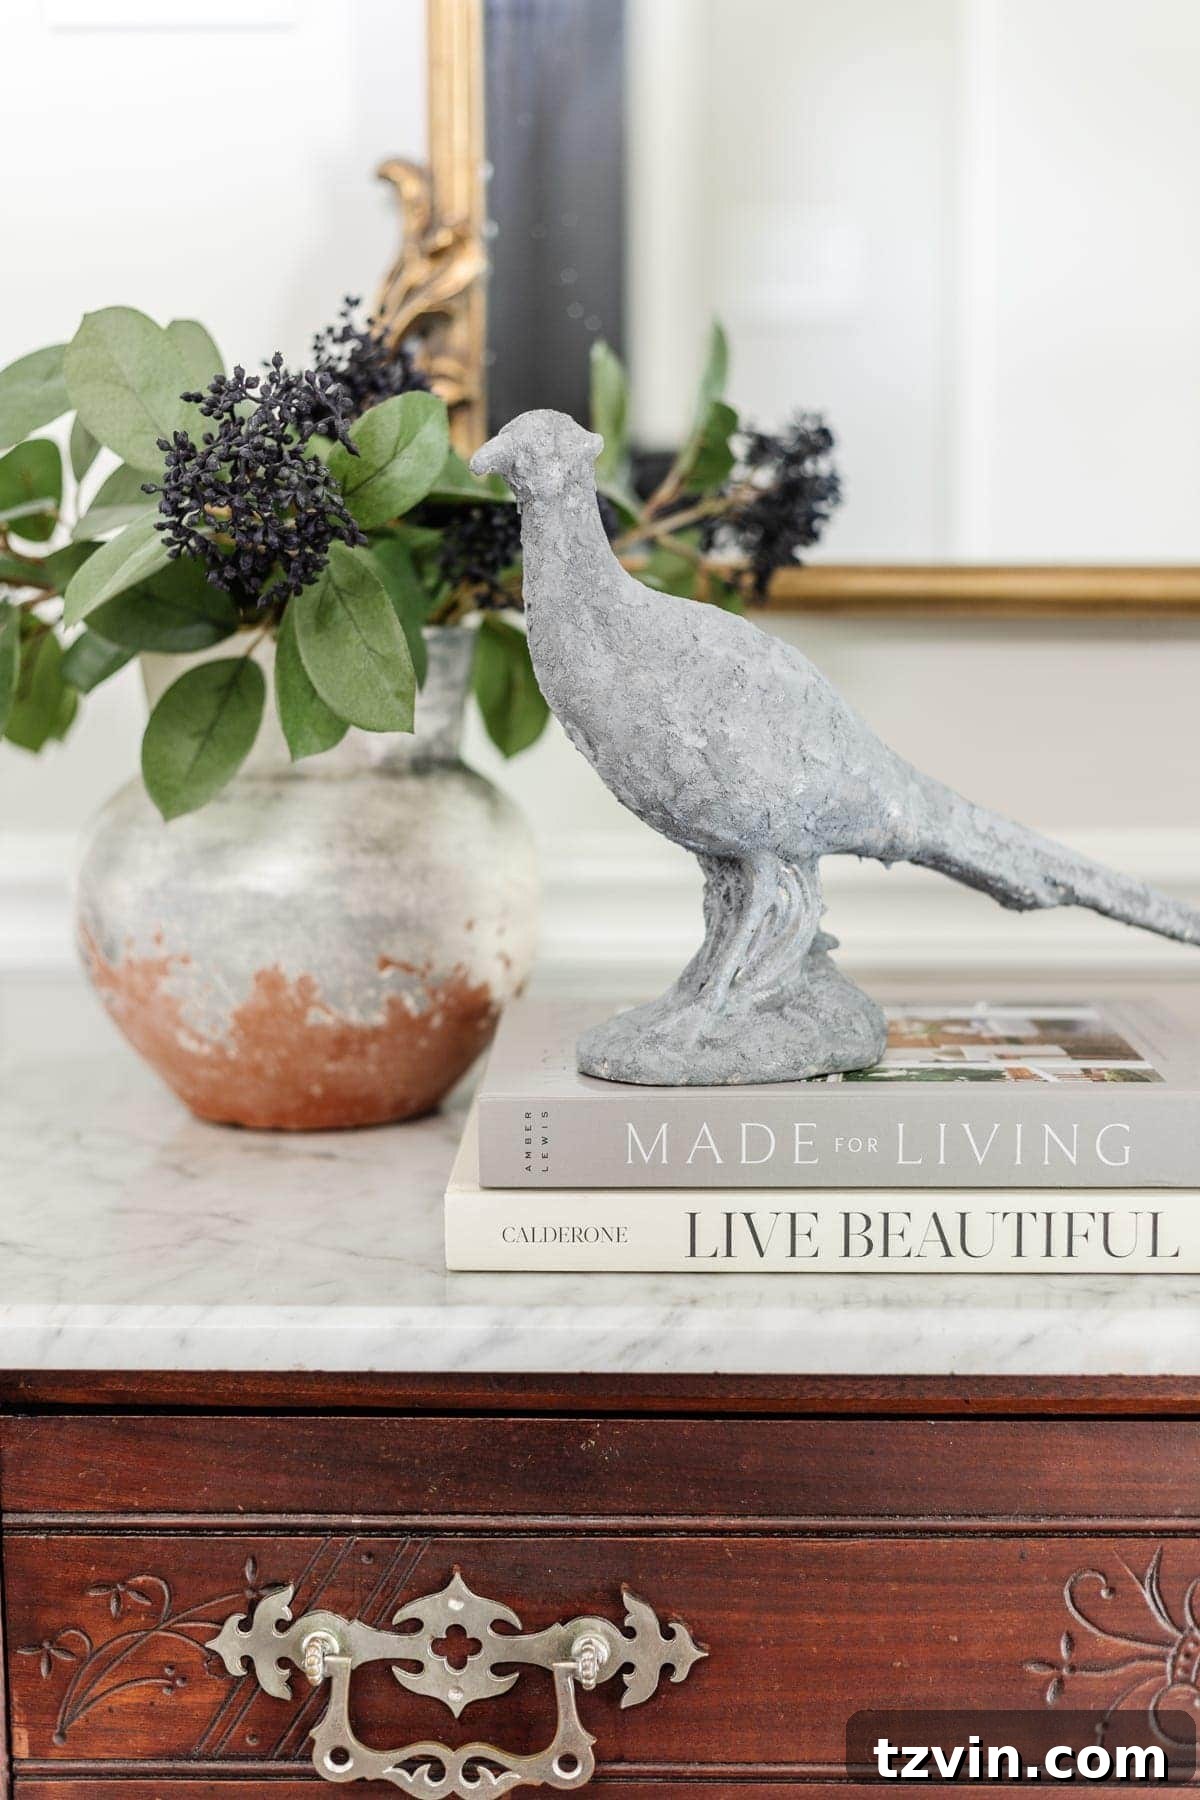
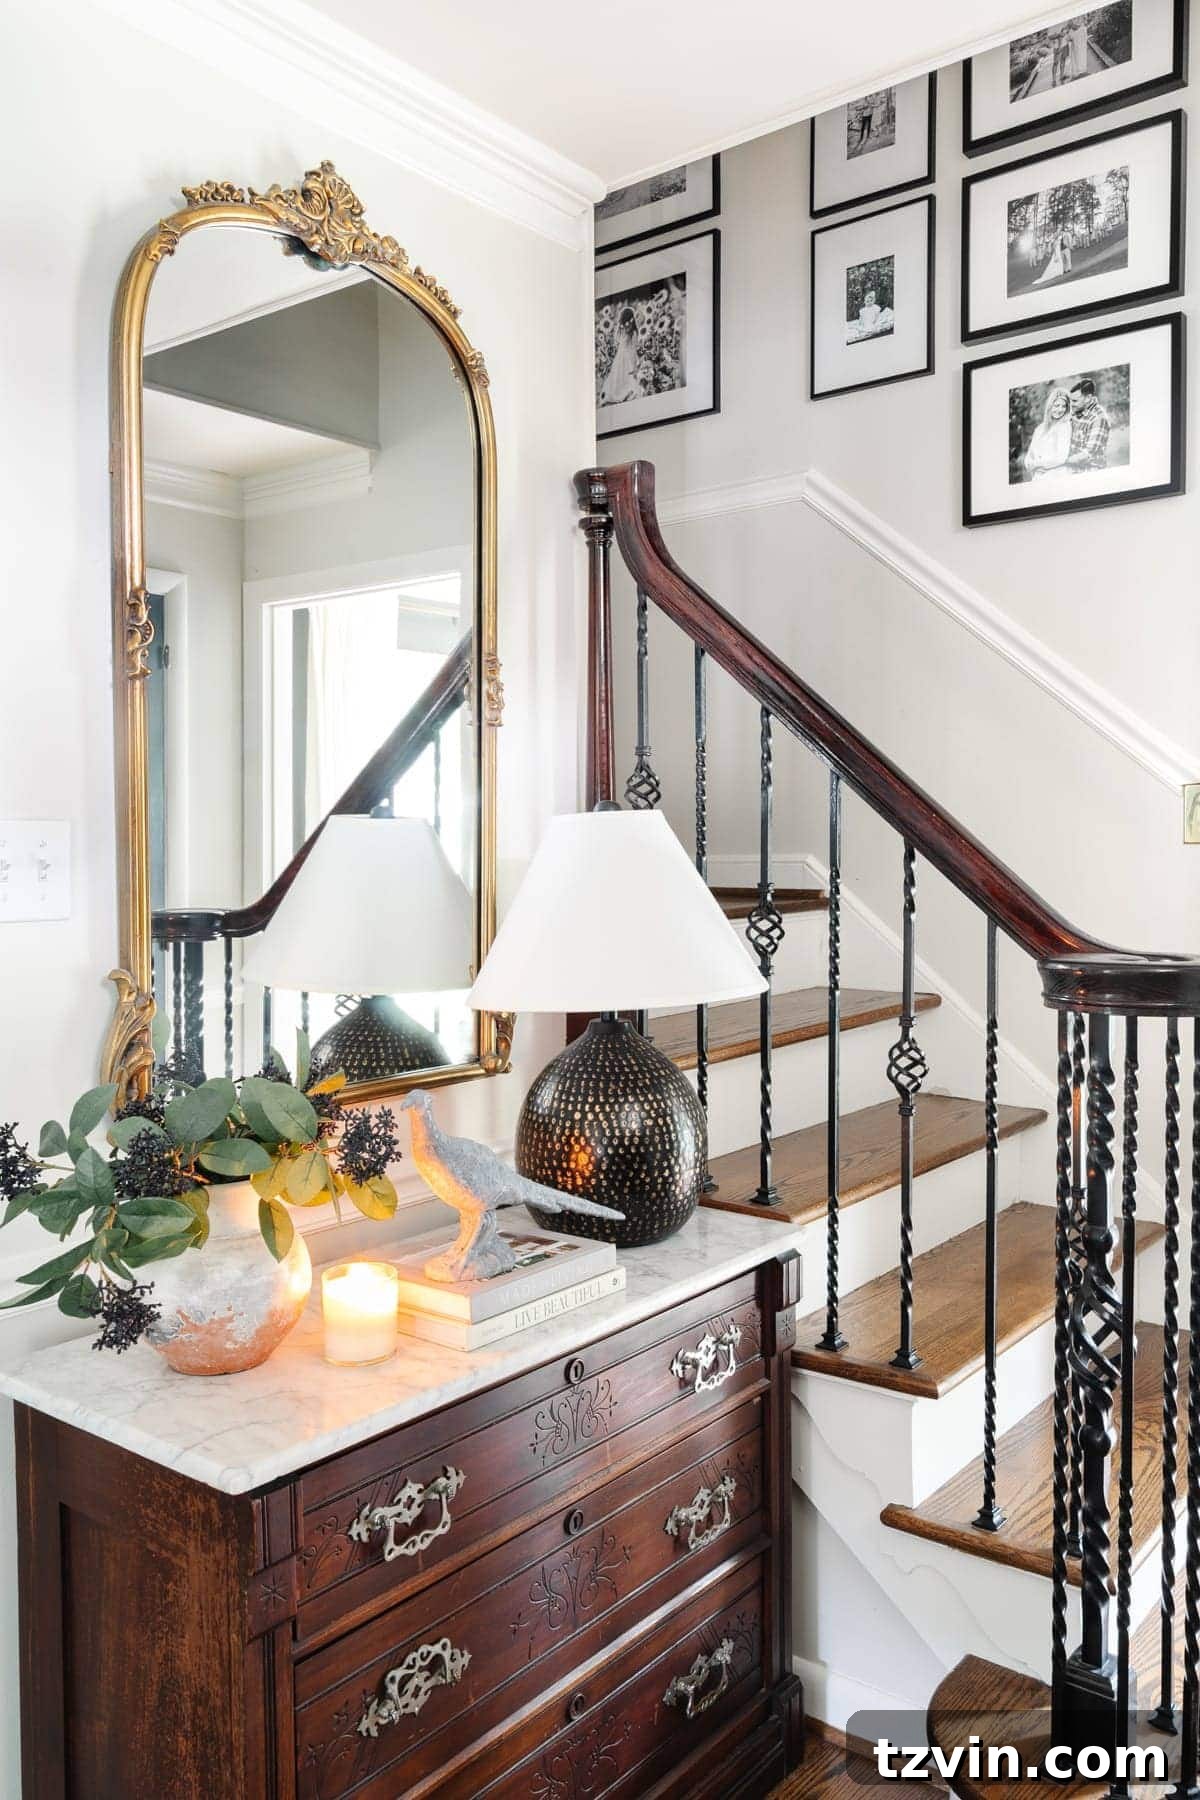
The final outcome is a strikingly realistic stone appearance, serving as a powerful testament to the transformative power of simple ingredients combined with creative and thoughtful application. In our featured project, the pheasant’s previously broken beak, a minor imperfection that might have deterred some, was cleverly repaired a few days prior using a bit of leftover air-dry clay from a previous crafting endeavor. This detail brilliantly underscores another fantastic aspect of engaging in DIY projects: the inherent ability to seamlessly combine various techniques and materials to achieve a beautifully cohesive and visually stunning outcome. It’s all about embracing resourcefulness, seeing hidden potential where others might perceive irreparable flaws, and turning those challenges into unique design opportunities.
Our little pheasant, now affectionately named Phred – a delightful nod to alliteration and a touch of well-deserved “phancy” – has proudly claimed a new home in our entryway. The wonderful online community on Instagram even played a role in bestowing upon him his distinctive moniker, adding a layer of community and engagement to his story. His remarkable transformation from a modest thrift store find to a sophisticated, custom-crafted decor piece perfectly embodies the spirit of creative upcycling and thoughtful home styling. Phred, you are truly looking “phly” in your magnificent new stone-inspired finish, a testament to the magic of DIY!
Unleash Your Creativity: More Inspiring Thrift Store Makeovers
The boundless joy of DIY creativity doesn’t have to end with texture paint. If Phred’s remarkable transformation has ignited your inspiration and you’re eager to embark on even more rewarding projects that harmoniously blend affordable thrift store finds with your unique creative flair, here are several more fun and exceptionally easy makeovers. These ideas are designed to spark your imagination and empower you to personalize your home decor beautifully and effectively, all while adhering to a conscious budget:
- DIY Easy Landscape Art Using a Thrifted Frame: Discover the simple yet profound methods to transform an ordinary, forgotten picture frame into a stunning, custom piece of art that speaks to your aesthetic, even if you consider yourself an absolute beginner in the art world.
- DIY Candle from a Thrifted Brass Canister: Learn how to cleverly repurpose elegant brass containers, often found for pennies, into luxurious, bespoke-scented candles. These creations not only add a wonderful aroma but also infuse your living space with warmth and a sophisticated ambiance.
- Textile Art Using an Old Rug: Uncover the innovative technique of transforming an inexpensive or old rug into a unique, high-end designer knock-off textile art piece. This project is perfect for adding captivating texture, intriguing visual interest, and a touch of global flair to your walls without the designer price tag.
- Sheet Music Gallery Wall from a Thrifted Book: Create a charming and deeply personalized gallery wall by utilizing vintage sheet music thoughtfully sourced from old, discarded books. This project is an ideal way to add historical character, artistic beauty, and a melodic touch to any room in your home.
- DIY Hobnail Vase: Master the clever trick of recreating the intricate, distinctive textured look of vintage hobnail glass. This simple technique allows you to elevate any plain glass vase, giving it a classic, tactile appeal that instantly upgrades its visual presence.
Tips for Success and Expanding Your Texture Paint Projects
To ensure all your DIY texture paint endeavors are consistently successful and yield professional-looking results, consider these additional tips and creative ideas:
- Thorough Surface Preparation: Always make it a priority to ensure your chosen item is impeccably clean, completely dry, and entirely free of any dust, dirt, or greasy residues before you begin applying the paint. For notoriously smooth or glossy surfaces, such as glass or highly polished ceramics, a light sanding or the application of a primer specifically formulated for enhanced adhesion can significantly improve the paint’s durability and longevity.
- Experiment with Application Tools: Do not feel confined solely to using a traditional paintbrush. Explore other tools! Sponges, flexible spatulas, or even your gloved fingers can be utilized to create a diverse range of unique and compelling textured effects, each imparting its own distinct character to your piece.
- Consider Multiple Coats: For achieving a truly robust, deeply textured, and aesthetically rich finish, contemplate applying two or even more coats of your textured paint. Ensure you allow each coat to dry completely and thoroughly before proceeding with the next. This layering strategy effectively builds up depth, enhances the tactile quality, and ensures full, opaque coverage.
- Sealing for Enhanced Durability: If your finished item is intended for frequent handling, will be exposed to moisture (like an indoor planter or bathroom decor), or is destined for outdoor use, it is highly advisable to apply a clear matte sealant or a protective topcoat once the texture paint has fully cured. This crucial step will safeguard the delicate finish and significantly extend its lifespan.
- Beyond the Stone Aesthetic: While the faux stone look is incredibly popular and versatile, remember that this ingenious technique can successfully mimic a multitude of other captivating textures. Dare to experiment with different paint colors, varying baking soda ratios, and diverse application methods to conjure effects such as raw concrete, rustic aged plaster, warm terracotta, or even the subtle grain of distressed wood.
- Broaden Your Creative Applications: Think beyond just small decorative items. This versatile texture paint can be magnificently utilized for accenting larger furniture pieces, crafting unique textured wall art panels, or even giving old, forgotten picture frames a dramatic and stylish refresh. The creative possibilities are genuinely boundless, limited only by your imagination!
This simple yet immensely powerful DIY technique truly opens up an entire, exciting realm of creative possibilities for both passionate home decorators and enthusiastic crafters alike. By ingeniously leveraging readily available leftover materials and injecting a generous touch of your own ingenuity, you possess the power to transform ordinary, unassuming items into extraordinary focal points. These custom pieces will not only elegantly reflect your unique personal style but also enable you to save a considerable amount of money in the process. So, gather your chosen supplies, embrace the joyful, creative mess, and begin the rewarding journey of crafting beautiful, textured decor pieces that will undoubtedly impress everyone who beholds them. Happy crafting!