Achieve stunning DIY Ardex Feather Finish Concrete Countertops on your existing laminate surfaces with this comprehensive, step-by-step tutorial. Learn essential tips, avoid common pitfalls, and transform your kitchen with an industrial-chic look.
There are certain DIY projects where you wish a magical “undo” button existed, allowing you to instantly reverse a misstep. Our journey into creating DIY concrete countertops was undeniably one of those memorable, albeit challenging, experiences. It was a project that tested our patience, pushed our limits, and ultimately taught us invaluable lessons.
At the outset of our ambitious kitchen makeover, when I first presented the idea of installing DIY feather finish concrete countertops to my incredibly supportive husband, Robert, his excitement mirrored mine. Perhaps, in hindsight, his enthusiasm was a little *too* infectious. We often approach projects with a “jump in and conquer” mindset, eager to tackle any DIY challenge head-on. This mentality is usually a strength, but for this particular endeavor, a more cautious approach would have served us well. Nevertheless, the thrill of a home transformation fueled our ambition.
Essential Insights Before You Start Your Concrete Countertop Project
Before you dive headfirst into the rewarding, yet demanding, world of DIY concrete kitchen countertops, especially if you’re considering a thin layer of concrete over existing surfaces, a bit of preliminary research is crucial. This isn’t a weekend project; it demands significant work, time commitment, and, above all, a generous dose of patience. Trust us, you’ll need every bit of it.
To ensure a smoother process and minimize surprises, here are critical aspects to understand before embarking on this type of project:
- Embrace the Dust: This project is inherently dusty—exceptionally dusty. Concrete sanding generates a fine, pervasive powder that will settle everywhere. Prepare thoroughly by sealing off your work area.
- Allocate Ample Time: Realistically, you’ll need to dedicate at least a full week to this project. This accounts for mixing, application, multiple drying times between coats, and extensive sanding to achieve a smooth finish. Rushing will only lead to a less-than-ideal outcome.
- Work in Small, Manageable Sections: Concrete feather finish dries rapidly. To maintain control over consistency and application, mix only small batches at a time and work on limited square-foot sections of your countertop. This prevents the concrete from hardening before you can properly apply it.
- Protect Your Home from Dust: Turn off your HVAC system to prevent dust circulation. Cover all furniture, appliances, and floors in the vicinity with heavy-duty drop cloths. Consider using plastic sheeting to create a barrier for adjacent rooms.
- Safeguard Cabinetry: If your kitchen cabinets and drawer fronts are not slated for a new coat of paint after the concrete application, protect them meticulously with plastic sheeting and painter’s tape. This barrier will shield them from both concrete splatter and the inevitable sanding dust.
- The Aesthetic Reward: If your goal is to transform your existing laminate countertops into a modern, industrial-style surface, the effort is truly worth it. The unique, earthy appeal of concrete can dramatically elevate your kitchen’s aesthetic.
UPDATE: Explore our complete kitchen makeover reveal for more inspiration!
The Longevity of DIY Concrete Countertops: What to Expect
UPDATE: Discover how our DIY concrete countertops have performed and held up over time in this detailed follow-up post!
Before we delve into the specific “oopsie” moment that became a pivotal learning experience for us, let’s first ensure you have a clear understanding of the necessary supplies and the correct, step-by-step procedures to achieve successful concrete countertops.
Step-By-Step Guide to Crafting Your Own Concrete Countertops
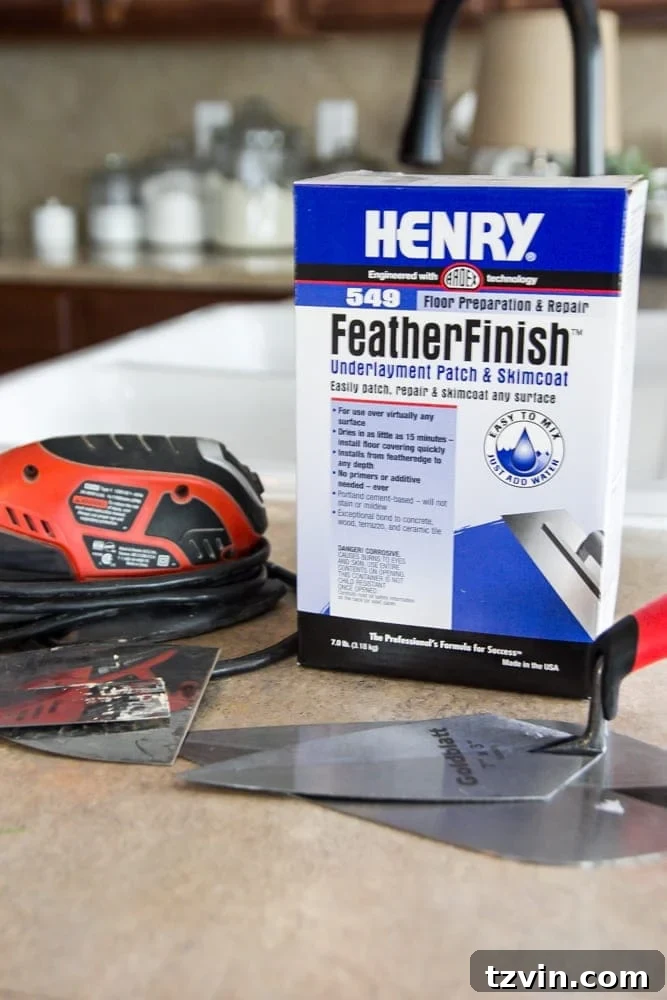
The world of DIY concrete countertops offers a myriad of tutorials, broadly categorized into two main methods: poured concrete and skim coat applications. Given that our kitchen already featured existing laminate Formica countertops, we opted for the skim coat approach, which is significantly less complex and more budget-friendly than poured concrete methods. For this technique, we chose Henry Ardex Feather Finish Underlayment Patch & Skimcoat, a readily available product at most local hardware stores.
Ardex Feather Finish is an excellent choice for DIY concrete countertops because it eliminates the need for constructing elaborate edge forms or installing heavy cement board, which are typical requirements for poured concrete. This not only makes the process more accessible but also substantially reduces both material costs and the labor intensity associated with traditional concrete casting. The resulting countertops are remarkably durable, offer a contemporary industrial aesthetic, and present a cost-effective alternative to purchasing new countertops. Before starting, I meticulously researched and gathered as many expert tips as I could find for this method. And truly, if only I had communicated *all* of these critical details to my project partner, Robert, we might have avoided a significant hiccup along the way.
Gather Your Supplies
As an Amazon Associate, I earn from qualifying purchases via affiliate links. For more information, see my full disclosure here.
- Henry Feather Finish: For approximately 60 square feet of countertop, we used about 4 boxes, purchased at Home Depot for around $20 each.
- 3-4 disposable 2-quart sized buckets: Essential for mixing small batches.
- Concrete stick stir or concrete mixer paddle bit: For thorough and consistent mixing.
- Orbital sander: For larger, flatter areas.
- Mouse sander: Ideal for corners, edges, and detail work.
- 50, 120, and 220 grit Mouse sanding pads and orbital sanding pads: A range of grits is crucial for initial roughing, leveling, and final smoothing.
- 50, 120, and 220 grit sanding sheets: For hand sanding in tricky spots.
- Mask: A high-quality respirator mask is absolutely essential for dust protection.
- Protective safety glasses: To shield your eyes from concrete dust and debris.
- Vacuum or ShopVac: For efficient dust removal throughout the sanding process.
- 12-inch taping knife: Your primary tool for spreading concrete smoothly over large areas.
- 6-inch taping knife: Useful for smaller sections and initial spreading.
- Putty knife: Perfect for precise application on edges and corners.
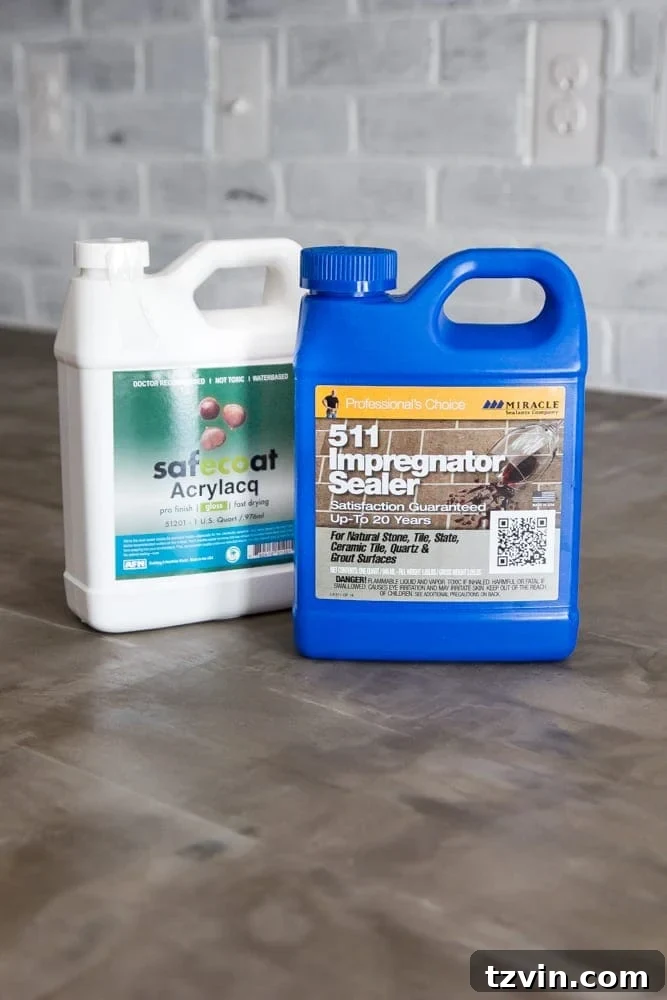
- 511 Impregnator Sealer: A penetrating sealer to protect against stains. (We found this primarily on Amazon.)
- Safecoat Acrylacq: A durable, water-based topcoat sealer for protection and finish.
- Paint brush or roller: For applying the sealers.
Step 1: Prepare Your Existing Counters by Roughing the Surface
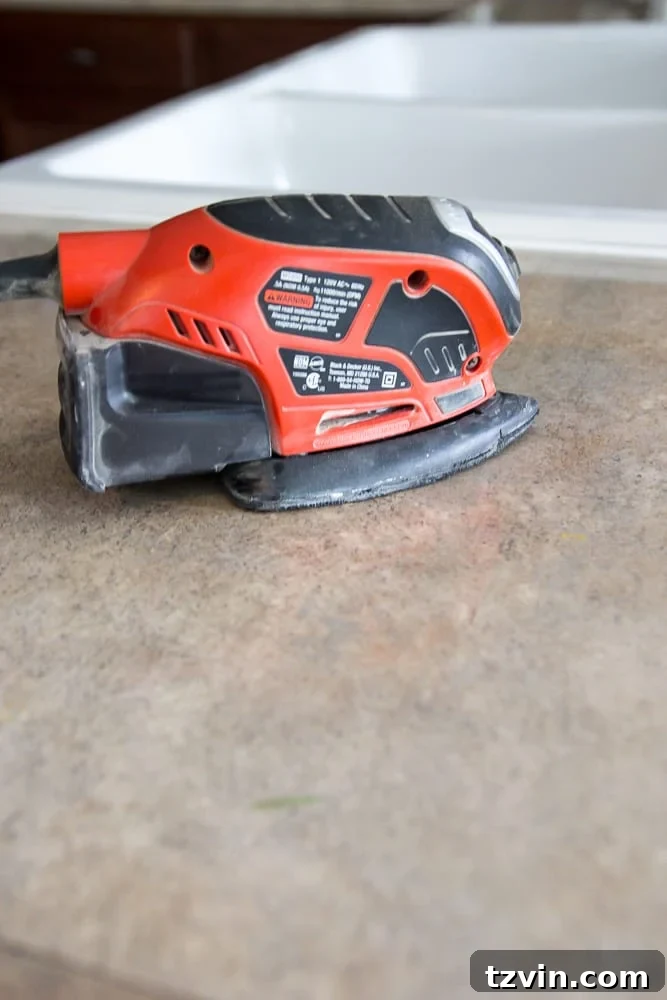
The foundational step for a successful concrete overlay is to properly prepare your existing laminate countertops. Our Formica surfaces had a notoriously glossy finish, which inherently resists adhesion. To counteract this, I meticulously roughed up the entire surface using my orbital sander fitted with 50-grit pads. The goal here isn’t to remove the laminate entirely, but rather to create a “tooth” or texture that the concrete can firmly grip onto. It might feel like you’re barely making a dent, but even a slight abrasion is critical for proper bonding.
After thoroughly sanding, it’s paramount to clean the surface. I wiped away every speck of residual dust with a damp cloth, ensuring the surface was perfectly clean and ready for the concrete application. This meticulous preparation prevents any loose particles from compromising the adhesion of the feather finish.
Step 2: Precisely Mix Your First Batch of Concrete
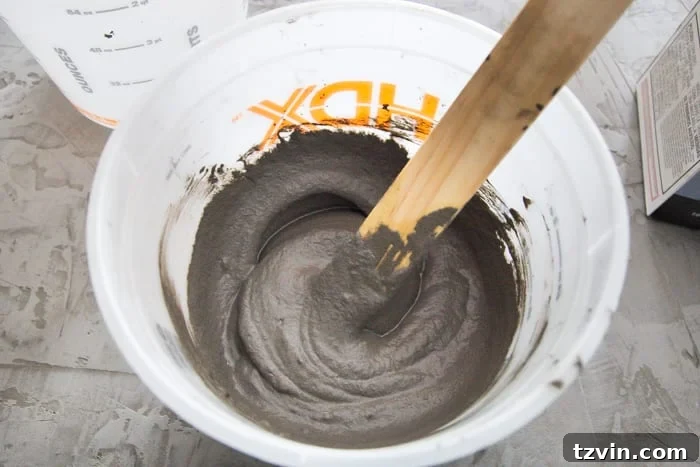
Mixing the Ardex Feather Finish is a crucial stage that dictates the workability and final consistency of your concrete overlay. We carefully followed the manufacturer’s directions on the back of the Feather Finish box, aiming for a 1:1 ratio of concrete powder to water, measured in two separate buckets. The ideal consistency you’re looking for is similar to that of thick toothpaste – smooth, lump-free, and spreadable, but not runny. This texture allows for proper adhesion and prevents excessive sagging or cracking.
A critical piece of advice: always mix only a small batch at a time. This material dries incredibly fast – truly, REALLY fast. I found that mixing about a quart at a time was the perfect amount, providing a manageable 10-15 minute working window before the concrete began to set. Attempting to mix larger quantities will invariably lead to wasted material and a rushed, uneven application.
Step 3: Begin Application with a Thin Coat in a Controlled Area
Now, before we delve into the proper application technique, let me share our significant misstep, a learning curve that undoubtedly added to the project’s timeline and our exhaustion. We initiated this ambitious project over Mother’s Day weekend, which also happened to coincide with my birthday. In a truly chivalrous gesture, my wonderful husband, Robert, insisted, “I’ve got this. You go enjoy a relaxing mani/pedi. I’ll take care of our little one and get the first coat on these countertops.” It was a moment straight out of a romantic comedy, and who was I to refuse such a thoughtful offer? I practically skipped out the door, eager for a well-deserved treat, whispering “Hallelujah! Treat yo’ self!”
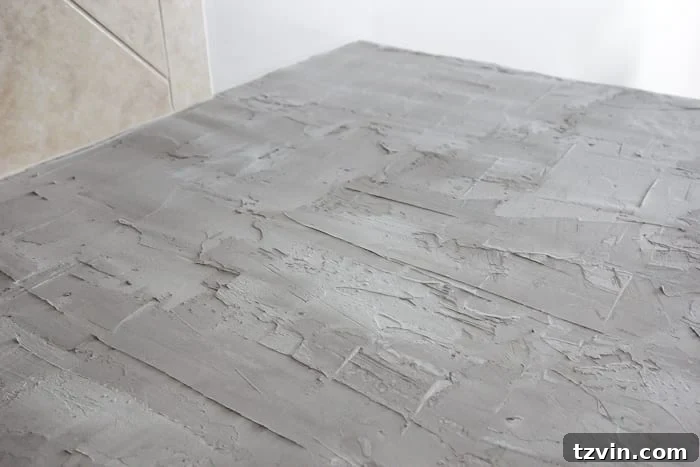
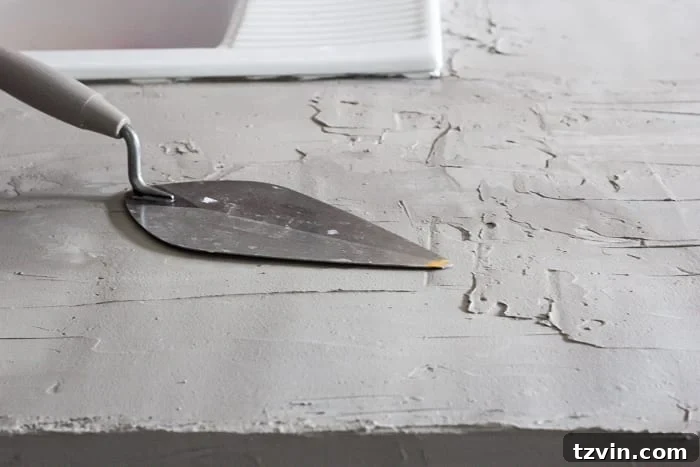
However, upon my return, as we prepared for the subsequent sanding step, a rather alarming sight awaited us. The countertops were a testament to the fact that enthusiasm, while valuable, must be paired with precise instructions and technique. This is what we were faced with:
Critical Caution: What NOT to Do When Applying Concrete to Laminate Countertops
IMPORTANT TIP: When working with feather finish concrete, the golden rule is to apply multiple thin, even coats. Resist the temptation to rush the process by applying fewer, thick coats. This is where our primary mistake occurred, and it’s a pitfall we strongly advise you to avoid.
As it turned out, I hadn’t sufficiently emphasized to Robert the crucial detail of applying the concrete in a very thin, consistent layer, with the intention of building up the surface with additional coats. Instead, with his “kick this project’s butt” mentality, he applied the material liberally, spreading it on really THICK. This oversight created a deeply uneven surface that would later prove incredibly challenging to rectify. Furthermore, he initially used a standard trowel, believing it to be the most effective tool for the job. While a trowel can be useful in some concrete applications, for a feather finish skim coat, it contributed to the thick, uneven spread.
Step 4: Attempt to Sand the First Coat Smooth (and learn from mistakes)
The result of the thick application was a countertop surface that was wildly uneven, boasting a super-rough texture that felt almost beyond repair. I spent two exhaustive days sanding, desperately trying to salvage the situation. To my dismay, it was incredibly challenging. The surface was simply too inconsistent, and I felt a pang of guilt for not having communicated the nuances of the process more clearly to Robert.
When sanding concrete, you typically begin with coarse sandpaper, running your sander over the surface a couple of times to knock down major high spots. Then, you progress to medium-grit sandpaper to refine the surface further, and finally, you use fine-grit sandpaper for a smoother finish. However, with our initial thick application, this progression was an uphill battle.
Crucial safety tip: Always wear protective safety glasses and a high-quality mask. Concrete dust is incredibly fine and irritating to both your eyes and lungs. After each sanding session, use a ShopVac or powerful vacuum cleaner to thoroughly remove the dust from the countertop surface and the surrounding area. This not only cleans your workspace but also prevents dust from interfering with subsequent concrete layers.
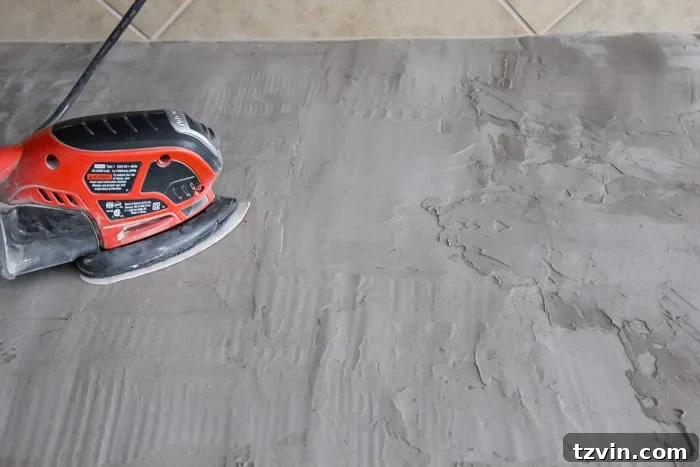
Even after my extensive “sand-a-thon,” the countertop still looked like this. A rather unappealing sight, to say the least.
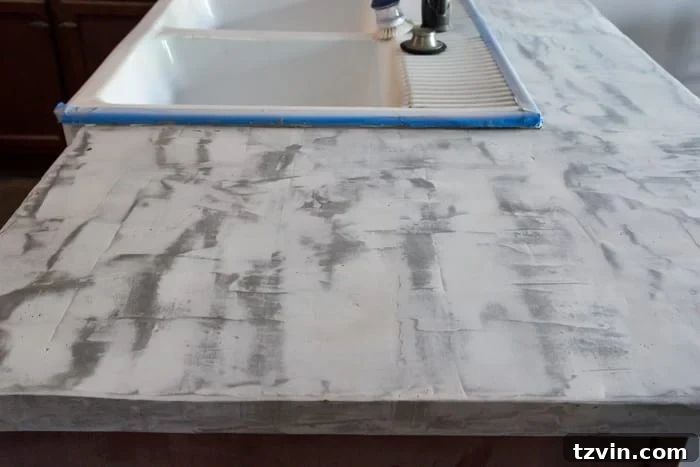
Step 5: Applying Subsequent Thin Coats of Concrete (the Right Way)
The splotchy countertops were definitely “no bueno.” All those dark spots were remnants of the humps and valleys in the concrete that my sander had slowly, painstakingly worn down. To rectify this significant problem, I first got the humpy, bumpy initial layer as smooth as humanly possible. Then, over the course of the next three days, I applied three *more* thin coats, using the correct technique. I sanded each layer in between applications, meticulously working to level the counters and achieve a uniform surface. (And yes, I’m practically type-screaming that because I was at the “don’t-mess-with-momma-she’s-gonna-snap” level of frustration.) This mistake undeniably added to our overall cost due to the excess concrete used in the first coat, but it was a hard-learned lesson that we now share so you can avoid the same fate.
So, for the proper way to apply the concrete coat, here’s the skinny:
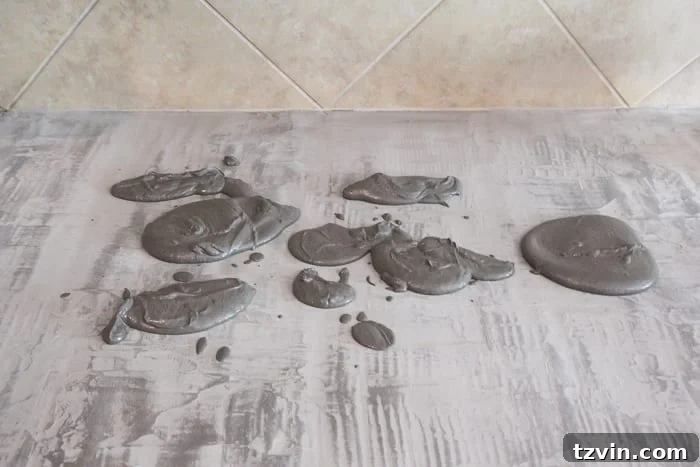
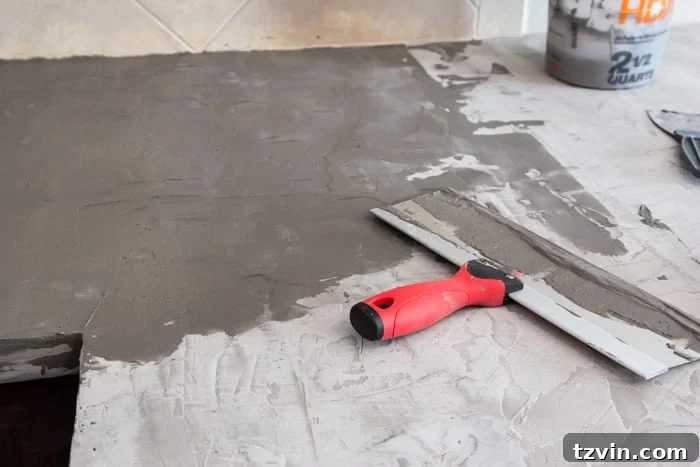
I emptied the majority of my mixed concrete (about 1 quart) into the middle of the small section I was working on. This time, instead of a traditional trowel, I opted for a 12-inch taping knife to spread and smooth the concrete. This tool proved infinitely faster and allowed for a much smoother, more even application. For any smaller, more intricate areas, I found a 6-inch wide putty knife to be incredibly effective, providing better control and precision.
Step 6: Meticulously Apply Concrete to Countertop Edges
Once the main countertop surface had its initial coats, attention turned to the edges. To apply a thin, consistent layer of concrete to the front edge and sides of the countertops, I utilized a smaller putty knife. It was crucial to wait approximately an hour or two after the top coat had sufficiently dried before tackling the sides. This strategic waiting period prevents accidentally disturbing or removing any of the freshly smoothed concrete from the top surface, ensuring a clean and sharp edge.
For visual learners, this video from Young House Love was an invaluable resource. Watching their technique provided immense clarity on the best way to apply the feather finish, making me sincerely wish I had discovered it before our initial mishap!
Step 7: Sanding Subsequent Coats for a Silky Smooth Finish
Timing is everything when it comes to sanding subsequent concrete coats. I discovered that the optimal time to begin sanding was roughly three hours after applying a fresh coat. At this point, the concrete wasn’t entirely cured, but it was dry enough to work with easily, making the sanding process far more efficient than waiting for full hardness.
After each concrete layer, I would start with the 50-grit sandpaper to tackle any lingering imperfections or minor humps. From there, I systematically worked my way up to 120-grit and then to 220-grit sandpaper, progressively smoothing the surface until it was incredibly refined. For stubborn spots or areas that needed extra care, I would go back over them by hand. For hard-to-reach crevices and intricate areas, a sanding block proved indispensable.
This process of applying thin coats and meticulous sanding was repeated for a third coat, and sometimes even a fourth, until the desired level of smoothness and evenness was achieved. After applying the final layer of concrete, waiting for it to dry, and then enduring days of continuous sanding, the entire room was enveloped in a persistent, giant cloud of concrete dust. But the hard work paid off – behold, the finally smooth concrete coat!
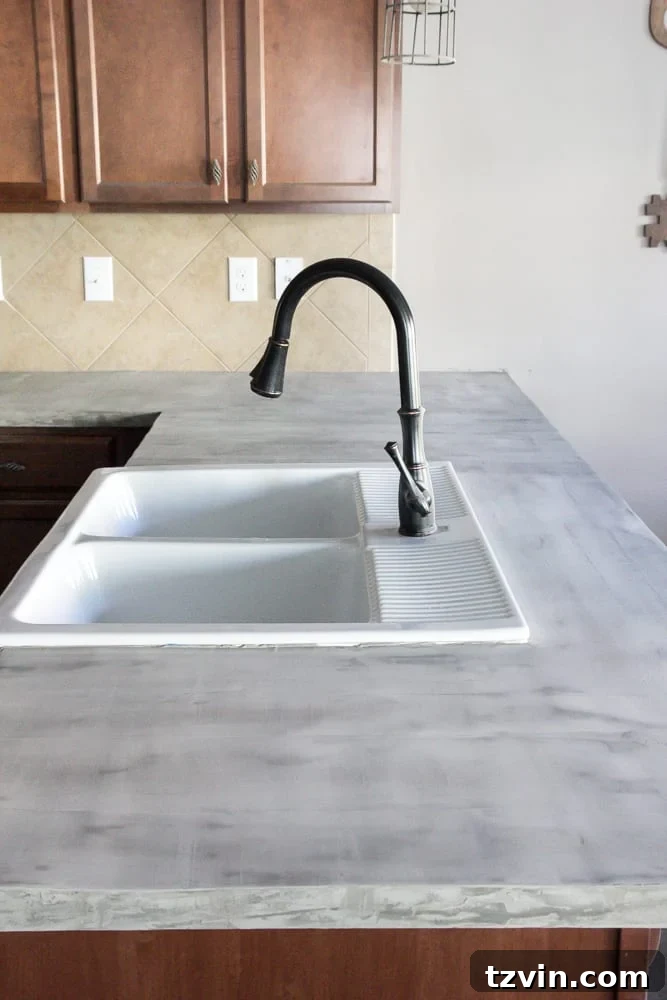
And this was the immediate aftermath of our extensive sanding marathon.
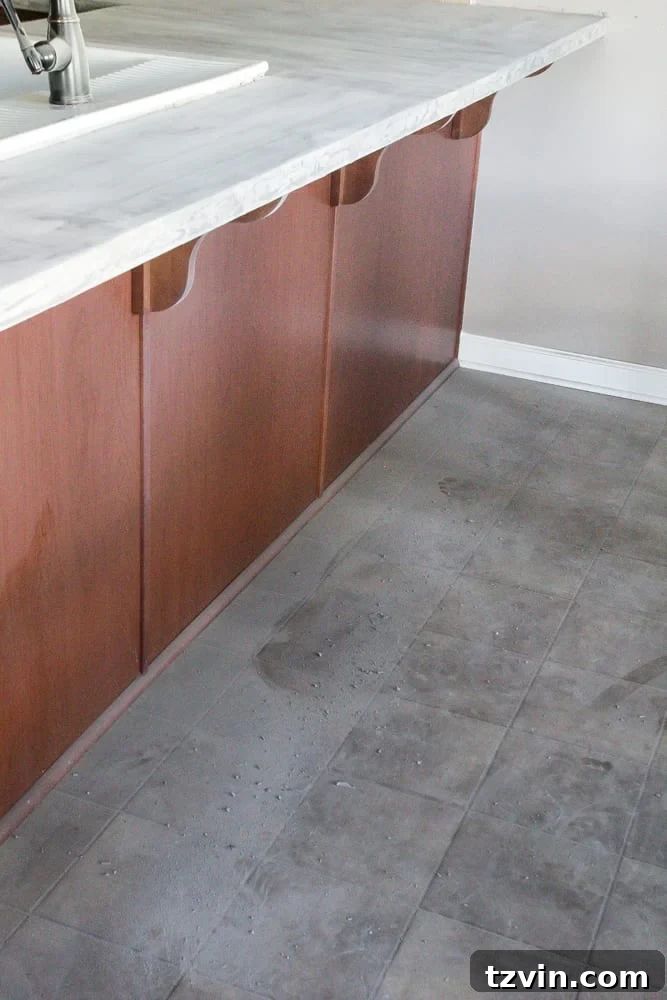
Every surface in our house seemed to have acquired a fine, ghostly layer of concrete dust. We literally had to take a full day to recuperate and meticulously clean, bringing our home back to a dust-free zone. Seriously, I felt like the kid from “The Sandlot” after the vacuum cleaner exploded in “The Beast’s” backyard – it was an epic mess!

To date, this project stands as the messiest DIY undertaking we’ve ever attempted. But with the sanding complete, it was time for the final, crucial step: sealing these beautiful countertops!
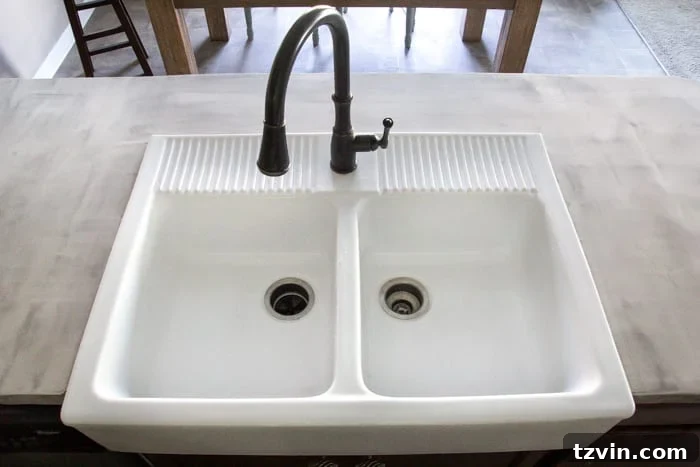
Initially, I tried a product called Cheng Concrete Sealer. After three coats, it still hadn’t fully achieved the desired finish, and the application process was quite arduous. Moreover, it was on the pricier side. While it might work for others, I eventually found a Plan B that delivered far superior results for us – a dynamic sealer duo that truly completed the transformation.
Step 8: Apply the Penetrating Impregnator Sealer
For the essential sealing stage, I began by brushing on two coats of the 511 Impregnator Sealer. This product is a penetrating sealer, meaning it seeps deep into the concrete surface, providing robust protection against stains and moisture. I meticulously followed the directions on the back of the bottle, ensuring optimal application and allowing a full 24 hours of drying time between each coat. This crucial step creates a strong foundational barrier, preparing the concrete for the final protective layer.
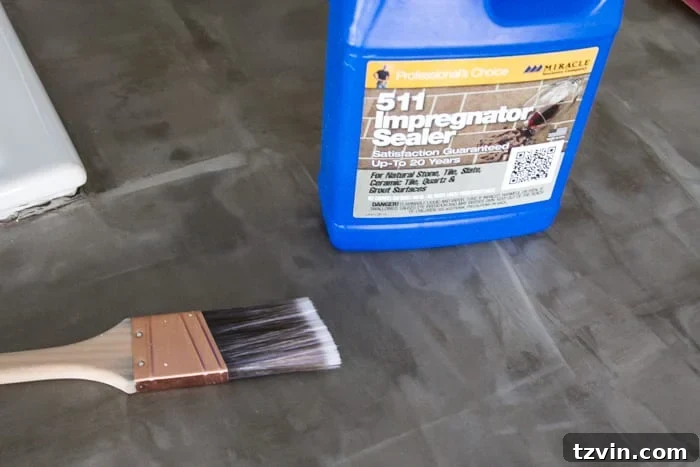
Step 9: Apply the Final Protective Topcoat Sealer
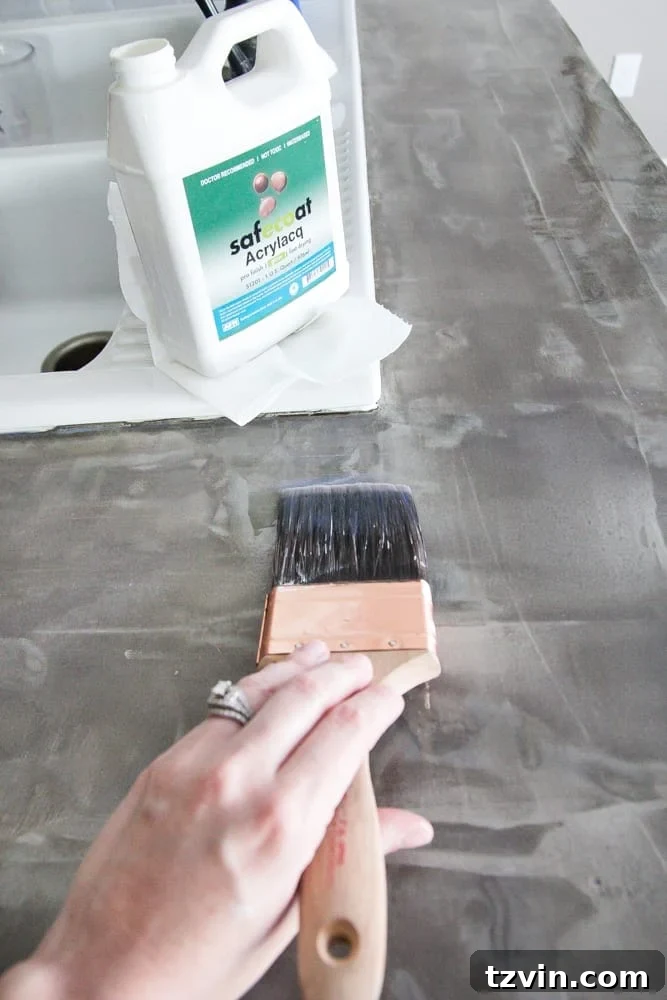
After the 511 Impregnator Sealer had fully cured for 24 hours, I moved on to applying the topcoat. I brushed on three coats of Safecoat Acrylacq, again adhering strictly to the manufacturer’s instructions, and allowing 24 hours between each application. I focused on brushing it on evenly, taking care to avoid any air bubbles that could compromise the smooth, clean finish. This product cures to a hard, glossy topcoat that not only provides exceptional durability but also enhances the aesthetic of the concrete. While I initially thought I preferred a matte finish, avoiding the “wet cement” look, I absolutely fell in love with how this final gloss coat transformed our countertops. They now possess a luxurious, almost granite-like feel and appearance, which was an unexpected but delightful outcome.
Normally, I’m drawn to a more distressed, rustic look, but it took me only a day or two to fully appreciate the unique character and subtle variations in the concrete’s finished appearance. Considering the week-long ordeal and the initial snafu we had to straighten out, the final result was nothing short of amazing. The overall cost for transforming all 60 square feet of our countertops came in at approximately $250, a remarkably affordable price for such a dramatic kitchen upgrade.
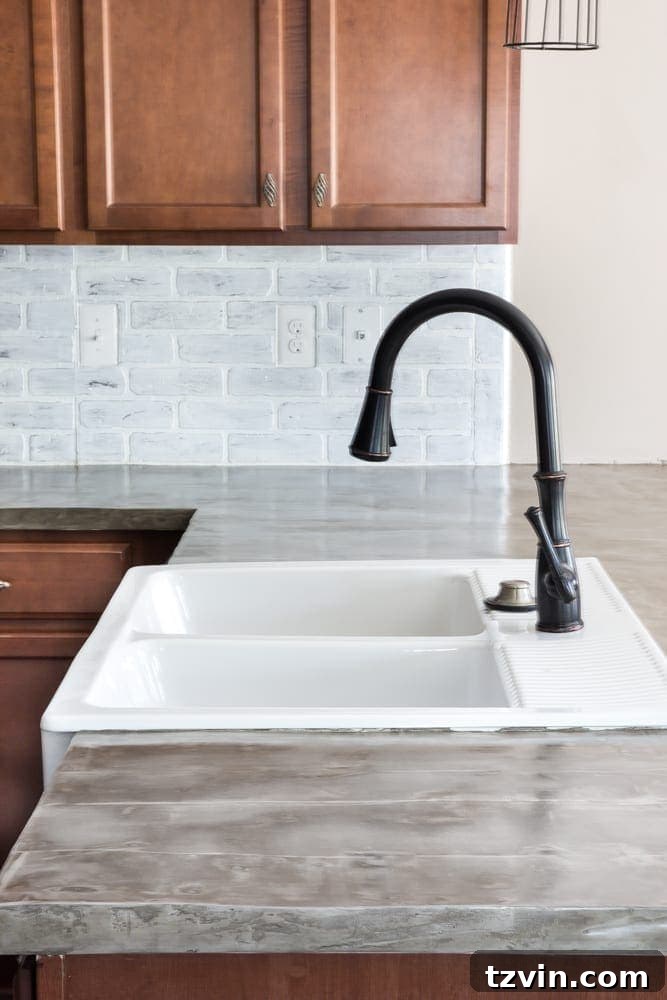
Showcasing Our Finished Skim-Coated Concrete Countertops
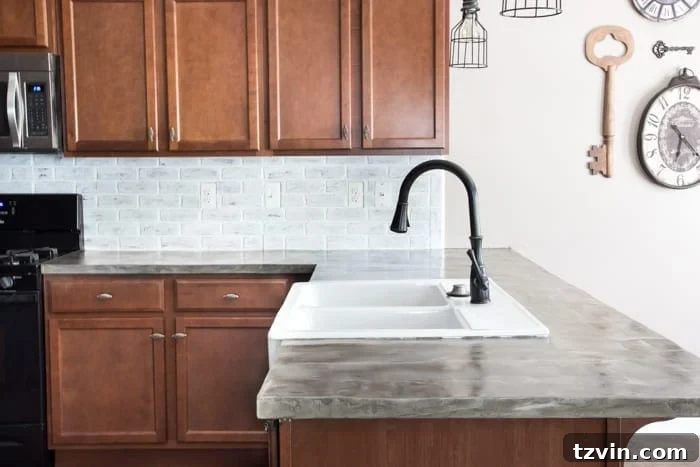
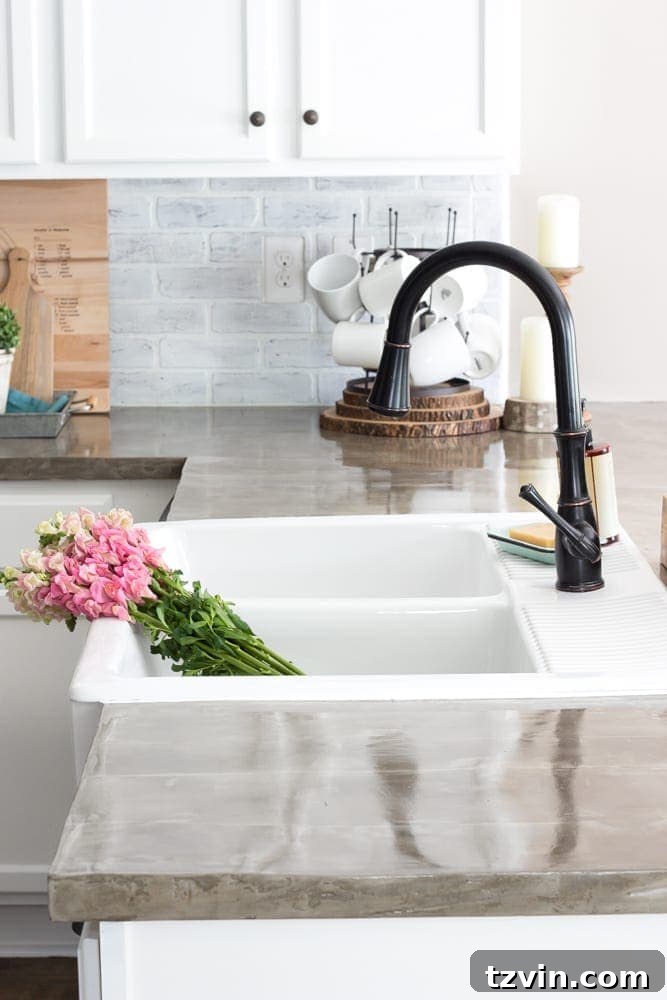
Now that this demanding project is finally behind us, we are absolutely thrilled with the enduring end result. Our DIY skim-coated concrete countertops have fundamentally transformed the heart of our home.
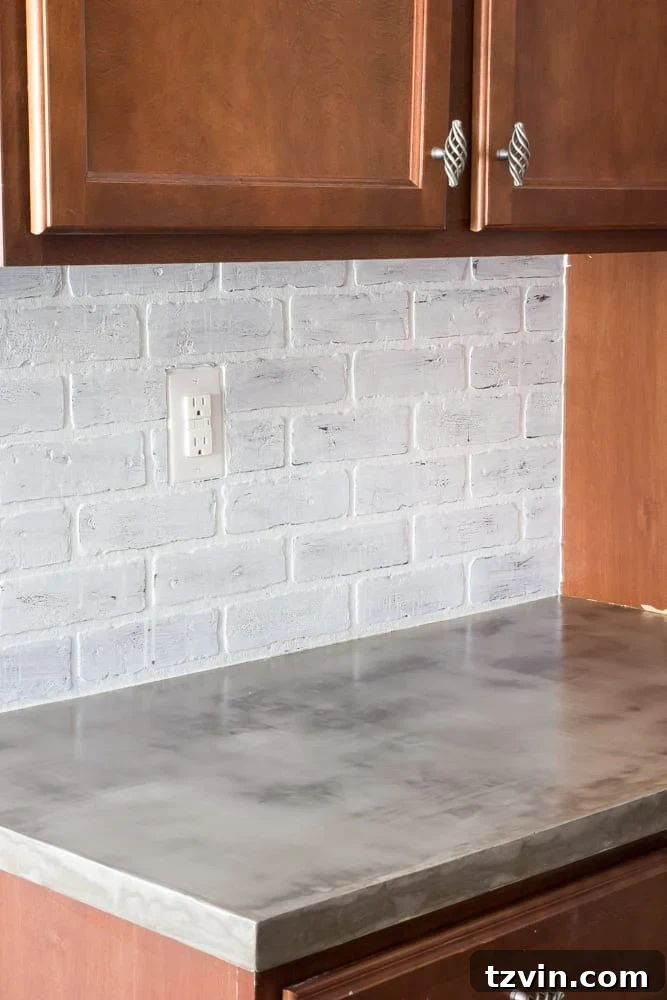
To complement the industrial charm of the concrete, we also introduced a beautiful whitewashed brick backsplash, adding another layer of texture and warmth to the space.
Explore the full tutorial: DIY Whitewashed Faux Brick Backsplash
It’s genuinely surprising to me, as I had envisioned classic subway tile since day one of our renovation. However, the rustic charm of the brick, paired with the modern elegance of the concrete countertops, created a wonderfully cohesive and inviting look that is far from sterile. This combination strikes a perfect balance between contemporary and farmhouse styles.
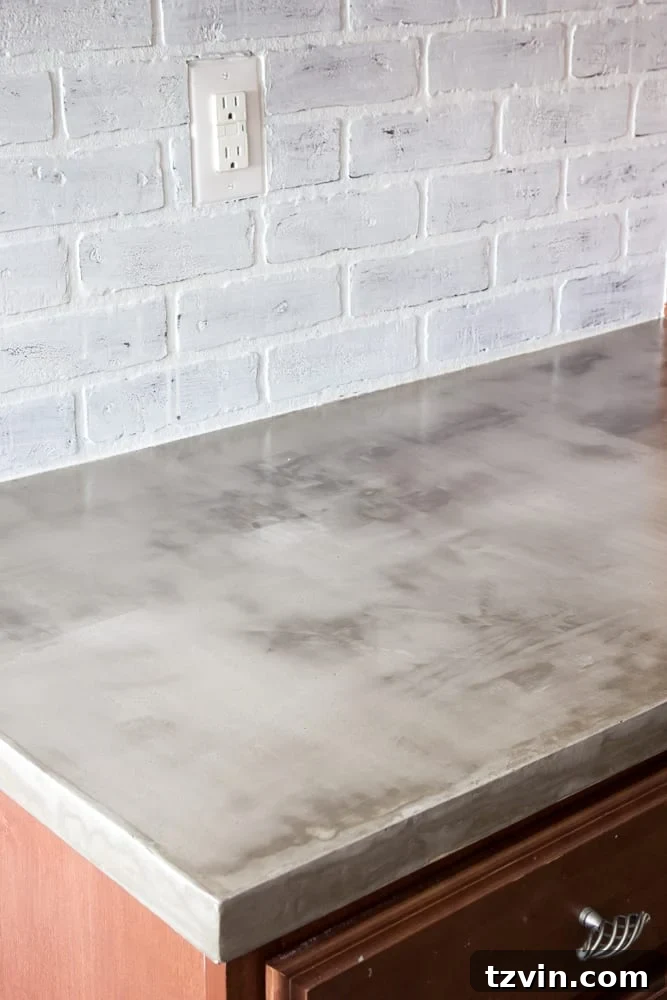
This kitchen has truly come an incredibly long way from its previous, somewhat dated state. The transformation is striking, proving that with vision and perseverance, even the most challenging DIY projects can yield stunning results.
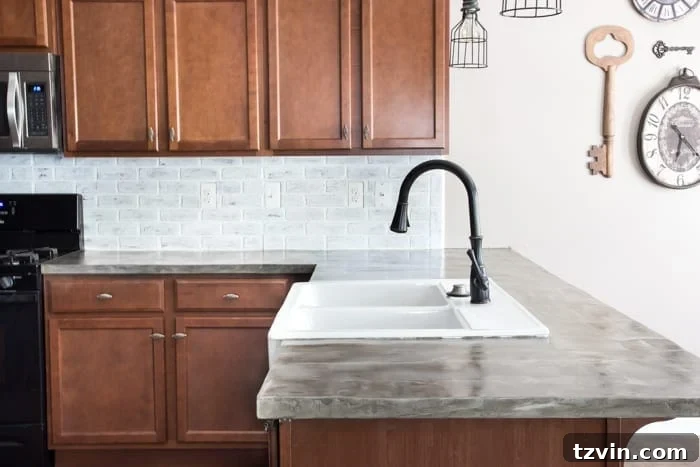

I can honestly say I’ve never been so relieved and glad to finally finish a project! Whew! Despite the dust, the delays, and the moments of frustration, the ultimate satisfaction of seeing our vision come to life made every challenge worthwhile.
Have you ever considered or installed concrete countertops in your home? Were you captivated by the idea of an industrial aesthetic? While the process of creating your own DIY concrete countertops can be messy and exhausting, we can unequivocally say they are completely worth the effort for the unique character and durable finish they bring to your space.
Discover More Inspiring DIY Kitchen Ideas
DIY Pressed Tin Kitchen Backsplash: Add Vintage Charm
Cottagecore Style Budget Kitchen Facelift Ideas: Refresh Your Space
Simplified Decorating: Creative Ways to Style Kitchen Countertops
Floor Transformation: How to Install a Herringbone LVP Floating Floor Over Tile