Achieve Your Dream Kitchen on a Budget: A Cottagecore Style Facelift with Paint, DIY, and Thoughtful Touches
Are you captivated by those awe-inspiring kitchen transformations featured on HGTV, where dated spaces are completely overhauled with open concepts, sparkling new lighting, custom cabinets, luxurious countertops, and pristine flooring? These ambitious renovations, often accompanied by eye-watering price tags upwards of $80,000, certainly provide endless inspiration. And while we all enjoy dreaming of such grand projects, they often feel out of reach for the average homeowner.
The reality for many of us is a desire for significant change without the equally significant budget. This is precisely where a budget kitchen facelift shines. It’s about understanding that a truly impactful transformation doesn’t always require a complete demolition and rebuild. Sometimes, the most remarkable changes come from smart, cost-effective DIY projects and a keen eye for detail.
Discover the full breakfast nook and kitchen reveal here!
Explore the detailed kitchen facelift budget breakdown!
Cottagecore Charm: A Stunning Kitchen Facelift Before and After
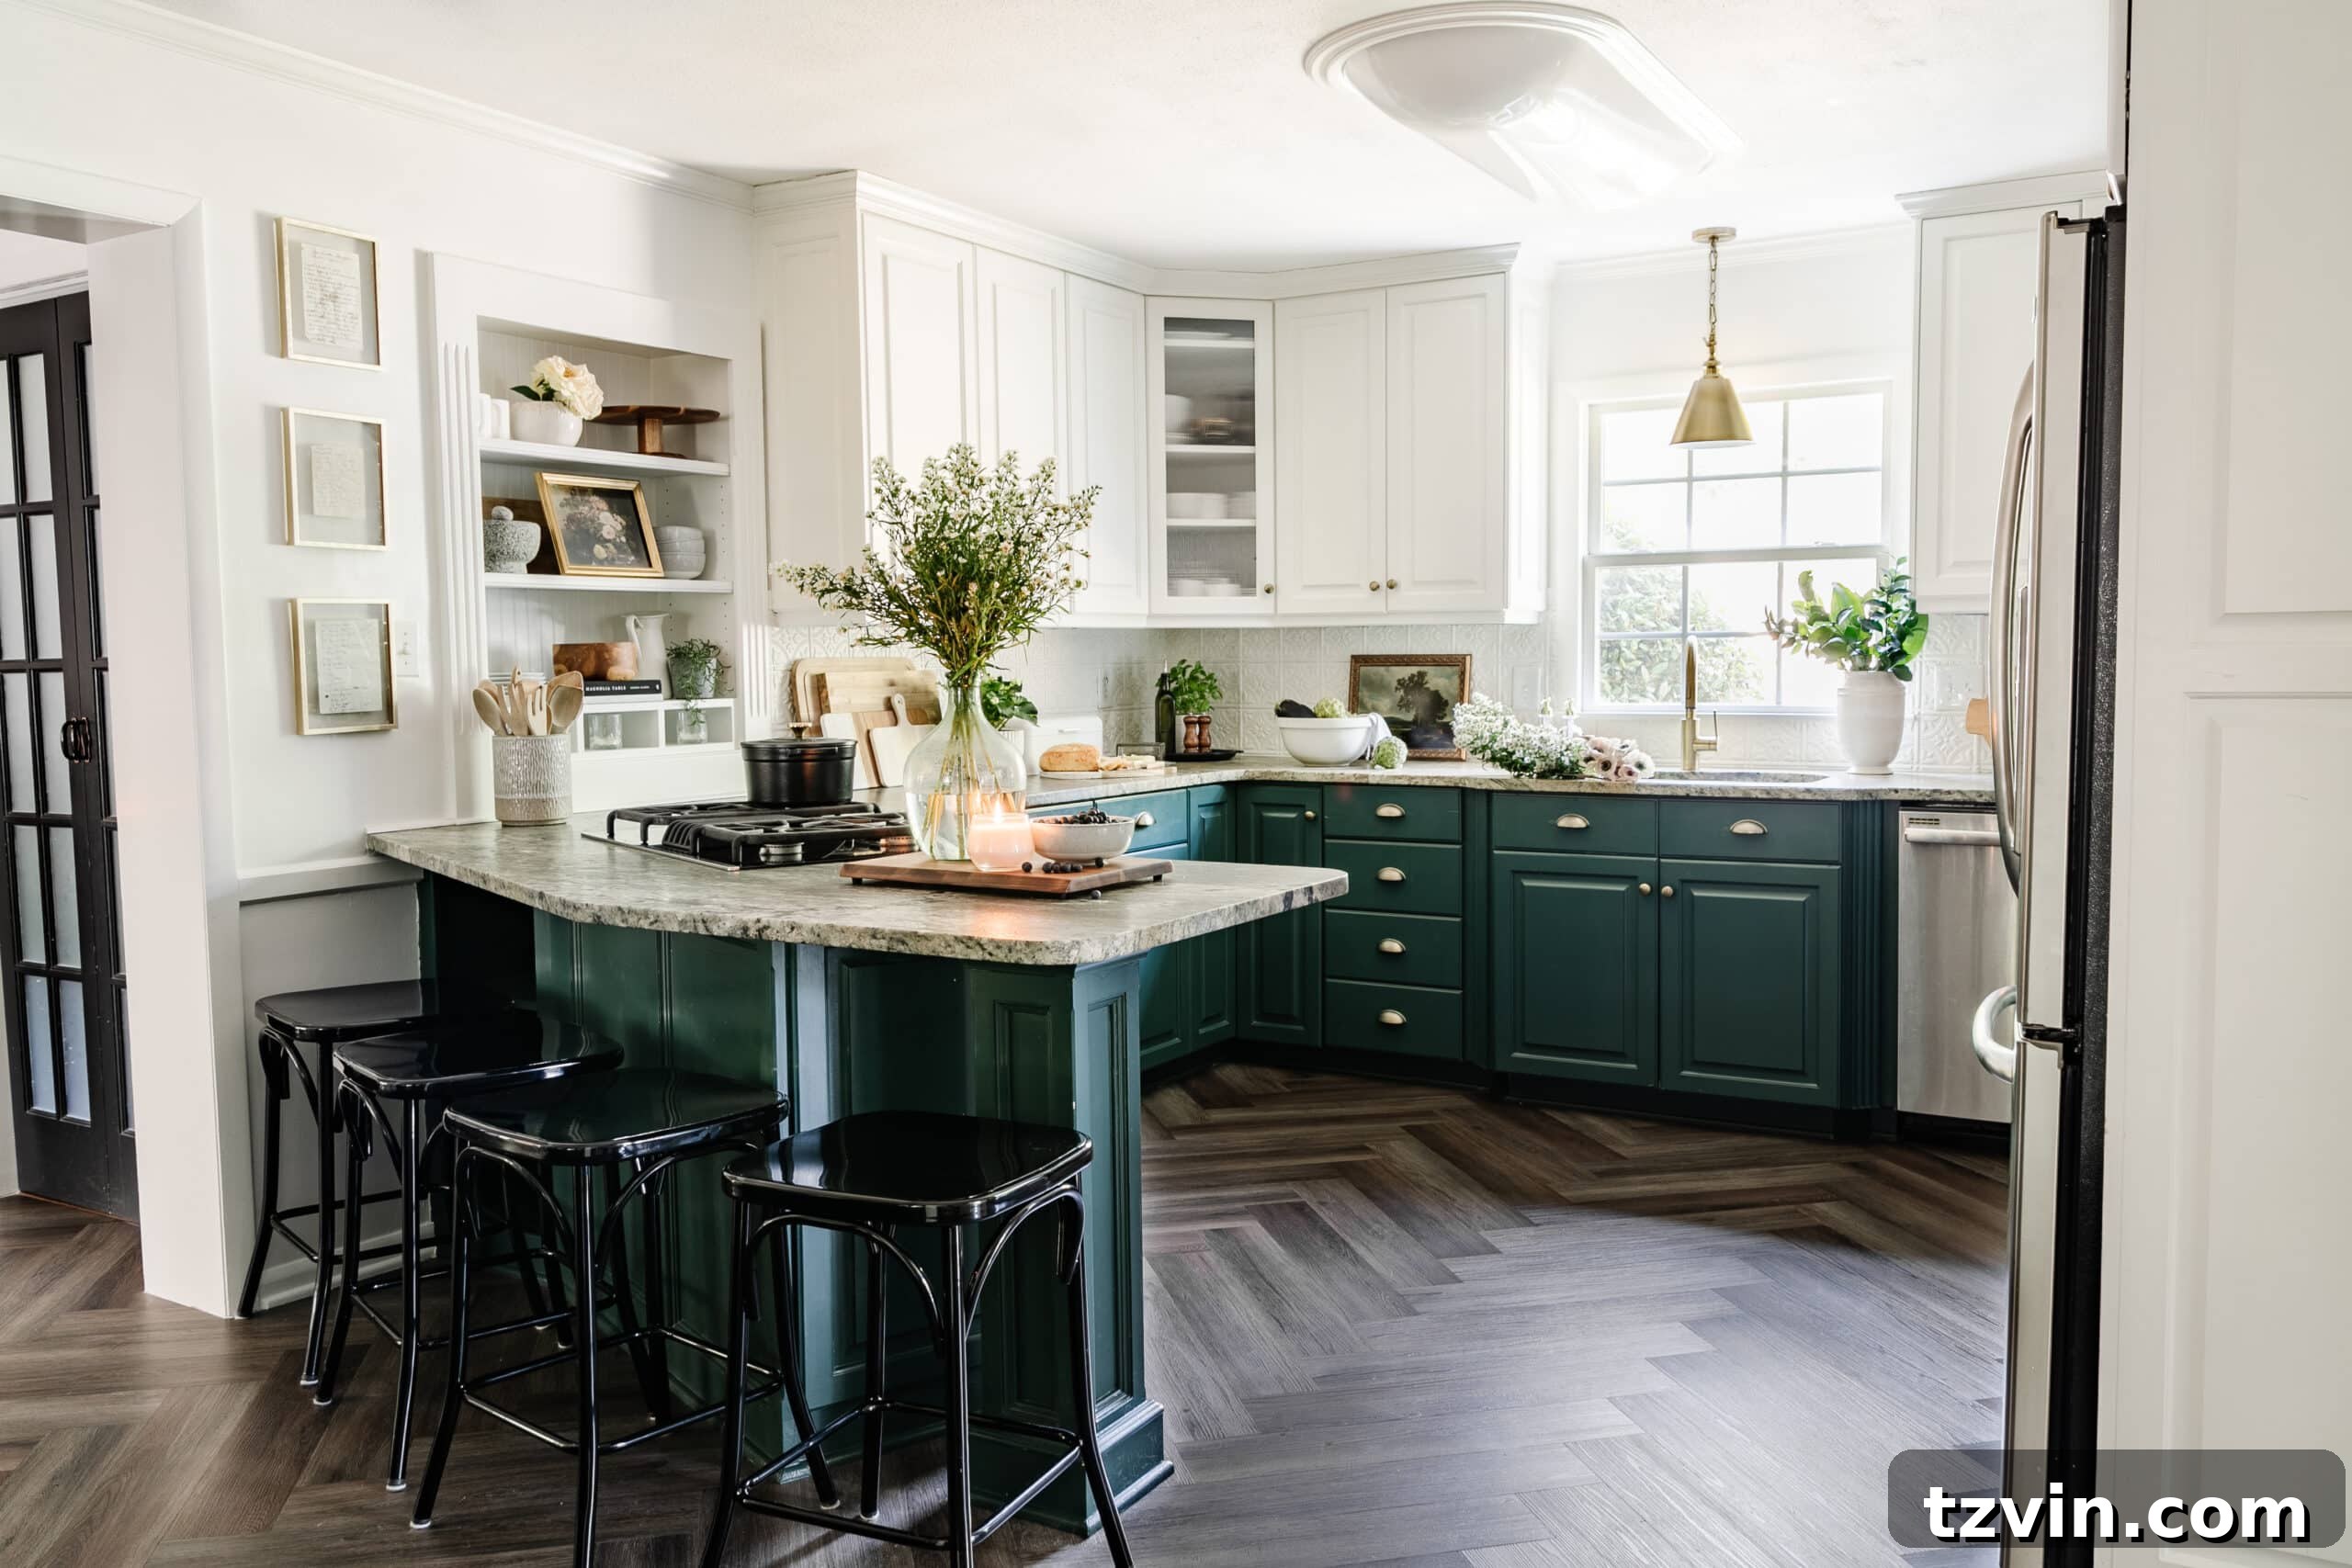
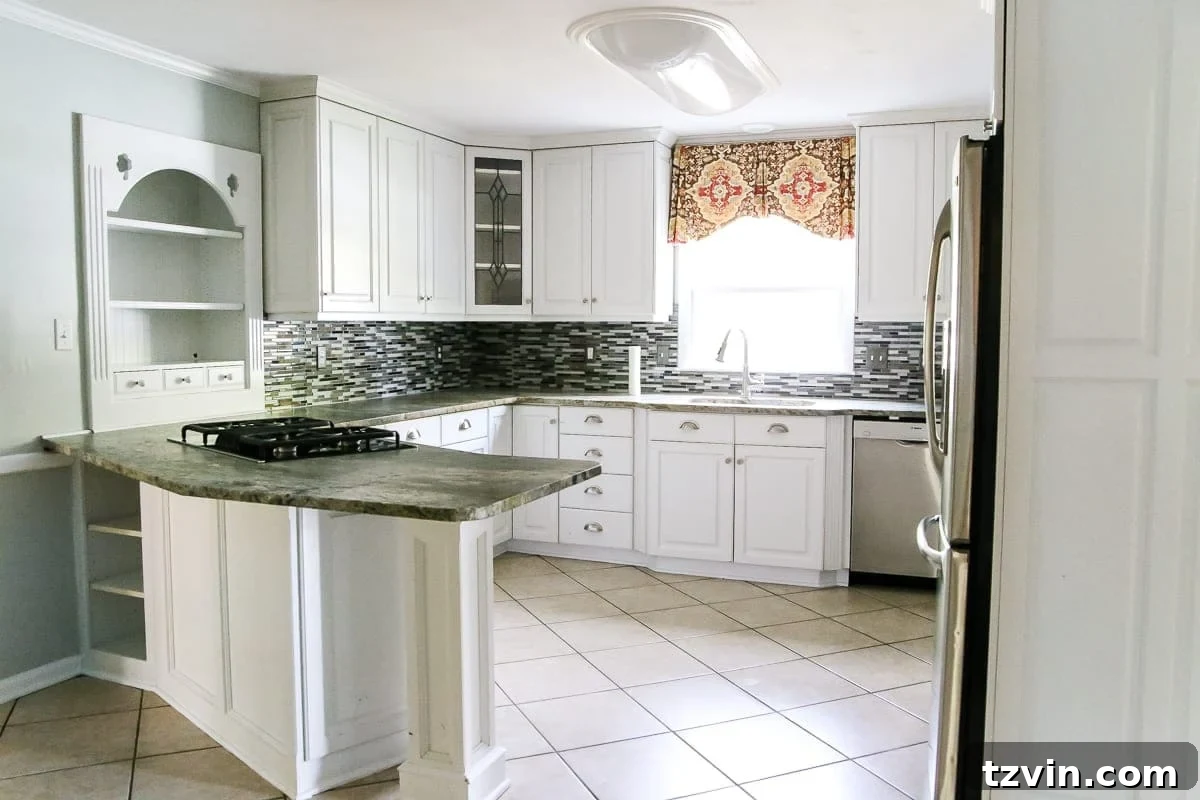
It’s easy to get caught up in the fantasy presented by television shows, leading us to yearn for a life that isn’t our own. However, our recent kitchen facelift served as a powerful reminder to appreciate and transform what we already possess. Take a look at the incredible journey of our kitchen, from its state five years ago on move-in day to its current charming incarnation. This wasn’t a project involving extensive demolition or a massive structural remodel. Instead, it was a series of thoughtful, cosmetic updates and budget-friendly DIYs that collectively created a dramatic and refreshing change, embracing a delightful cottagecore aesthetic.
Top Tips for an Affordable Kitchen Facelift with Maximum Impact
Dreaming of a refreshed kitchen but wary of the cost? These actionable tips prove that significant changes can be achieved without breaking the bank, transforming your kitchen into a space you truly love. Focus on cosmetic enhancements that deliver big results for minimal investment.
- **Harness the Power of Paint:** A fresh coat of paint can dramatically alter the look and feel of your entire kitchen. Cabinets, walls, and even floors can be revitalized for approximately $300 if you’re willing to tackle the painting yourself. This is arguably the most cost-effective way to achieve a major aesthetic upgrade.
- **Innovative Backsplash Solutions:** Don’t let old, unappealing tiles dictate your kitchen’s style. Explore options like peel and stick tiles or panel backsplashes. These materials are not only budget-friendly but also offer a relatively easy DIY installation process, instantly updating the entire visual dynamic of your cooking space.
- **Floor Makeovers without Demolition:** If tearing out old flooring isn’t an option, consider painting your existing floors or installing floating Luxury Vinyl Plank (LVP) flooring. LVP is a durable, attractive, and affordable alternative that can be laid directly over many existing surfaces, saving you time, effort, and money on demolition.
- **Elevate with Lighting:** Upgrading your light fixtures is a simple yet incredibly effective way to enhance ambiance and style. Swap out basic, builder-grade fixtures for ones that reflect your personal taste and add character. Improved lighting can make a space feel brighter, more modern, and intentionally designed.
- **Hardware for a Fresh Feel:** It’s amazing what a small detail can do. Simply changing the knobs and pulls on your cabinets can make them feel brand new. This minor update can unify a design, introduce a new metallic accent, or simply refresh the tactile experience of your kitchen.
- **Mindful Countertop Decor:** Avoid clutter and create a sense of calm by being intentional with your countertop decor. Keep it minimal, functional, and aesthetically pleasing. Choose a few key pieces that add personality without overwhelming the space.
For years, I harbored plans for grand renovations: replacing dated floors, knocking down walls for an open concept, or swapping the peninsula for a kitchen island. But a crucial realization dawned: you don’t have to endure a space you dislike while saving for a monumental remodel. Embrace the “make it work” philosophy! With creativity and resourcefulness, you can discover the inherent beauty that’s been waiting to shine through. This journey of transformation has been a profound lesson in appreciating and enhancing what’s already present in our kitchen.
Today, after focusing primarily on strategic paint choices, clever inexpensive DIY projects, and a handful of small yet impactful changes, our kitchen has been completely revitalized. Below, I’ll share all the details: product sources, exact paint colors, step-by-step tutorials, and a transparent budget breakdown for each project.
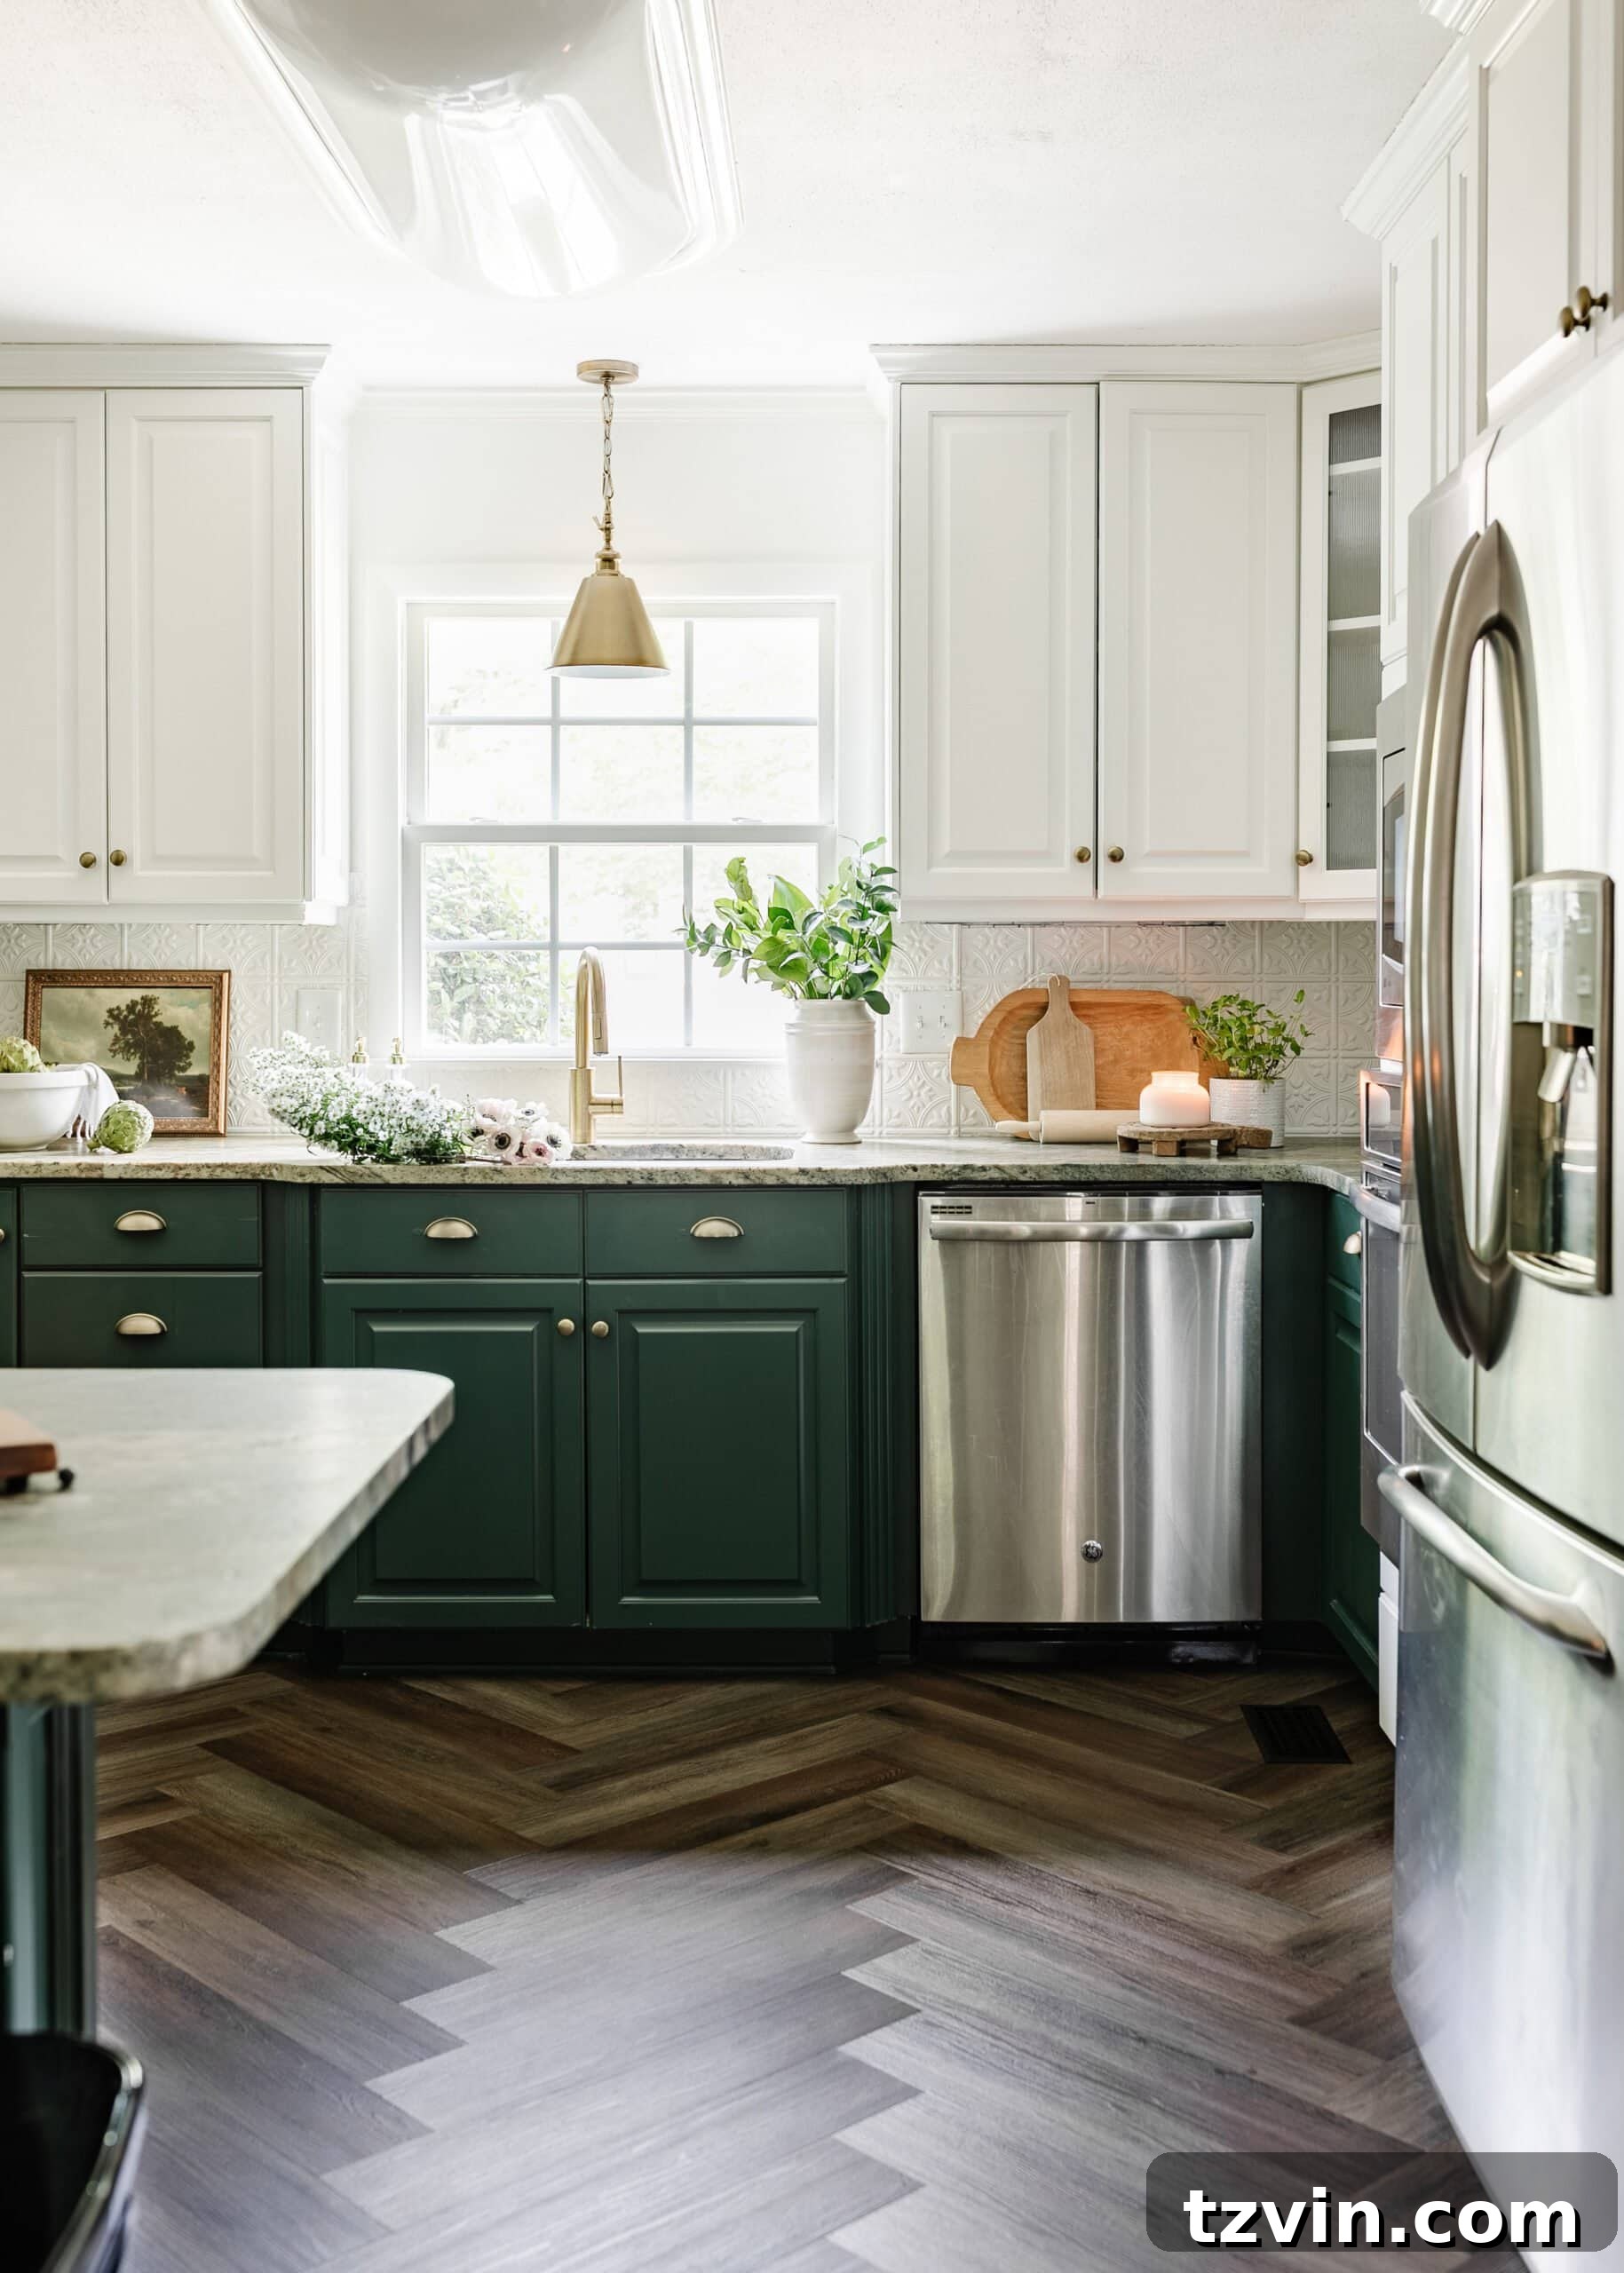
Transformed with Painted Cabinets
Tutorial | How to Paint Kitchen Cabinets Like a Pro
Inspiration | Green Kitchen Cabinet Ideas
Cost: $280
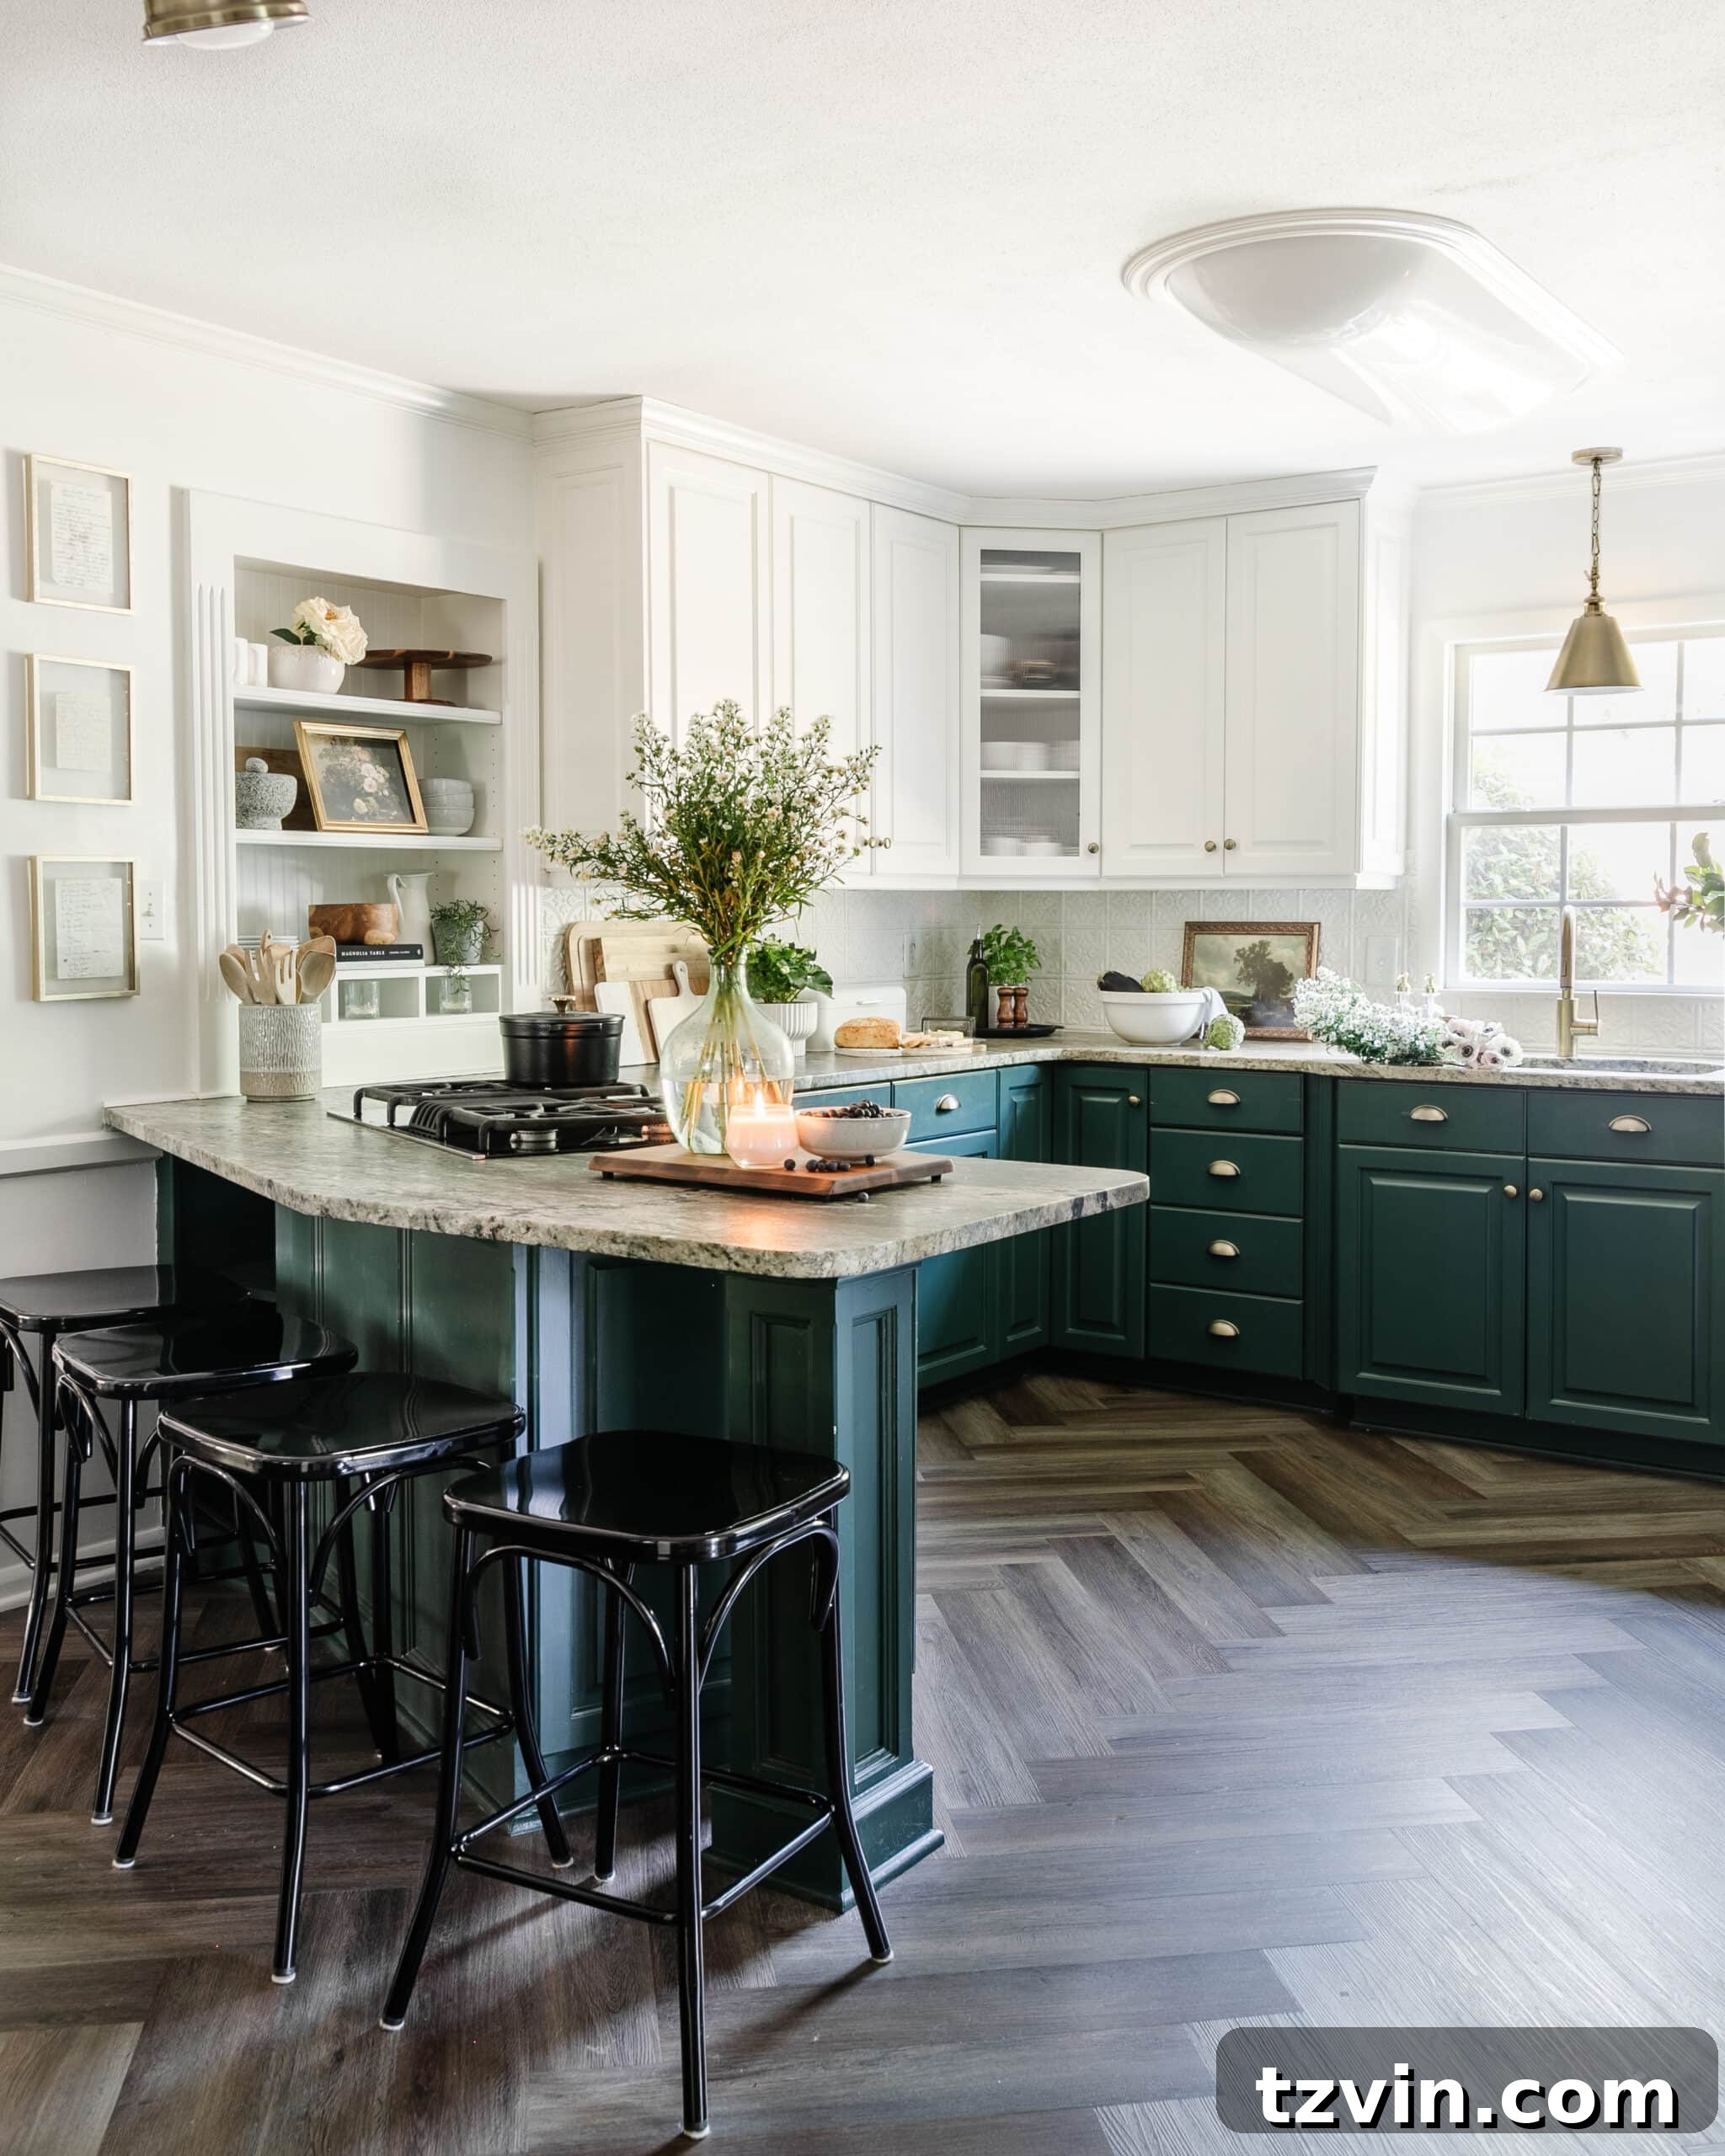
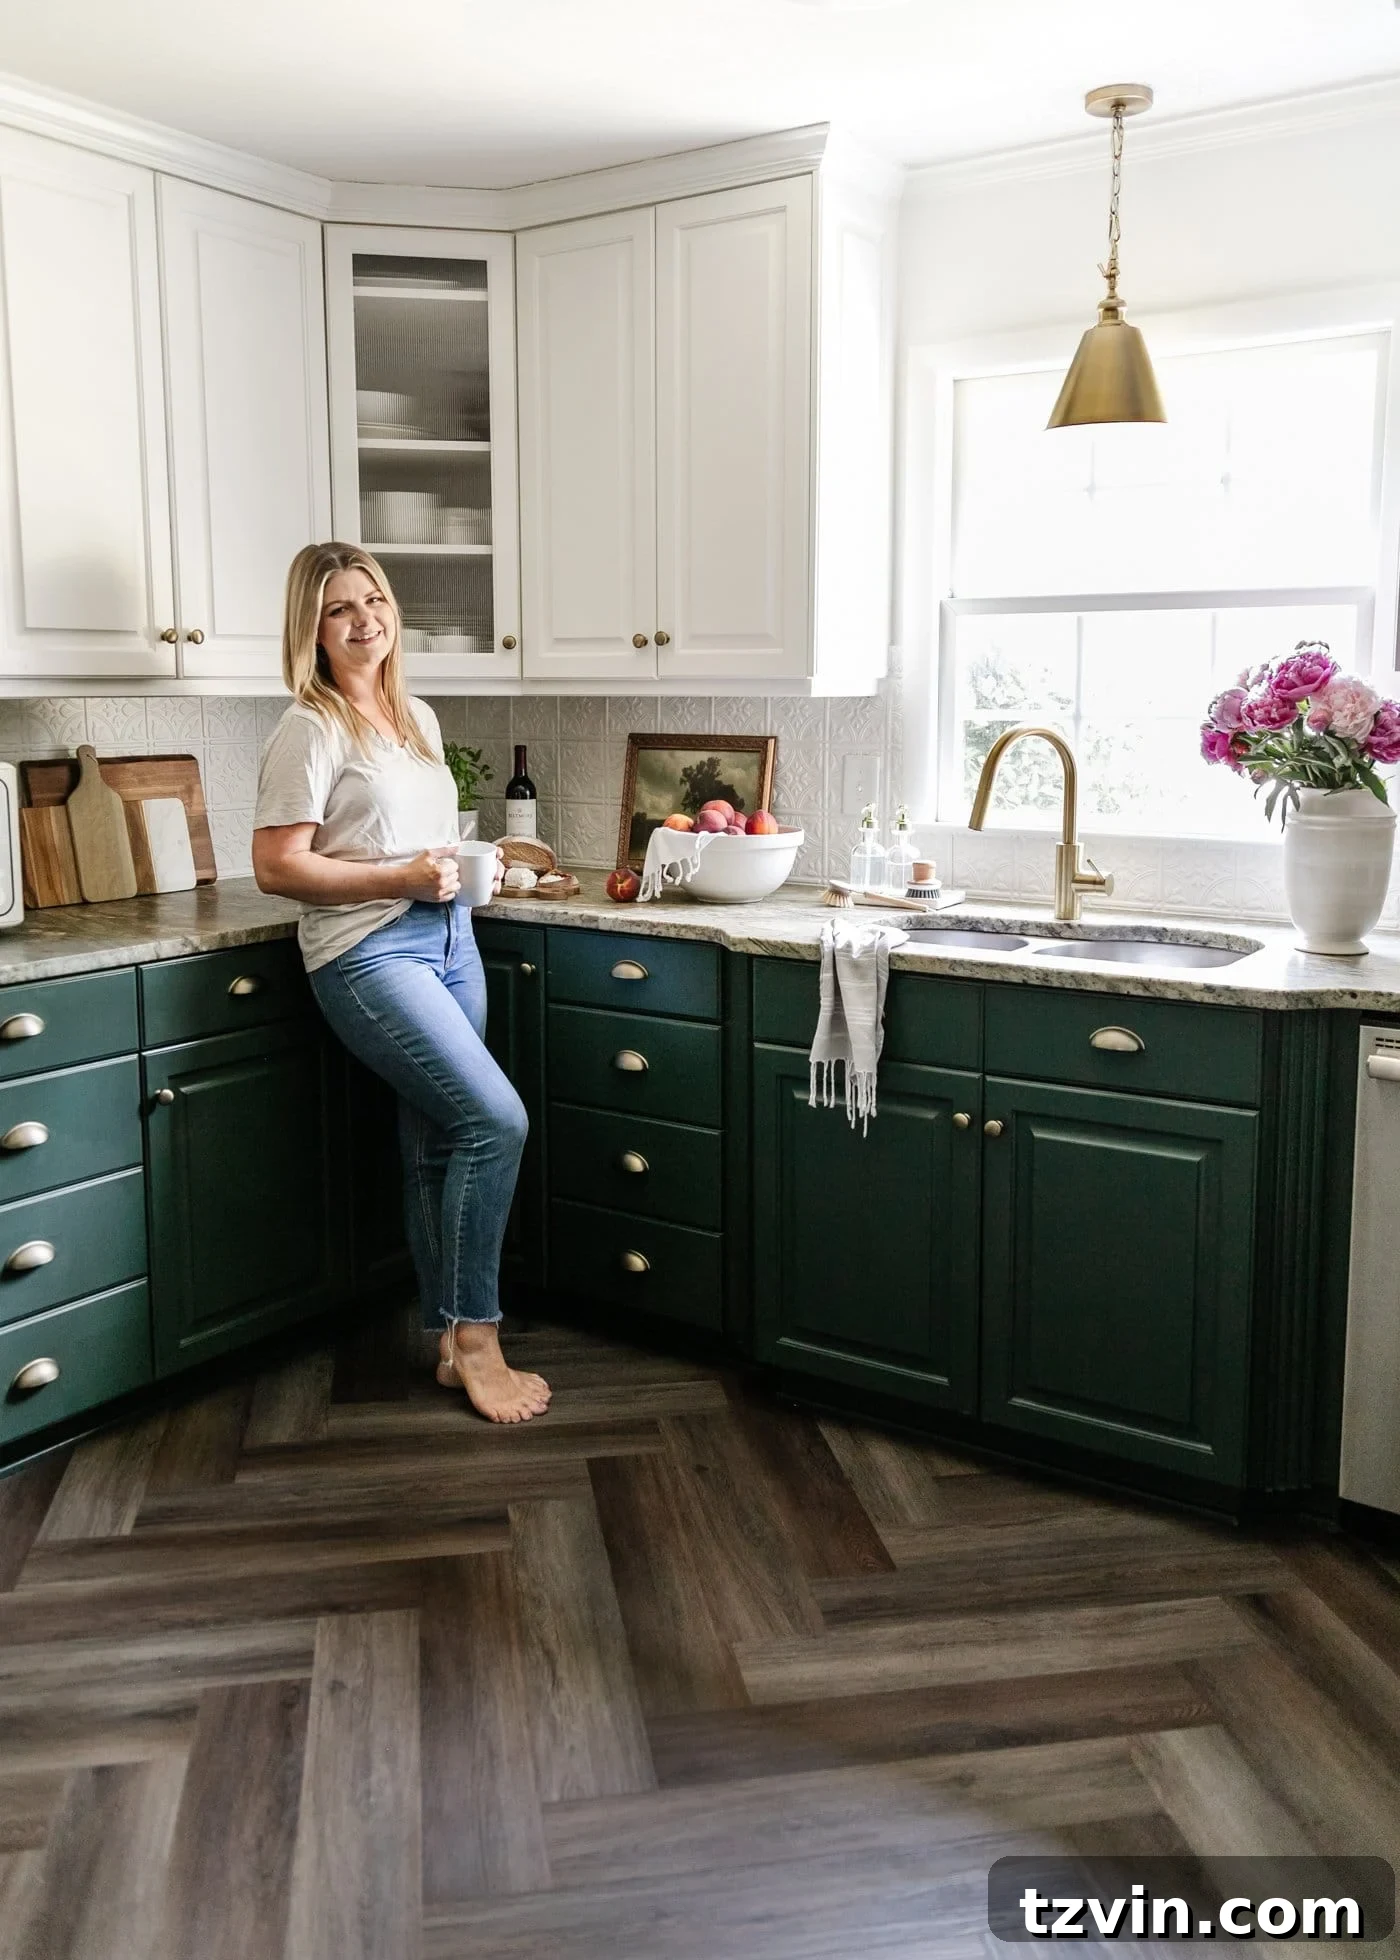
Painting our kitchen cabinets was, without a doubt, the single best decision we made for this kitchen facelift. While I wouldn’t recommend undertaking this project at seven months pregnant in the middle of summer, as I did, the enduring results speak for themselves. Four years later, the paint job remains pristine and beautiful. The transformation was further elevated by replacing the old brushed nickel hardware with elegant aged brass knobs and pulls, which introduced much-needed warmth and a touch of sophistication.
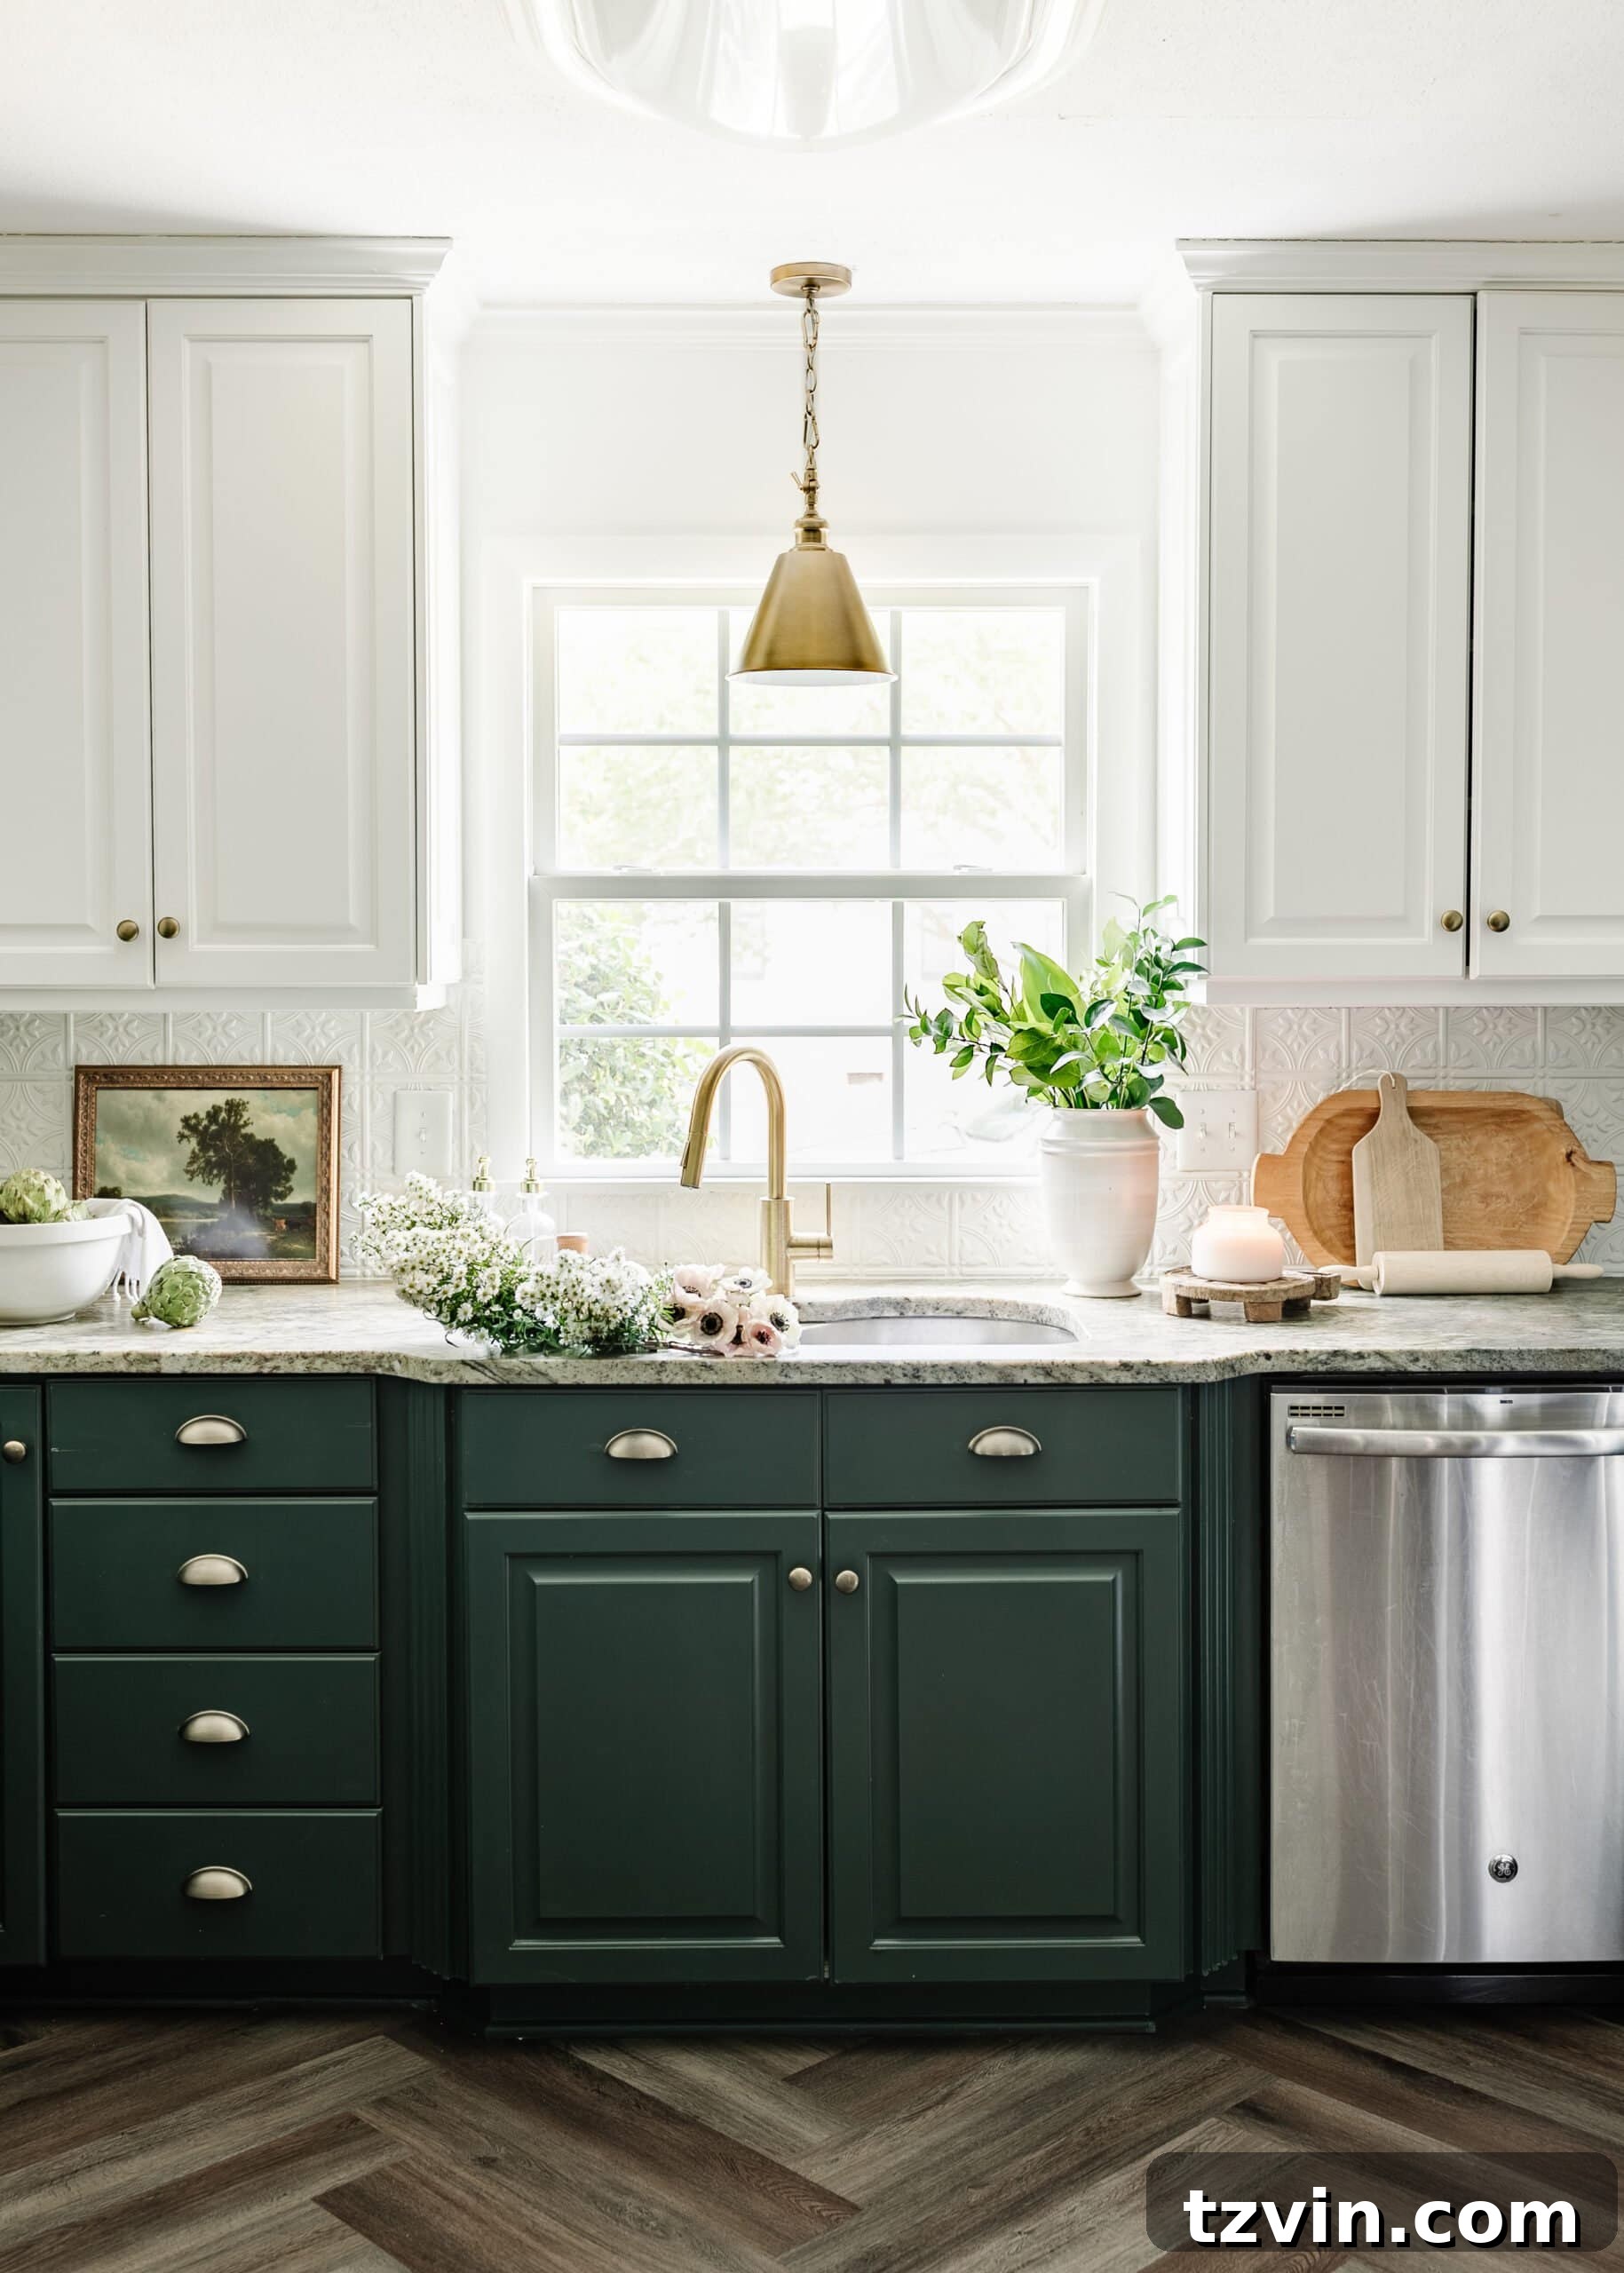
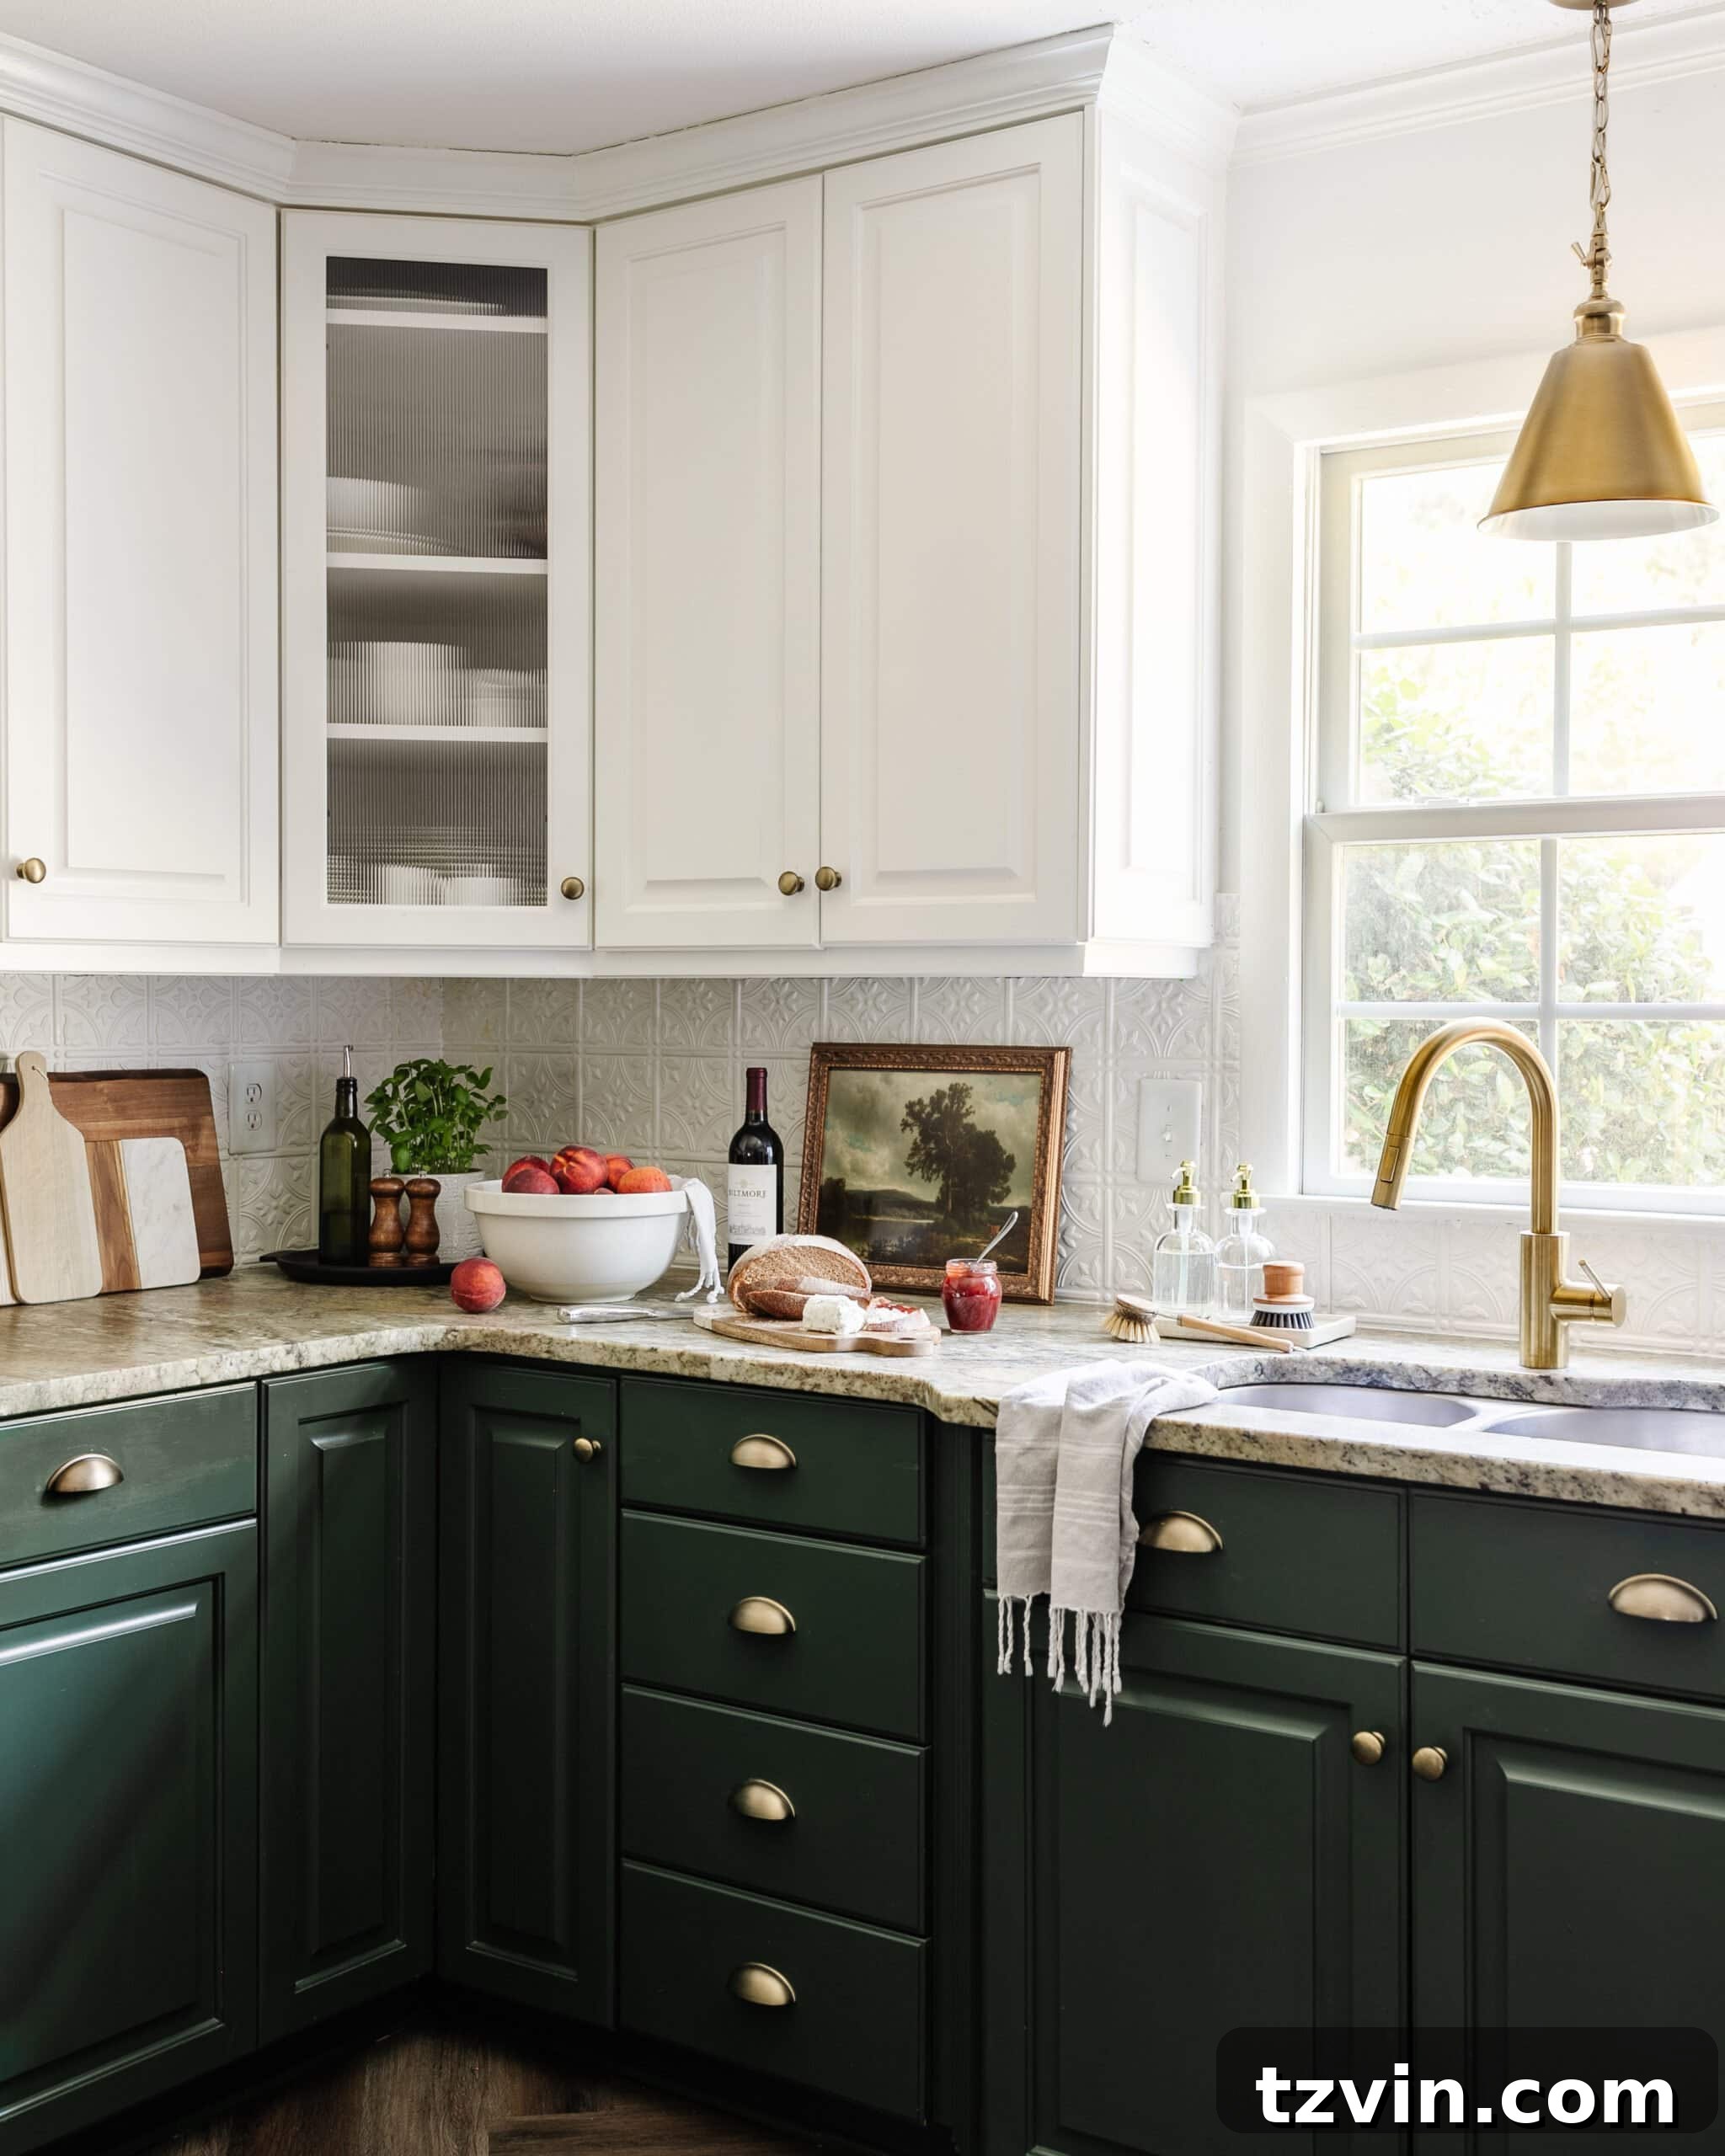
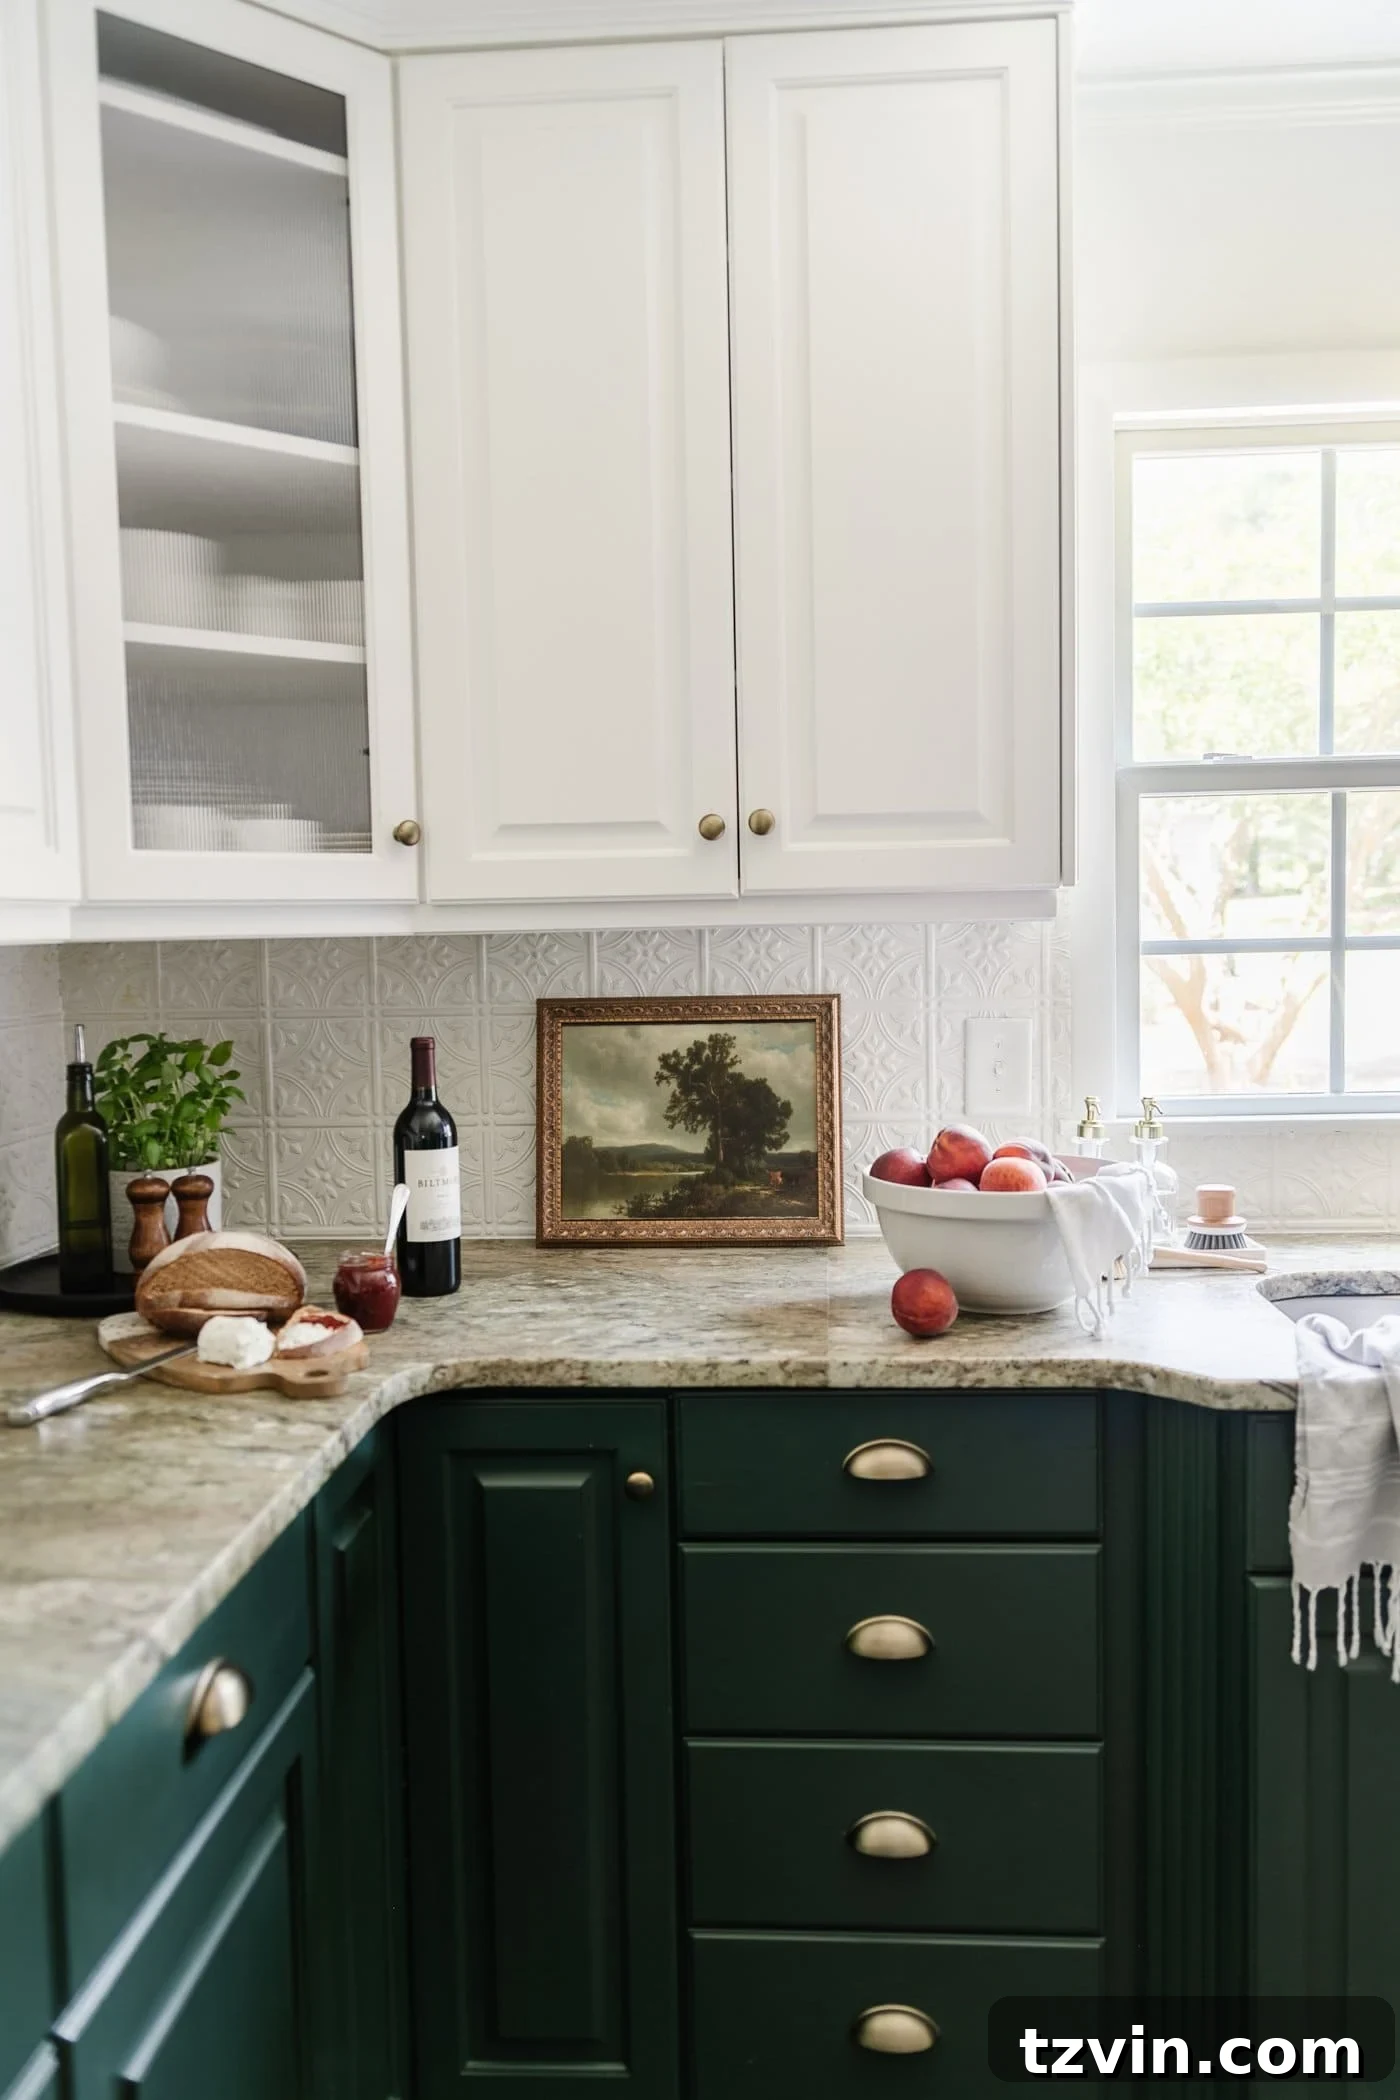
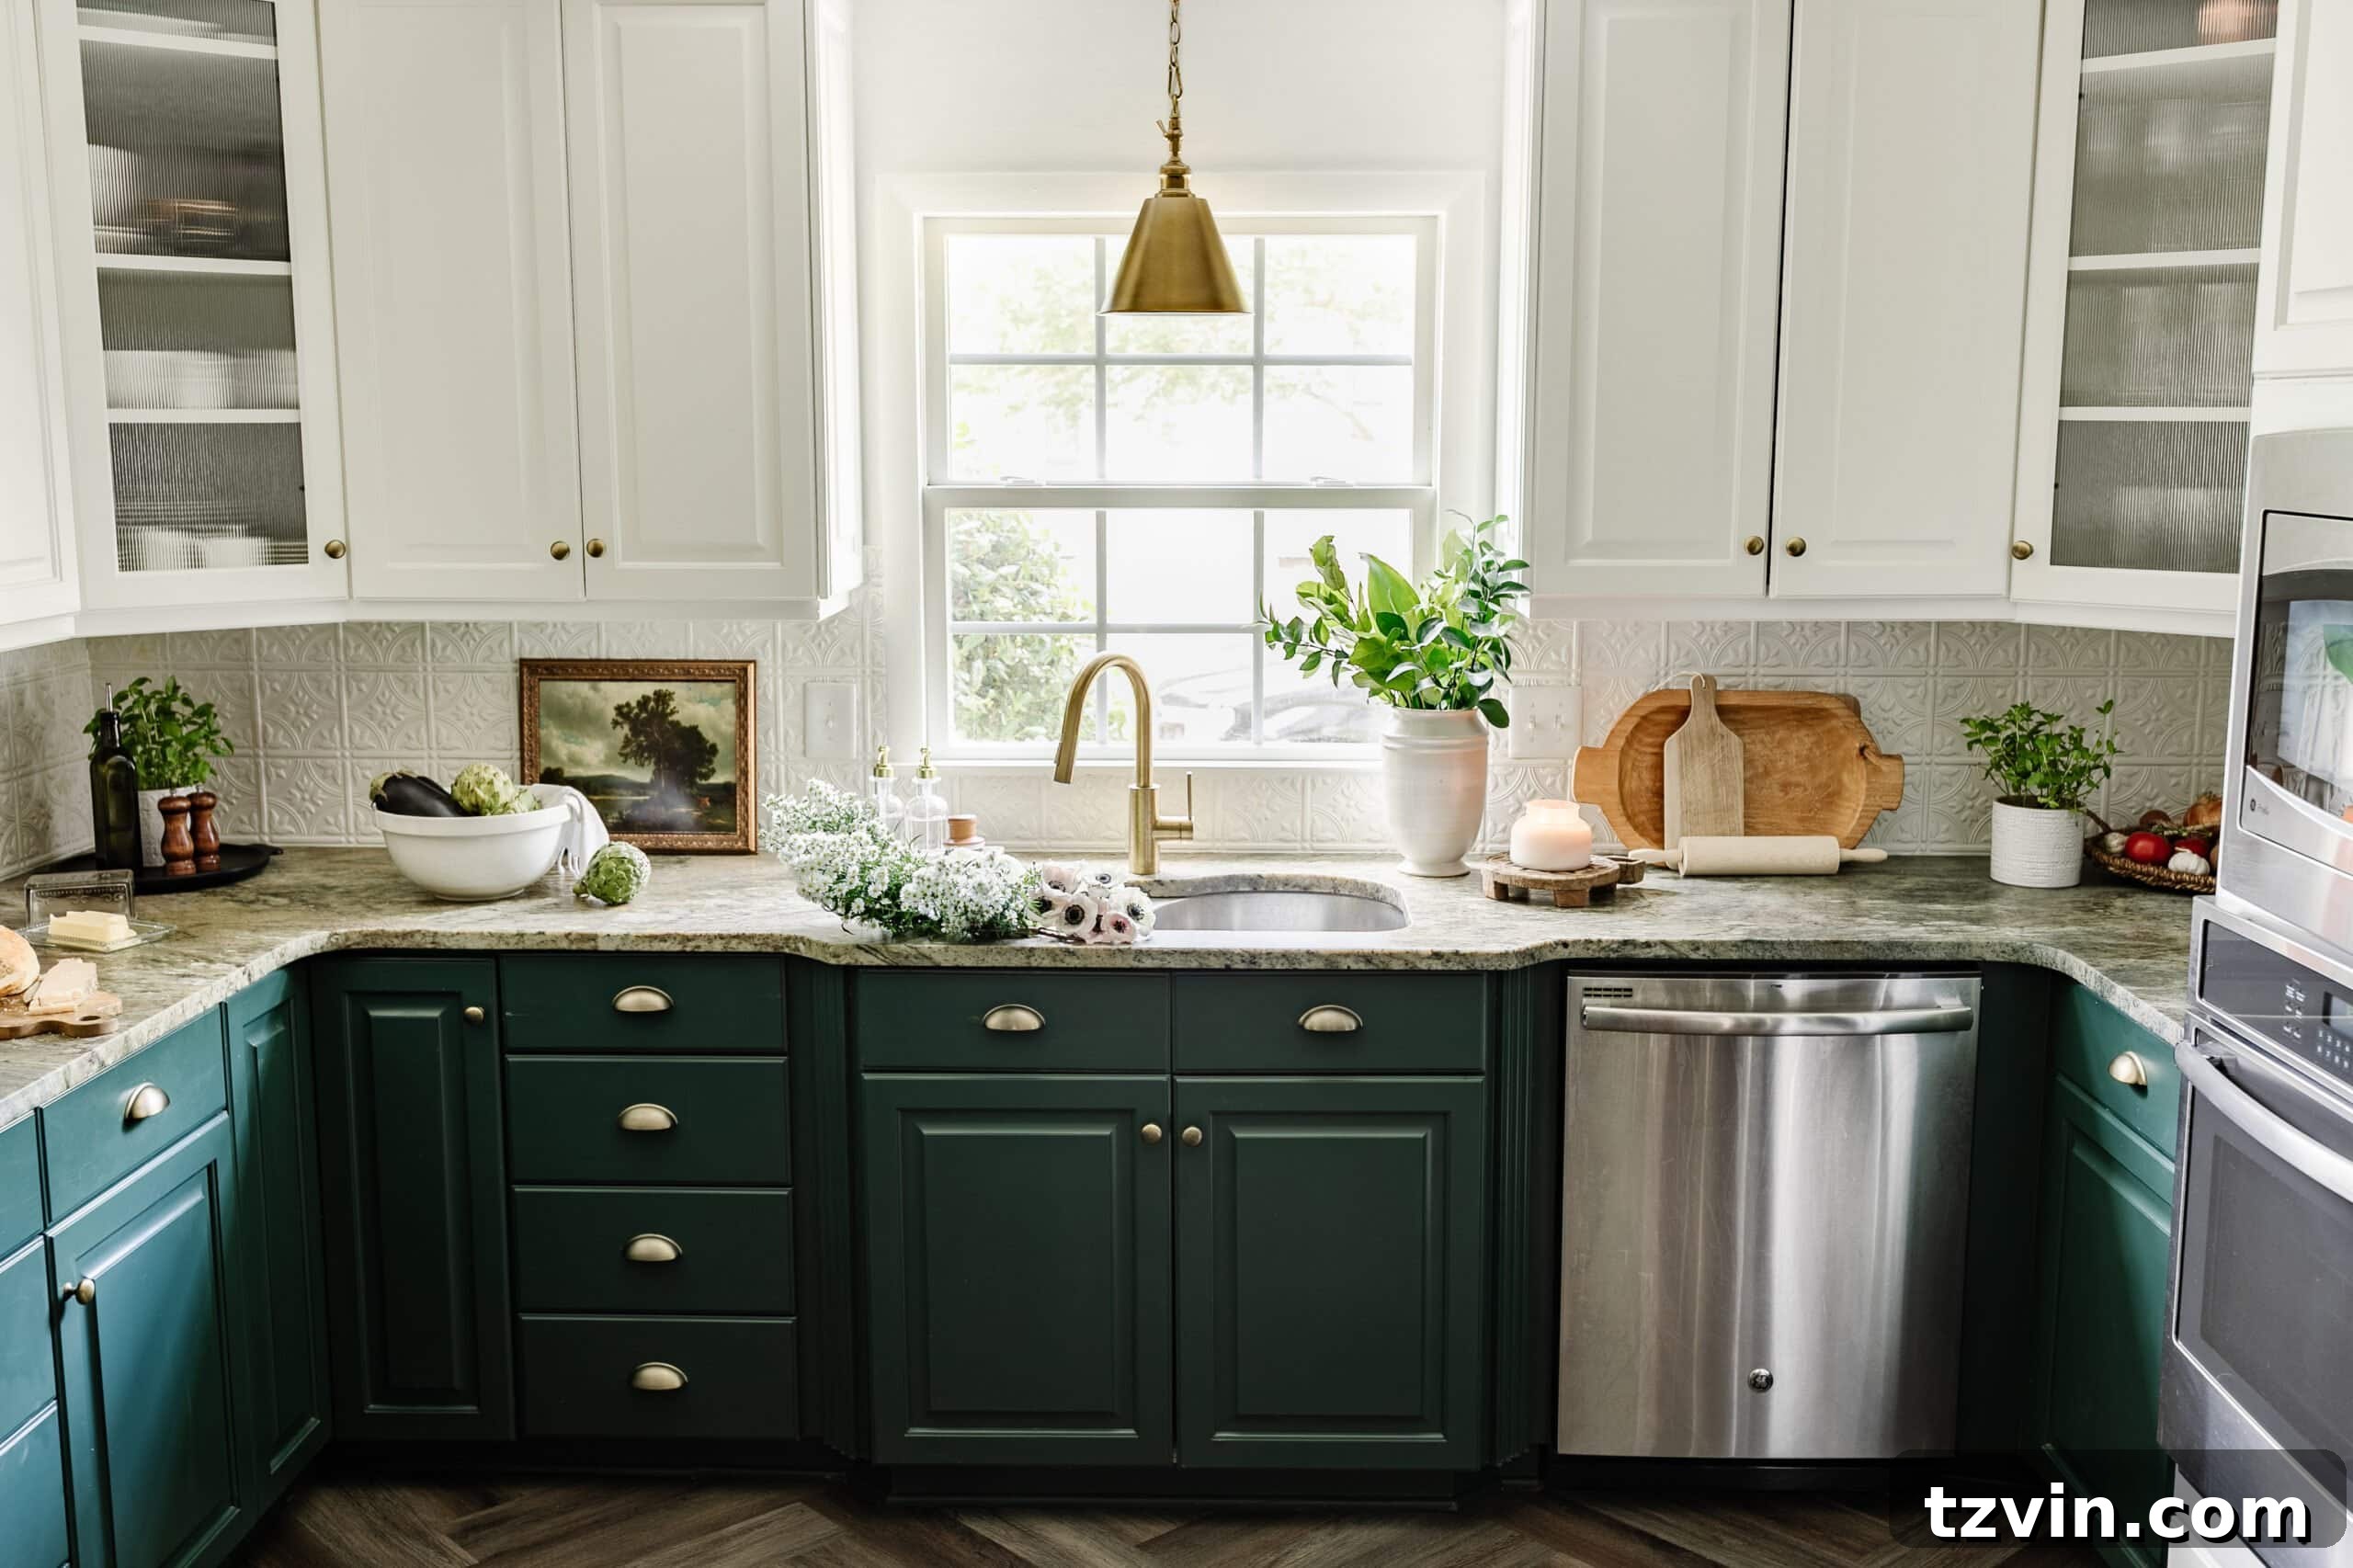
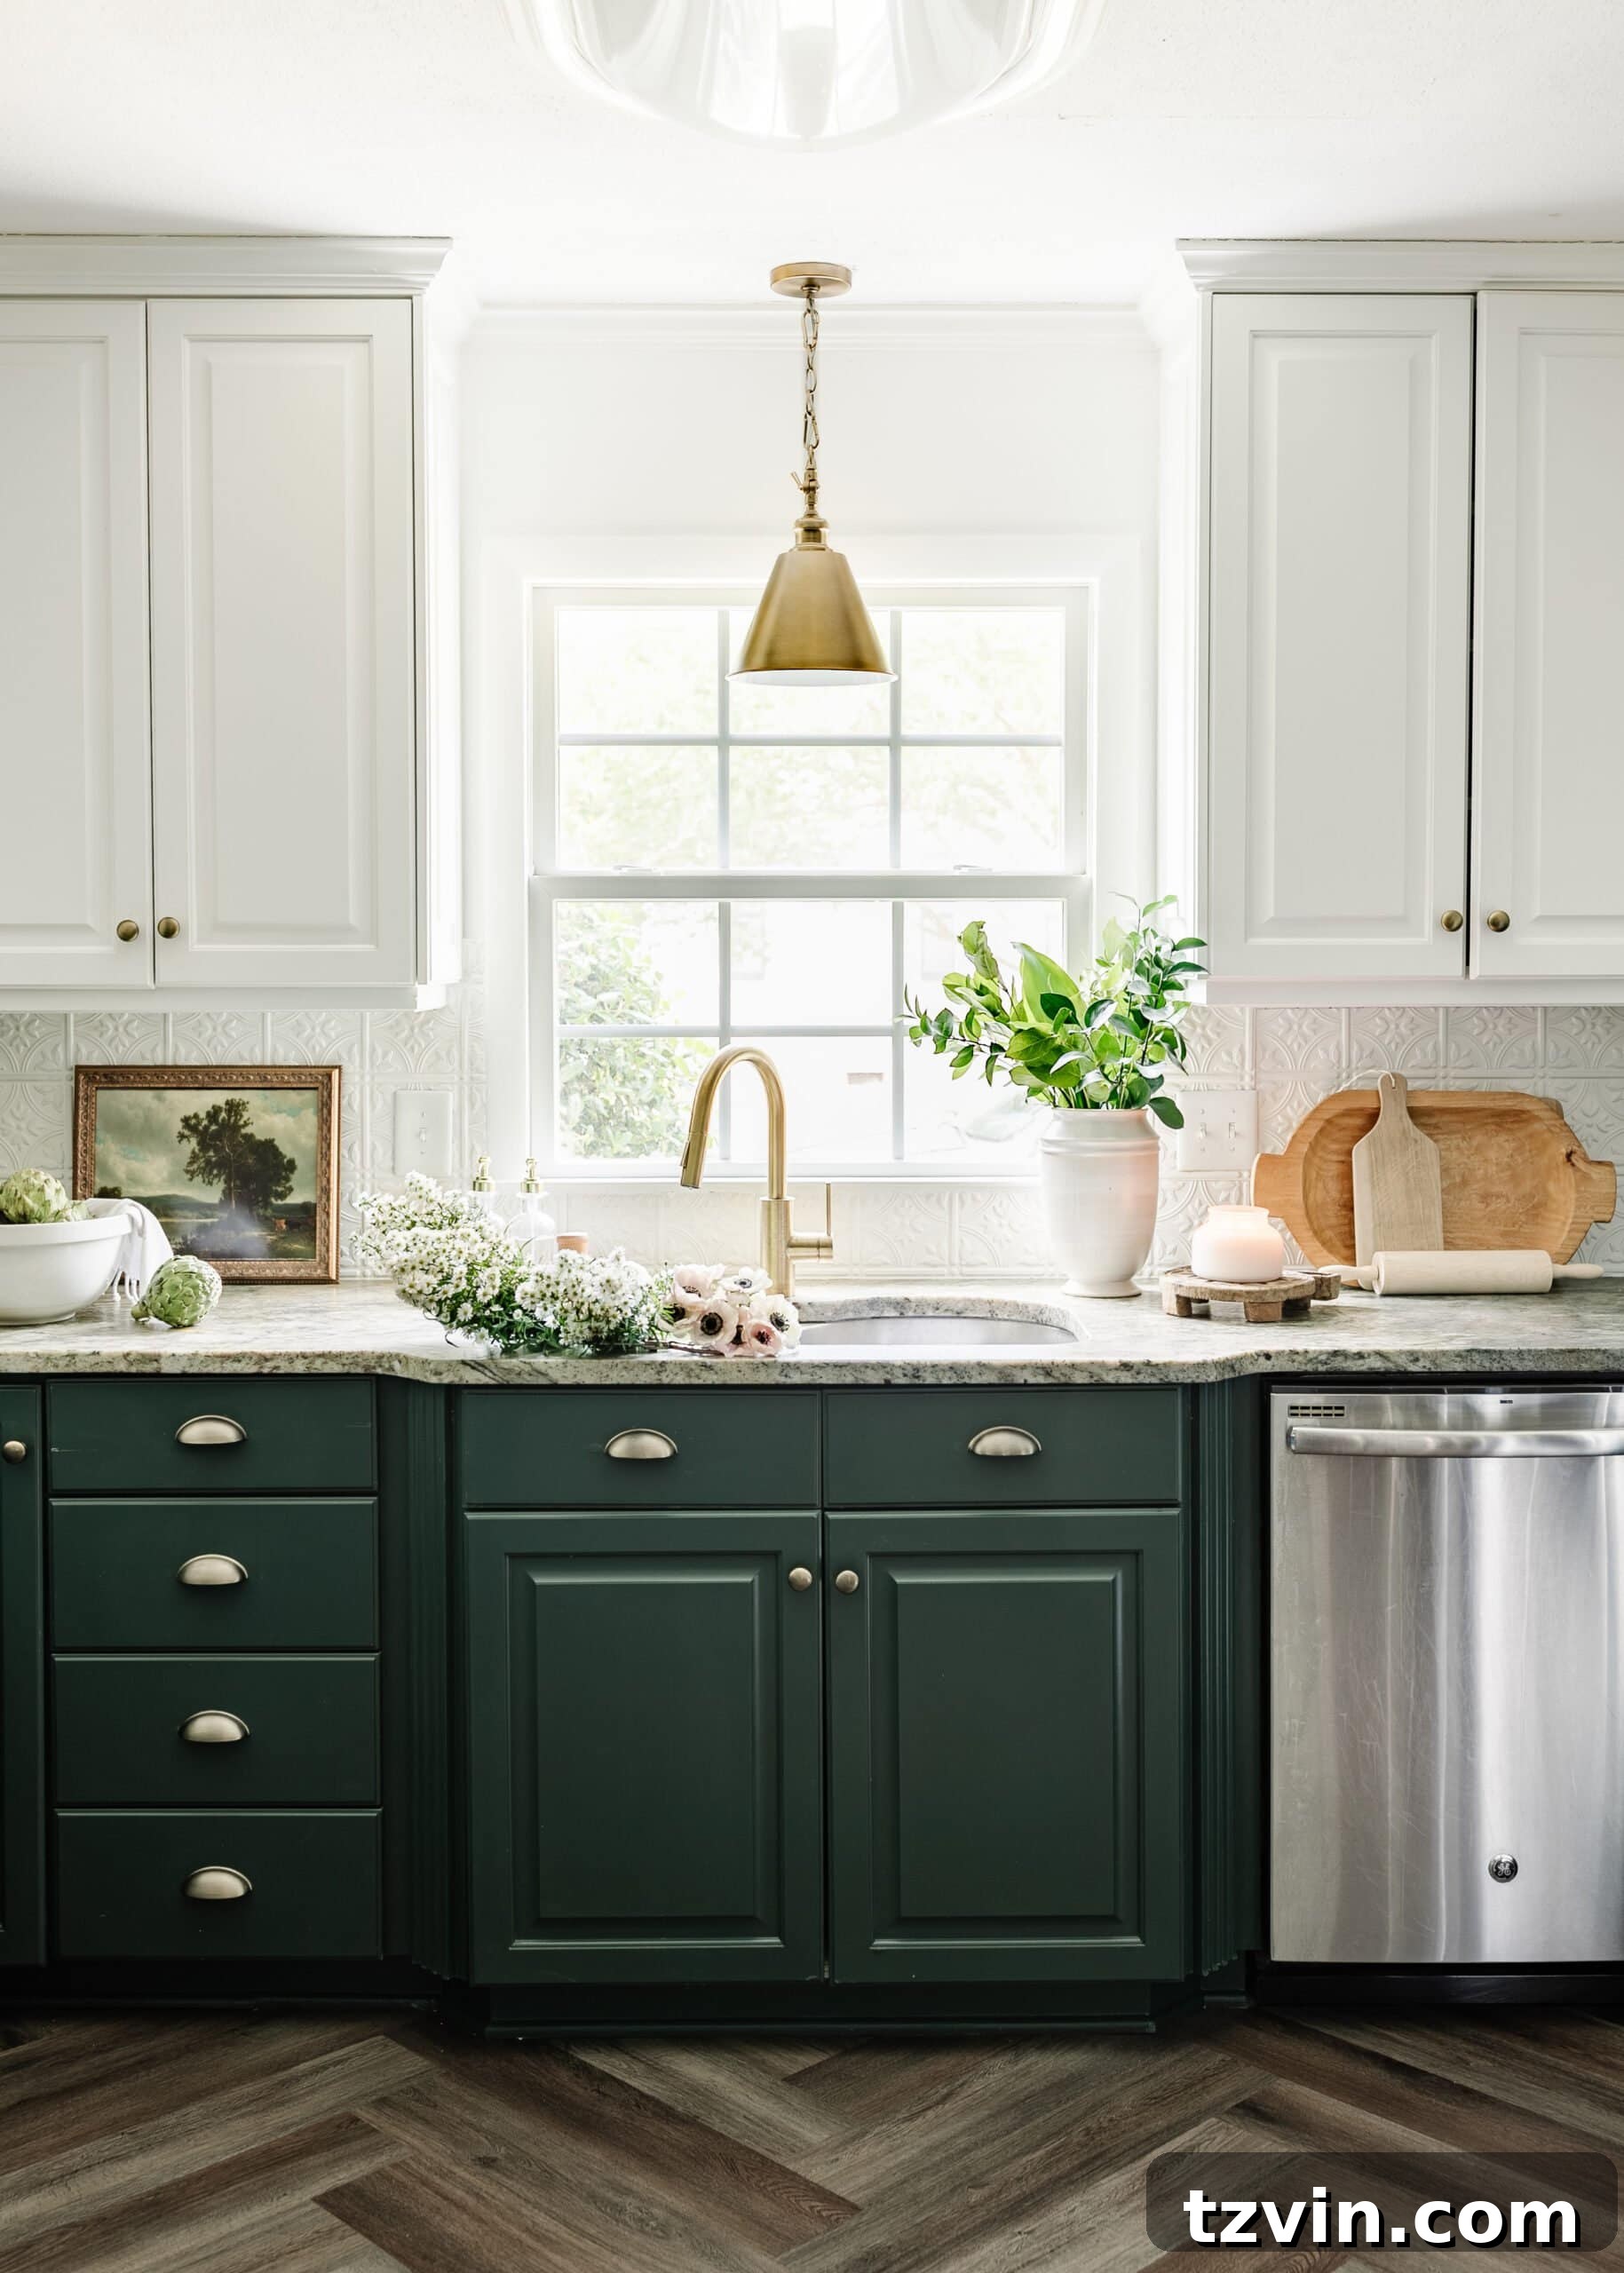
For a striking two-tone effect, we opted for Benjamin Moore Simply White on the upper cabinets, creating an airy and bright feel. The lower cabinets were painted in Sherwin Williams Billiard Green, a rich hue chosen to complement the subtle green tint already present in our existing leathered granite countertops. This strategic color choice allowed us to “make it work” with what we had, demonstrating how existing features can inspire new design directions.
Our kitchen wasn’t inherently bad before; it featured cabinets less than 30 years old, younger than our 58-year-old house itself. However, they had yellowed over time and accumulated scuffs, signs of daily wear. Paint proved to be the perfect remedy, completely erasing these imperfections and infusing the space with fresh life. The entire cabinet painting project, including paint and supplies, cost a remarkably affordable $280, proving that a high-impact upgrade doesn’t require a high investment.
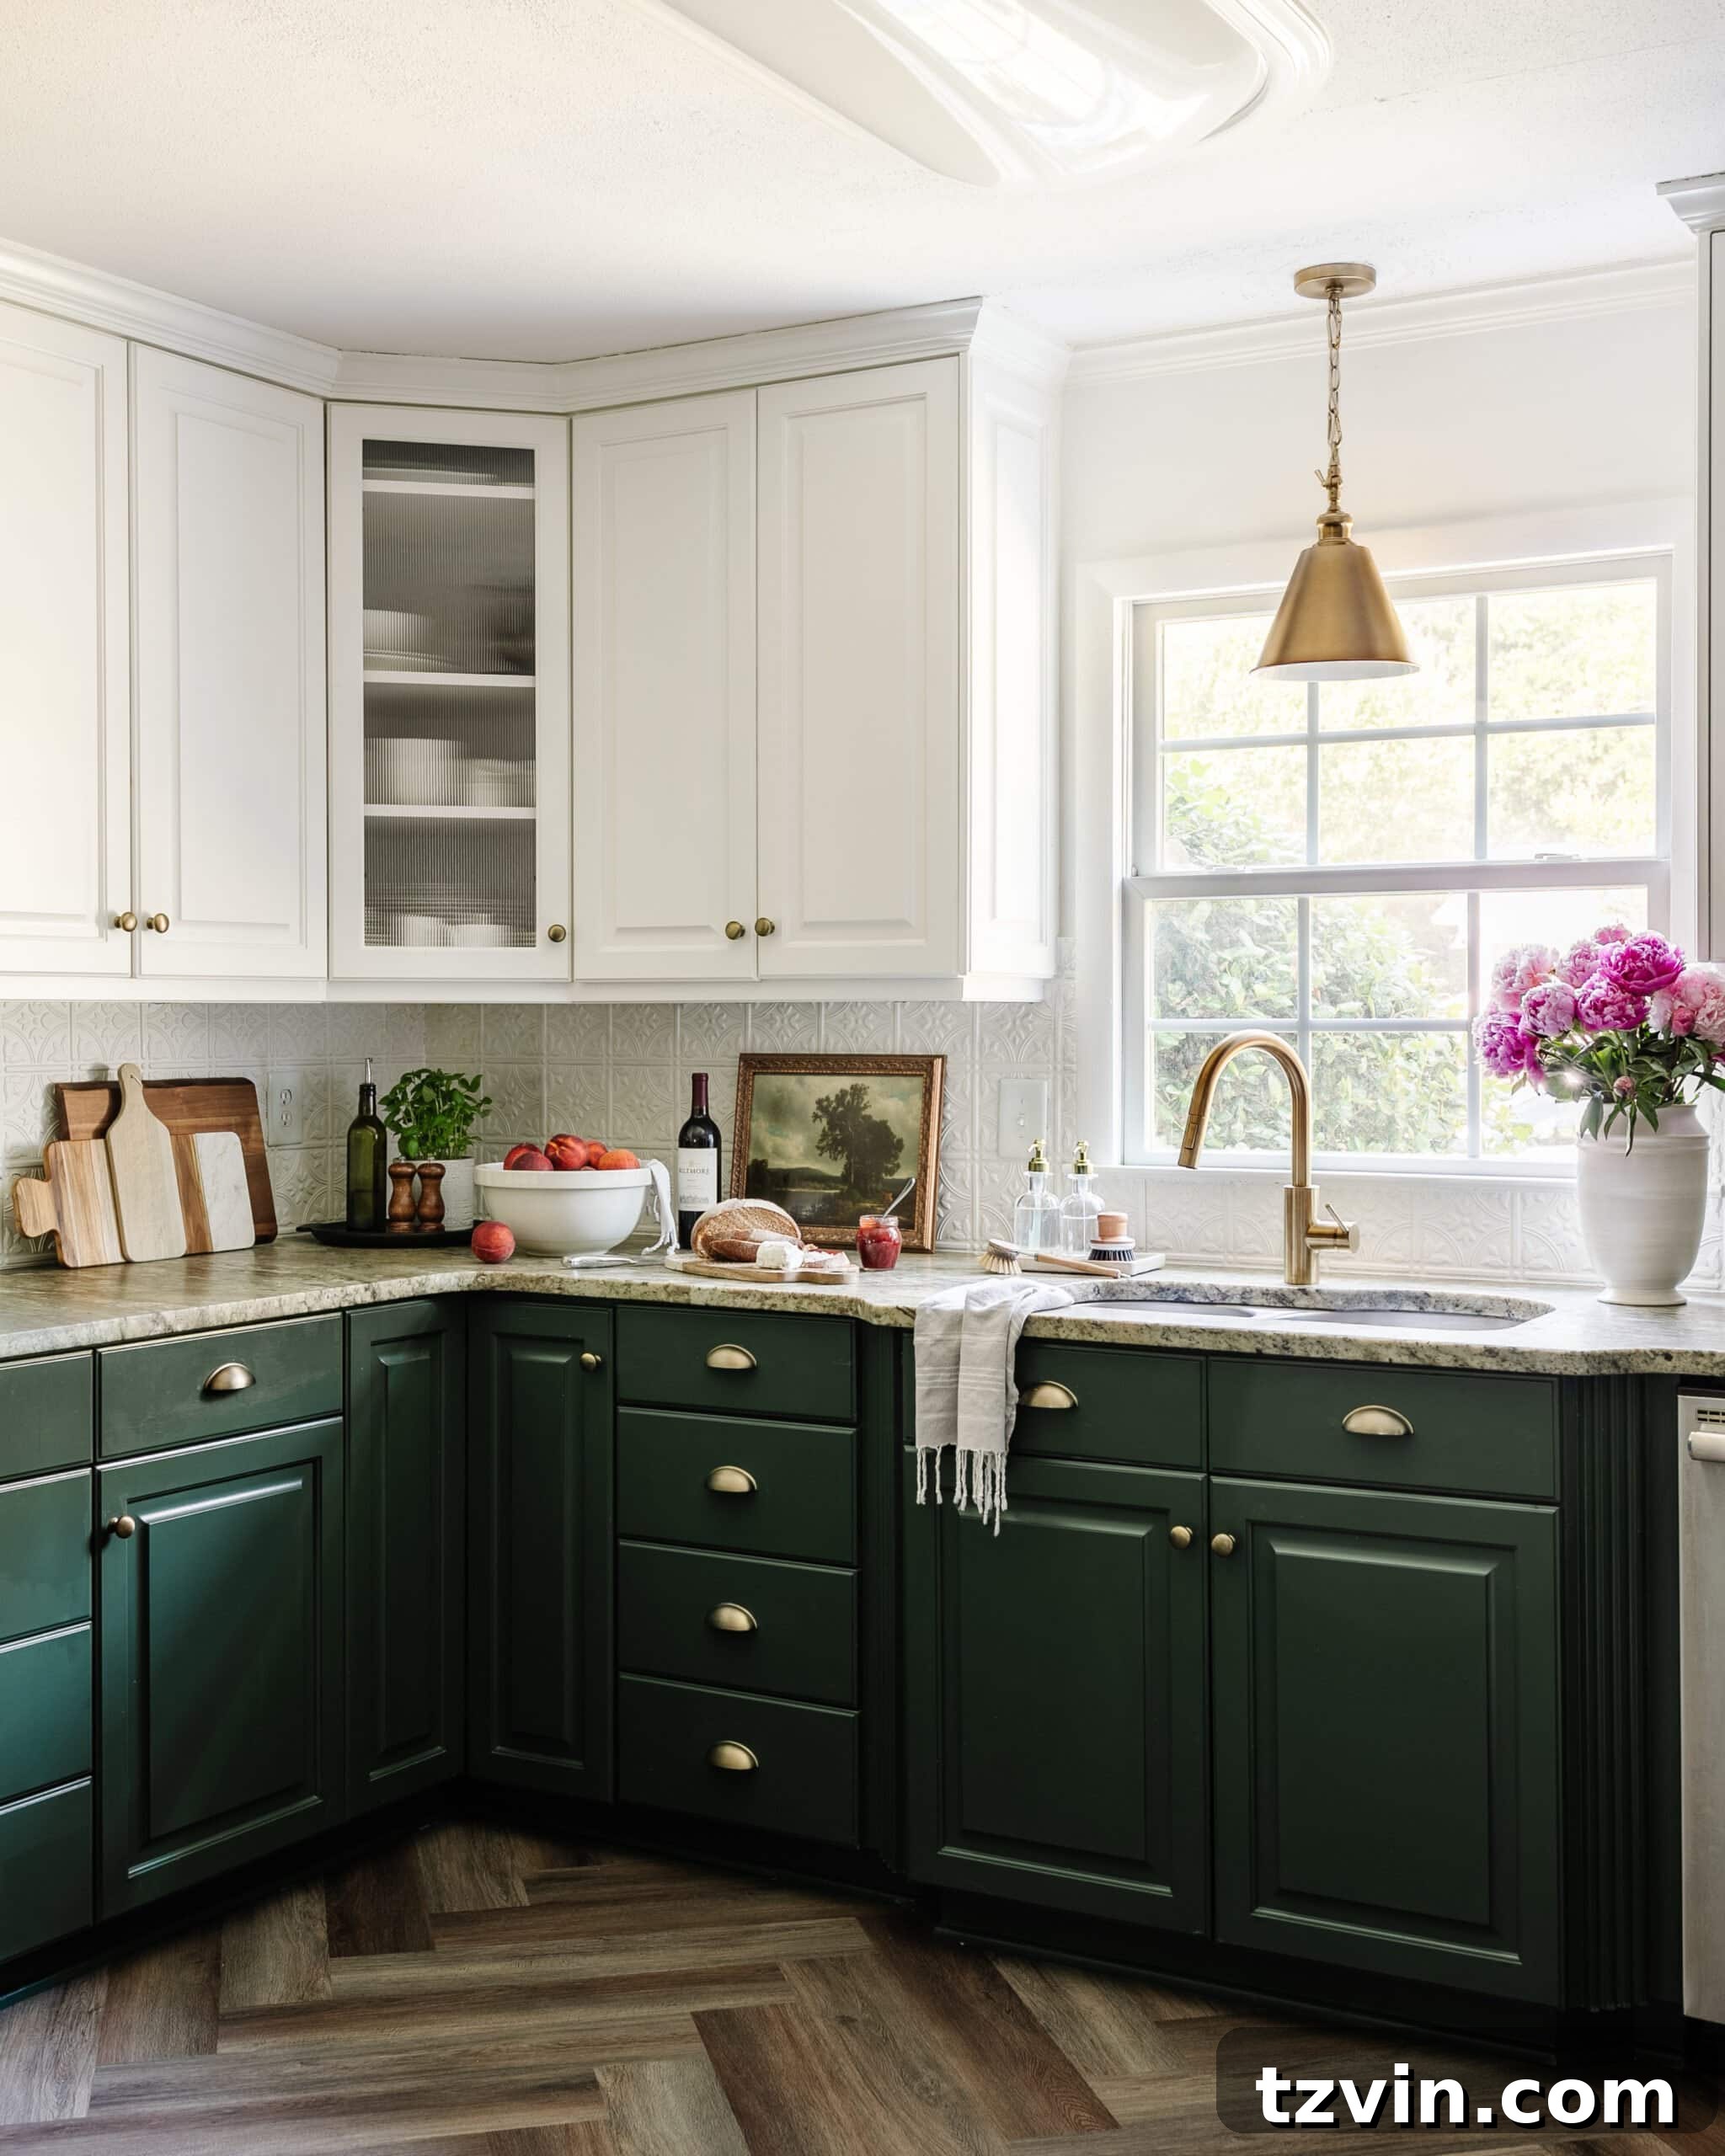
The difference a thoughtful application of paint makes is truly astounding. While the adage “white paint makes small rooms look bigger” holds some truth, it’s often a myth if applied without contrast. Too much white can lead to a bland, washed-out appearance, failing to provide the visual anchor a space needs. Our before picture perfectly illustrates this point, where a lack of contrast made the kitchen feel less dynamic.
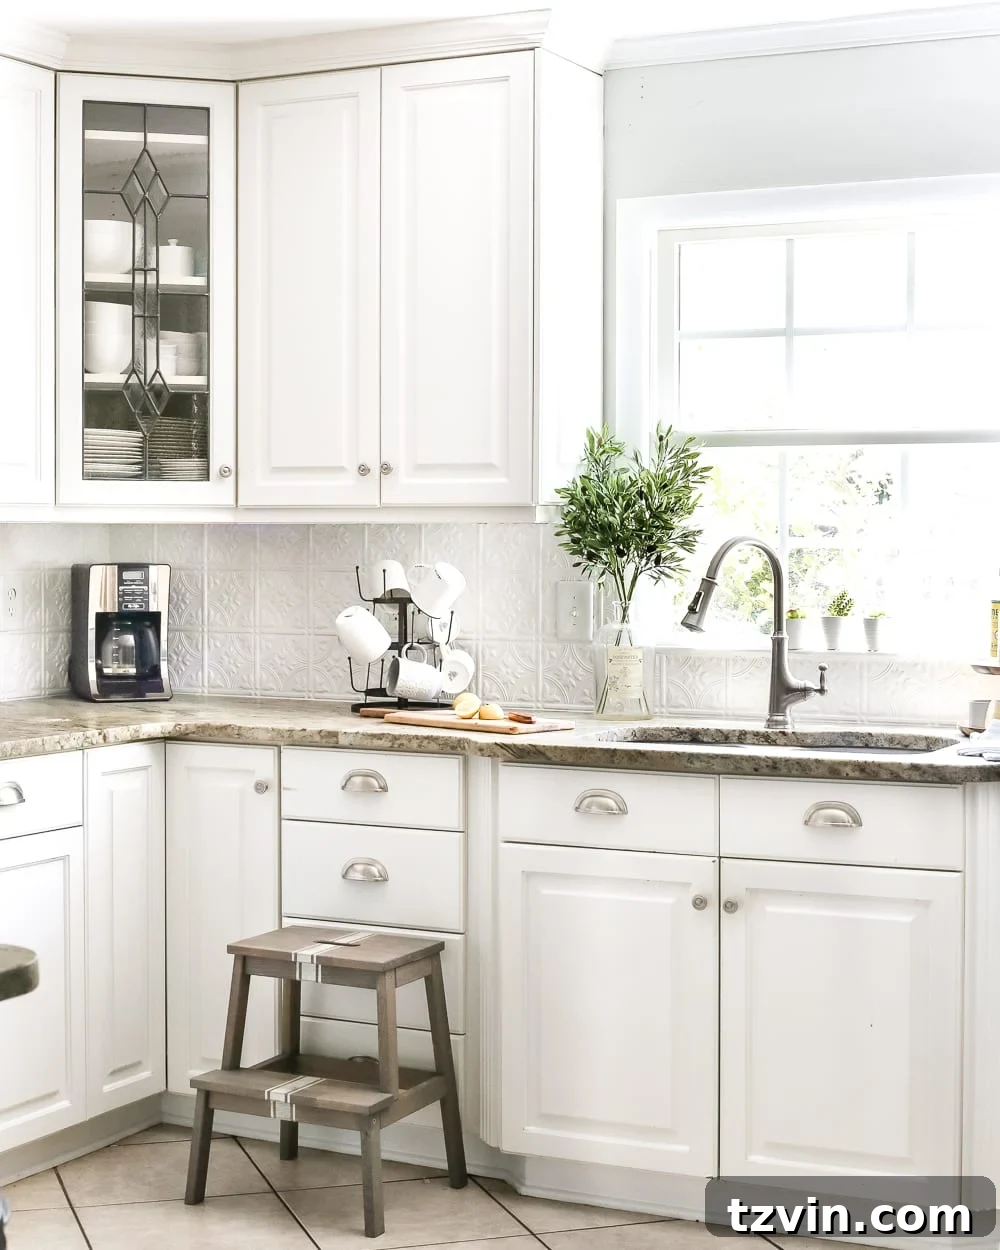
Elegant Herringbone LVP Flooring
Tutorial | How to Install a Herringbone LVP Floating Floor Over Tile
Cost: $815
Addressing our dated tile floor without a full remodel was a significant challenge, but installing floating Luxury Vinyl Plank (LVP) flooring proved to be the ideal solution. This innovative approach allowed us to cover the old tile seamlessly, offering a durable and aesthetically pleasing surface that will serve us beautifully for many years, potentially even decades. It’s a fantastic solution for homeowners looking for a fresh floor without the mess and expense of demolition.
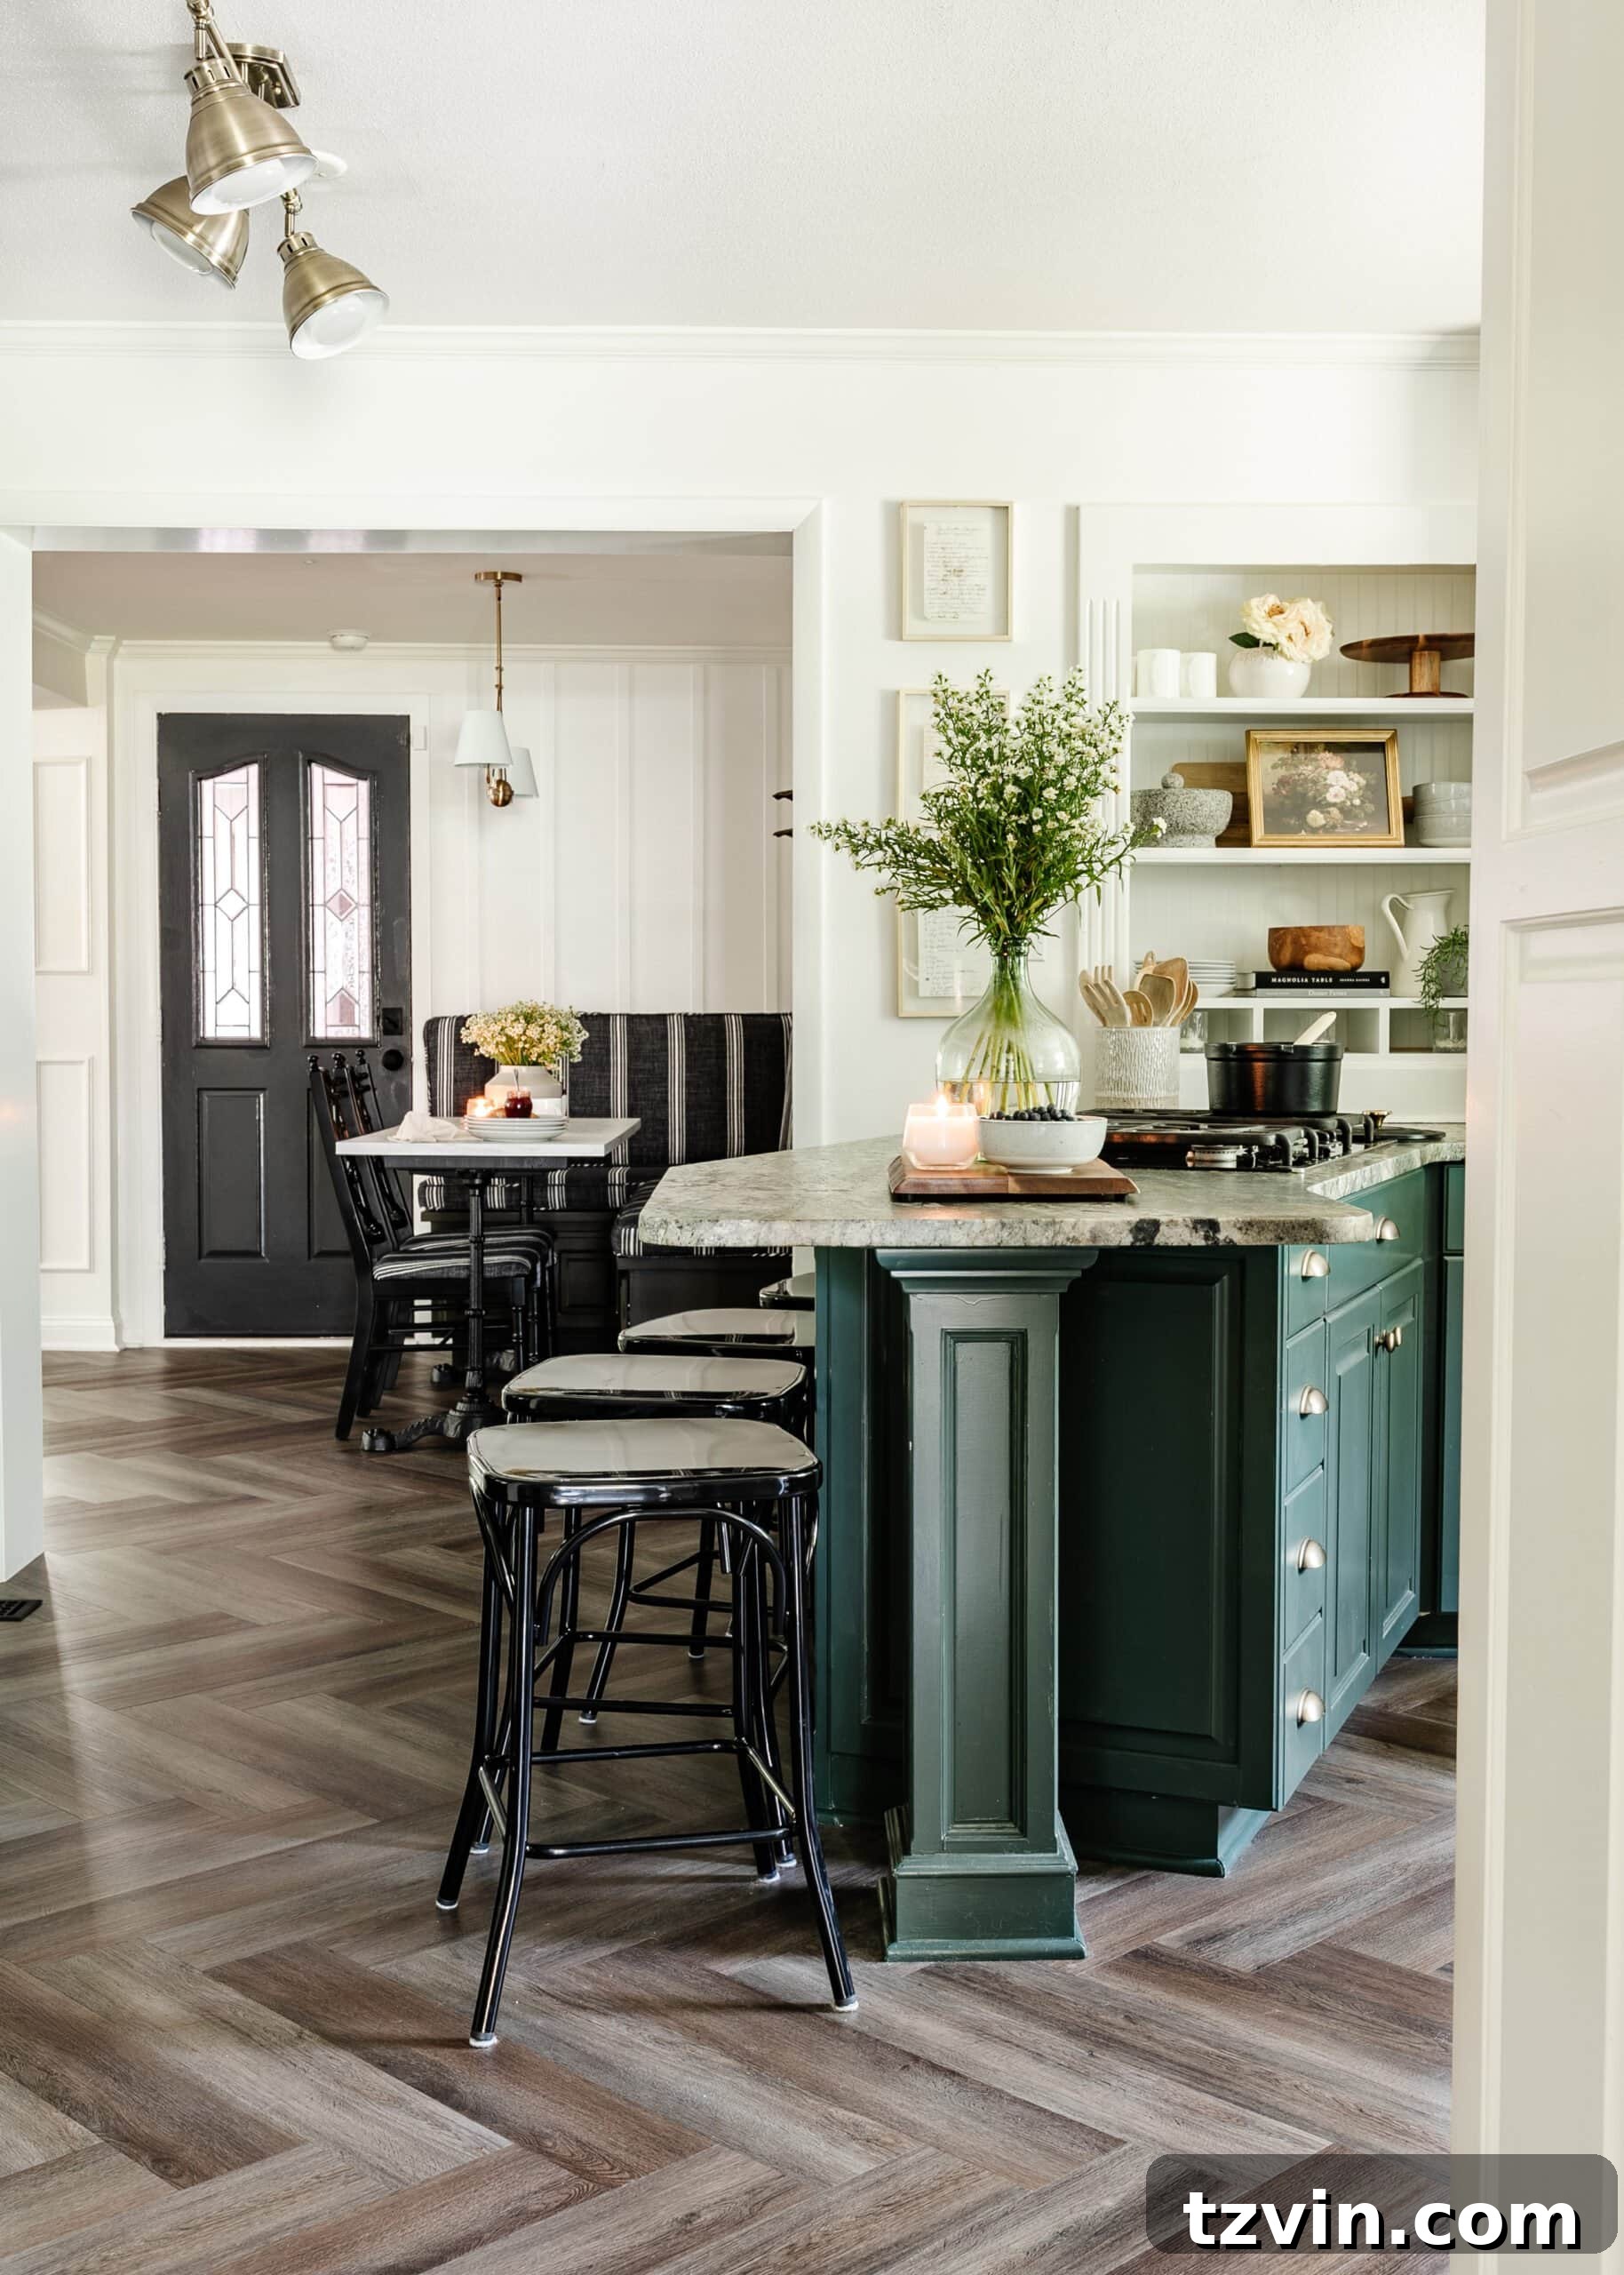
The installation of the LVP flooring throughout the entire kitchen took us approximately four days, a manageable timeframe for a DIY project of this scale. The total cost came in around $815, making it an incredibly budget-friendly alternative to traditional flooring replacement. While a straight LVP installation would have been even quicker and cheaper, I was utterly captivated by the classic herringbone pattern. This distinctive layout added a vintage, sophisticated touch that perfectly embodies the cottagecore style we aimed to achieve, proving that sometimes, a little extra effort for a specific aesthetic is well worth it.
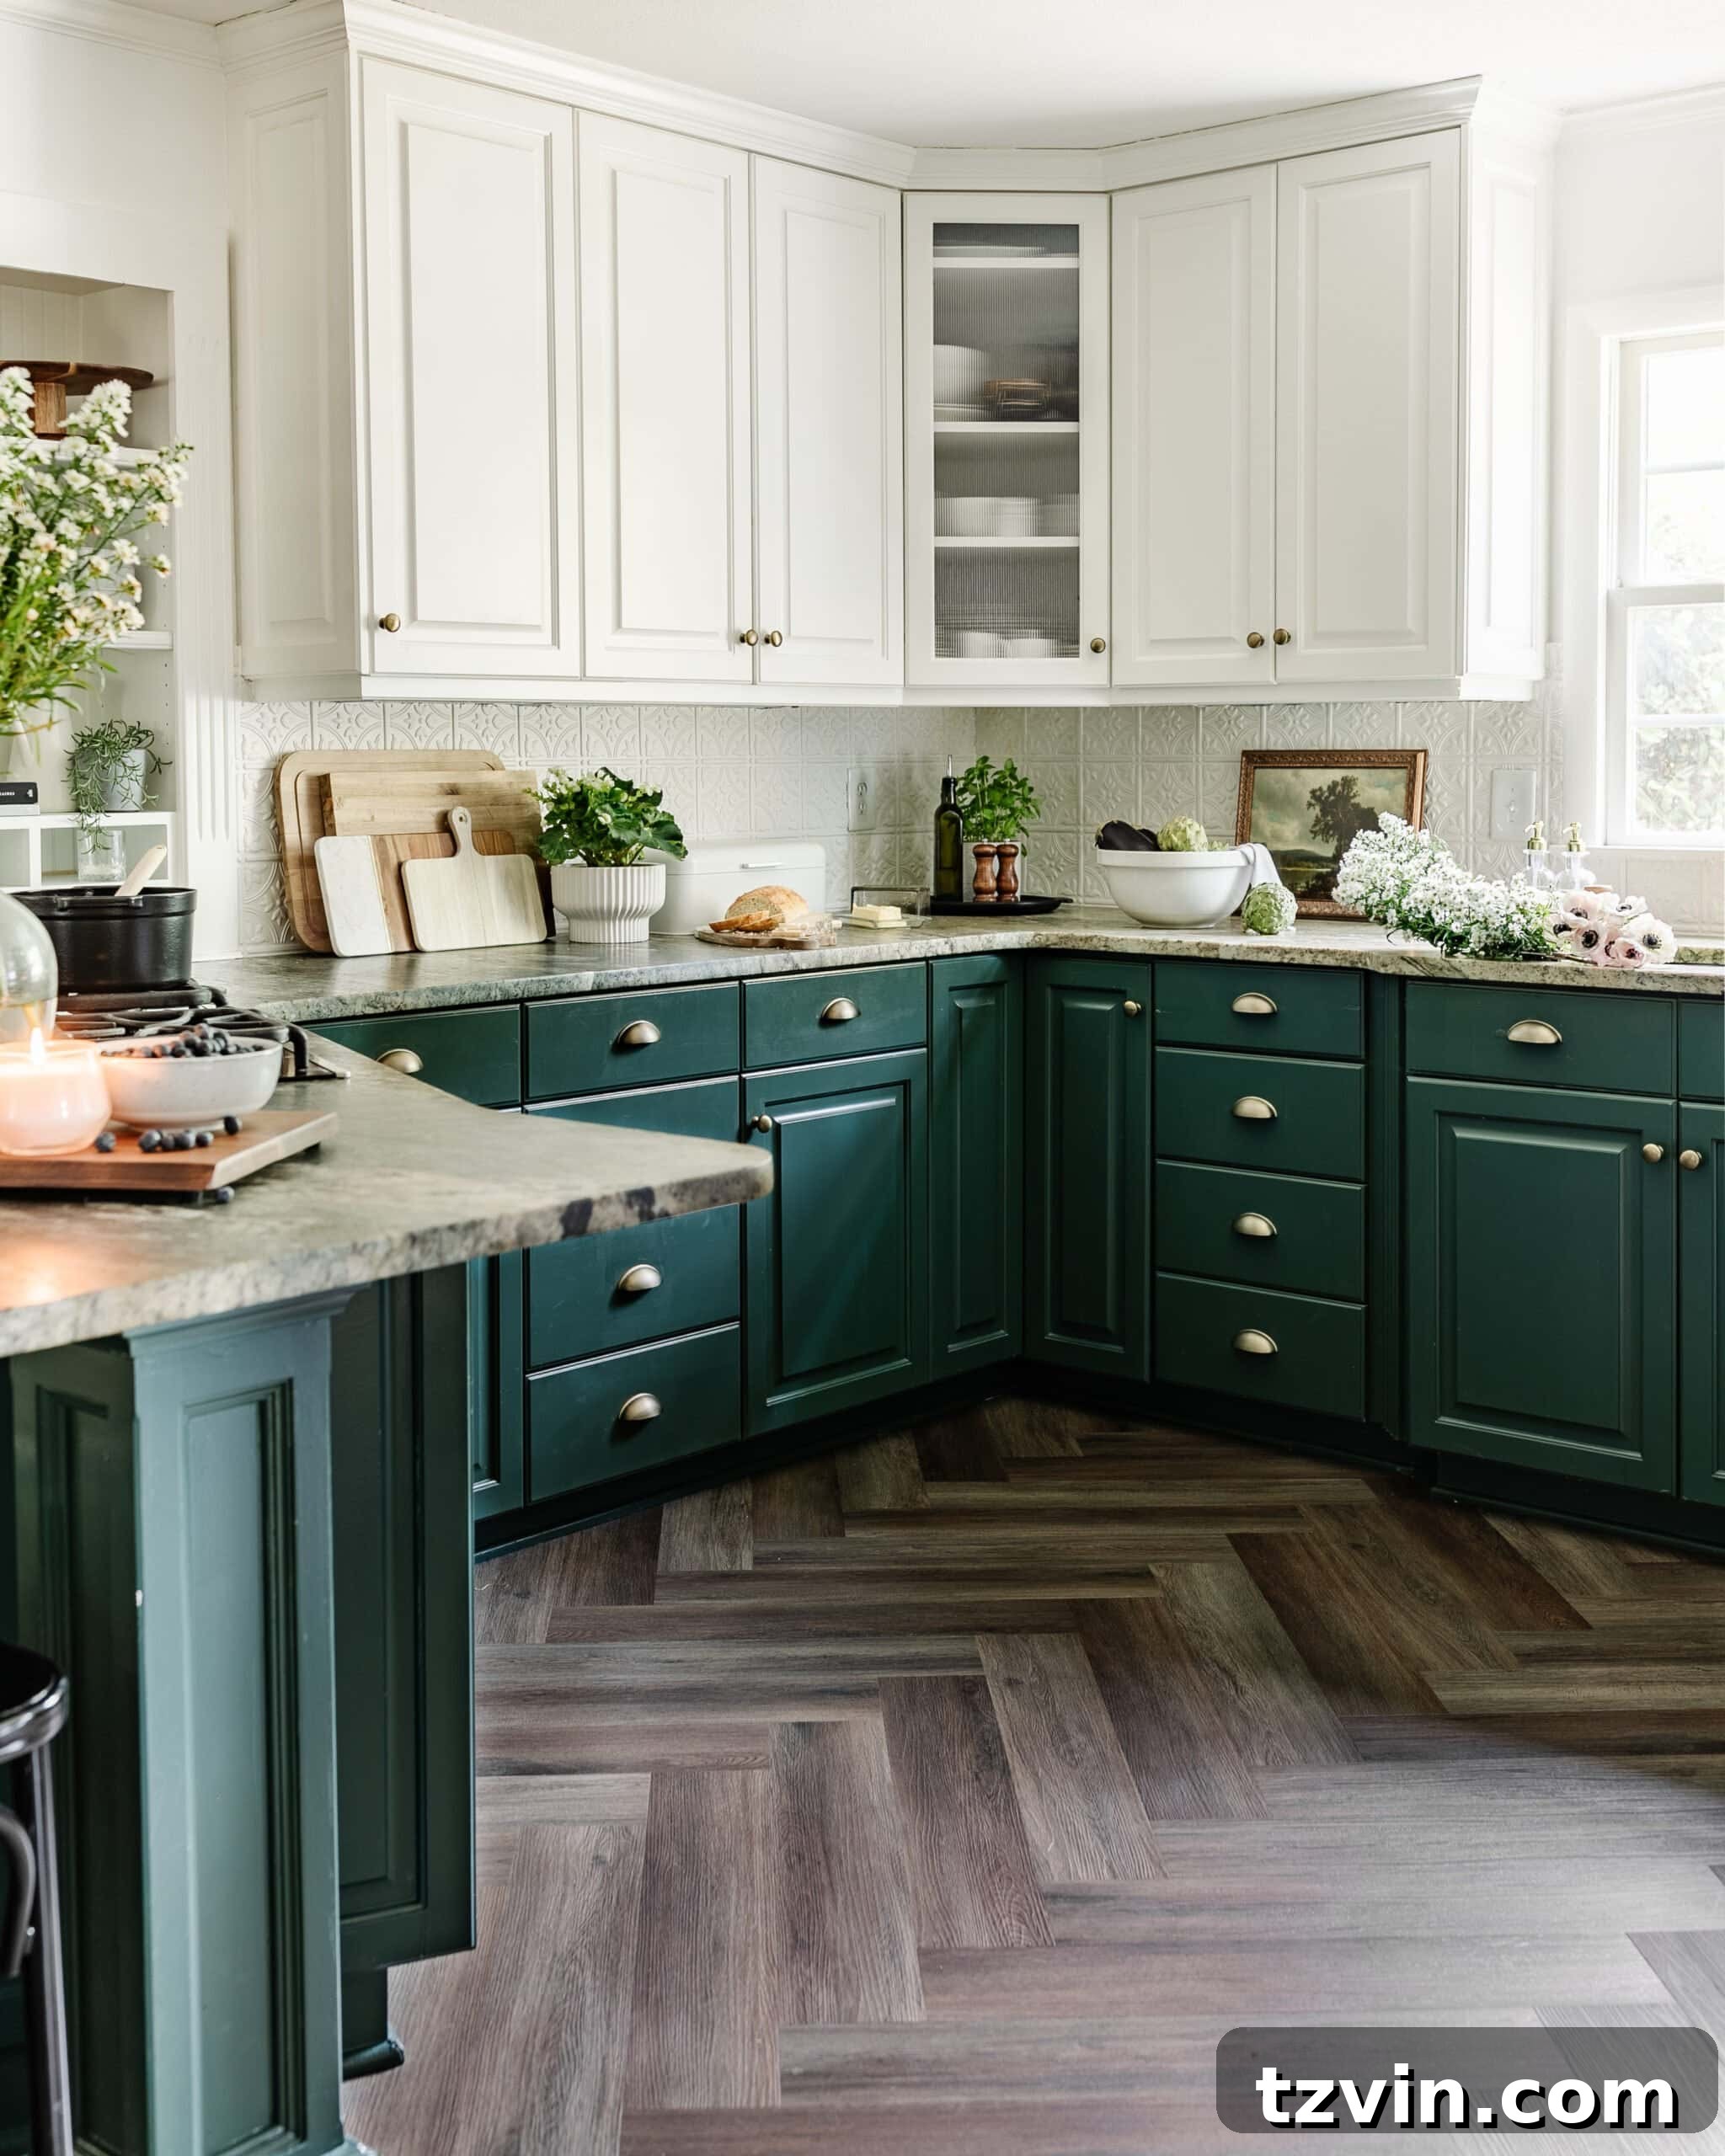
Functional IKEA Pantry Cabinets
Tutorial | DIY IKEA Pantry Cabinet Using Hemnes
Cost: $980
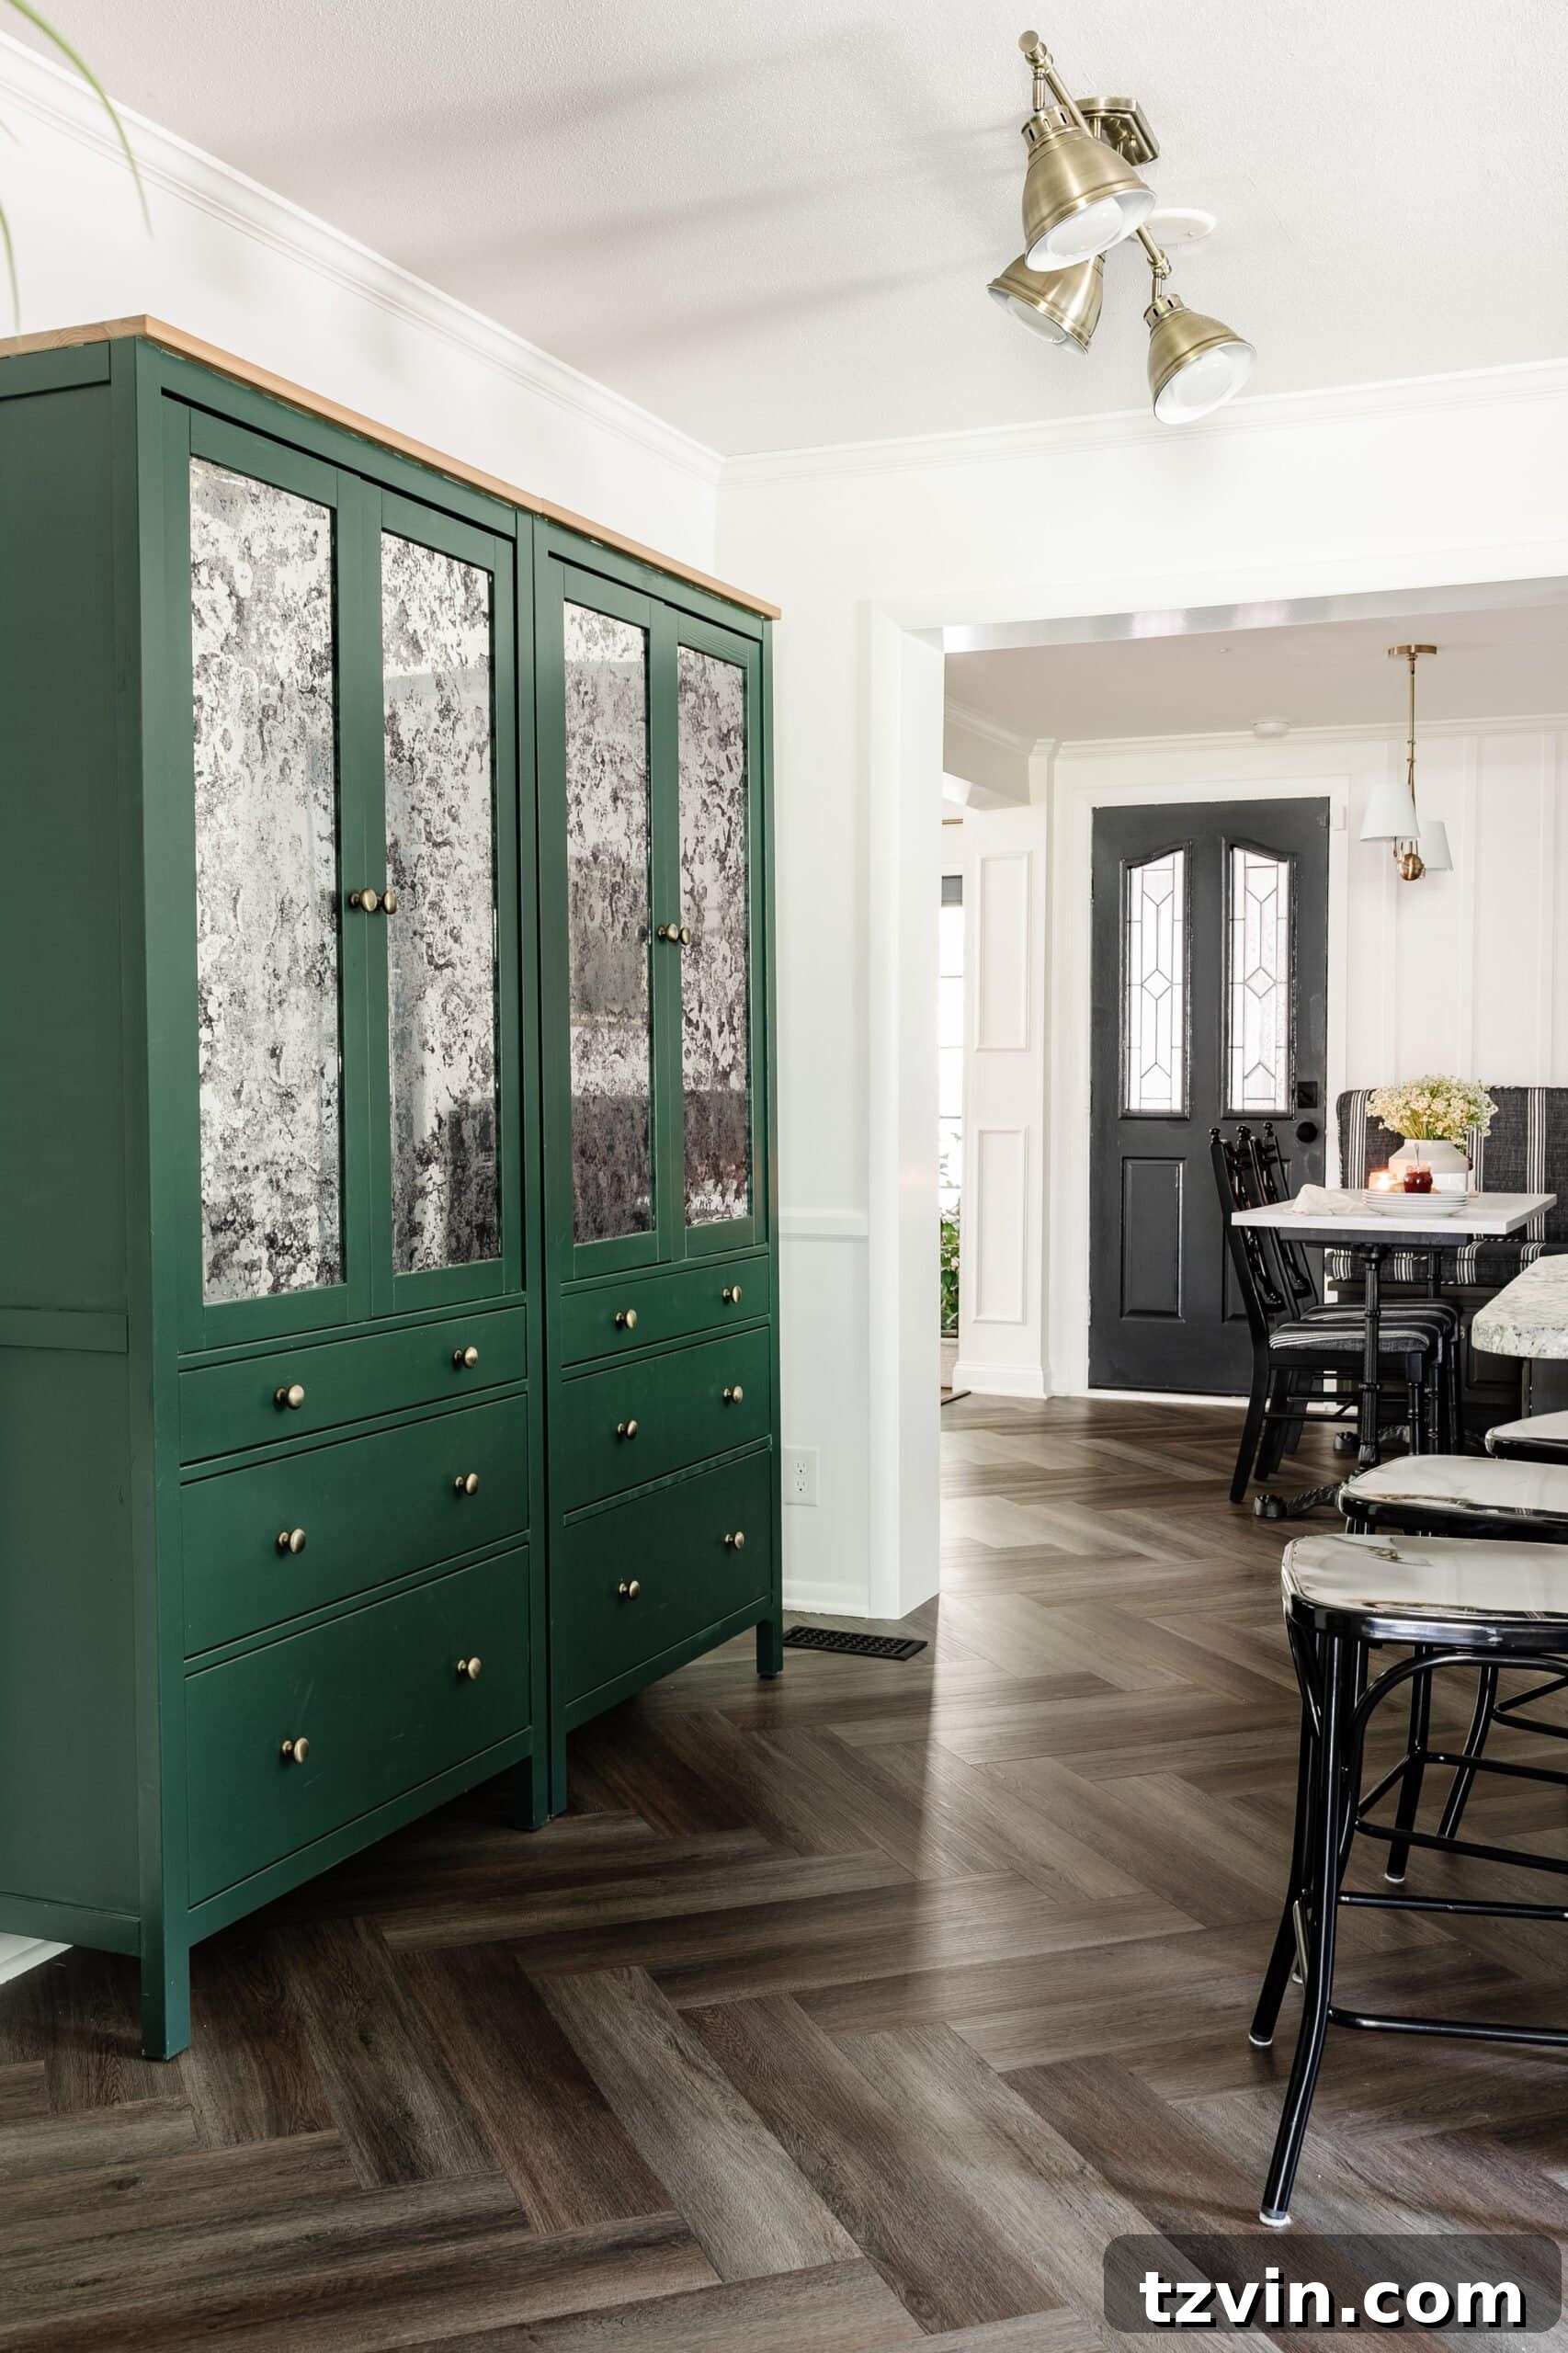
One of the biggest functional shortcomings of our kitchen was the complete lack of a dedicated pantry or sufficient food storage. Fortunately, our kitchen featured a large, blank wall—a completely wasted space—that presented a perfect opportunity for a DIY solution. We decided to maximize this area by incorporating two IKEA HEMNES cabinets. These versatile pieces were then customized by painting them the same Sherwin Williams Billiard Green as our lower kitchen cabinets, ensuring a cohesive and integrated look.
To further enhance their functionality and conceal the pantry’s contents, we applied antique mirror window film to the glass doors. This clever hack not only adds a touch of vintage charm but also provides privacy for the stored items, preventing the visual clutter that can often accompany open or glass-fronted storage. These customized IKEA pantry cabinets transformed a previously unused wall into an essential, stylish, and highly functional storage solution, drastically improving the kitchen’s organization and flow.
Brightening with Thoughtful Lighting
Cost at time of purchase: $391
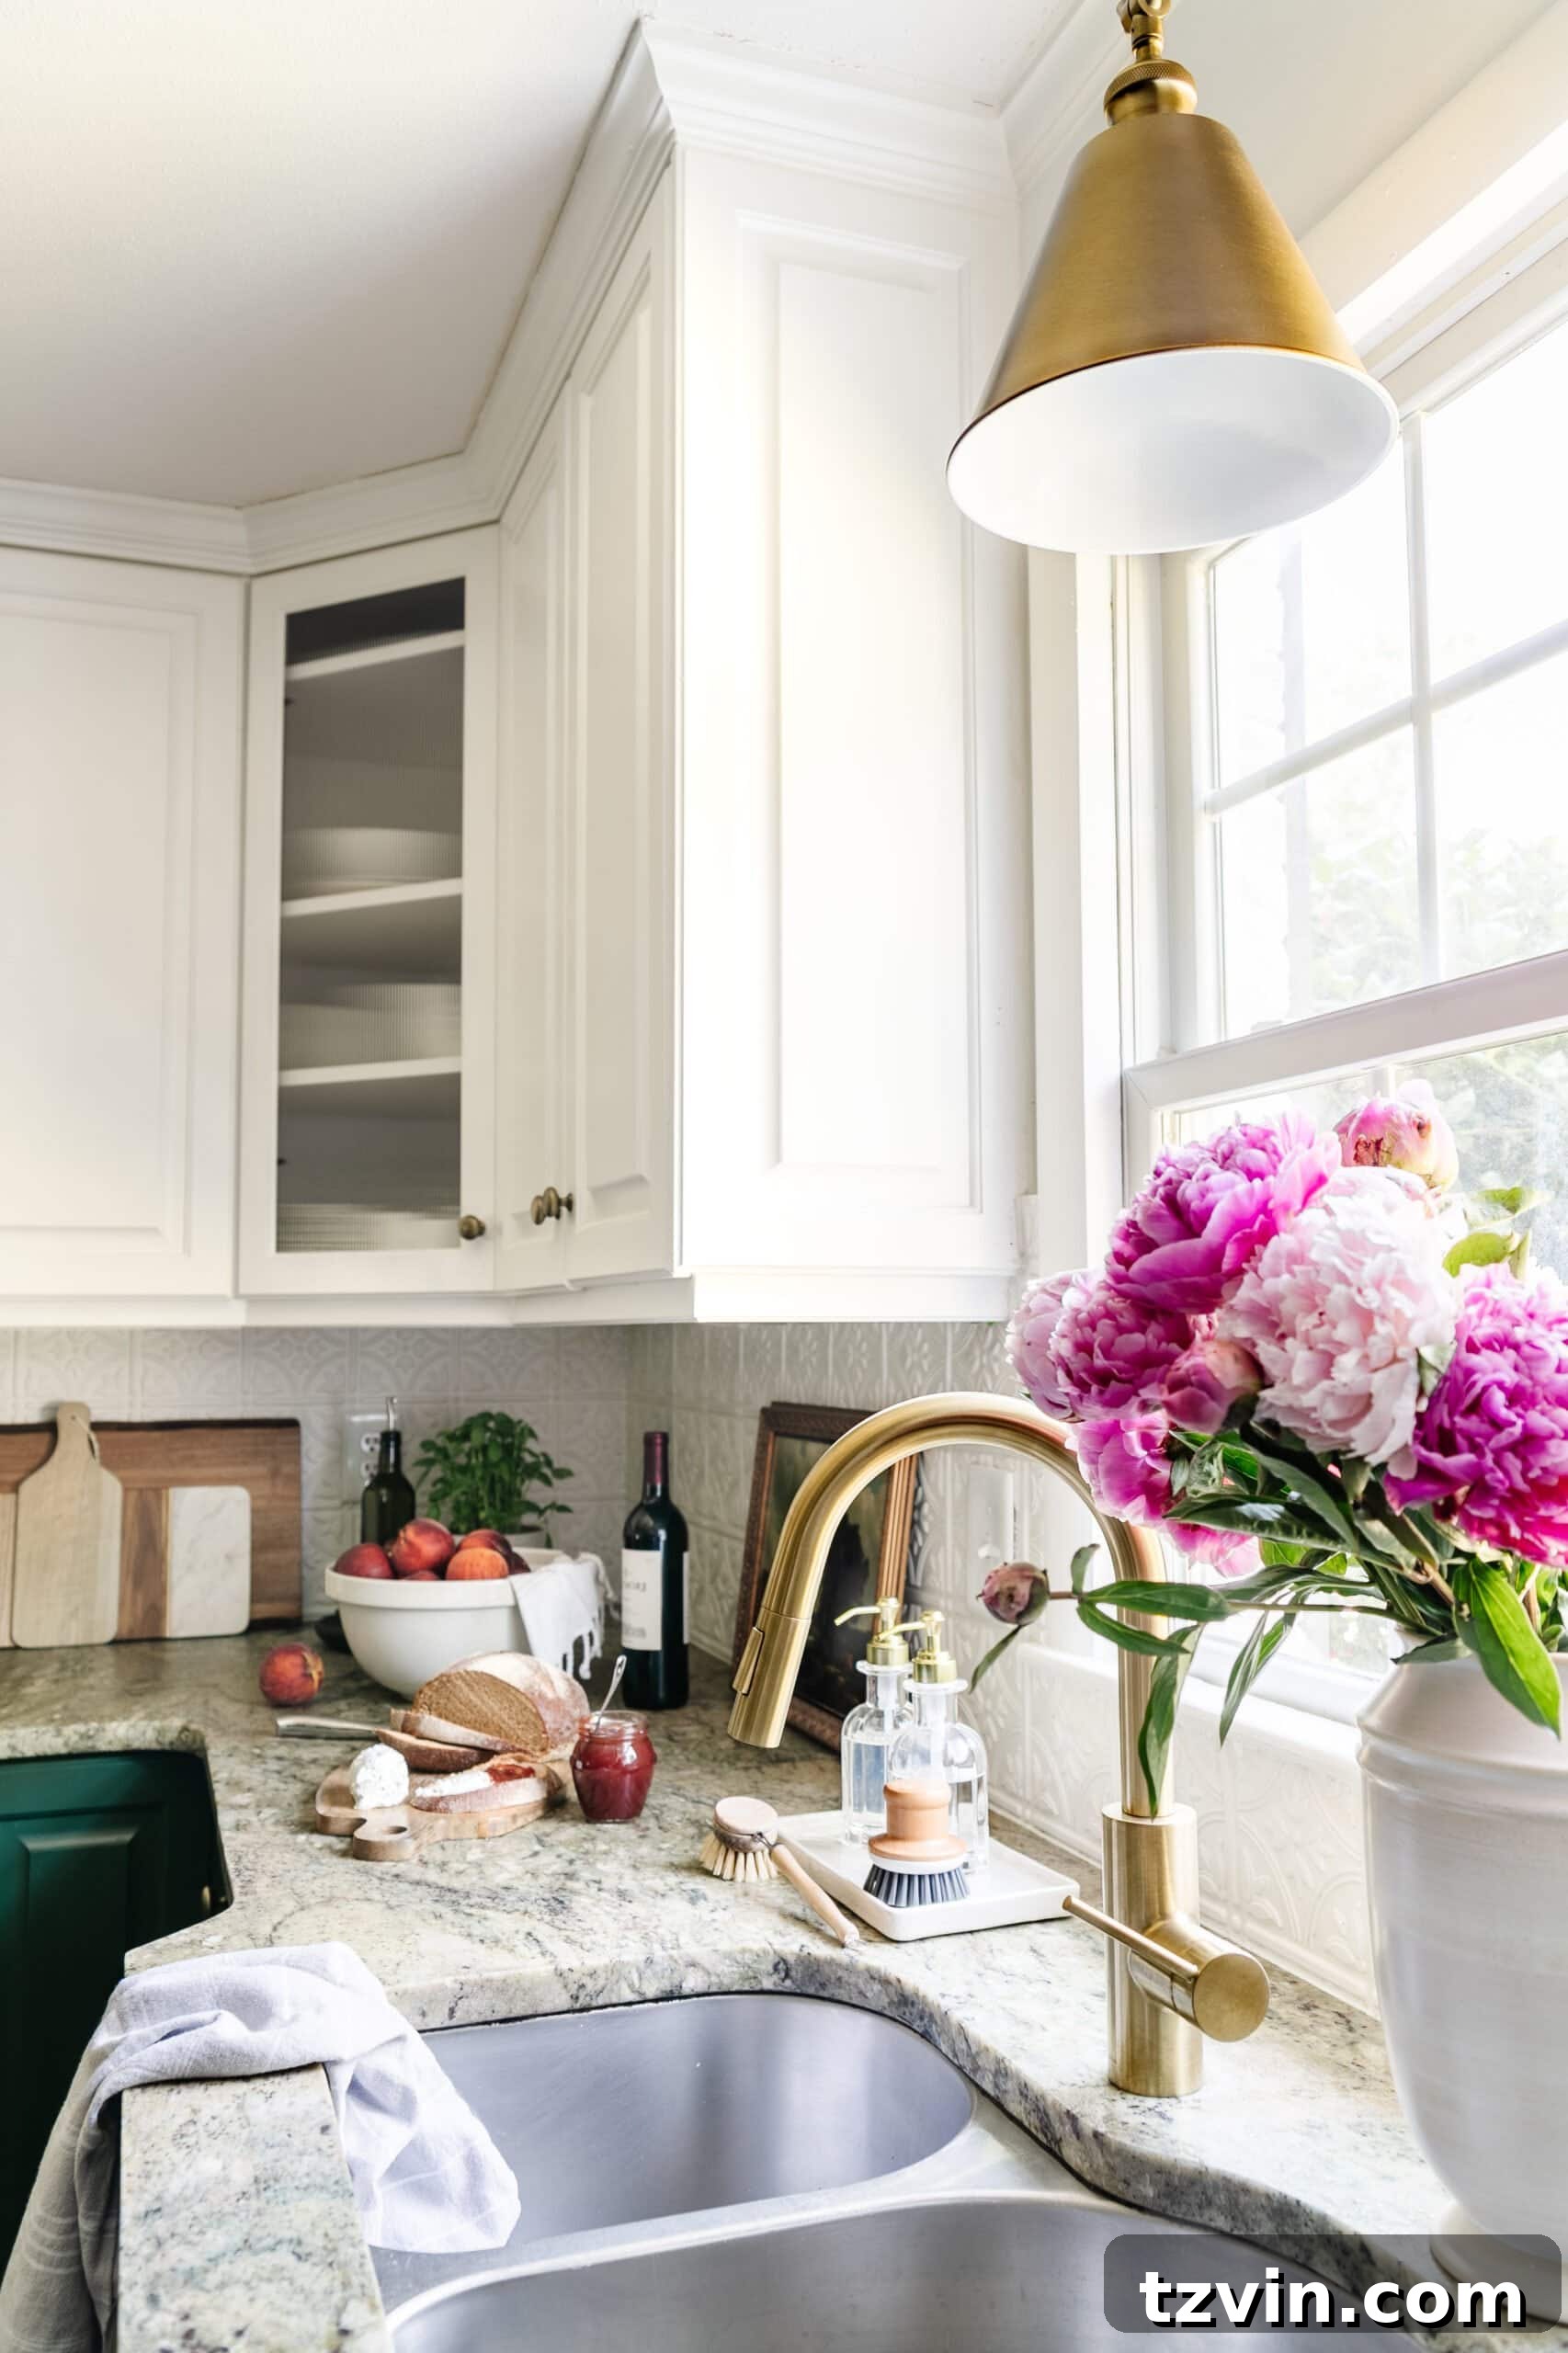
Lighting plays a pivotal role in setting the mood and defining the style of any room, and the kitchen is no exception. Above the sink, we replaced a mundane canned light with a stylish aged brass pendant. This simple yet effective change immediately elevated the space, tying together the traditional-meets-modern aesthetic we cherish. Its streamlined design adds a perfect dose of warmth without overpowering the area, providing focused illumination where it’s most needed.
Several years ago, we also addressed the dated, yellowed track light that dominated the kitchen’s main walkway. We swapped it for an aged brass track light, which offers improved functionality and a more contemporary look. While a large, fluorescent light fixture still resides in the center of the kitchen ceiling – a major undertaking to remove that we’ve postponed for now – the addition of these two elegant brass lights significantly detracts from its presence, drawing the eye to more appealing focal points. These strategic lighting upgrades demonstrate how targeted changes can make a substantial difference in both form and function.
Aged Brass Faucet Upgrade
Cost at time of purchase: $288
A worn-out faucet can significantly detract from the overall appearance of your kitchen sink area. Our old sink faucet was showing considerable signs of age and wear, making its replacement a priority for our kitchen facelift. We opted for a sleek, modern aged brass faucet, and this single change delivered a massive upgrade to our sink area. The aged brass finish perfectly complements our new hardware and lighting, creating a cohesive and refined look that feels both contemporary and timeless.
While I would have loved to replace the sink itself, its undermount installation into our granite countertop presented a significant logistical and financial challenge that wasn’t feasible for a budget-friendly facelift. For now, the existing sink remains. However, the impact of the new faucet alone is truly remarkable, demonstrating how a targeted upgrade can dramatically improve the aesthetics and functionality of a key kitchen zone. It makes me reminisce about my beloved IKEA white porcelain apron sink from a previous home – truly, a single basin sink simplifies life!
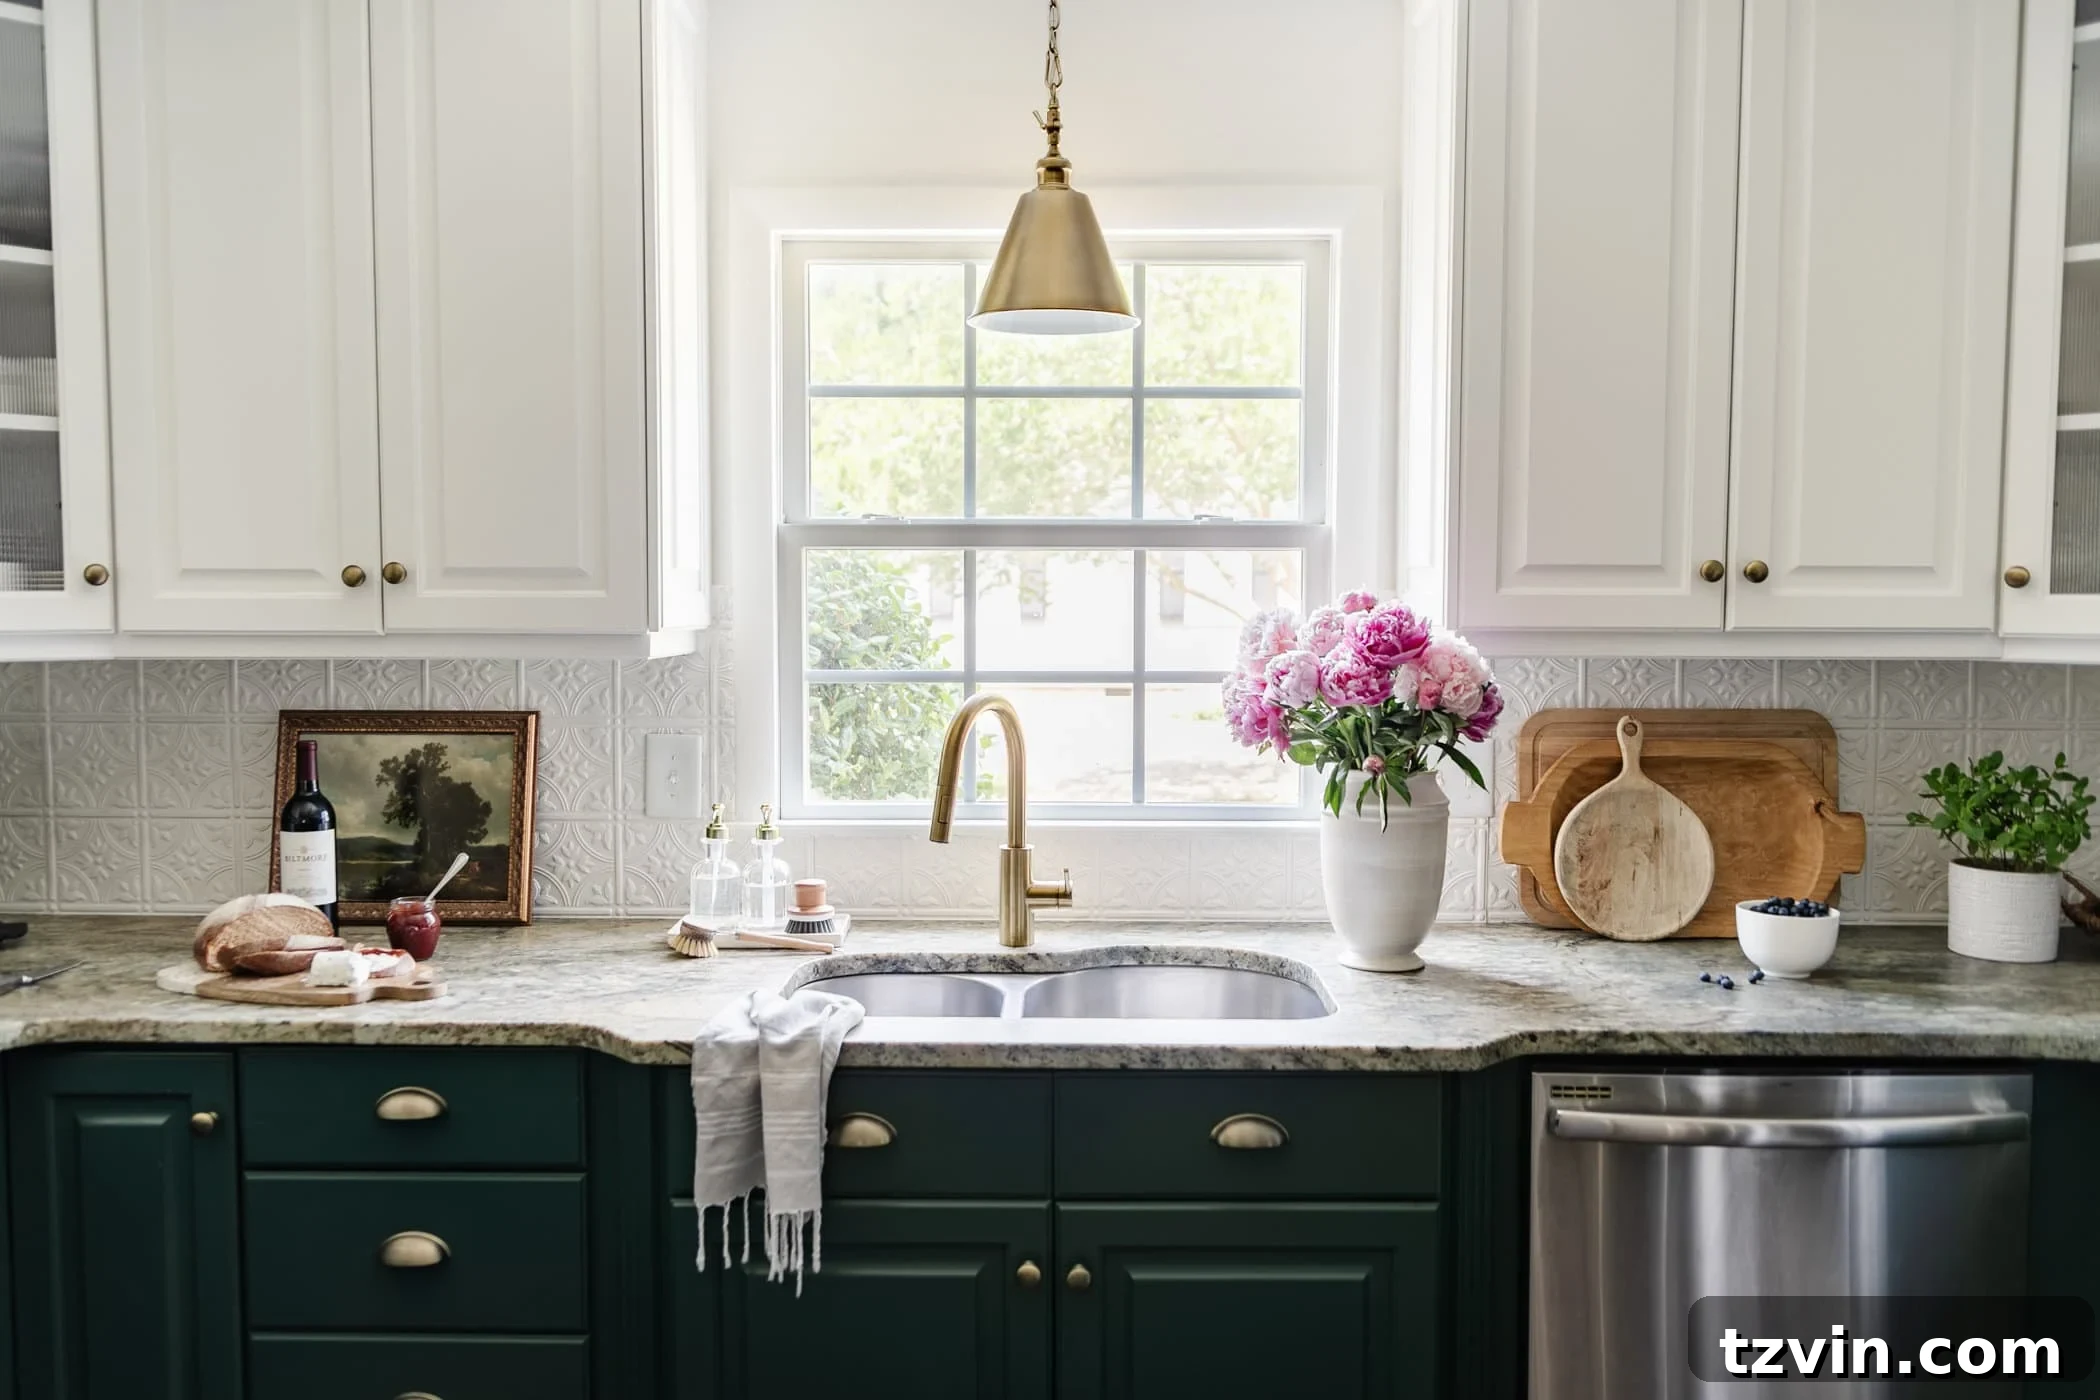
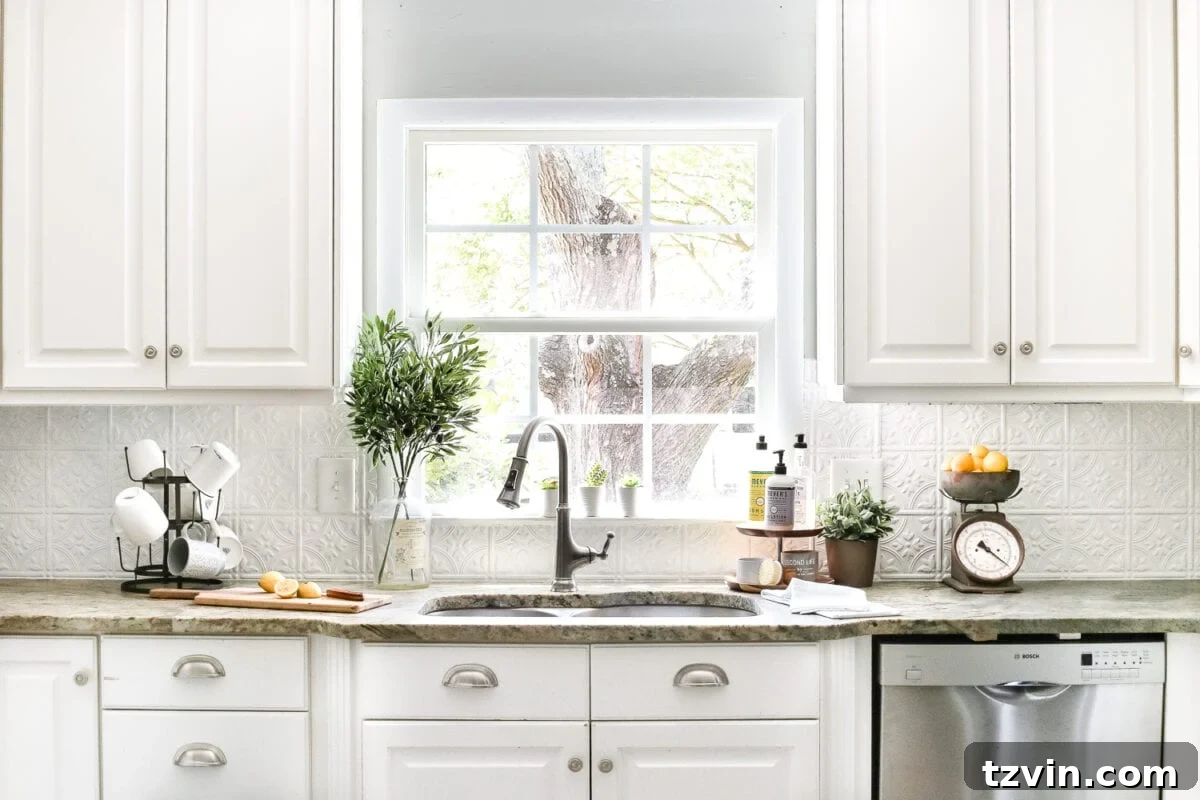
Ingenious Pressed “Tin” Style Backsplash Hack
Tutorial | DIY Pressed Tin Kitchen Backsplash
Free Printable | Antique Oil Painting Printable Art
Cost: $160
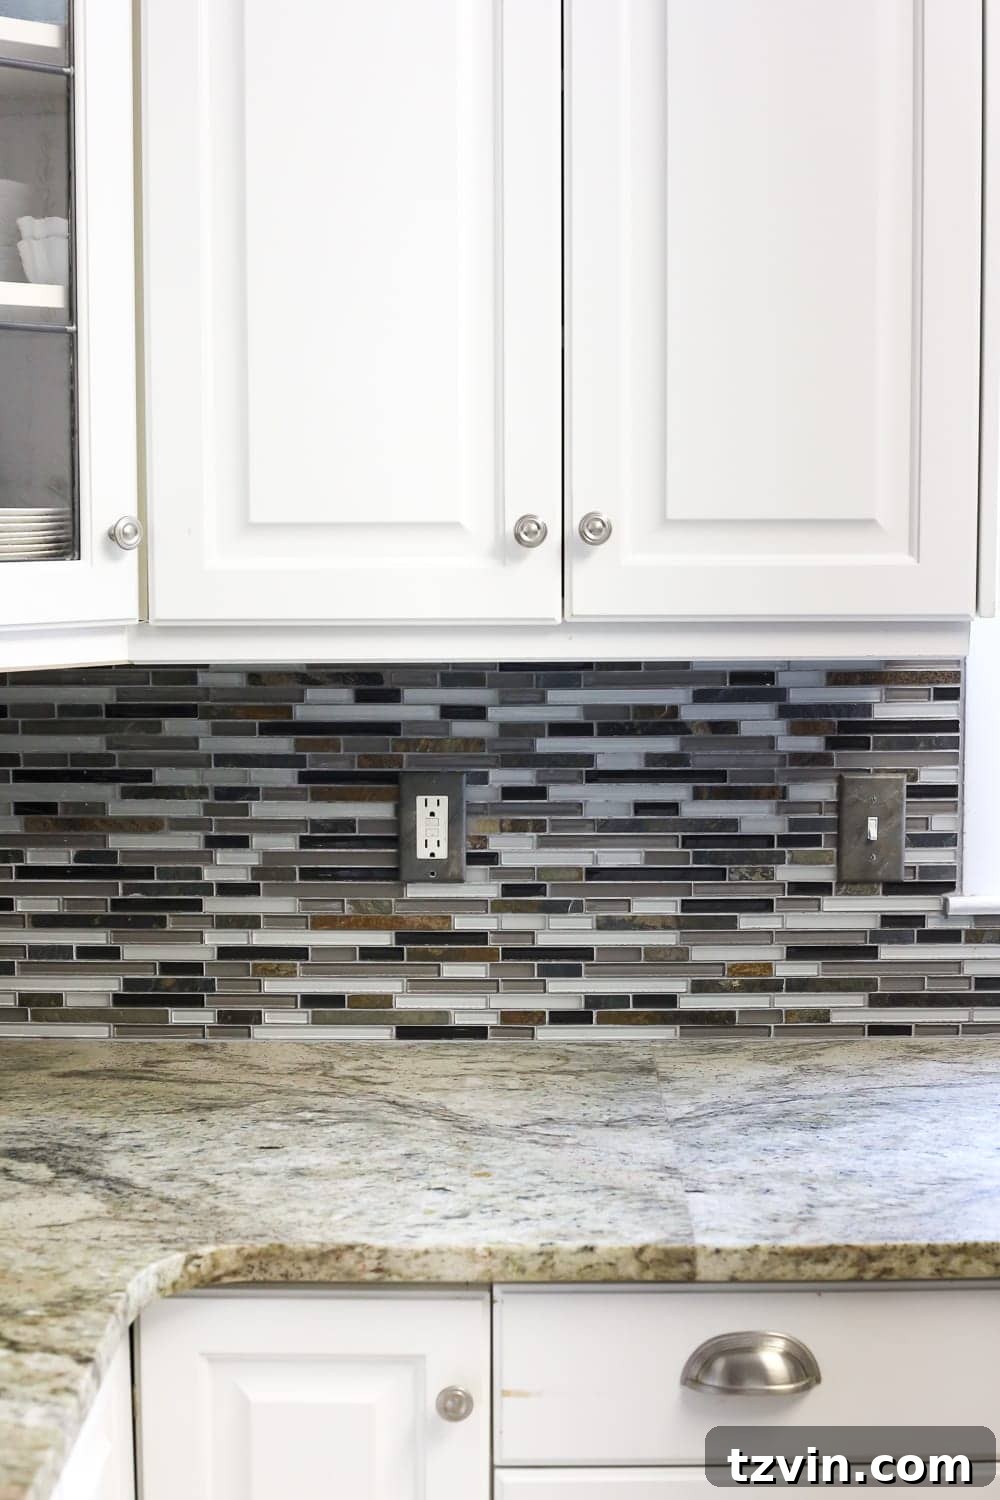
One of the very first projects we tackled in this house, five years ago, was transforming the backsplash. The original backsplash felt busy and outdated, and we knew it needed a change to create a more serene and modern kitchen environment. Our DIY pressed “tin” style backsplash hack stands out as one of the most impactful changes we made, especially considering its incredibly low cost.
This ingenious solution proved to be incredibly easy to wipe clean and has held up perfectly over the years, maintaining its charm and integrity. Best of all, it was a remarkably fast DIY project, completed in just one afternoon without the need for any power tools. The subtle pattern of the pressed tin style adds visual interest without overwhelming the space, striking a perfect balance between simplicity and character. Crucially, it beautifully highlights our existing leathered granite countertops, which was the driving force behind our decision to use Sherwin Williams Billiard Green for the lower cabinets – a testament to “making it work” with what you have. This backsplash hack truly demonstrates how creative, affordable solutions can yield stunning and durable results.
Organized Command Center Wall and Custom Vent Cover
Tutorial | DIY Air Return Cover
Cost | $275
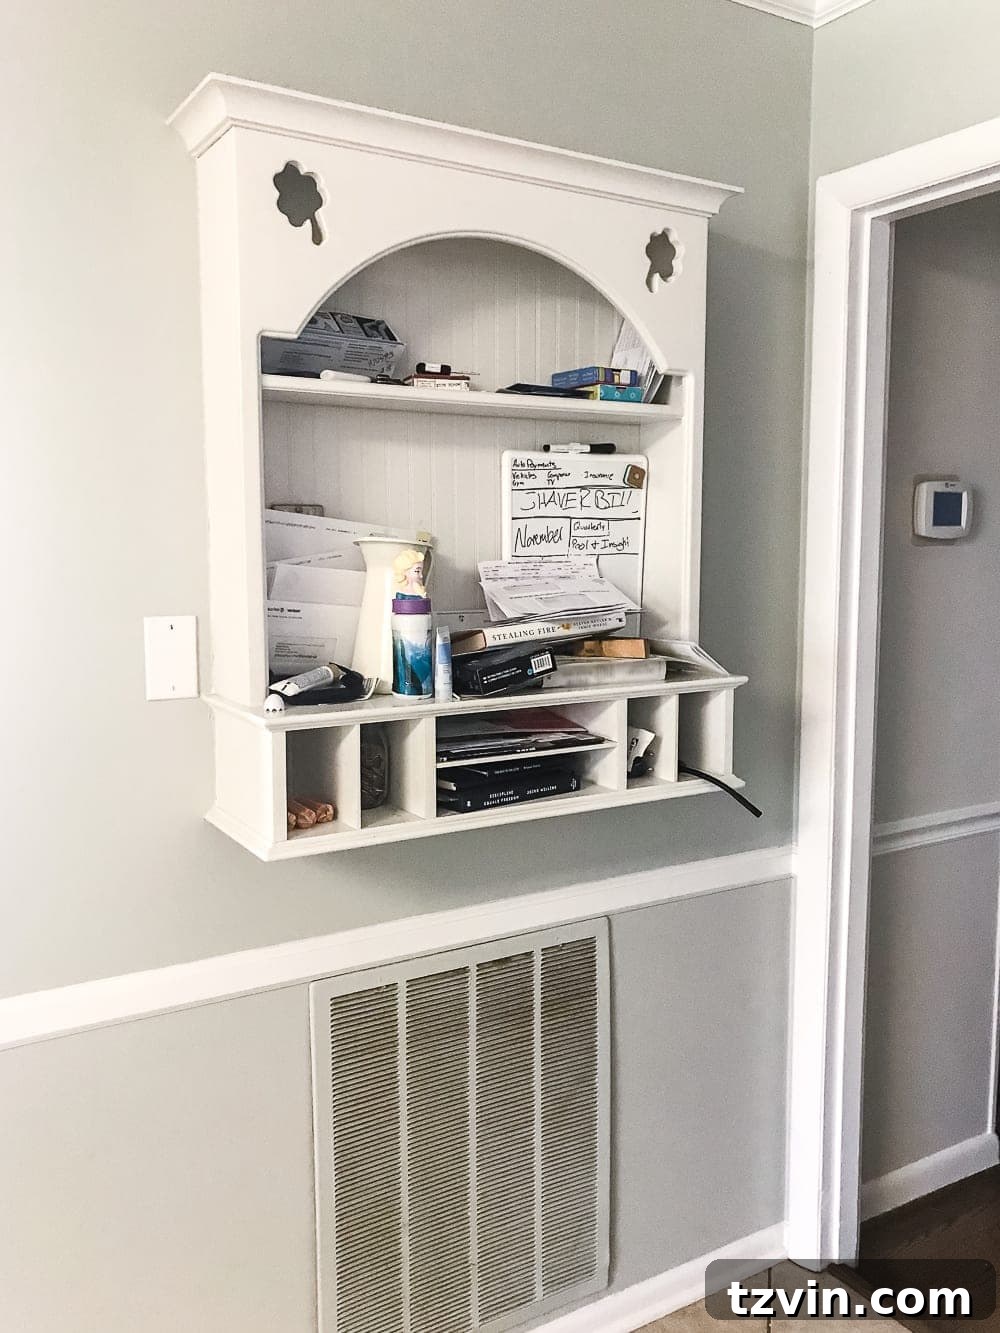
On the wall adjacent to our newly installed pantry cabinets, there once stood a built-in shelf that, regrettably, became a notorious collector of clutter. Recognizing the need for both aesthetic improvement and enhanced organization, we removed the shelf and decided to transform this area into a highly functional command center. We started by painting the walls in a crisp, clean Benjamin Moore Chantilly Lace. This brilliant white shade instantly made the previously dark corner feel significantly brighter and more expansive, contributing to the overall fresh feel of the kitchen.
To establish an organized hub, we added a command center complete with a stylish calendar, a dedicated mail sorter, and a memo board. This setup helps our family stay on top of schedules, incoming mail, and important reminders, bringing order to daily chaos. By giving every item a designated home and eliminating the old “clutter collector” shelf, we’ve successfully created a corner that promotes efficiency and neatness, preventing random items from accumulating. This transformation proves that thoughtful design can solve practical problems while enhancing the visual appeal of a space. Take a look at the “before” to truly appreciate the impact:
Streamlined Open Shelving
Cost: $0
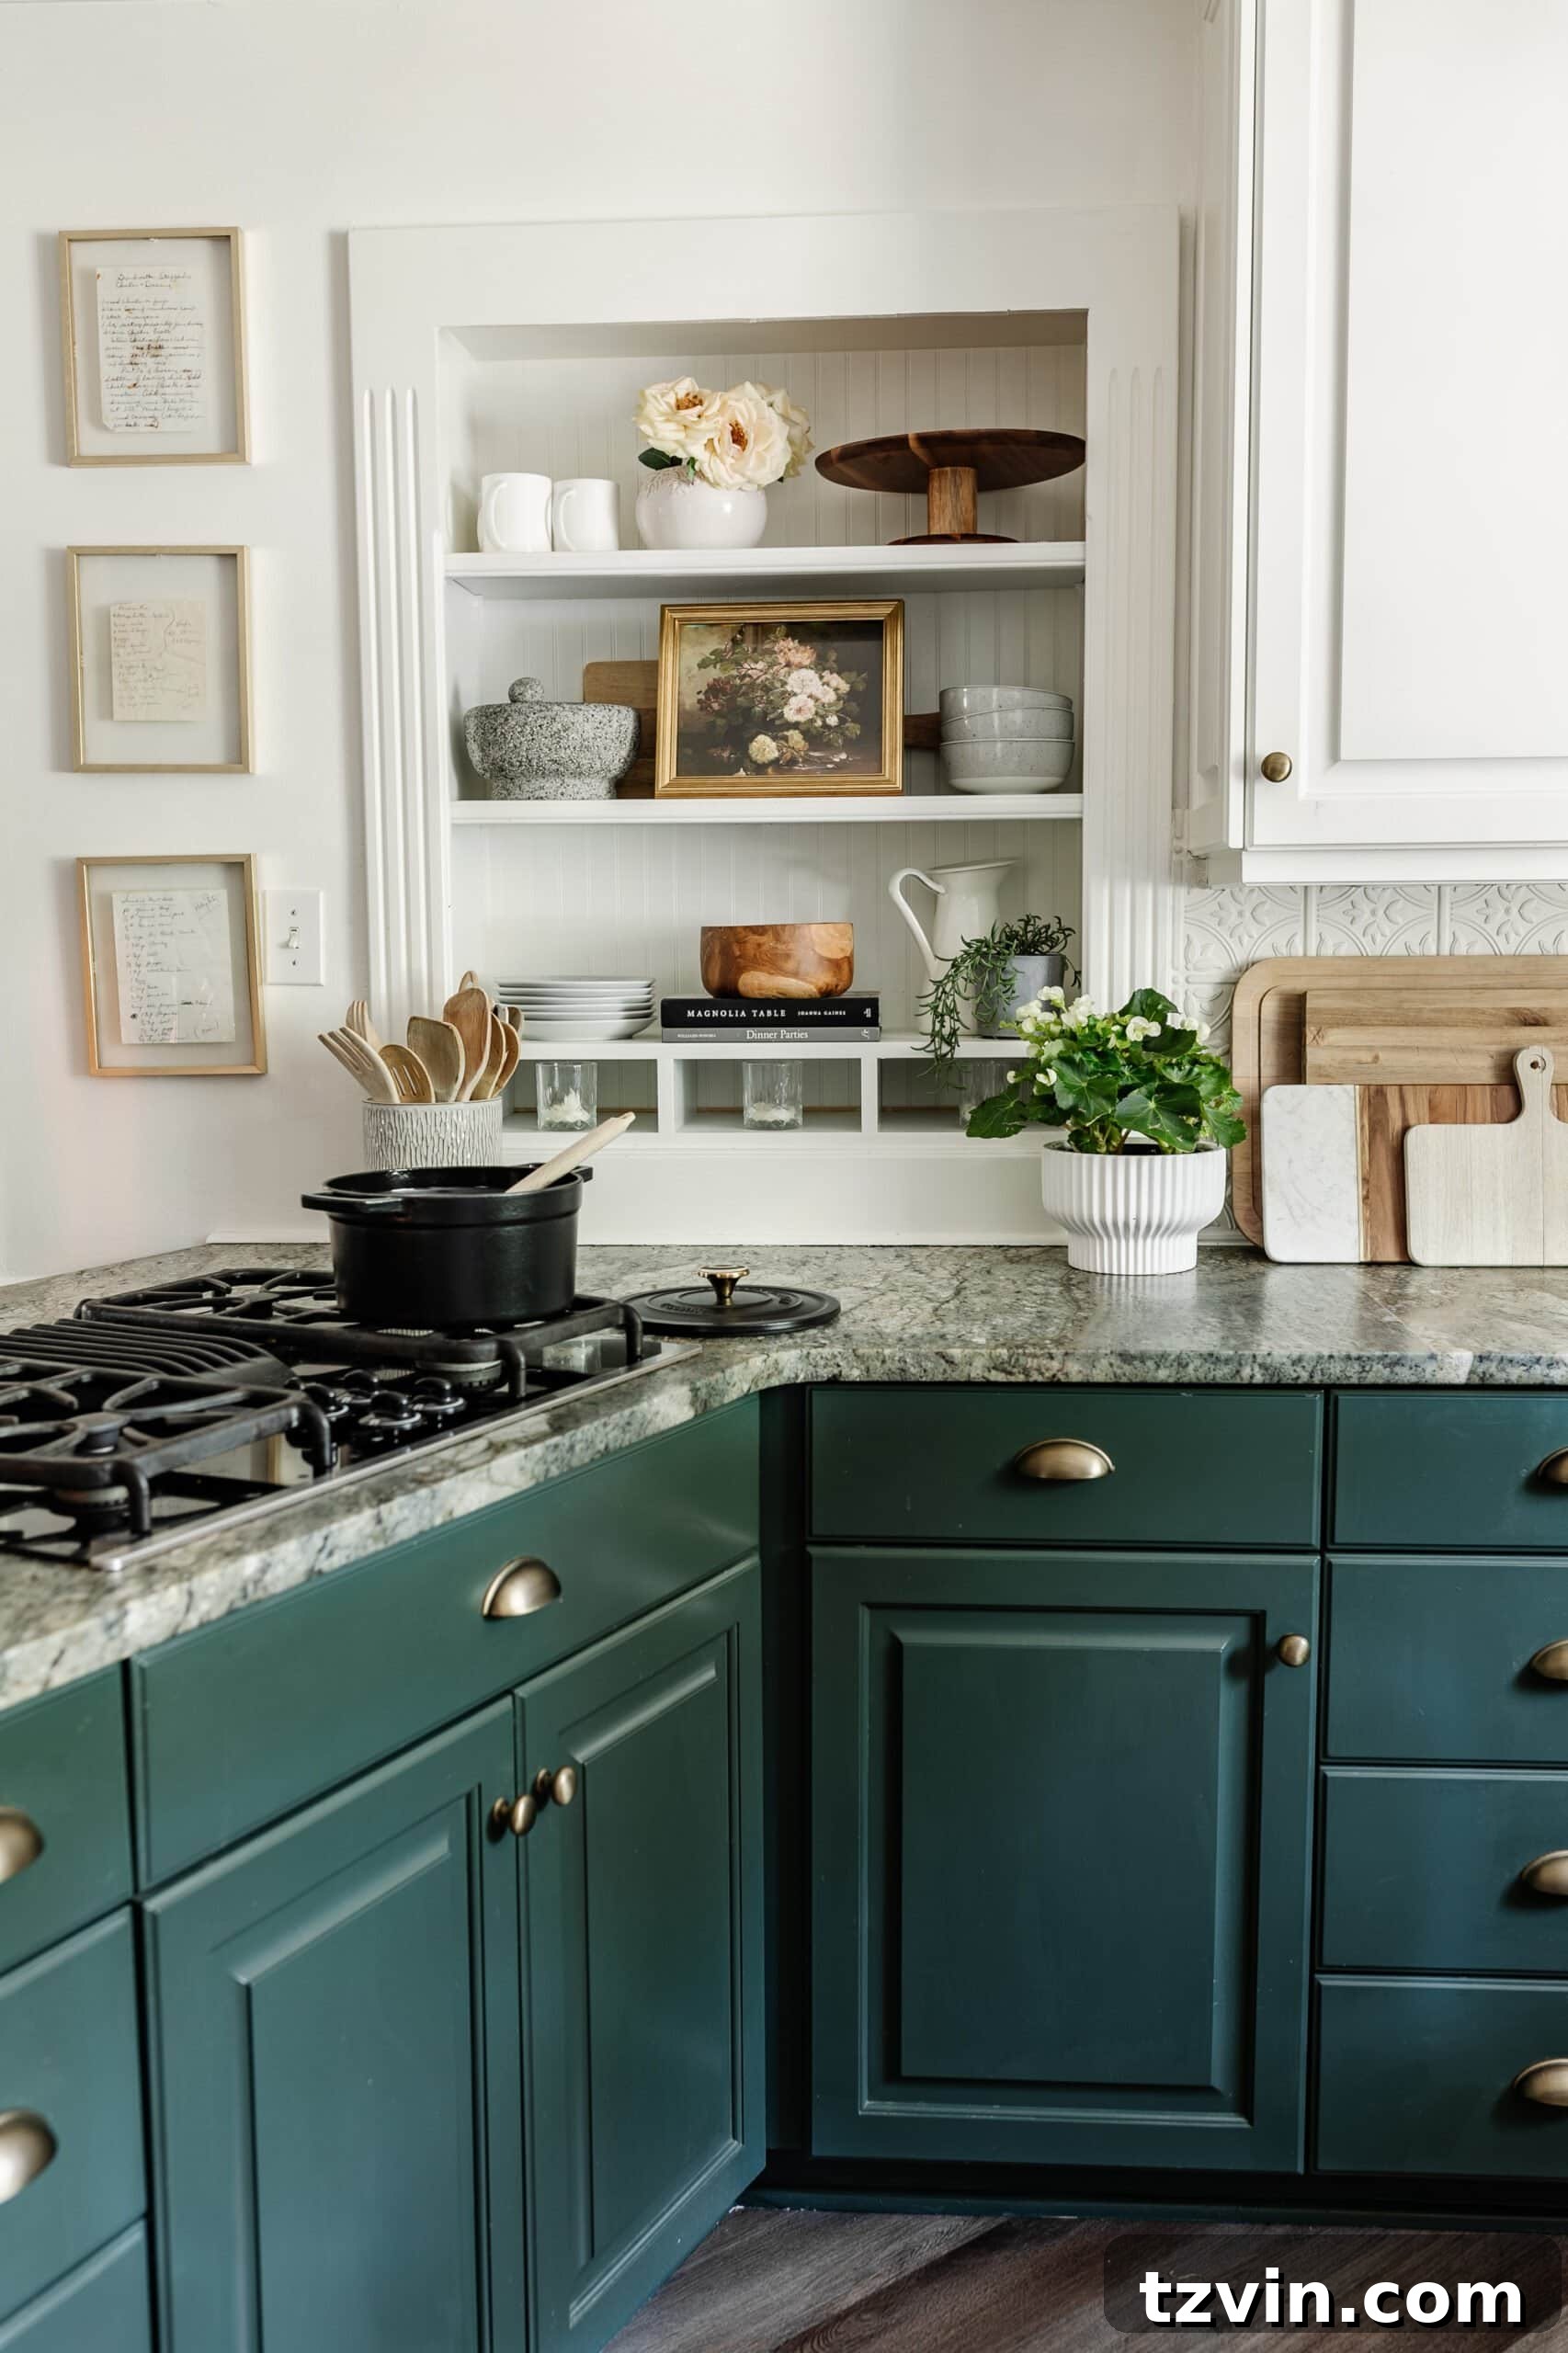
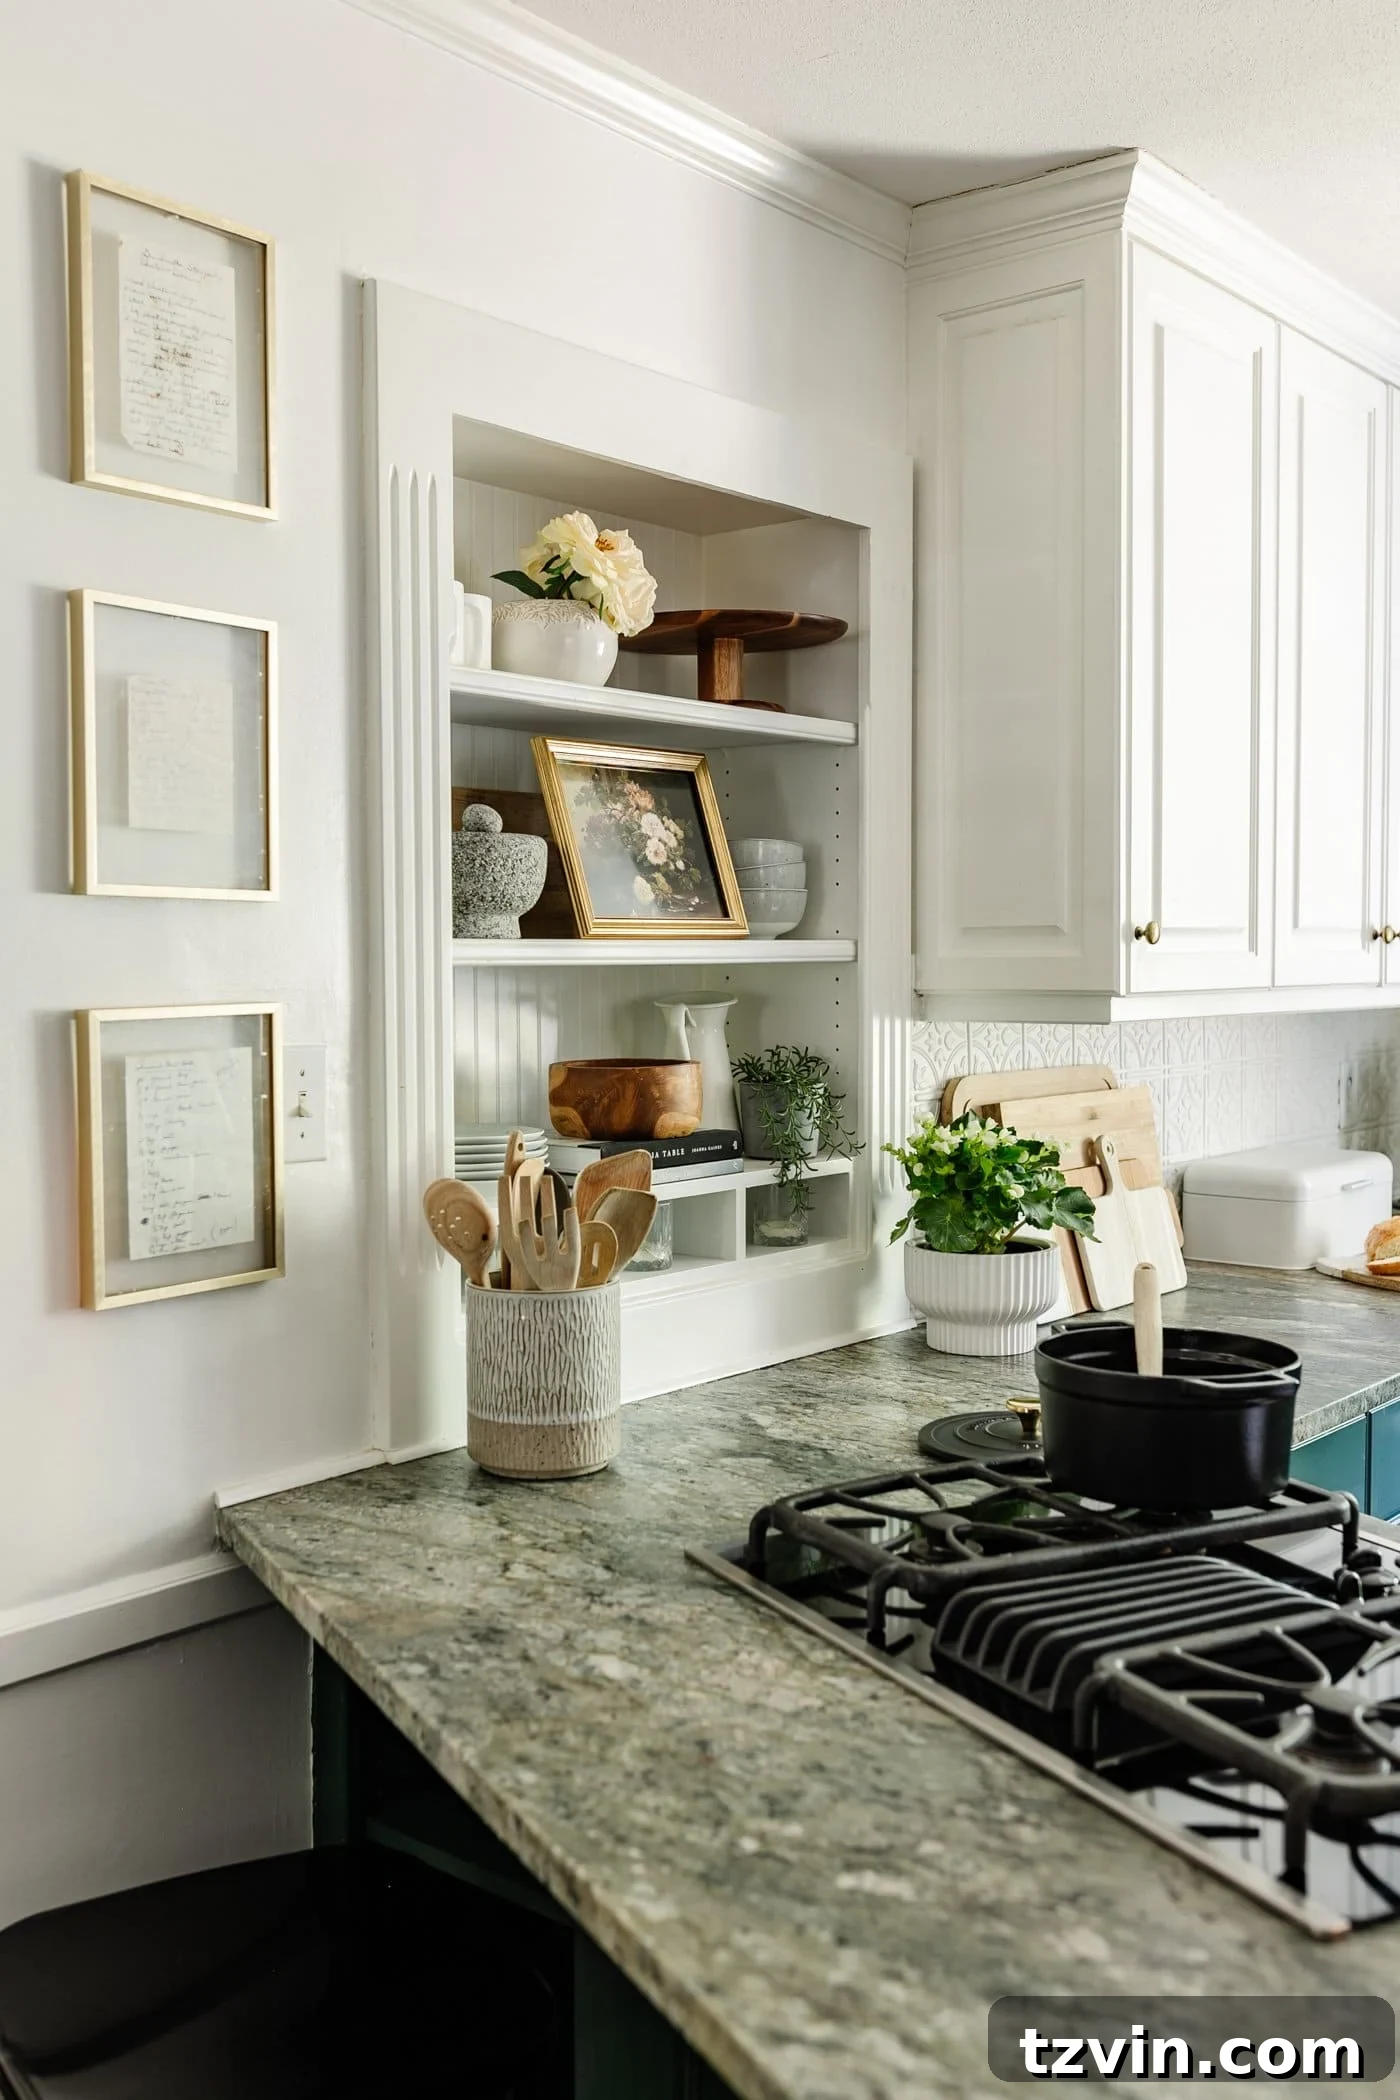
Adjacent to our stove, there was another built-in shelf that mirrored the style of the old command center shelf, complete with decorative arch and shamrock cut-outs. To achieve a more modern and streamlined aesthetic that aligns with our cottagecore vision, Robert skillfully used a jigsaw to remove these dated details, creating a simple and clean open shelf. This modification cost us absolutely nothing, leveraging an existing structure to better suit our updated style.
To ensure this redesigned shelf wouldn’t become another “clutter-catcher,” I styled it with a minimalist approach. A few carefully selected serving pieces and dishes are displayed, adding both decorative appeal and practical accessibility. This approach demonstrates how open shelving, when thoughtfully curated, can enhance a kitchen’s charm and functionality without contributing to visual chaos. It’s about striking a balance between display and utility, ensuring every item earns its place.
Cherished Framed Handwritten Recipe Art
Tutorial | How to Preserve and Frame Letters and Handwritten Recipes
Cost: $54
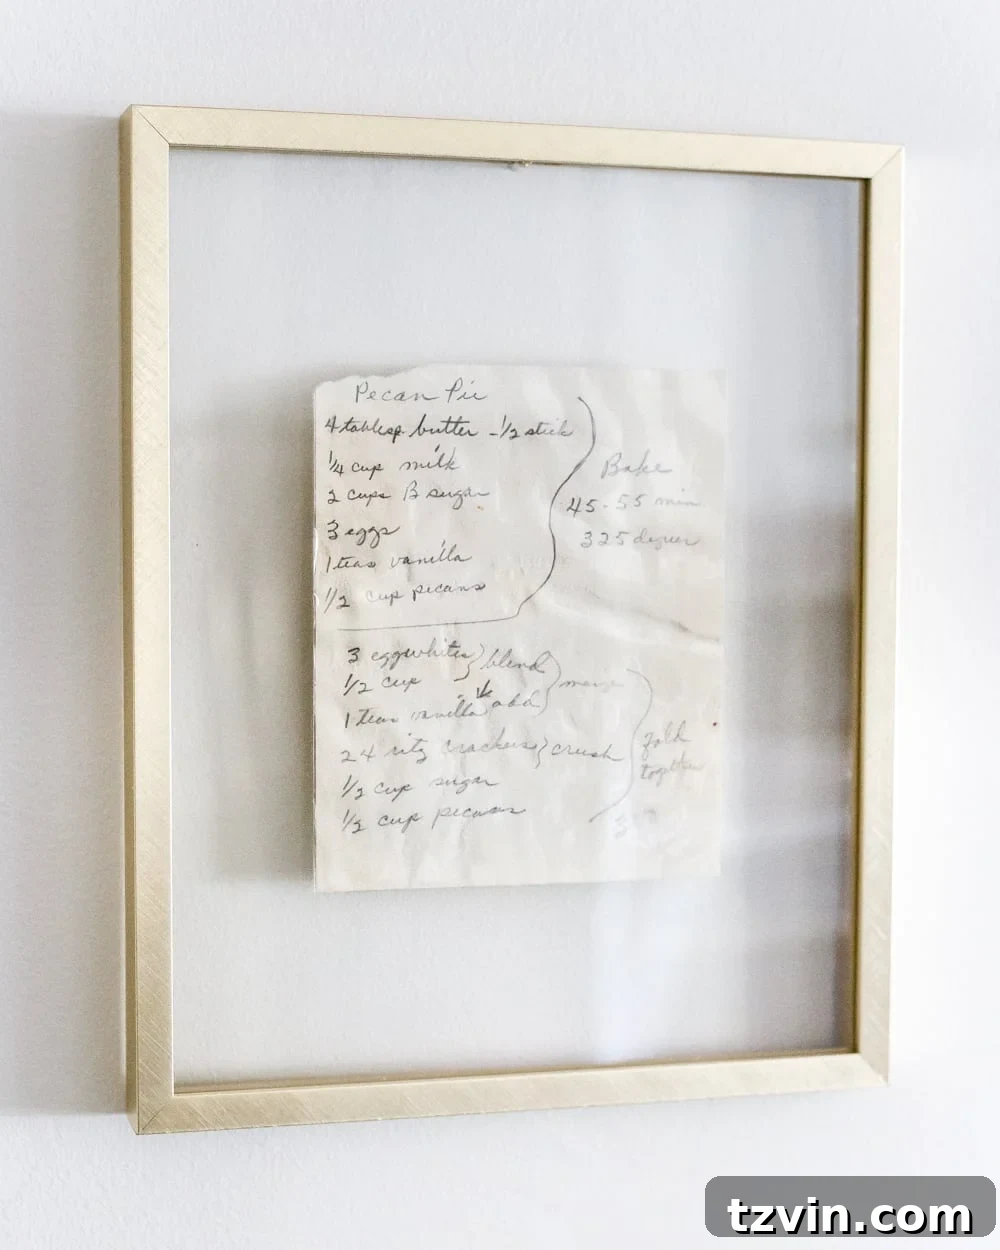
Adding a deeply personal and sentimental touch to our kitchen, I decided to display three framed handwritten recipes from my mom and grandmothers. These aren’t just pieces of paper; they are precious heirlooms filled with family history and love. Positioned beside the open shelf, they serve as a constant reminder of family traditions and culinary heritage.
Using a float frame was a deliberate choice, as it beautifully showcases the tattered, authentic edges of the old paper, adding to their vintage charm. To ensure their longevity, I laminated them with UV film, protecting the delicate ink from fading over time. Each recipe represents a signature dish that my grandmothers and great-grandmother were renowned for within our family, preserved in their unique handwriting. For me, no priceless art could ever rival the value of these sweet, splotch-filled pieces of paper. They embody love, memories, and the true heart of our home, making them an invaluable addition to our kitchen’s aesthetic and story for a mere $54.
The Finished Kitchen Facelift: A True Home Transformation
Through countless hours of re-imagining and hands-on effort, our kitchen has finally evolved into a space that genuinely feels like home. The journey to achieve this enchanting cottagecore style has been a gradual one, spanning a considerable period of time. However, this extended process has only added to the satisfaction and enjoyment of the transformation. It allowed us to truly savor each step, making thoughtful decisions that contributed to the overall character and warmth of the space.
While we still harbor long-term aspirations for a grand, HGTV-level renovation someday, we are immensely grateful that our budget-friendly facelift has eliminated any rush to undertake such a massive project. We can now comfortably wait several years, enjoying our beautiful, refreshed kitchen in the interim. This transformation stands as a testament to the power of small, deliberate changes, proving that significant style and functionality can be achieved without breaking the bank or sacrificing personal touch. It’s a kitchen that embodies comfort, charm, and the unique story of our home.
Kitchen Facelift Sources, Paint Colors, and Comprehensive Budget Breakdown
Here’s a detailed list of all the elements that contributed to our kitchen’s stunning cottagecore transformation, including paint colors, product sources, and a transparent breakdown of the costs involved:
- Wall color: Benjamin Moore Chantilly Lace
- Upper cabinet color: Benjamin Moore Simply White
- Lower cabinet color: Sherwin Williams Billiard Green
- Herringbone LVP Flooring
- Antique Brass Cup Pulls
- Antique Brass Knobs
- Aged Brass Pendant Light
- Brass Track Light
- Aged Brass Modern Faucet
- Pressed Tin Backsplash
- Pantry Cabinets
- Reeded Glass Window Film
- Brass Float Frame
- Acrylic Wall Calendar
- Mail Sorter
- Wall Planter
- Shelf Ledge
- Hanging Basket
- Wall Clock
- Counter Stools
- Large White Bowl
- Terrazzo Cutting Board
- Marble Cutting Board
- Raw Edge Cutting Board
- Cream Vase
- Woven Tray
- Black Wood Tray
- Sink Tray
- Soap Dispenser
- Free Oil Painting Kitchen Art Prints
Kitchen Facelift Budget Total: $3,921
It’s important to remember that this kitchen makeover wasn’t achieved overnight. We’ve been diligently chipping away at these projects over the course of five years. While the final cost of $3,921 might seem substantial for a “facelift,” it reflects a gradual process of saving, planning, and executing DIYs over an extended period. Averaging out to approximately $785 per year to significantly enhance our kitchen’s functionality and aesthetic appeal, this approach proves to be incredibly cost-effective and rewarding in the long run.
Have you embarked on any budget-friendly kitchen facelift projects in your own home that you absolutely adore? I’d love to hear your stories and see your creative solutions in the comments below!
More Inspiring Kitchen Decorating Ideas
- The Good, Bad and Ugly of Concrete Countertops
- DIY Whitewashed Faux Brick Backsplash
- Cottagecore Kitchenware Favorites
- Our Full Kitchen Organization Makeover
- Simplified Decorating: How to Decorate Kitchen Countertops