Transform Your Home: Easy DIY Window Trim Without Miter Cuts
Are you yearning to infuse your home with distinctive architectural charm but feel daunted by complex DIY projects? Many modern homes, especially new construction or builder-grade houses, often lack the character and intricate details found in older, more established residences. Basic, unadorned windows can make a room feel bland and unfinished, failing to live up to its full potential. The good news is, adding chunky window trim is one of the most impactful and surprisingly straightforward ways to elevate your interior aesthetics, making even smaller windows appear larger and more substantial.
This comprehensive DIY tutorial unveils a simple, beginner-friendly method for installing beautiful interior window trim without the need for complicated miter cuts or specialized woodworking equipment. Whether you’re a seasoned DIY enthusiast or a complete novice, you’ll discover how to create stunning window casings that exude the warmth and charm of an old house, transforming every room into a more inviting and visually appealing space. Say goodbye to dull, flat window frames and hello to custom character!
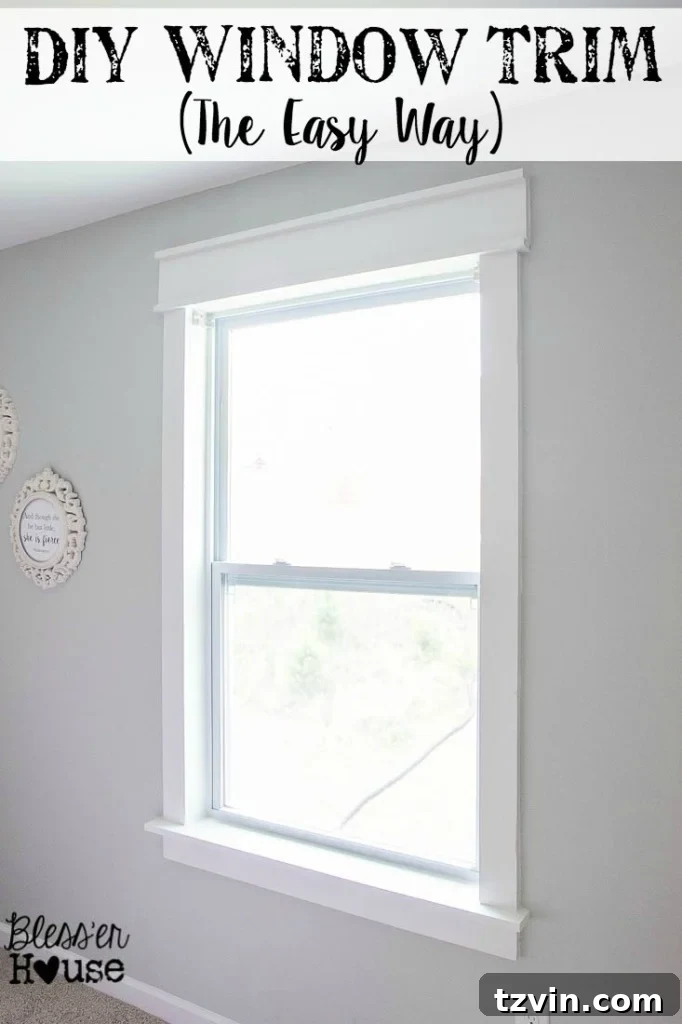
While some DIY projects might feel overwhelmingly creative or intricate, this simple window casing project offers immense visual impact with minimal complexity. It’s truly one of the most rewarding home improvement endeavors for adding significant architectural interest and a touch of elegance to any room. We’ll guide you through each step, ensuring you achieve professional-looking results that will make your basic new windows feel custom-built.
Achieving Custom Window Frames with Simple Straight Cuts
For those new to home improvement, the idea of adding custom window frames might seem intimidating. However, this specific DIY window casing technique is designed with simplicity in mind, requiring only straightforward straight cuts. You don’t even need a host of power tools to get started, though a few will certainly speed up the process if you’re comfortable using them. The beauty of this method lies in its accessibility, allowing anyone to achieve beautiful, chunky window trim.
One of the most effective ways to combat the generic feel of new construction is to introduce architectural elements that speak of craftsmanship and thoughtful design. Having previously installed similar robust trim around the modern windows in our master bathroom, we’ve fallen in love with the cohesive and elevated look it brings. This experience has fueled our desire to implement this chunky window molding throughout the rest of our home, ensuring a consistent and refined aesthetic. While countless variations of interior window trim exist online, our approach prioritizes ease, efficiency, and affordability, delivering a high-impact transformation without the high cost or advanced skills often associated with custom millwork.
Beyond Windows: DIY Ideas to Add Character to Your Home
Windows are just one canvas for adding character. Thoughtful details throughout your home can significantly enhance its appeal. Consider these other impactful DIY projects to further personalize your space:
- 8 DIY-able Wall Molding Ideas to Add Character to Your Home
- How to Quickly Beef Up Crown Molding and Baseboards
- The Best Paint Colors for Gray Trim
Before embarking on this delightful transformation, let’s take a moment to appreciate the “before” state. Olivia’s bedroom window, for example, was undeniably lackluster. It was a blank canvas, perfectly illustrating the lack of visual interest that plain windows can present. Blah. Boooooriiiiiing, indeed!
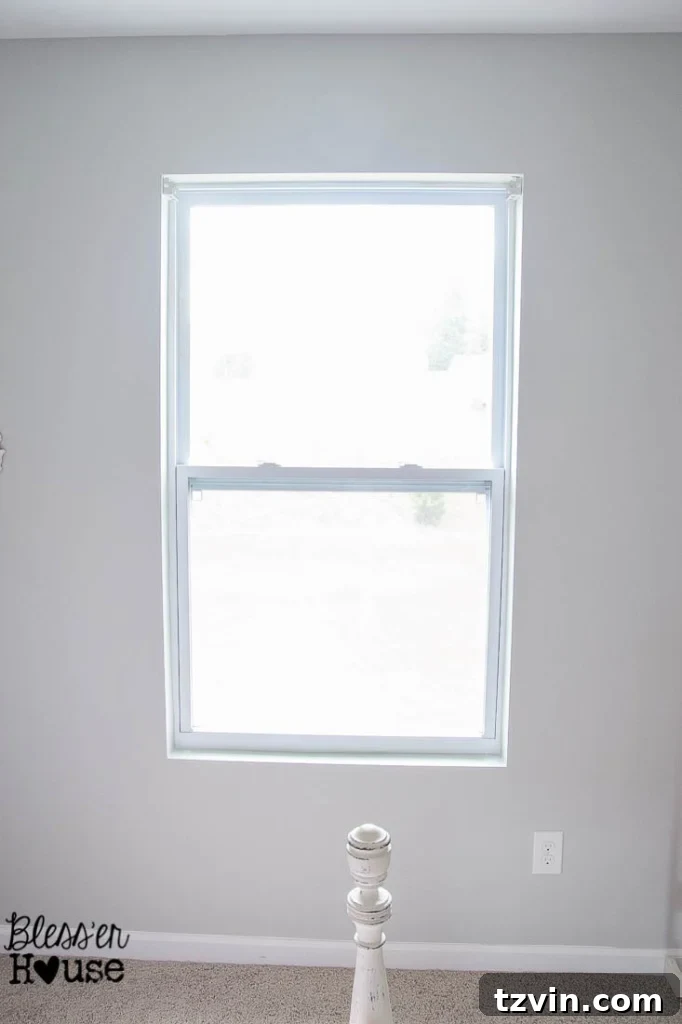
Imagine a glamorous chandelier gracing a room, yet paired with an utterly plain window – it’s a sartorial mismatch of epic proportions! It’s like wearing elegant stilettos with jogging shorts; a style faux pas that even the late, great Joan Rivers would have undoubtedly chastised us for. This contrast perfectly highlights how vital proper window trim is to complete a room’s aesthetic, bringing balance, sophistication, and a much-needed touch of glamour to match other beautiful furnishings.
DIY Window Trim – The Easy Way Without Miter Cuts
This method focuses on creating a layered, Craftsman-style look using standard lumber dimensions and straight cuts, eliminating the need for tricky angled cuts. This makes it a perfect project for beginners and those looking for a quick, impactful update.
Essential Supplies for Your Window Trim Project
Gathering the right materials is the first step to a successful DIY project. Here’s what you’ll need for this chunky window trim, along with a few tips for selection:
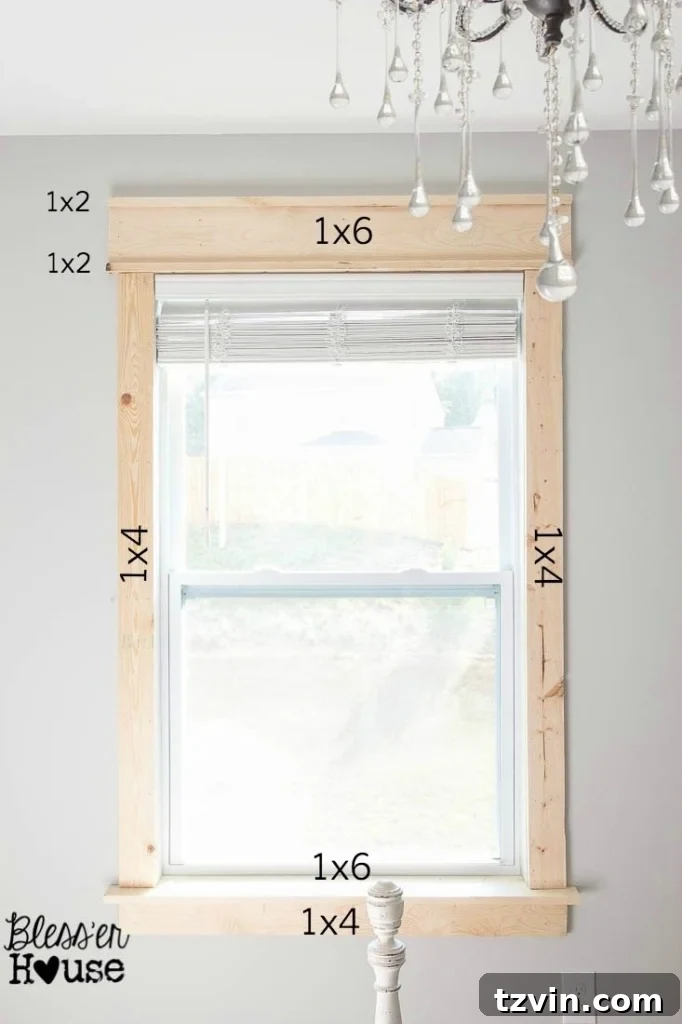
- 1×2 piece of wood: This piece will be used for the top and bottom accent strips on your header. The length will depend on the overall width of your window and sill. Consider buying a longer piece than you think you need to account for any errors.
- 2 1×4 boards: These will form the side casings and the apron beneath the sill. Again, measure your window height and width carefully and add a little extra.
- 1 1×6 board: This wider board is crucial for the main window sill and the substantial top header. Its width provides the necessary overhang and visual weight for the chunky look.
- Brad nails: Essential for securely attaching the trim pieces to the wall and to each other. Choose a length appropriate for your wood thickness and wall type.
- Wood screws: For assembling the header pieces (1x2s to the 1×6) where a stronger bond is desired.
- Hammer: For manual nailing. While effective, a power tool will save you a lot of time and effort. If you’re looking for efficiency, a cordless brad nailer is a game-changer for speed and consistency.
- Paintable caulk: Your best friend for filling gaps between trim pieces and the wall, achieving a seamless, professional finish.
- Wood filler: Necessary for filling nail holes, minor imperfections, and knots in the wood, creating a smooth surface for painting.
- Primer: Absolutely crucial for raw wood. It seals the wood, prevents knots from bleeding through your paint, and ensures an even paint application for a durable finish.
- Paint: Choose a color that complements your room. A small sample size of good quality interior paint, like Valspar Du Jour, is often enough for one window. Consider a semi-gloss or satin finish for durability and easy cleaning.
- Jigsaw: Or your preferred type of saw for cutting lumber. A simple hand saw can also work if you don’t own power tools, though it requires more physical effort and patience. A miter saw (even a basic one for straight cuts) can make cuts faster and more precise.
- Nail setter: For countersinking brad nails slightly below the wood surface, allowing for easy filling and a smooth finish.
- Fine-grit sandpaper: For smoothing wood filler and any rough edges before priming and painting.
- Pry bar and utility knife: Only if you plan to remove existing trim before installing your new, chunky window casings.
While various styles of molding exist, for this straightforward method, we recommend using plain pine lumber. This choice allows for clean lines and a contemporary Craftsman-style finished look. Alternatively, you could use MDF board for a more budget-friendly option, or other wood varieties, depending on your preference. For exterior applications around an exterior window, it is imperative to use preservative-treated wood trim or composite materials. These specialized materials are designed to resist moisture, rot, and insects, preventing long-term issues on the exterior of your home. Always ensure your materials are appropriate for the intended environment.
Step-by-Step Guide to Installing Your Easy Window Trim
Here’s the strategic game plan for installing your window trim. A visual representation often simplifies the process, so refer to the images as you go.
Preparation: Removing Existing Window Trim (Optional)
If your window already has existing trim that you intend to replace, begin by carefully scoring the old caulk. Use a utility knife to cut along both the inside and outside edges of the side casings, the head casing, and the window sill board. This step is crucial for cleanly breaking the caulk seal without damaging your walls. Once the caulk is scored, use a pry bar to gently but firmly remove the old trim from the wall. Work slowly to minimize damage to the surrounding drywall, and protect your wall with a thin piece of wood or cardboard behind the pry bar.
Step 1 – Constructing and Installing the Window Sill
The window sill is the foundation of your new trim and sets the stage for the chunky look. We begin with this piece to ensure proper alignment and stability.
- Cut the 1×6 for the sill: Measure the total width of your window opening. Then, cut your 1×6 board to this width plus an additional 10 inches. This extra length will create a generous 5-inch overhang on each side of the window, contributing to the substantial, custom feel of the trim. Precise measurements here are key to a balanced look.
- Mark and cut the sill corners: With your 1×6 cut to the correct length, hold it up against the bottom of the window frame. Carefully mark where the window frame extends, indicating the sections of the 1×6 that need to be cut out to allow the sill to fit snugly around the window base. Use a straight edge to draw clear lines for these notch cuts. A jigsaw is ideal for making these precise interior cuts.
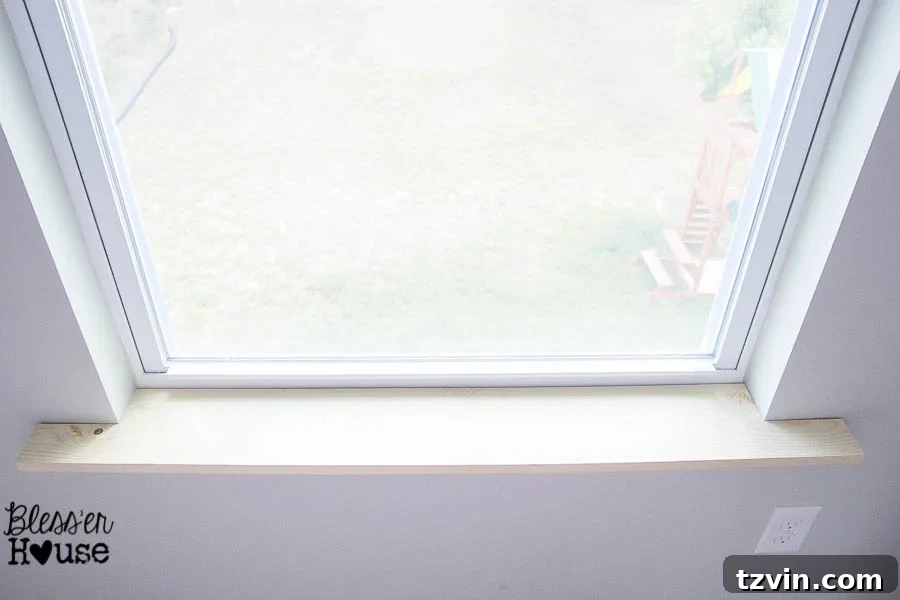
3. Attach the sill: Once you’ve test-fitted the sill and ensured it sits perfectly level and flush against the bottom of the window, it’s time to secure it. Use a brad nailer (or hammer and brad nails) to firmly attach the 1×6 sill to the window frame and the wall studs beneath the window. Drive nails every 12-16 inches, making sure they penetrate into structural elements for maximum stability. Check for levelness one last time before securing all nails.
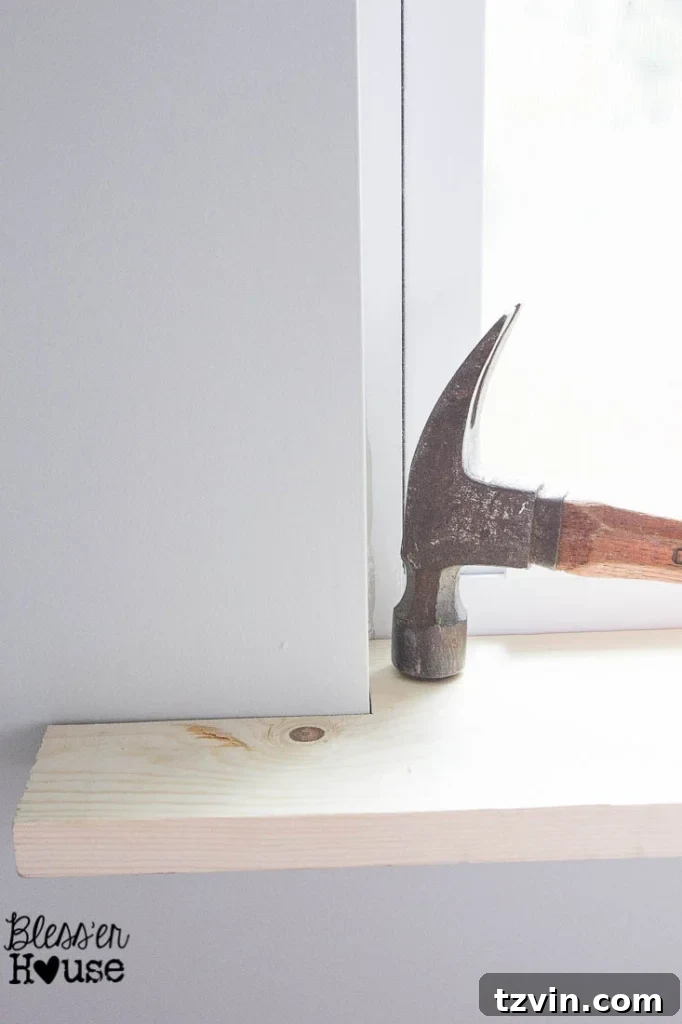
Step 2 – Installing the Side Window Casings
With the sill securely in place, the next step is to install the vertical side casings that frame your window.
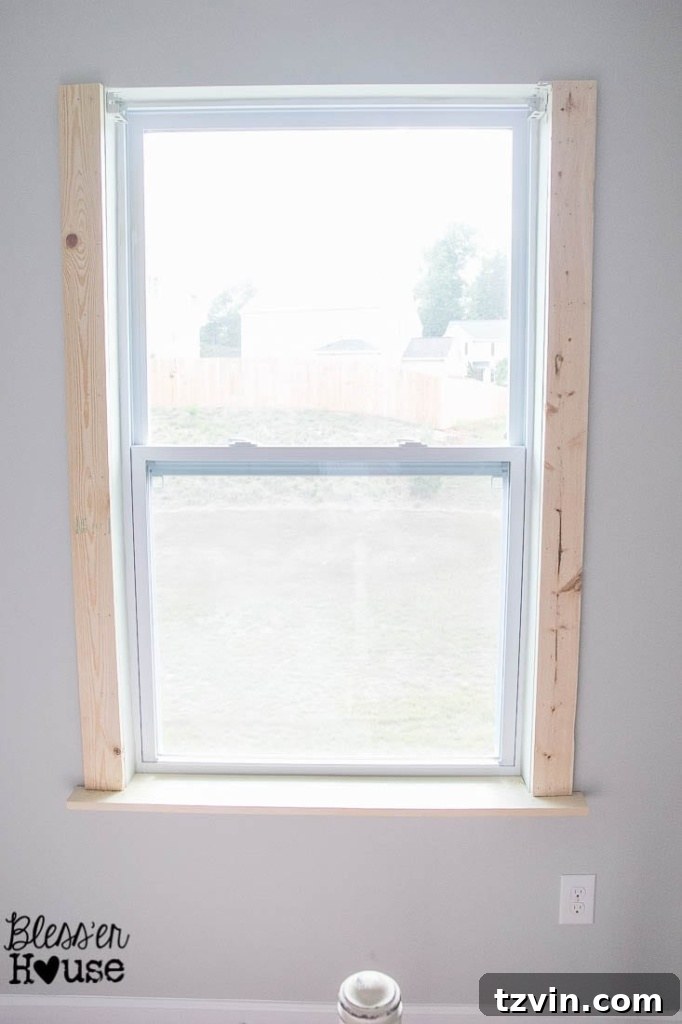
4. Measure and cut the 1×4 side casings: For the vertical sides of the trim, hold your 1×4 boards up against each side of the window, resting them directly on the installed sill and extending upwards. Mark precisely where the top of the window frame (or the desired height of your header) aligns with the board. This direct marking method often proves more accurate than relying solely on a tape measure for complex window dimensions. We often find that “measuring is overrated” for certain projects; if we can directly line up wood pieces, mark, and cut, we do. It’s often easier and yields equally precise results, saving you the extra step of calculations and potential measurement errors.
Once marked, make your straight cuts. Ensure the edges are smooth and clean. Align the cut 1x4s plumb (perfectly vertical) against the window frame and flush with the inner edge of the sill. Use brad nails to secure them into the wall studs, or use construction adhesive in conjunction with nails if studs aren’t perfectly aligned. Ensure the side casings are firmly attached and perfectly vertical to create a clean, crisp frame for your window.
Step 3 – Assembling and Attaching the Decorative Header
The header is where this “chunky” style truly shines, adding significant visual weight and architectural detail to the top of the window.
5. Cut the header components: Once the side casings are securely in place, it’s time to create the impressive header. Take the remaining 1×6 board and cut it to the exact same length as your installed window sill. This ensures a consistent overhang and balance. Next, cut the 1×2 board into two pieces, each also matching the length of the 1×6 header piece. These 1x2s will serve as decorative accent strips, sandwiching the 1×6 to create a layered, substantial look.
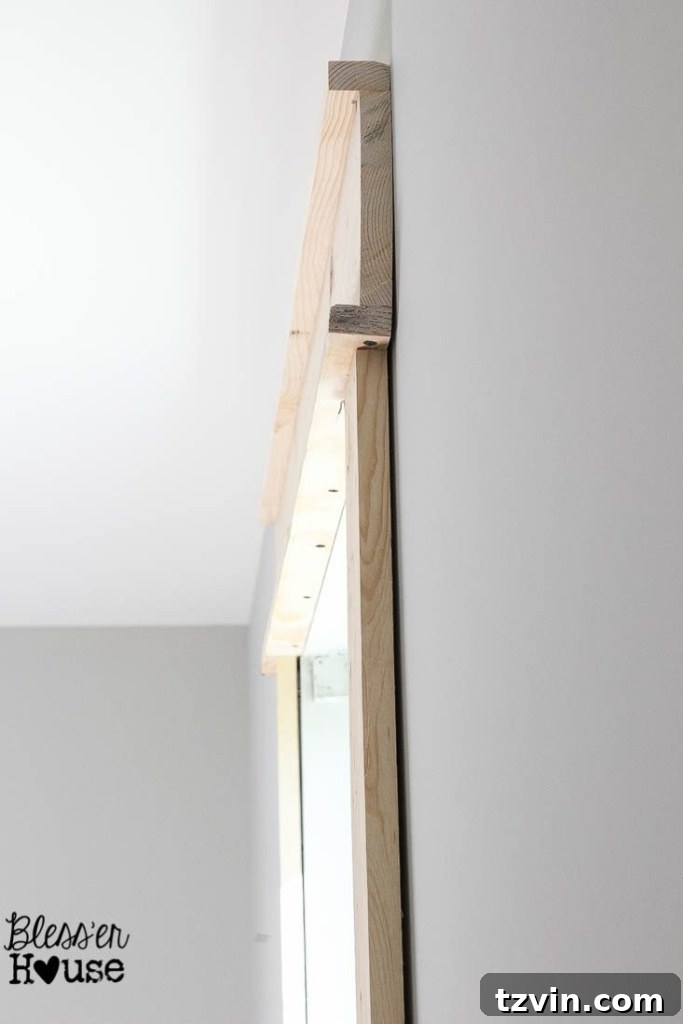
6. Assemble the header: This step involves securing the two 1×2 pieces to the top and bottom edges of the 1×6 board using wood screws. Position one 1×2 flush with the top edge of the 1×6 and the other flush with the bottom edge, creating a layered profile. Drive wood screws through the 1x2s into the 1×6 at regular intervals for a strong bond. We may have been so captivated by Robert’s incredible craftsmanship during this step that we forgot to capture a photo, but the resulting assembly provides a clear visual. The layered effect of the 1×6 flanked by the 1x2s is what gives this trim its distinct, chunky character.
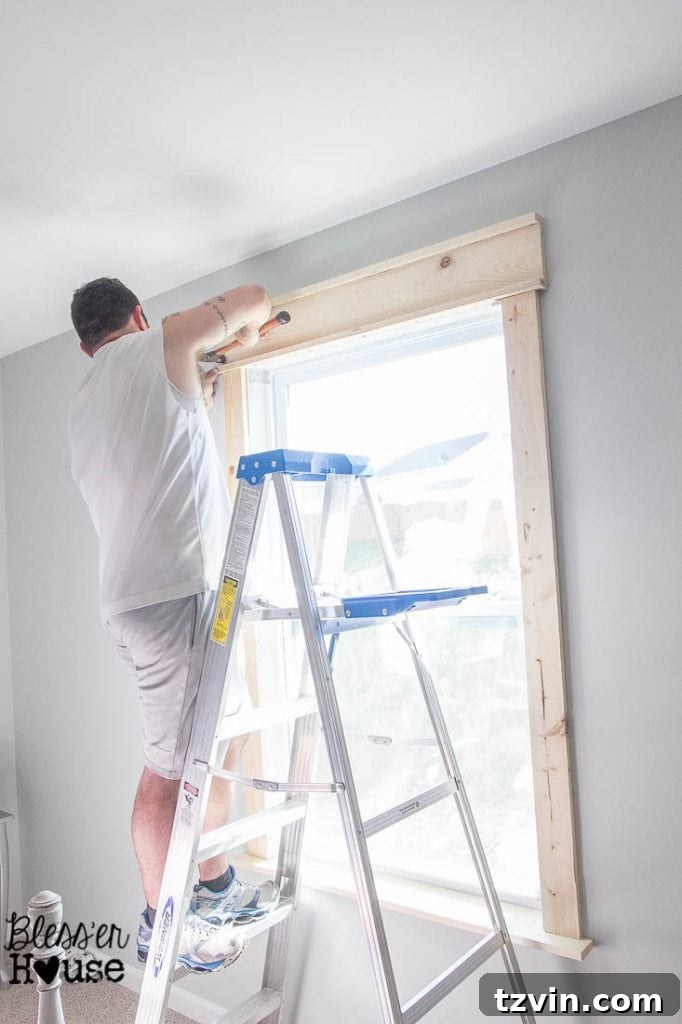
7. Attach the assembled header: Carefully lift the pre-assembled header and align it over the top of your installed side casings, ensuring it is level and centered. Use brad nails to firmly attach the header to the wall, making sure to drive nails into any available wall studs for maximum security and stability. If studs are not accessible, use construction adhesive in combination with nails. Double-check that the header is level and provides an even overhang on both sides of the window.
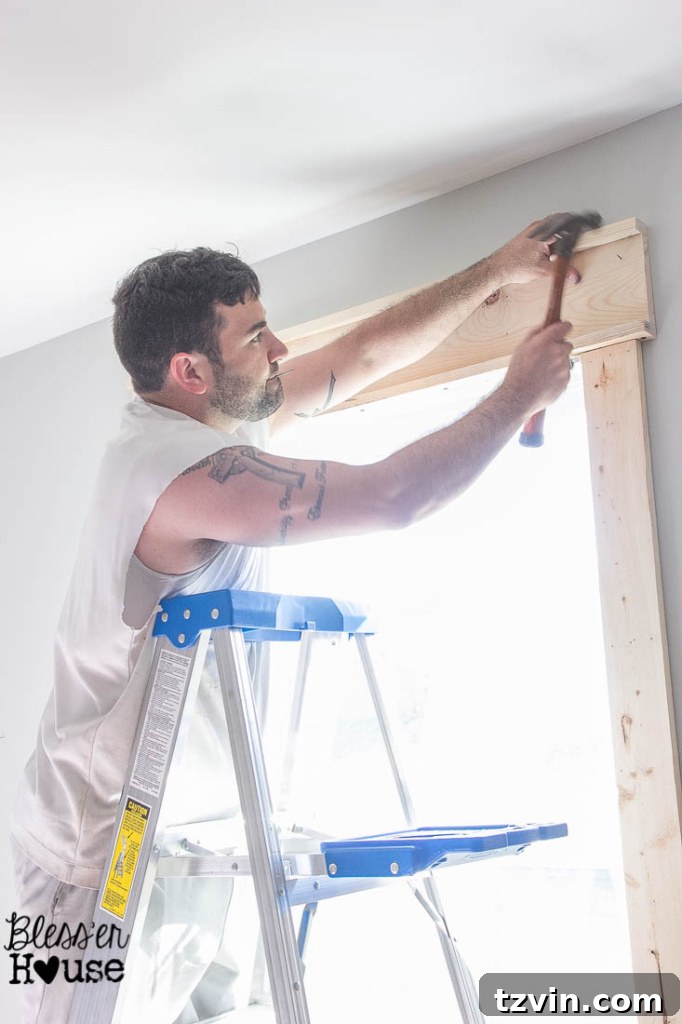
Step 4 – Installing the Apron and Initial Finishing Touches
The apron provides a finished look beneath the sill, balancing the substantial header above.
8. Add the apron: Measure the distance between the outside edges of your side casings, or simply hold a 1×4 board beneath the window sill and mark its length to match the outer width of the side casings. Cut this 1×4 to size; this piece is called the apron. Secure it underneath the window sill using brad nails, ensuring it is level and flush with the wall. The apron creates a clean line and finishes the bottom of the window trim assembly, mirroring the prominence of the header.
9. Caulk any gaps and fill wood knots: Now that all your wood pieces are installed, it’s time to address any imperfections. Observe closely for gaps between the wood trim and the wall, or between individual trim pieces. This is where caulk becomes your invaluable ally. Apply a smooth, even bead of paintable caulk along all seams. Don’t be shy – caulk can truly “forgive a lot of sins” in DIY projects! For knots in the raw wood or any small nail holes, apply wood filler liberally. You can get a clearer idea of how the 1x2s are attached to the 1×6 in the header from various angles, which also reveals potential gaps that caulk will brilliantly conceal. Always remember that a meticulously caulked and filled surface is the secret to a professional, high-end finish. Wipe away any excess caulk immediately with a damp cloth for a smooth transition.
Just for a moment of levity, I once attempted an oh-so-awkward “Charlie’s Angels” pose with my caulk gun, and somehow, the photographic evidence mysteriously vanished from my memory card. A true blessing in disguise, perhaps, as it confirmed that my caulking skills are thankfully far superior to my modeling abilities!
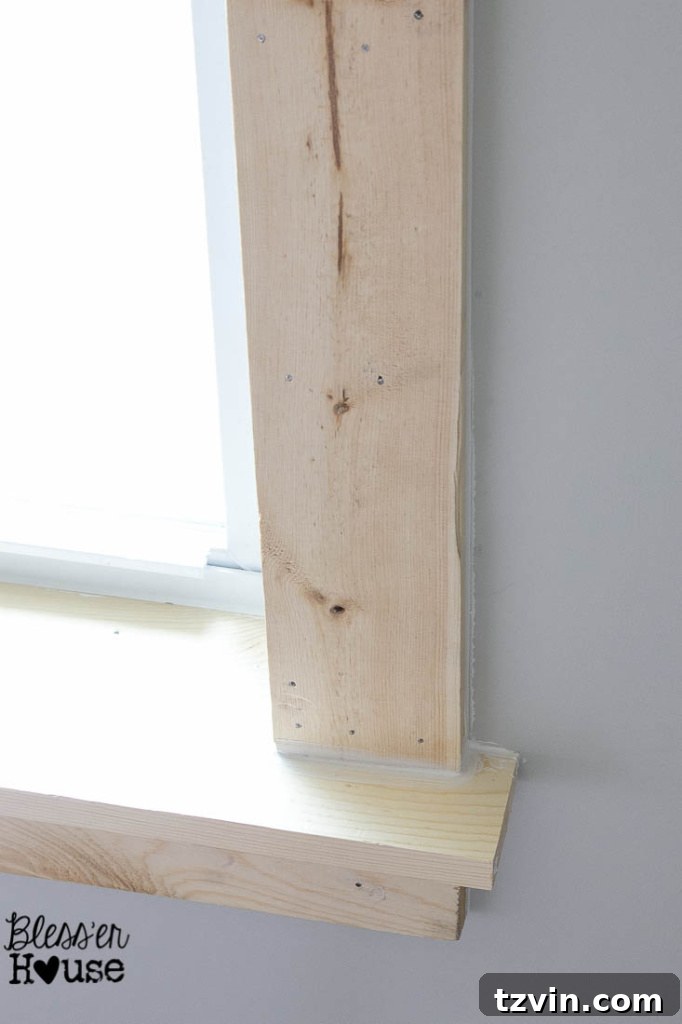
Step 5 – Refine and Smooth: Setting Nails, Filling, and Sanding
Achieving a truly professional finish requires attention to these crucial details.
10. Set the nails: Even after using a brad nailer, some nail heads might still protrude slightly or not be fully countersunk. Use a nail setter (or a hammer and a nail punch) to gently tap each brad nail slightly below the surface of the wood. This creates a small indentation that will be easily concealed by wood filler, ensuring a perfectly smooth finish free of bumps or visible fasteners.

11. Wood fill and sand: Apply a small amount of wood filler to all nail holes and any remaining minor imperfections or knots. Overfill slightly, as wood filler tends to shrink when it dries. Allow the wood filler to dry completely according to the manufacturer’s instructions (this can take several hours). Once dry, use fine-grit sandpaper (around 150-220 grit) to gently sand all filled areas until they are perfectly smooth and flush with the surrounding wood. Also, lightly sand any rough edges or surfaces on the trim itself to prepare for painting. This step is critical for achieving that flawless, custom look.
Step 6 – Prime and Paint for a Flawless Finish
The final steps bring your vision to life, showcasing the true beauty of your new window trim.
12. Apply primer: It is absolutely essential to apply at least one coat of quality primer to all raw wood surfaces. Primer serves multiple purposes: it seals the wood, prevents the natural tannins and knots from bleeding through your paint (which can cause yellowing or discoloration over time), and creates a uniform, smooth surface for the paint to adhere to evenly. This ensures your paint job looks professional and lasts longer. Allow the primer to dry completely as per product instructions.
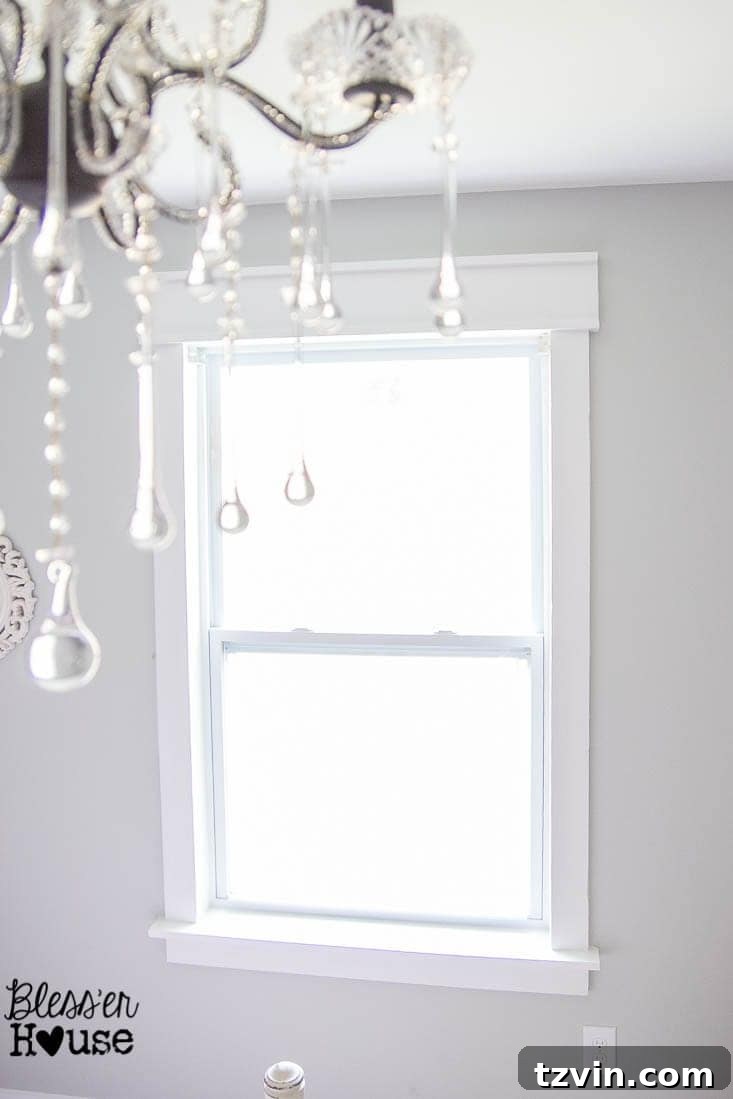
13. Paint your trim: Once the primer is dry, apply 1-2 coats of your chosen paint color. We opted for Valspar Du Jour, a lovely shade that beautifully highlights the new trim. Apply thin, even coats, allowing sufficient drying time between each coat. Multiple thin coats generally provide a more durable and smoother finish than one thick coat. After just two coats of crisp white paint, Olivia’s room underwent a dramatic transformation. The window, once a bland void, now appeared significantly larger and more elegant. We are certain Joan Rivers would wholeheartedly approve of this dazzling ensemble now!
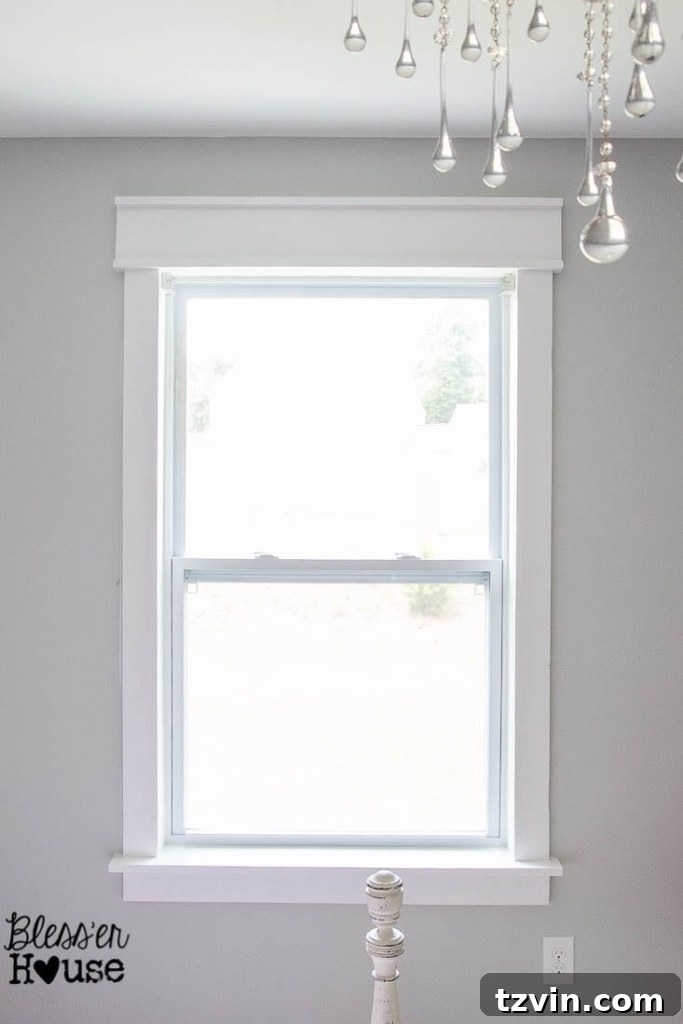
With the fresh paint drying, the excitement builds! We have beautiful curtain panels ready to be hung, which will further enhance the perceived size and luxurious feel of this now-transformed window, a stark contrast to the boring, plain one that existed before. This combination of chunky trim and elegant drapery will create a truly stunning focal point.
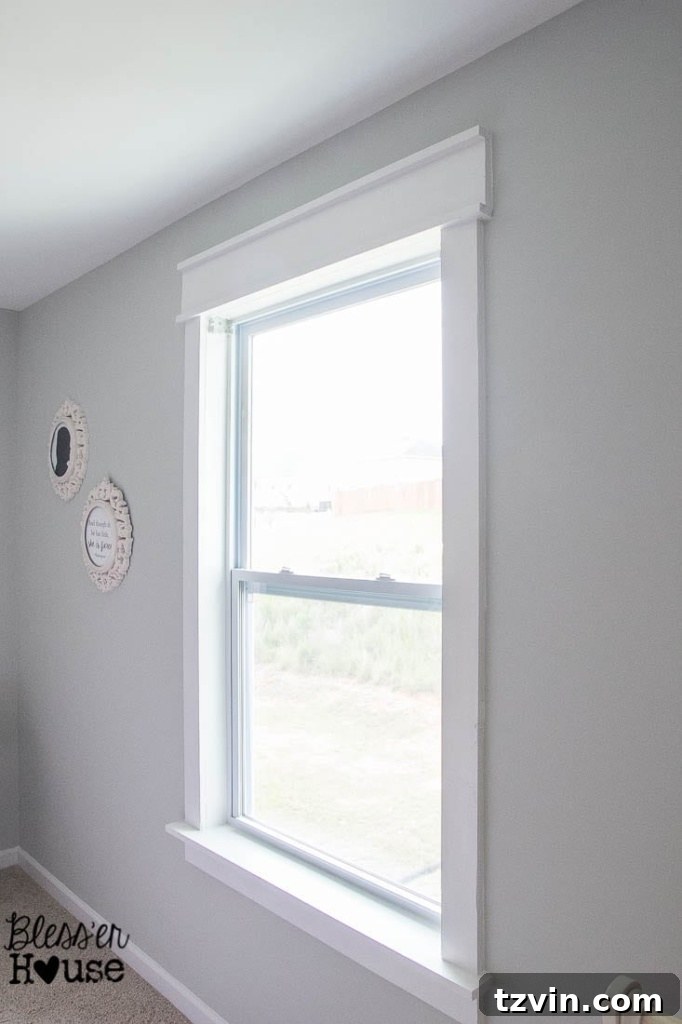
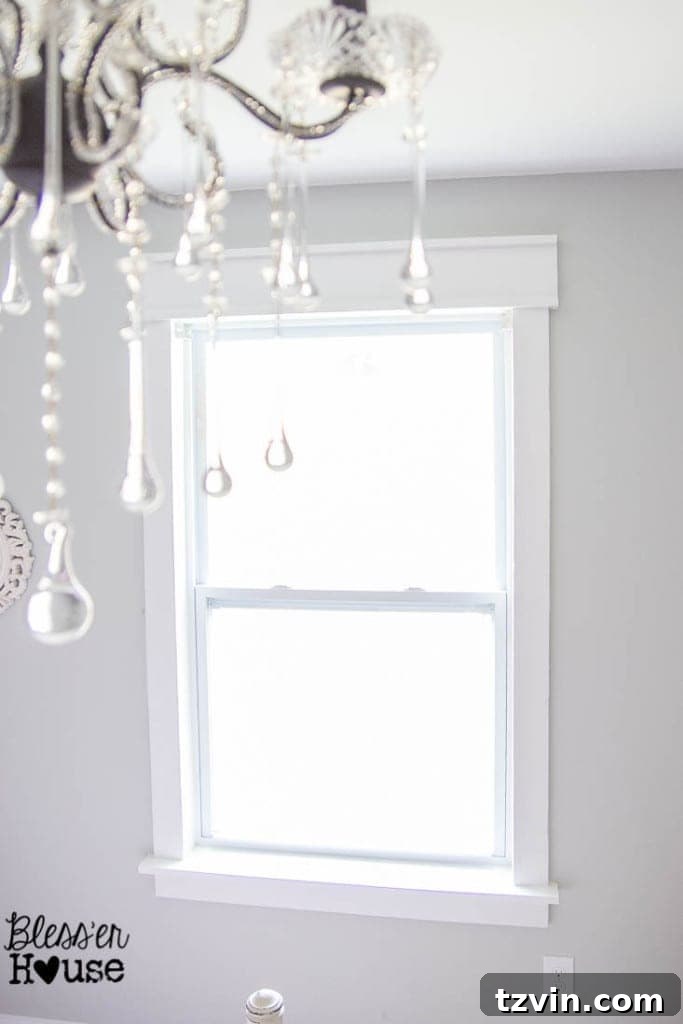
The Finished Window Trim: A Testament to DIY Power
It’s truly amazing how a little lumber, some paint, and a commitment to detail can dramatically alter the feel and perceived value of a room. This project is undeniable proof that the combination of caulk and wood filler can indeed “forgive a lot of sins,” making even minor imperfections disappear to reveal a polished, custom finish. The transformation from a bland, builder-grade window to a charming, architecturally significant focal point is remarkable, all achieved with straightforward techniques and basic tools.
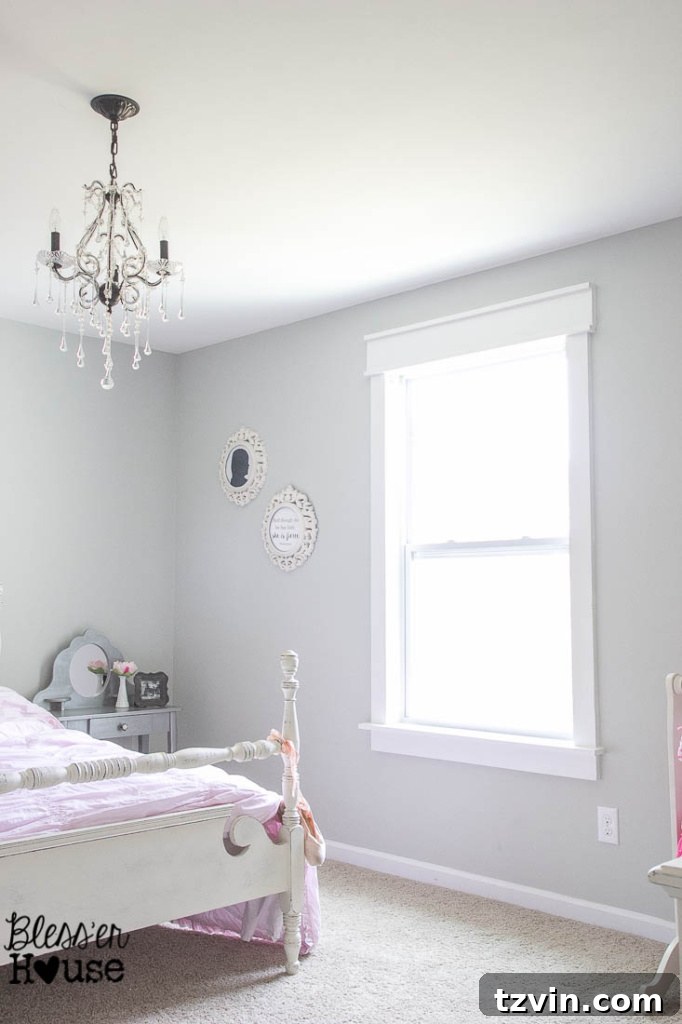
Once the carefully selected curtain panels are hung and the area rug we ordered arrives, this space will truly come alive. It won’t just be singing; it will be dancing with joy – after all, this is a ballerina-themed room! The added window trim provides the perfect backdrop, enhancing the room’s theme and making it feel complete.
What are your thoughts? Is this DIY window casing project something you feel confident tackling? The satisfaction of creating such a beautiful, impactful change with your own hands is truly immense. Robert is already enthusiastic about trimming the windows in our living room and dining room, and I am wholeheartedly on board with continuing this journey of adding character and warmth to every corner of our home. We encourage you to give it a try and discover the transformative power of simple DIY!
More Inspiring DIY Window Ideas for Your Home
Looking for more ways to enhance your windows and the areas around them? Explore these additional resources for creative and budget-friendly ideas:
- Best Luxury for Less: Amazon Curtains, Rods & Window Shades
- Window Film Ideas to Create Decorative Glass Around Your Home for Less
- DIY Window Seat From a Kitchen Cabinet
Frequently Asked Questions About Window Trim
Does window trim have to match baseboards?
Are window casings worth it?
What is the easiest way to trim a window?
Can this trim be used on exterior windows?